
Showcasing your products on your store’s homepage is essential for attracting customers and driving sales. This article will demonstrate how to display your products on your store’s homepage. Not all themes support displaying single products. Themes like Wind, Hero, Modern, and Halloween support single-product sections, while themes like Lifestyle, Pluto, Venus, Jupiter, Mars, Amazing - Buy on Amazon, support single-item sections. The explanation provided here is a basic introduction to displaying products. For more detailed information about sections, please refer to relevant articles in the Shoplazza documentation. If you want to learn more about website decoration, please refer to the basic store editor tutorial.
Creating products and collections
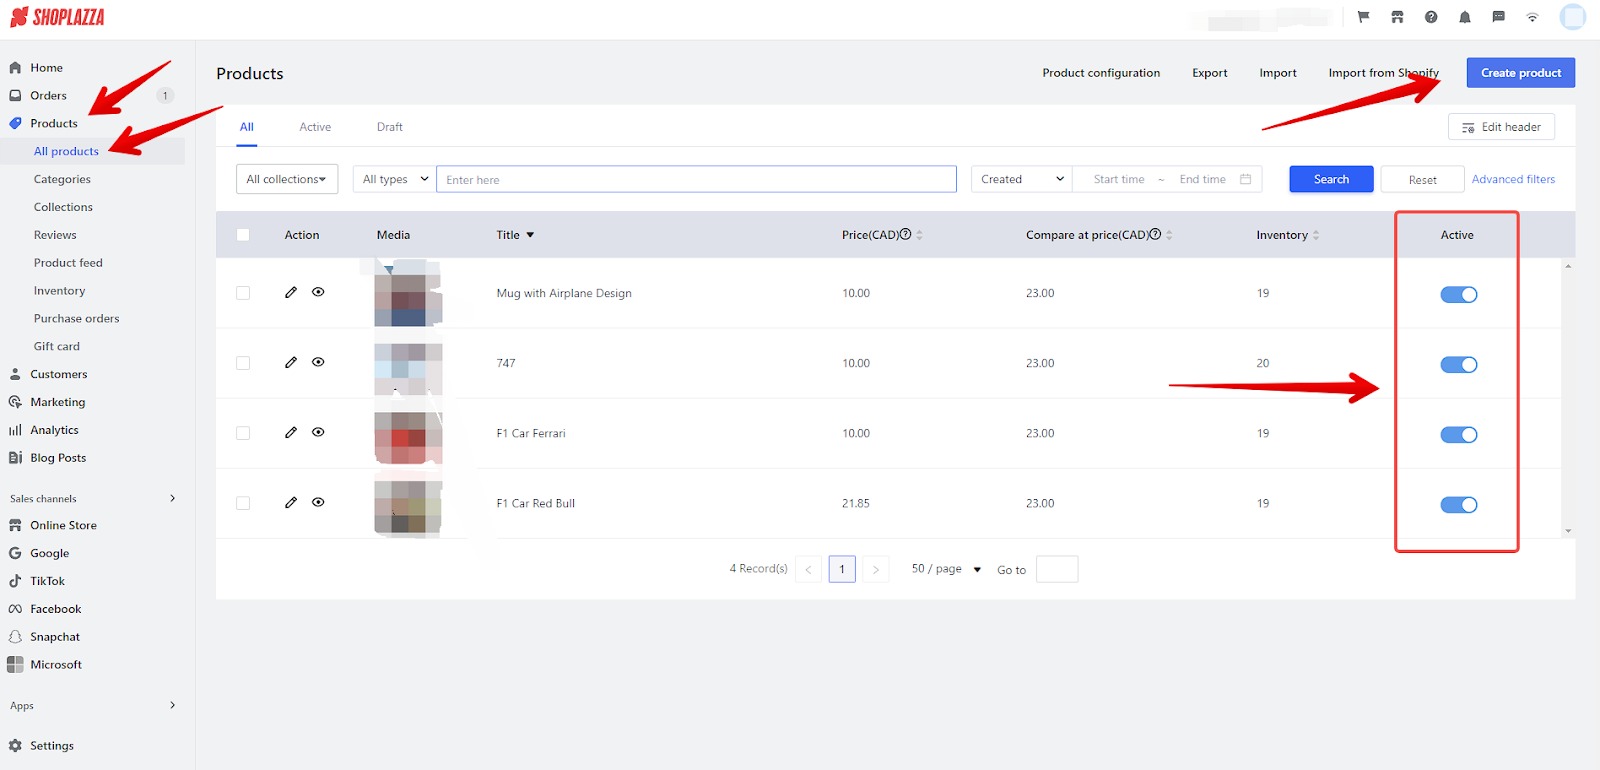
1. Create a product: Navigate to your Shoplazza Admin > Products > All Products > Create product. Create and activate your products. Please note that only active products will be displayed on your homepage. If you need guidance on creating products, please refer to How to create new products.
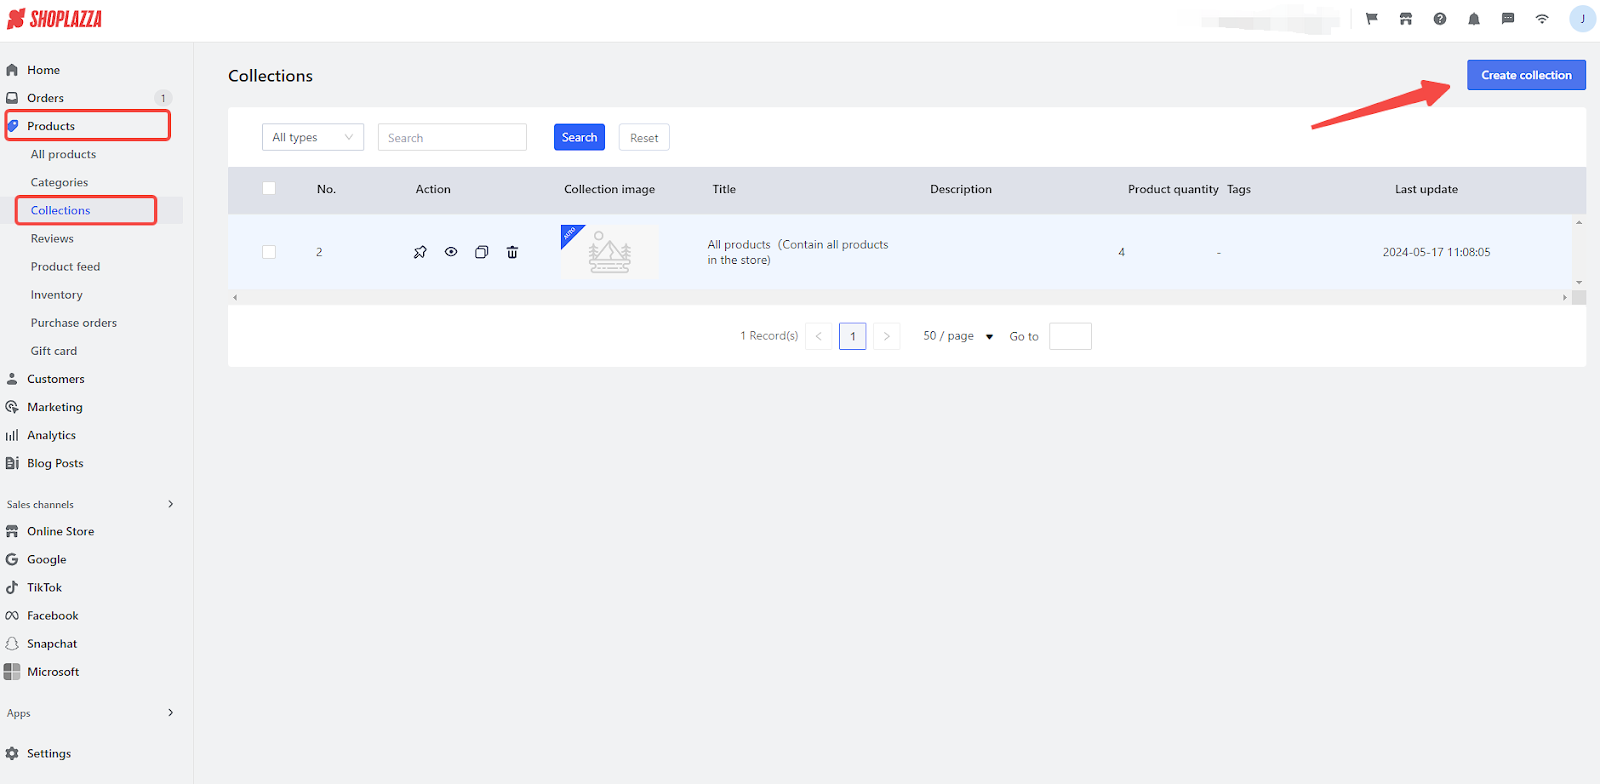
2. Create a collection: After creating a new product, click on Products > Collections > Create Collection and add the product to your new collection. Collections are sets of products where similar products can be organized and grouped together in one place within the store. If you need guidance on creating collections, please refer to Creating product collections.
Linking collections or products to your navigation menu
To help customers find products easily, link collections or product pages to the top navigation menu bar. Your customers can then click on the navigation menu on the storefront to navigate to the desired page and see product information. Set the specific menu names according to your preferences. To configure the navigation menu, set up the navigation menu framework and link the collection or product pages in the navigation menu.
Displaying products by collection
Organizing products into collections and displaying them on your store is a common practice. Using different sections in the theme editor, you can link collections to display sections, ensuring your products are showcased effectively. To display your products by collection:
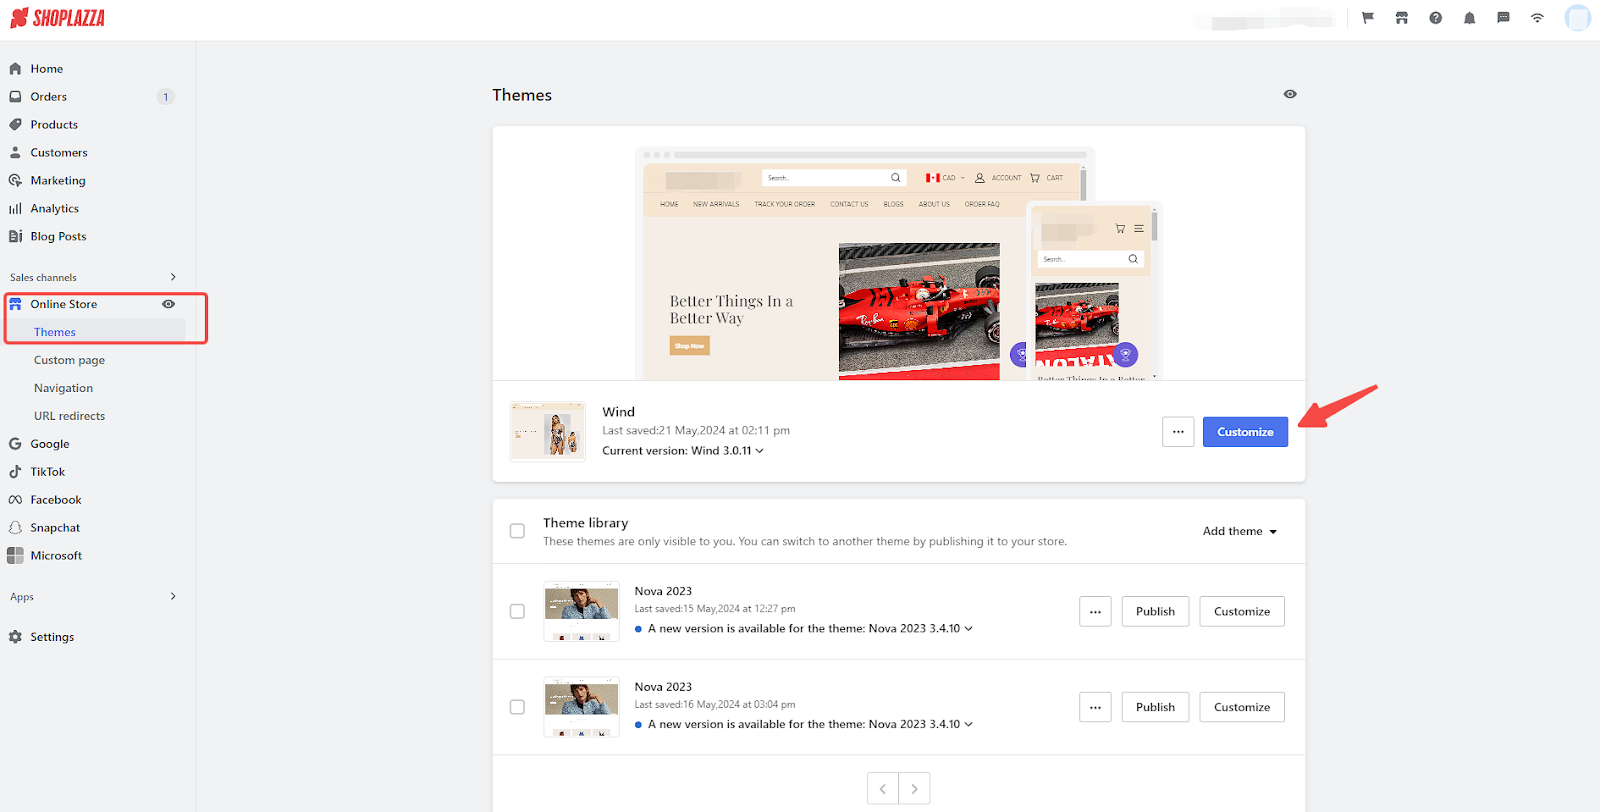
1. Customize your theme: Click on Online Store > Themes. Select your target theme and select Customize.
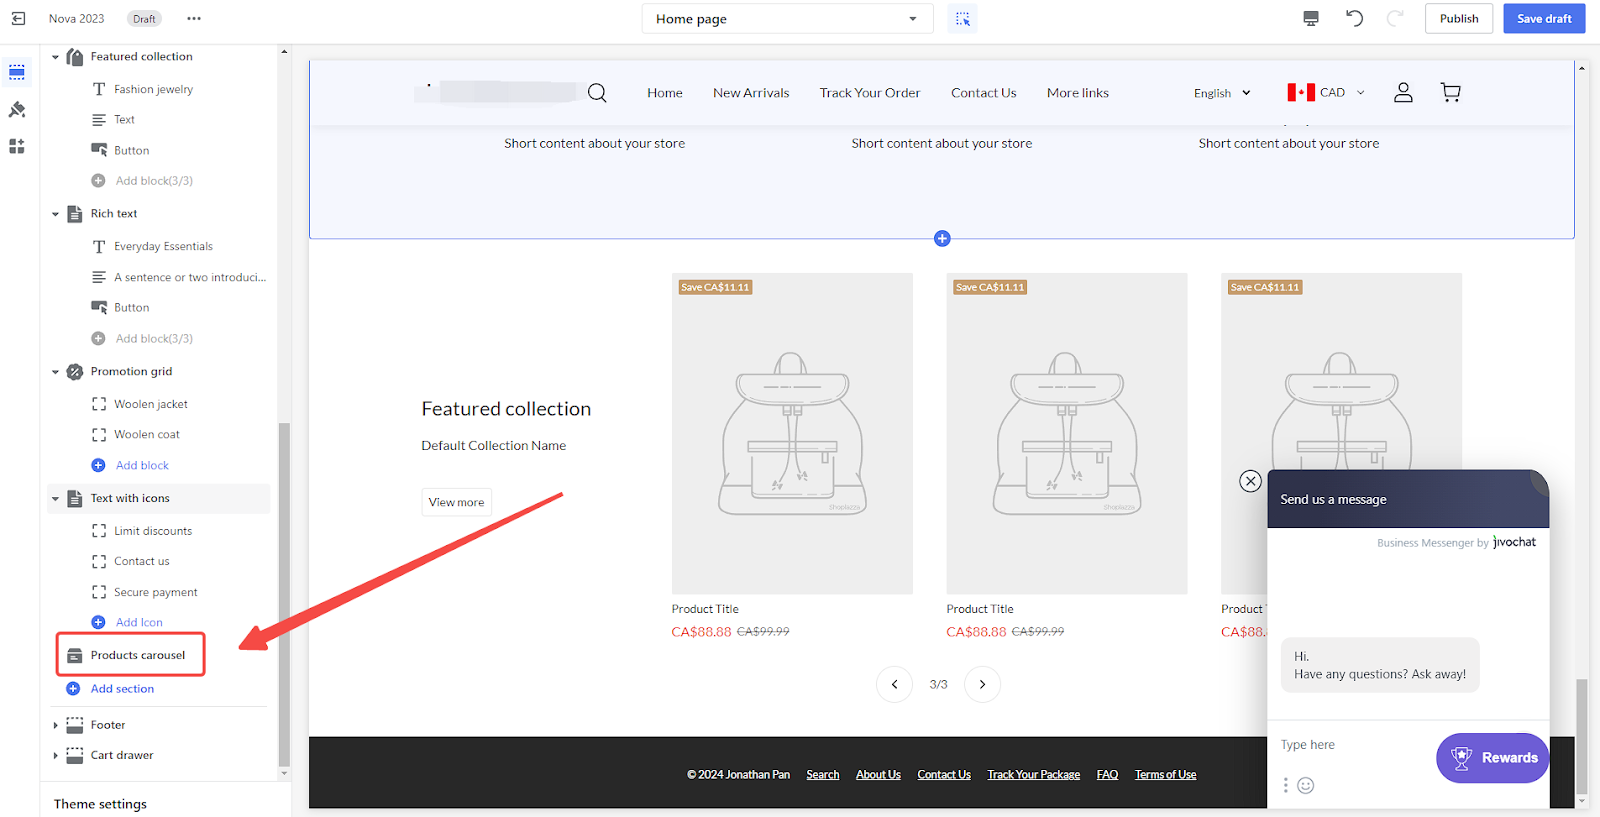
2. Choose and add a product display section: Once you’re in the theme editor, add a product display section. Commonly used sections include collection lists, product carousels, featured products, and single product. While different themes may support different section types, the process remains similar:
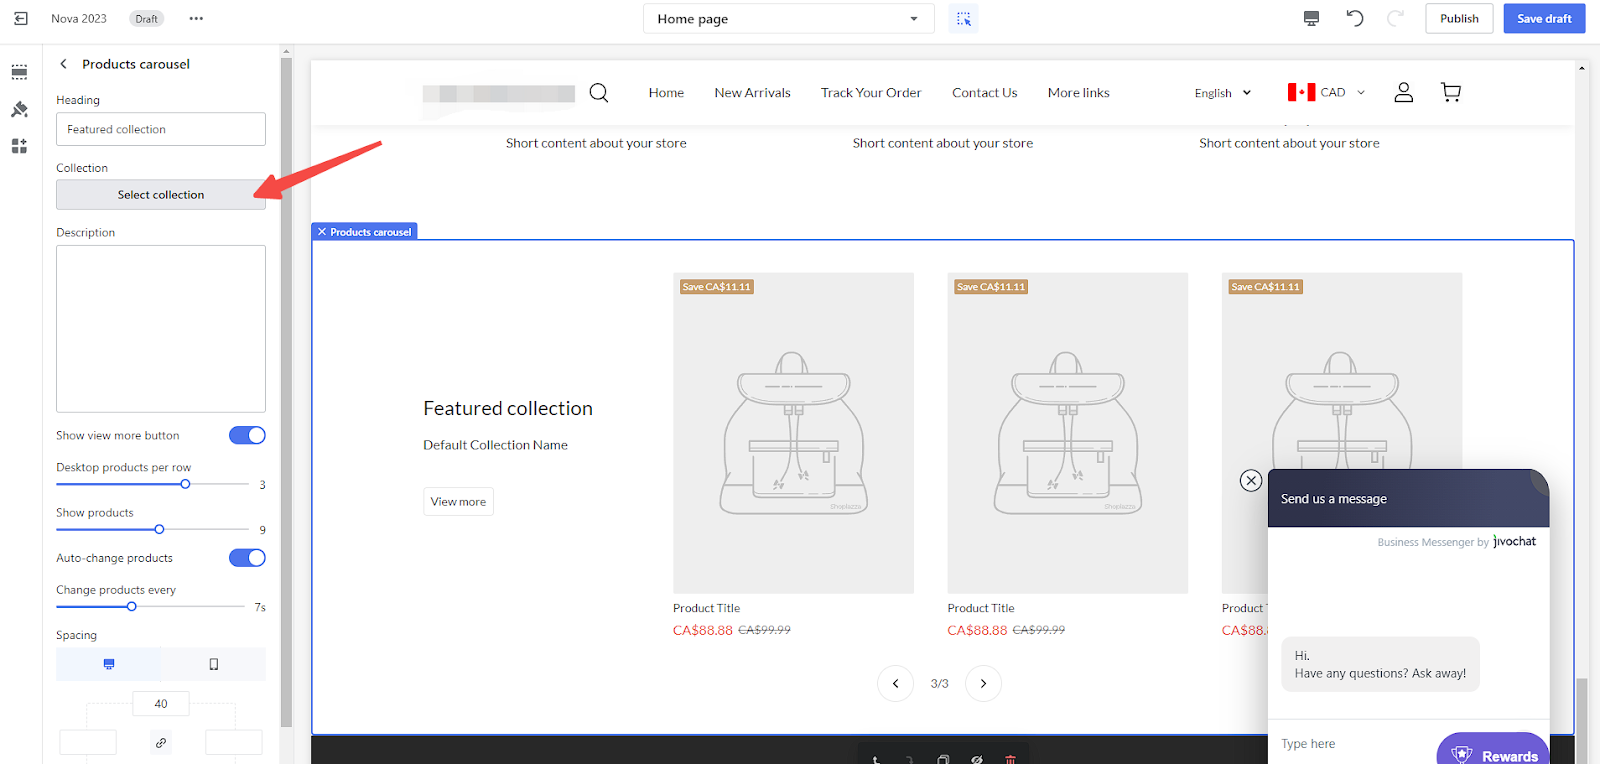
- Example with Nova2023 theme: Add a new section called Product Carousel. Click on the product carousel title to configure settings.
- Click the Select collection button to add a collection to the Product Carousel.
- Select a collection available here. Once selected, click Select.
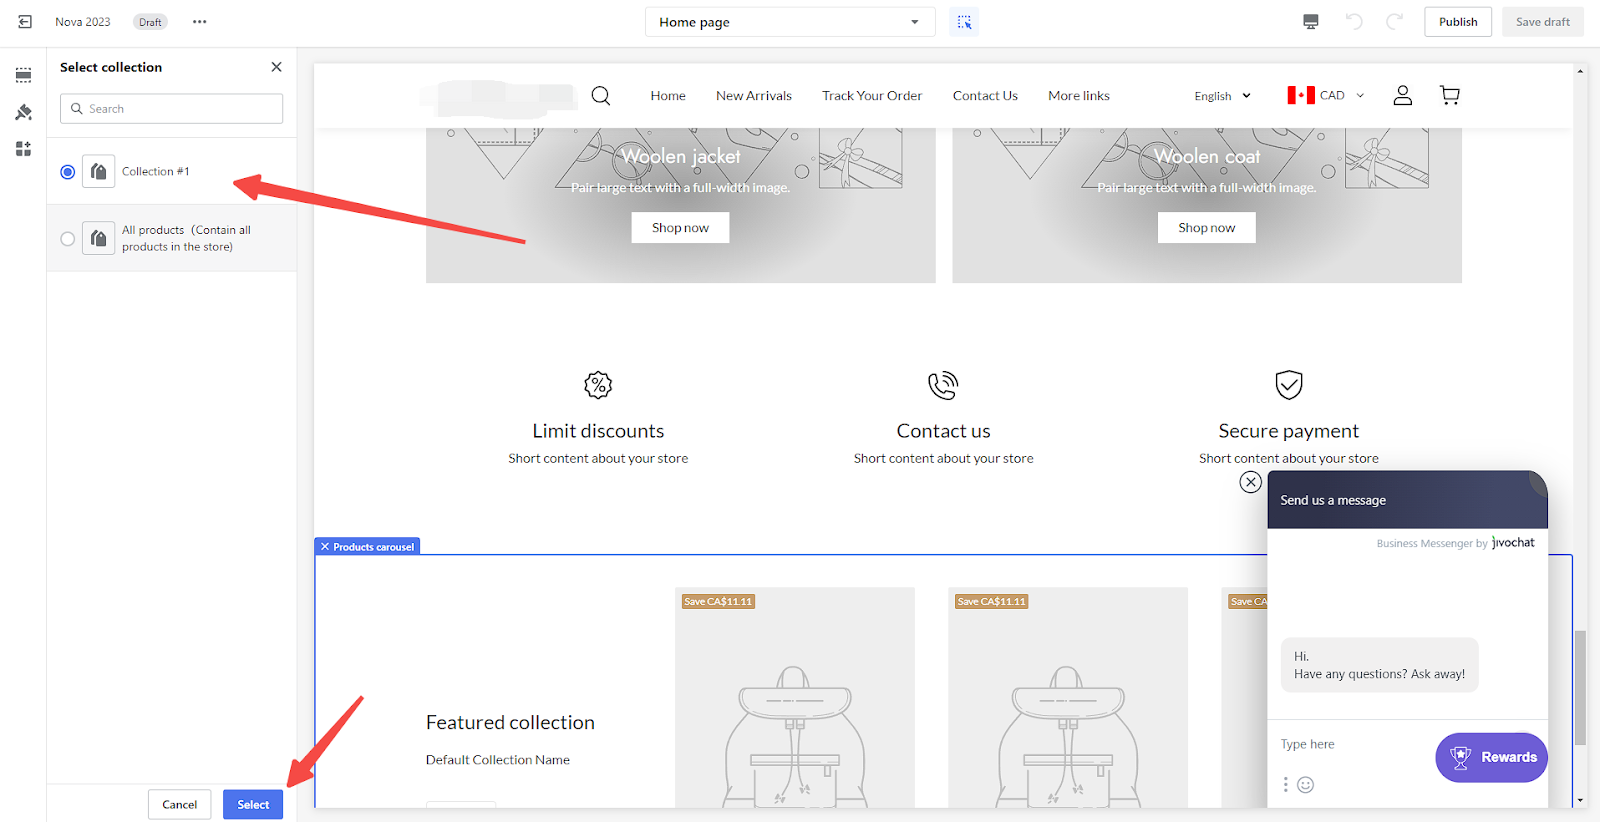
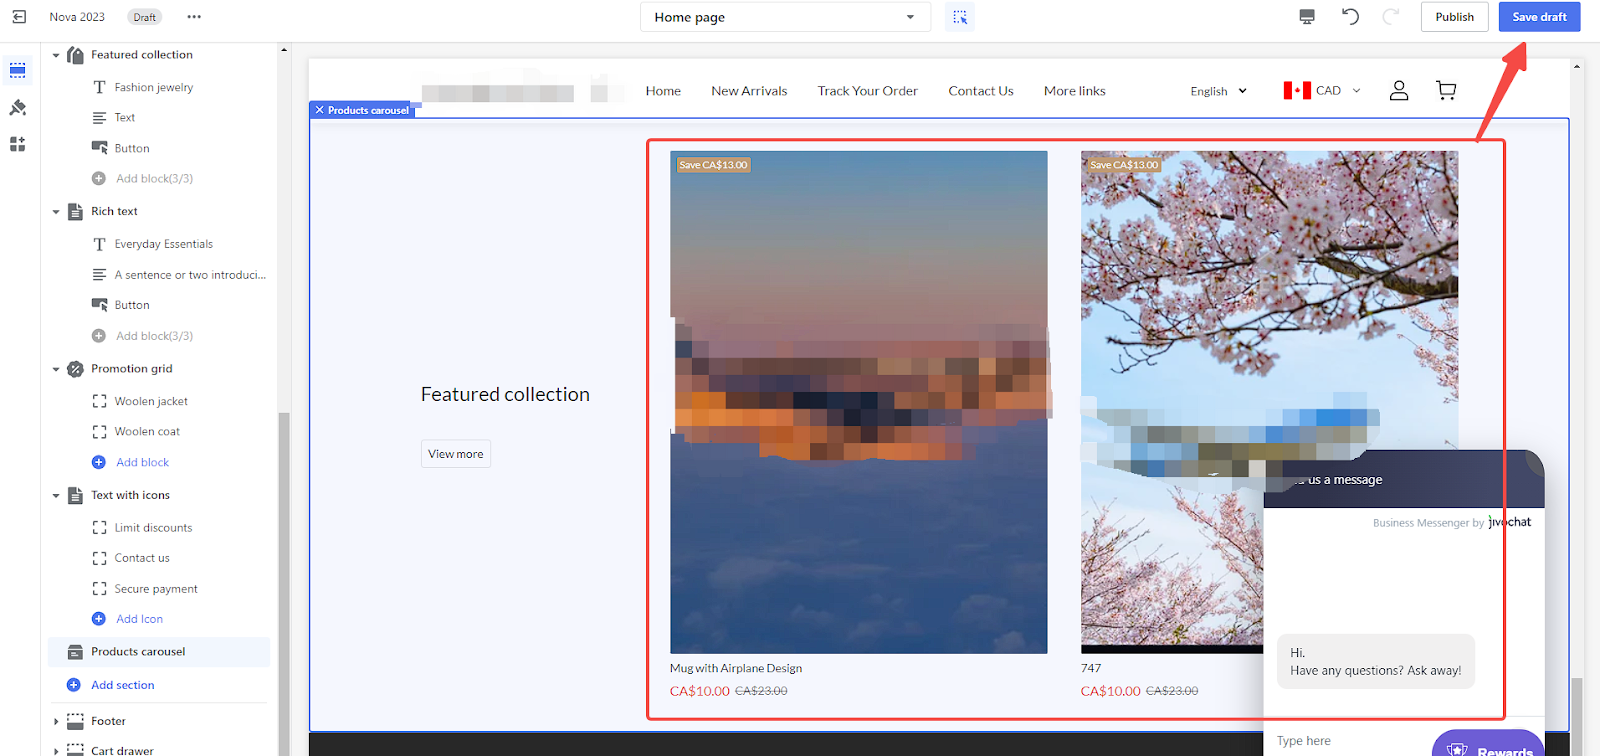
- After making your selection, refresh the theme editor page. The section should now display the products from the selected collection. Once you are satisfied with how it looks, click Save Draft or Publish (live) to save your configuration.
Displaying individual products
Highlighting individual products can draw attention to popular or promotional items. This involves using sections that link directly to a product, making it easy for customers to find and purchase these items.
1. General method (applicable to all themes): Use sections with the ability to link to a product, such as Image Slideshows, Image with Text, and Recommended images and text. While different themes may support different section types, the process remains similar:
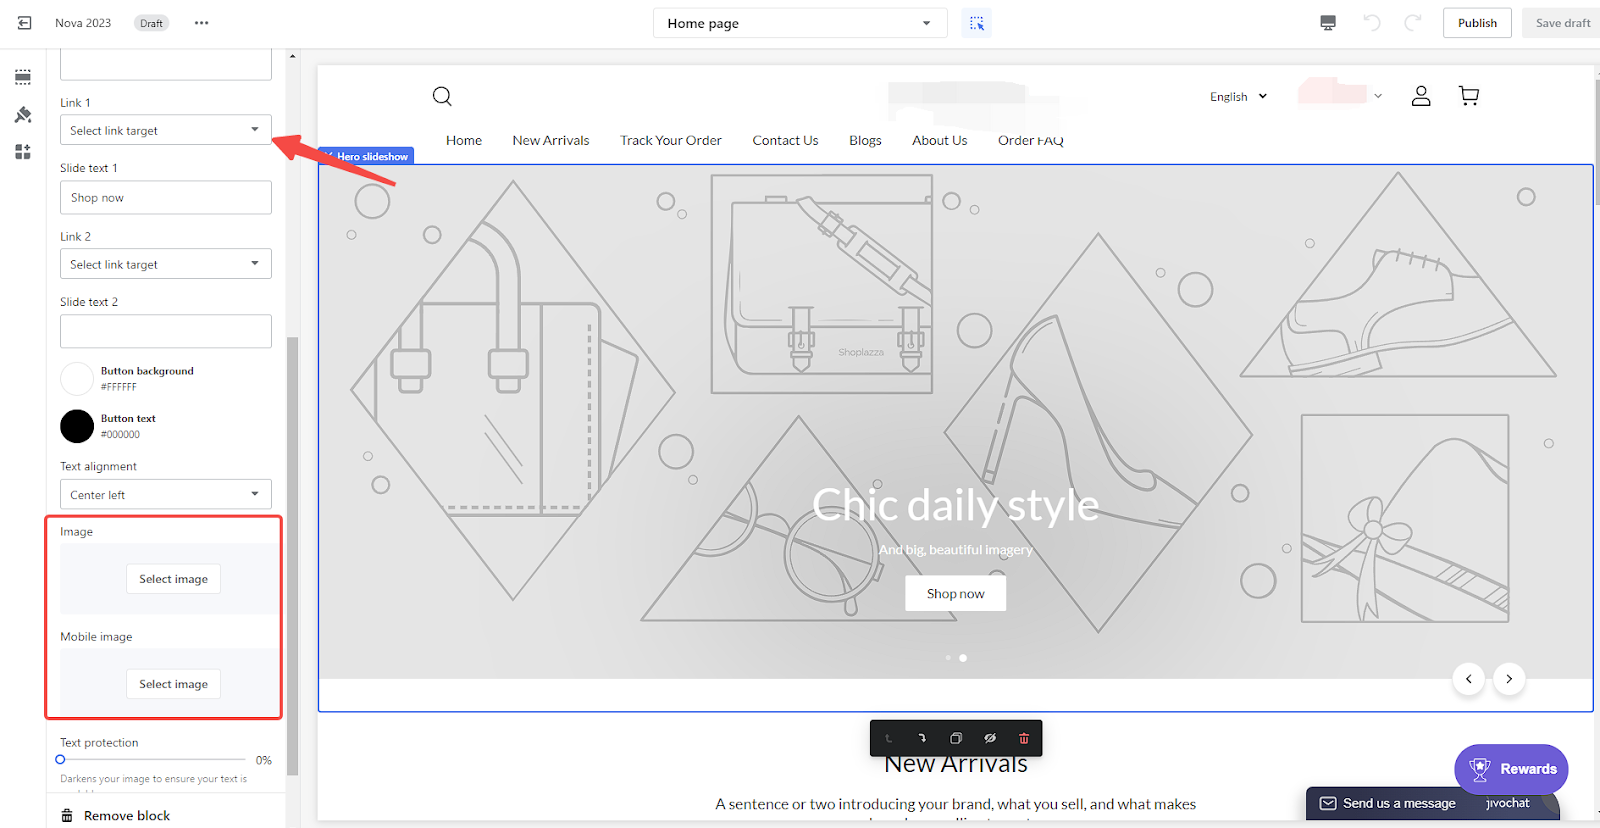
- Example with the Hero slideshow section in the Nova2023 theme: Click on the section title to enter its settings.
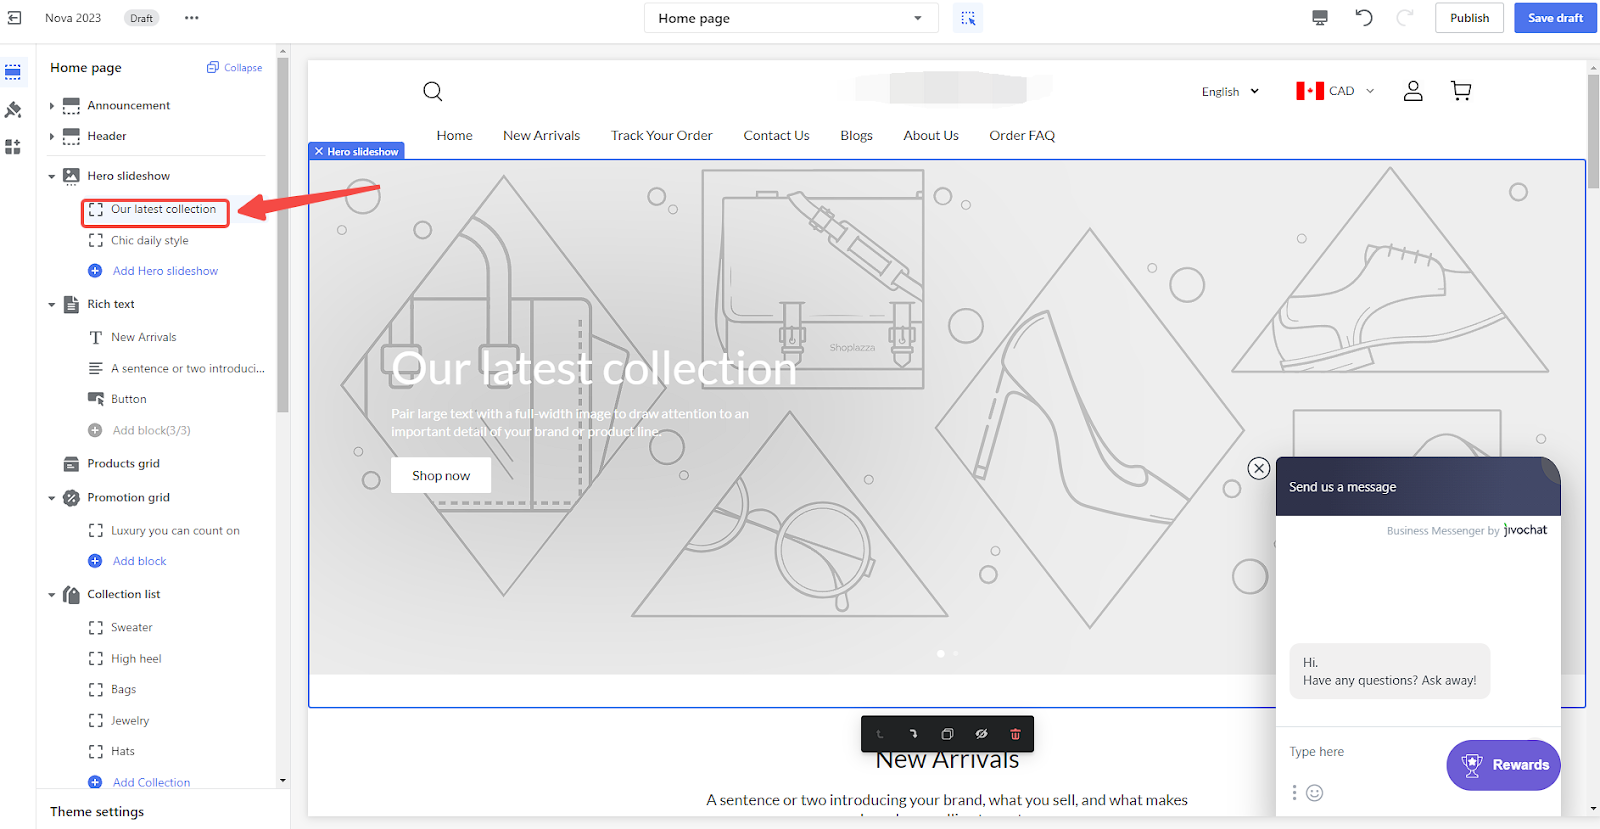
- Click on the image, then click on Select target link, and set the redirection link to the product detail page you want to showcase. Afterward, add promotional images of the product to the image slideshow section by clicking on Select image.
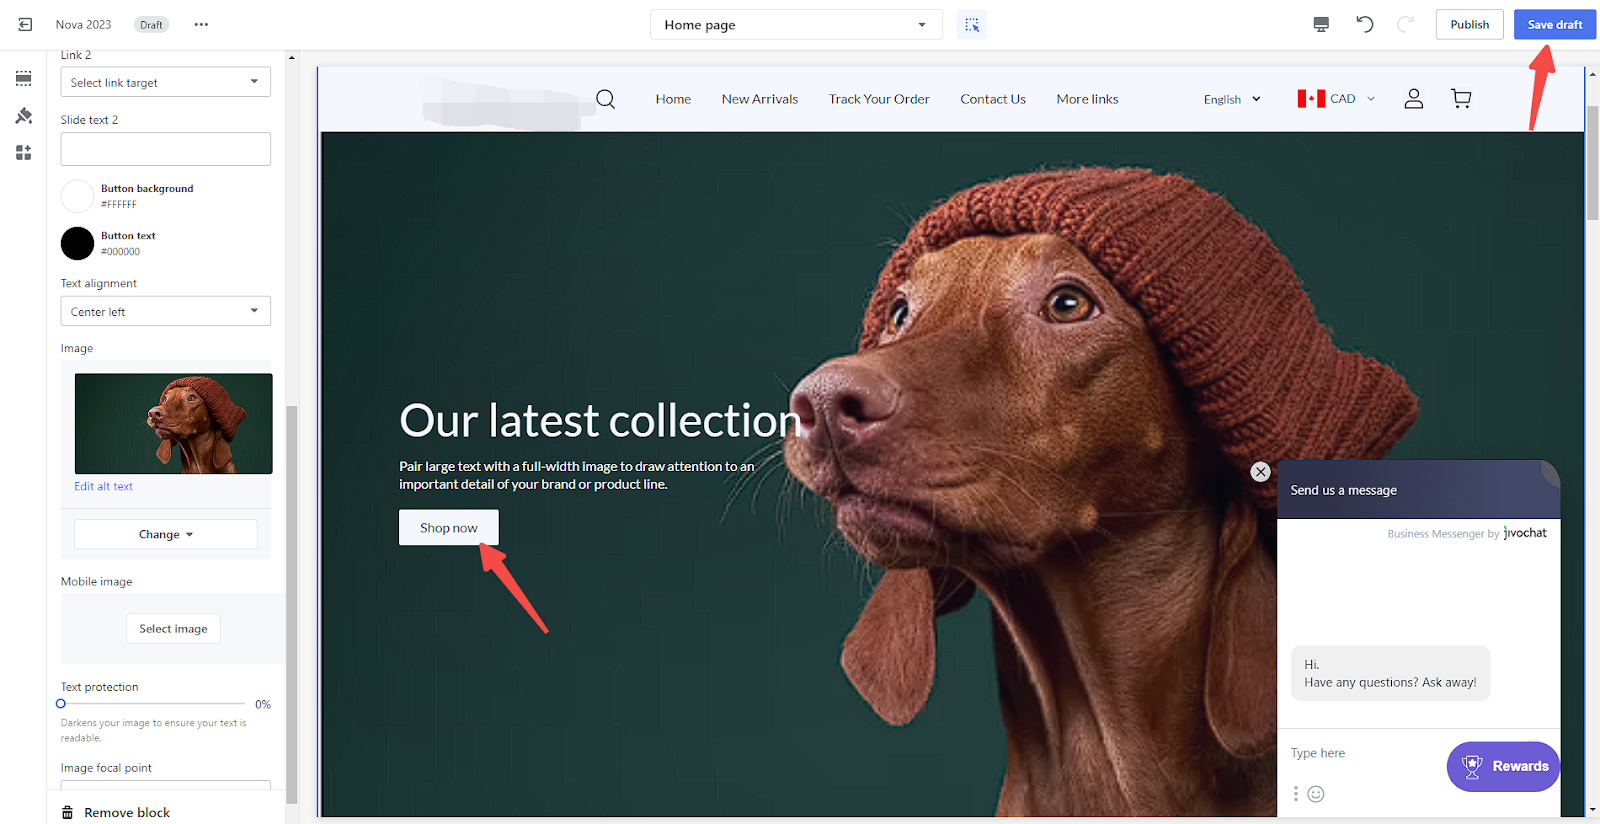
- Once satisfied with the look of the section, click Save Draft or Publish (live) to save your configuration. Once set up, customers who click on the image will be redirected to the desired product detail page.
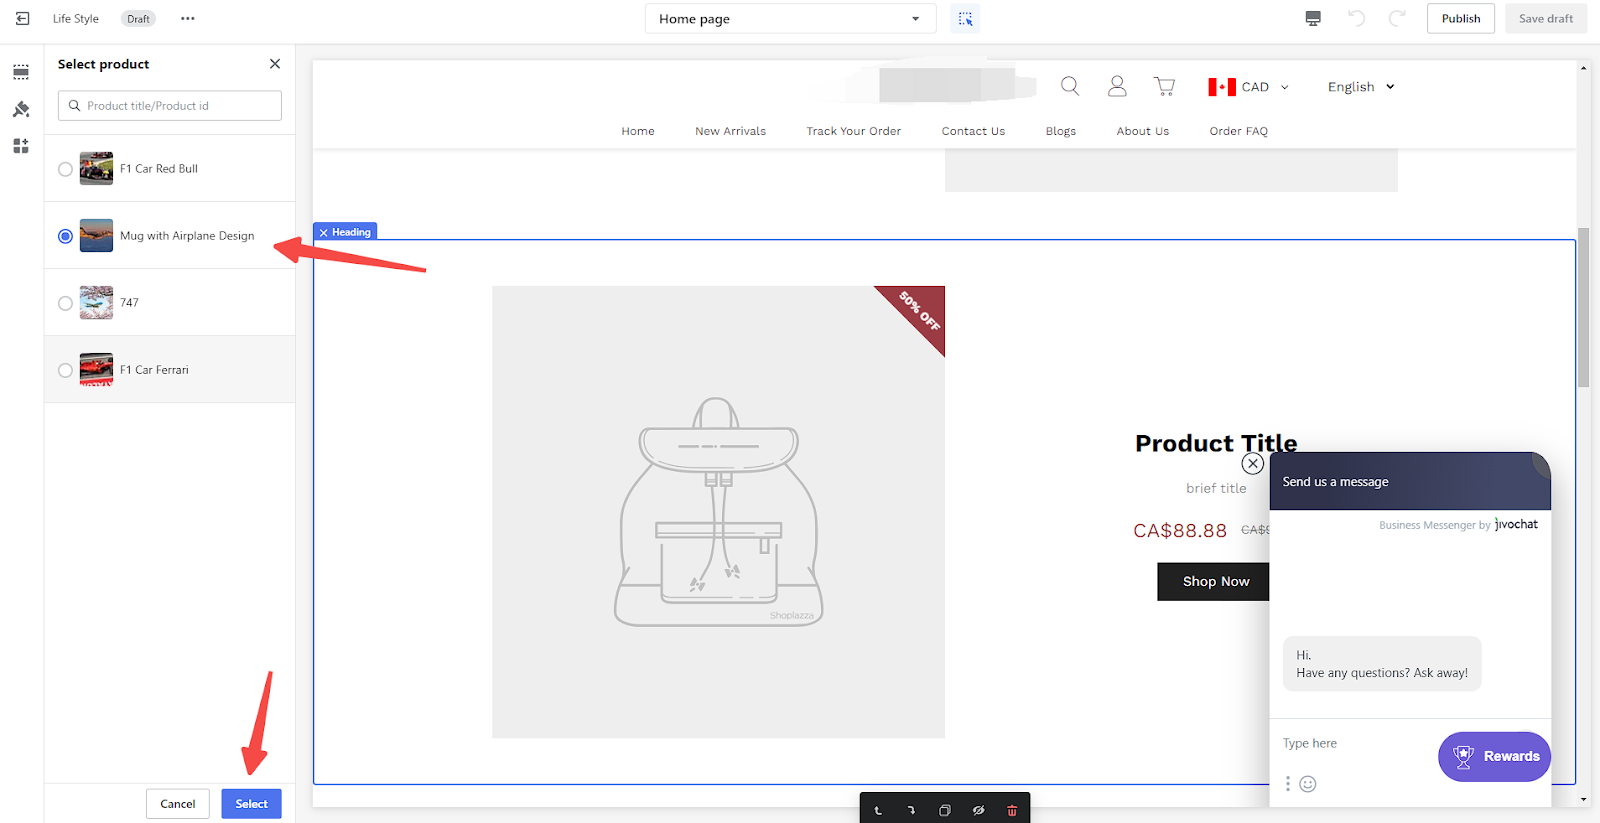
2. Single-item section display method: The usage of single-item and single-product sections is quite similar:
- Example with Single product section in the Lifestyle theme: Add a new section called Single product. Once added, click on the section title to configure the settings.
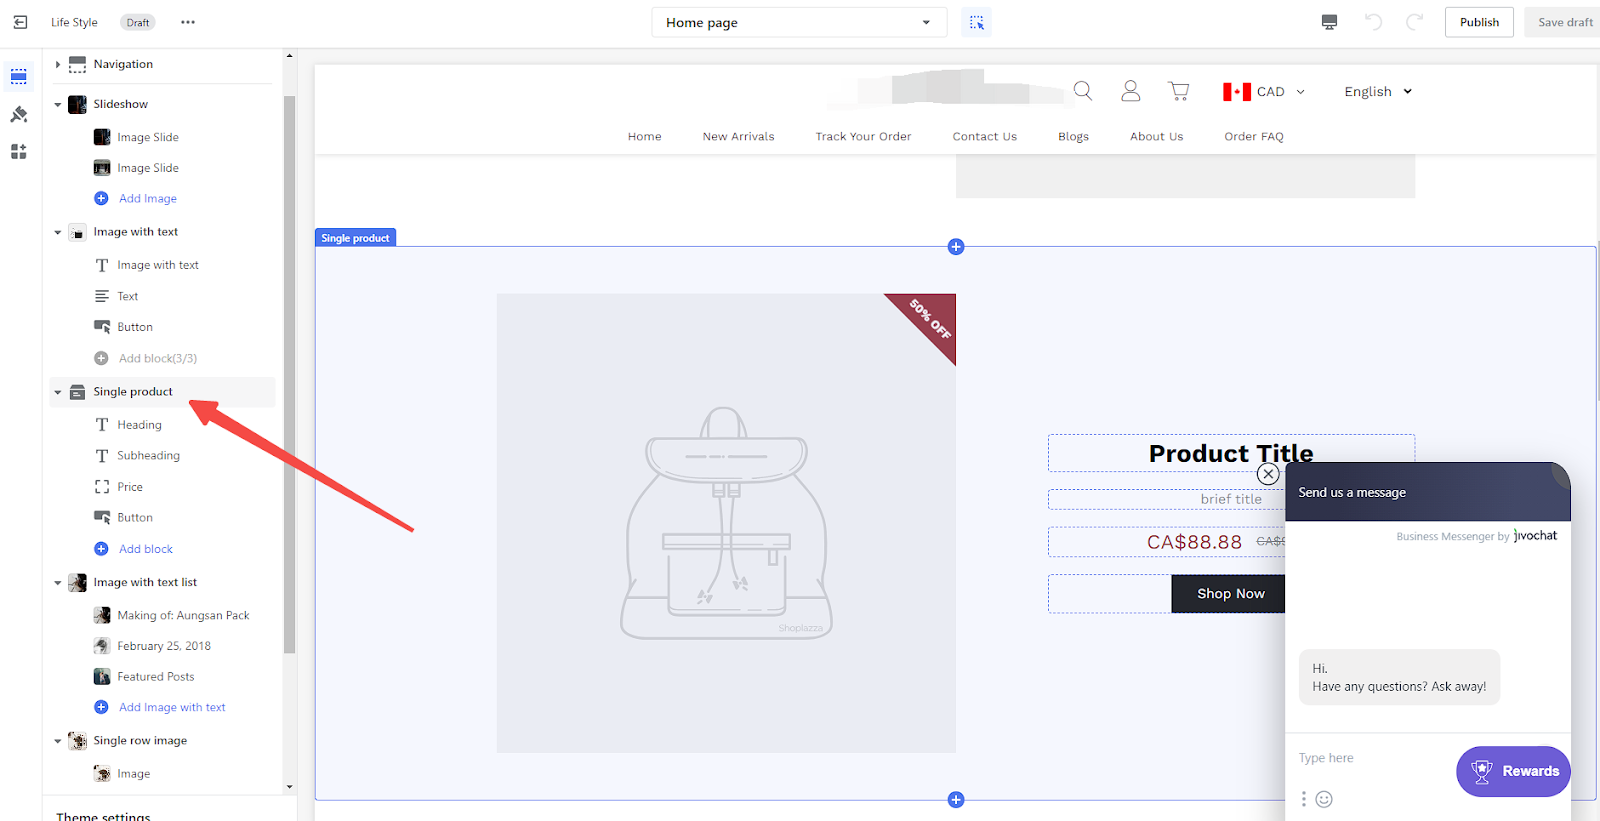
- Choose the product you'd like to showcase by clicking on Select product.
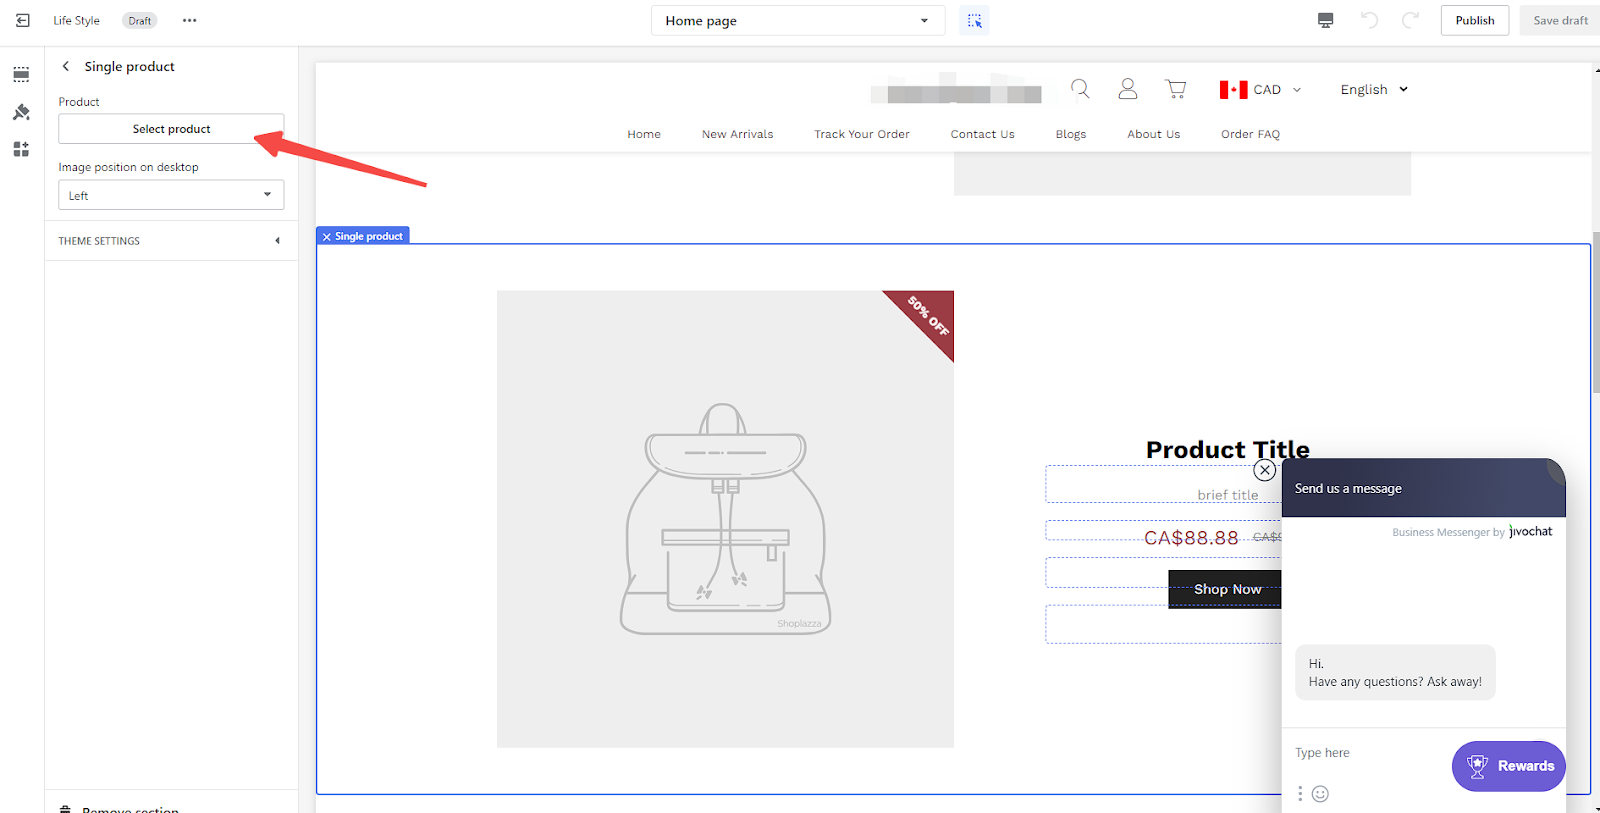
- Once you've chosen your single product, click Select to finalize.
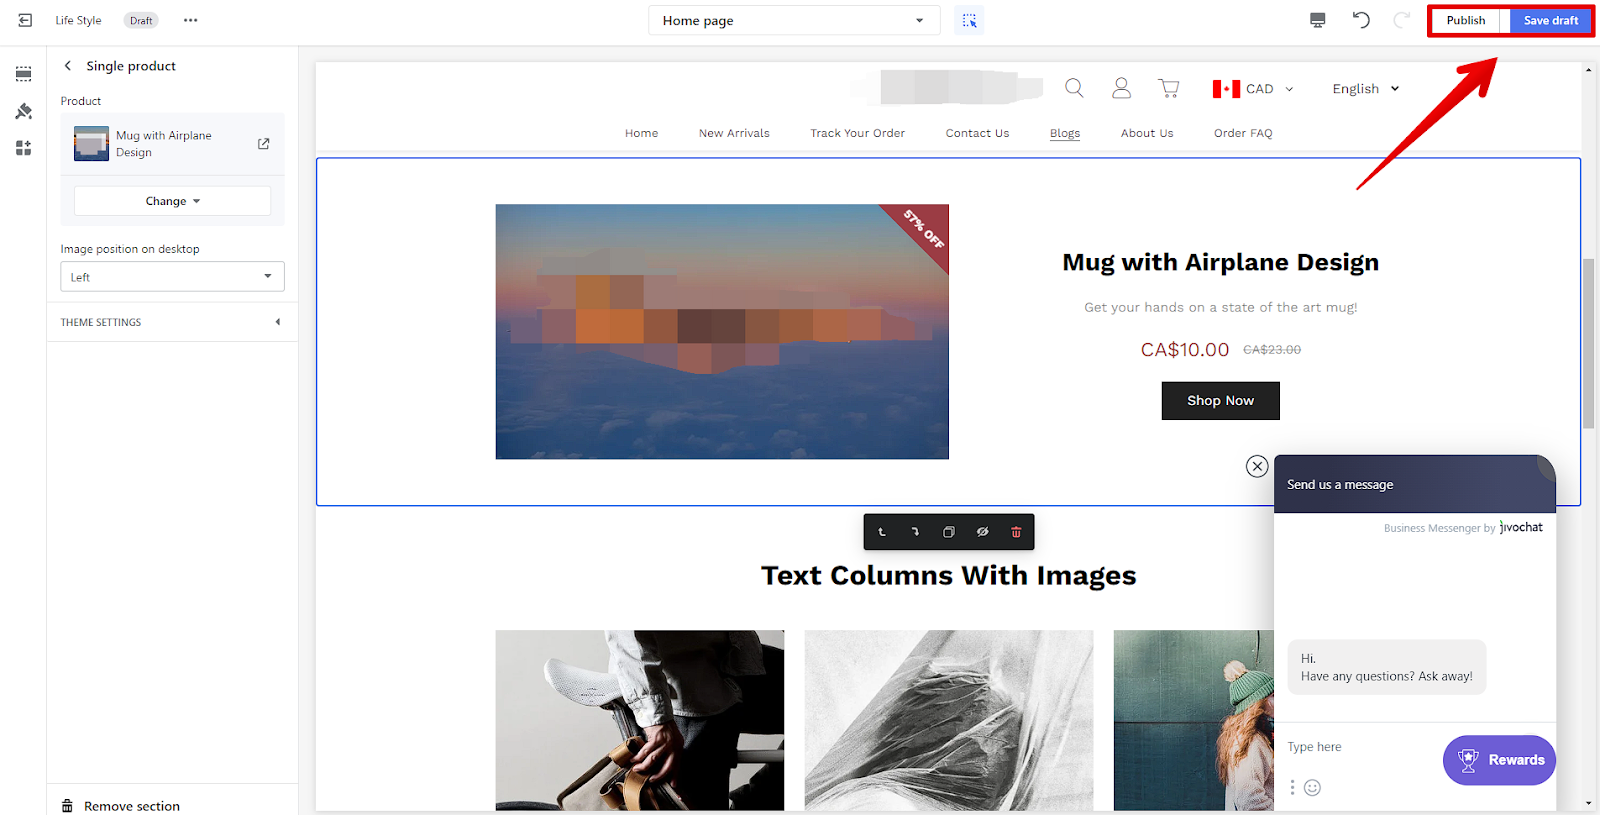
- After configuring the settings, the product information will be displayed in the theme editor. When customers click on the button within the section, they will be directed to the product details page. Once you are satisfied with the look of the section, click Save Draft or Publish (live) to save the configuration.
By following these steps, products can be effectively displayed on your store, ensuring that they are visible and easily accessible to your customers.
Related articles
Adding a product grid section to your store theme
Editing the featured collection section in theme editor
Adding a product carousel section to your store theme
Adding a product tab section to your store theme
Adding a hero slideshow section to your store theme
Adding an image slideshow section to your store theme
Split slideshow section
Slideshow section
Single product section for hero


Comments
Please sign in to leave a comment.