
A slideshow section (available in select Shoplazza themes, such as the Geek theme used in this example) captures visitors' attention and encourages them to explore the website. It effectively showcases your best products, promotions, and important content. Use a slideshow to convey important messages, establish a brand identity, and differentiate the store from competitors. Include images that reflect the brand's style and values to create a unified visual identity for the website.
Adding a slideshow section
Follow these steps to add a slideshow to your store:
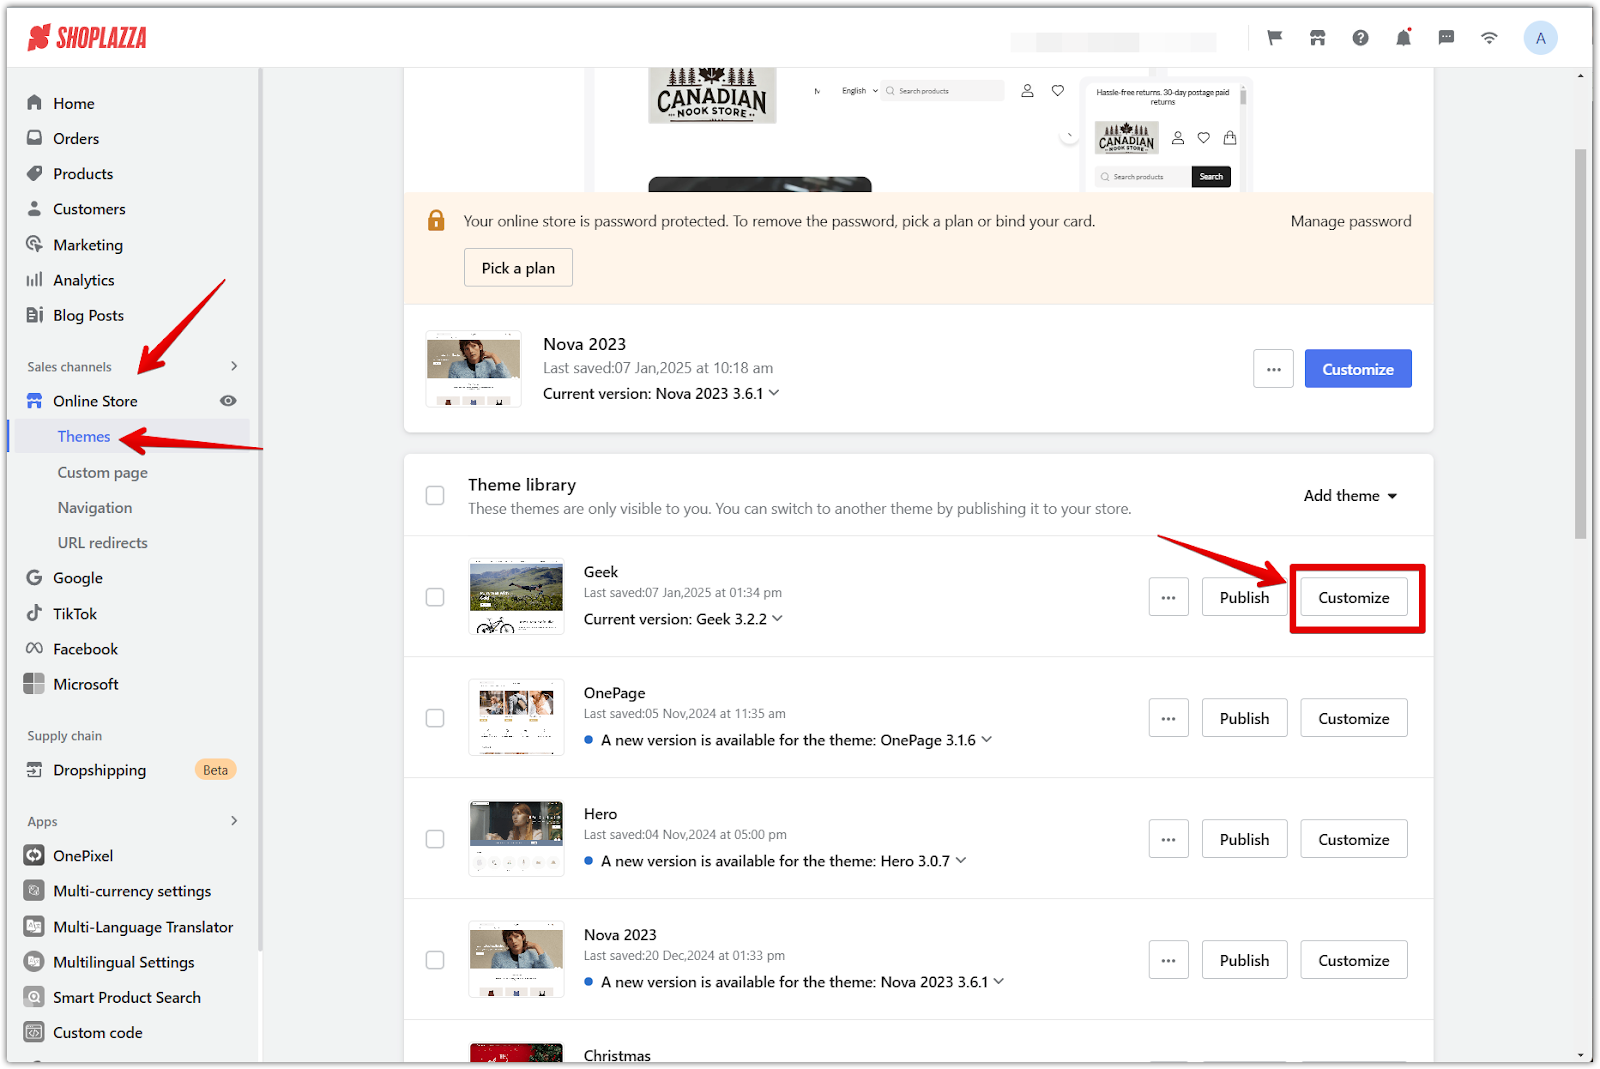
1. Access theme editor: Go to Shoplazza Admin > Online Store > Themes, and click the Customize button. This action takes you to the theme editor, where you can change the store's design.
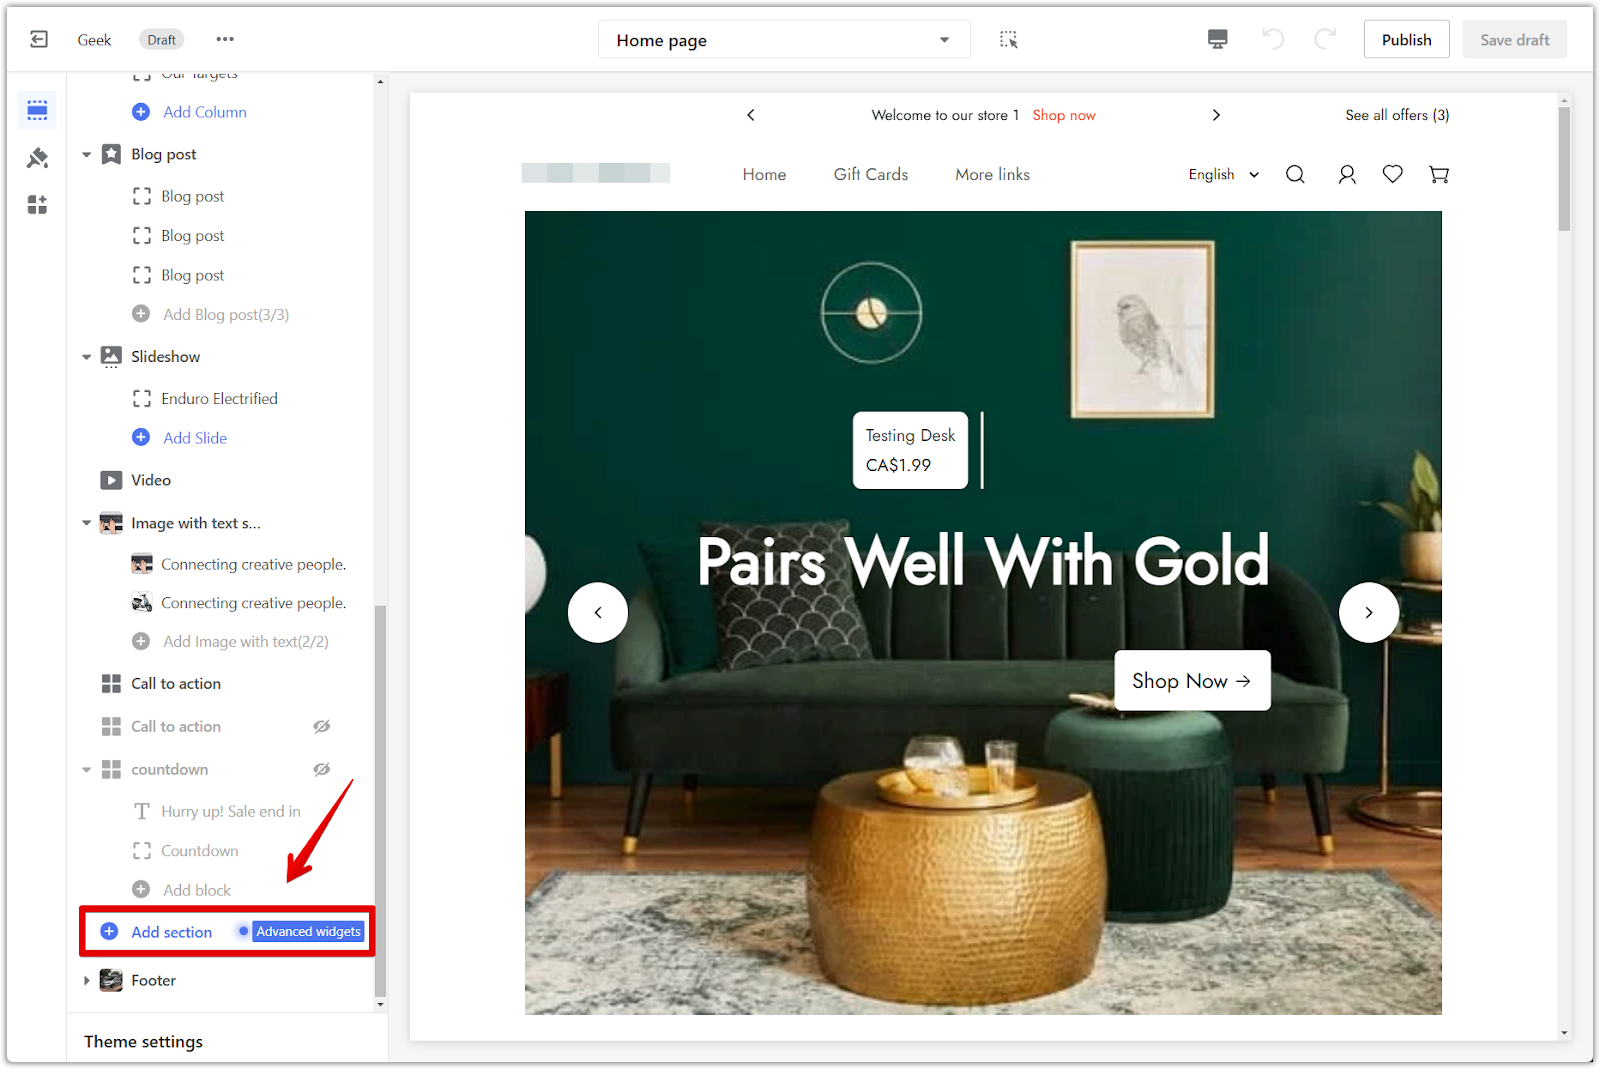
2. Add section: Scroll down and click Add section to see available sections. The homepage, including the slideshow, can be customized with a variety of pre-designed sections.
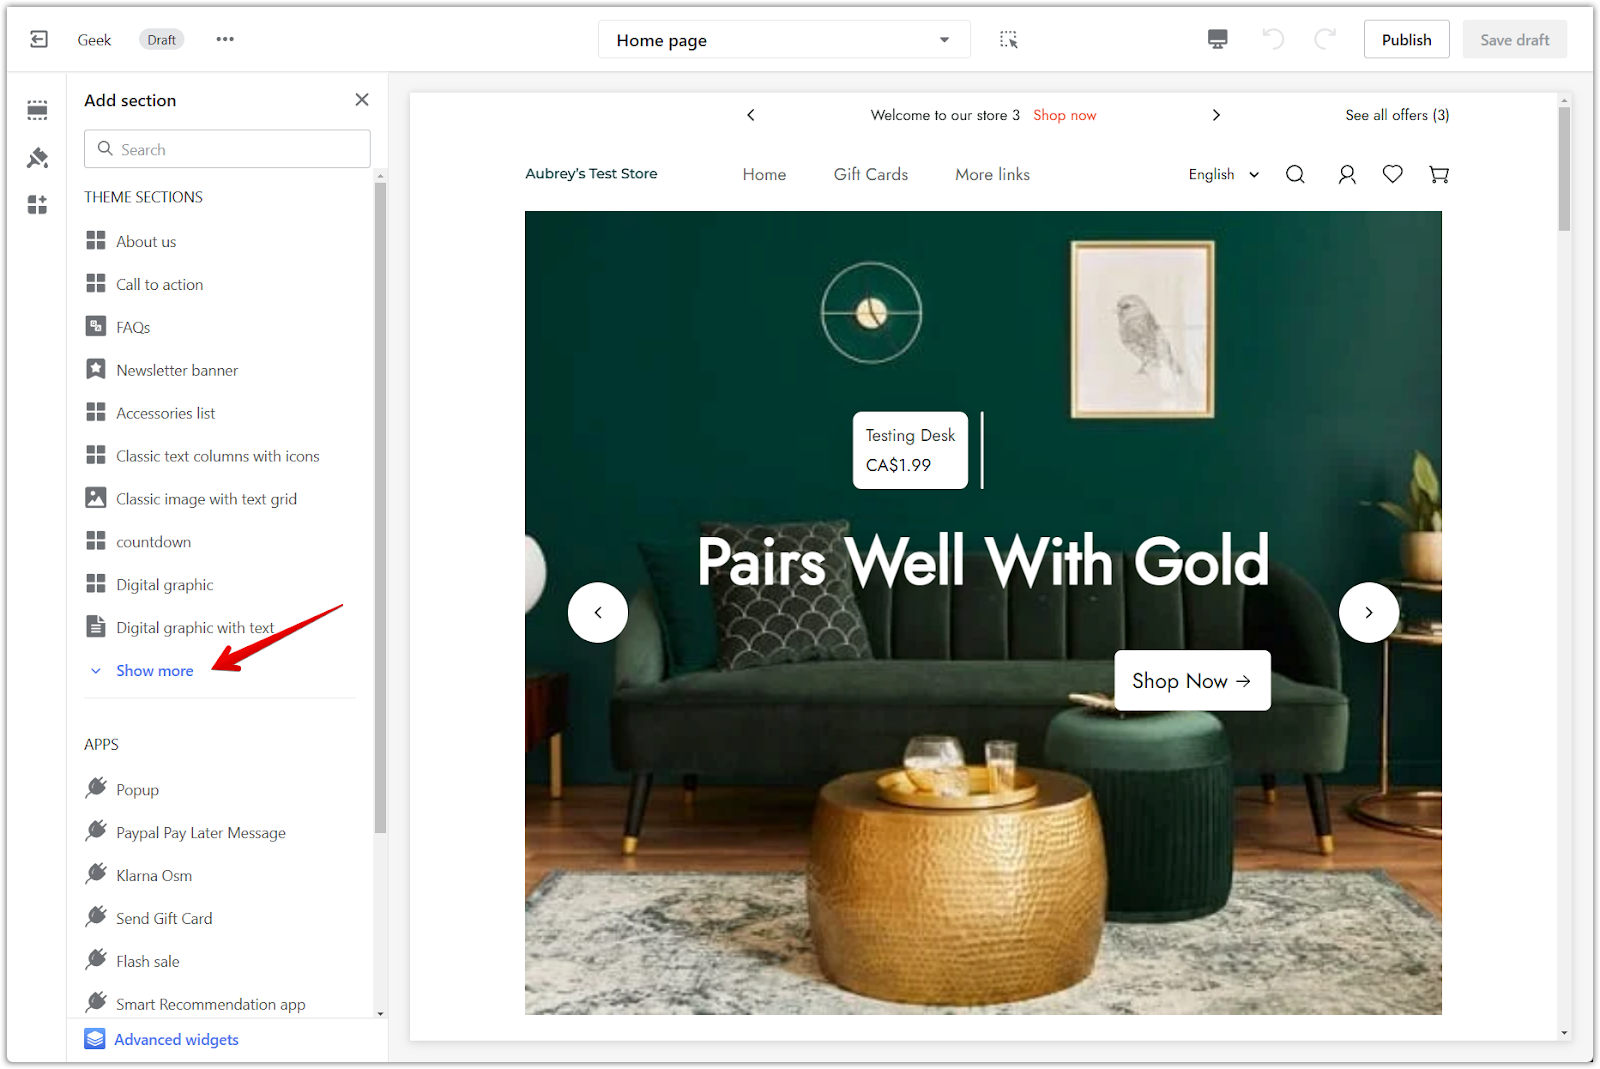
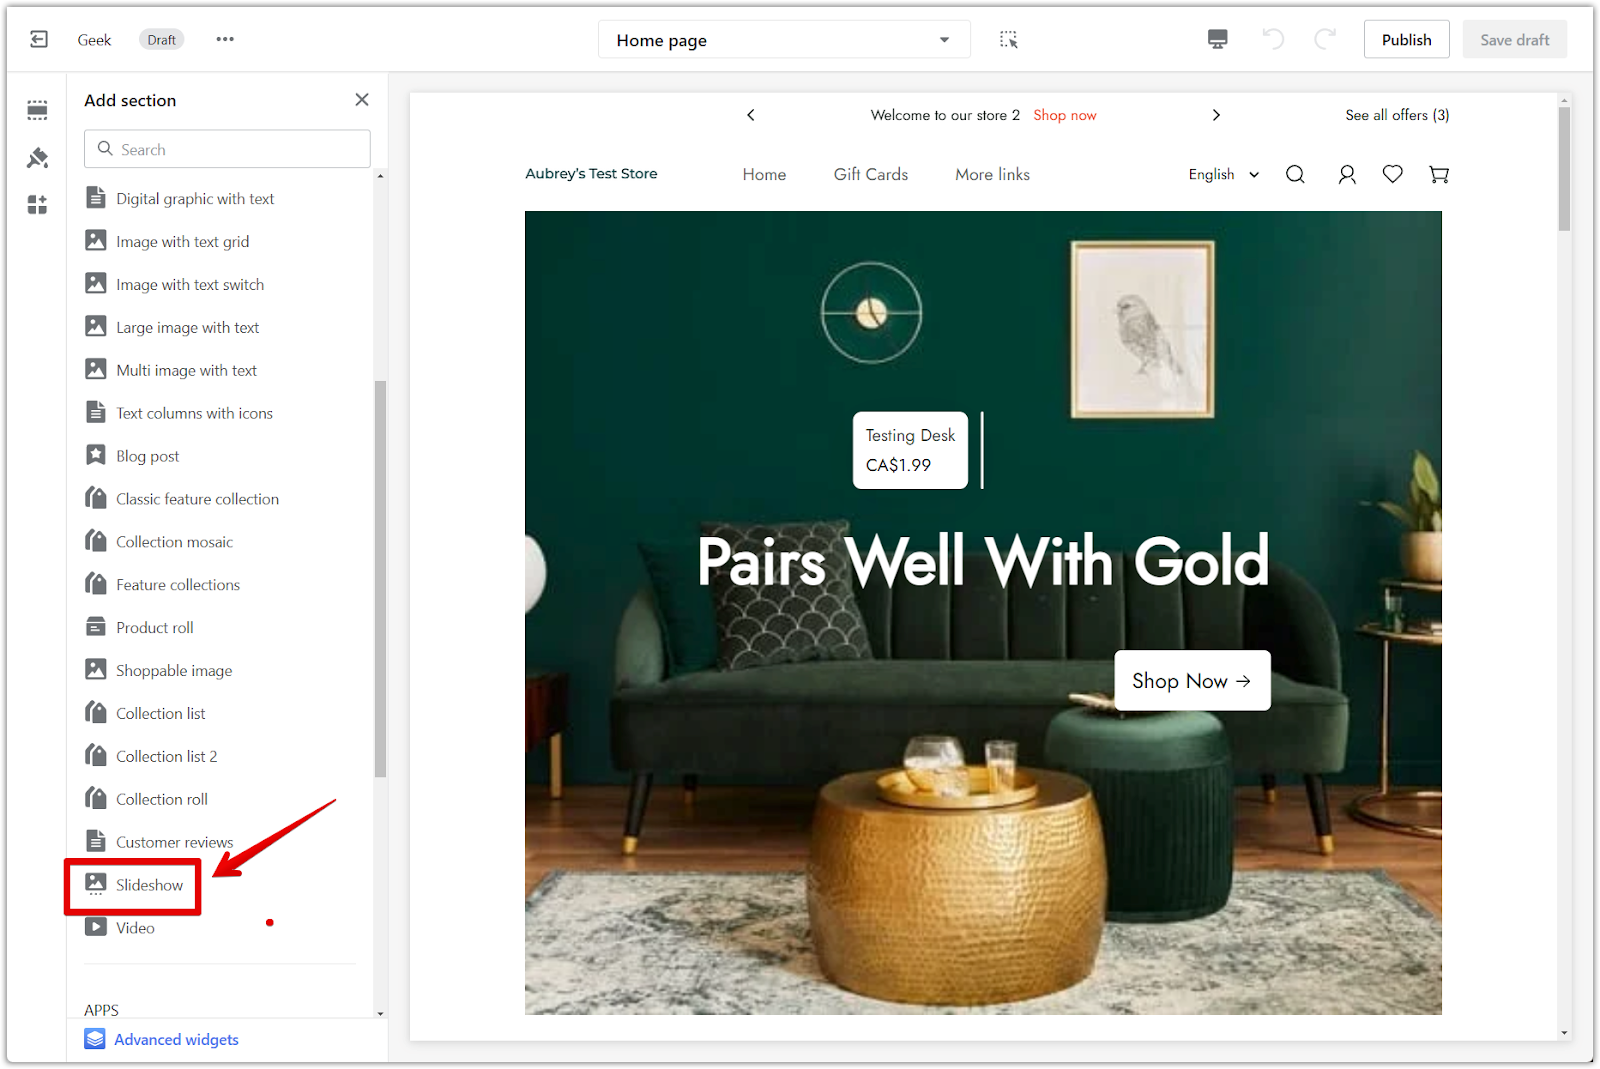
3. Select slideshow: Under Theme sections, click Show more to select the Slideshow section and customize configurations. You can then add the slideshow section and customize it to your preferences.
4. Reposition: Use the Drag indicator to place the Slideshow section anywhere on the layout. This functionality gives complete control over the arrangement of elements on the homepage, ensuring the slideshow appears in the most effective position.
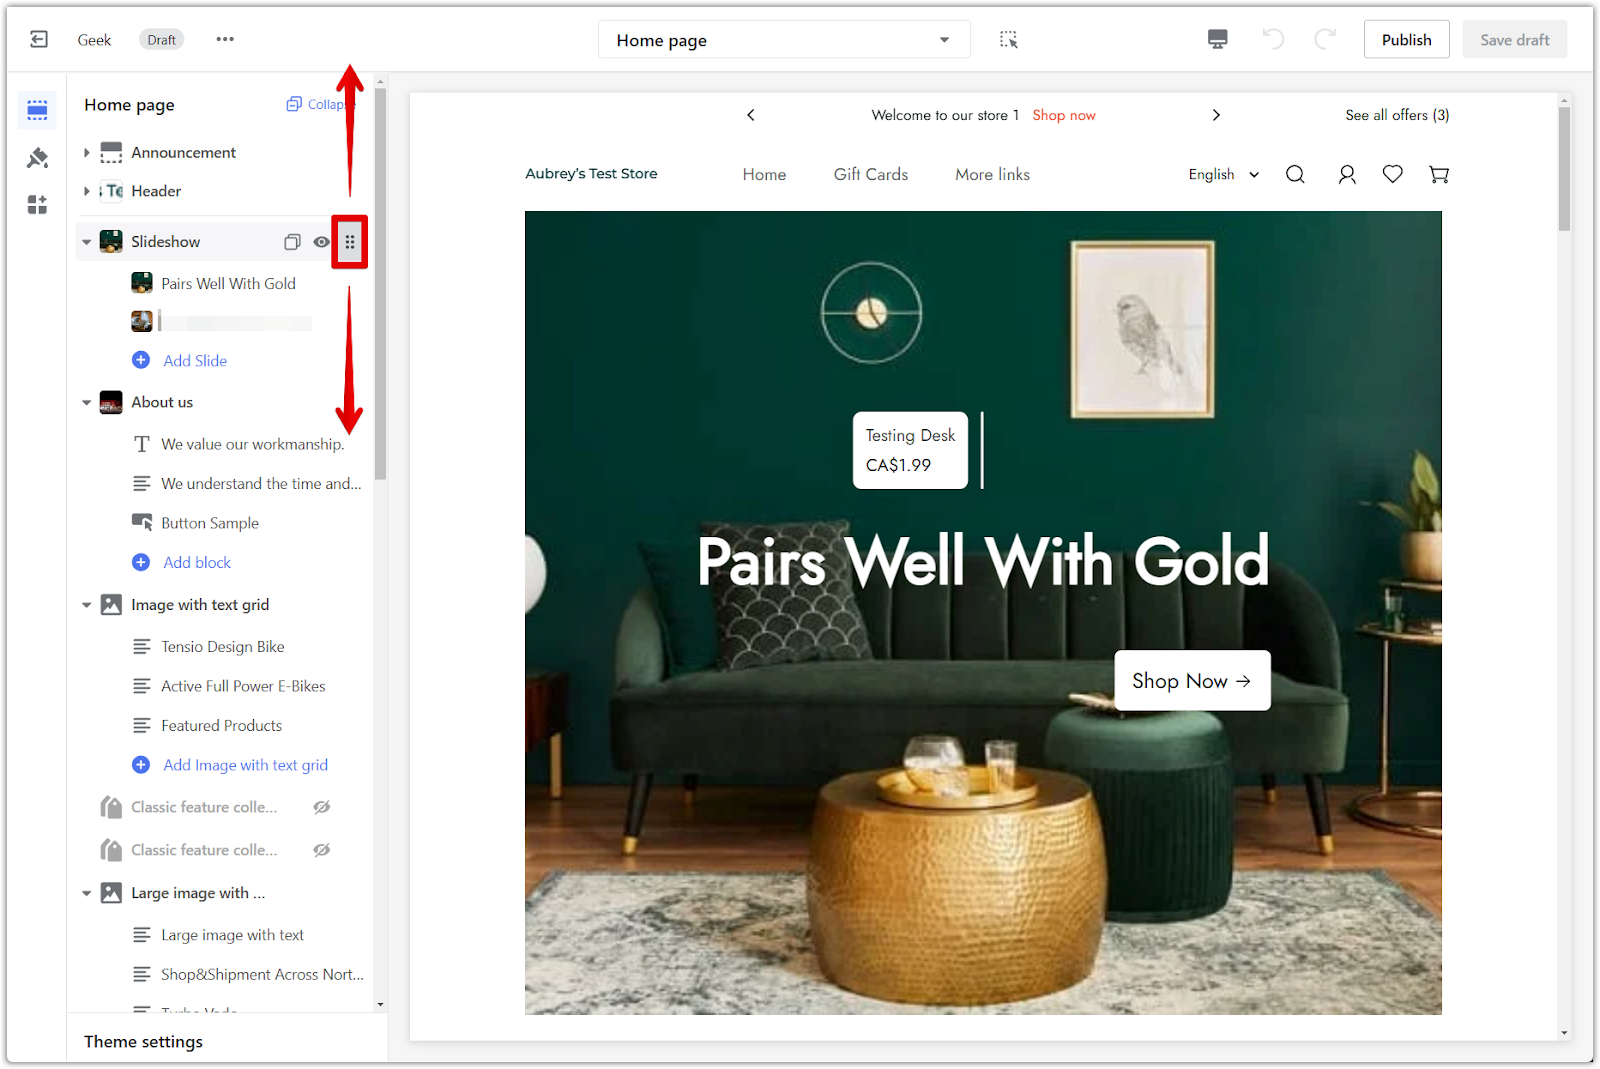
5. Configure section settings: Click the section title to configure settings for the section. This opens a panel with various options to tailor the slideshow's appearance and behavior.

6. Slideshow settings: The Slideshow section provides options to edit:
- Snowflake overlay: Enable the snowflake overlay during winter to showcase your store visually.
- Desktop & Mobile height: Use the sliders to adjust the height. The slideshow will then look great on both desktop and mobile devices. To preview adjustments for mobile devices, refer to the preview icon at the top right.
- Auto-change slides: Toggle on to automatically rotate slides according to the time frame set up. The slideshow creates a dynamic and engaging visitor experience, showcasing different content without requiring action.
- Width and width units: Enter a matching value in pixels to crop the size of your photos. Precise control over the dimensions of slideshow images ensures they fit perfectly within the designated space.

Editing your slideshow section
Customize each slide in the slideshow:
1. Modify each slide: Modify each slide separately. This provides granular control over the content and appearance of each slide in the slideshow. Note: A minimum of 1 slide is required, adding up to a maximum of 3 slides.

2. Add images: Separate images are added for desktop and mobile. Images can be optimized for different screen sizes, ensuring they look sharp and clear on any device.
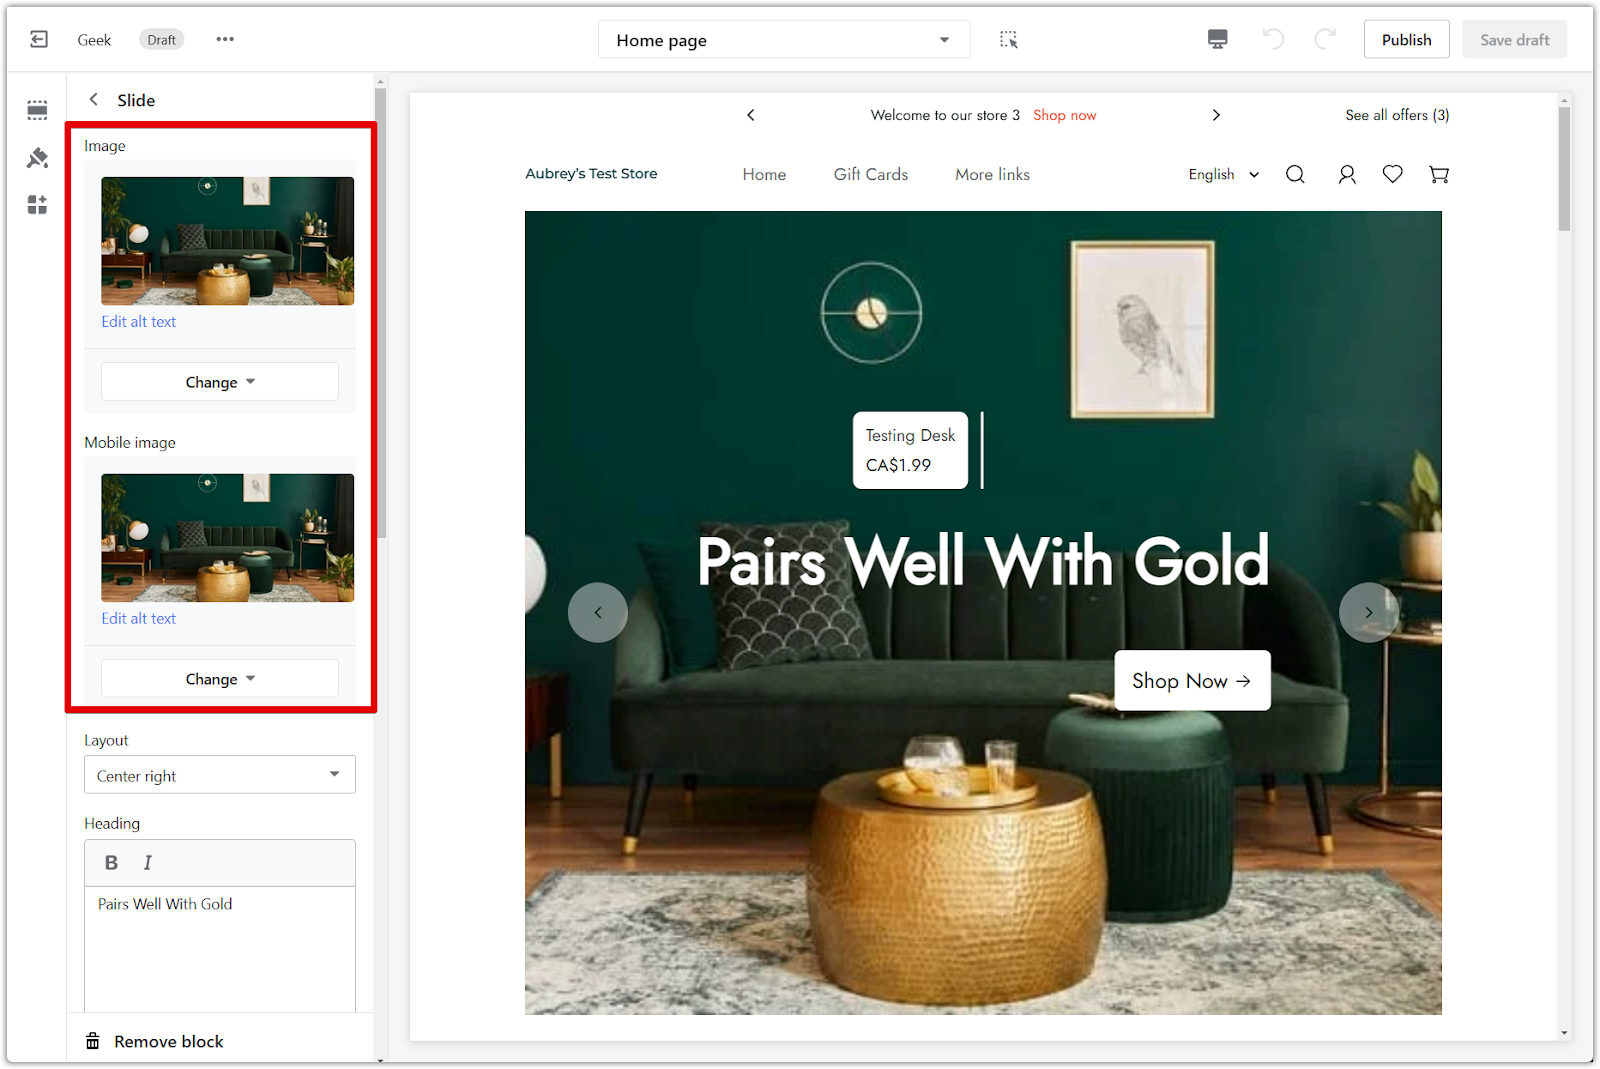
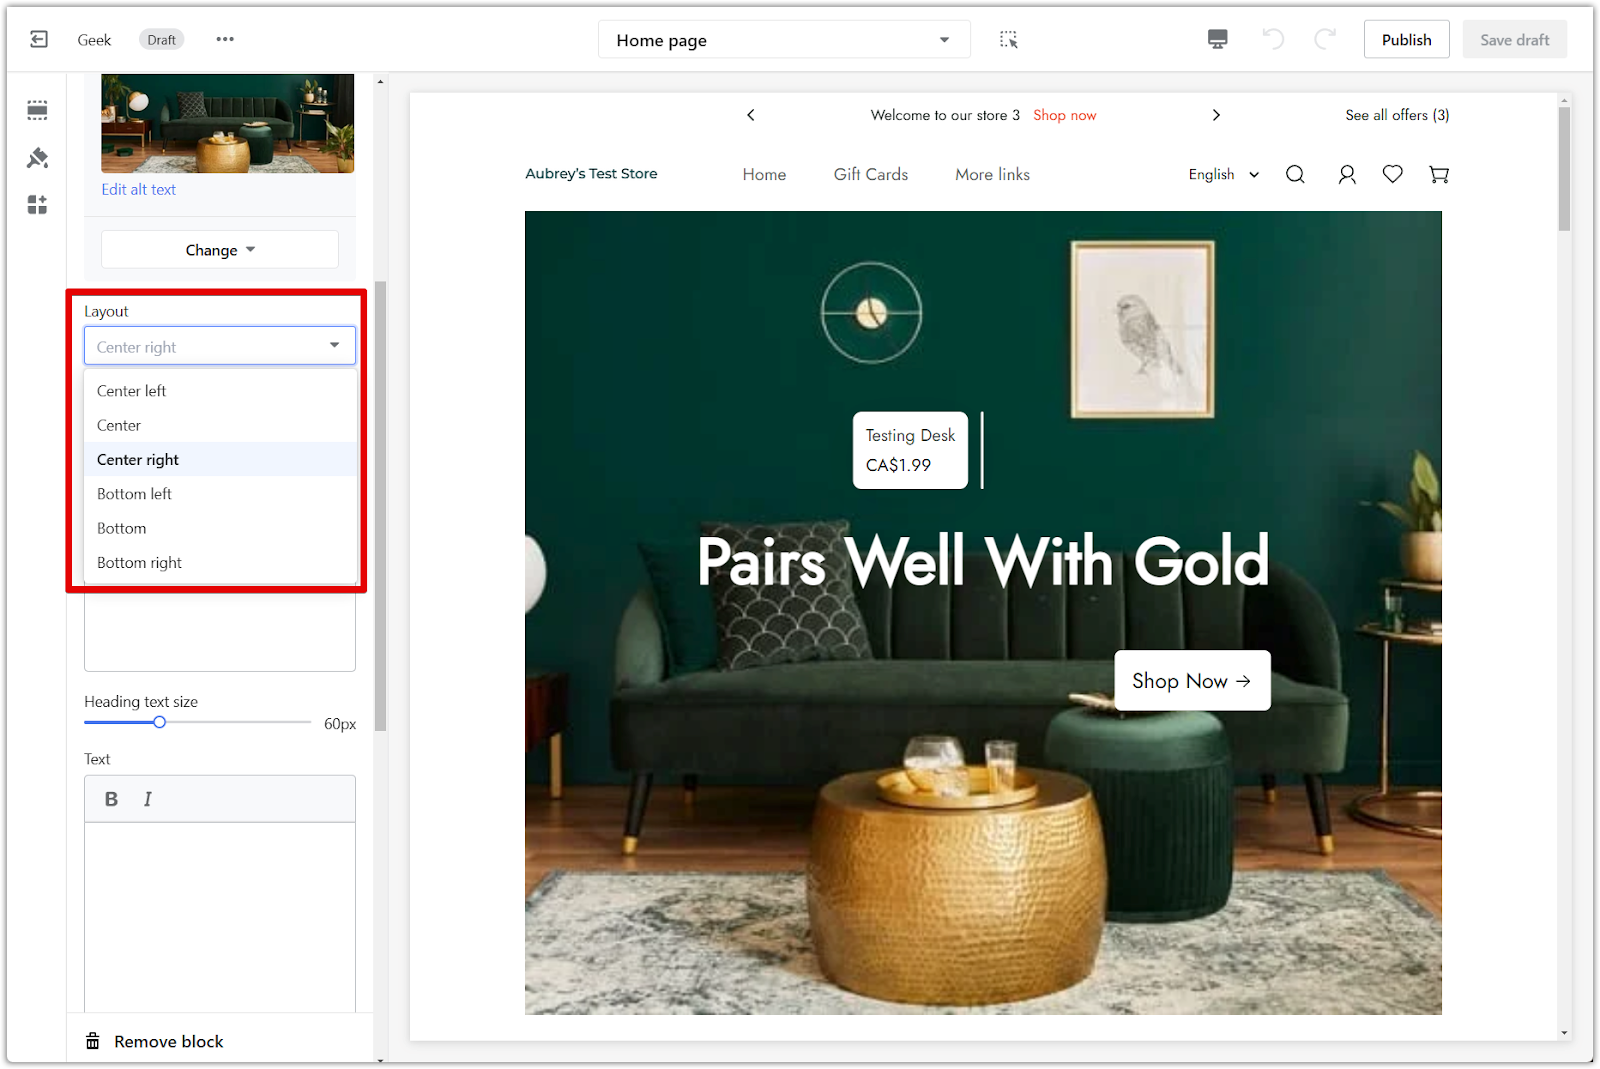
3. Layout menu: Use the layout menu to modify and reposition text and optional buttons. The layout alignment menu offers flexibility in designing the layout of each slide, allowing you to place elements strategically for maximum impact.
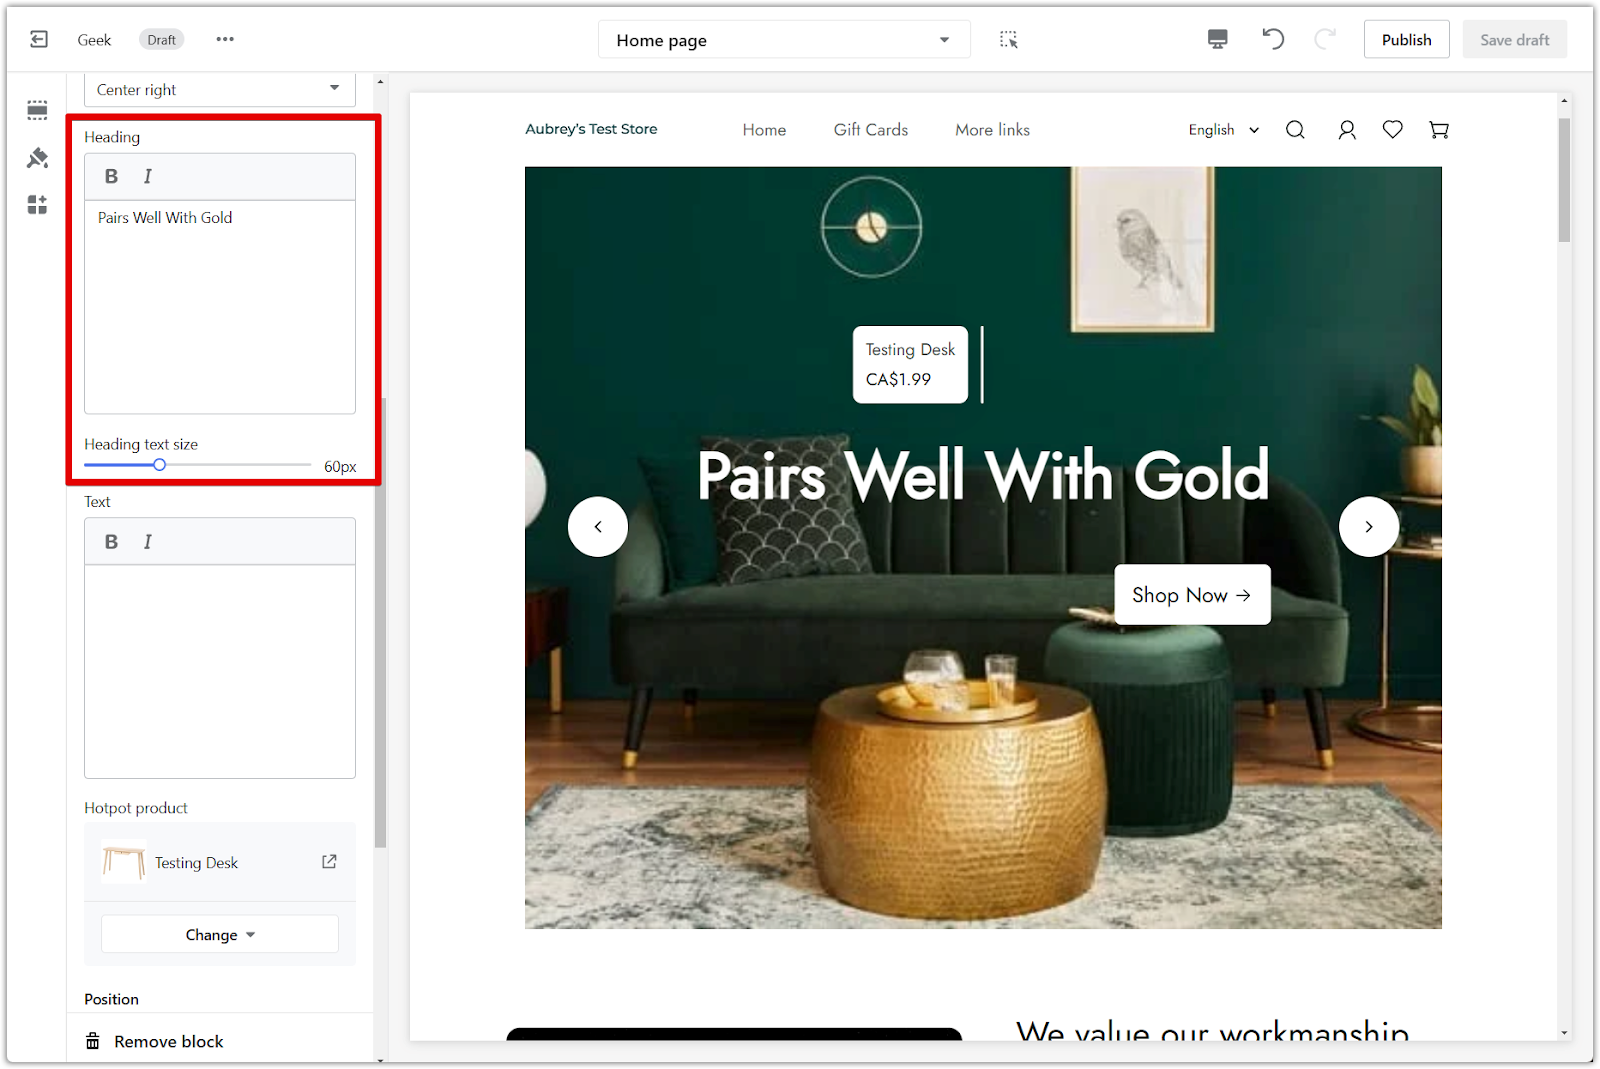
4. Heading: Customize the Heading and Heading text size. This creates visually appealing and informative headings that capture attention and guide visitors through the slideshow content.
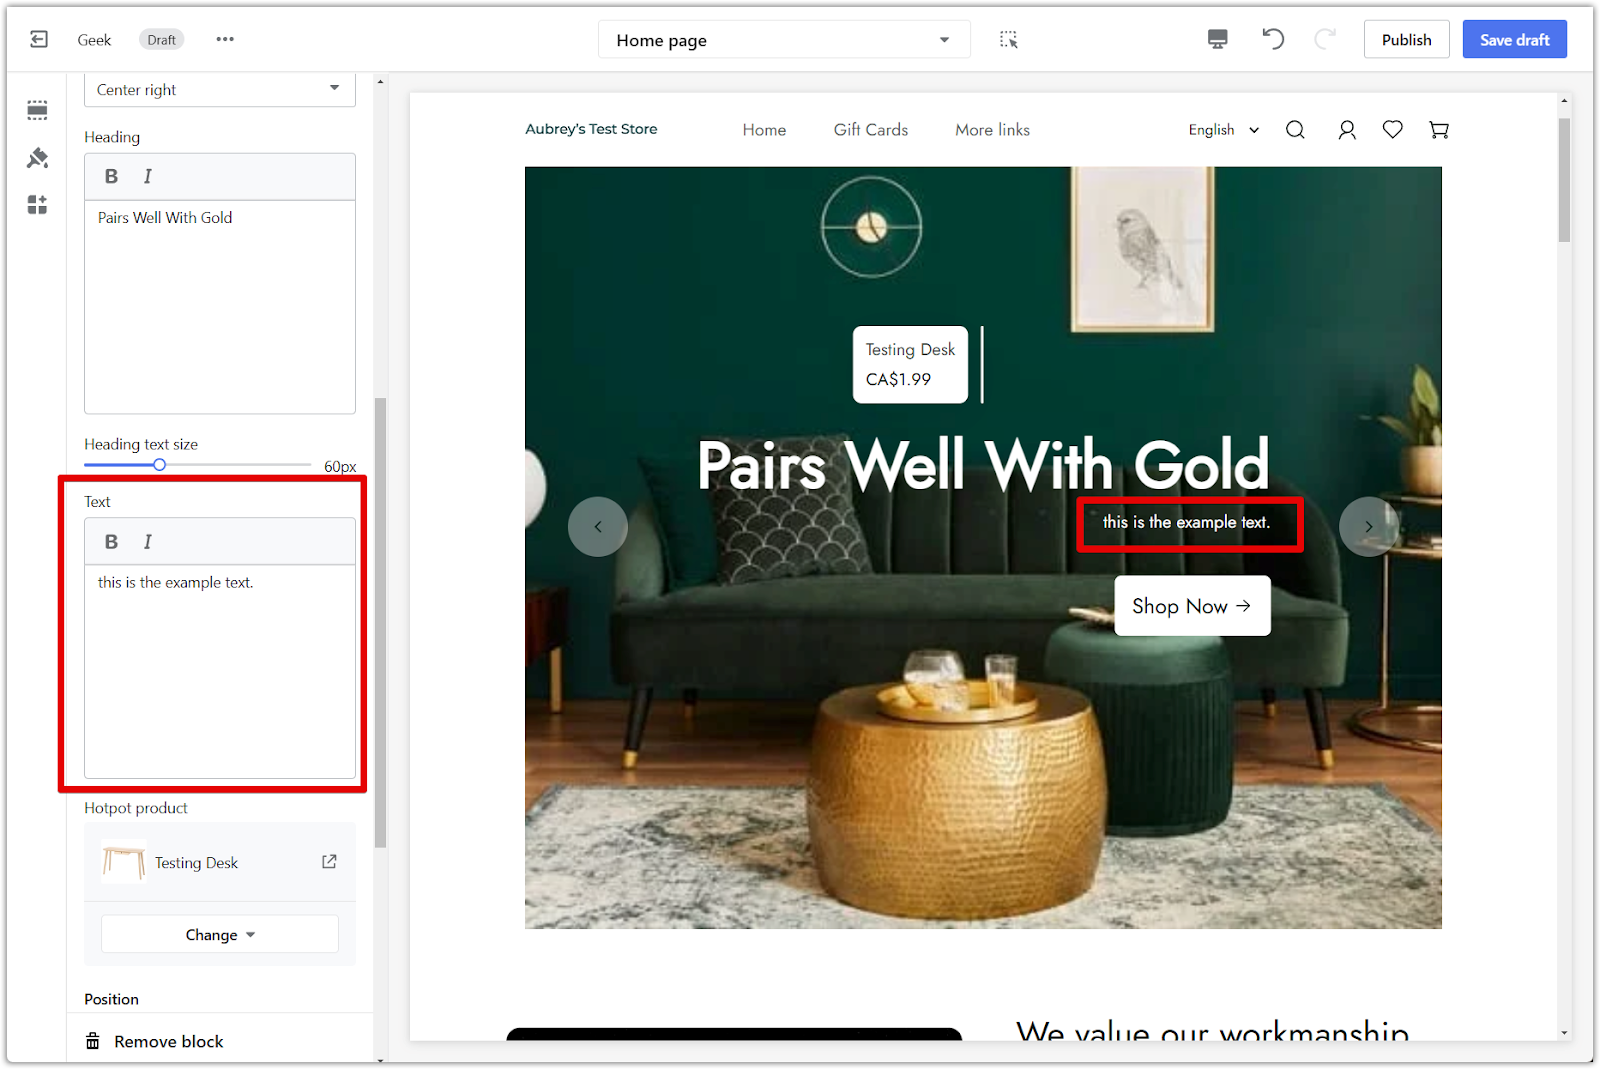
5. Text: Add and customize the text content that accompanies your heading. This provides additional context and information to engage visitors and encourage them to explore further.
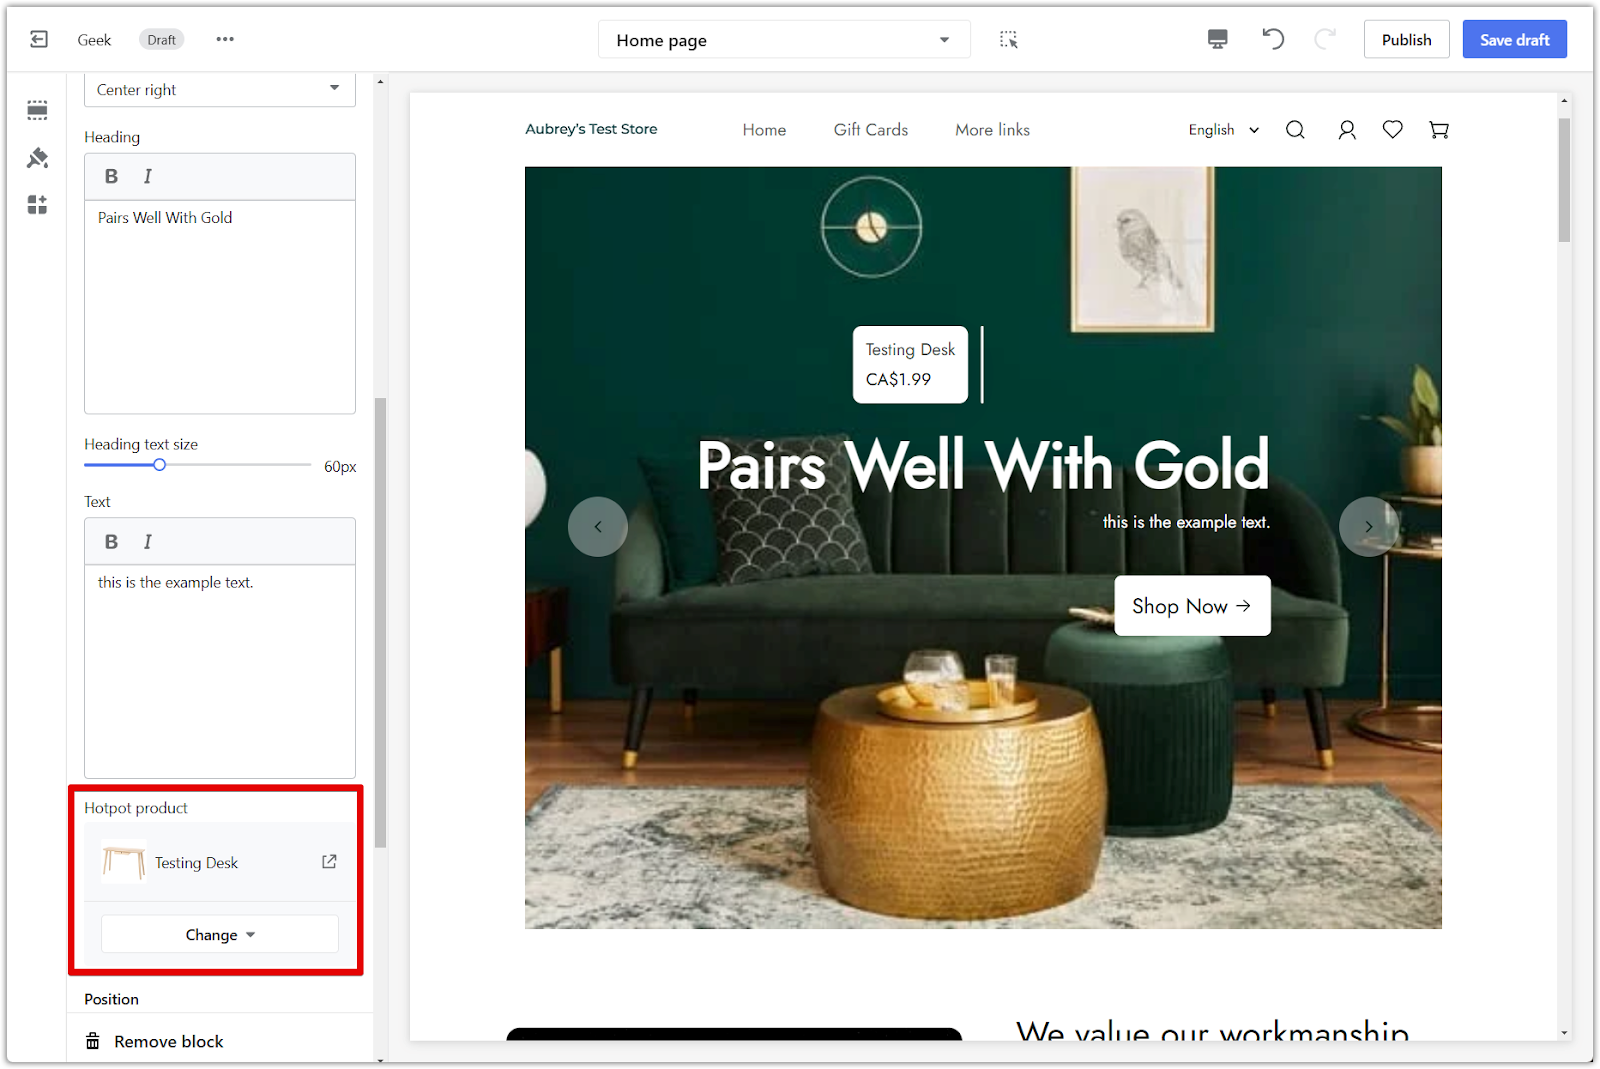
6. Select product: Select a product to highlight in the slideshow. Featuring specific products directly in the slideshow drives traffic to product pages and potentially increases sales.
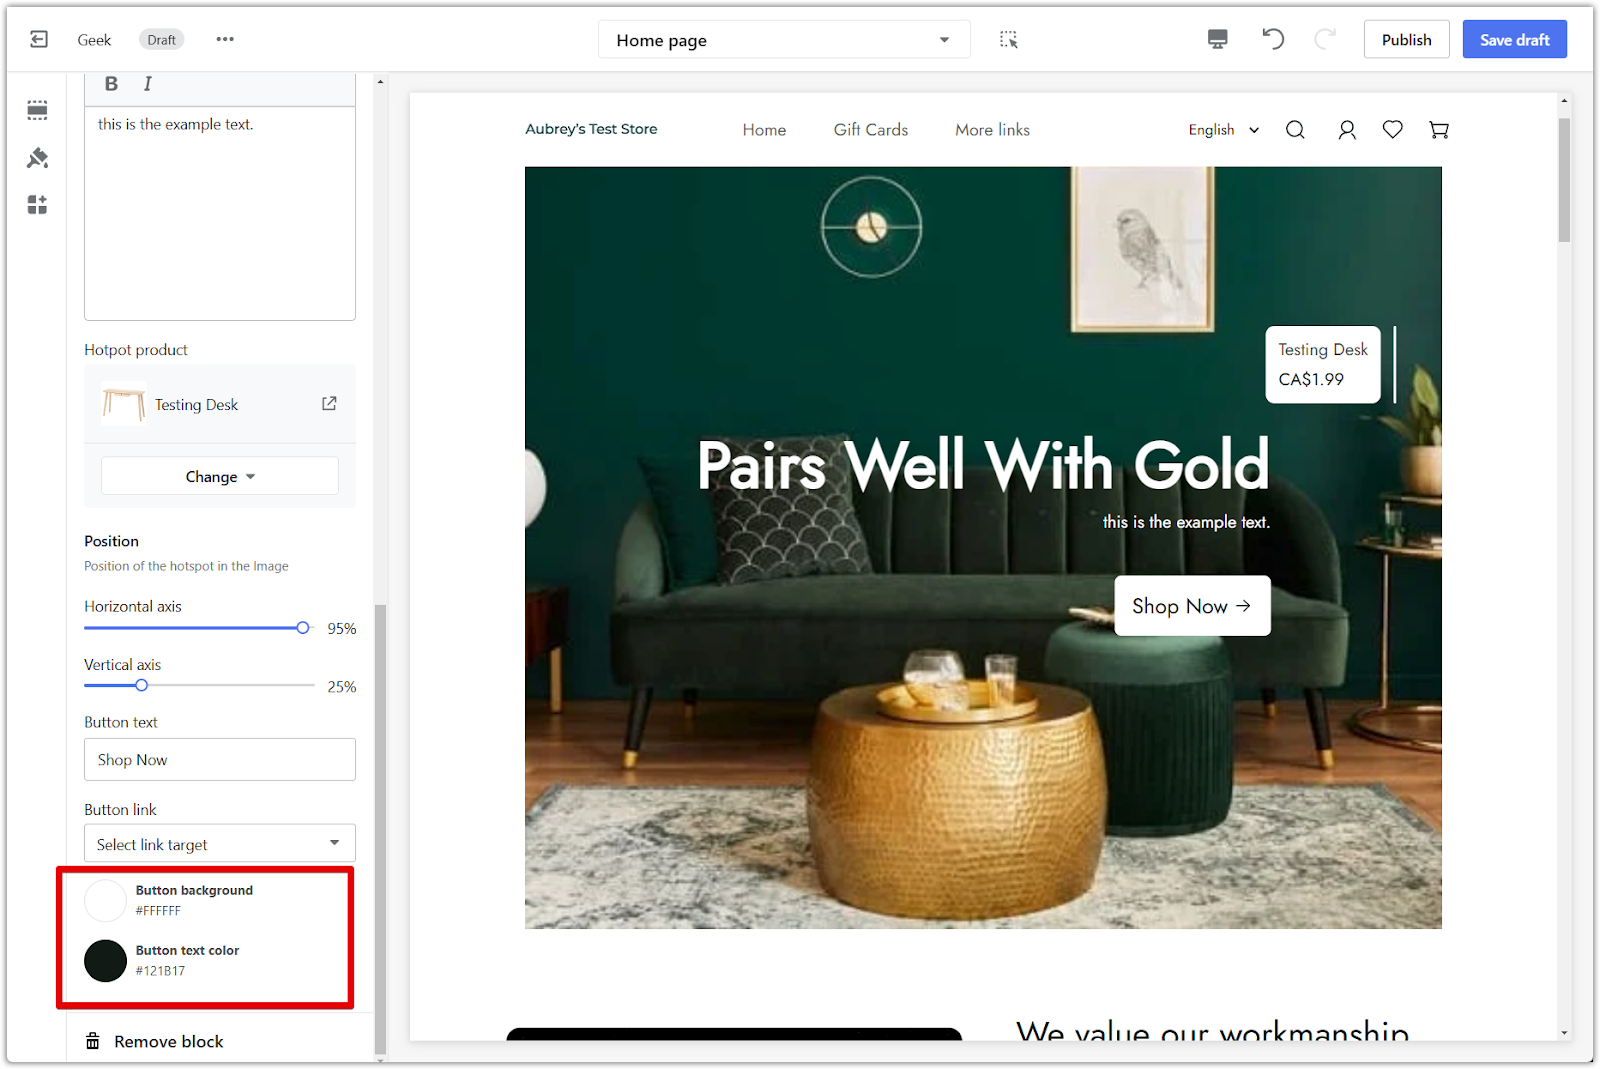
7. Reposition hotspot: Customize the horizontal and vertical axes to change the position of the hotspot in the image. This feature allows for fine-tuning the focal point of images, ensuring that the most important elements are always prominently displayed.

Linking your buttons
This section provides options for customizing the appearance and functionality of buttons within your slideshow:
1. Button text: Customize the text displayed on the buttons. Choose clear and concise wording that encourages visitors to click and explore further. For example, use action-oriented text like "Shop Now," "Learn More," or "Discover."

2. Button link target: Choose where you want the button to link to. Direct customers to other relevant pages on the website, such as product pages, collection pages, or blog posts.

3. Button background and text color: Select a background color for the button. This allows you to match your brand's color scheme or create visual contrast to draw attention to the button. Choose a color for the button text. Ensure the text color contrasts well with the background color for easy readability.
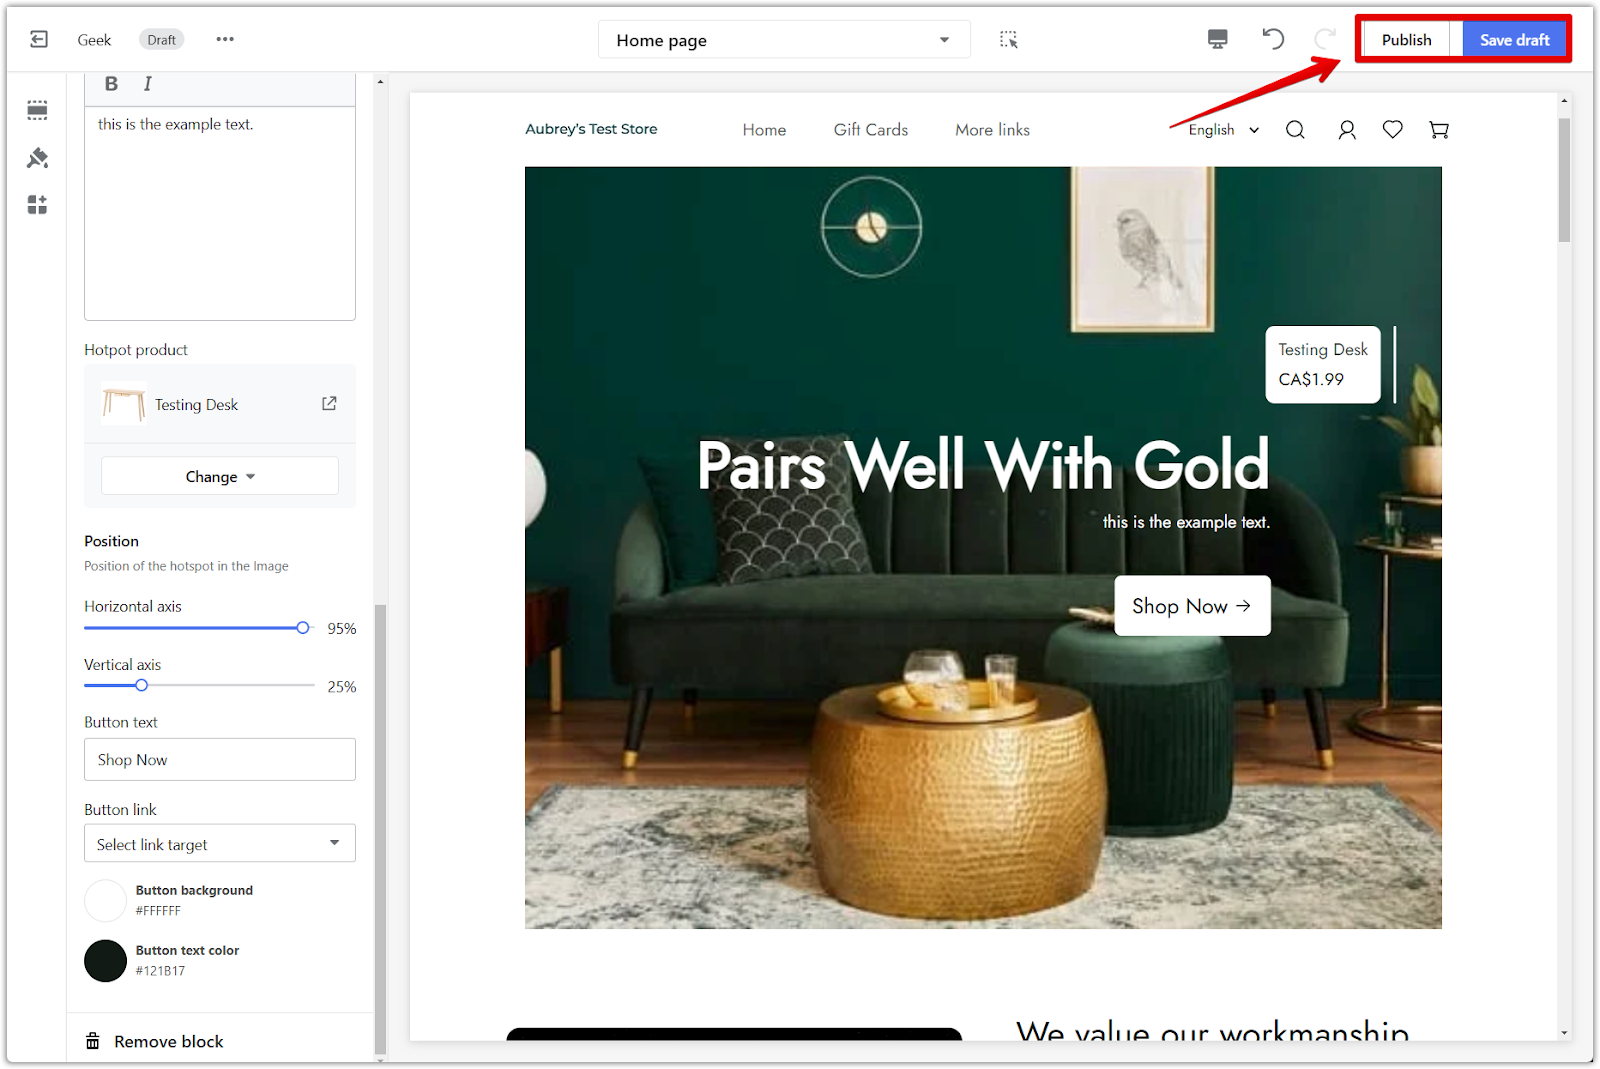
4. Save your progress: Click Publish to make your changes live on your store, or click Save draft to save your changes without publishing.
Following these steps, you create a captivating slideshow that enhances the website's visual appeal and effectively communicates the brand's message. Experiment with images, text, and button configurations to optimize the slideshow for maximum impact and engagement.


Comments
Please sign in to leave a comment.