
A hero slideshow is an impactful way to showcase products and engage customers with captivating visuals and messaging. This dynamic feature is especially useful for highlighting featured collections or creating a welcoming experience with visually rich introductions.
Adding a hero slideshow section
This section will guide you through adding a hero slideshow to your store theme.
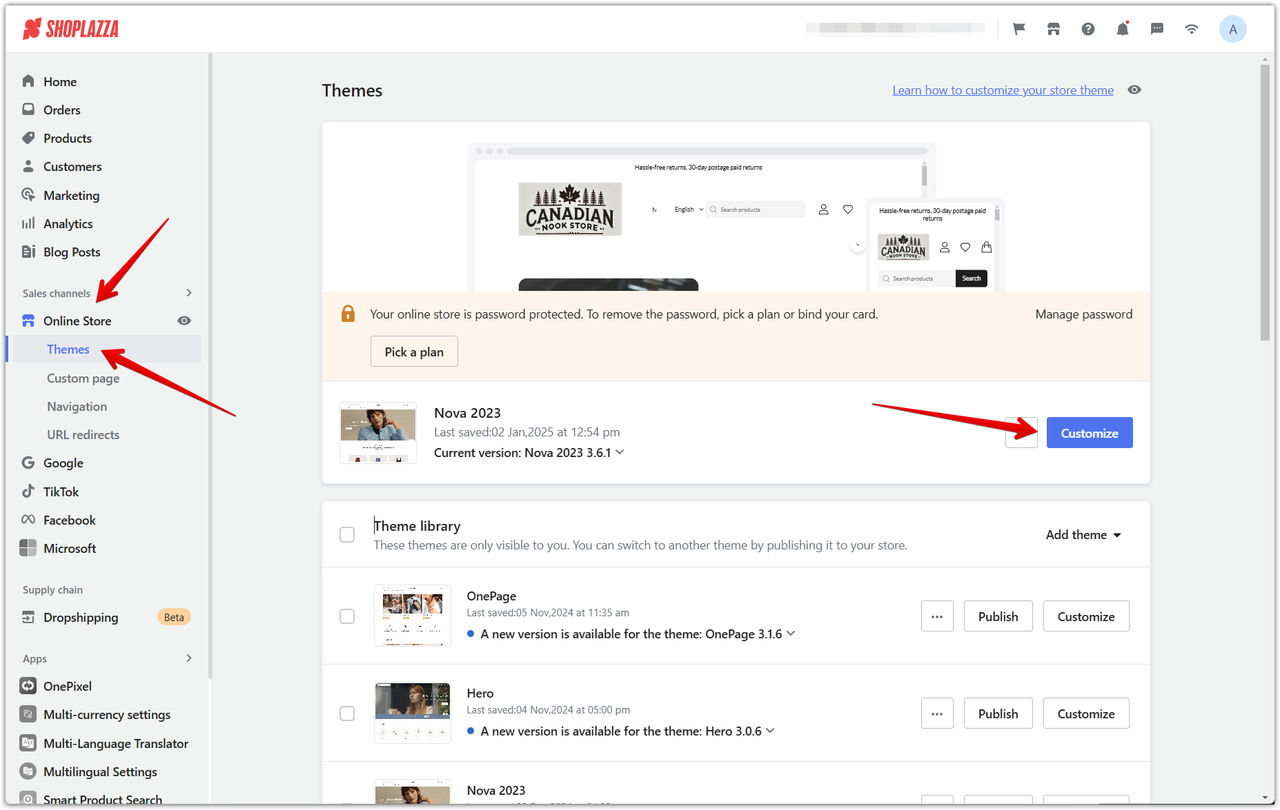
1. Access the theme editor: Navigate to your Shoplazza Admin > Online Store > Themes. Click Customize next to the desired theme.
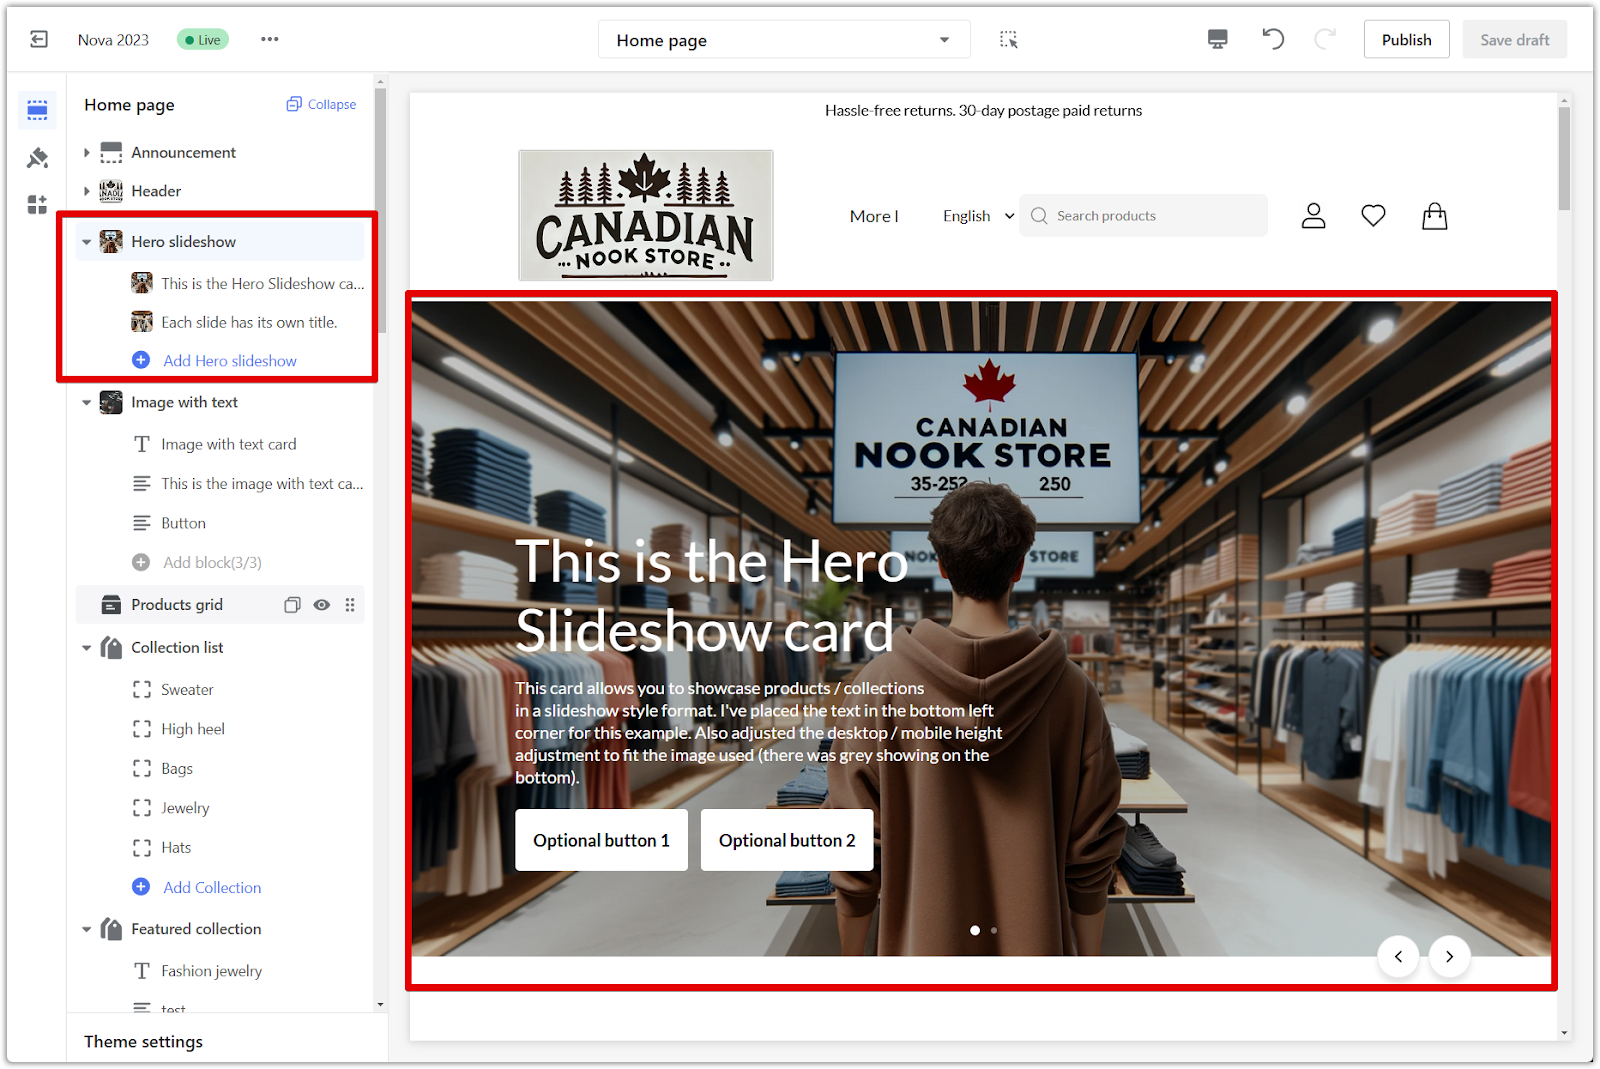
2. Utilize default sections (optional): Some themes include default hero slideshow sections. Click on a section to edit the existing layout or continue to the next step to add a new slideshow.
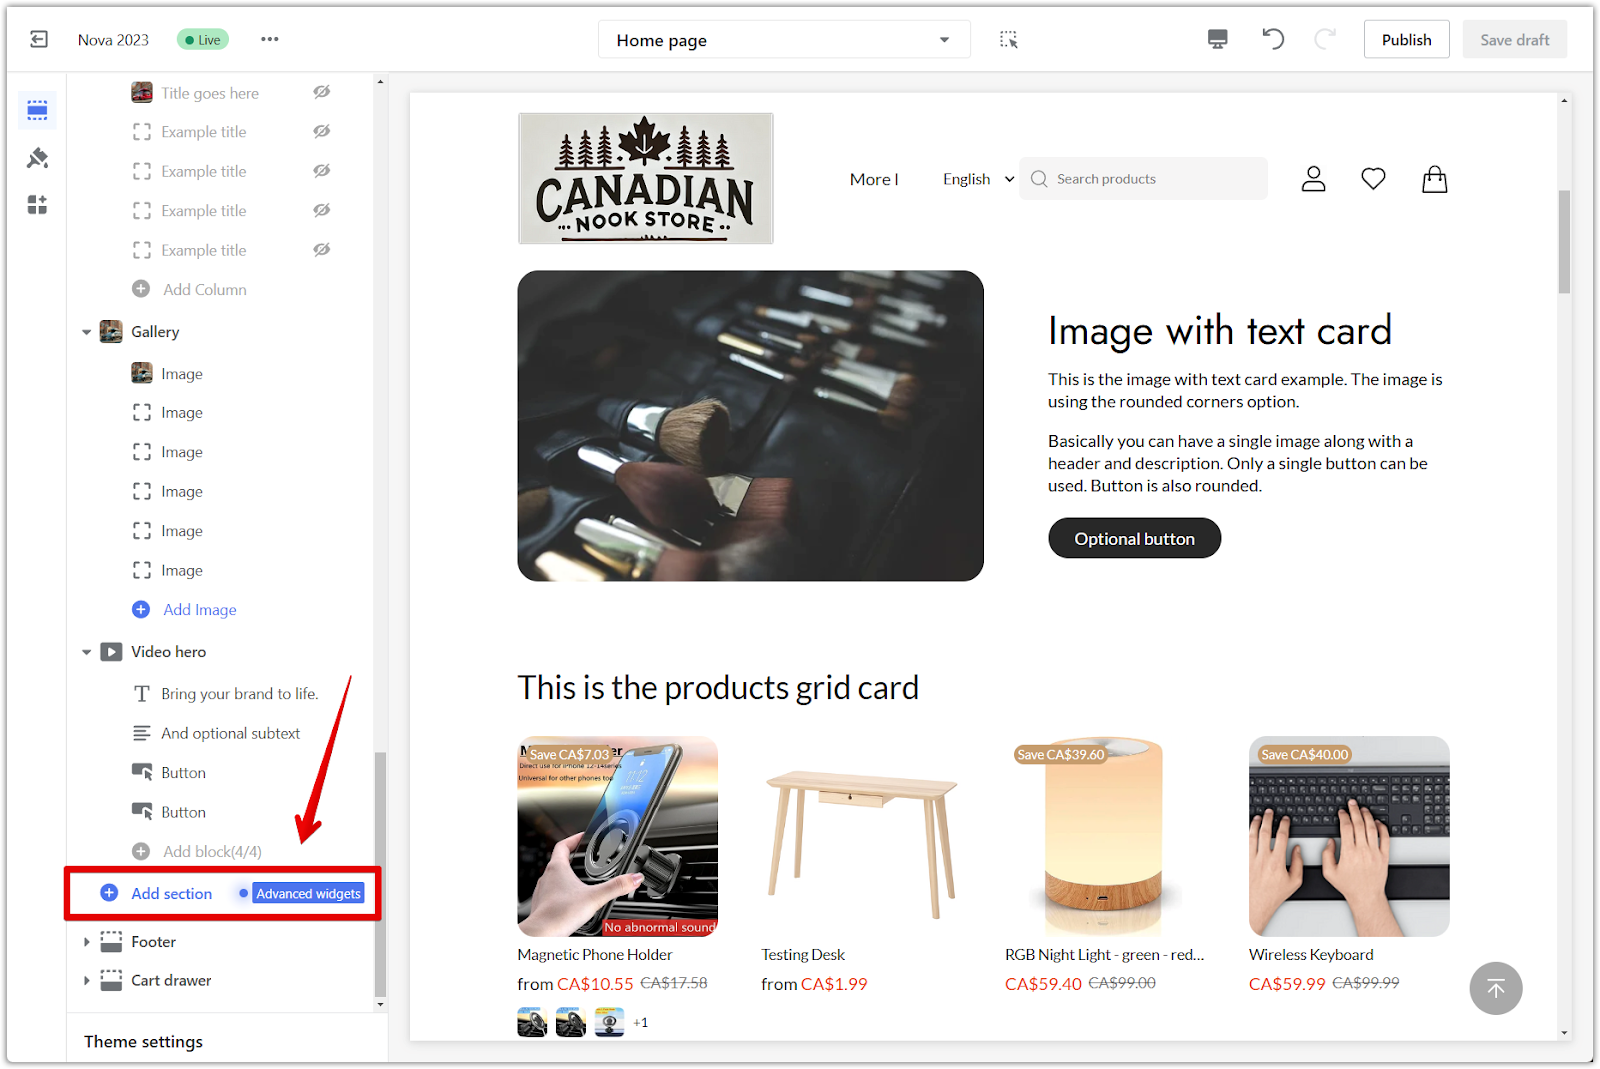
3. Add a new section: Scroll down and click Add section in the theme editor.
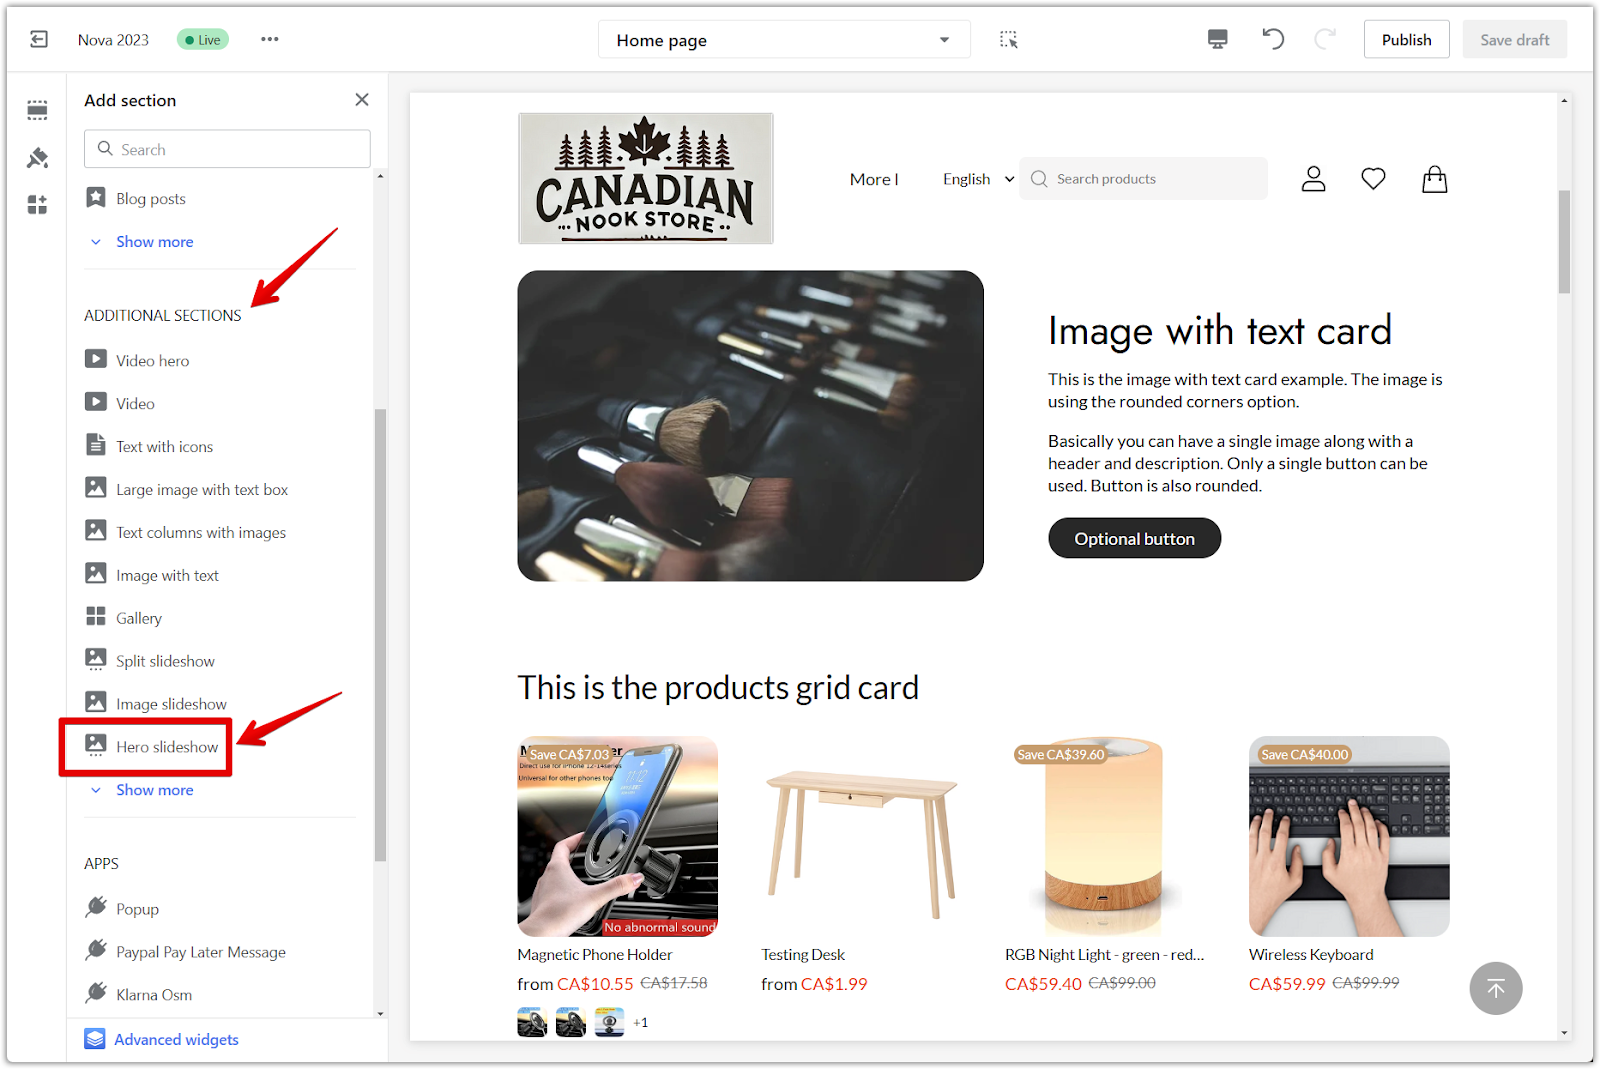
4. Select the hero slideshow: Under Additional sections, locate and click Hero slideshow to add it to your theme.
Hero slideshow configuration
To customize your slideshow settings, access the configuration settings.
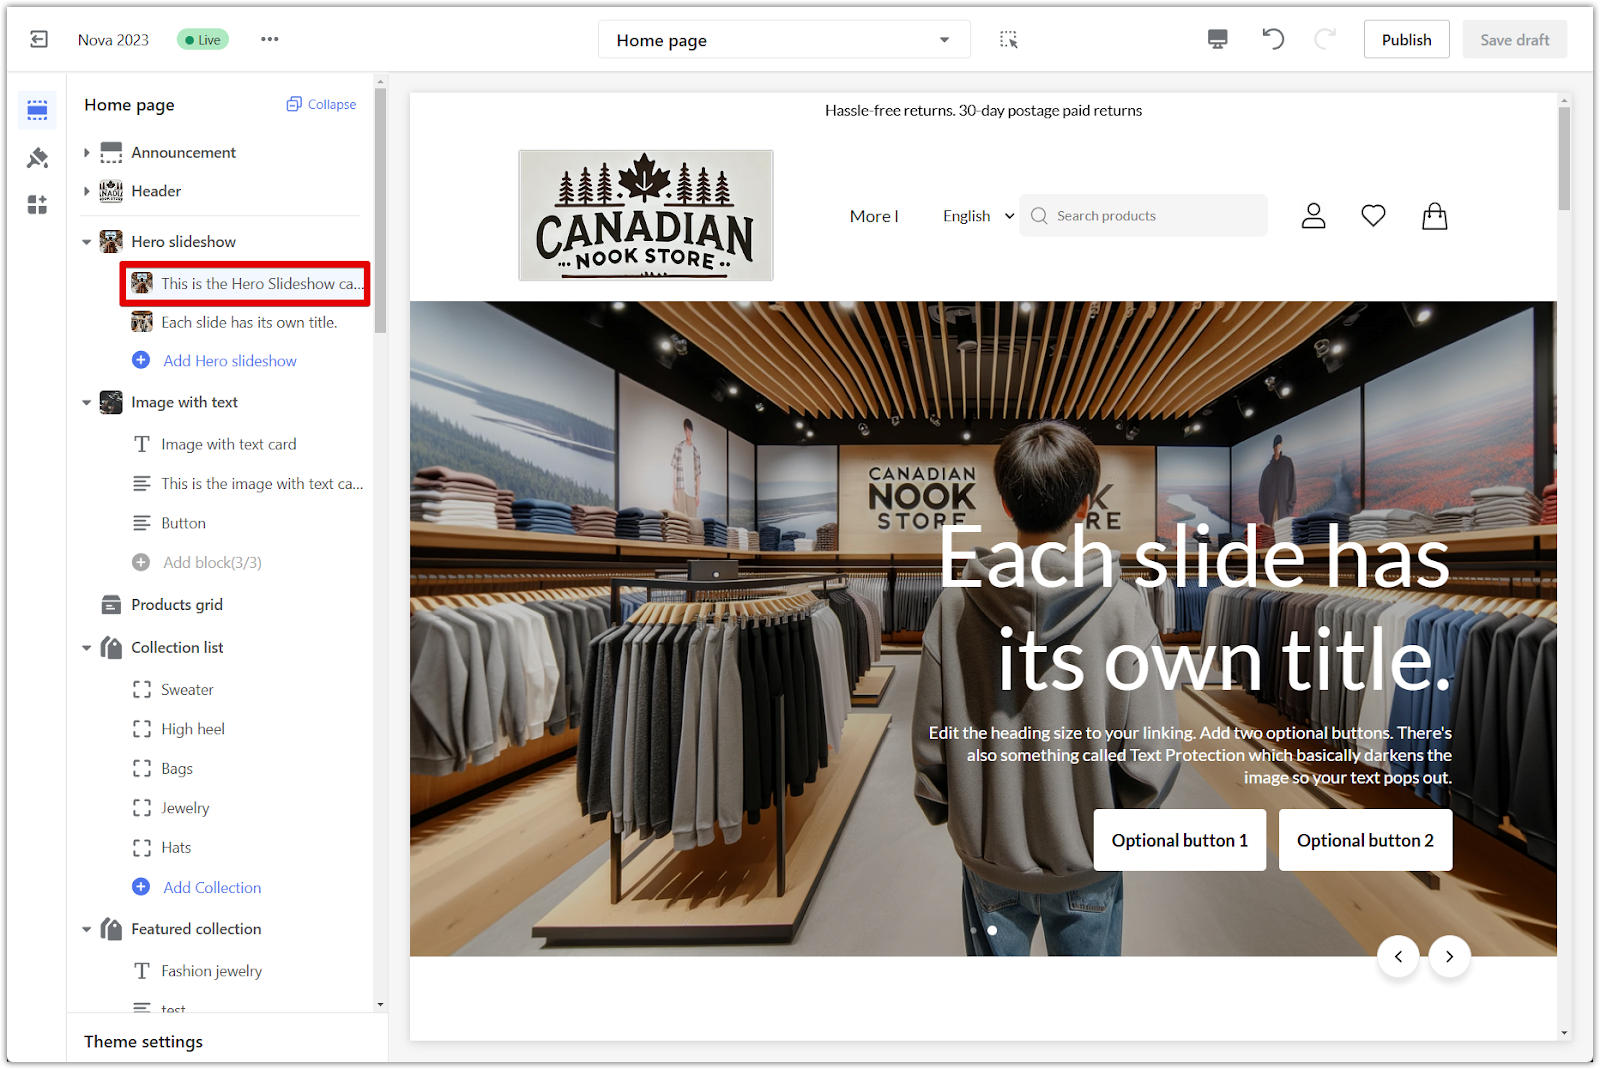
1. Access configuration: Click on the Hero slideshow title at the top of the section to open its configuration options.

2. Configure section: This will open a panel with various settings to modify your hero slideshow:
- Full page width: Extend the slideshow to cover the full width of the page. This creates a more immersive experience and can be particularly effective for showcasing high-quality images.
- Desktop height adjustment: Adjust the height of the slideshow on desktop devices. This allows you to control its visual impact and ensure it complements your store's overall layout.
- Mobile height adjustment: Adjust the height of the slideshow on mobile devices. Optimize the slideshow for smaller screens, maintaining a balanced and engaging presentation.
- Auto-change slides: Enable automatic transitioning between slides. This creates a dynamic and engaging experience, capturing attention and showcasing various content.
- Change images every: Set the duration for each slide to display before transitioning. Control the pace of the slideshow, giving viewers enough time to absorb the information while maintaining their interest.

Content and links
Start by crafting compelling content for your slides and ensure it effectively guides customers to the right place.
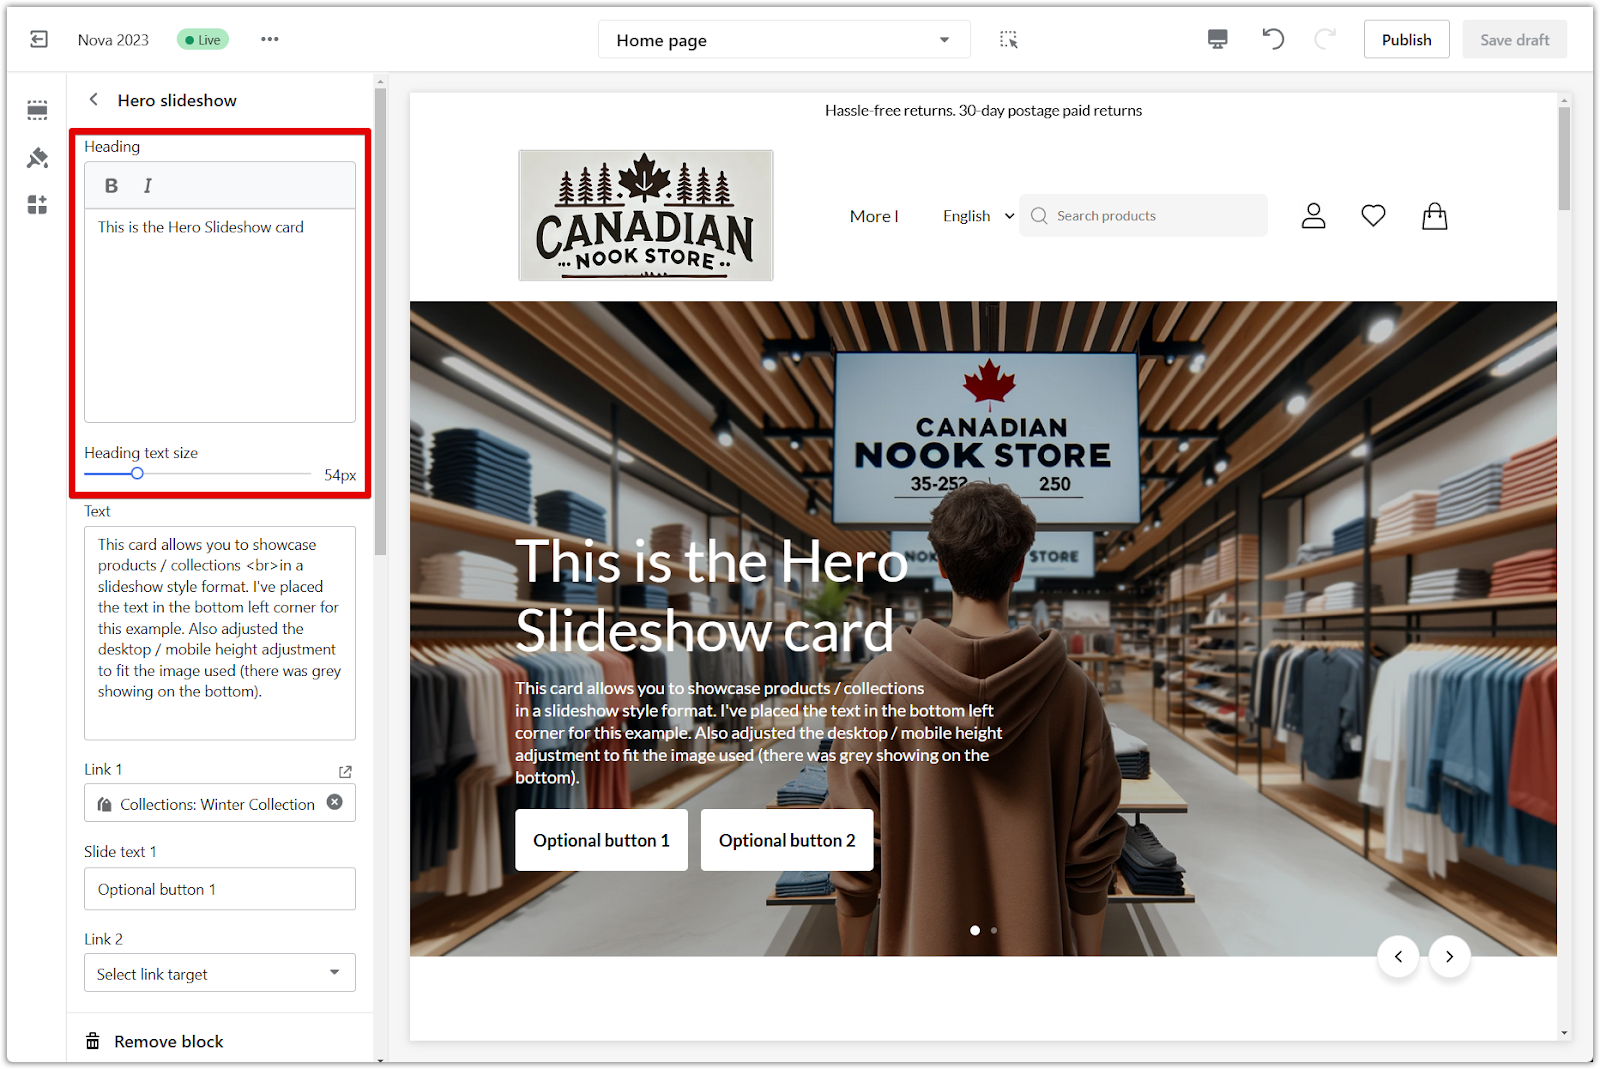
1. Click on block title: To adjust the heading, text, button linking, and button color, click on each block within the slideshow. This reveals a panel with the following options:
2. Heading and size: Craft a compelling title for your slide. This is the first element visitors see, so make it engaging and relevant to the image and message. Adjust the size of your heading text. Ensure it's easily readable and proportionate to the other elements on the slide.
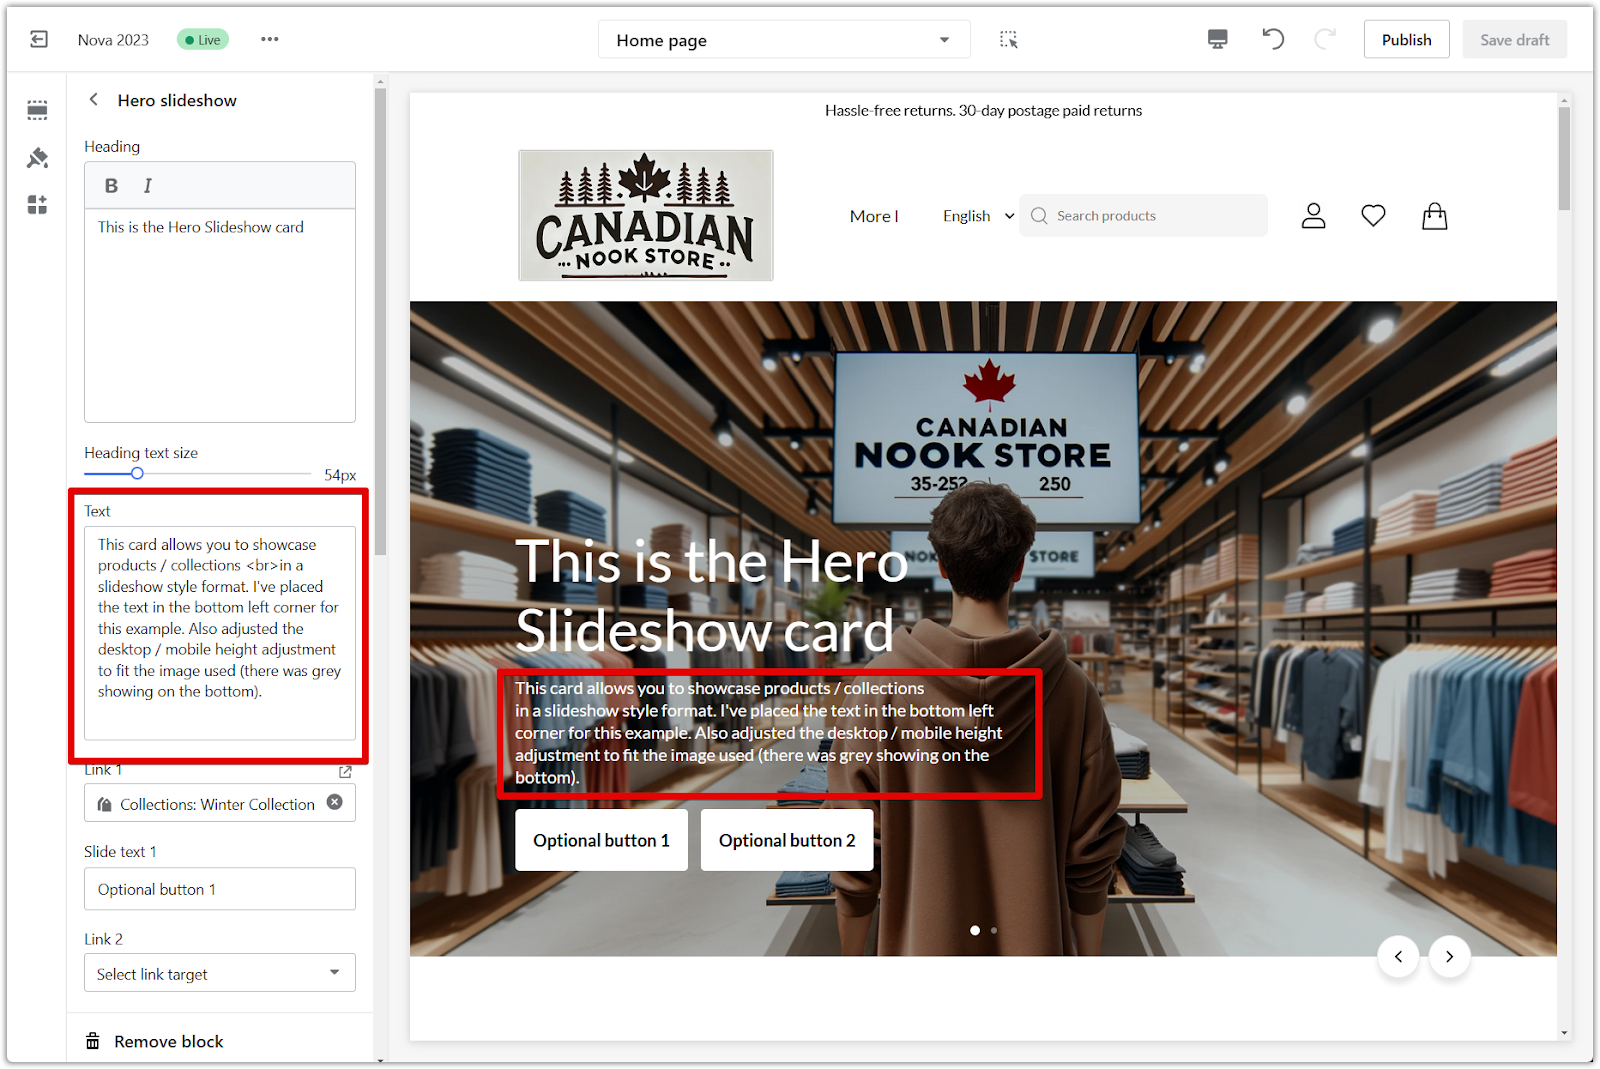
3. Text: Write a concise and informative description for your slide. Provide context and entice viewers to learn more or take action.
4. Link 1 and 2: Add links to a specific collection or page for your buttons. Guide customers toward featured products, promotions, or other relevant sections of your store.

5. Slide text 1 and 2: Customize the text for the buttons. Use a clear call to action that encourages clicks and conversions. Note: If you leave these fields blank, the buttons will be disabled.
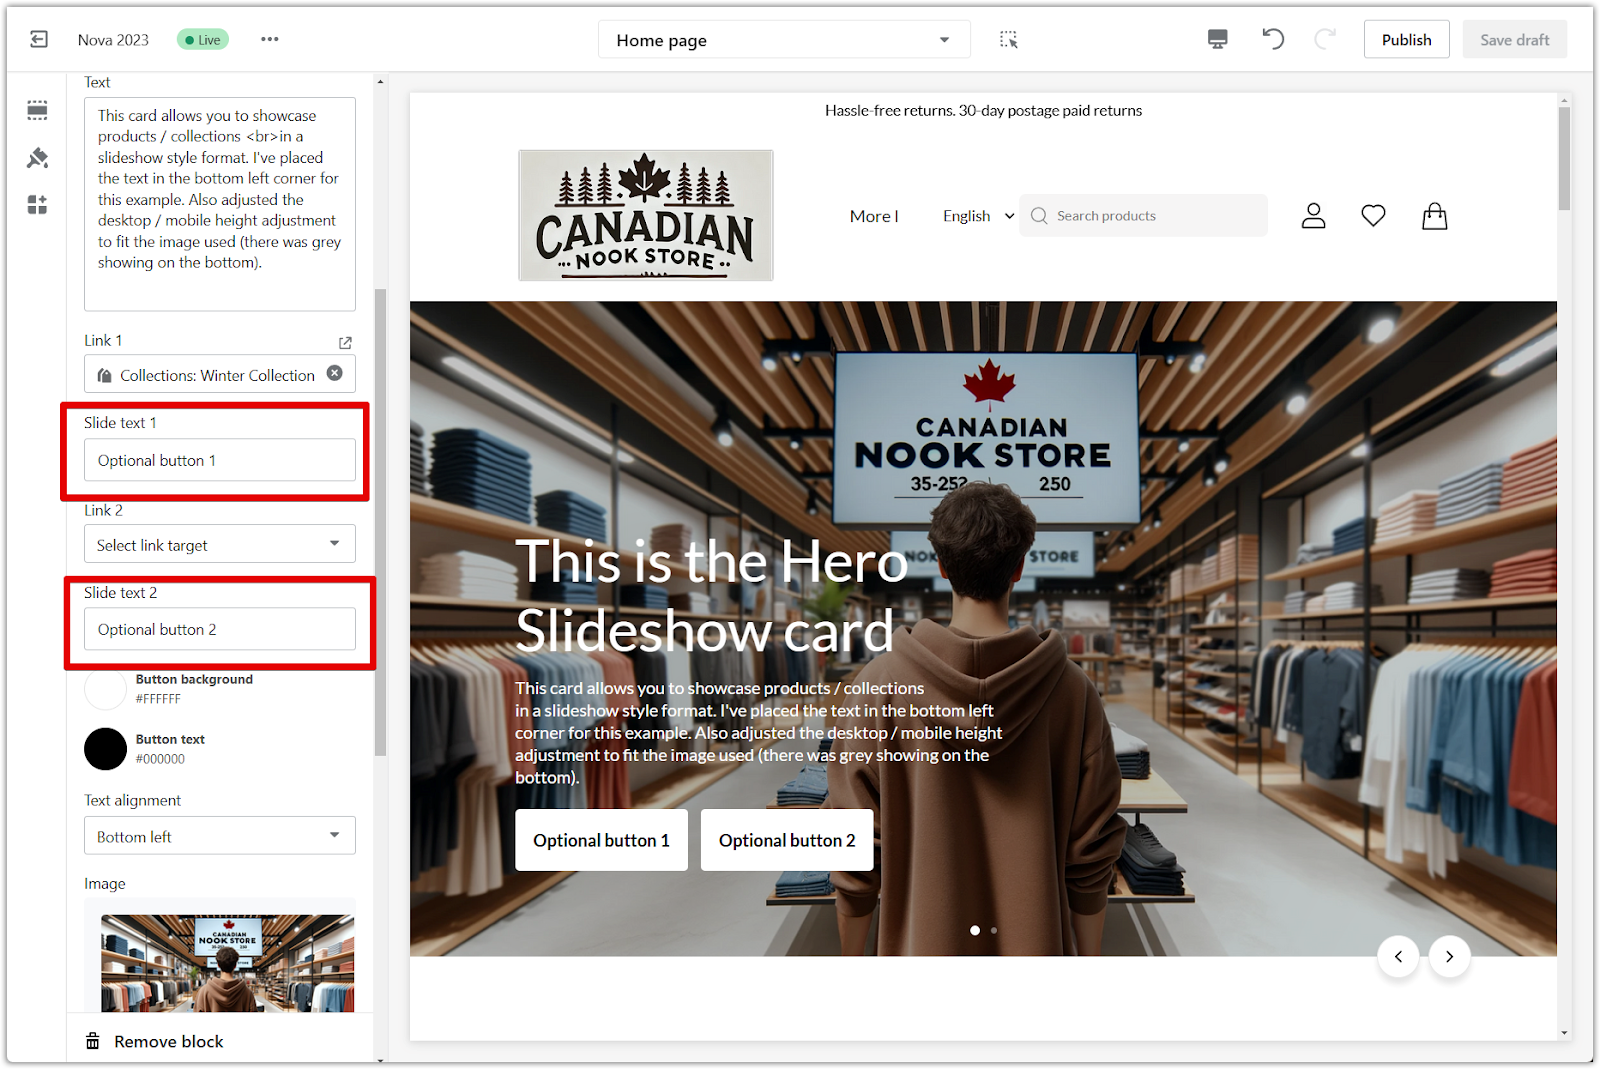
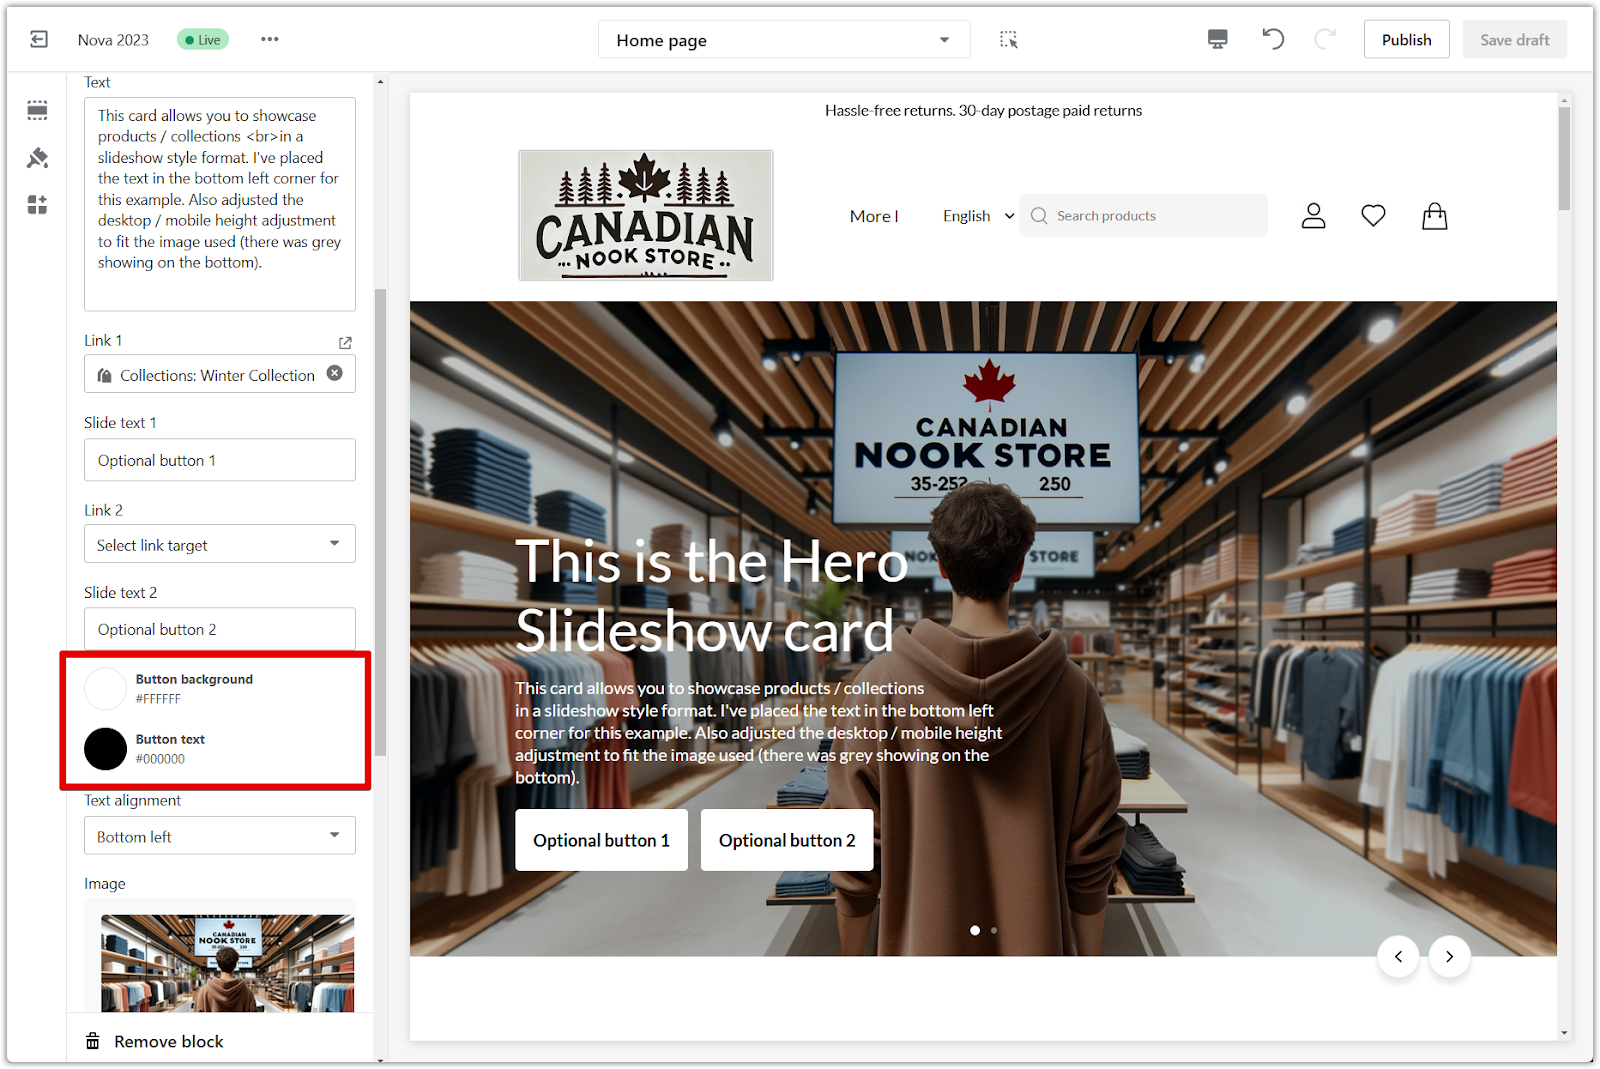
6. Button background and color: Select a background color for your buttons. Choose a color that aligns with your brand and stands out against the image. Choose a text color for your buttons. Ensure the text is easily readable against the chosen button background.
Layout and visuals
Enhance the visual impact of your slideshow by selecting striking images and optimizing their presentation.
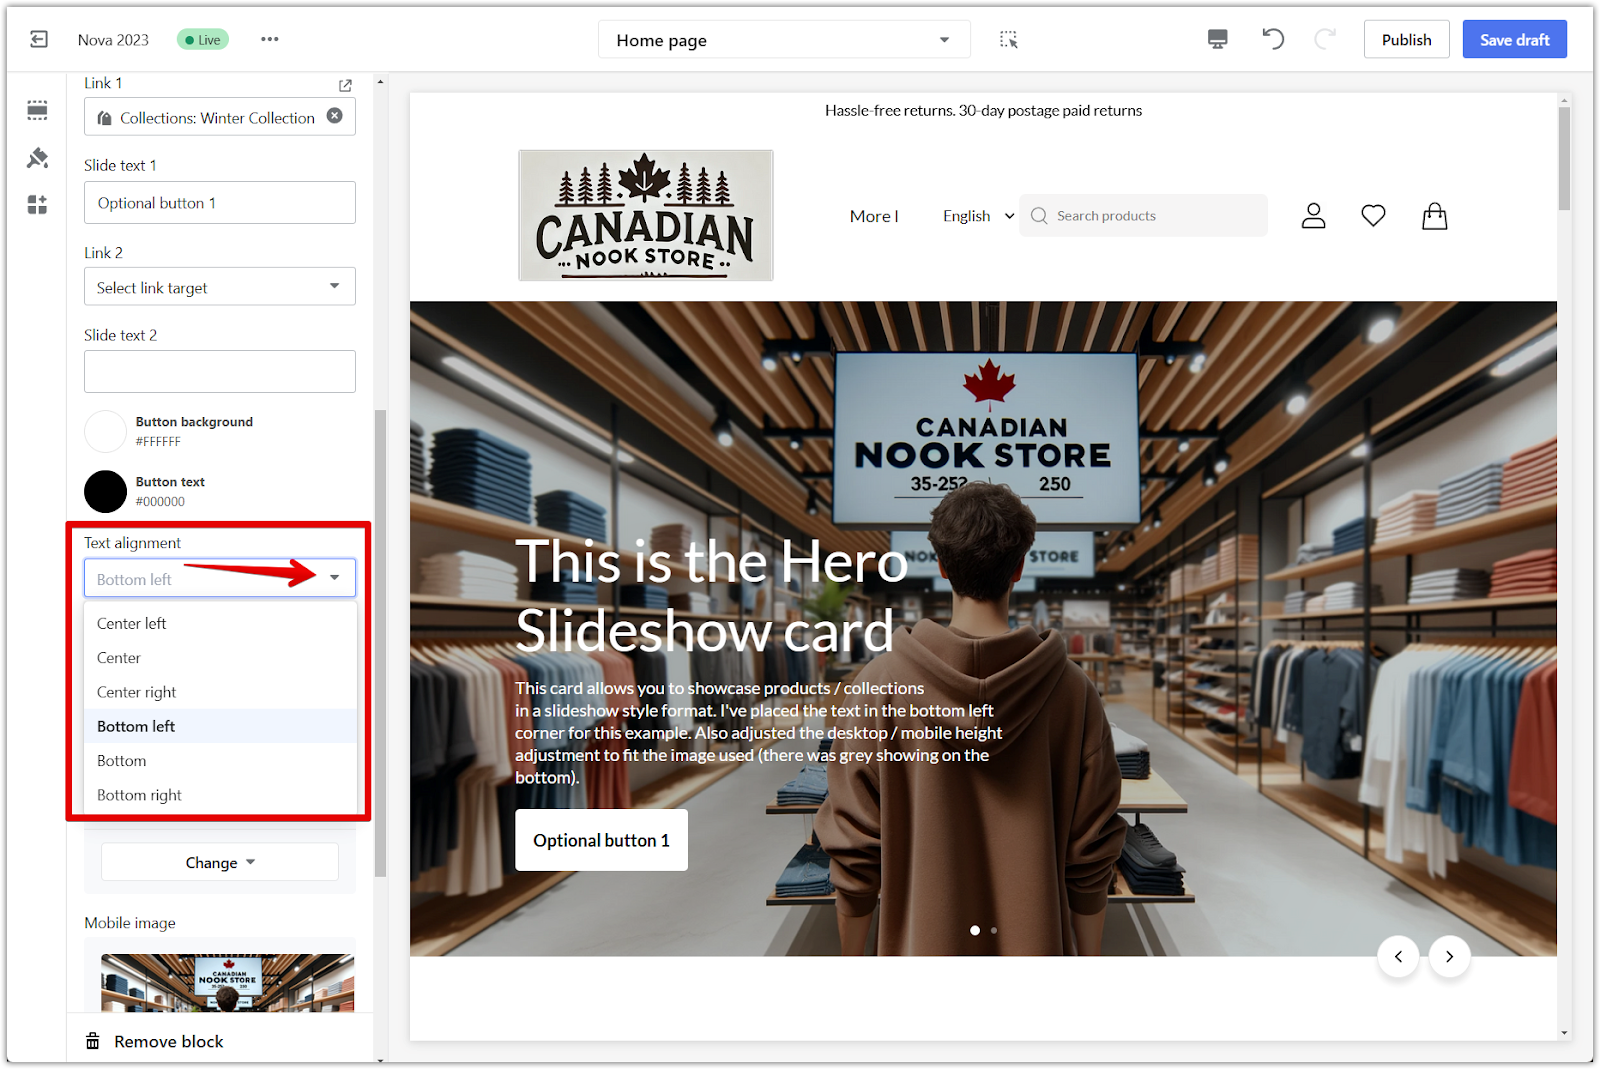
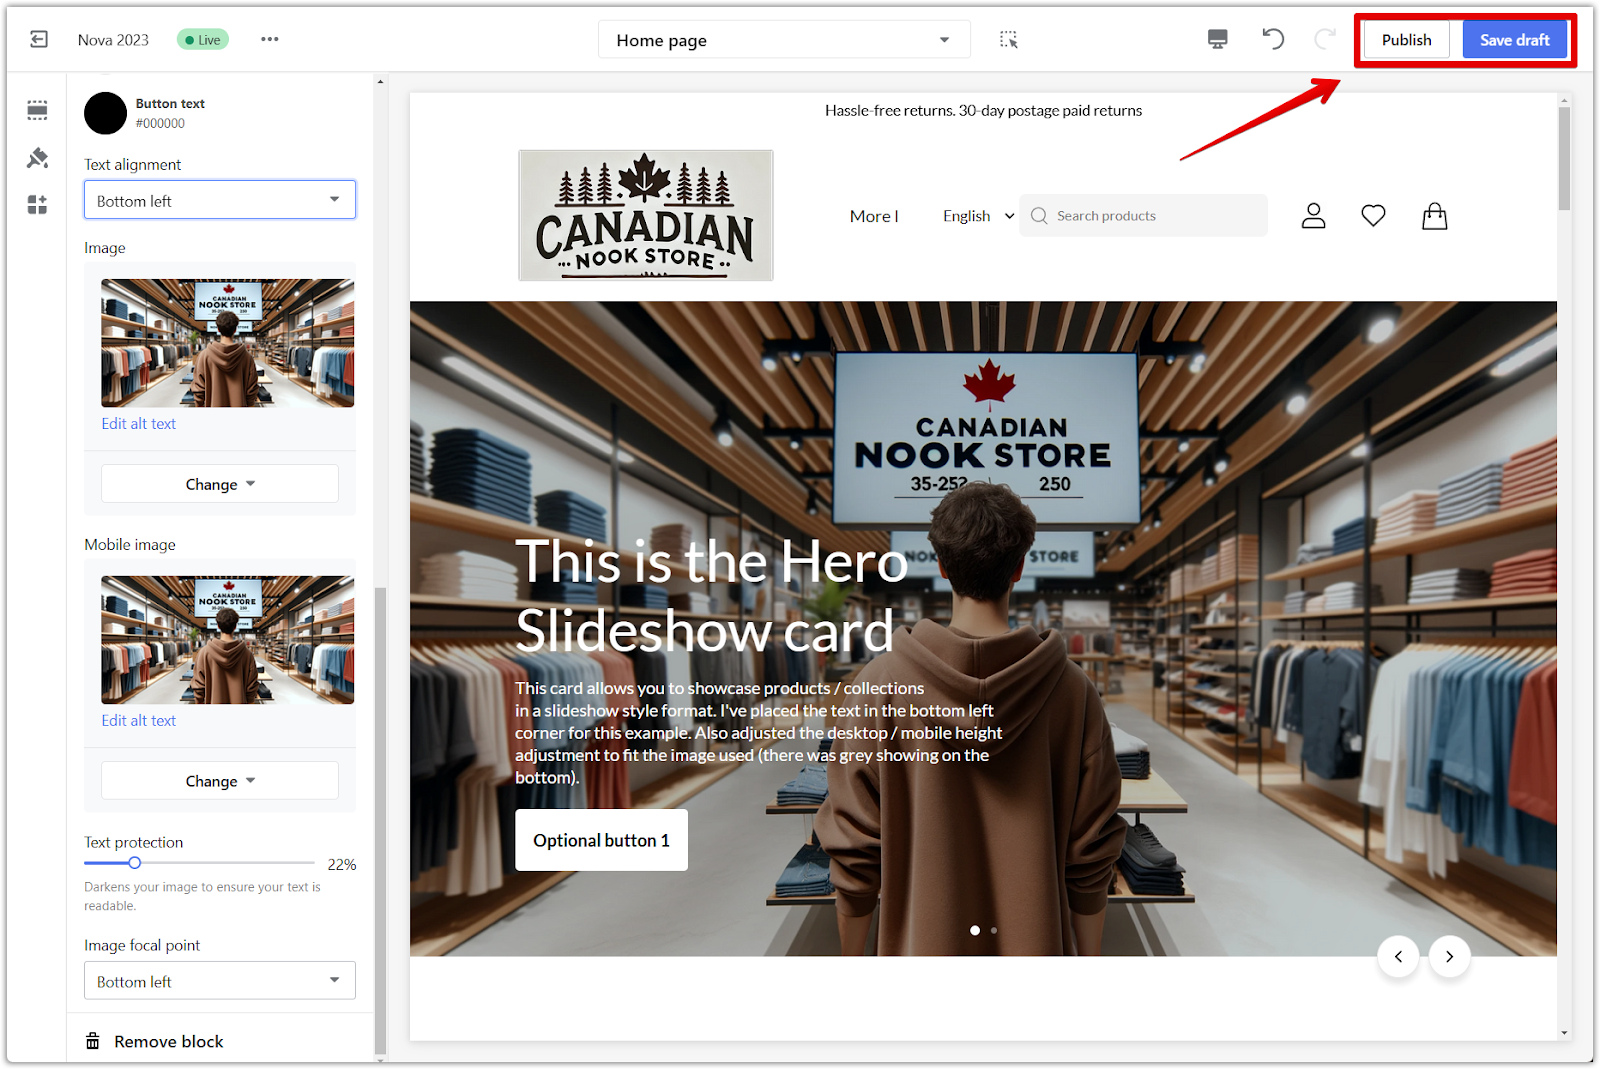
1. Text alignment: Adjust the alignment of your text (left, center, right). Optimize readability and visual balance based on the image and content.
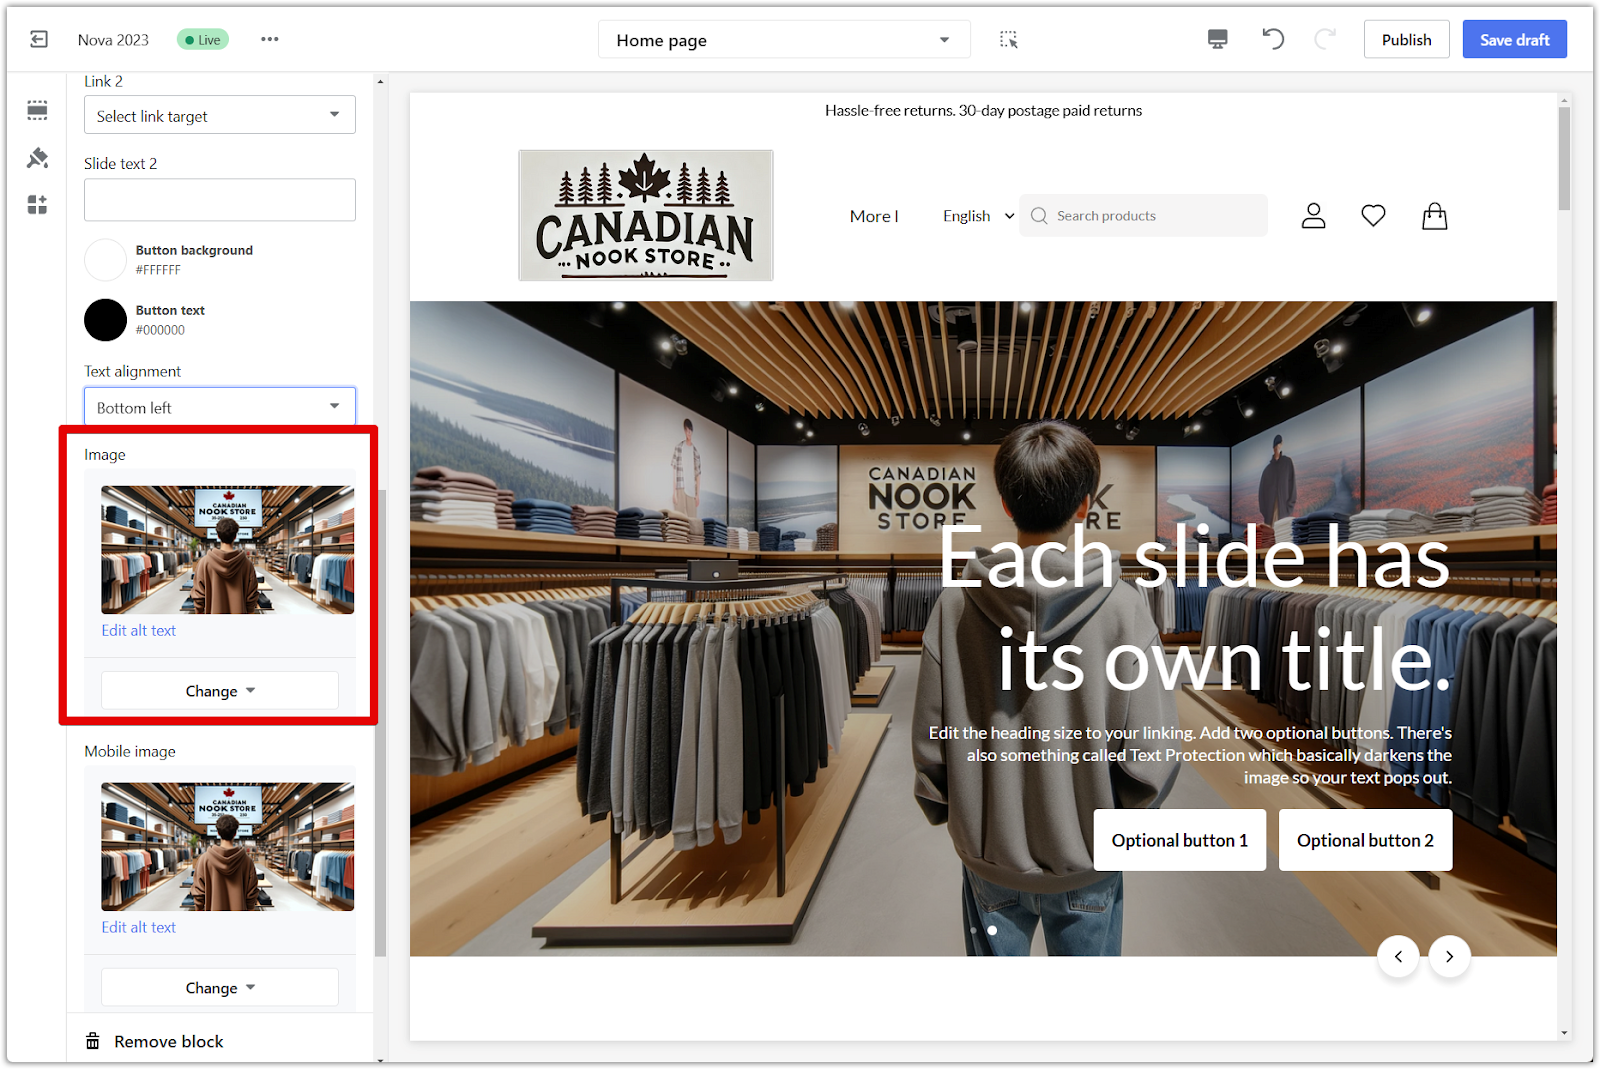
2. Upload image: Upload the main image for your slide. Choose a high-quality image that effectively showcases your products or brand.
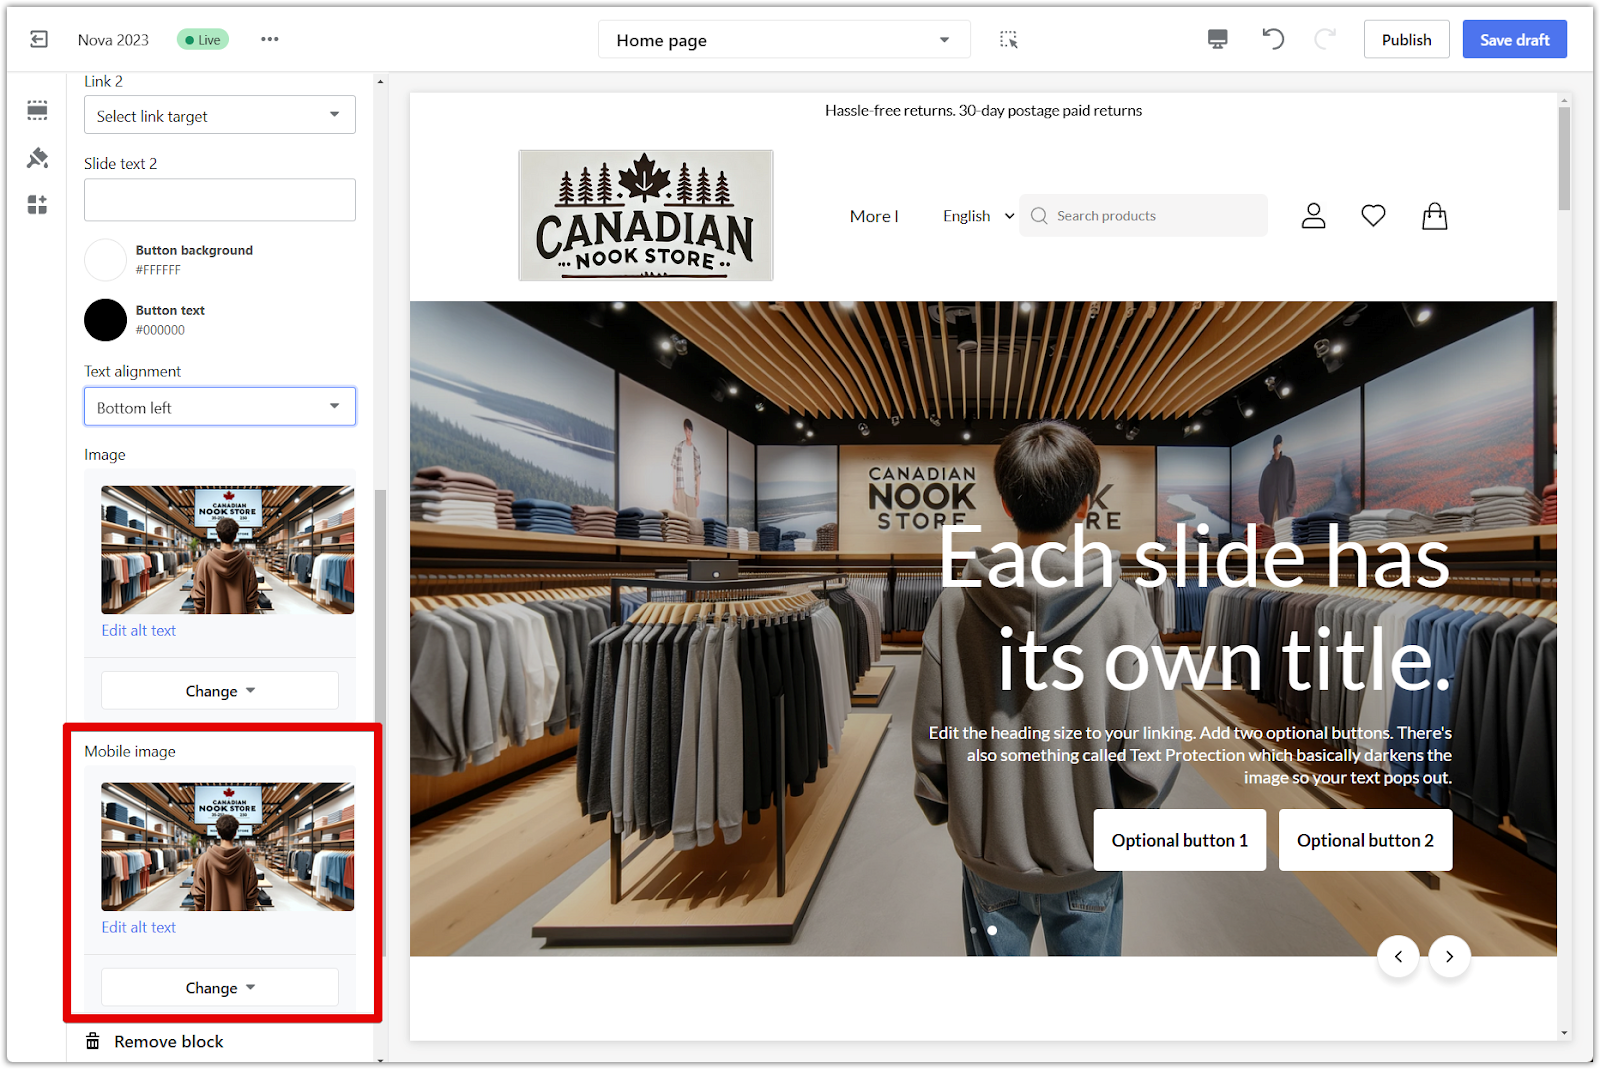
3. Mobile image: Upload a separate image specifically for mobile devices to ensure optimal display and visual impact on smaller screens.
4. Text protection: Adjust the opacity of the text protection overlay. Subtly darken the image behind the text to enhance text readability.

5. Image focal point: Select the focal point of your image to prevent important parts from being cropped. Maintain the visual integrity of your images across different screen sizes.

6. Save your progress: Click Publish to make your changes live on your store, or click Save draft to save your changes without publishing.
By leveraging the hero slideshow section, you can effectively showcase top products, new arrivals, or special promotions. This captivating feature immediately captures customer attention, enhancing their shopping experience and potentially increasing engagement and sales.


Comments
Please sign in to leave a comment.