
Enabling product taxes is an important step in ensuring accurate tax calculations for your store. By default, new products are not charged tax. After setting up your store’s tax rates, return to the product management page to enable taxes for each product. This allows the products to apply the correct tax rate during sales. This guide provides detailed instructions on enabling taxes for individual products and multiple products in bulk.
Enabling taxes for individual products
Enable taxes for individual products either by editing the product directly or through the product list.
Enable on the product management page
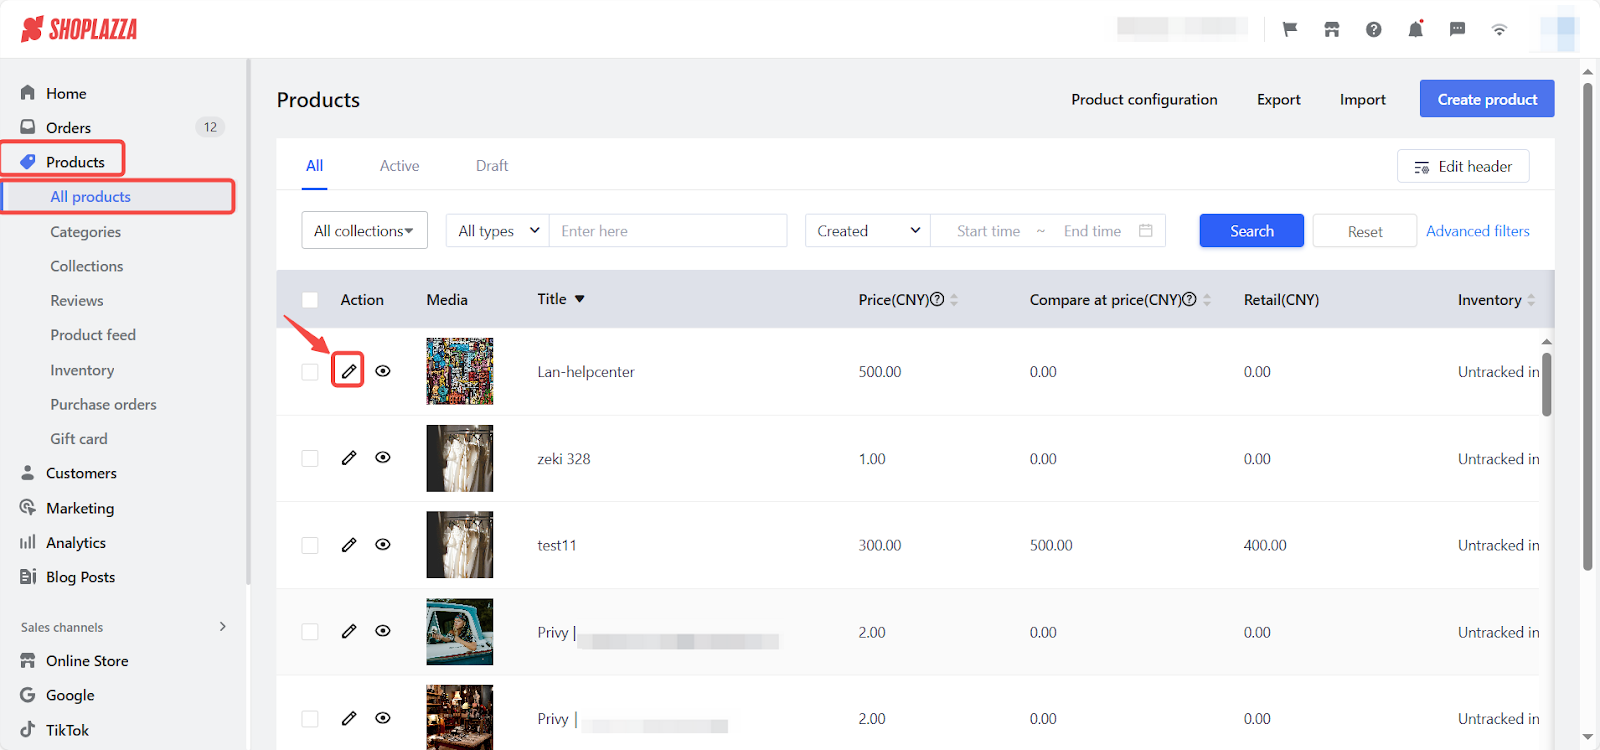
1. Access to product editing page: Log into your Shoplazza admin, click Products > All products, select the product that requires tax, then click the Edit button.
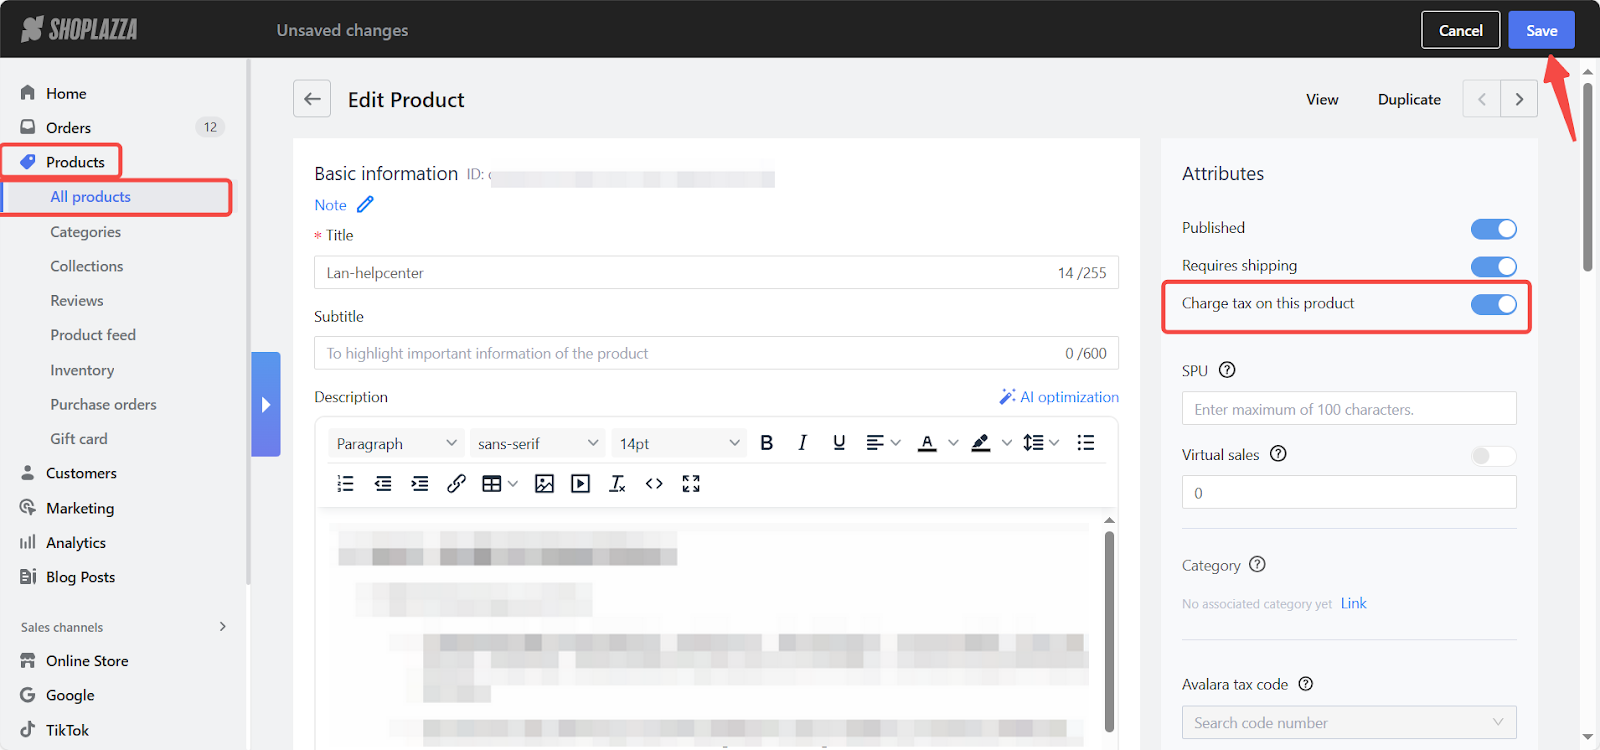
2. Enable tax button: On the Edit Product page, in the Attributes section, enable the tax option, and then click Save.
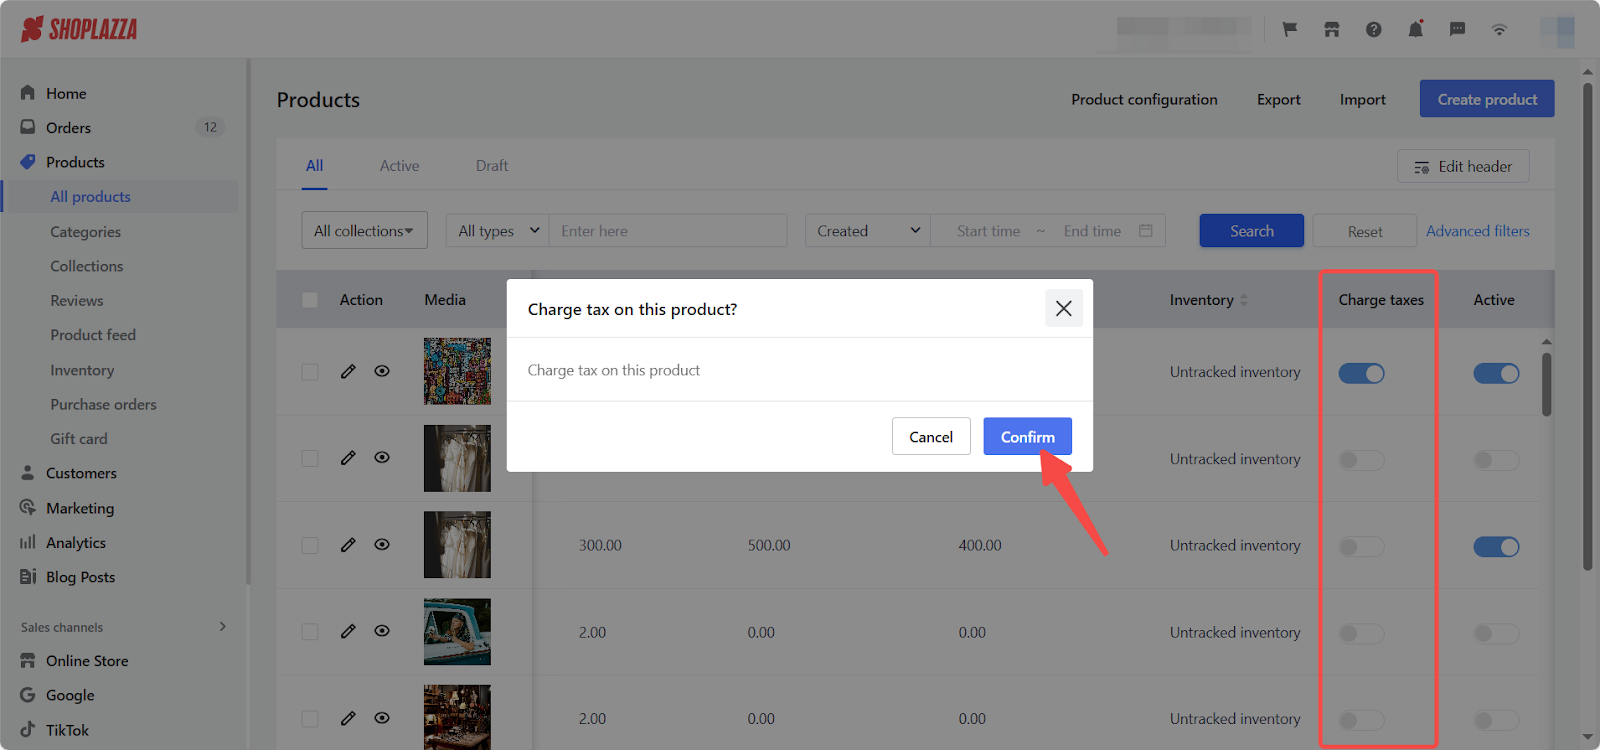
Enable in the product list page
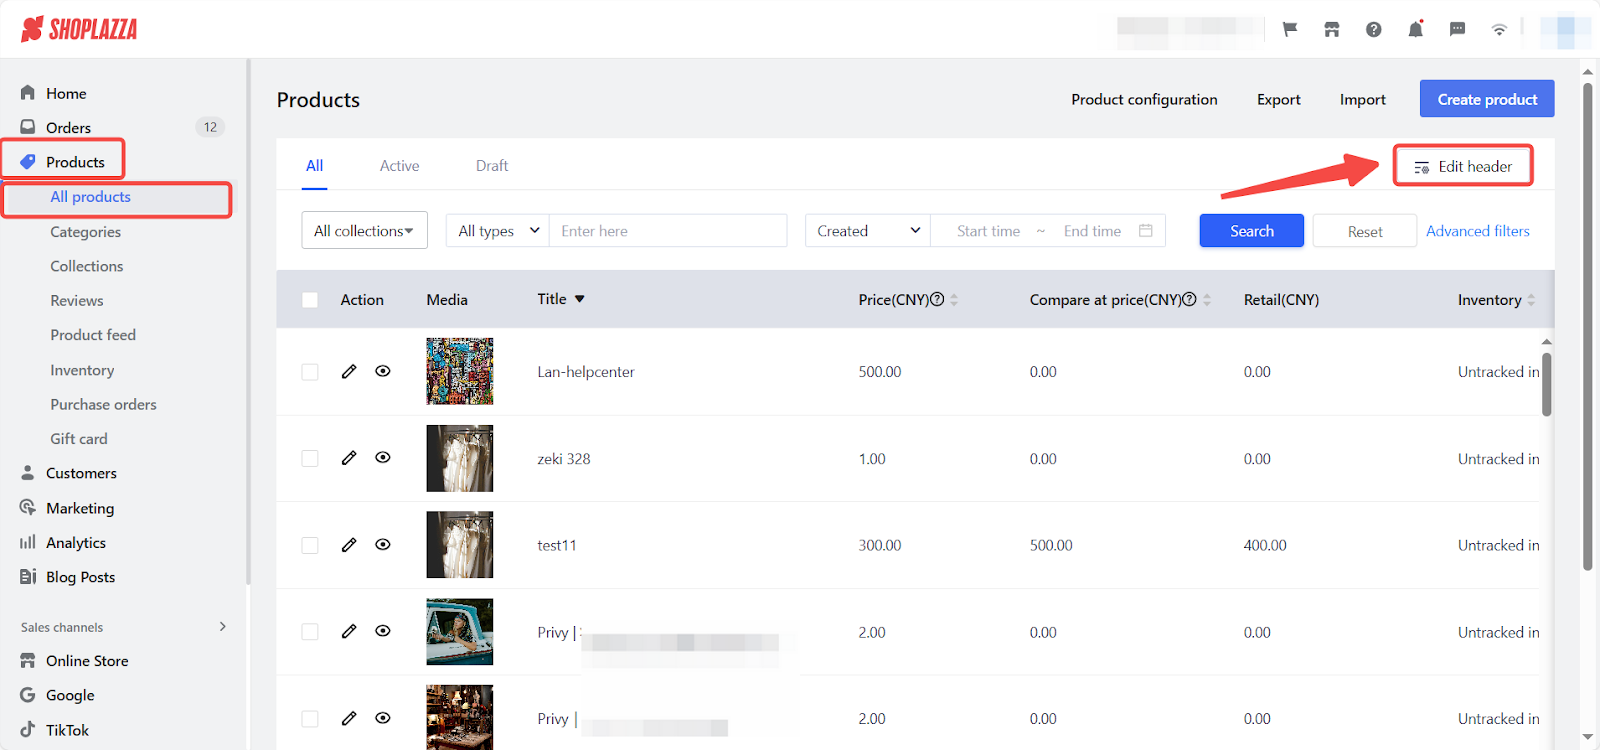
1. Access to header settings: From your Shoplazza admin > Products > All products, click Edit header.
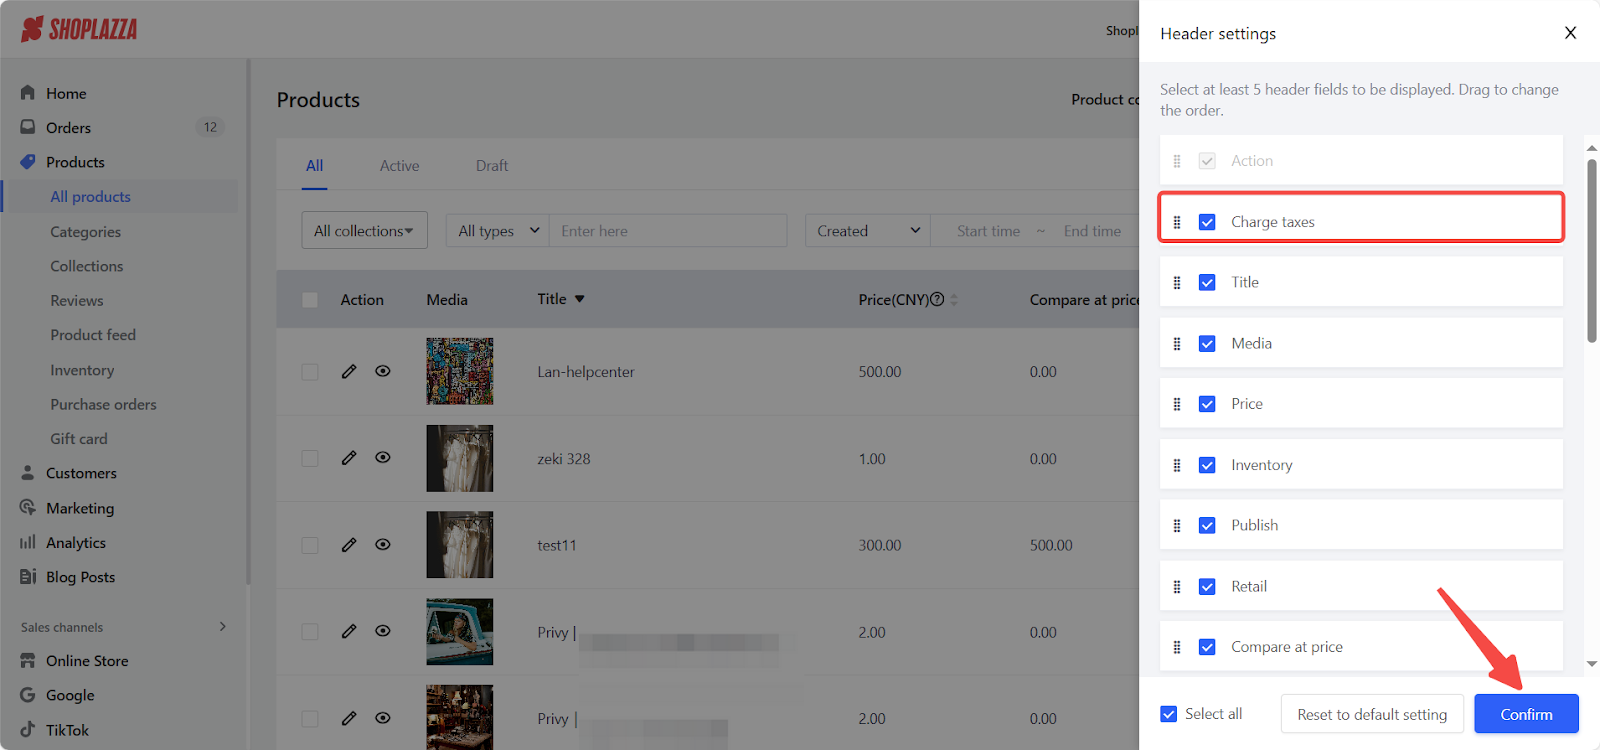
2. Check the charge taxes field: In the pop-up header settings window, select the Charge taxes field, and then click Confirm.
3. Confirm the update: After completing the previous step, a Charge taxes column will appear in the header of your product list. Toggle the Enable switch here and click Confirm.
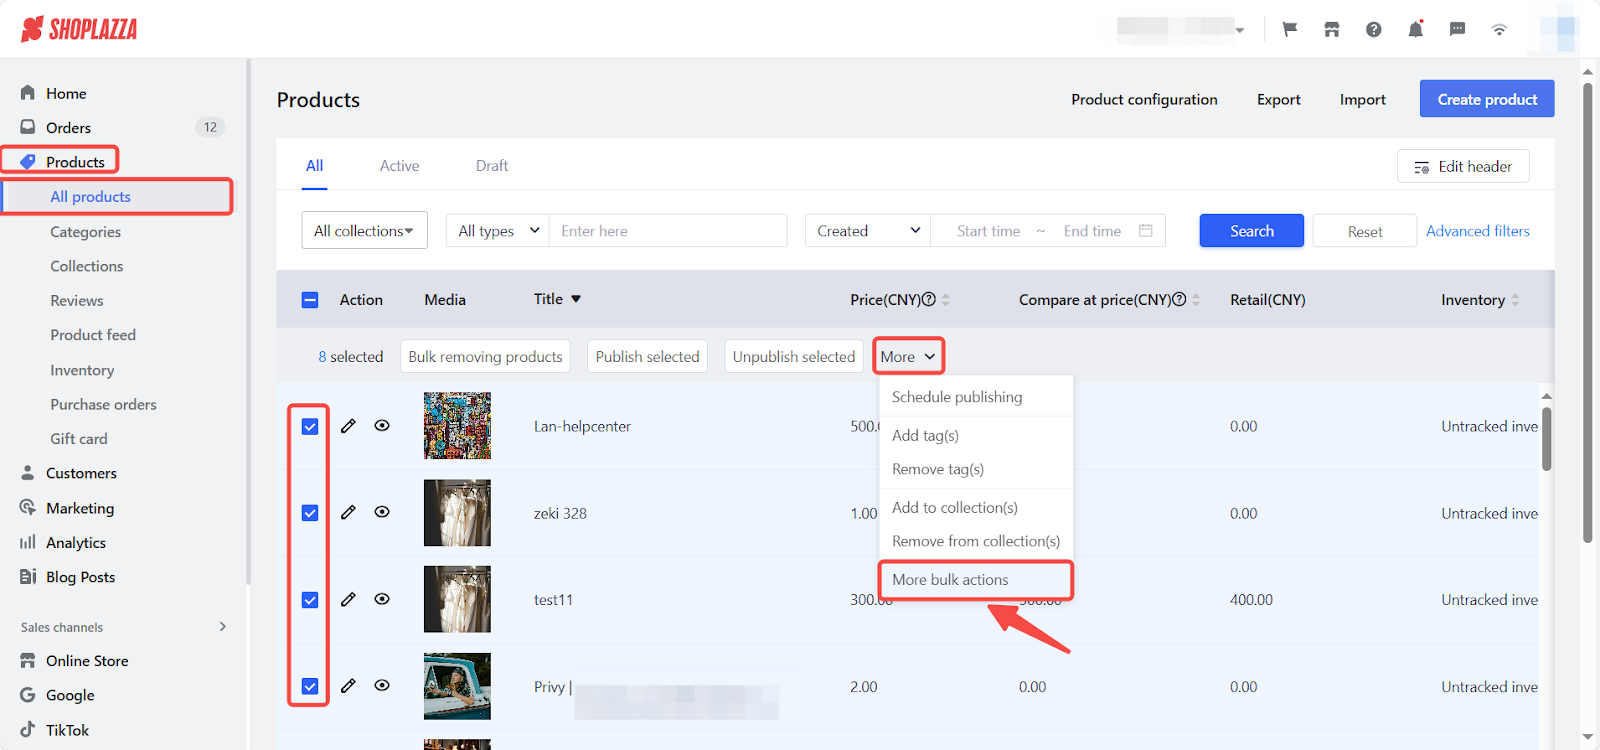
Batch enabling taxes for multiple products simultaneously
For multiple products, enable taxes using the batch editor or by editing a spreadsheet.
Batch enabling in the product batch editor
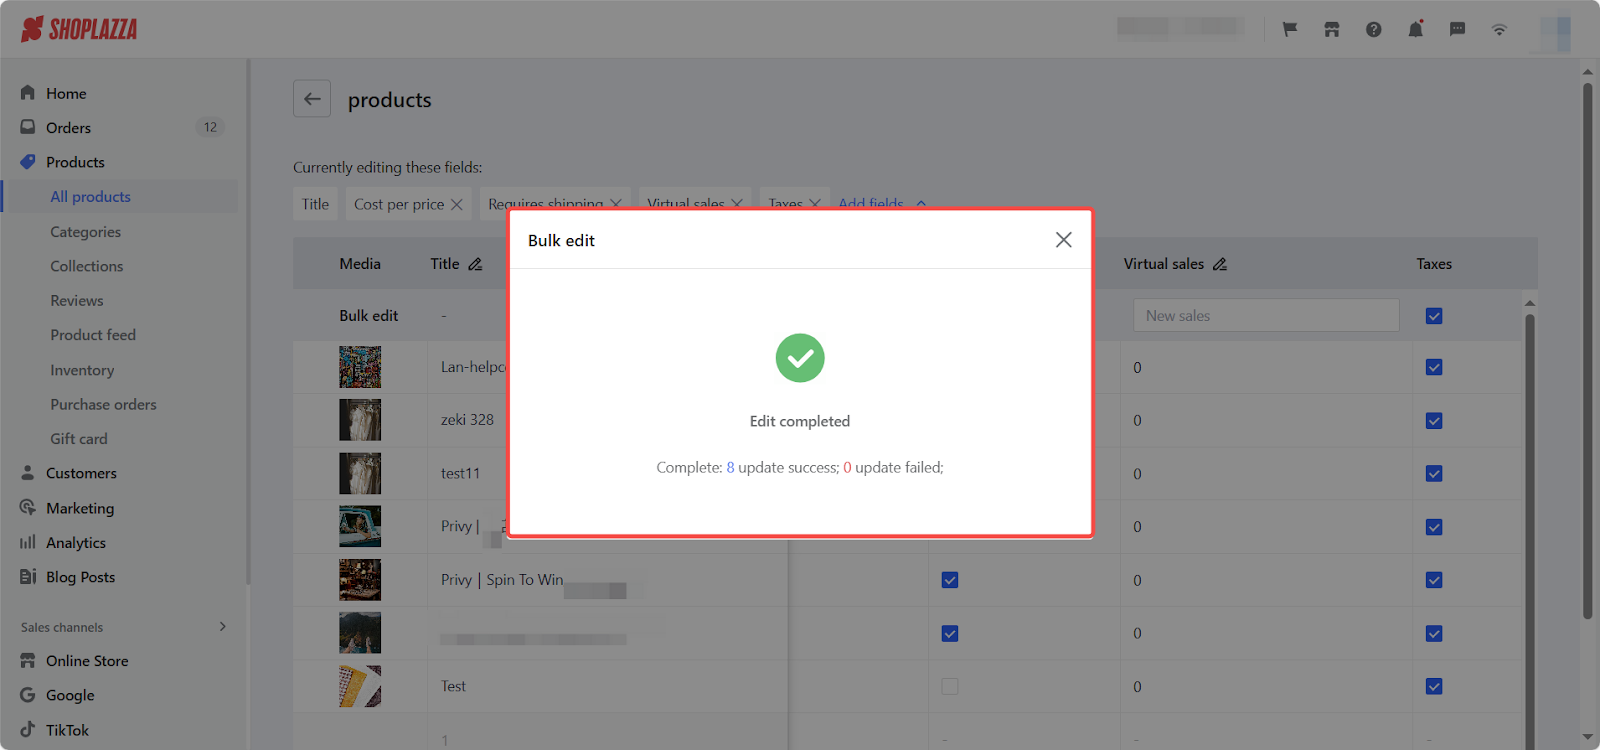
1. Access to bulk actions: From your Shoplazza admin > Produts > All Products, select the products requiring tax changes, open the More options button, and click More bulk actions in the drop-down menu.
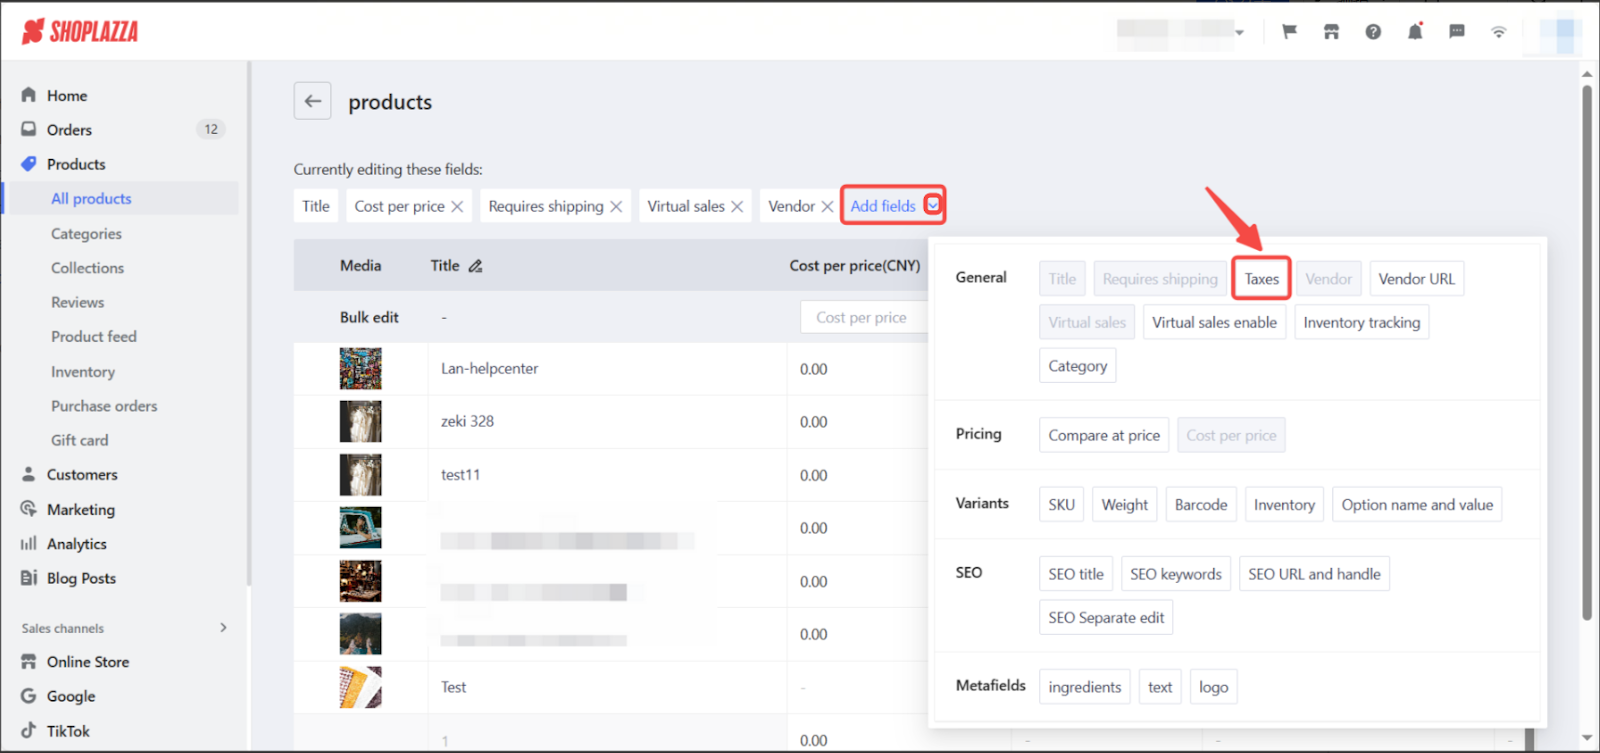
2. Add taxes field: Click the drop-down button to the right of Add fields, and select the Taxes field in the pop-up.
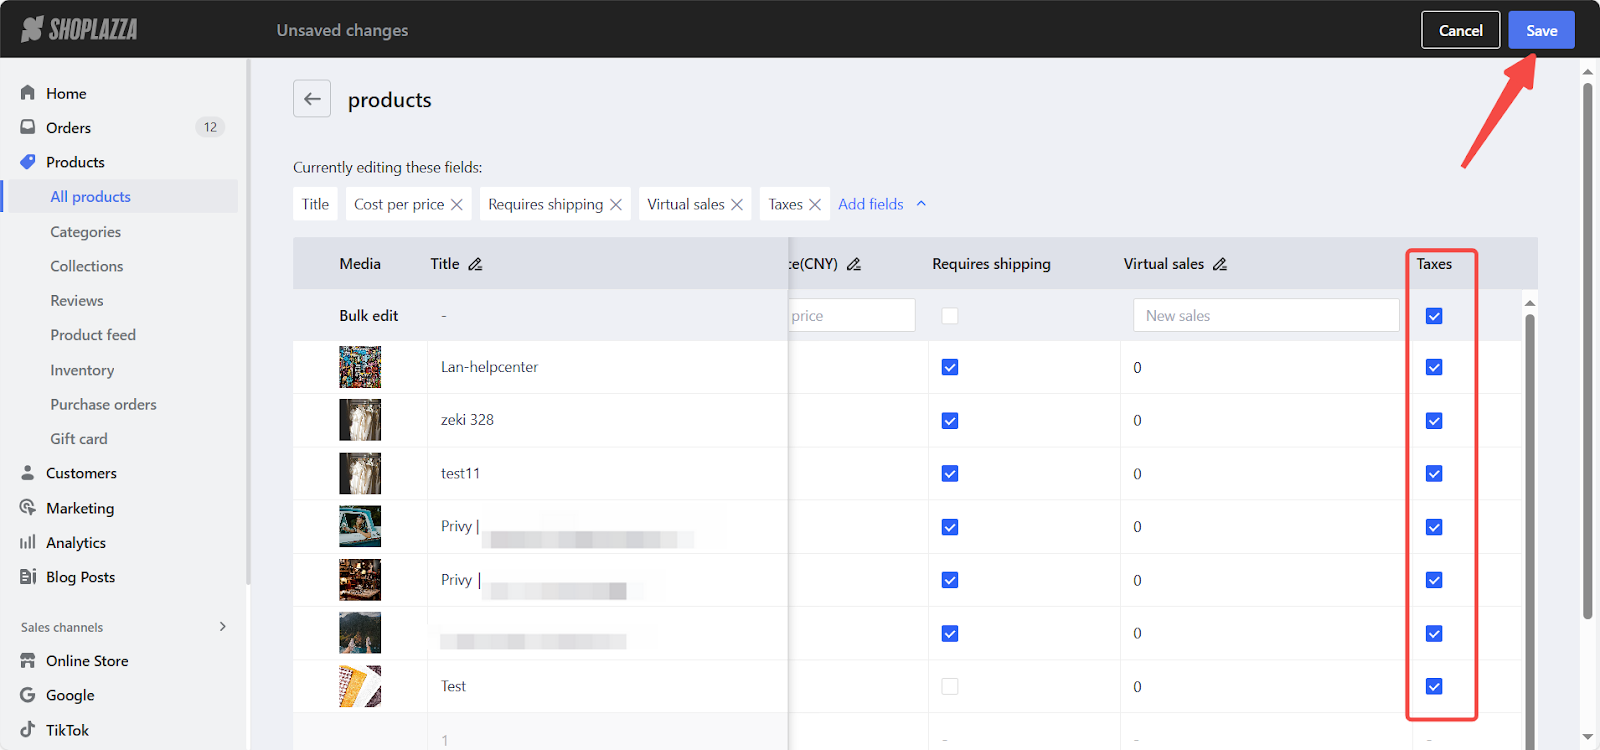
3. Save the changes: In the products list, select the Taxes column for the products that need to be taxed in bulk, and then click Save.
Batch enabling product tax settings in a spreadsheet
Enabling taxes for multiple products at once can be efficiently managed by using a spreadsheet. This method is ideal for stores with a large number of products. Familiarity with importing and exporting products is required for this process. For detailed instructions, refer to the help documentation: Exporting / Importing Products.
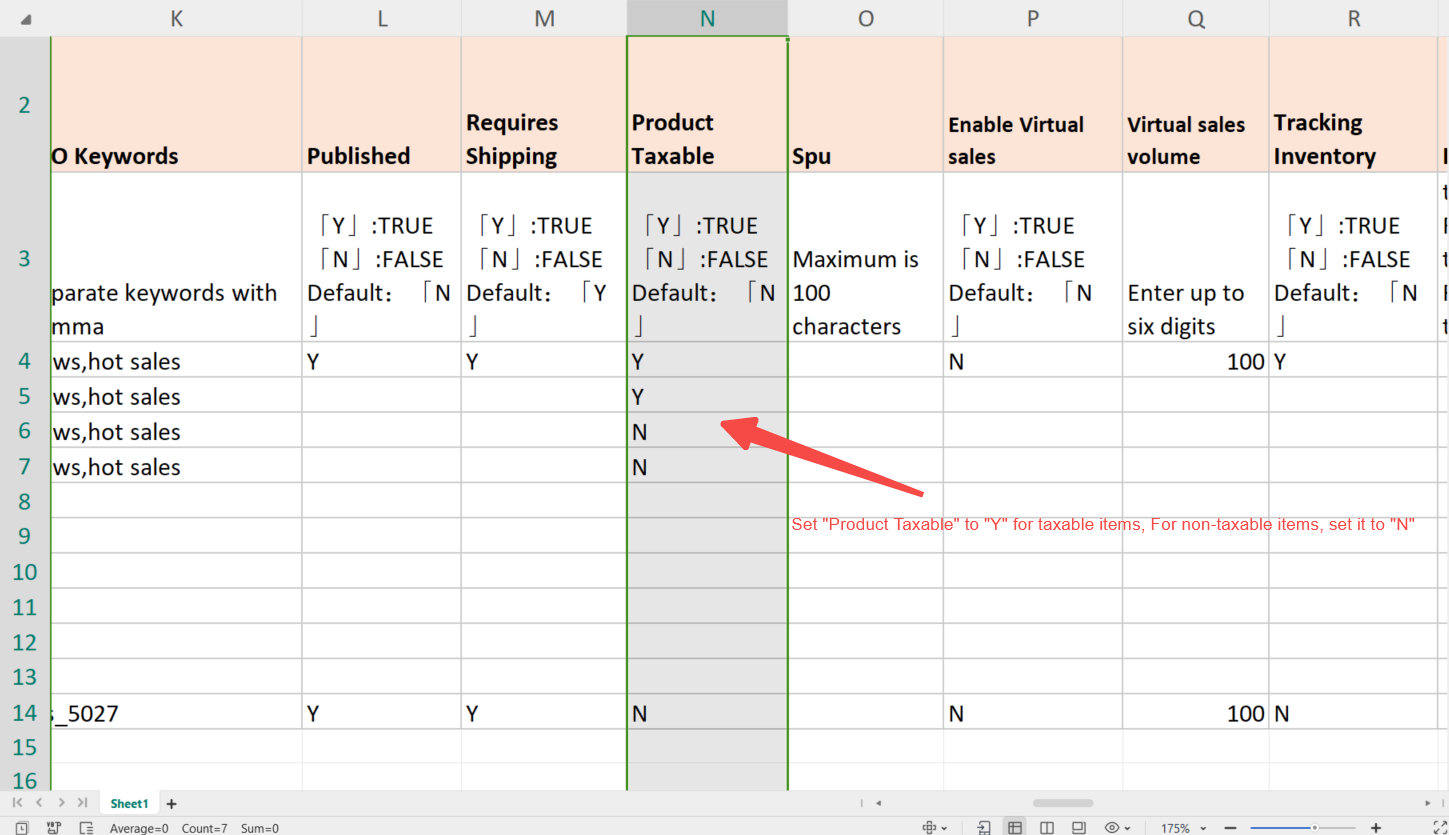
1. Modify tax status: In the exported product table, in the column of product tax collection, fill in [Y] for the products that require tax, and fill in [N] for the products that do not, then save the table.
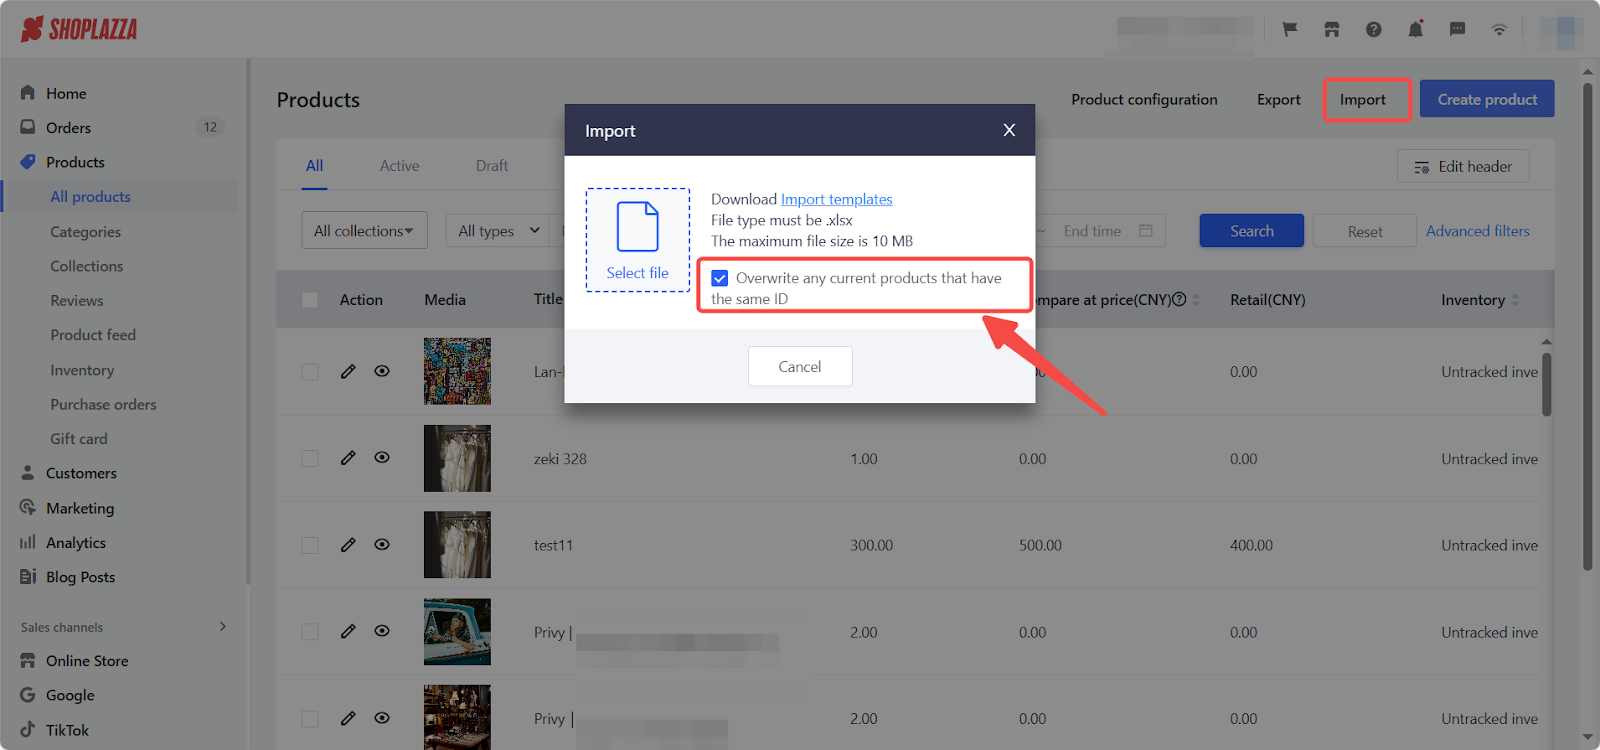
2. Upload and finalize changes: Upload the modified form back to the store to update the tax status.
Note
When importing products, to avoid duplicate products in the background, check the Overwrite any current products that have the same ID.
Following these steps ensures that your products are correctly set up for tax calculation, providing accurate pricing for your customers and maintaining compliance with tax regulations. Whether enabling taxes for individual products or multiple products in bulk, this guide helps streamline the process and keep your store’s operations running smoothly.


Comments
Please sign in to leave a comment.