
This comprehensive guide will walk you through the ShareASale merchant registration process, enabling you to join the platform quickly and efficiently. Follow these steps to set up your account, configure your affiliate program, and start attracting affiliates to grow your business.
Note
ShareASale has been owned by Awin since 2017 and officially shut down at the end of 2025. All new customers should now register directly on Awin .

Register a ShareASale account
Starting your journey with ShareASale begins with creating a merchant account. This section provides detailed instructions on signing up and ensuring your account is set up correctly from the start.
Merchant Sign up
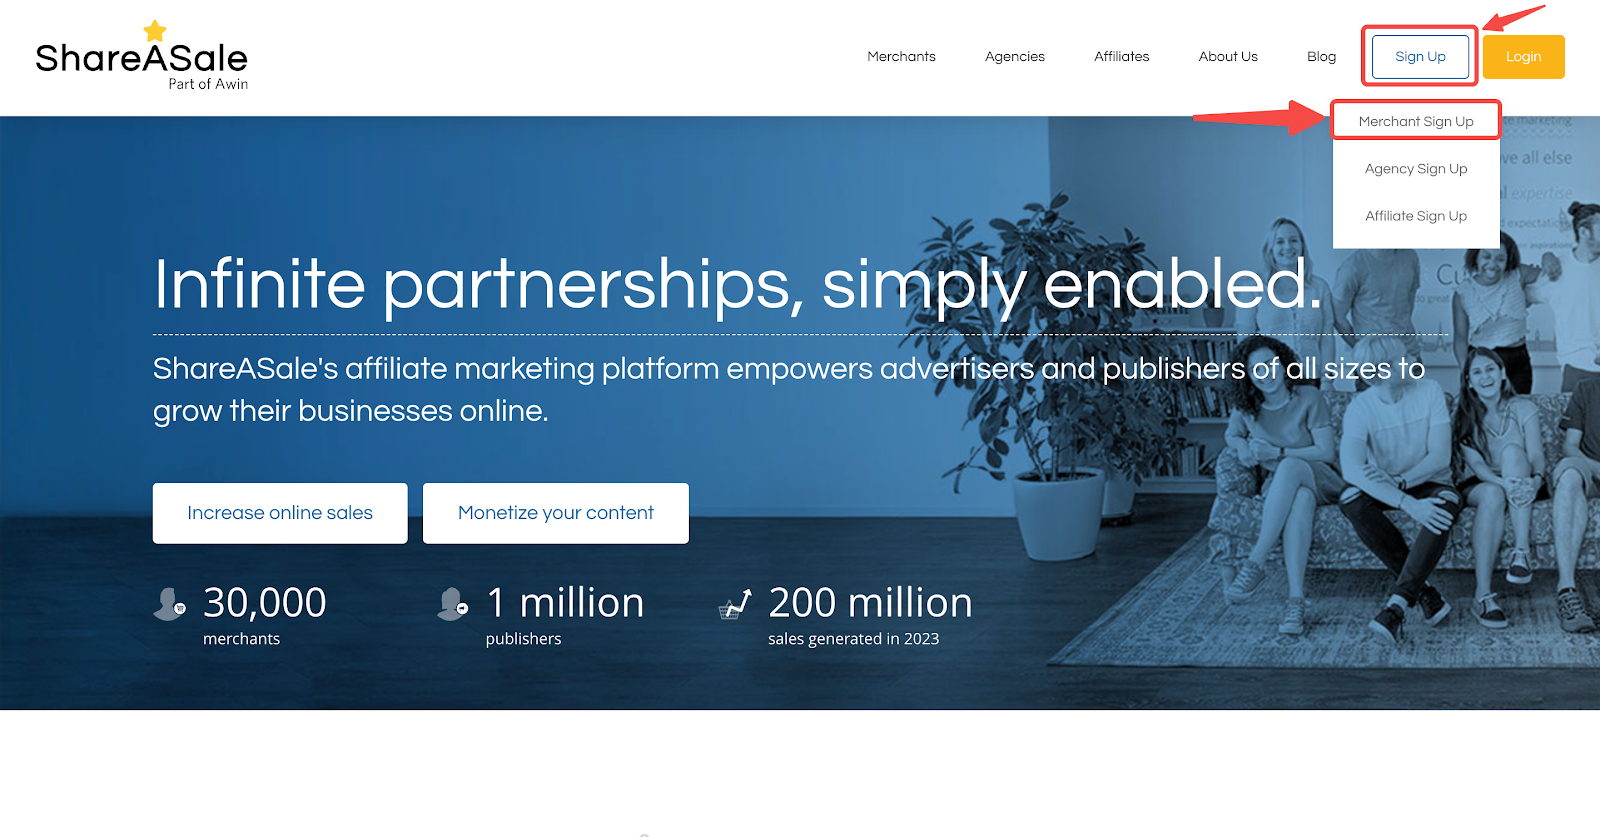
1. Navigate to ShareASale website: Click here to enter the ShareASale official website. Hover the mouse over the sign up position in the upper right corner and click Merchant Sign up.
Create a merchant account
1. Basic information: Fill in your merchant name, company name, contact phone number, and contact address information.
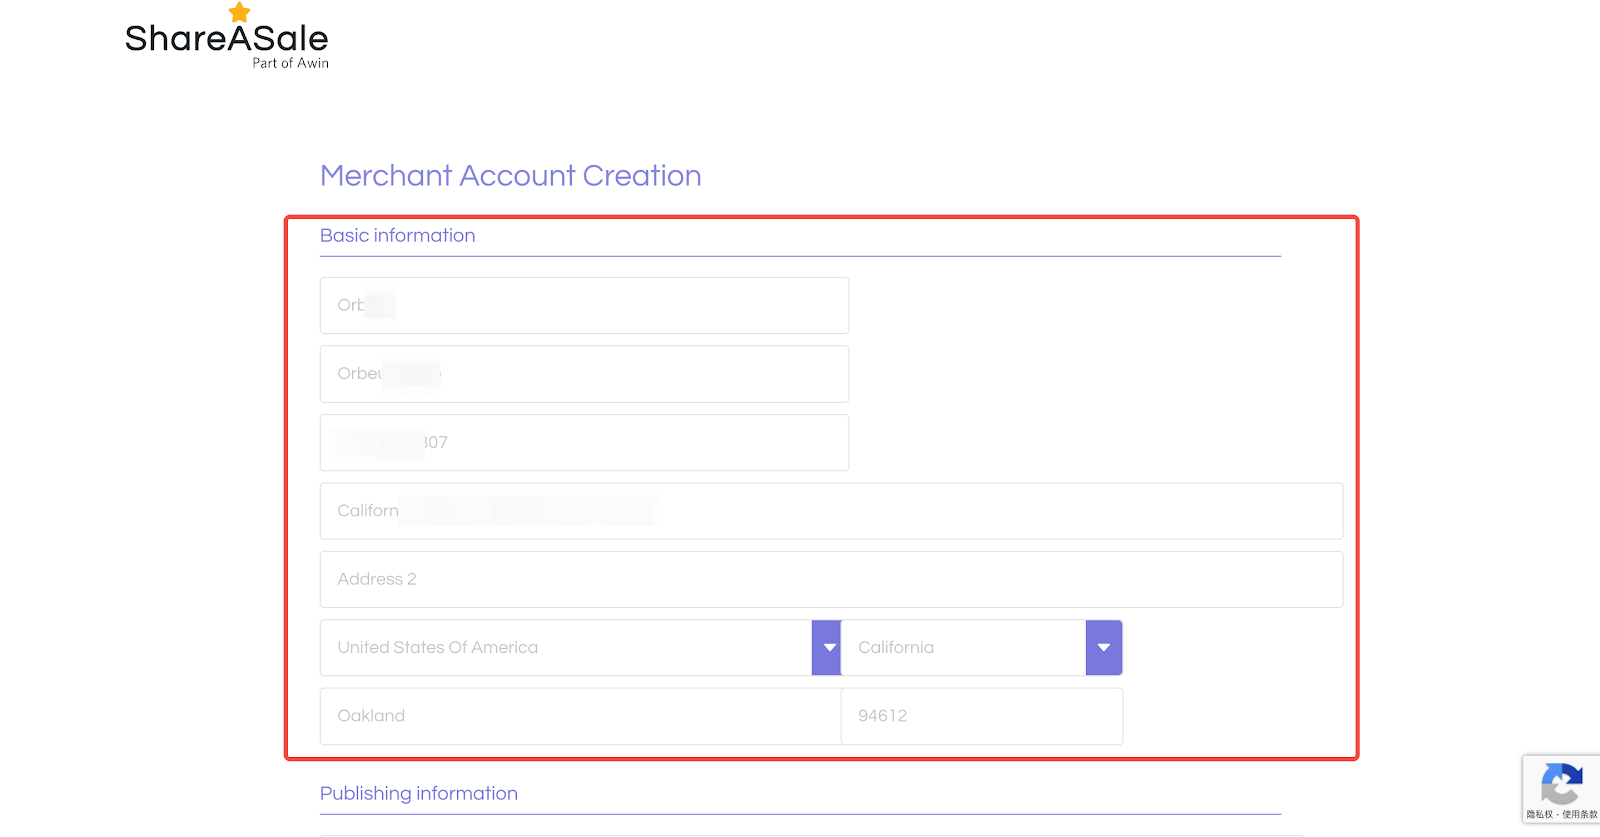
2. Publishing information: Provide a valid store domain name and email address.

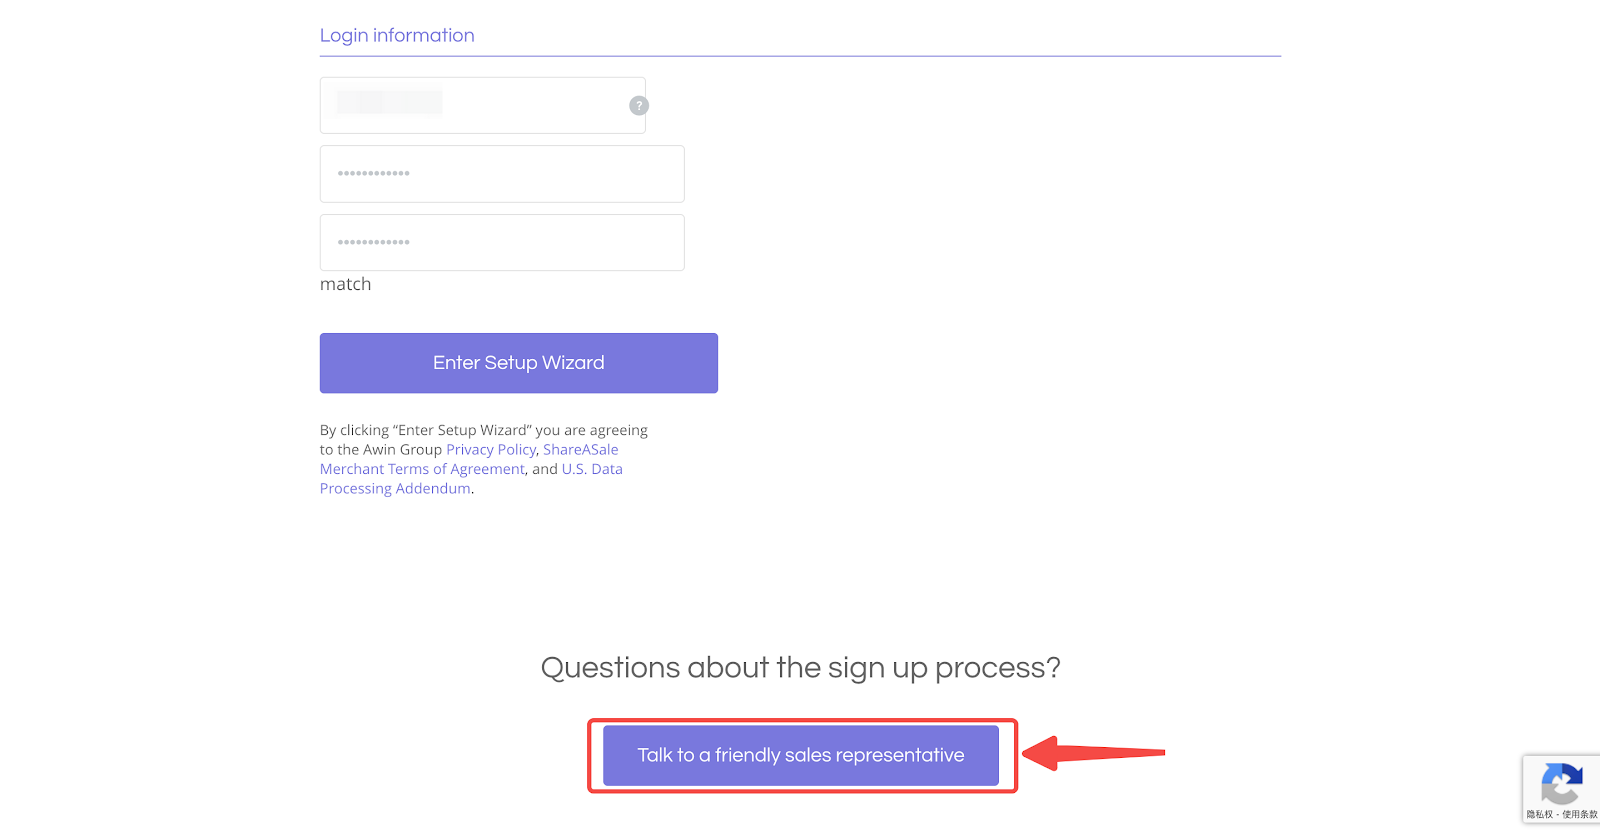
3. Login information: Enter a username and password, then click Enter Setup Wizard.

Note
It is highly suggested to use a combination of letters, numbers, and symbols for your account password. This enhances security, making your account more resistant to unauthorized access and ensuring that your sensitive information remains protected.
4. Get assistance: For more detailed guidance, click the Talk to a friendly sales representative button to contact the ShareASale team for assistance.
Setup wizard detail
Once your basic account information is entered, you will proceed to the Setup Wizard. This section ensures all essential configurations are completed for your merchant account.
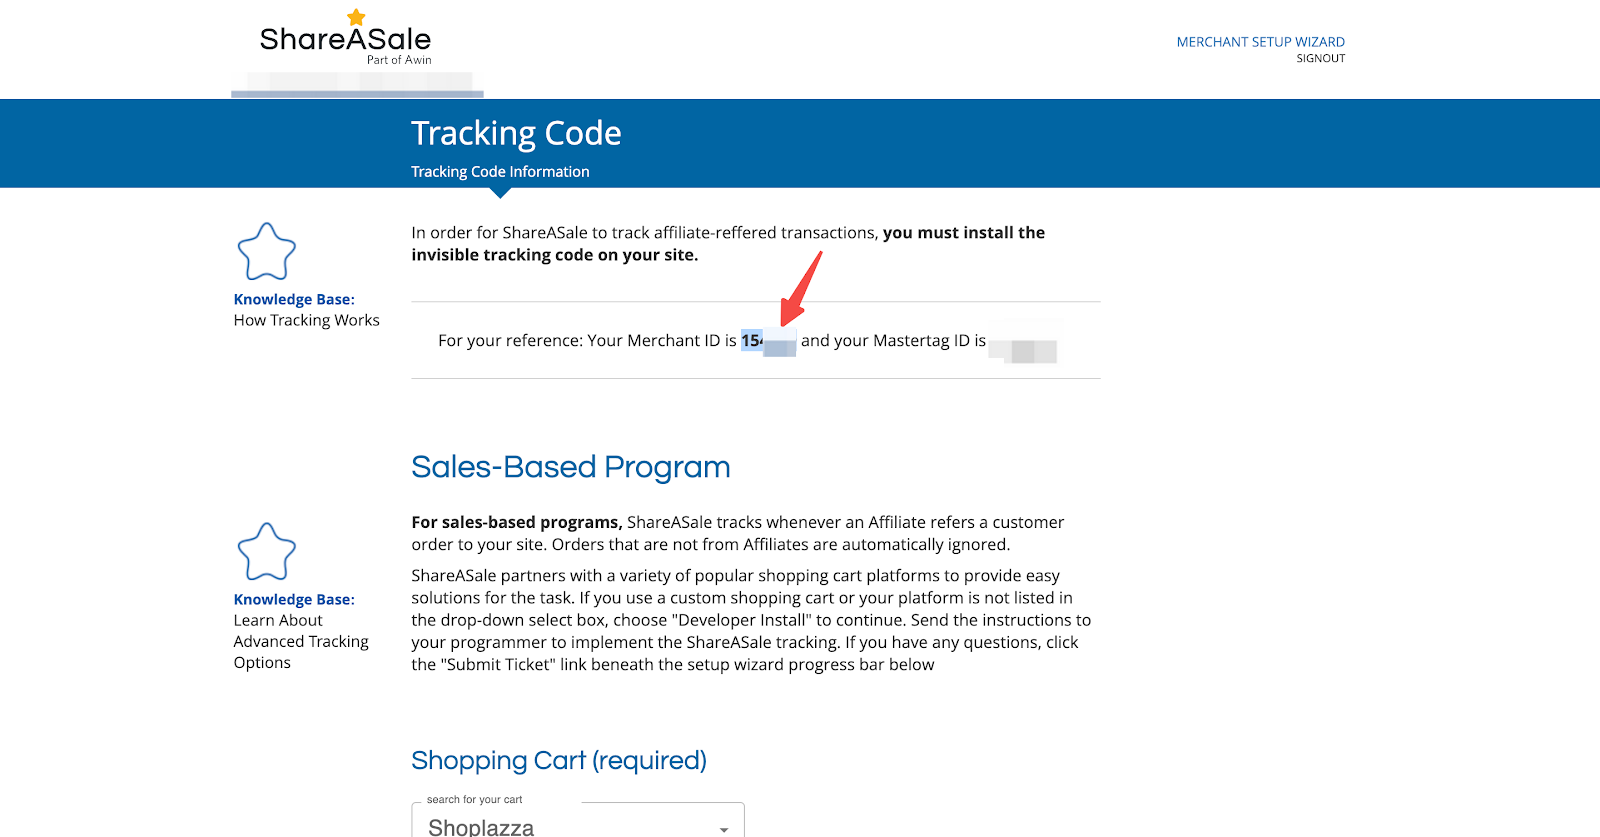
1. Begin setup: After entering the Merchant Setup Wizard, click BEGIN SETUP. To avoid data loss, make a note of your Merchant ID displayed on the upper left corner of this page.

Setting up commissions
Determining how to reward your affiliates is essential. This section guides you through setting up the commission structure for your affiliate program.
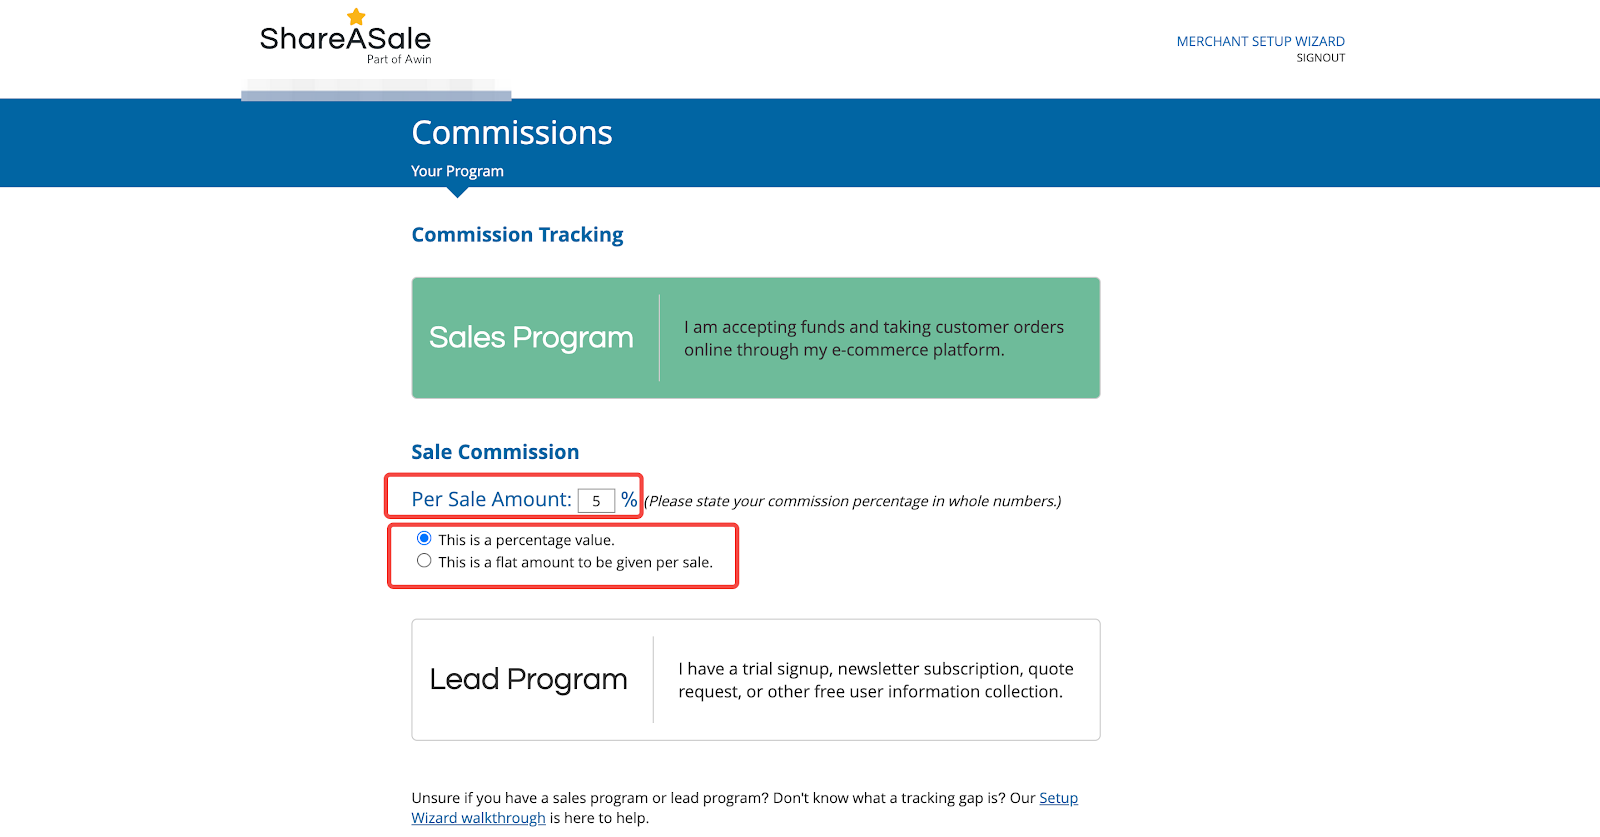
1. Select programs: Generally, most merchants can choose the Sales Program. If unsure, click here to learn about the differences between the Sales Program and Lead Program.

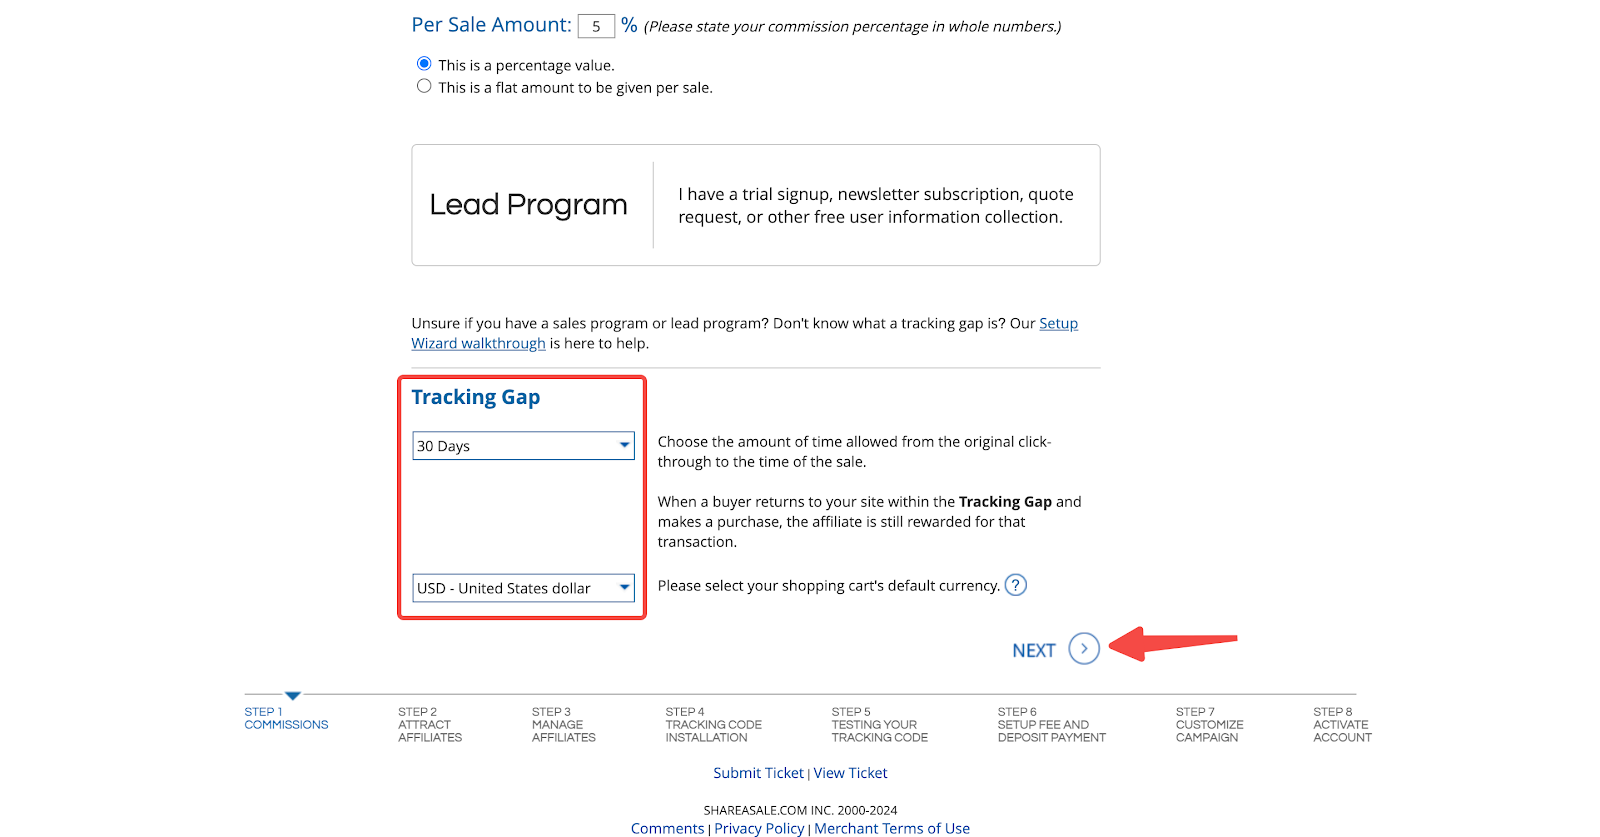
2. Sale commissions: Set the commission using either a percentage value or a flat amount.
3. Tracking gap: Customize the tracking gap and currency type, then click NEXT. The tracking gap is the duration between a click on your affiliate’s link and the conversion on your website (lead or sale). When a customer makes a purchase during the tracking gap, the affiliate will receive a commission. It is recommended that the currency type be consistent with the default currency in your admin settings.
Attracting affiliates
Creating an attractive affiliate program will help you build a strong network. The more enticing your offer, the more affiliates will want to partner with you.
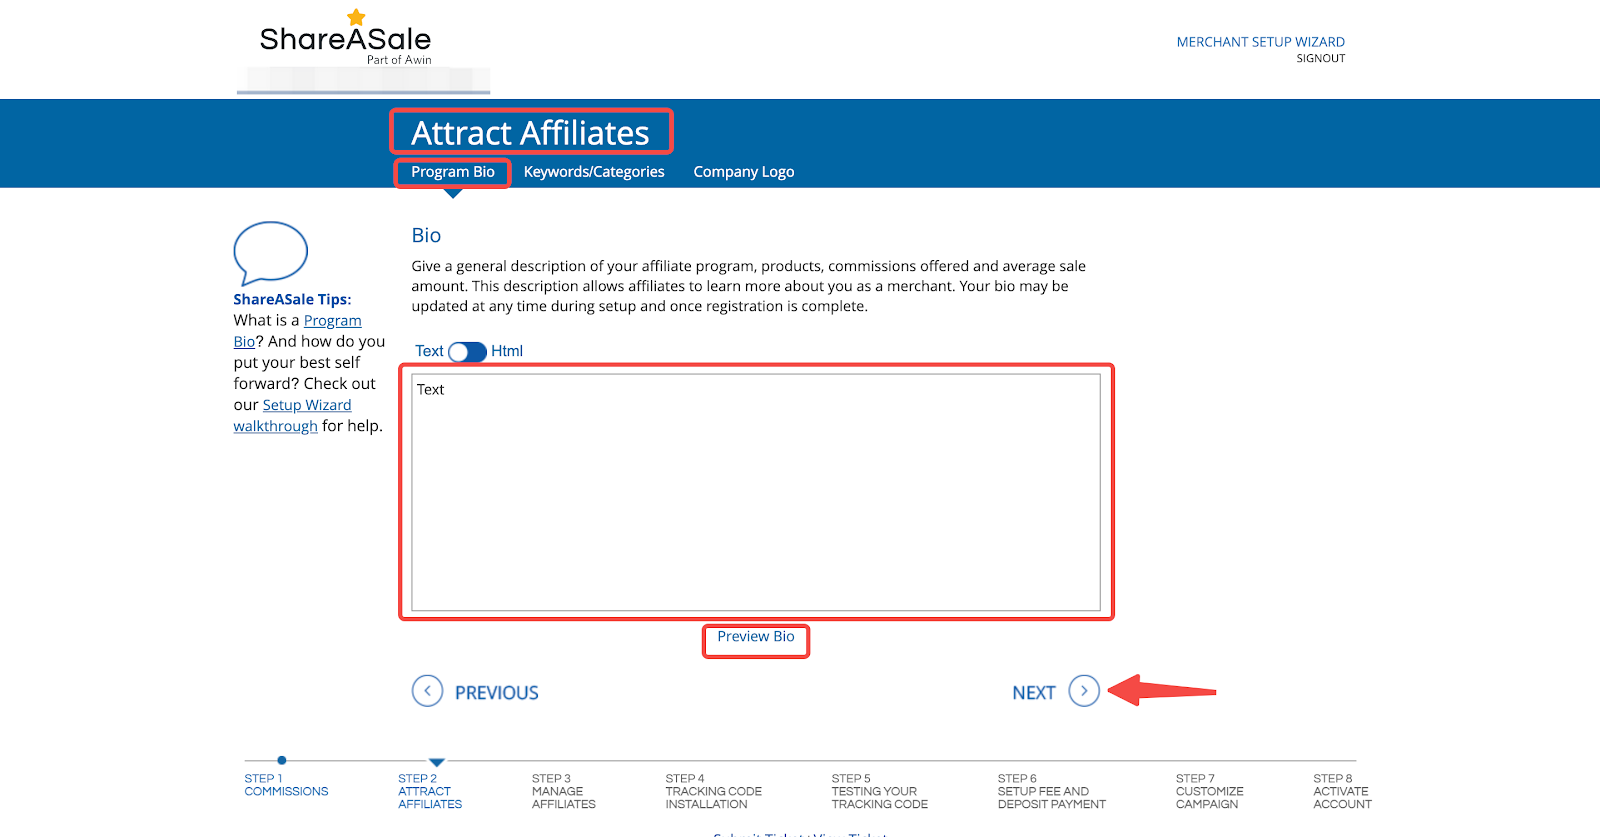
1. Fill program bio: Use HTML to add branding, pictures, and format the page to make it appealing. Fill in your affiliate marketing plan, products, offered commissions, and average sales in the Program Bio box. Click Preview bio to ensure the accuracy of the information. To learn more about attracting affiliates, click here .
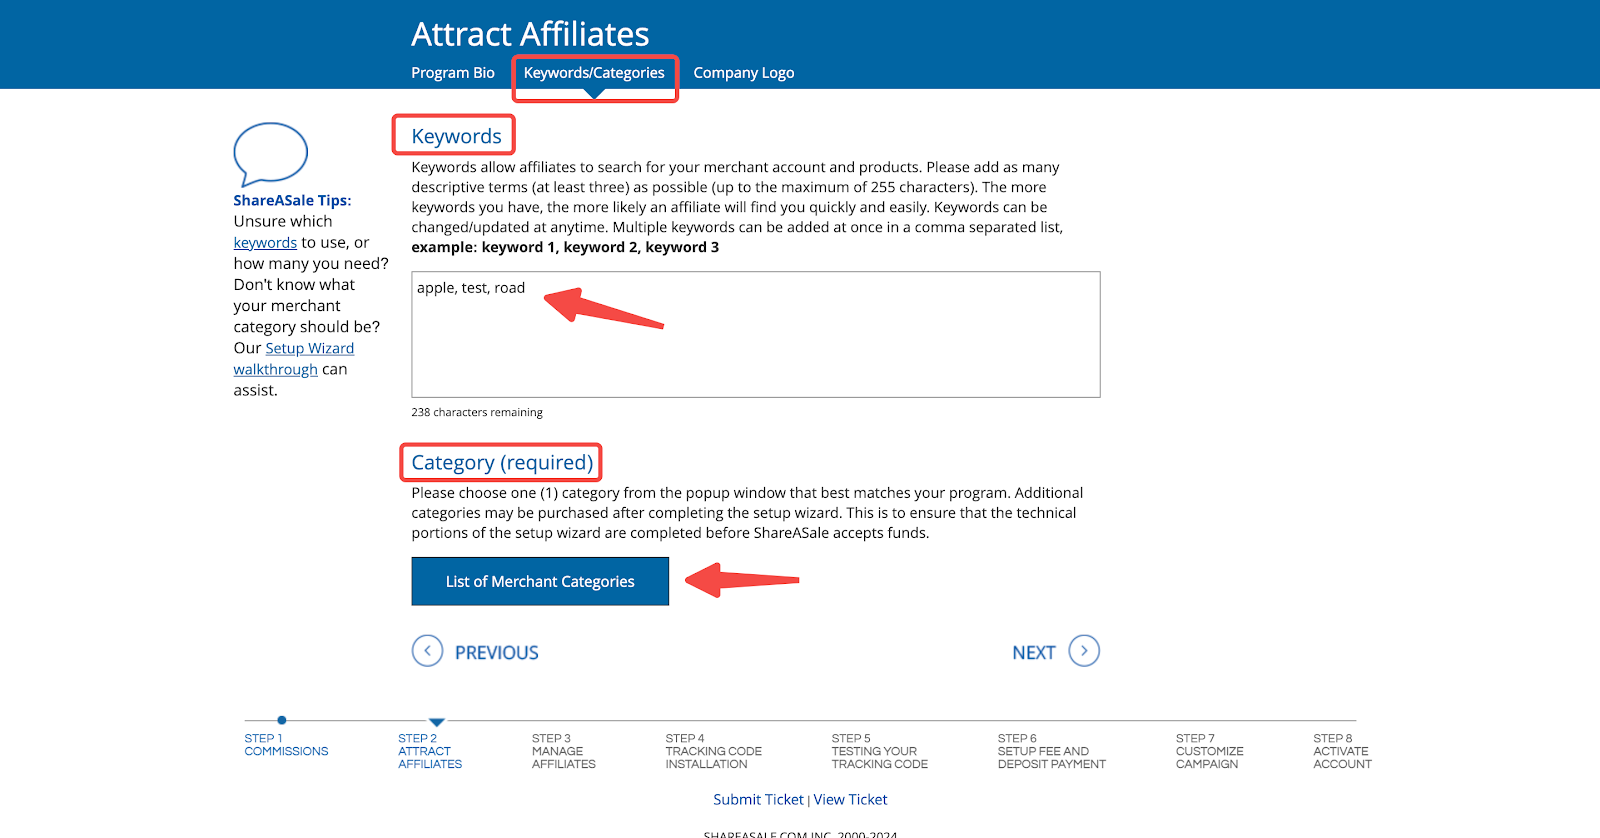
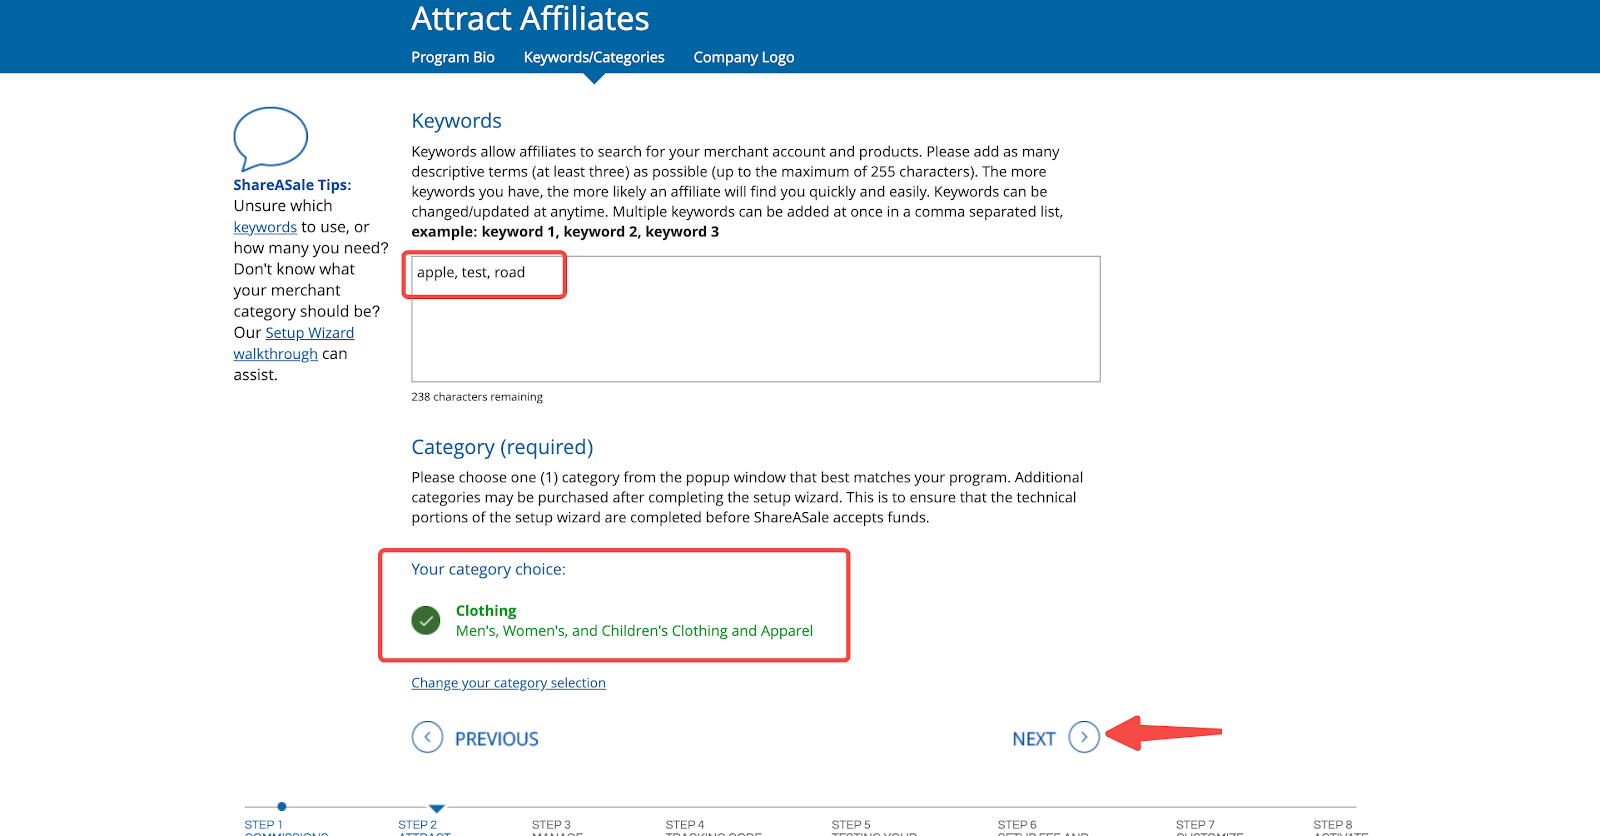
2. Supplement keywords/categories: Fill in keywords related to your product and click List of Merchant Categories to select a category. Fill in at least three keywords, with a total of no more than 255 characters. Choose the product category carefully, as adding a category after registration requires additional payment.
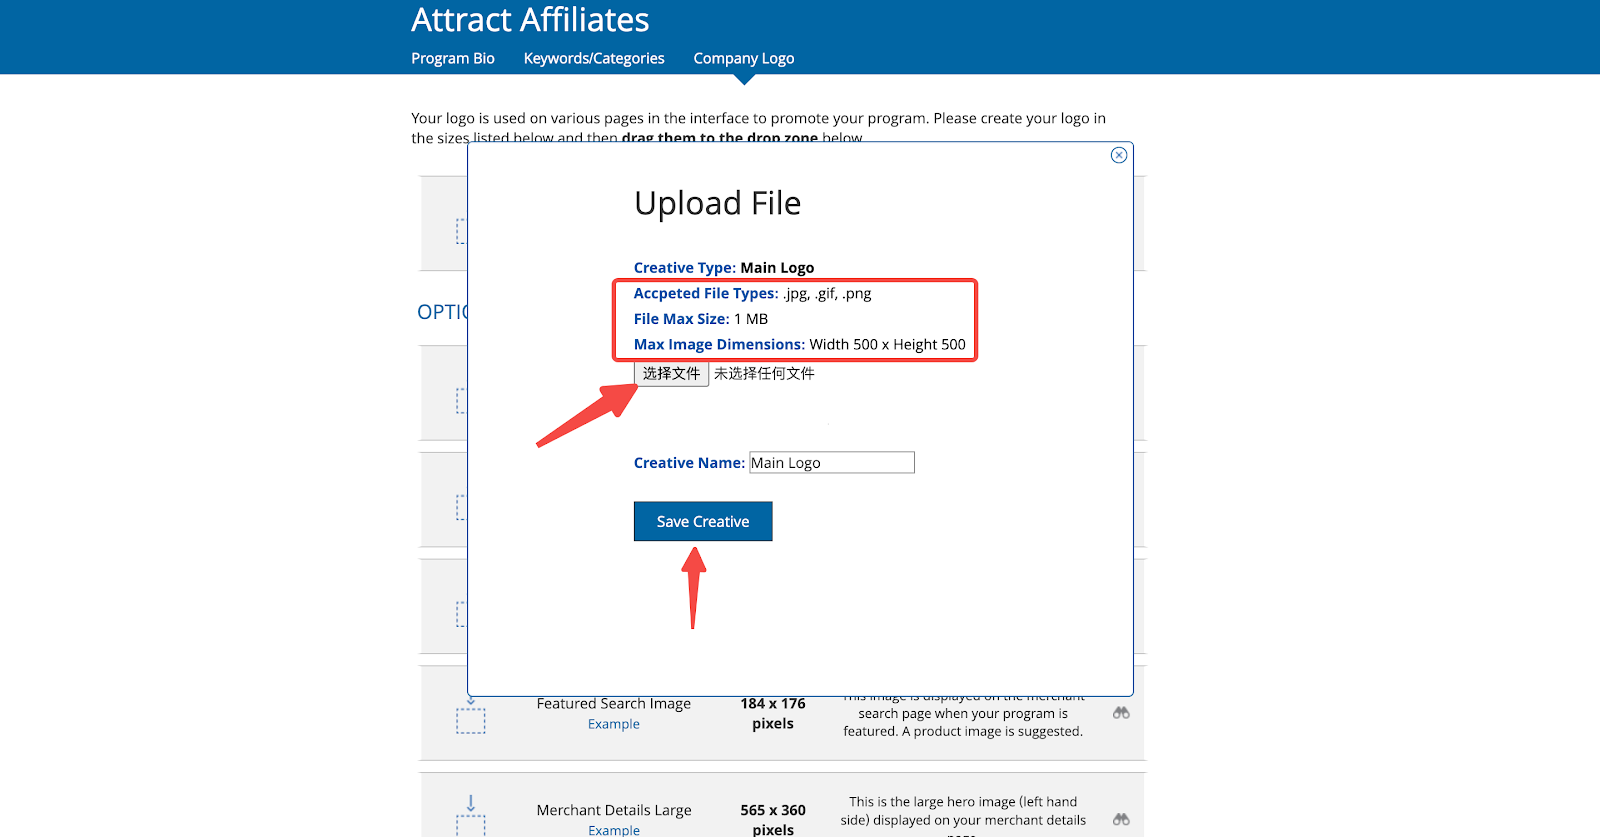
3. Upload your logo: In the Company Logo section, click the icon and select Local File to upload your website brand logo.
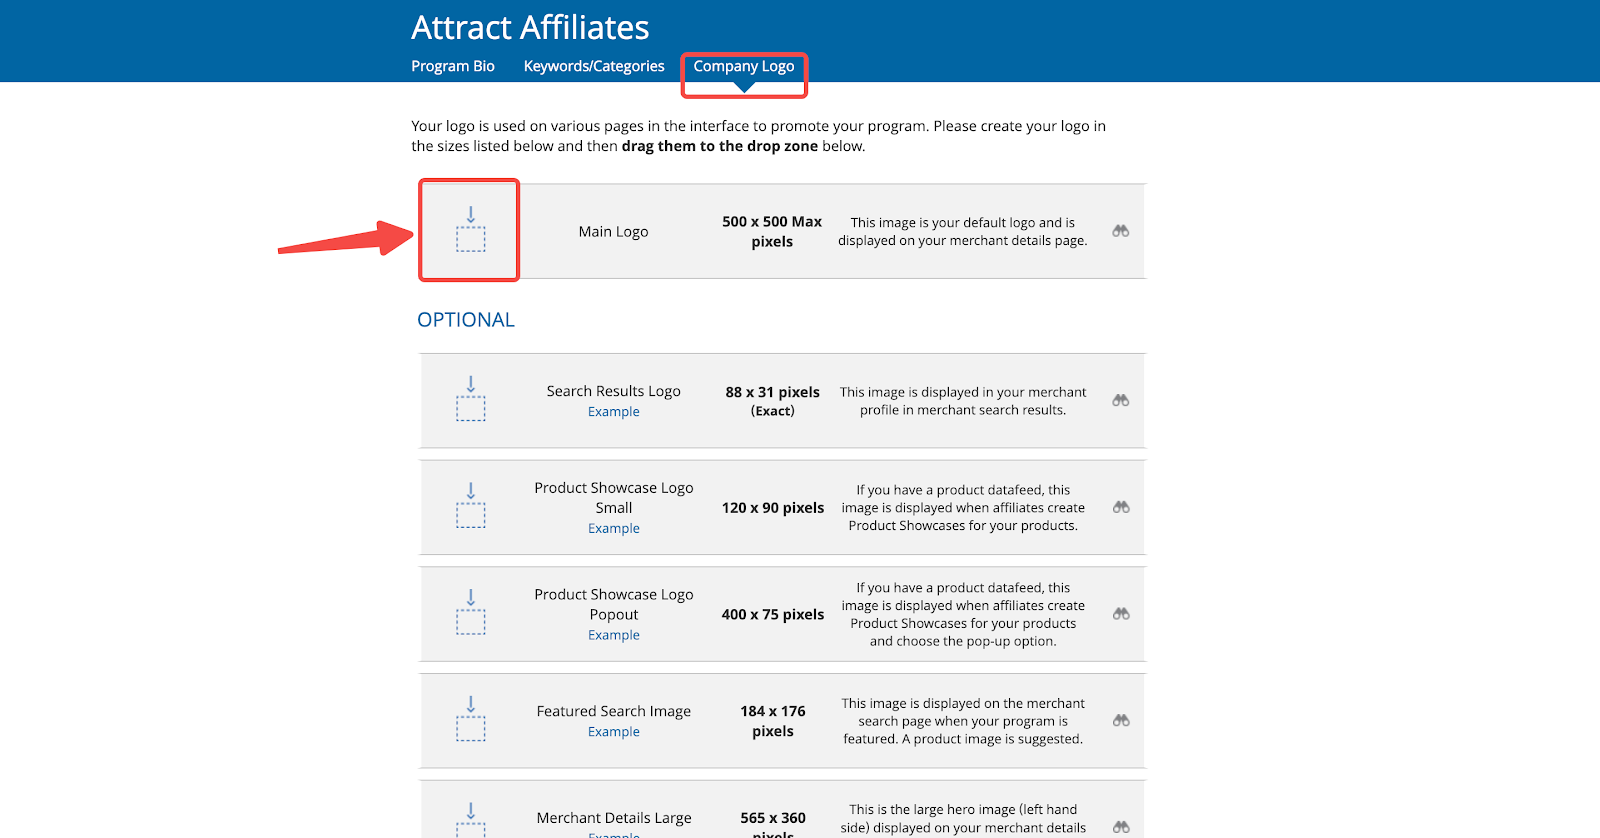
4. Review logo requirements: The size requirements and introduction of each logo are displayed at the marked position in the figure below. Click the icon on the right to preview the logo effect. Only upload the Main Logo to complete the setup wizard process.
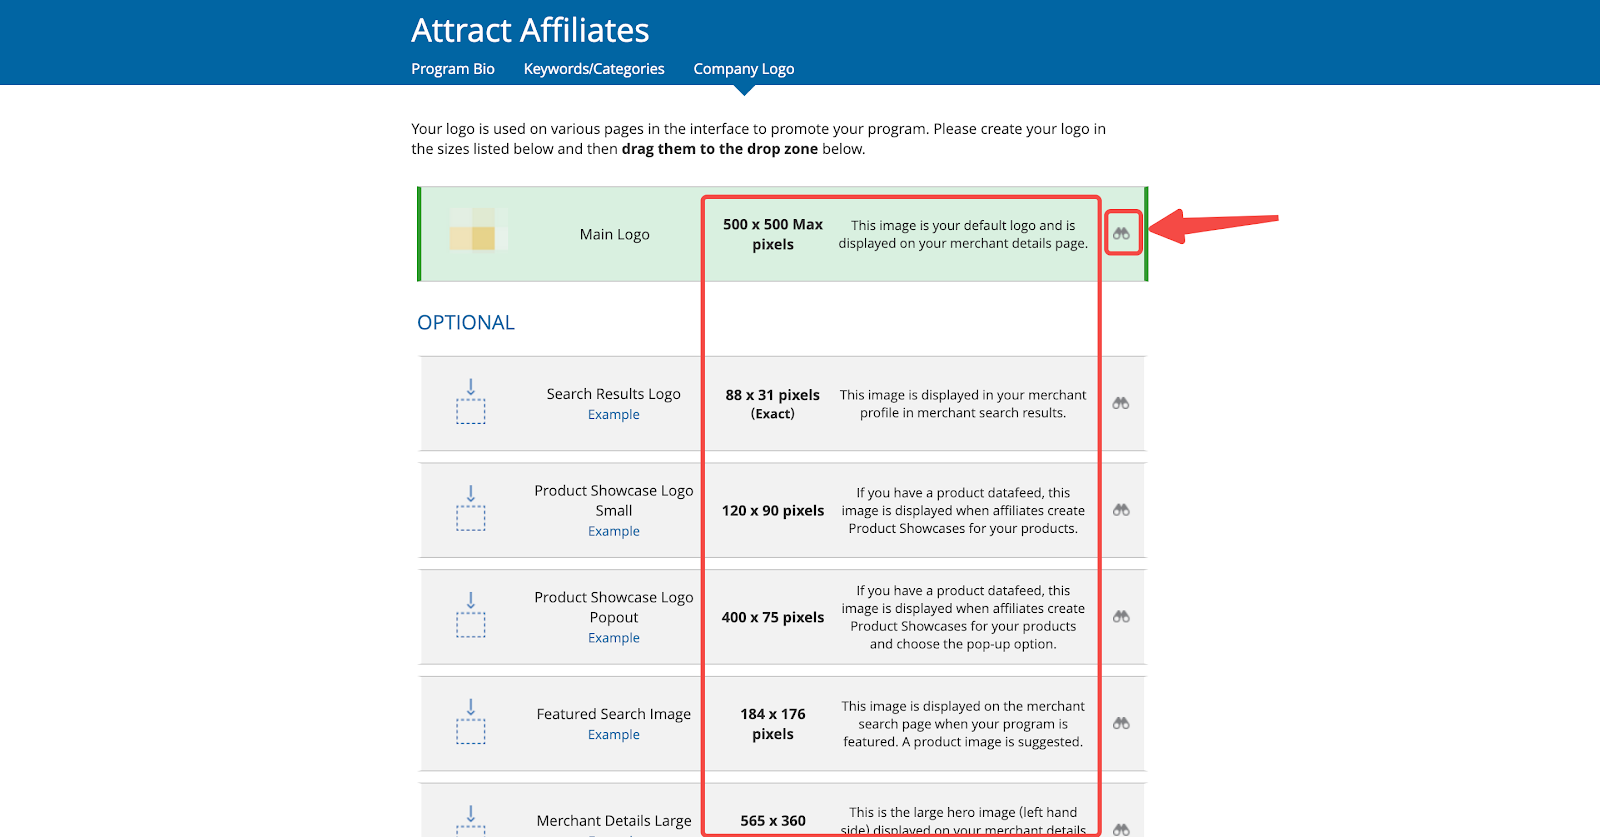
5. Complete logo upload: After completing the logo configuration, scroll down to the bottom of the page and click NEXT.

Managing affiliates
Effectively managing your affiliates is key to a successful affiliate program. This section covers various tools and settings to help you streamline affiliate management, ensuring that your program runs smoothly and efficiently. By setting clear agreements, defining PPC rules, and automating responses, you can maintain a well-organized and legally sound affiliate network.
1. Program agreement: Fill out the project agreement to strengthen the legal foundation of your project and list any restrictions or regulations.
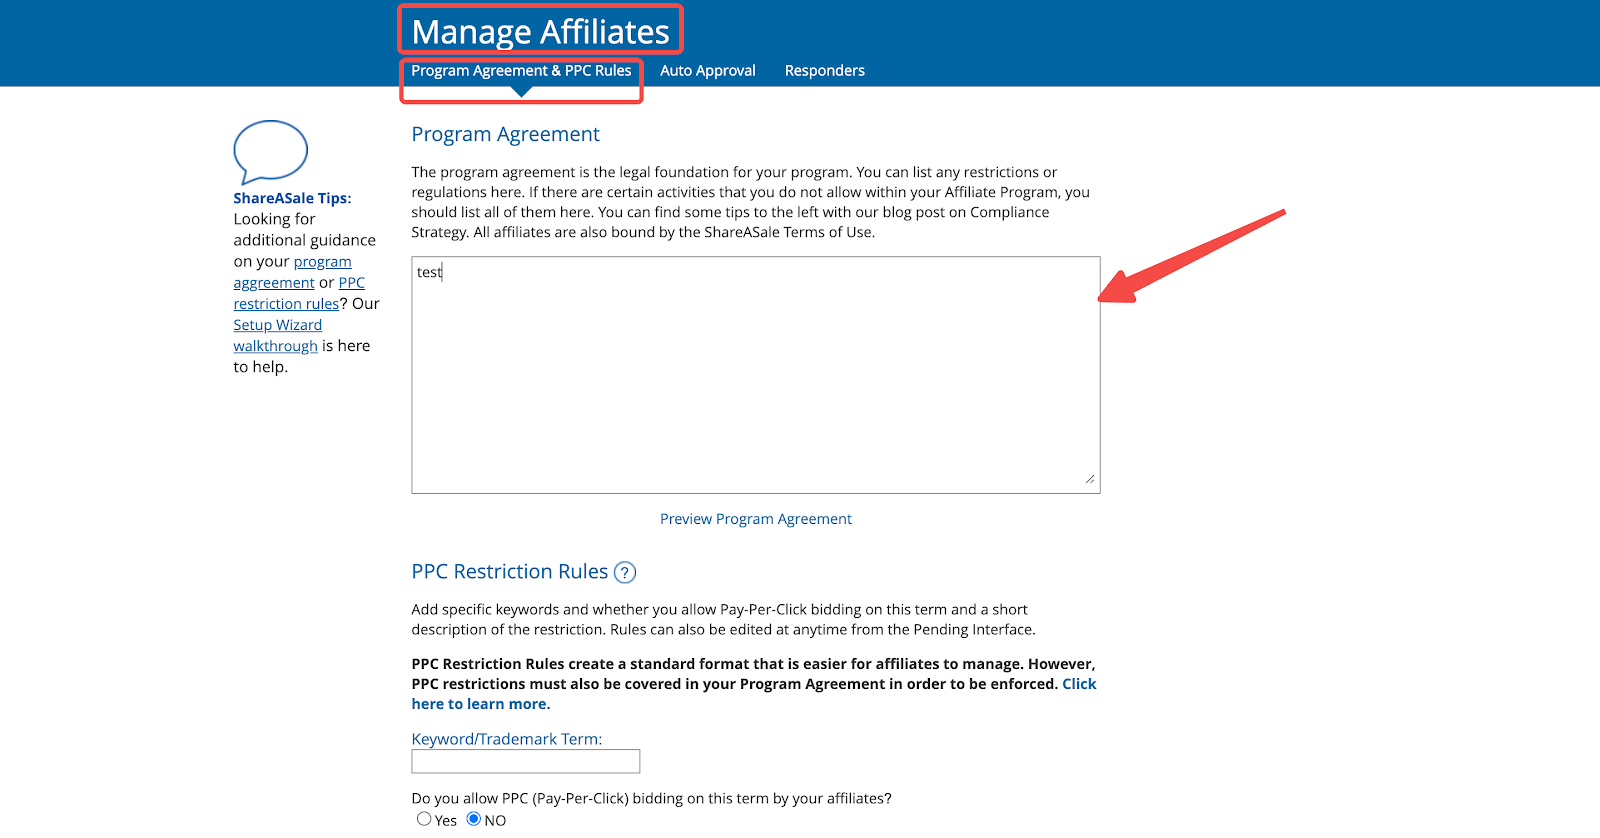
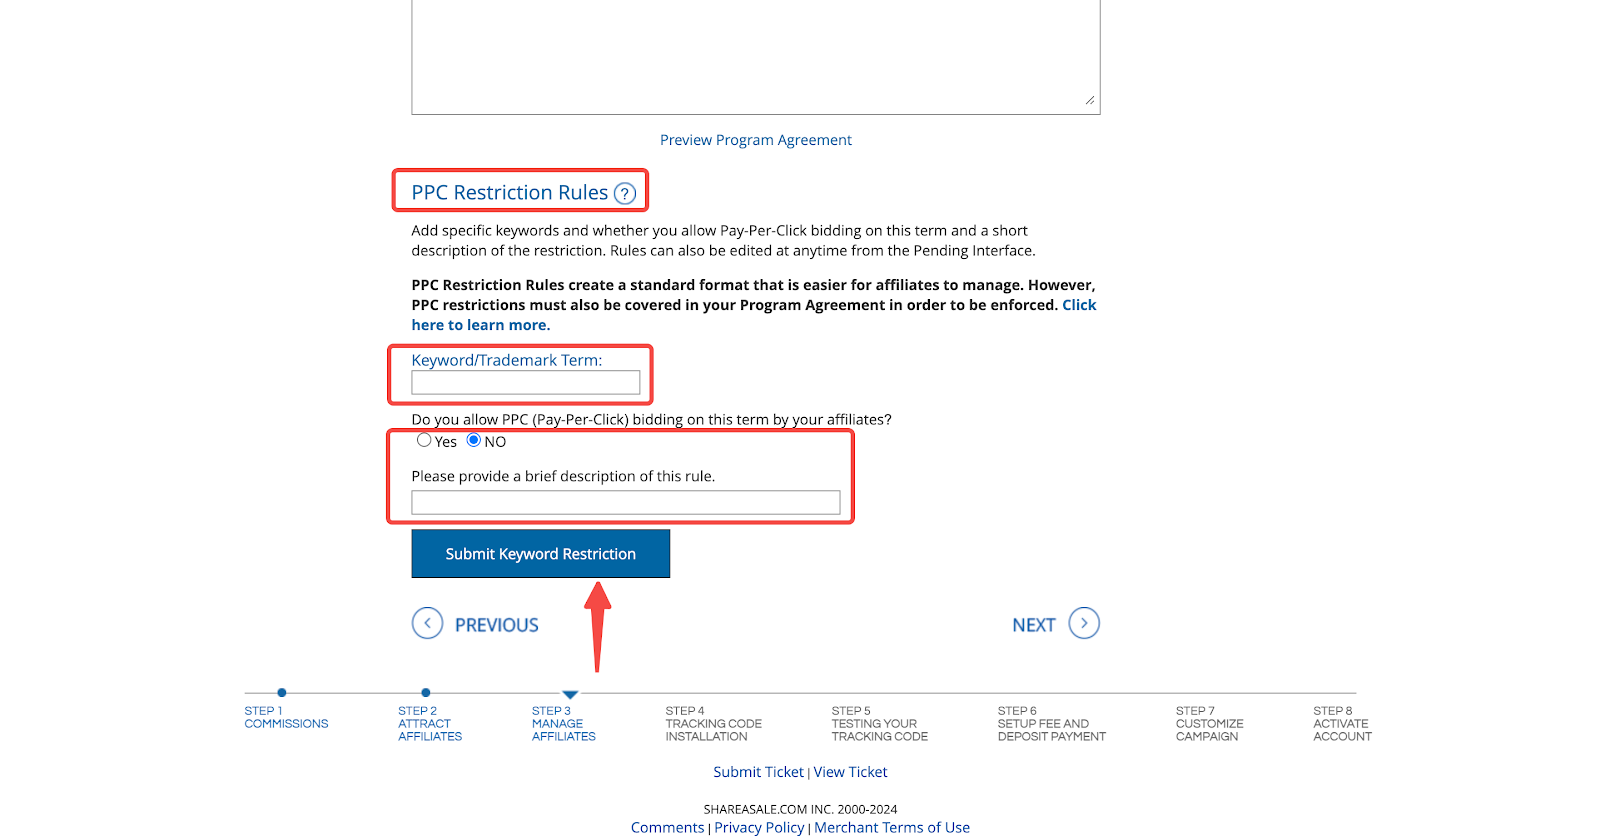
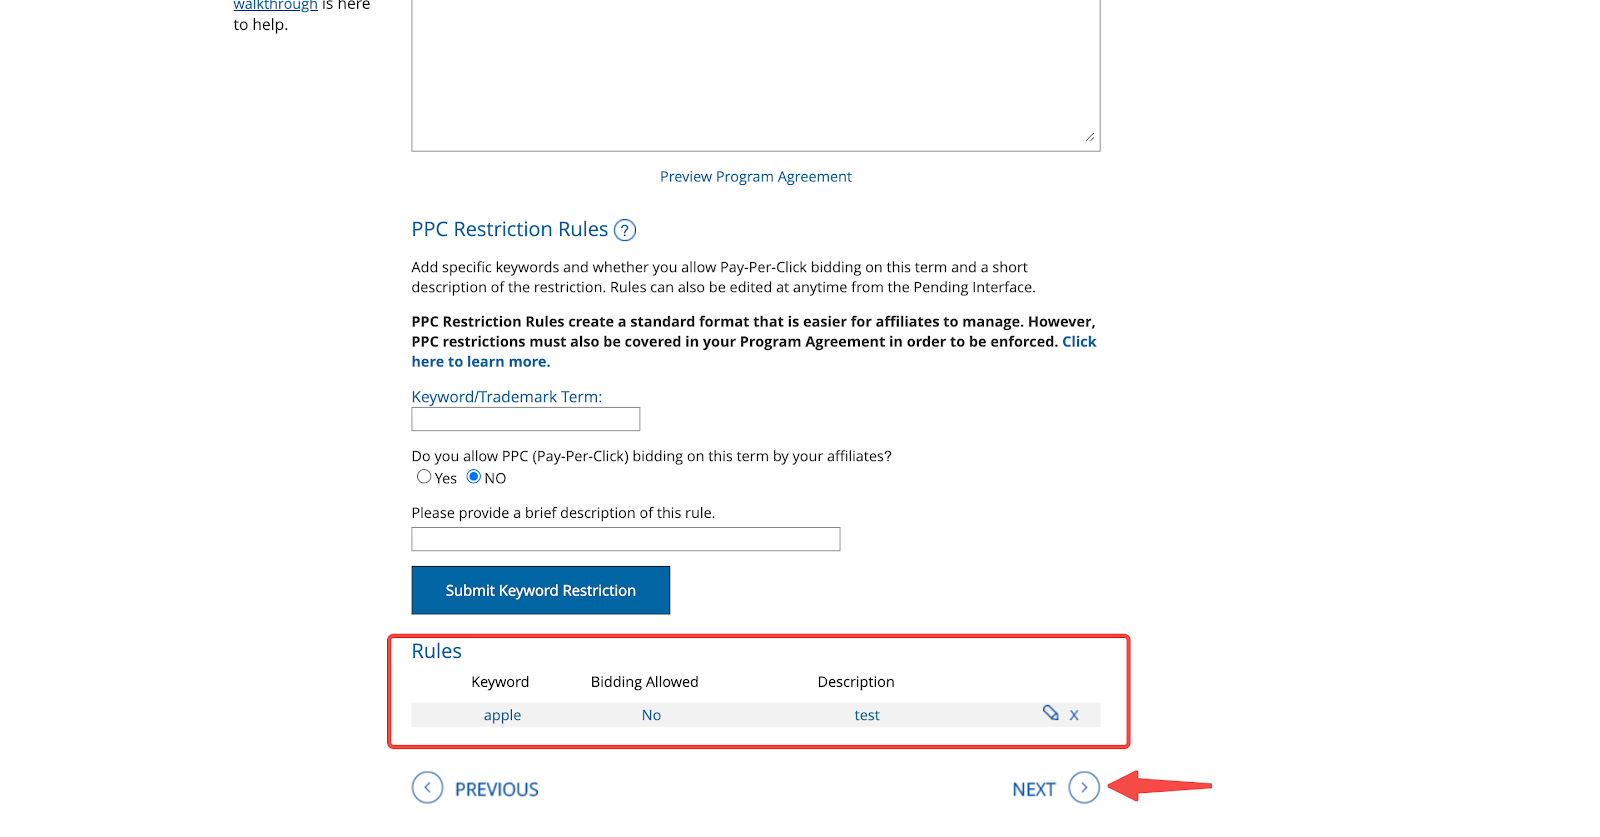
2. PPC restriction rules: Fill in your brand name under Keywords/Trademark Terms, choose whether to accept PPC (Pay-Per-Click), provide a brief description of this rule, and click Submit Keyword Restriction after the configuration is complete. Then, click NEXT.
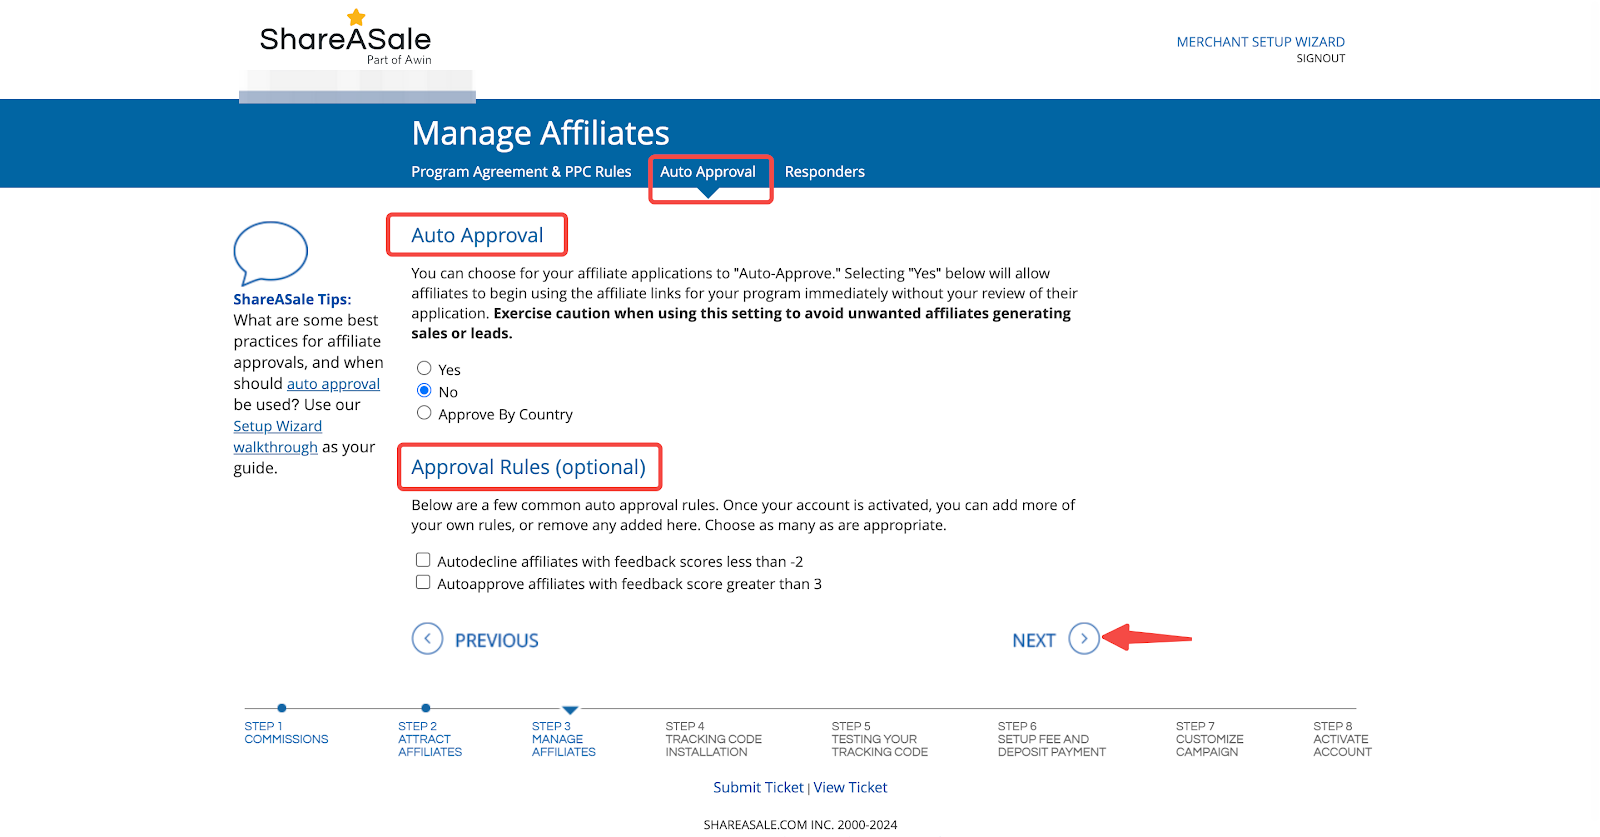
3. Configuring auto approval: Choose whether to automatically approve affiliates to begin using the affiliate links for your program immediately without reviewing their application. Select the appropriate option (Yes, No, or Approve By Country). You can also add common auto-approval rules, such as auto-declining affiliates with feedback scores less than -2 or auto-approving affiliates with feedback scores greater than 3. After making your selections, click NEXT.
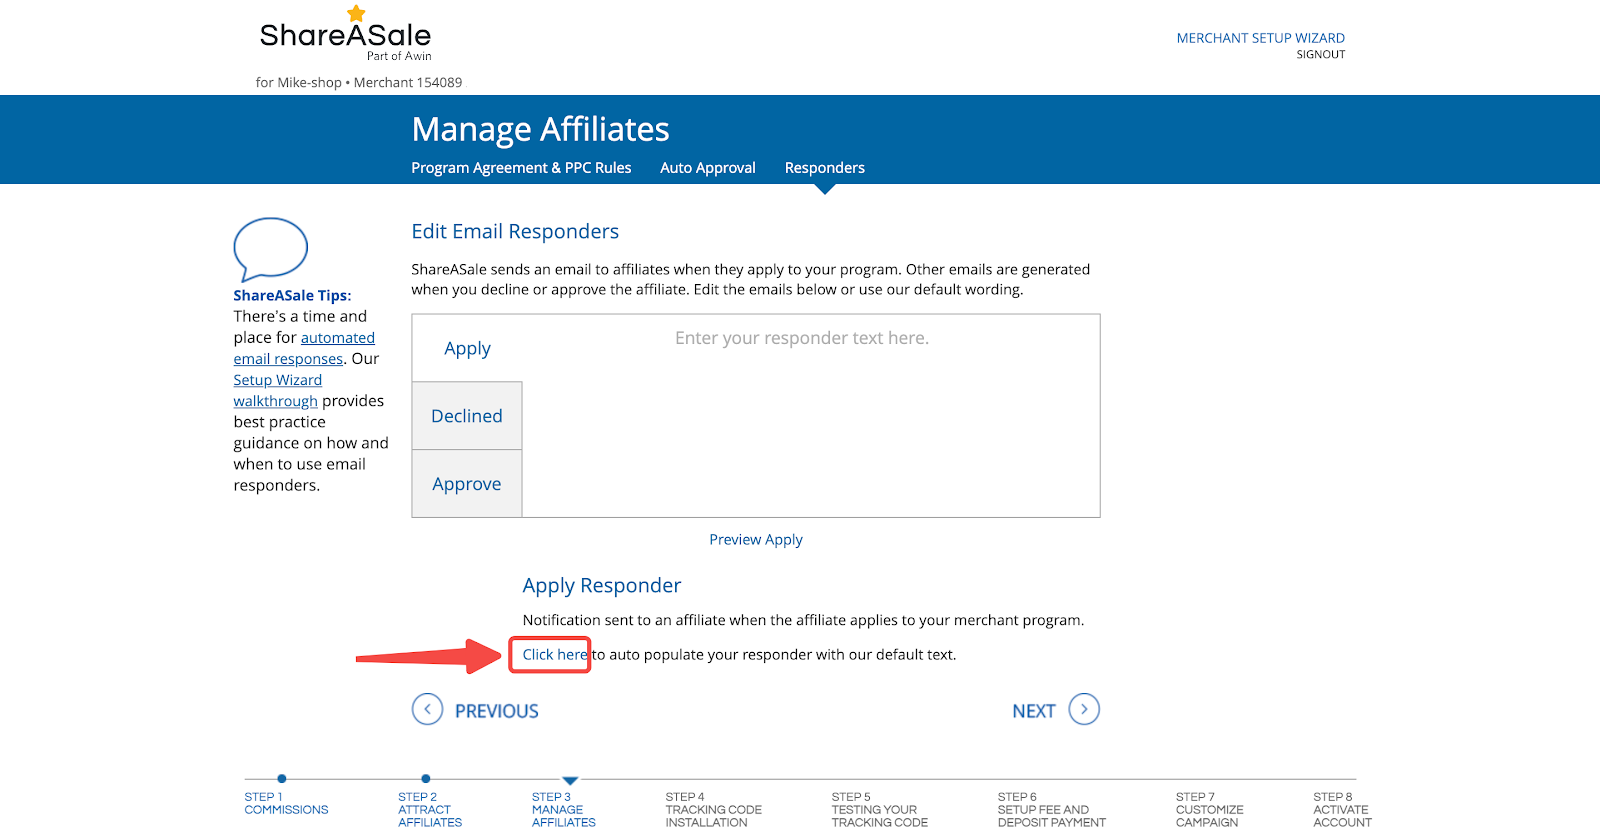
4. Setting up automatic responses: Configure automatic reply emails for the following situations:
- When an affiliate applies
- When an affiliate is declined
- When an affiliate is approved
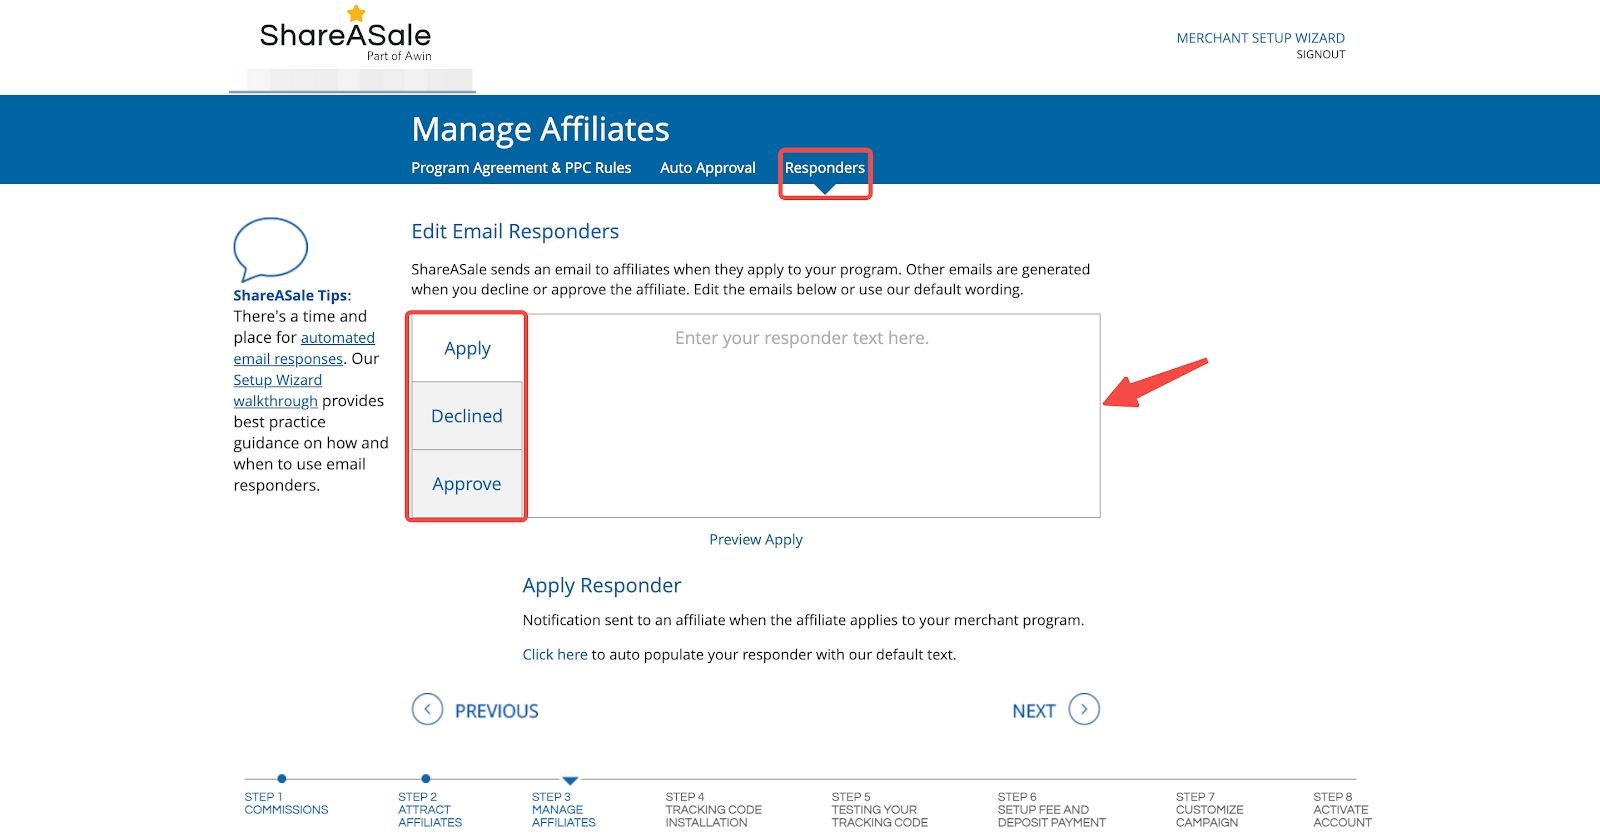
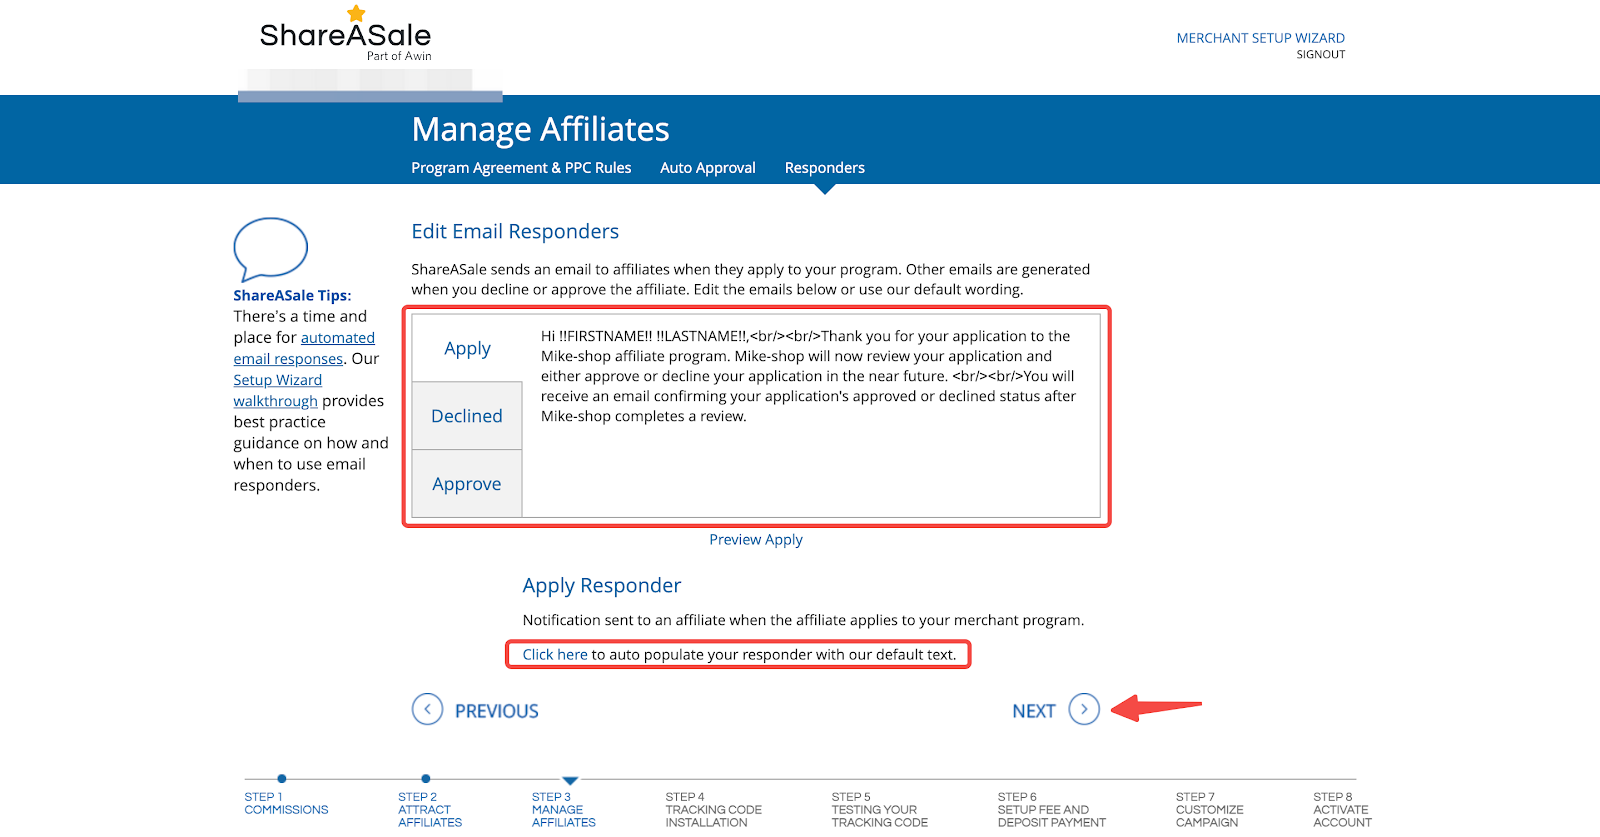
5. Mandatory content: Enter the required content for each automatic response. To use the default template provided by ShareASale, click the Click here button shown in the screenshot to auto-populate the responder with default text. This step must be completed before proceeding.
Installing the tracking code
Properly installing the tracking code is essential for tracking affiliate sales and leads. This section guides you through the installation process.
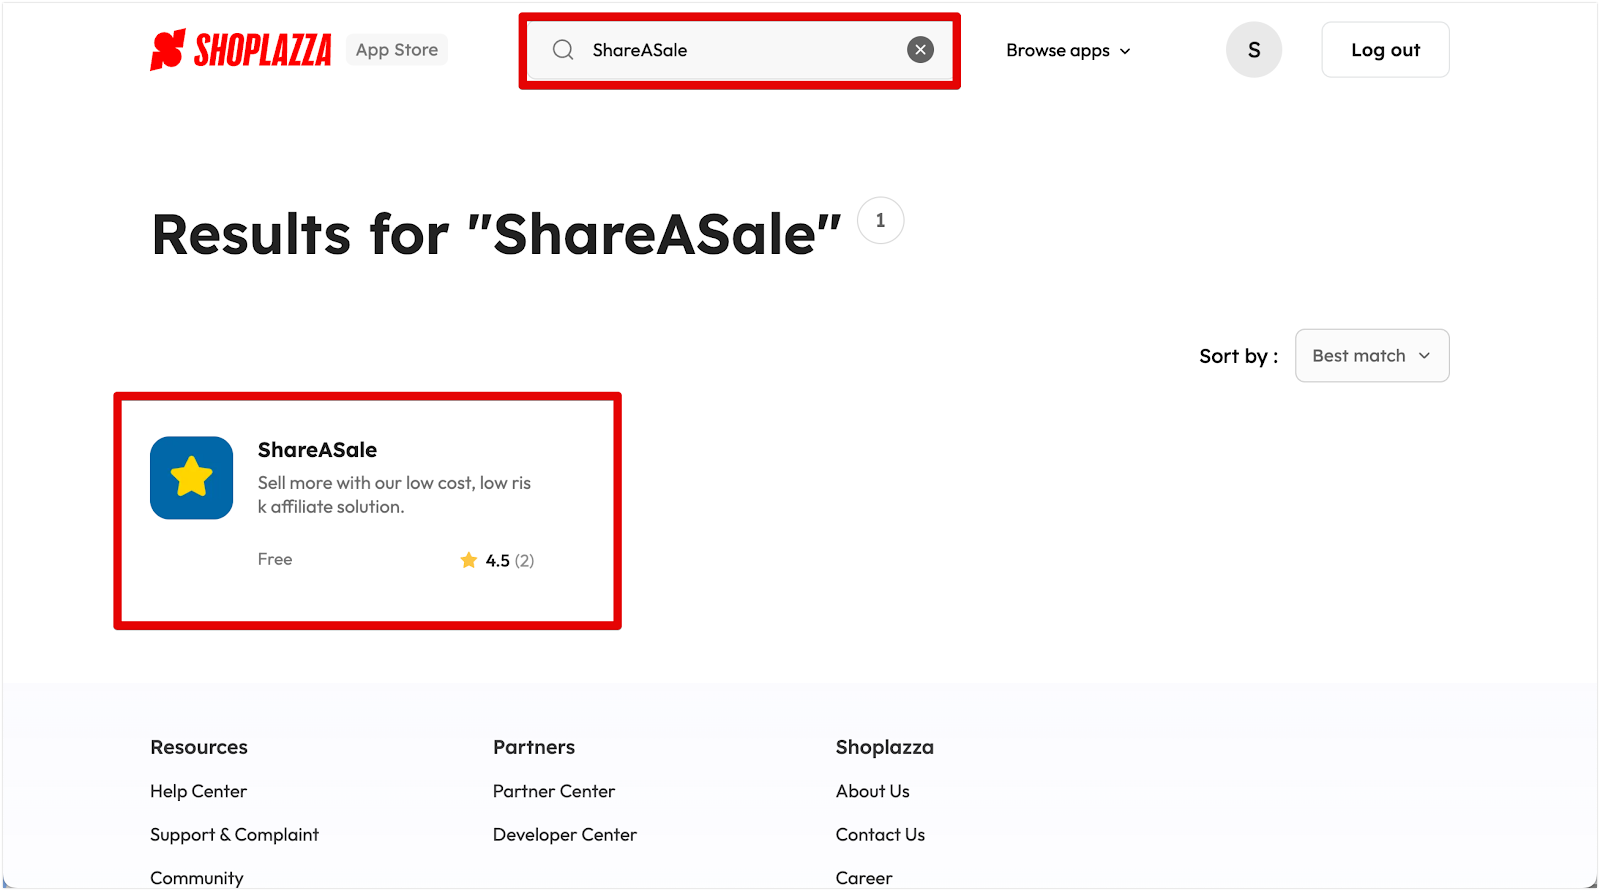
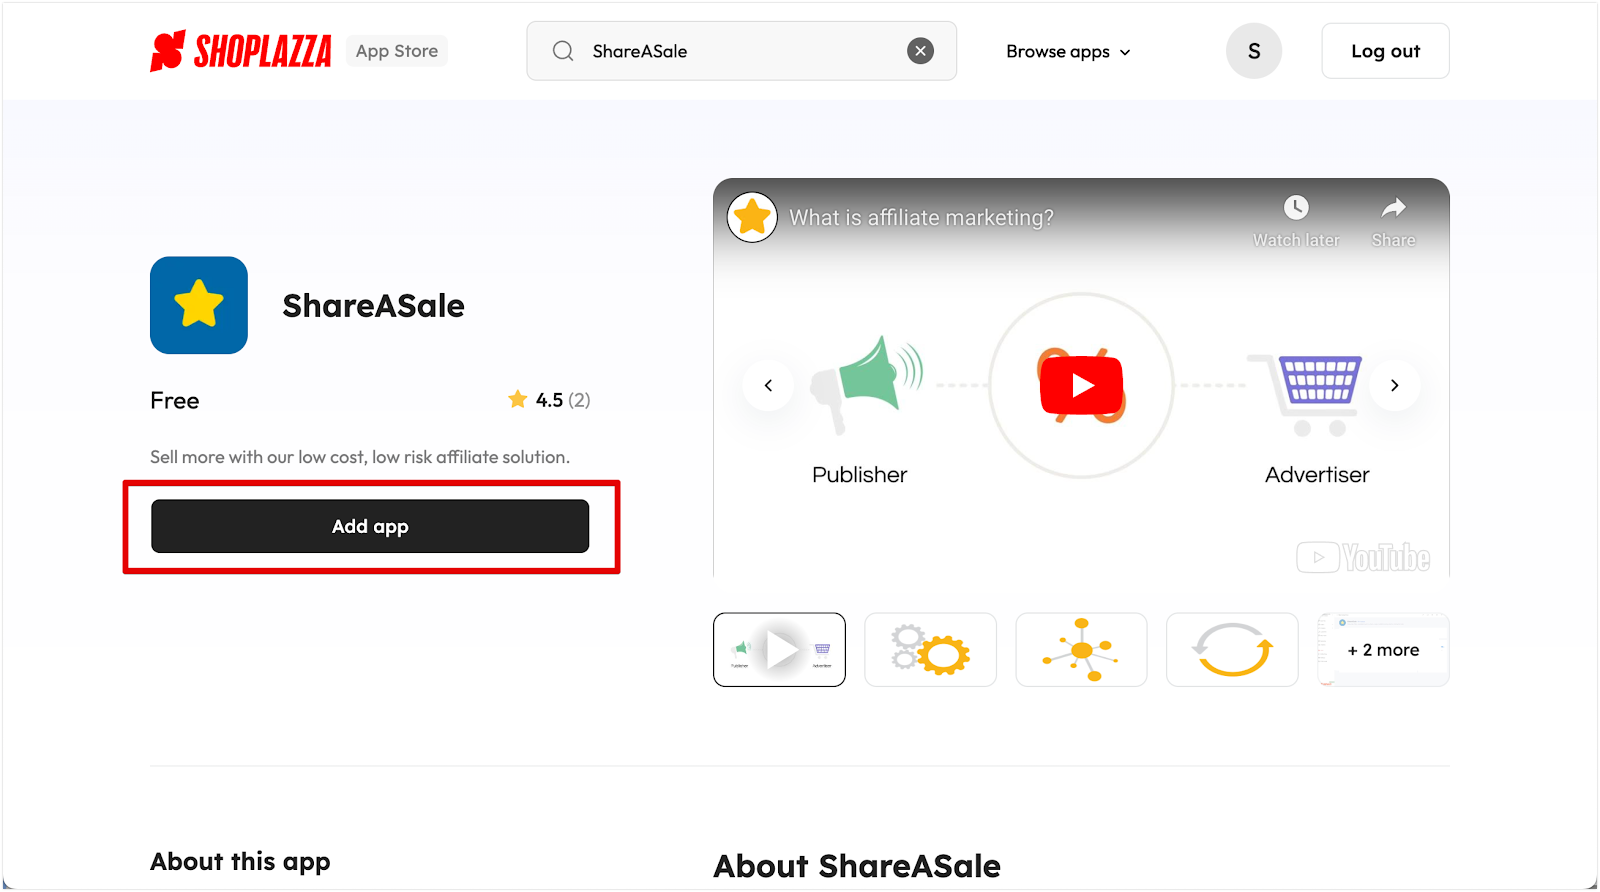
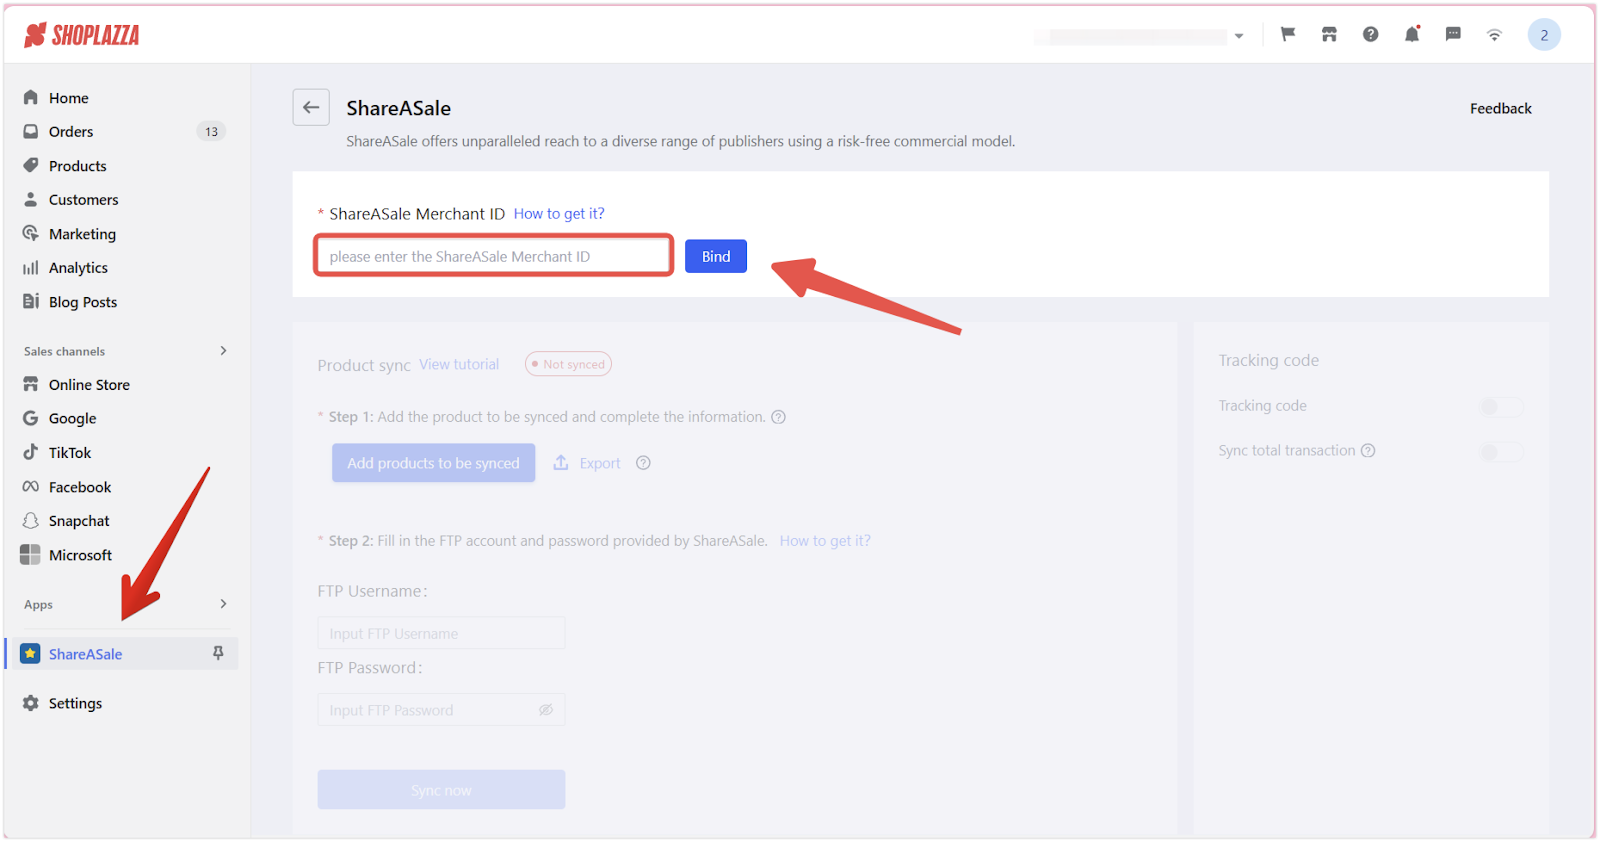
1. Install the app: Click here to install the ShareASale app. Once installed, the app will open automatically.
2. Copy your Merchant ID: Switch back to the ShareASale website to copy your Merchant ID.
3. Link ID: In the app, paste the copied Merchant ID into the marked position in the following image and click Bind.
4. Enable tracking code: After the ID is linked successfully, click Enable tracking code.
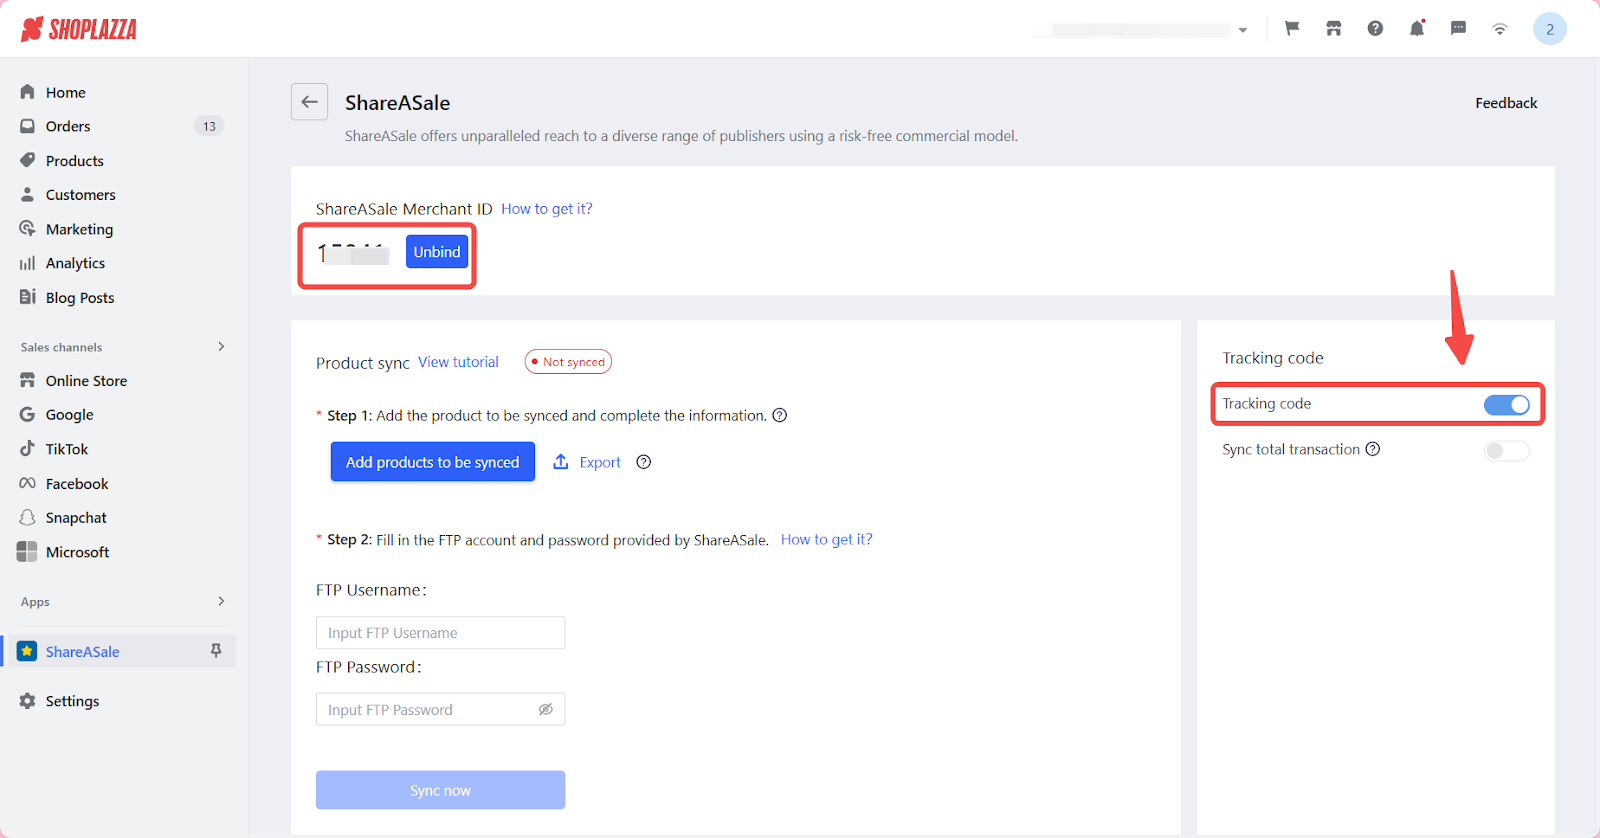
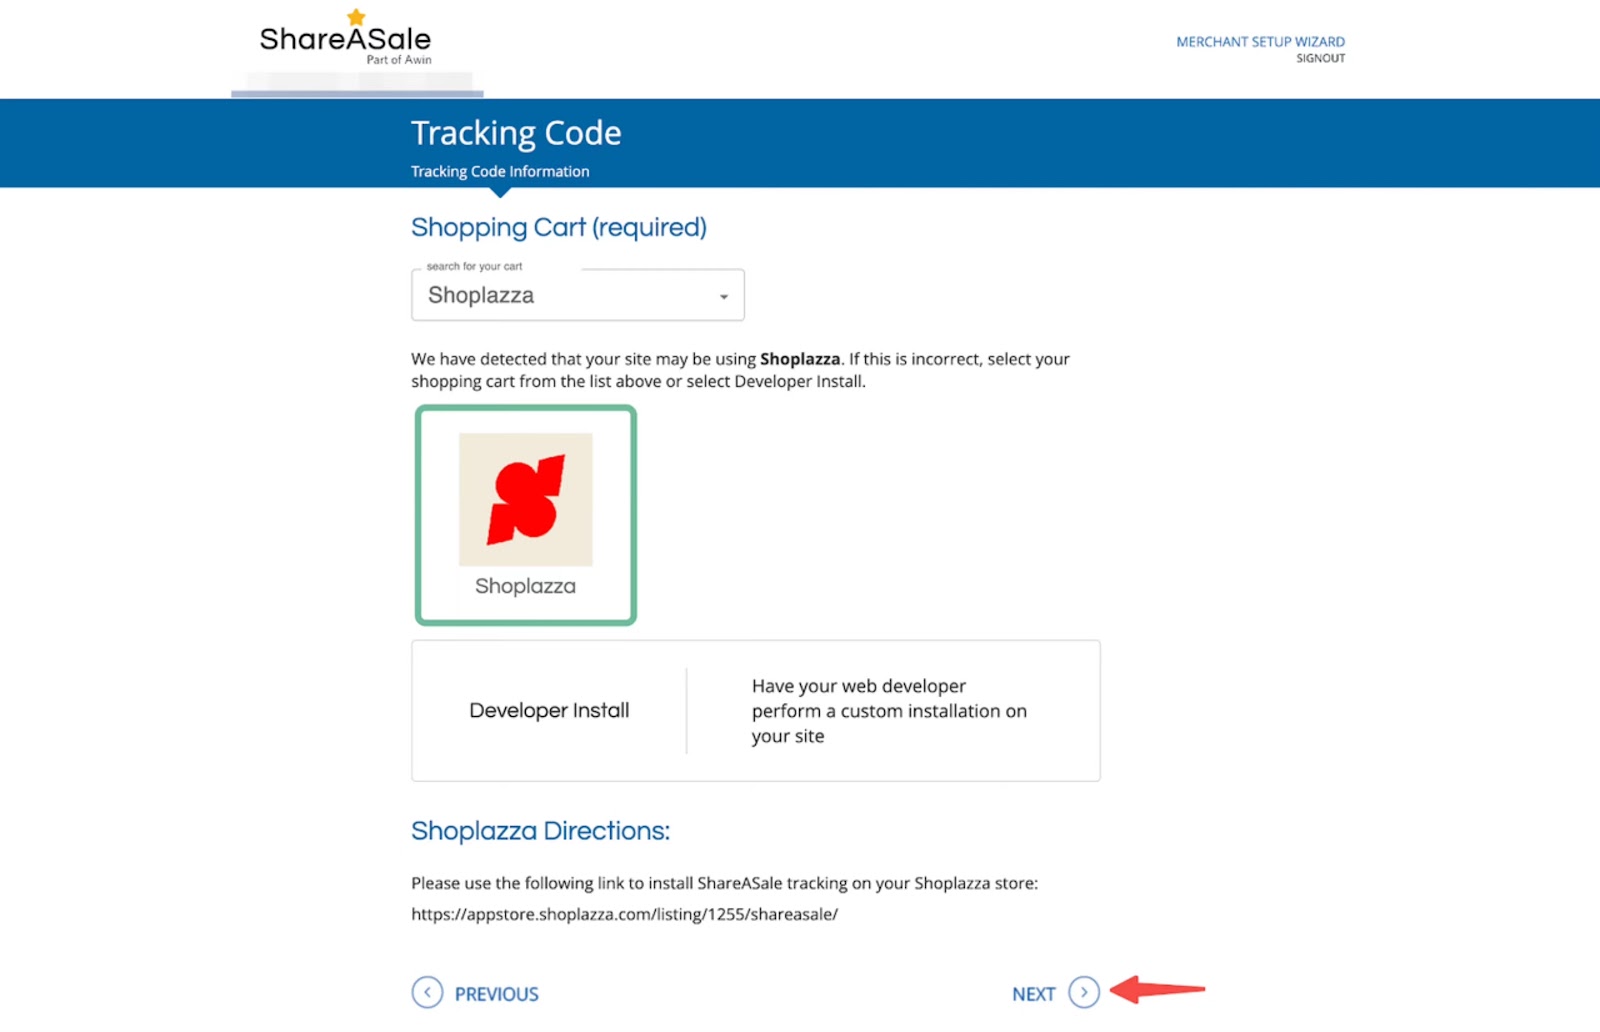
5. Return to ShareASale: Go back to the ShareASale website, navigate to Tracking Code, and click Next.
Test Tracking Code
Conducting a tracking code test ensures that all transactions are properly tracked. This section explains how to test the tracking code to confirm that it works correctly.
1. Start testing: Click Begin the Test to initiate the test process.
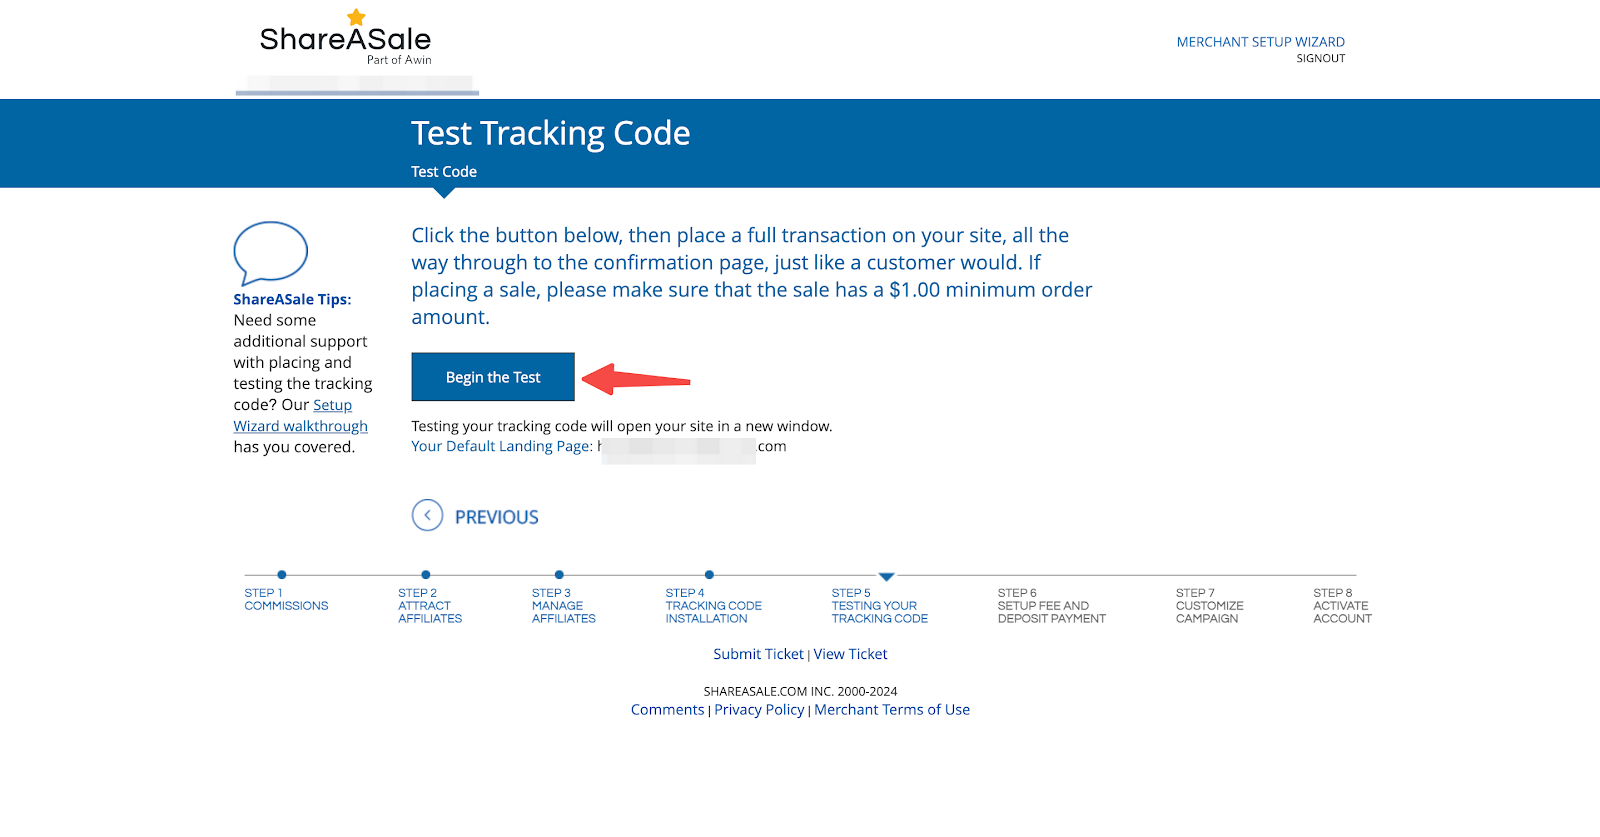
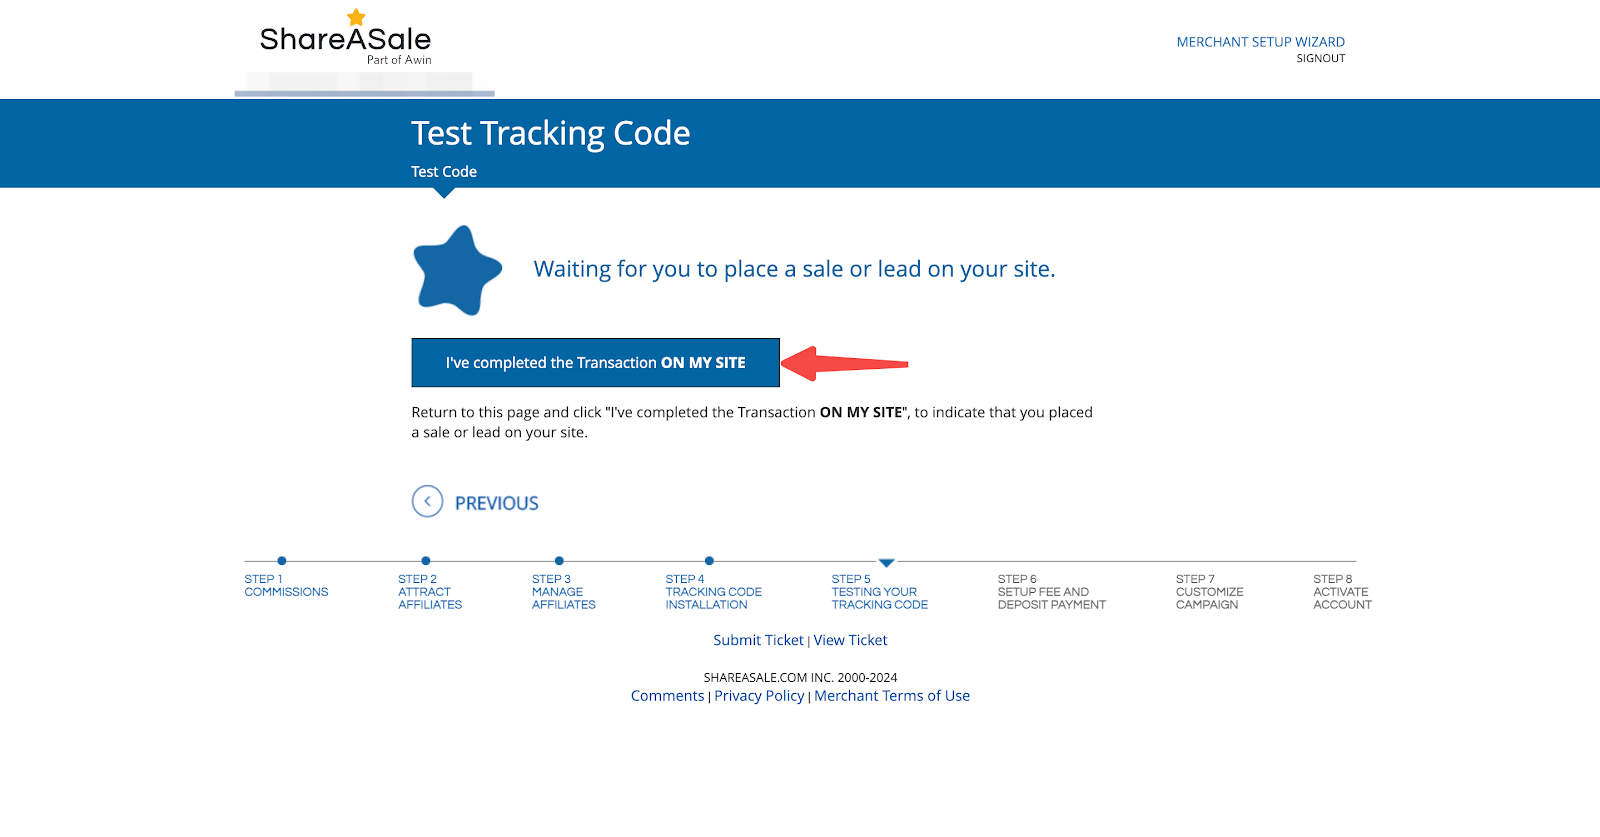
2. Simulate a transaction: To test the tracking code, replicate a customer’s complete order transaction on your store website. Add a product to the cart, proceed to checkout, and complete the purchase. Ensure the order amount is at least greater than $1.00 to validate the process. AAfter placing the order, return to ShareASale > Test Tracking Code and click I’ve completed the Transaction ON MY SITE to confirm the transaction.
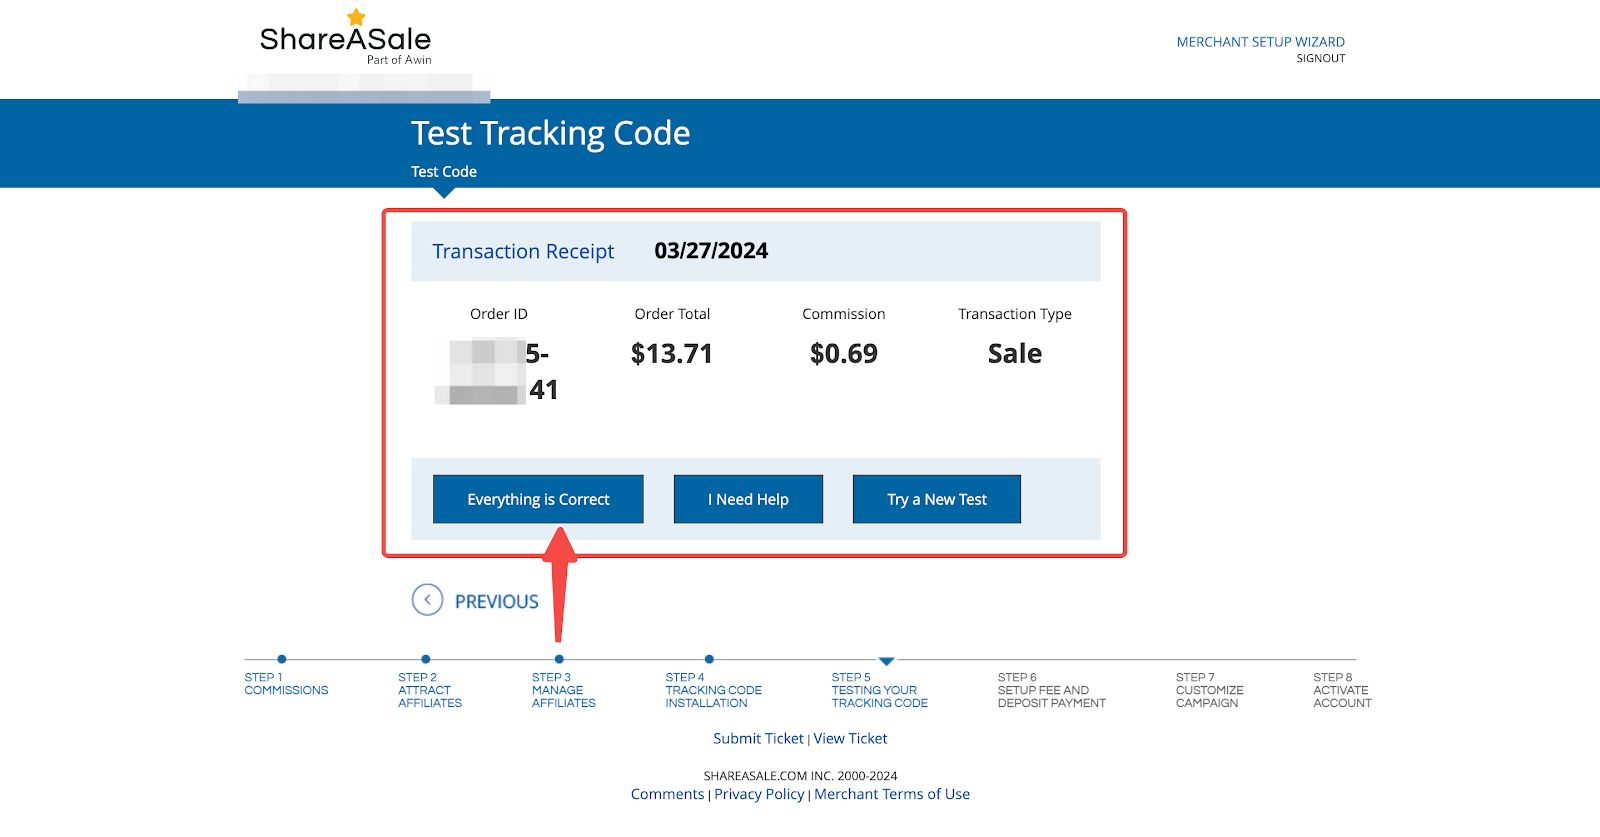
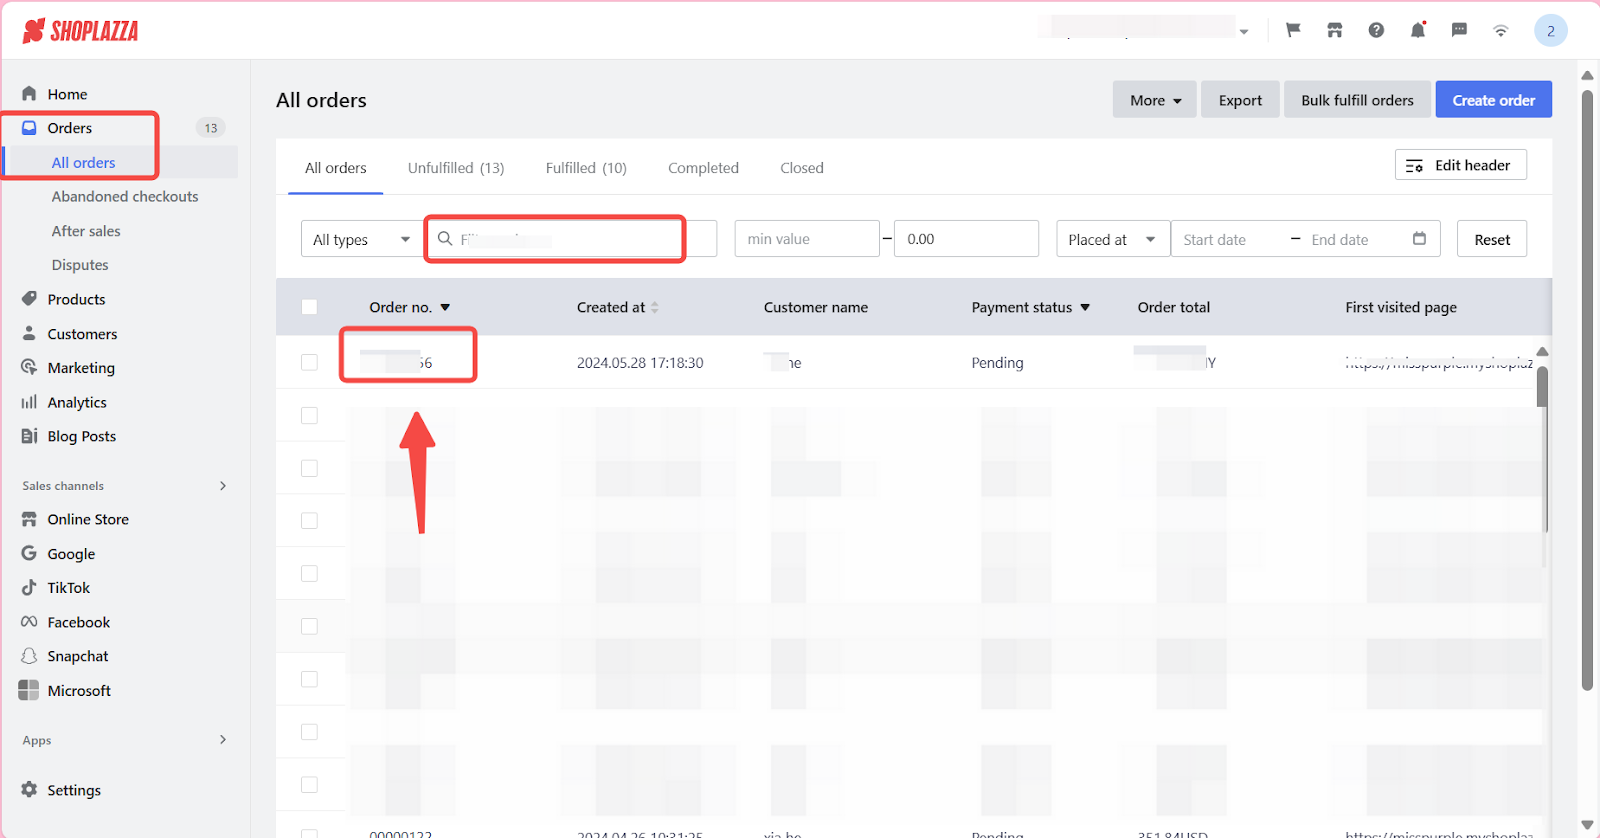
3. Verify order details: Copy the Order ID from the test transaction. Navigate back to your Shoplazza admin, go to Orders > All orders, and enter the Order number in the search field. Once the order is loaded, verify that the information is accurate.
4. Complete the test: Click Everything is Correct to complete the Tracking Code Test. This final step ensures that the tracking code is functioning correctly and capturing all necessary data.
Handling payment & fees
Properly managing payments and fees is important for maintaining effective operations. This section guides you through confirming payment amounts and customizing payment settings to avoid any issues.
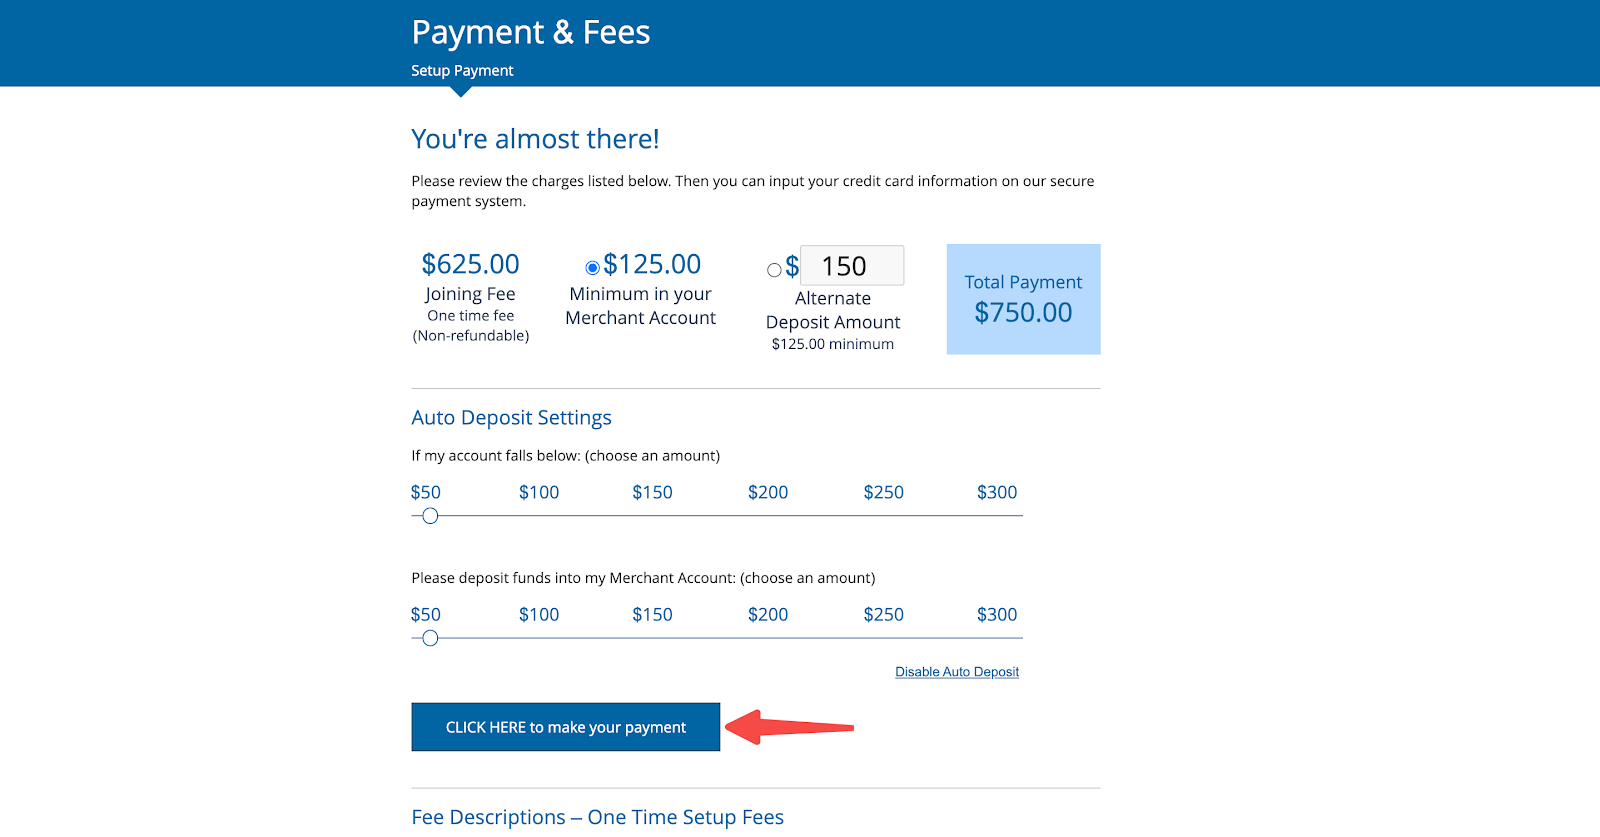
1. Confirm outstanding fees: During account setup, a $625 setup fee and a minimum deposit of $125 are required to start funding your account, for a total cost of $750. The deposit is used to pay out commissions to affiliates in addition to the ShareASale transaction fee.
- Pay $625 + $125 (Minimum deposit): This is the minimum required amount to activate your account and start funding commissions.
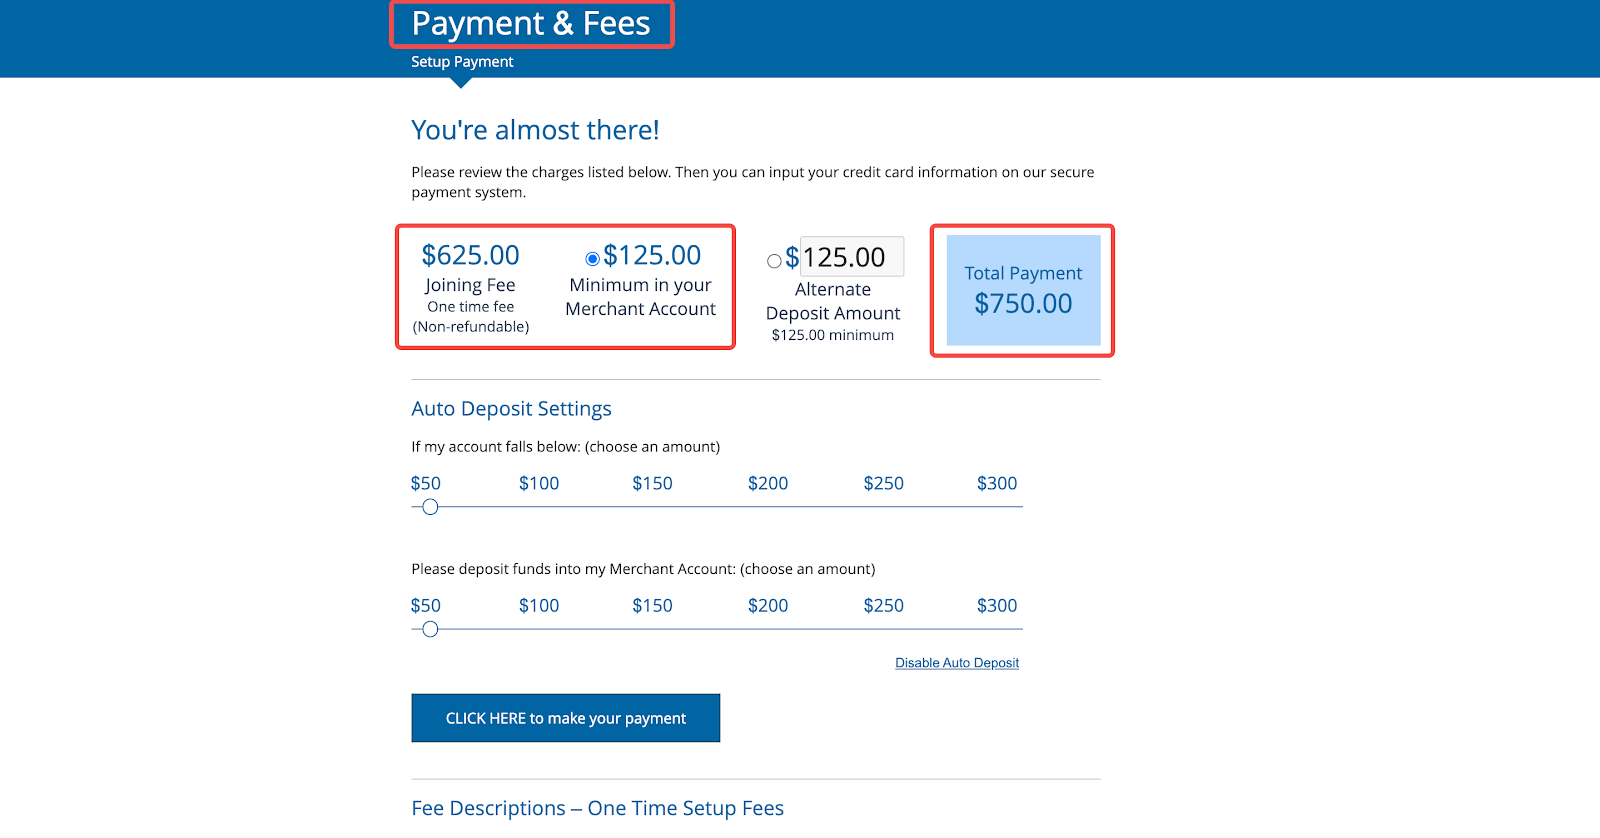
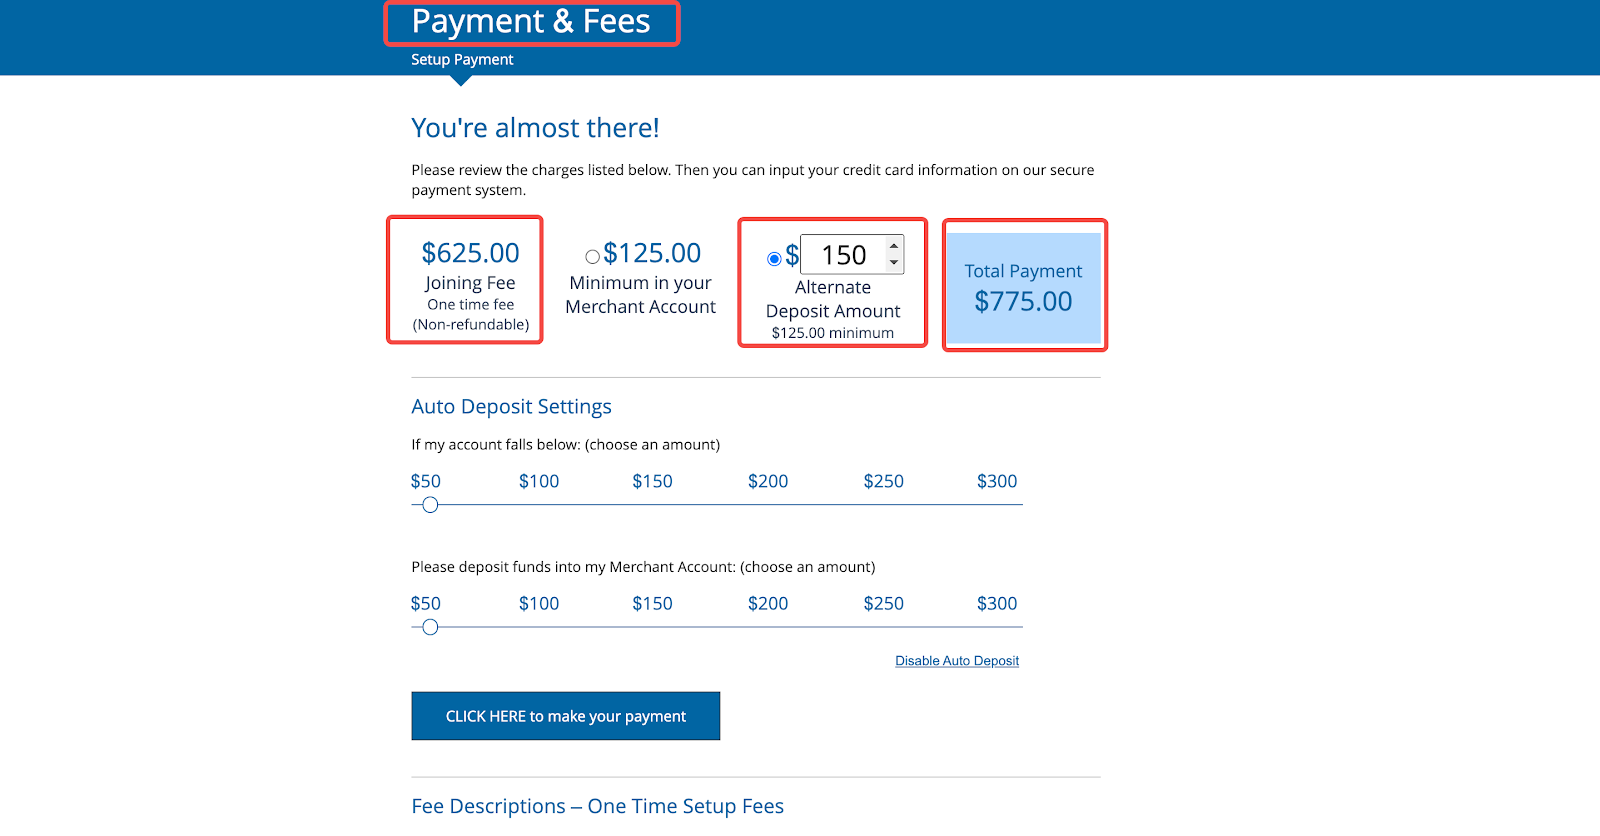
- Pay $625 + more than $125: You can choose to deposit more than the minimum $125 to ensure that you have sufficient funds to cover future commissions and fees without needing to make frequent manual deposits. This can be particularly useful if you expect a high volume of affiliate transactions and want to maintain continuous operations.
Note
This guide covers the registration process. The app fee is based on the specific fee displayed on the registration page.
2. Auto deposit settings: Edit the automatic deposit settings for ShareASale to ensure your account balance never falls below a certain threshold.
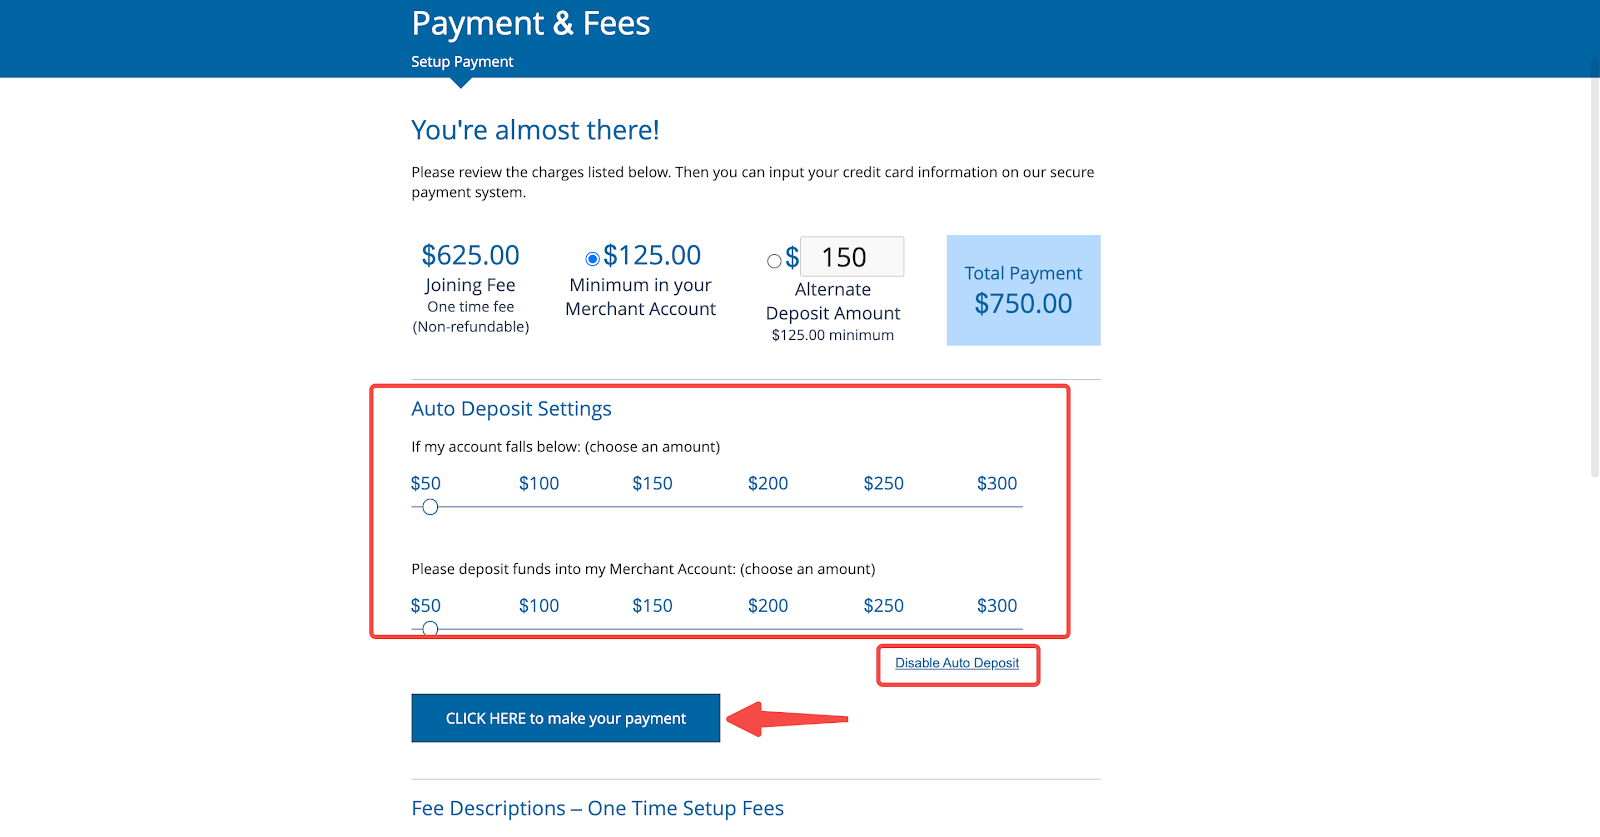
Note
- When the ShareASale account balance falls below a certain amount, the amount will be automatically recharged to the account: This helps maintain continuous operation without manual intervention.
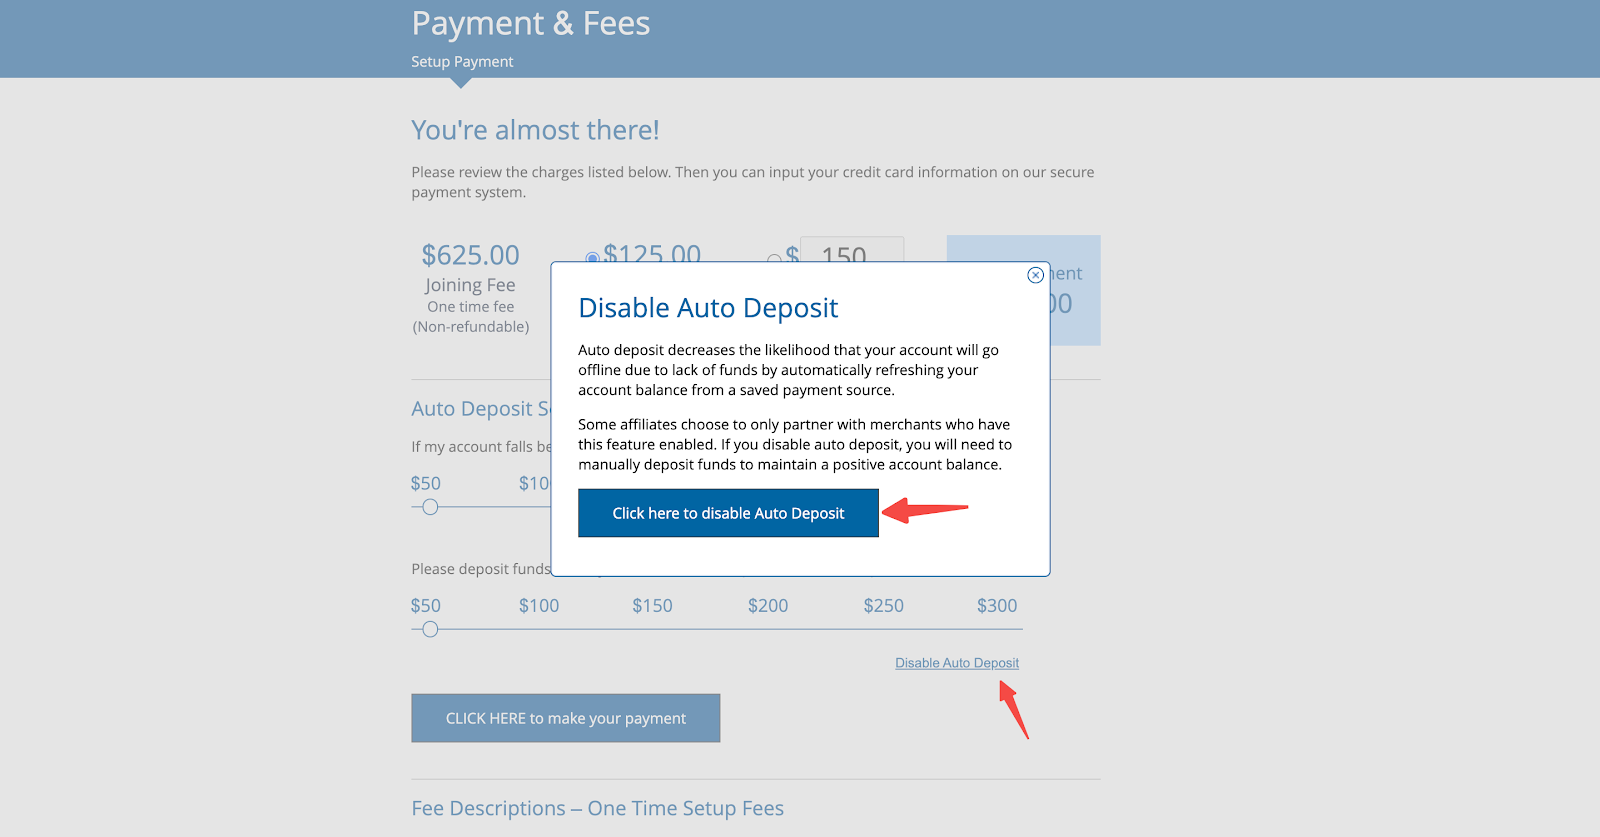
- Click Disable Auto Deposit to disable auto deposit: If you prefer to manage deposits manually, you can disable this feature.
- If automatic deposit is disabled, manual deposits are required to keep the account balance from reaching zero: Regularly check your balance to avoid interruptions in affiliate payments.
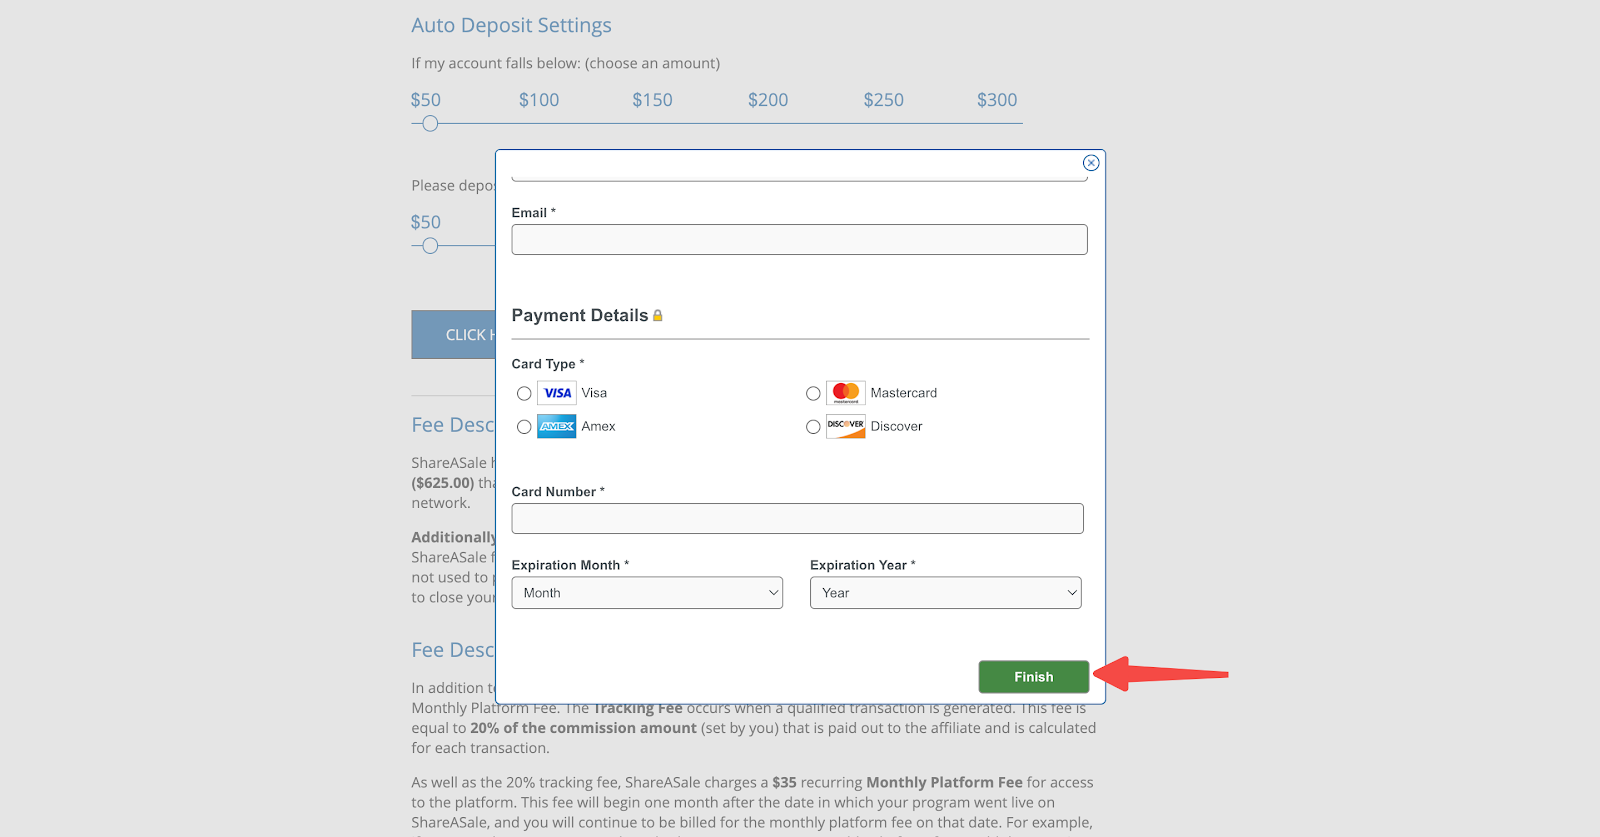
3. Complete the payment: Click CLICK HERE to make your payment, fill in the payment information, and complete the payment process.
Note
For details on customizing a campaign, click here .
4. Complete the registration: After successful payment, a prompt message will indicate that the ShareASale merchant account registration is complete.
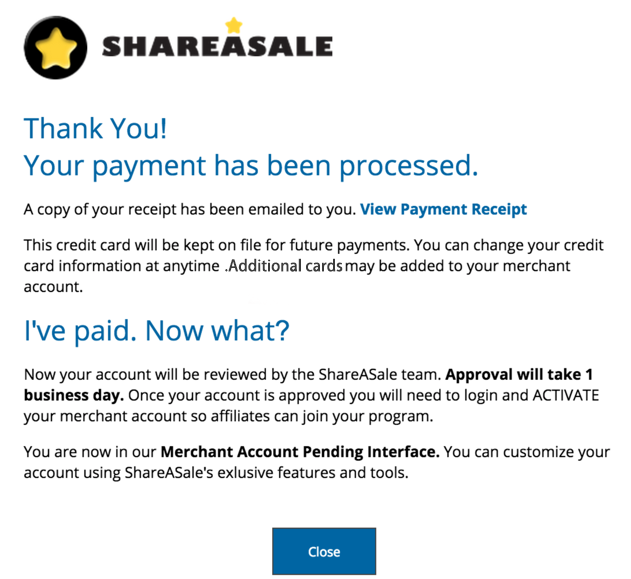
- Wait for ShareASale approval to start your journey: Once approved, you can begin using ShareASale to manage your affiliate program.
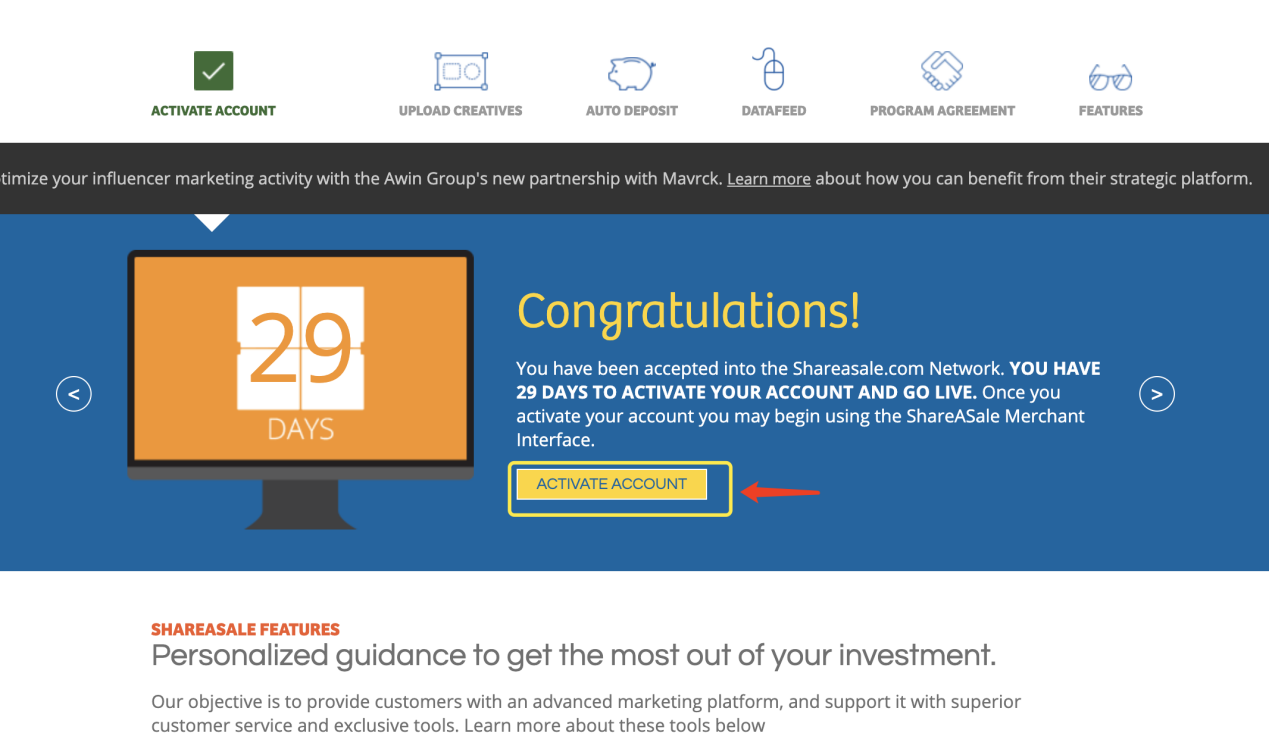
Activating your account
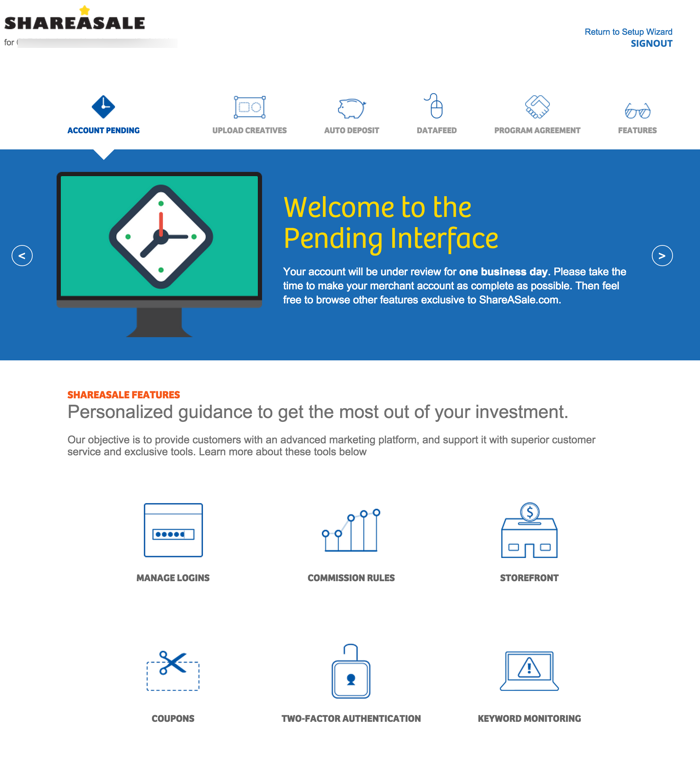
Activating your ShareASale account is the final step in the registration process. Once your account is approved, activating it will allow you to fully utilize the platform and start managing your affiliate program. Follow the steps below to complete this final step.
1. Activate your account: Once you receive approval from ShareASale, click ACTIVATE ACCOUNT to start using your account. This action will enable all the features and functionalities you need to run your affiliate program effectively.
Note
For more information on ShareASale's merchant registration process, click here .
Completing the steps in this guide allows you to successfully set up and activate your ShareASale merchant account. With your account configured, you can start attracting affiliates who will help grow your business. Make sure to manage your affiliates effectively, keep your payment settings up-to-date, and use the platform’s tools to optimize your operations.


Comments
Please sign in to leave a comment.