Optimizing your Shoplazza store with custom forms allows for a personalized touch to your site's user experience. Here's a step-by-step guide to configuring custom form entries using the Form Tools app.
Accessing the Form tools app
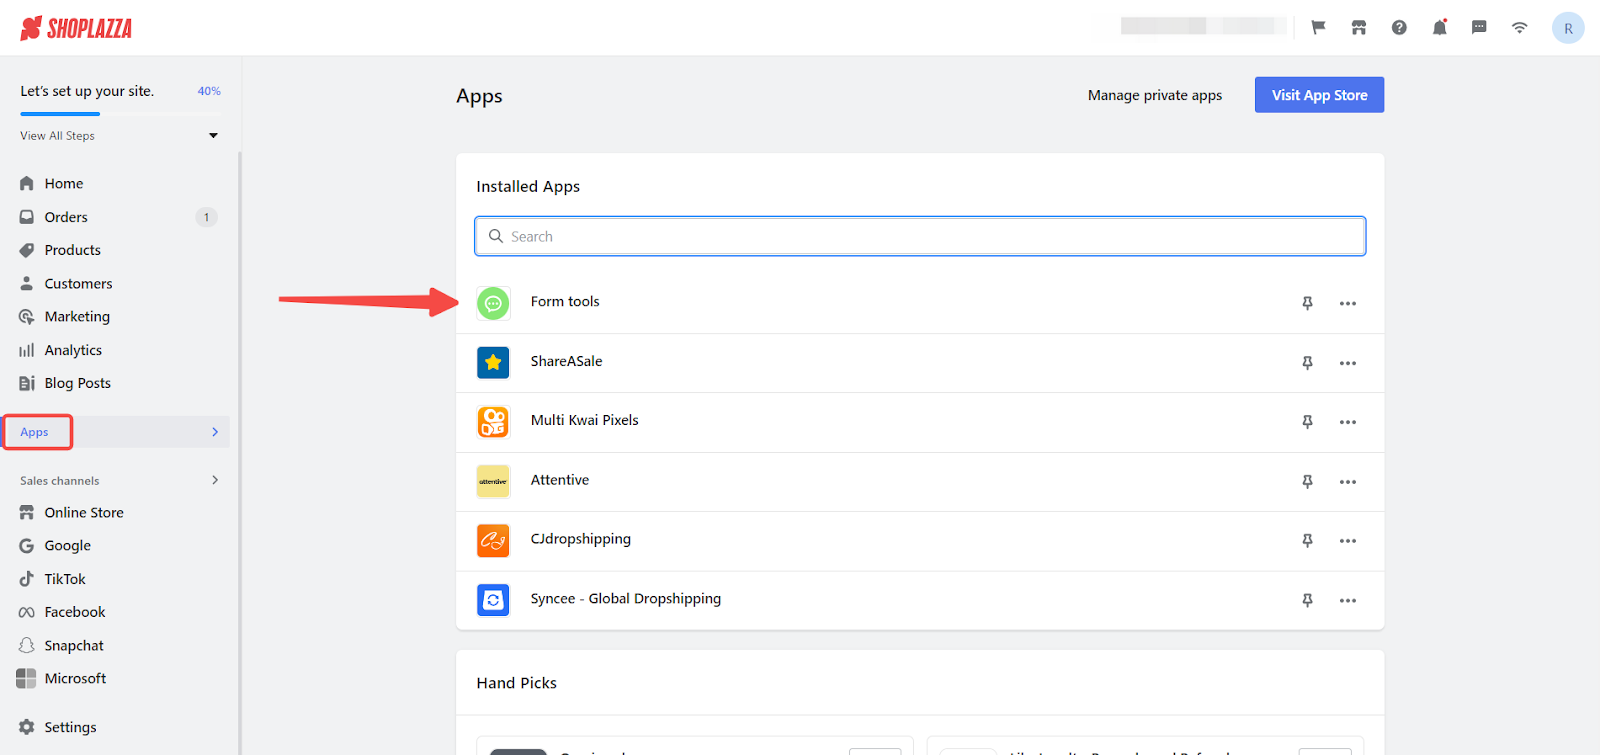
1. Access the app: From your Shoplazza admin, click on Apps. Search for the Form tools app among your installed apps and click to open it.
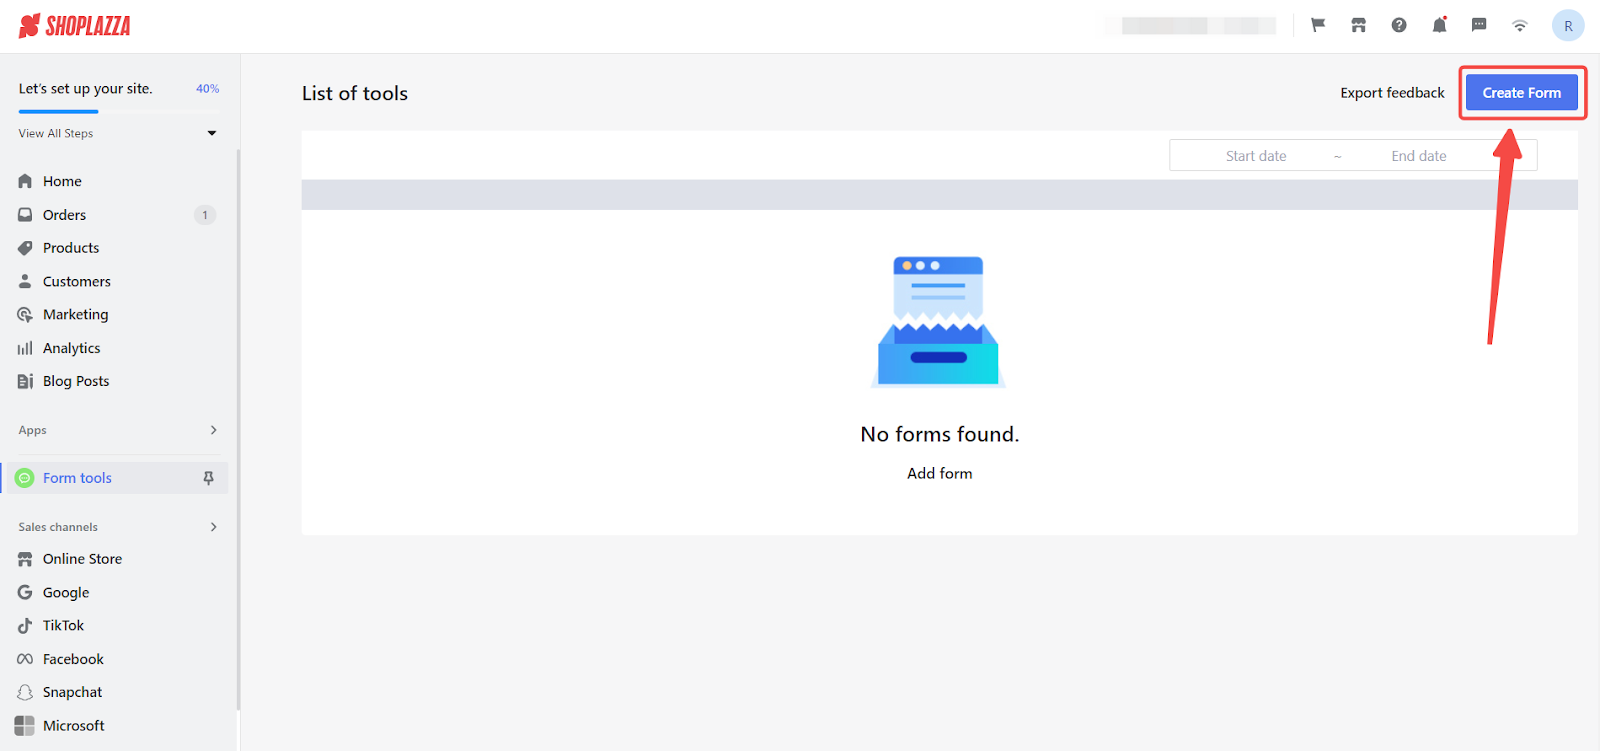
2. Create new form: Once in the app, begin by clicking the Create form button to initiate form setup.
Configuring the Form
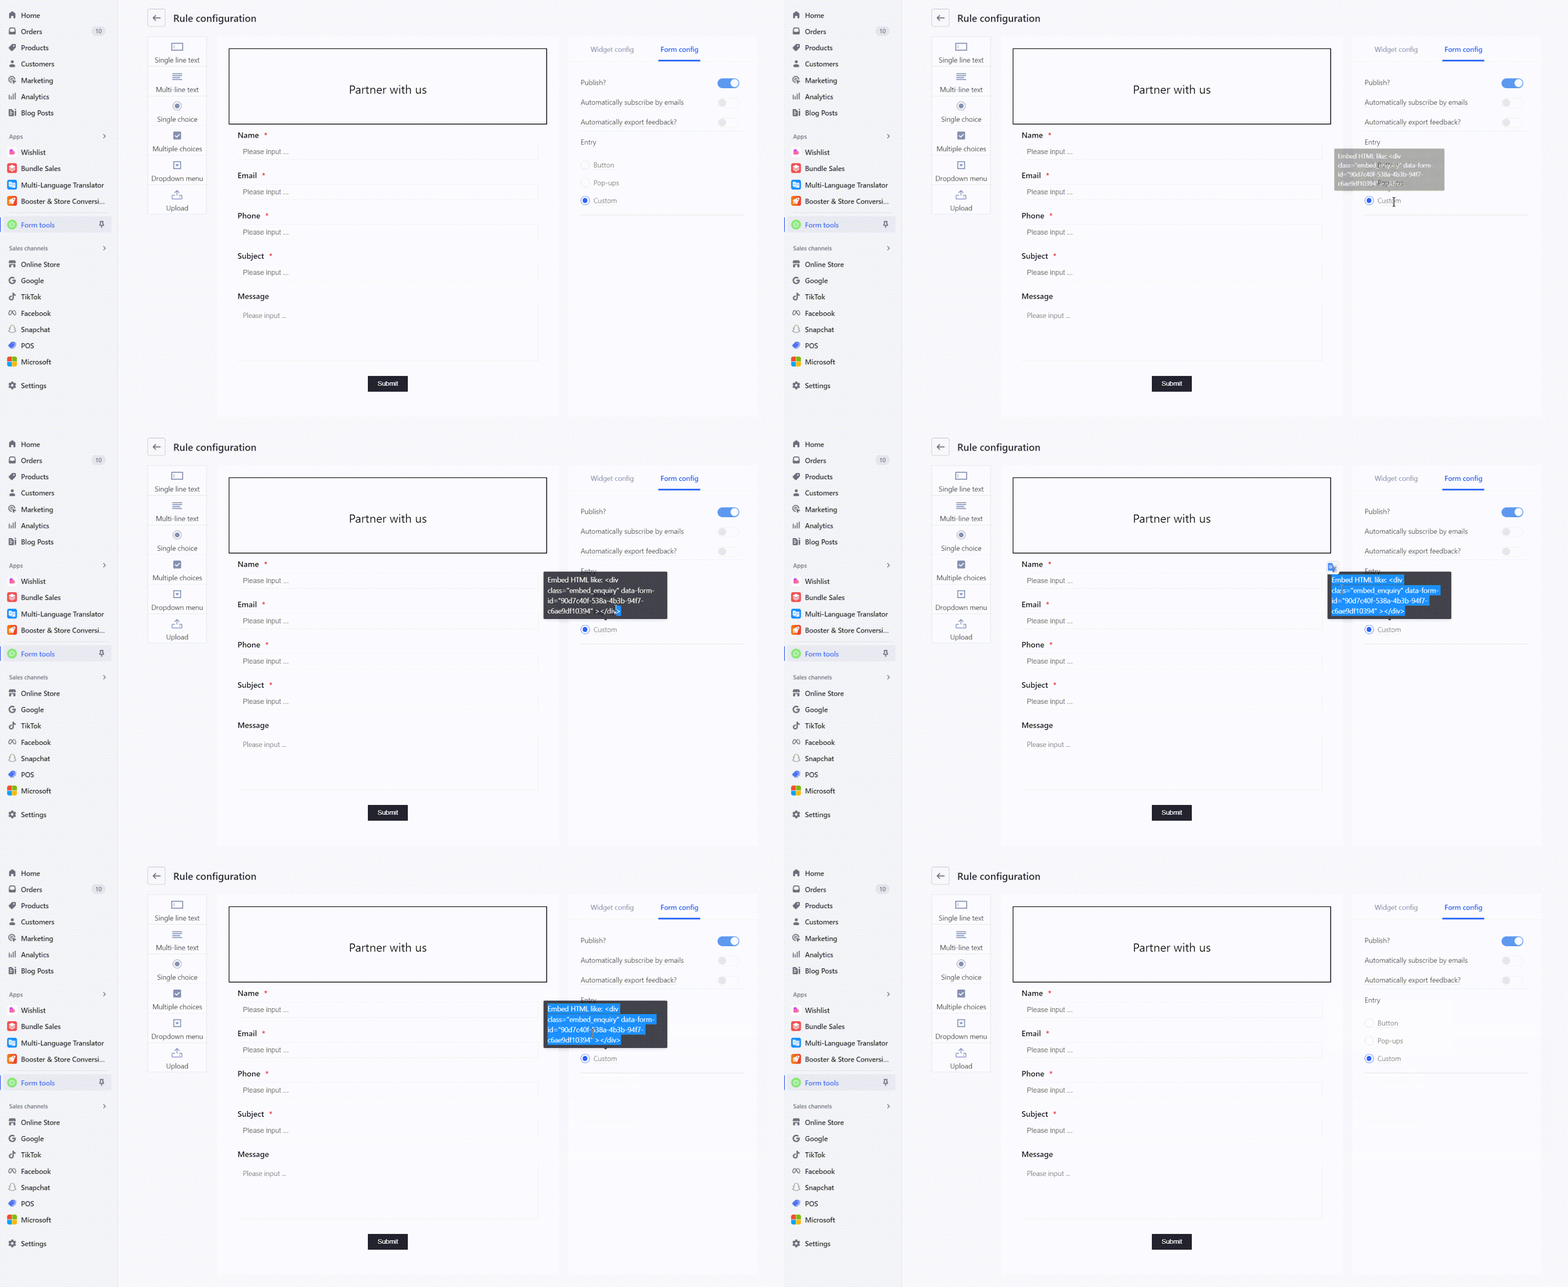
1. Access Form configuration: On the Rule configuration page within the Form Tools app, select the Form Config tab, then select Custom as the entry method.

2. Retrieve the Embed Code: Hover over the Custom title option to display the embed code needed for your custom page. Copy the entire embed code, ensuring it begins with <div> and includes all necessary attributes. You will be pasting this code in your theme editor explained in the next section below.
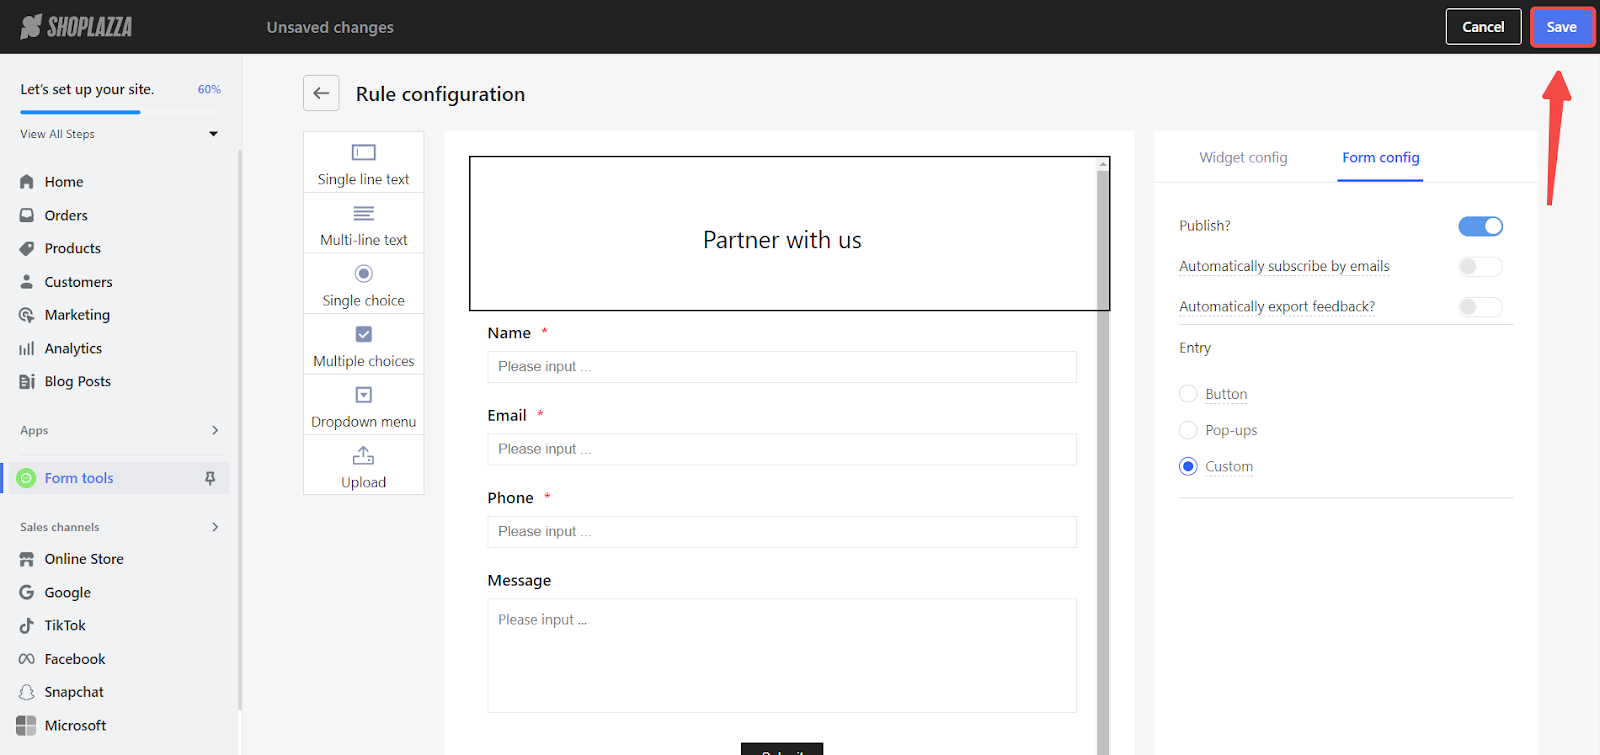
3. Save configuration: Confirm your settings by clicking on Save at the top right corner.
Creating a Custom Page
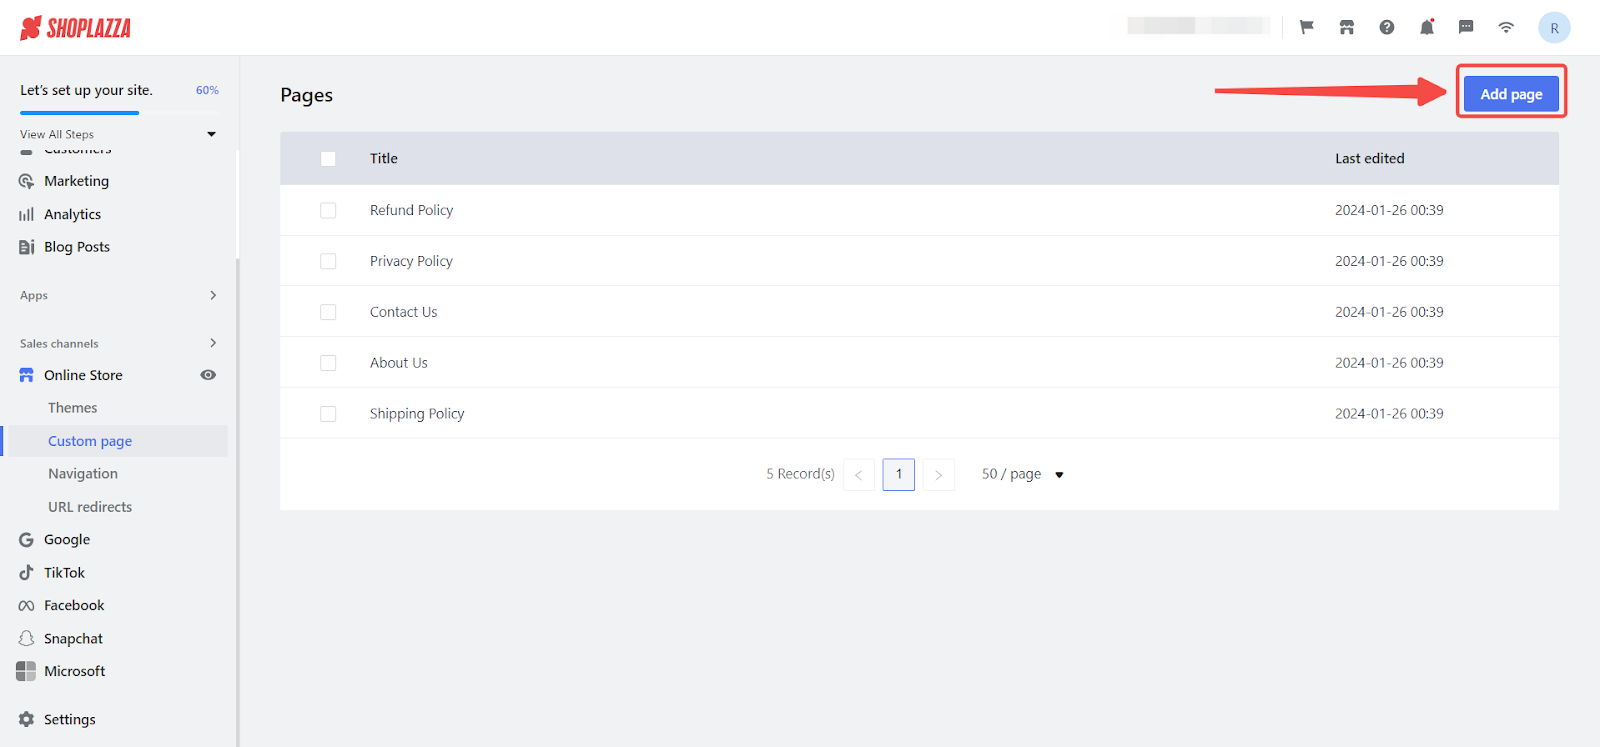
1. Create a custom page: Navigate to Online Store > Custom Pages and click on Add page.
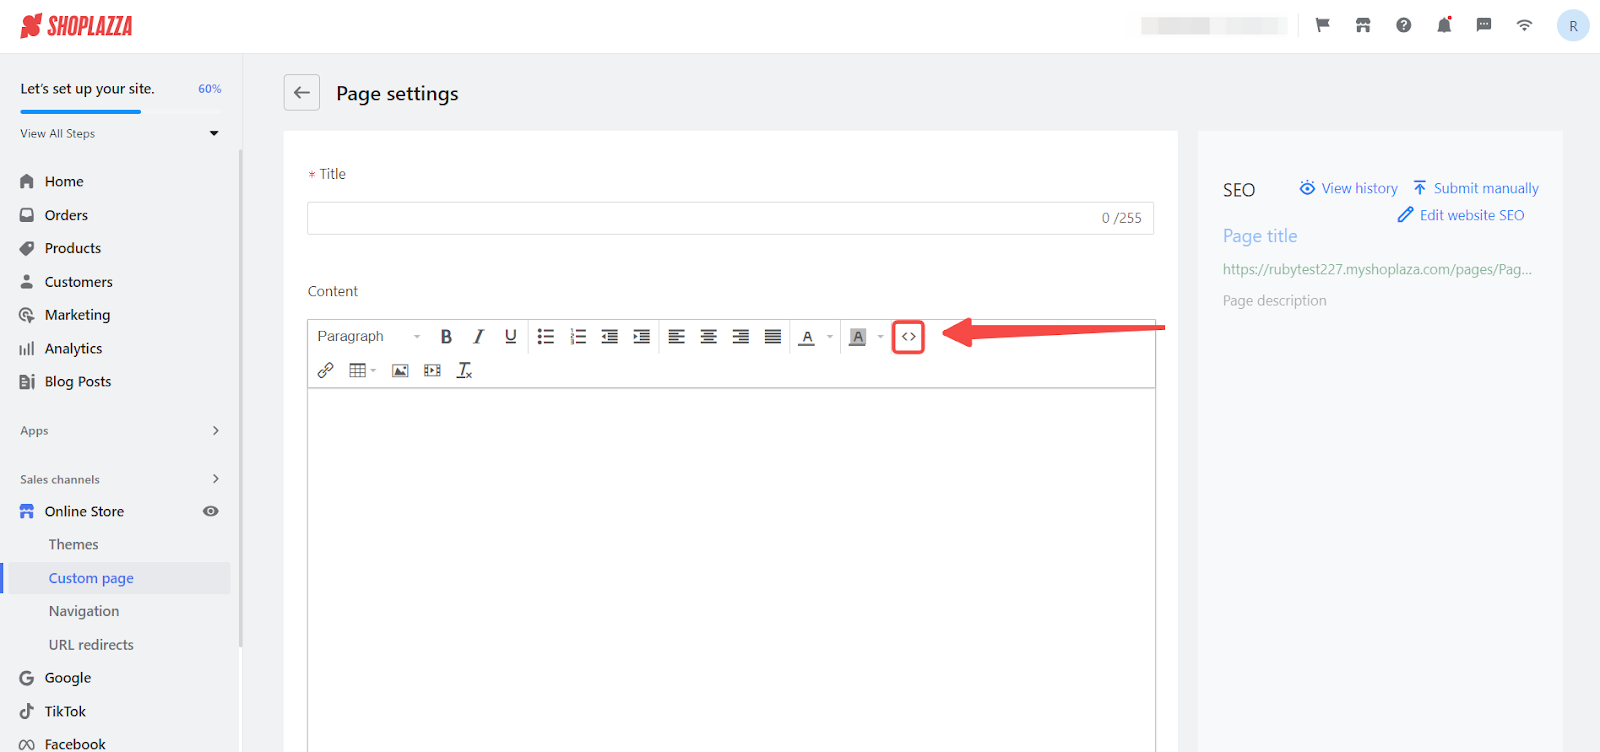
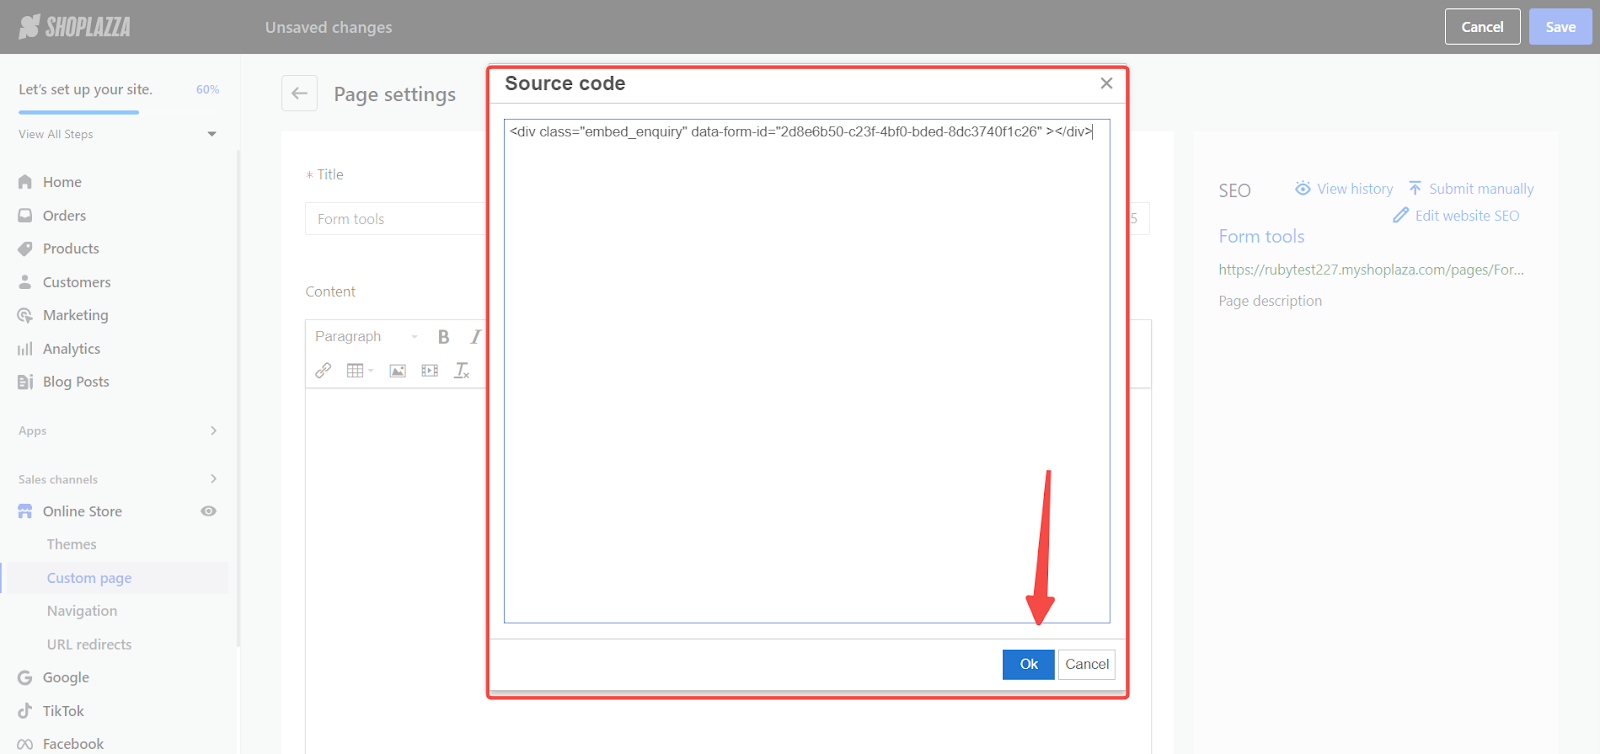
2. Paste embeded code: Click on the Source Code button and paste the copied embedded code into the source code area, then click OK.
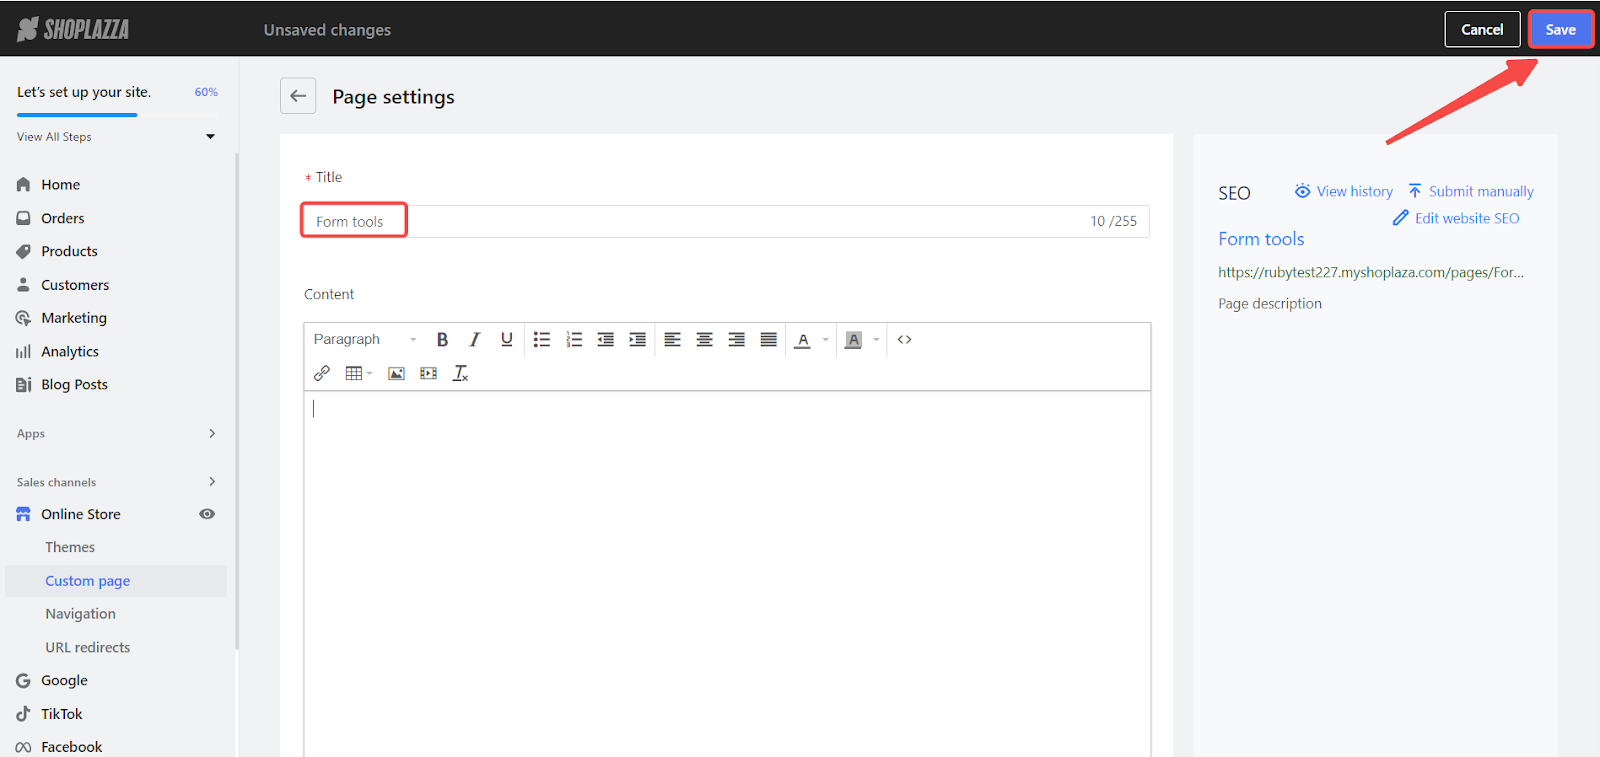
3. Finalize the Page: Give your new custom page a descriptive title, which will help users understand the form's purpose. and click Save.
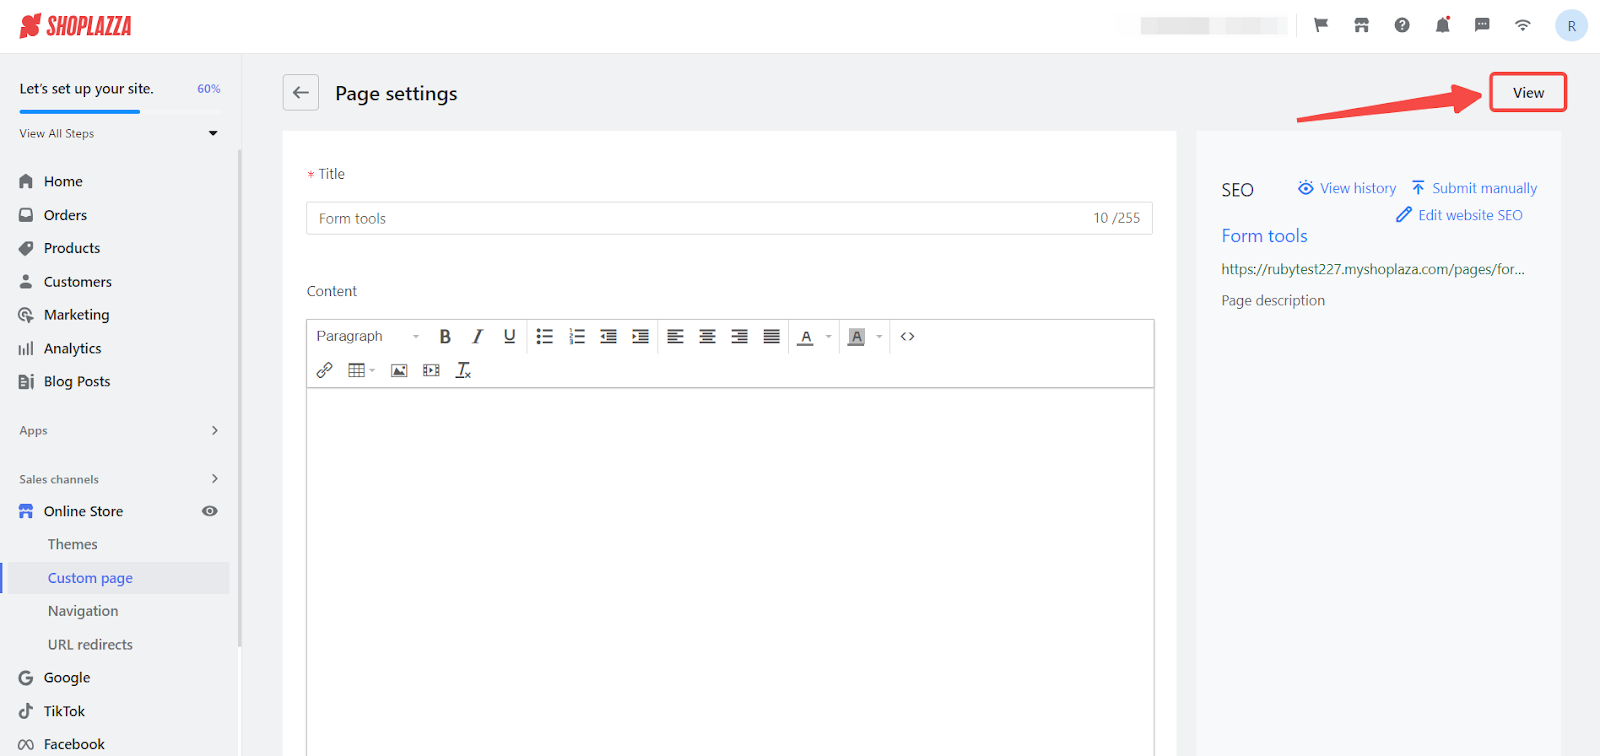
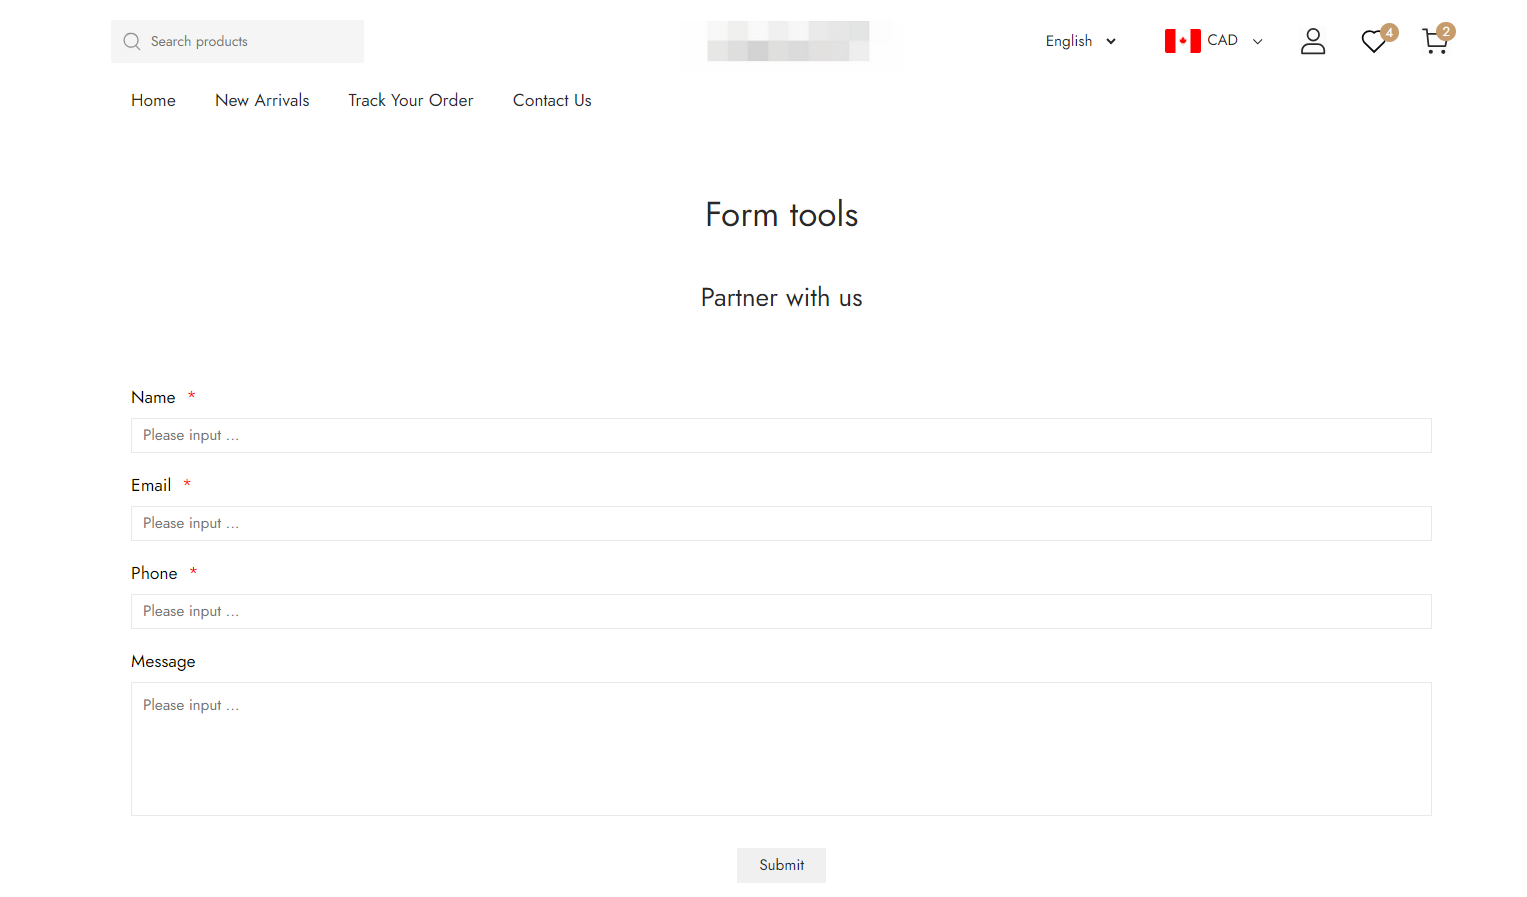
4. Review the Form: Use the View button to preview how the form will appear on your custom page, making sure it aligns well with your site's design and functions as intended.
By incorporating these tailored forms into your Shoplazza store, you elevate the level of engagement with your visitors. These forms should be designed to be user-friendly and should integrate smoothly within the layout of your site, ensuring a seamless and professional user experience.


Comments
Please sign in to leave a comment.