
QuickCEP is an AI-powered chatbot and automation platform designed to enhance customer interactions, improve sales conversions, and streamline communication. With built-in automation tools, QuickCEP helps businesses engage with customers through AI-driven chatbots, real-time responses, and seamless store integration. This guide walks you through installing and setting up QuickCEP in your Shoplazza store.
Installing QuickCEP
To get started, install QuickCEP in your Shoplazza store by following these steps:
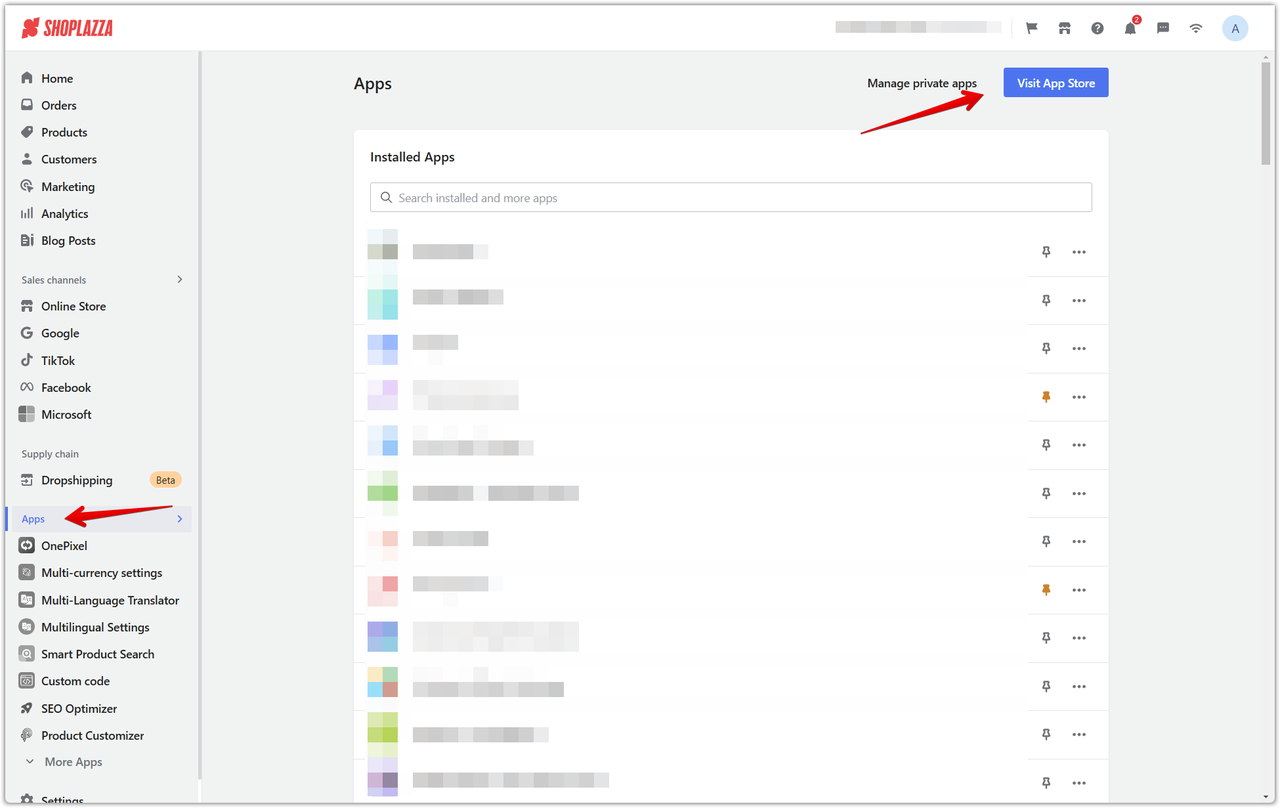
1. Locate the app: In your Shoplazza admin, go to Apps and select Visit App Store. This will take you to the app marketplace.
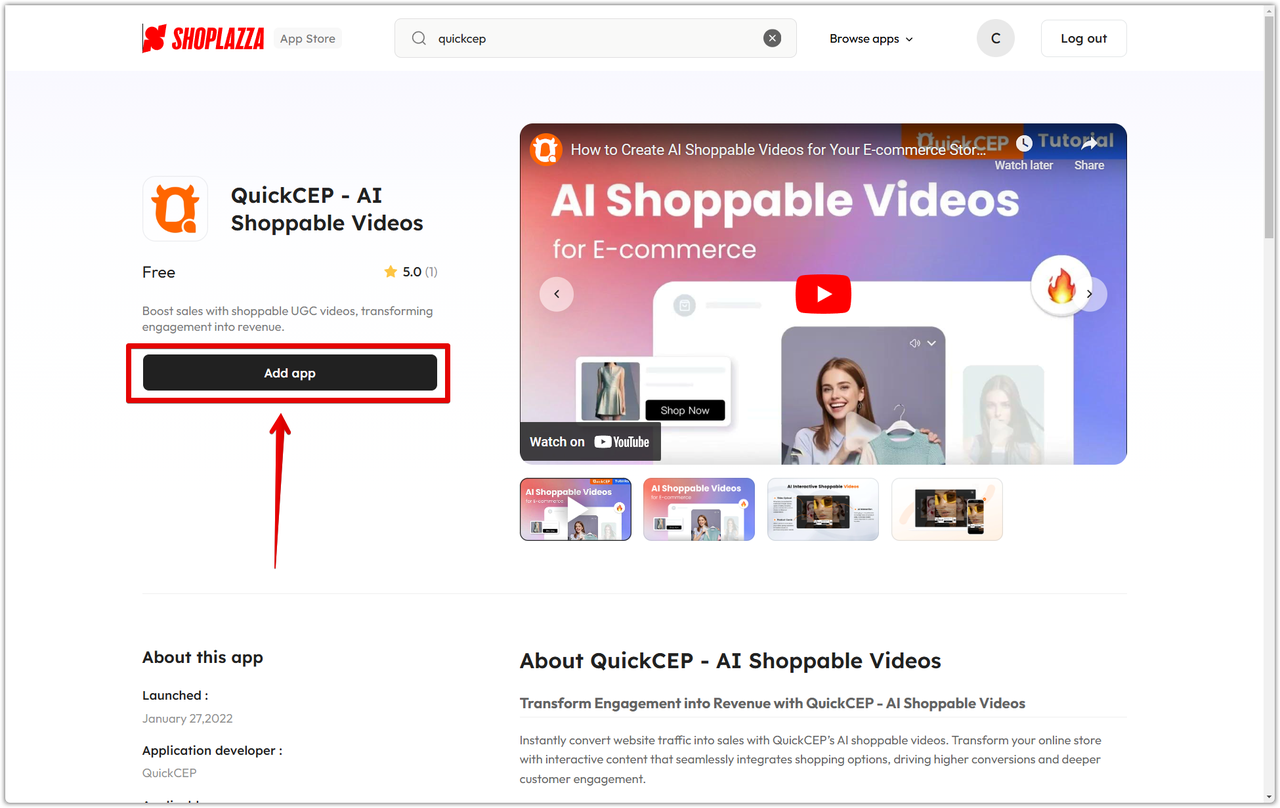
2. Search QuickCEP: Enter "QuickCEP" in the search bar, then click Add App and Install App to initiate the installation process.
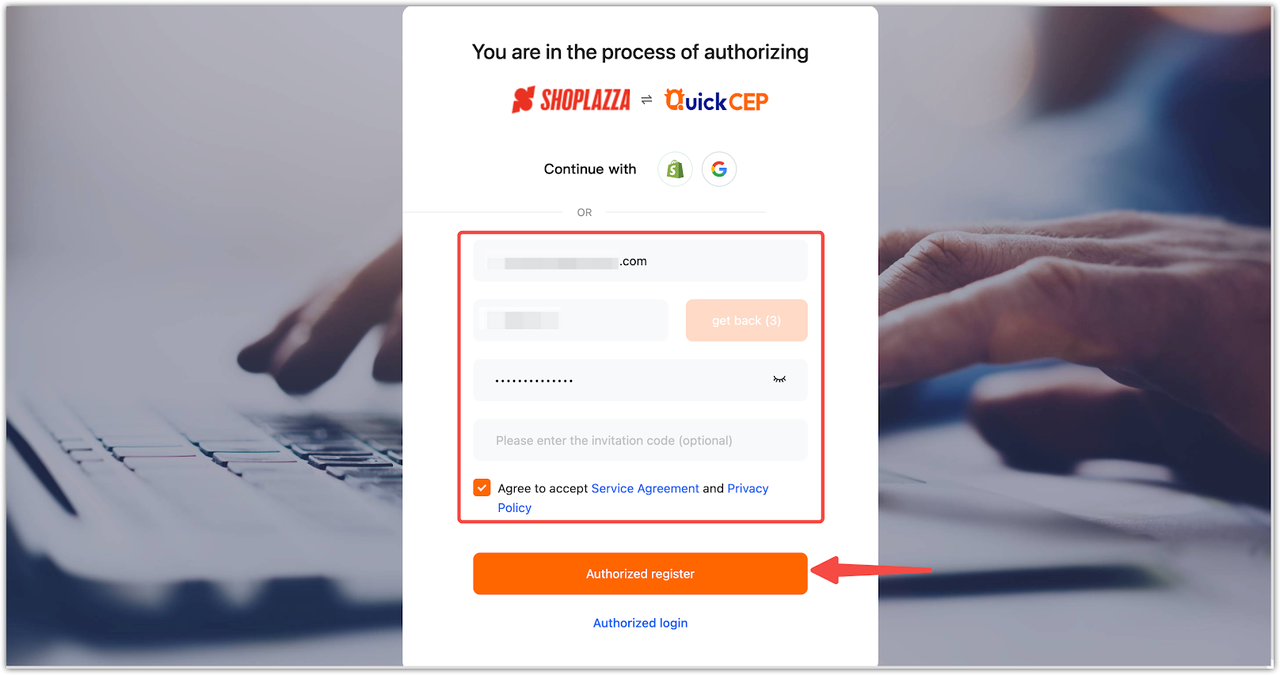
3. Complete registration: QuickCEP will automatically register and link to your store. If this does not happen, manually input the required details and authorize registration to complete the process.
Changing language settings
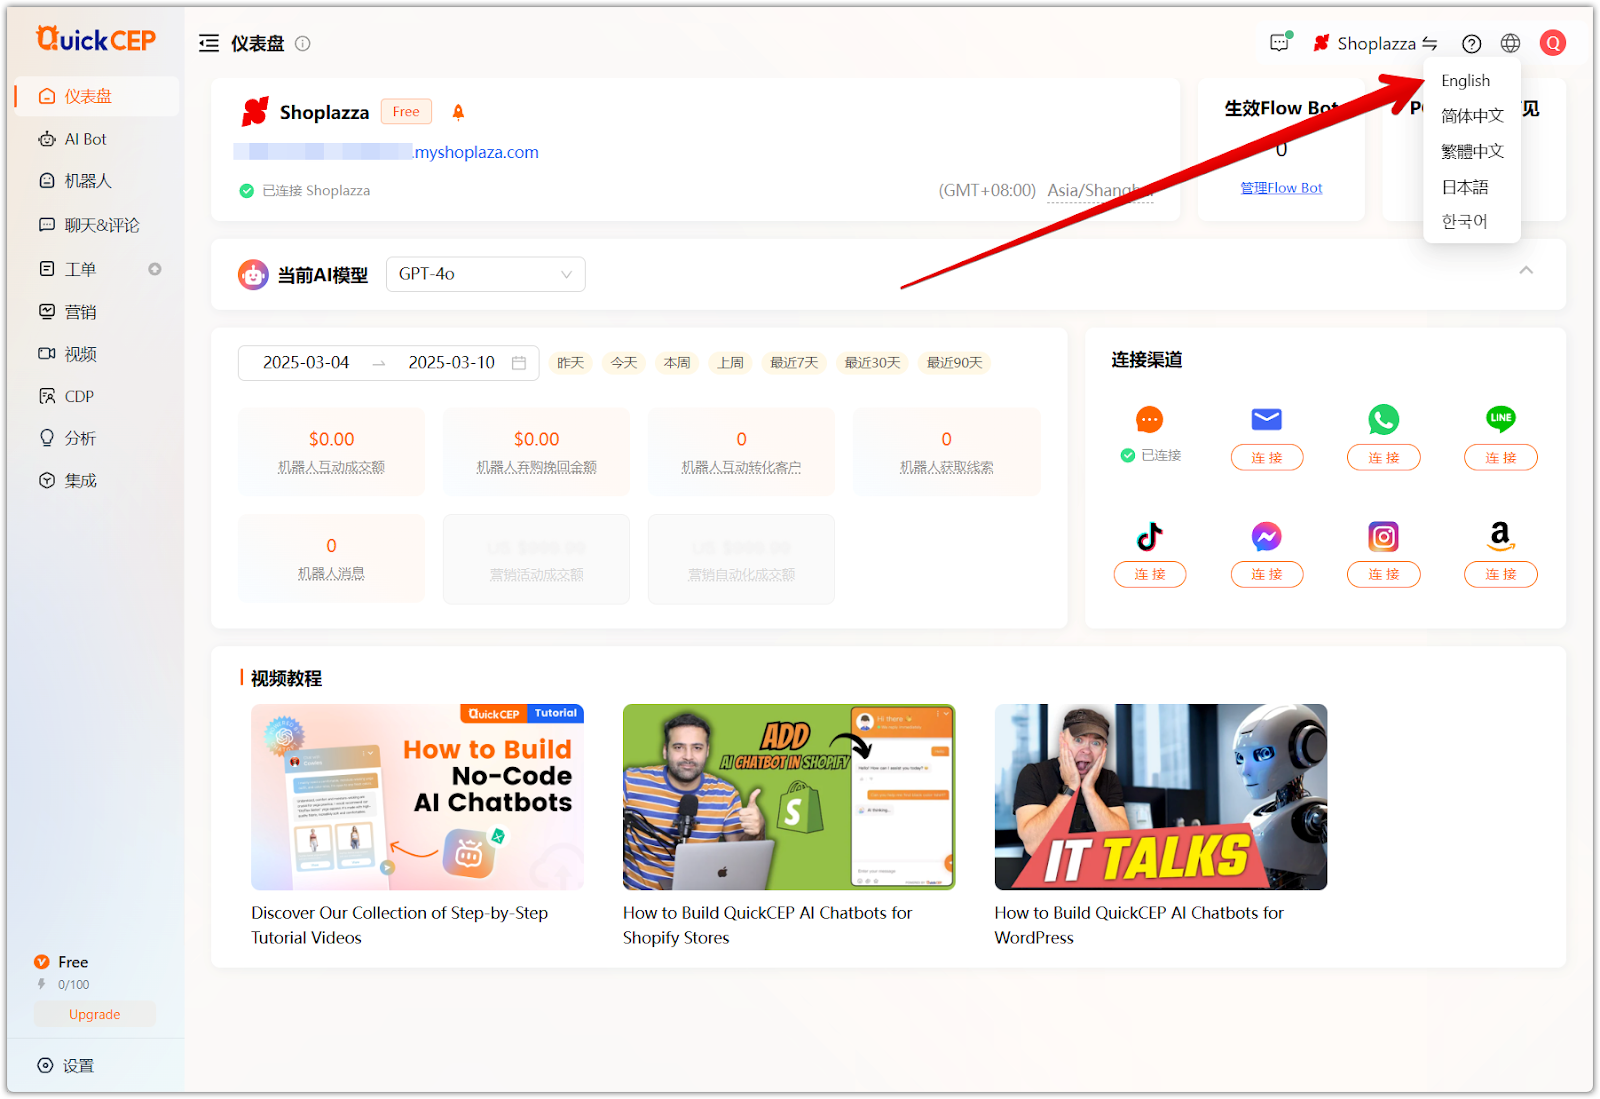
Upon installation, QuickCEP is set to Chinese by default. To improve accessibility, you can switch to English by following these steps.
1. Click the globe icon located in the top-right corner of the dashboard. This icon allows you to change the system’s display language.

2. Select English from the dropdown menu to switch the system language. Once selected, the system will reload with all menus, settings, and features displayed in English for easier navigation.
Configuring QuickCEP
Once installed, QuickCEP automatically connects to your store, but additional configuration is required to optimize its functionality. This onboarding section guides you through linking your store, selecting training resources, activating chatbot scenarios, and customizing its appearance.
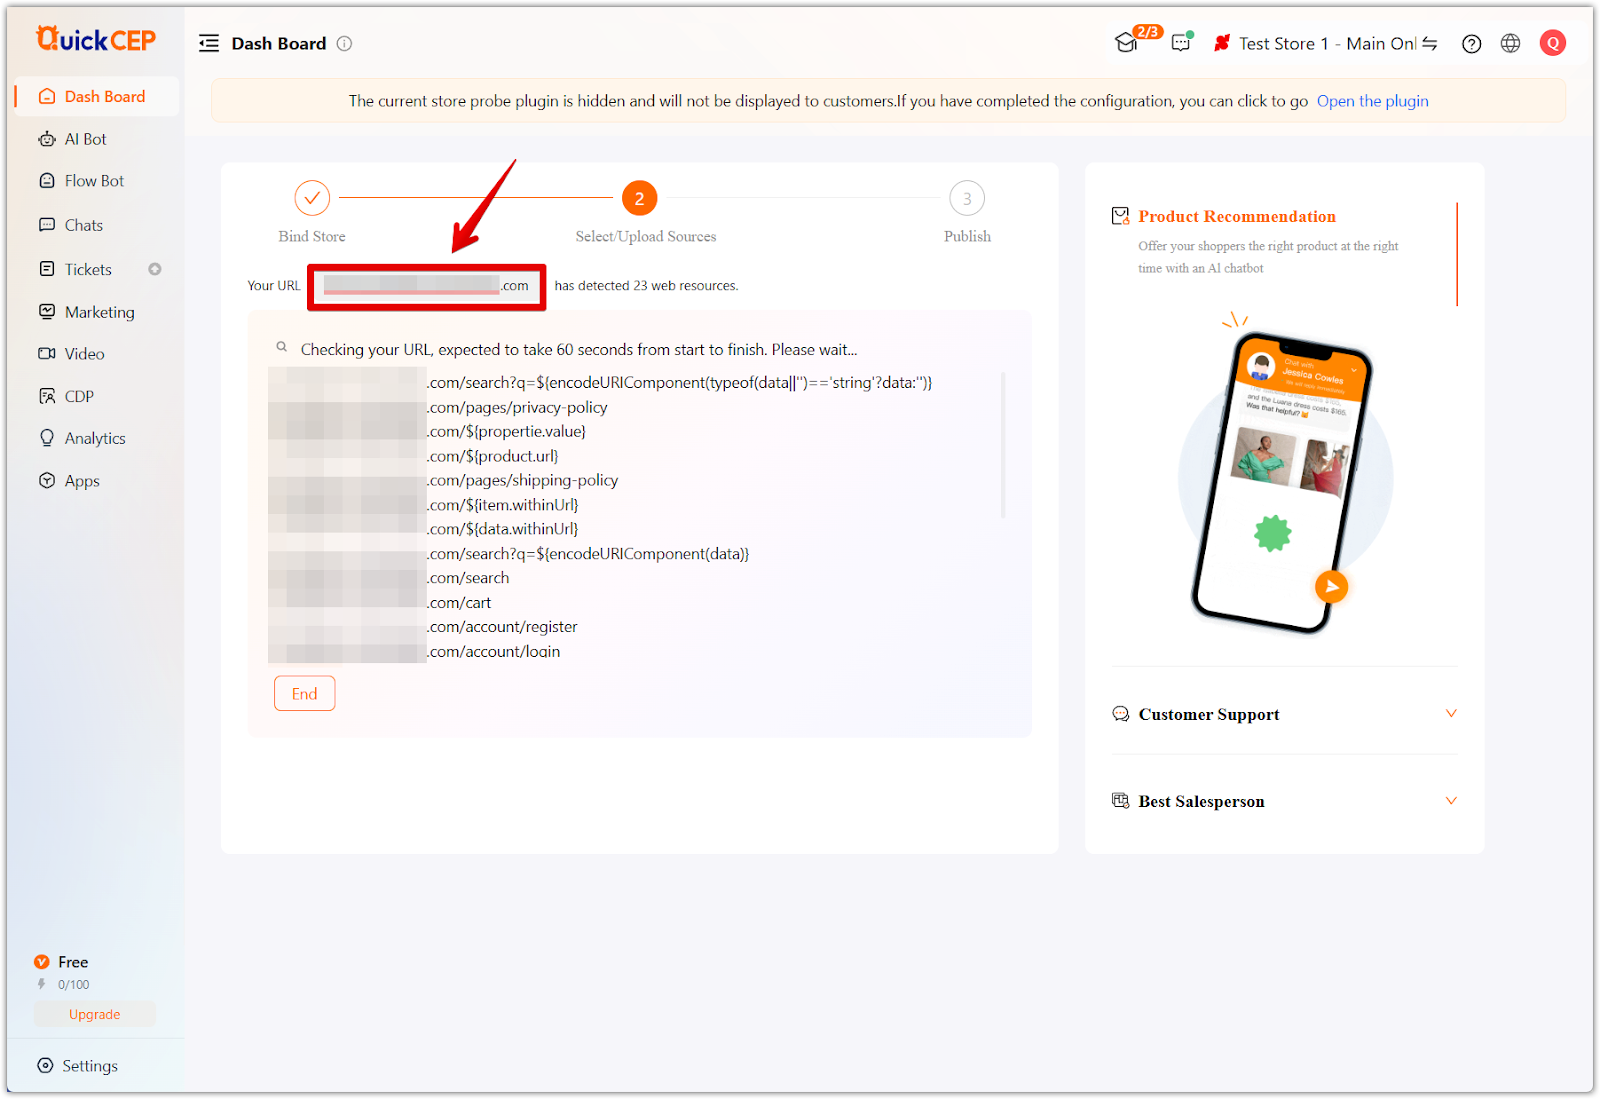
1. Confirm store linking: QuickCEP will detect your store URL automatically. Review the detected URL to ensure it matches your store. Once confirmed, click End to finalize the store binding process.
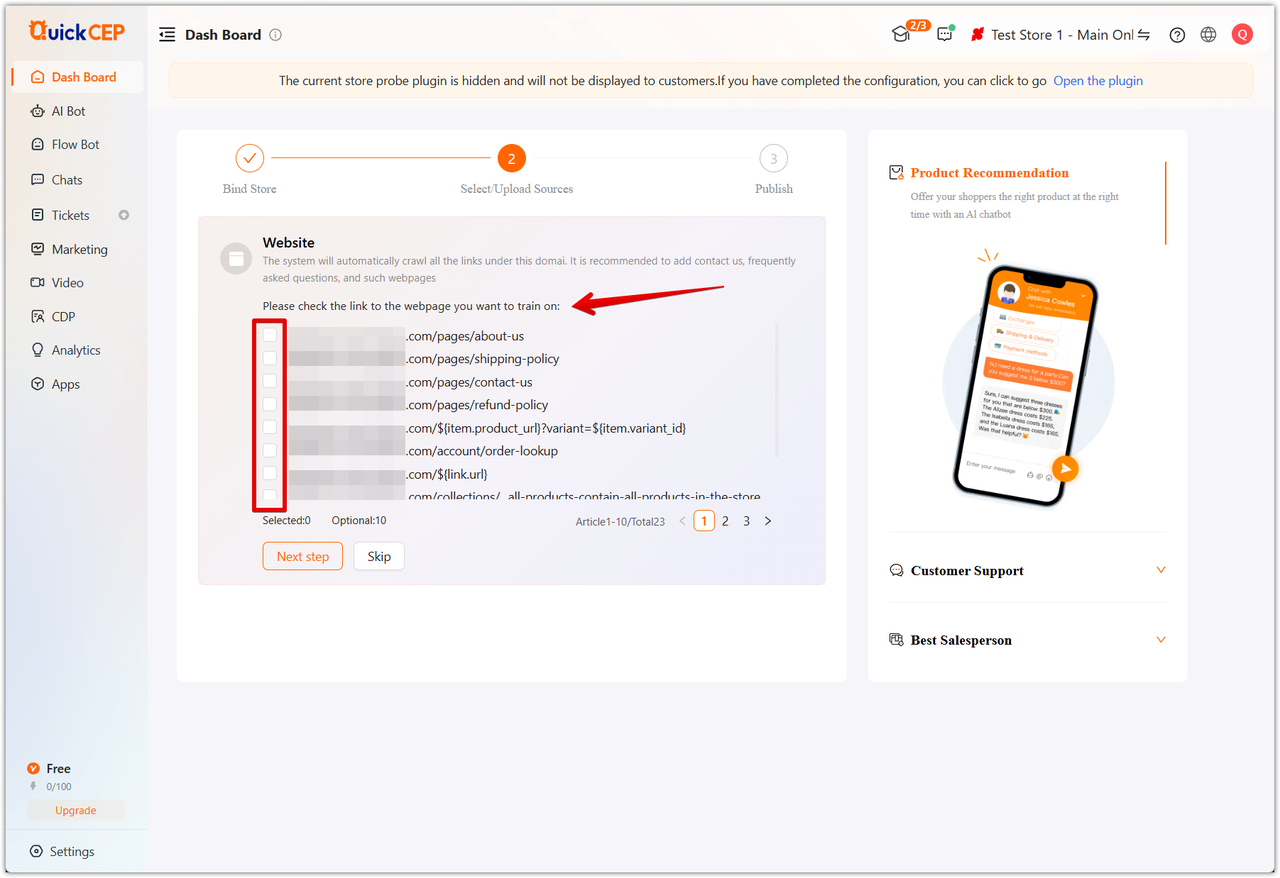
2. Select training resources: After selecting End from the previous onboarding step, QuickCEP uses various store resources to train the AI bot, ensuring it provides accurate and relevant responses to customers.
- Website pages: Choose essential pages such as "Contact Us," "FAQ," and "Shipping Policy" to give the AI bot access to useful information. Once selected, click Next step or Skip if you want to add an update later.
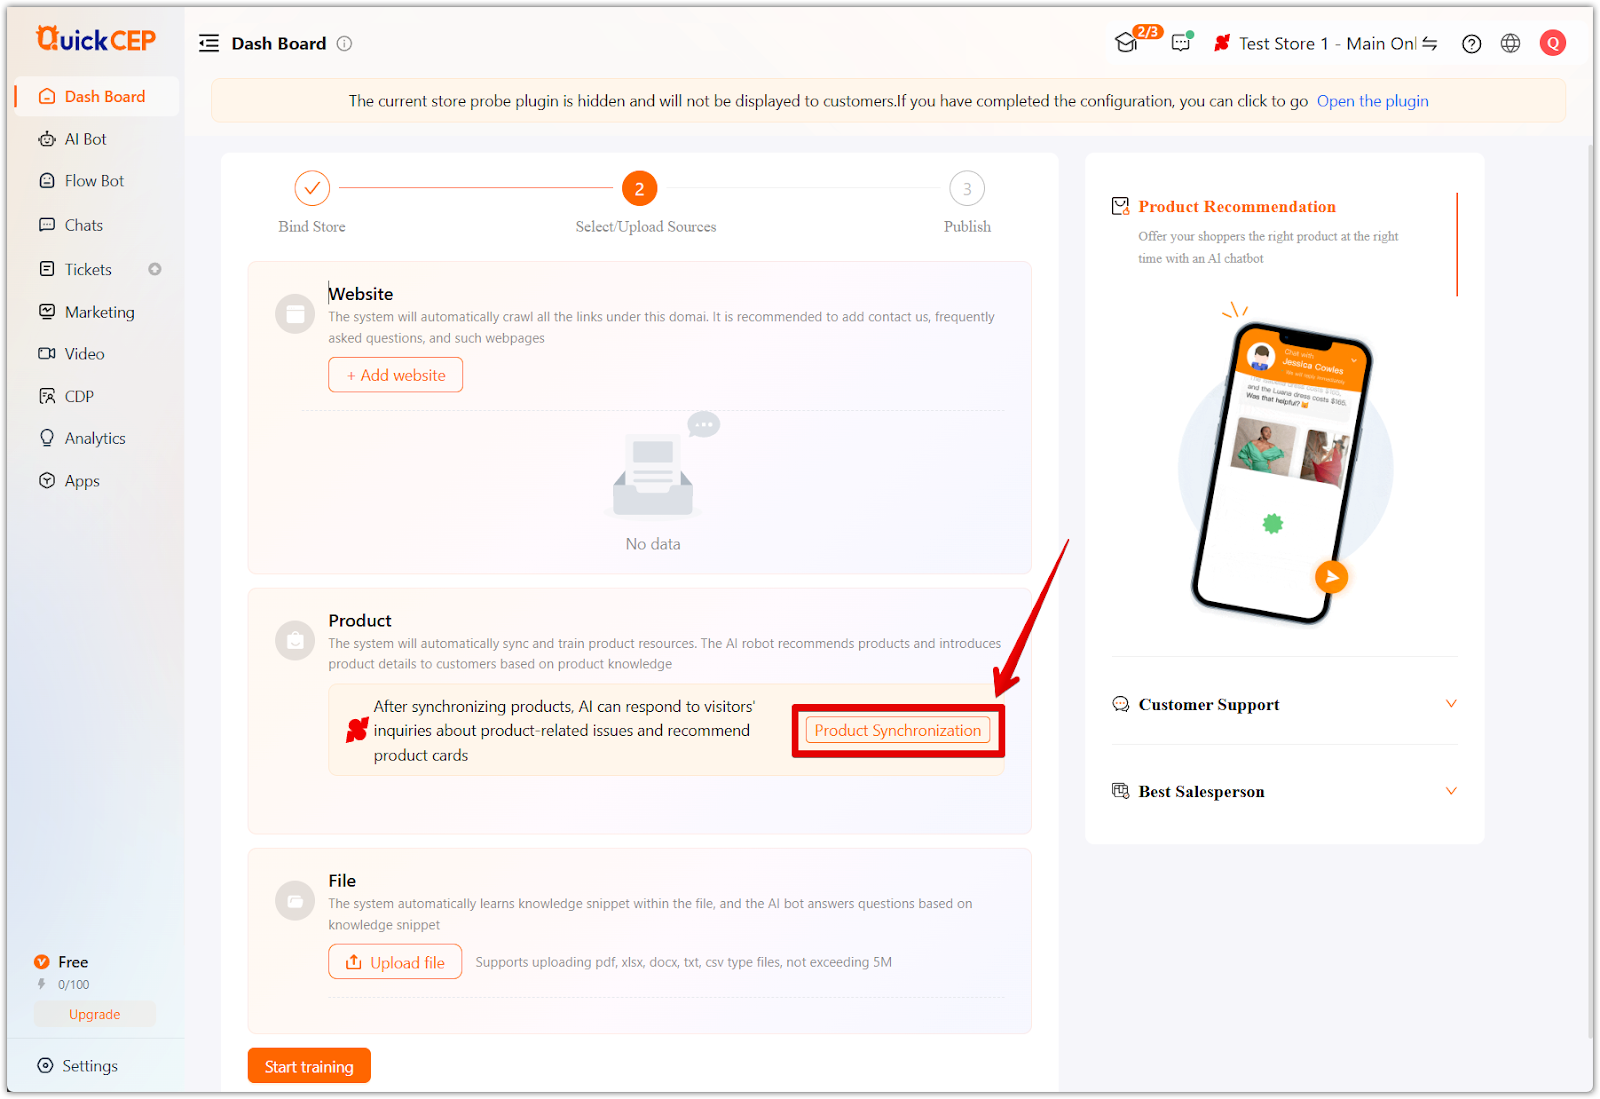
- Product synchronization: After clicking Next step, you'll be brought to a page where QuickCEP will sync your store’s products. This enables the chatbot to recommend items and provide product details. Click Product Synchronization to upload and sync products.
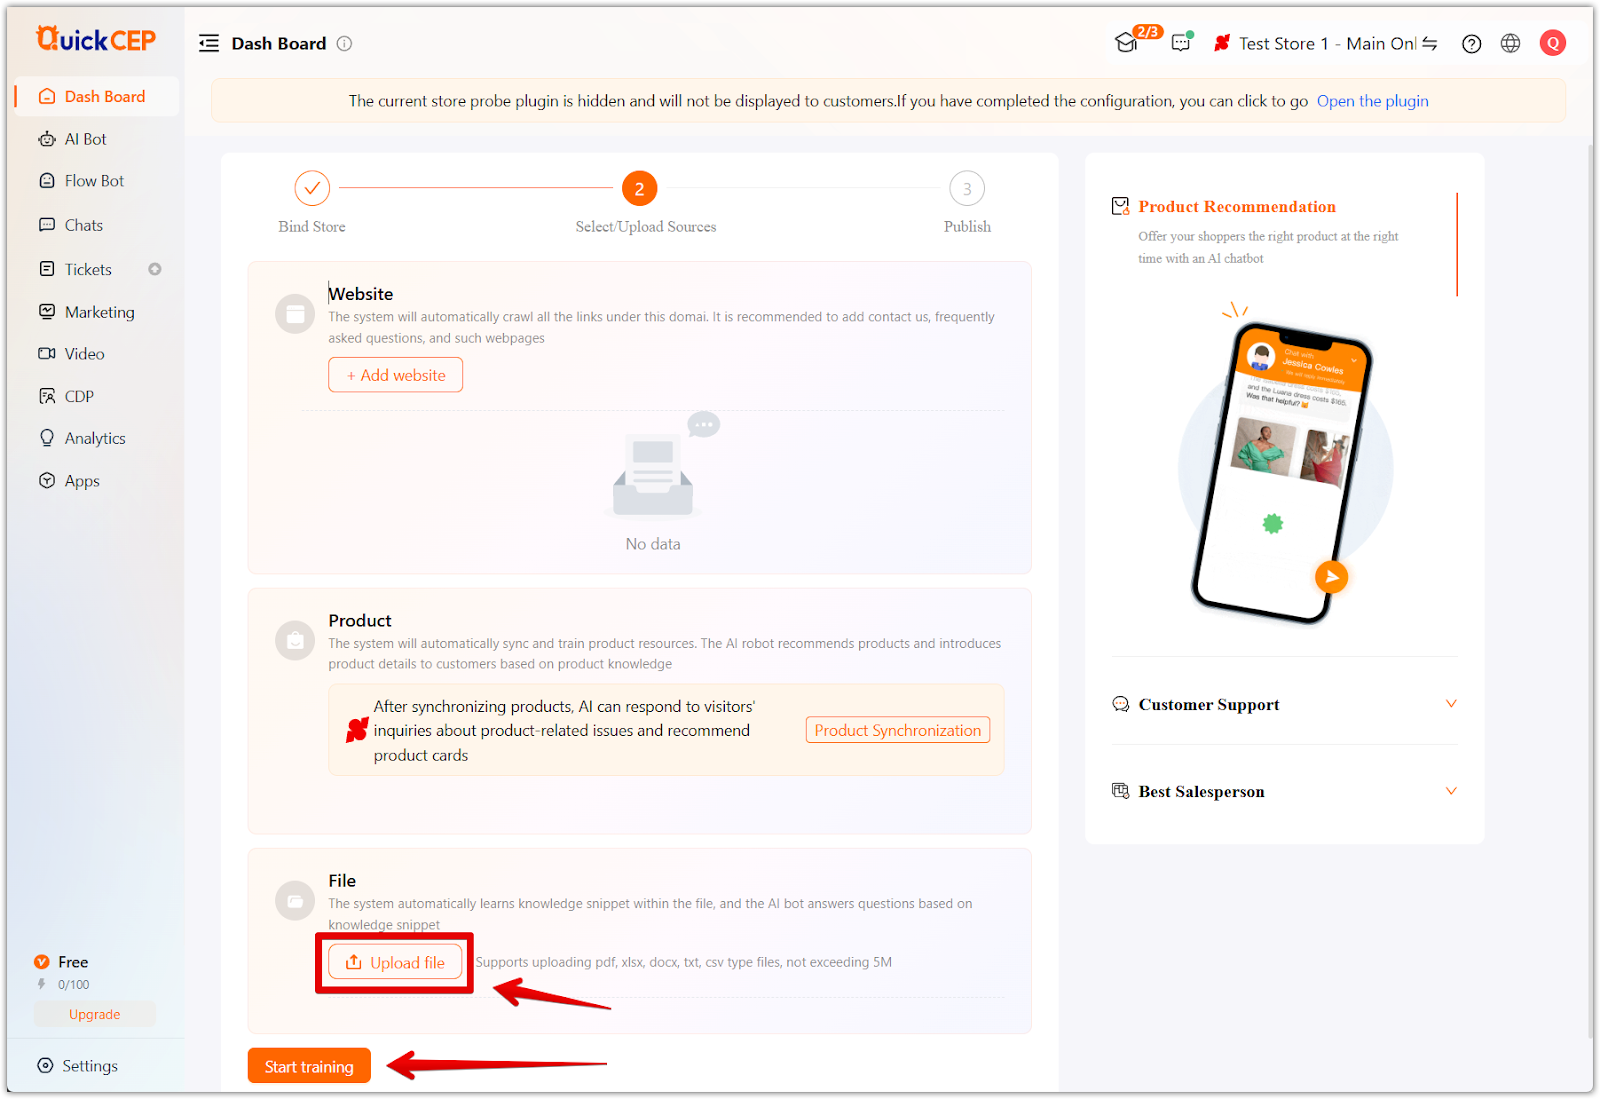
- Upload documents: To further enhance the chatbot's knowledge base, upload additional resources, including PDFs, spreadsheets, and text files (PDF, XLSX, DOCX, TXT, CSV). Once resource selection is complete, click Start Training.
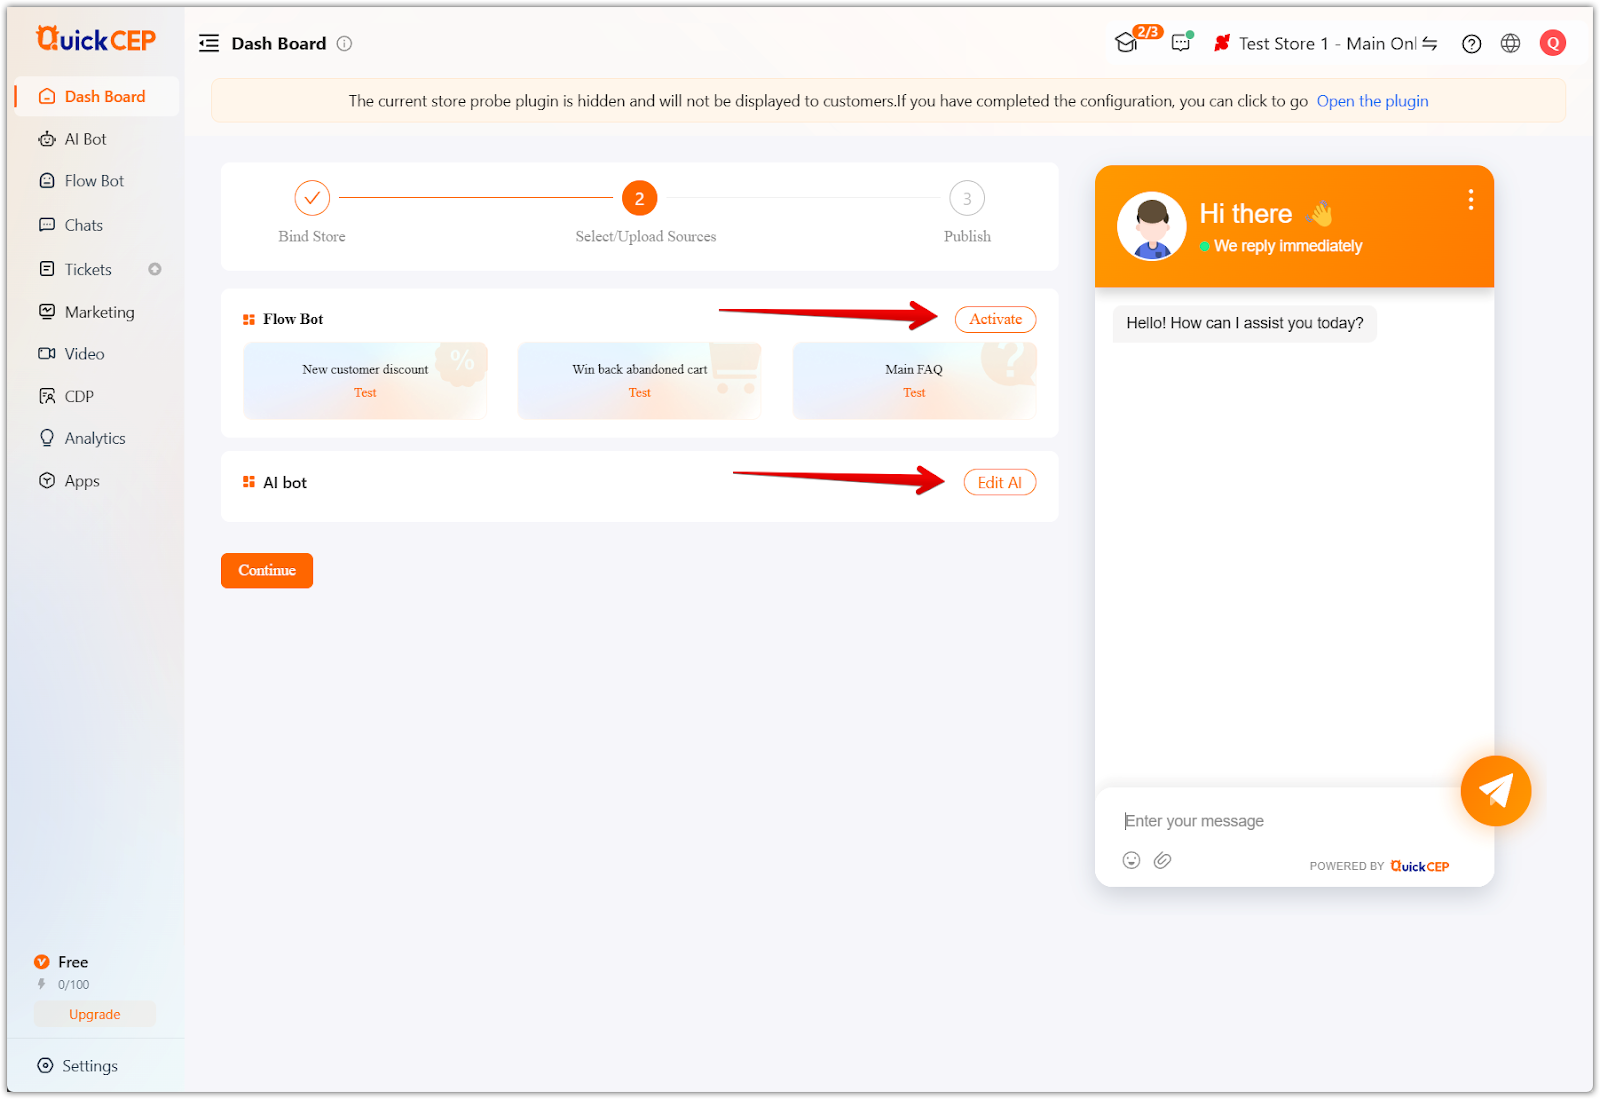
3. Activate chatbot scenarios: The next section allows you to select and activate chatbot workflows for automated customer interactions. Click Edit AI to modify chatbot workflows and response settings as needed. Once you've edited your workflows, click Continue to go to the next page.
- New customer discount – Automatically offer discounts to first-time buyers.
- Abandoned cart recovery – Send reminders to customers who left items in their carts.
- FAQ automation – Answer common customer questions instantly.
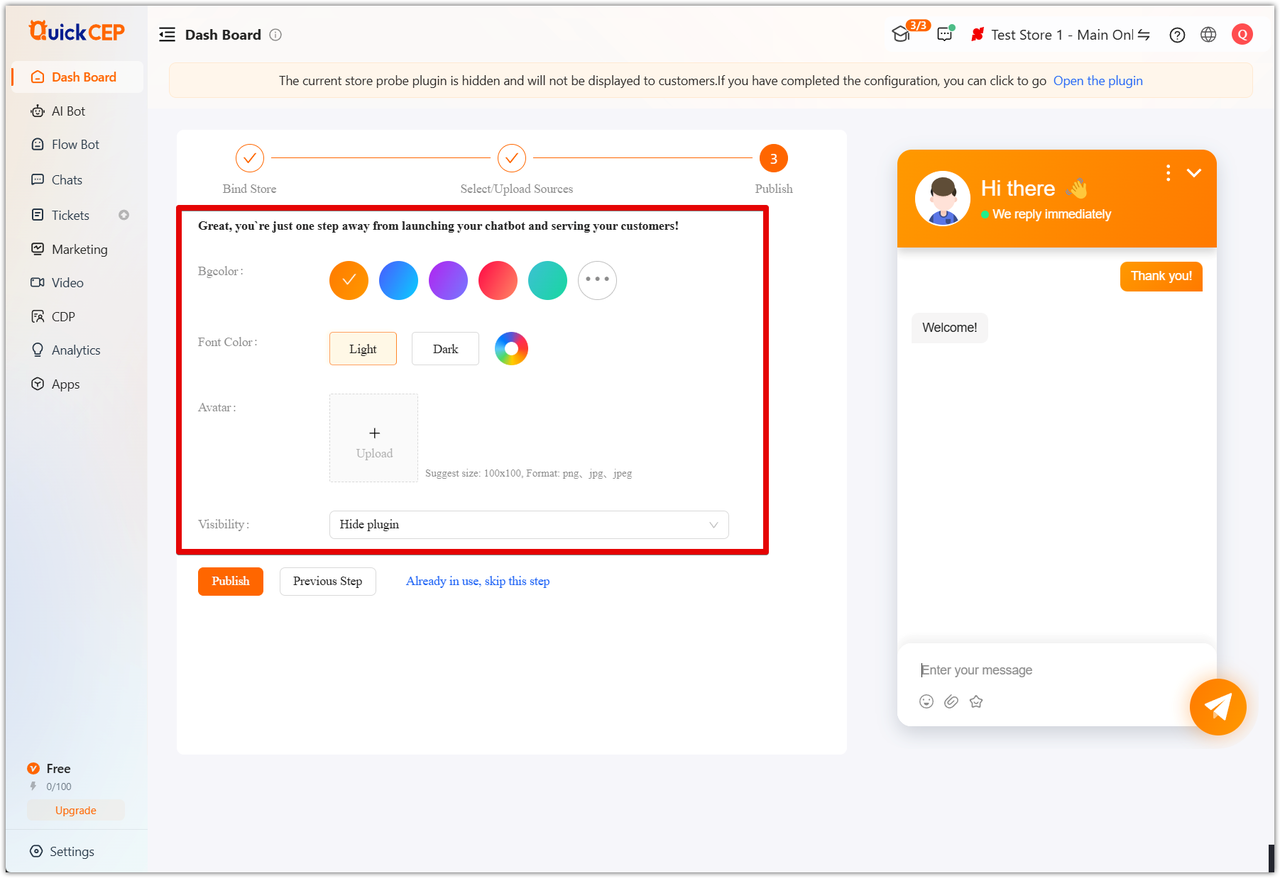
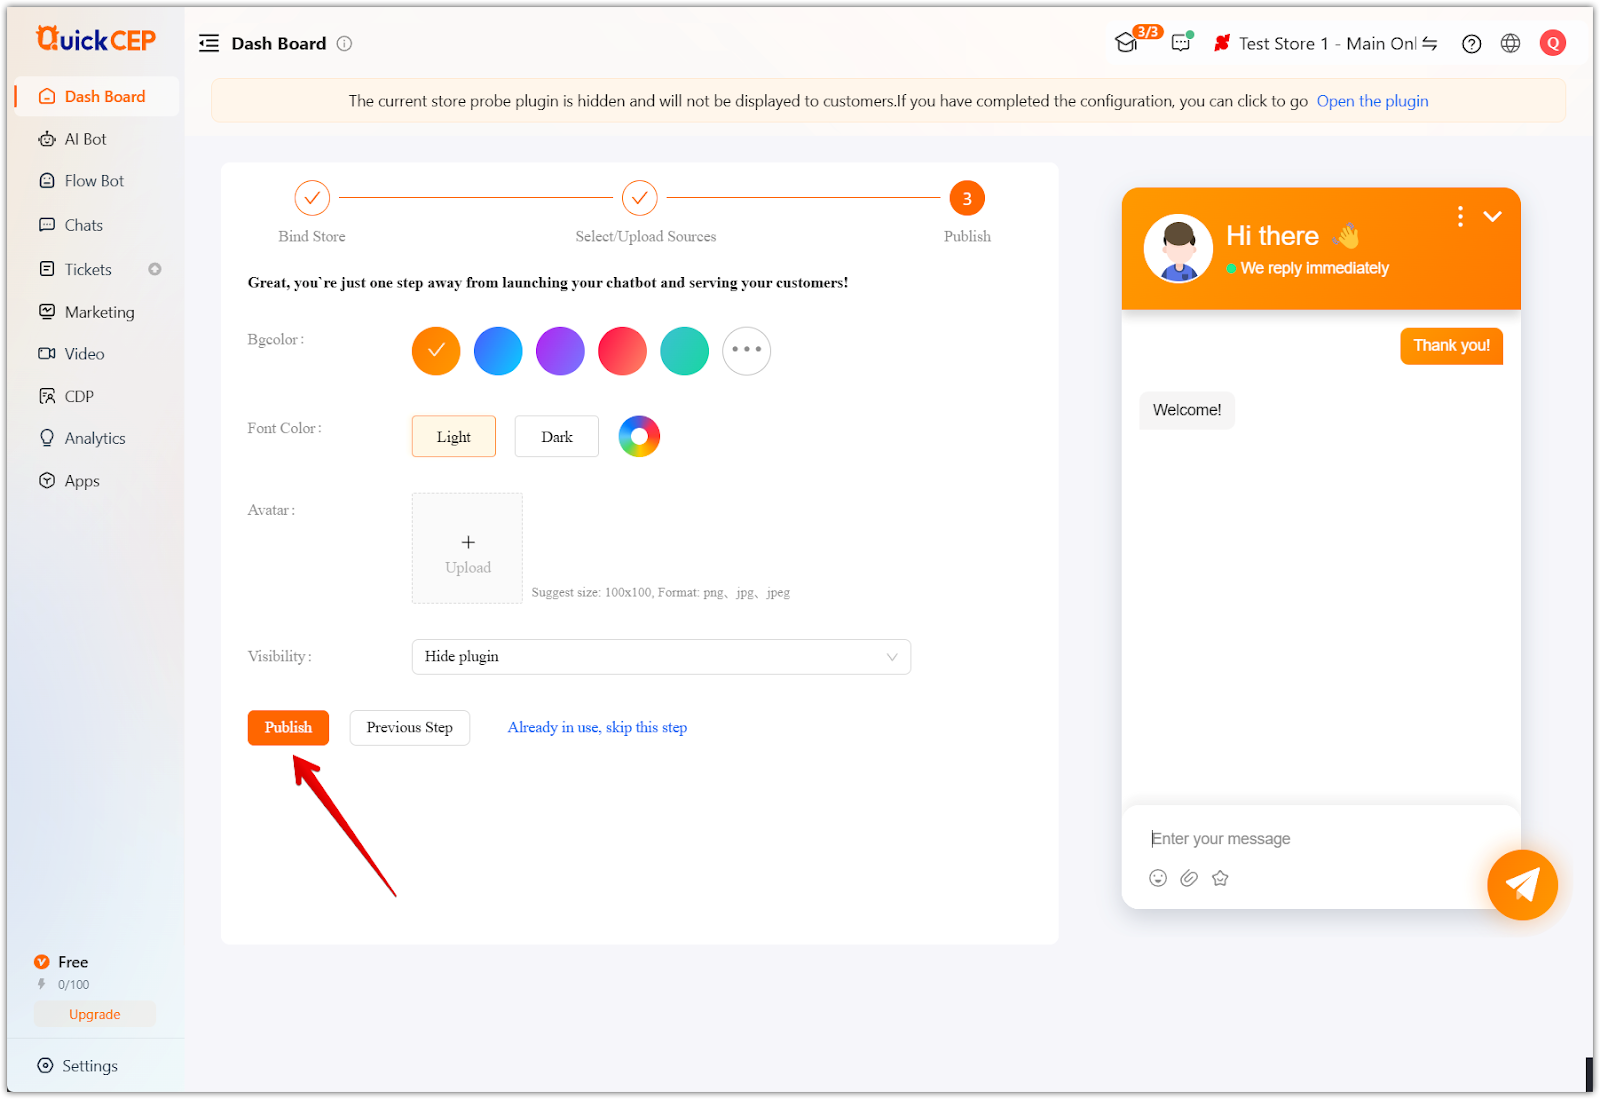
4. Customize chatbot appearance: In the third step of the onboarding, adjust the background color, font color, and chatbot avatar to match your brand identity. Set visibility preferences to control when and where the chatbot appears on your website.
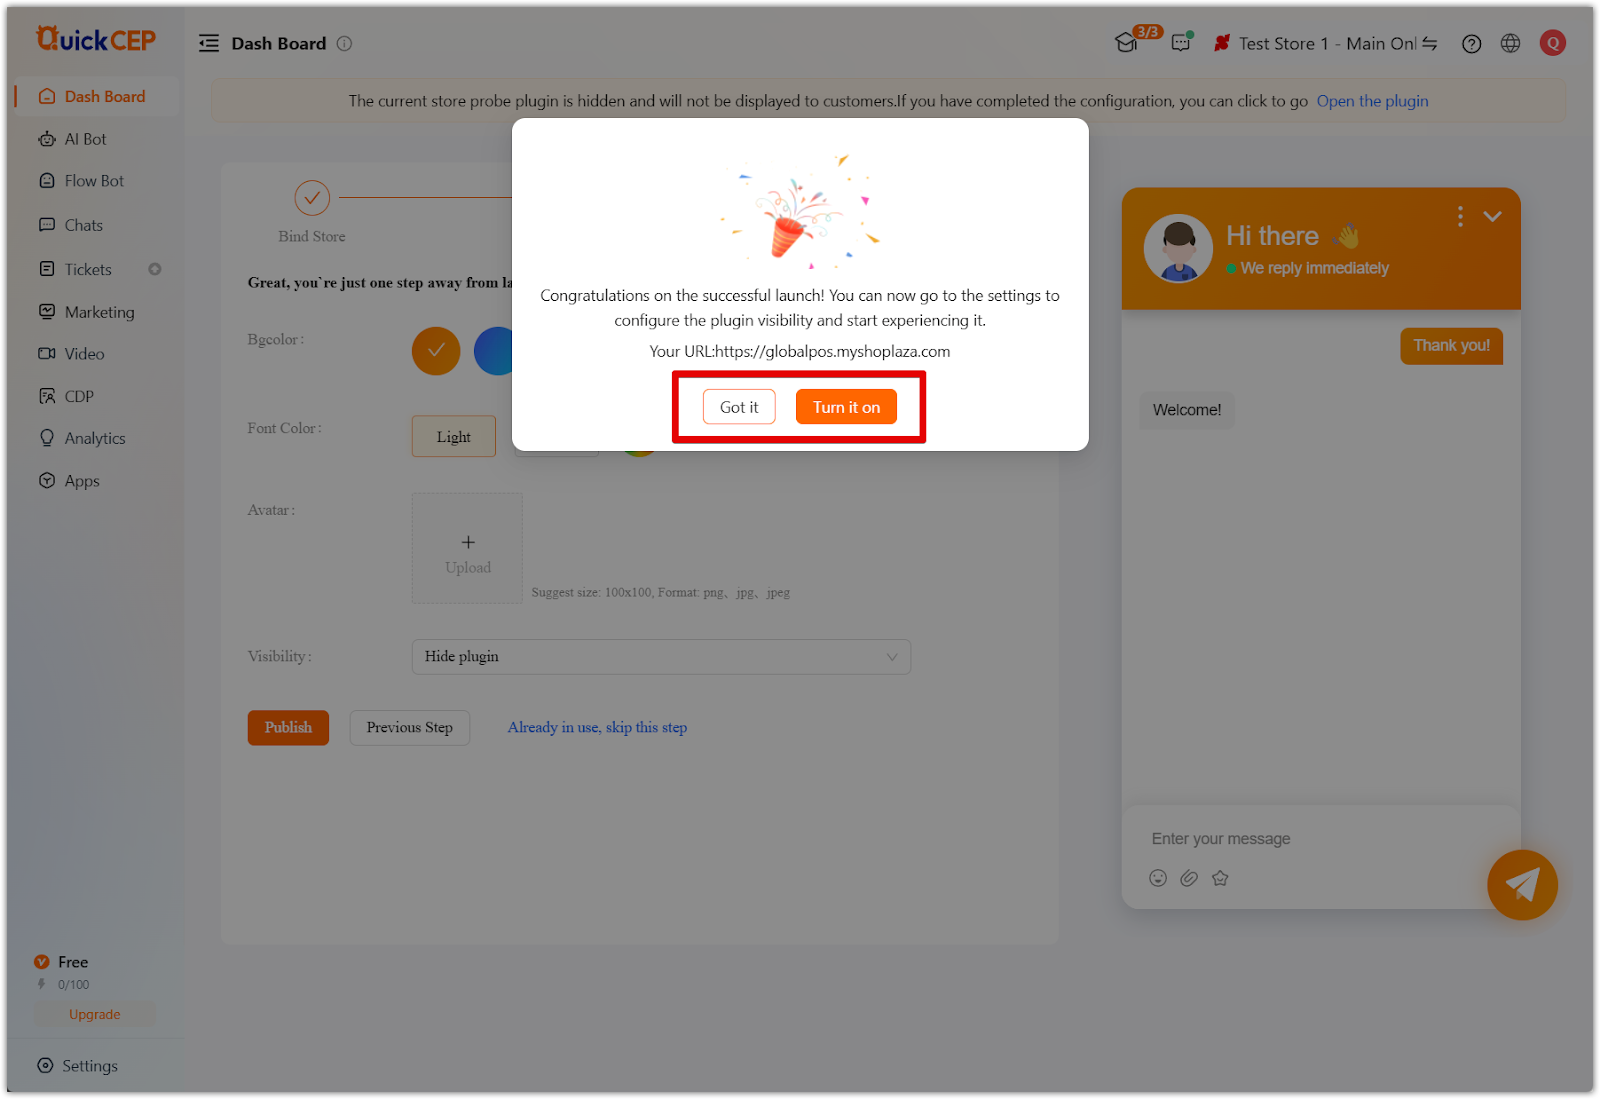
5. Publish QuickCEP: Click Publish to activate QuickCEP on your store. A confirmation pop-up will appear, confirming that QuickCEP is successfully set up and ready to assist customers. Select Got it to go to your page's main dashboard, or click Turn it on to access more settings for your chatbot.
Customizing plugin visibility
Controlling when and where QuickCEP appears in your store is essential for optimizing customer engagement. This section explains how to adjust plugin visibility settings for desktop and mobile users.
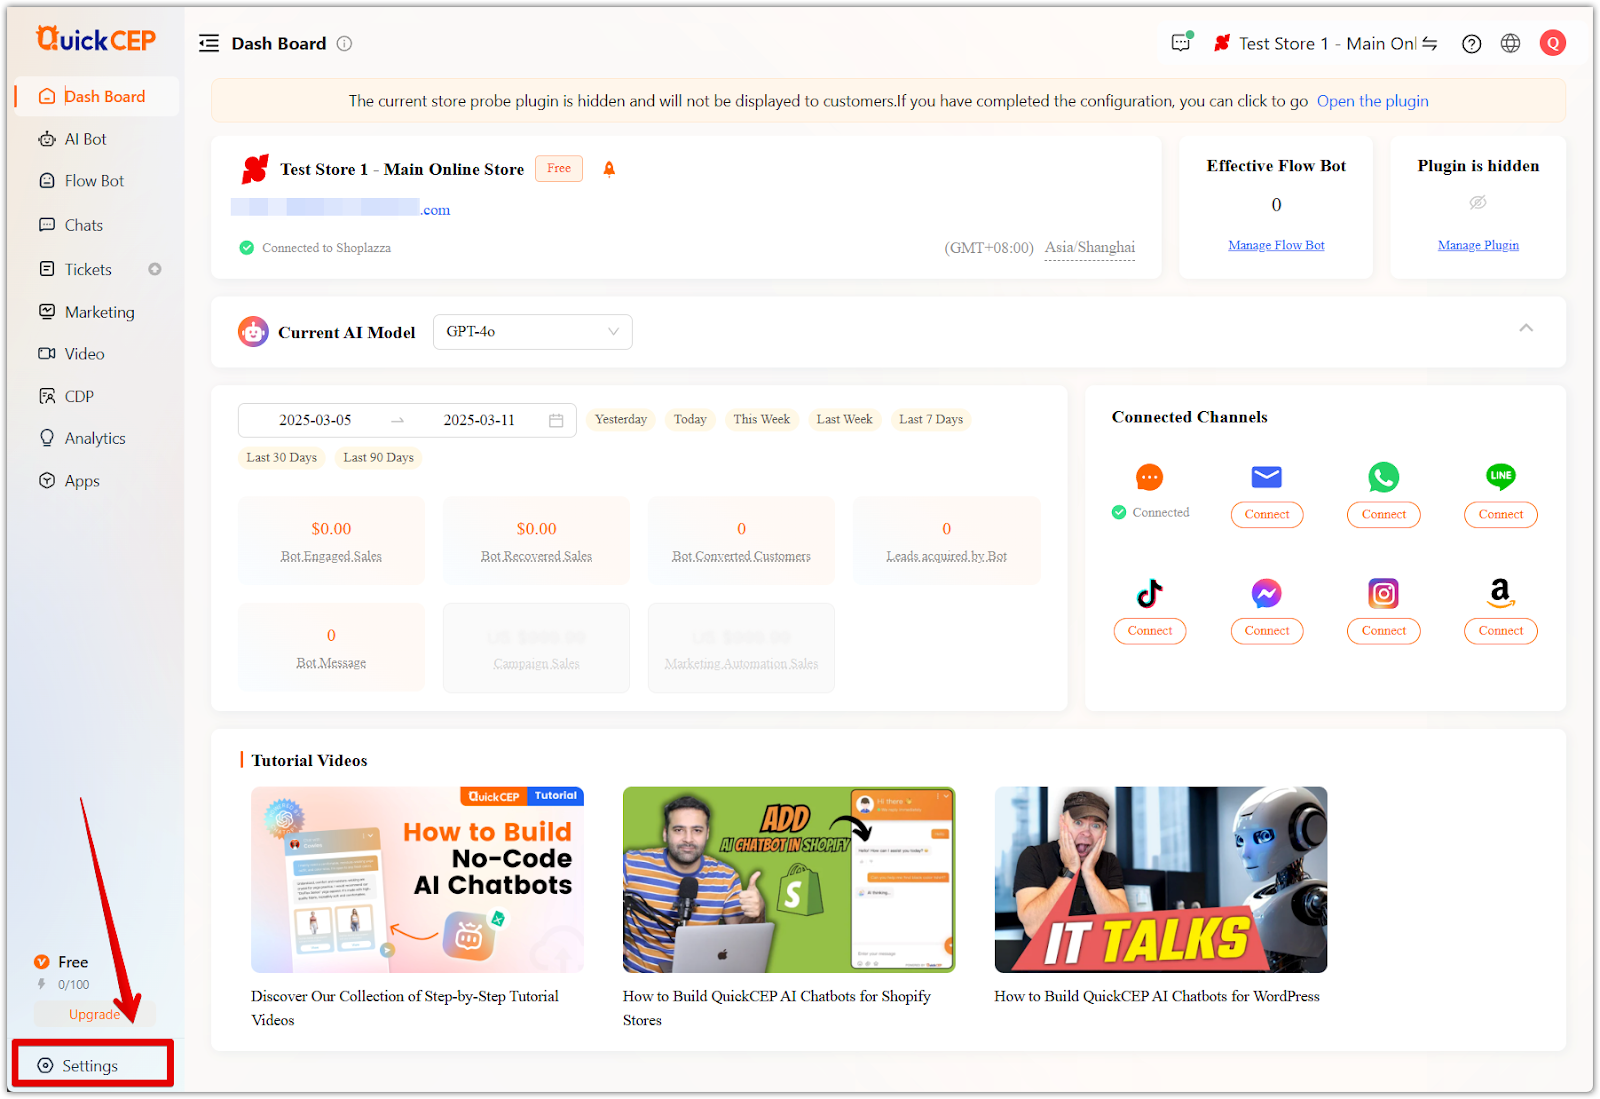
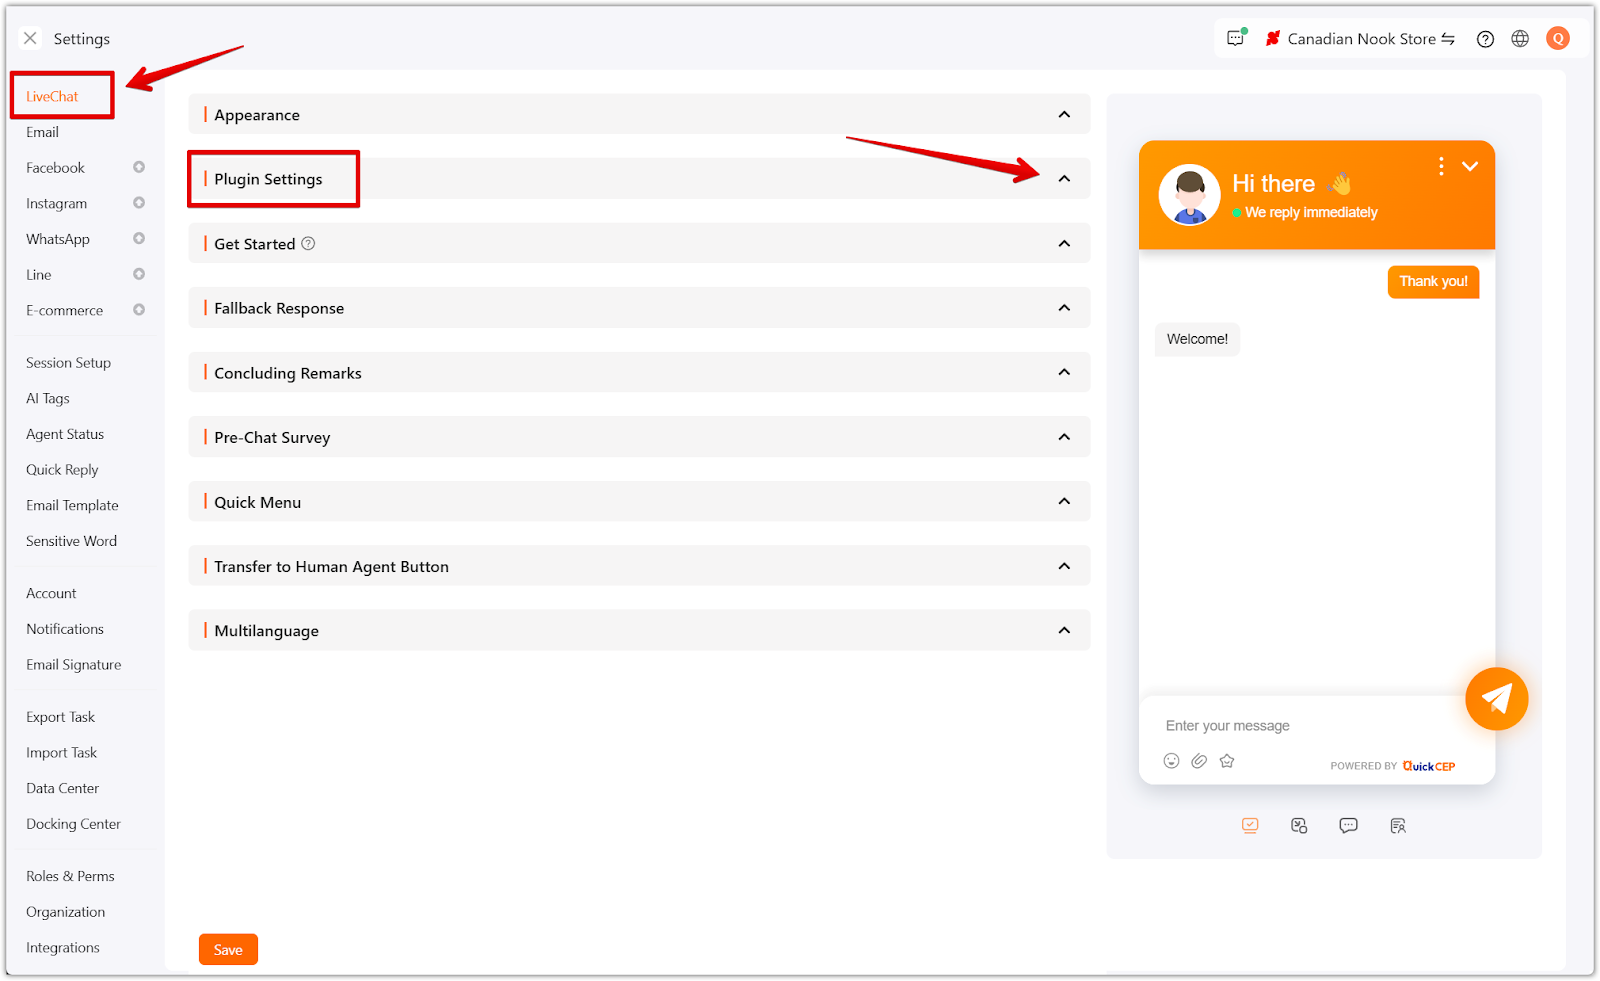
1. Access plugin settings: Go to Settings > LiveChat > Plugin Settings to manage where QuickCEP appears on your site.
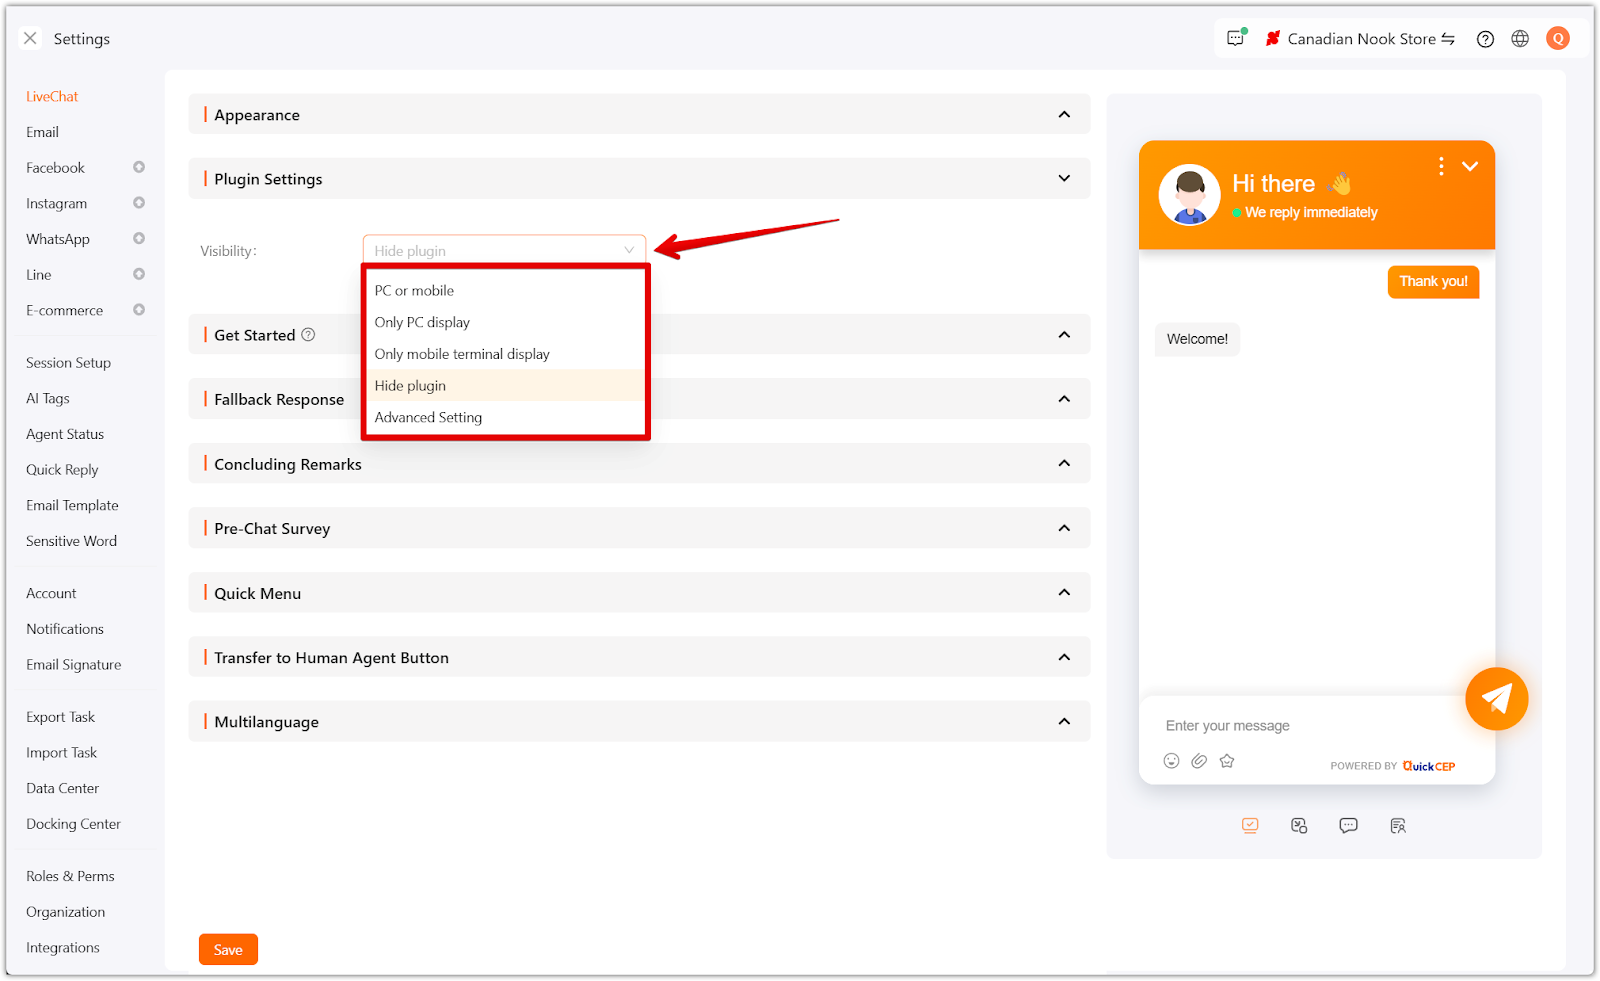
2. Select display preferences:
- PC or mobile display – Show the chatbot on both desktop and mobile versions of your store.
- Only PC display – Restrict chatbot visibility to desktop users.
- Only mobile display – Make the chatbot available exclusively to mobile users.
- Hide plugin – Temporarily turn off the chatbot without uninstalling it.
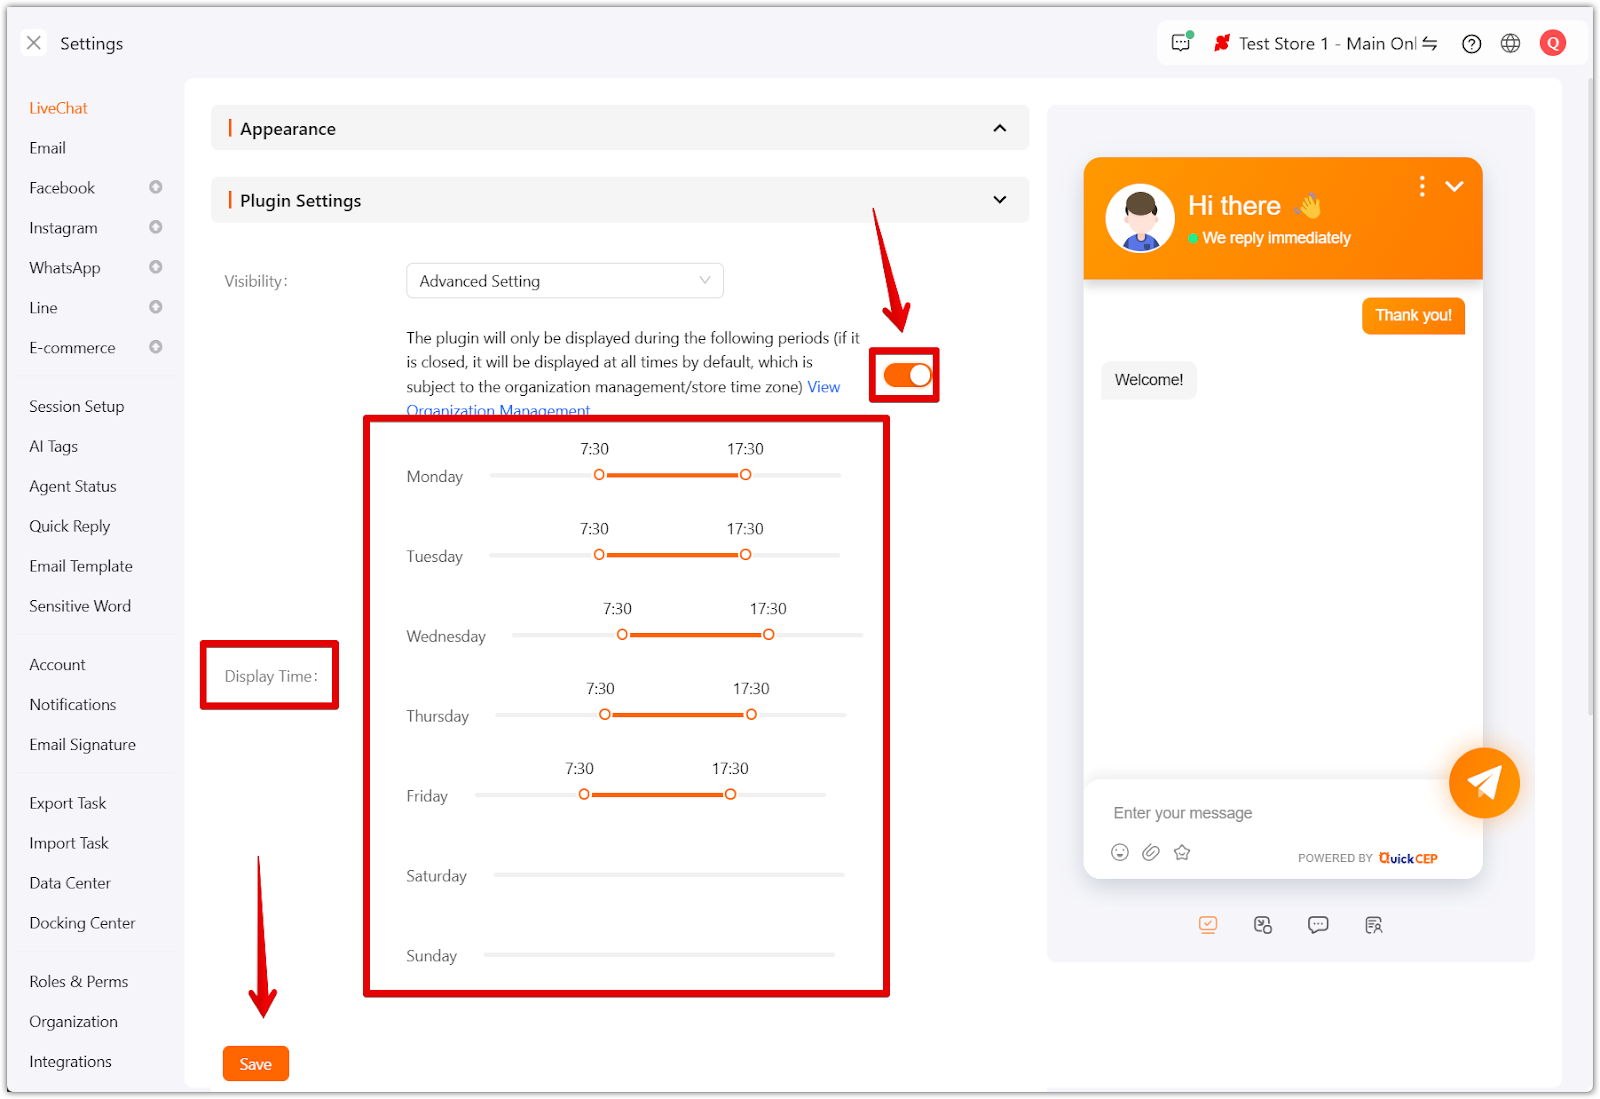
3. Adjust advanced settings:
- Choose specific pages where QuickCEP should appear or be hidden.

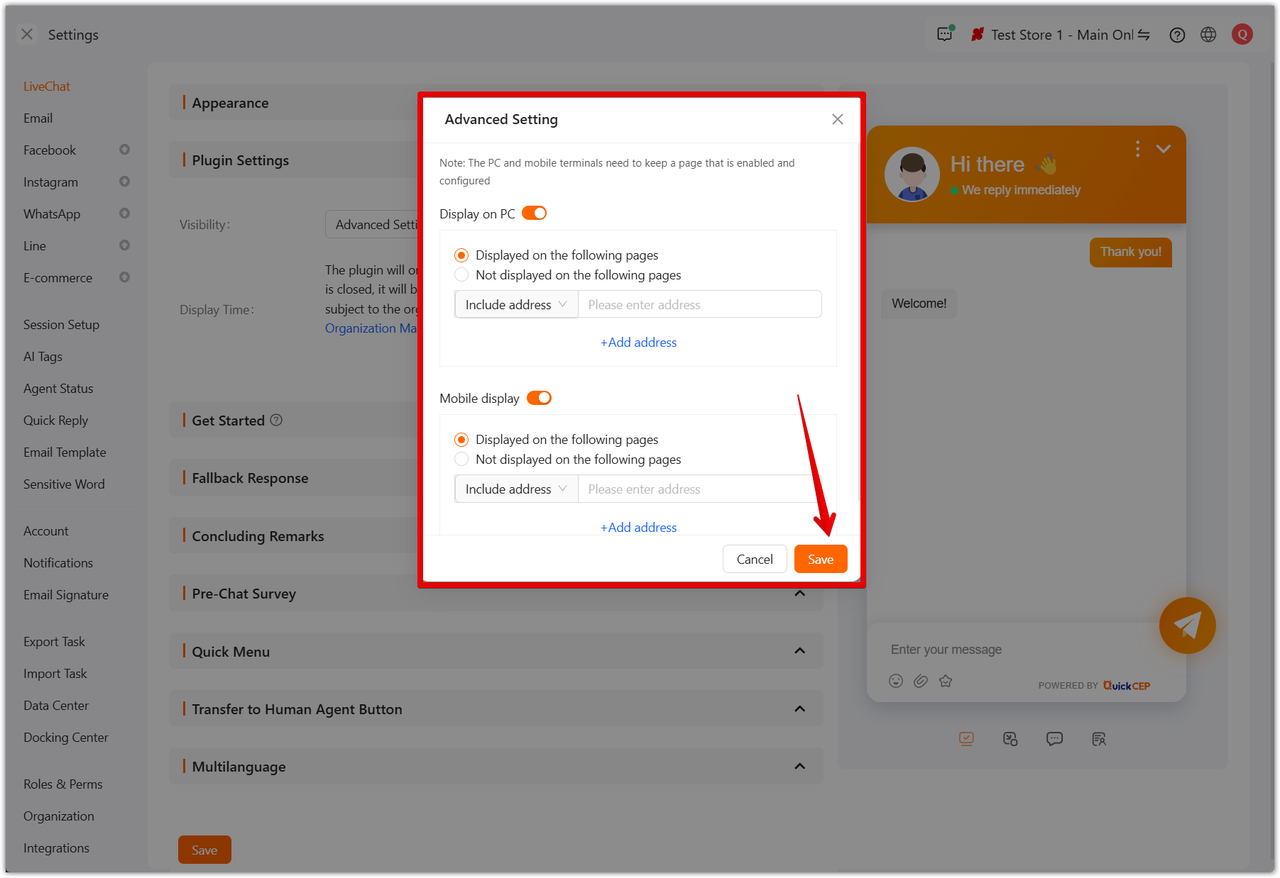
- Configure Display Time to control when the chatbot is visible (e.g., during business hours only or 24/7 availability). Click Save to apply your changes.
Next steps
With QuickCEP fully installed and configured, you're ready to take full advantage of its AI-powered automation. This section highlights what you can do next to improve customer interactions and streamline operations.
Now that QuickCEP is installed and configured, you can explore its full potential:
- Set up AI chatbots and automated workflows: Learn how to train AI bots and automate customer interactions in the Managing AI Chatbots and Automated Workflows guide.
- Manage customer conversations and support tickets: Use QuickCEP’s live chat and ticketing features for real-time assistance, which are covered in Handling Customer Conversations and Support .
- Launch marketing campaigns: Utilize email, SMS, WhatsApp, and Line campaigns to engage customers, as explained in Marketing and Customer Engagement .
- Analyze chatbot performance and customer data: Gain insights into chatbot effectiveness and customer interactions in Analytics, Apps, and Advanced Settings .
With QuickCEP fully configured, your store is now equipped with AI-powered automation to enhance customer interactions, improve sales, and streamline operations!


Comments
Please sign in to leave a comment.