
The Popups feature in Poptin allows you to engage with visitors through well-timed and targeted popups. Whether you want to grow your email list, reduce cart abandonment, or highlight a special offer, popups help you capture attention effectively. A well-designed popup can enhance user experience, encourage action, and drive higher conversion rates.
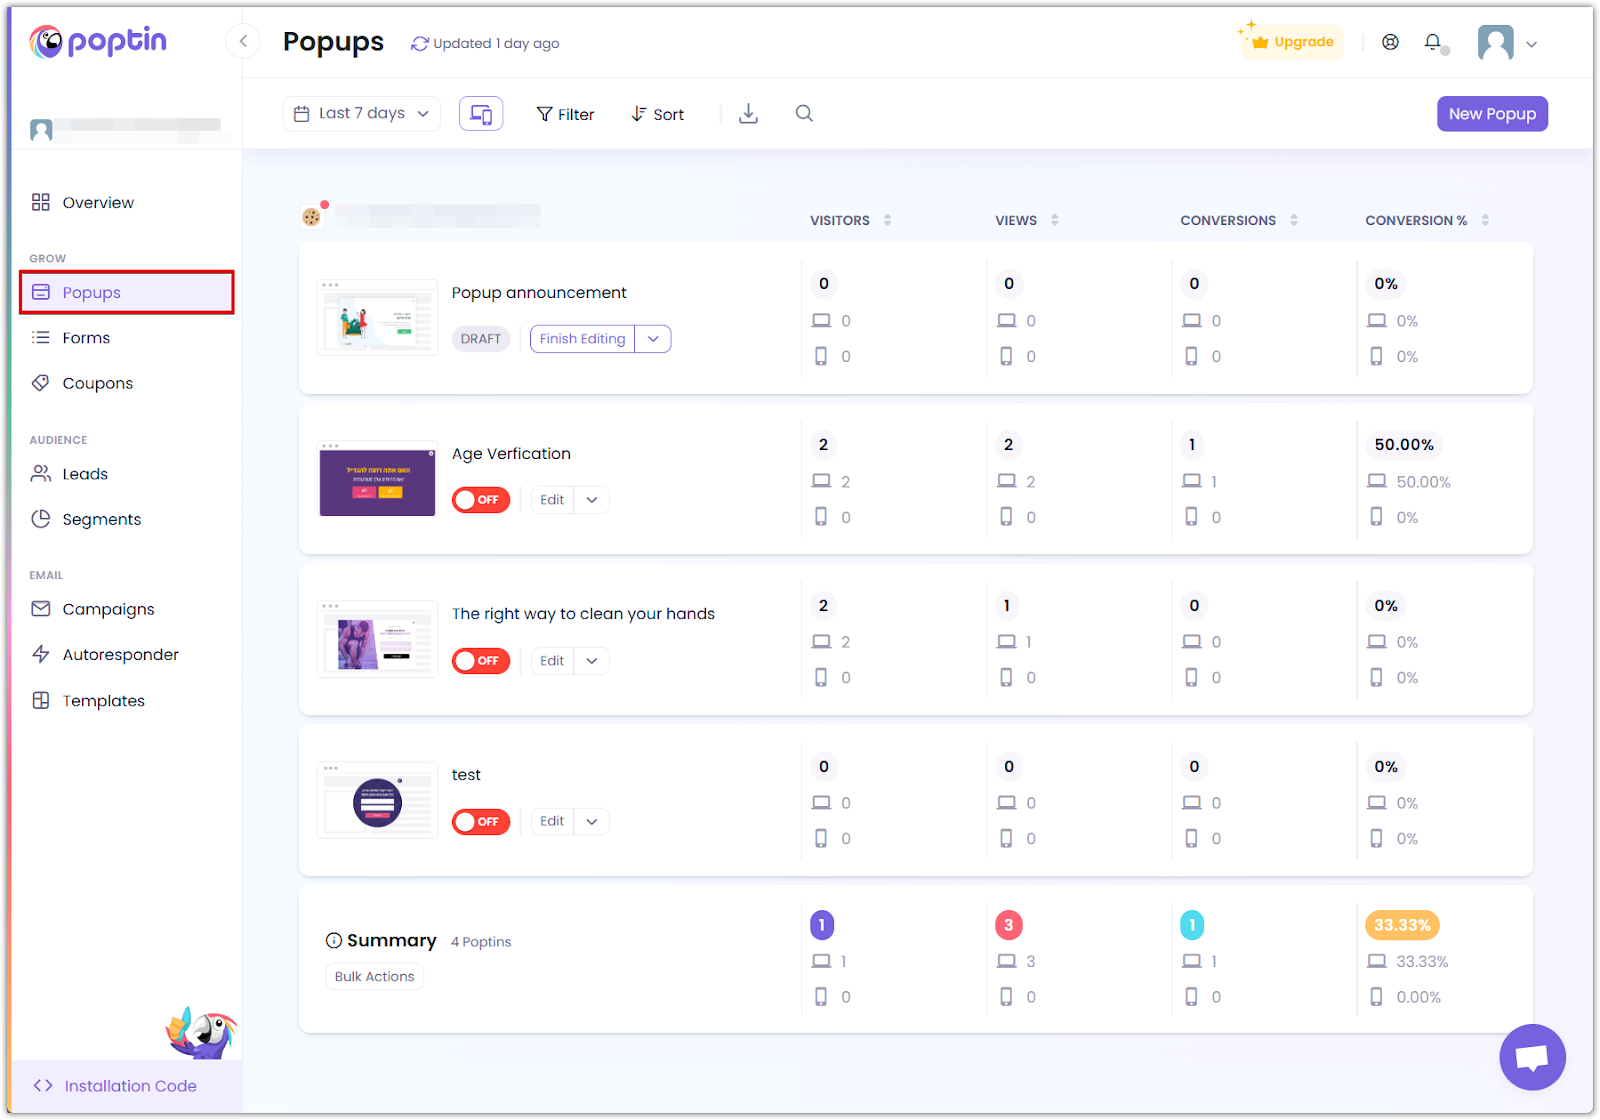
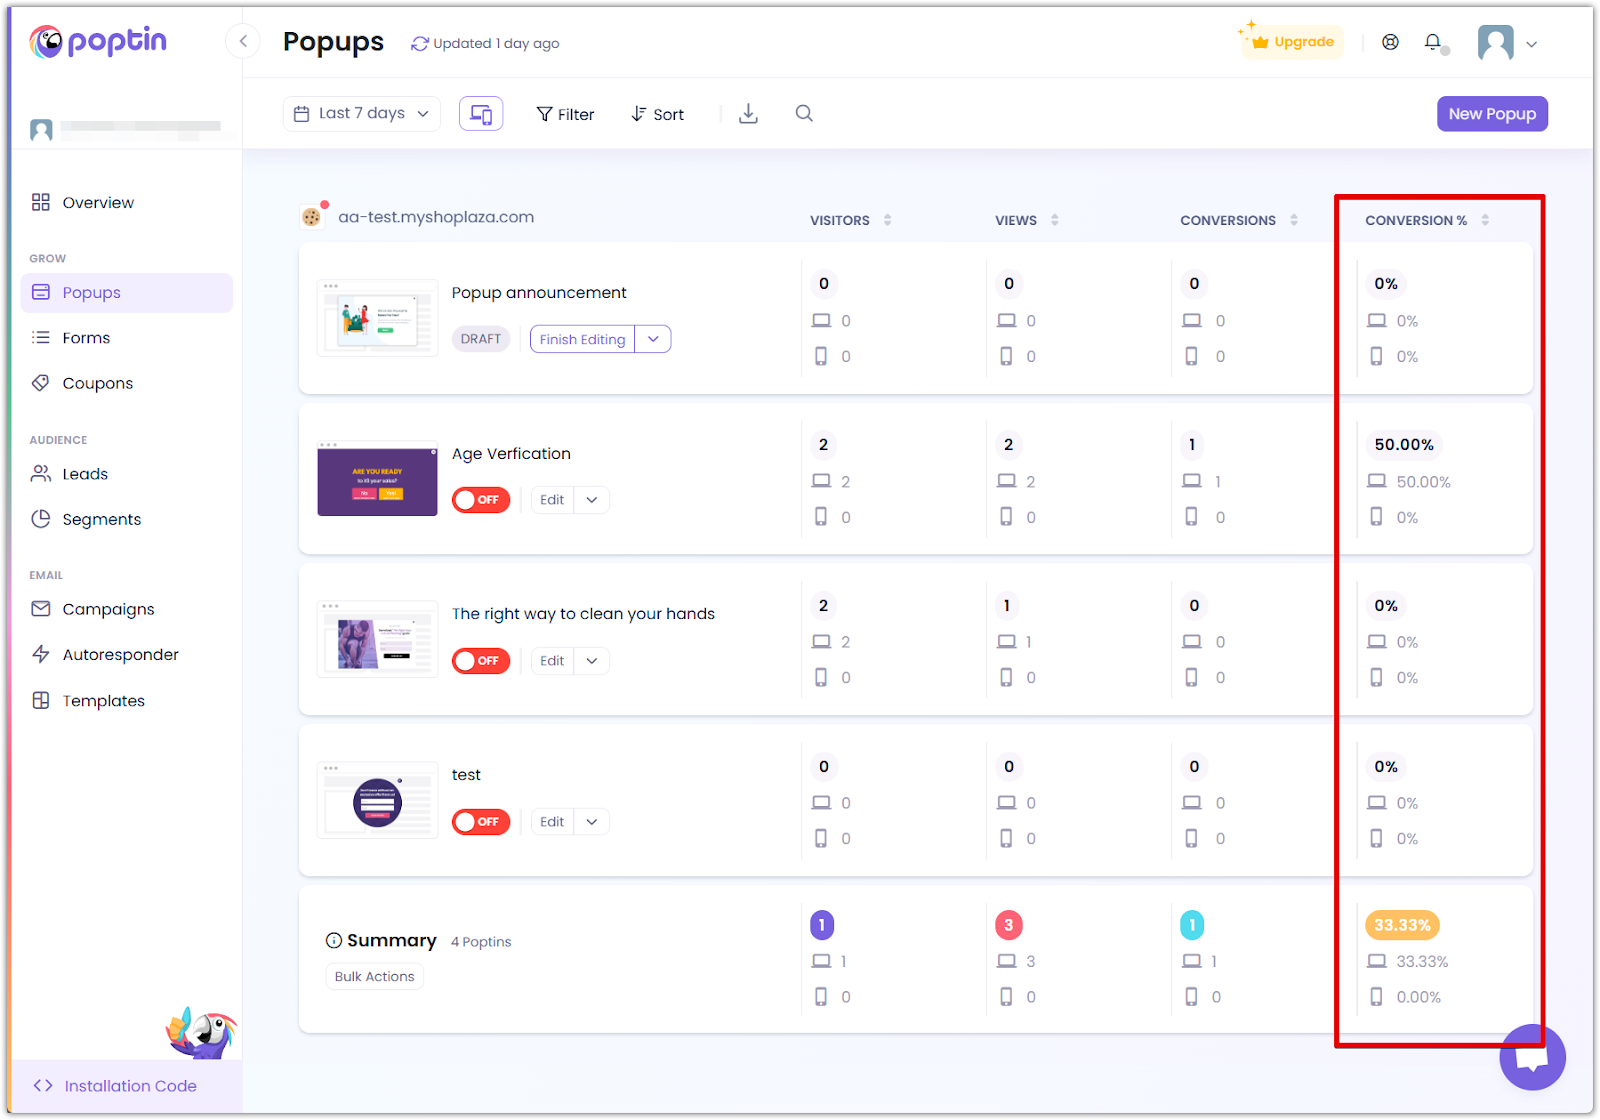
Popup dashboard
- View all created popups and track their performance in one place. The dashboard provides a centralized location to manage your campaigns efficiently.
- Monitor key metrics such as views, conversions, and engagement rates. Understanding these numbers helps identify what’s working and where improvements are needed.
- Easily edit, duplicate, or remove popups to refine your strategy. Make changes to optimize based on real-time performance insights.
Creating a new popup and choosing a template
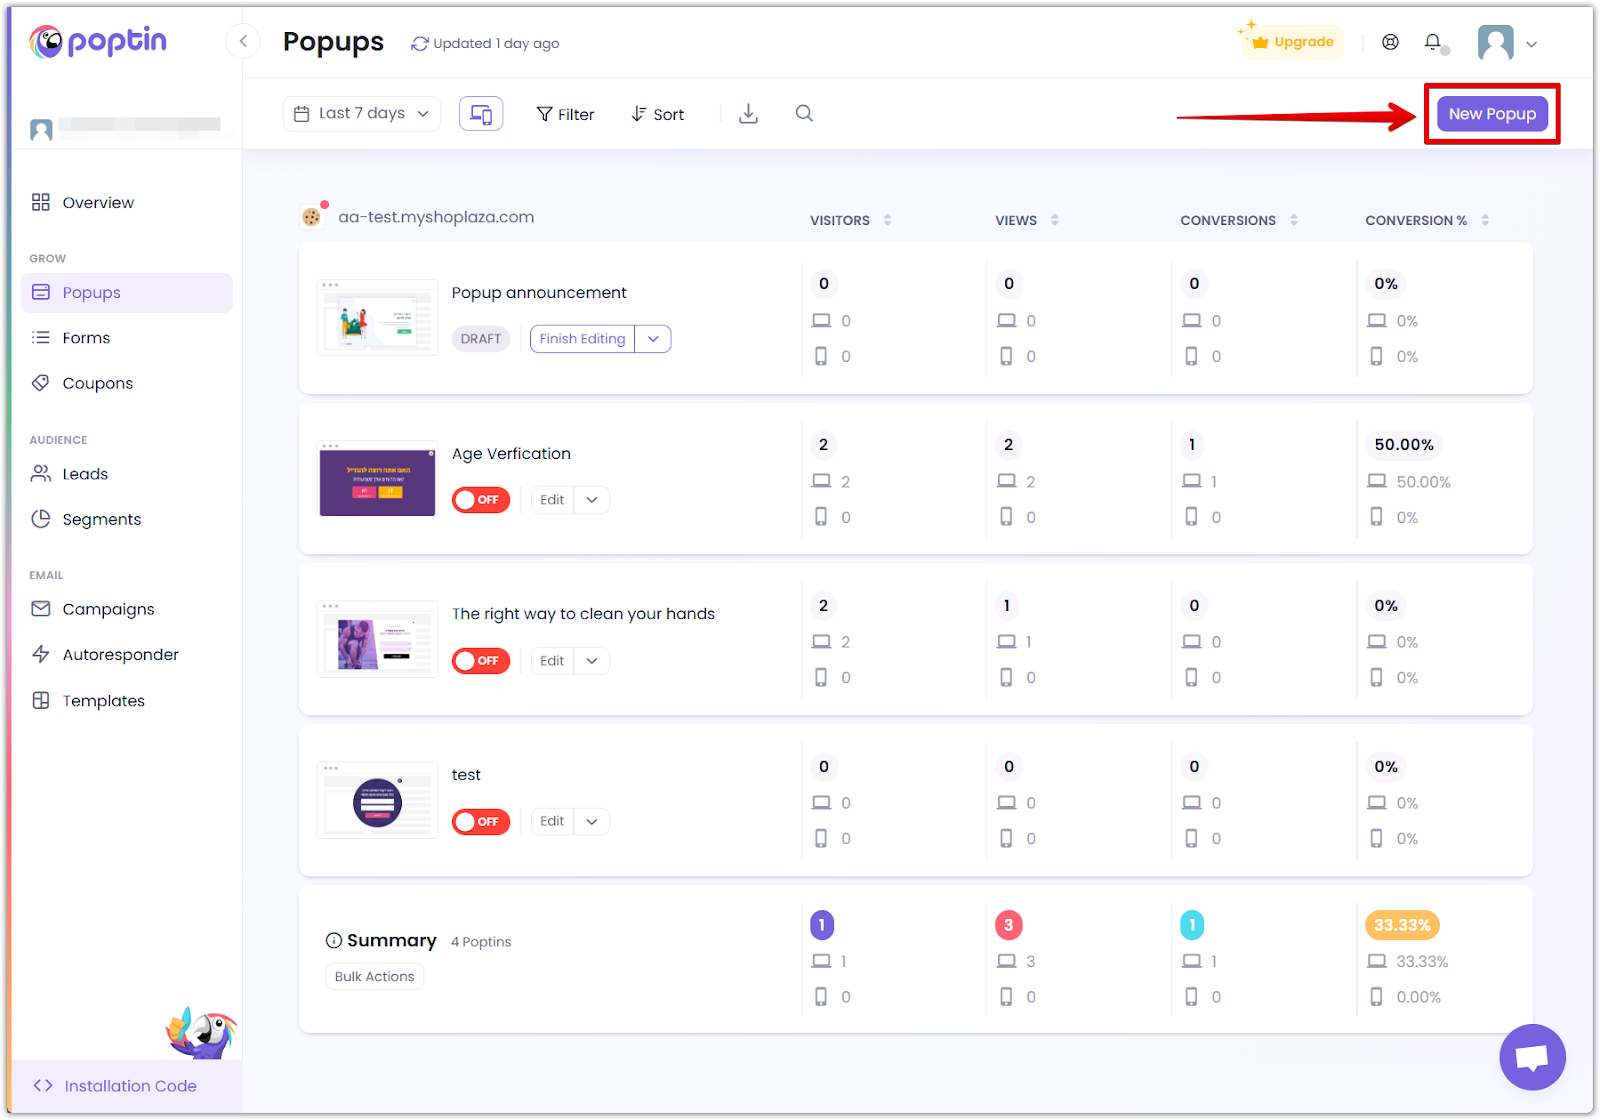
1. Click "New Popup" in the Popups section to start designing a new campaign.
2. Select a goal: Choose whether you want to Increase Sales by promoting offers or Get More Leads by capturing emails or customer details.
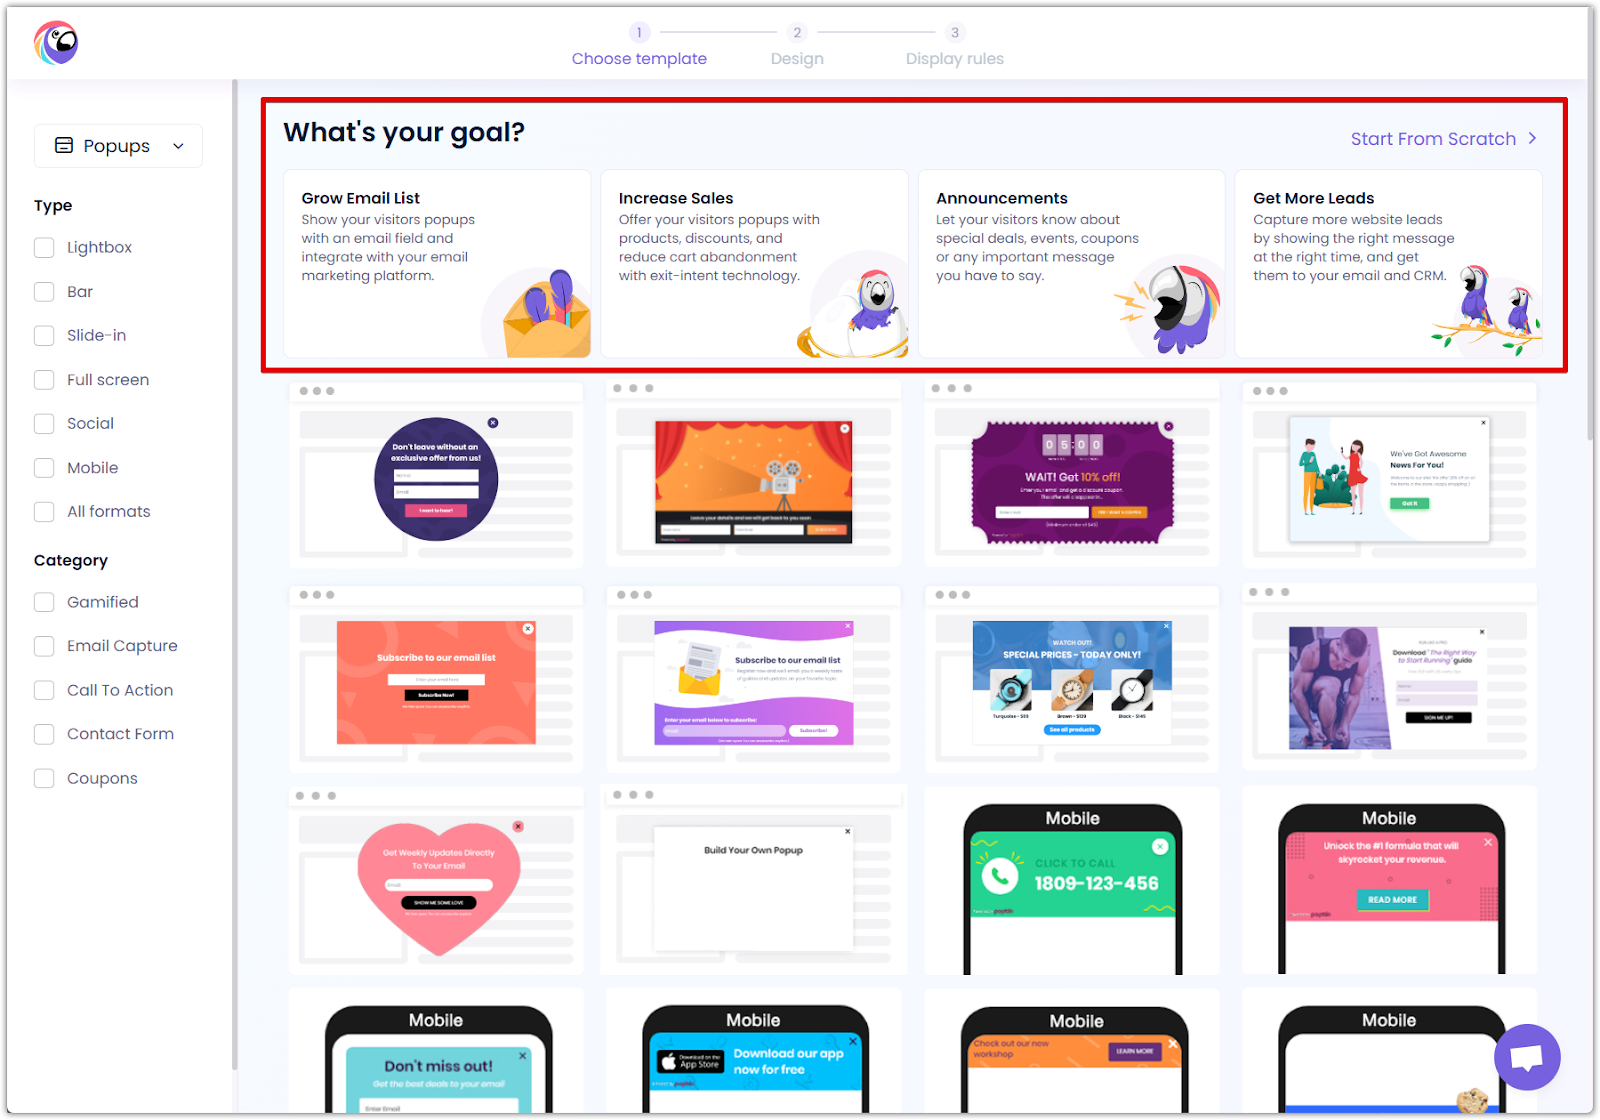
3. Browse and filter templates: Use categories like Email Capture, Contact Form, or Call to Action to find the perfect design that matches your objective.
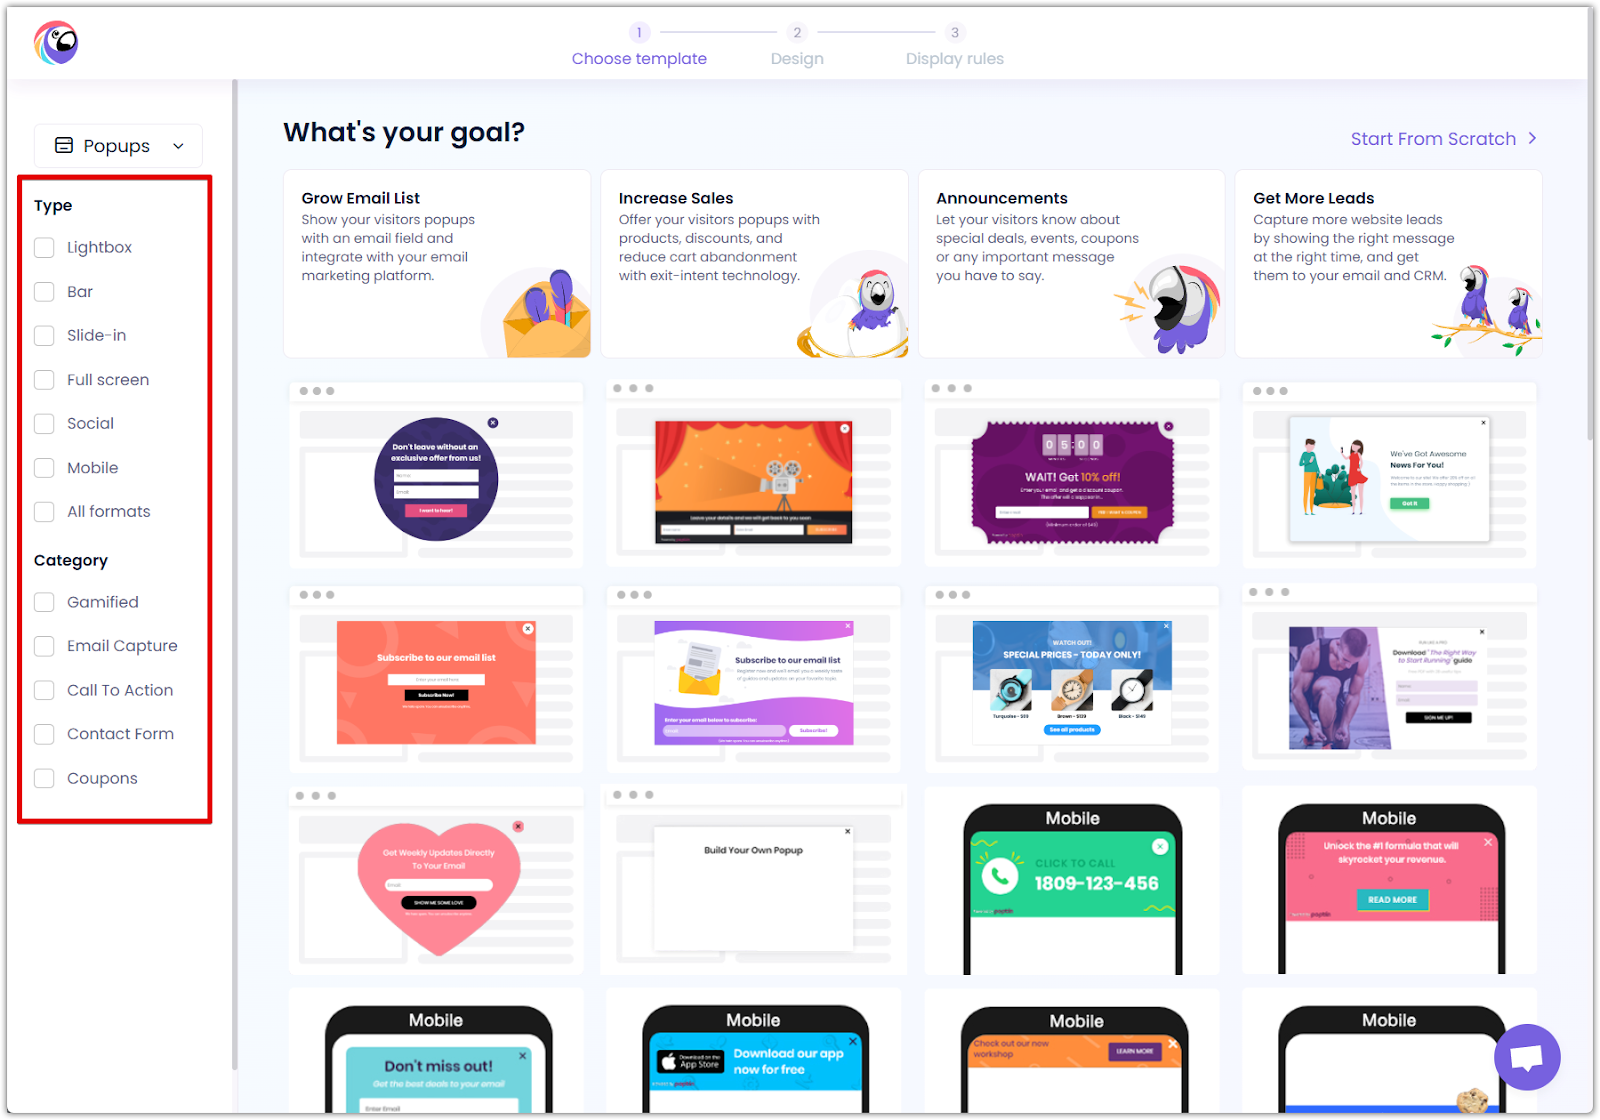
4. Preview and customize: Click Preview & Edit to modify the content, style, and triggers to ensure the popup aligns with your brand.

5. Enter Poptin details:
- Poptin name: Input a relevant name for easy identification.
- Domain: Specify the domain where the popup will be displayed.
- Status: Ensure the toggle is set to "On" (default setting).
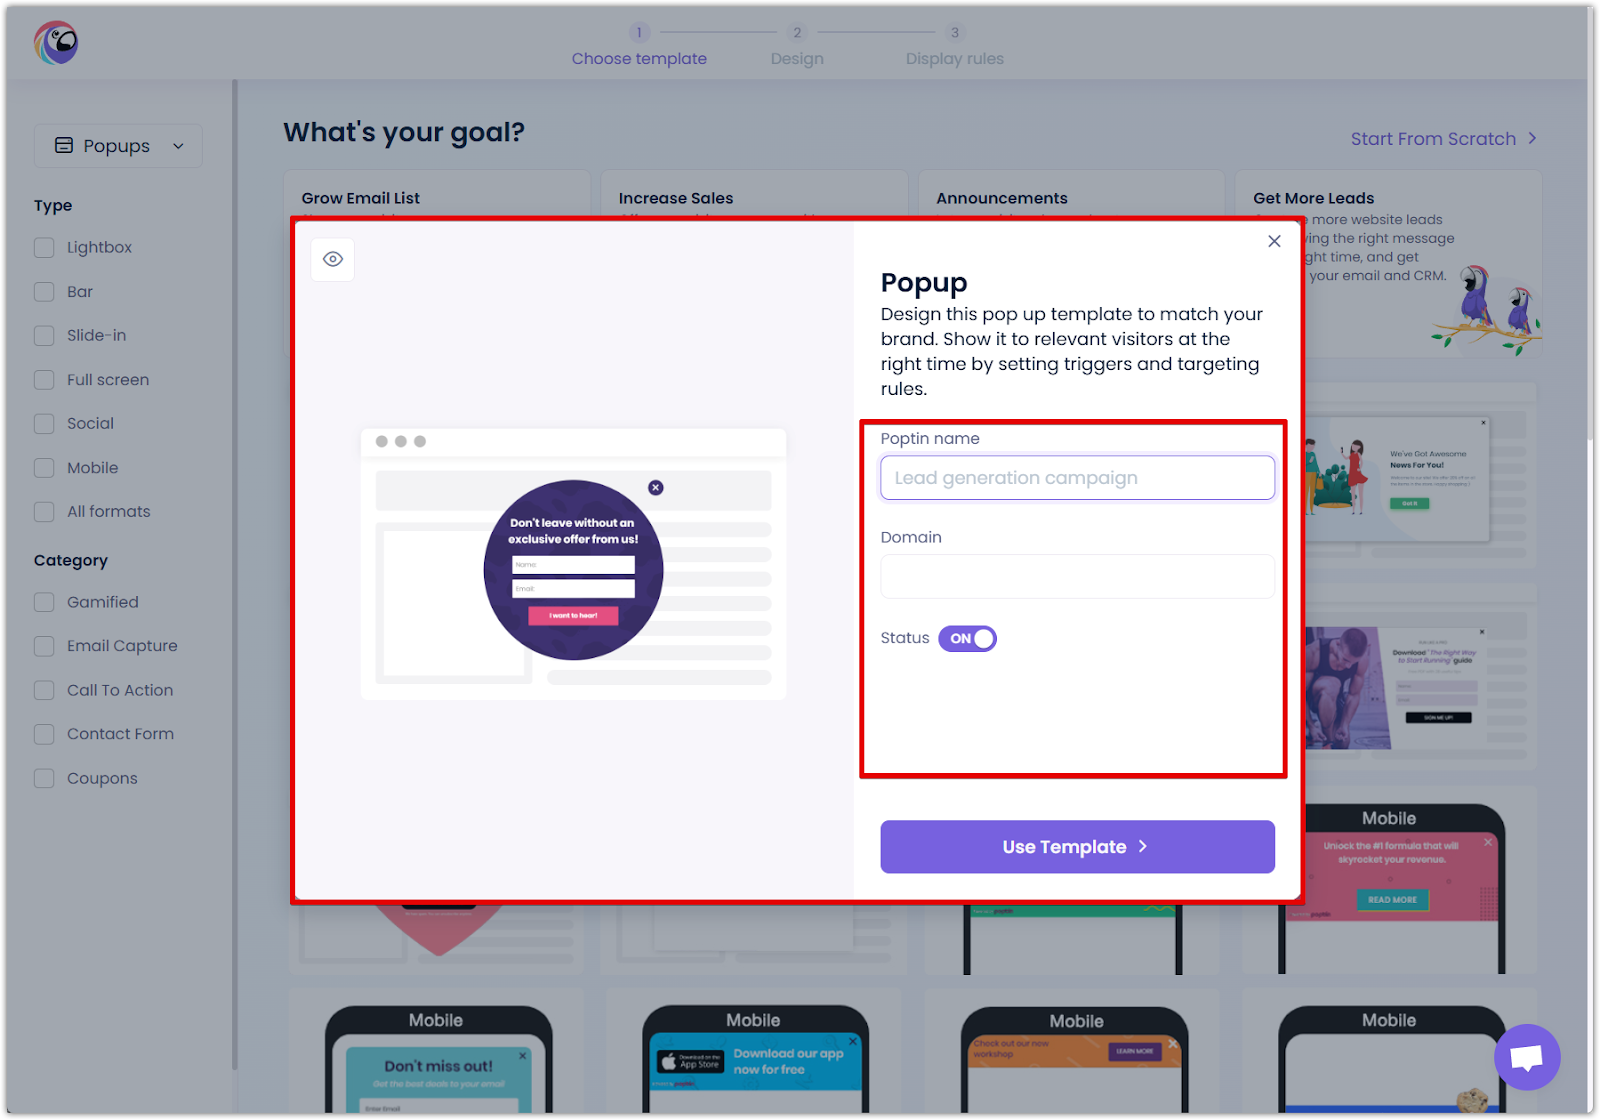
6. Click "Use Template": After completing the required fields, click Use Template to proceed with further customization and activation.

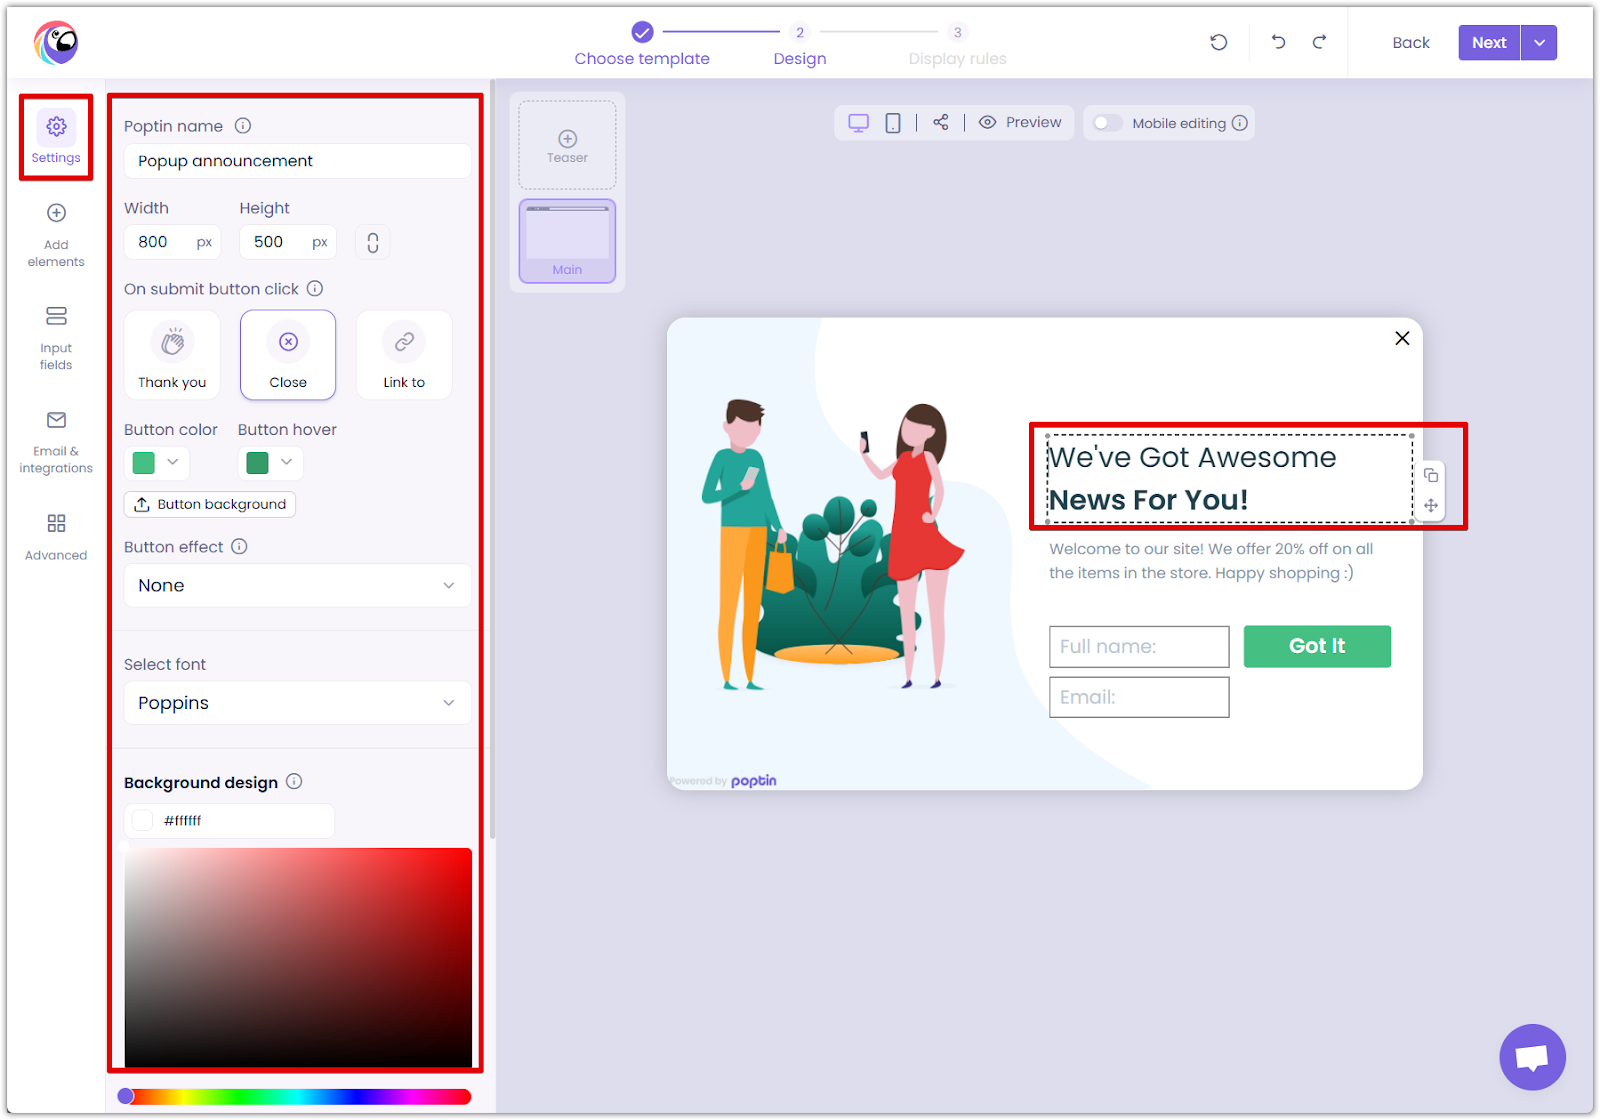
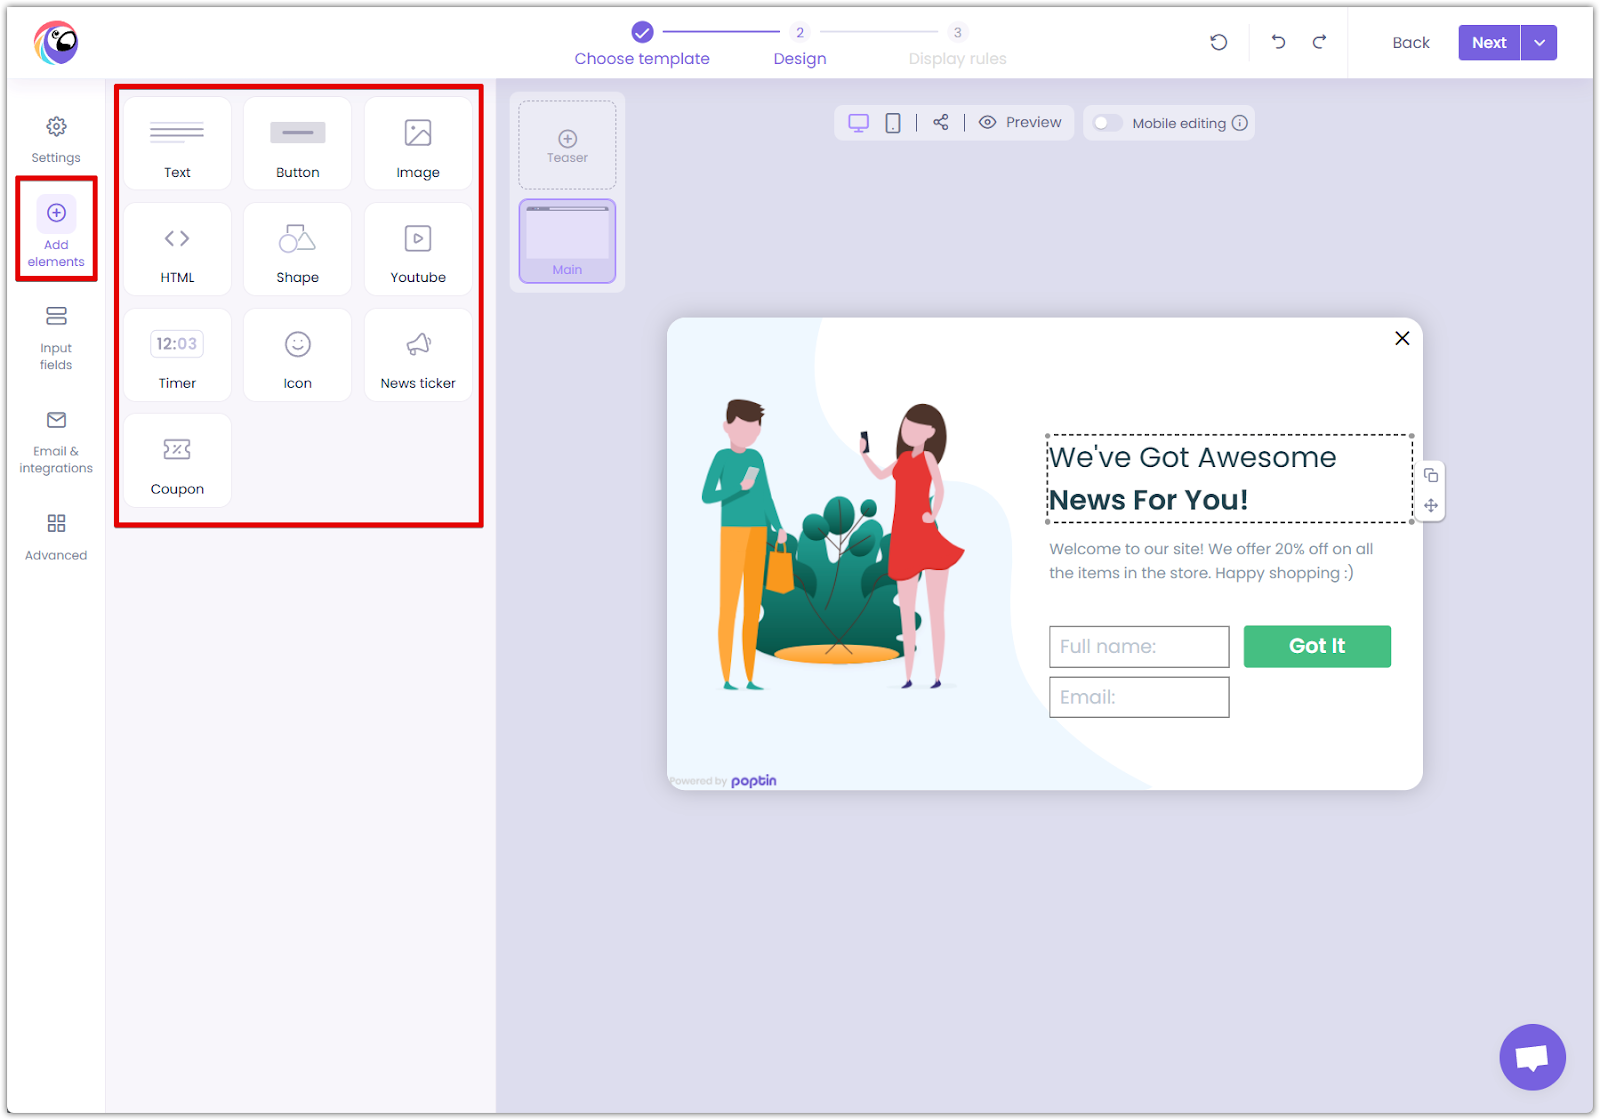
Design customization
1. Settings: Modify text, colors, and images to align with your branding. This ensures consistency and enhances brand recognition.
2. Add elements: To make your popup more engaging and action-driven, incorporate interactive components such as countdown timers, buttons, and progress bars.
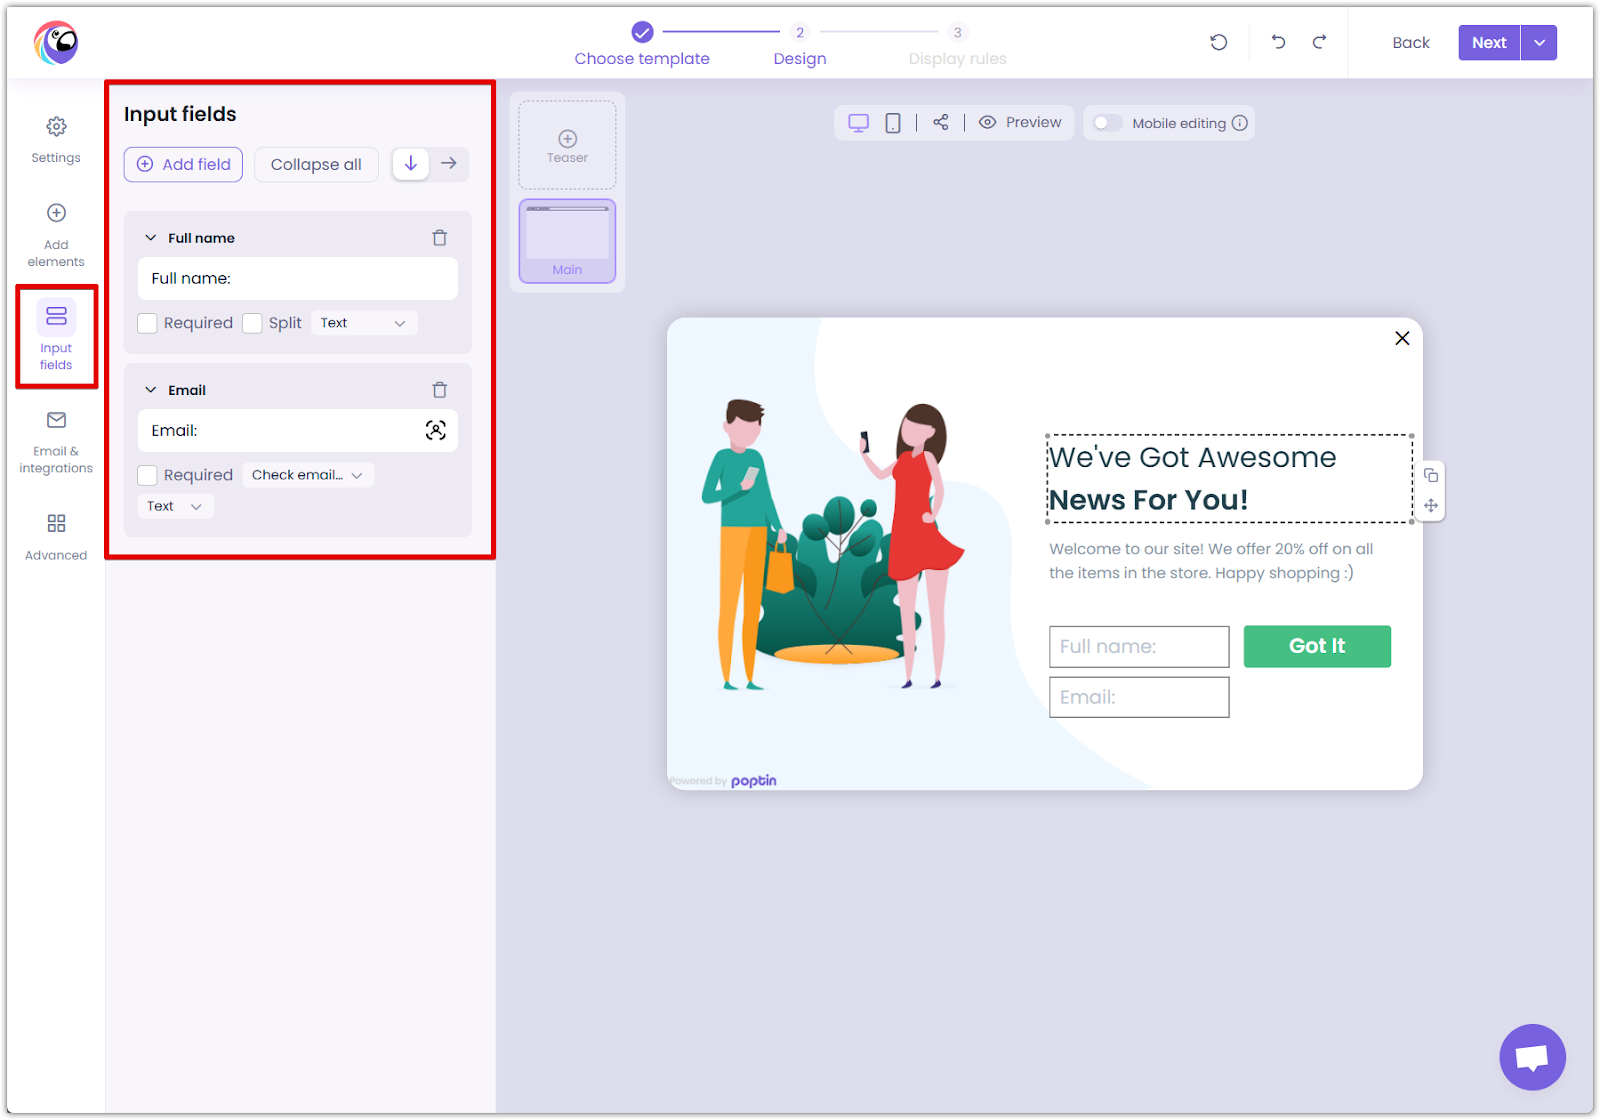
3. Input fields: Collect user information by adding name, email, or phone number fields, making it easy to capture leads and personalize interactions.
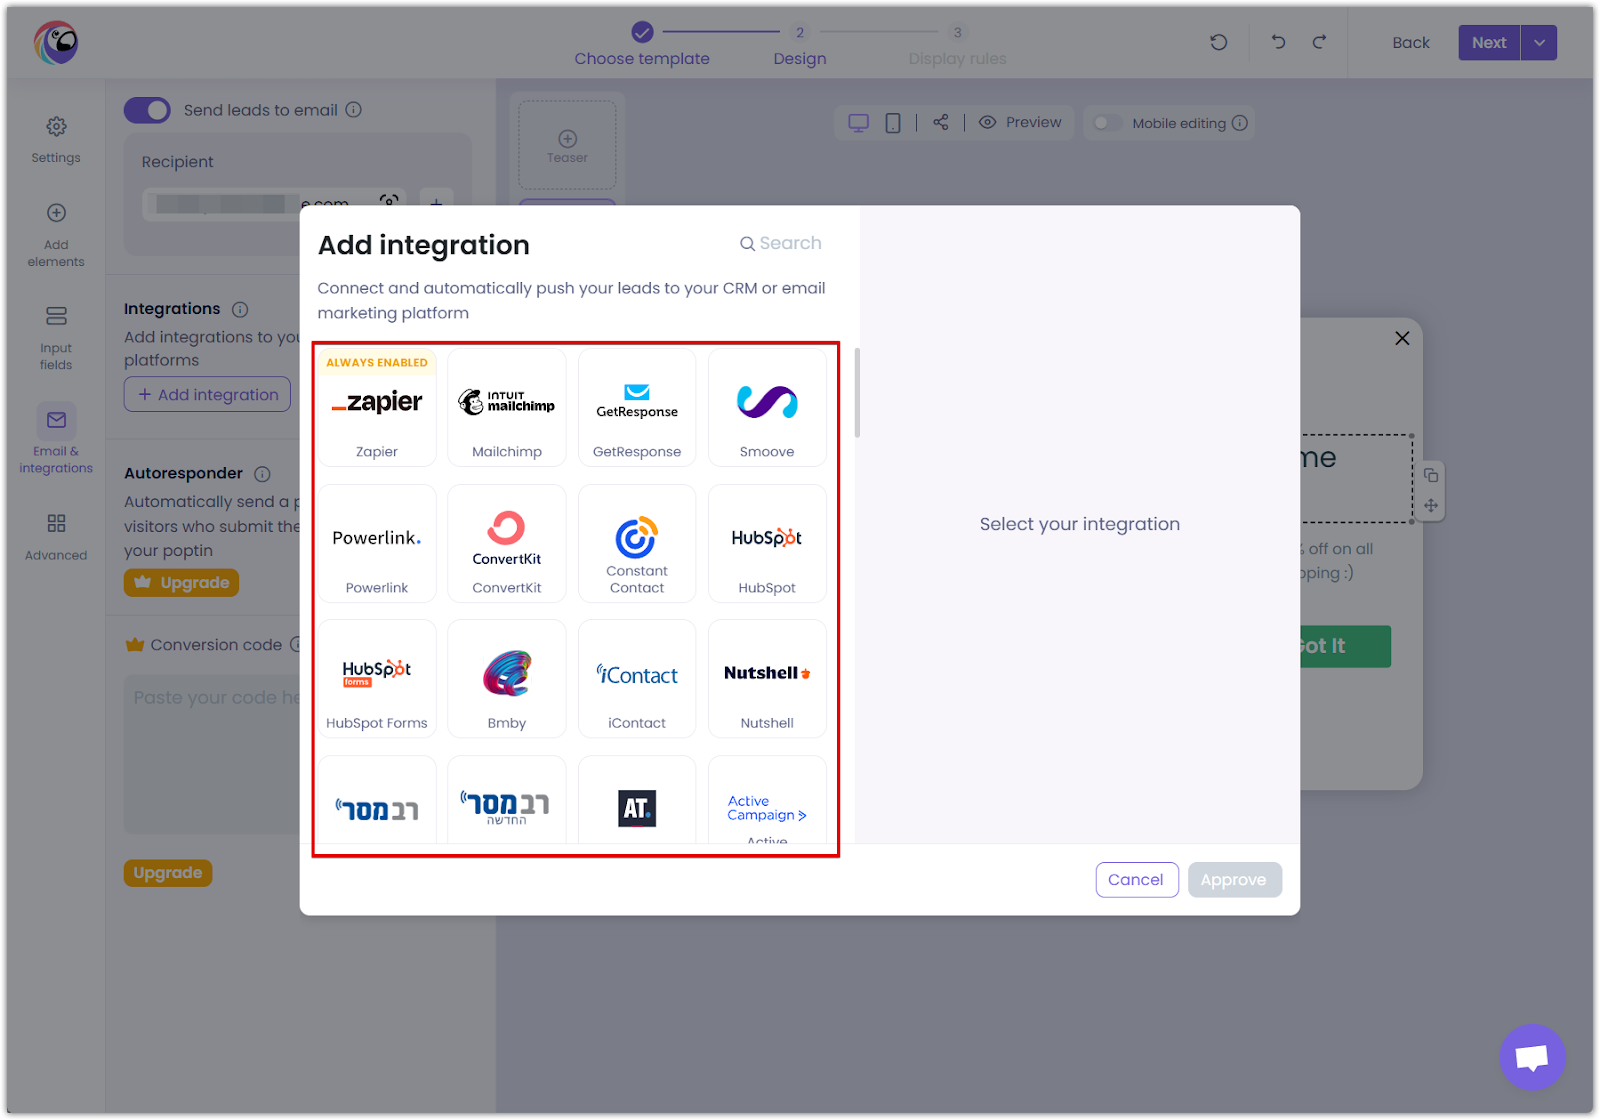
4. Email and integrations: Sync with your email marketing tools by connecting Poptin with platforms like Mailchimp, HubSpot, and Klaviyo to automate follow-ups and nurture leads effectively.

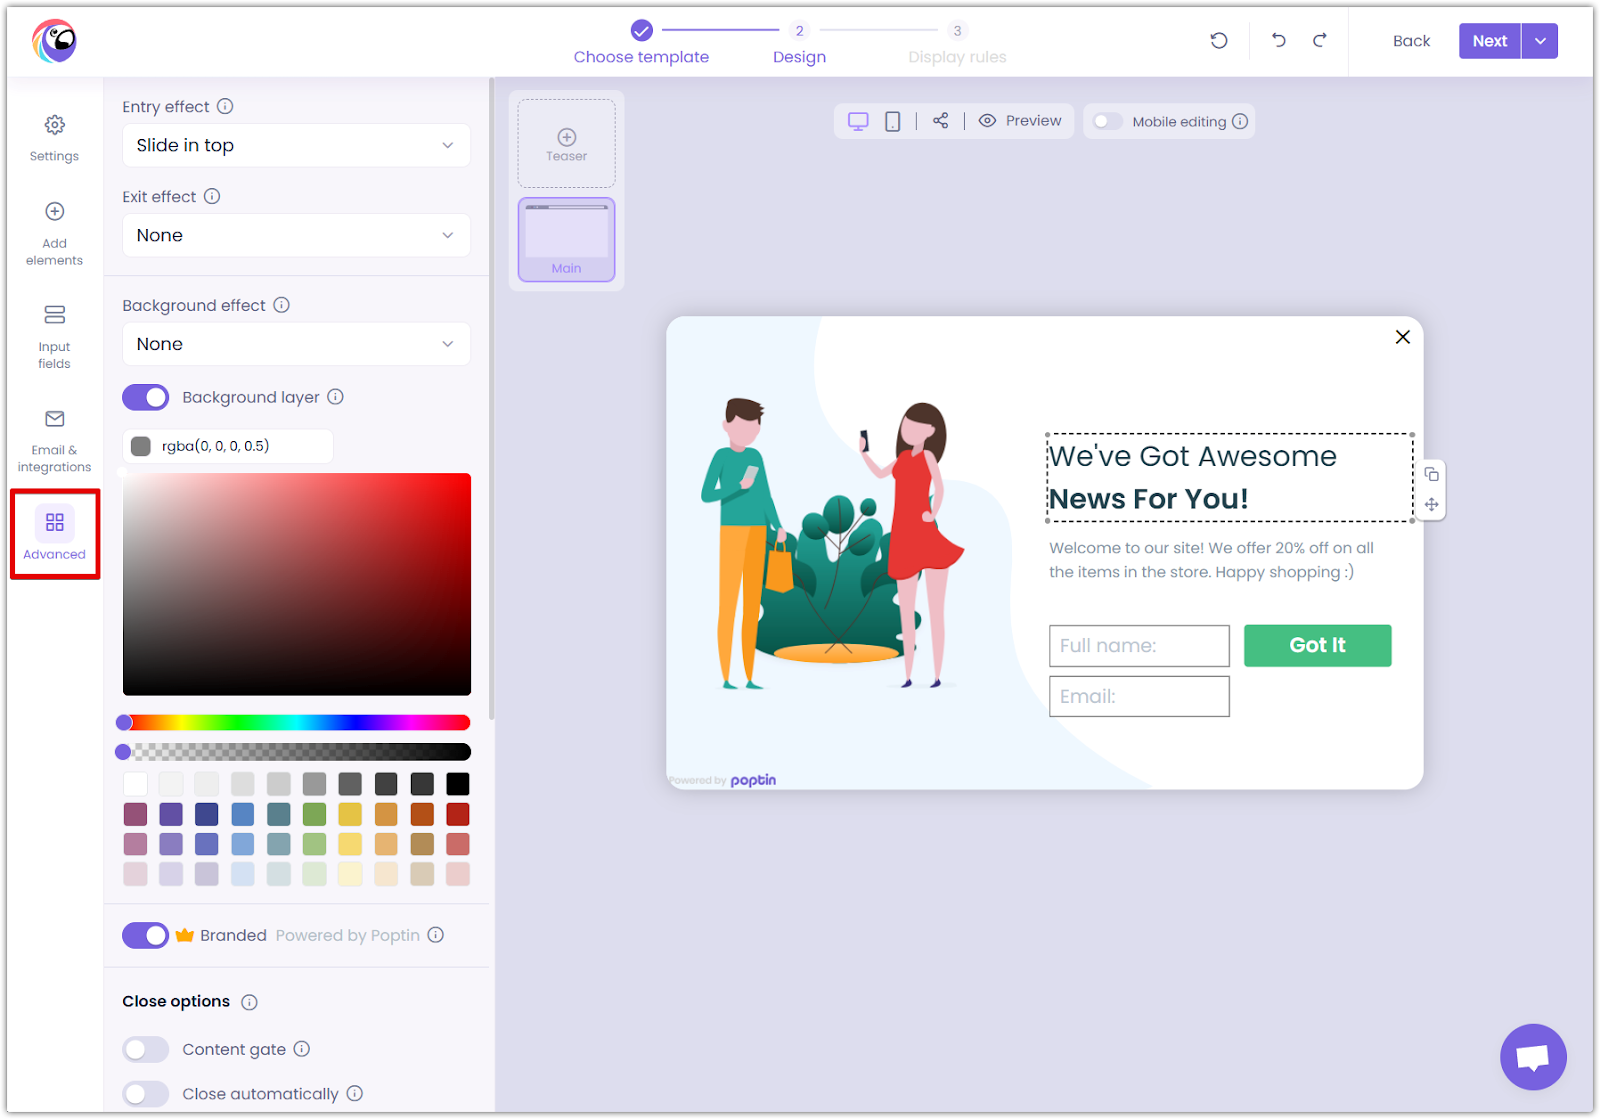
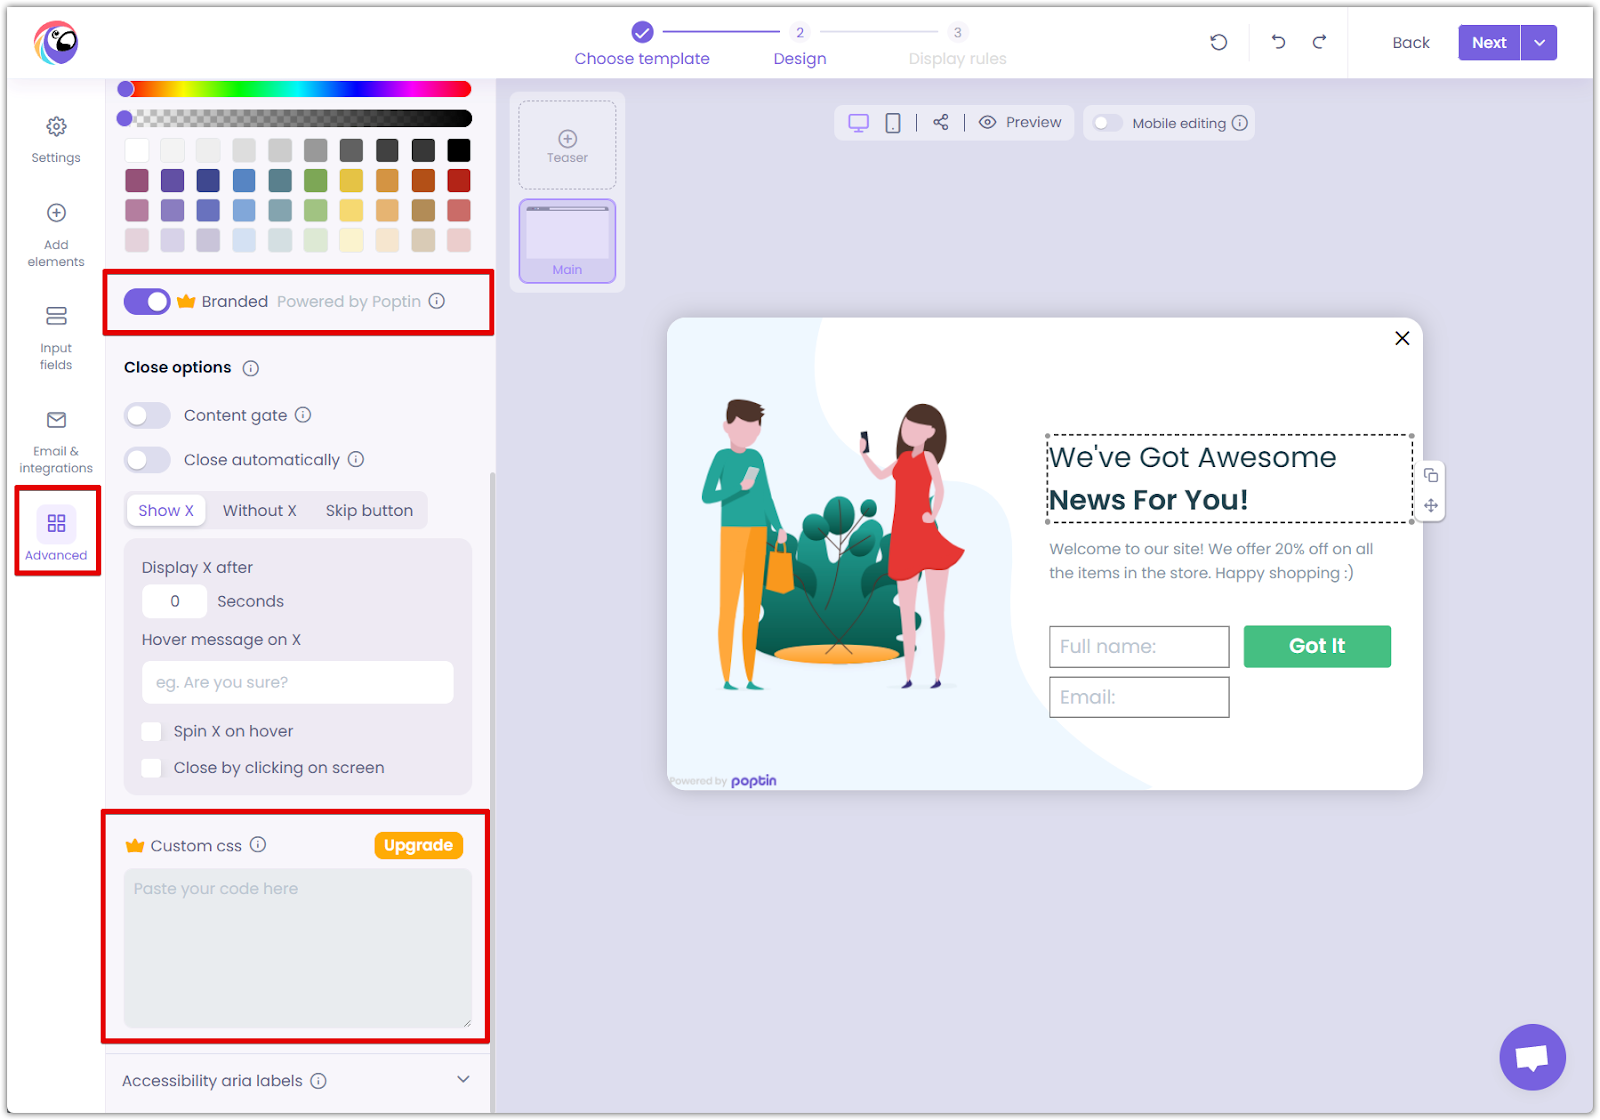
5. Advanced settings: Use animations and branding removal (premium users only) to create seamless, visually appealing popups. Customize further with CSS to match your website’s unique design requirements.
Display rules and triggers
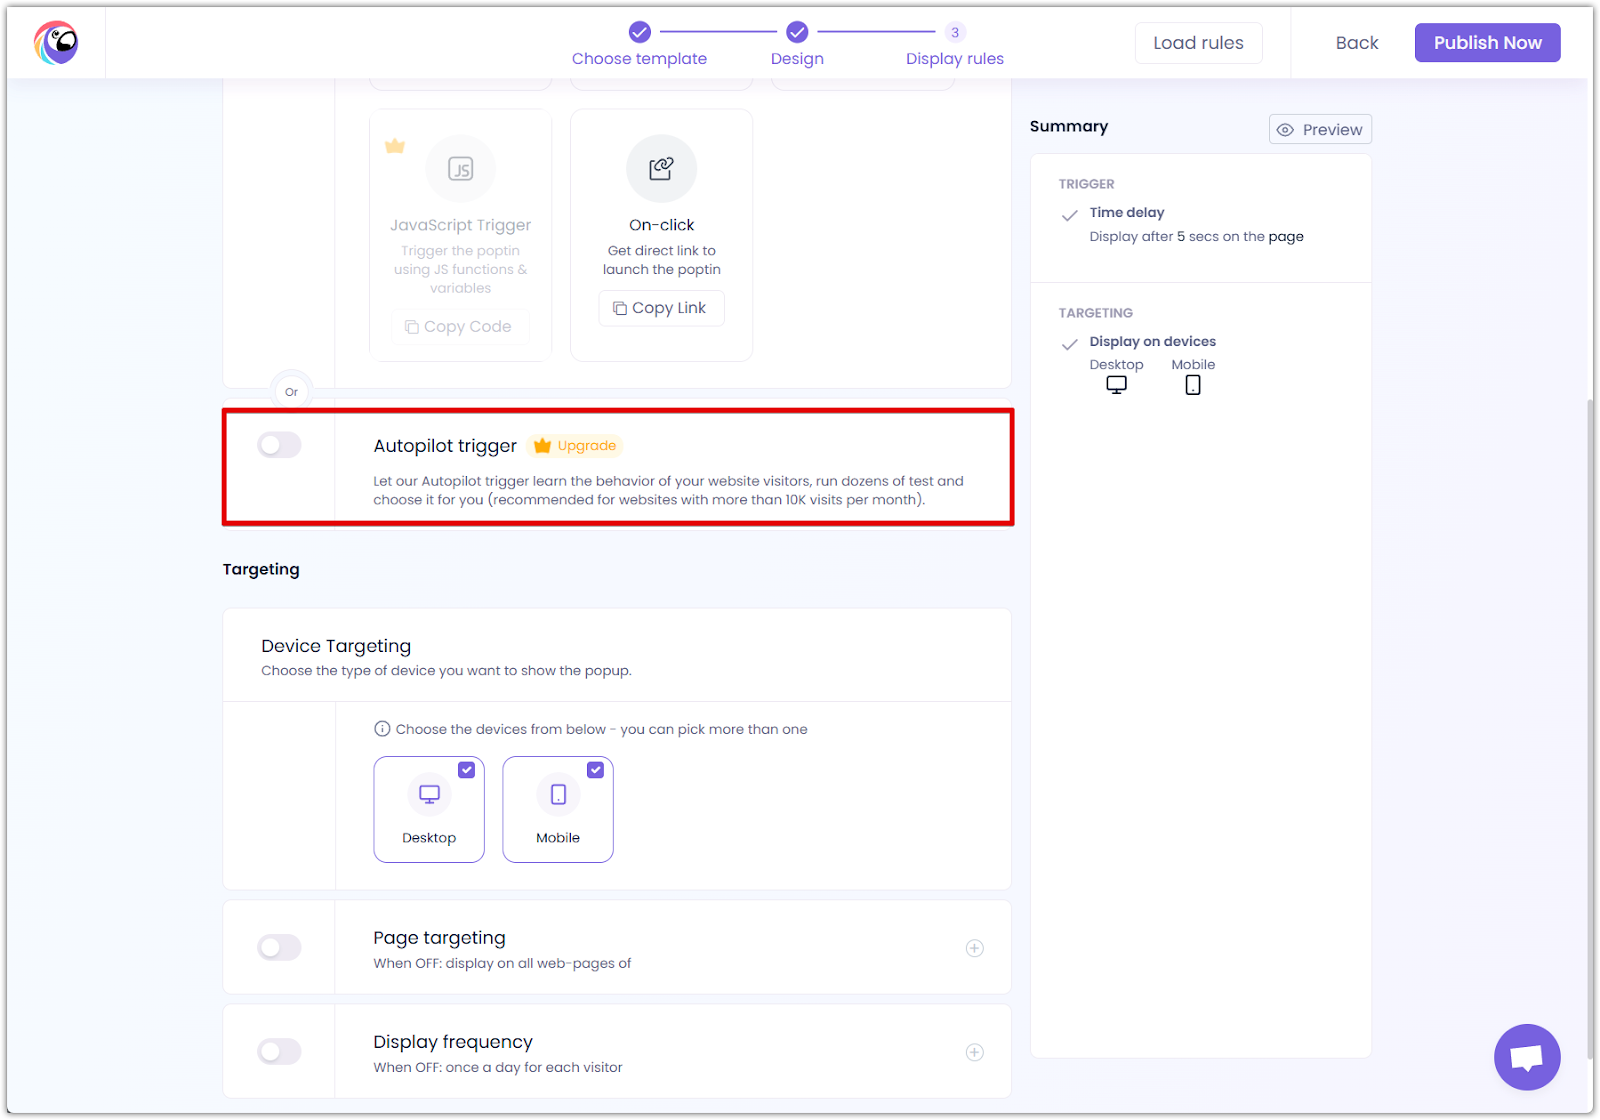
Poptin provides two types of triggers to control when popups appear:
1. Manual Trigger: Choose from various triggering methods to determine when the popup will be displayed. You can select multiple triggers, and the popup will launch as soon as the first condition is met.
- Exit intent: Displays when visitors try to leave the page, encouraging them to stay or take action before leaving.
- Time delay: Appears after a set number of seconds, ensuring the visitor has had time to browse before the popup is triggered.
- Scroll trigger: This shows when the visitor scrolls a certain percentage of the page, capturing their attention as they explore.
- Click trigger: Activates when a visitor clicks a specific element, allowing for highly targeted engagement.
- Inactivity trigger: Engages users after a period of no activity, re-engaging visitors who may have lost focus.
- Page count trigger: Displays after a visitor has browsed a specific number of pages.
- Click count trigger: Triggers after a set number of clicks, ideal for encouraging deeper engagement.
- On-click trigger: Provides a direct link that launches the popup when clicked.

2. Autopilot Trigger (Premium Feature): This AI-driven feature learns website visitors' behavior, runs multiple tests, and selects the optimal time to display the popup. It is recommended for websites with more than 10K monthly visits and requires an upgraded plan.
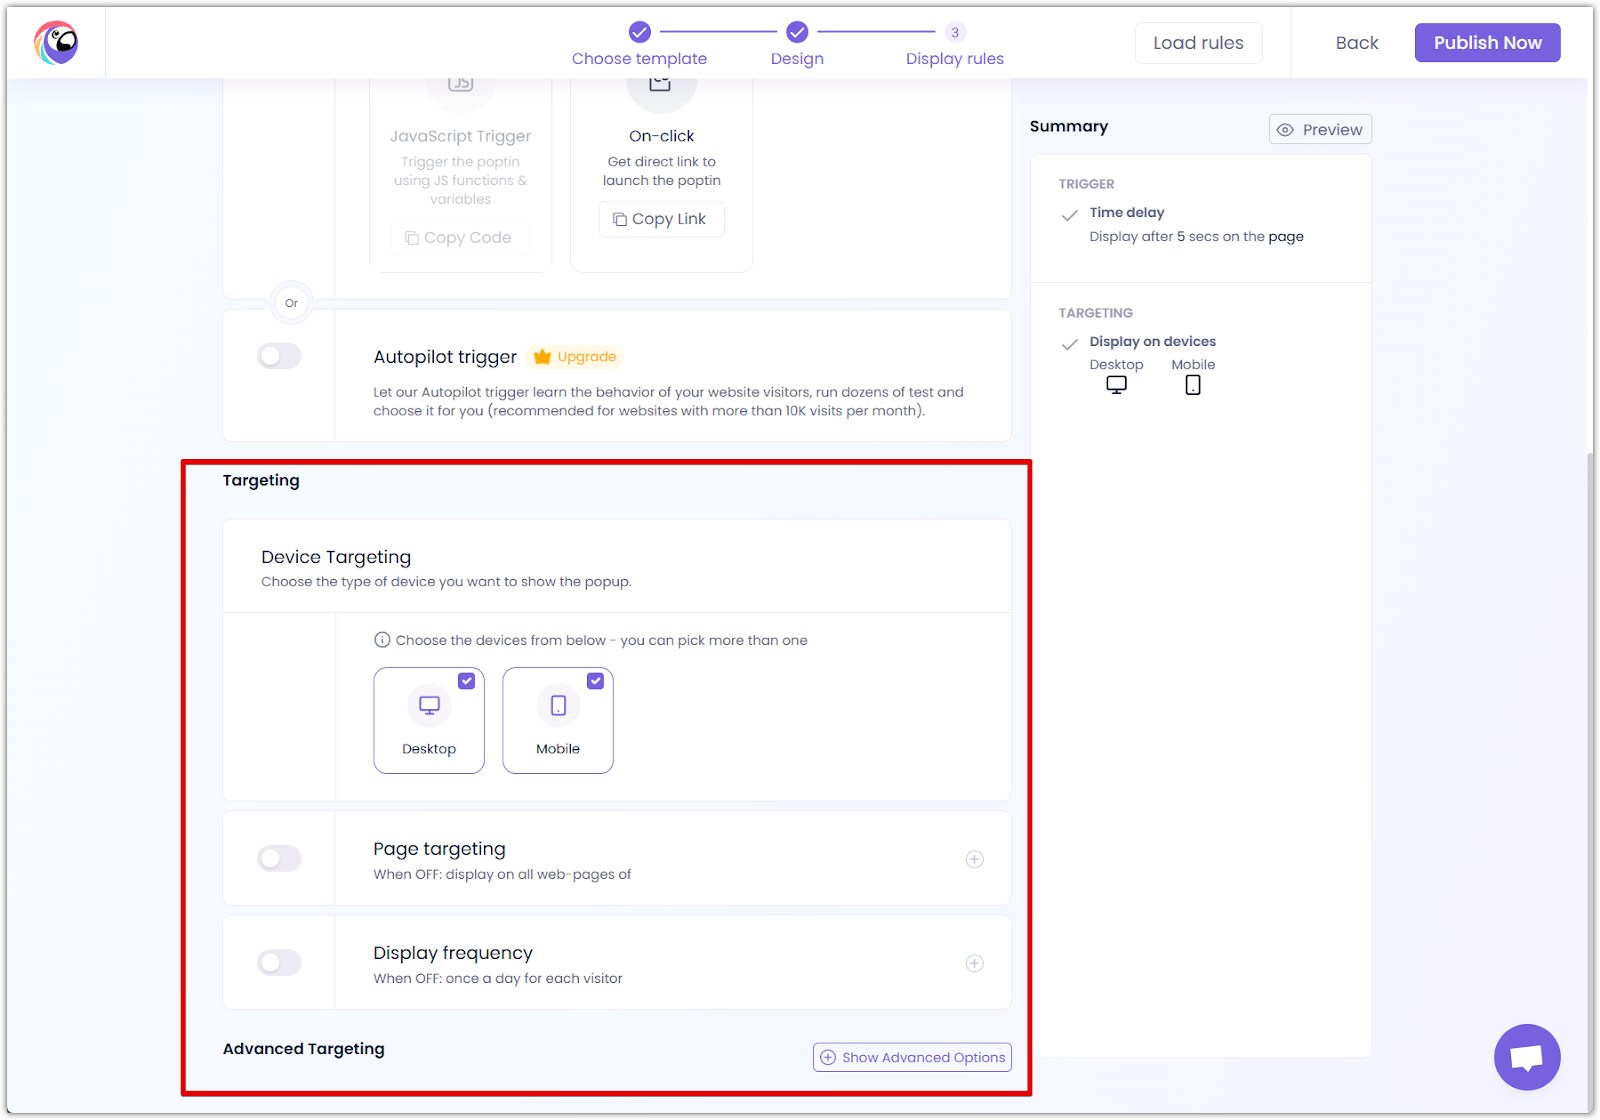
Targeting and advanced options
- Device Targeting: To ensure a seamless experience across devices, choose whether to display the popup on desktop, mobile, or both.
- Page Targeting: Set specific pages on which the popup should appear. If disabled, it will display on all pages.
- Display Frequency: Control how often visitors see the popup. By default, it appears once a day per visitor, but you can adjust this setting as needed.
- Advanced Targeting: Access additional options for further refining audience targeting.
Optimizing popup performance
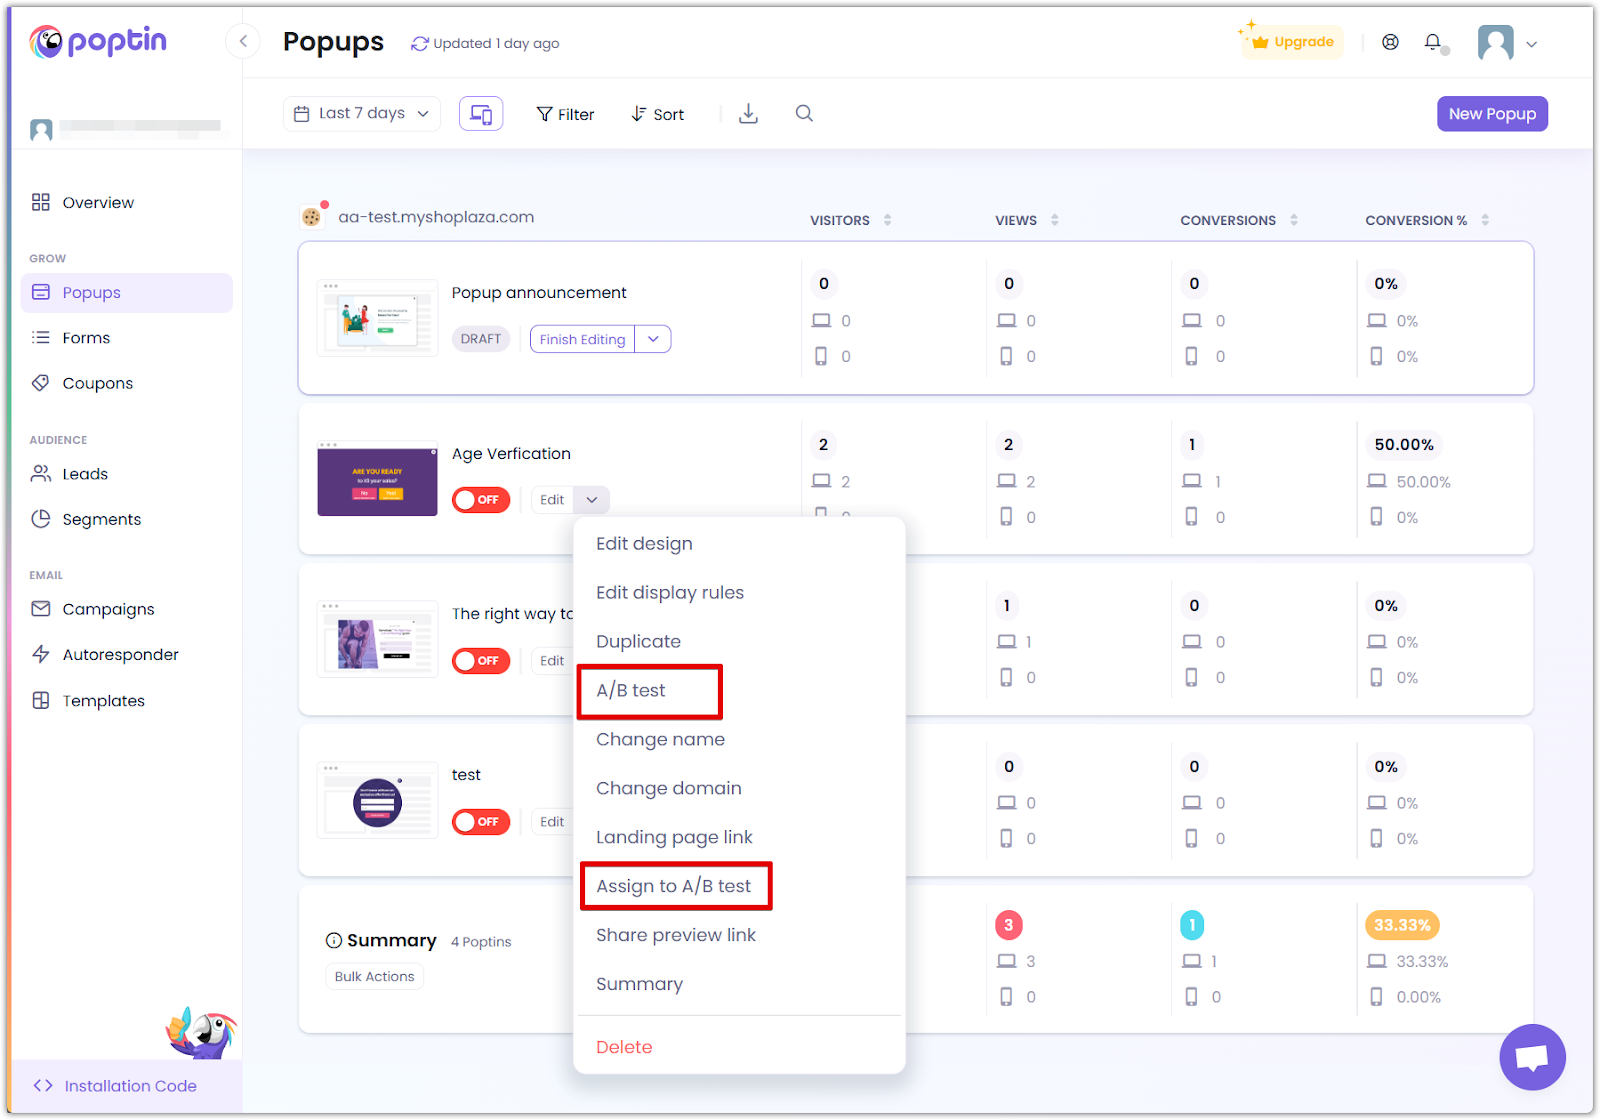
1. Run A/B tests to compare different popup designs, messages, and triggers. Testing variations help determine what resonates most with your audience.

2. Analyze conversion rates and tweak your strategy based on real data. If a popup isn’t performing well, adjust the design, timing, or messaging to improve effectiveness.
3. Refine targeting settings to ensure popups appear to the right visitors at the right time. Overexposure to popups can lead to visitor frustration, so balance is key.

Best practices for high-converting popups
- Keep the message clear and concise: Avoid overwhelming visitors with too much text. Stick to a strong, action-driven message.
- Use eye-catching visuals: A well-designed popup with compelling imagery can significantly boost engagement.
- Offer real value: Whether it’s a discount, exclusive content, or a free resource, ensure visitors have a reason to take action.
- Ensure easy exit options: A user-friendly popup should include a clearly visible close button to prevent frustration.
With Poptin Popups, you can engage visitors in meaningful ways and drive higher conversions. Experiment with different popup styles, triggers, and targeting options to find what works best for your audience!
Contact Poptin support
If you need assistance, visit the Poptin Help Center , where you can search for help docs, chat live with support, or send an email for further assistance.
Next Steps
- Learn about Forms and when to use them instead of Popups.
- Track popup performance using Leads & Reports.


Comments
Please sign in to leave a comment.