
Various marketing campaigns, such as rebates, flash sales, coupons, and discount codes, can attract more customers, increase sales, and build customer loyalty. Linking promotional campaign landing pages to your store header makes it easy for customers to learn about your brand, products, and services. This also streamlines customer information collection for future marketing activities and long-term store growth. For detailed instructions on creating marketing campaigns, click the links above.
Adding promotional campaigns to your store's header navigation is straightforward. This ensures customers can easily find and engage with your special offers. Here's a guide to walk you through it:
Linking a campaign
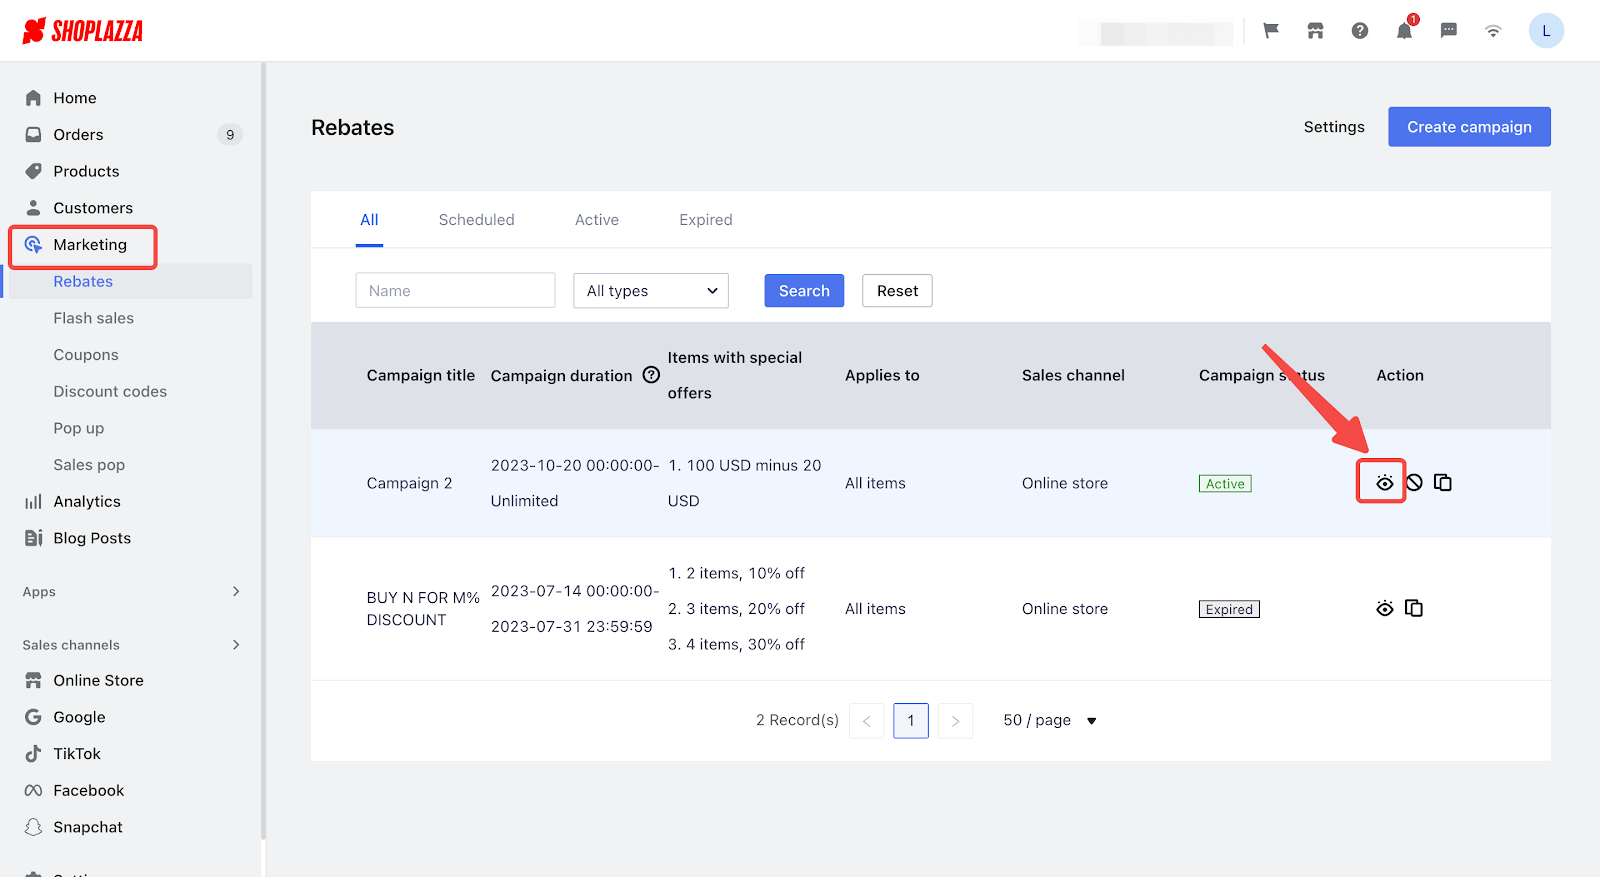
1. Access marketing campaign: Navigate to your Shoplazza admin > Marketing. Locate the specific campaign you want to link in your header and click the eye icon. This action will open a preview of the campaign landing page.
2. Copy landing page URL: Once the preview page loads, locate the URL in your browser's address bar. Select the entire URL and copy it. This is the link customers will use to access your promotion.

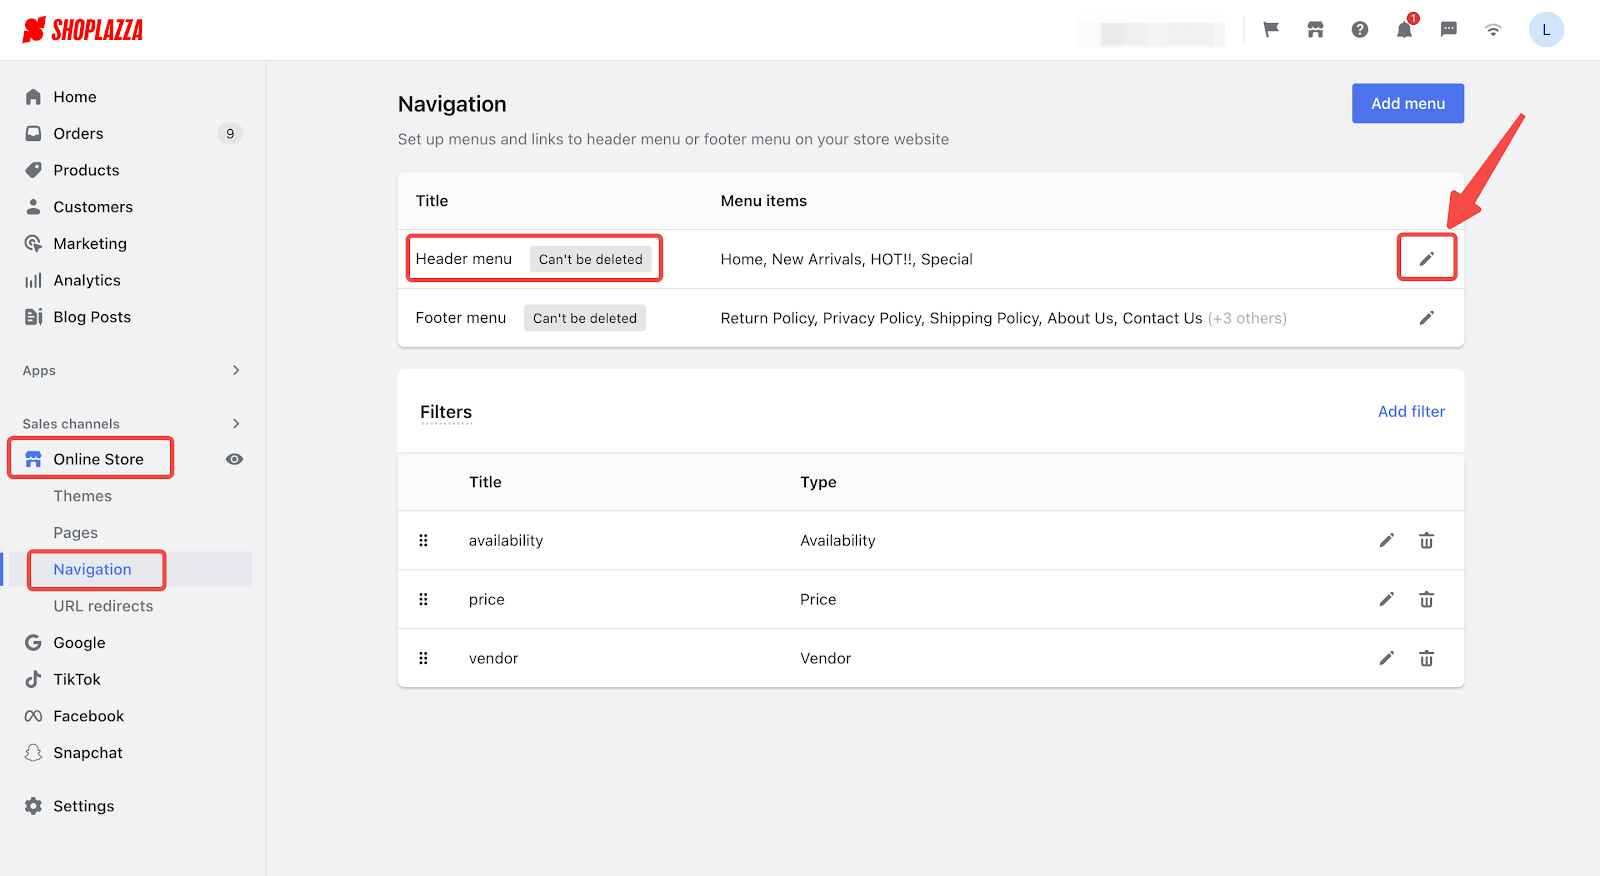
3. Edit header menu: Return to your Shoplazza admin. Go to Online Store and then select Navigation. Find the Header menu and click the pencil icon to edit it. This will allow you to modify the existing header links.
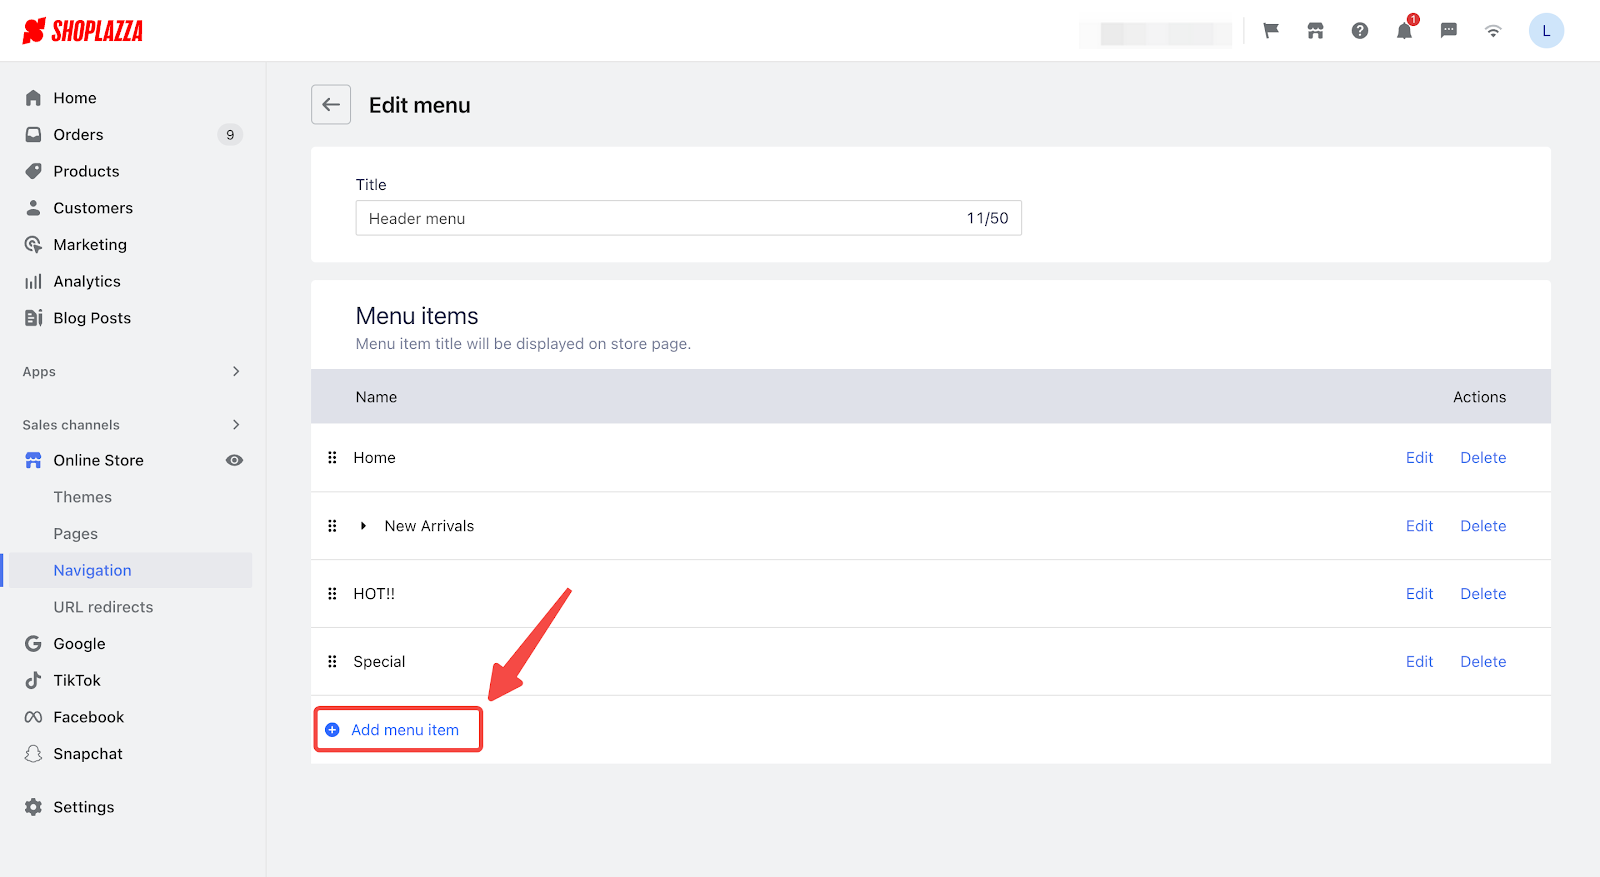
4. Add menu item: Within the header menu editor, click the Add menu item button. This will open a new field where you can configure the link to your campaign.
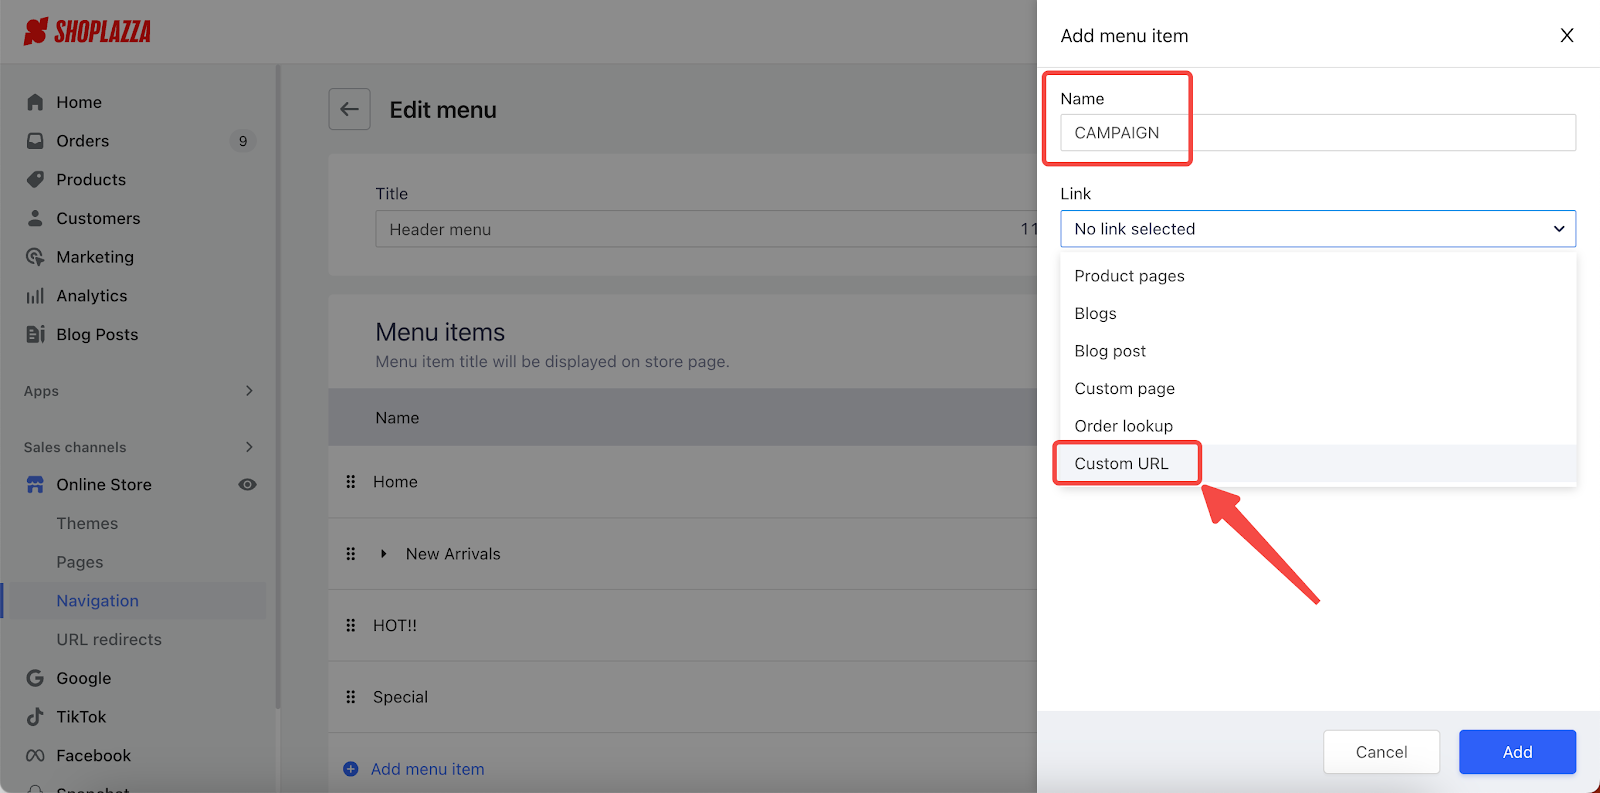
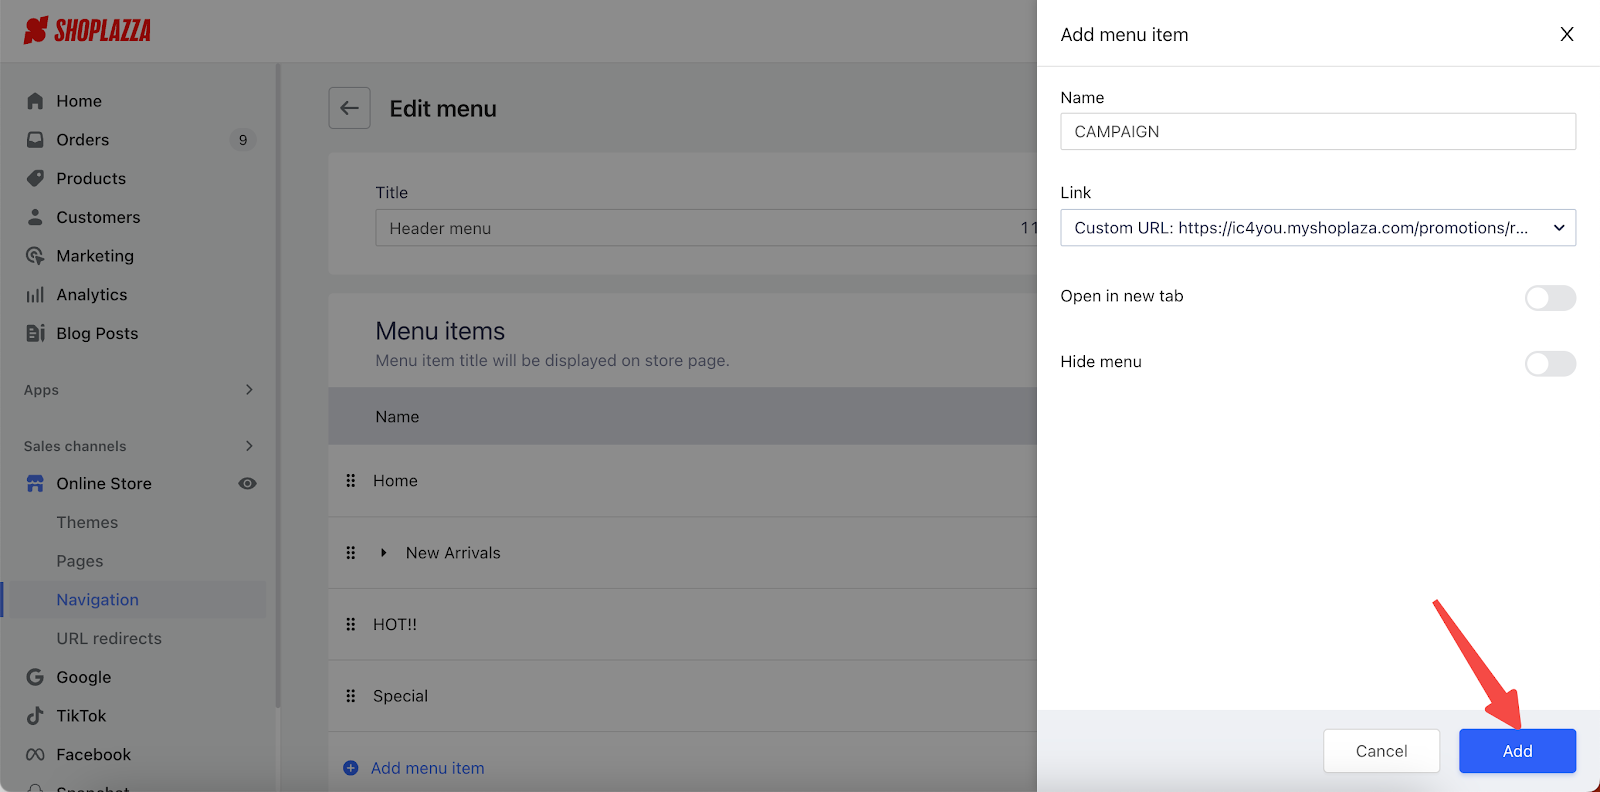
5. Name menu item and select custom URL: Give your new menu item a descriptive name (e.g., Summer Sale, Discount Codes, etc.). This is the text customers will see in the header. In the dropdown menu, select Custom URL.
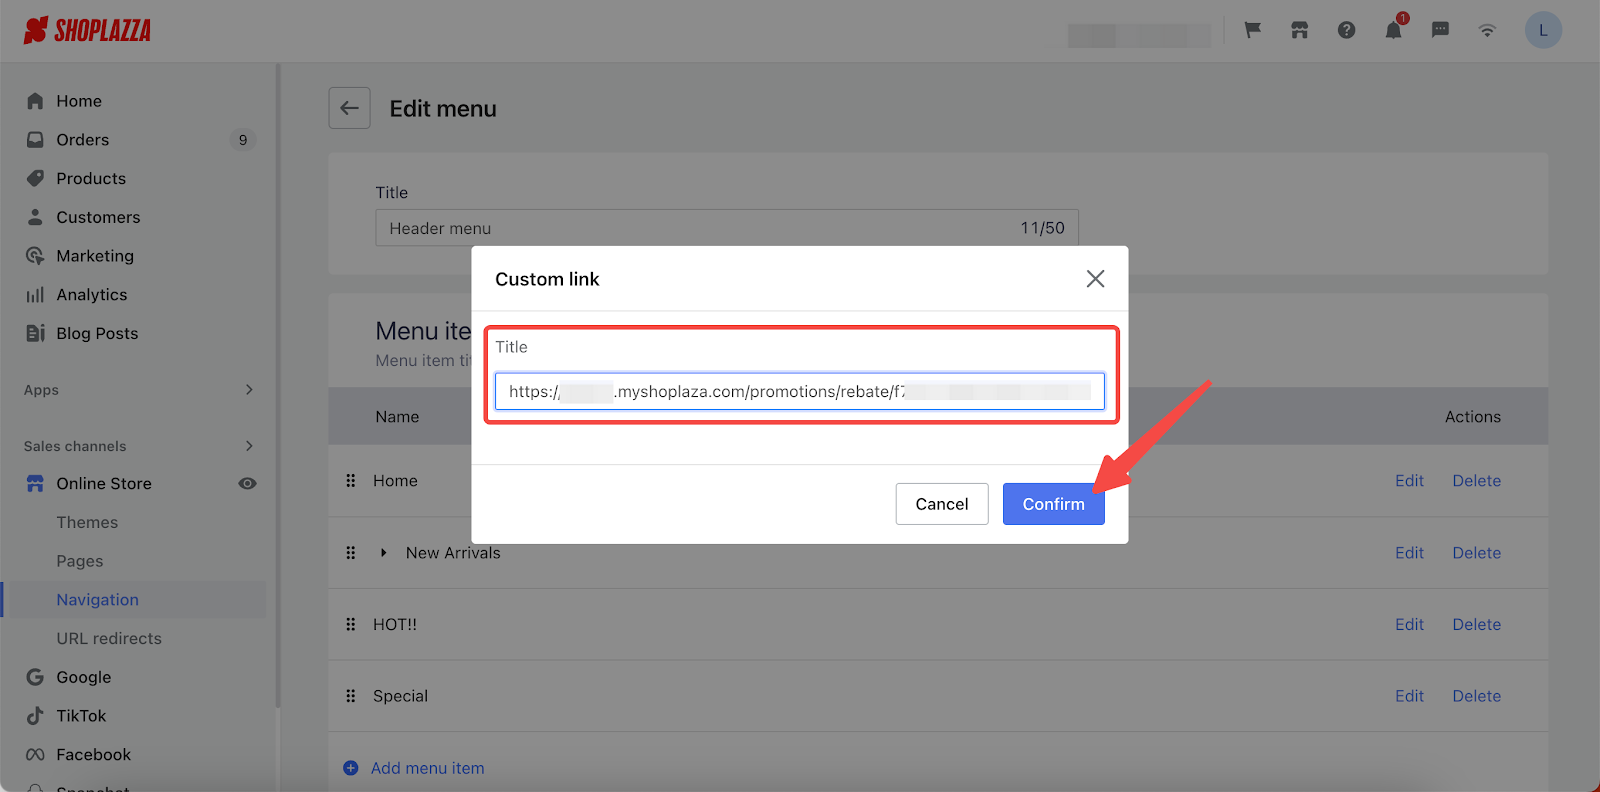
6. Paste URL and confirm: Paste the campaign landing page URL you copied earlier into the provided field. Double-check that the URL is correct. Then, click the Confirm button.
7. Add menu item: After confirming the URL, click the Add button to add the new menu item to your header officially.
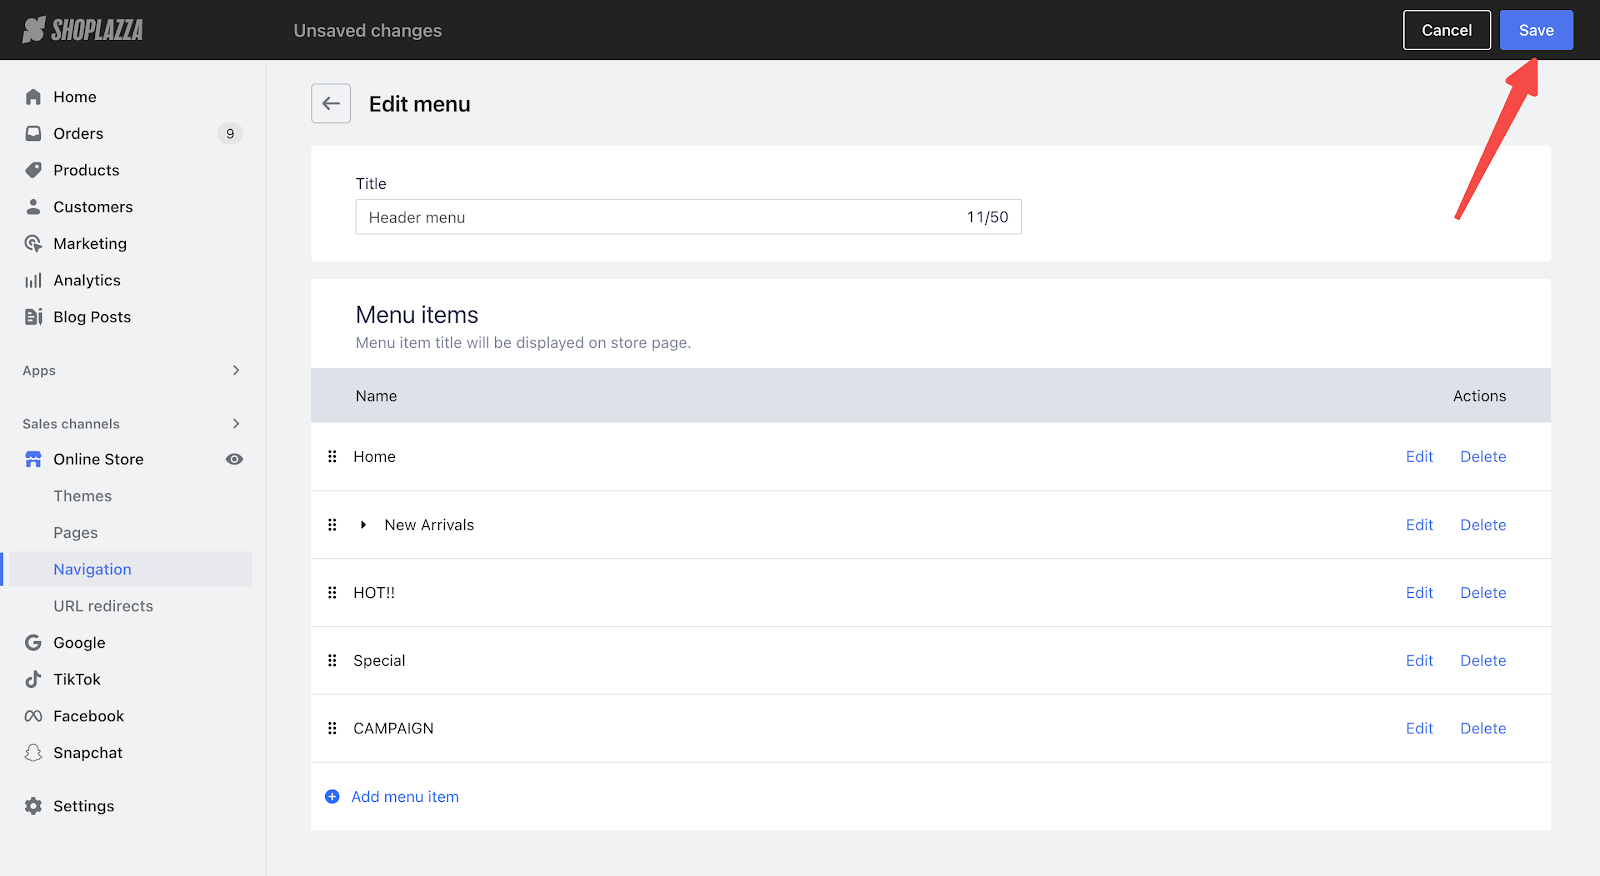
8. Save changes: Once you've added the menu item and are satisfied with its name and link, click the Save button to apply the changes to your store's header navigation.
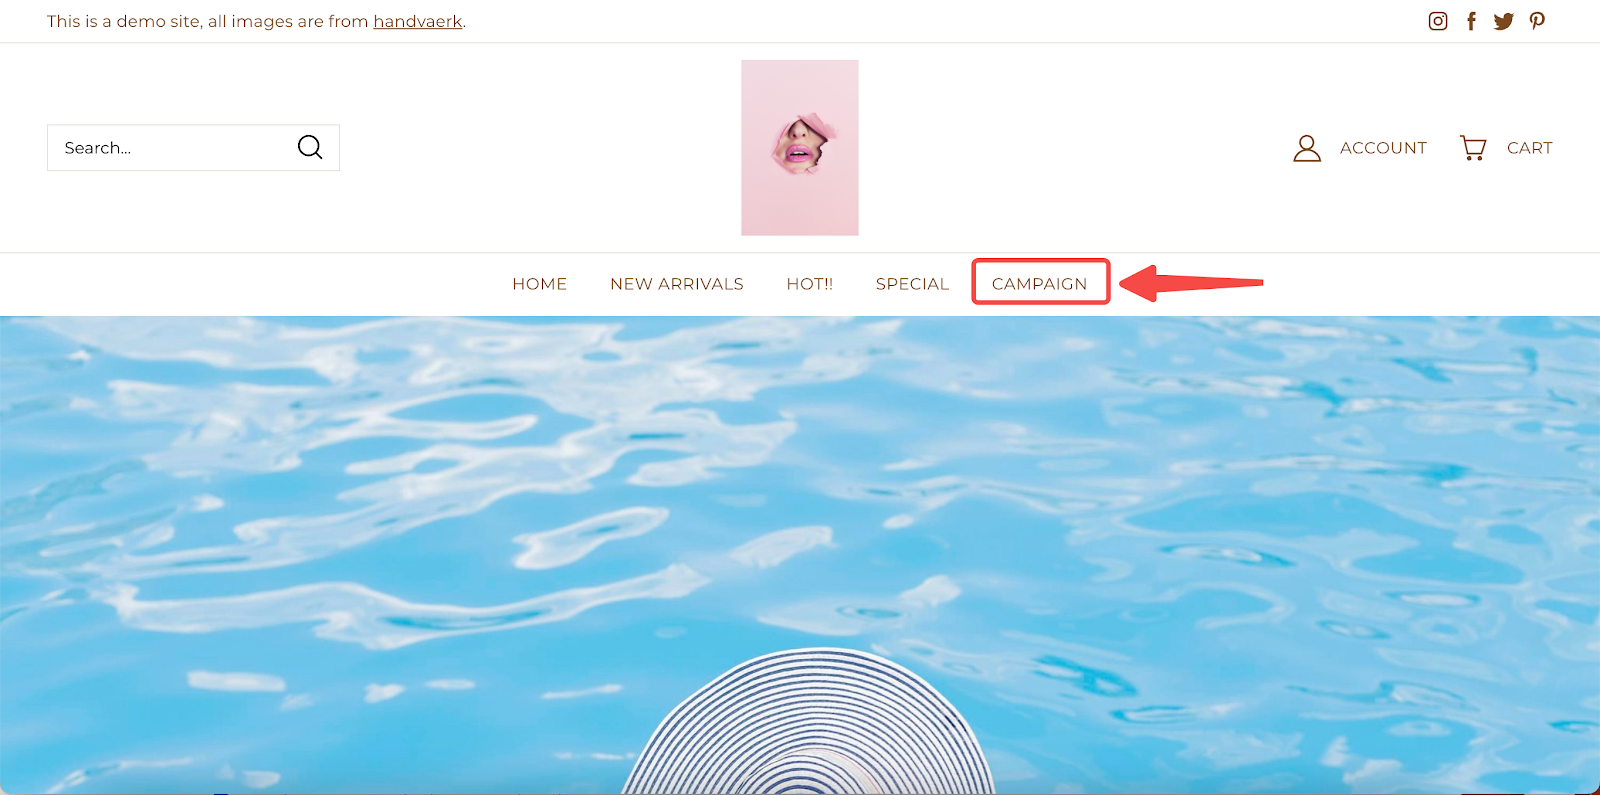
9. View final appearance: Visit your store's website for the new menu item in your header. Click the link to ensure it directs customers to the correct campaign landing page. The screenshot below displays the final appearance. Customers will be directed to the campaign post when they click the link.
By following these steps, you can effectively integrate your marketing campaigns into your store's header navigation, improving customer access and engagement. This direct link provides a seamless experience for customers to discover your promotions and encourages interaction with your brand.


Comments
Please sign in to leave a comment.