
AppsFlyer is a tool that helps you make the most out of your mobile marketing campaigns. By setting up deep linking, you can effectively interact with your customers, get precise data on your campaigns, and even grow your customer base. If you've integrated AppsFlyer with MoCart, here's how to get started with deep linking.
Steps
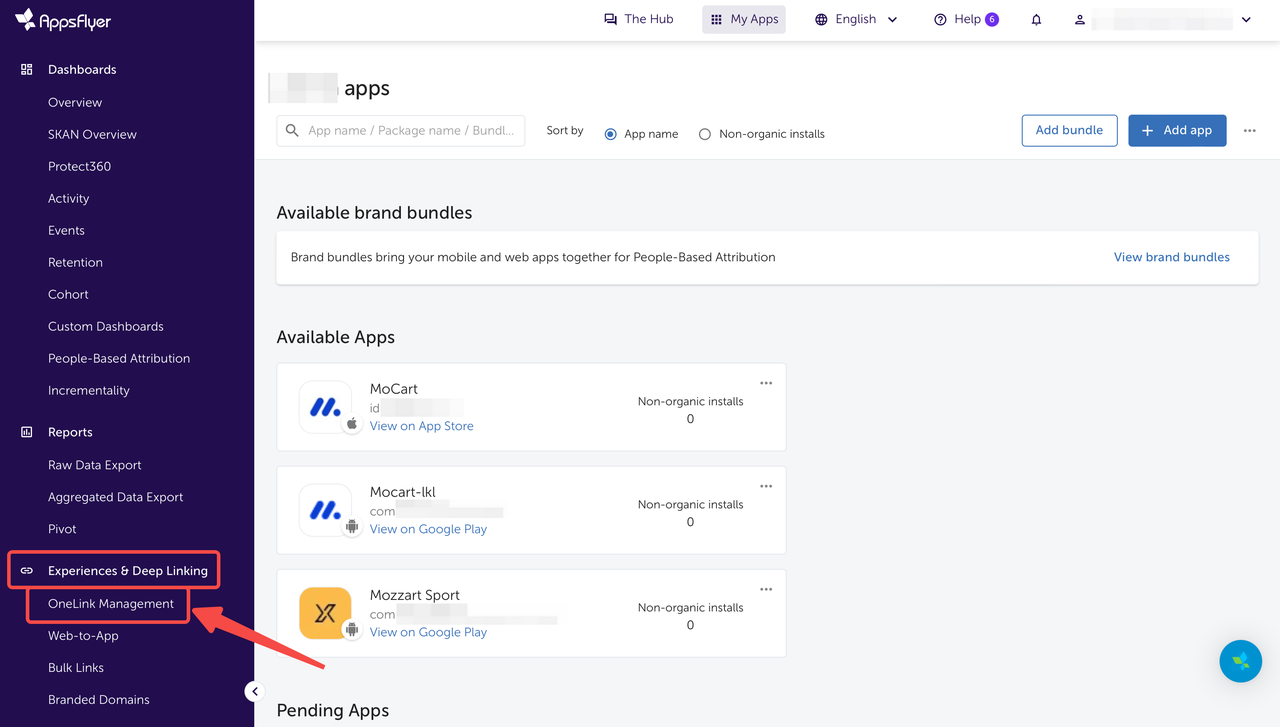
1. From your AppsFlyer admin > Experiences & Deep Linking > OneLink Management.
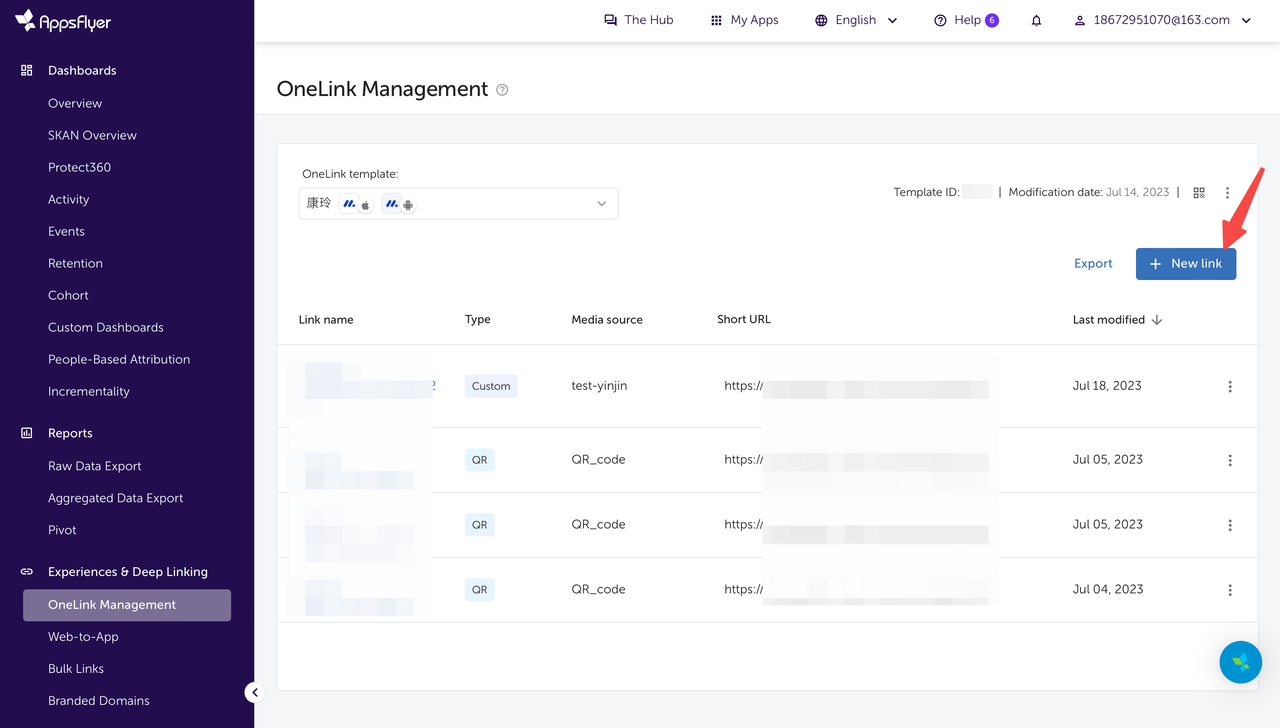
2. Click + New link.
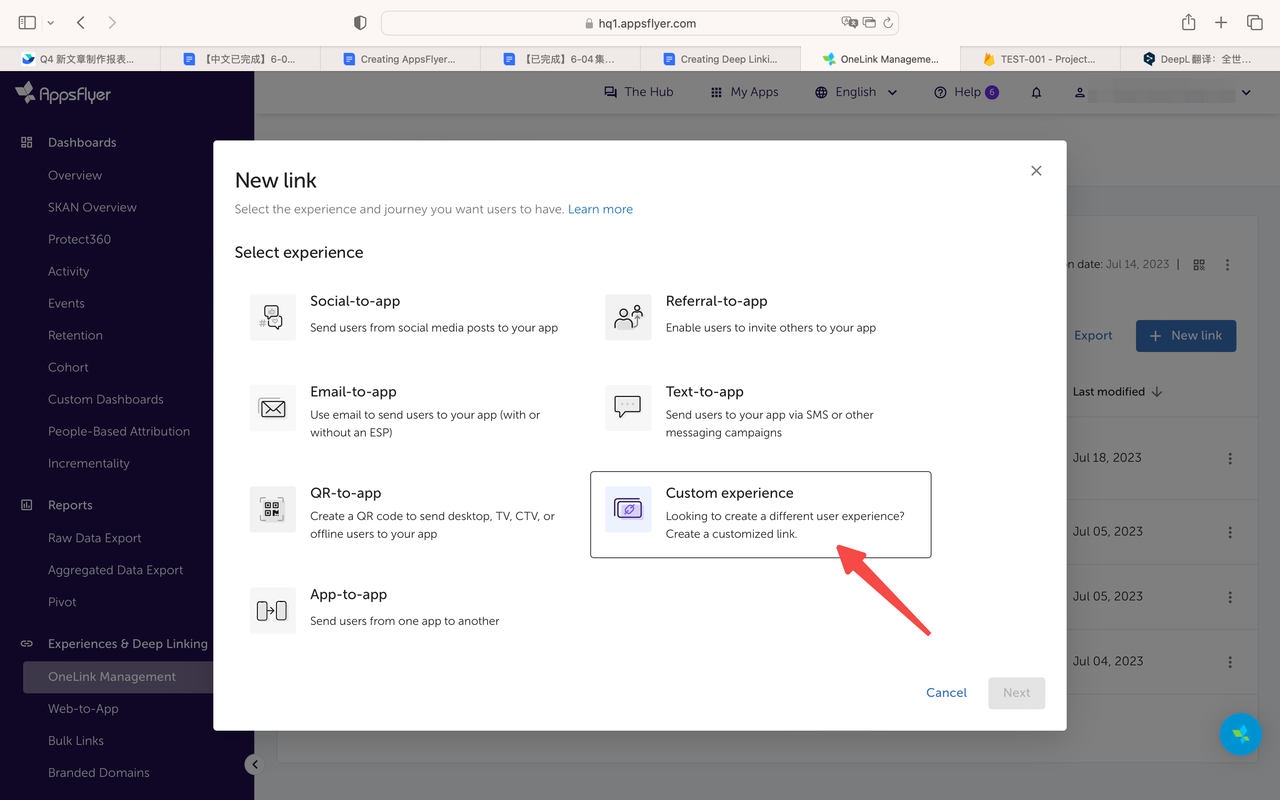
3. Select Custom experience in the pop-up window.
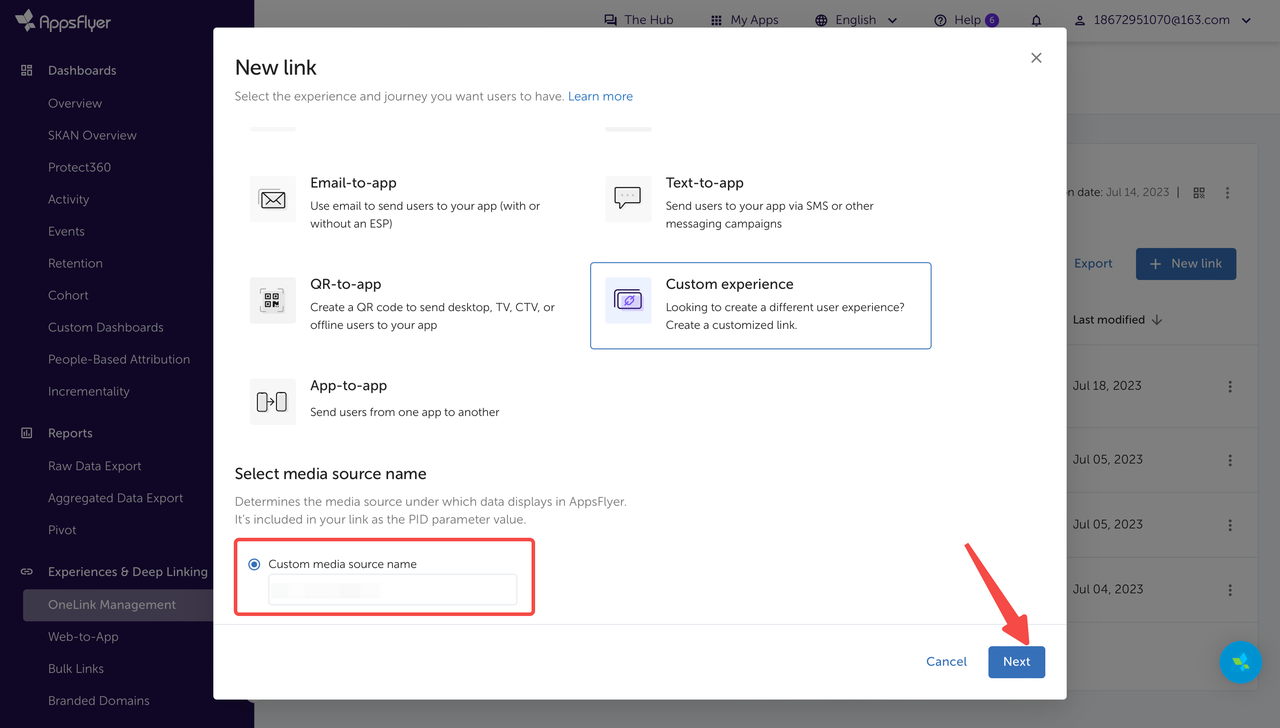
4. Enter a custom media source name, then click Next. The custom media source name is a label you create to identify the channel or platform where your mobile marketing campaign is running. This helps you keep track and analyze the effectiveness of your different campaigns. For example, if you're running an ad on Facebook, you might name it "Facebook_Ad1".
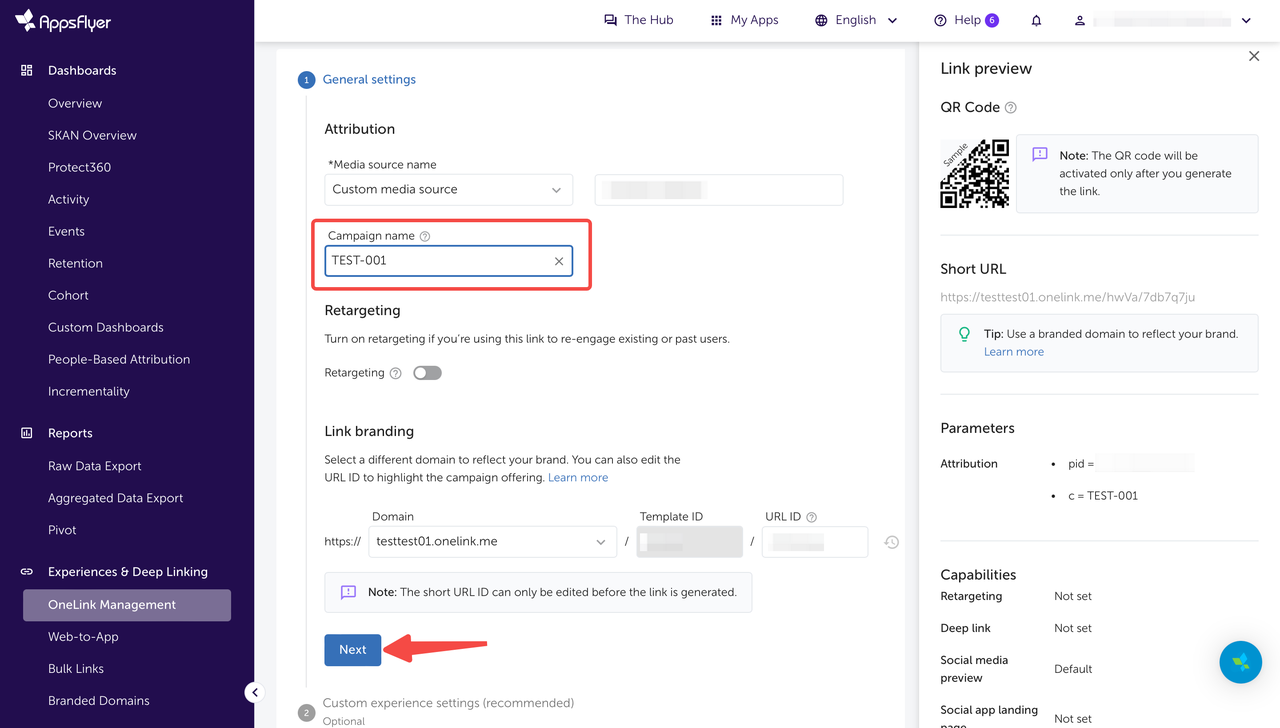
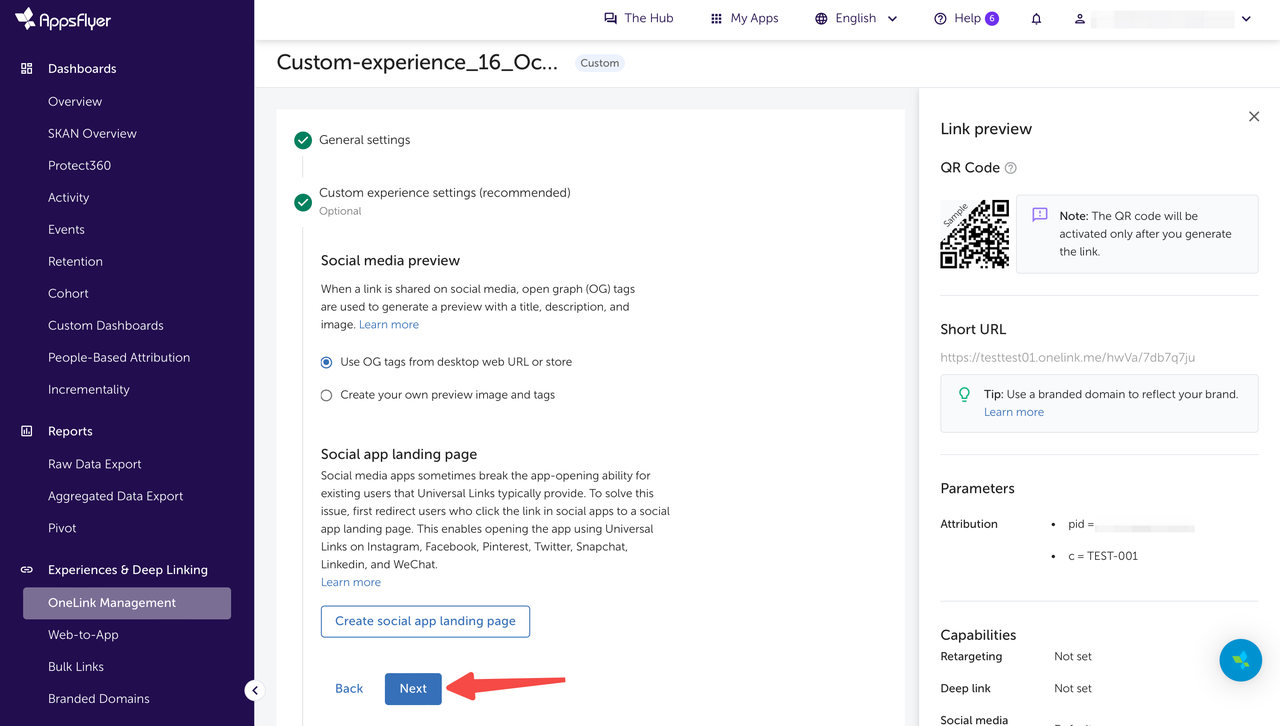
5. In the General settings section, give your campaign a name. The other options here can remain at their default settings. Once you've named your campaign, click Next. You'll see more settings appear; you can also leave these at their default settings. Click Next again to continue.
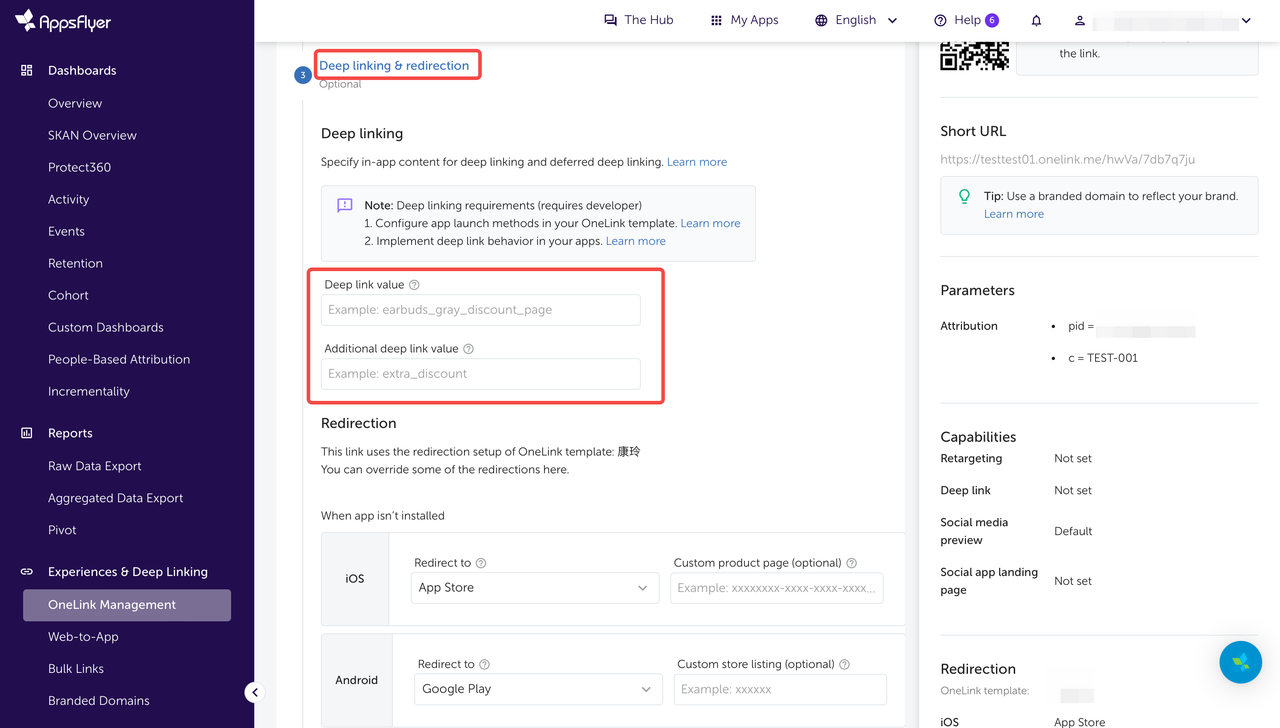
6. In the Deep linking & redirection section, specify where your customers will go when they click the link.
- Deep link value: Enter the type of available content on the page your customers will be directed to.
Example: If you want your customers to be navigated to the product details page, enter ProductDetail.
- Additional deep link value: Enter the specific content your customers will see.
Example: If you want your customers to be navigated to the details page of a certain product, enter its product ID.
| Page | Deep link value | Additional deep link value |
| Product details page | ProductDetail | Product ID |
| Collection page | CollectionDetail | Collection ID |
| Search page | Search | Search terms |
| Custom page | Webview | Specific page URL |
| Collections group page | Collections | No input needed |
7. In the Redirection section, you can set up the URL your customers will be navigated to if they have or have not installed your app. By default, they will be navigated to App Store or Google Play. If you want your customers to be navigated to other pages, set it up here.
- When app isn’t installed: For both iOS and Android systems, select Web URL in the dropdown and enter the specific URL. This is for guiding your customers to visit the app store and download your app.
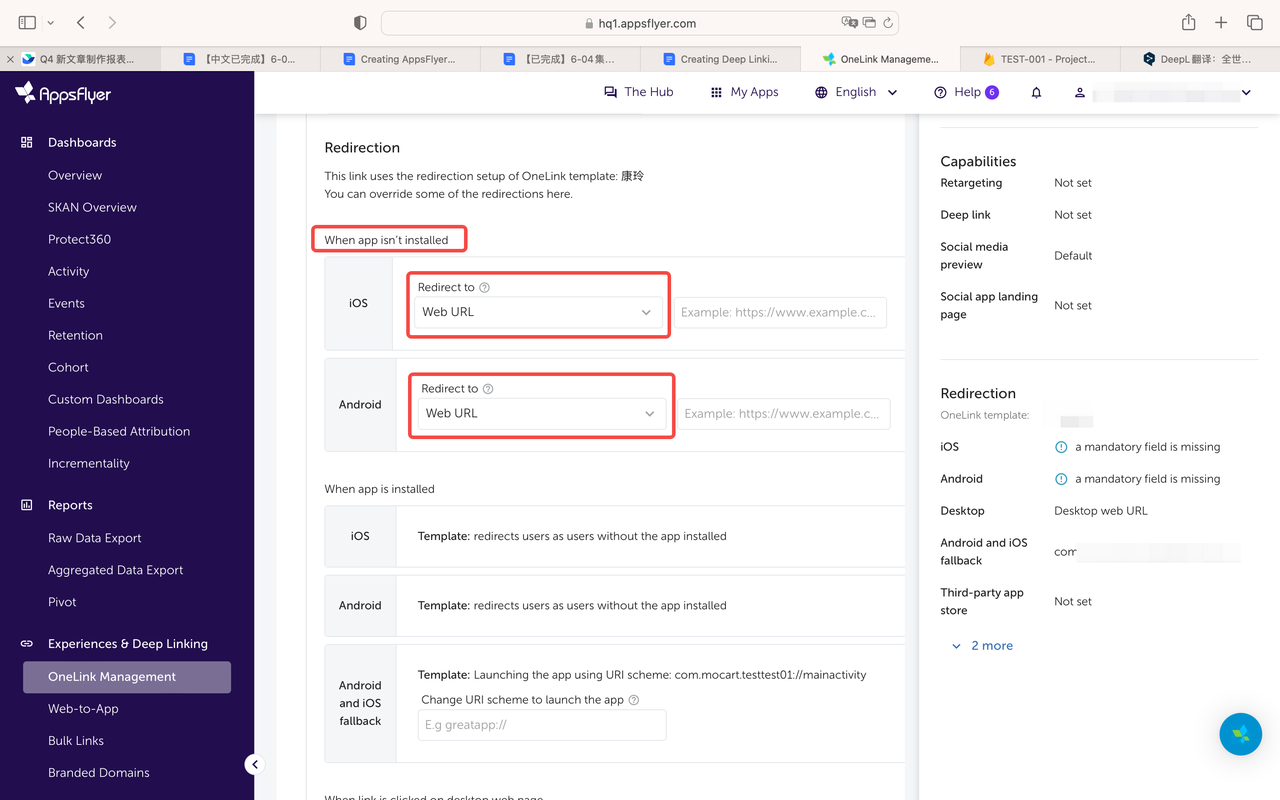
- When app is installed: By default, customers will be redirected according to the templates. You can set up the fallback URL of Android and iOS systems with the format of your bundle ID://mainactivity. This is for guiding your customers to visit the page you want to show them.
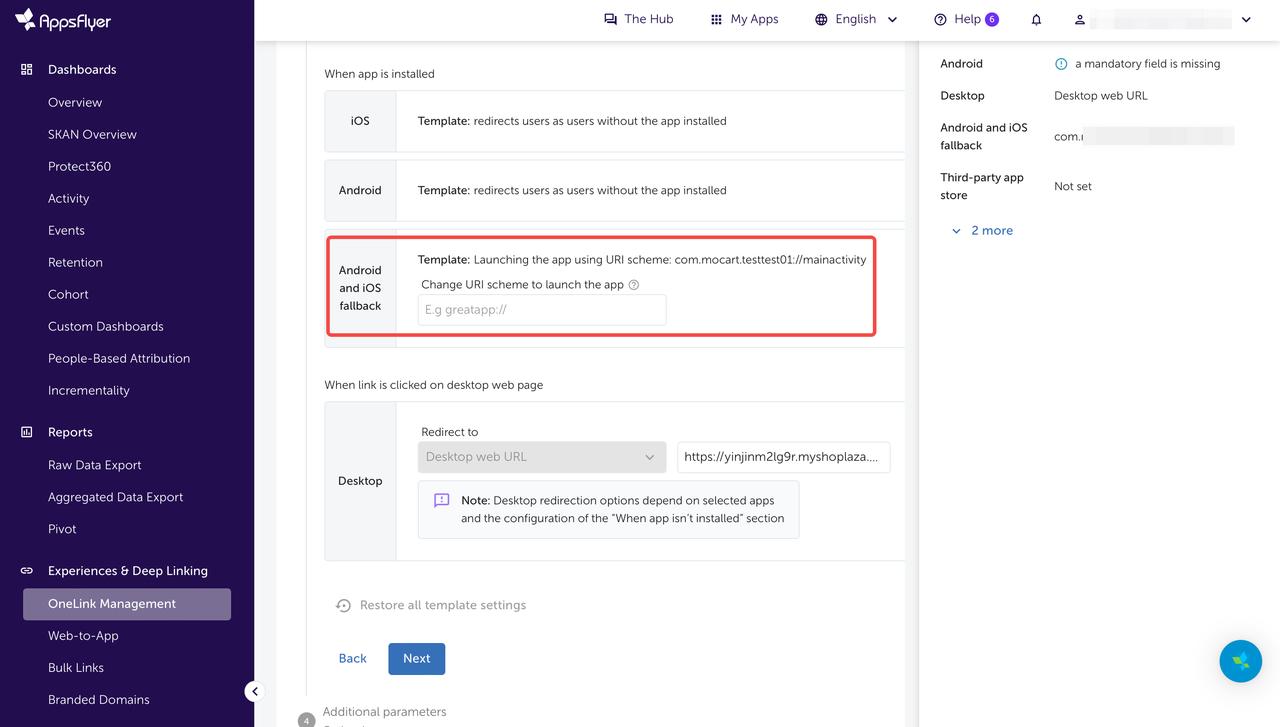
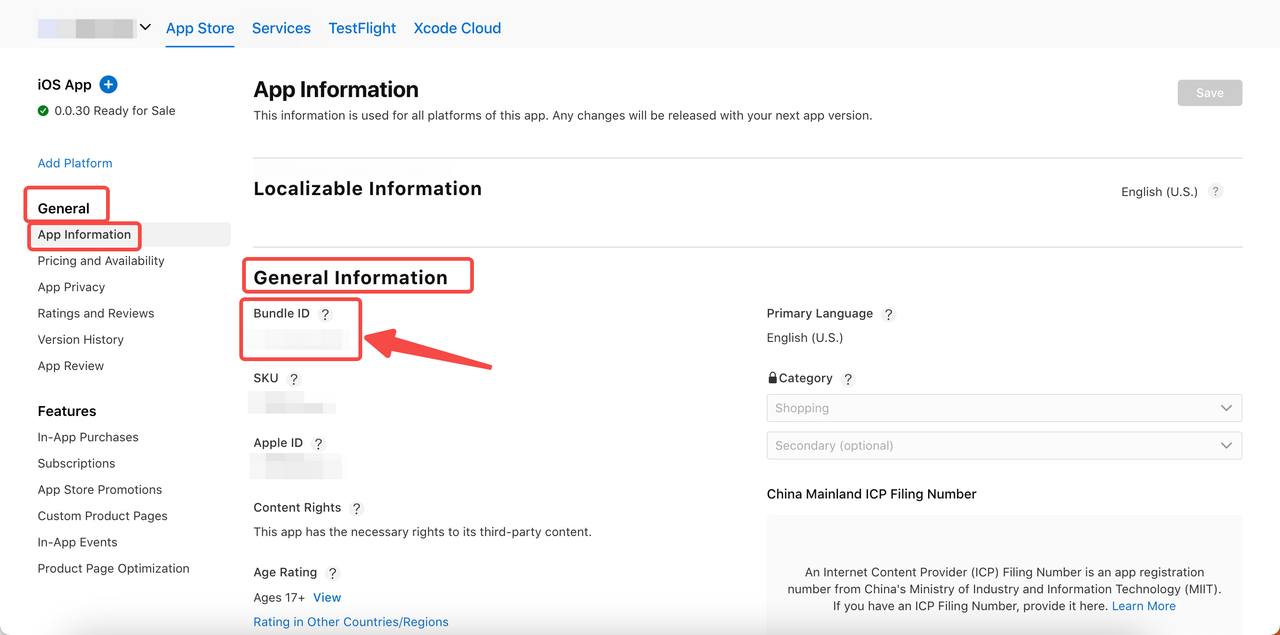
Note
Your Bundle ID can be found in your App Store Connect admin panel. Navigate to My App, select your app, and then go to General > App information > General Information.
- When link is clicked on desktop web page: Select Desktop web URL in the dropdown, copy and paste the URL of your app's homepage. Then, click Next.

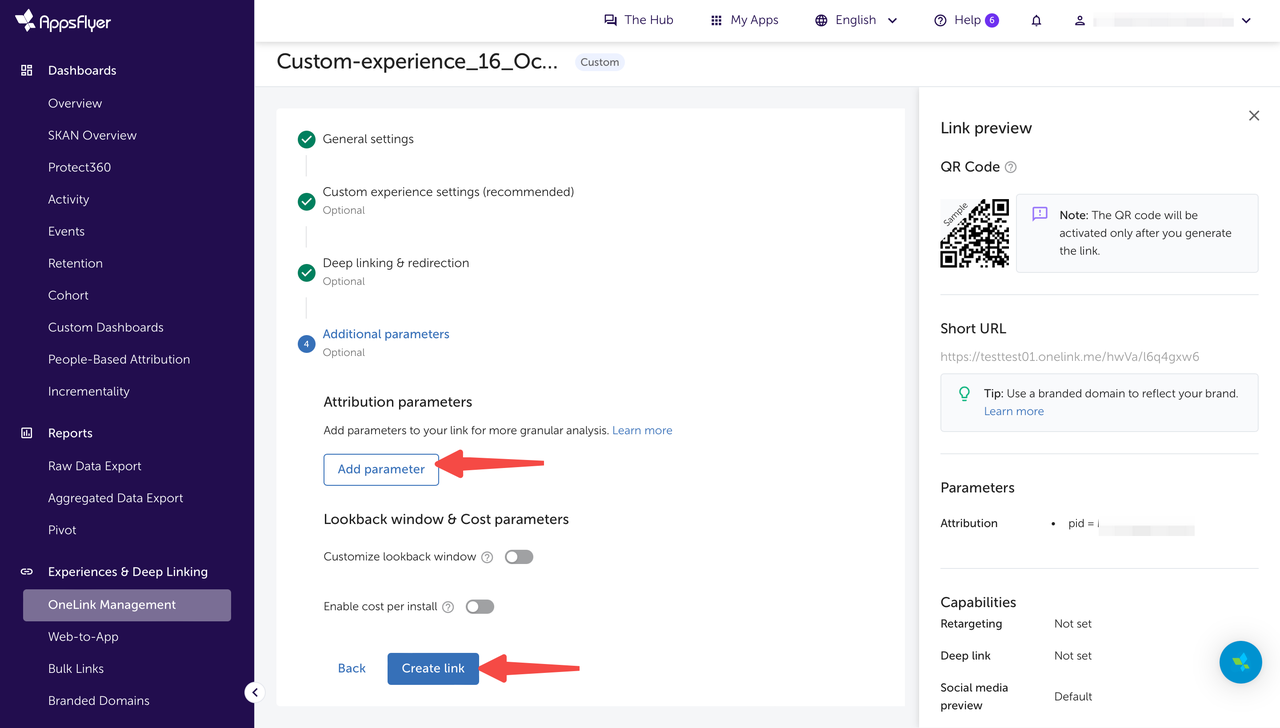
8. You can click Add parameter to set up additional parameters according to your needs. Then, lick Create link to complete your settings.
Related articles
Integrating AppsFlyer with MoCart
Integrating an app to AppsFlyer


Comments
Please sign in to leave a comment.