
When you have multiple places to store your inventory, like warehouses or stores, Shoplazza makes it simple for you to add and handle information for all these different locations. You can easily manage your inventory across various sites right from your Shoplazza admin.
If your business uses different storage locations, like warehouses or backroom storage within a city or across various cities, managing them effectively is key. For example, a merchant with several retail stores within a city might also have additional inventory in various warehouses to ensure timely restocking and efficient distribution between locations. Shoplazza provides a straightforward way to manage these diverse locations. Follow the steps below to set up multiple store locations, simplifying the organization and oversight of your inventory across different places.
Adding store location
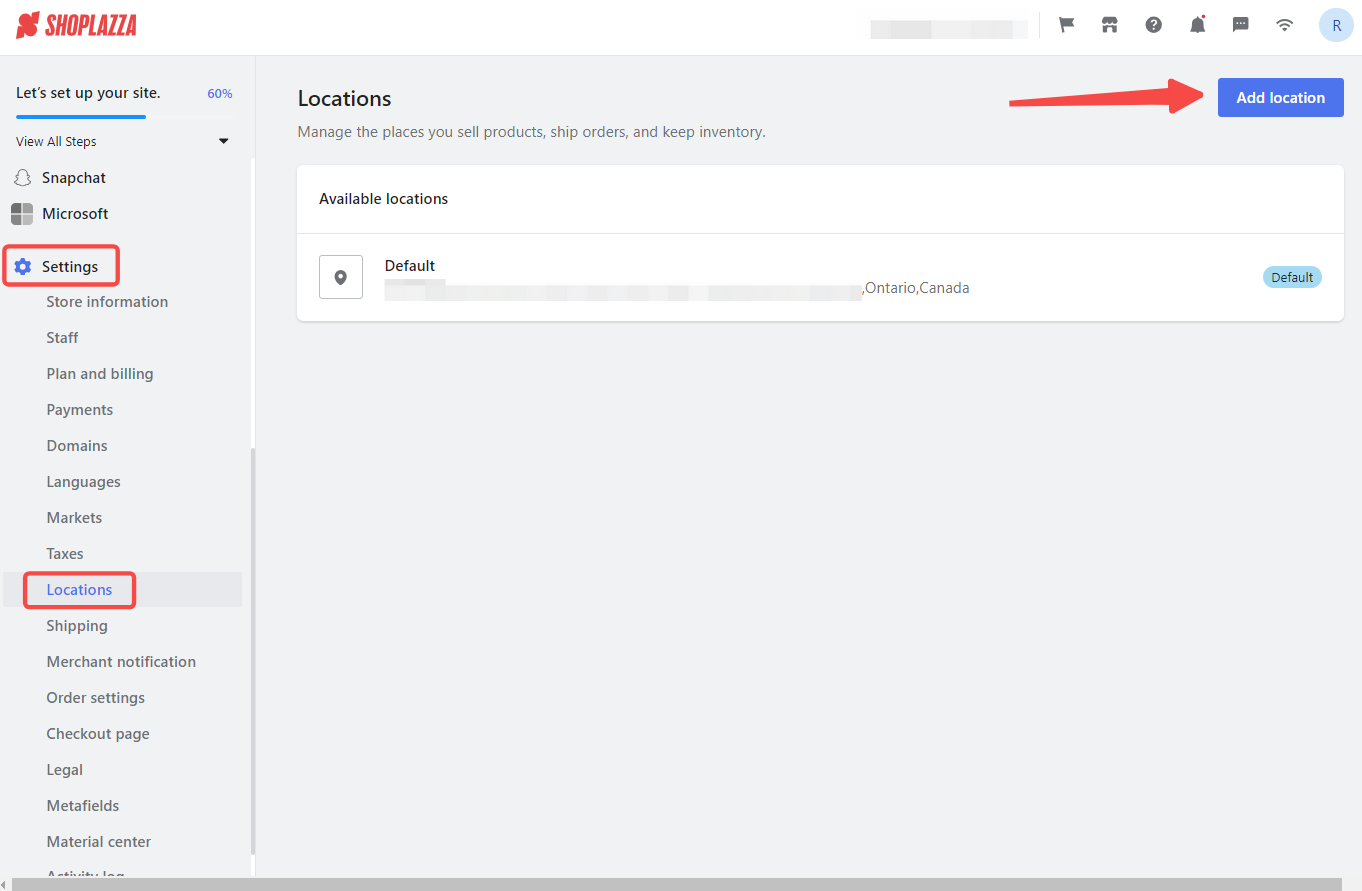
1. From your Shoplazza admin > Settings > Locations, click on Add location on the top right corner.
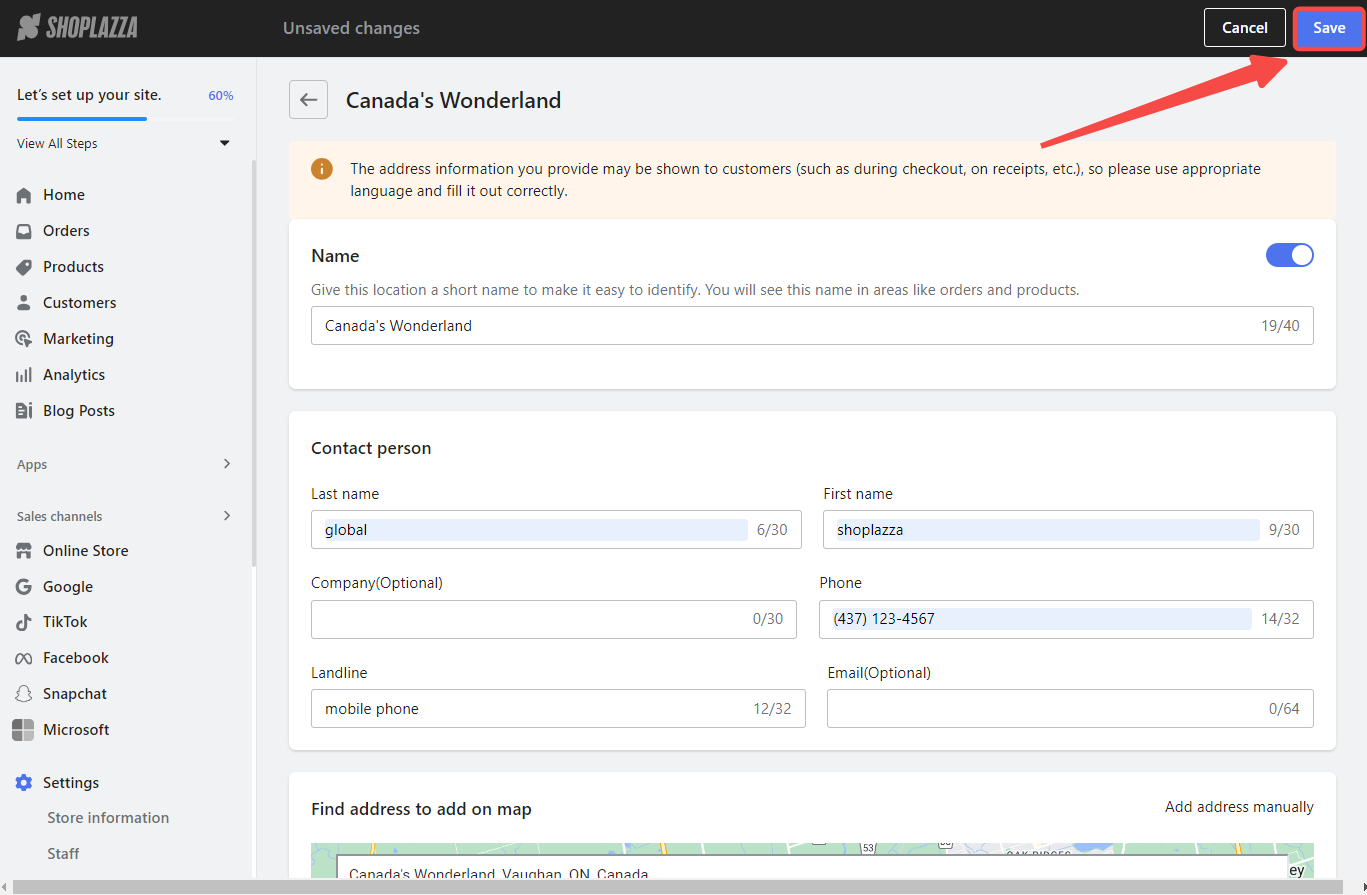
2. Here you can give your location a name with no more than 20 characters.
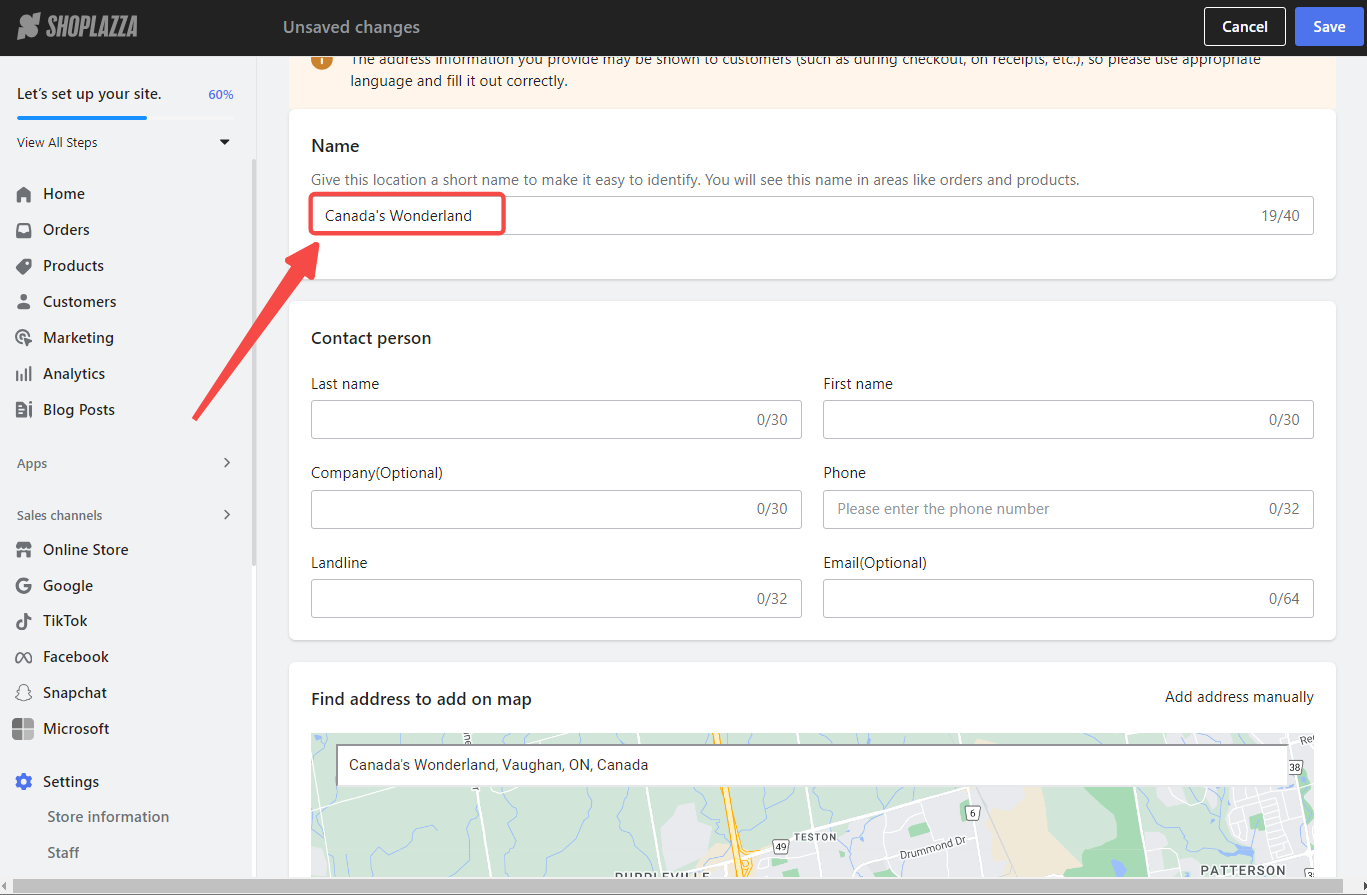
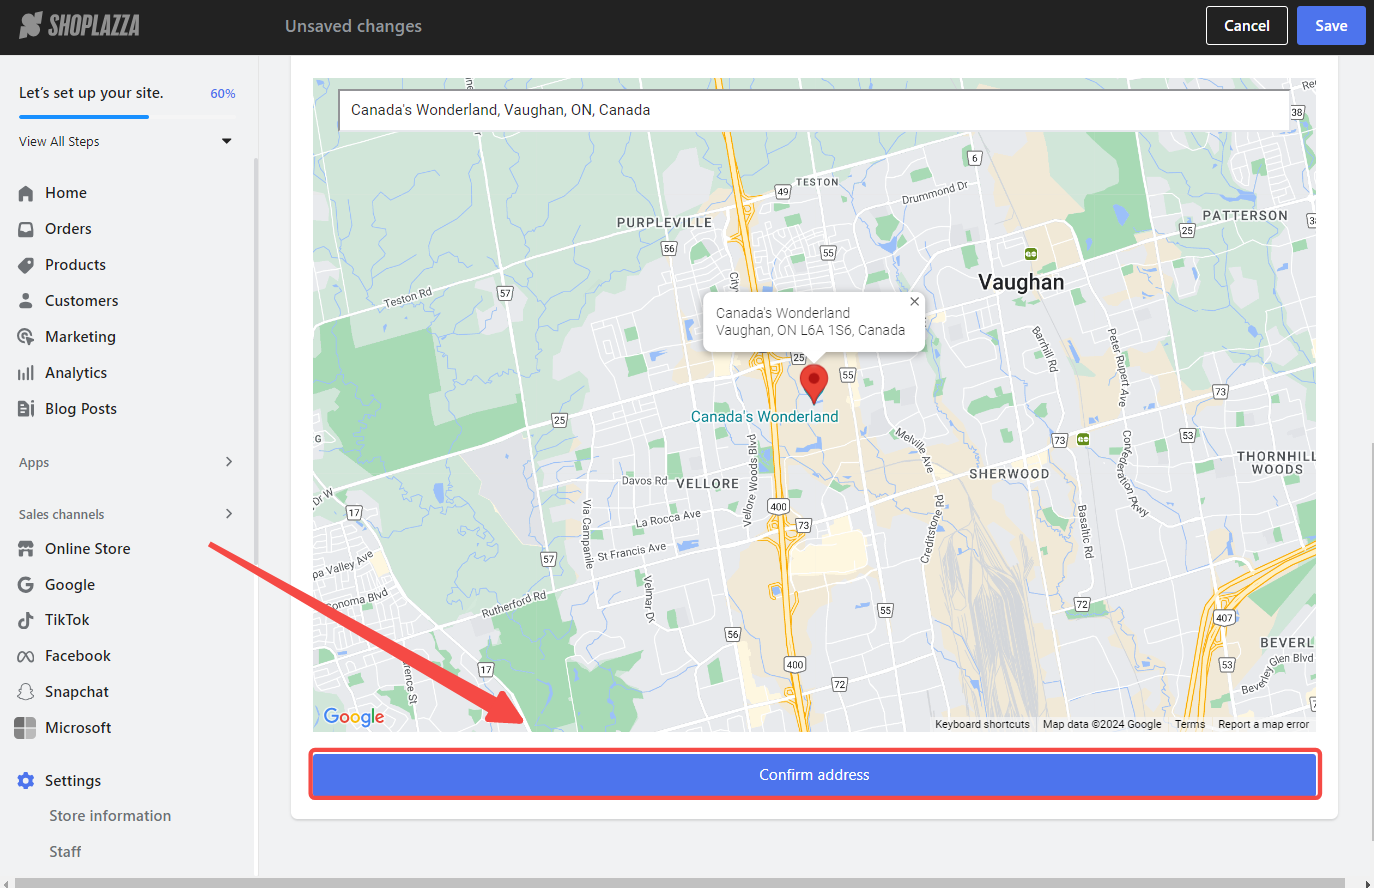
3. Add a delivery point by using Find address to add on map to ensure the location has clear coordinates.

Note
You will see this name in areas like orders and products. And your customers can see it in local delivery and local pickup.
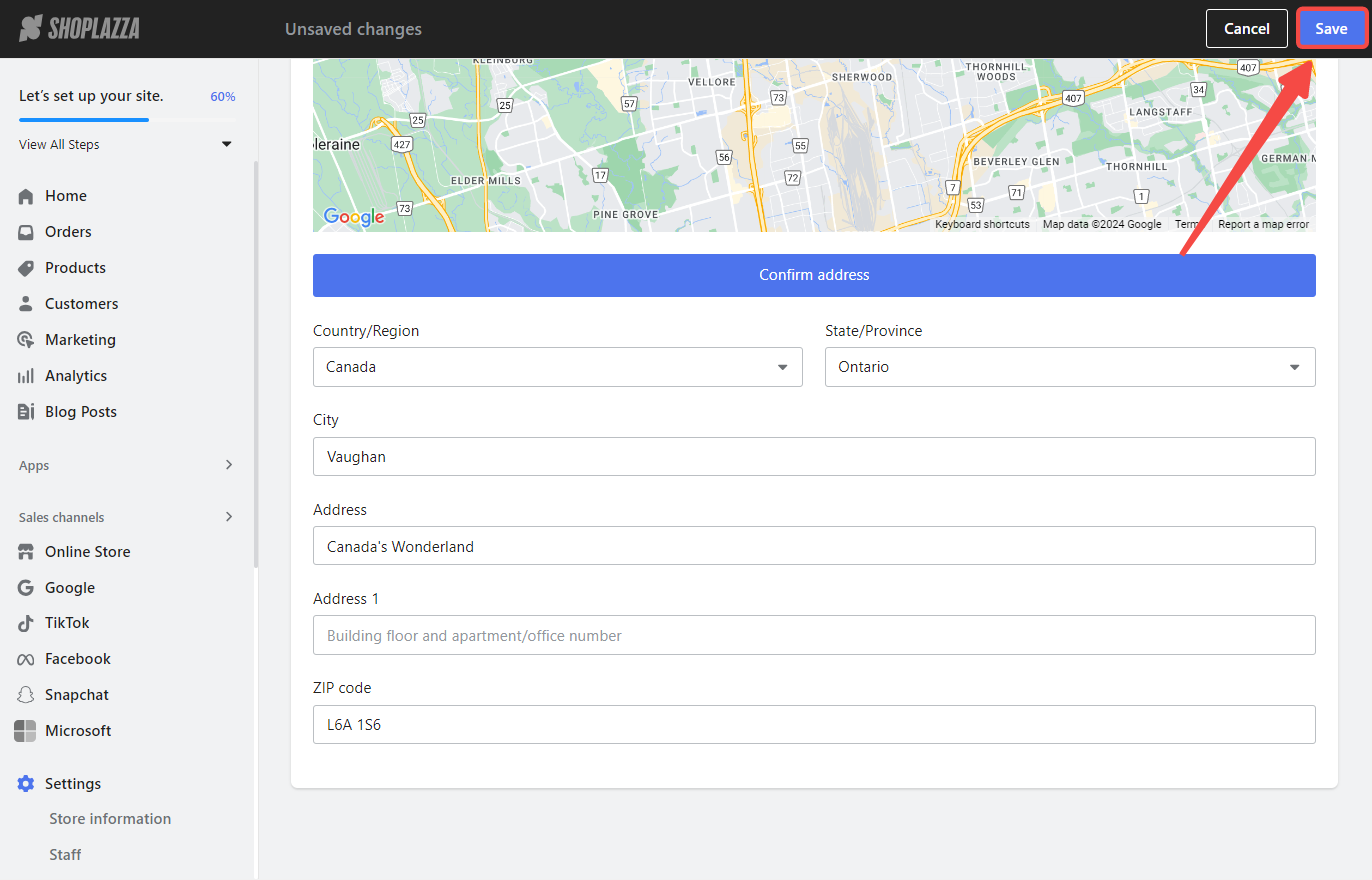
4. Click on Confirm address to proceed.
5. Add your location details here, including Country/Region, State/Province, City, etc.
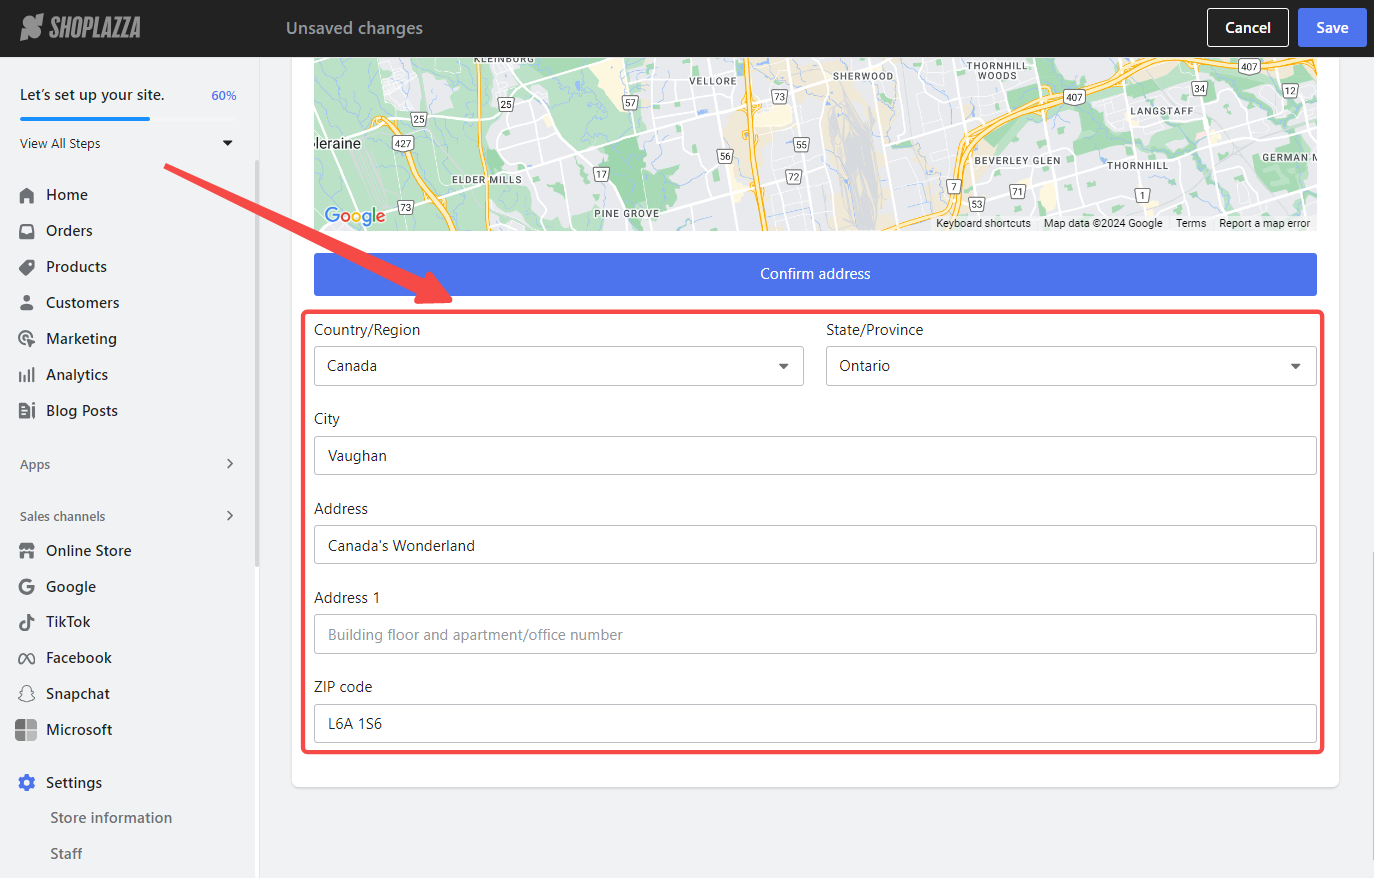
6. Please remember to click on Save button in the top right corner after you complete all the required details.
Activating/deactivating location
Activating location
1. All newly added locations will be activated automatically after you click on the Save button.
Note
When a location is activated, it can be selected as a shipping point for deliveries, displayed in the local delivery and local pickup options, and allow you to manage inventory across multiple locations.
Deactivating location
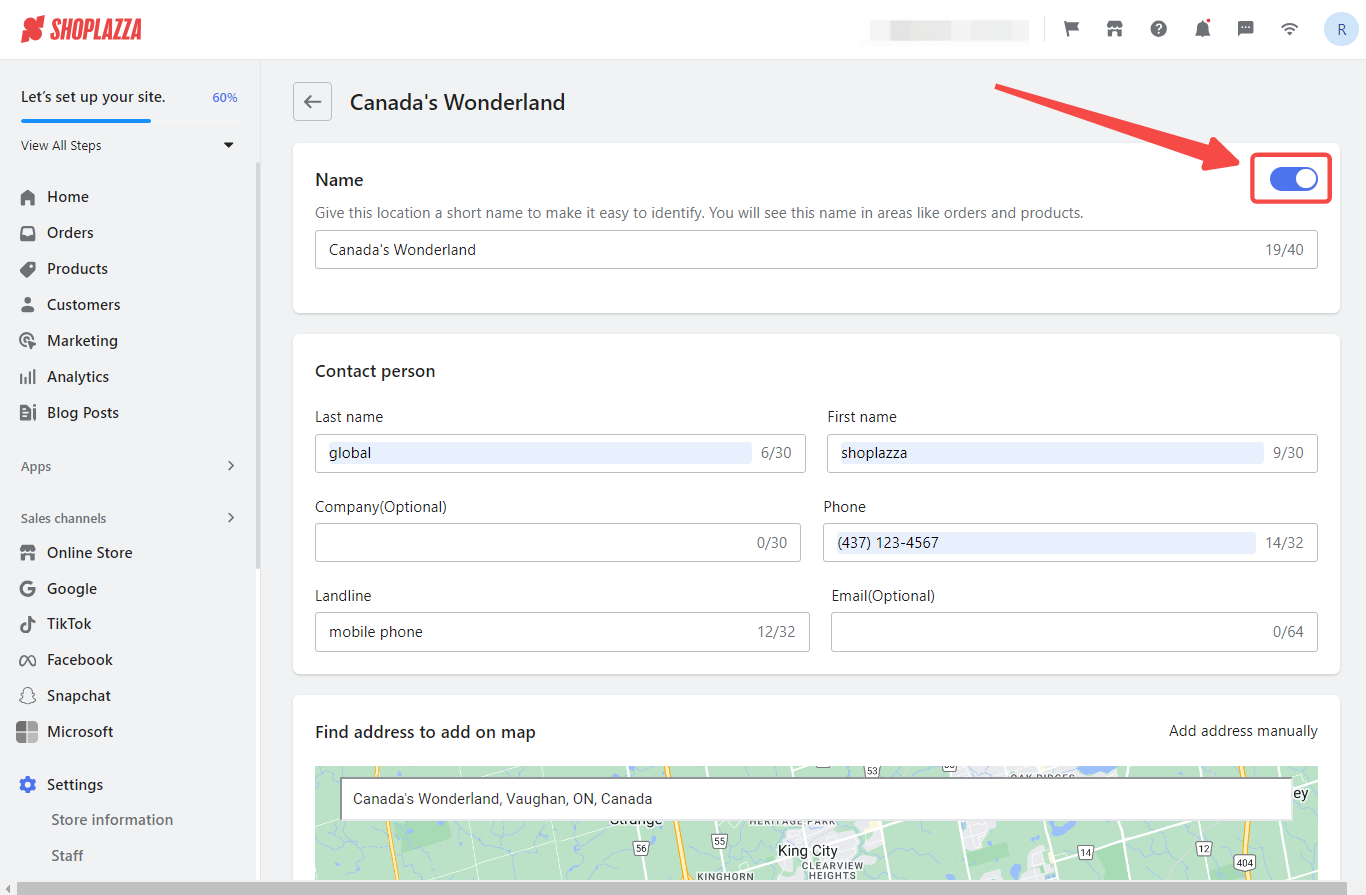
1. Click on the activated button on the right hand of your location name.
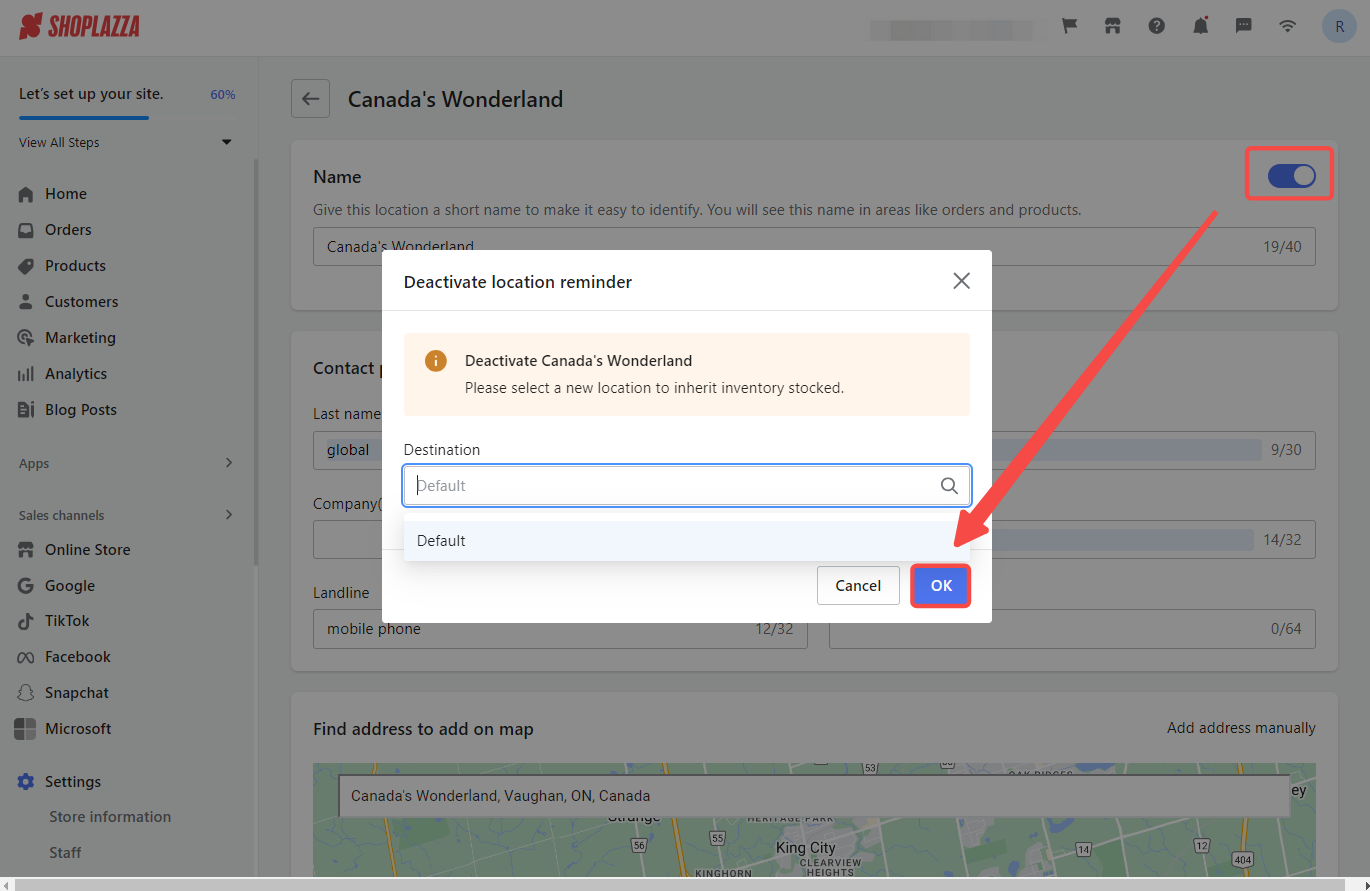
2. Select a new location to inherit the inventory stocked and click on OK to confirm.
Note
When a location is deactivated, you won't be able to select it as the shipping destination when sending out your packages. This means you can't place orders with the logistics provider to ship from that specific place. The configuration settings for local delivery and local pickup at that location will no longer be effective, and customers won't be able to choose it as a pickup or delivery location. As a result, you won't be able to manage your product inventory at that particular place anymore.
Changing your default location
The default location is where your shipments are automatically sent from. If you've changed your main inventory location and need to update the default location, you can navigate to Shipping to change the default location. For more details, please refer to Changing your default location.
By following the simple steps mentioned above, you can easily establish and manage multiple store locations. This will enable you to streamline distribution, ensure timely restocking, and ultimately enhance your overall business operations.


Comments
Please sign in to leave a comment.