Offering local delivery gives your customers a faster and more convenient way to receive their orders while helping you save on shipping costs. By defining specific neighborhoods or postal codes, you can ensure local customers have a seamless checkout experience with a delivery option that fits their needs.
Since you're handling these deliveries yourself, there's no need for tracking numbers or carrier details, making the process simpler and more efficient.
If you have multiple warehouses, stores, or storage locations, you can easily manage them all in your Shoplazza admin. For step-by-step instructions on setting up locations, refer to Setting up multiple store locations.
Setting up your local delivery
Local delivery ensures a seamless shopping experience for customers within designated areas. You can define delivery zones, apply specific fees, and streamline your fulfillment process by configuring the correct settings. Follow these steps to set up local delivery efficiently.
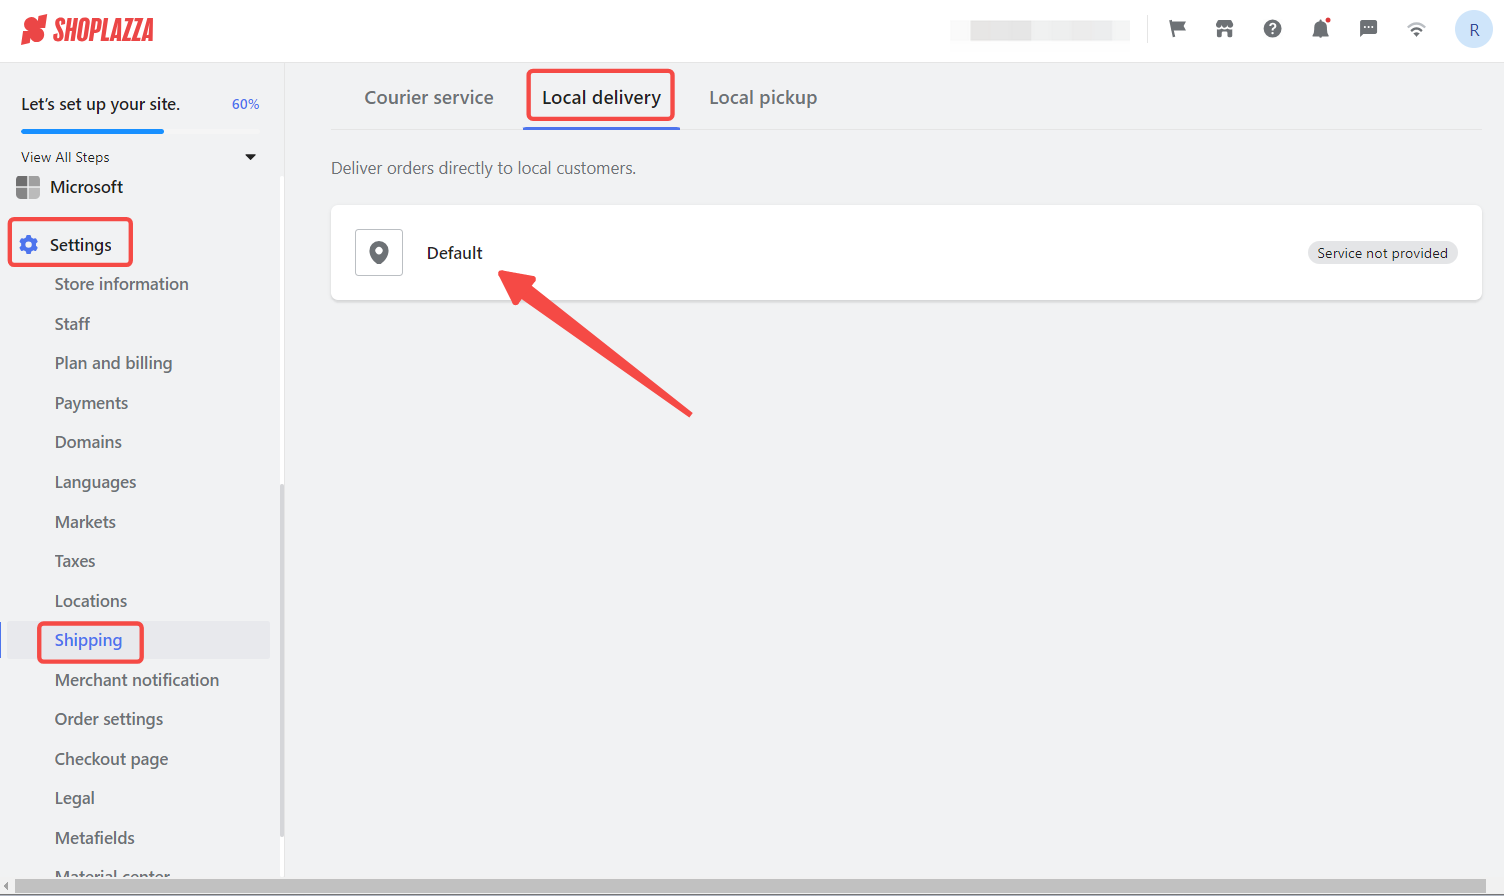
1. Access your local delivery settings: Go to your Shoplazza admin > Settings > Shipping. Select the Local delivery tab and select the location you need to edit.
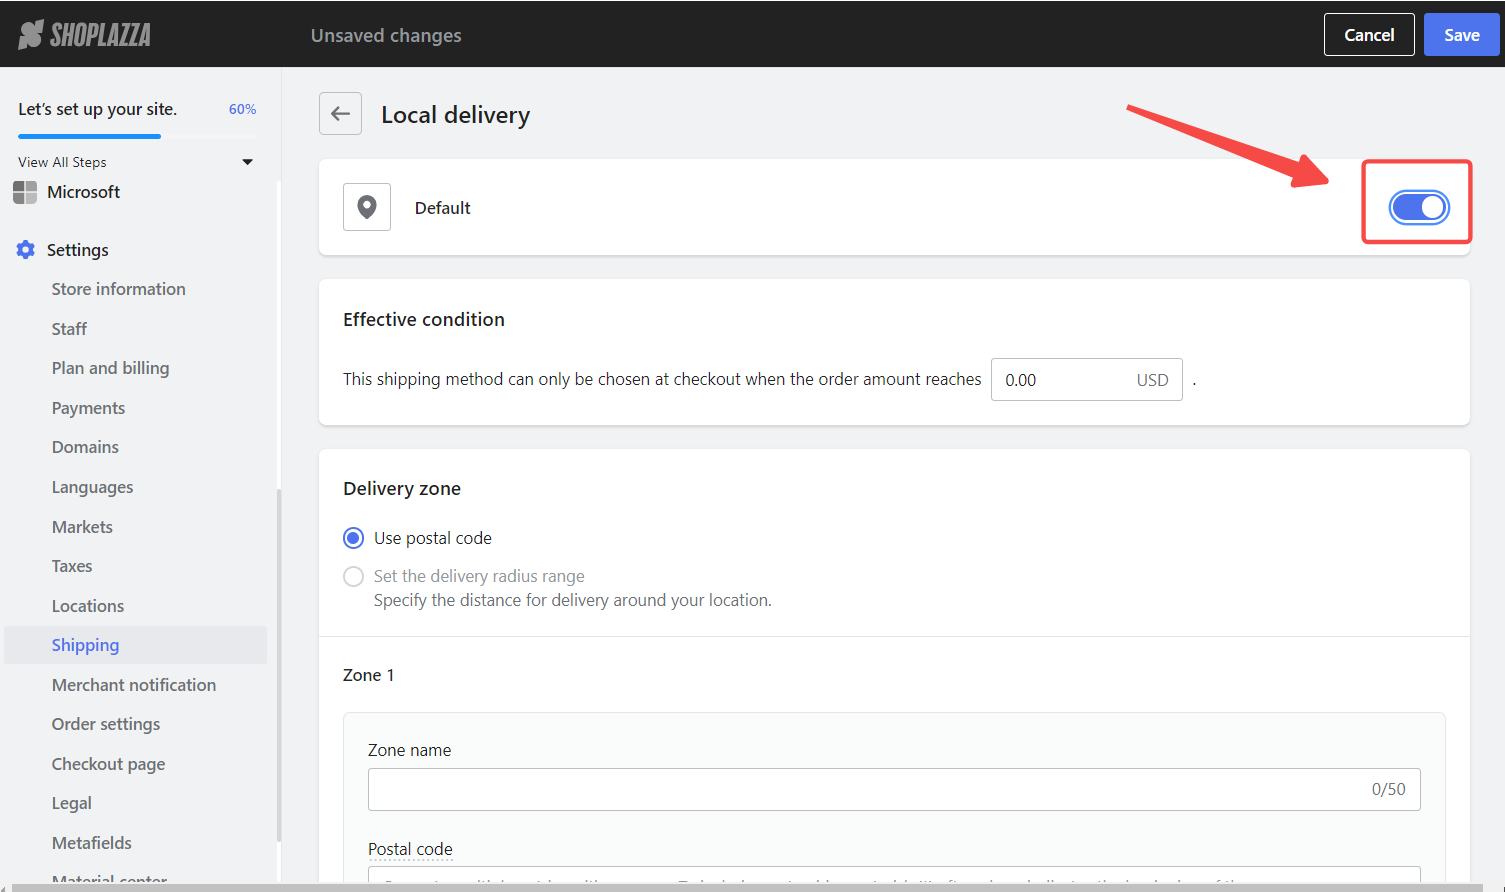
2. Activate local delivery: Toggle the button on the right to activate local delivery for the selected location.
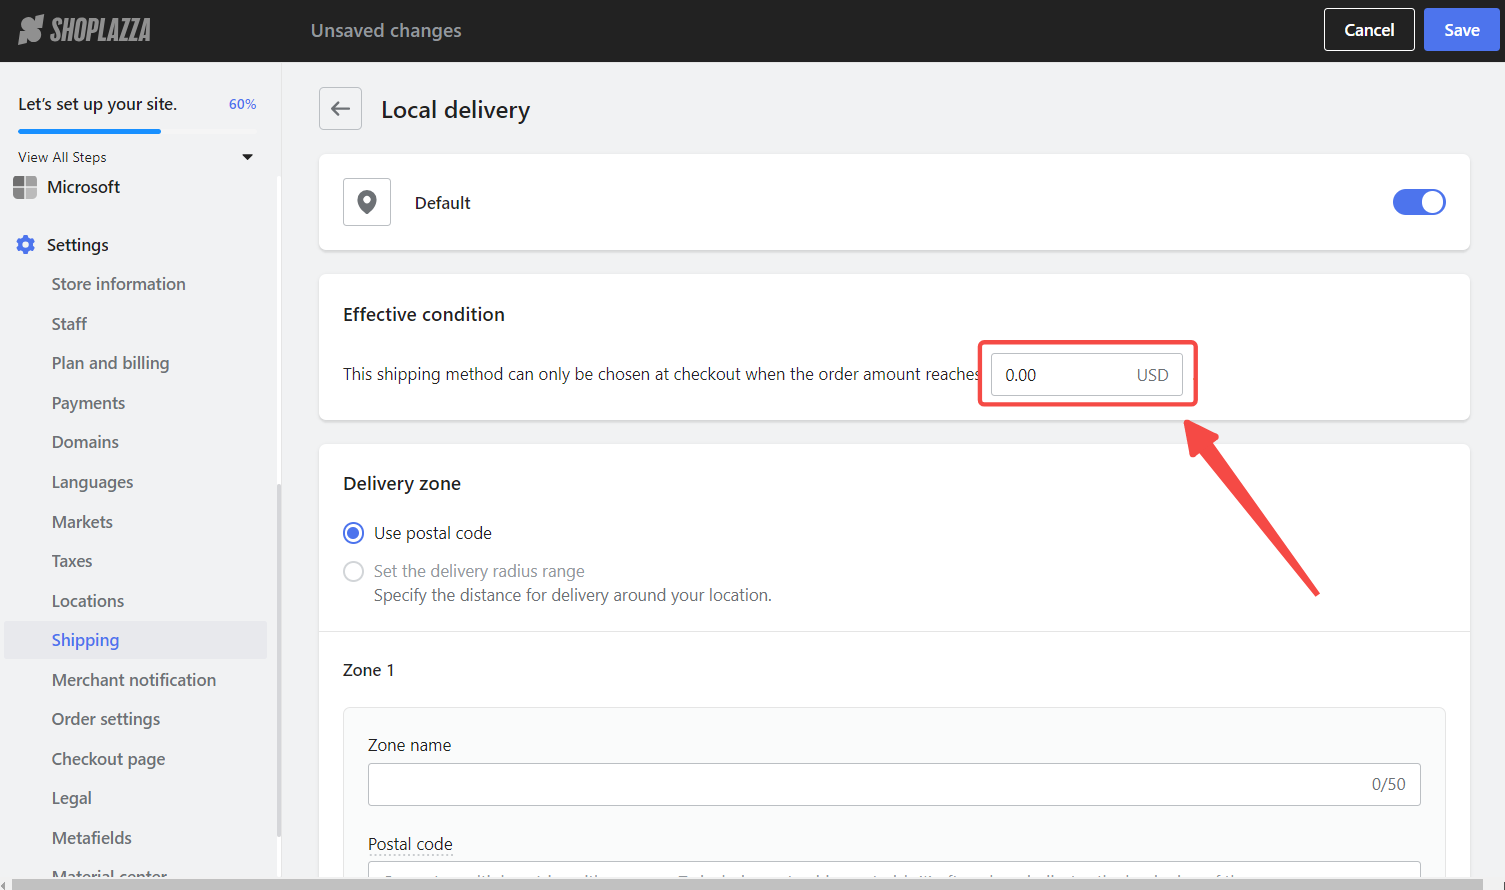
3. Set a trigger amount: Define the minimum order amount required to qualify for local delivery.
Note
This shipping method is only available at checkout when the order amount meets or exceeds the trigger amount you set.
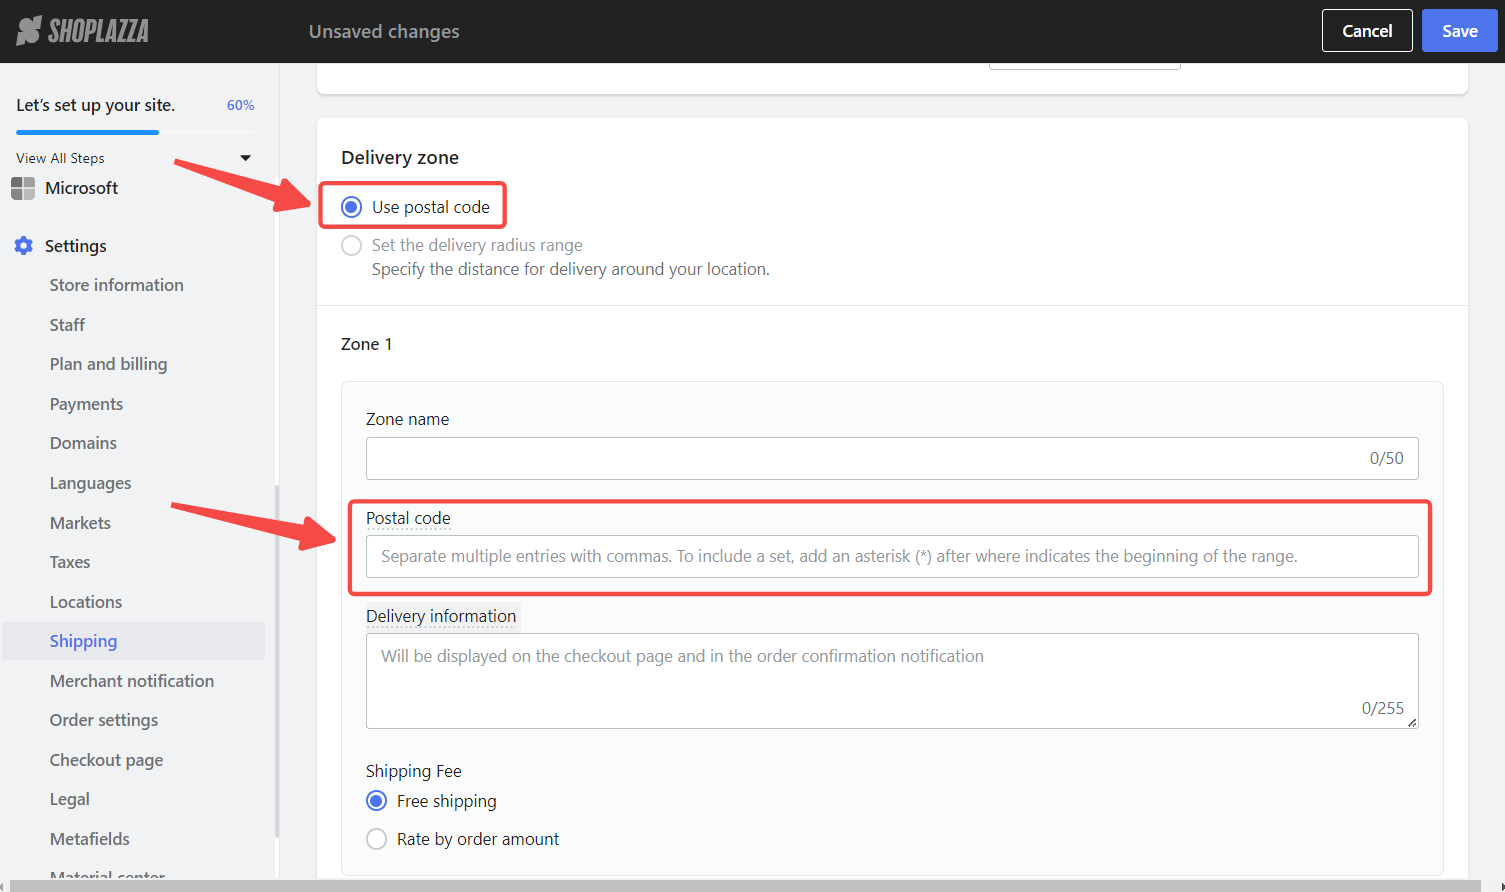
4. Define your delivery zone: Choose how you want to set your delivery area with one of the following options:
- Use postal codes: Enter one or multiple postal codes separated by commas. To specify a range, use an asterisk (*) at the beginning of the range.
- Set a delivery radius: Choose between kilometers or miles, then enter a radius distance (0-160 km or 0-100 miles).
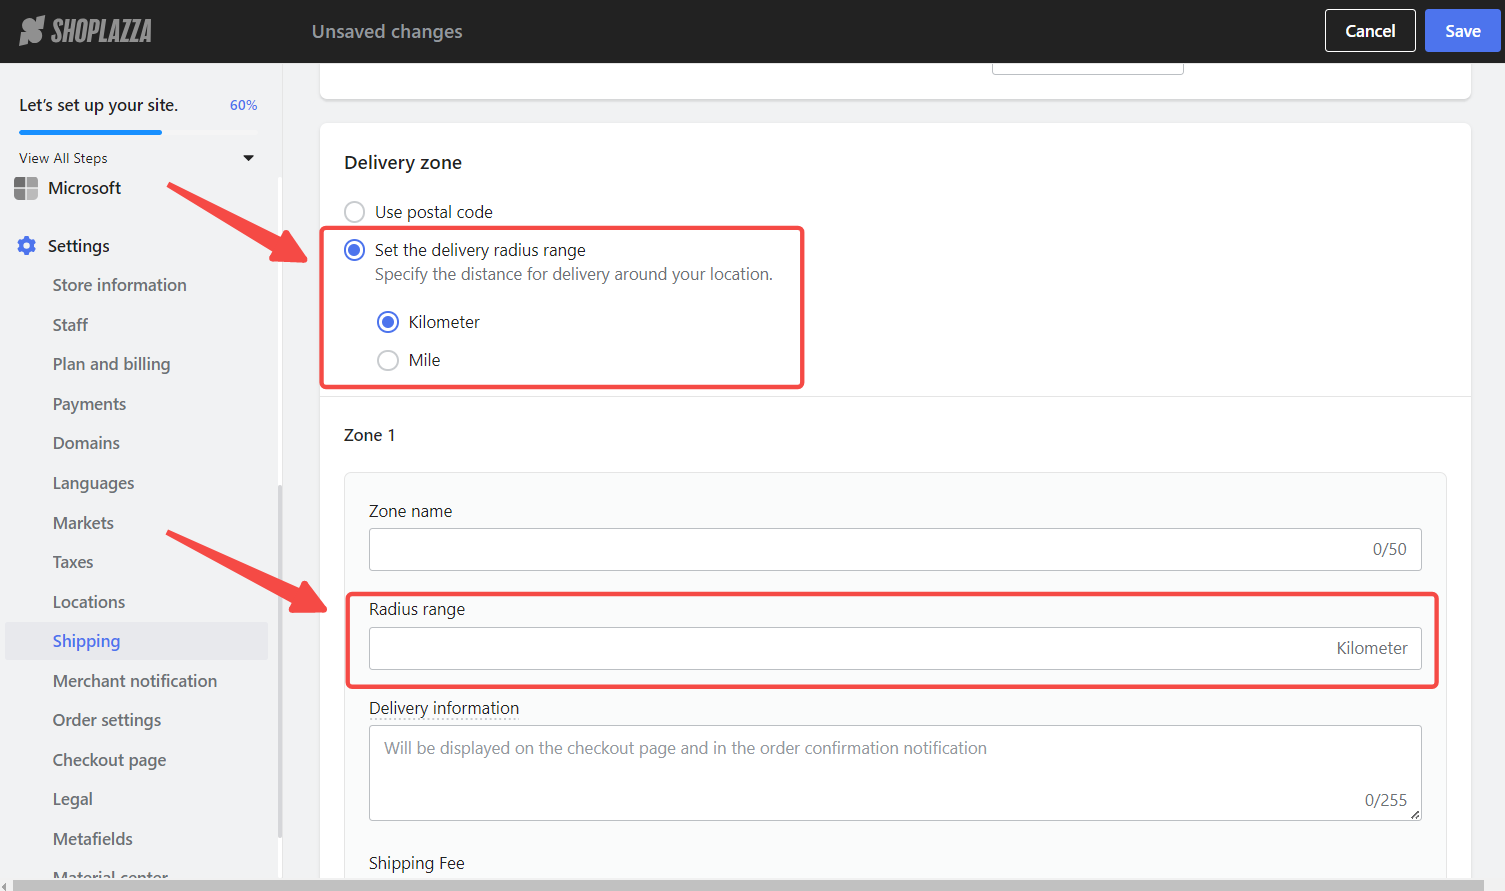
5. Add delivery zone details: Enter the zone name, postal code/radius range, and delivery information.
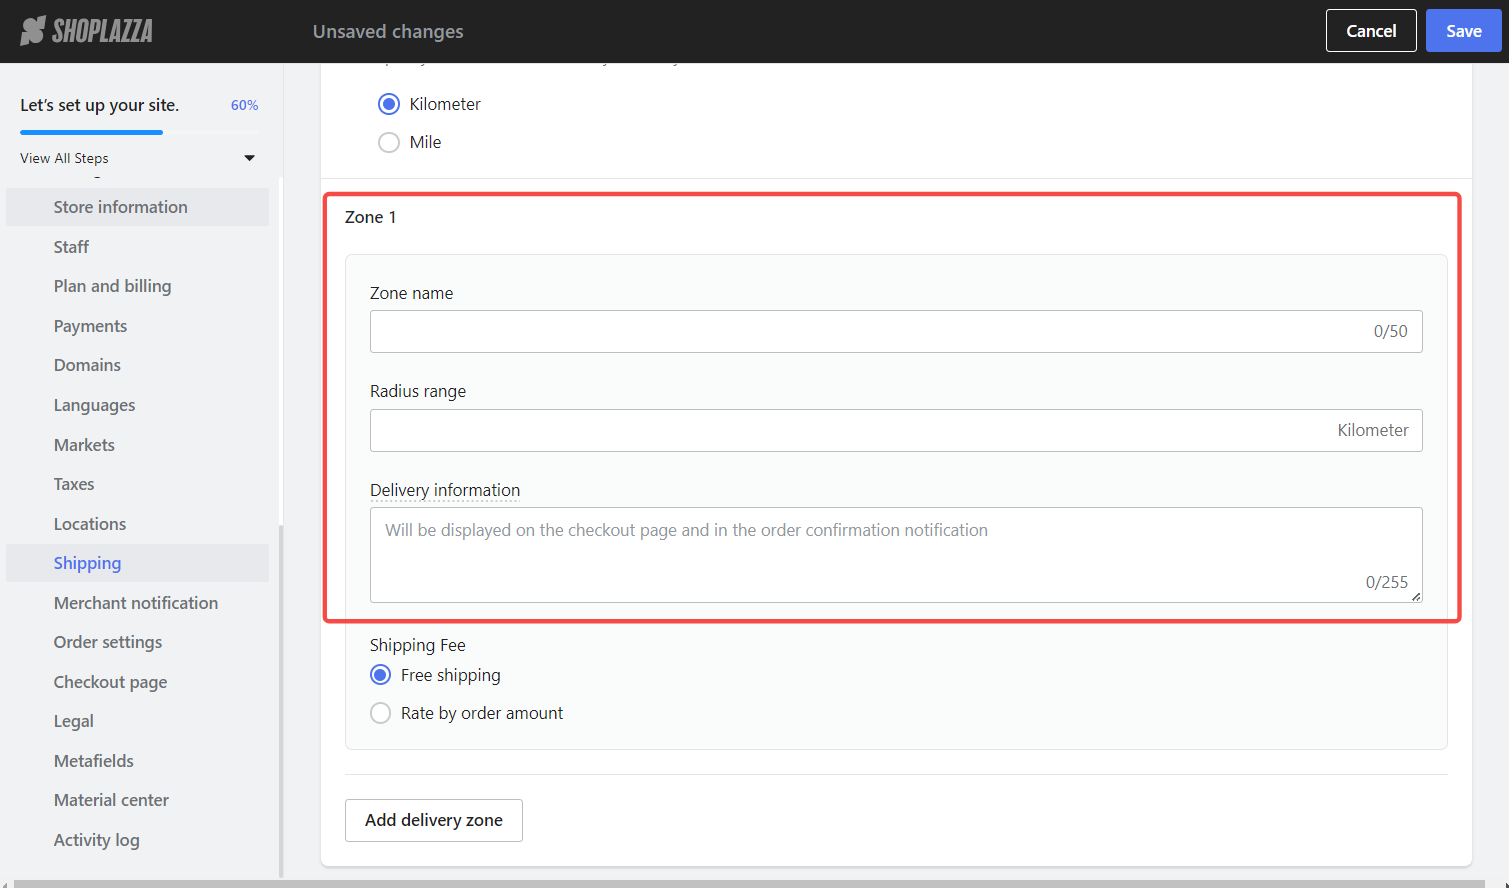
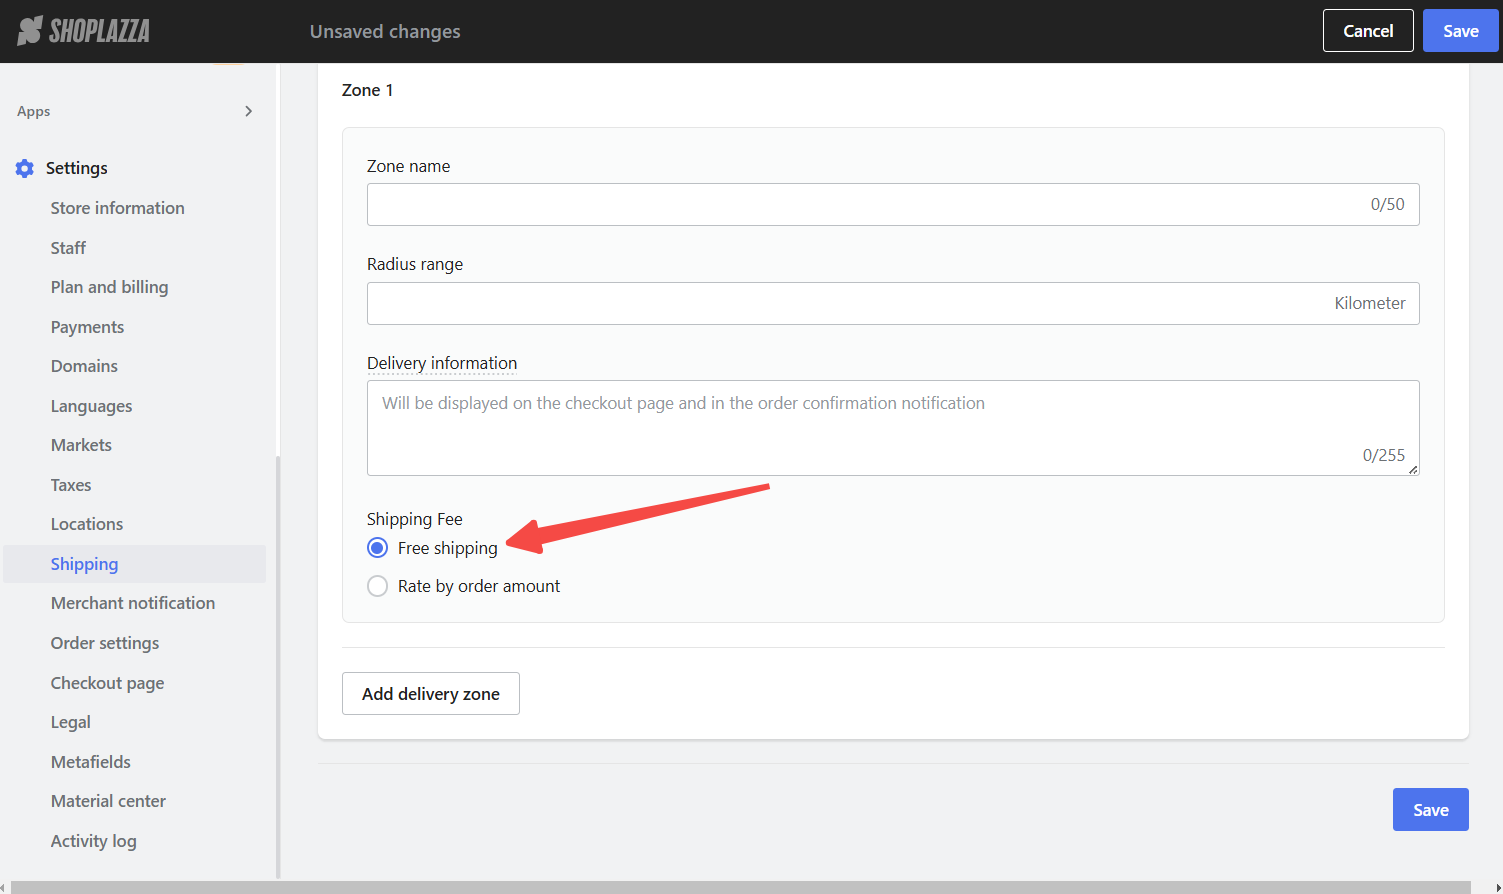
6. Select a fee type: Decide how customers will be charged for local delivery.
- Free shipping: Customers receive delivery at no additional cost.
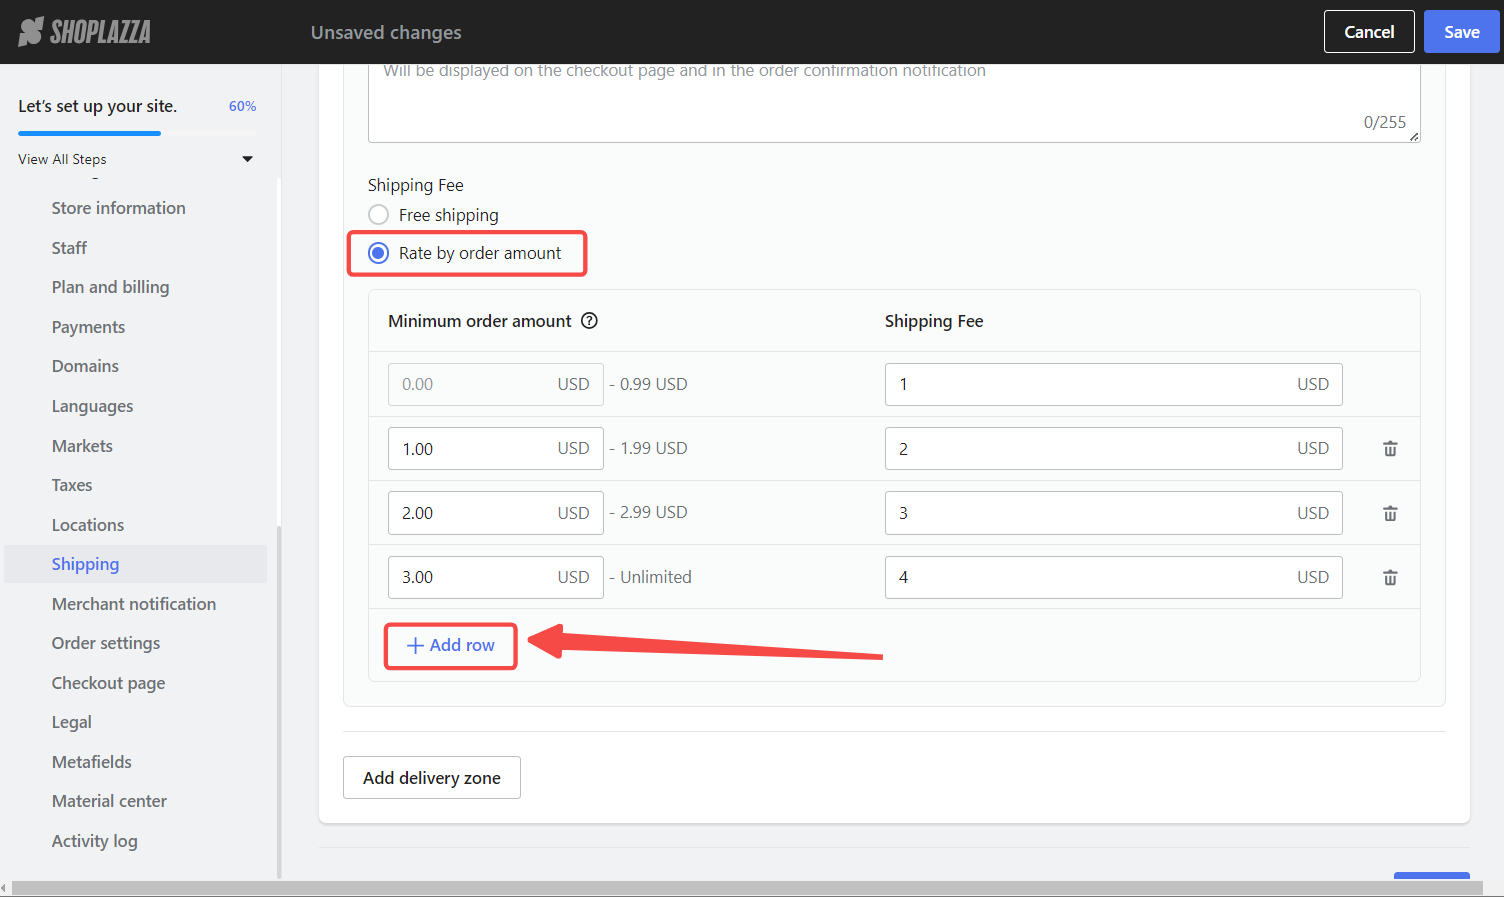
- Rated by order amount: Define a minimum order amount and corresponding shipping fee.
Note
Click Add row to create up to five price ranges for any shipping zone. Define the lower limit, and the system will automatically determine the upper limit.
7. Manage delivery zones: Modify your delivery zones by following these steps:
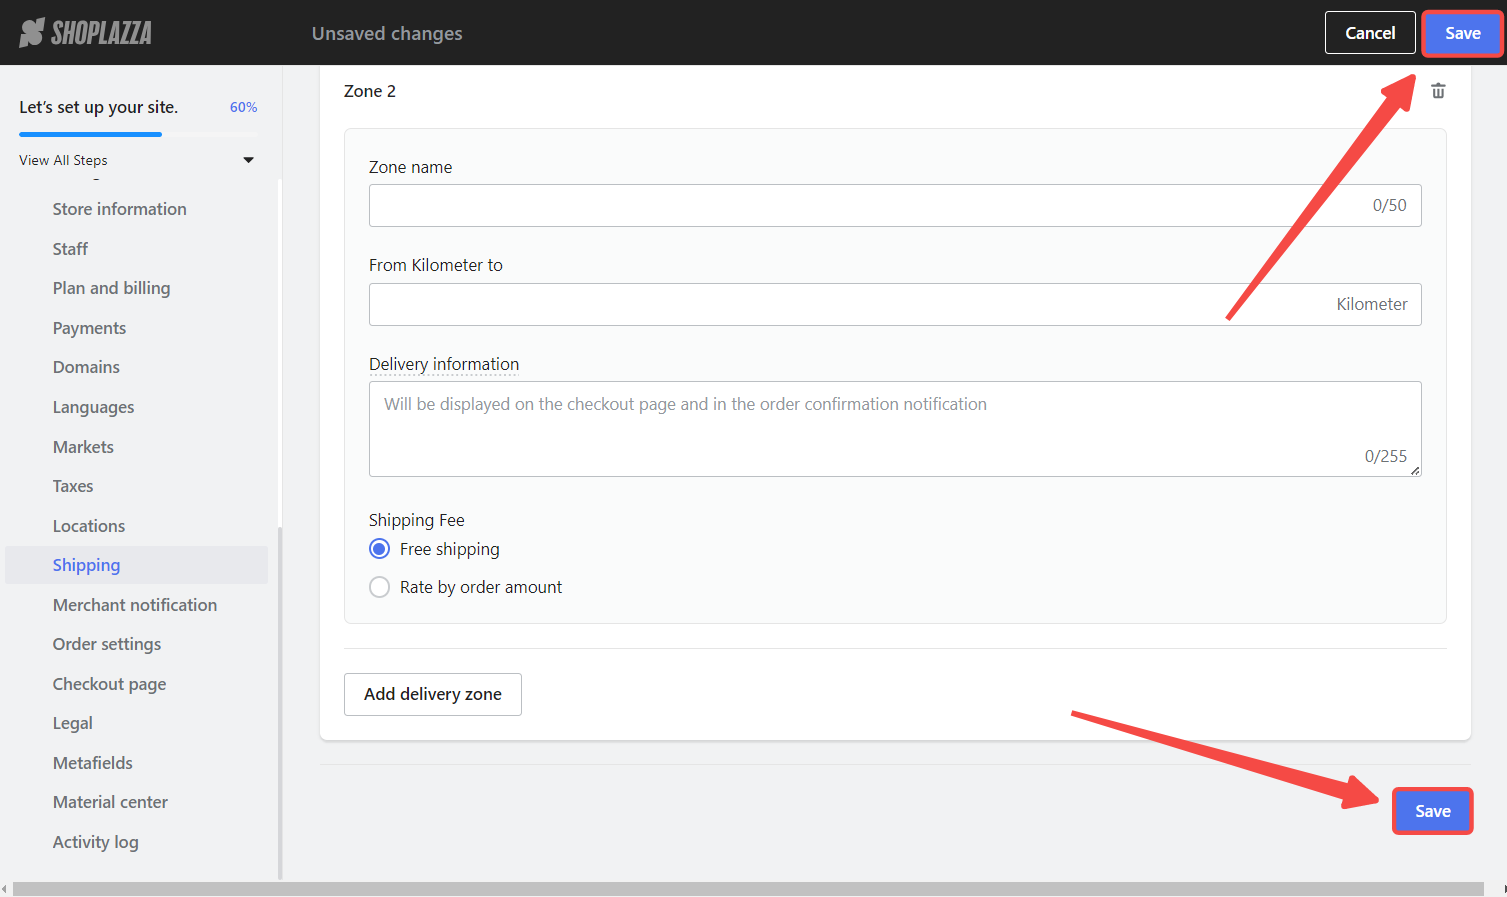
- Add a delivery zone: Click Add delivery zone at the bottom left (up to five zones can be added).

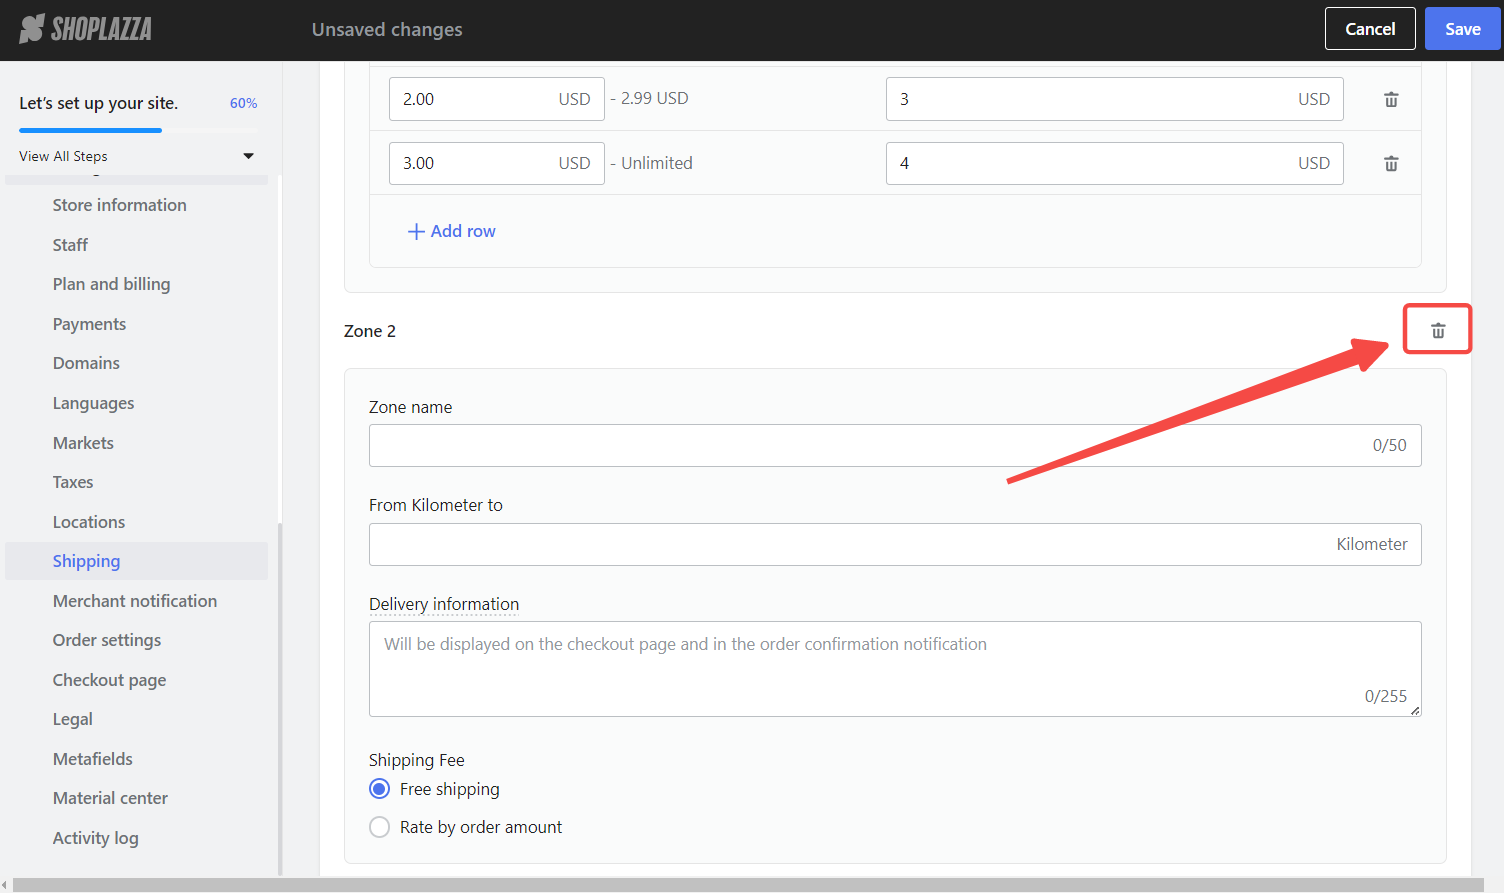
- Delete a delivery zone: Click the trash can icon in the top right corner of the zone.
8. Save your settings: Click Save at the top or bottom right of the page.
Offering local delivery to specific areas creates a more convenient and personalized shopping experience for customers, increasing their satisfaction and loyalty. This approach also improves business operations and enhances your delivery services.


Comments
Please sign in to leave a comment.