
Connecting a custom domain to your Shoplazza store is an essential step in launching your business online. Your domain name is what customers will use to access your site, and having a personalized domain strengthens your brand identity, builds trust, and improves your store’s search engine ranking.
After entering your third-party domain in Shoplazza, the system will generate the DNS records you need to configure in your domain provider's settings. These typically include an A record and a CNAME record, which vary depending on the domain name entered. You must copy these values into your DNS settings to complete the domain verification process and successfully connect your domain to Shoplazza.
Purchasing your domain
Choose and purchase a custom domain from a trusted registrar such as GoDaddy, Cloudflare, or Hover. A personalized domain reinforces your brand identity and builds customer trust. Please avoid using unsupported domain suffixes such as .fun or Chinese domain names., which are not compatible with Shoplazza.
- Choose a registrar: Popular options include GoDaddy , Cloudflare , and Hover .
- Complete your purchase: Follow the registrar’s instructions. Make sure to avoid unsupported domain suffixes.
Connecting a third-party domain to Shoplazza
Once you’ve purchased your domain, follow the steps below to connect it to your store:
1. Go to your Shoplazza admin: Navigate to Settings > Domains, then click Connect existing domain.
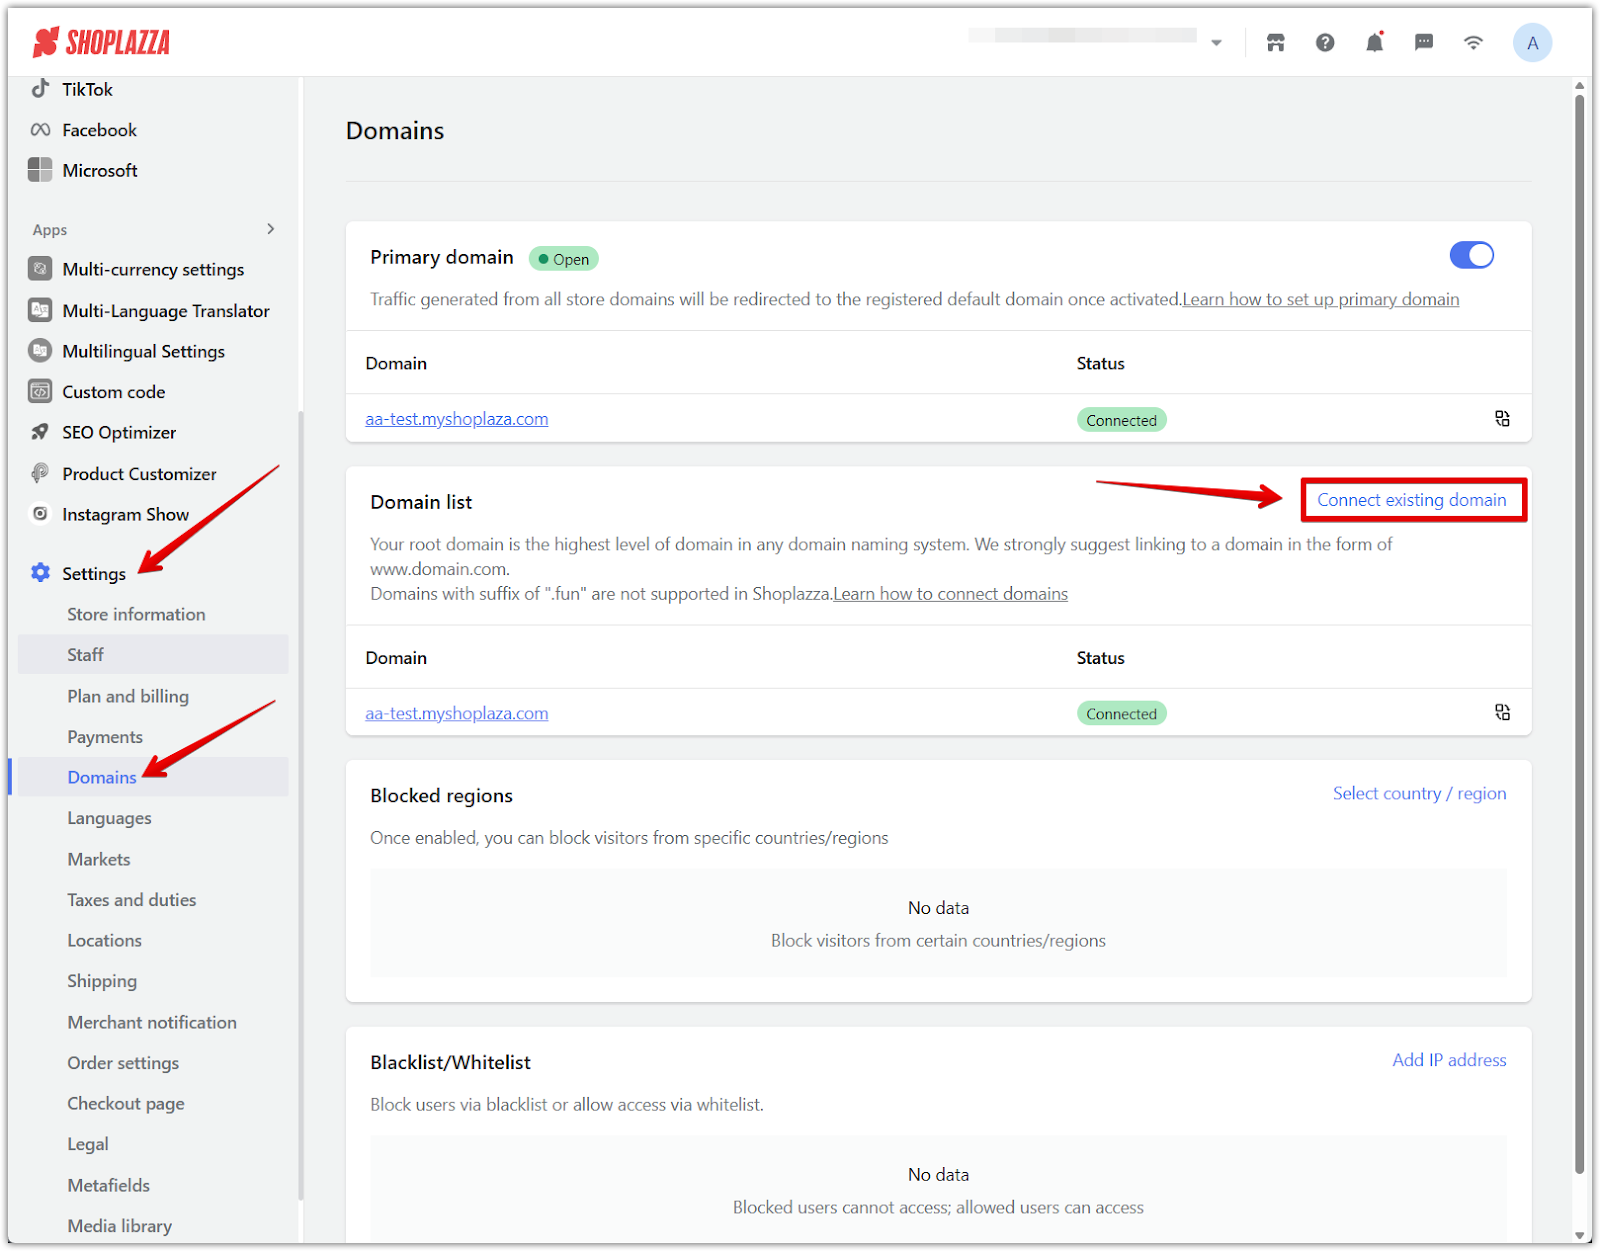
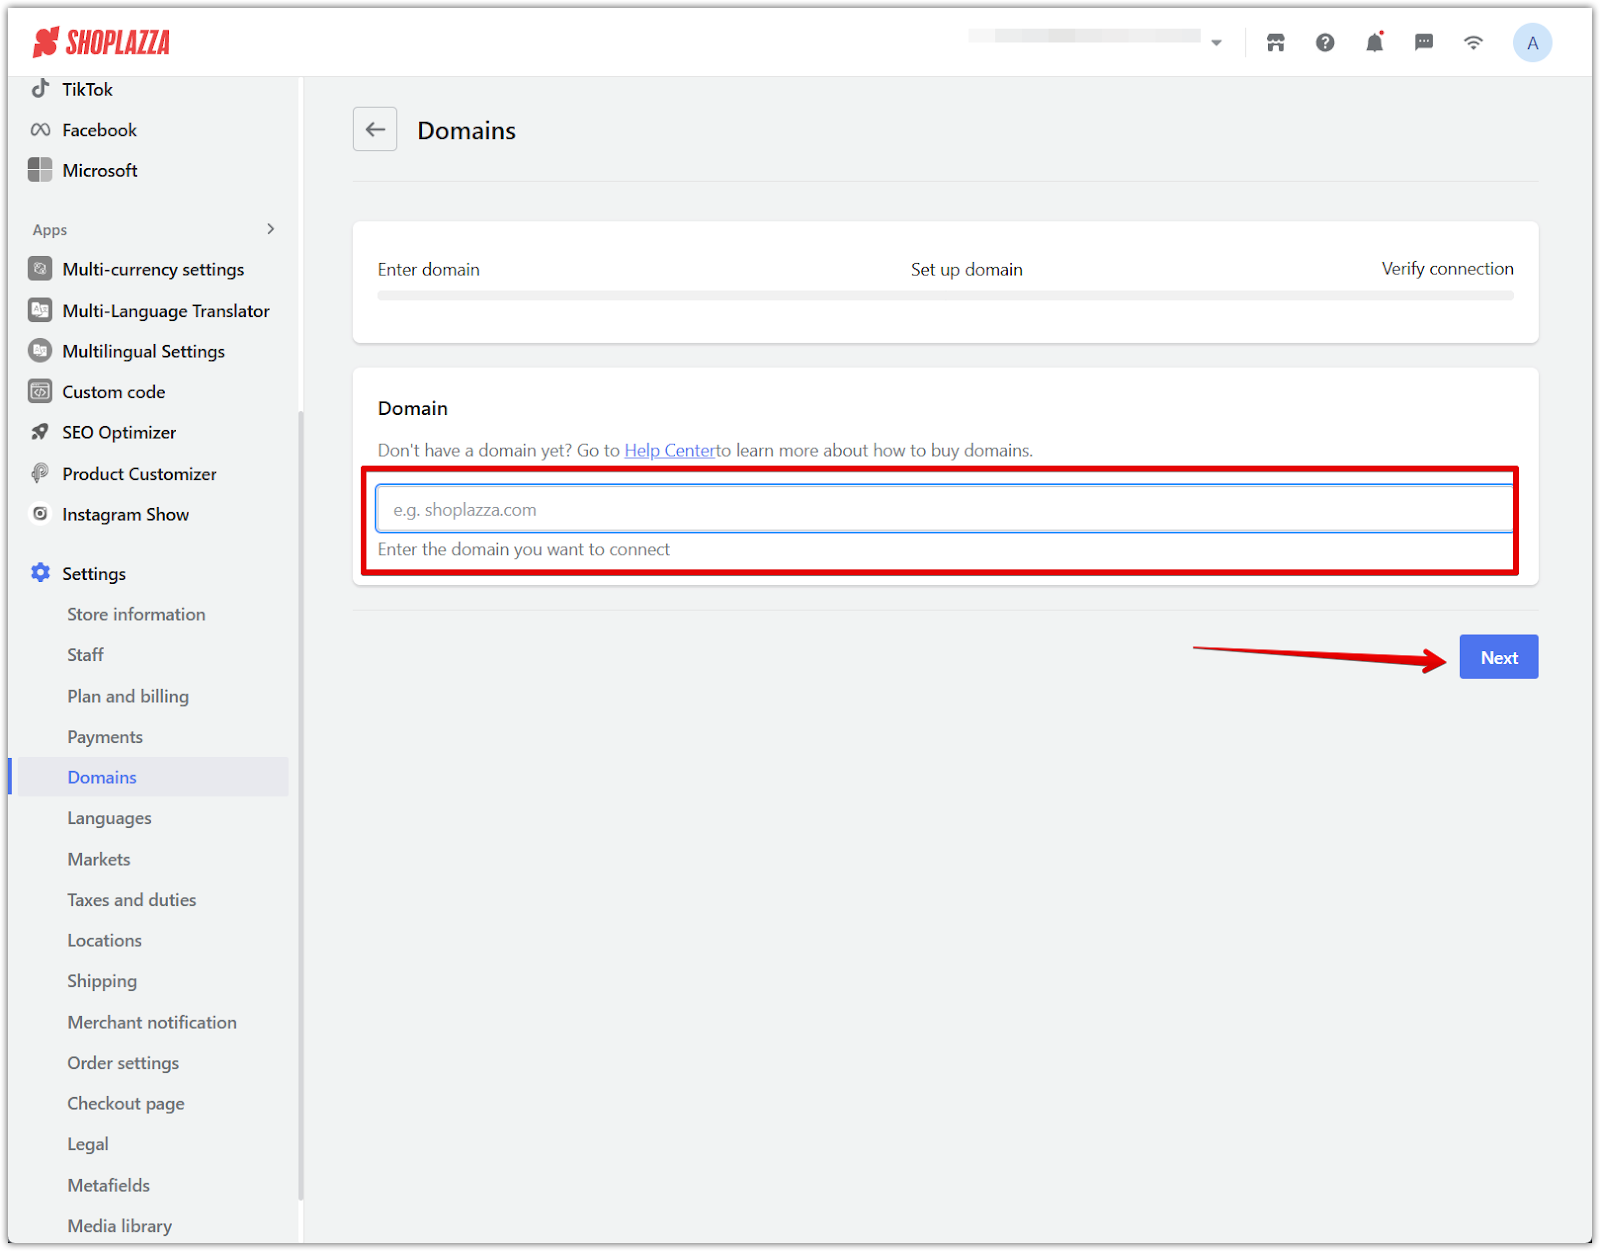
2. Enter your domain: In the input field, type your purchased domain (e.g., yourstore.com) and click Next.
Note
New domains may take 15–60 minutes (or up to 48 hours) to register across the internet. If you see “domain not registered,” wait and try again later. This is a normal delay during domain propagation.
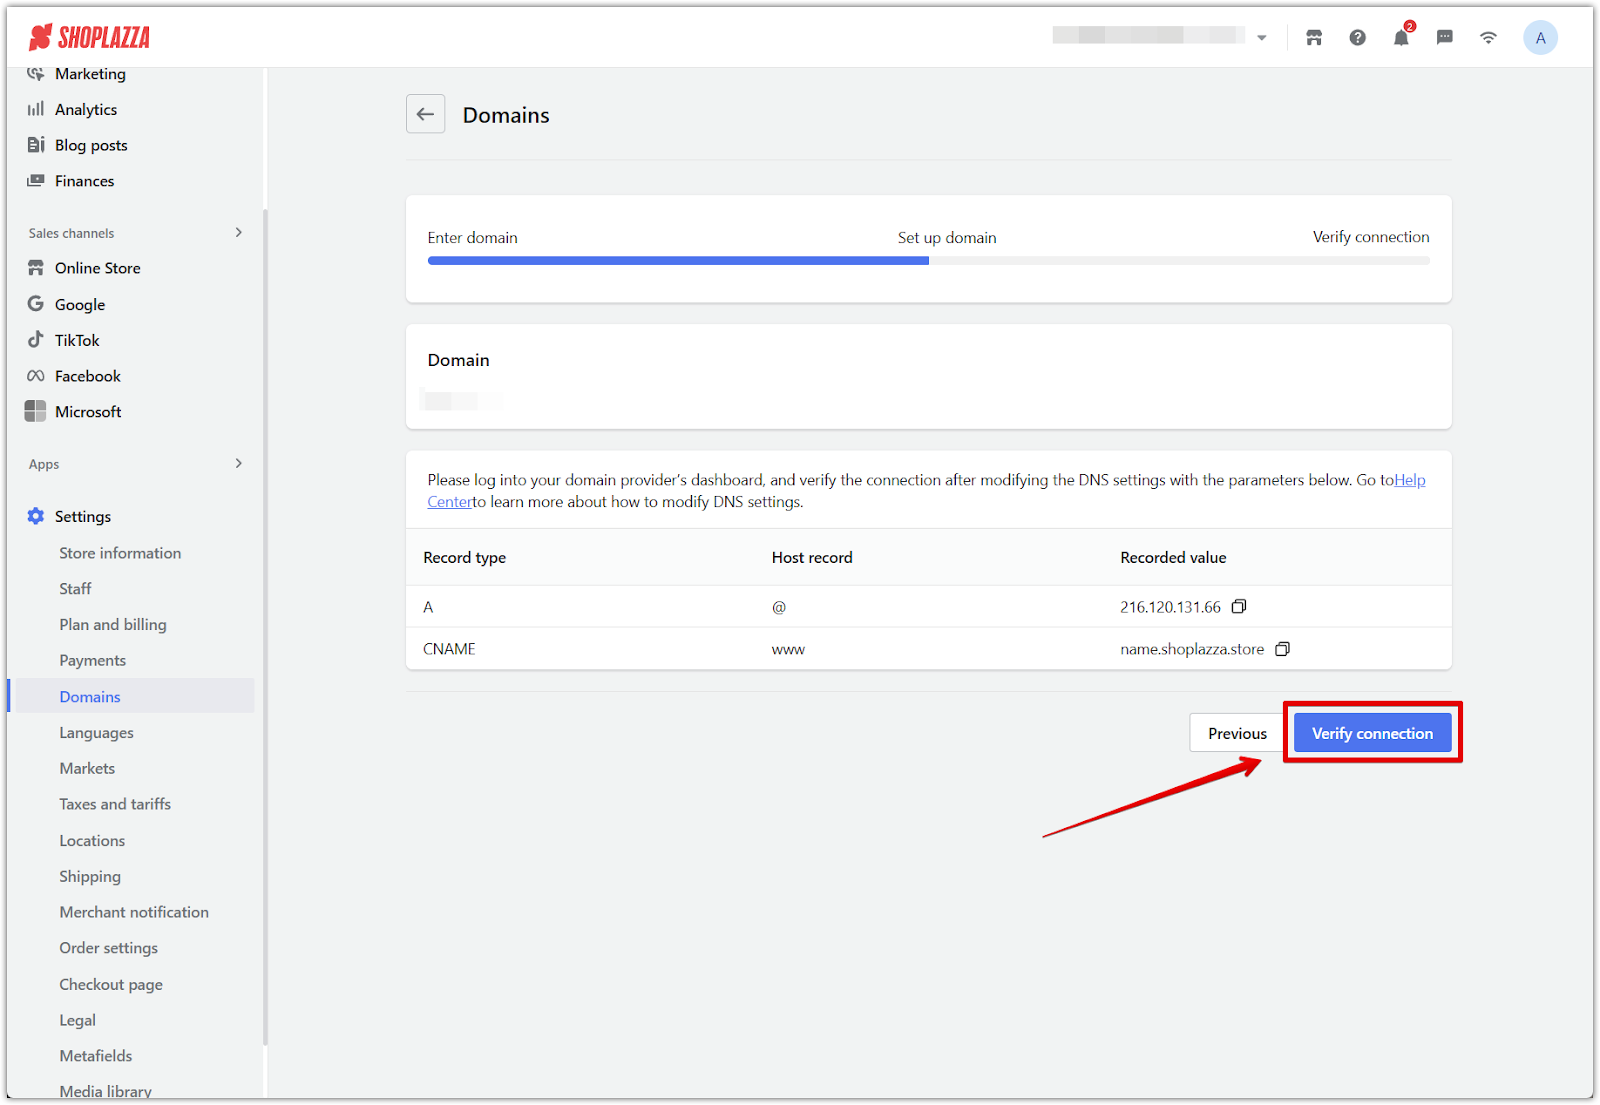
3. Configure your DNS records: To ensure both yourdomain.com and www.yourdomain.com work correctly, you must configure two types of DNS records at your domain registrar. Copy the records and insert them into your domain provider.
-
A record (used for root domains): This record ensures yourdomain.com directs to your Shoplazza store.
- Host: @
- Points to: 216.120.131.66
-
CNAME record (used for subdomains): This record ensures www.yourdomain.com also directs to your store.
- Host: www
- Points to: name.shoplazza.store

4. Update DNS at your domain provider: Log in to your domain provider’s dashboard and add or update the A and CNAME records using the values provided by Shoplazza.
Use our step-by-step guides to complete your DNS setup:
- Integrating GoDaddy Domain with your Shoplazza Store
- Integrating your Cloudflare domain with your Shoplazza Store
- Hover
5. Verify the connection: Return to Settings > Domains in your Shoplazza admin and click Verify connection.
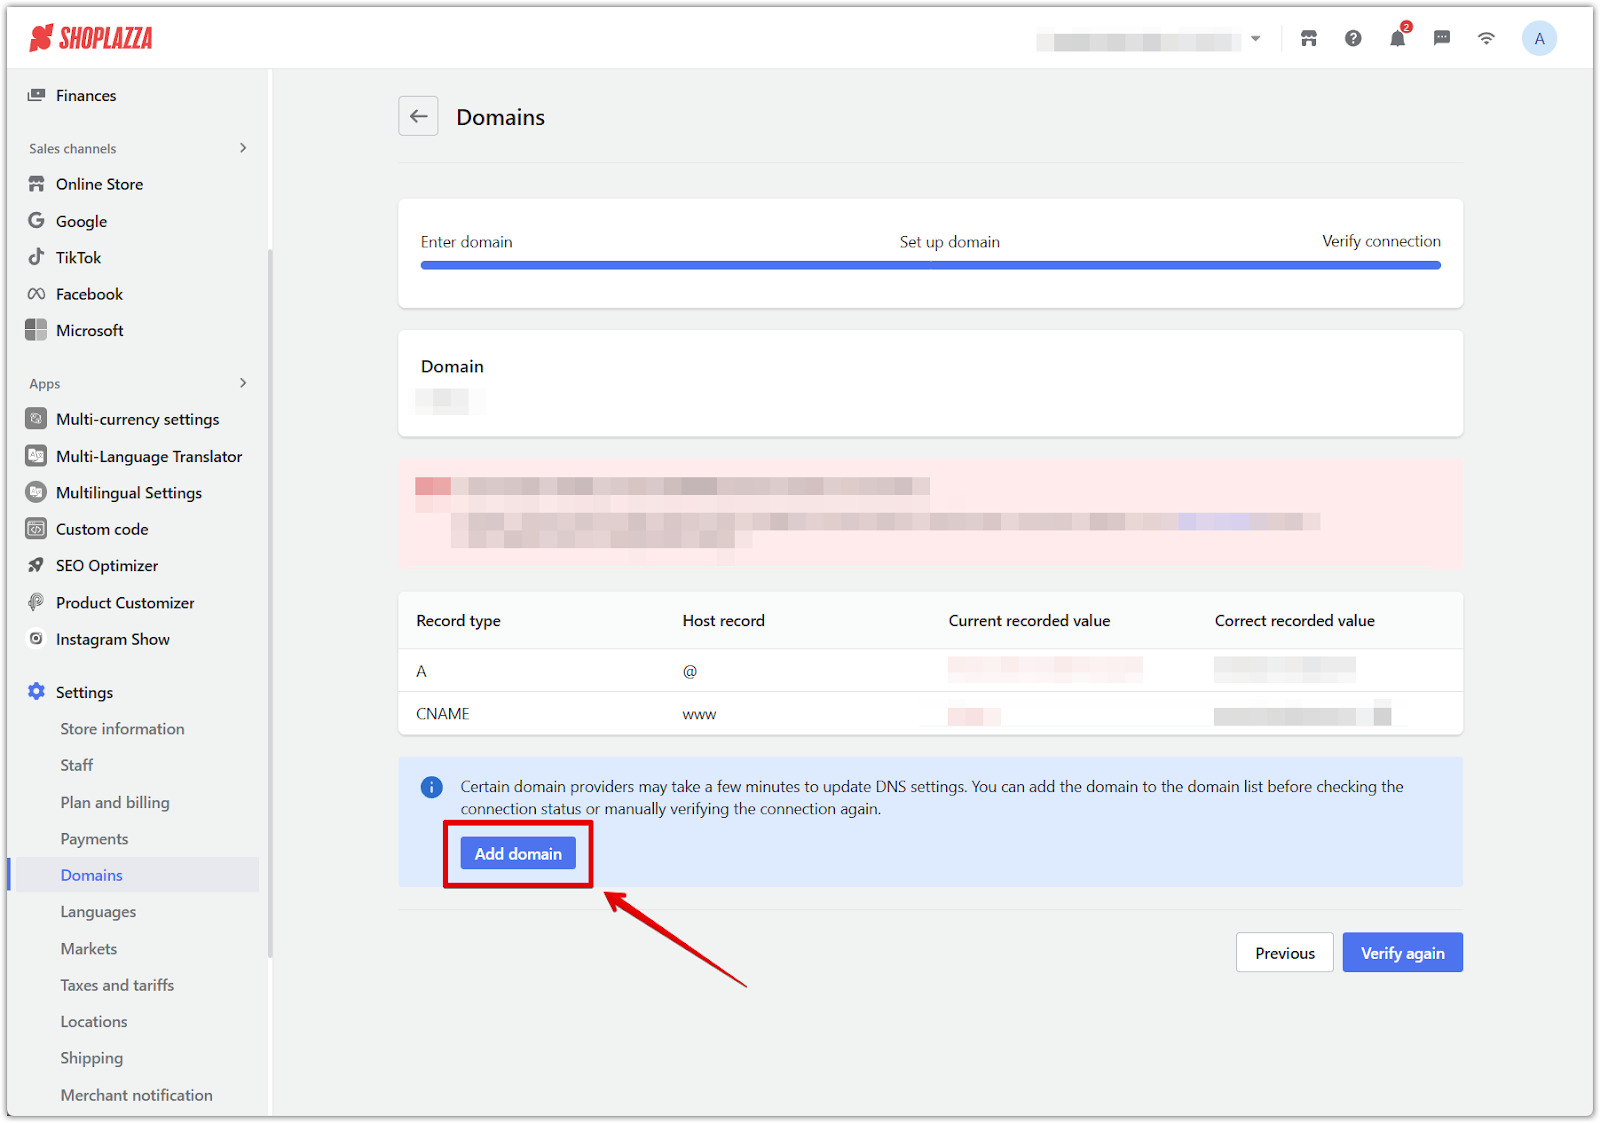
6. Confirmation message: Once the connection is verified, you will see a success screen confirming that your domain is connected. The system will automatically issue an SSL certificate within 24 hours to secure your domain. Once verified, your domain will be listed as connected. If the verification fails, review the DNS values for accuracy and allow up to 48 hours for propagation.

7. Automatic verification fallback: If your domain doesn't connect right away, re-enter the domain and click Add domain to queue it for automatic verification. This gives the system more time to detect your DNS updates.
Troubleshooting verification issues
1. Incorrect or missing records: Double-check the A and CNAME records at your domain registrar to ensure they match what Shoplazza provided.
2. Propagation delay: DNS changes can take up to 48 hours to take effect. If the connection is still not verified after this time, contact your domain provider.
3. Unsupported extension: If your domain uses an incompatible suffix, consider switching to a supported one.
For more detailed help, contact your domain registrar's support team directly.
Successfully completing your domain setup ensures that customers can access your store through a secure, branded domain URL. Finish your domain setup to go live with a secure, branded URL. A verified domain boosts your store’s SEO, trust, and visibility.

