
Understanding the performance of your ads is key to successful marketing. The Facebook Data Assistant is a valuable tool that gives you insights into your ad performance, covering aspects like clicks, impressions, and conversions. It also allows you to add UTM parameters for tracking ad traffic sources, helping you pinpoint your most effective campaigns. This guide provides a straightforward walkthrough for setting up the Facebook Data Assistant in your Shoplazza admin.
Installing the Facebook Data Assistant App
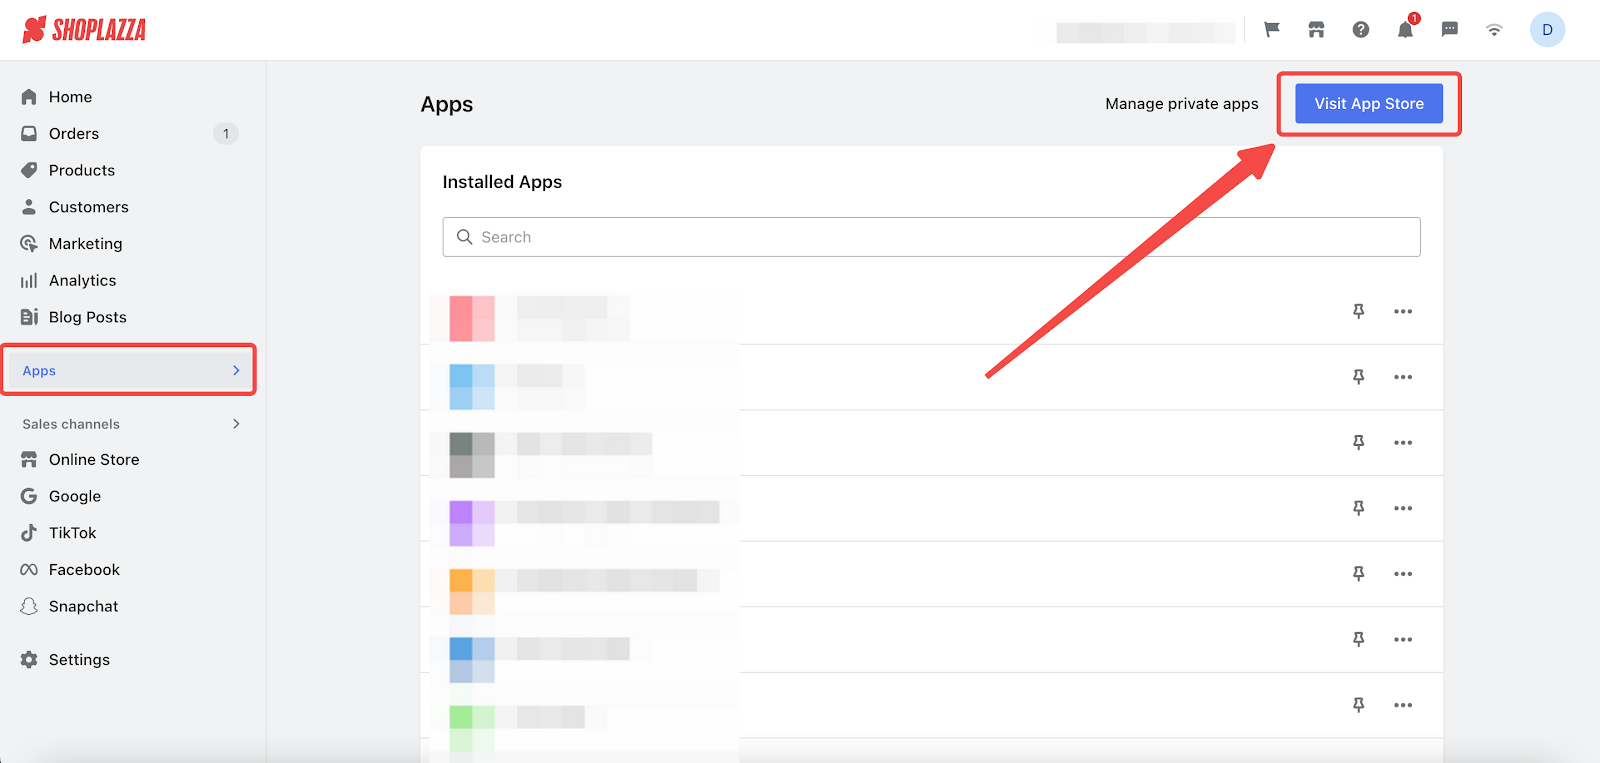
1. From your Shoplazza admin > Apps, click Visit App Store.
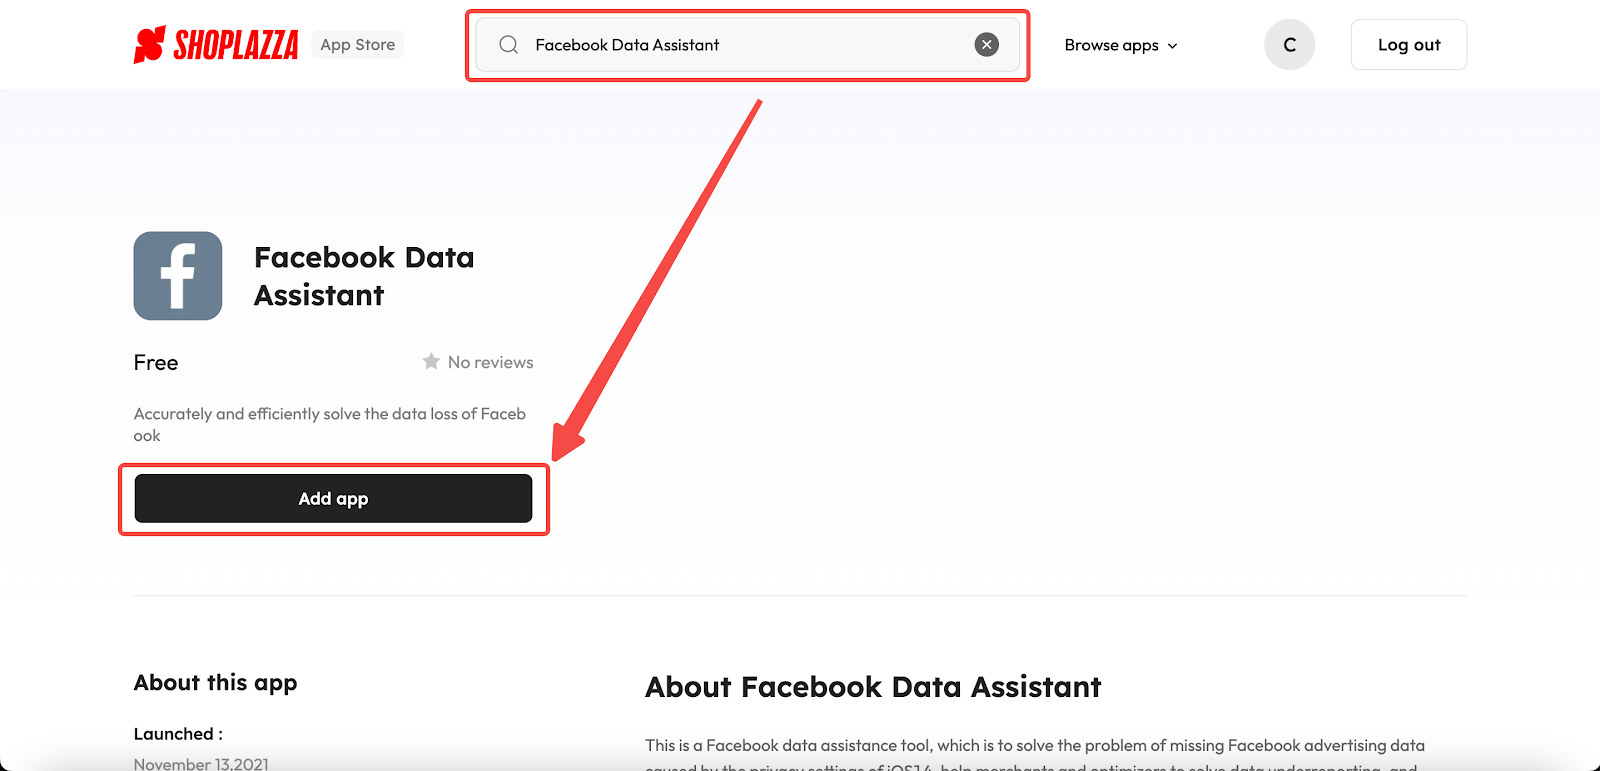
2. Search the Facebook data assistant app and click Add app to your store.
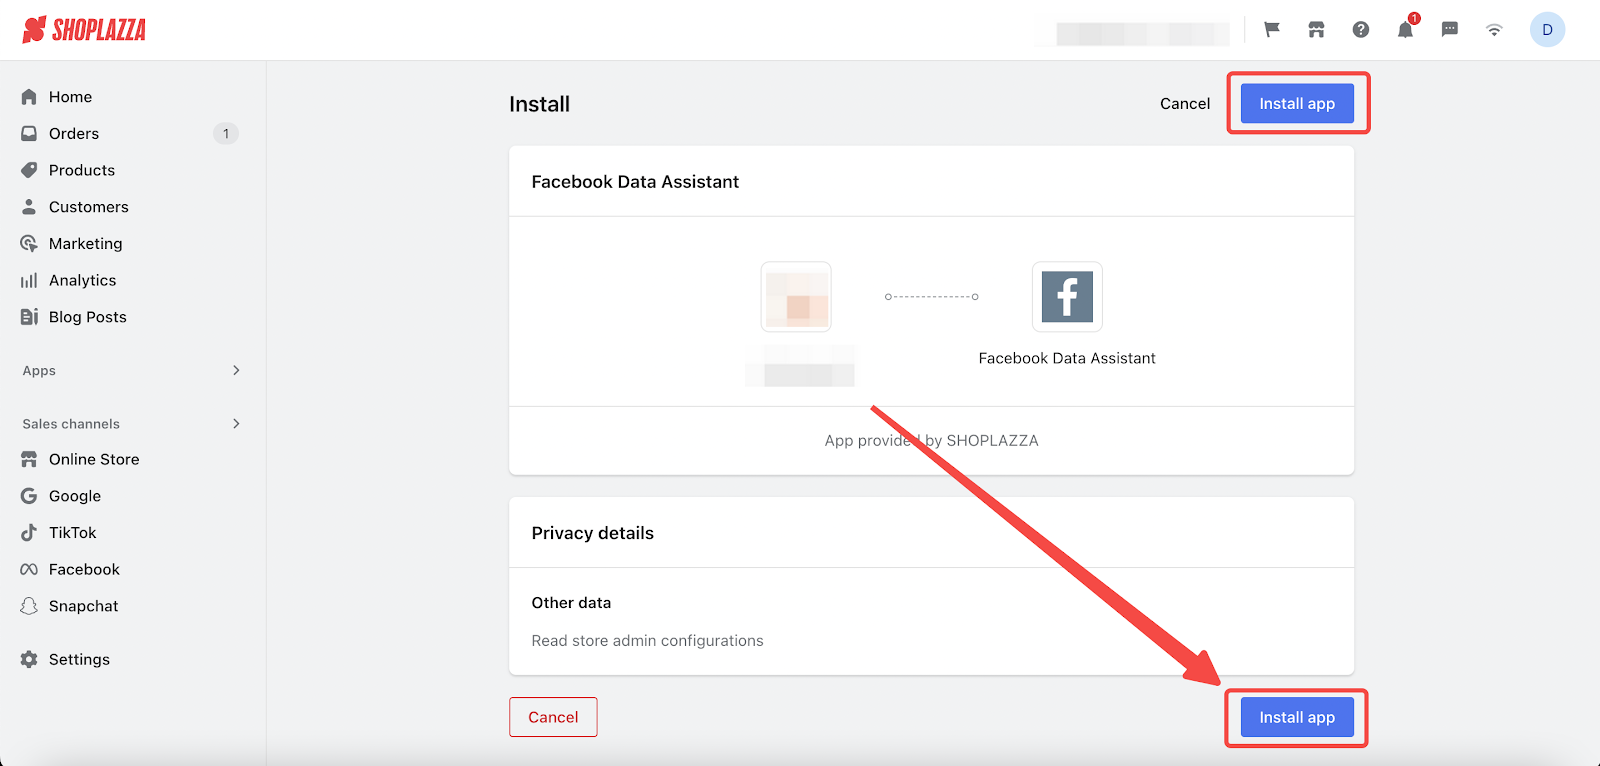
3. Click Install app.
Link your Facebook Ads account
Start by linking your Facebook account and ensuring the time zone matches your account.
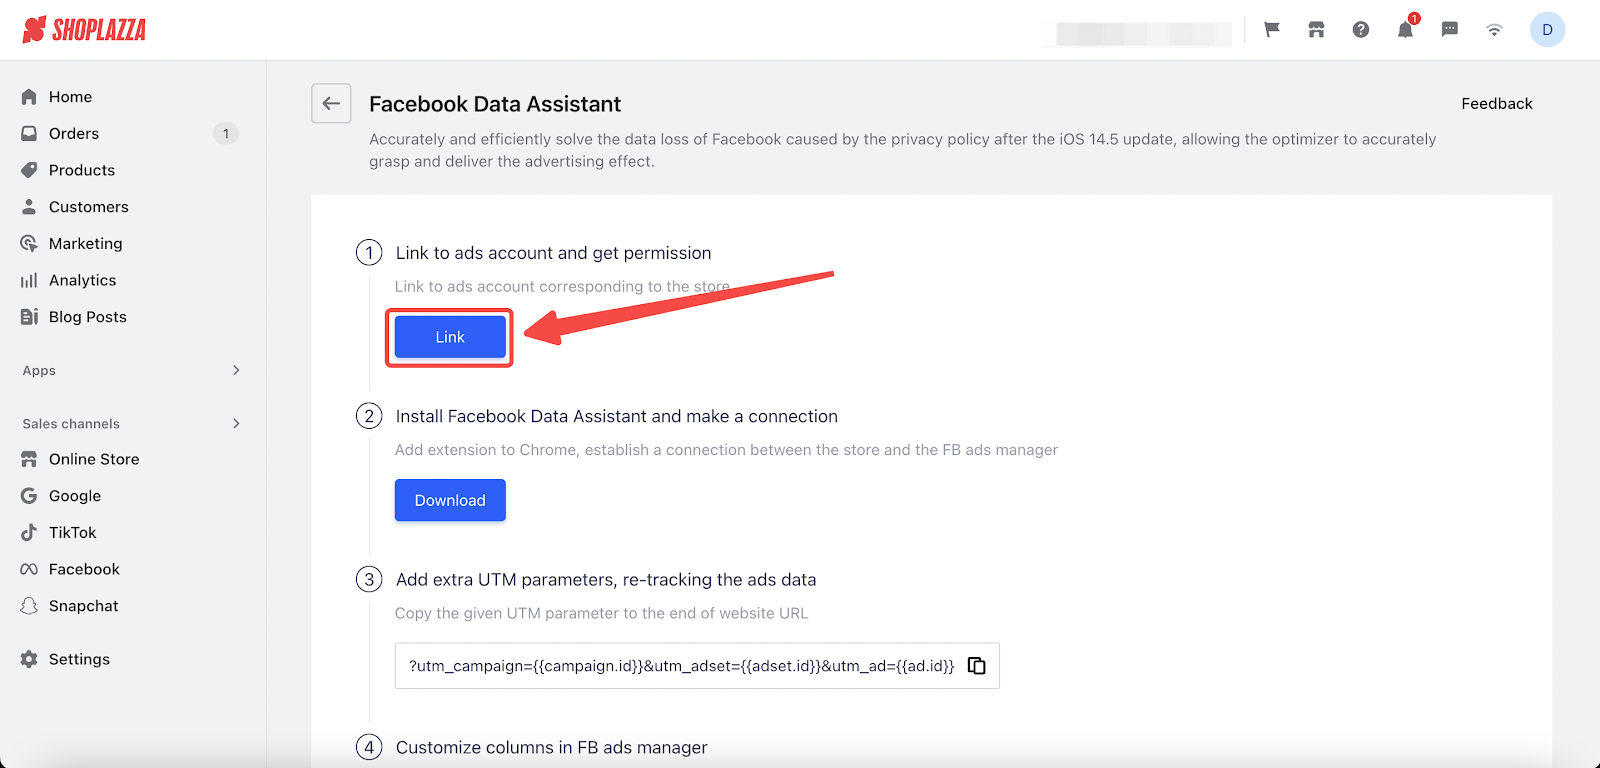
1. Click the Link button.
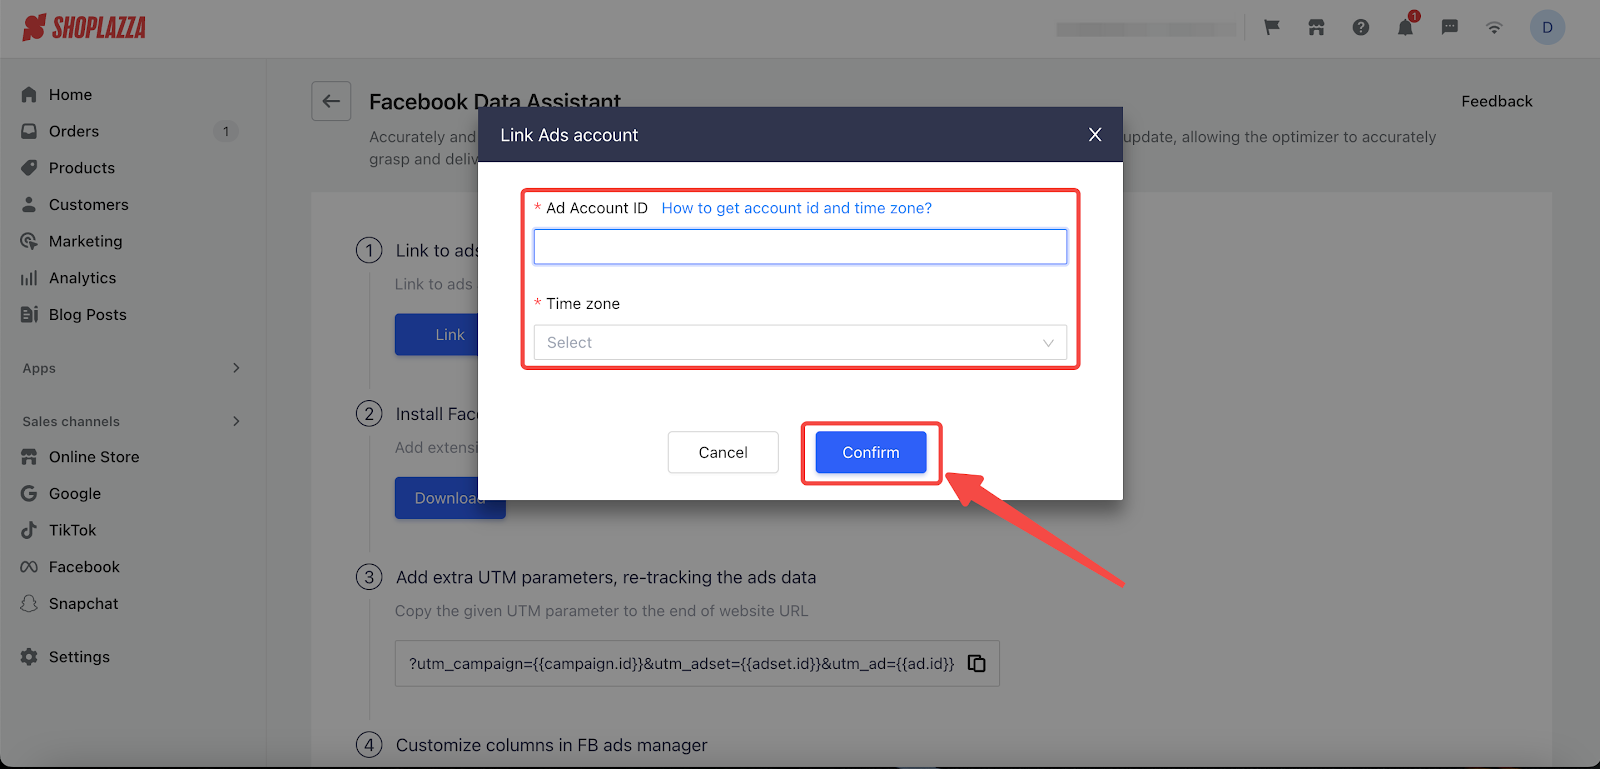
2. Here you will enter the ad account ID in the pop-up window and select the account time zone. Click here to learn how you can access your Ad account ID and Time Zone. Once done, click Confirm.
Note
The time zone should align with your ad account to sync store order data correctly.
Installing the Facebook Data assistant extension
The next step is to install an extension in Chrome/Microsoft edge to create a connection between your store and Facebook ad manager.
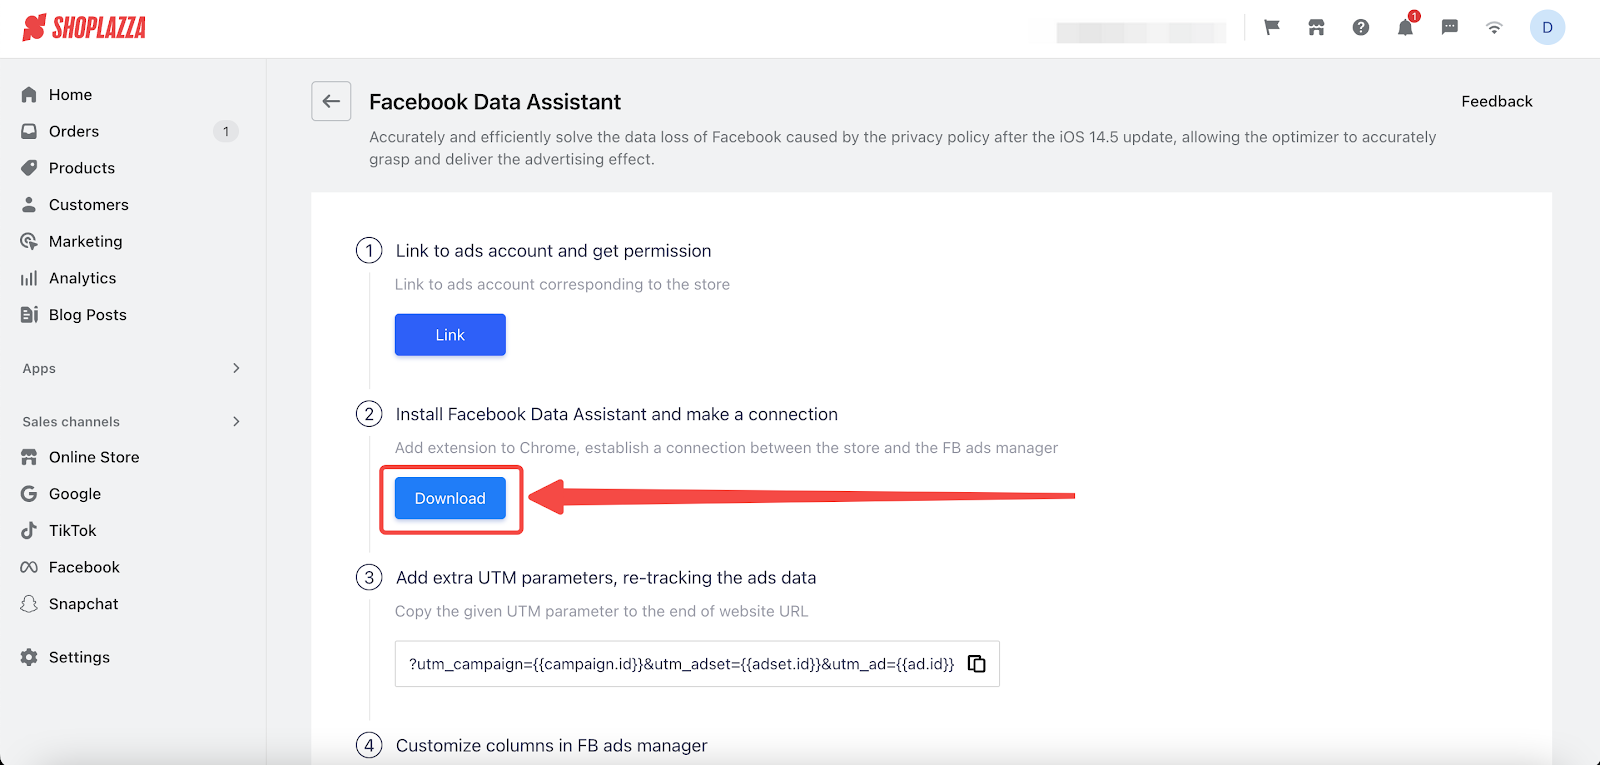
1. Once your Ads account is linked, click Download to get the fb_data_assistant.zip file.
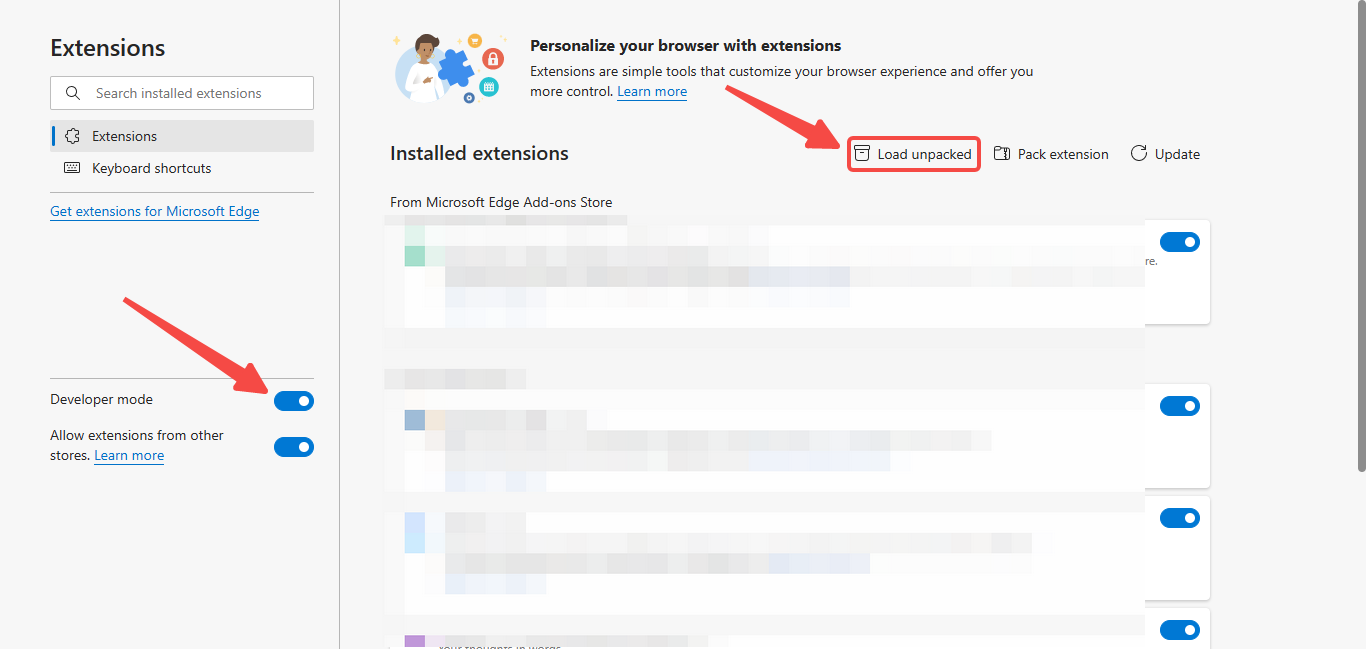
2. Open your Microsoft Edge or Chrome browser and go to Manage Extension.


3. Turn on Developer mode and click Load unpacked.
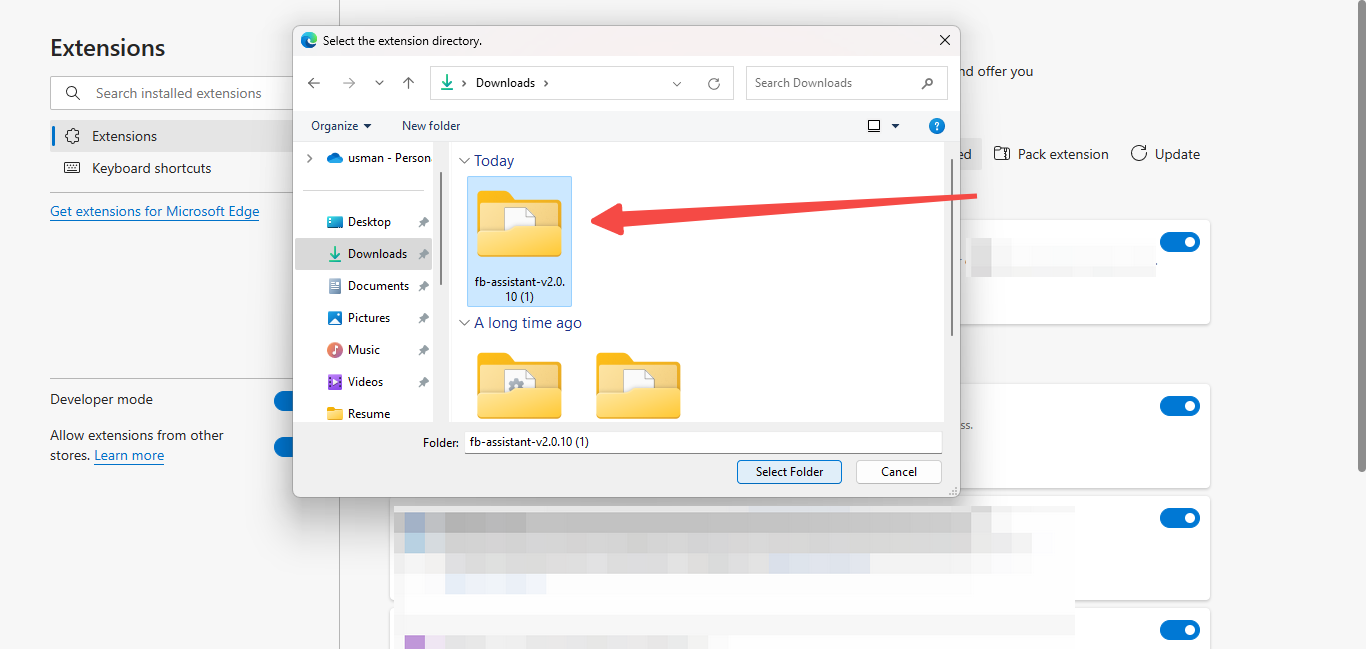
4. Select the zip file previously downloaded.
5. Confirm the file in the extension list to make sure the upload is successful.
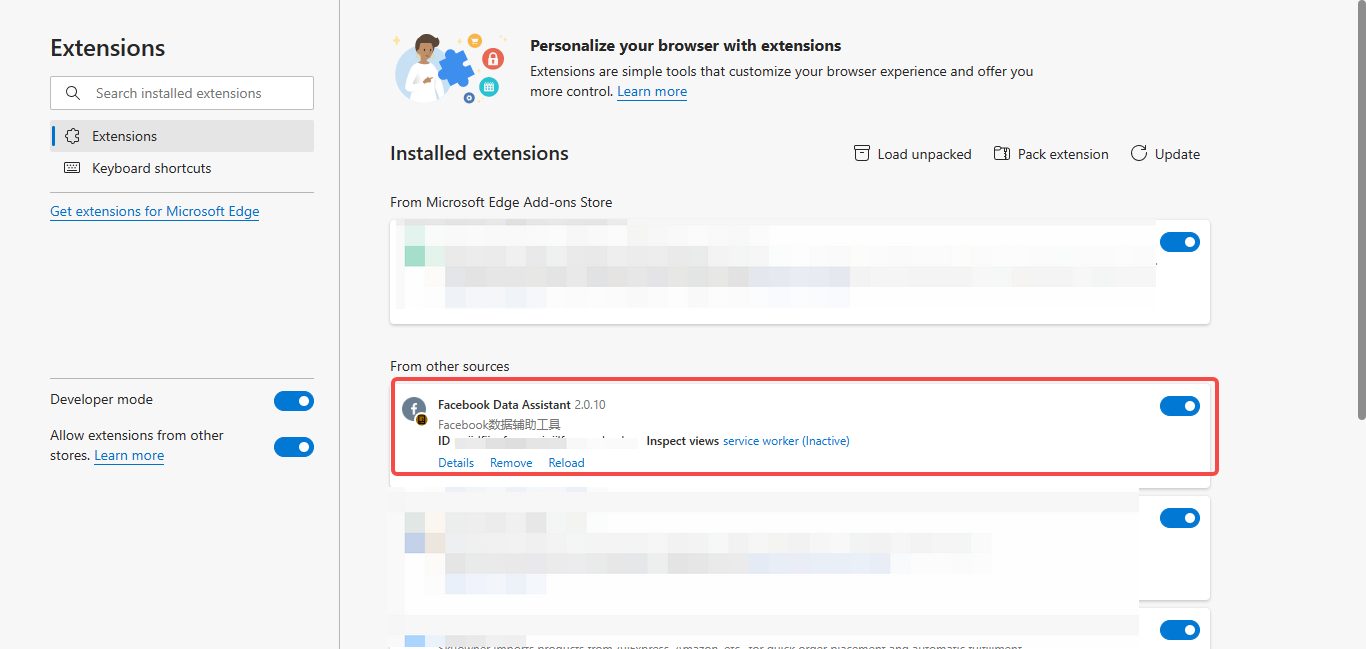
6. Activate the extension for data reporting.

Note
The extension is effective only on the Facebook Ad Manager page.
Adding extra UTM parameters, re-tracking the ads data
With the assistant installed, you can now add UTM parameters.
1. Click to copy the UTM parameter.

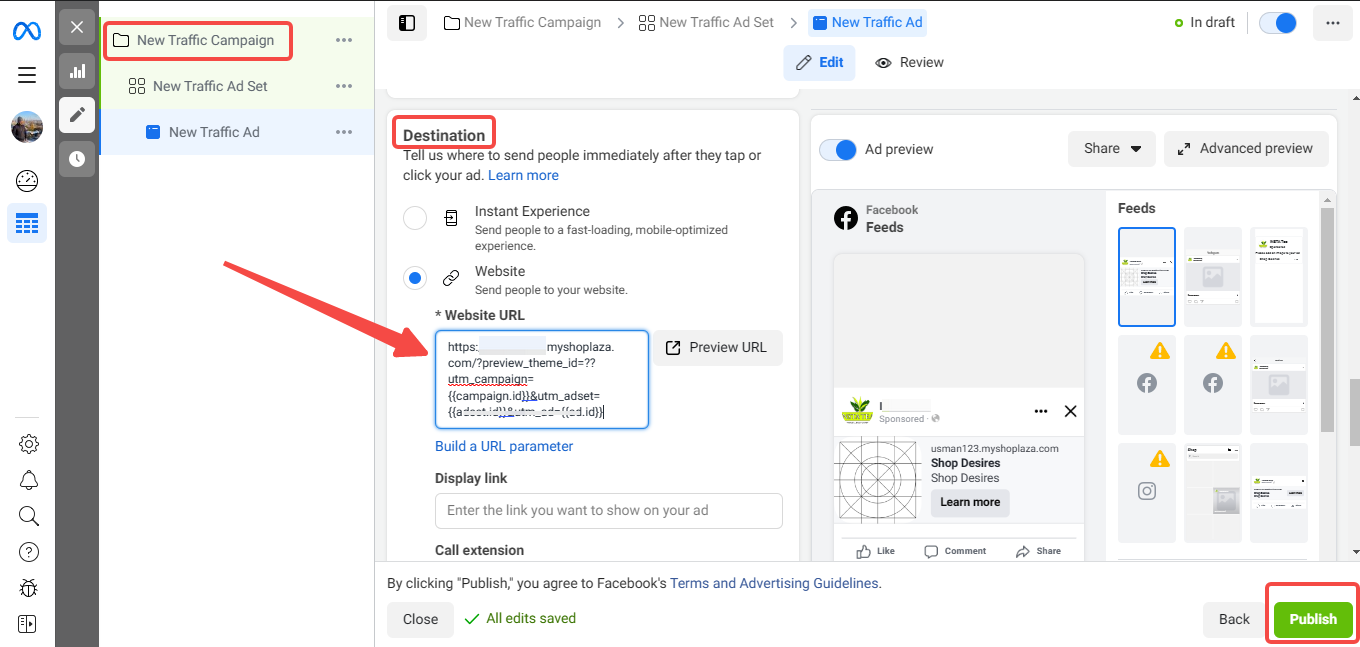
2. Log in to your Facebook Ad manager account, select the Ad type and paste the UTM parameter to the end of the website URL. Click Publish to save the settings.
Customizing columns for accurate advertising data
The last step in setting up Facebook data assistant is customizing columns.
1. Log in to your Facebook ads manager. Under the campaigns, click Columns > Customize column.

2. Select OBJECT NAMES & IDS in the pop-up window. Once confirmed, click Apply.

3. Look for the green icons on the ad data page to view accurate ad performance statistics.

Note
- The Facebook Data Assistant aligns ad campaigns with order data using UTM parameters, ensuring accurate order-to-ad linkage.
- A single store can be linked to multiple Facebook ad accounts, but each ad account can only connect to one store. Verify the correct store association before linking.
- UTM parameters can be added to both new and existing ads, with immediate data tracking upon activation.
In conclusion, the Facebook Data Assistant is an integral tool for maximizing your ad performance in Shoplazza. Its capabilities in tracking and optimizing your campaigns through detailed insights and UTM parameters enable you to recognize and focus on the most effective strategies. This setup process lays the foundation for leveraging data-driven decisions that are instrumental in driving the growth and success of your business.


Comments
Please sign in to leave a comment.