
The Product Bases module is a key component in your Print-On-Demand (POD) process. Product bases are templates that define the structure and specifications for blank products, ensuring consistency and efficiency in your production workflow. By setting up well-organized product bases, you can streamline your design process and maintain high standards across all custom products. This guide will walk you through the steps to create and manage your product bases effectively, covering initial setup, defining dimensions, outlining printable areas, and setting pricing.
Getting started with product bases
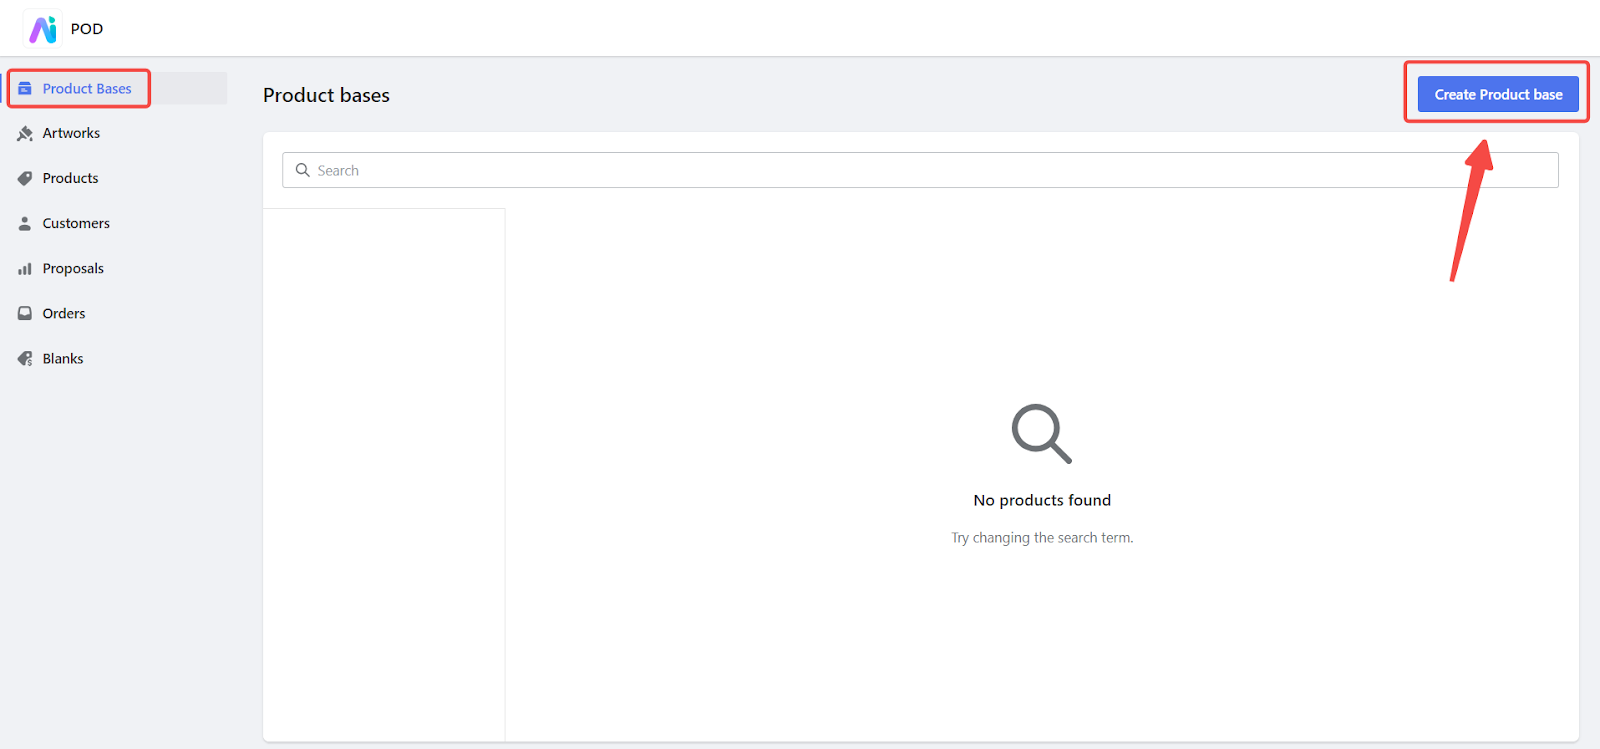
1. Create product sases: Navigate to the Product Bases page. Click Create product base to begin creating a new template. This page also allows you to preview all previously created templates.
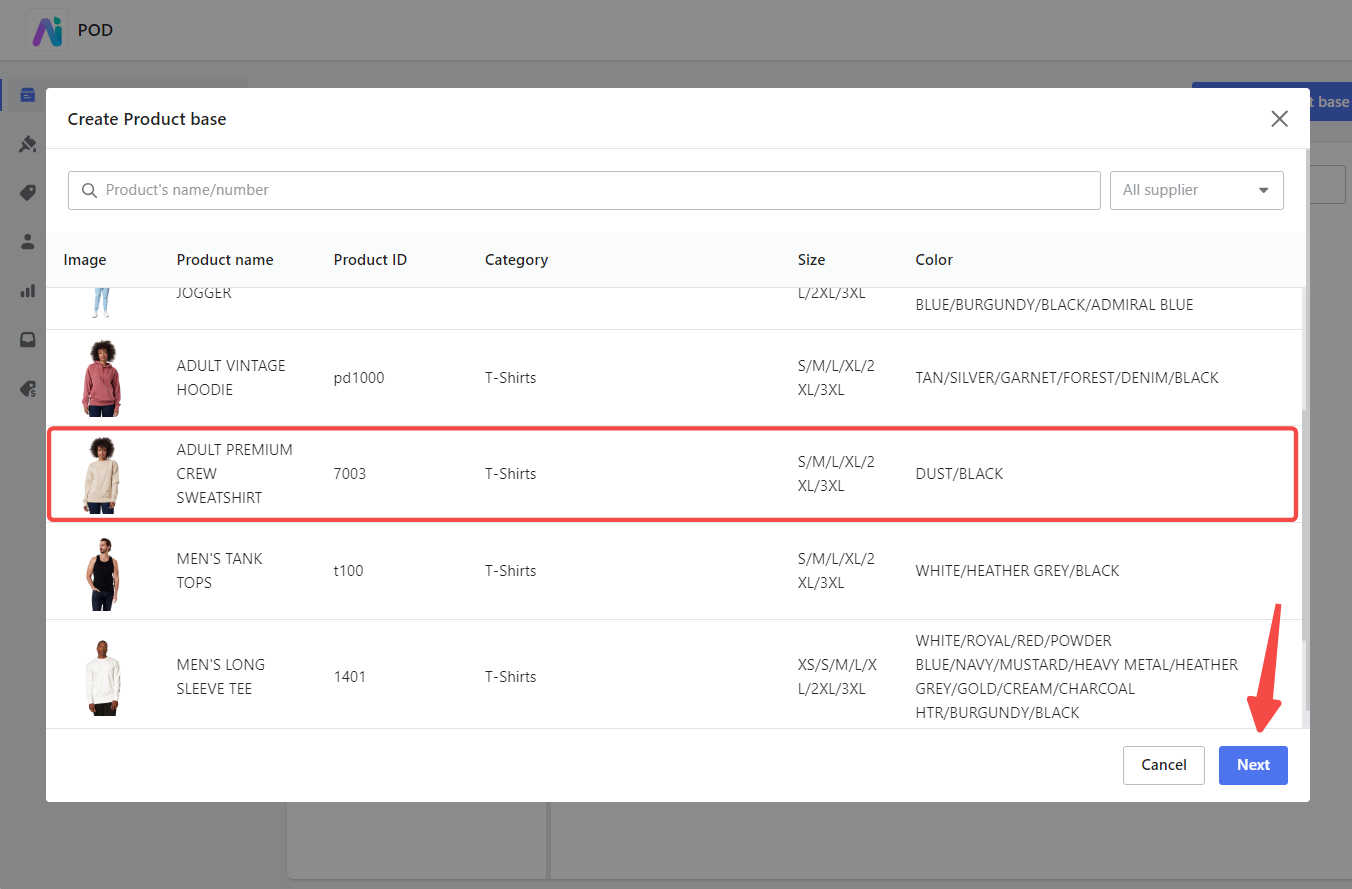
2. Select blanks: In the pop-up window, you'll see a list of blank products to choose from. Select the blank products you wish to use and click Next. Detailed information about each blank, including the product name, product ID, category, and supplier, will be available for you to review.
3. Enter Basic information: After selecting the blanks, you will be directed to the Basic Information page. Here, you need to fill in the new style's name and choose a category. Use easily distinguishable names for clarity. Categories refer to your admin product backend. For guidance, refer to creating product categories. Once completed, click Next to proceed or Back to return to the previous step.

Configuring the specified dimension
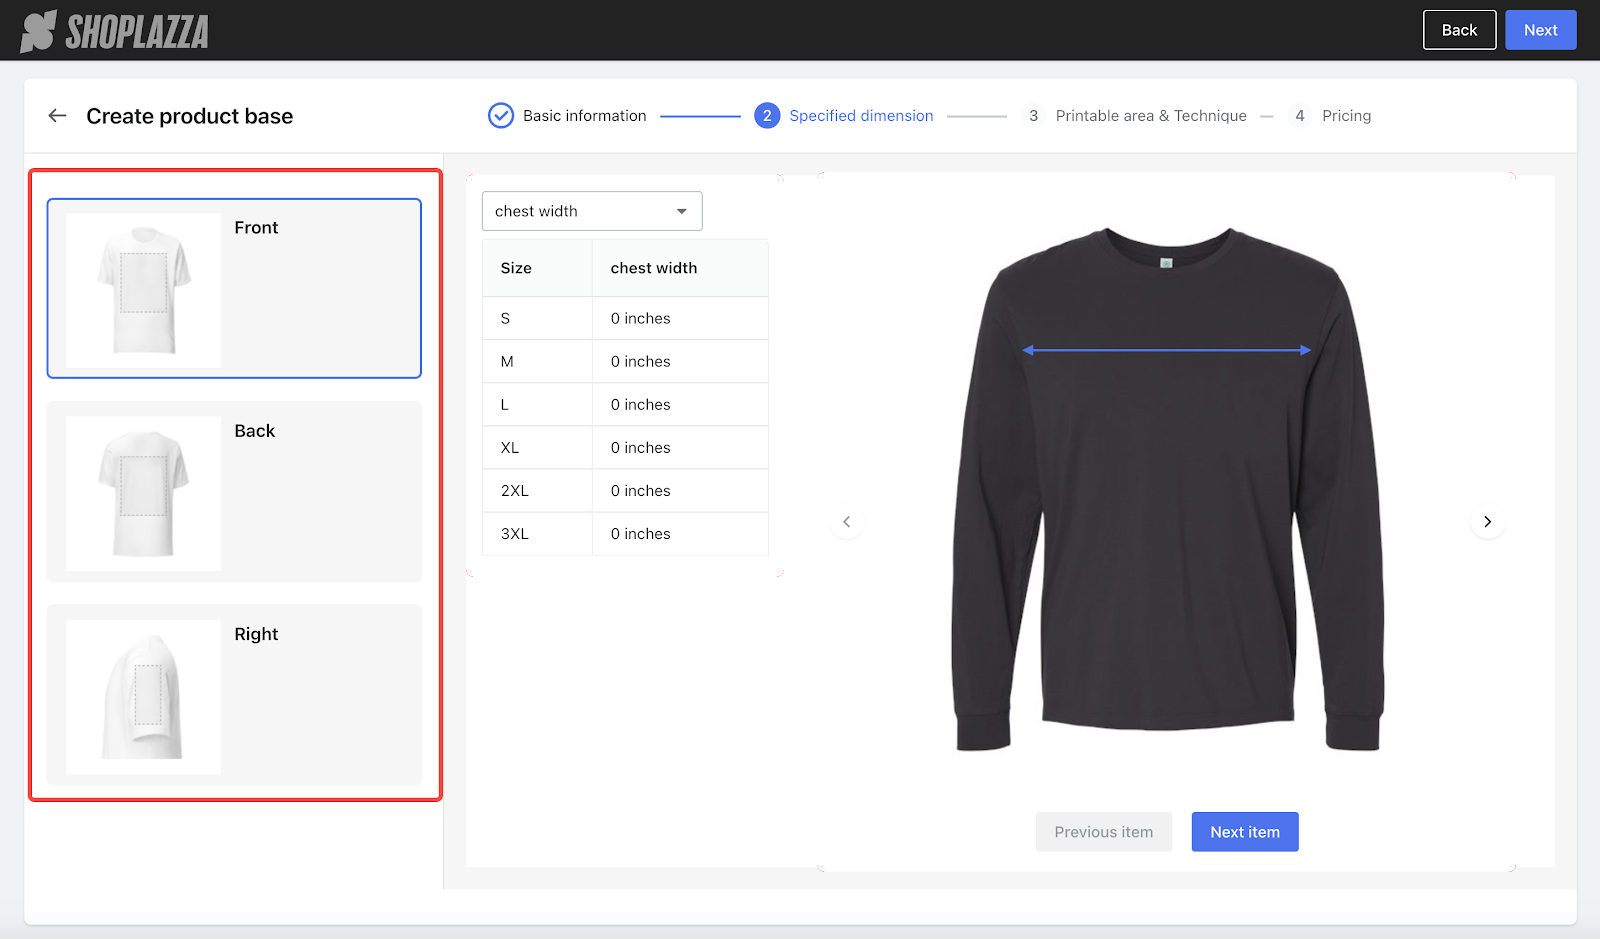
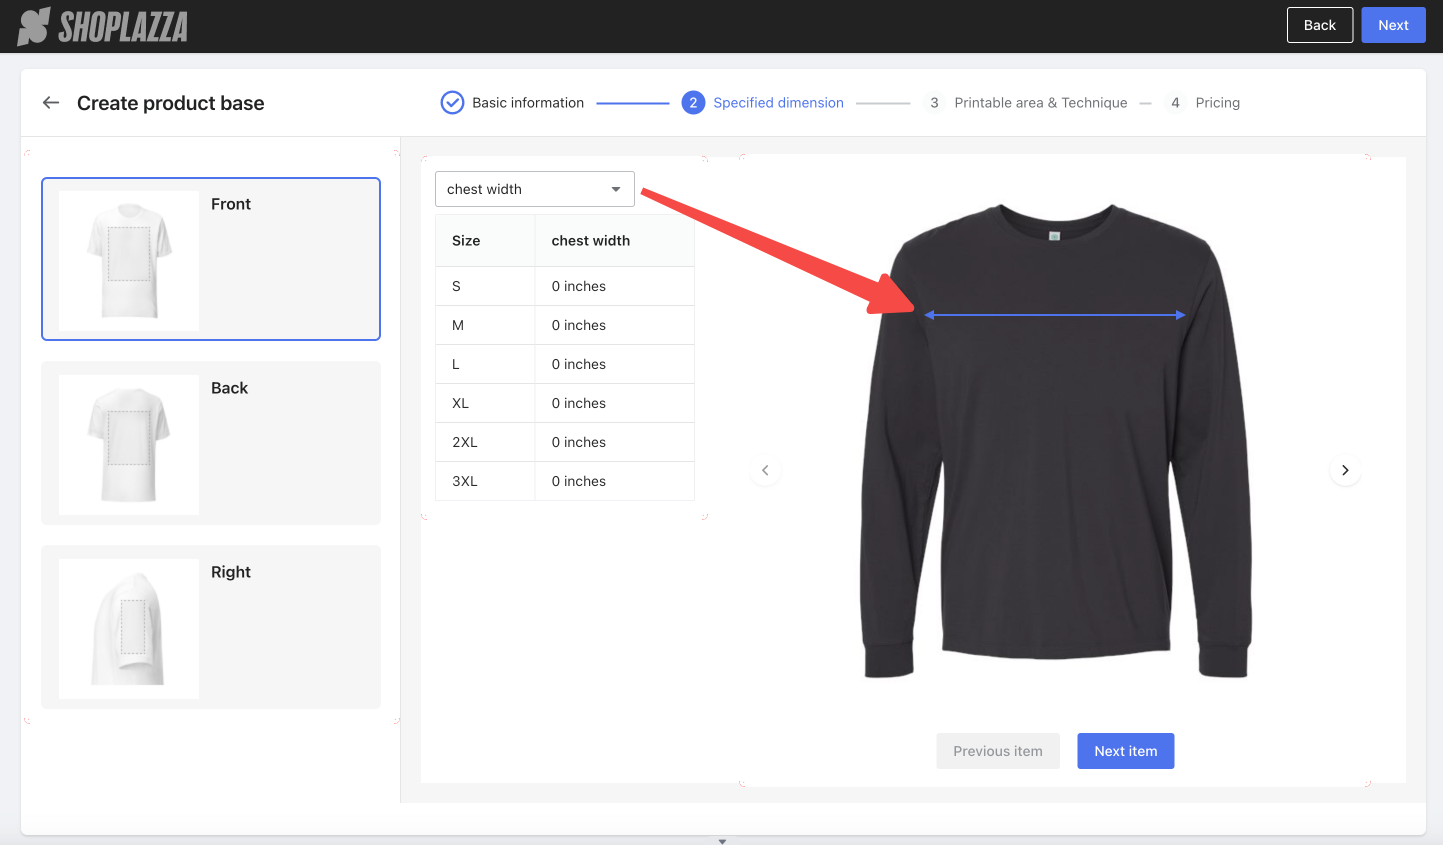
On the Specified Dimension step, choose the garment views and body parts, then draw lines to determine the appropriate dimensions.
1. View garment: On the left side of the page, you'll see different views of the garment. Typically, these include Front, Back, Right, and Left views. However, some blanks may offer fewer views based on the uploaded information.
 2.
2.
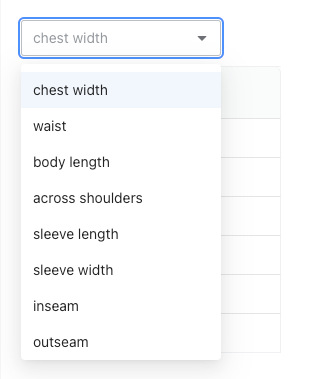
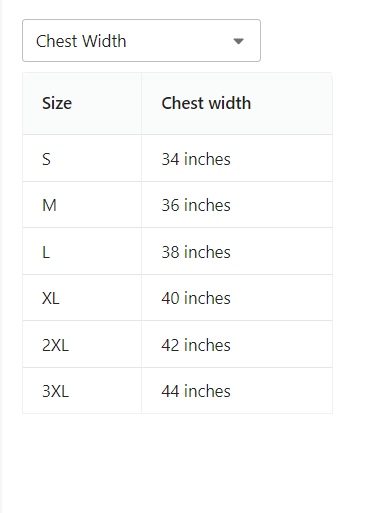
2. Select body part: In the middle of the page, select the body part from the dropdown menu, such as chest width or body length. The system will automatically fill in the corresponding values for all sizes based on your selection. If the blanks do not have corresponding information, you'll need to manually input the size values.
3. Draw lines: For the line drawing step, complete the lines for all views and styles. On the right side, follow the prompts and use your mouse to draw a line on the garment according to the selected body part. The system will automatically calculate the actual production values based on the pixel dimensions you draw, saving you the hassle of manual measurements.
4. Switch styles: Use the arrows on the garment's left and right sides or the Previous item and Next item buttons at the bottom to switch between different color styles.
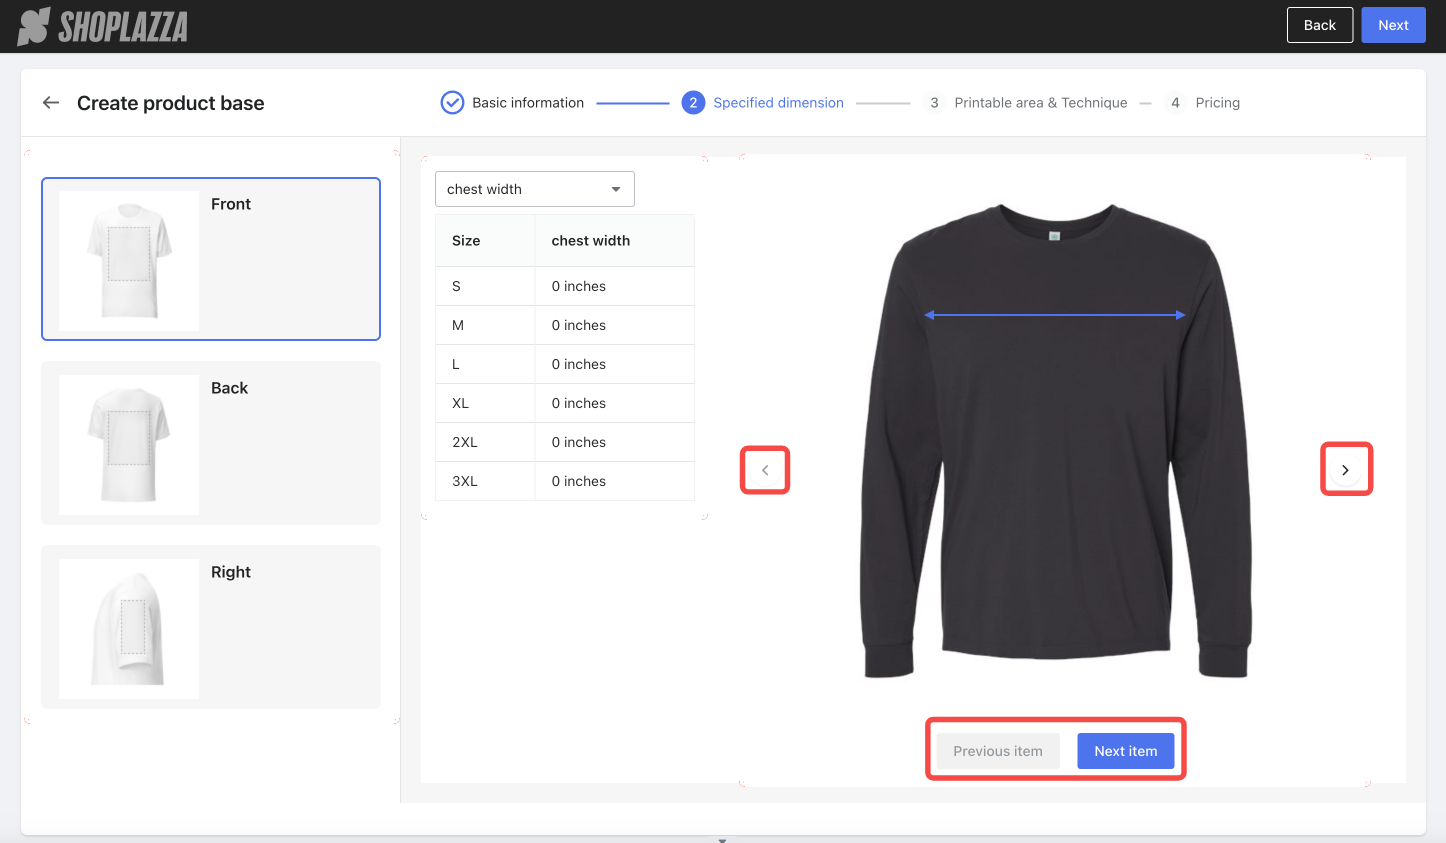
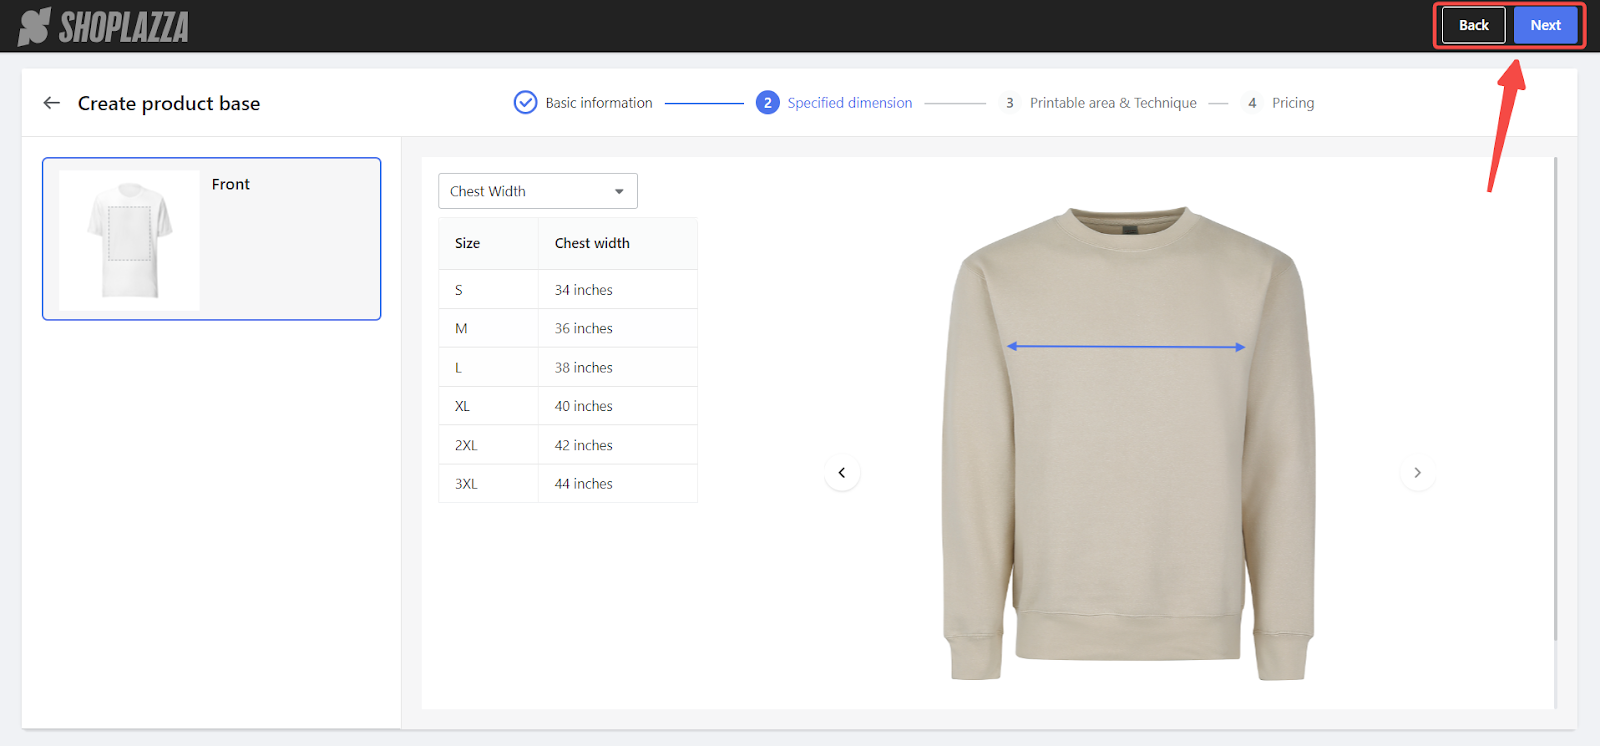
5. Complete drawing: After completing the line drawing for all colors and views of a blank, click Next to proceed, or click Back to return to the previous step.
Defining printable area & technique section
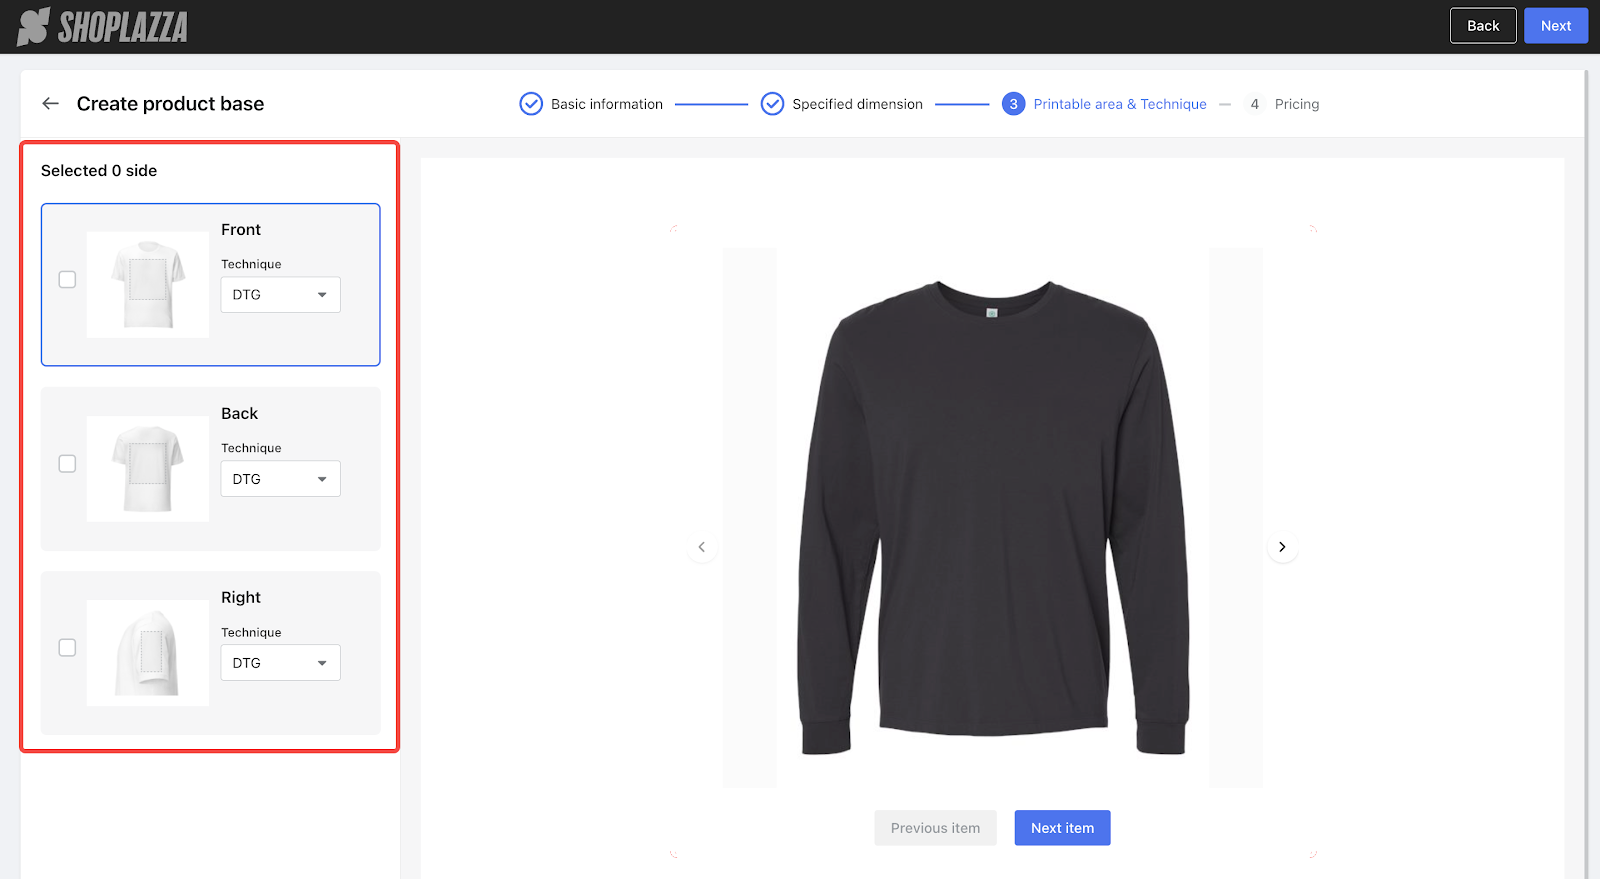
In the Printable area & Technique step, select the garment view and printing technique, and outline the printable area.
- Select view and technique: On the left side of the page, select at least one view and the corresponding printing technique. Currently, options include DTG and DTF, and future production will automatically record and apply the selected technique.
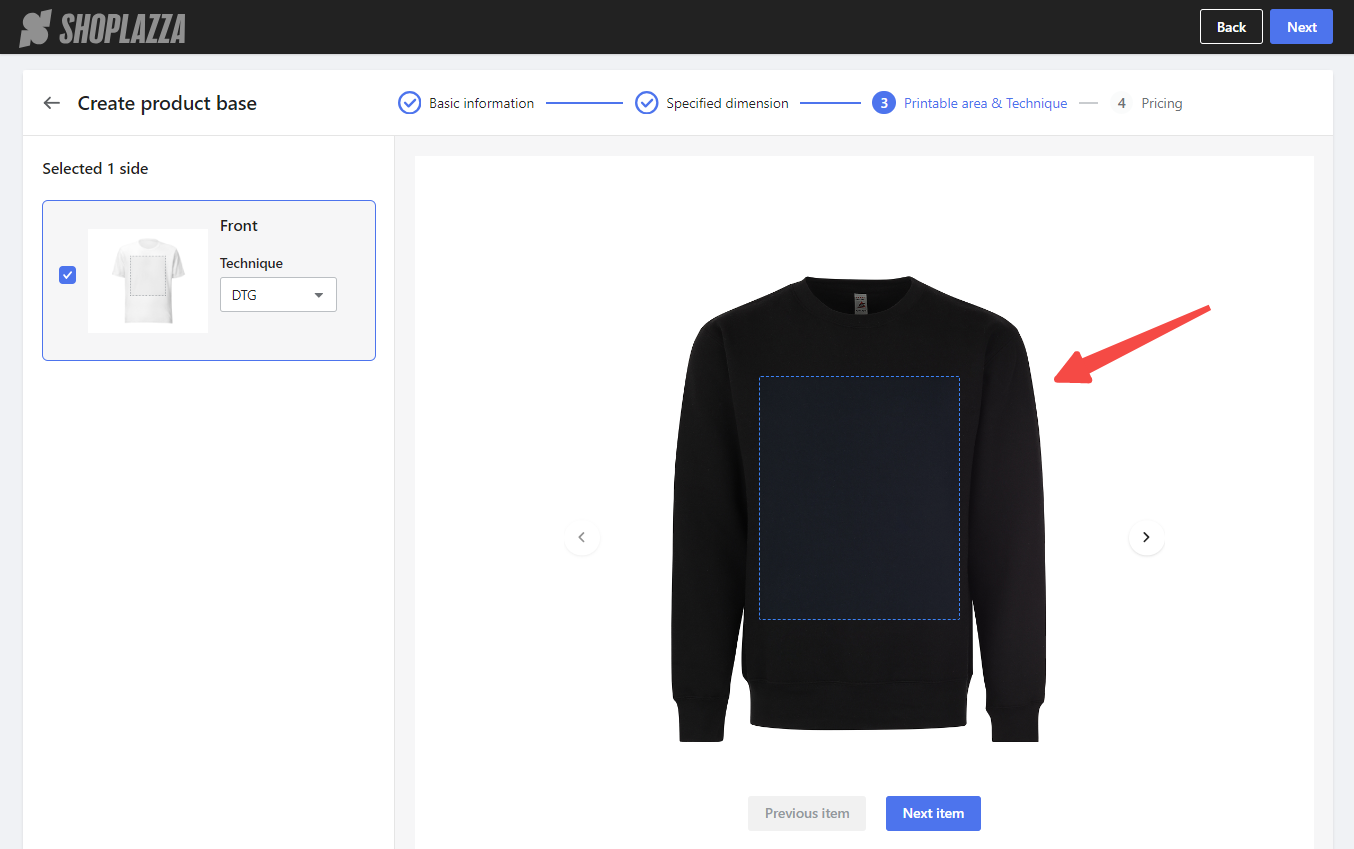
- Outline printable area: On the right side, outline the printable area on the garment using your mouse. Future designs will be automatically restricted to this area.
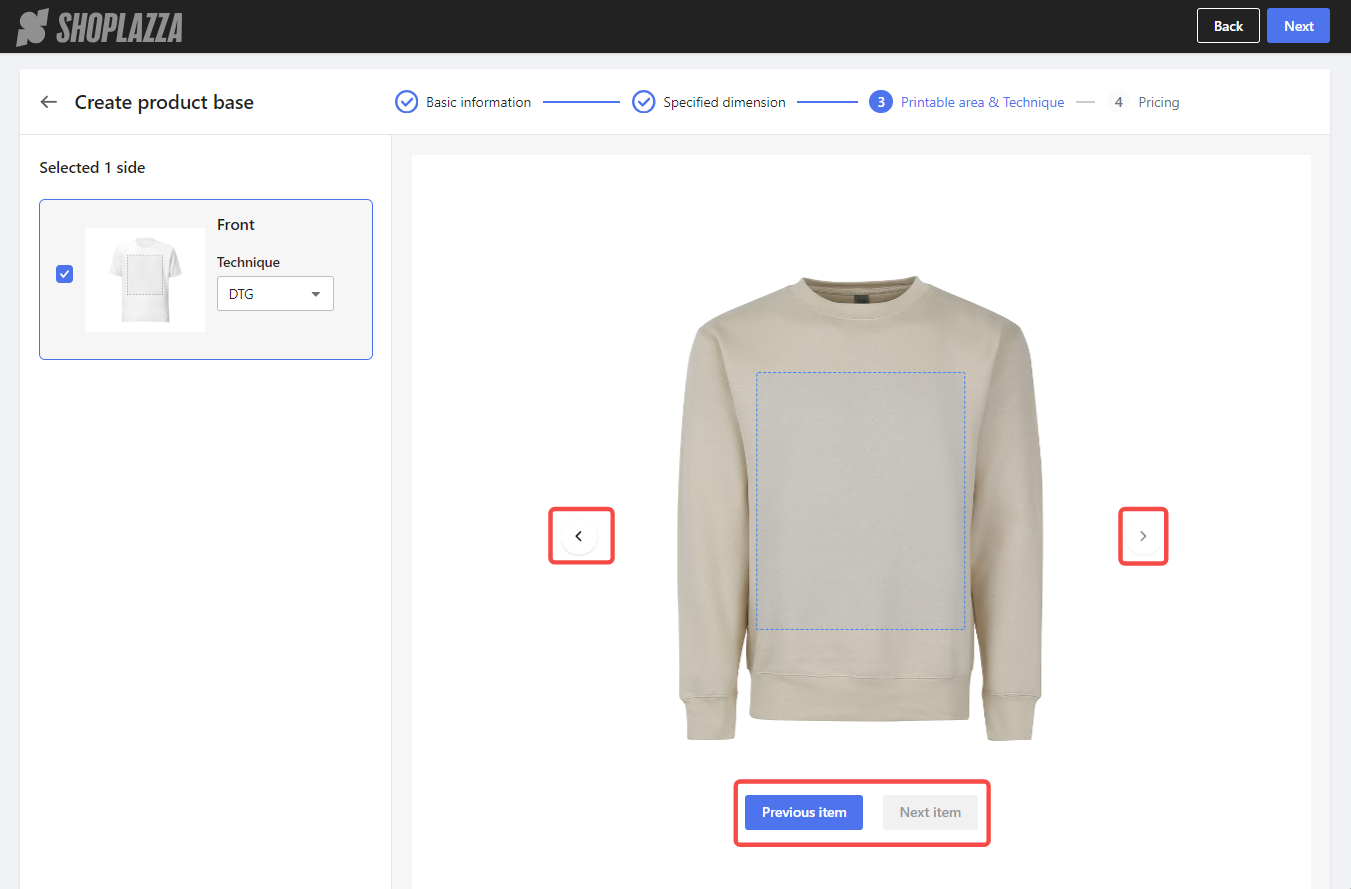
- Switch styles: Use the arrows on the garment's left and right sides or the Previous item and Next item buttons at the bottom to switch between different color styles.
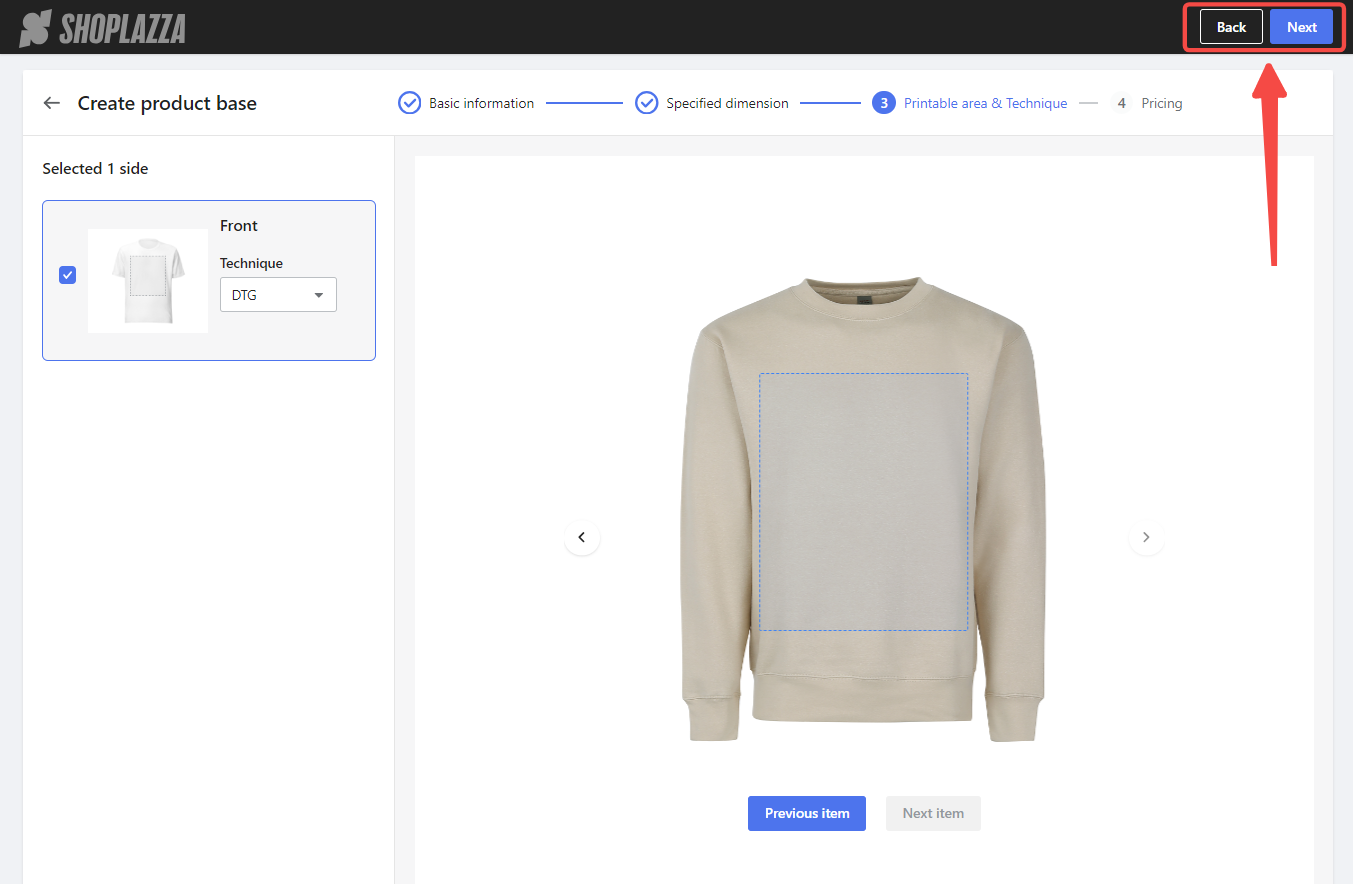
- Complete outline: After completing the outline for all colors of a blank, click Next to proceed, or click Back to return to the previous step.
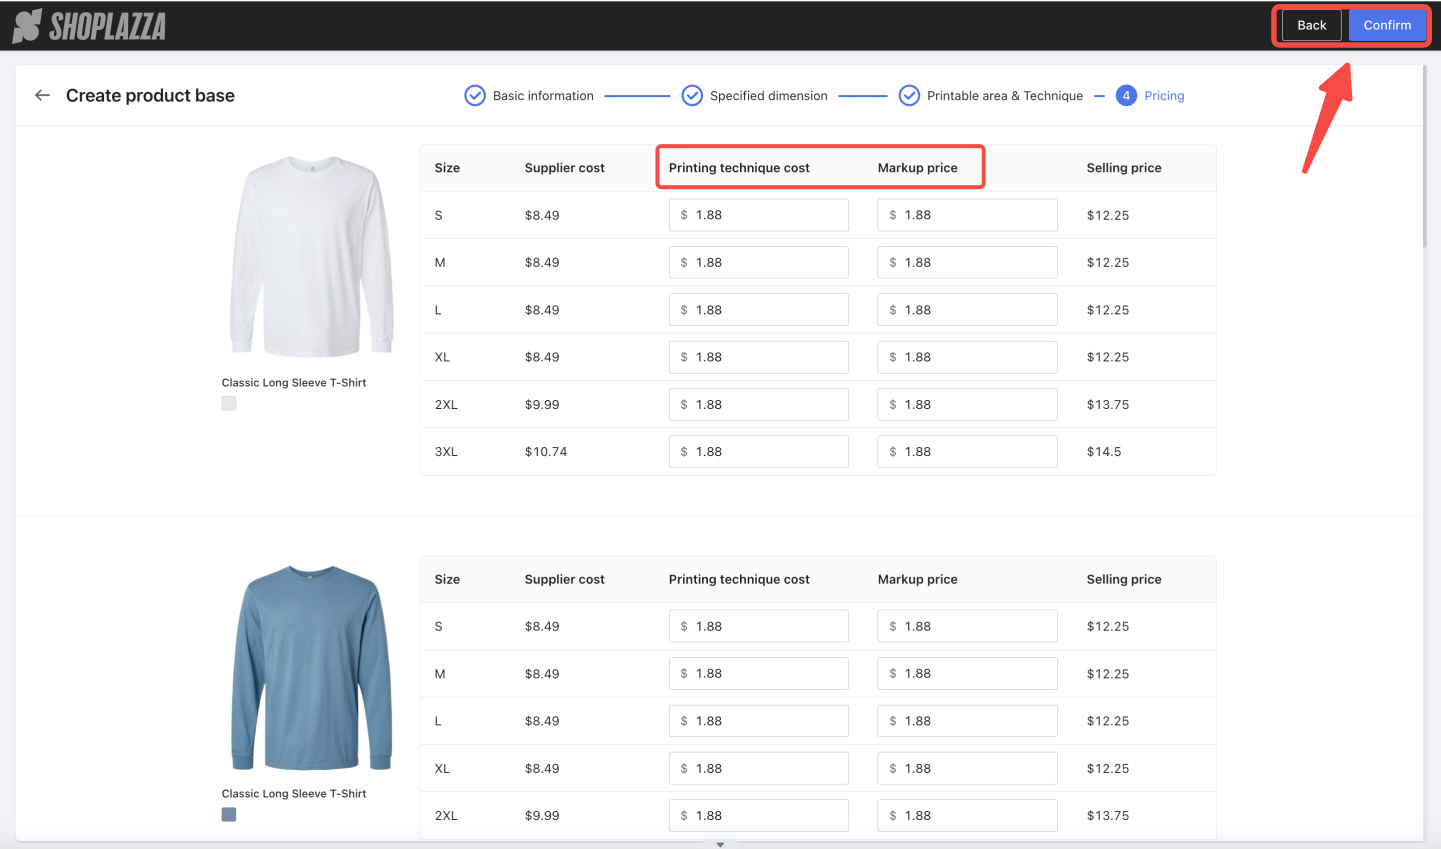
Setting your pricing
On the Pricing page, you'll see thumbnails and color styles of the blanks on the left, with a table displaying price details for different sizes in the middle.
1. Input costs: The Supplier cost section automatically syncs when uploading blanks, and after manually inputting the Printing technique cost and Markup price, the final Selling price will automatically sum these values, displaying the final price without manual calculation. Once all prices for colors and sizes are set, click Confirm to complete the creation of the new printable style.
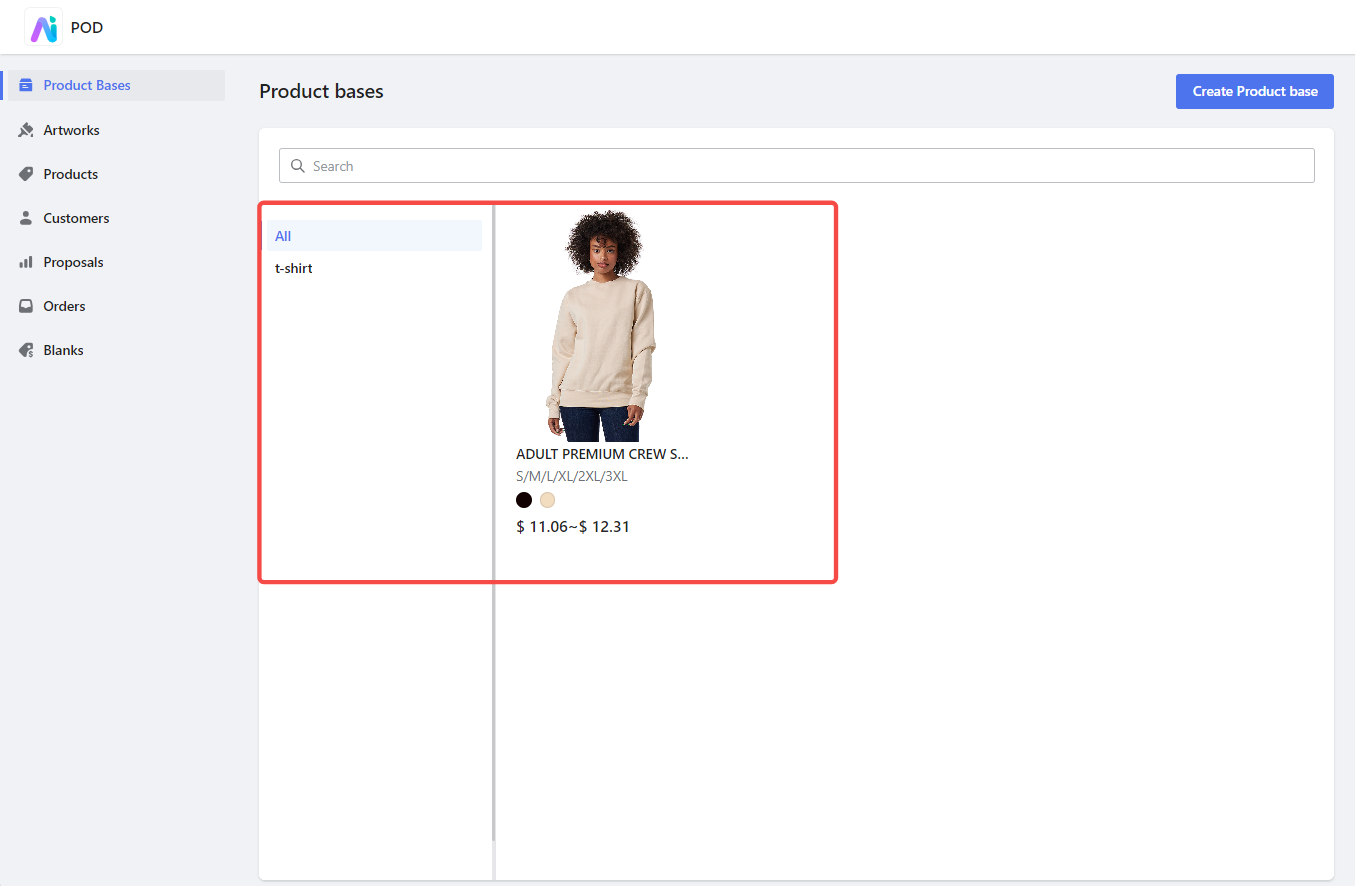
Previewing your product bases
After creating a Product Base, you can preview all the printable styles you have created.
1. Navigate categories: On the preview page, the left navigation bar shows the categories of your works. The main page displays thumbnails, names, sizes, colors, prices, and other information.
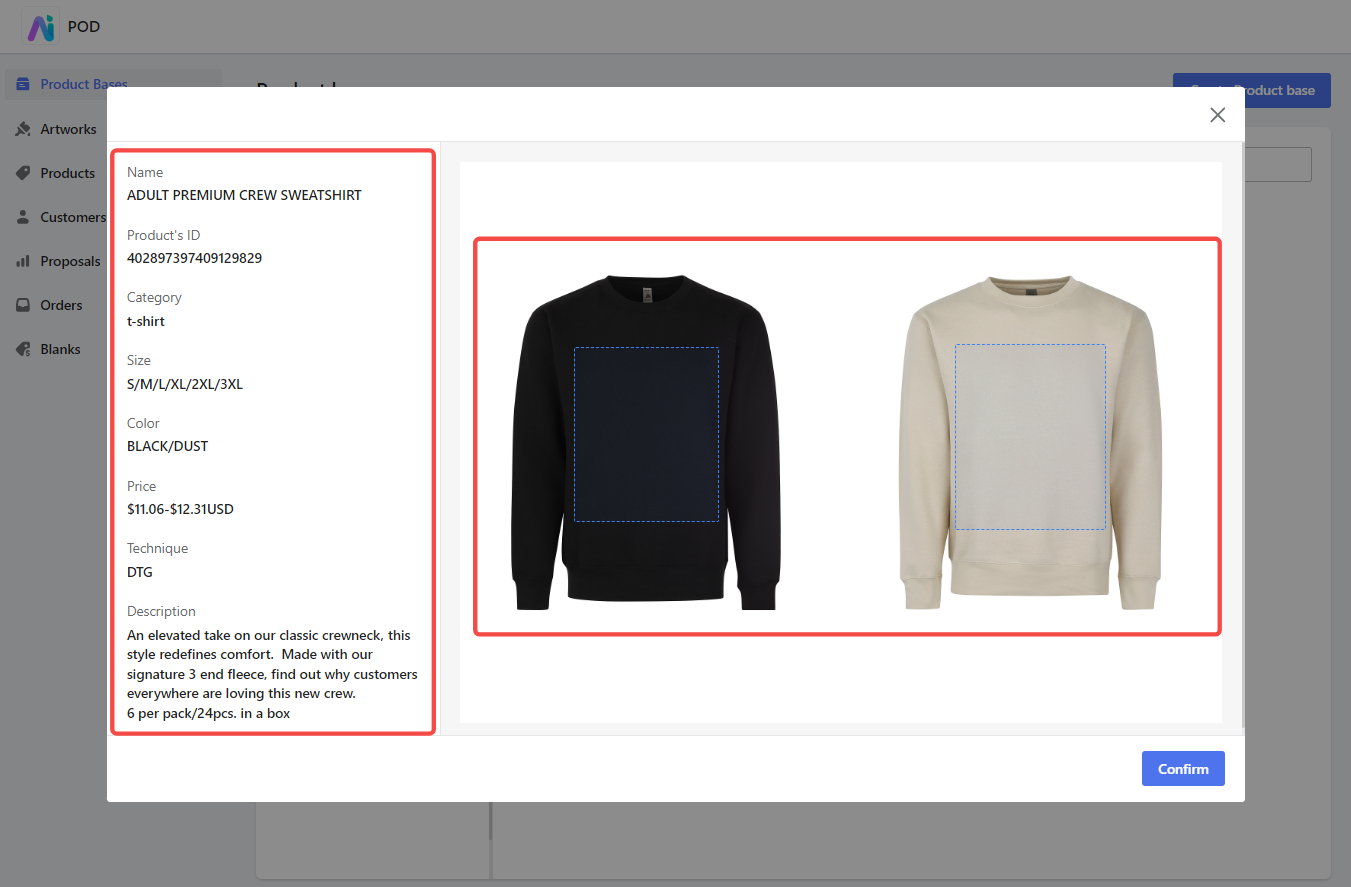
2. View details: Click any work to enter its details page. The details page shows the name, product ID, category, size, color, price, printing technique, description, and other information on the left side. The right side displays the printable area of the work. Click the arrows to view different styles' printable areas (if available).
Following these steps helps you efficiently create and manage product bases, ensuring a streamlined and high-quality production process for your custom products. This organization enhances your workflow, enabling you to deliver consistently superior products to your customers.


Comments
Please sign in to leave a comment.