
Migrating your store to Shoplazza is now easier than ever! With the Store Migration Tool, you can seamlessly transfer your Shopify data while saving time and effort. This guide walks you through the step-by-step process, from setting up your Shoplazza account to verifying your migration results.
Before you migrate
- Shopify's Basic plan has limited access to customer data. Here's what you need to know when migrating:
- Orders: Orders will be migrated without customer details (name, address, phone, email, etc.).
- Customer Records: Direct migration of customer profiles is not available.
- Discount Rules: Discount settings will transfer, but any customer-specific conditions will be removed.
- To fully migrate customer data, you’ll need to upgrade to the Shopify, Advanced, or Plus plan.
If you only need customer information (without orders or discount codes), simply export the customer list from Shopify and import it into Shoplazza. Follow this step-by-step guide to import customers:Customer management | Importing customer information
Step 1 : Installing the Store Migration App
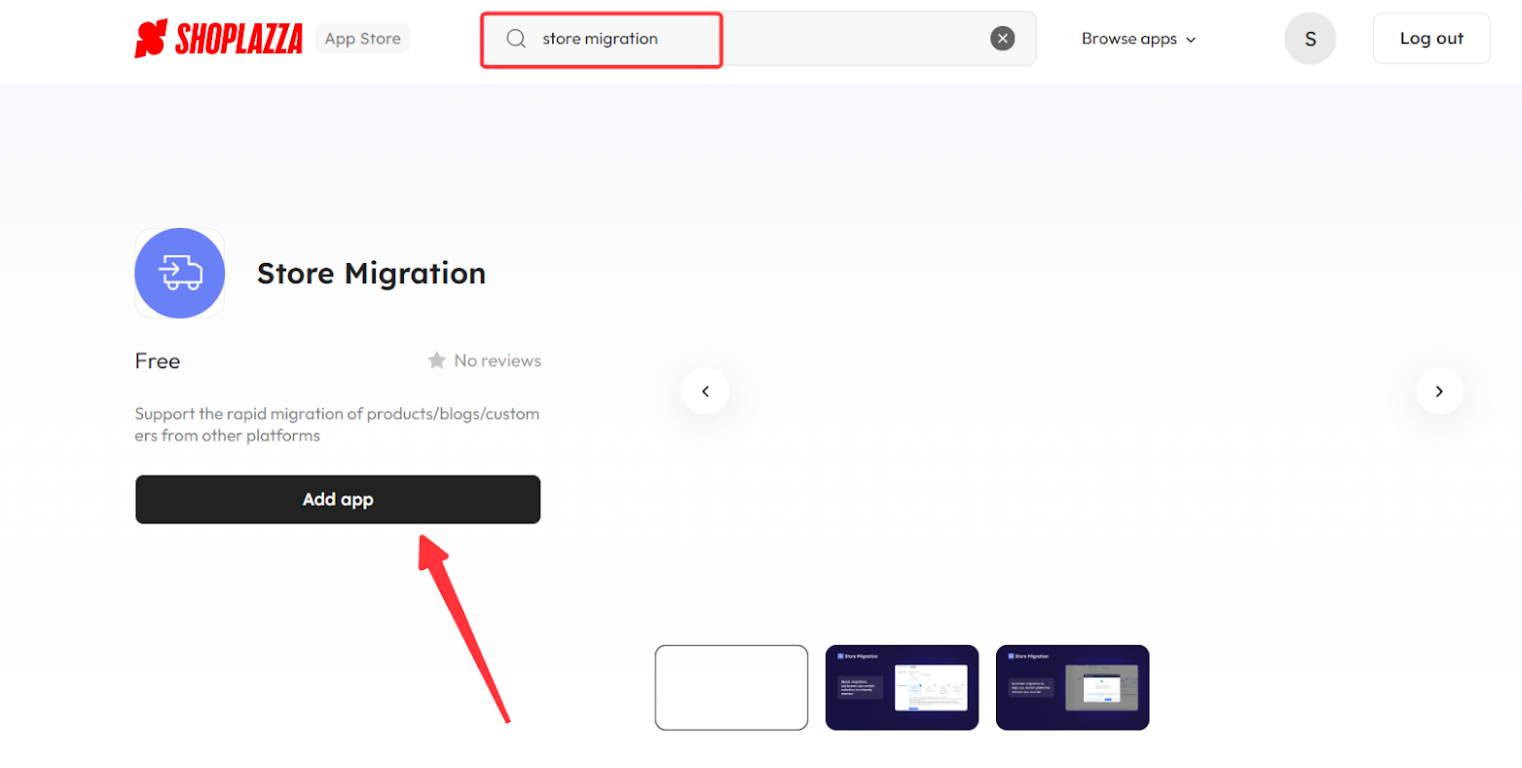
1. Access the app: From your Shoplazza Admin > Apps, click Visit App Store.

2. Find the app: Search for Store Migration in the search box and click Add app to add it to your store.
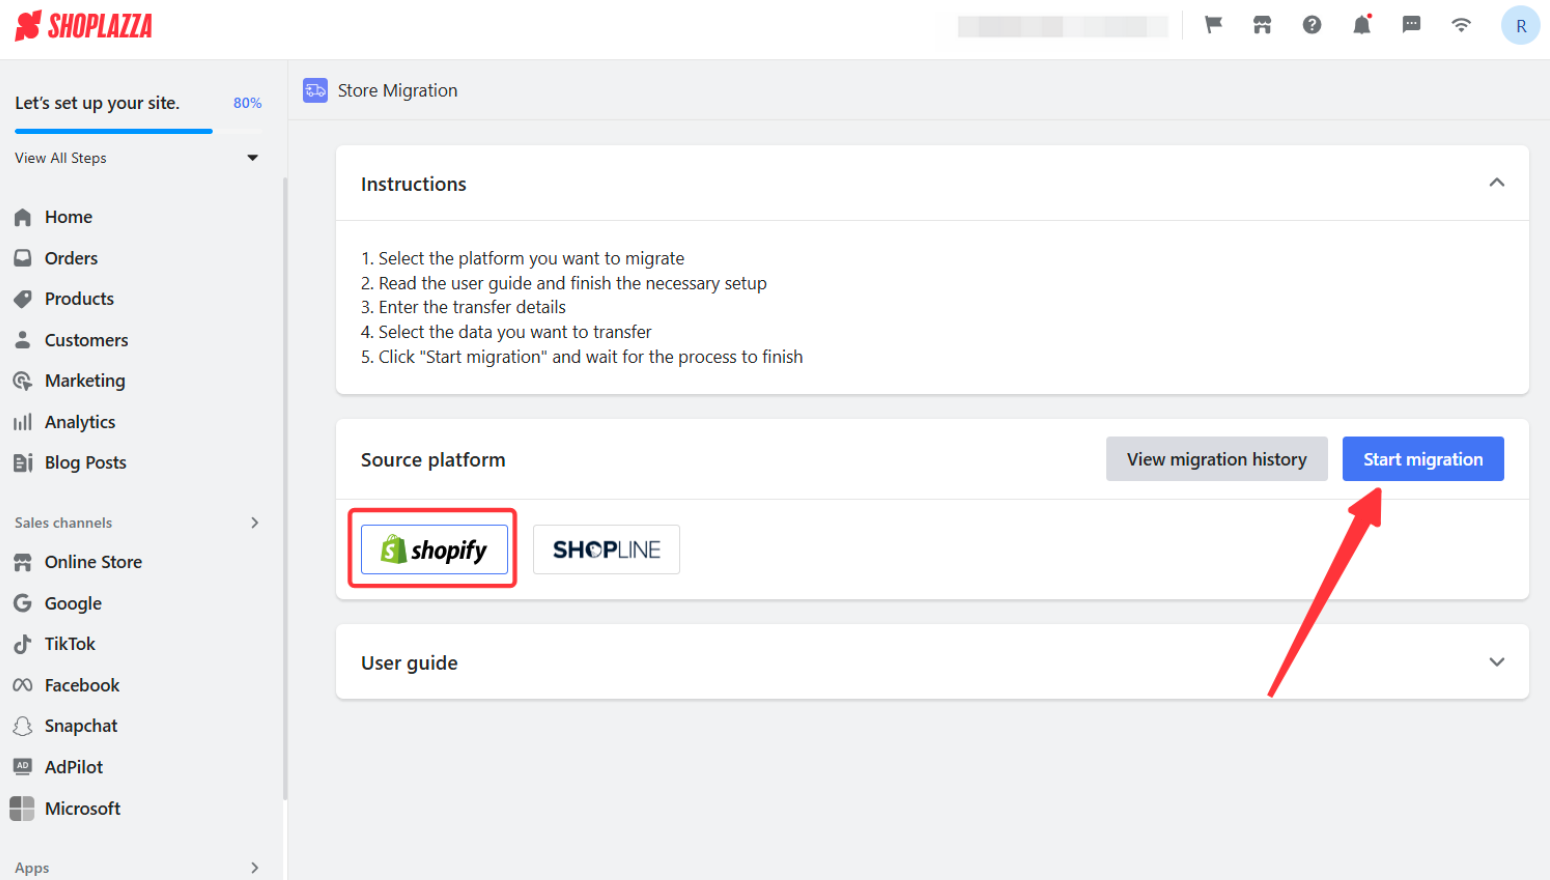
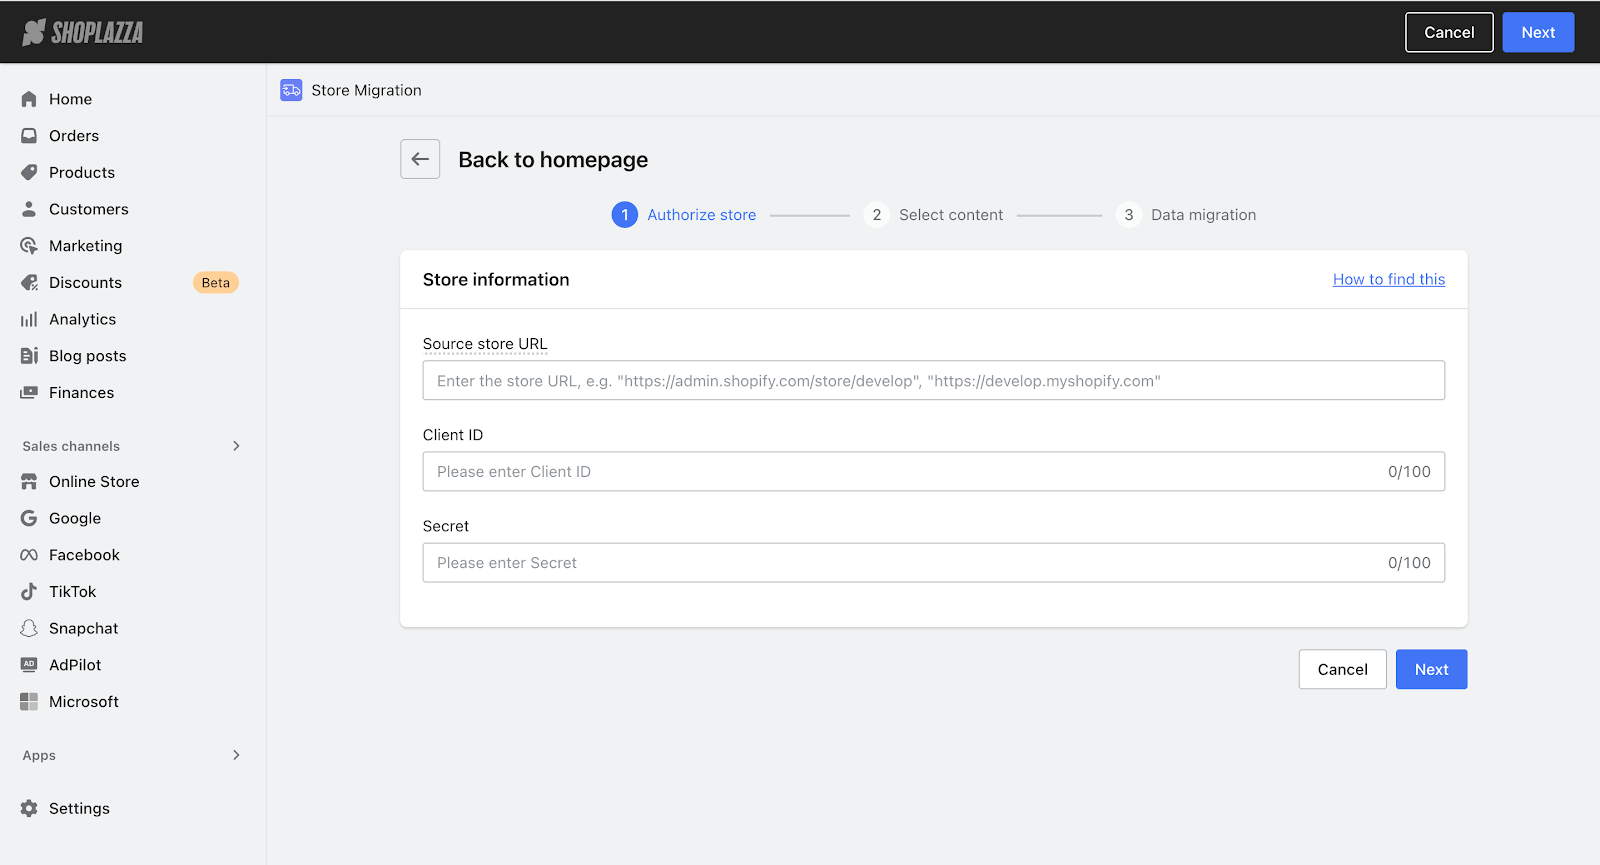
3. Enter the plugin and click the Shopify icon. You will be prompted to enter the source store URL and store access key. The following section will explain how to obtain these two pieces of information.
Step 2: Obtain Account Information
Get the source store URL
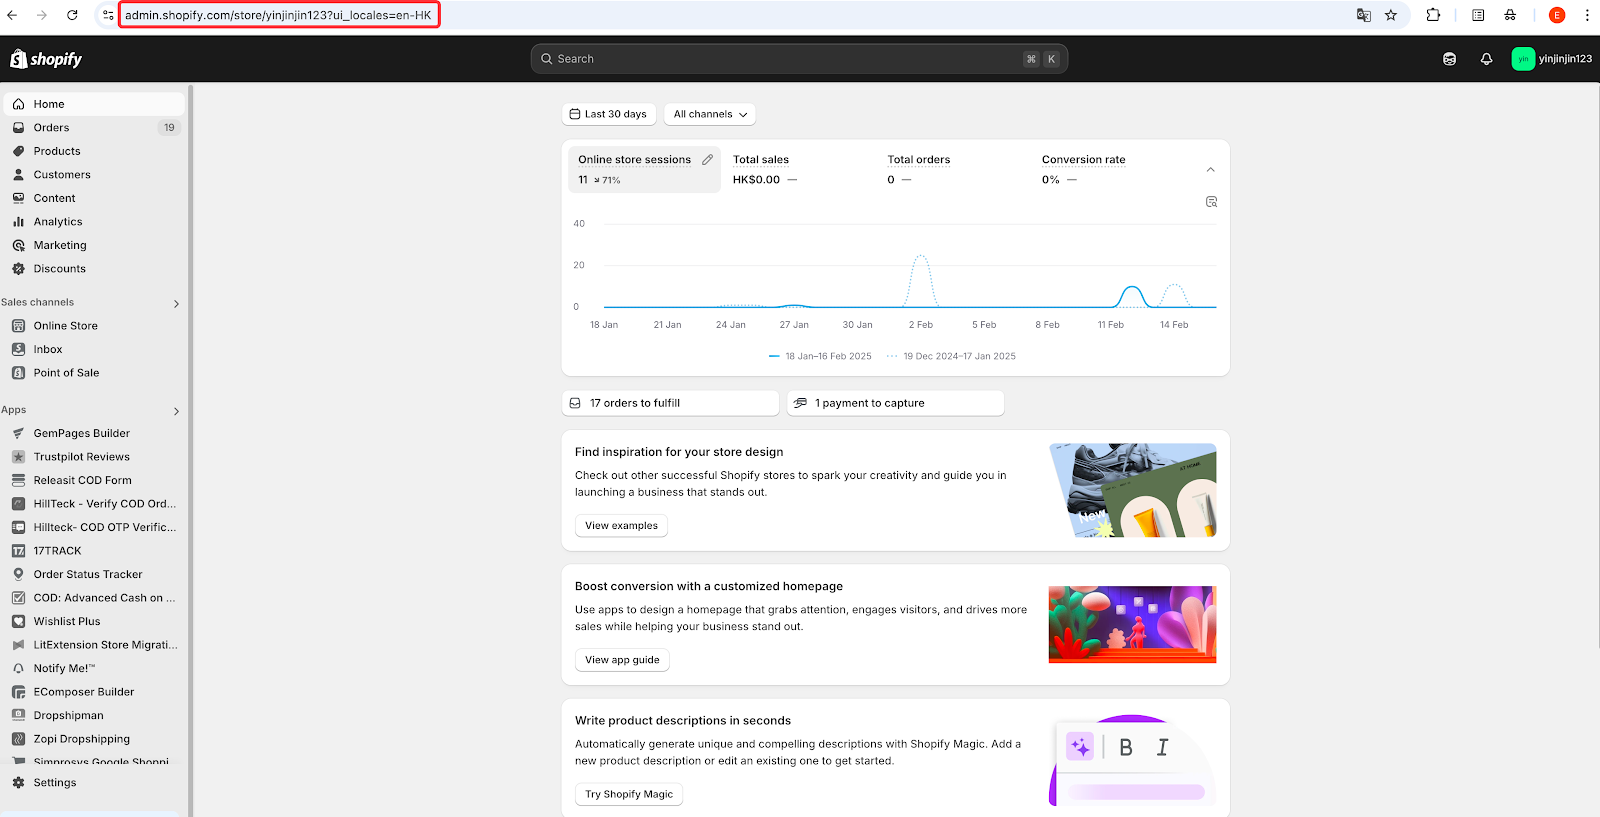
1. Log in to your Shopify panel and copy the store’s admin URL.
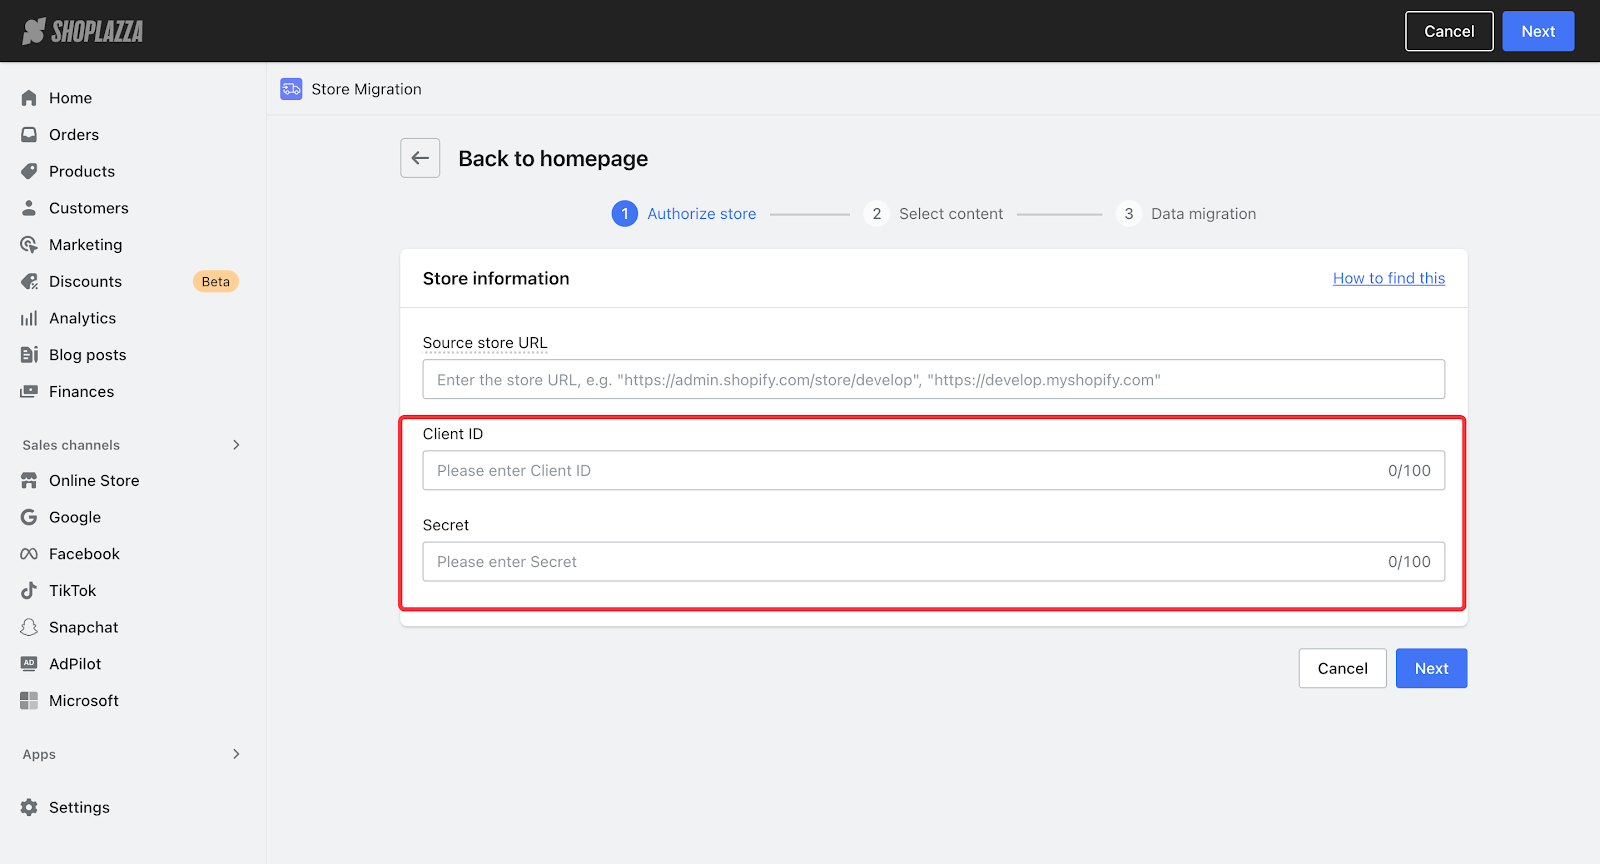
2. Enter the Shopify admin store URL into the plugin under Authorized Store → Source Store URL.
Creating an App
Create a dedicated app in Shopify for migration. Once created, you will obtain a Client ID and Client Secret.
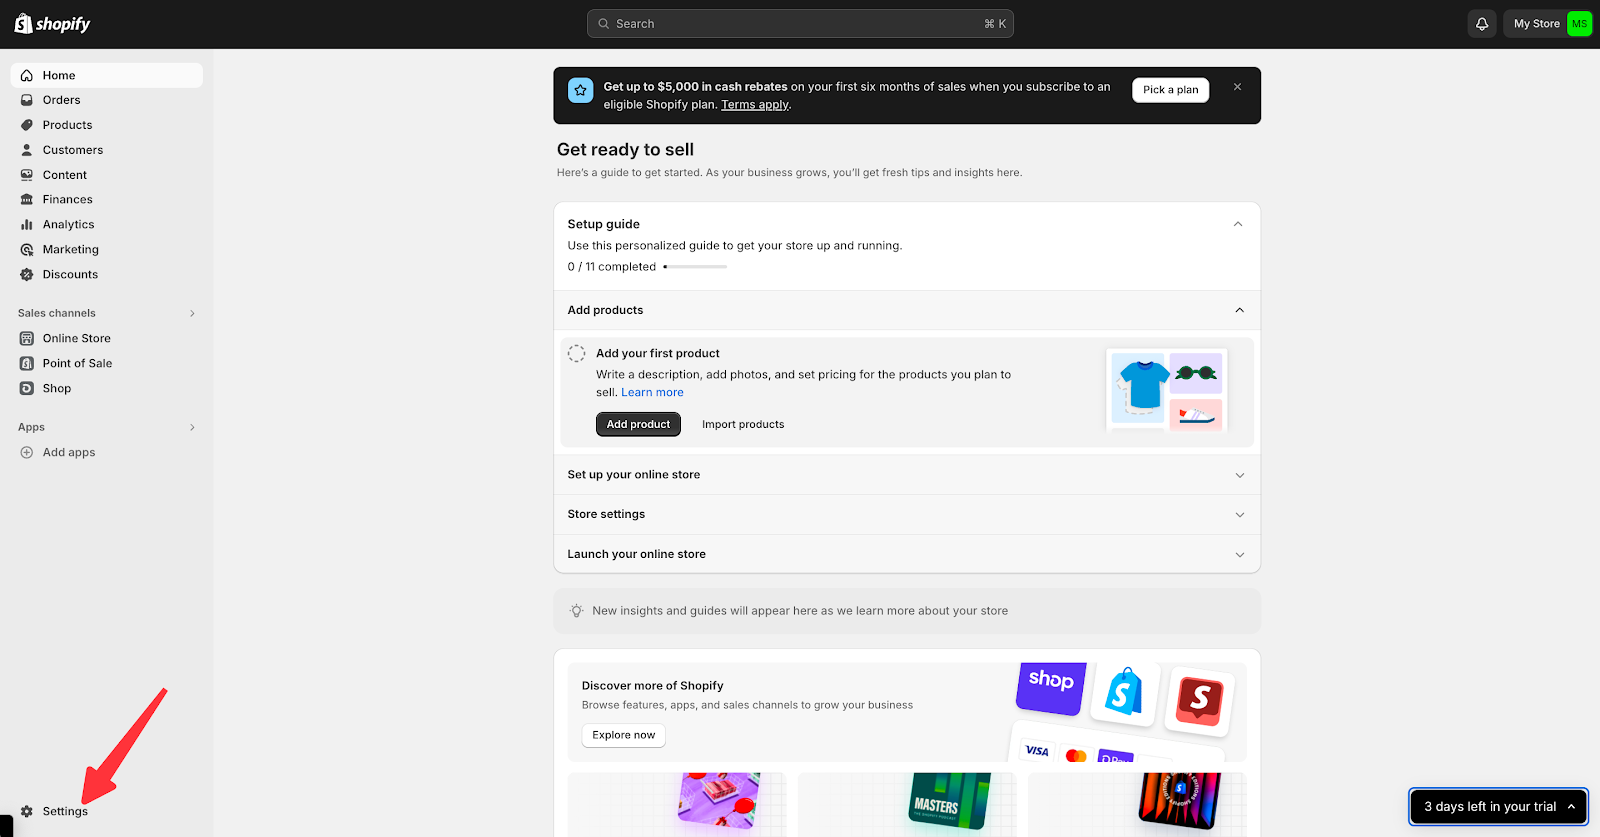
1. Log in to your Shopify admin panel and click Settings in the bottom-left corner.
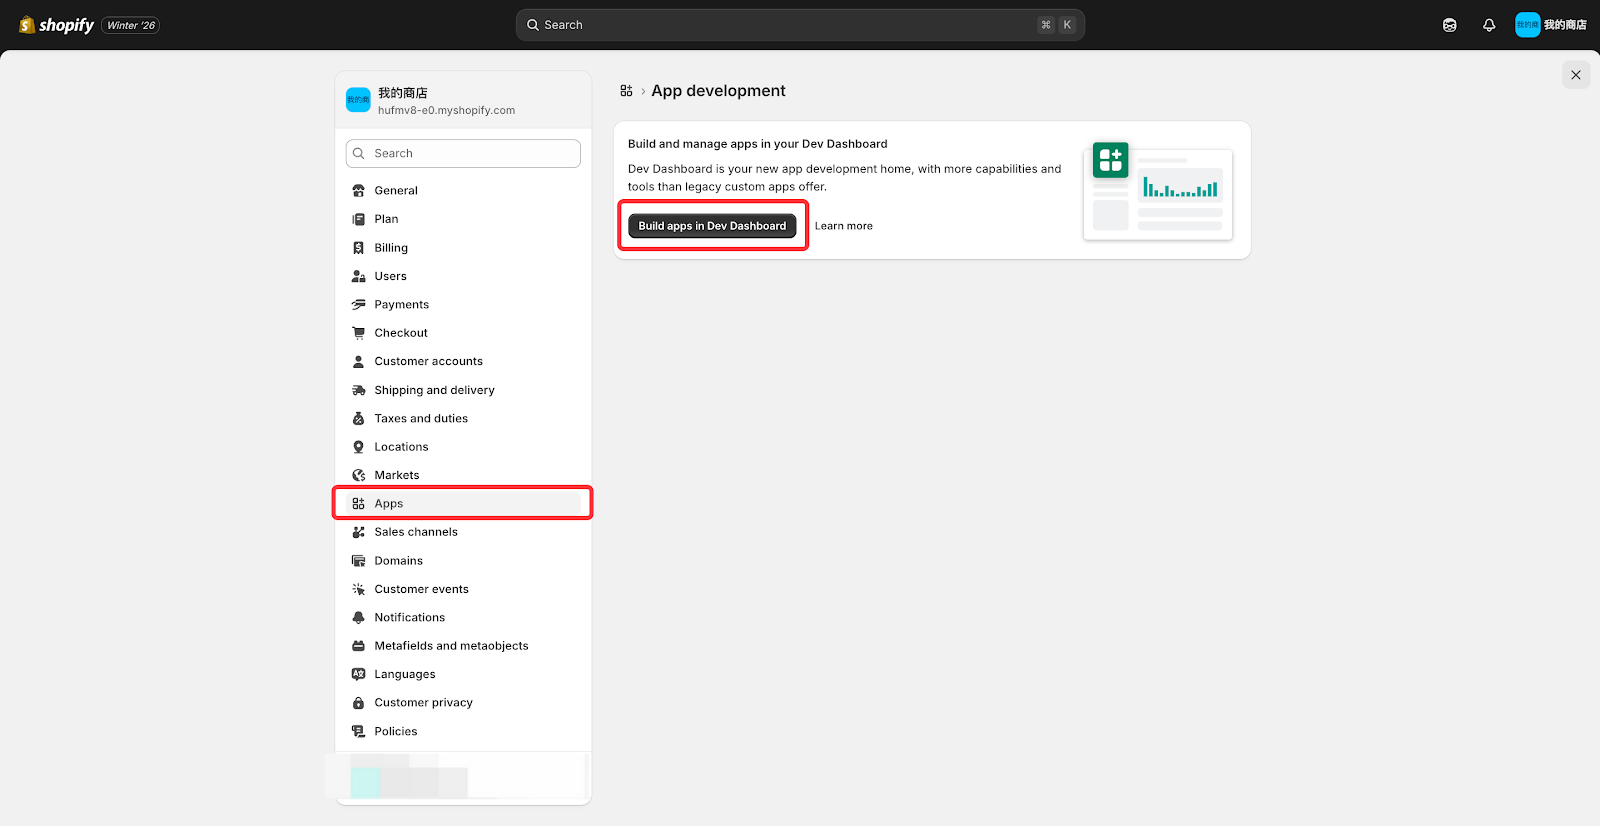
2. In the Settings window, click Apps in the left-hand navigation, then click Build apps in Dev Dashboard.
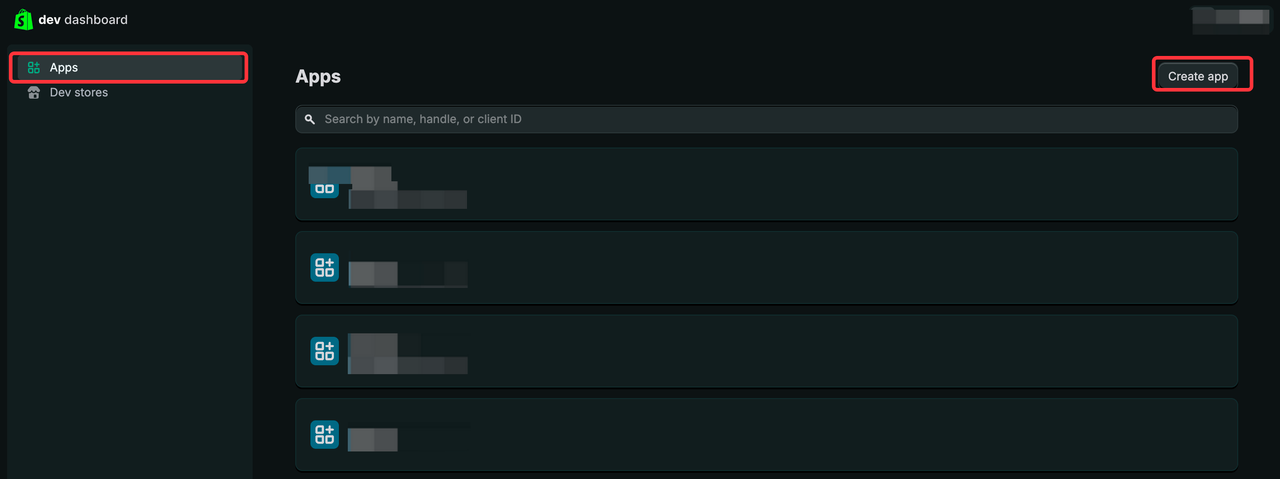
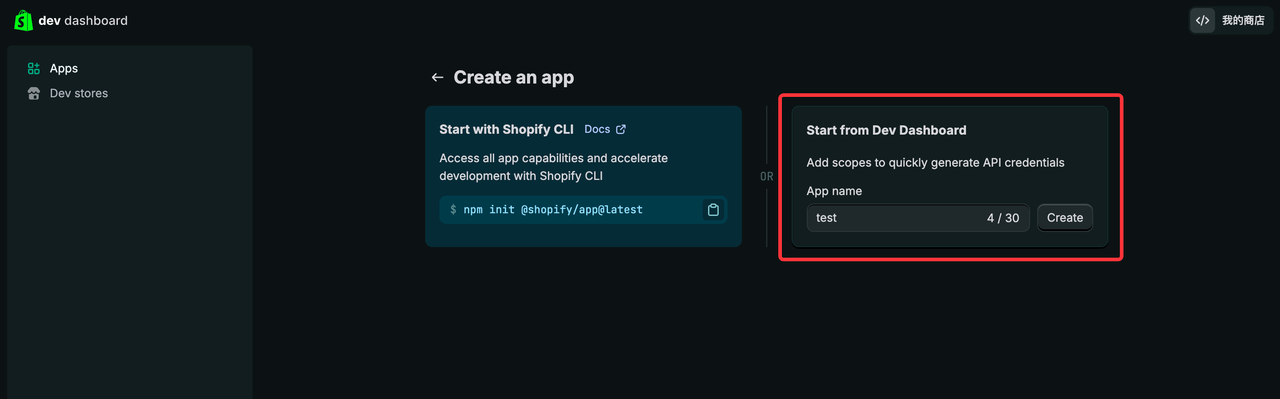
3. Once you enter the dashboard, click the Create app button in the top-right corner of the page.
4. In the pop-up window, select Start from Dev Dashboard, enter any name for the App name, and click Create.
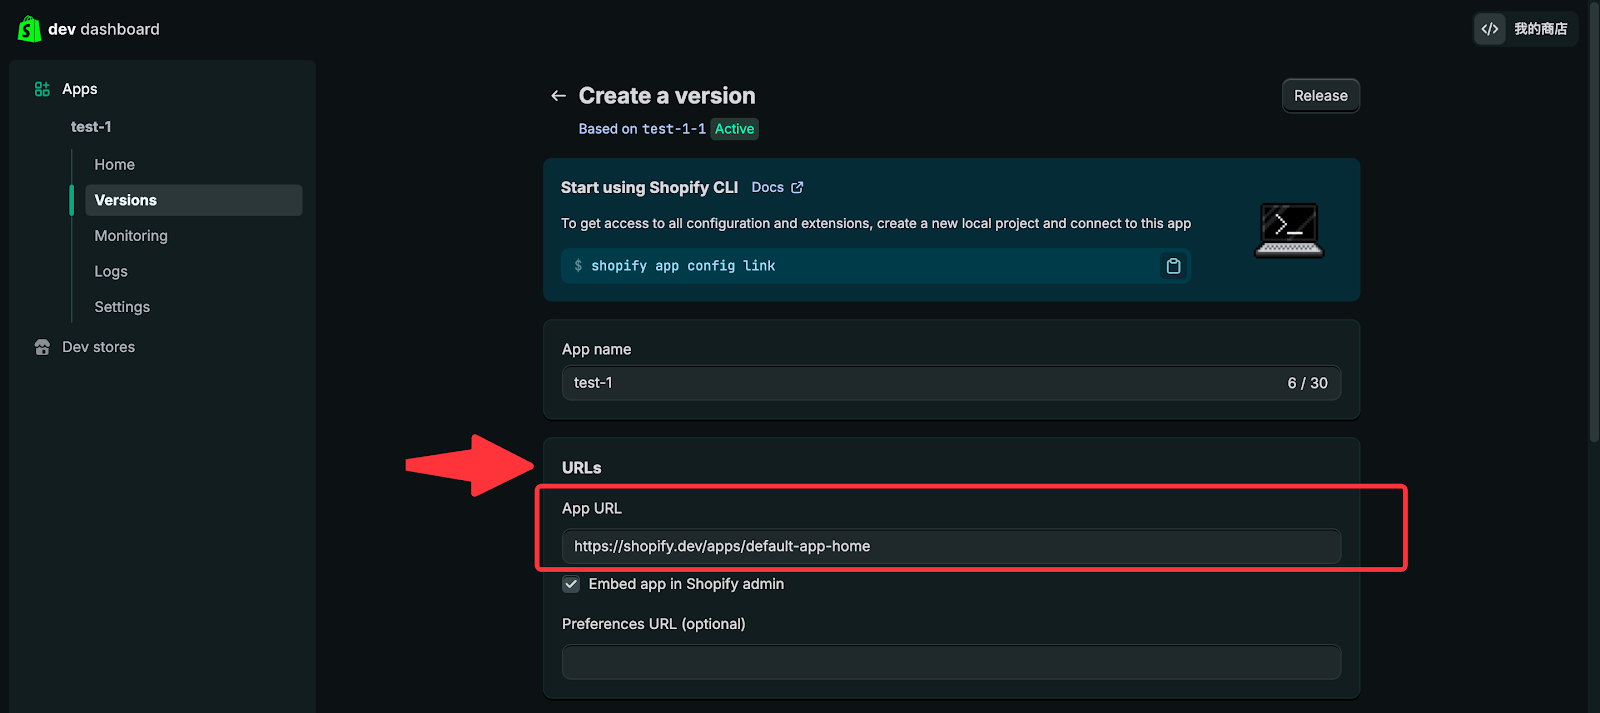
5. On the app configuration page, enter the default address https://shopify.dev/apps/default-app-home in the App URL field.
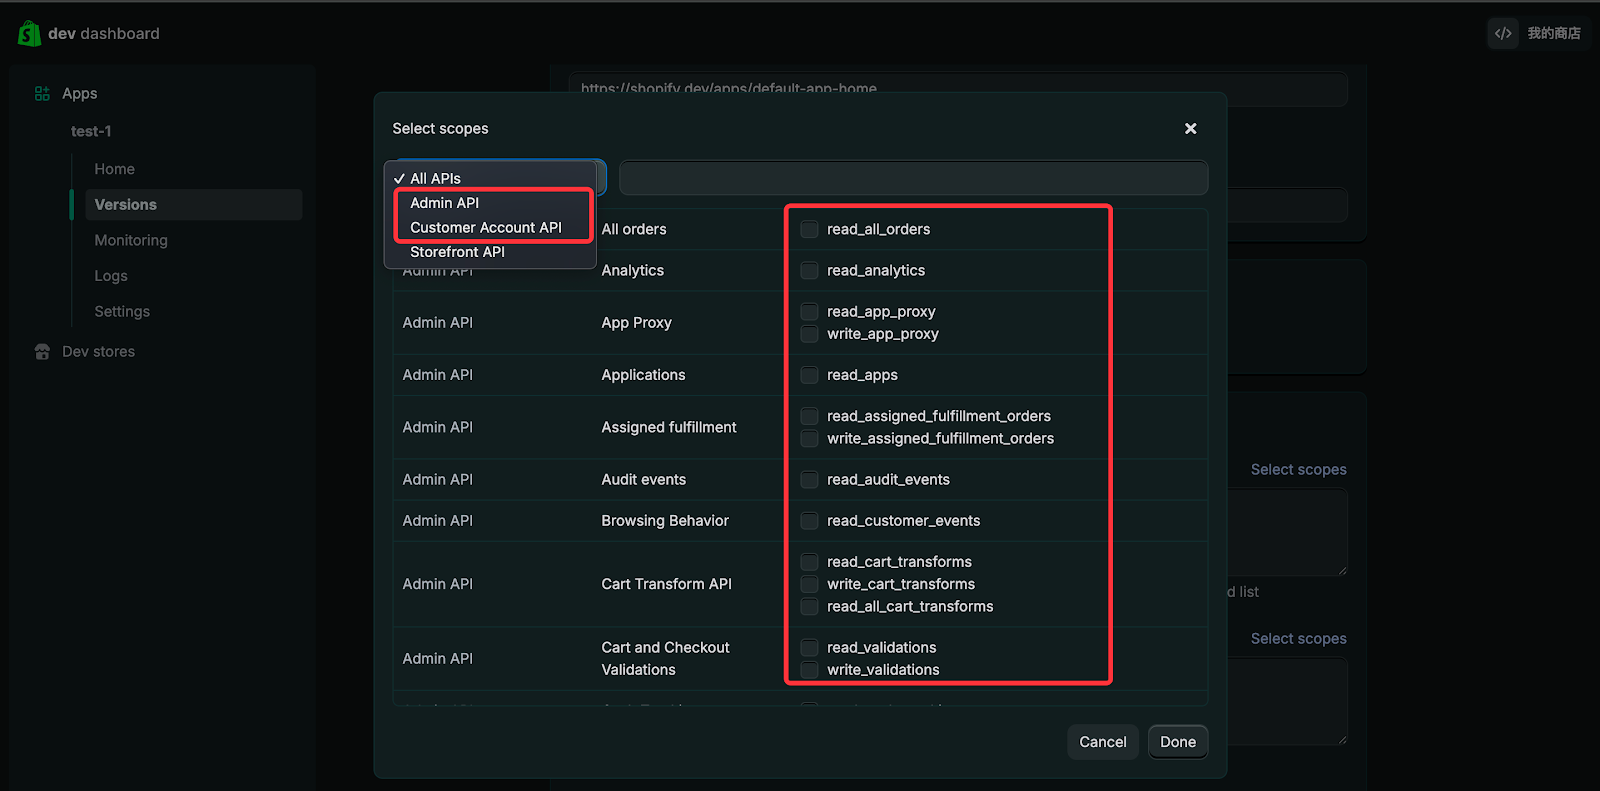
6. Configure the API scopes by selecting Access according to the content you want to migrate. Currently, supported migration data includes products, blogs, customers, orders, and discount codes.
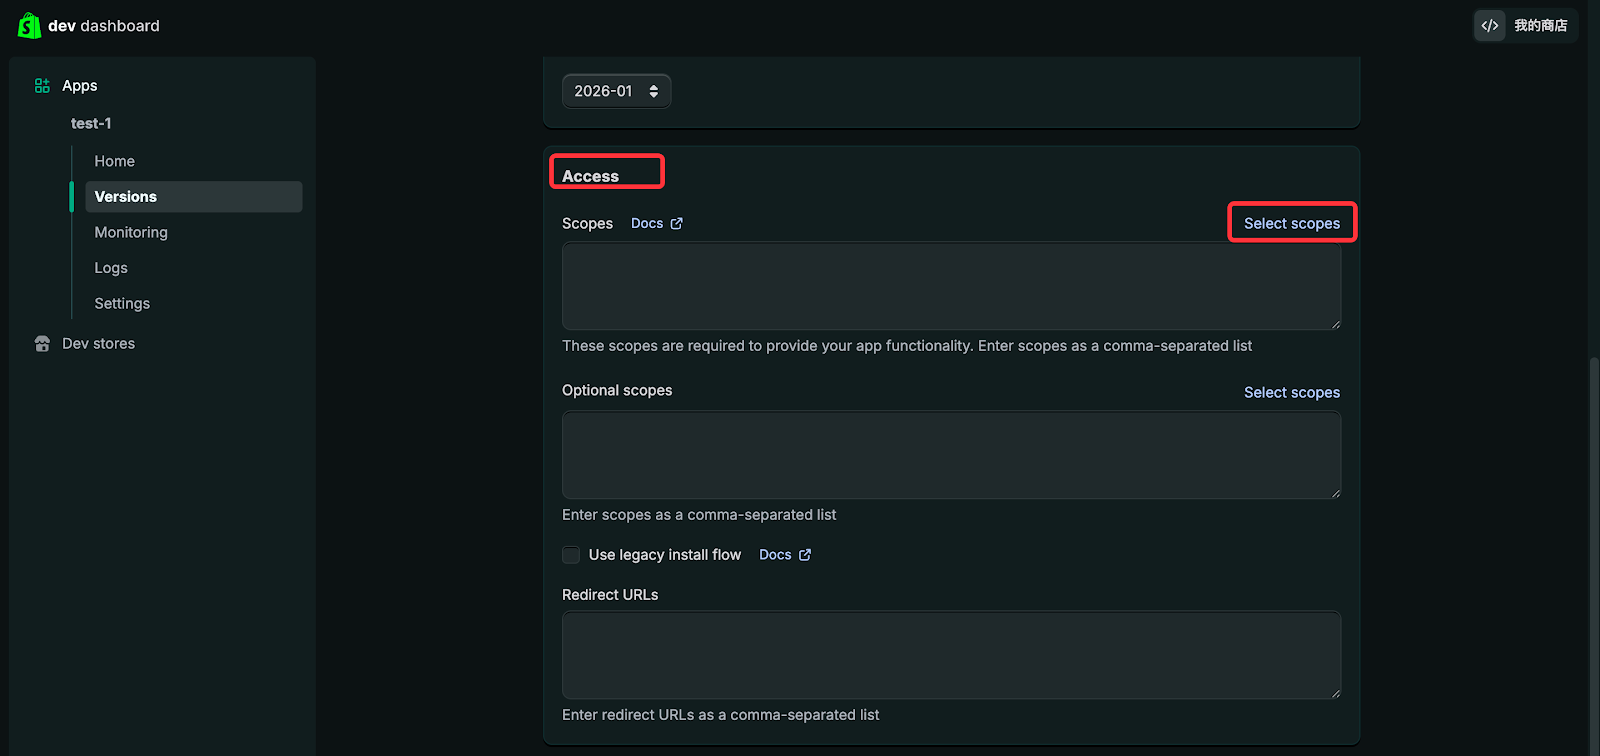
7. To ensure a smooth migration without issues, it is recommended to select all read and write permissions for the following two modules (except Payments), to guarantee complete data transfer:
Note
If order information needs to be migrated beyond 60 days, you must check "read_all_orders".
- Admin API
- Customer Account API
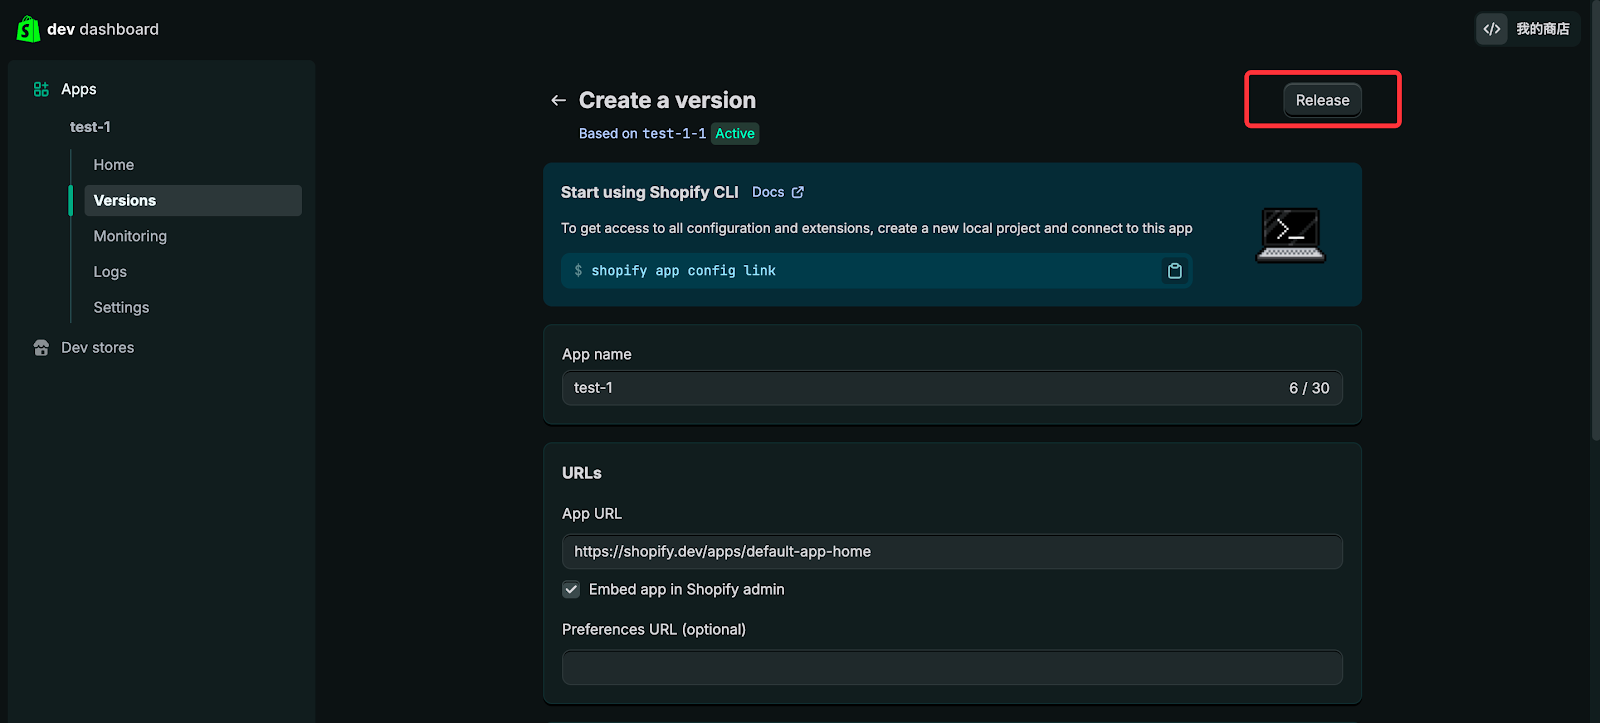
8. After completing the above steps, click Release to proceed.
Install the App
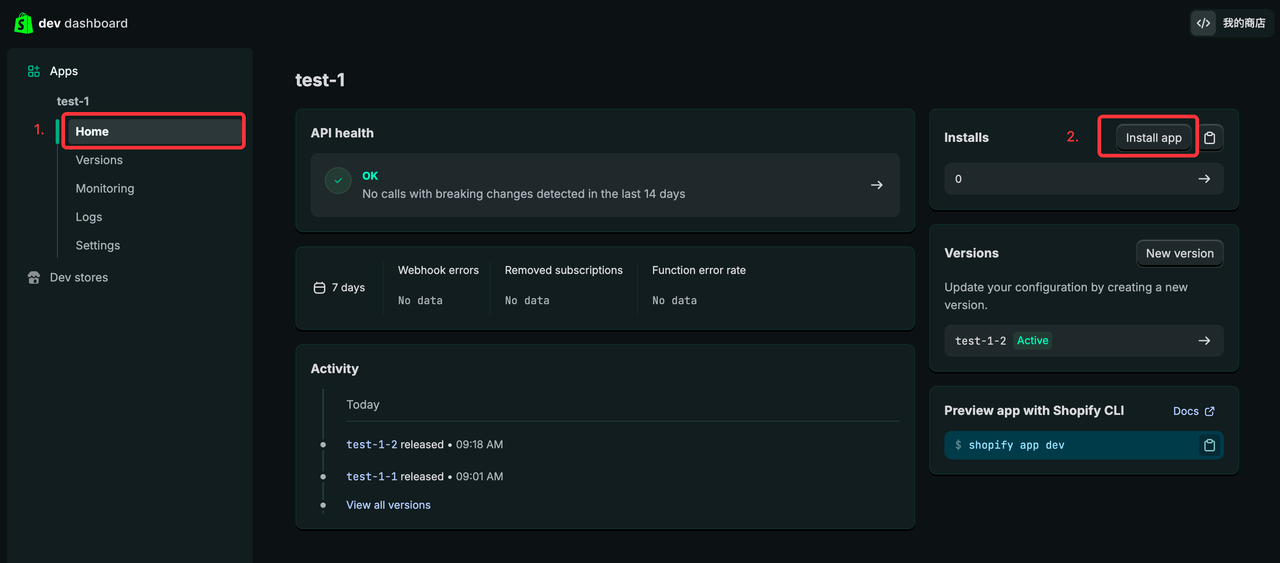
1. After completing the above steps and successfully releasing the app, click App Home in the left-hand menu.
2. Click Install app in the top-right corner of the page to install the application.
3. Select the target store for migration and click Install to complete the installation.
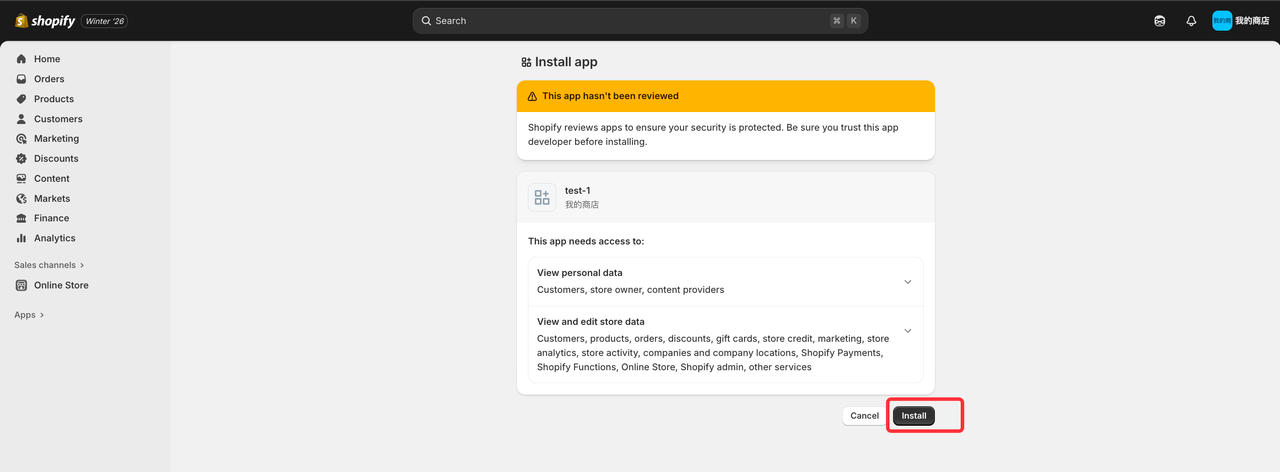
If the installation fails due to insufficient permissions, please check the staff permission settings or contact the store owner for assistance.
Obtain Authorization Information
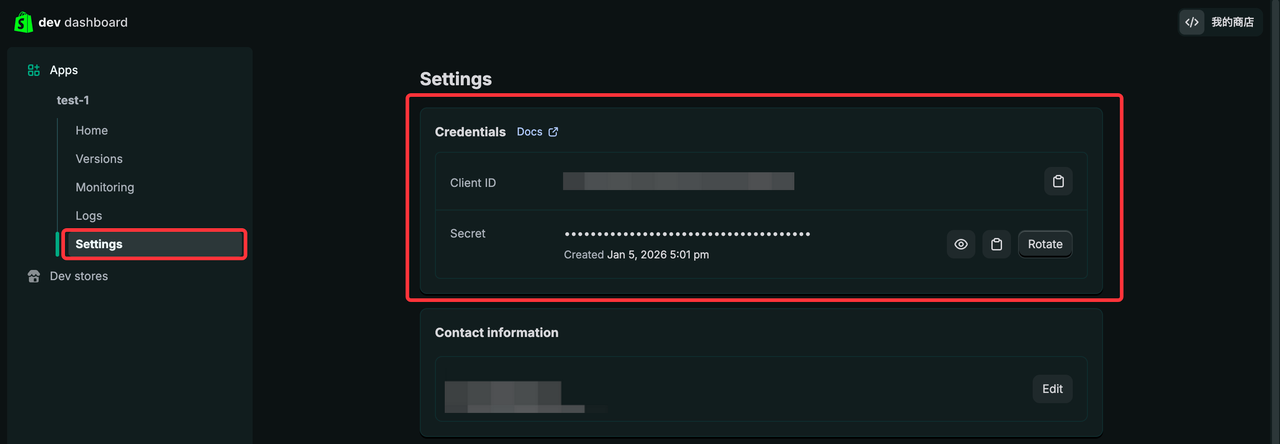
1. After the installation is successful, return to the app management page of the app you just created, click Settings in the left-hand menu, and copy the Client ID and Client Secret.
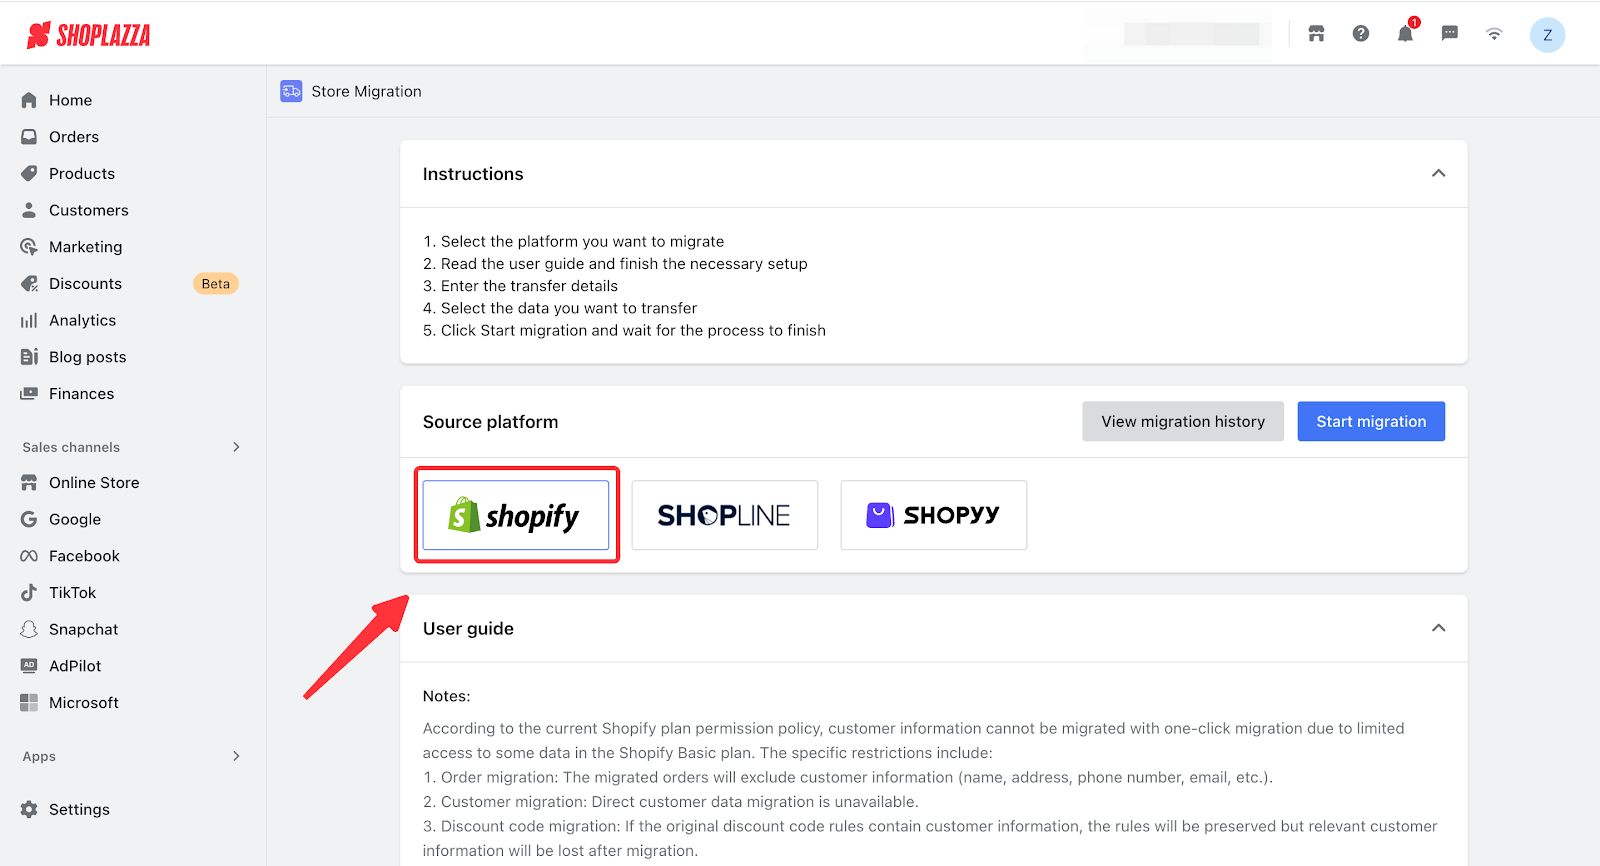
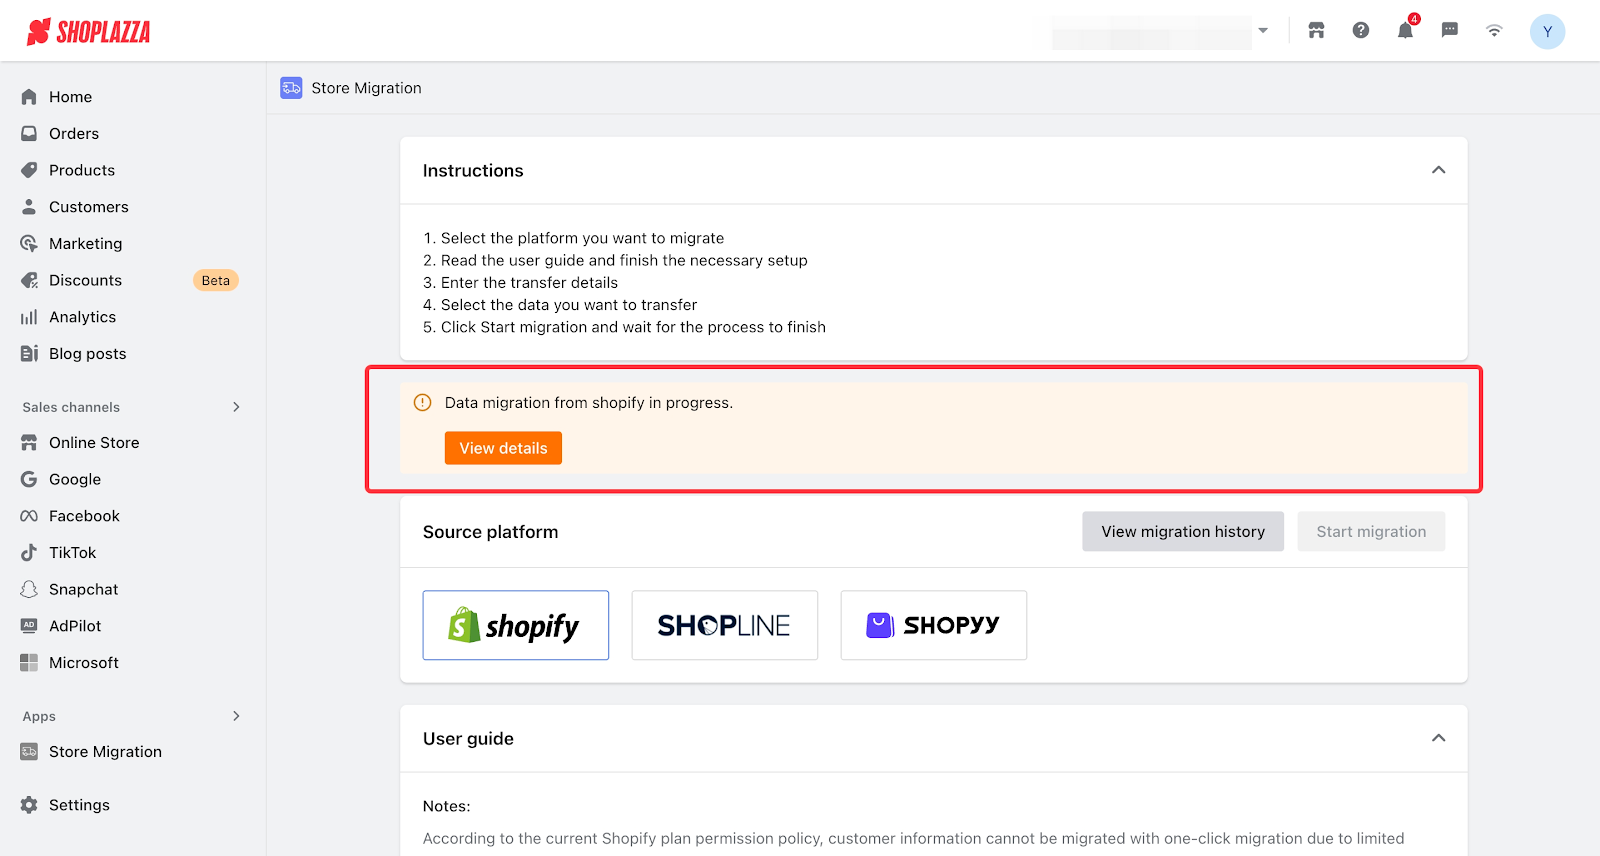
Step 3: Start Migration
1. Select Shopify Migration Platform, click Start Migration, and after entering the Authorized Store page, fill in the authorization information to complete the verification.

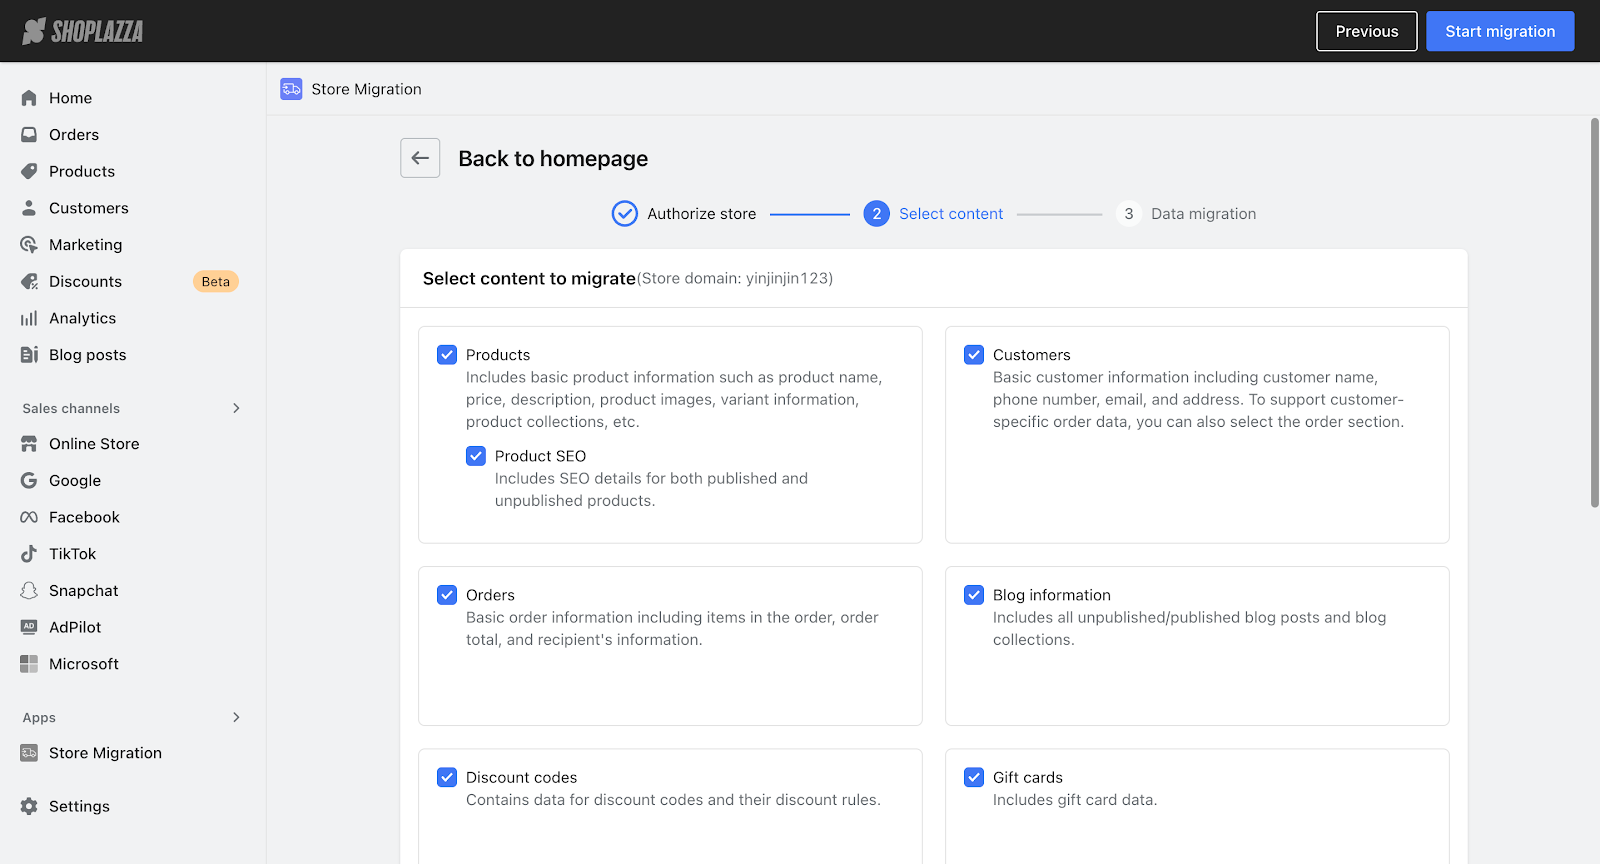
2. Click Next to go to the migration module selection, and choose the modules you want to migrate.
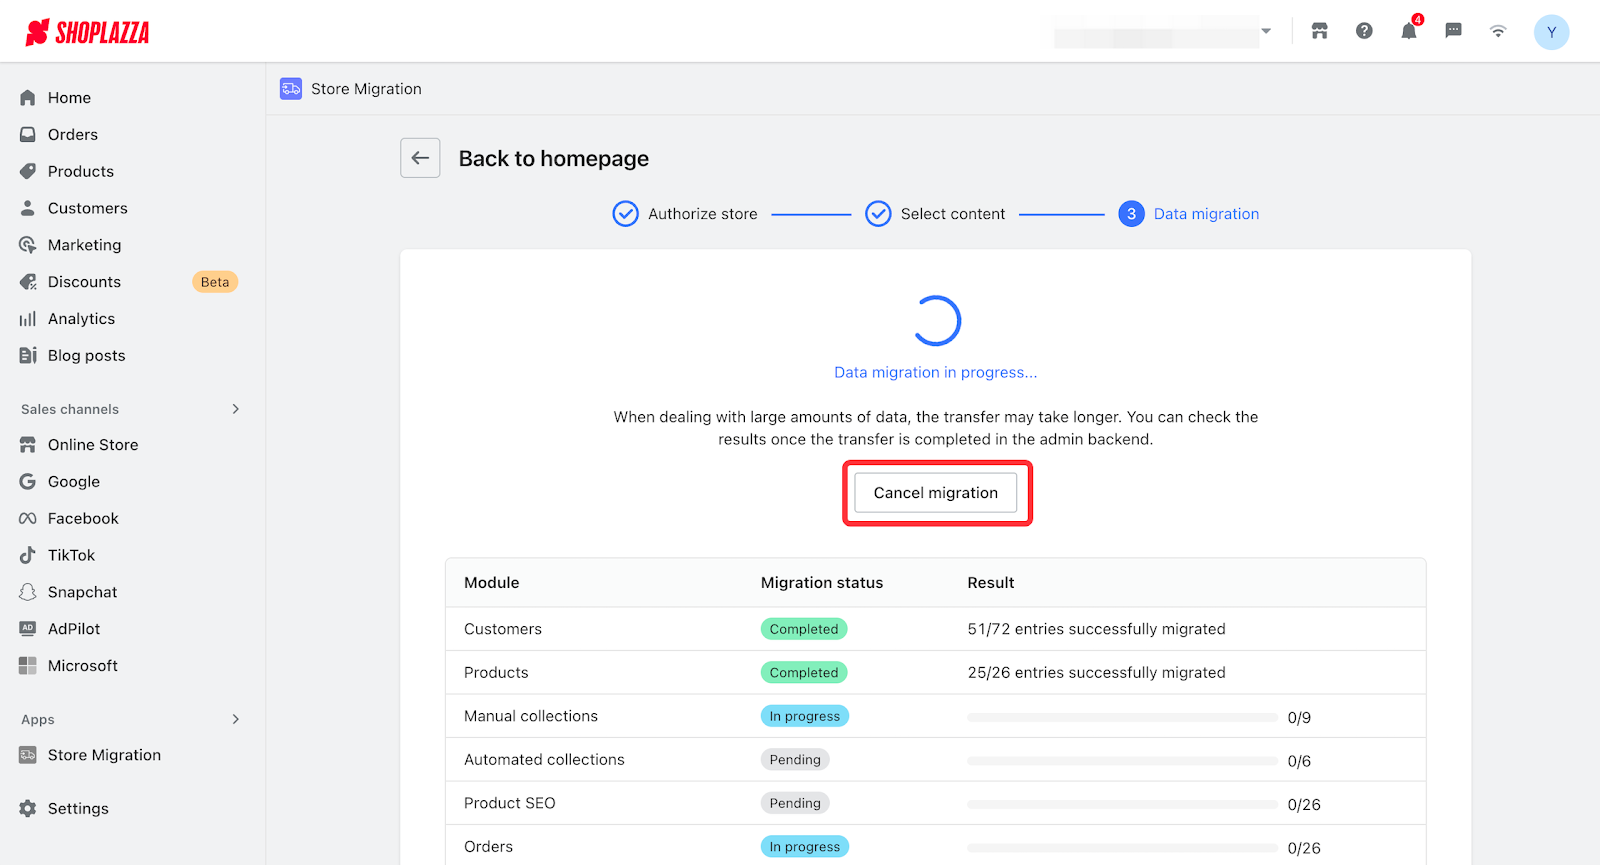
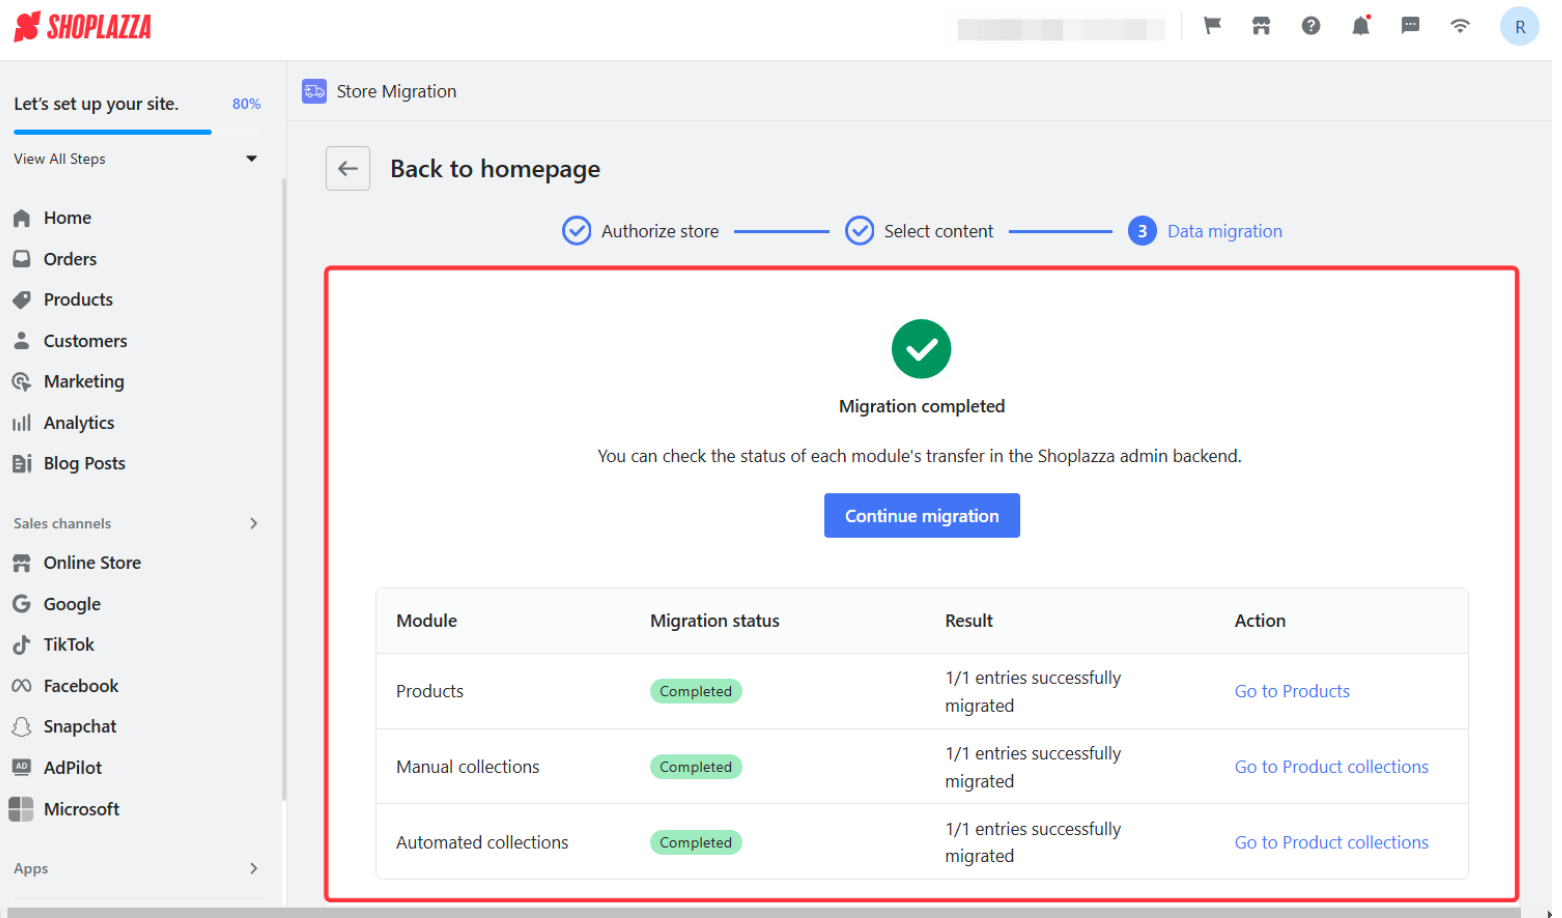
3. After confirming the migration modules, click Start Migration to go to the data migration progress page.
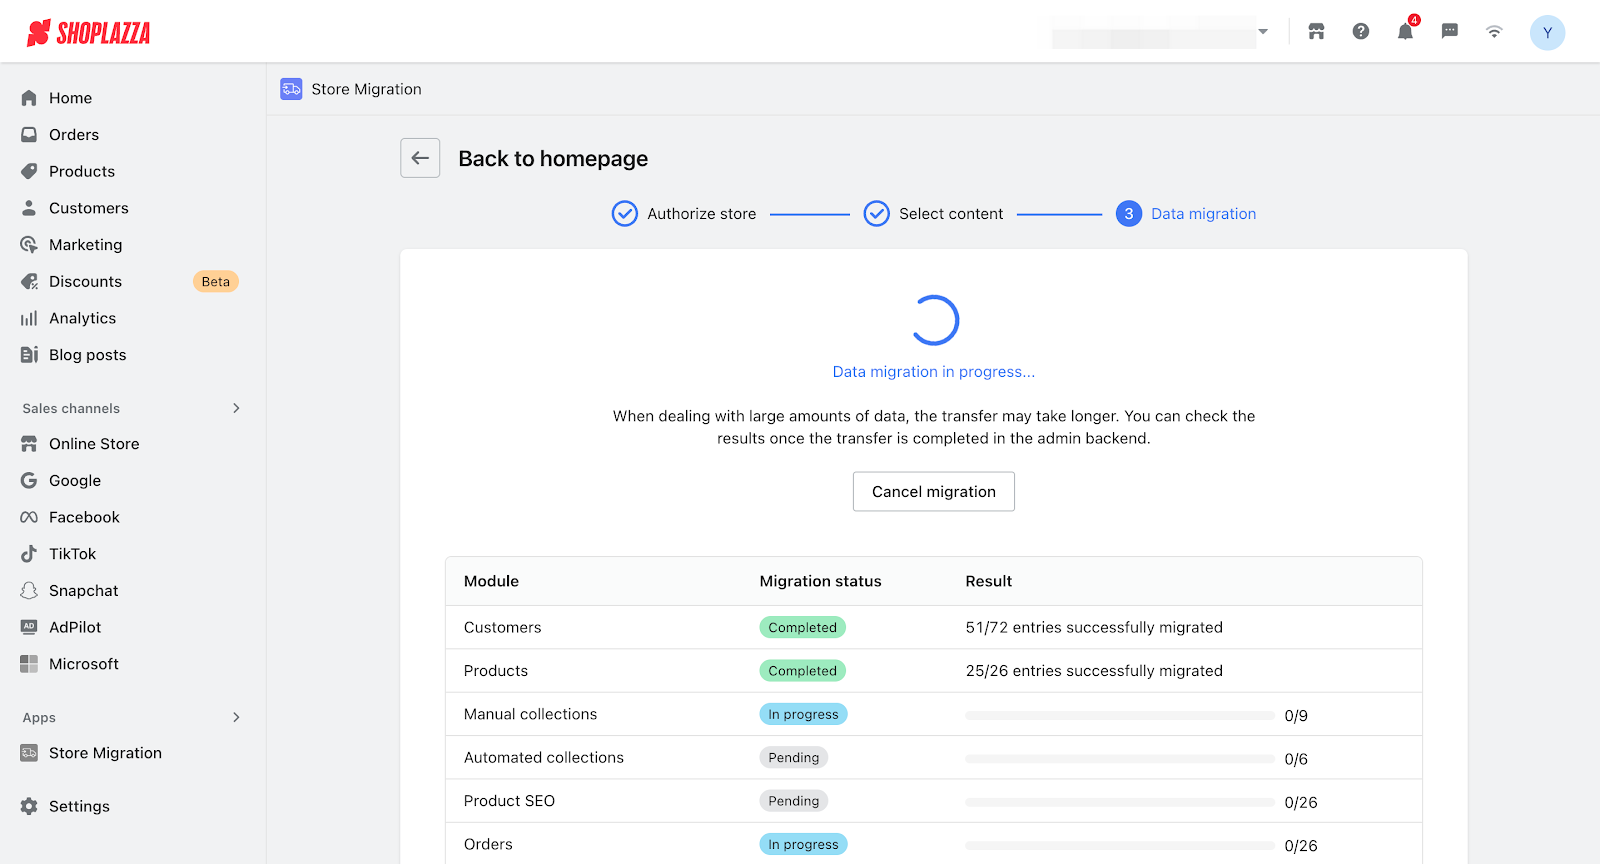
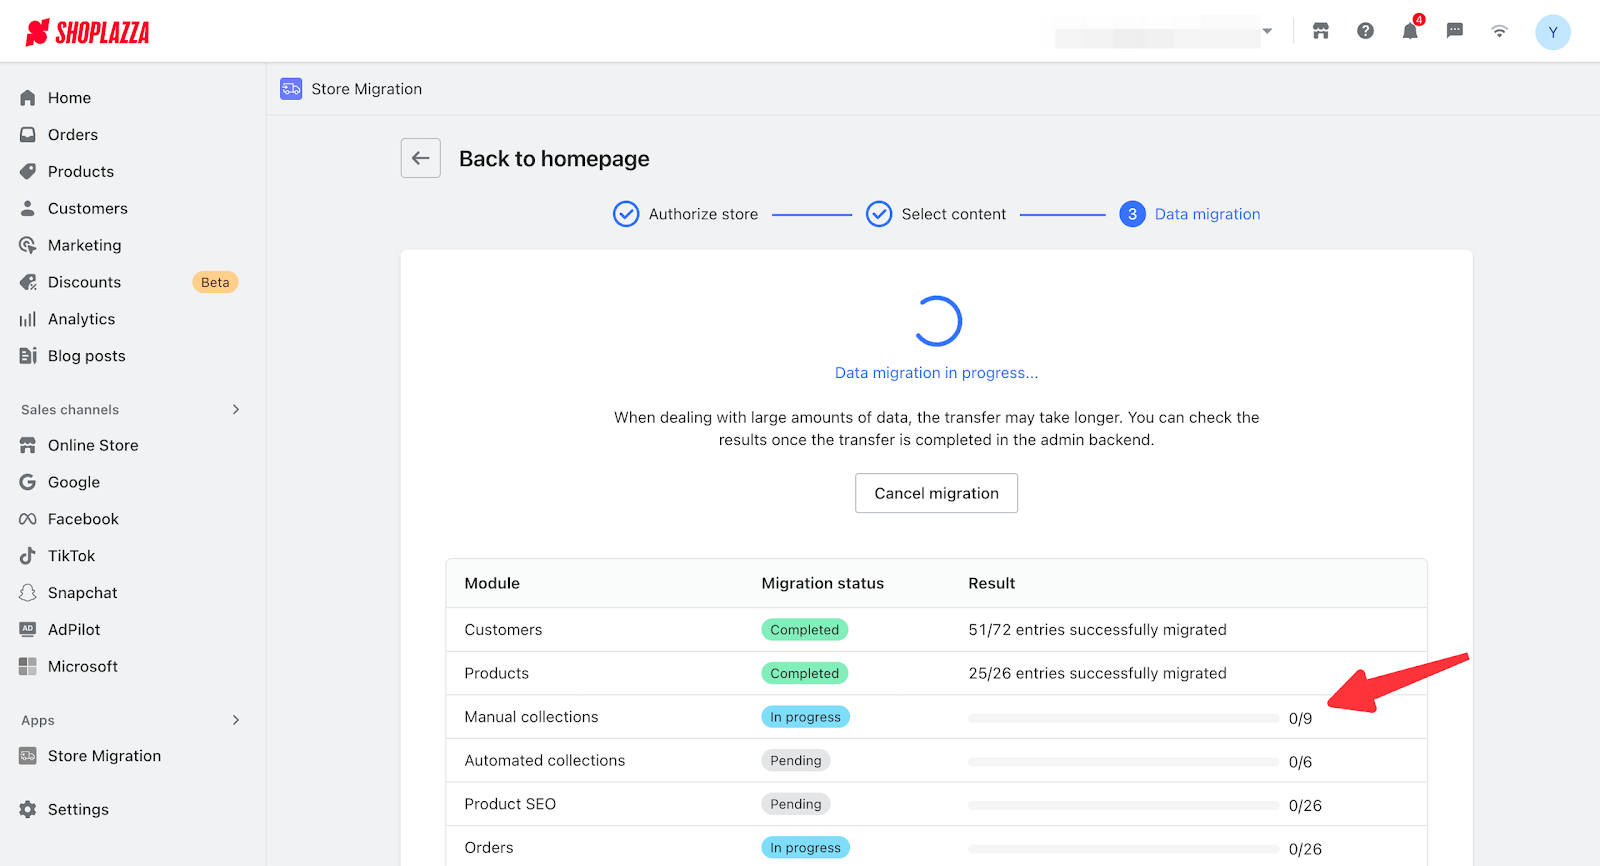
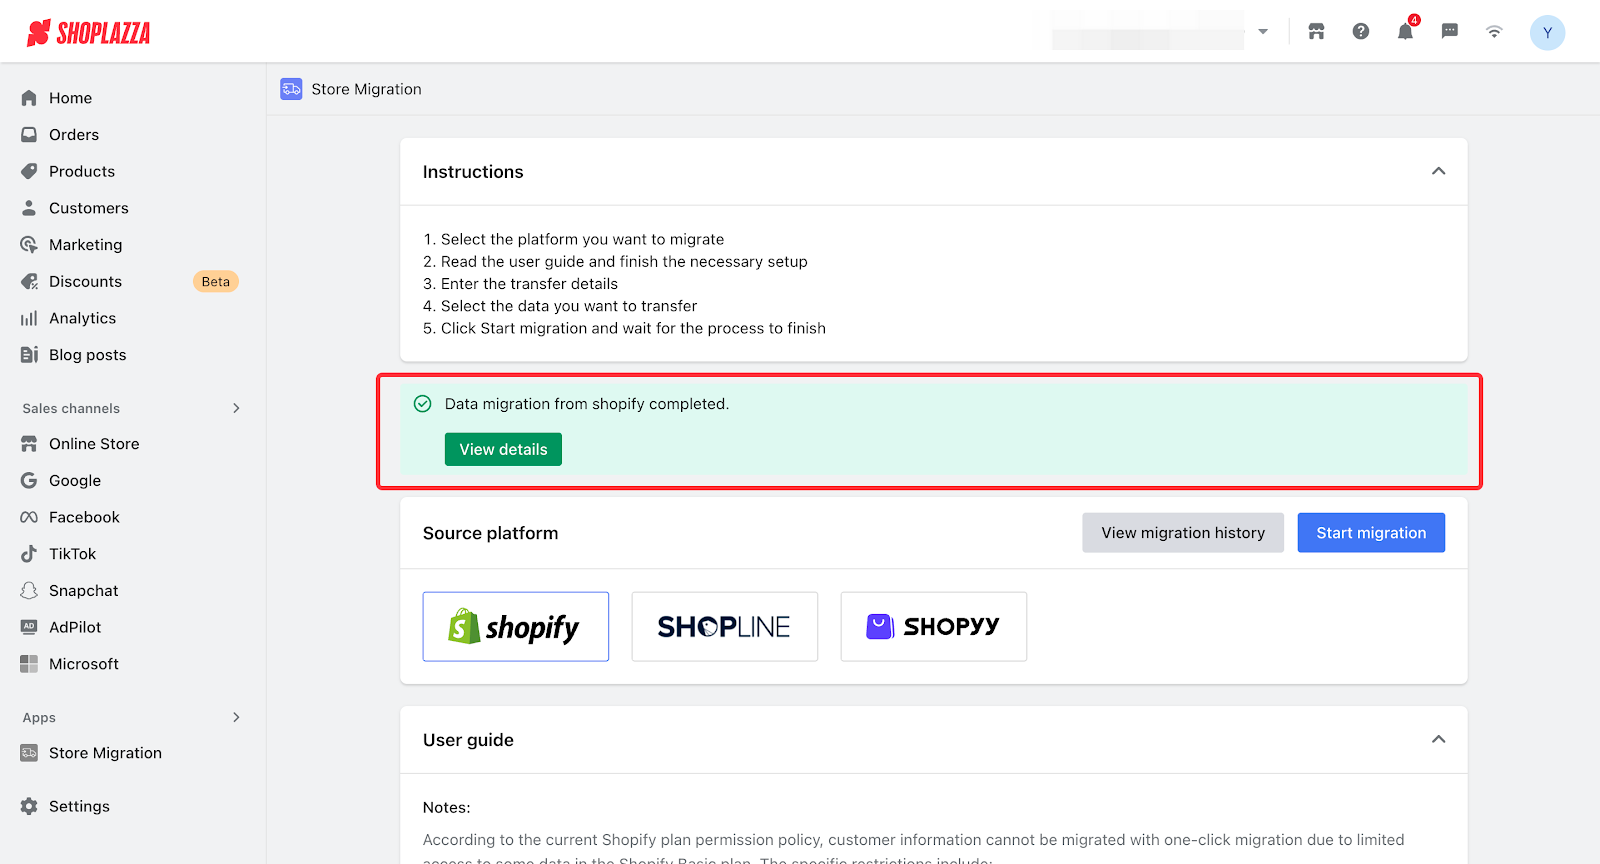
4. The data migration page will display the progress for each module. If the data volume is large, migration may take longer. You can return to the homepage without waiting—the migration task will continue running, and you can check the results once it is completed.
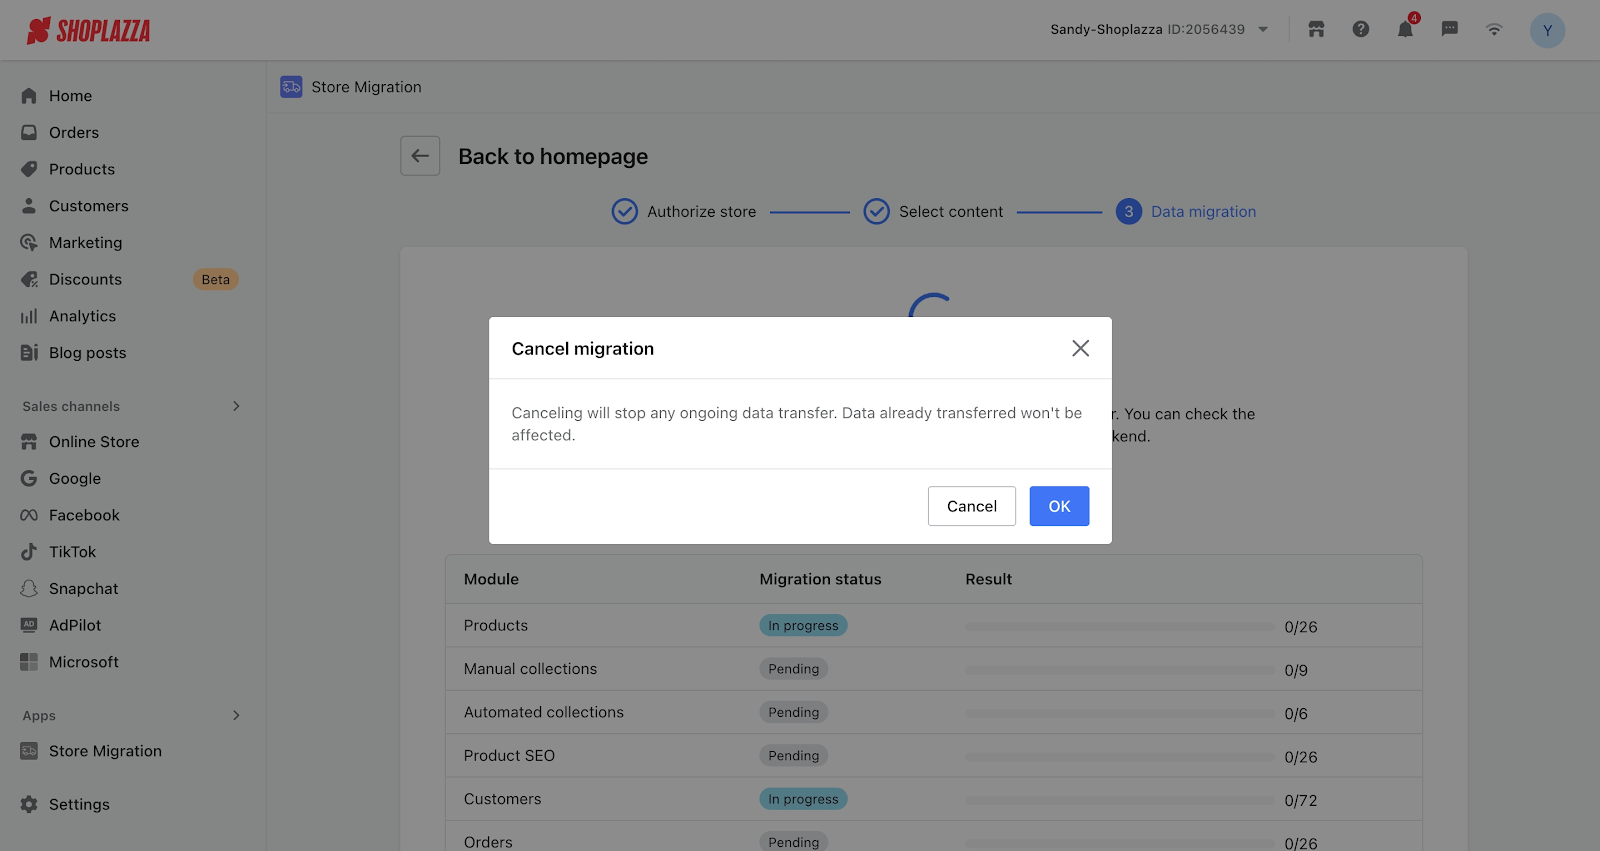
5. While the migration task is running, you can cancel the migration. Canceling will stop any data that has not yet been migrated, but the data that has already been migrated will remain unaffected.
6. After the data migration is complete, you can navigate to the corresponding page to view the successfully migrated data.


Comments
Please sign in to leave a comment.