
Unlocking the potential of product customization has never been easier, thanks to the Product Option App, a revolutionary tool developed by Shoplazza. This app, a cornerstone for Print-on-Demand (POD) services, is crafted to meet the ever-growing customer demand for personalized products. By integrating a variety of selectable attributes—ranging from color swatches and dropdown menus to text inputs, image uploads, buttons, and checkboxes—the Product Option App elevates your online store's functionality. It streamlines the customization process, ensuring a seamless and enriching shopping experience for your customers.
Key features to enhance your online store:
- Adjusting pricing configuration: Tailor prices for each customizable feature, balancing the costs of personalization while maintaining profitable margins on unique products.
- Setting up redirect link configuration: Boost your store's conversion rates and unlock cross-selling opportunities with strategic redirect links for various selections and actions.
- Implementing conditional logic functionality: Meet specific customer preferences by employing conditional logic, offering a shopping experience that adapts to individual needs.
- Previewing customization effects: Enhance customer engagement by providing visual previews of customization options, encouraging informed and satisfied purchases.
- Uploading fonts: Elevate personalization to new heights with the option to upload fonts, reflecting your brand's unique style and distinguishing your products.
Note
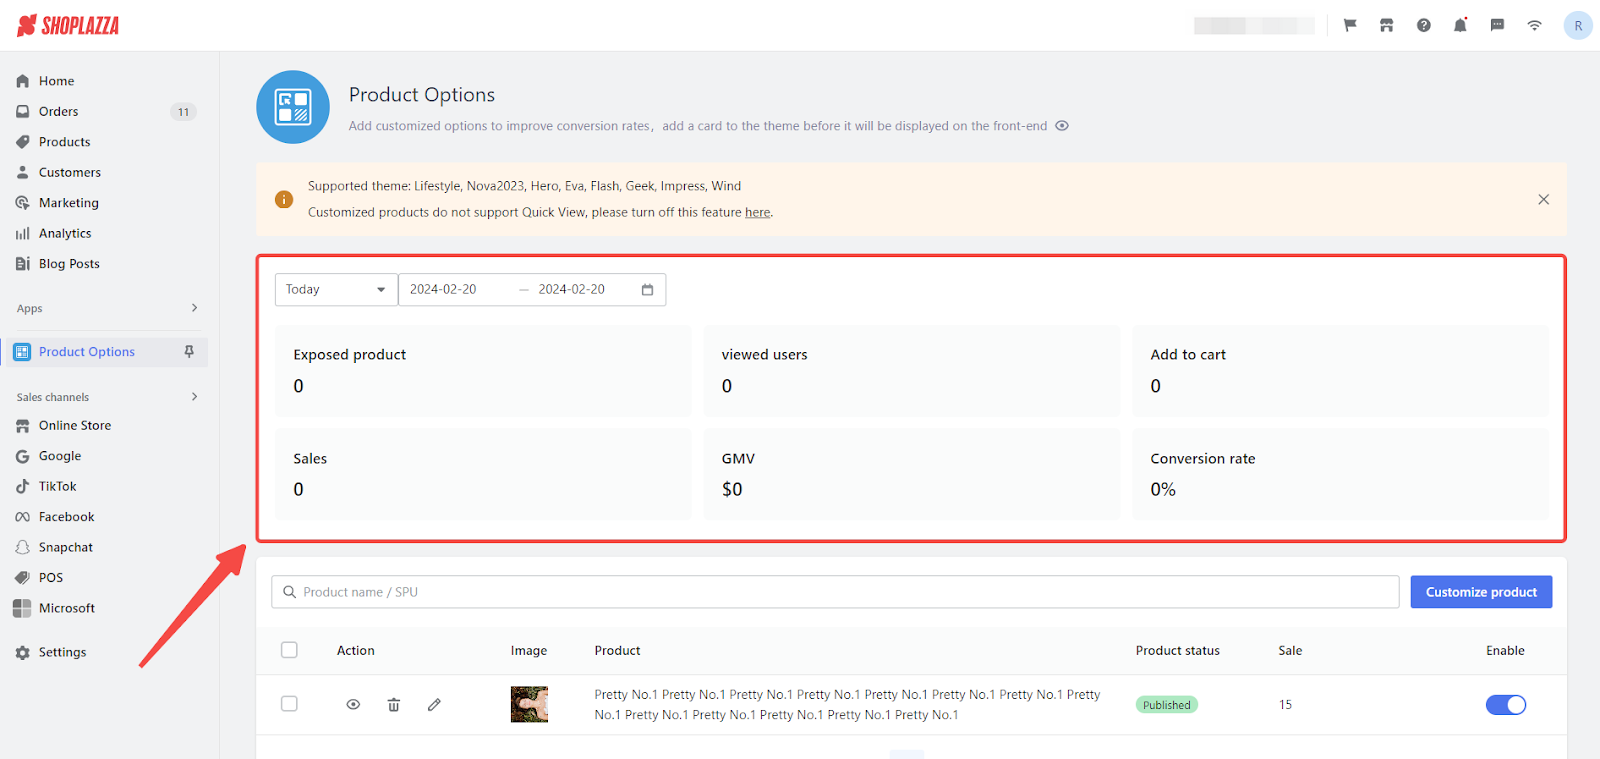
Ensure compatibility by checking if your store's theme is among those supported, including Lifestyle, Nova2023, Hero, Eva, Flash, Geek, Impress, and Wind. Currently, the Quick Add-to-Cart module is not supported, which may affect the checkout experience for customers prioritizing speed and convenience.
Installing the Product option App
1. Access the App Store: From your Shoplazza Admin > Apps, click Visit App Store.
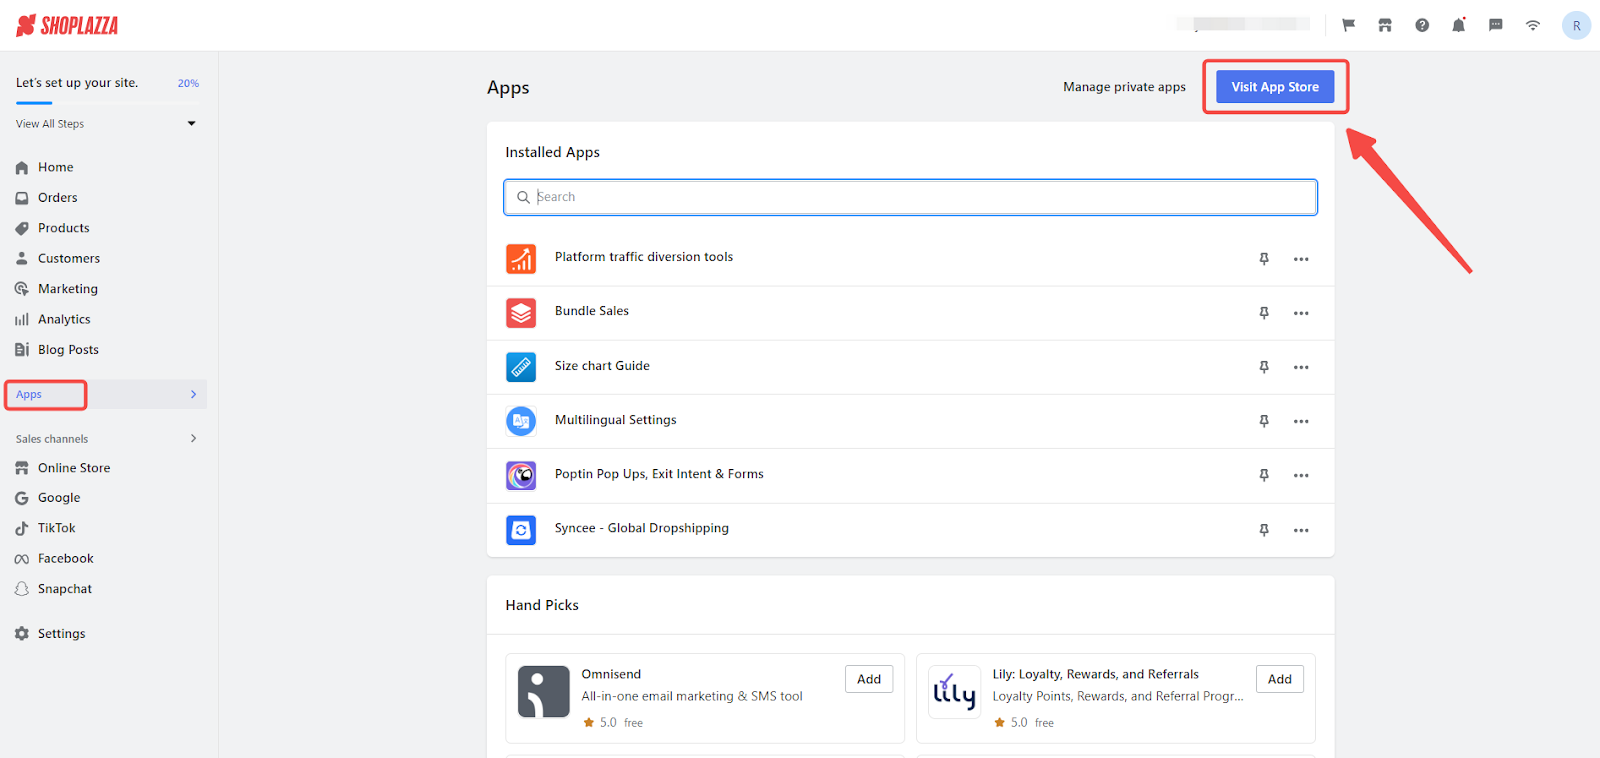
2. Find the app: Search for Product option in the search box and click Add app to add it to your store.

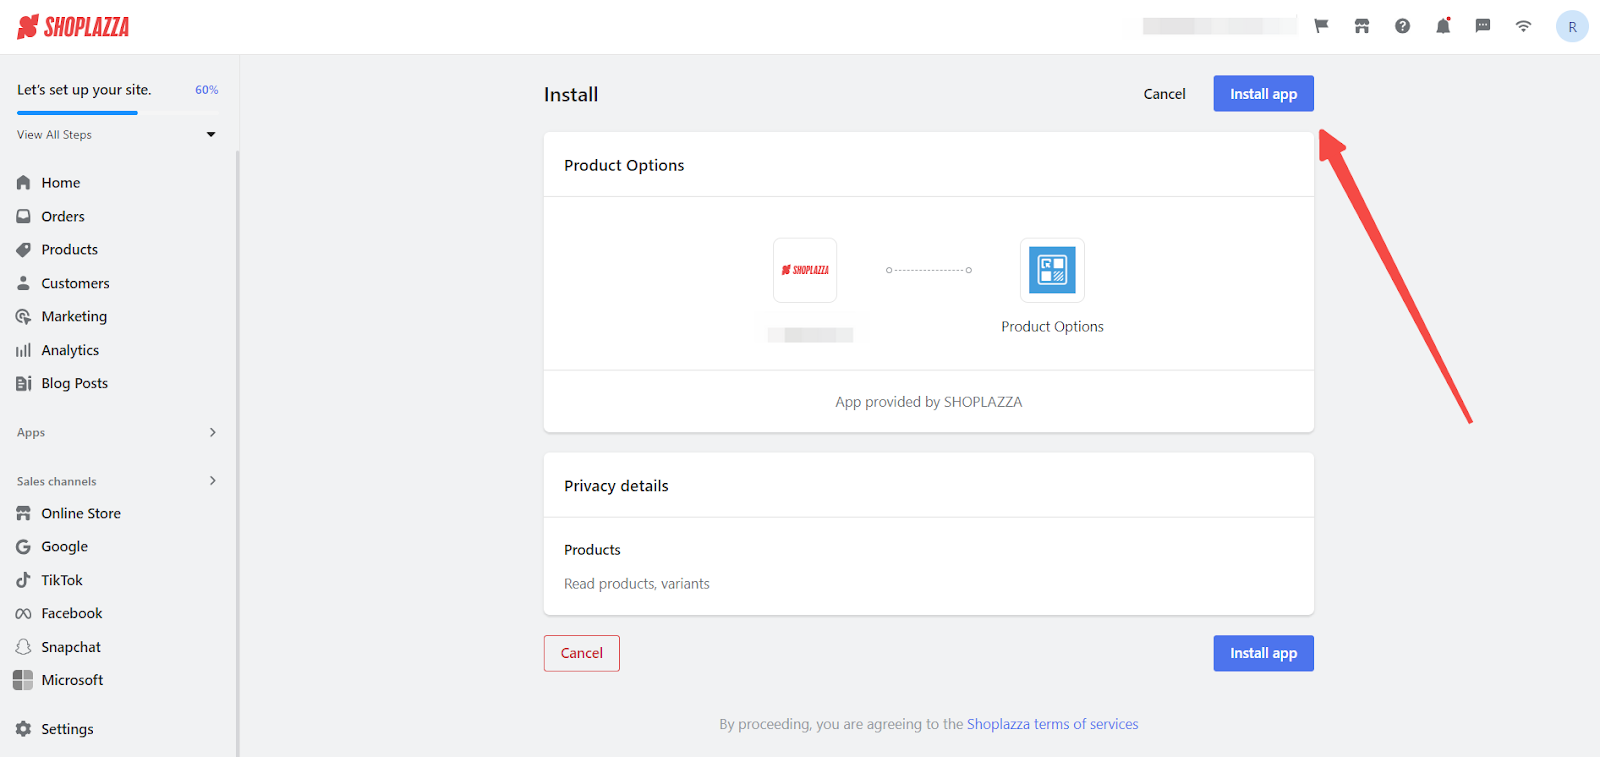
3. Install the app: Click the Install app to complete the app installation.
Interface Overview
1. Review customized products: This section allows you to review data from your customization campaigns, such as product exposure, user engagement, cart additions, order completions, total transactions, and conversion rates, aiding in strategic decision-making.
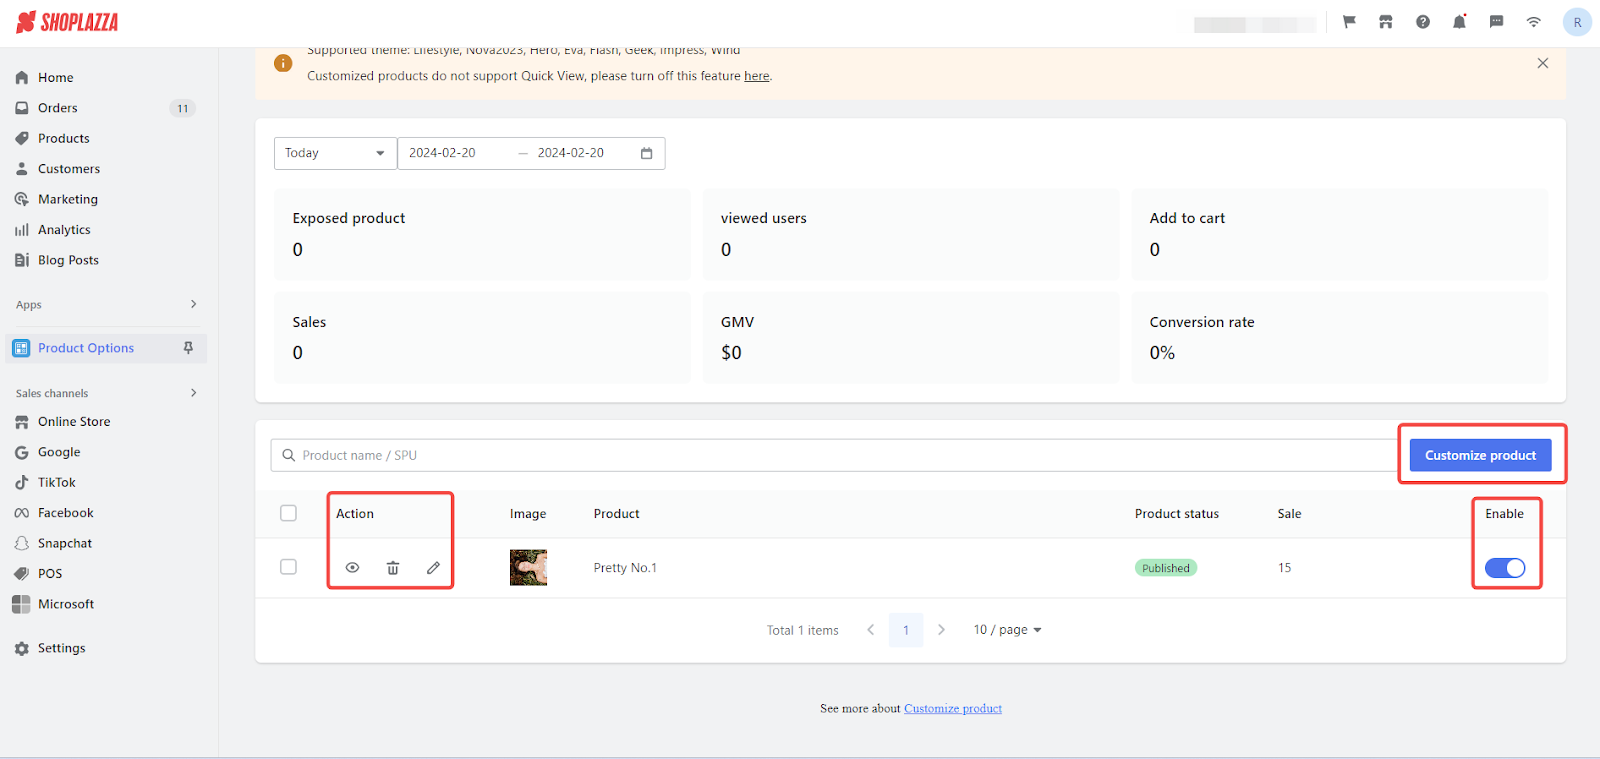
2. Create customized products: Begin the product customization process by selecting the Customized products button. For a comprehensive guide, refer to Product option | Setting Customized Product Attributes.
3. Manage customized products: The product list showcases essential details such as images, titles, and sales figures. Here, you can:
- Preview customizations on the storefront using the eye button.
- Remove custom attributes with the delete button.
- Edit attributes via the pencil icon.
- Toggle product customization features on or off.
This overview guide is designed to assist you in maximizing the Product Option app's benefits, significantly enhancing your Shoplazza store's appeal and sales potential through personalized product offerings.


Comments
Please sign in to leave a comment.