
Troubleshooting technical issues can feel overwhelming, especially when you’re not sure where to start. This guide walks you through simple steps to help identify and document common store-related issues, such as display glitches, missing products, or checkout errors. Even if you’re not a developer, you can use these tools to gather clear evidence that will speed up the investigation process when contacting Shoplazza Support.
Step 1: Clear your browser cache
Your browser stores temporary files to help pages load faster, but an outdated or corrupted cache can prevent new updates from appearing correctly. Clearing your cache forces the browser to load the latest version of your storefront and can fix many visual or loading-related issues.
Google Chrome
Option 1: Use the menu
- Click the three-dot menu in the top-right corner. Go to Settings > Privacy and security Delete browsing data.

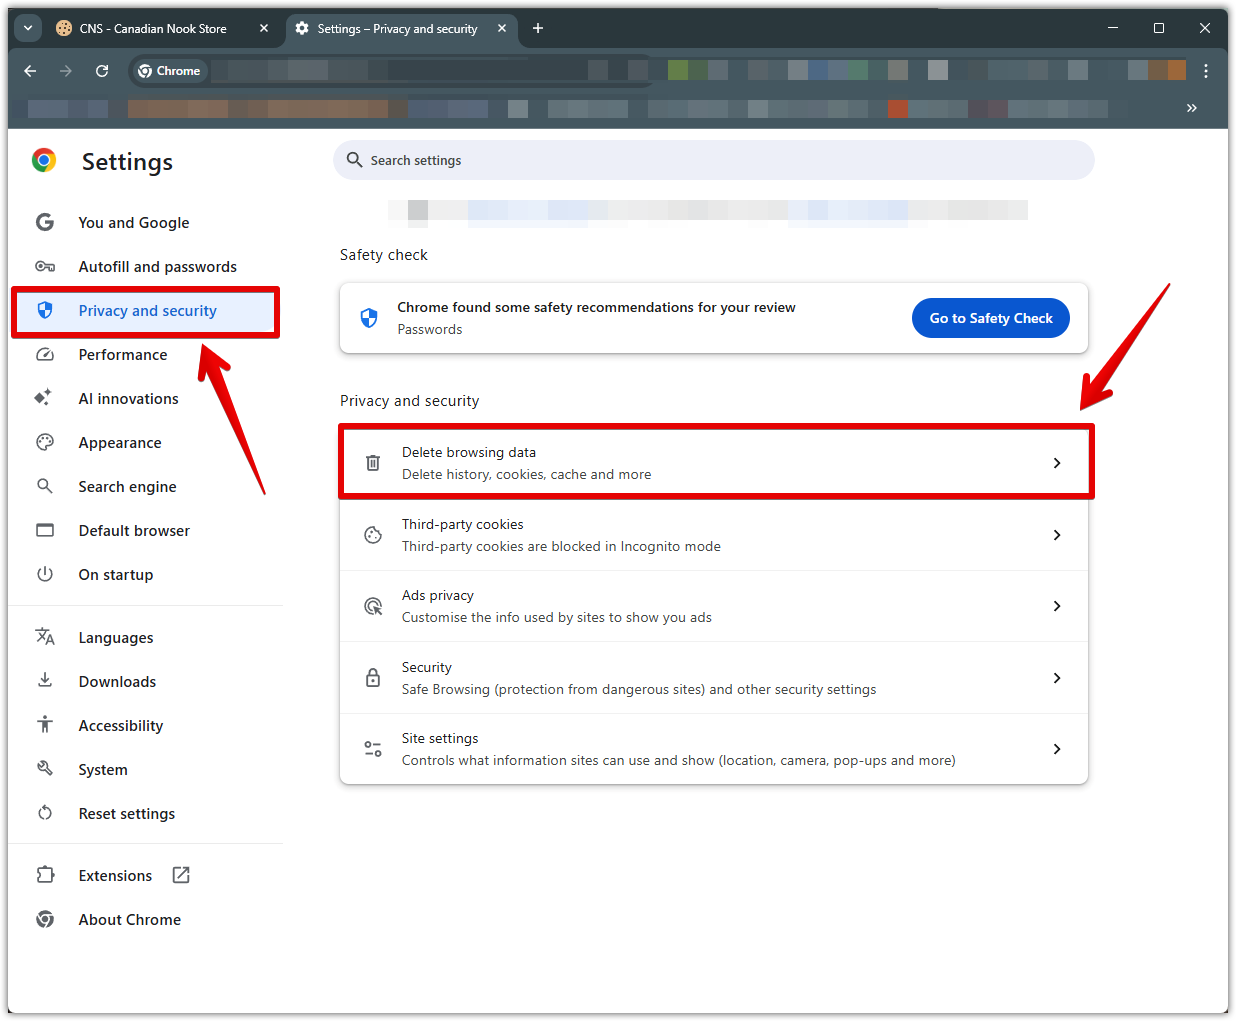
- Under the Basic tab, select Cached images and files. Click Delete data, then refresh your storefront.

Option 2: Use the shortcut
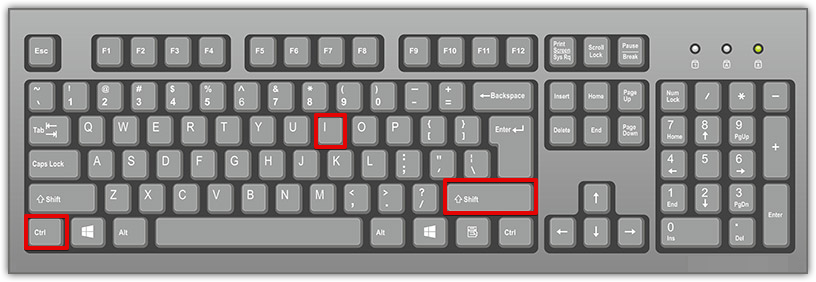
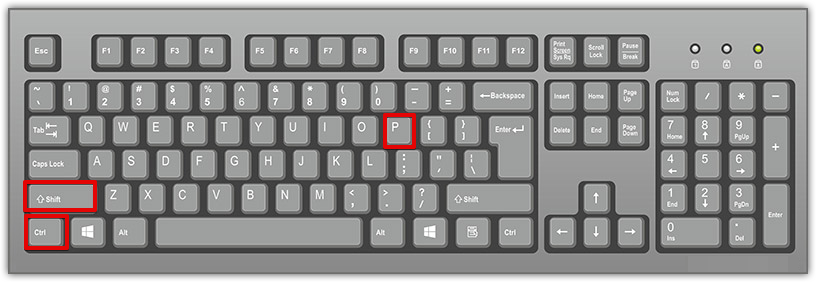
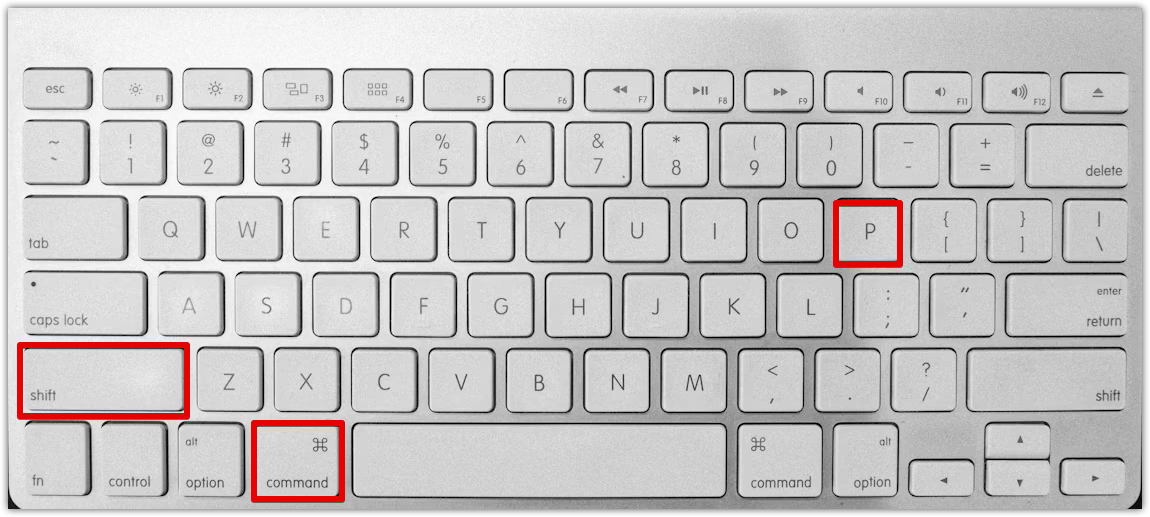
- Press Ctrl + Shift + Delete (Windows/Linux) or Command + Shift + Delete (Mac) to open the Clear Browsing Data window directly.


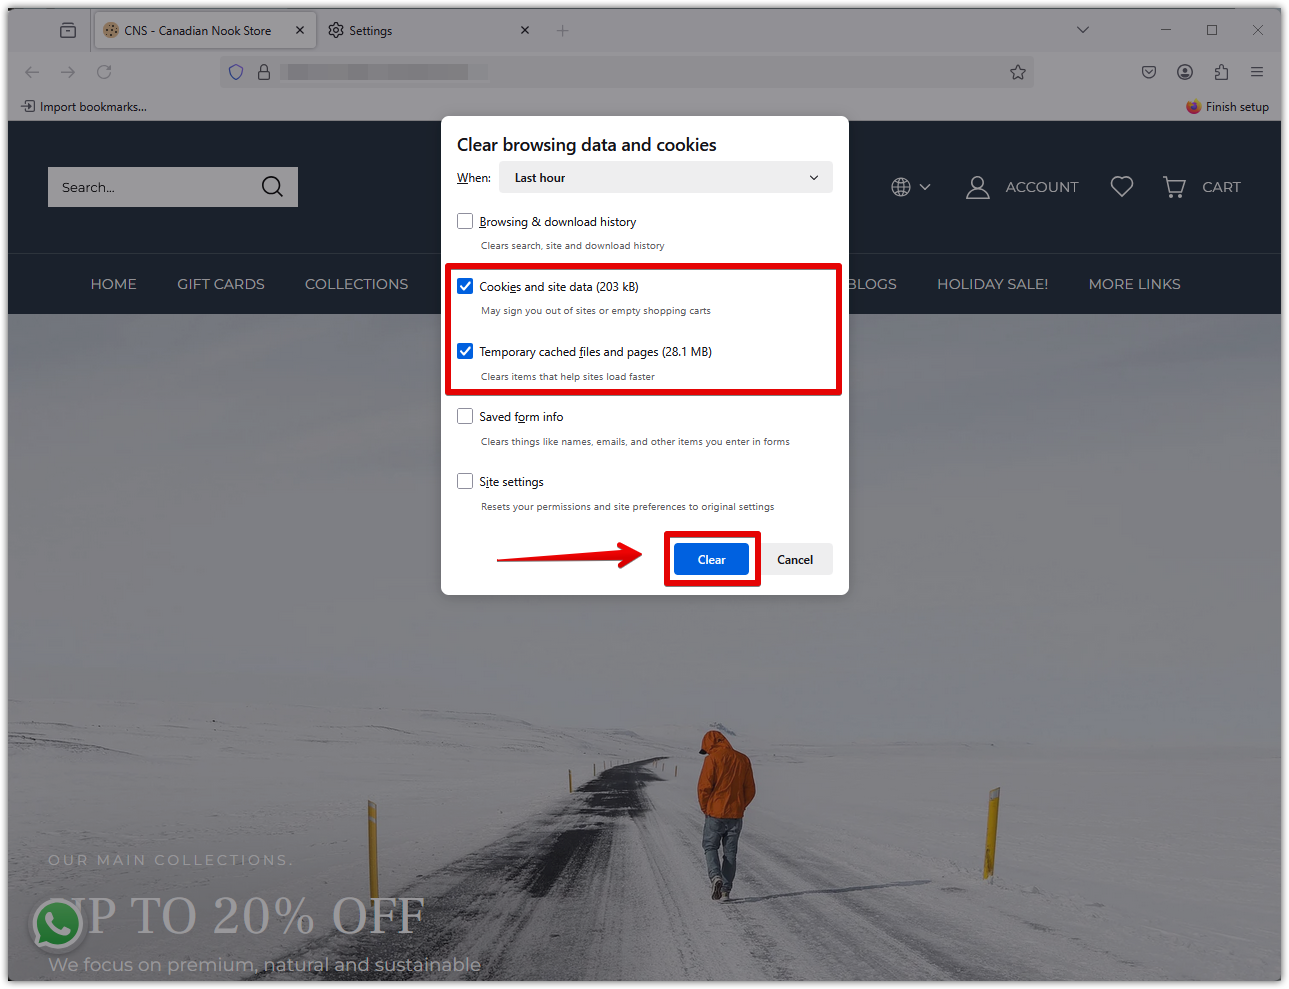
Mozilla Firefox
Option 1: Use the menu
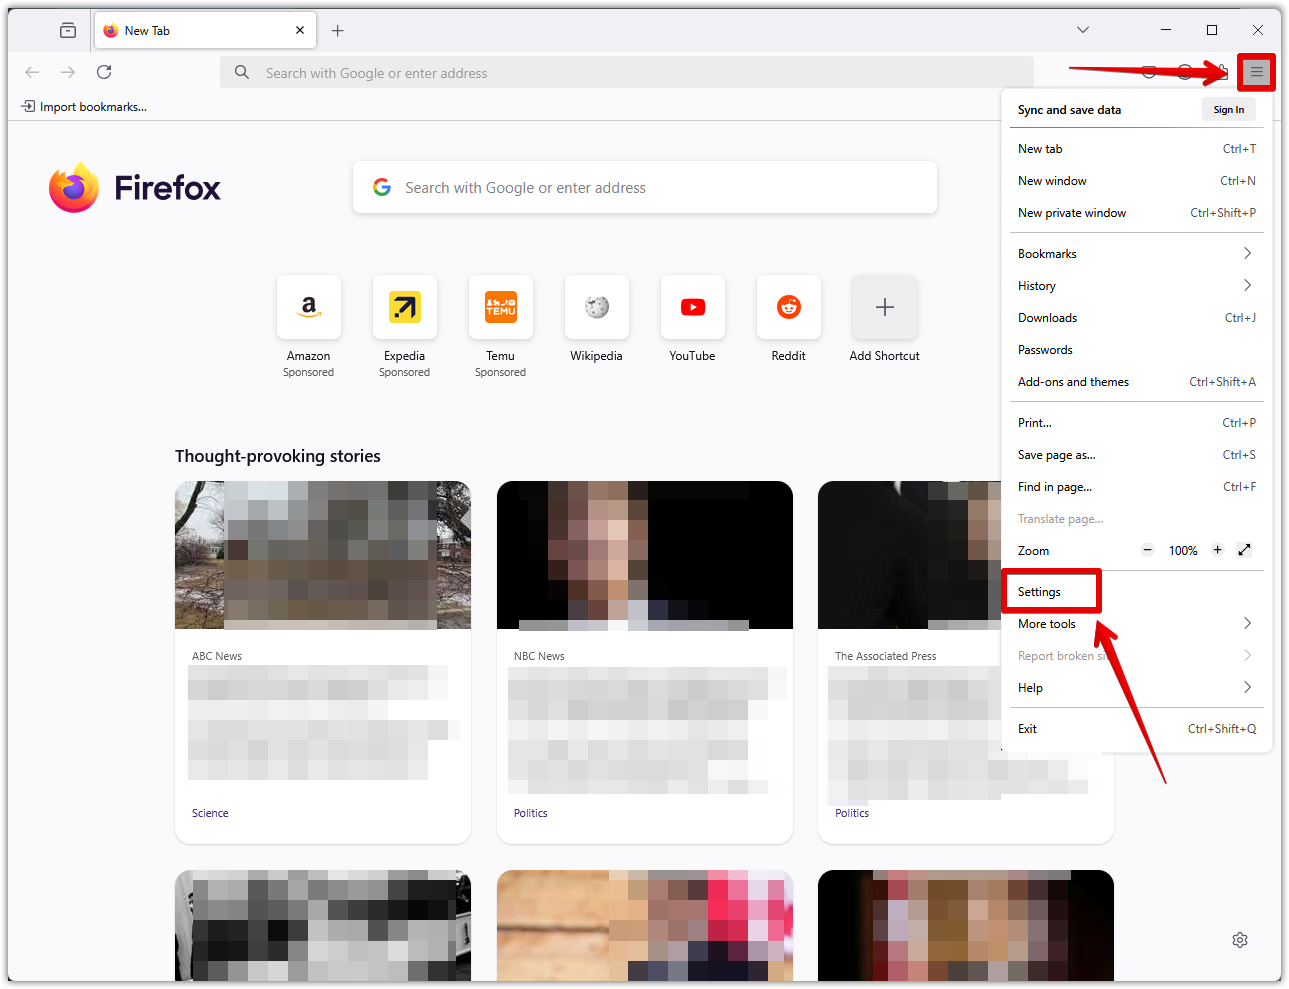
- Click the menu icon in the top-right corner and go to Settings.
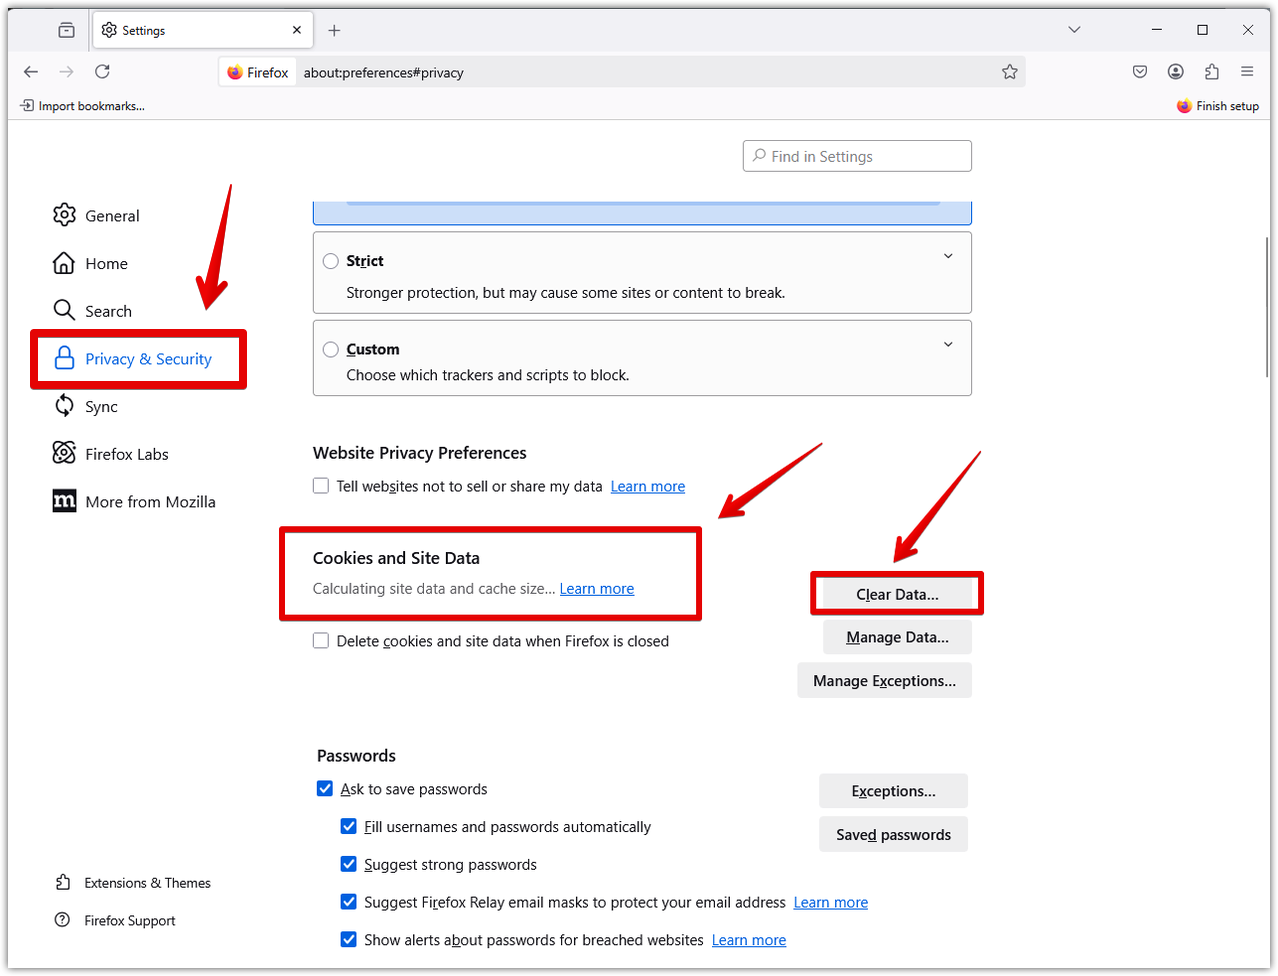
- Select Privacy & Security. Under Cookies and Site Data, click Clear Data.
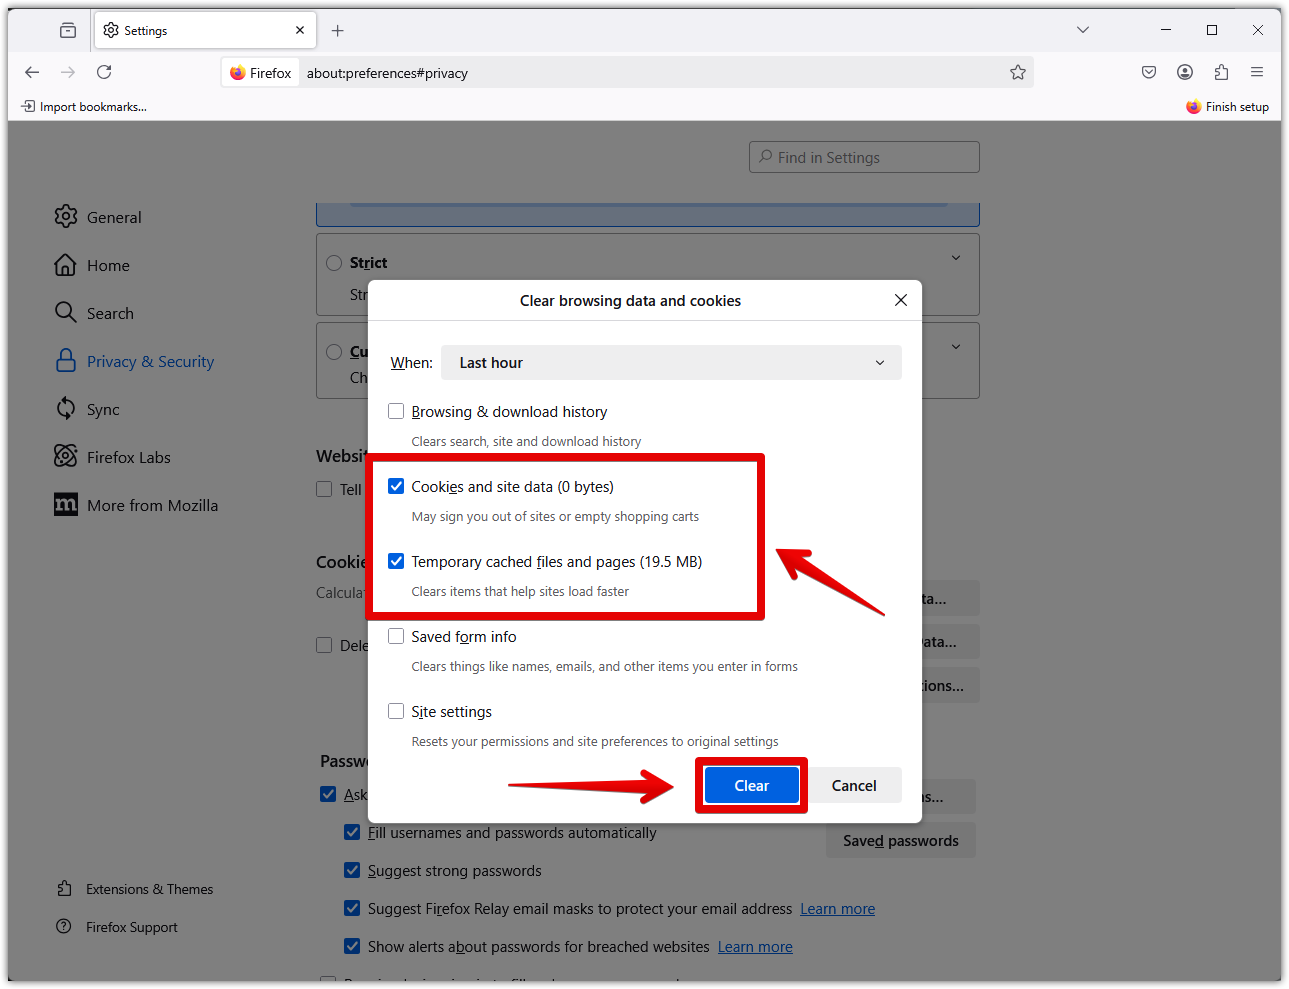
- Select Cookies and side data and Temporary cached files and pages. Click Clear, then refresh your storefront.
Option 2: Use the shortcut
- Press Ctrl + Shift + Delete (Windows/Linux) or Command + Shift + Delete (Mac) to open the Clear Recent History window.
- Check Cookies and side data and Temporary cached files and pages, then click Clear.
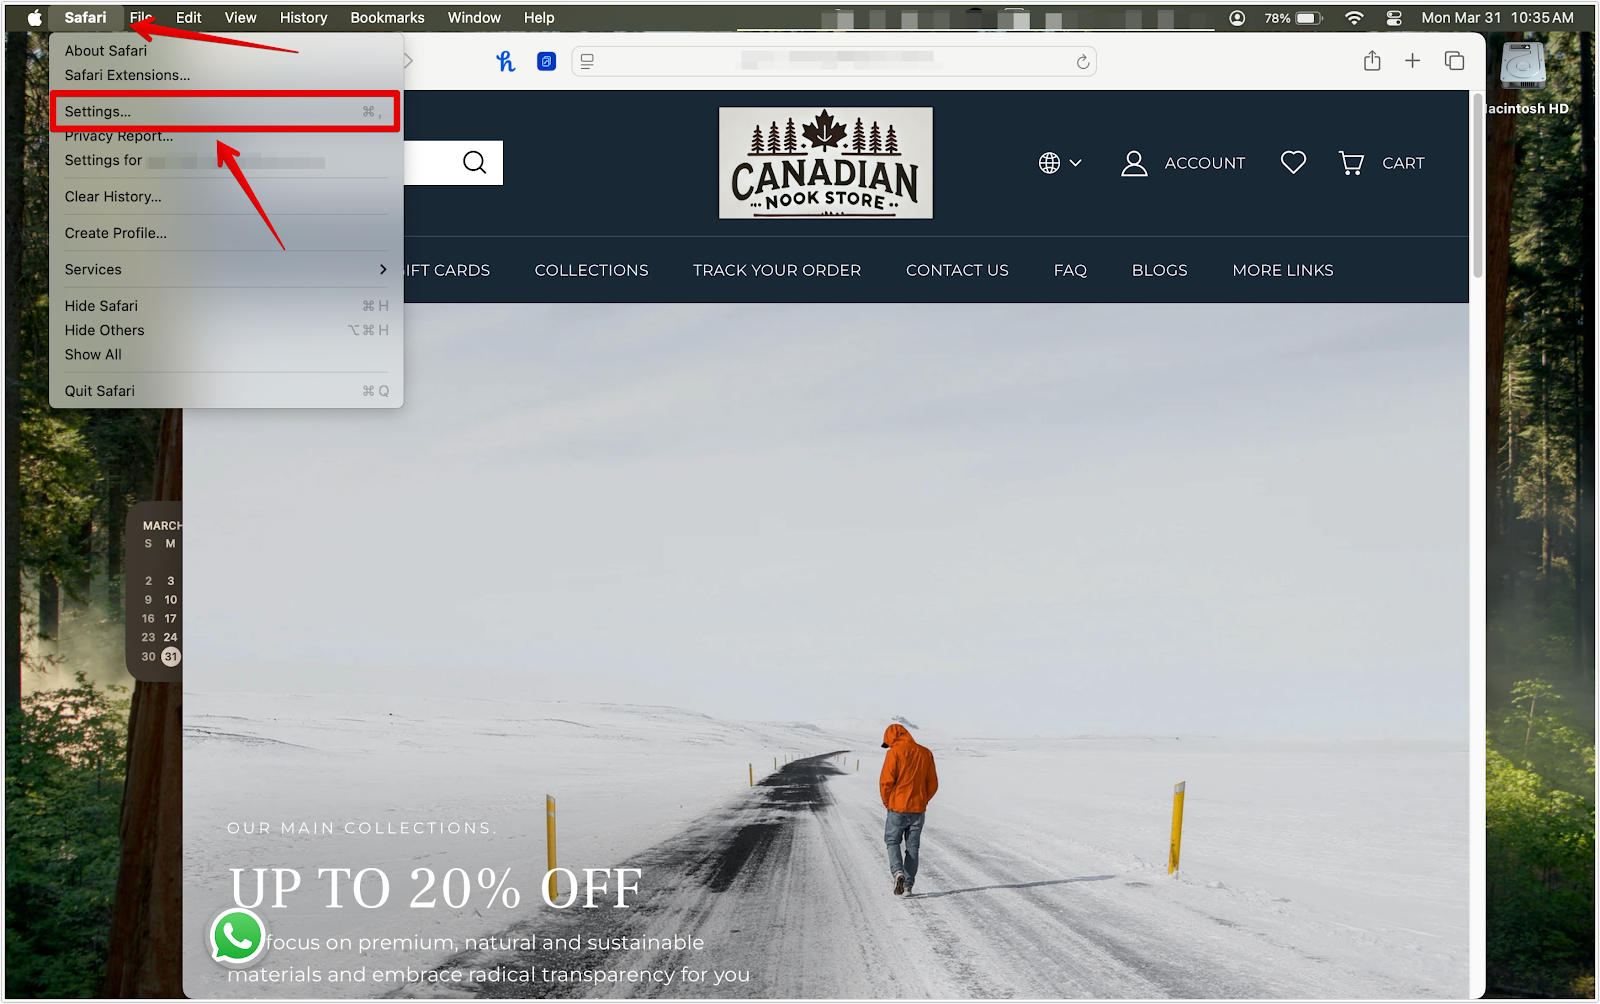
Safari
Option 1: Use the menu
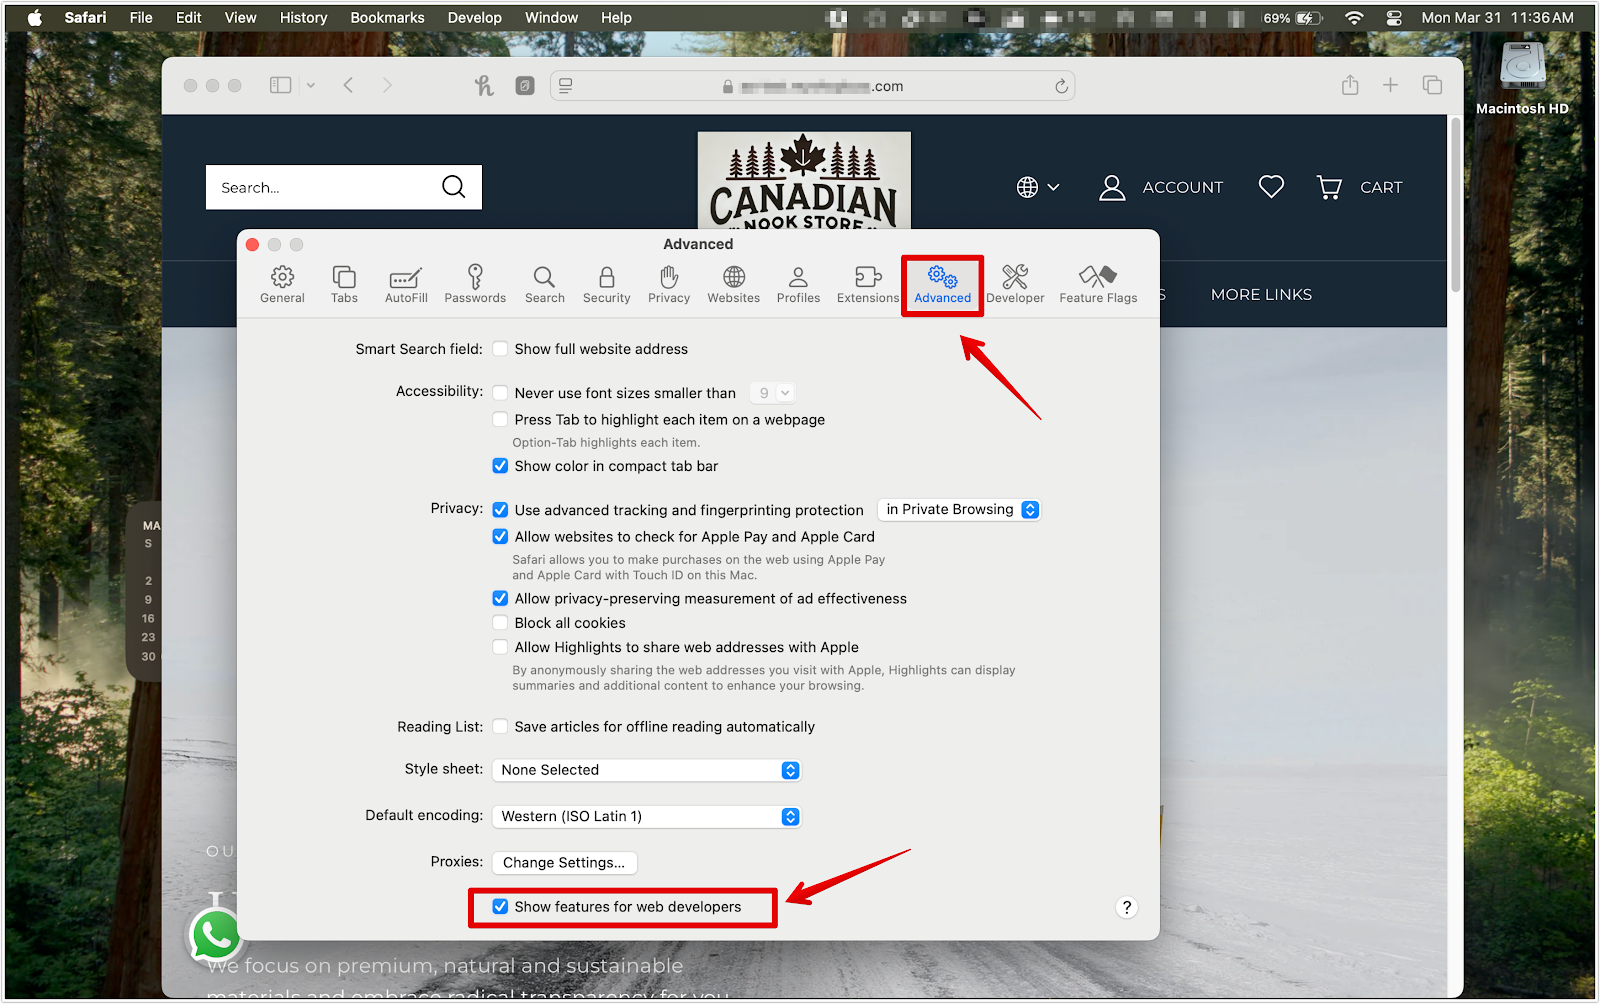
- Go to Safari > Settings (or Preferences) > Advanced.
- Enable the Show features for web developers menu in the menu bar.
- In the top menu bar, click Develop > Empty Caches. Refresh your storefront.

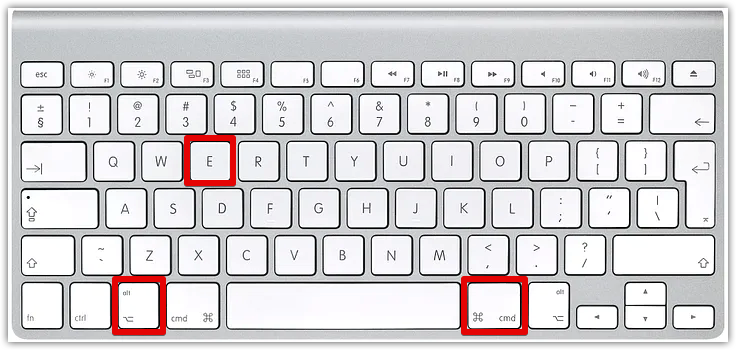
Option 2: Use the shortcut
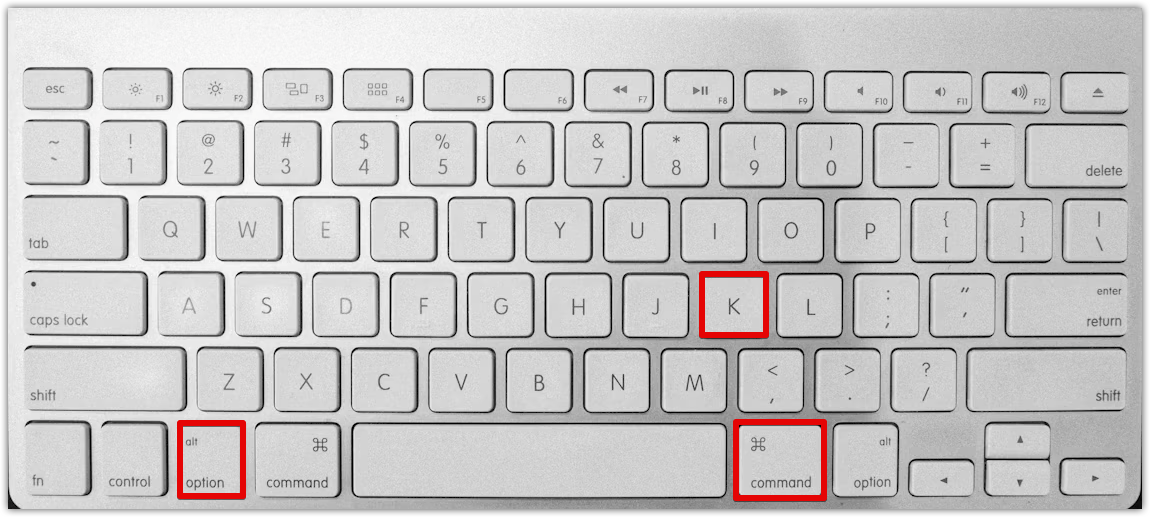
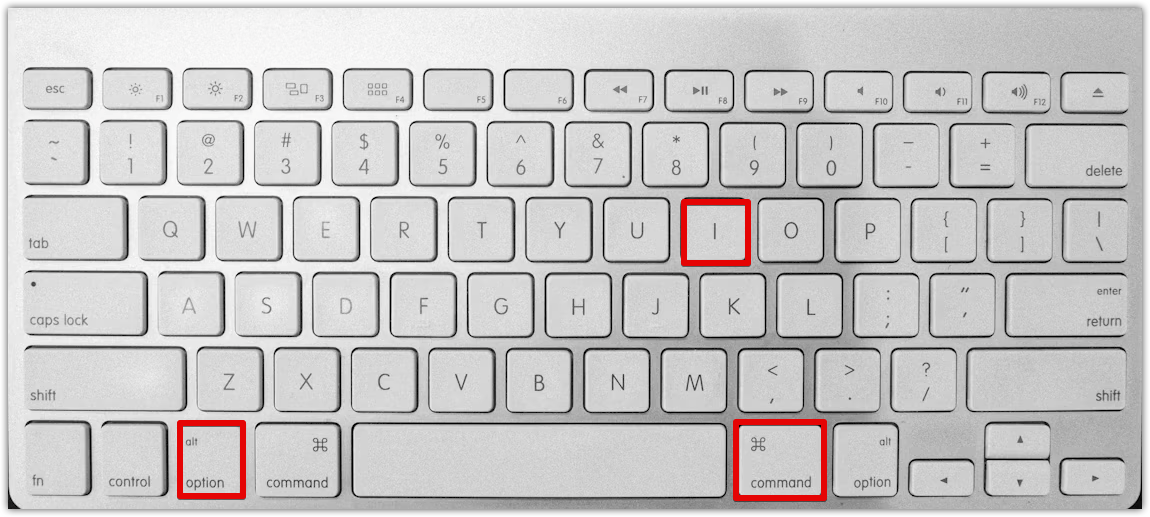
- Once the Developer menu is enabled, press Option + Command + E to instantly empty the cache.
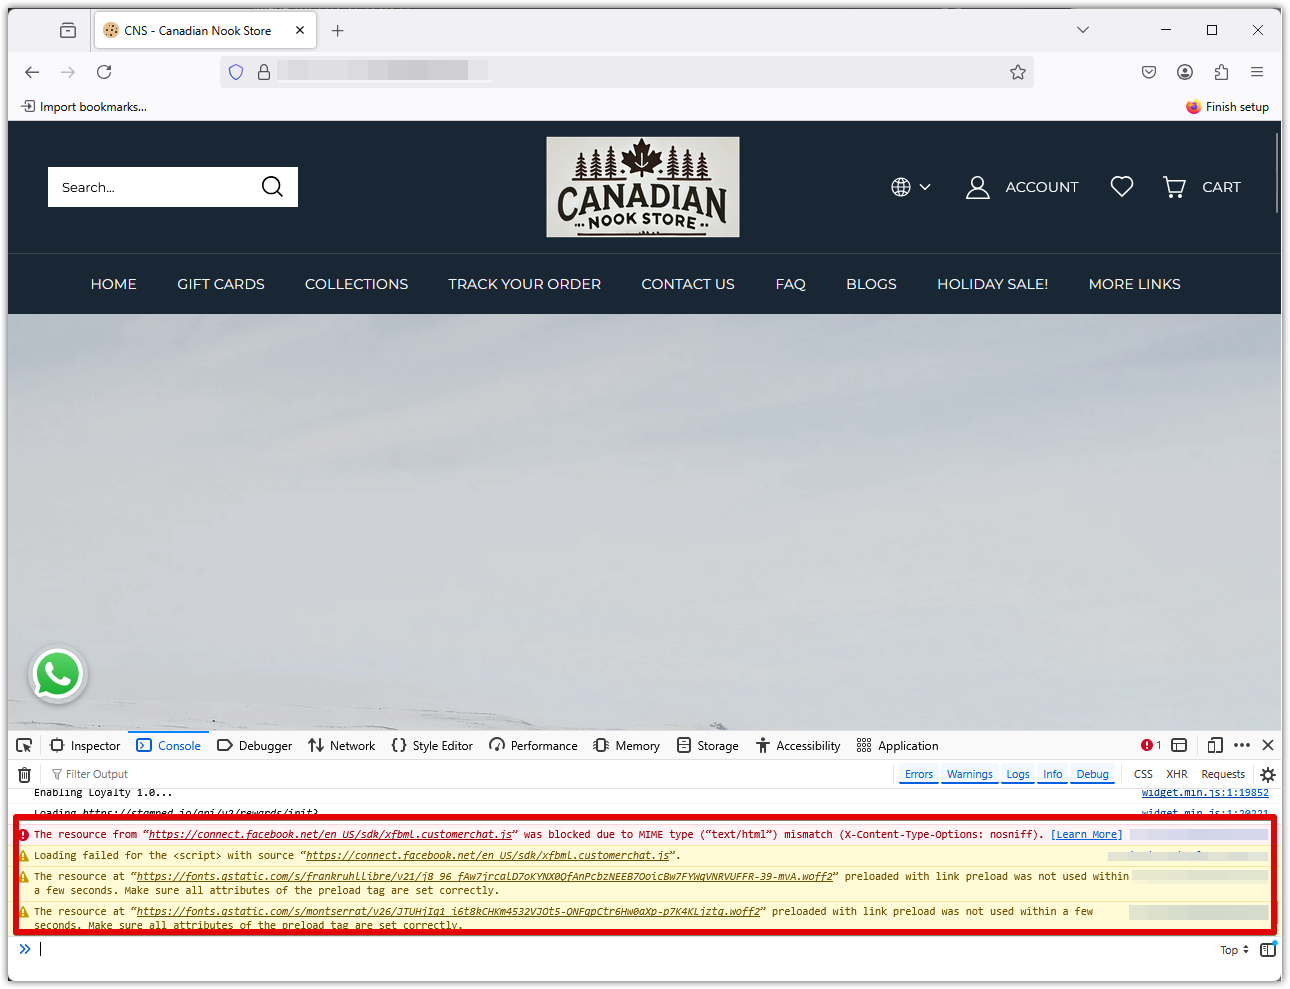
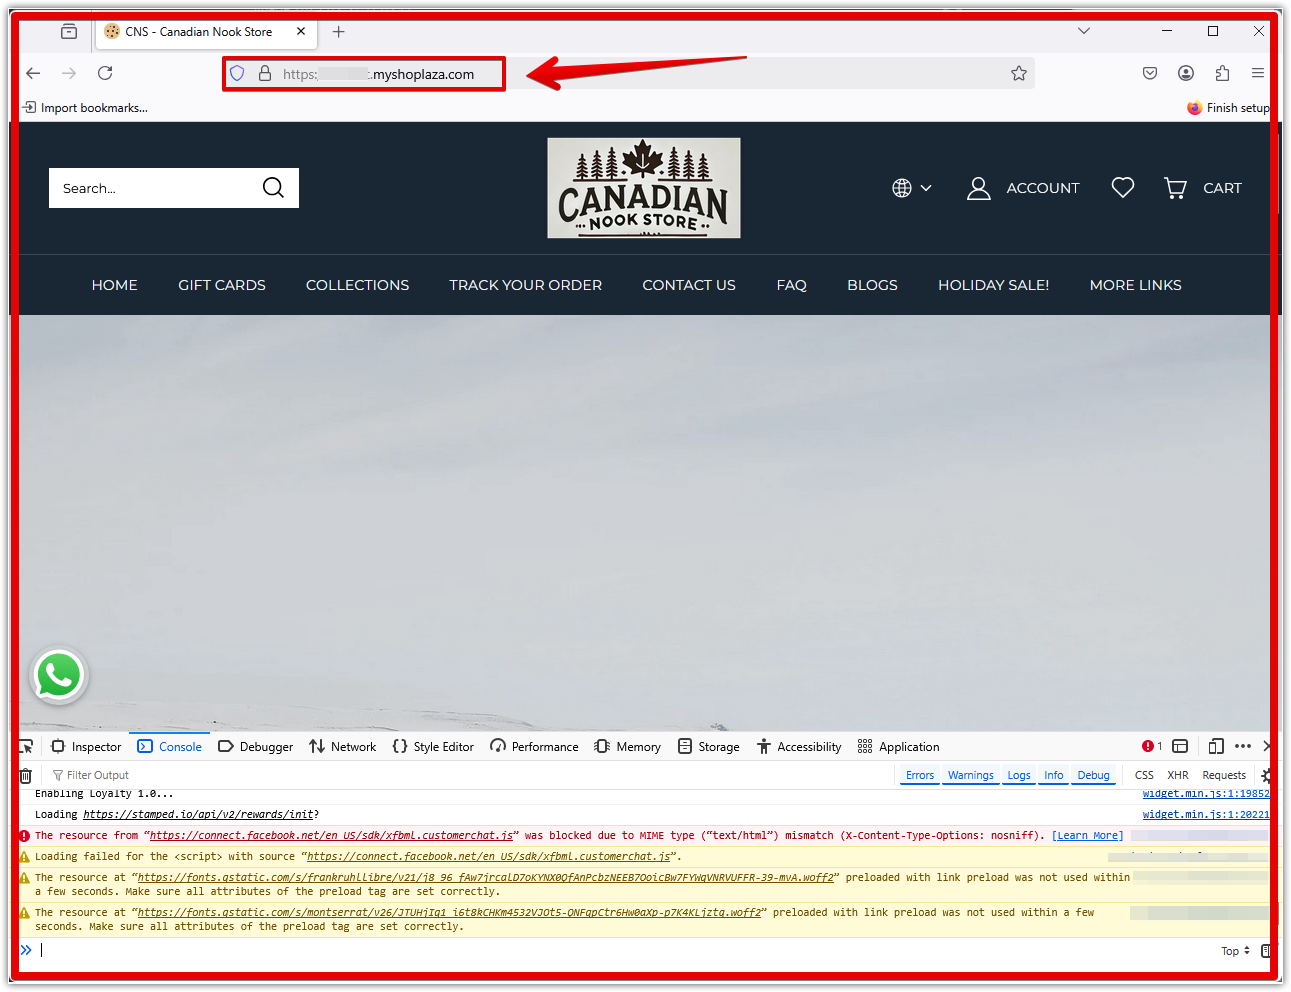
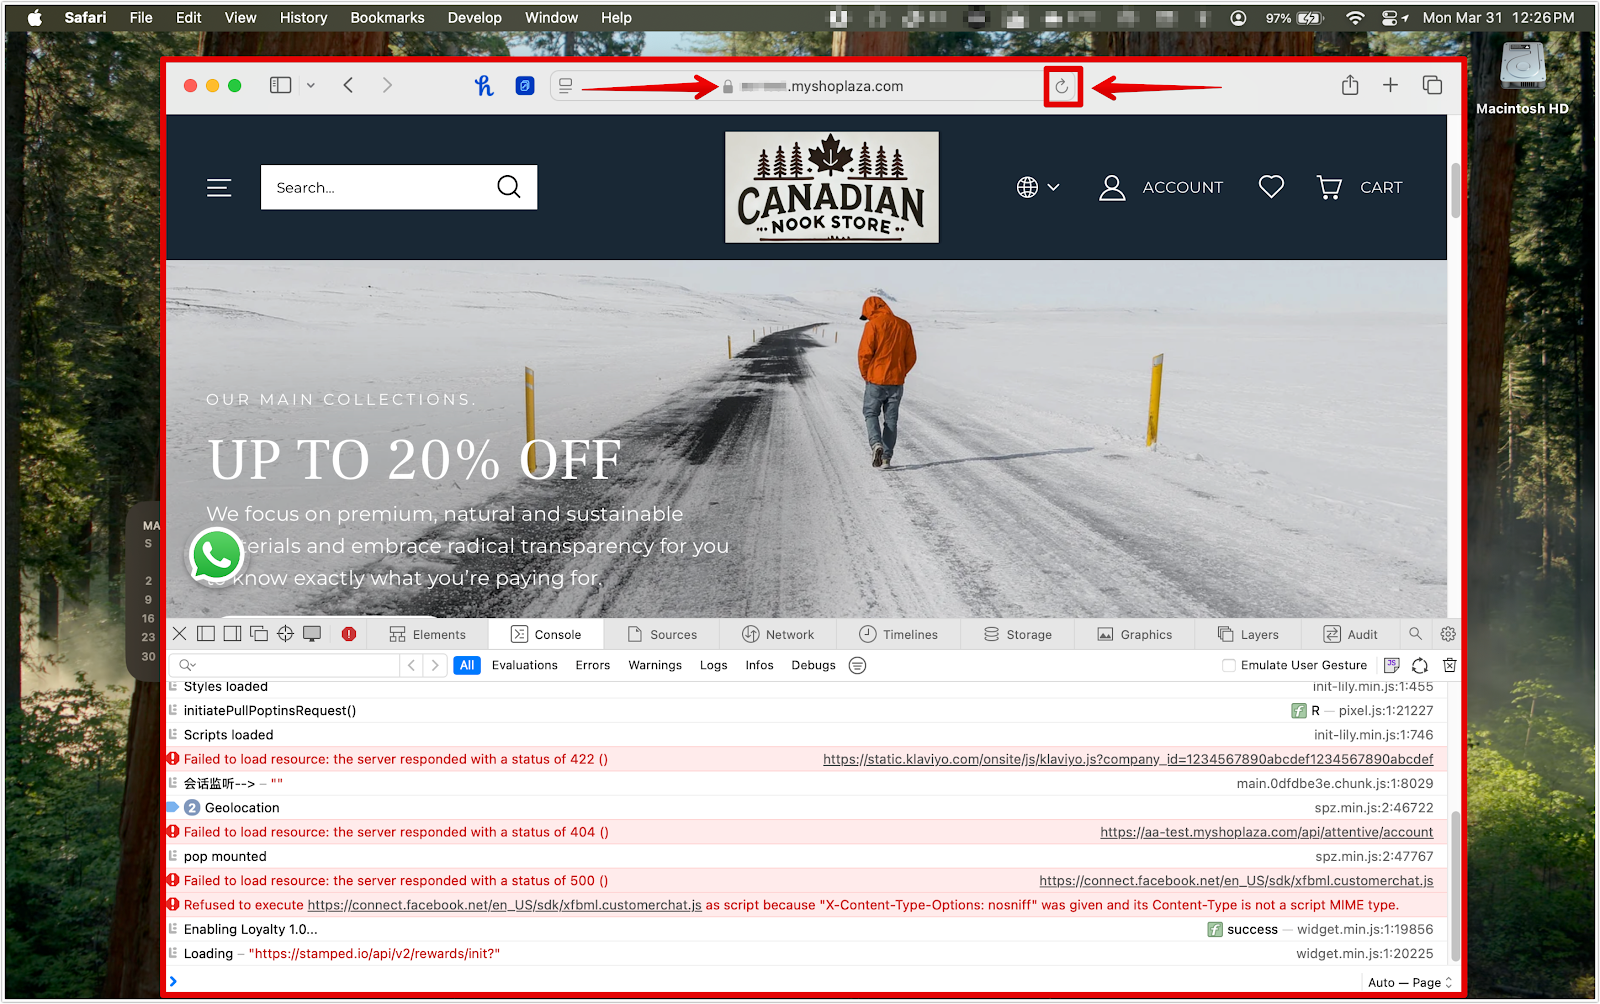
Step 2: Open the browser console and collect error logs
The browser console displays hidden technical errors that occur in the background, such as broken scripts, app conflicts, or failed resources. These logs help identify the root cause of issues and are essential for Support to troubleshoot effectively.
Note
If the console includes many messages, scroll through and capture multiple screenshots to ensure nothing is missed.
Google Chrome
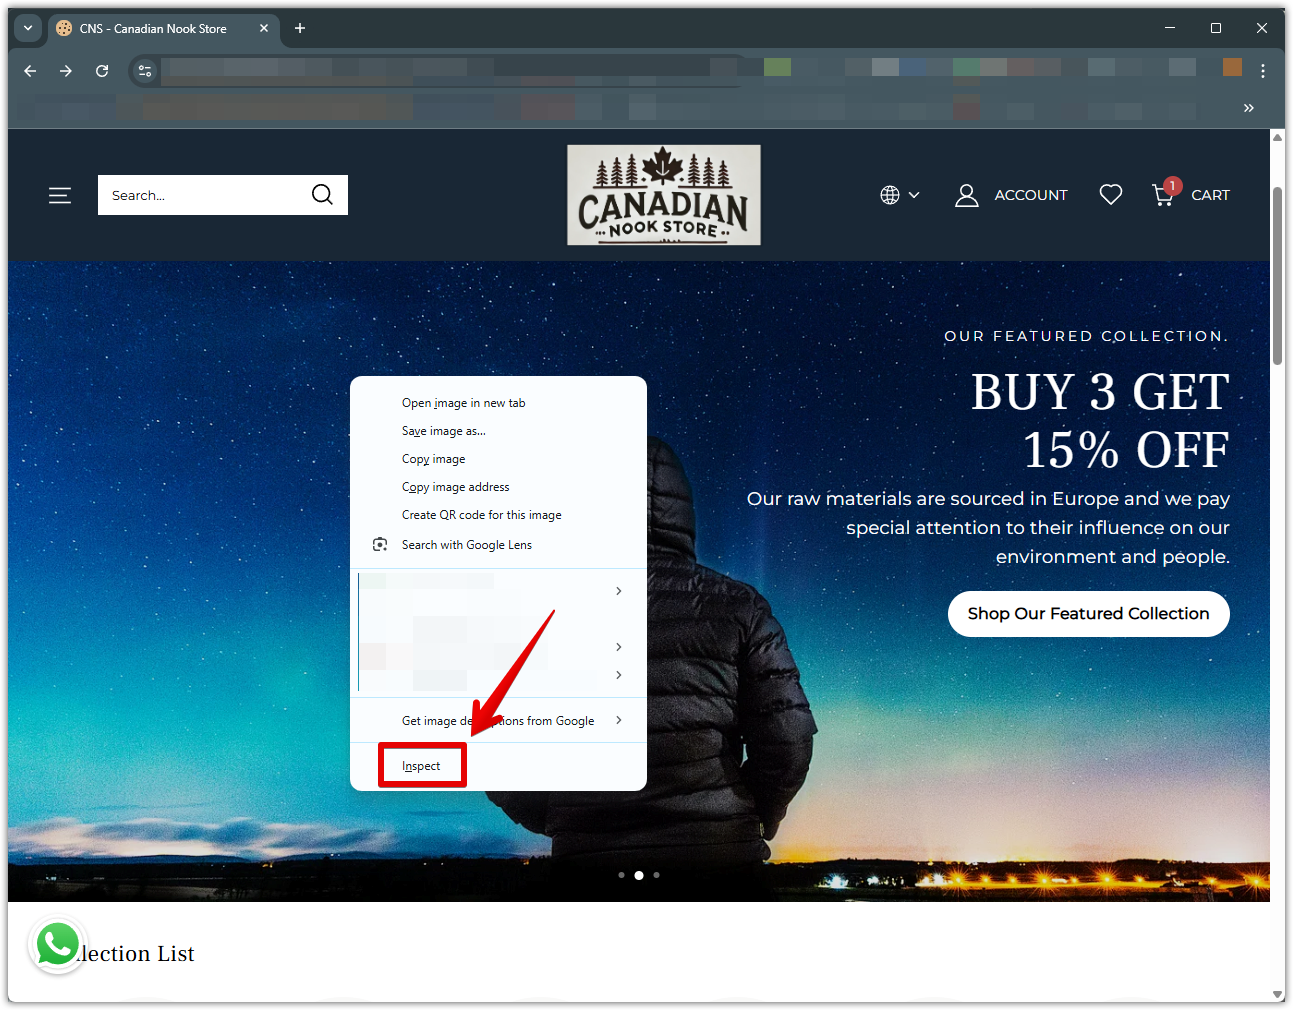
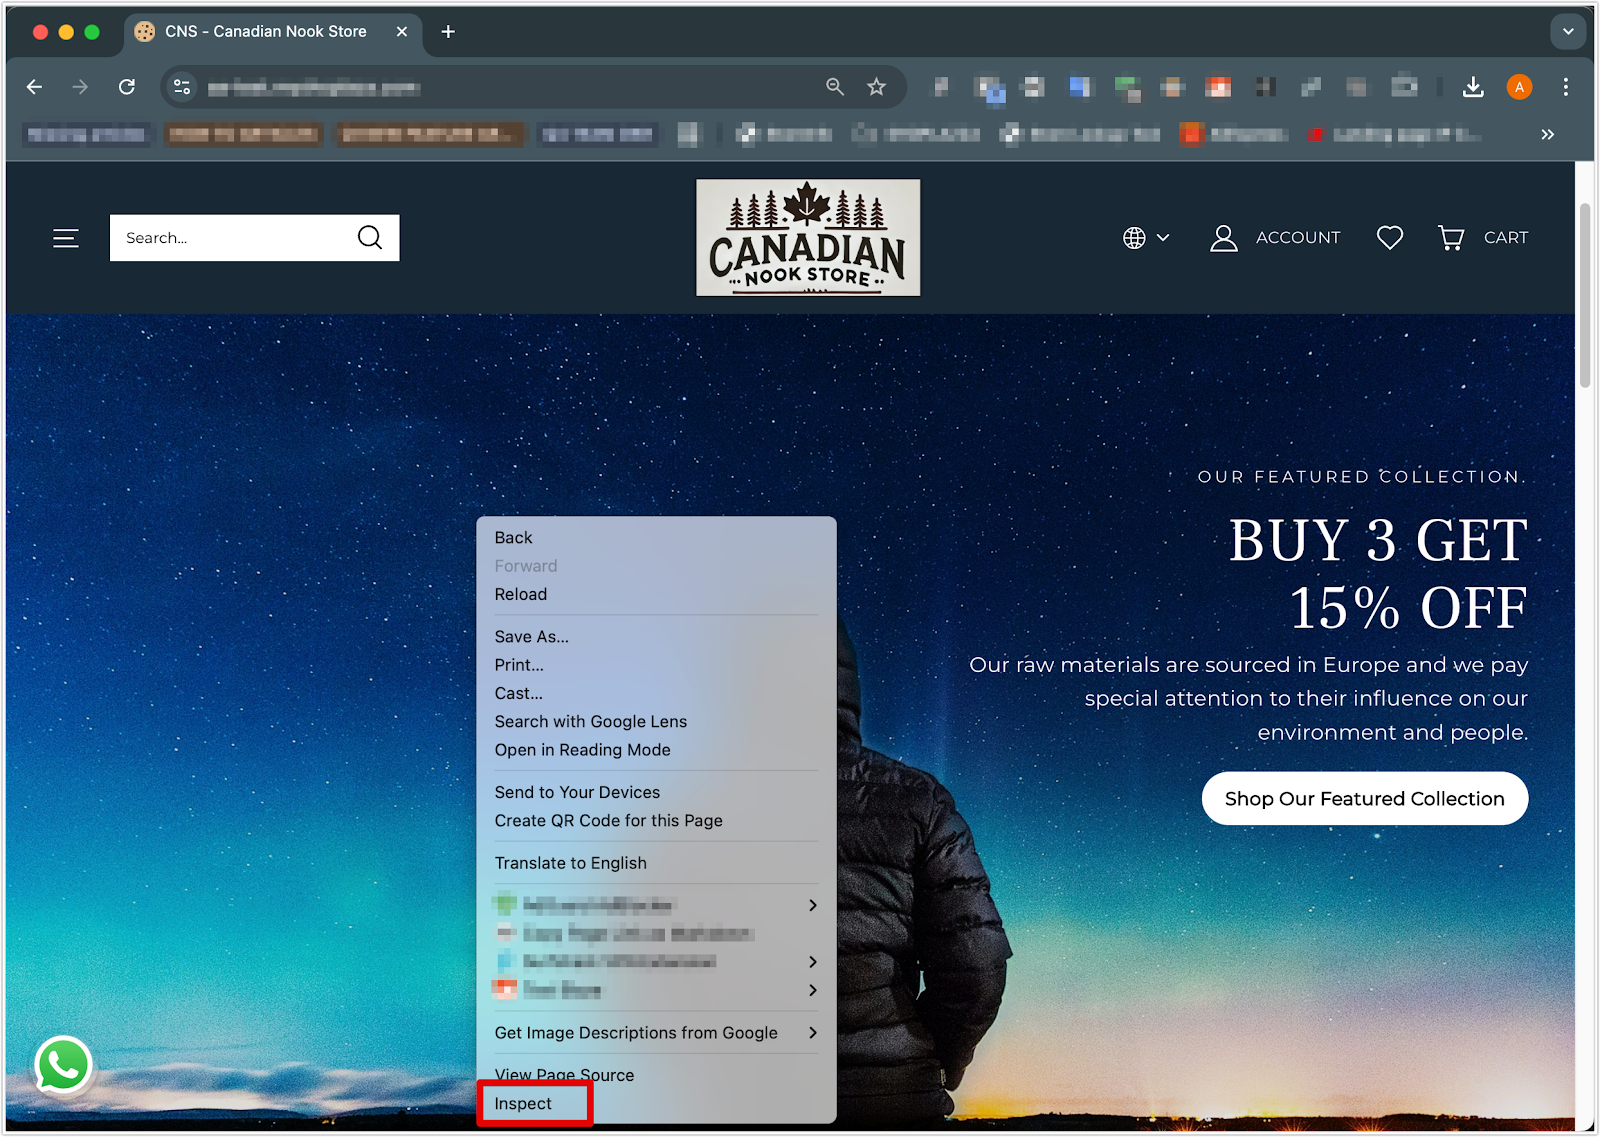
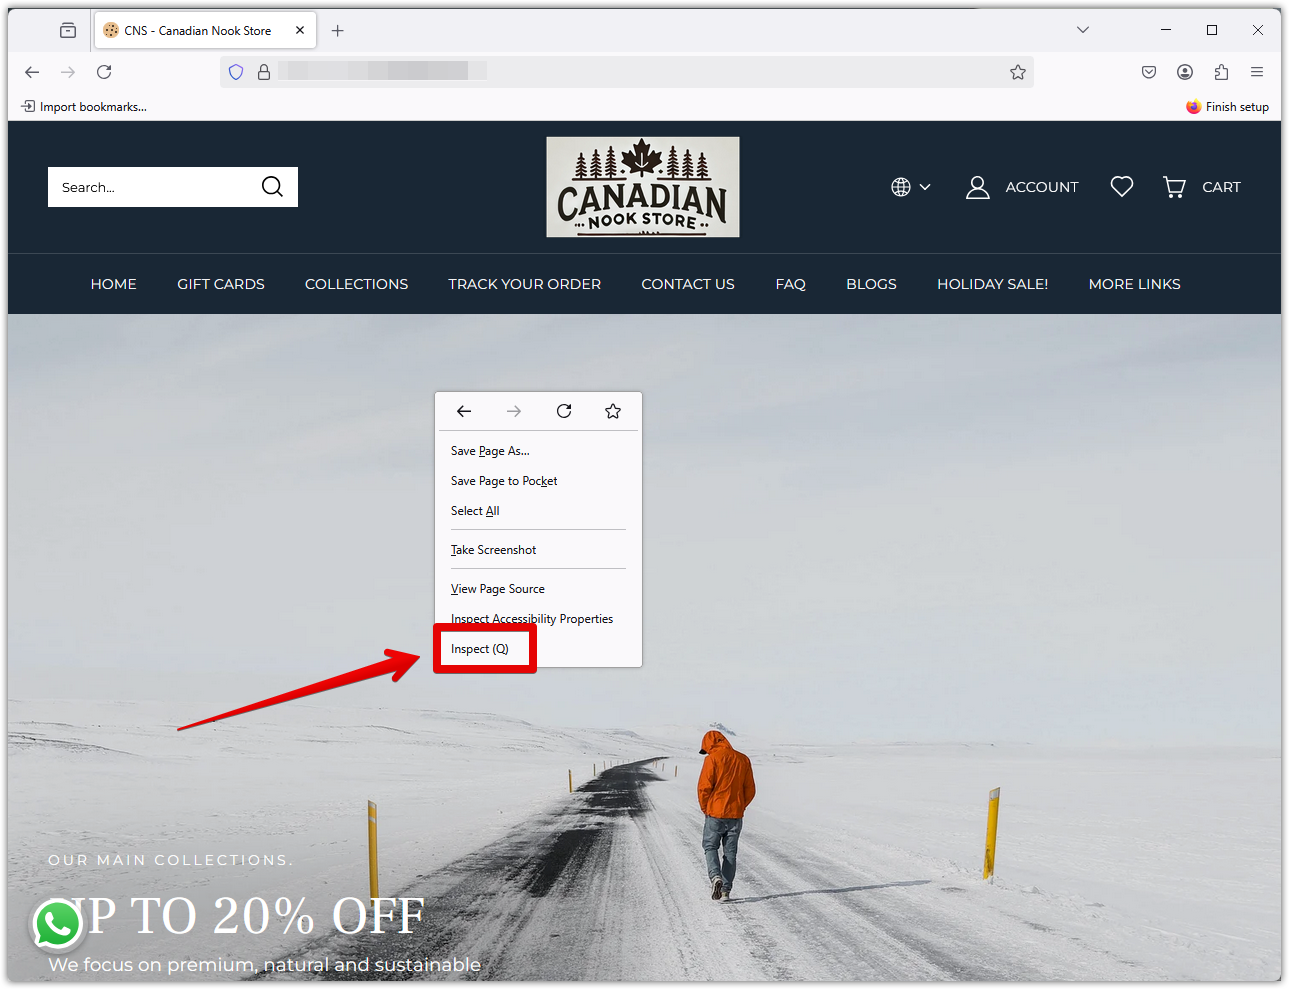
1. Right-click anywhere on the page and select Inspect.
2. Click the Console tab.
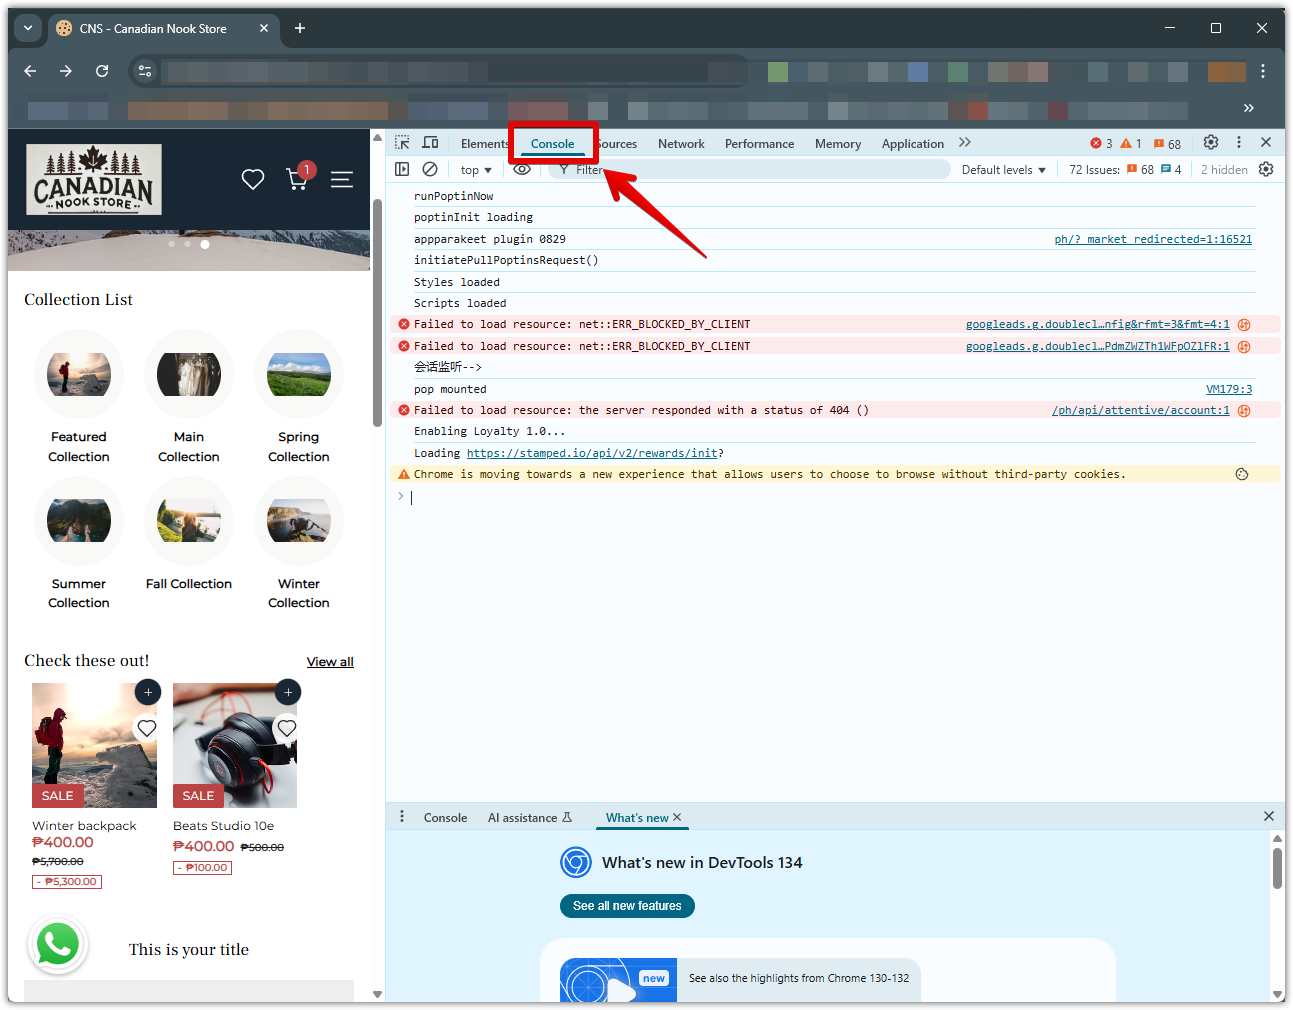
3. Reload the page or repeat the action that causes the issue. Look for red or yellow error messages.
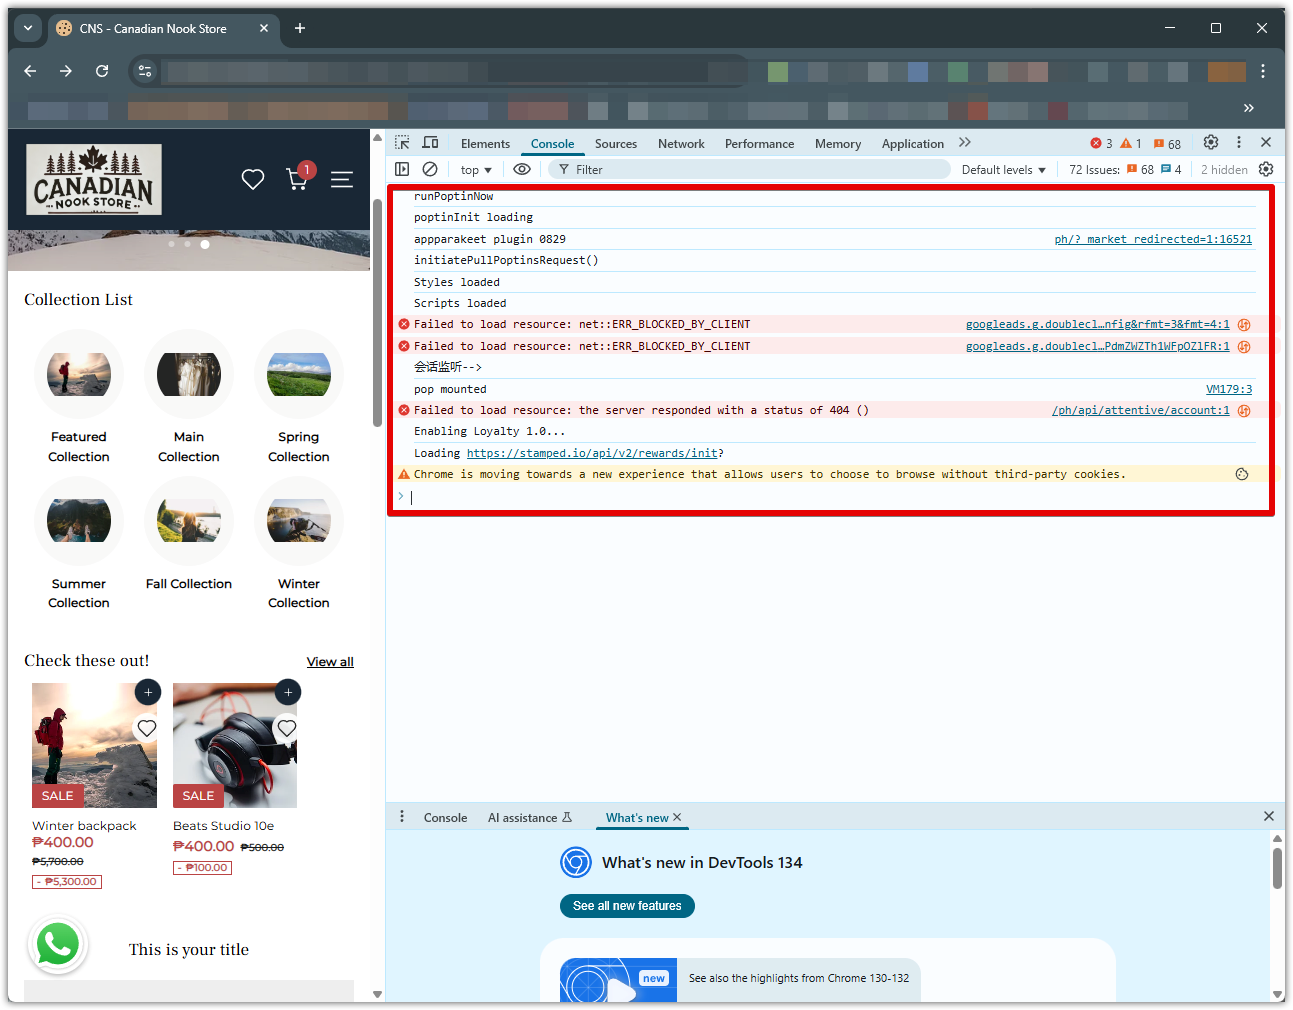
4. Take full-page screenshots, making sure the browser URL is visible.

Mozilla Firefox
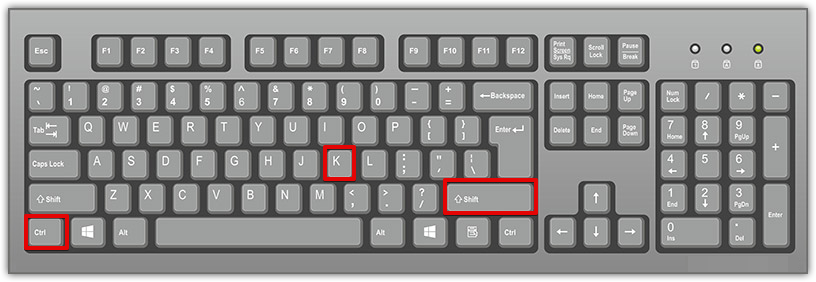
1. Press Ctrl + Shift + K (Windows) or Command + Option + K (Mac).
2. Reload the page and look for errors in red or yellow.
3. Take full-page screenshots of the visible console output, including the URL.
Safari
1. Go to Safari > Settings (or Preferences) > Advanced.
2. Enable the Show features for web developers menu in the menu bar.

3. From the top menu, click Develop > Show JavaScript Console.
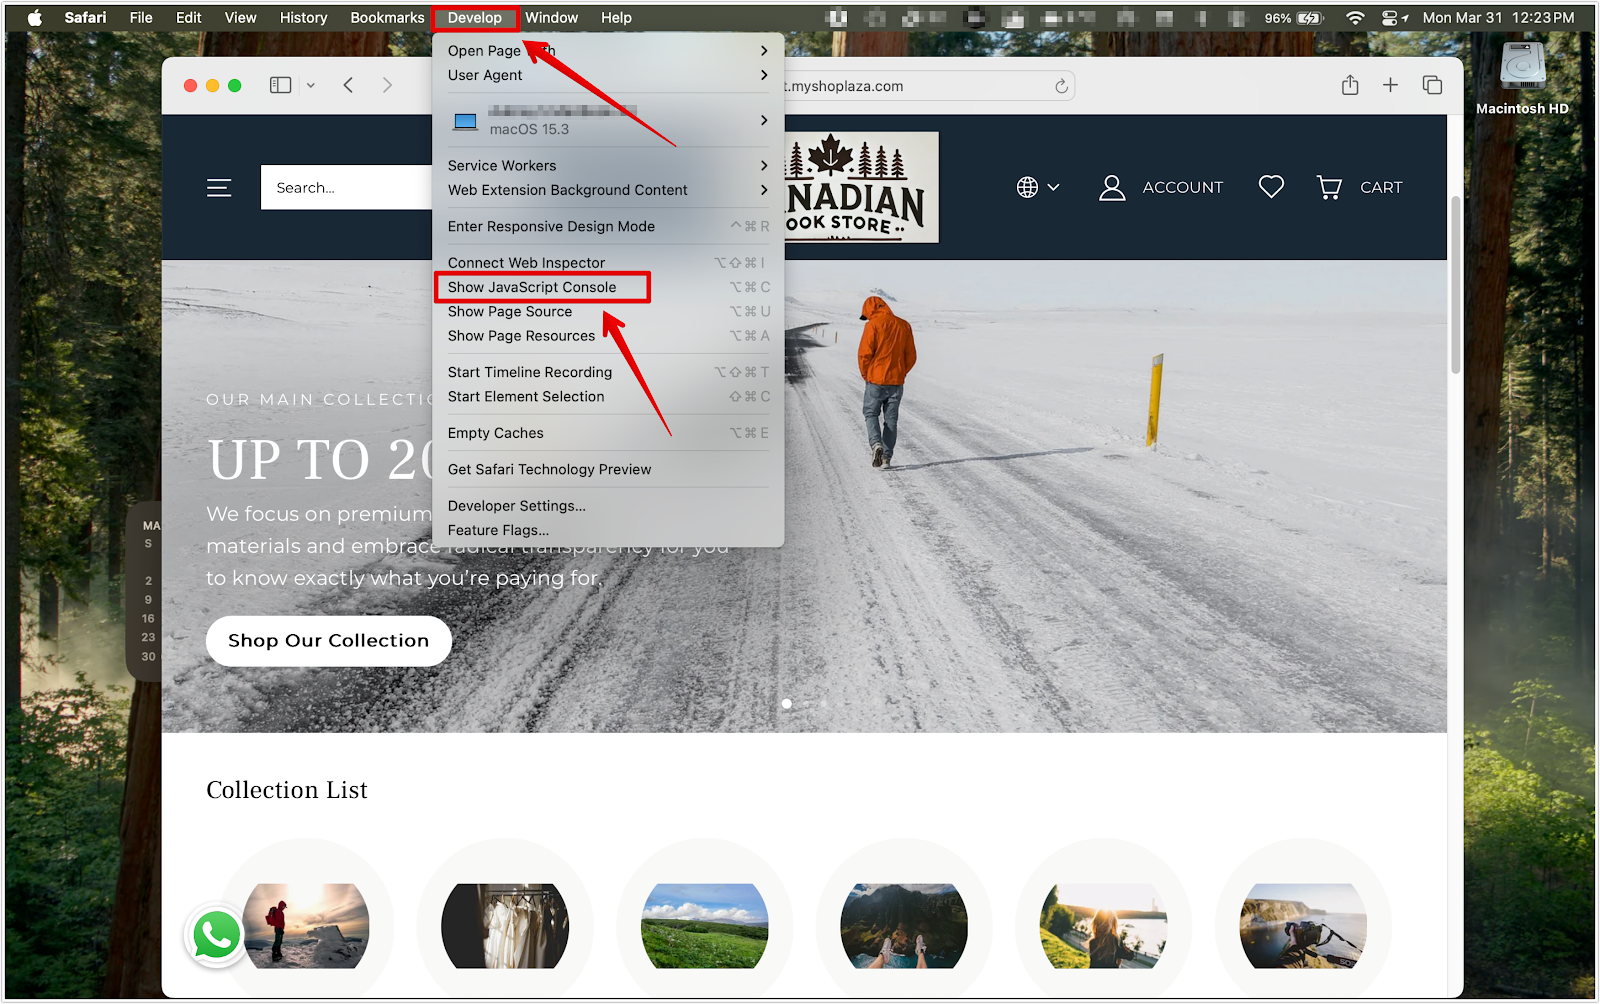
4. Reload the page or reproduce the issue. Take full-page screenshots of the console to ensure the URL link is also shown.
Note
If the console includes many messages, scroll through and capture multiple screenshots to ensure nothing is missed.
Step 3: Save a HAR file with content
A HAR file captures all network activity between your browser and your website, including loading times, failed requests, and redirects. This data is especially useful for diagnosing issues like checkout errors, slow pages, or broken app behavior.
Note
HAR files can contain sensitive information such as cookies, login tokens, and website content. Avoid recording real customer activity, and remove sensitive data before sharing your file.
Google Chrome
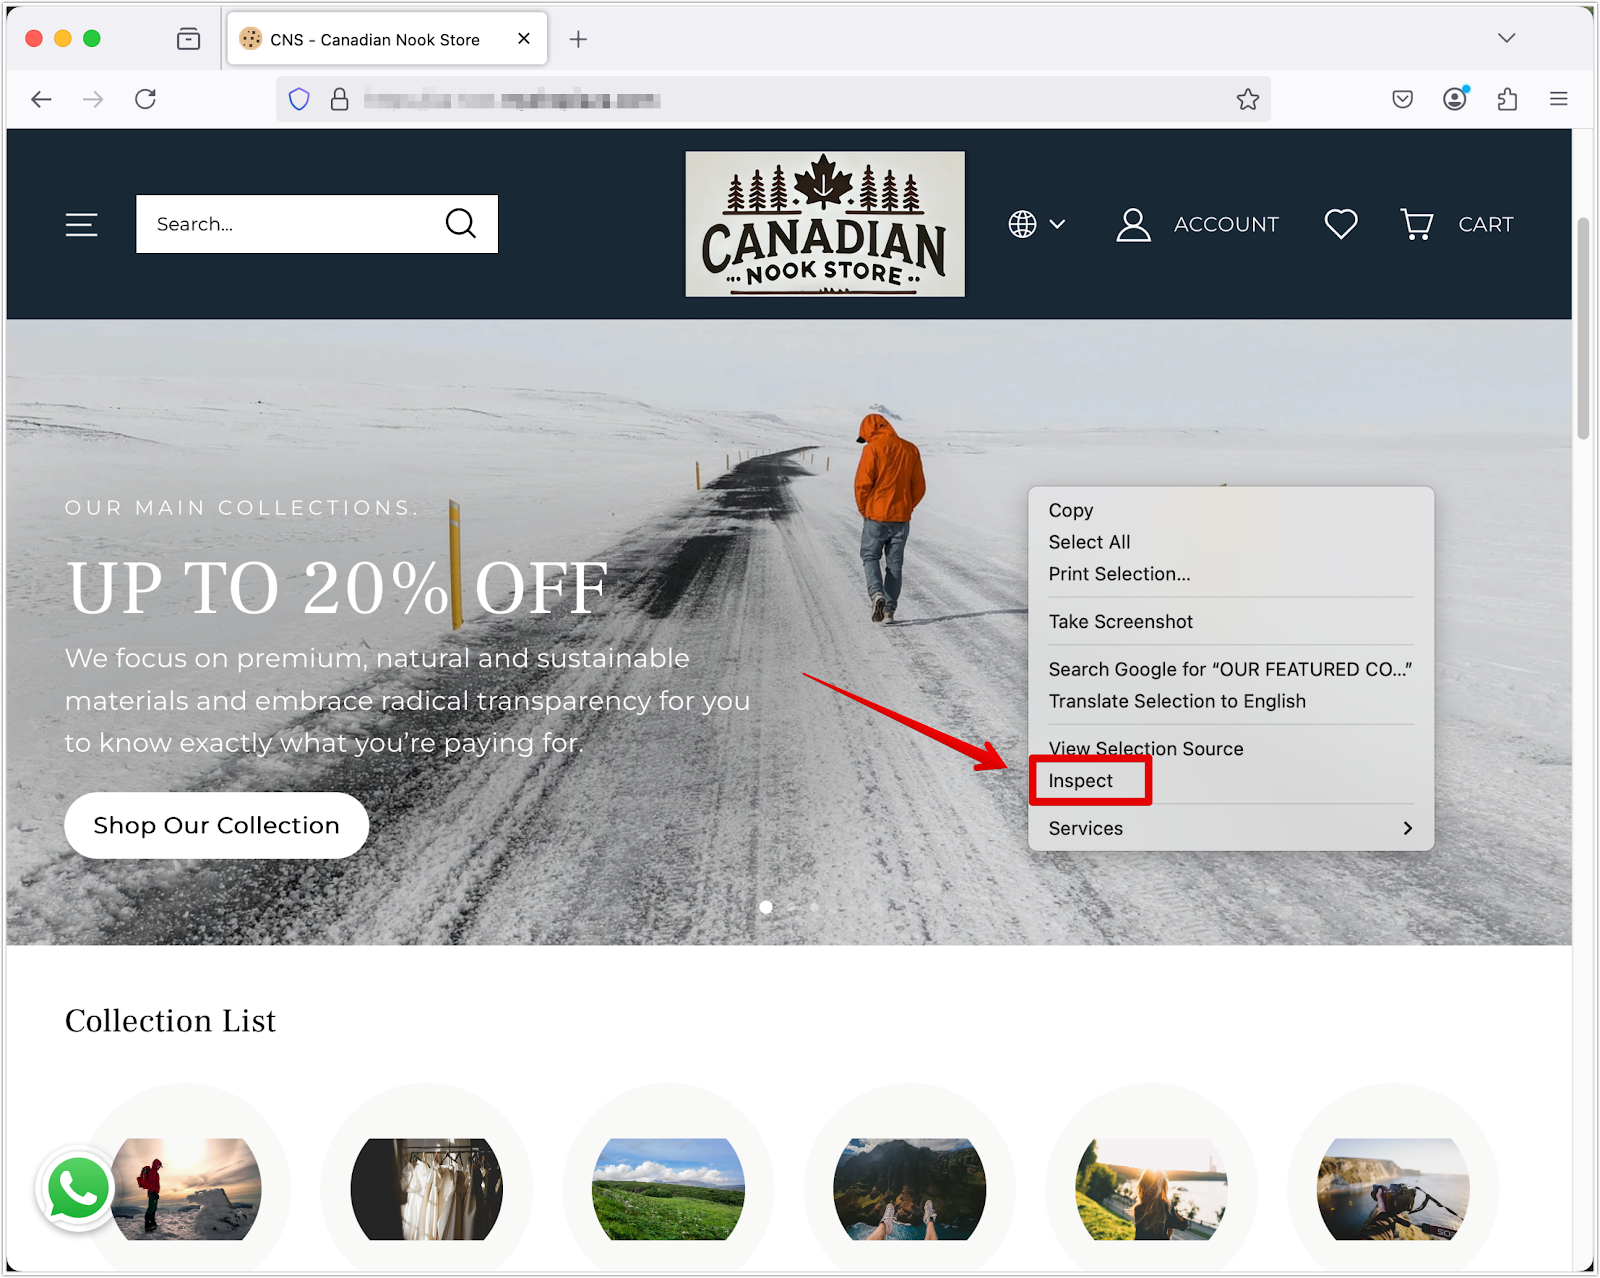
1. Open Developer Tools by right-clicking on the page and selecting Inspect, or press Ctrl + Shift + I (Windows/Linux) or Cmd + Option + I (Mac).
- Windows/Linux:
- Mac:
2. Go to the Network tab and enable the Preserve log.
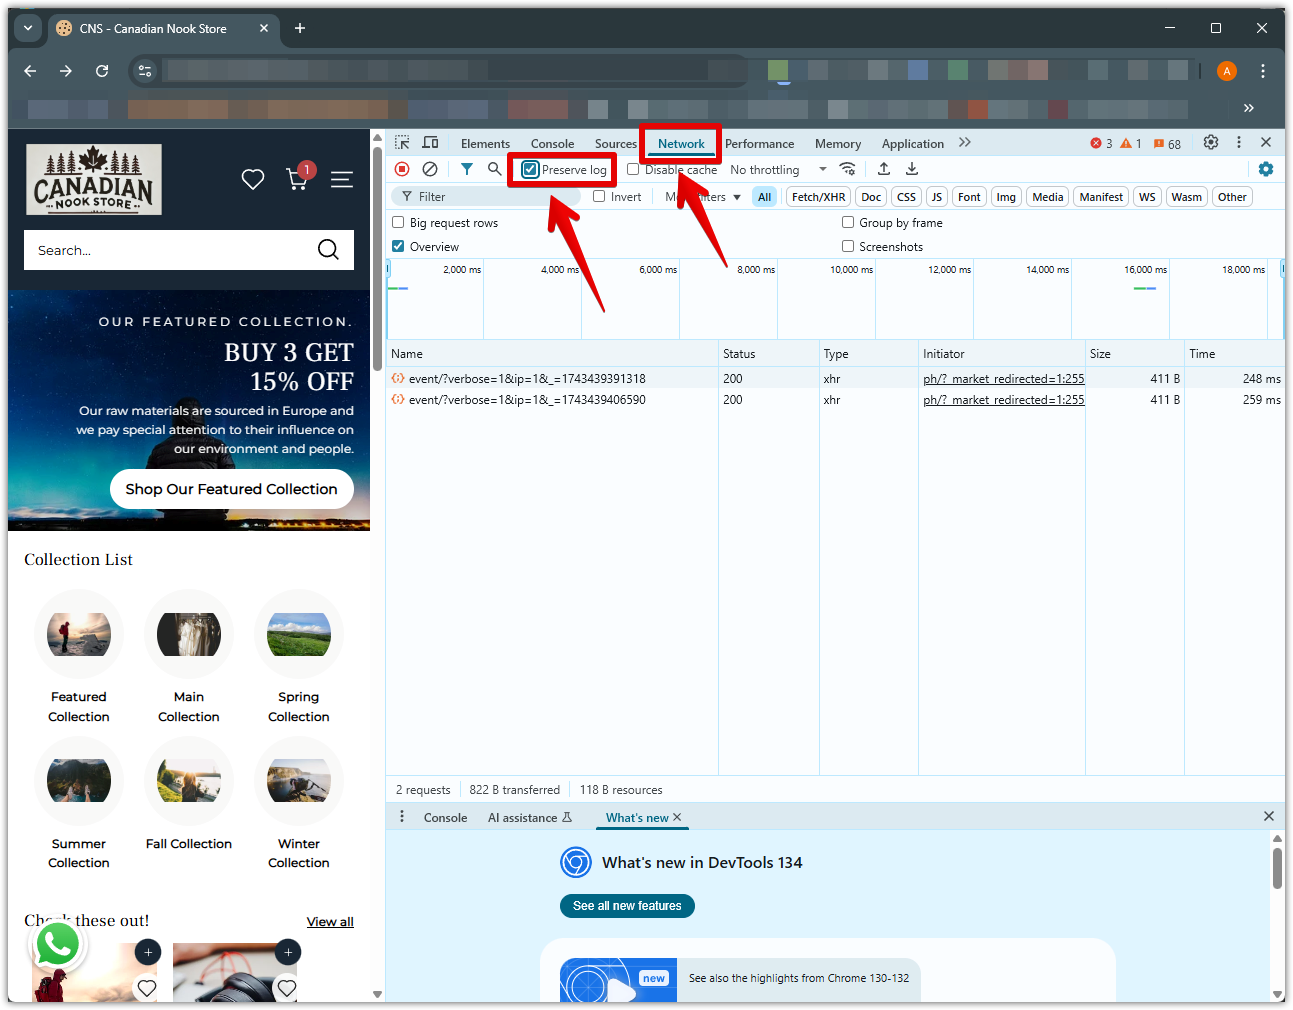
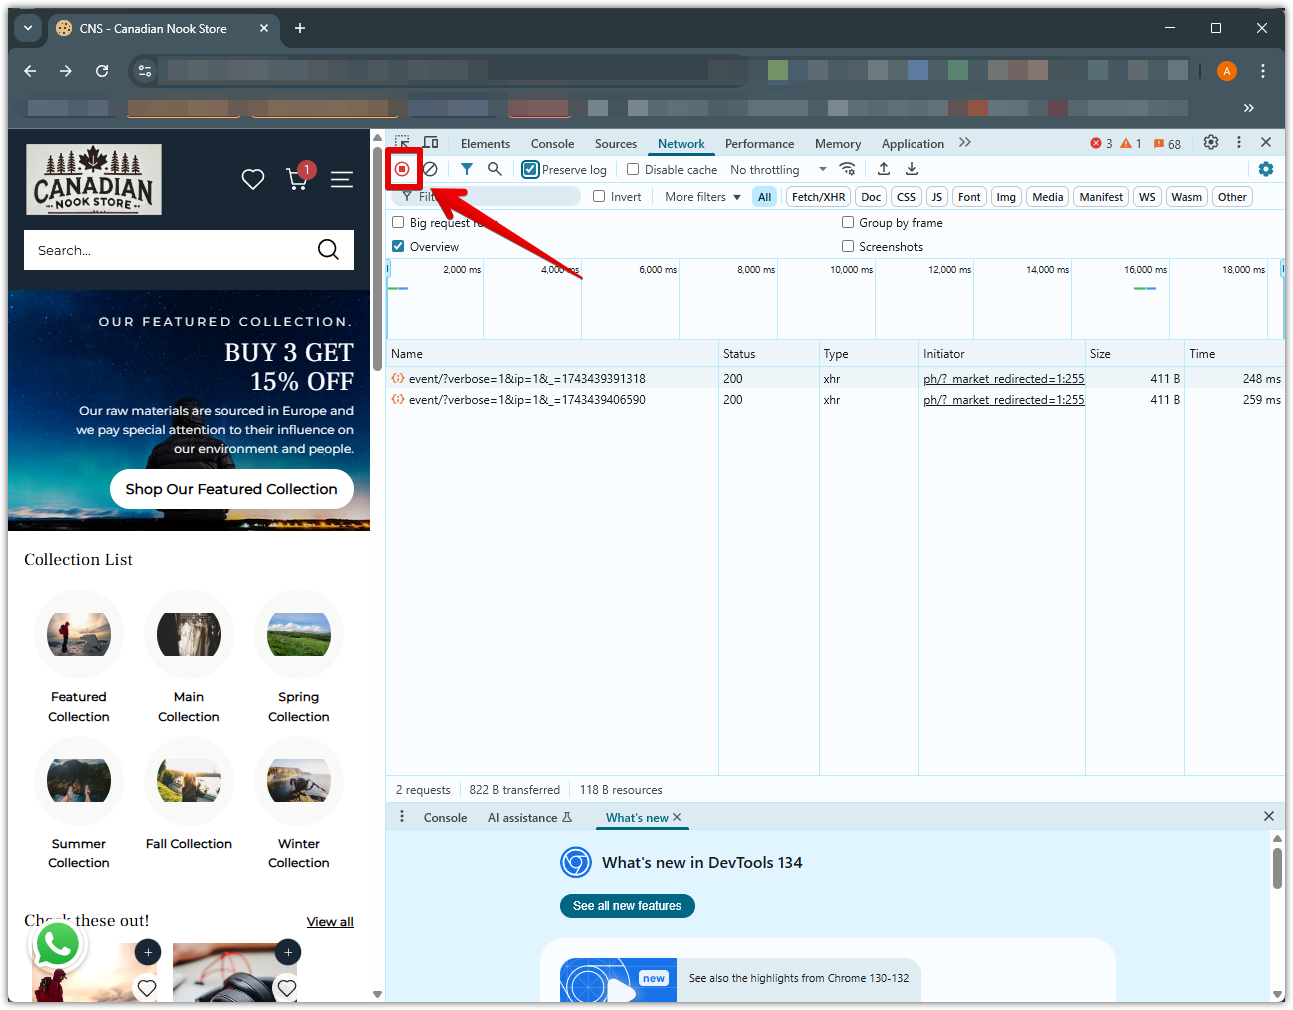
3. Make sure the record button (a red circle) is active. If it is grey, click it to start recording.
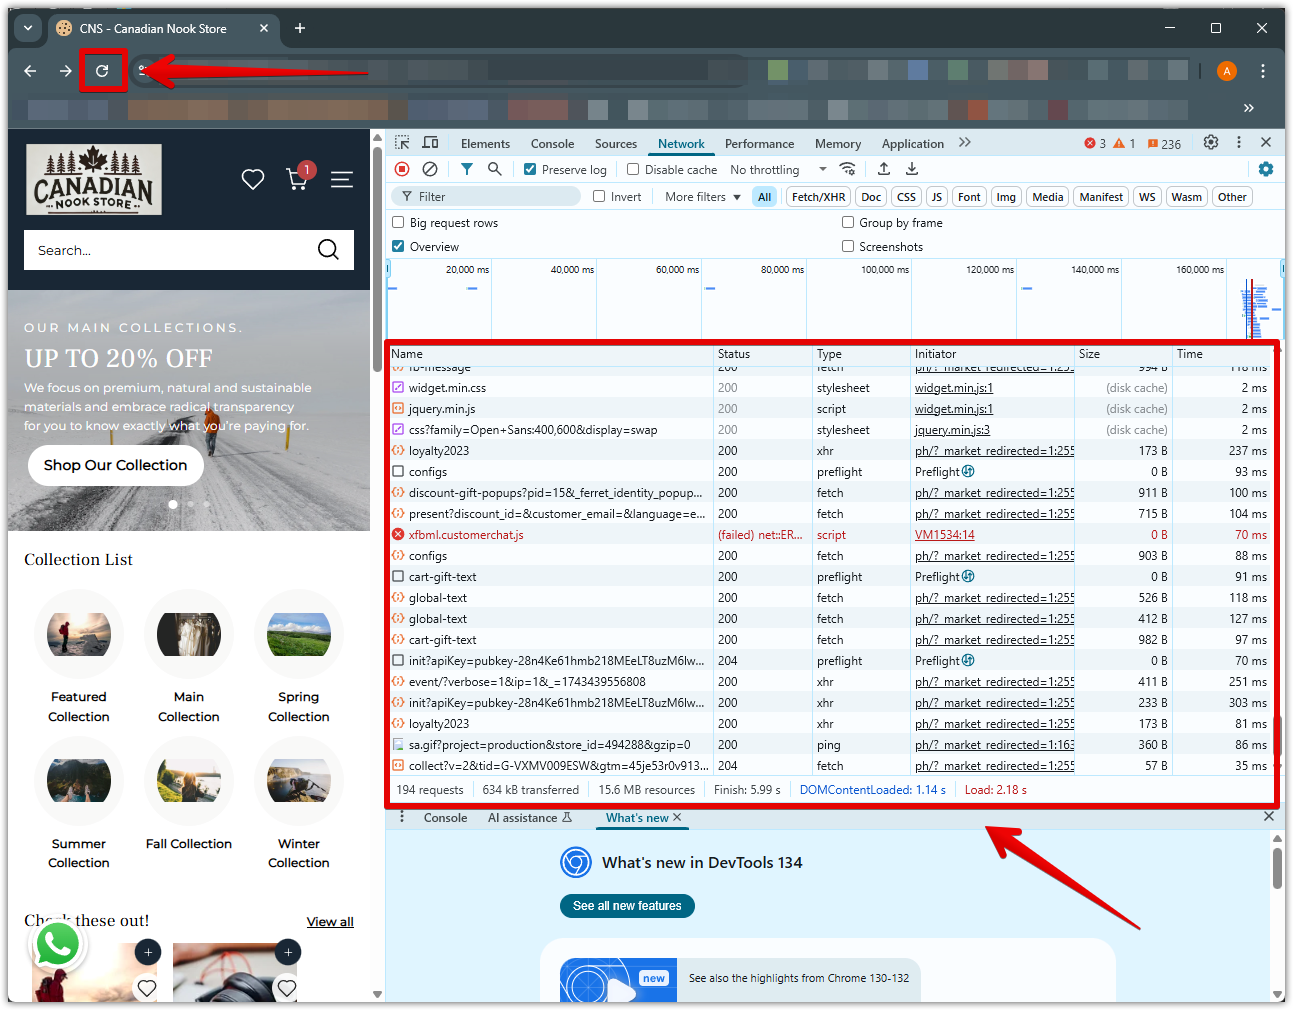
4. Reload the page or perform the steps that trigger the issue.
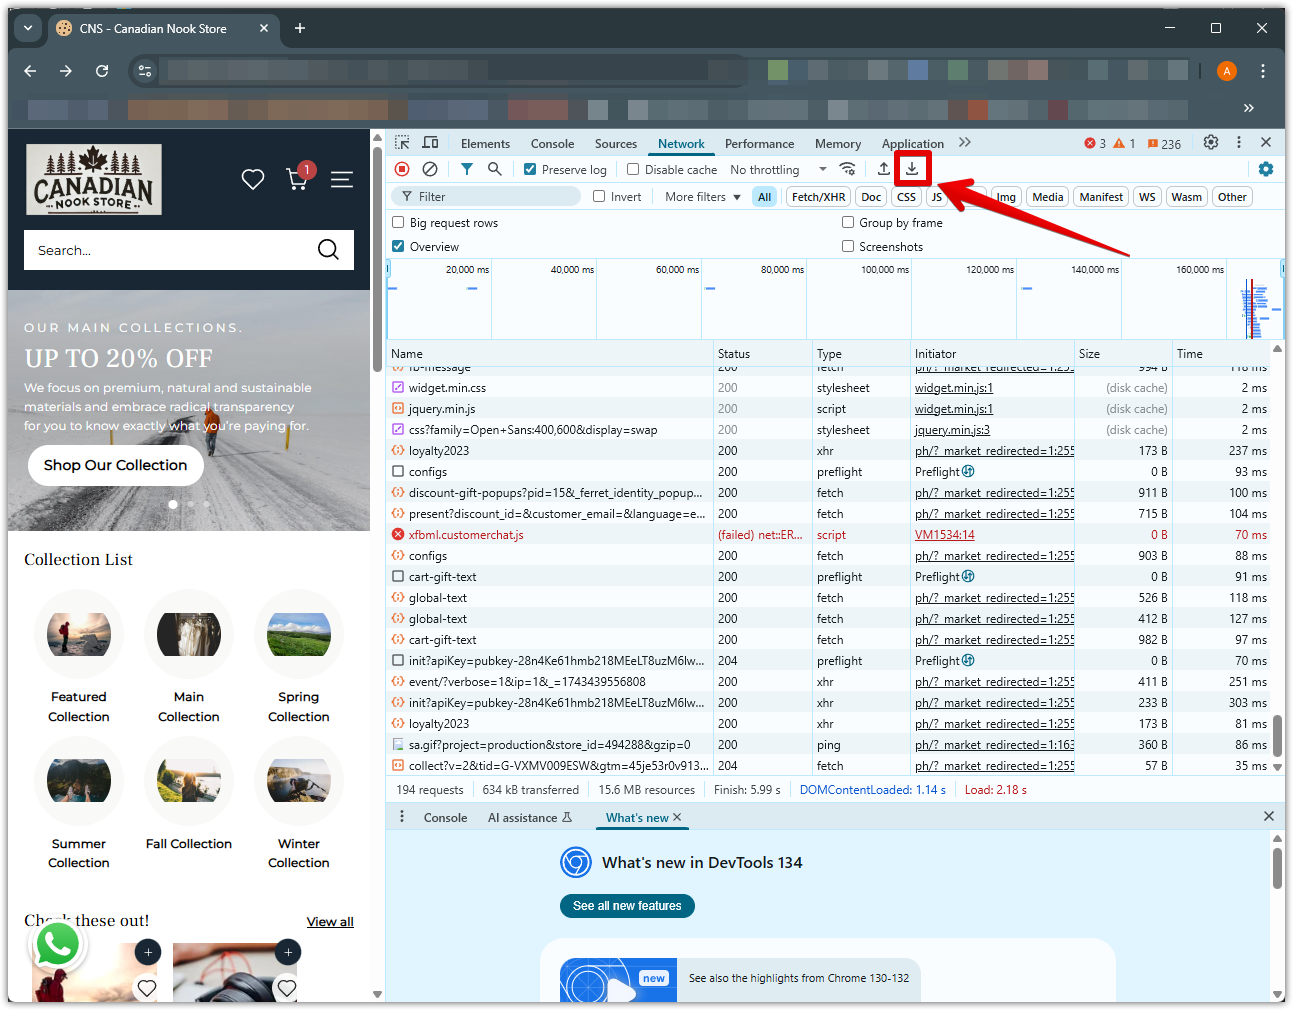
5. Click the Export HAR icon (a downward arrow) in the Network tab toolbar. Save the file and attach it to your support request.
Mozilla Firefox
1. Open Developer Tools by right-clicking on the page and selecting Inspect, or press Ctrl + Shift + I (Windows/Linux) or Cmd + Option + I (Mac).
- Windows/Linux:
- Mac:
2. Go to the Network tab.
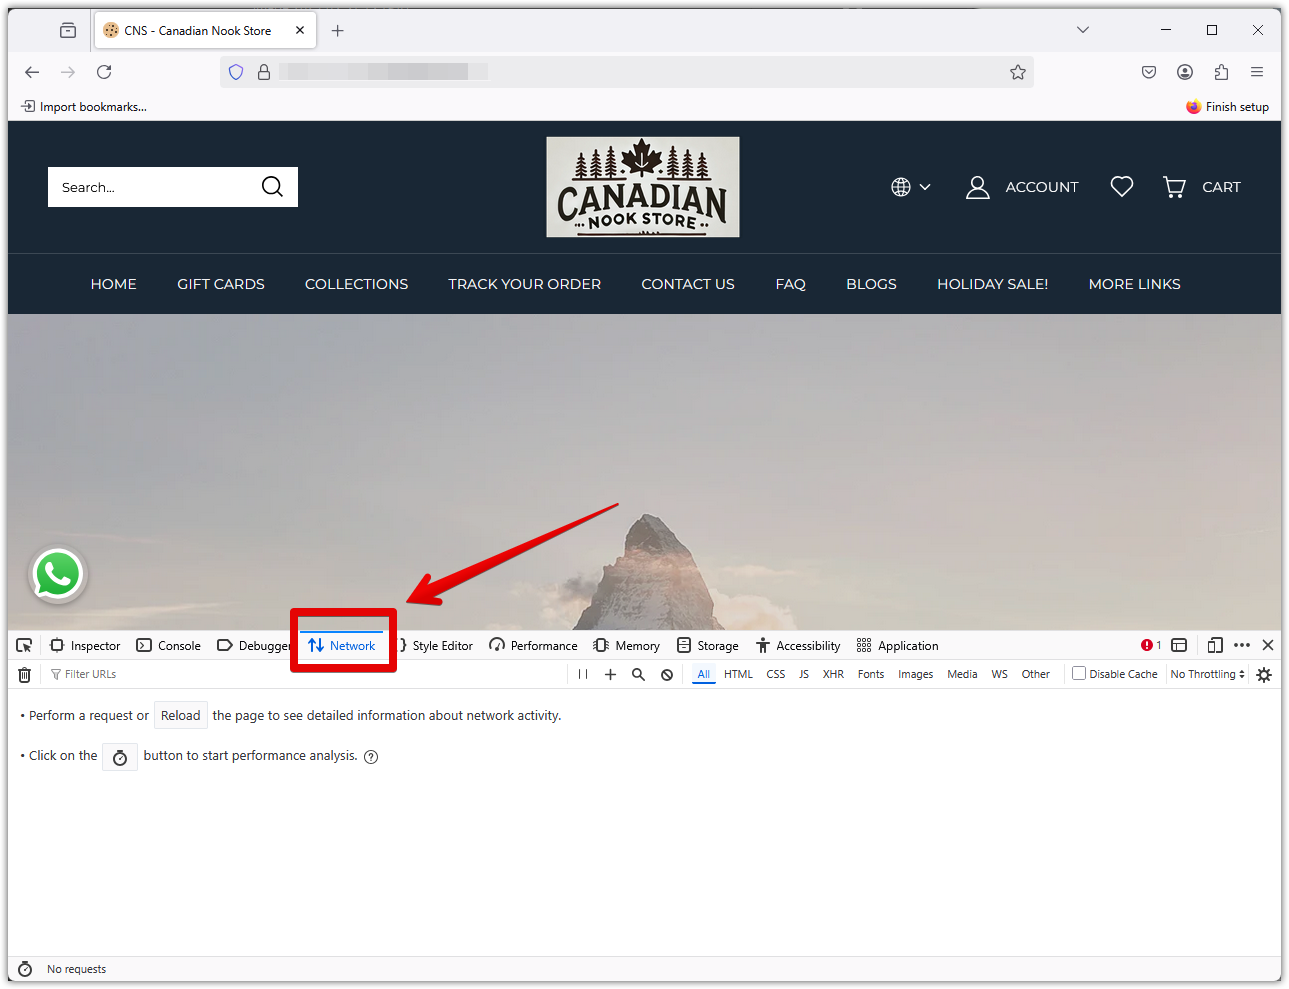
3. Reproduce the issue by clicking Reload, ensuring network requests are being recorded.

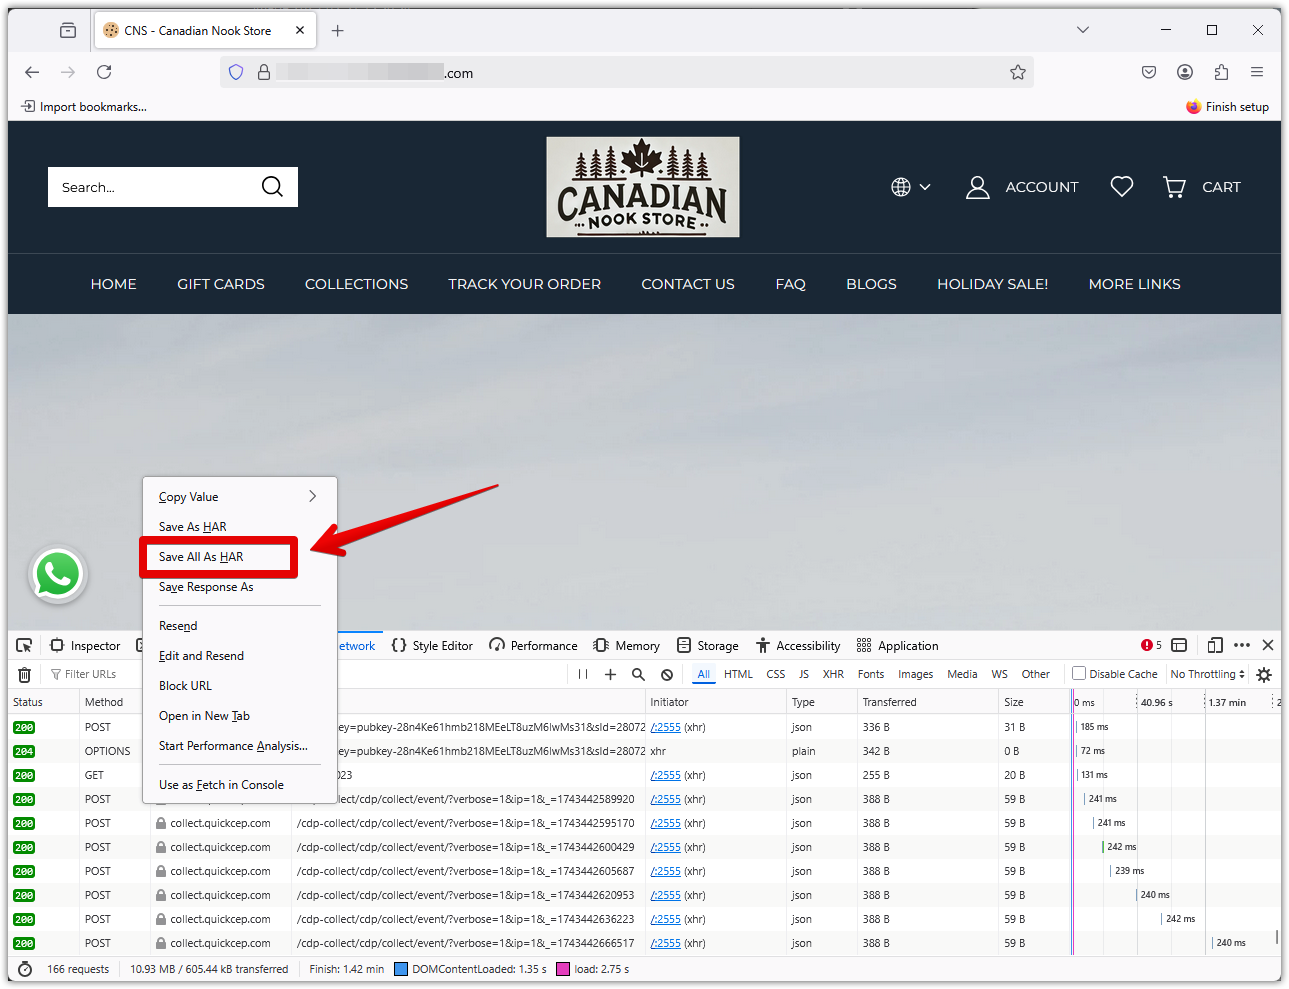
4. Right-click anywhere under the File column in the Network tab. Select Save All As HAR, save the file, and include it in your support request.
Safari
1. Enable the Develop menu (if needed). Go to Safari > Settings (or Preferences) > Advanced.
2. Enable the Show features for web developers menu in the menu bar.
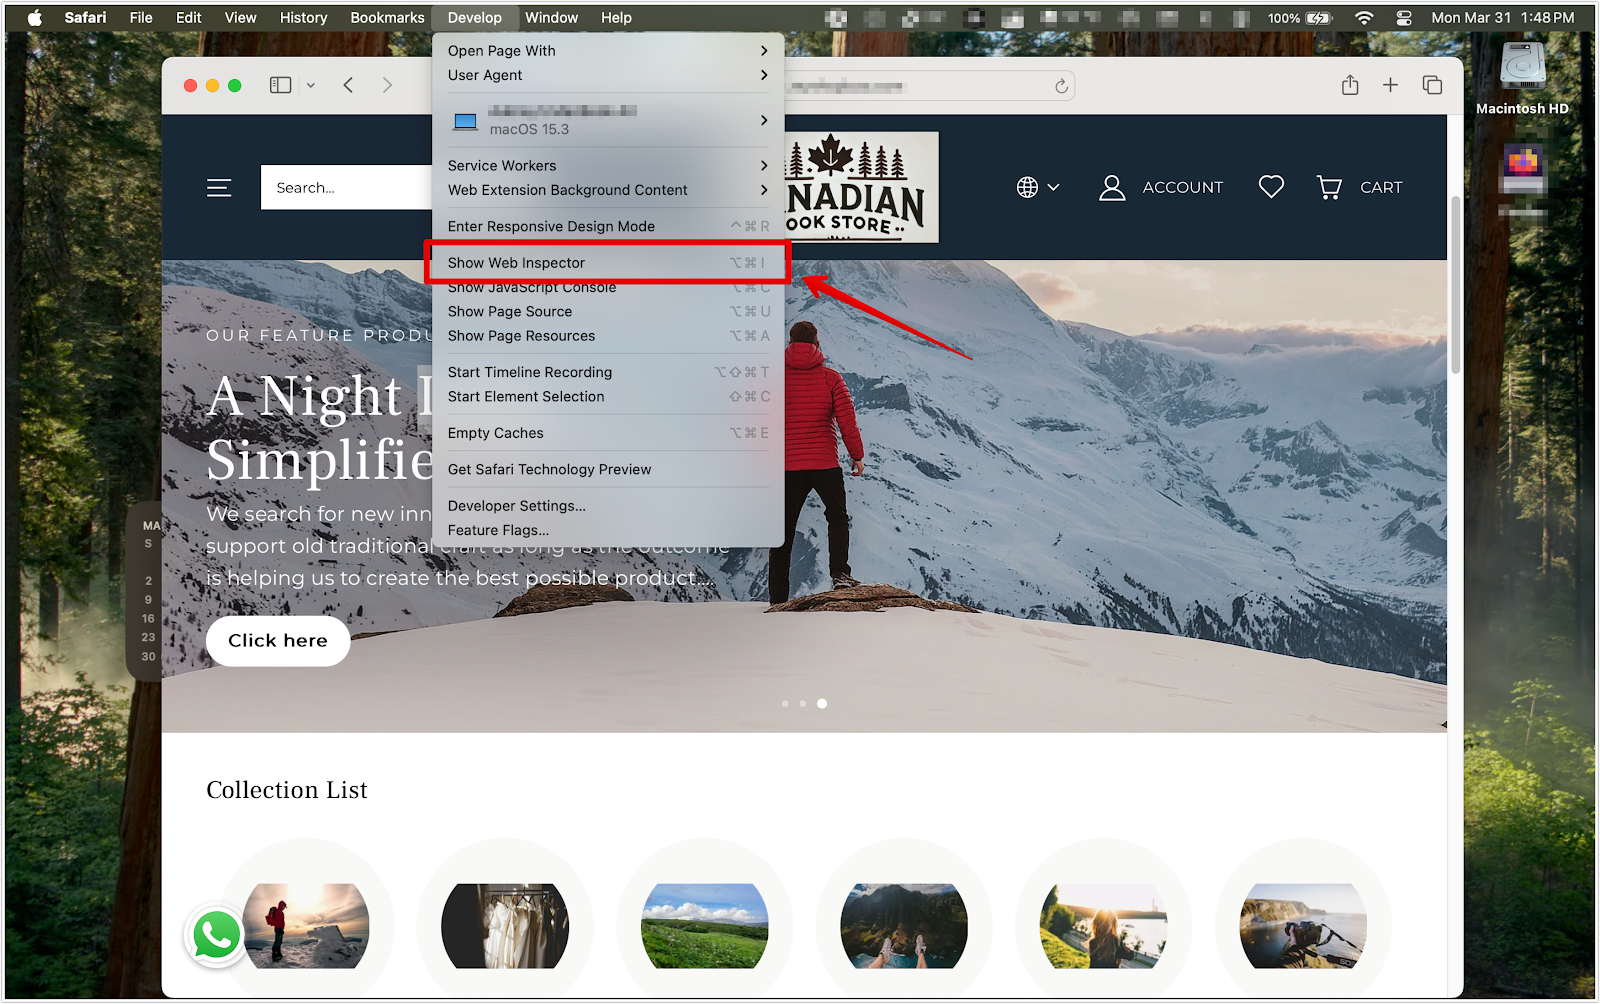
3. Navigate to the page where the issue is occurring. Click Develop > Show Web Inspector.
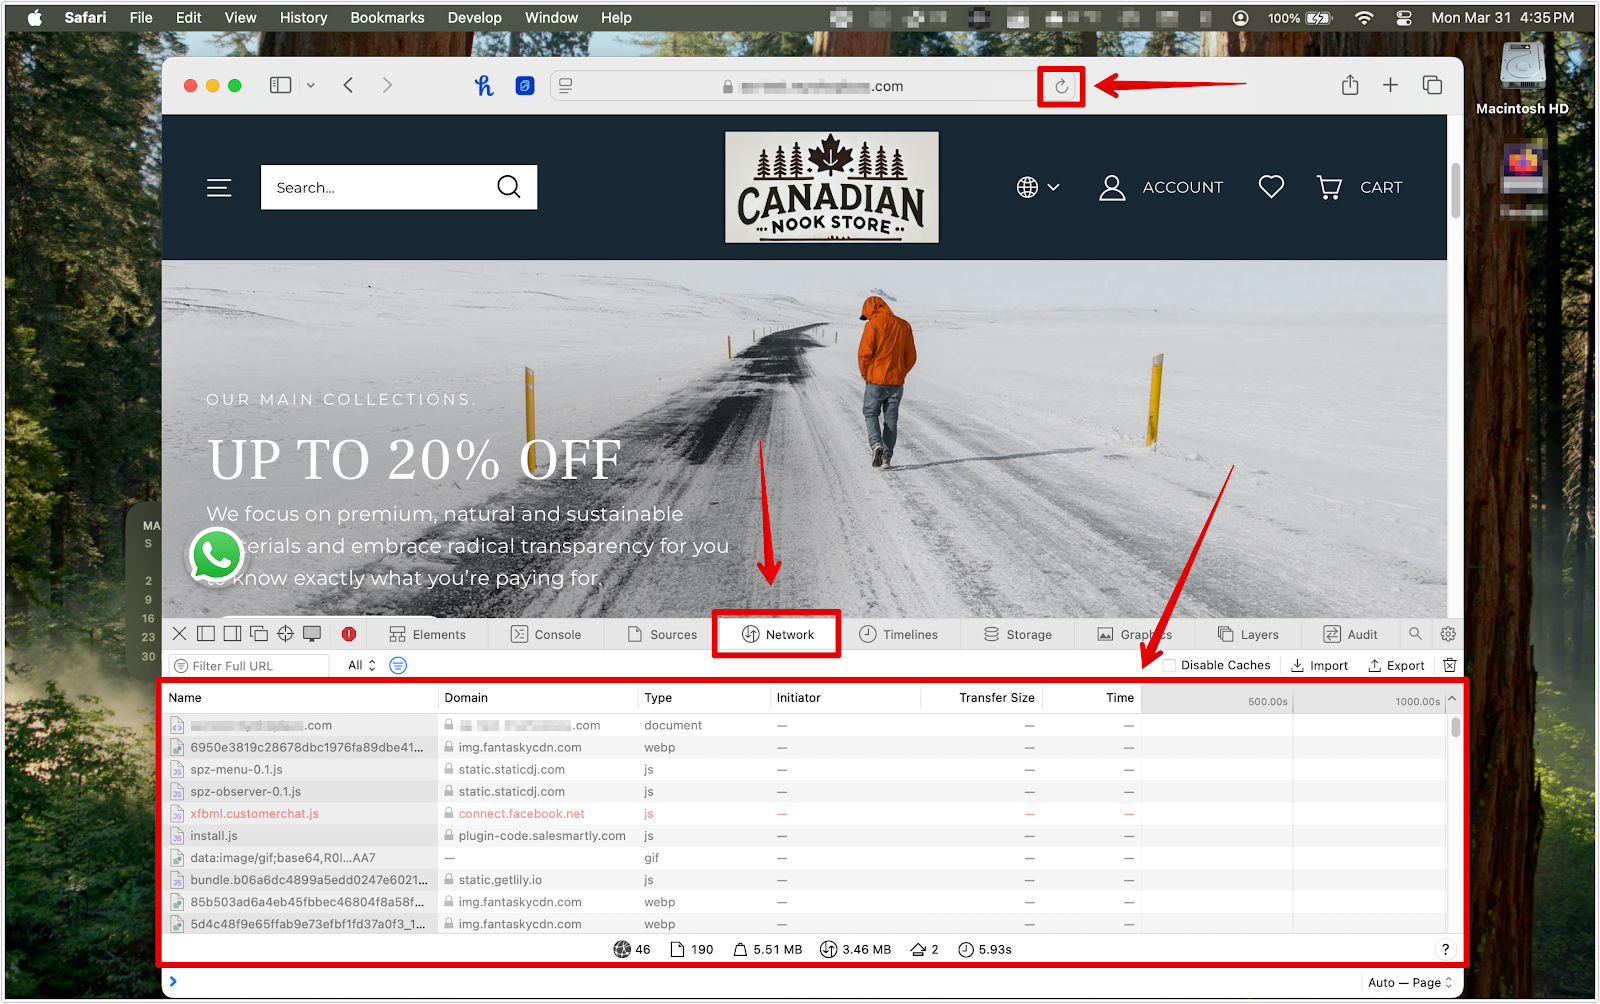
4. Click the Network tab and reload the page or perform the steps that trigger the issue.
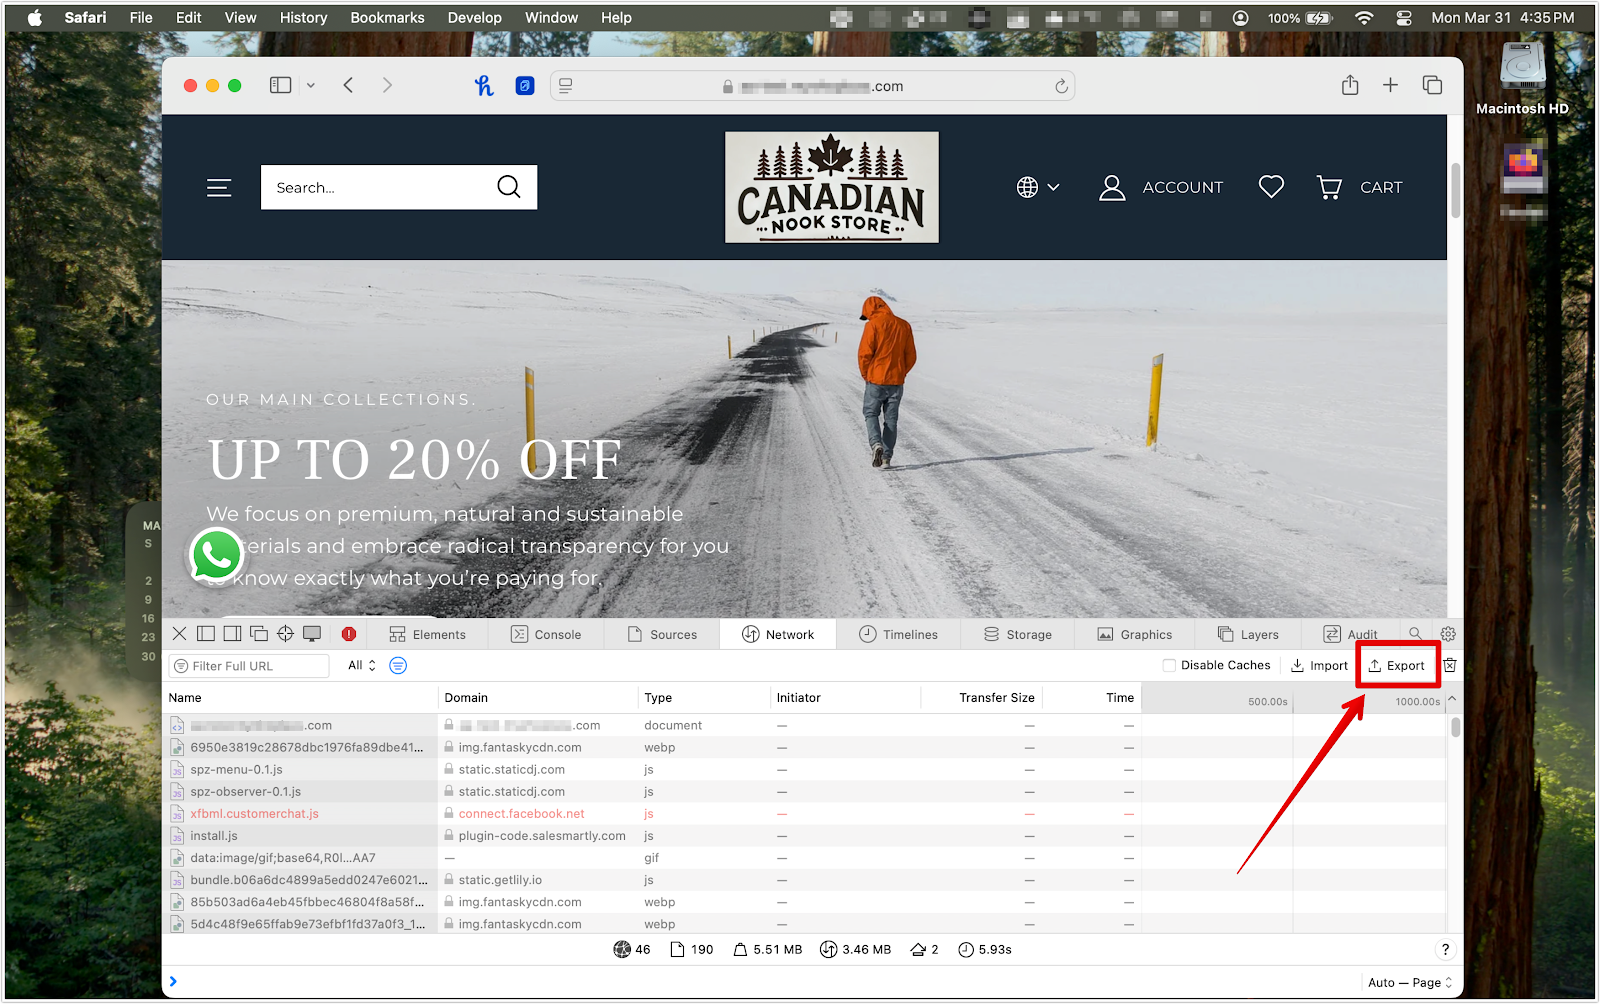
5. Click the Export icon (upward arrow) in the Network tab. Save the HAR file to your computer and attach it to your support request.
Note
HAR files can contain sensitive information such as cookies, login tokens, and website content. Avoid recording real customer activity, and remove sensitive data before sharing your file.
Step 4: Use Incognito or private browsing mode
Private browsing disables extensions, skips cookies, and ignores cached content. This helps determine whether the issue is related to something stored in your browser or an external extension affecting performance.
To open private mode:
- Chrome: Ctrl + Shift + N (Windows) or Command + Shift + N (Mac).

- Firefox: Ctrl + Shift + P or Command + Shift + P.
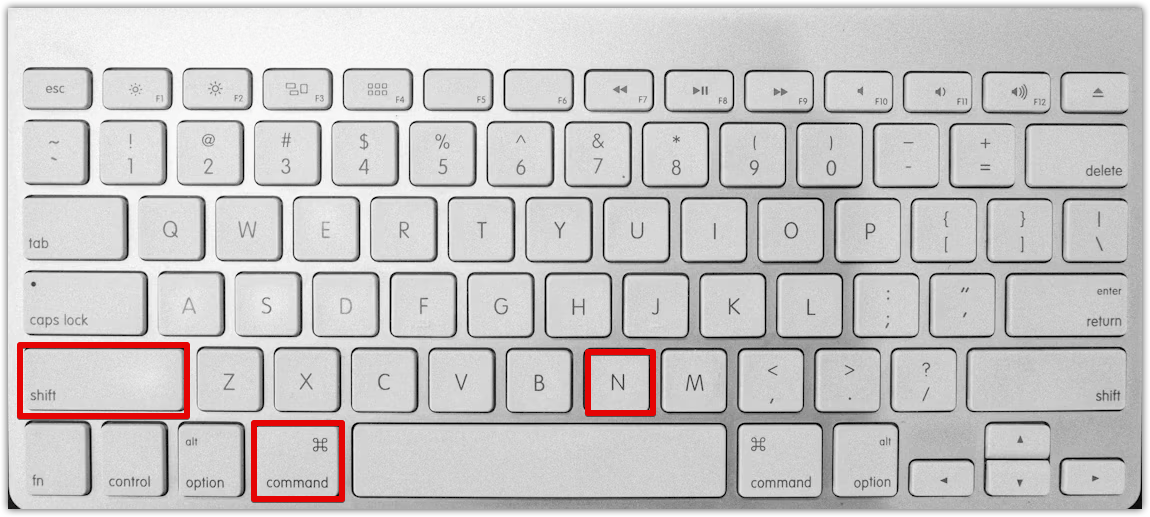
- Safari: Command + Shift + N.

Refresh your store and check if the issue occurs.
Step 5: Try another browser or device
Testing your storefront on a different browser or device helps determine whether the issue relates to your current setup. This is a quick way to rule out browser-specific bugs, operating system conflicts, or local hardware limitations.
- Switch browsers: Try opening your store in a different browser (e.g., Chrome, Firefox, or Safari) to see if the issue persists.
- Use another device: Test your store on a different device, such as a phone, tablet, or another computer.
- Compare results: If the issue only appears on one browser or device, mention that in your support request. This helps narrow down the root cause.
Step 6: Test with a different network or user
Sometimes, issues may be caused by your internet connection, firewall, or local network environment.
- Try switching to another network, such as using mobile data (cellular) instead of Wi-Fi or connecting to a different Wi-Fi network.
- You can also ask a friend or colleague in a different location to check your storefront and let you know if they experience the same issue.
- If the problem does not happen on another network or device, it may be caused by your internet provider, network configuration, or firewall settings.
Step 7: Prepare your support request
Once you've gathered screenshots, console logs, HAR files, and test results, prepare to submit your report. Please include:
- A clear description of the problem.
- Steps you took before the issue occurred.
- Full-screen screenshots or recordings.
- Console log screenshots.
- HAR file with content (if available).
- Your browser name and version.
- Your operating system and device.
- Whether the issue occurs in private mode or across multiple browsers.
- A list of what you've already tried.
Step 8: Contact Support
Once everything is collected, submit your request through Shoplazza Support and attach all collected information. The more complete your report, the faster we can investigate and help resolve the issue.
Collecting the right diagnostic information can significantly reduce troubleshooting time and lead to faster solutions. When you provide clear screenshots, HAR files, and console logs, our Technical Support teams can quickly identify the root cause and guide you toward a resolution. These steps empower you to take control of technical issues while ensuring that expert help is always within reach when you need it.


Comments
Please sign in to leave a comment.