
Facebook Ads features offer great flexibility to the different types of ads you can create. Since Facebook ads are also shown on Instagram and Facebook's display network, you have much more range and flexibility in creating ads that reflect your business. Configure your Facebook marketing settings inside your Facebook Business Manager before creating Facebook ad campaigns from the Marketing section of your Shoplazza admin.
If you have a personal ad account, then you will need to connect it to a Business Manager. If this is your first time running ads with your personal ad account, then you will need to create a new ad account inside Meta's Business Manager before you can create Facebook ad campaigns. Learn more about Meta's Business Manager and from the Facebook Ads Help Center.
1. Head over to your Shoplazza Admin > Marketing > Facebook.
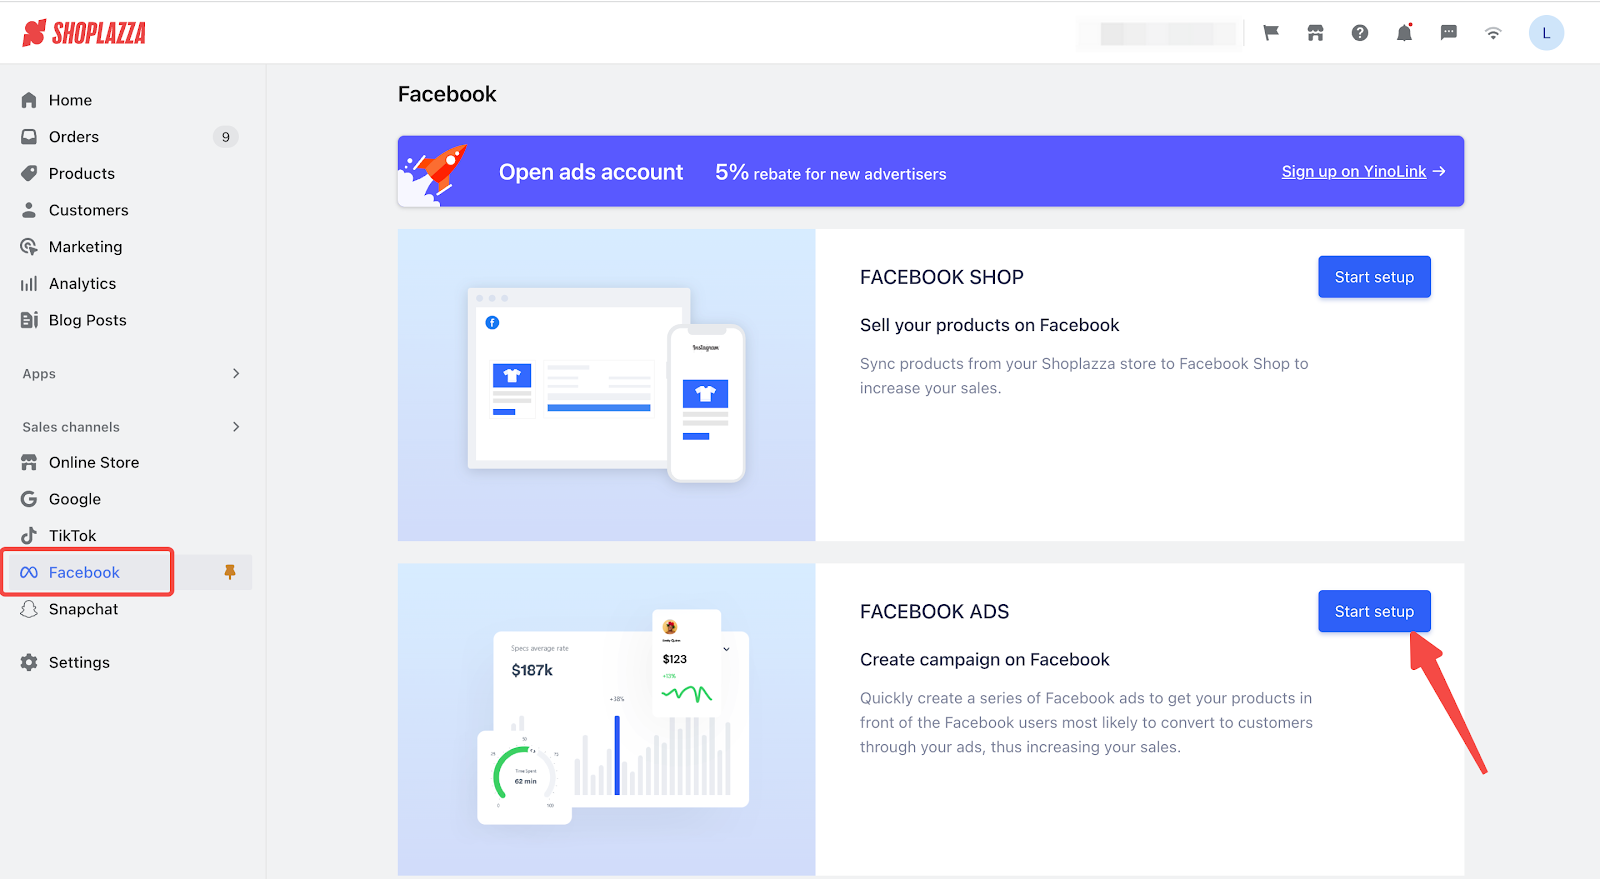
2. Click Connect to start connecting to your Facebook account.
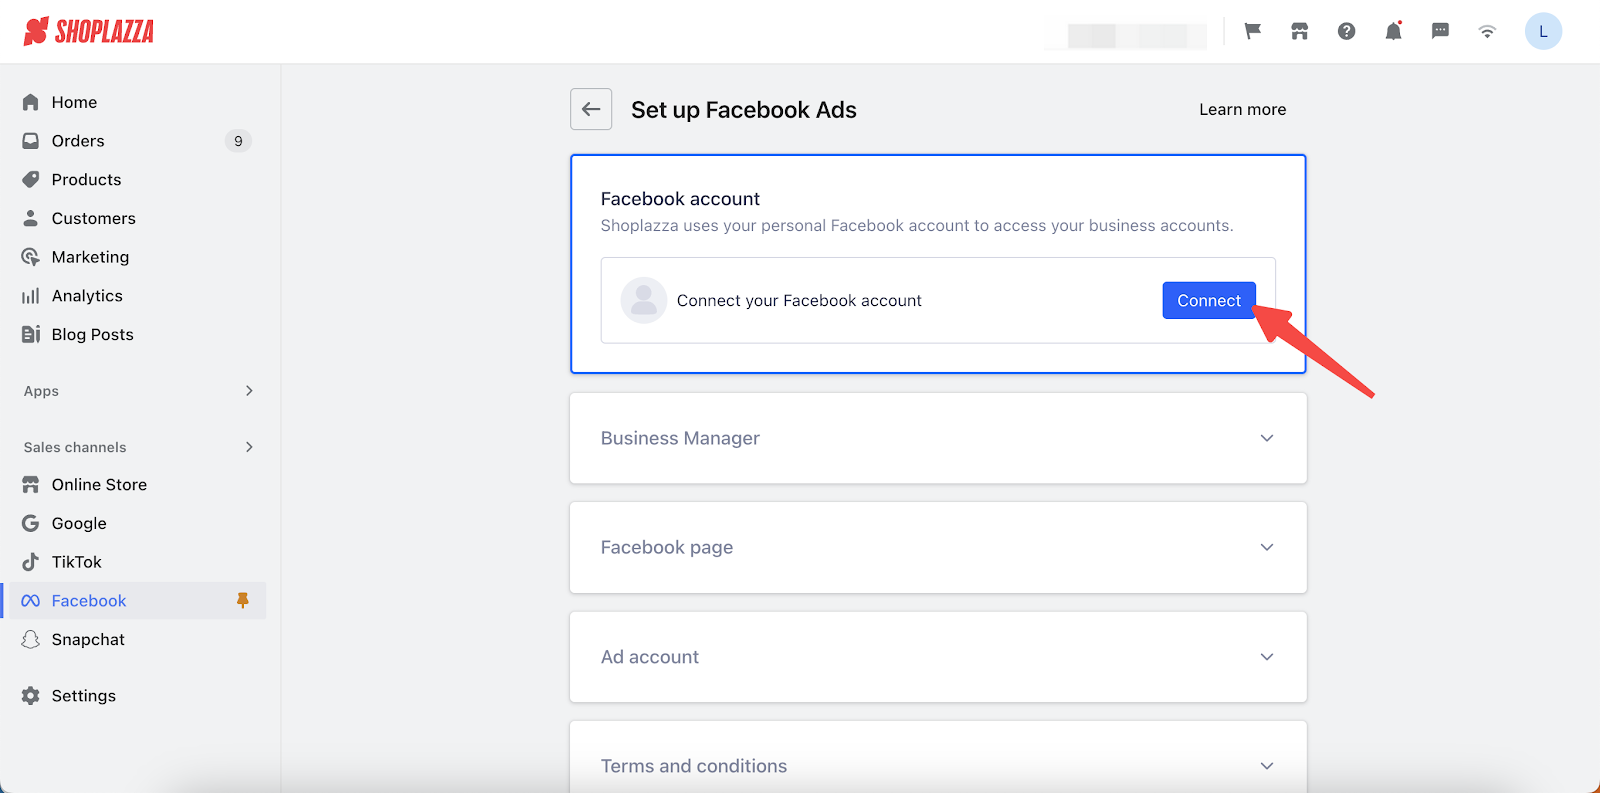
3. You will be navigated to the Facebook Business Center authorization page to authorize your store.
Note
If you manually un-select some permissions, the authorization of the Facebook account will not let you proceed, and you will need to re-select all permissions for authorization.
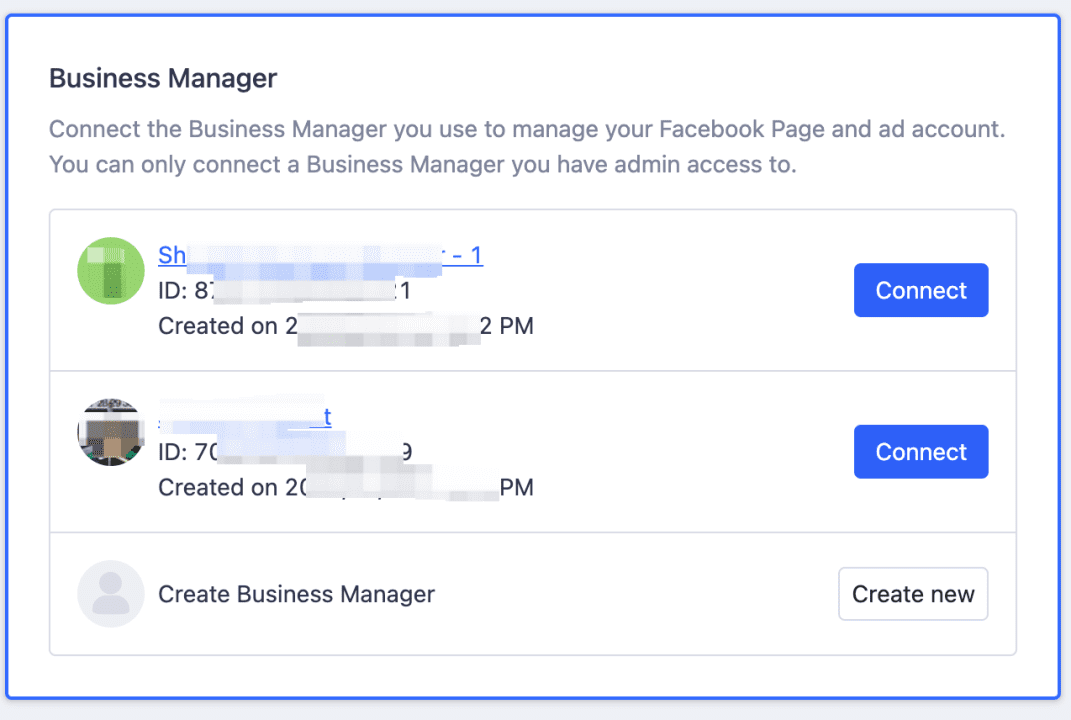
4. Connect a Business Manager account: You can only connect to a Business Manager account for which you have admin access. If you don't have an account yet, you can click Create new to create a new Business Manager account.
Note
If there are any errors, please head over to your Facebook via Meta Business Manager page to confirm whether your account is active. Your account may be inactive because you have reached the maximum number of accounts registered or your Facebook account does not have the proper permissions set within the Business Manager account.
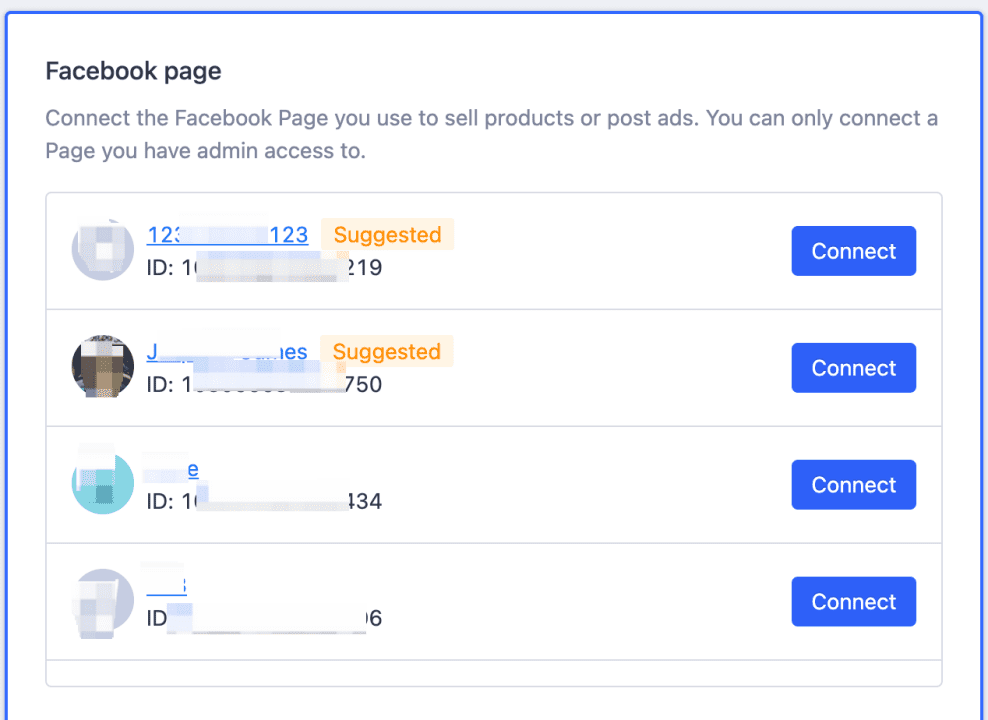
5. Connect your Ad account to deliver Facebook ads and pay for the fees. Please note that you can only connect the ad account which has already been linked to your Business Manager account.
6. Accept the Terms and conditions of service. Click Seller Agreement and Beta Product Testing Terms and it will redirect you to the Facebook Terms page. By Accepting terms, you agree to Facebook Terms of Service, and now you can synchronize products from your store.
Once these steps are completed, you can now create Facebook ads and Facebook Page posts through the Marketing section in your Shoplazza admin. Once your products have been approved by Facebook, you can create dynamic retargeting ads with approved products.


Comments
Please sign in to leave a comment.