
Integrating the Payment Messaging App into your store offers significant benefits. It simplifies the payment process for your customers, providing clear, concise information about payment options and installments. This transparency can enhance customer trust, potentially leading to increased sales and customer loyalty. Additionally, the app's customization options allow for a seamless integration with your store's design, further enhancing the user experience. This guide walks you through each step of the setup process, ensuring you can fully leverage these advantages
Steps
1. Navigate to the Shoplazza app store:
- Head over to your Shoplazza Admin > Apps and click on Visit App Store.
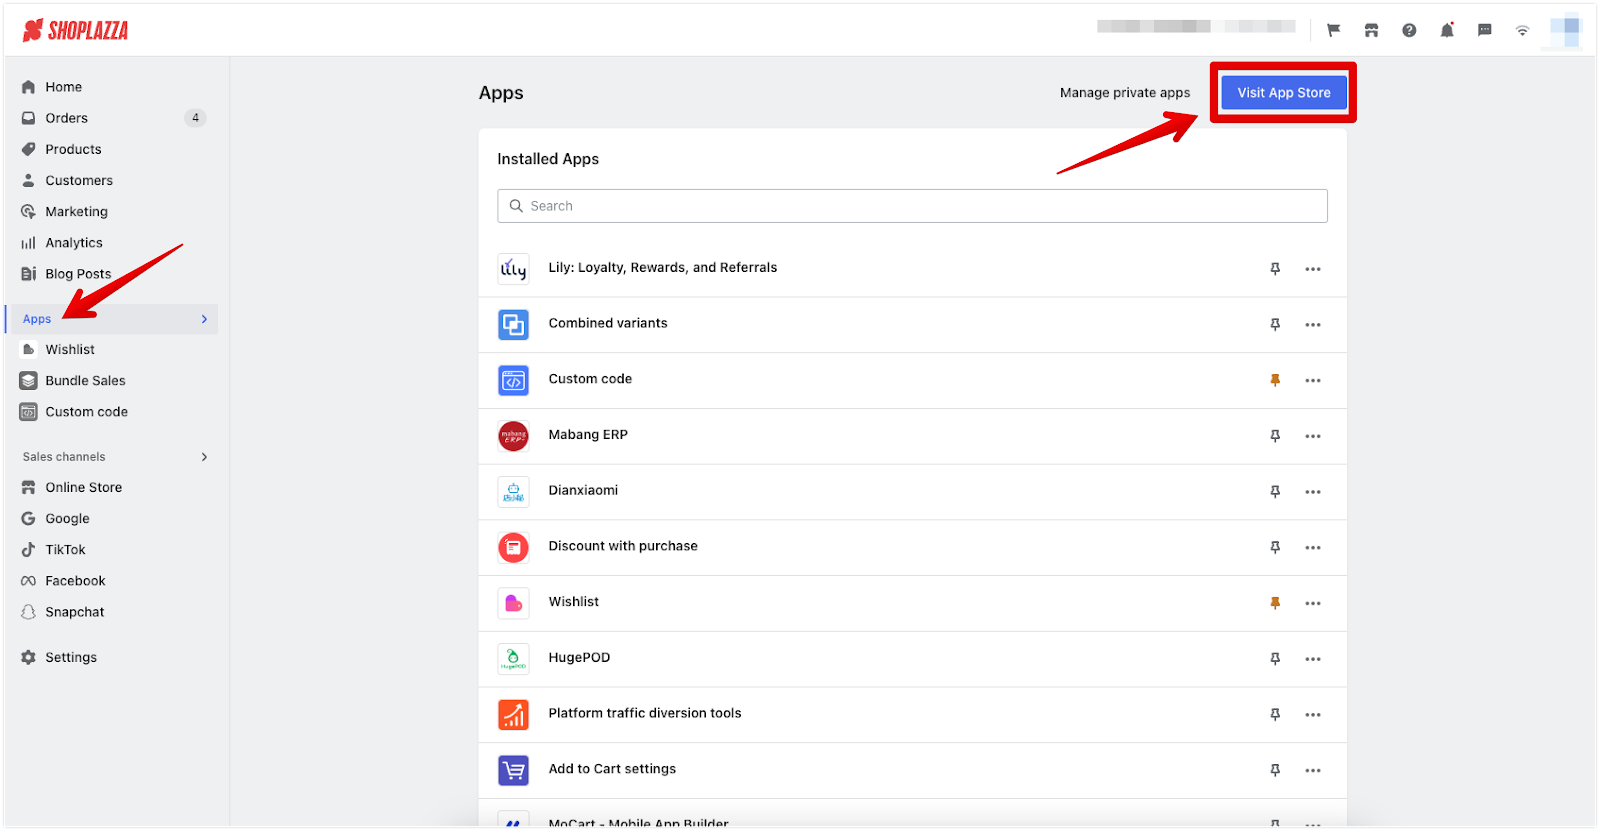
- Type in 'payment messaging' in the search box.

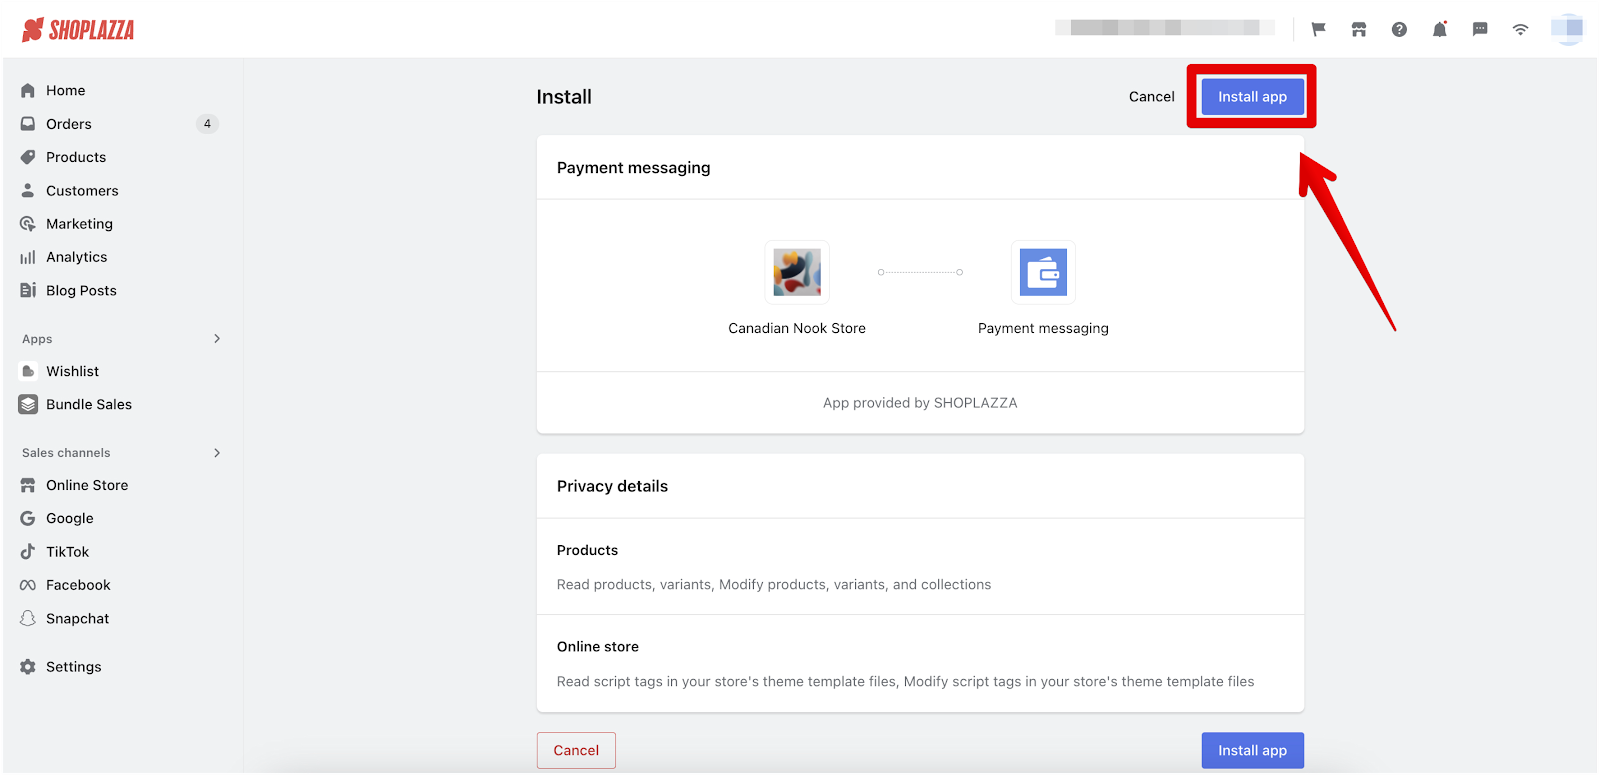
- Click Install app to add to your store.
Configuring settings for optimal display
Adjusting Payment Display Settings: Tailor the app settings to match specific payment processes and merchant requirements. Here's how you can optimize each setting:
- Campaign name: Begin by giving a distinctive name to your campaign, such as "Payment Bar," to keep your promotions organized.
- Select display country: Determine which country’s customers will see the payment information. This will only show for customers from the chosen national IP address. For example, if you choose "United States," only customers accessing from the U.S. will see the payment options.
- Installment plan: If you offer installment payments, specify the number of installments. The system will display the total number of payments and the amount due for each. For instance, a $100 item on a 4-installment plan will show as "4 payments of $25.00" in the preview on the right. You'll need to ensure that the installment plan feature is enabled for your store by your payment service provider.
- Payment Name: Enter the payment method name you'll be offering, for example, 'Klarna'.

-
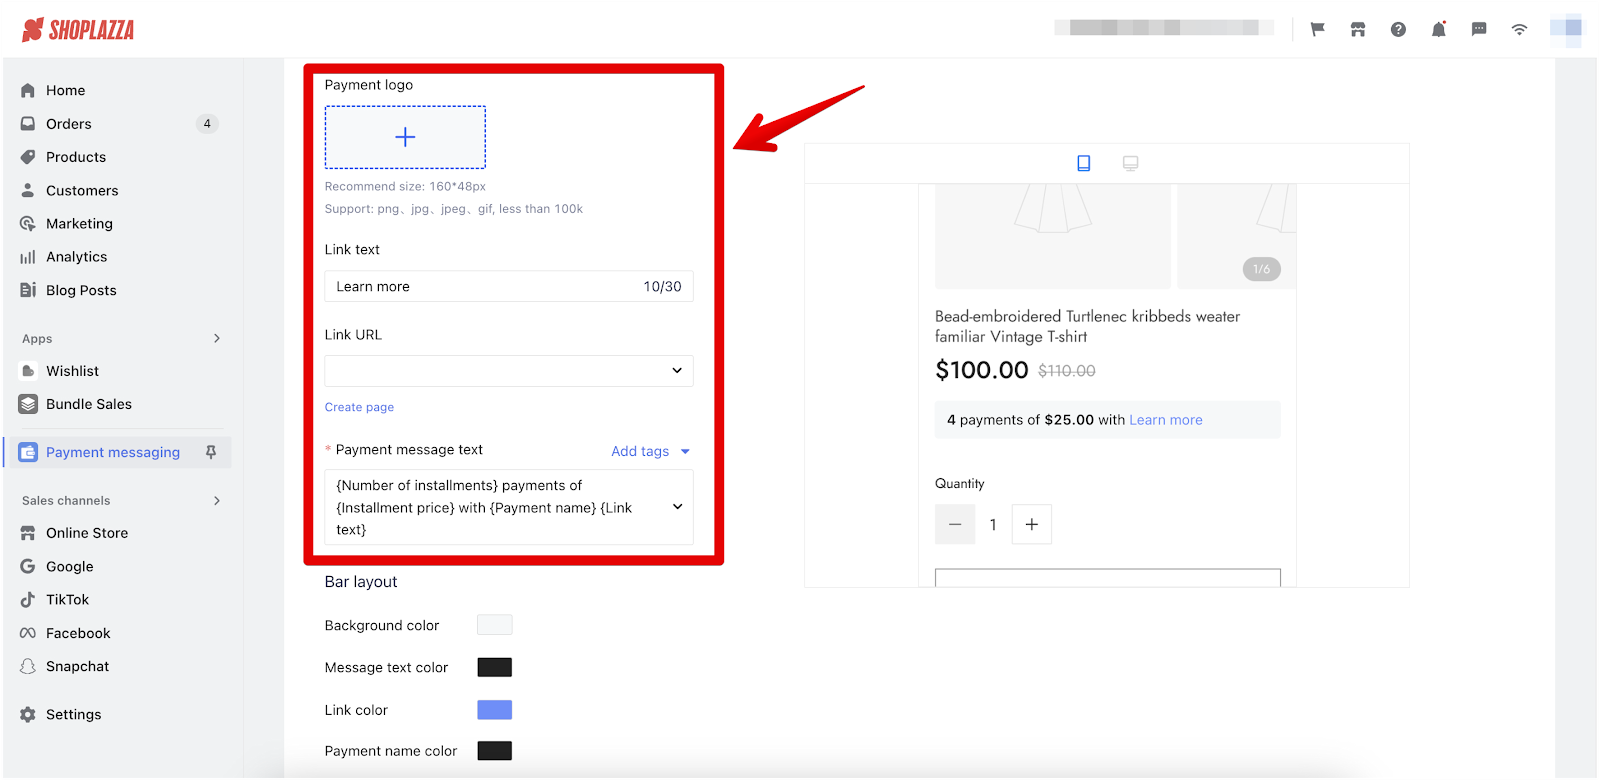
Uploading payment logo and customizing links: This section allows you to visually represent your payment method with a logo and direct customers to more information.
- Payment logo: Click the plus icon to upload your payment logo. It's best to use an image that is 160x48 pixels and in PNG, JPG, JPEG, or GIF format, with a file size under 100KB.
- Link text: Enter the text for the link, such as "Learn more", which will guide customers to additional information. This text should be succinct and action-oriented.
- Link URL: Here, you'll input the destination URL for the link text. Once a customer clicks on the "Learn more" text, they'll be directed to this URL for further details.
- Create page: If you need to create a new informational page for this link, you can do so by clicking "Create page".
- Customizing payment message text: Craft the message that will display the payment details on your product page. Use the provided template to ensure consistency and clarity in your messaging. For example, "{Number of installments} payments of {Installment price} with {Payment name} {Link text}" allows you to clearly communicate the payment structure to your customers.
-
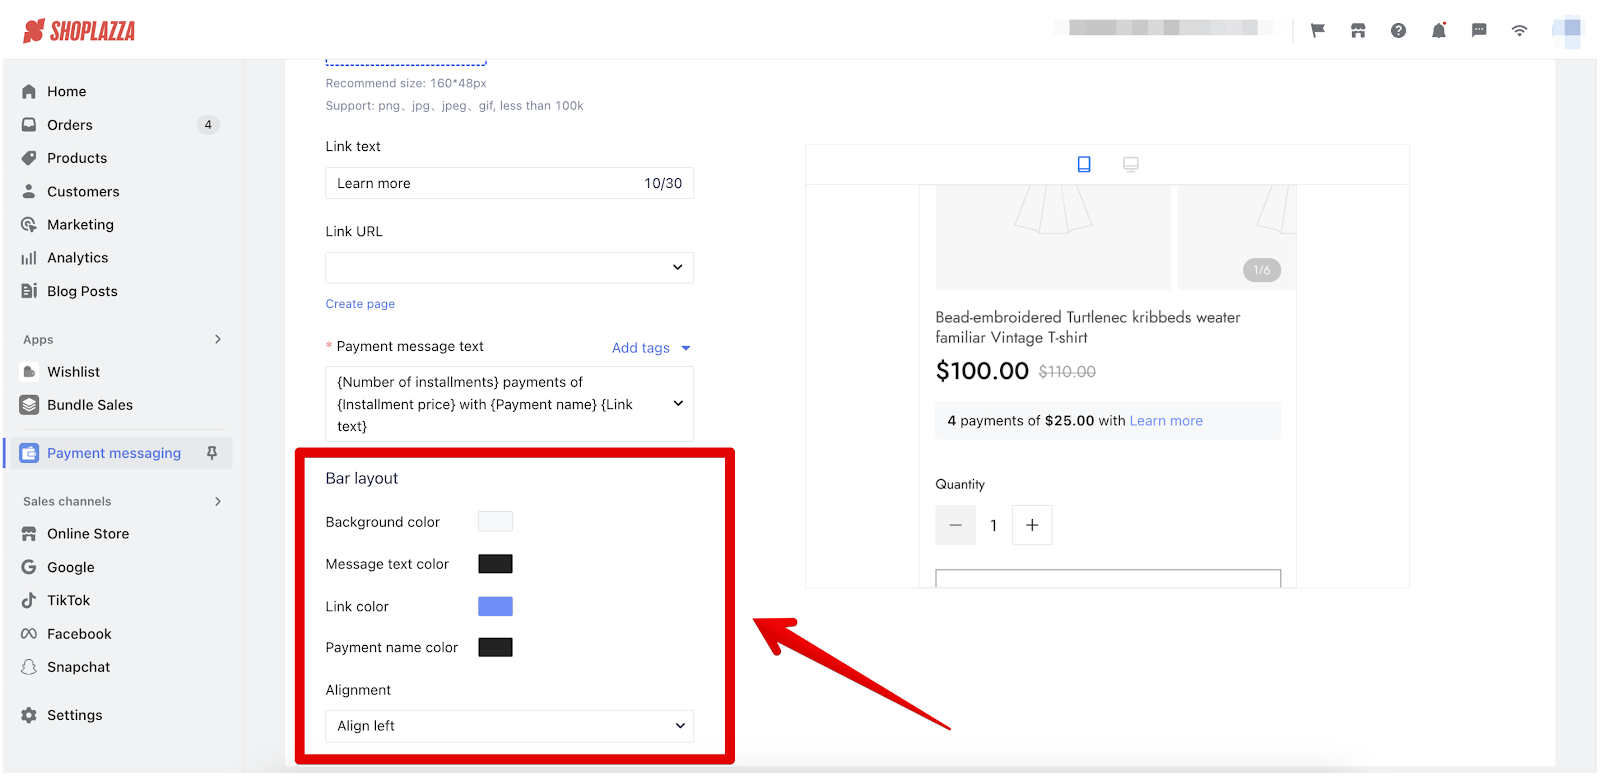
Styling the Payment Message Bar: Customize the appearance of your payment message bar to align with your store's branding.
- Background Color: Choose a color that complements your store's theme. This will be the backdrop of your payment message bar.
- Message Text Color: Select a color that ensures the text is readable against the background color you've chosen.
- Link Color: Pick a distinct color for your links to make them stand out and be easily identifiable by customers.
- Payment Name Color: If you have a color that you associate with your payment method or brand, apply it here to maintain consistency.
- Alignment: Decide on the alignment of your message bar text. Options include align left, align right, or centered to best fit your page layout.
By customizing these elements, you ensure that the payment message bar is not only functional but also visually integrated with the overall design of your product page, enhancing the user experience and maintaining brand coherence.


Comments
Please sign in to leave a comment.