
Expanding your online store to different regions means adapting to local language preferences. Setting a market-specific default language helps improve customer experience and engagement, leading to potential sales growth. Before proceeding, you first need to create a new market. Follow the steps outlined in Market Management to set up a new market before continuing with the language configuration. This guide then walks you through changing the default language for a newly created market in your Shoplazza admin.
Adding and enabling the target market’s language
To ensure customers in different regions can browse your store in their preferred language, you need to add and enable the appropriate language for the target market. This process involves selecting the language, activating it, and linking it to the market for seamless localization.
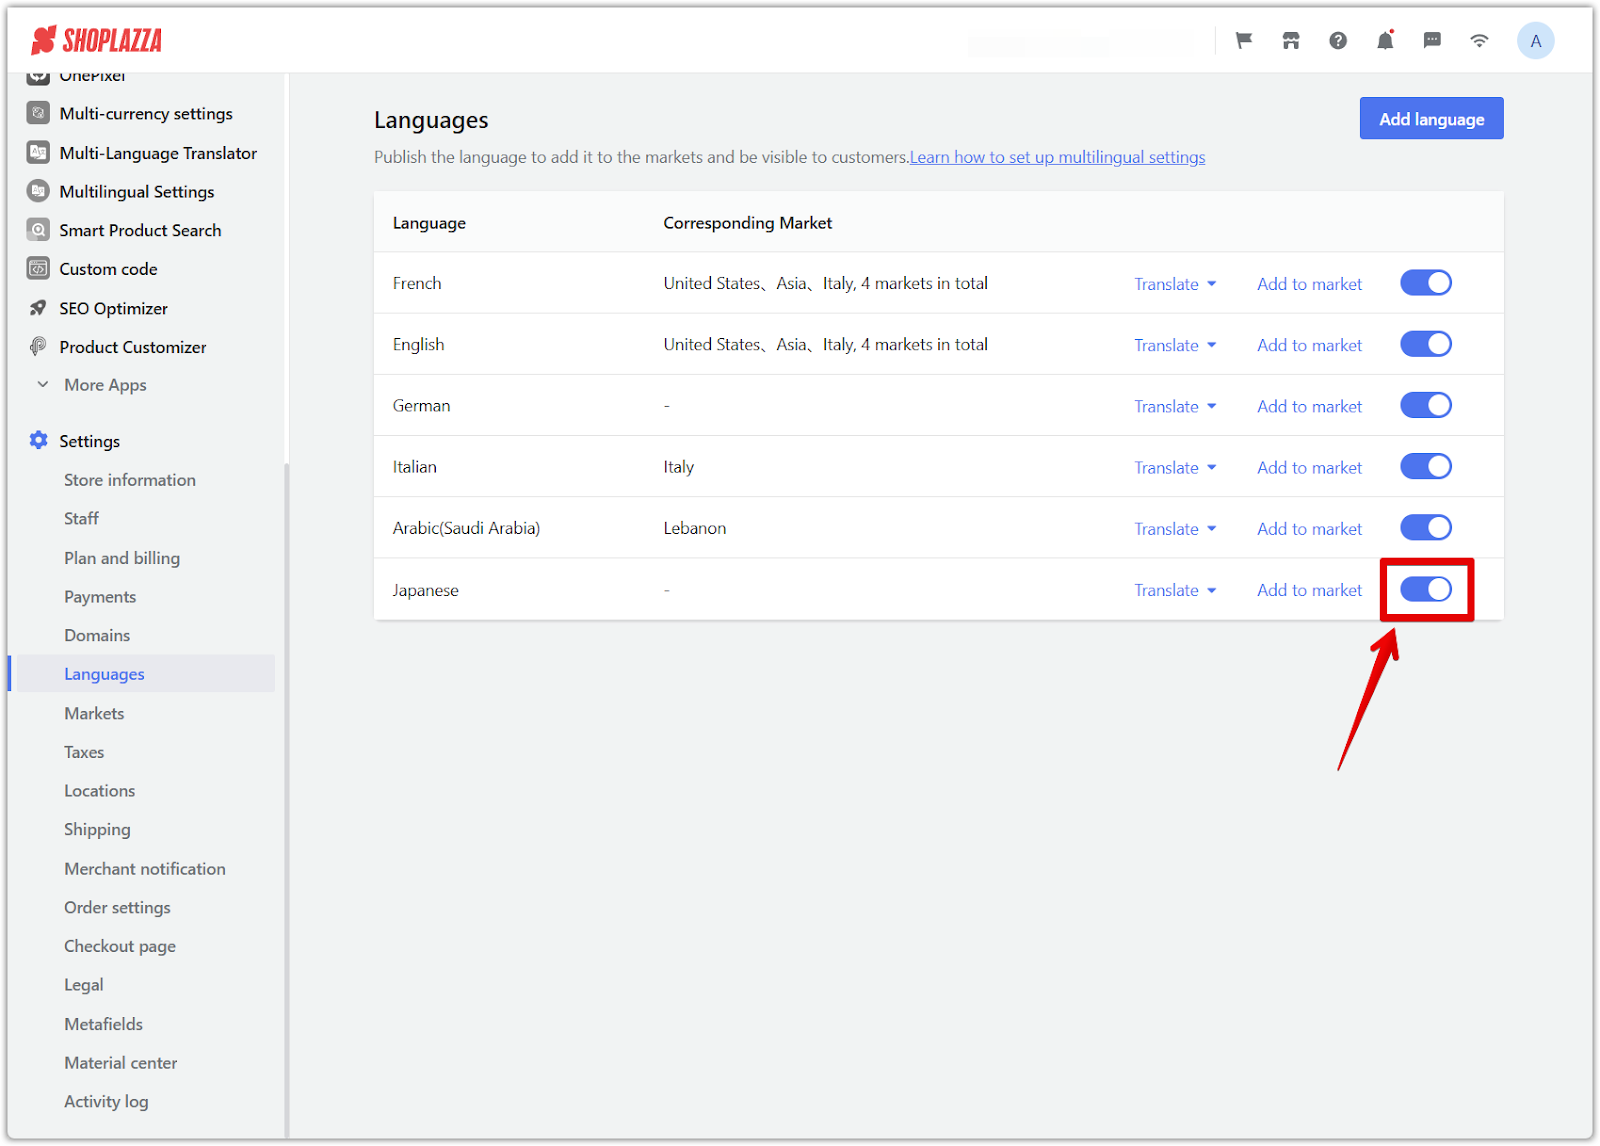
1. Add a new language: Log into your Shoplazza admin and go to Settings > Languages. This is where all the language settings for your store are managed. Click Add language to add an additional language to your store.

2. Select the target language: Use the search function to find the language you want to add. Once located, click Done to confirm the selection.

3. Enable the language: After adding the language, you must activate it by toggling the switch next to it. This ensures it becomes available for use in your store.
Configuring the market settings
Before adding a language to a market, the market’s domain structure must be properly set up to ensure seamless integration with language configurations. Follow these steps to configure the market settings correctly before proceeding with the language assignment.
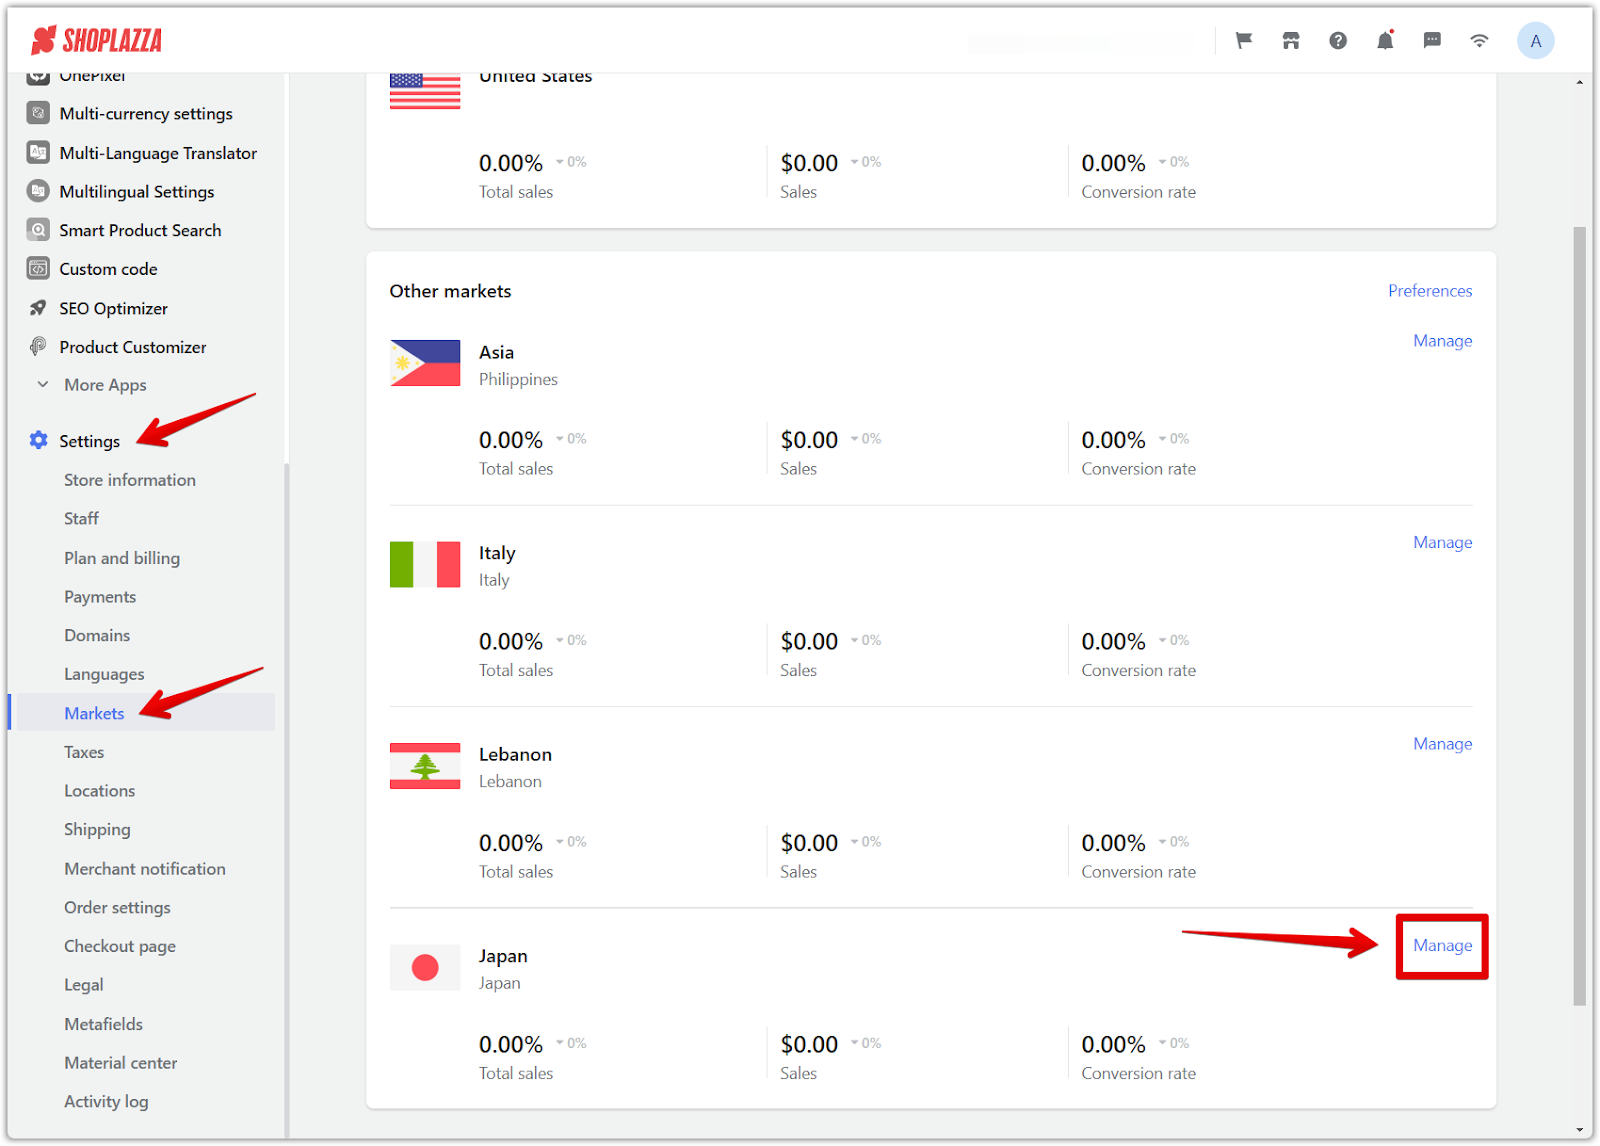
1. Access the market settings: Go to Markets, select the specific market, and click Manage.
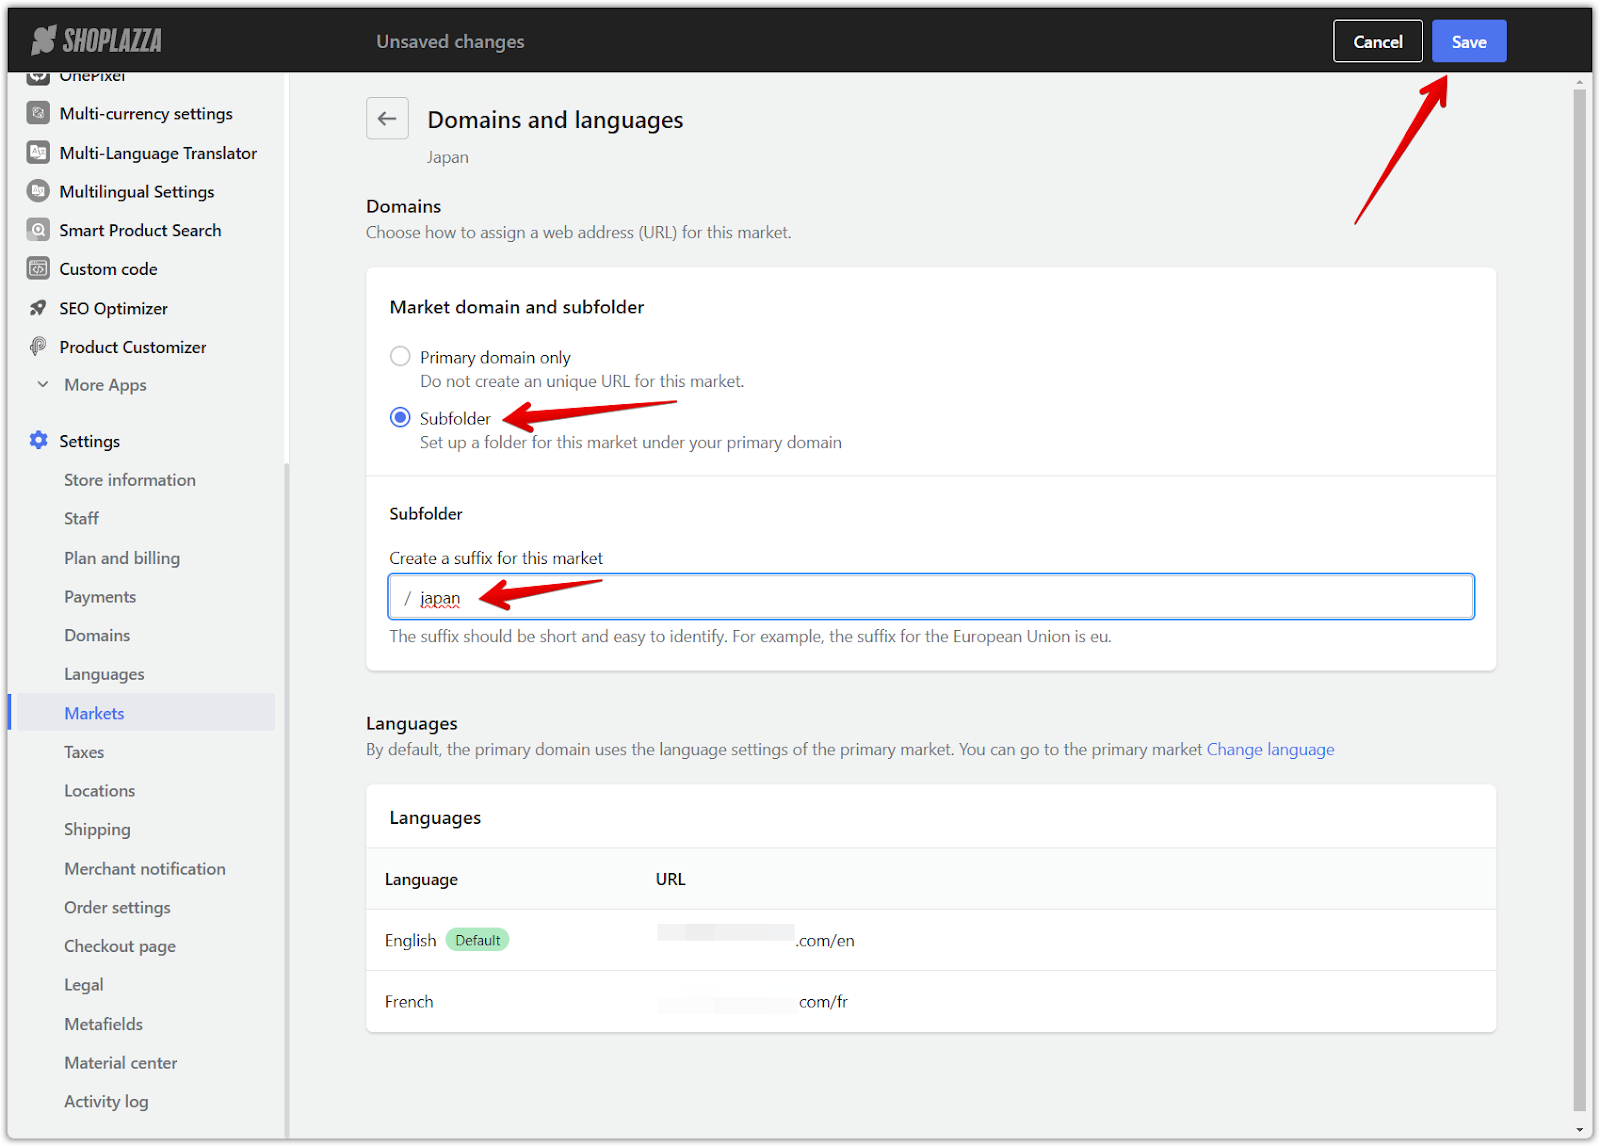
2. Manage domains and languages: Under Domains and Languages, click Manage again to access configuration options.

3. Set up a subfolder prefix: Inside Domains and Languages, select Subfolder, create a subfolder prefix for the market, and click Save to apply the changes.
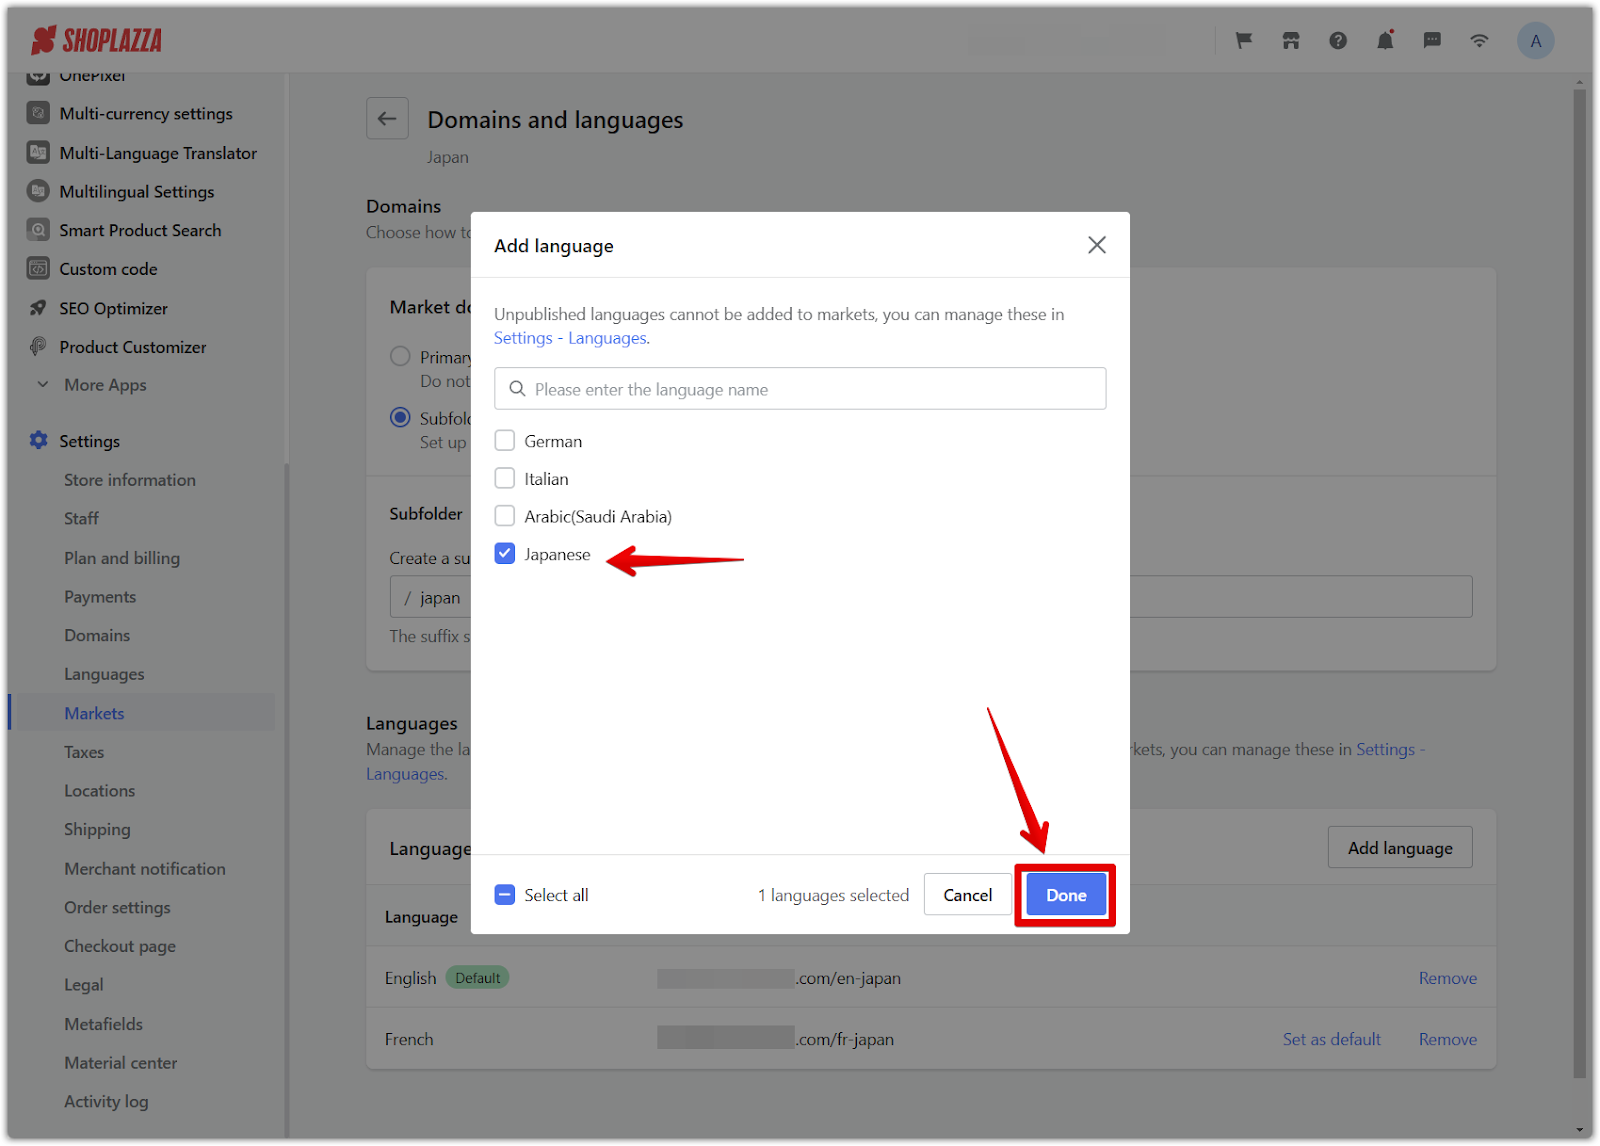
4. Add language to the market: Return to Domains and Languages, scroll down to Languages, and click Add language.

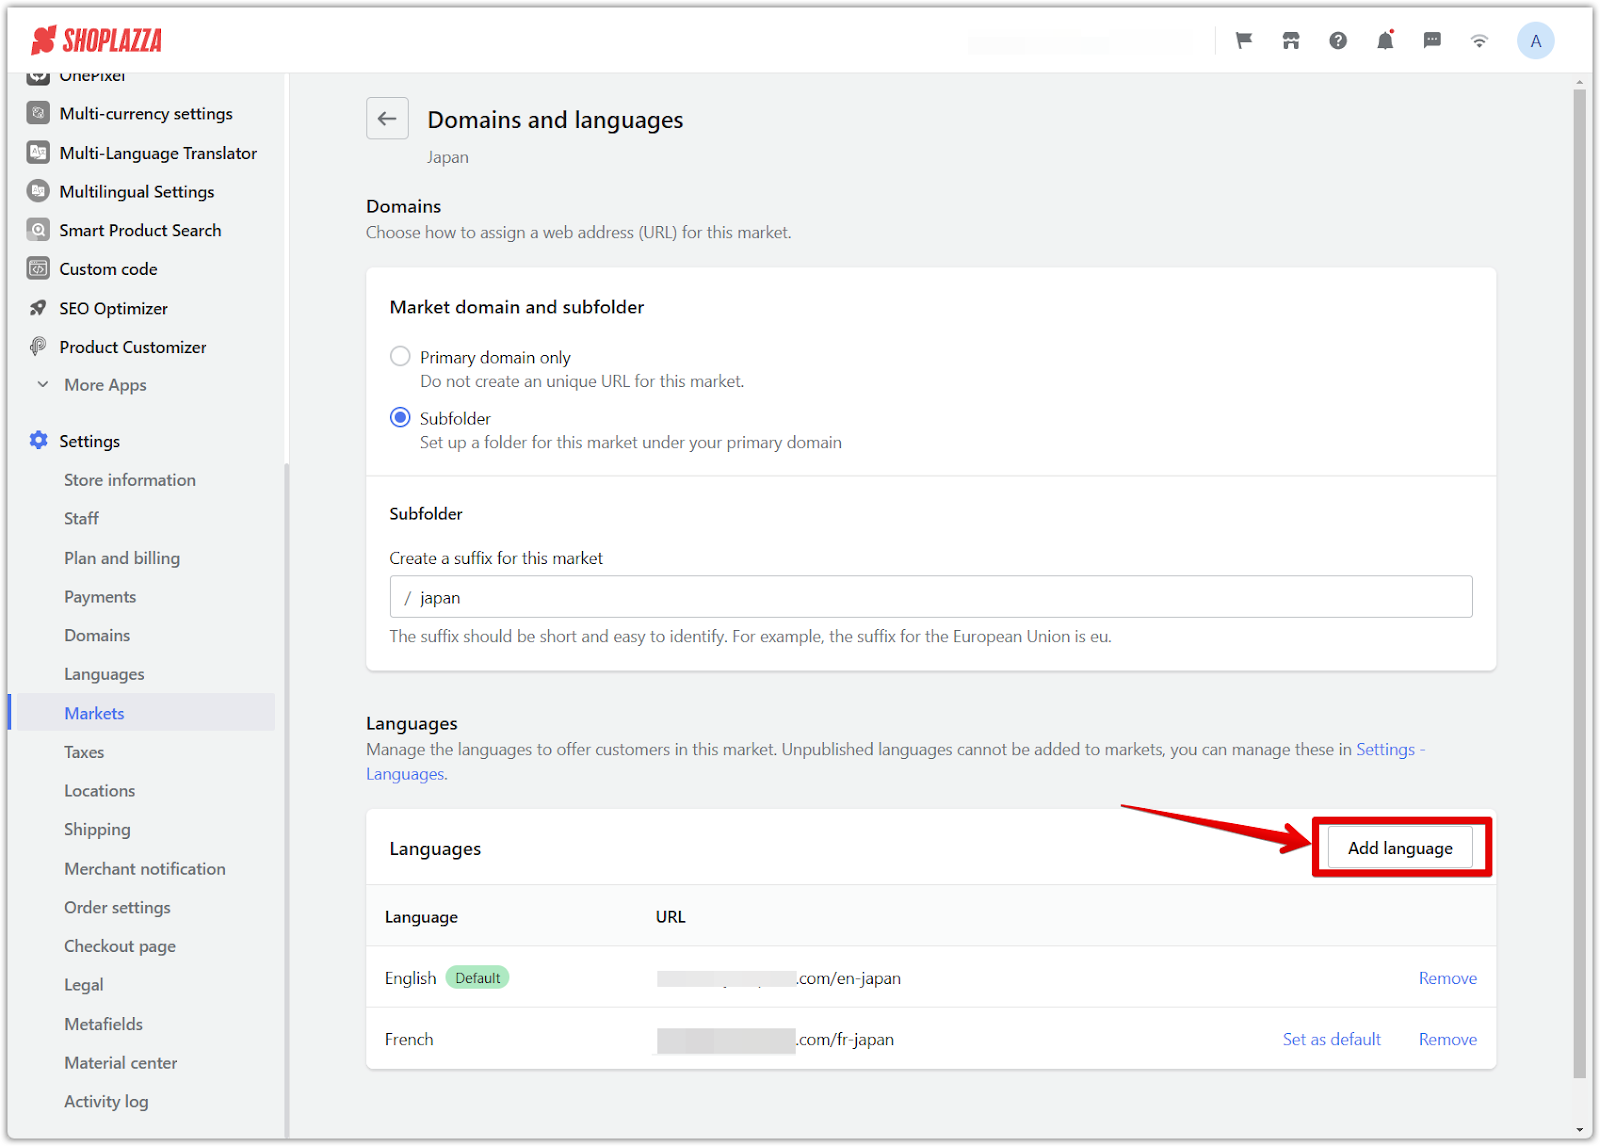
5. Select the target language: In the pop-up window, choose the language you previously added and click Done to confirm.
Adding language to market and configuring translation options
Once the language has been set as the default for a market, configure additional translation settings and finalize the language assignment.
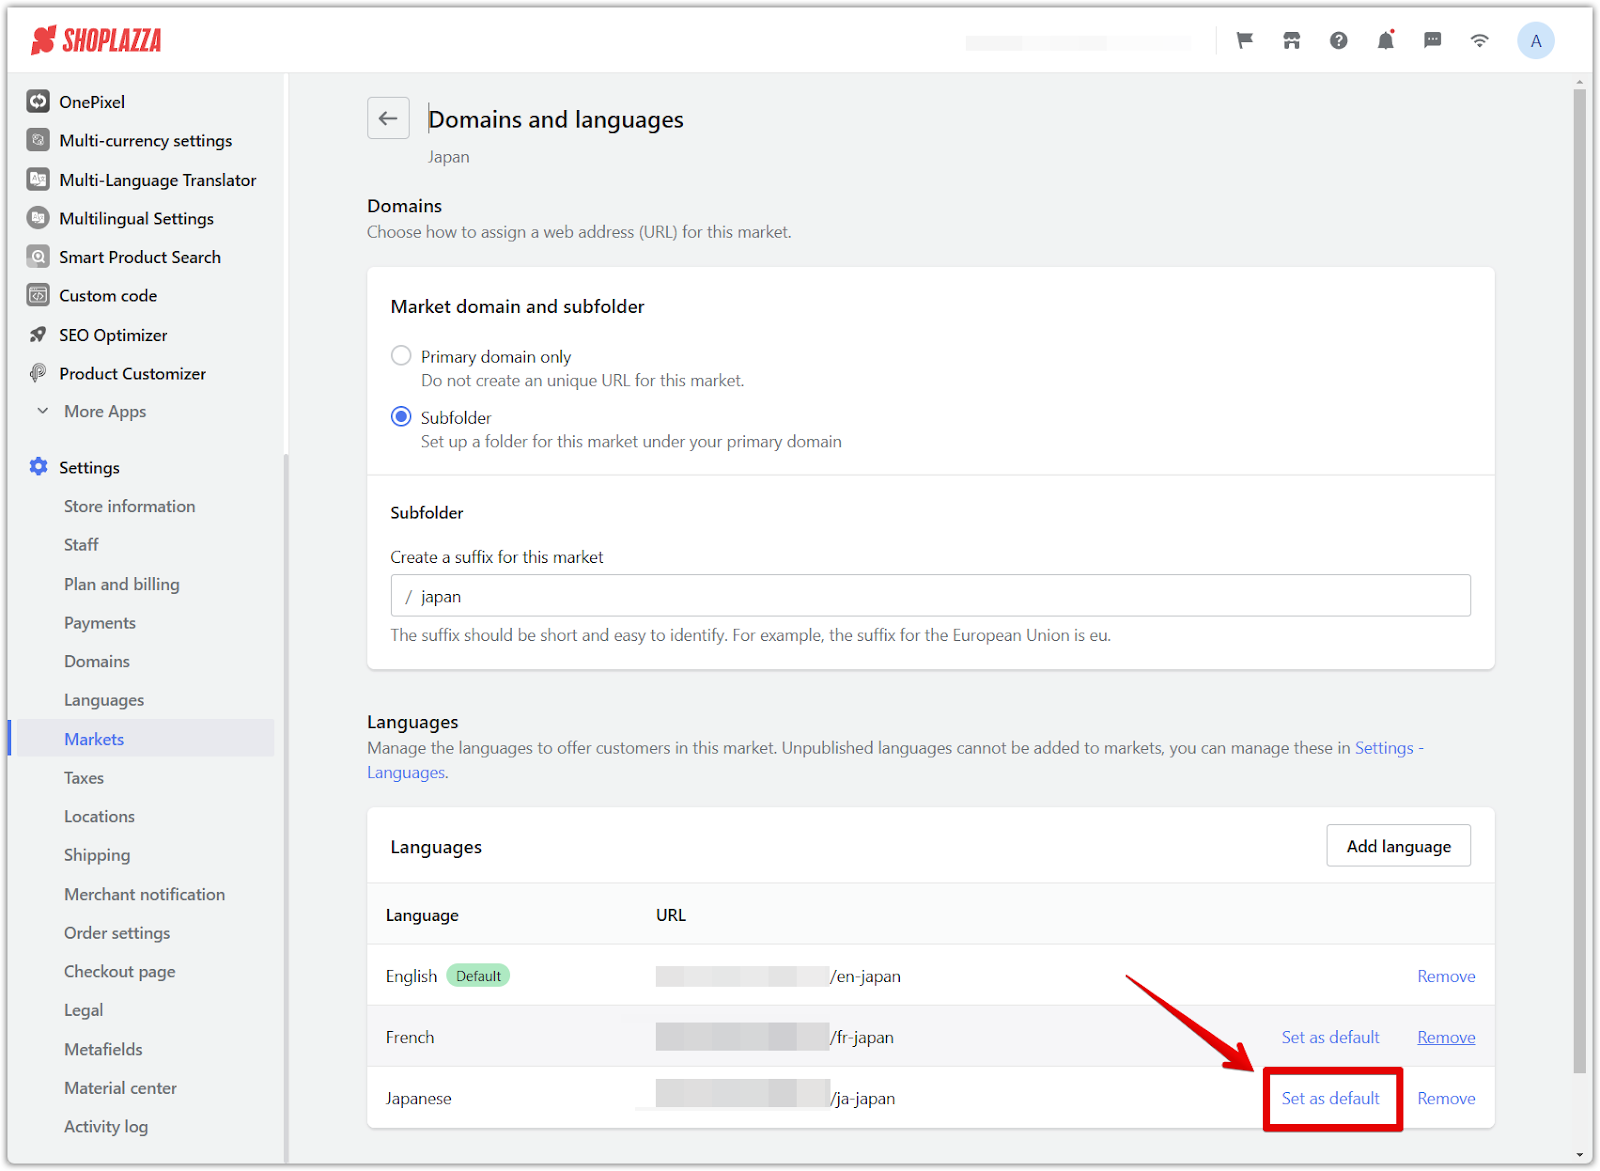
1. Set default language: After selecting the target language, click Set as default to make it the primary language for that market.
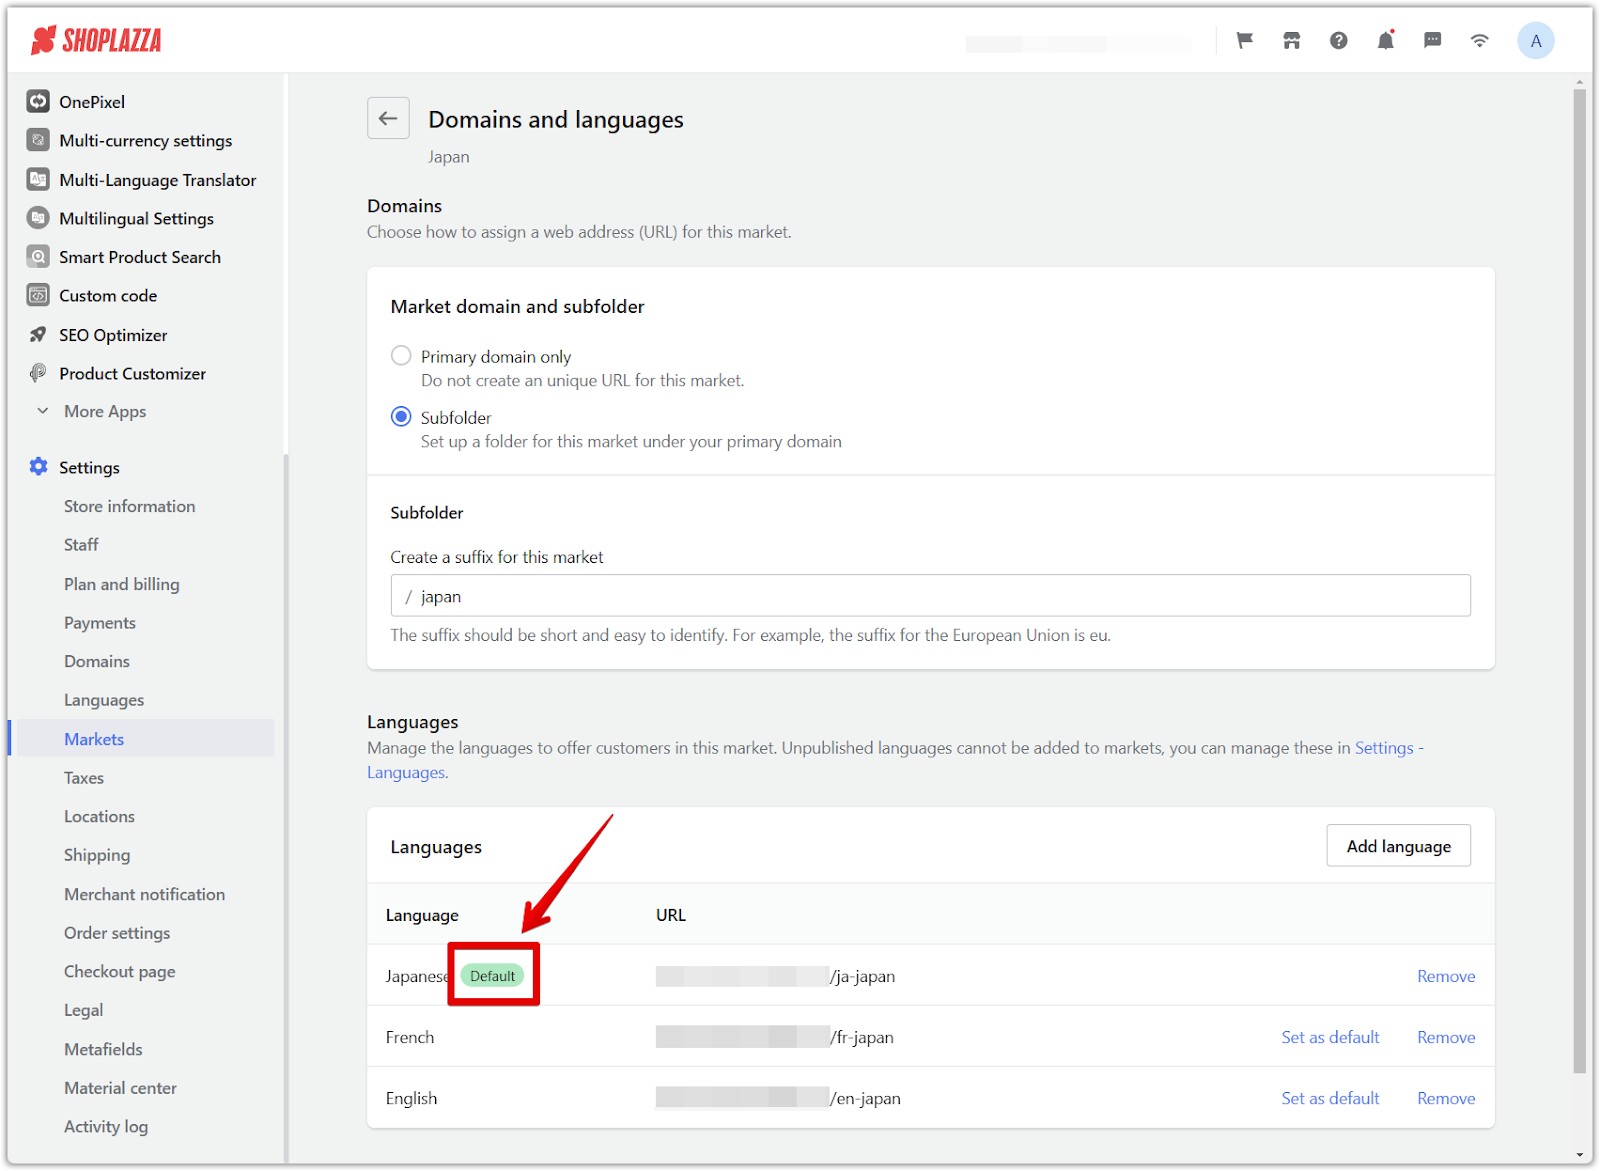
2. Verify default status: Once set, a Default label will appear next to the selected language, confirming the update.
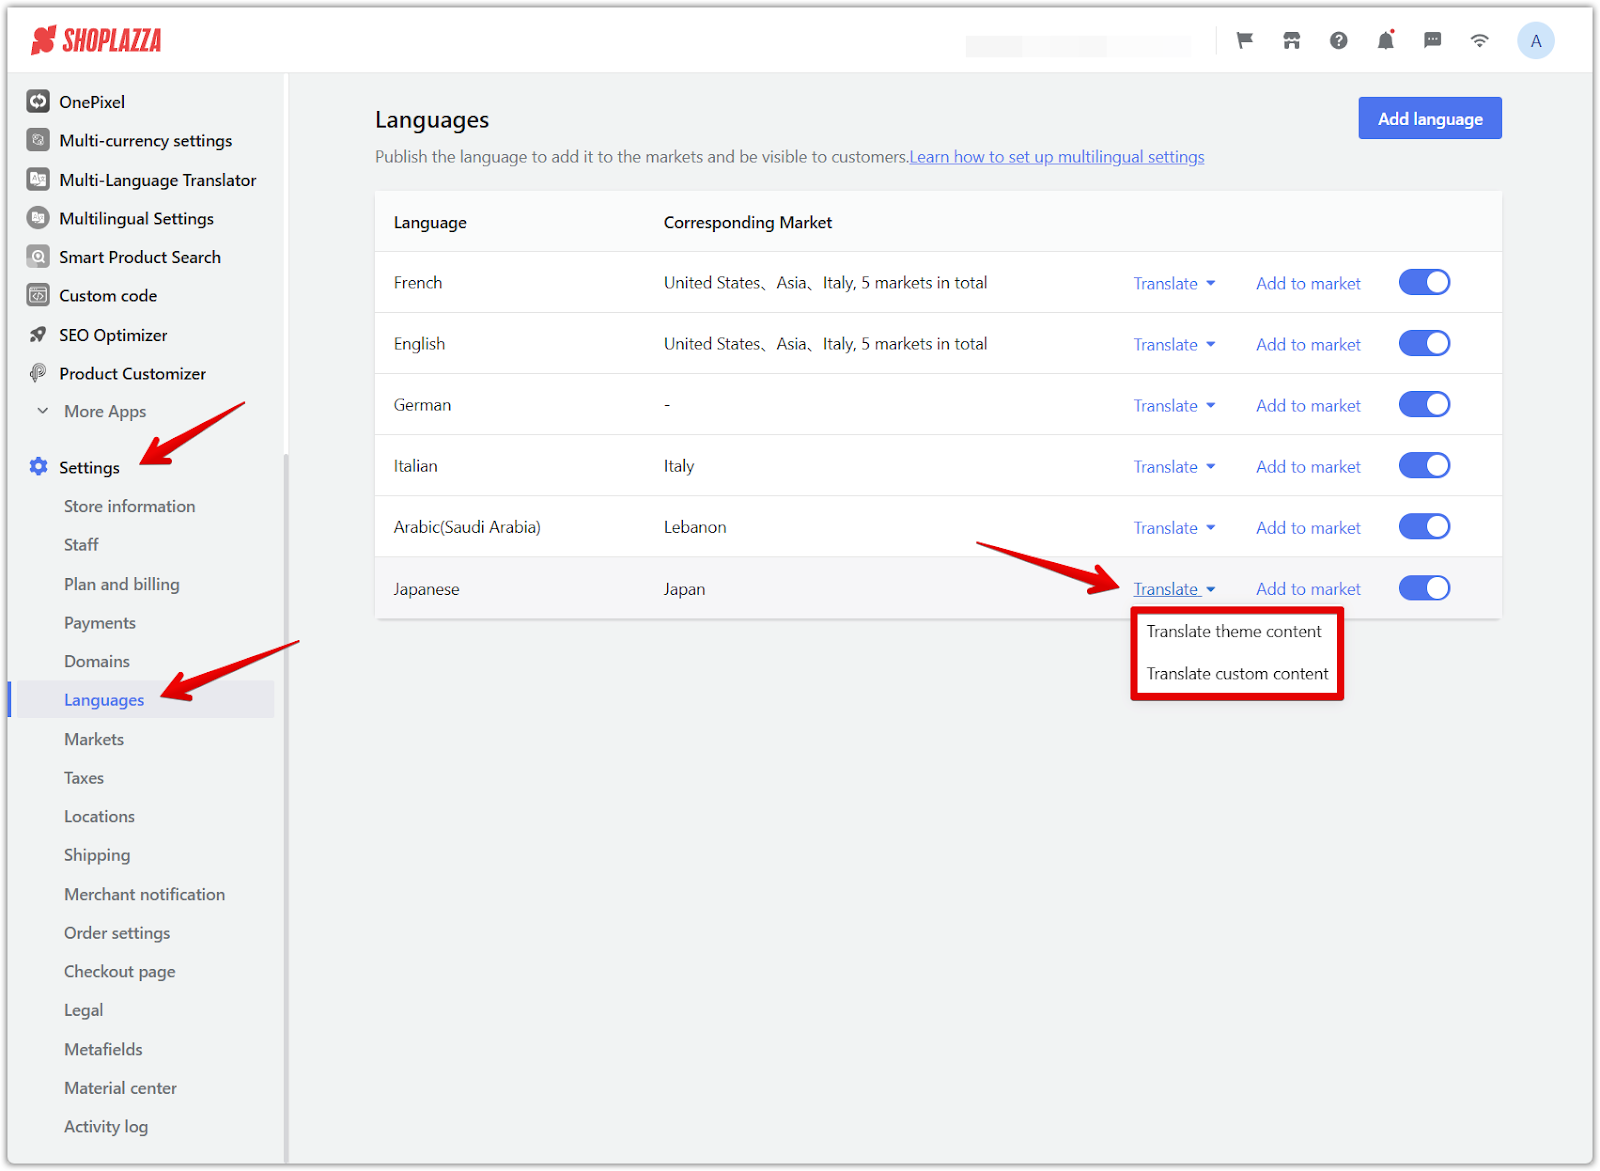
3. Configure translation settings: Navigate back to Settings Languages to adjust additional translation options.
- Translate theme content: Redirects to the theme languages section, where store terminology can be manually customized.
- Translate custom content: Translate pages like product descriptions, collections, and blogs further. This requires installing the Multi-Language Translator app.
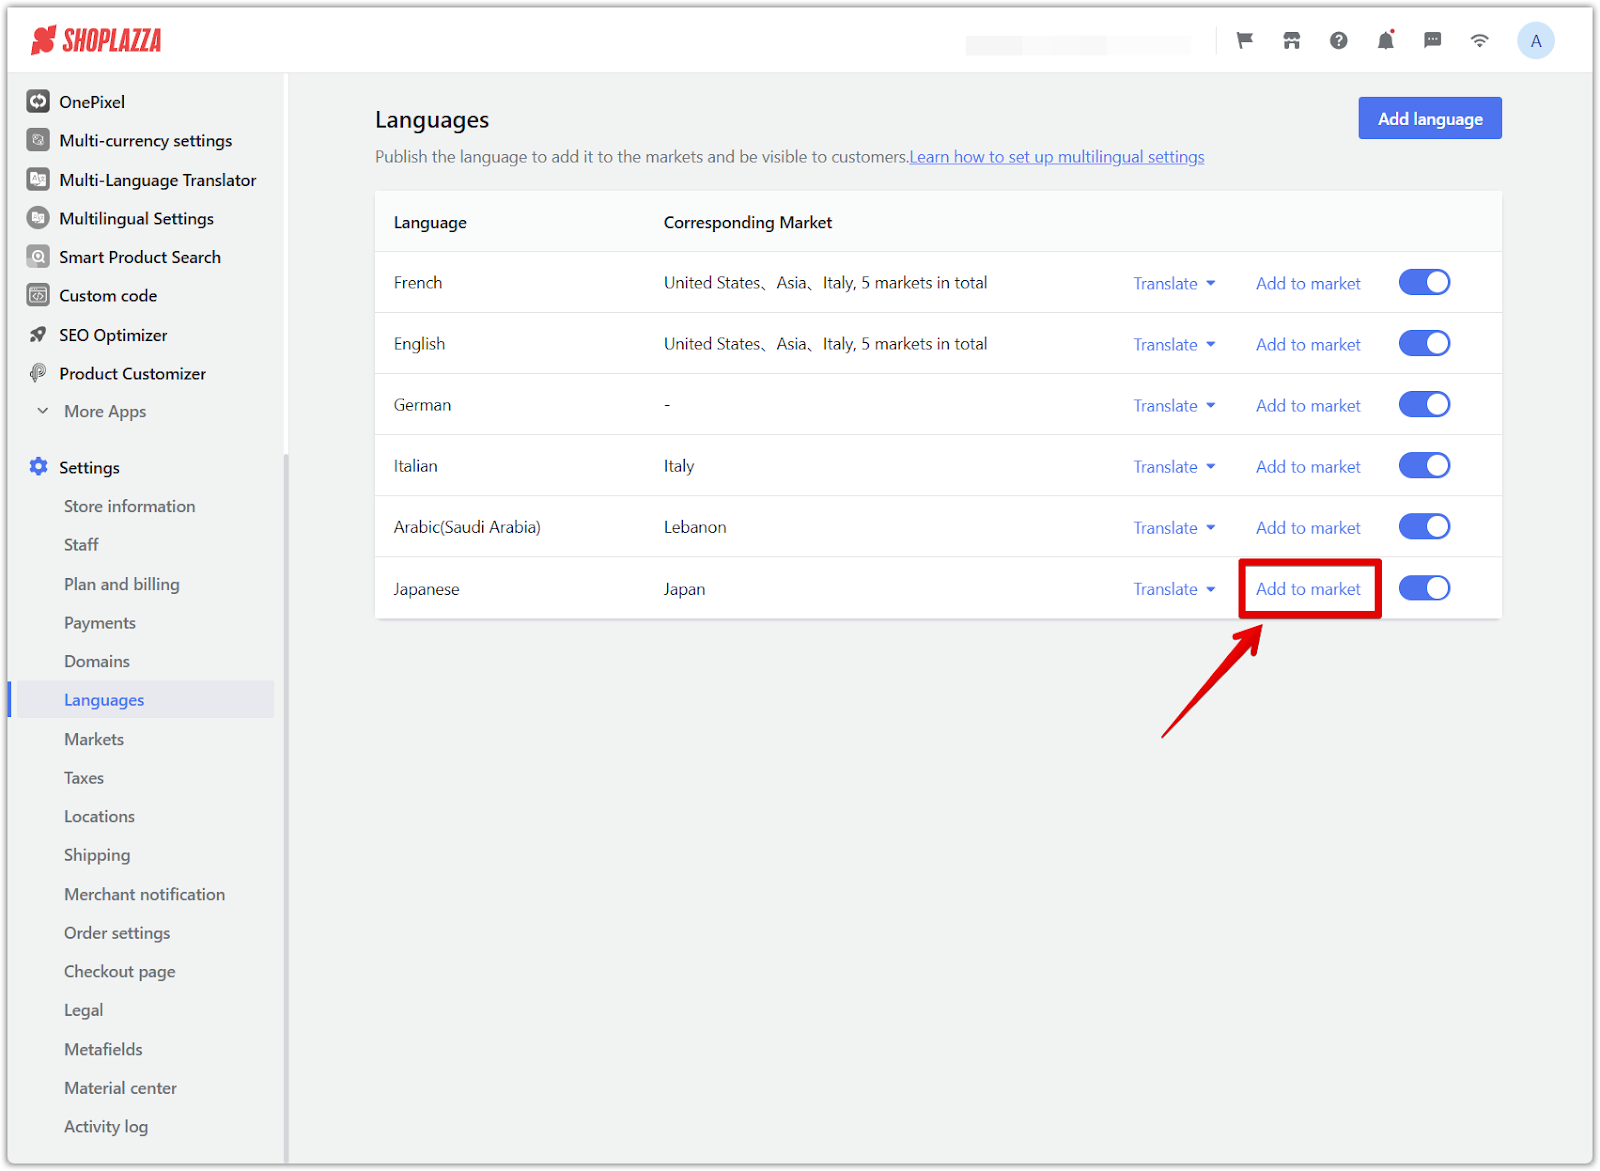
4. Add language to market: Click Add to Market, select the relevant market, and confirm the selection.
Important notes
When setting up a market-specific language, there are a few key considerations. Ensuring the correct default settings and avoiding conflicts with other translation apps will help provide a smooth customer experience.
- If the Multilingual Settings app is installed, it may cause confusion when testing. Ensure the market’s language is set as default; otherwise, it will display the language configured in that app. Additionally, this app should only be used when you do not have multiple markets, as it does not support multi-market language management.
- If your store’s primary market changes, adjust the default language accordingly in the Primary Market settings. If you need to modify the default language in the Multilingual Settings app, you can also refer to the above steps to modify the default language of the Primary Market.
Setting a market-specific default language ensures a smoother shopping experience for customers in different regions. It strengthens customer trust and engagement, helping your store connect with a wider audience.


Comments
Please sign in to leave a comment.