
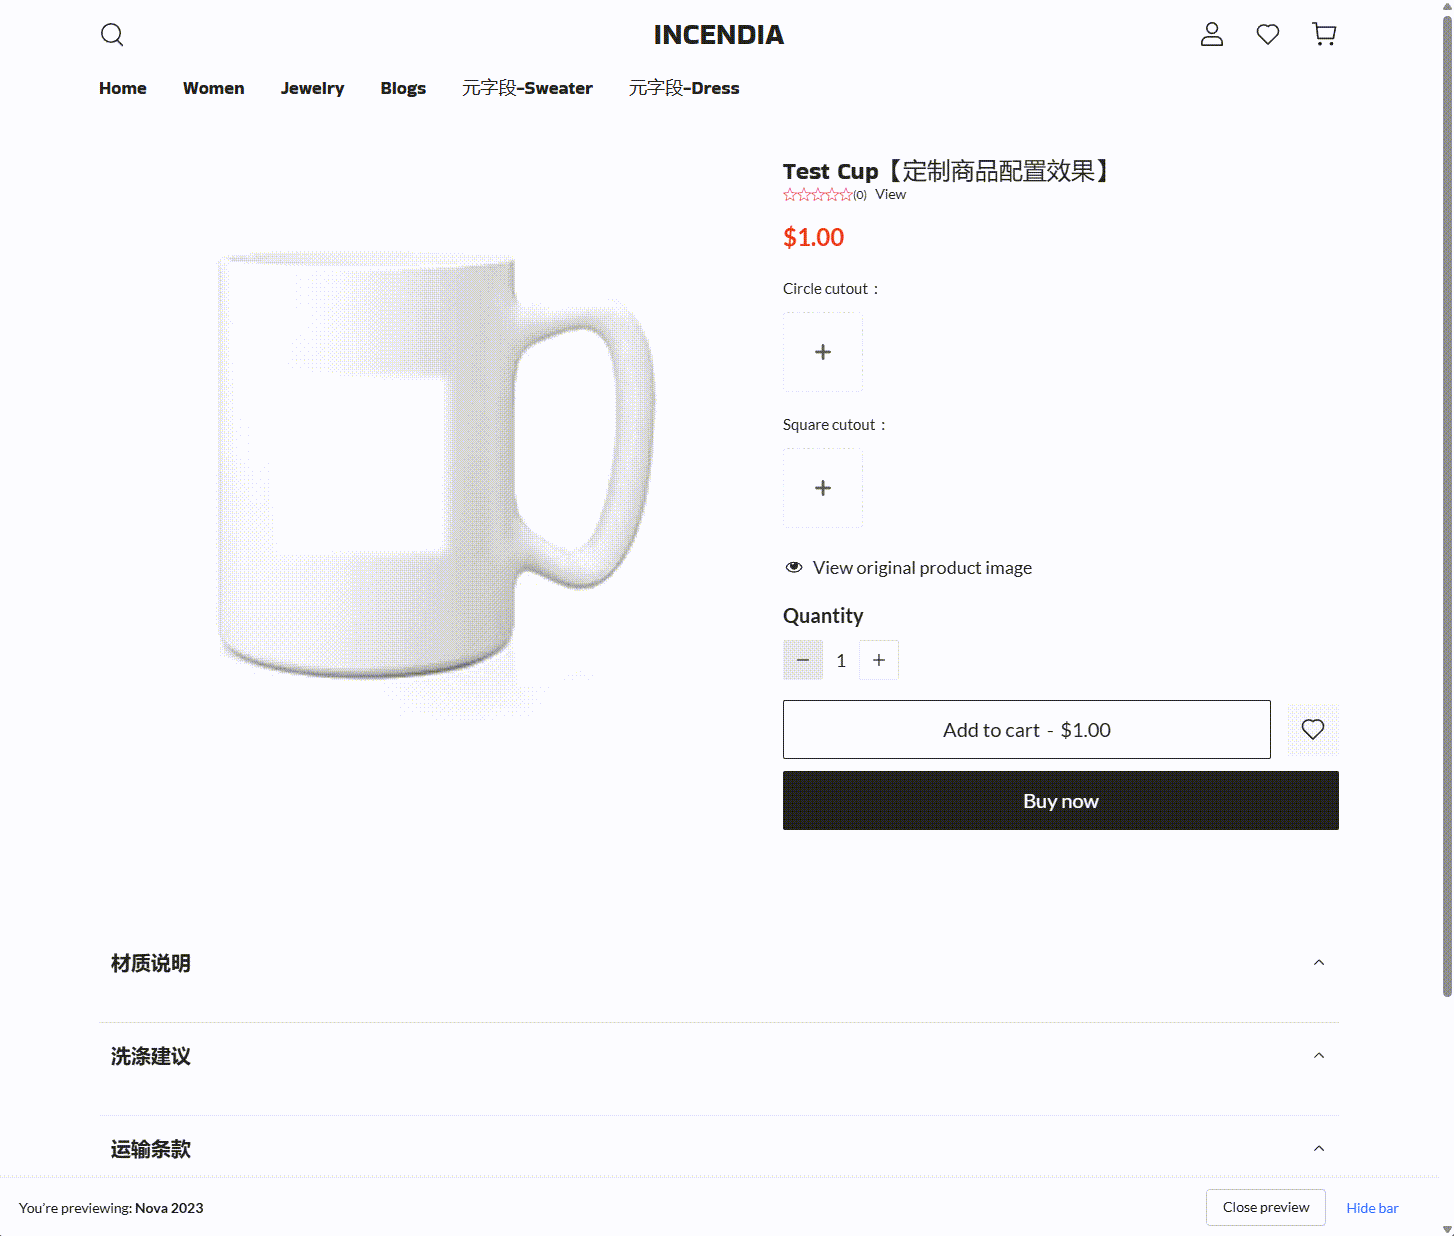
The Product Options app supports a real-time cutout preview effect that allows customers to see their uploaded images directly in your product mockup. By layering a transparent cutout over the product image, customers can instantly preview how their design will appear on the final product. This interactive visualization enhances engagement and speeds up decision-making by providing a clear, mockup-style display as they customize.
Preparing your background images
To set up the cutout preview, you’ll first need to create background images that act as templates for your product. These images should have a transparent area where your customer’s uploaded design will appear.
- Start with a matching product image: Use an image that has the same size and angle as what appears on your product page.
-
Remove the area where the upload should show: Open the image in a design tool like Photoshop, Photopea, or Canva. Erase the area where the customer’s image should appear, such as a square or circle in the center.
- Save the image in a format that keeps transparency.
-
Use one of the supported image formats:
- .png (recommended for transparency)
- .jpeg
- .jpg
Uploading your mockups and configuring the preview
Once your background images are ready, you can upload them in the Product Options app and set up the live preview.
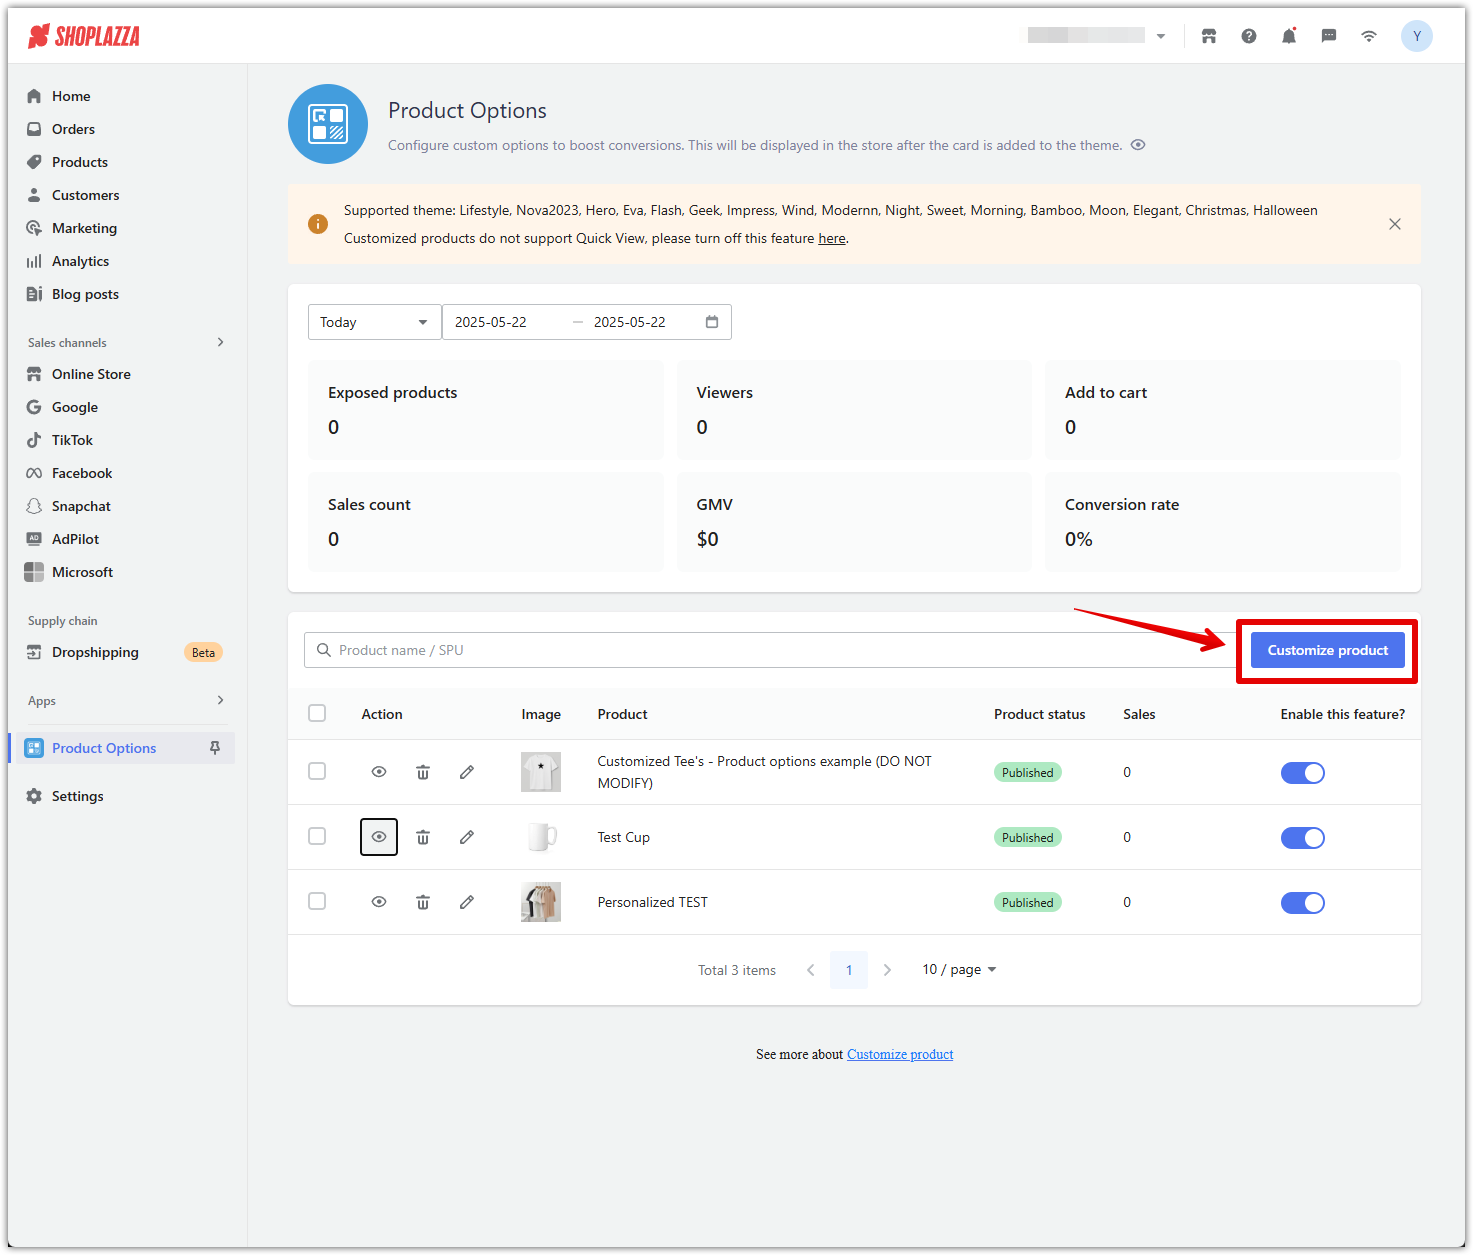
1. Go to the Product Options app: In your Shoplazza admin, go to Apps > Product Options. If the app is not yet installed, install it from the Shoplazza App Store . Then click Customize product.
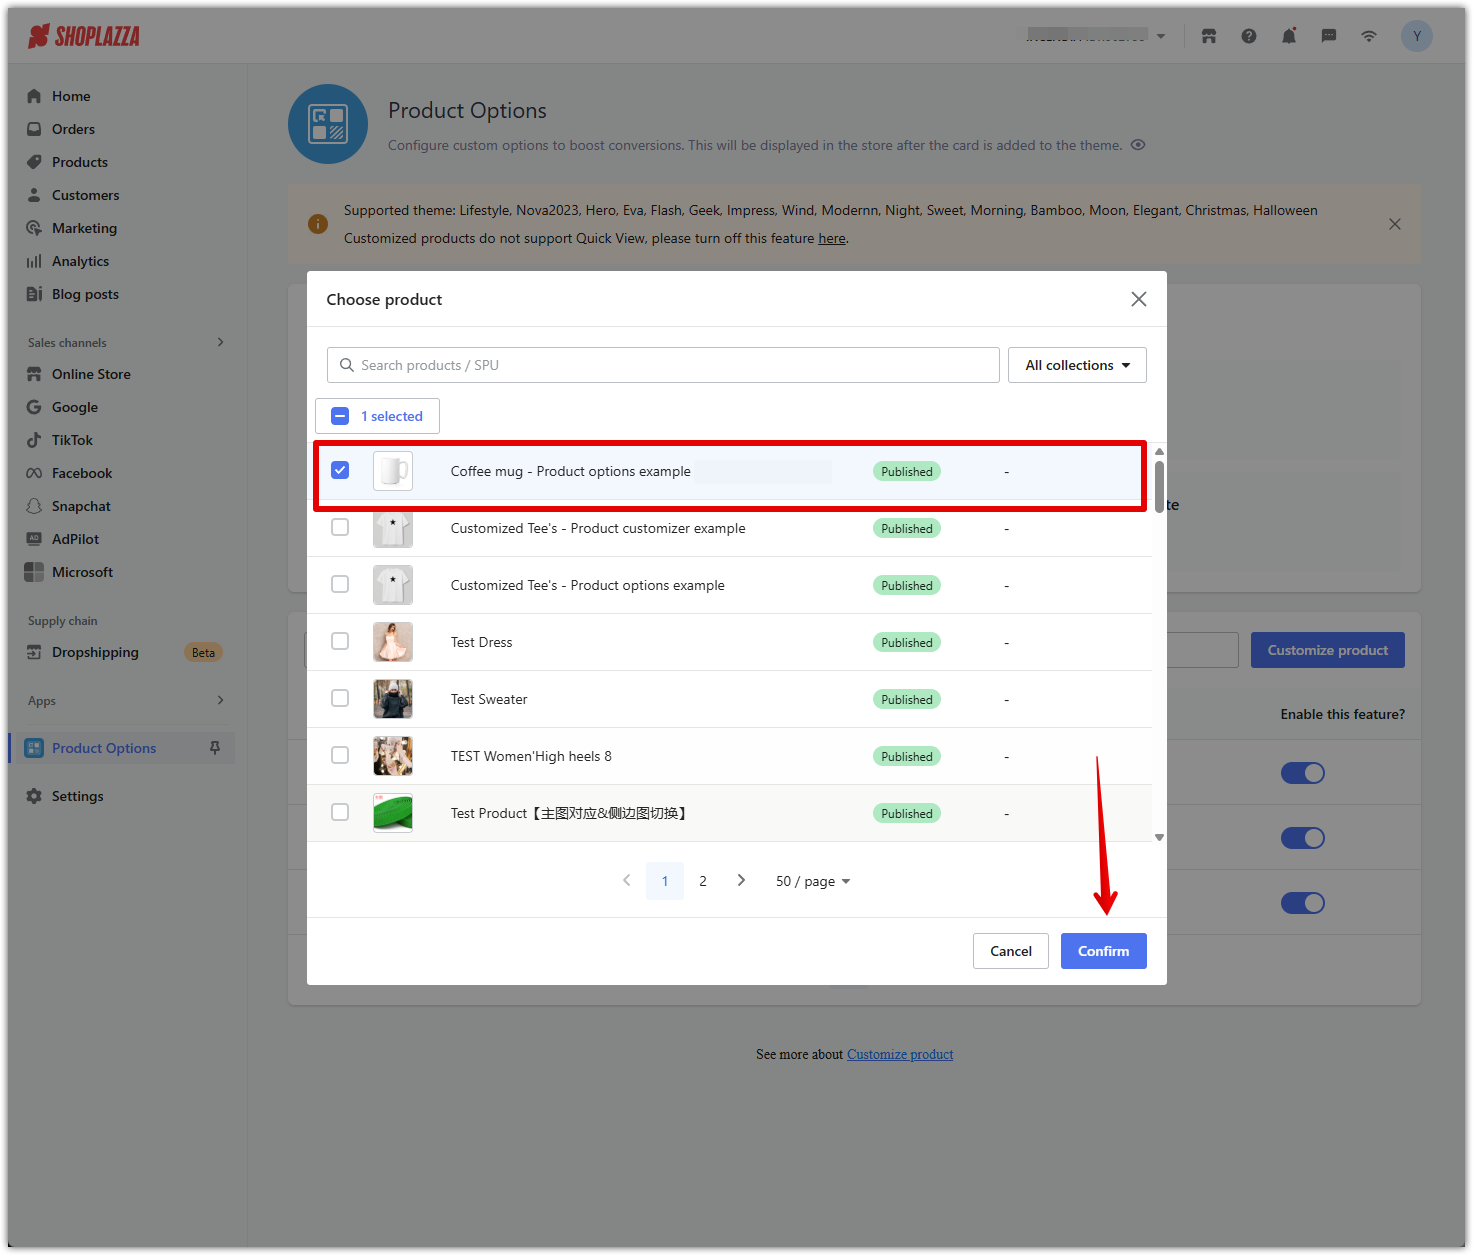
2. Select the product: In the pop-up window, choose the product you’d like to customize and click Confirm.
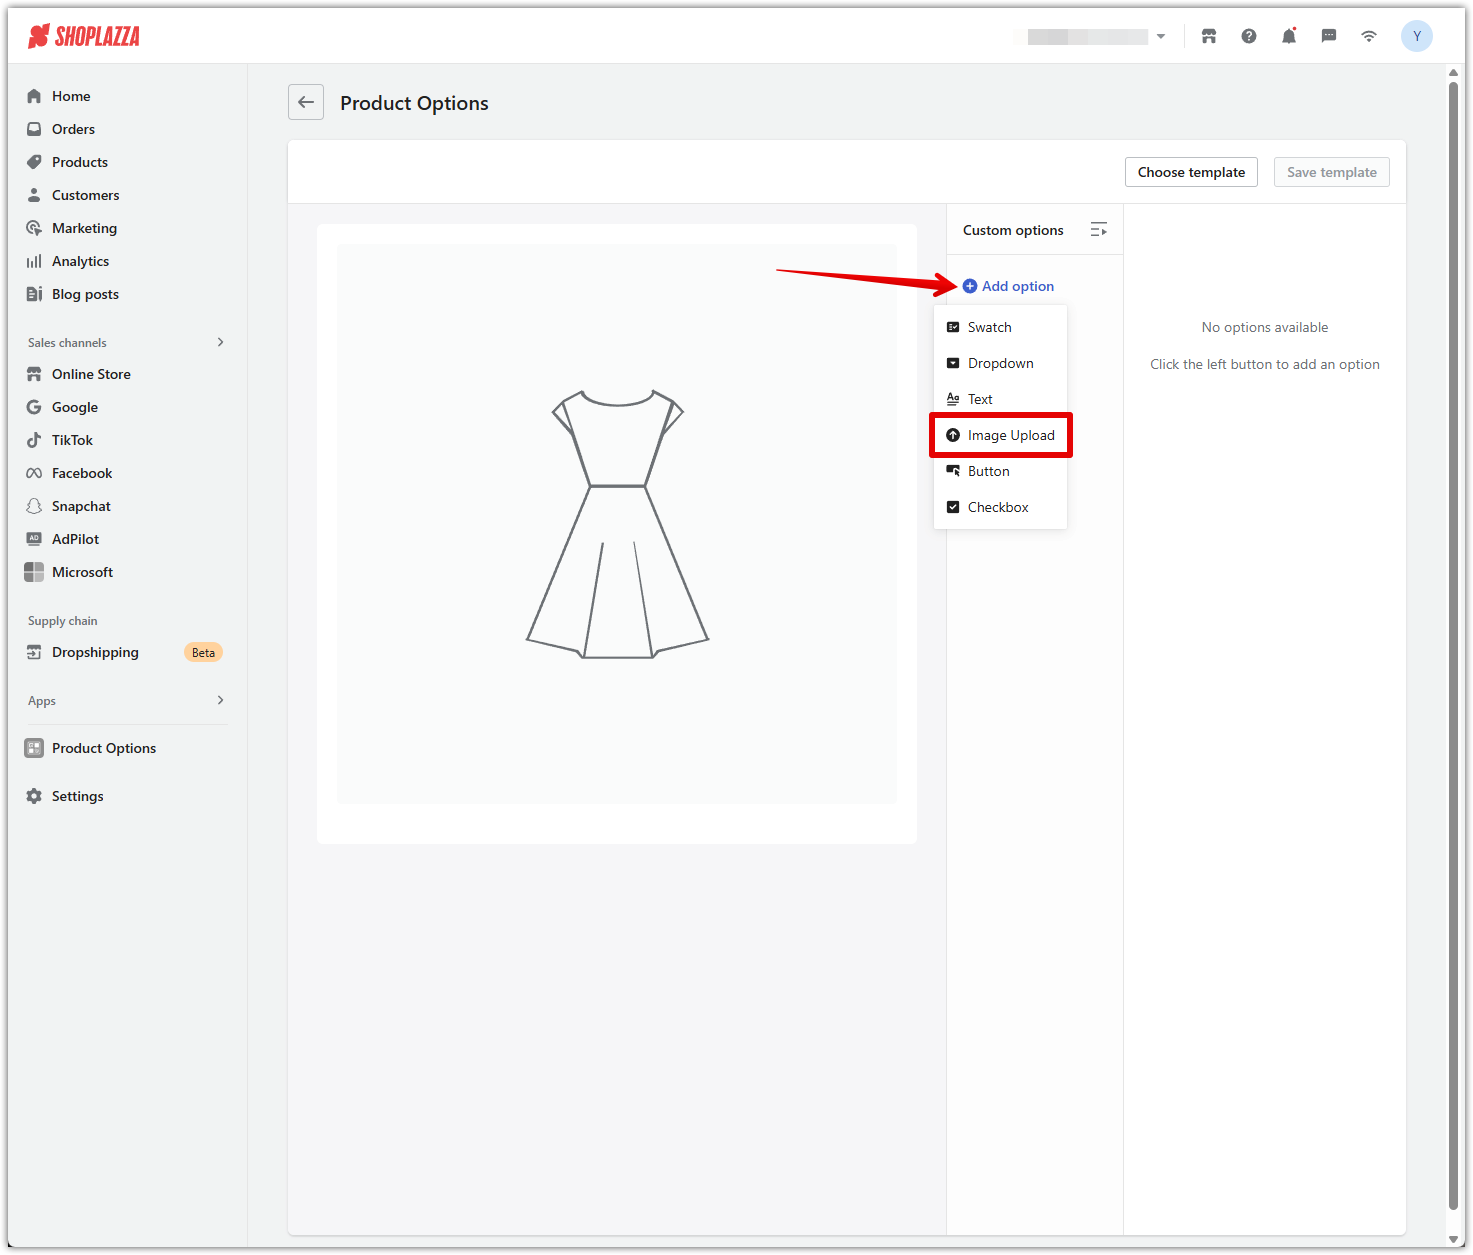
3. Create your upload fields: Click Add option, then choose Image Upload from the list. This allows customers to upload their own designs. For example, you might create two separate upload fields labeled:
- Circle
- Square
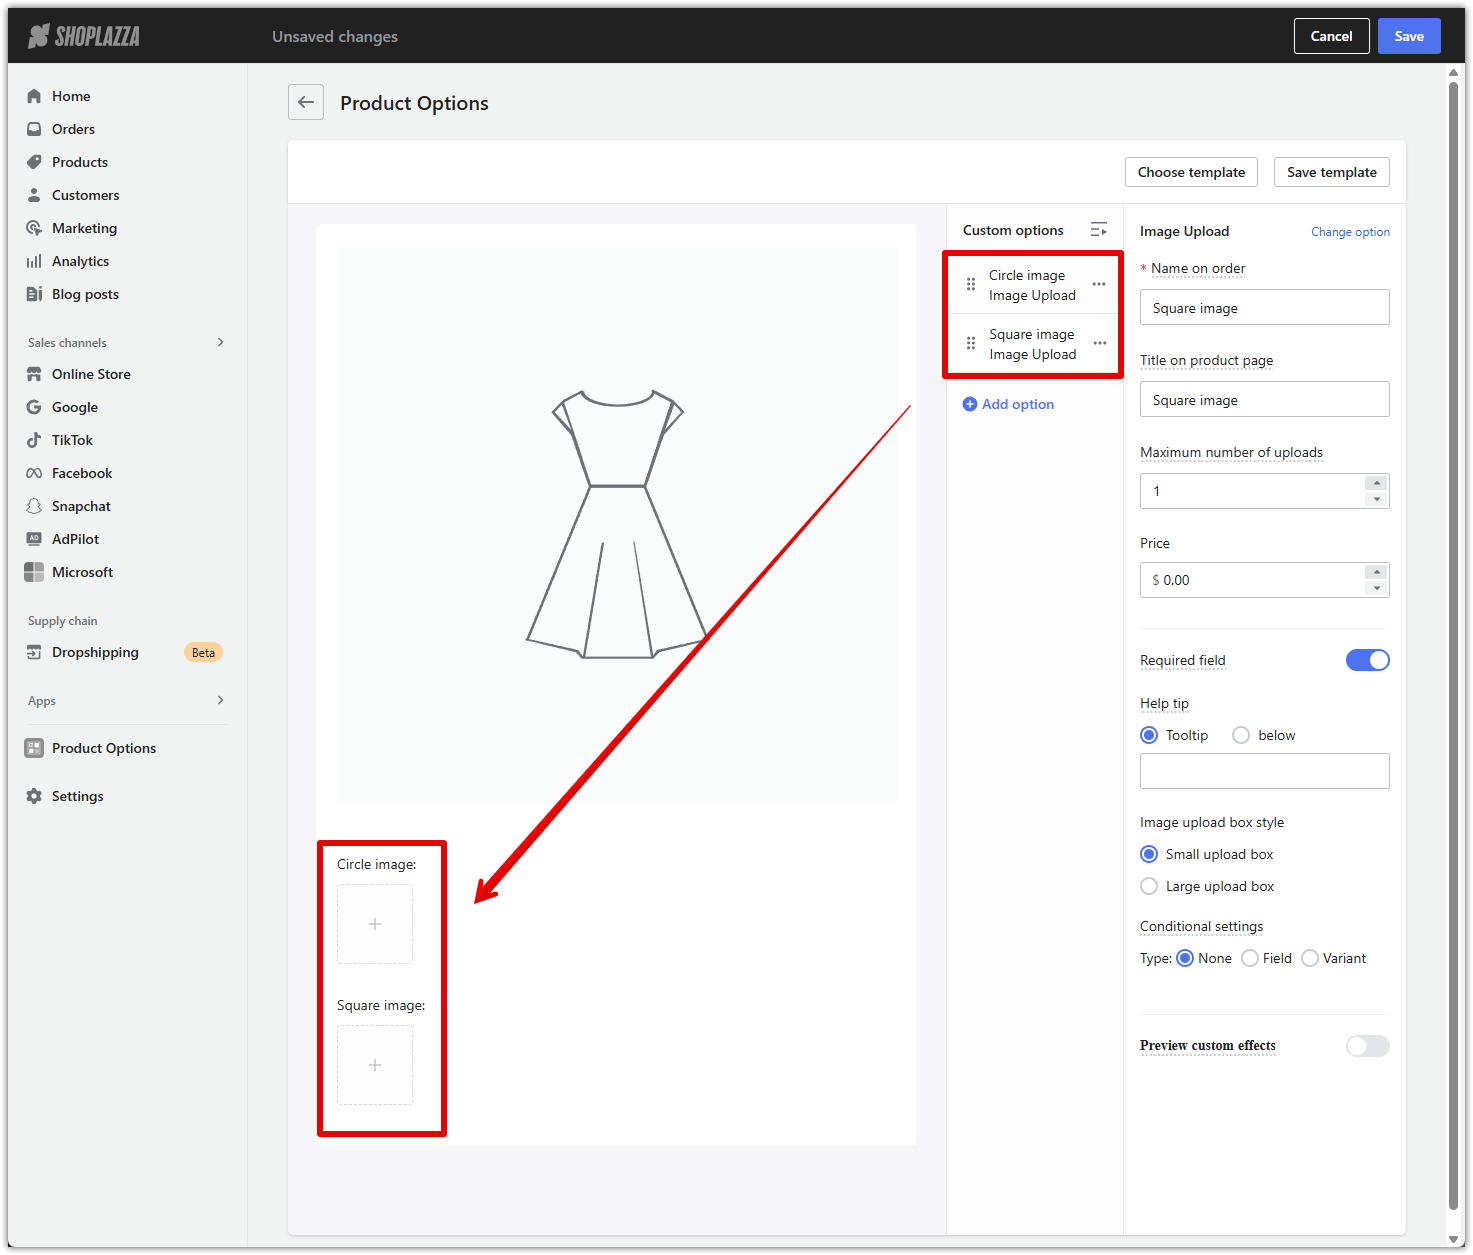
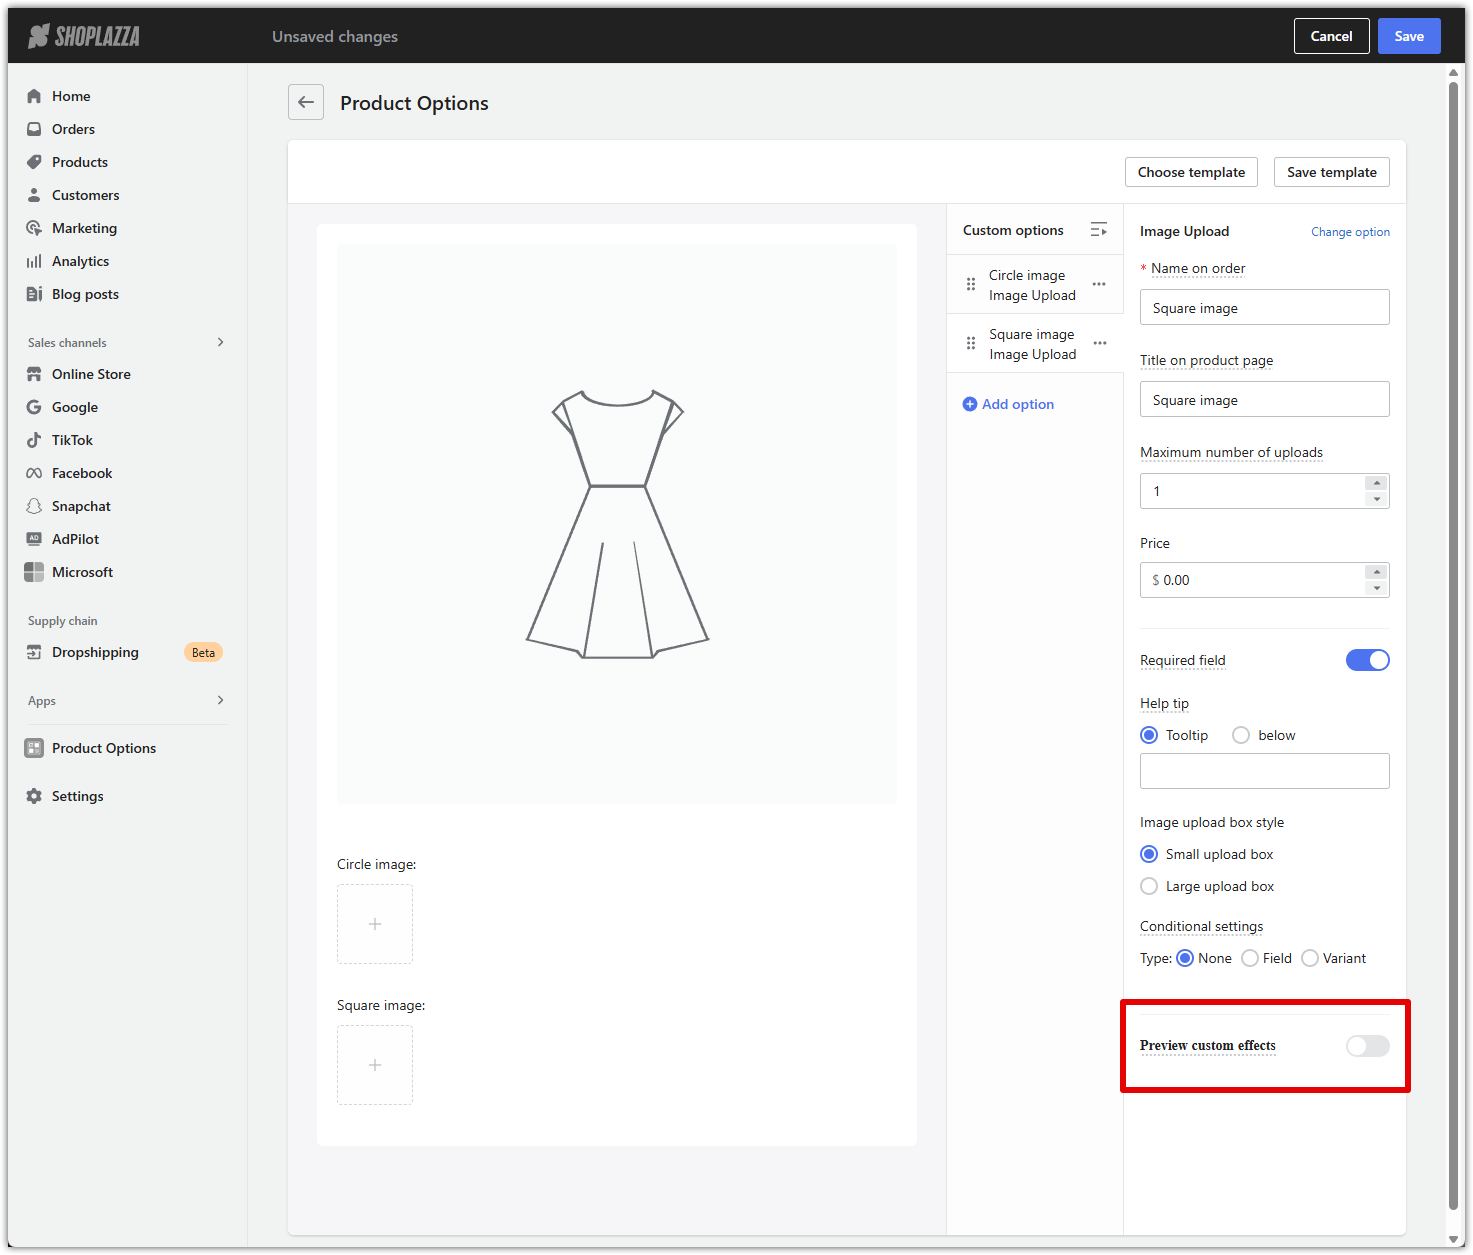
4. Turn on the preview feature: In the settings panel for the upload field, scroll down and toggle on Preview custom effects. This enables the live preview so customers can see their uploaded image placed on the product.
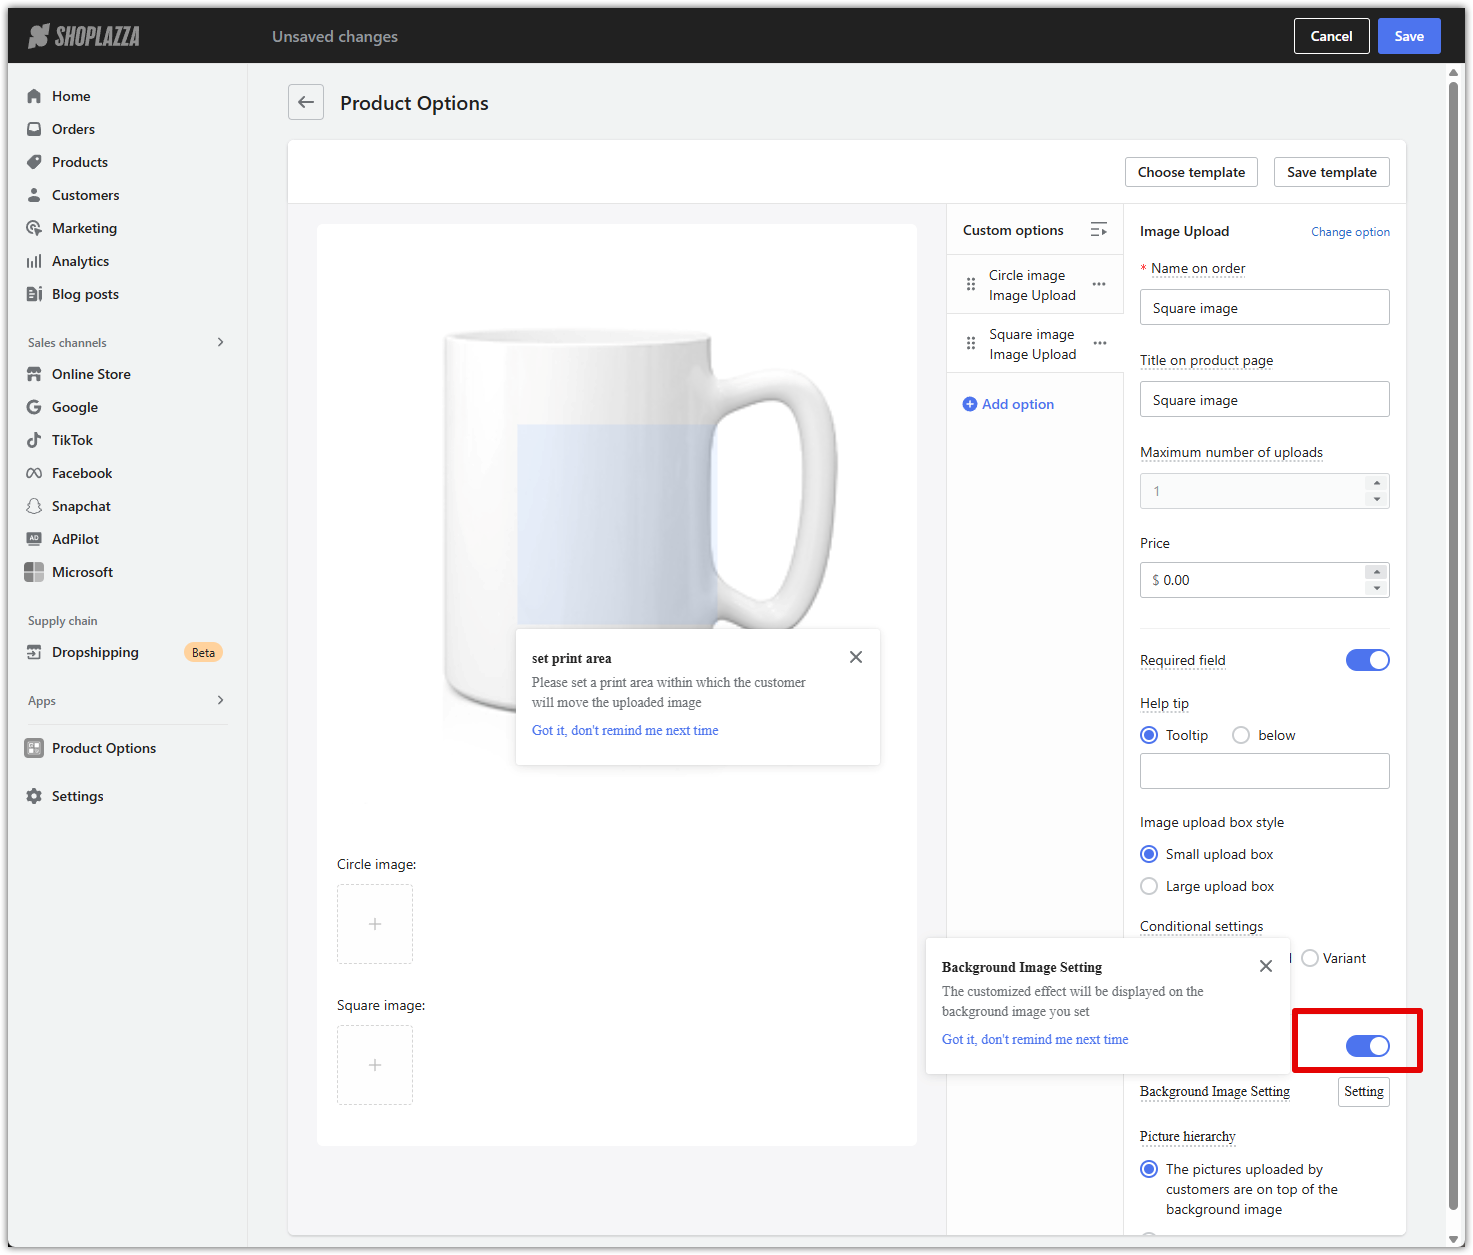
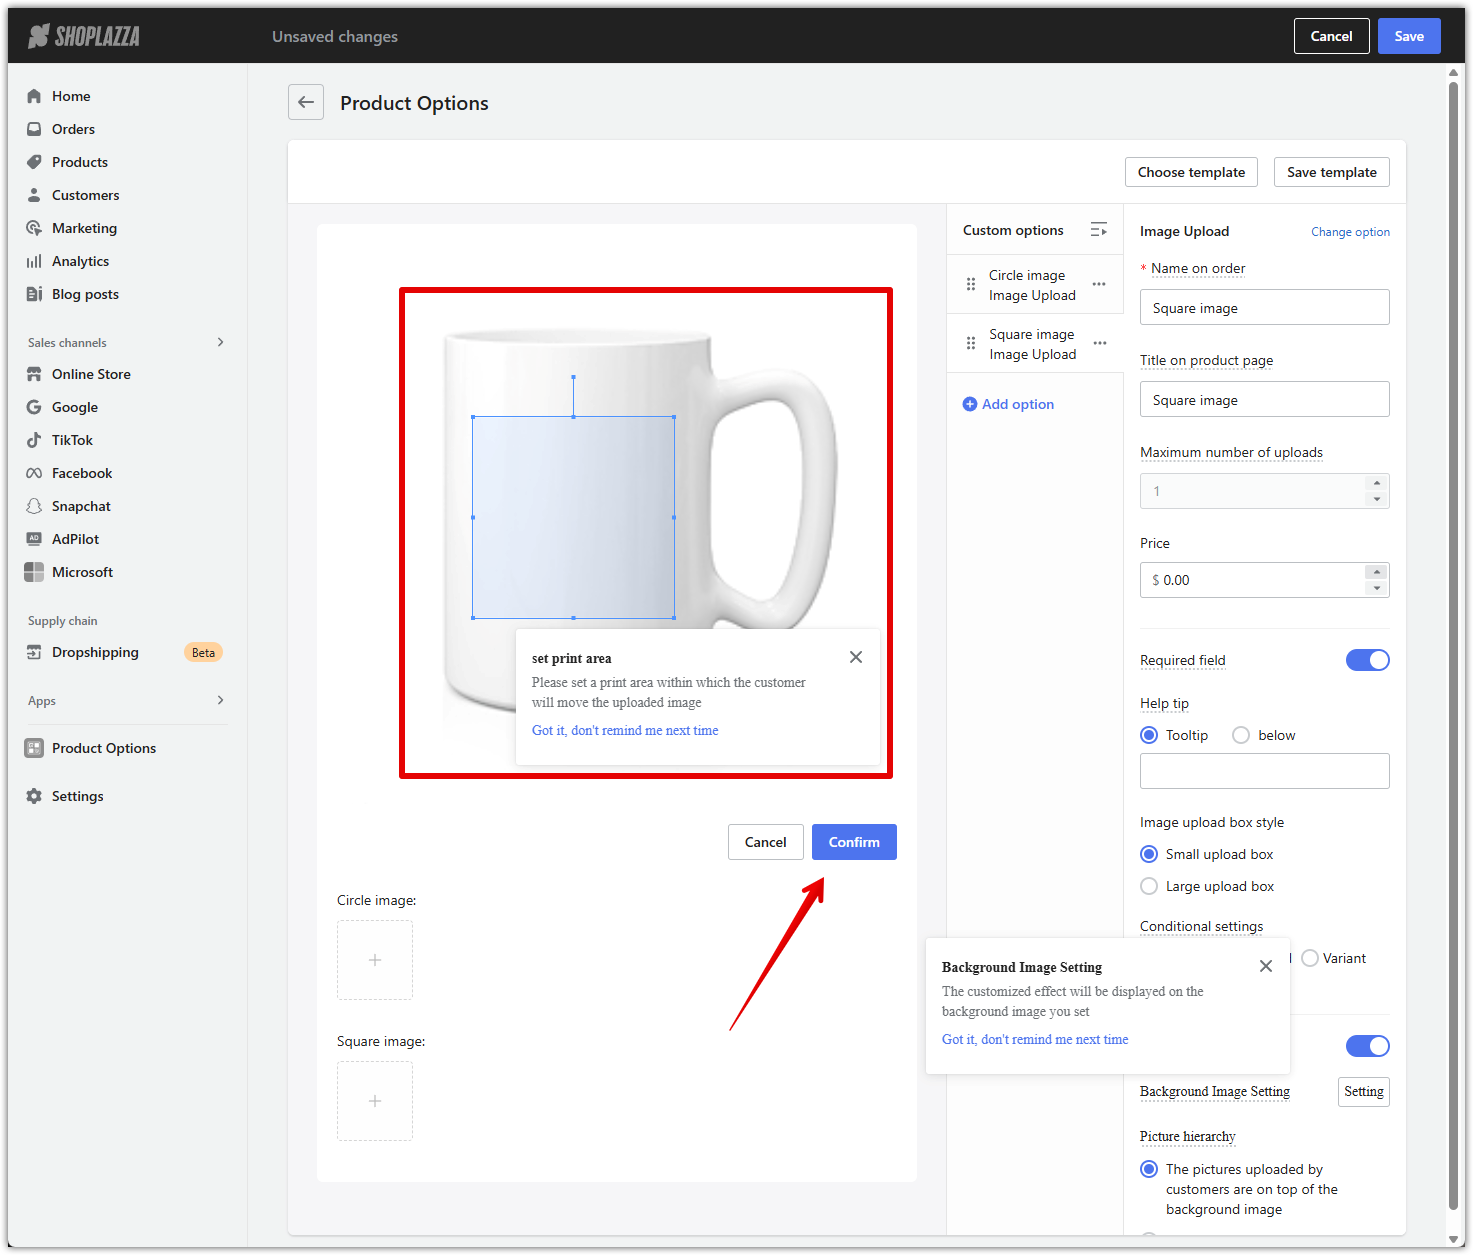
5. Upload your background image:
- Scroll to Background Image Setting and click Setting.
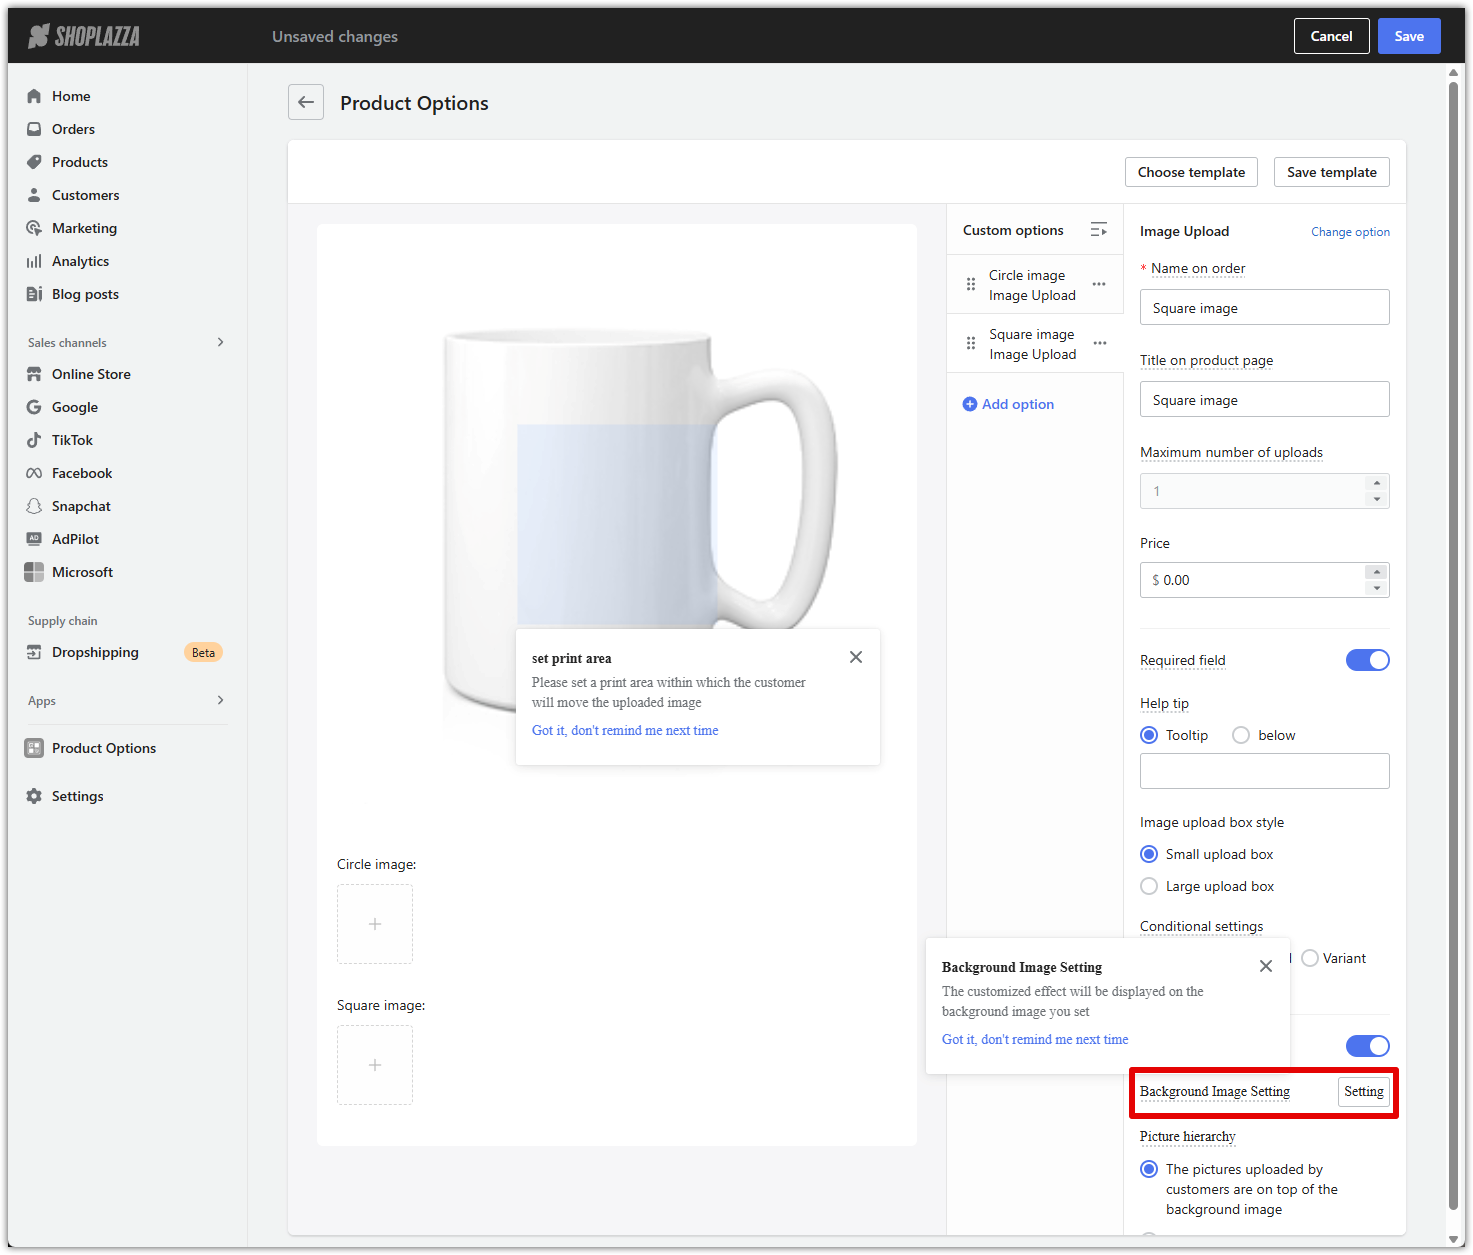
- Upload the transparent mockup image you prepared earlier.
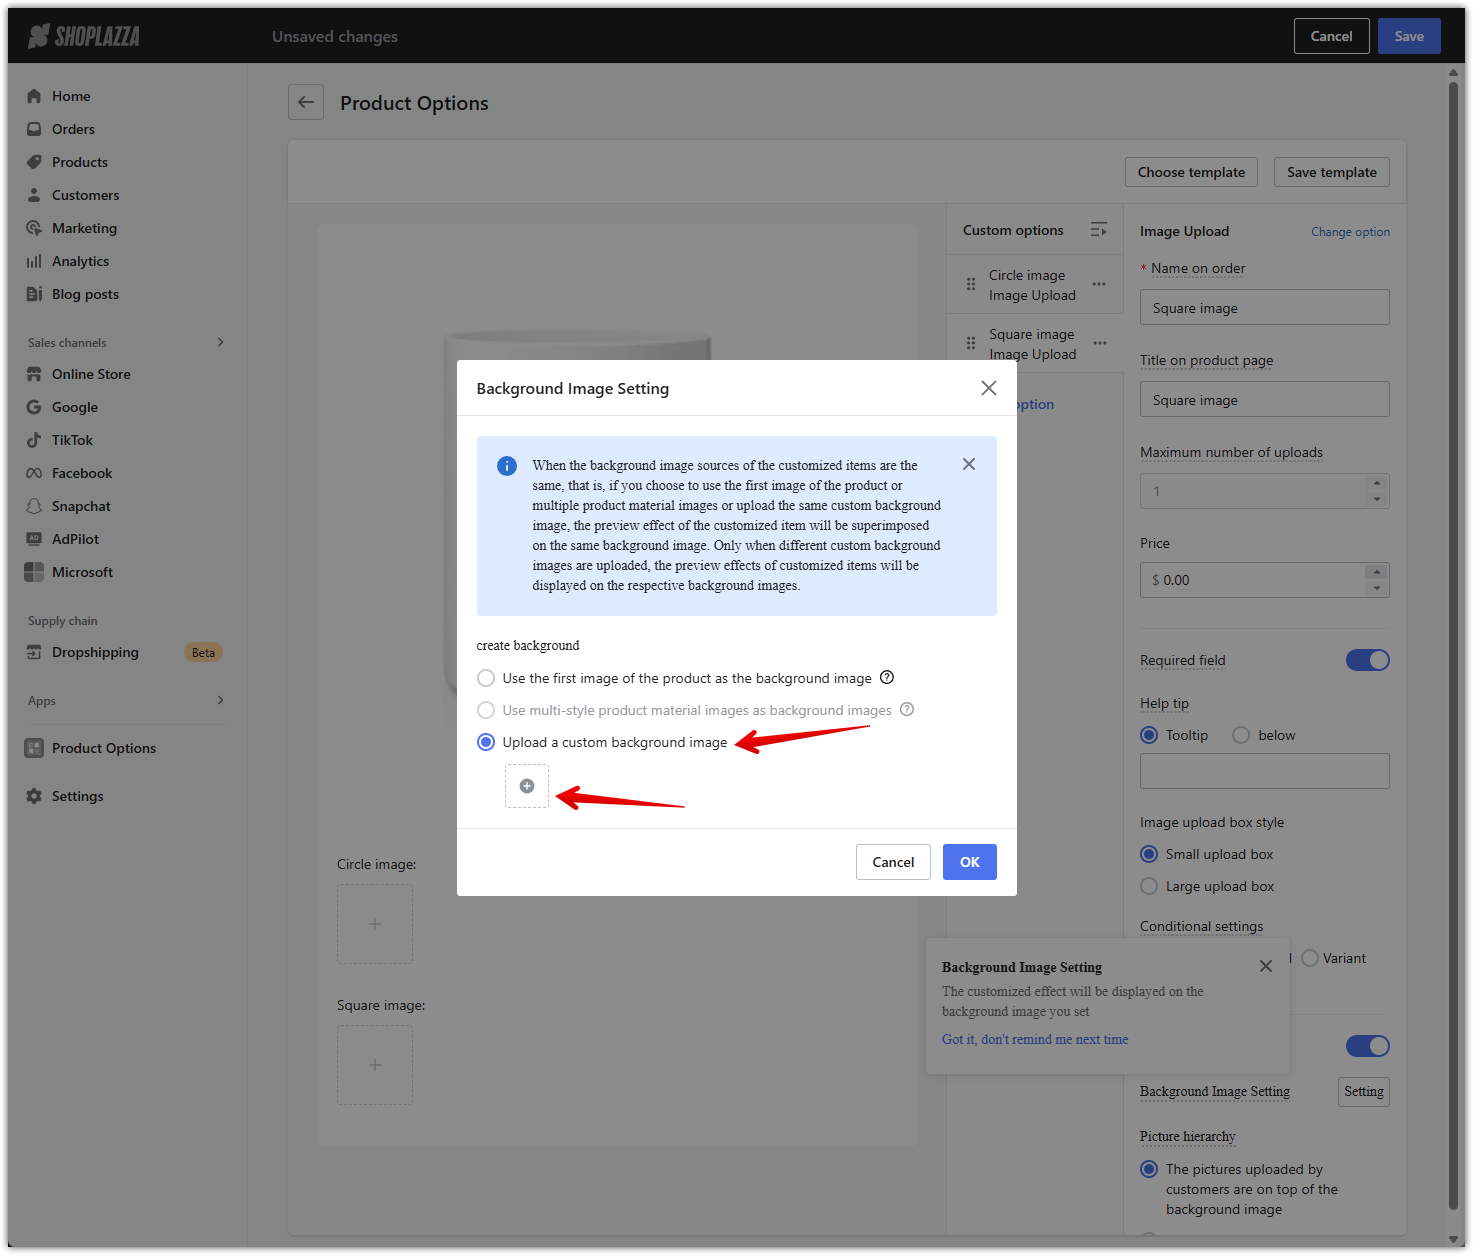
- Use the blue handles to adjust the print area so it aligns with where you want the customer’s image to appear on the product.
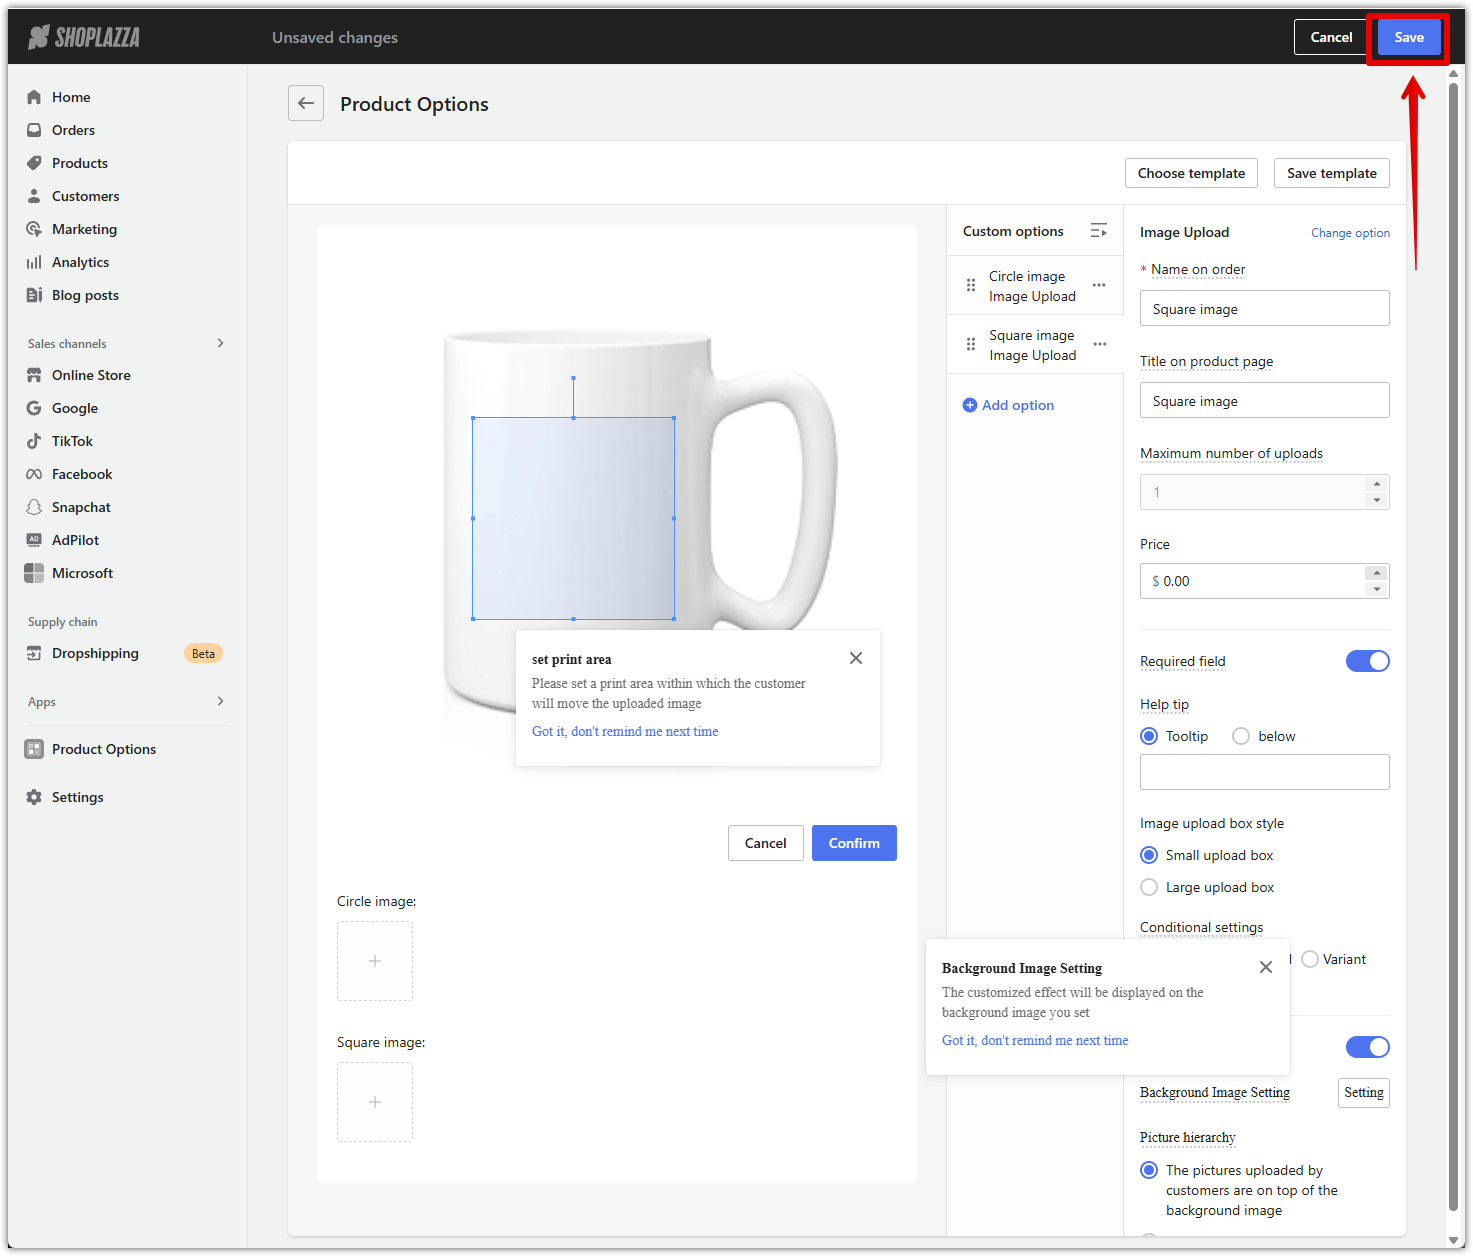
6. Save your changes: Once everything looks right, click Save in the top-right corner.
Cutout previews provide a professional and intuitive way to showcase personalized products. By layering customer uploads beneath transparent mockups, you create a clear, realistic preview that builds confidence and drives conversions.


Comments
Please sign in to leave a comment.