
The Product Customizer app helps bring personalized shopping to life by supporting a wide range of custom product options and interactive settings that respond to customer choices. As shoppers make selections, new options can appear or disappear automatically, creating a natural and guided customization experience. Whether you're offering color and size choices, image uploads, or special services, these smart tools make even detailed setups easy to navigate. This guide walks you through how to build a product page where the available options change based on what the customer selects.
Before creating your customization fields, take a moment to plan how each option will appear based on previous selections. Mapping out the customer flow in advance—such as when to show image upload fields or name inputs—helps ensure your setup is clean, logical, and responsive.
Understanding the customization flow
Before setting up your product, it’s helpful to map out how customers will move through the customization options. For example, if you're offering a customizable shirt, the flow might include:
- Color and size selection: Start with basic style choices like color and size. These are free and available to all customers.
- Image customization groups: Let customers choose to customize 1, 2, or 3 image areas. This can unlock preset designs or allow image uploads, with options that may include an additional charge depending on what’s selected.
- Name personalization fields: Offer the option to personalize each image with a name. If selected, show matching name fields based on the number of image areas being customized.
- Extra services and packaging: Include additional choices such as special services or packaging styles. These are completely optional and may come with separate pricing.
Setting up product variants
Start by preparing your product with sub-style variants that define how many custom designs a customer can add. These variants act as the foundation for showing and hiding different options later in the customization flow.
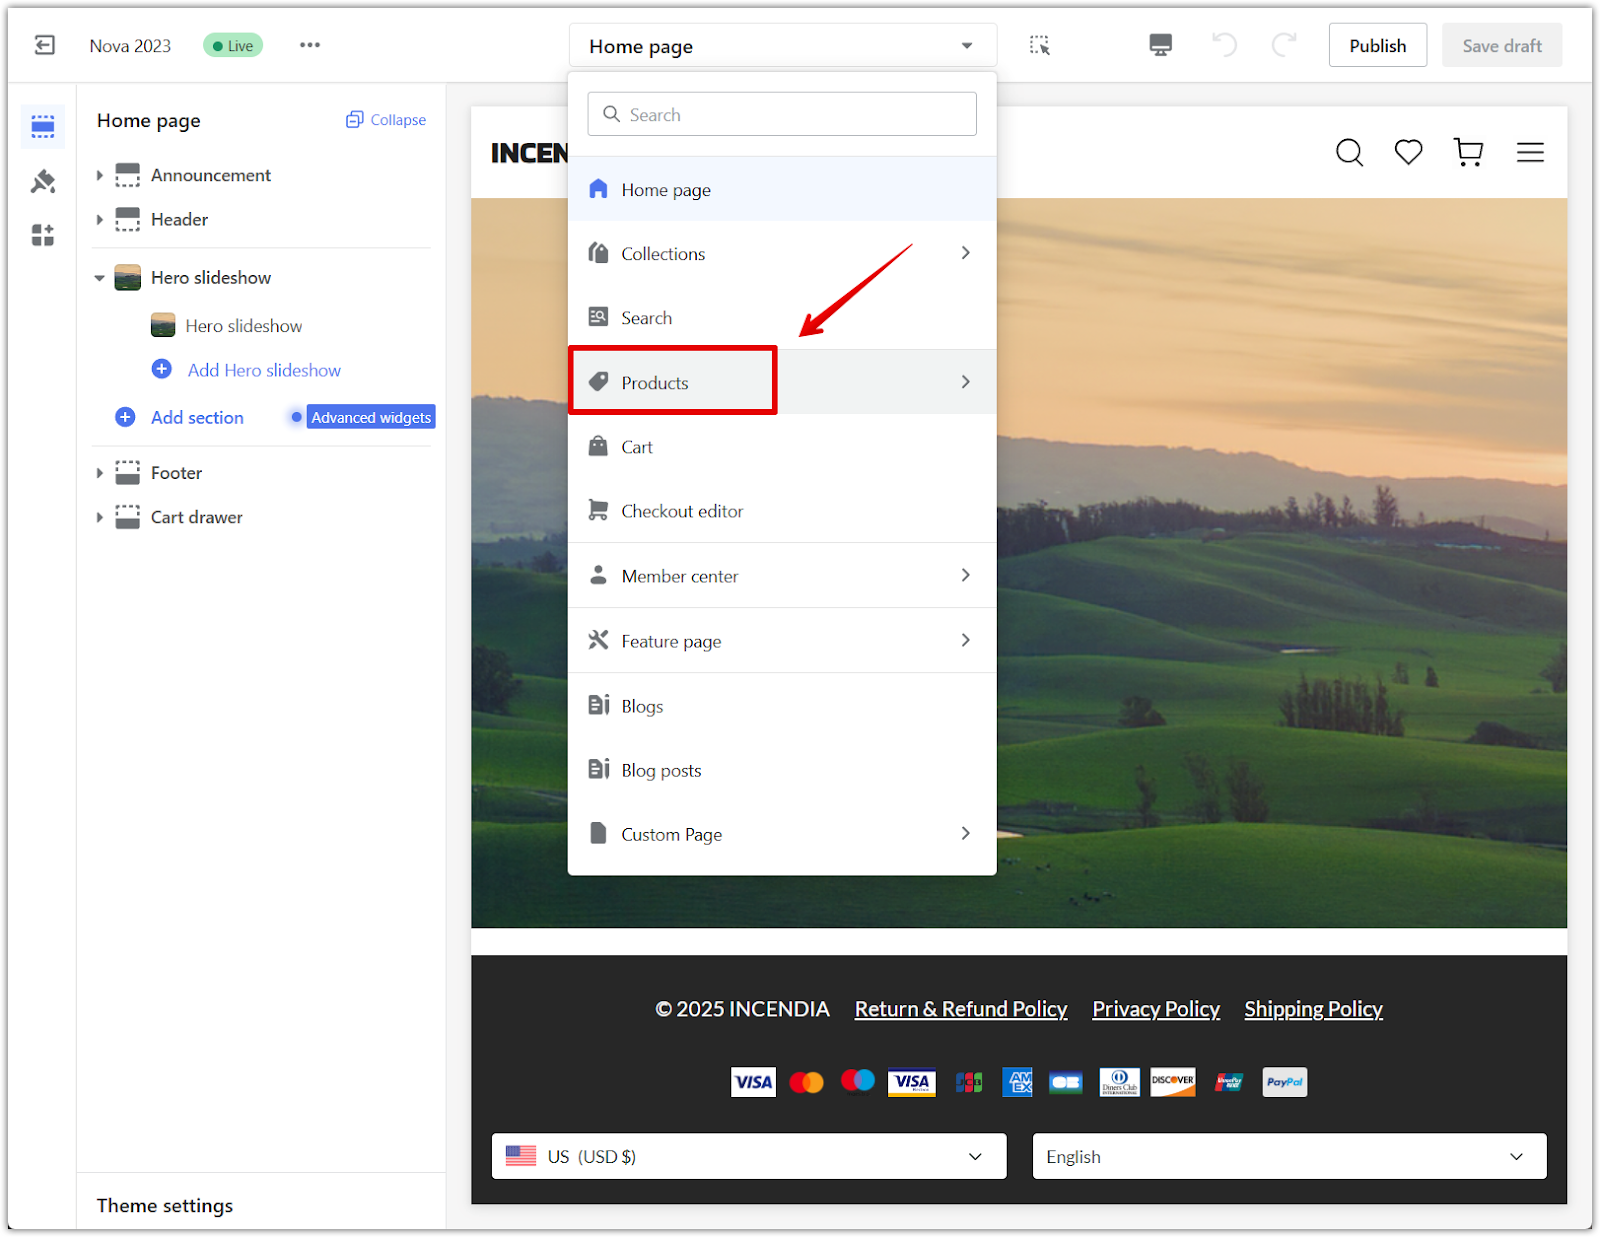
1. Go to your product: From your Shoplazza admin > Products > All products, select the product you want to customize.
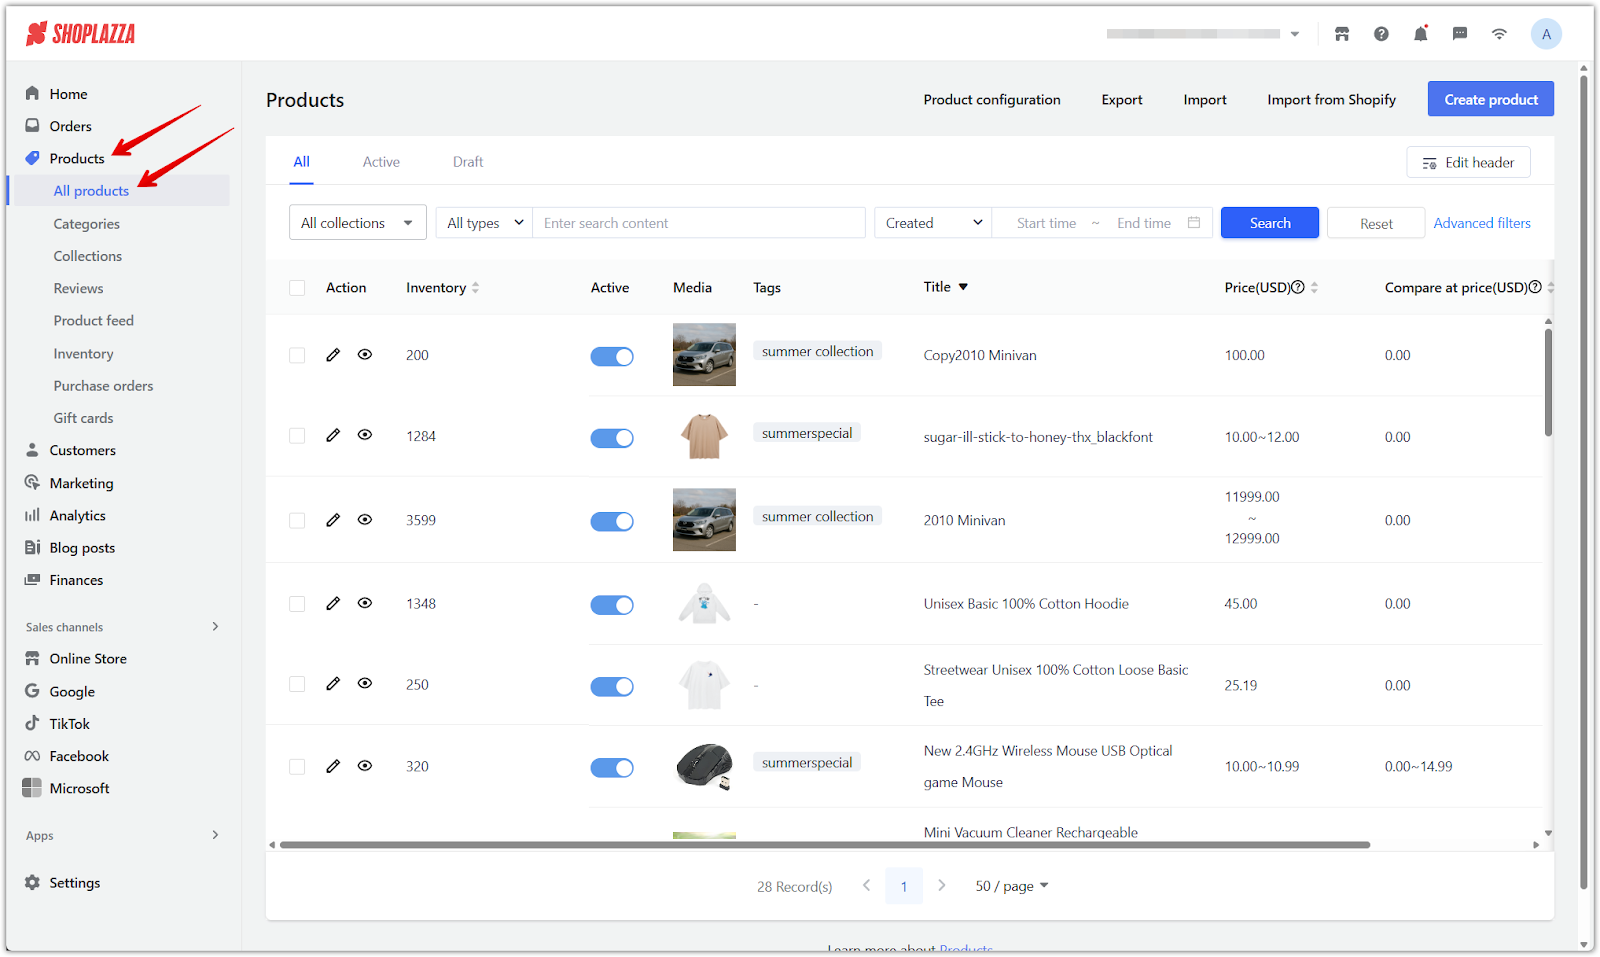
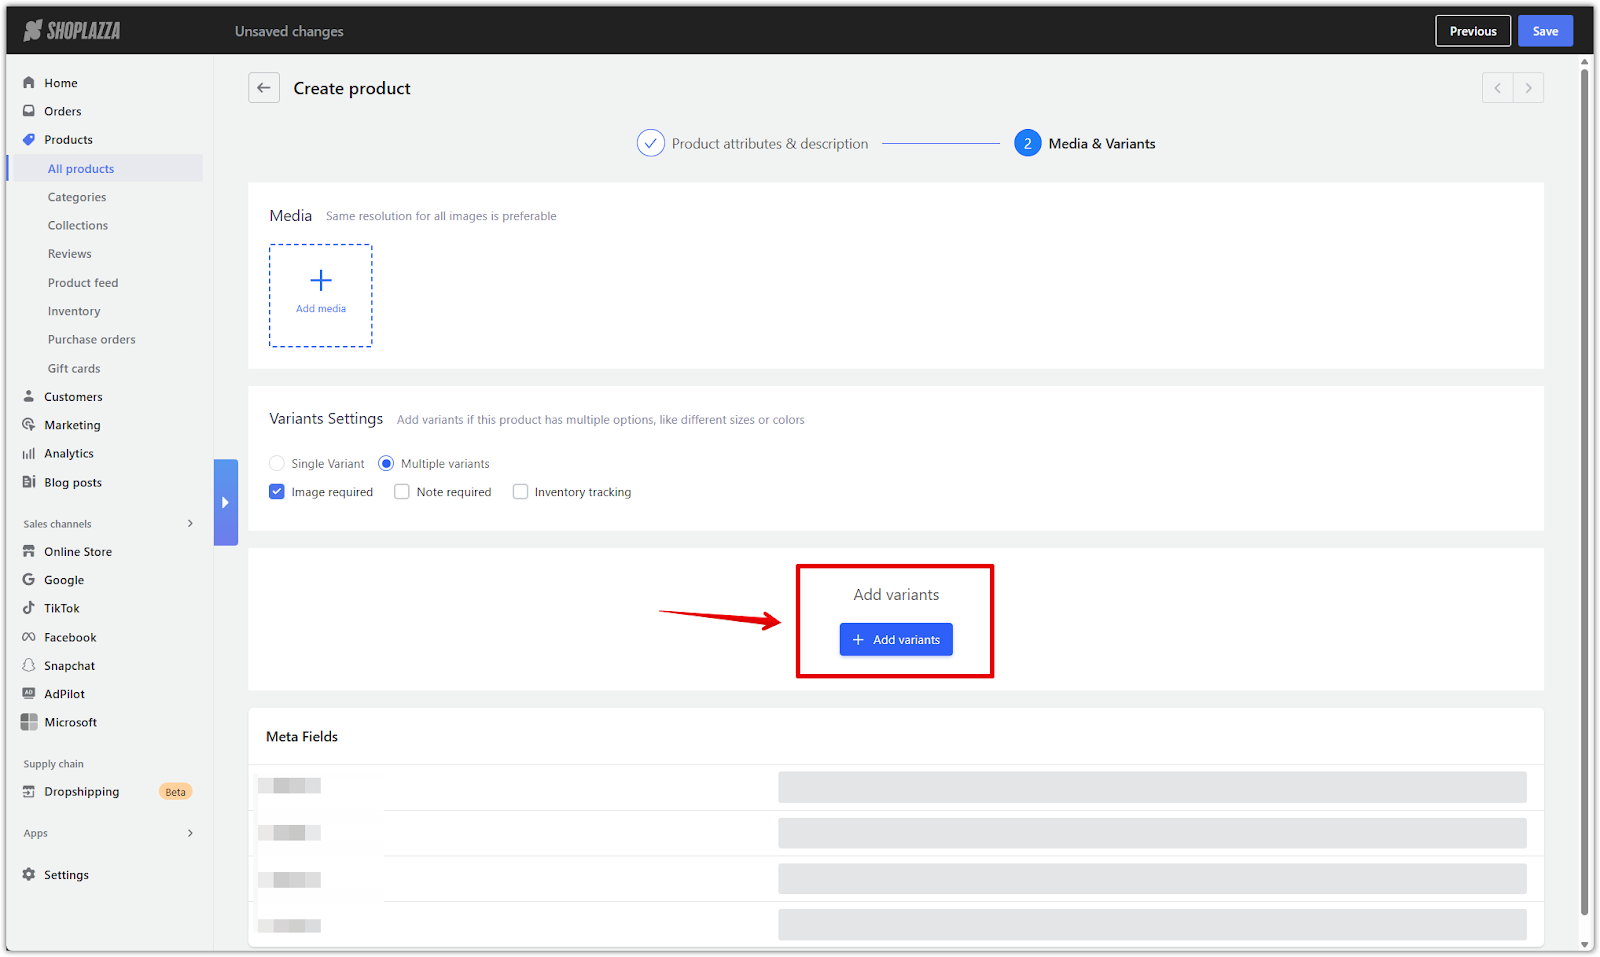
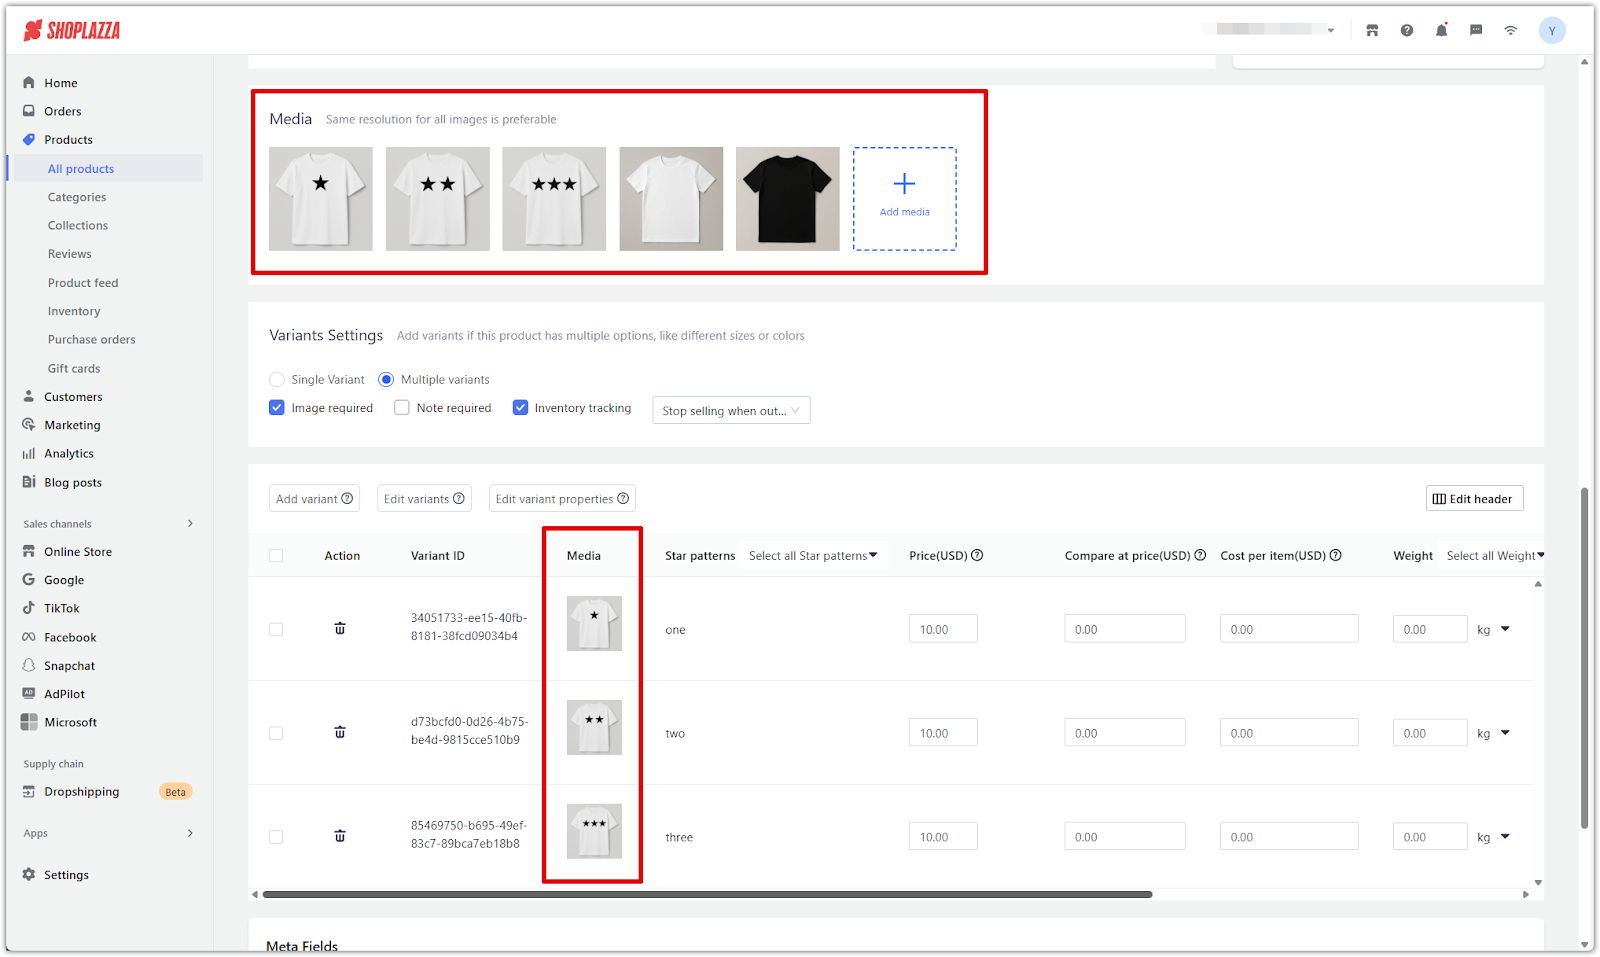
2. Enable variant options: Scroll to the Variants section, then enable both Multiple variants and Image required.
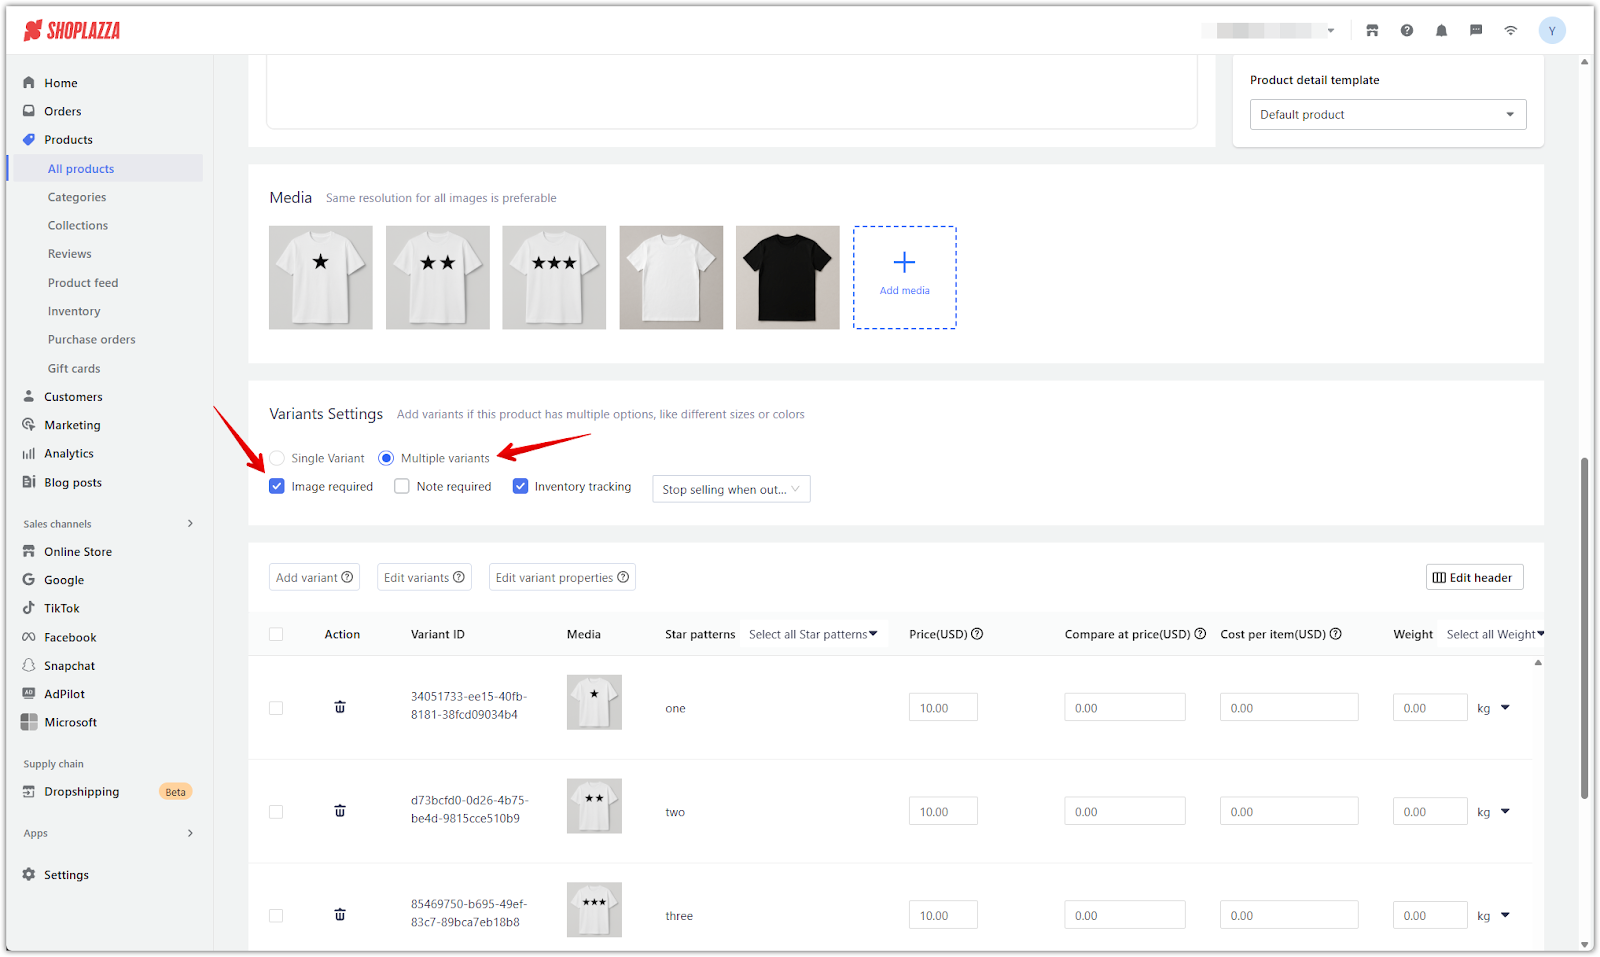
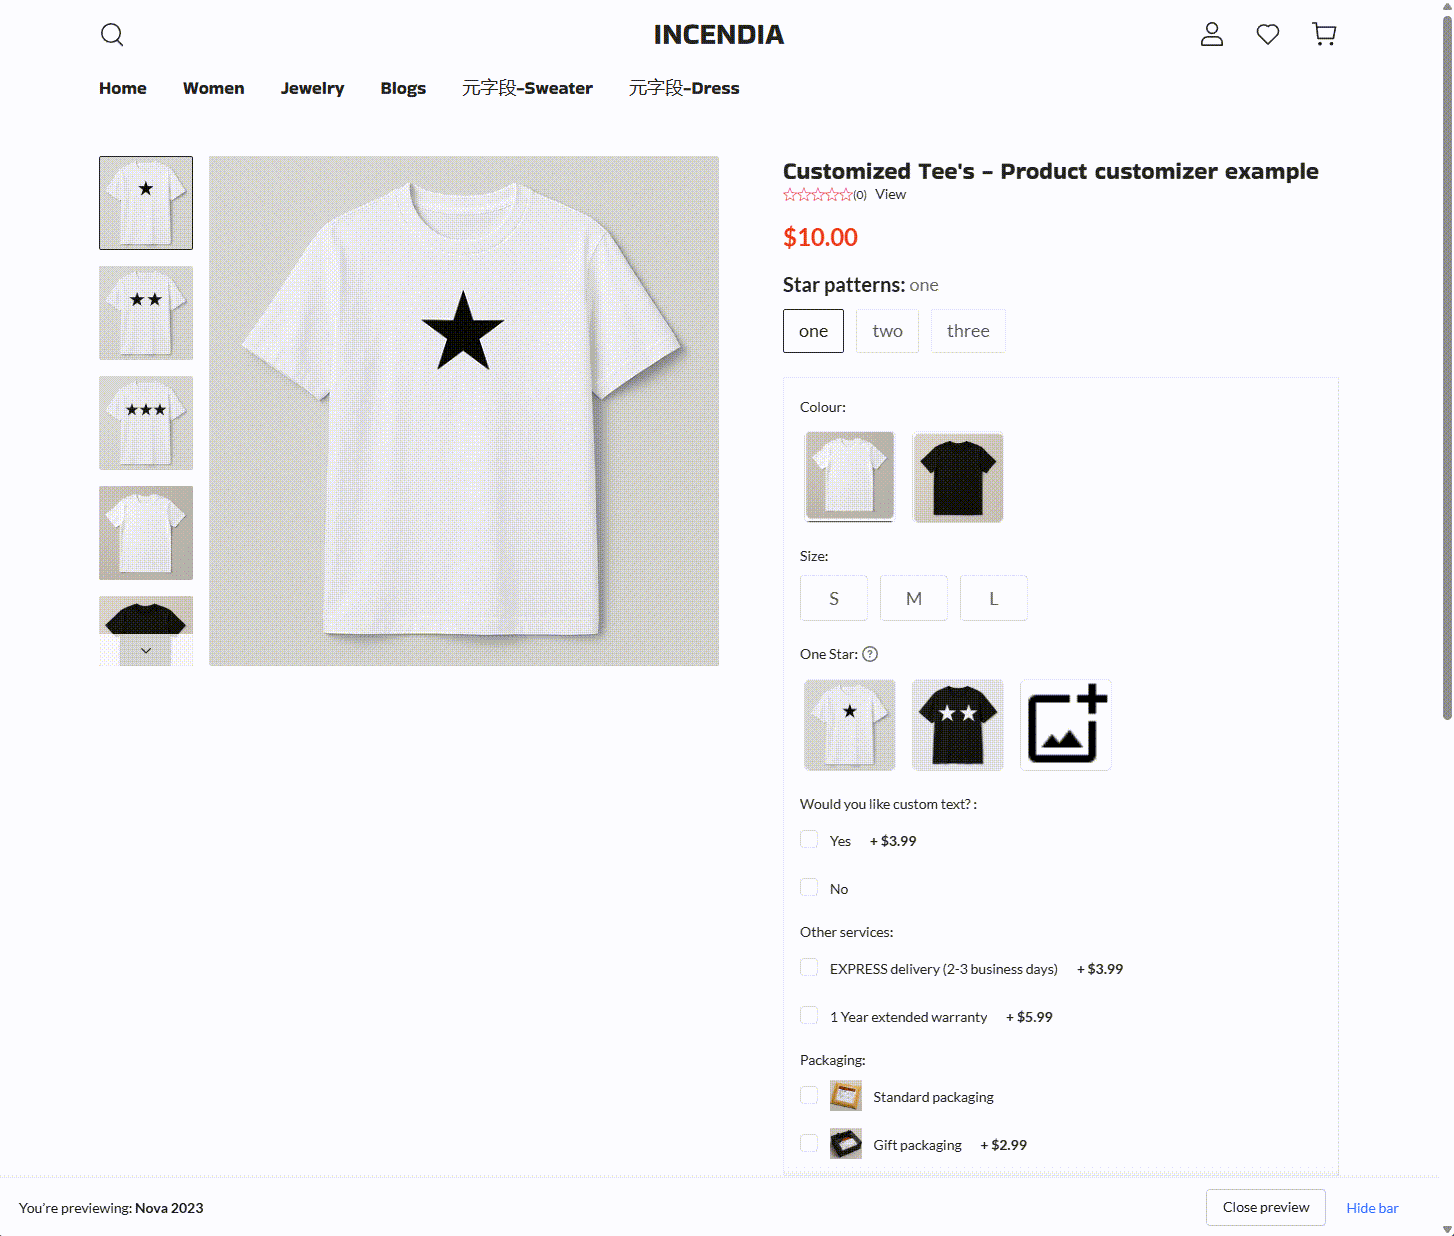
3. Add variant attributes: Click Add variants, name the option something like Star patterns, and enter values such as one, two, and three, then click Confirm.
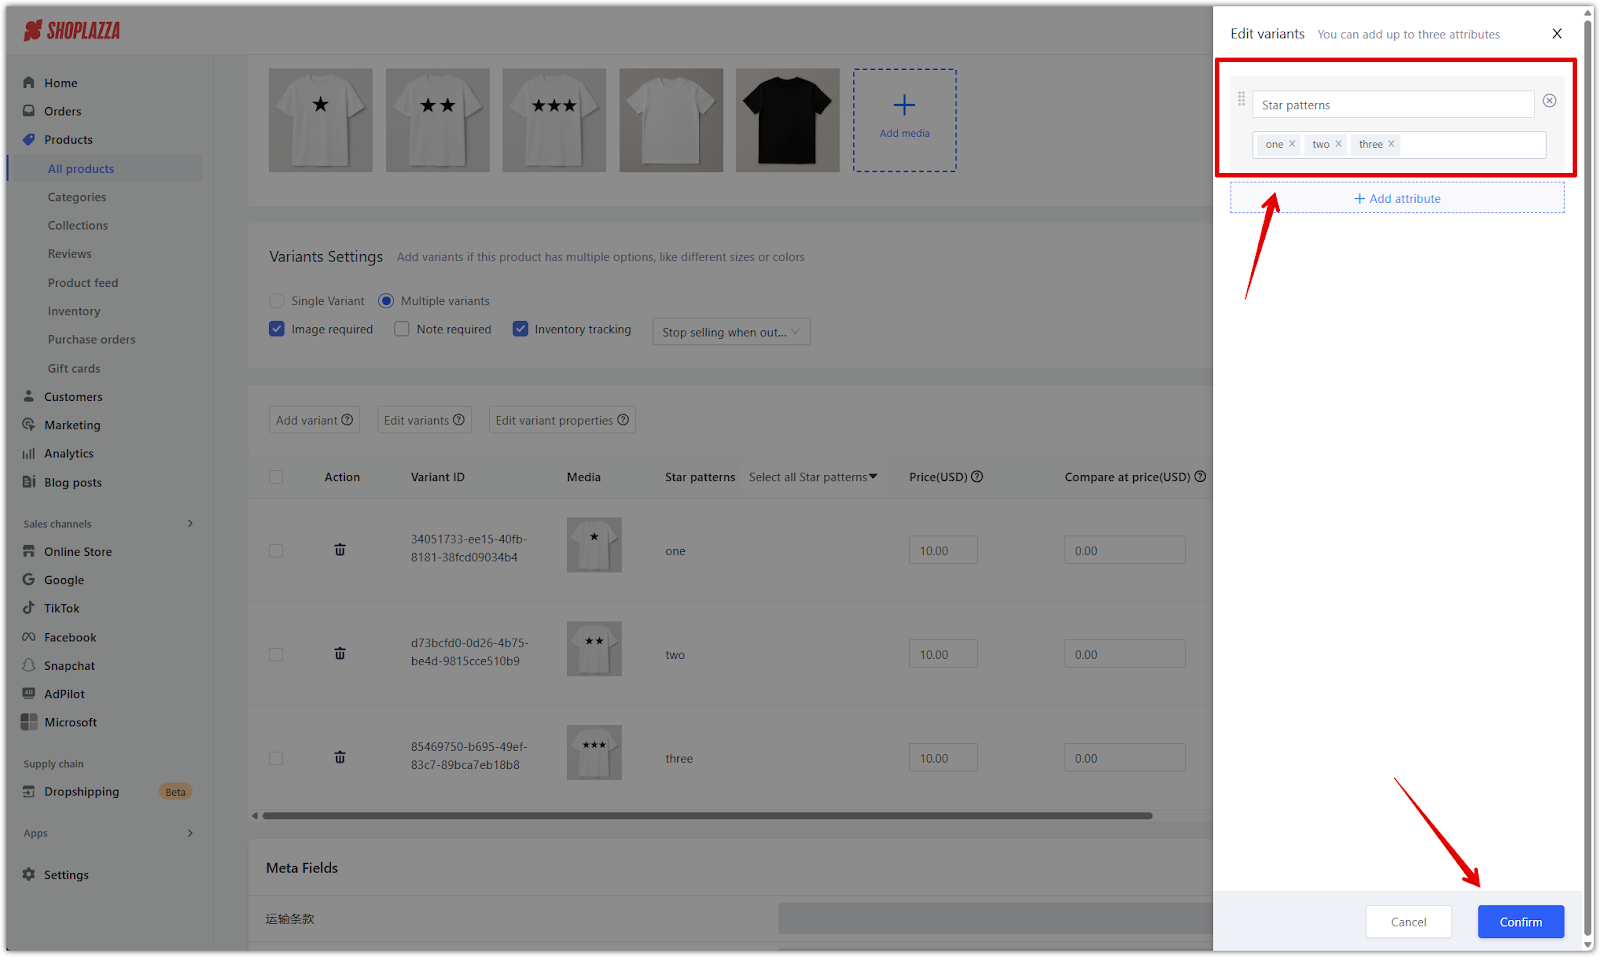
4. Assign images to each variant: Add a unique product image to each variant so that the main image updates when a customer selects a different design quantity. This allows the main mockup to update in real time, helping customers better visualize their selection.
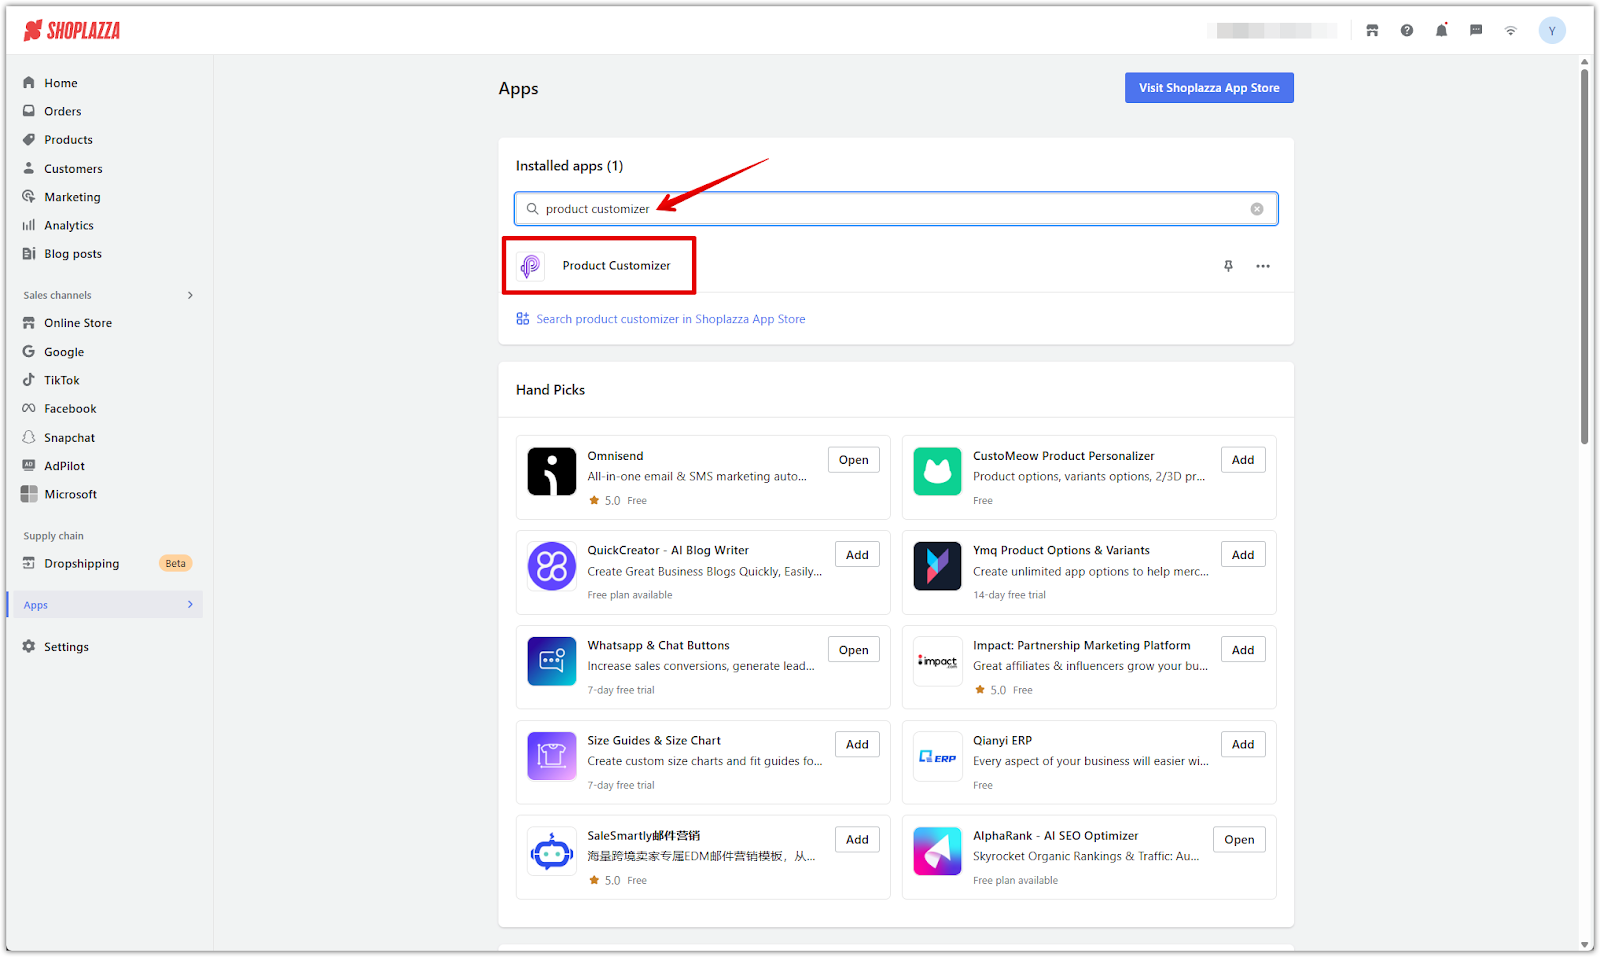
5. Access the Product Customizer app: Go to your Shoplazza admin > Apps > Product Customizer and select the product to begin configuring your options.
Building your option fields
This section walks you through how to select your product and build out each interactive customization option. These fields define the structure of your product experience and are configured inside the Product Customizer editor.
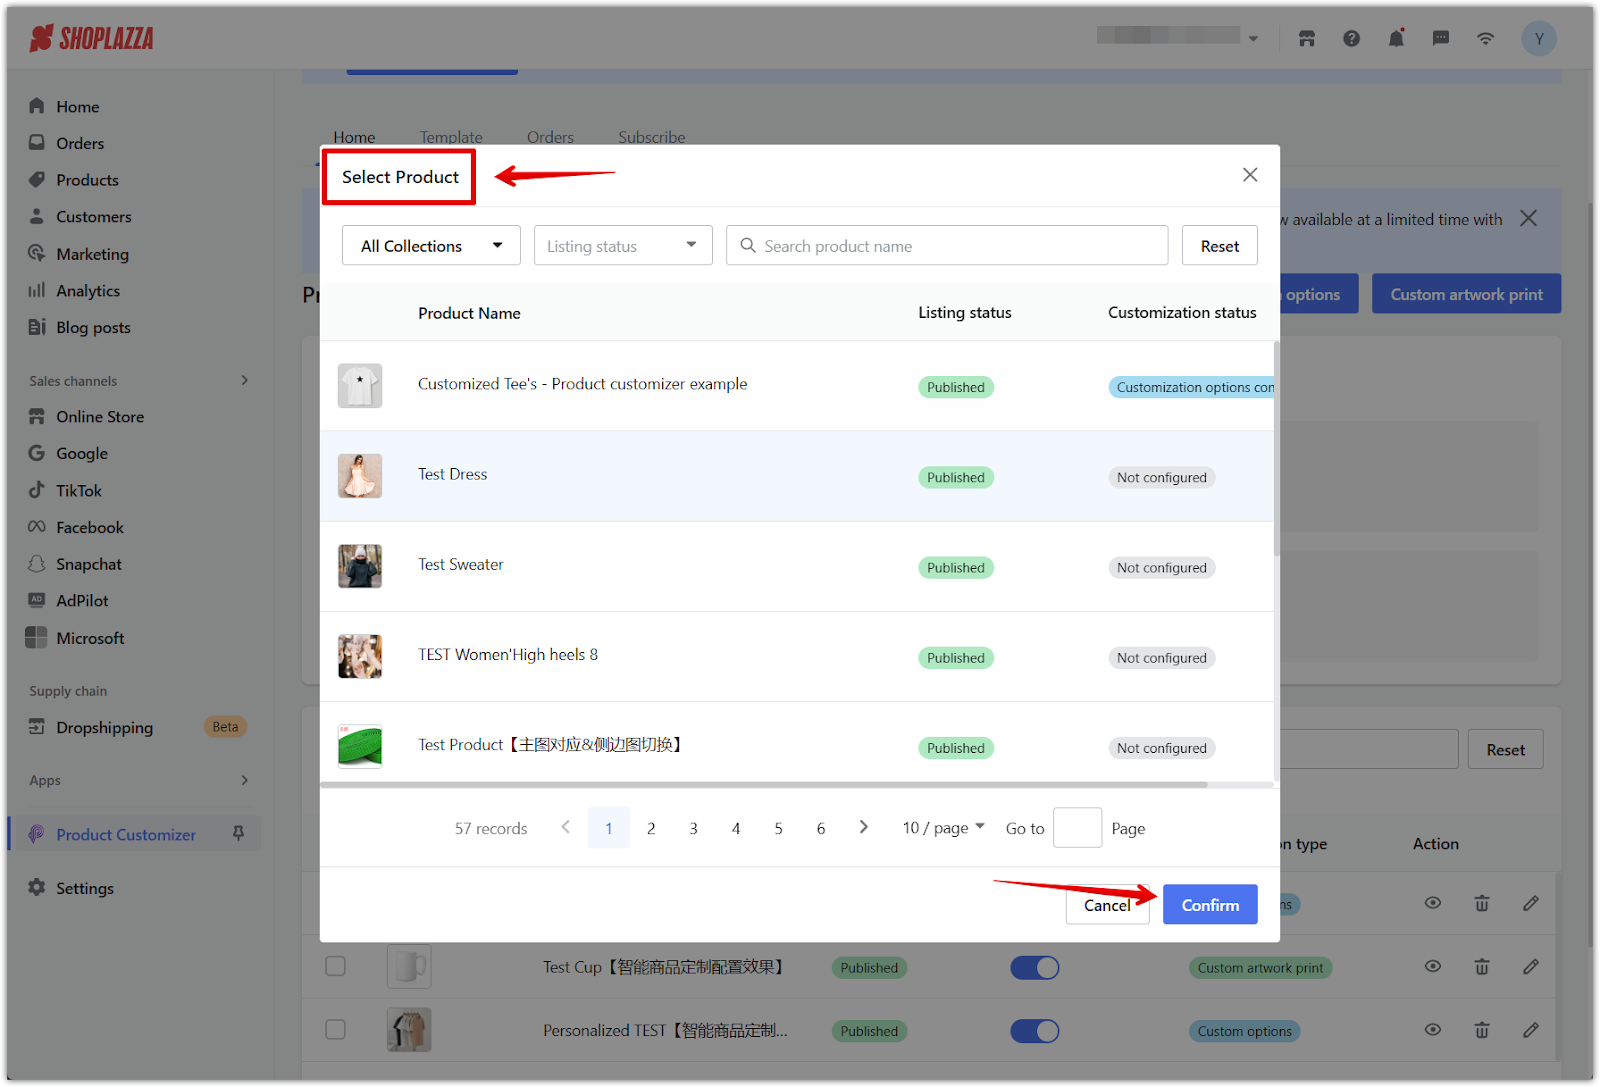
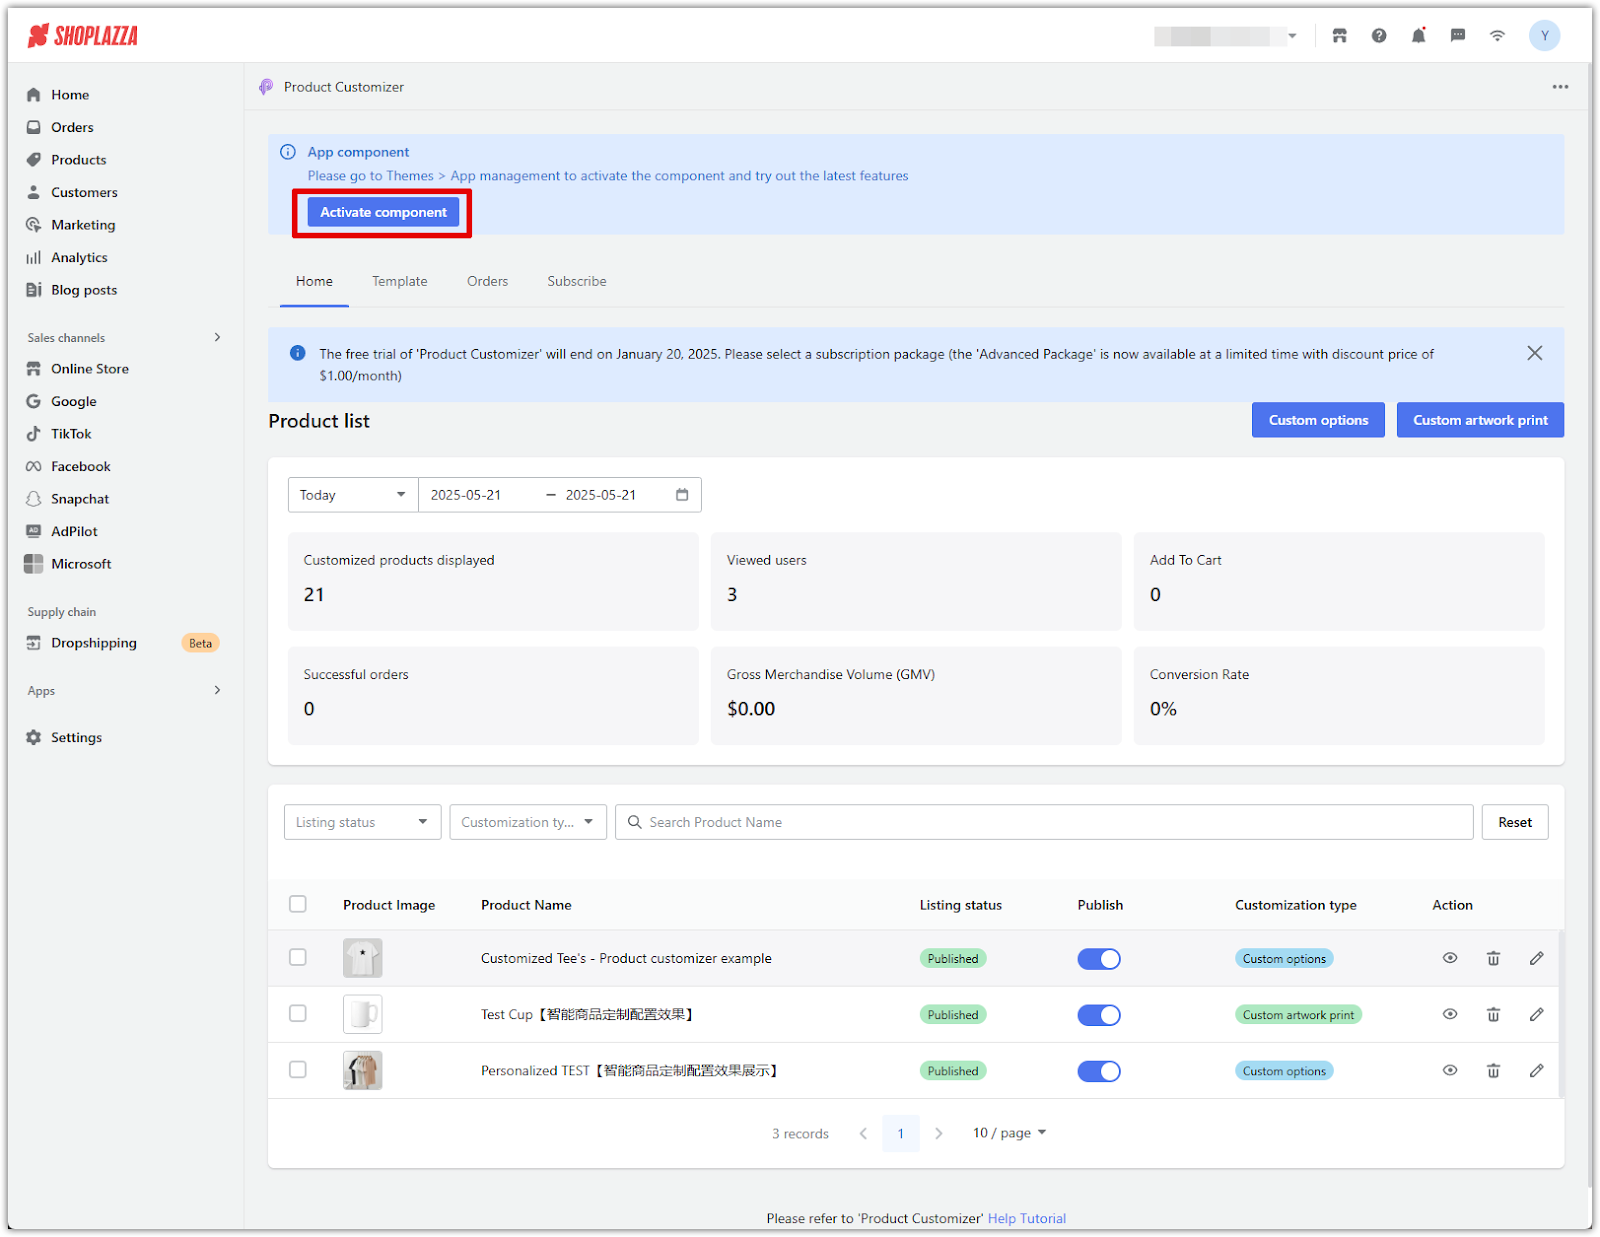
1. Open the Product Customizer app: Go to your Shoplazza admin > Apps > Product Customizer, then click Custom options.
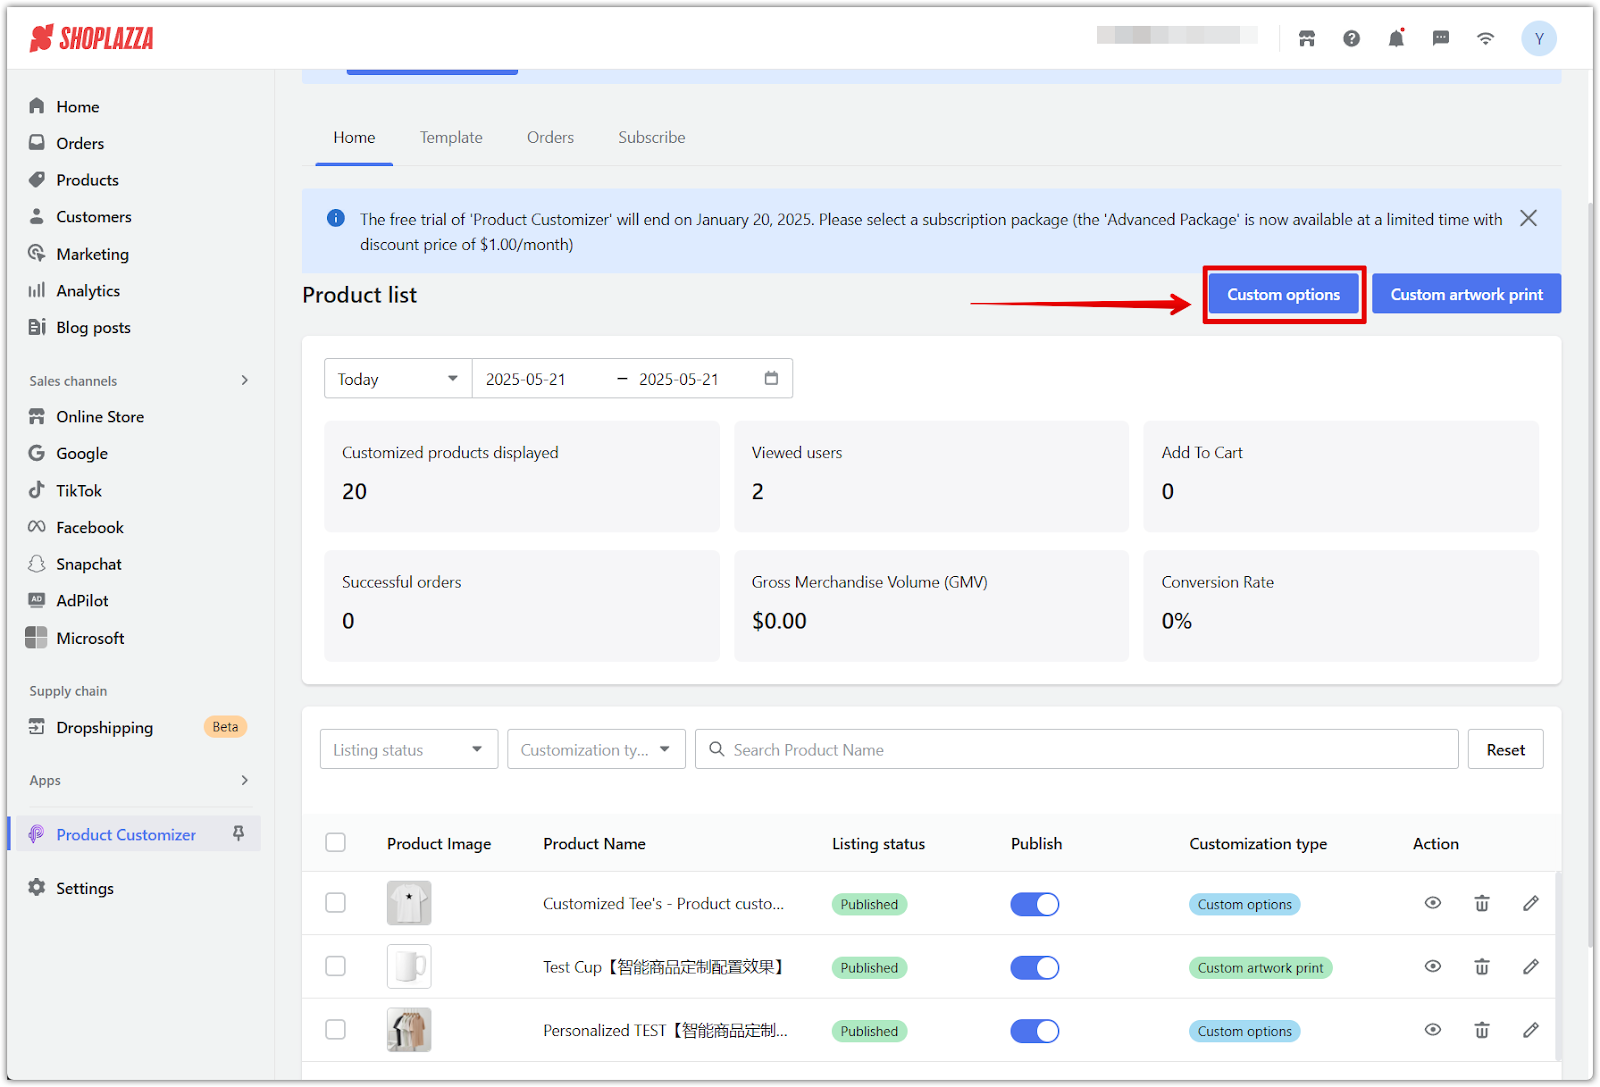
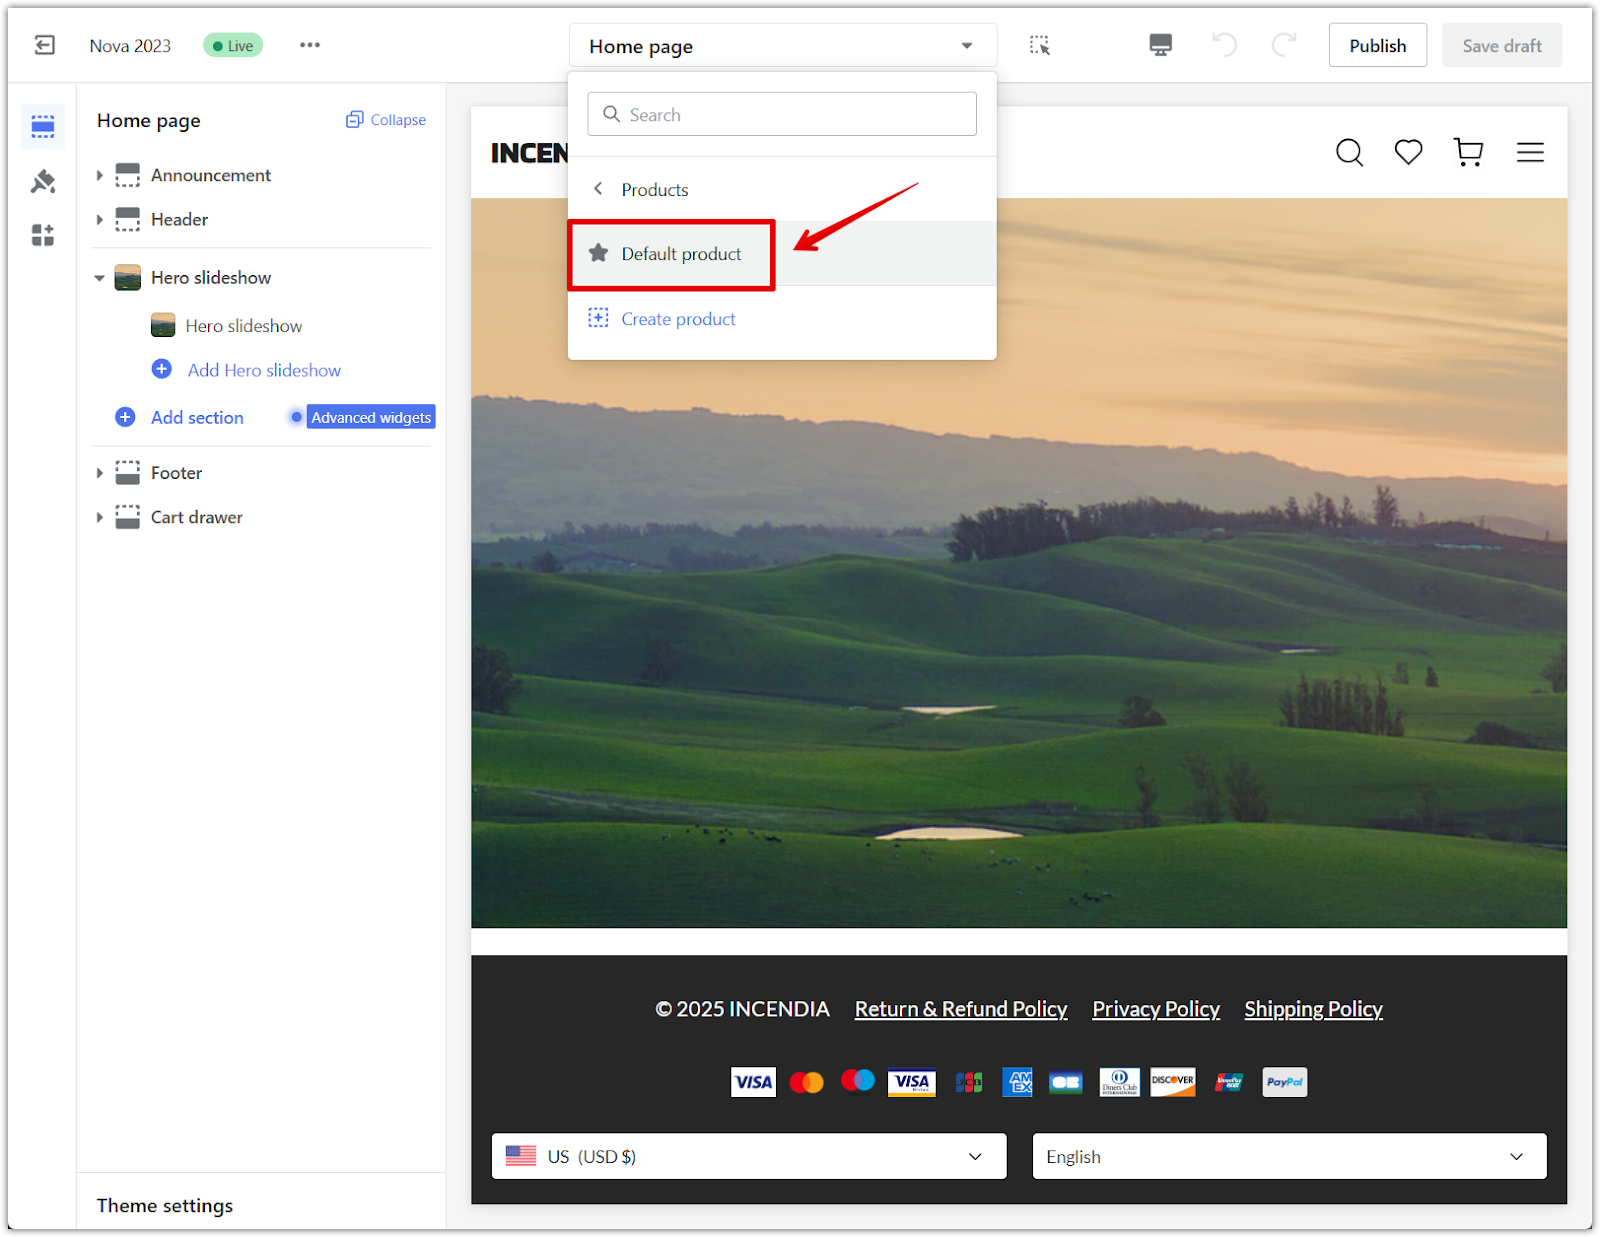
2. Select your product: Click Select Product, choose your target product, and click Confirm.
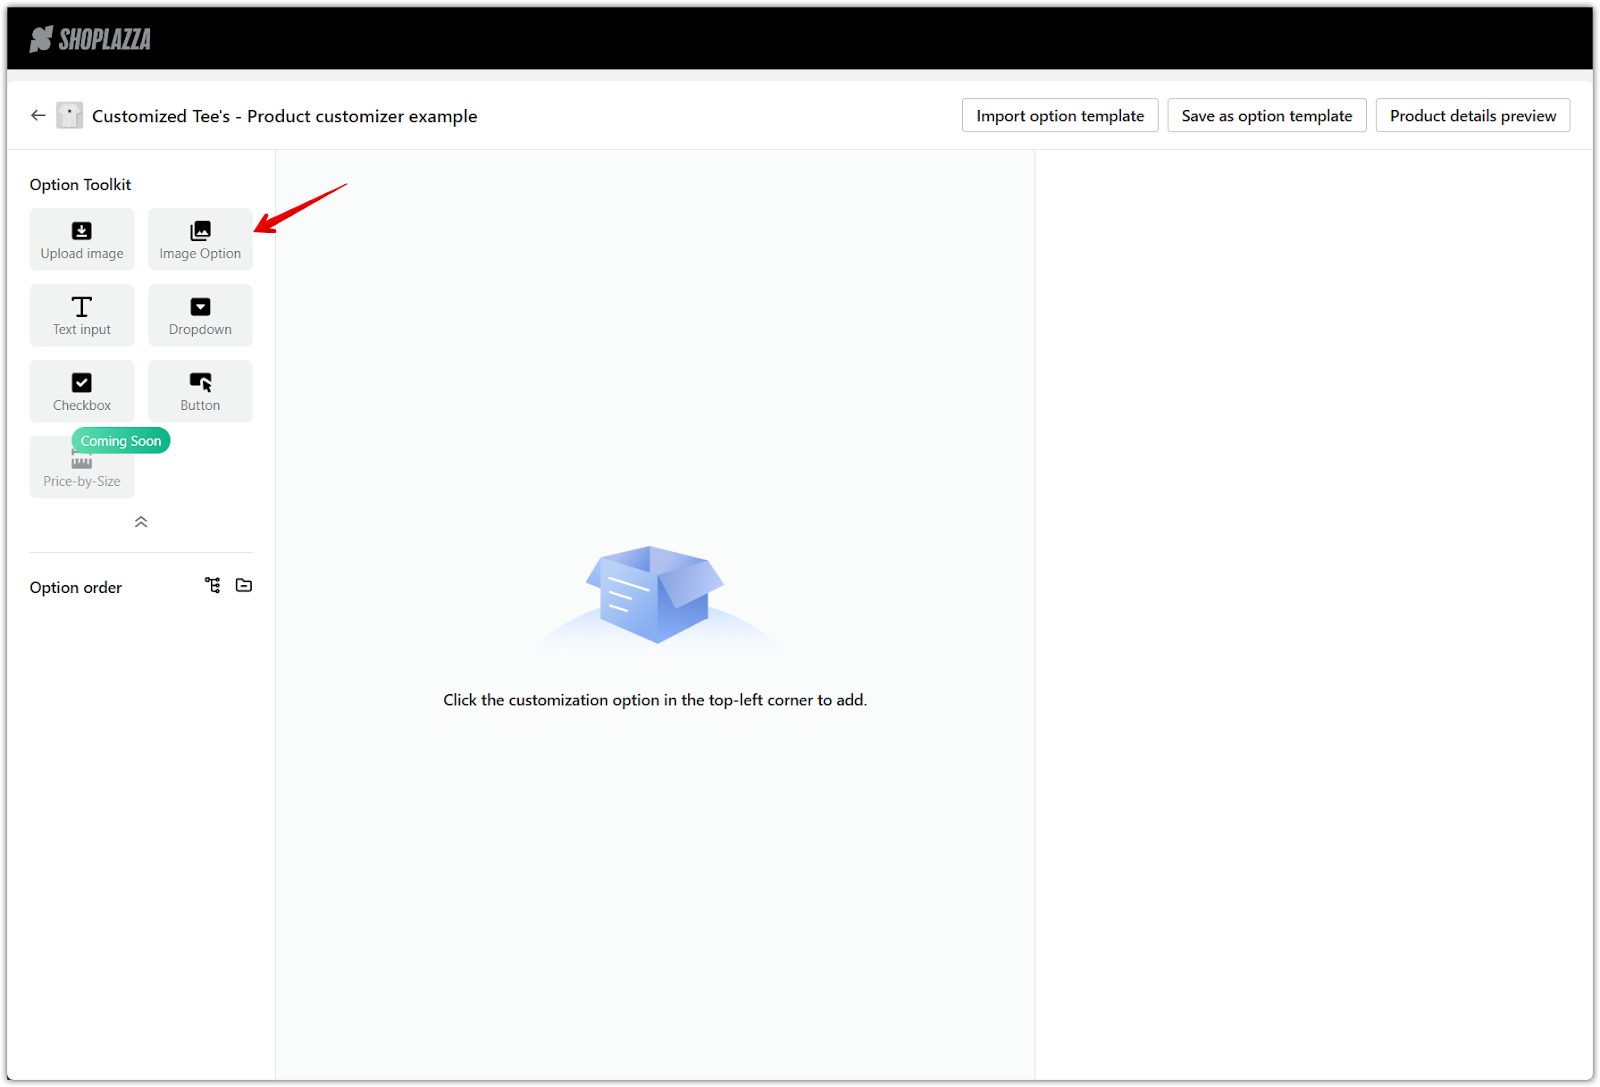
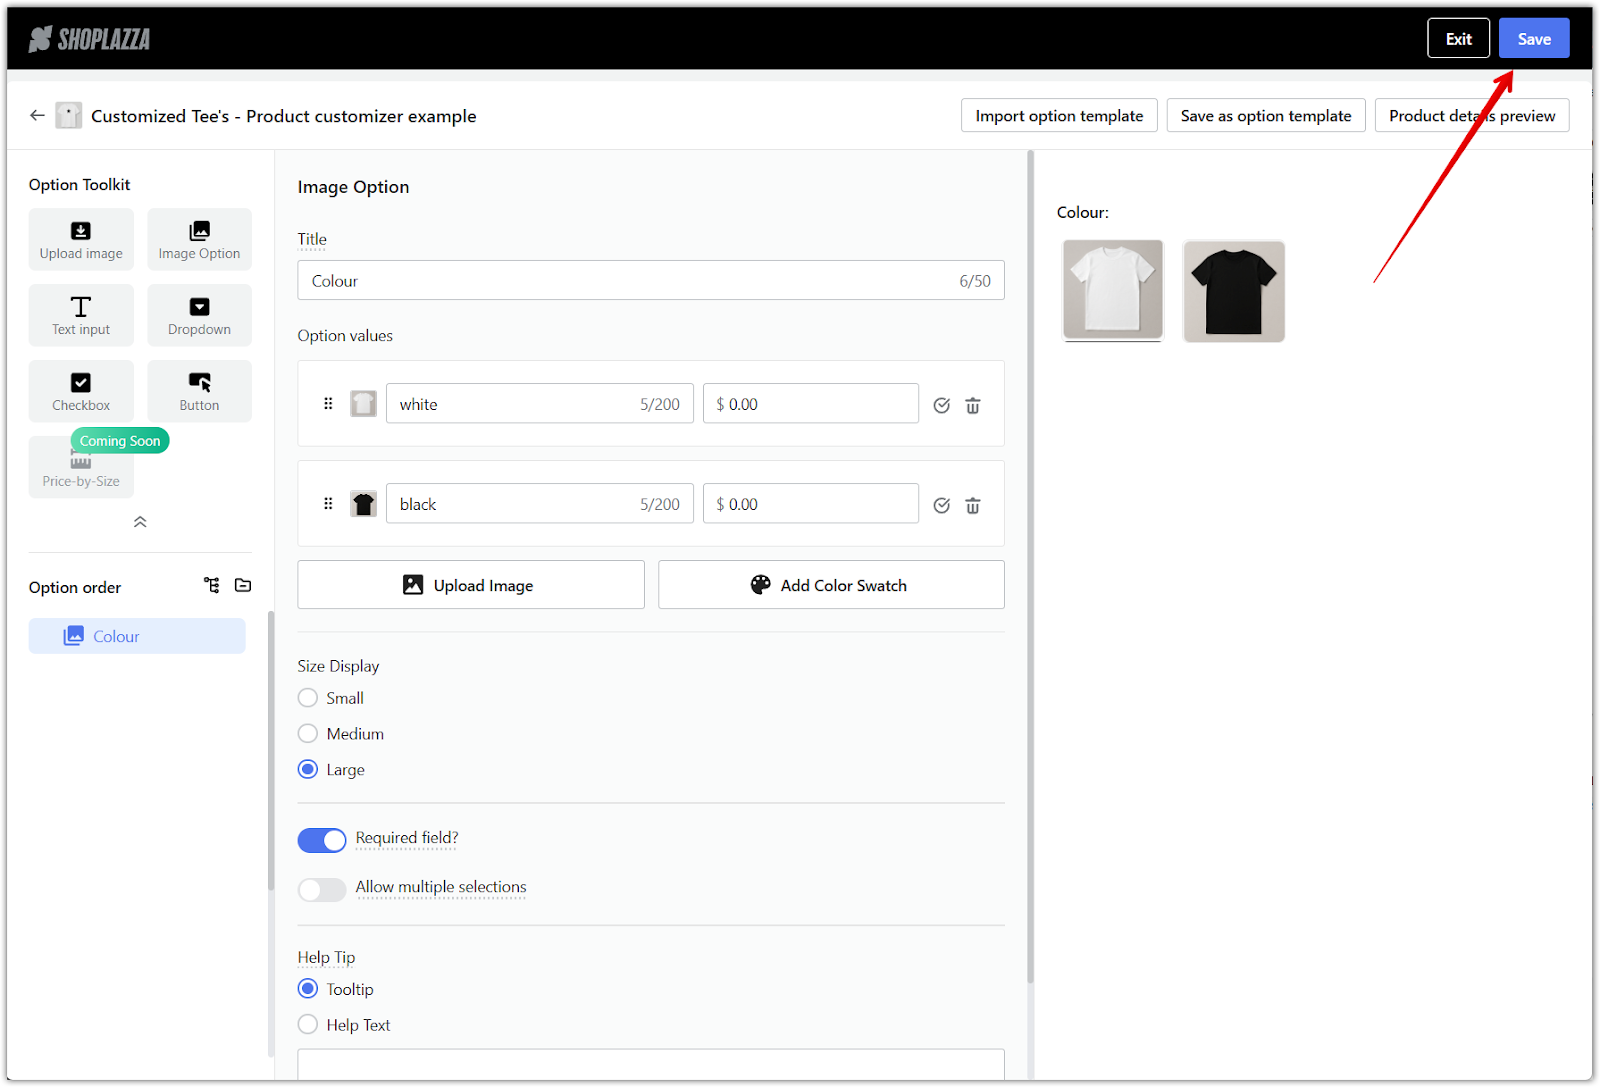
3. Add an image option block: Click Image Option from the Option Toolkit in the top-left panel to begin creating your first option.
4. Name the option and define values: Enter a Title such as Colour, then add each Option value (e.g. black, white). You can also upload images or swatches and assign prices to individual values if needed.
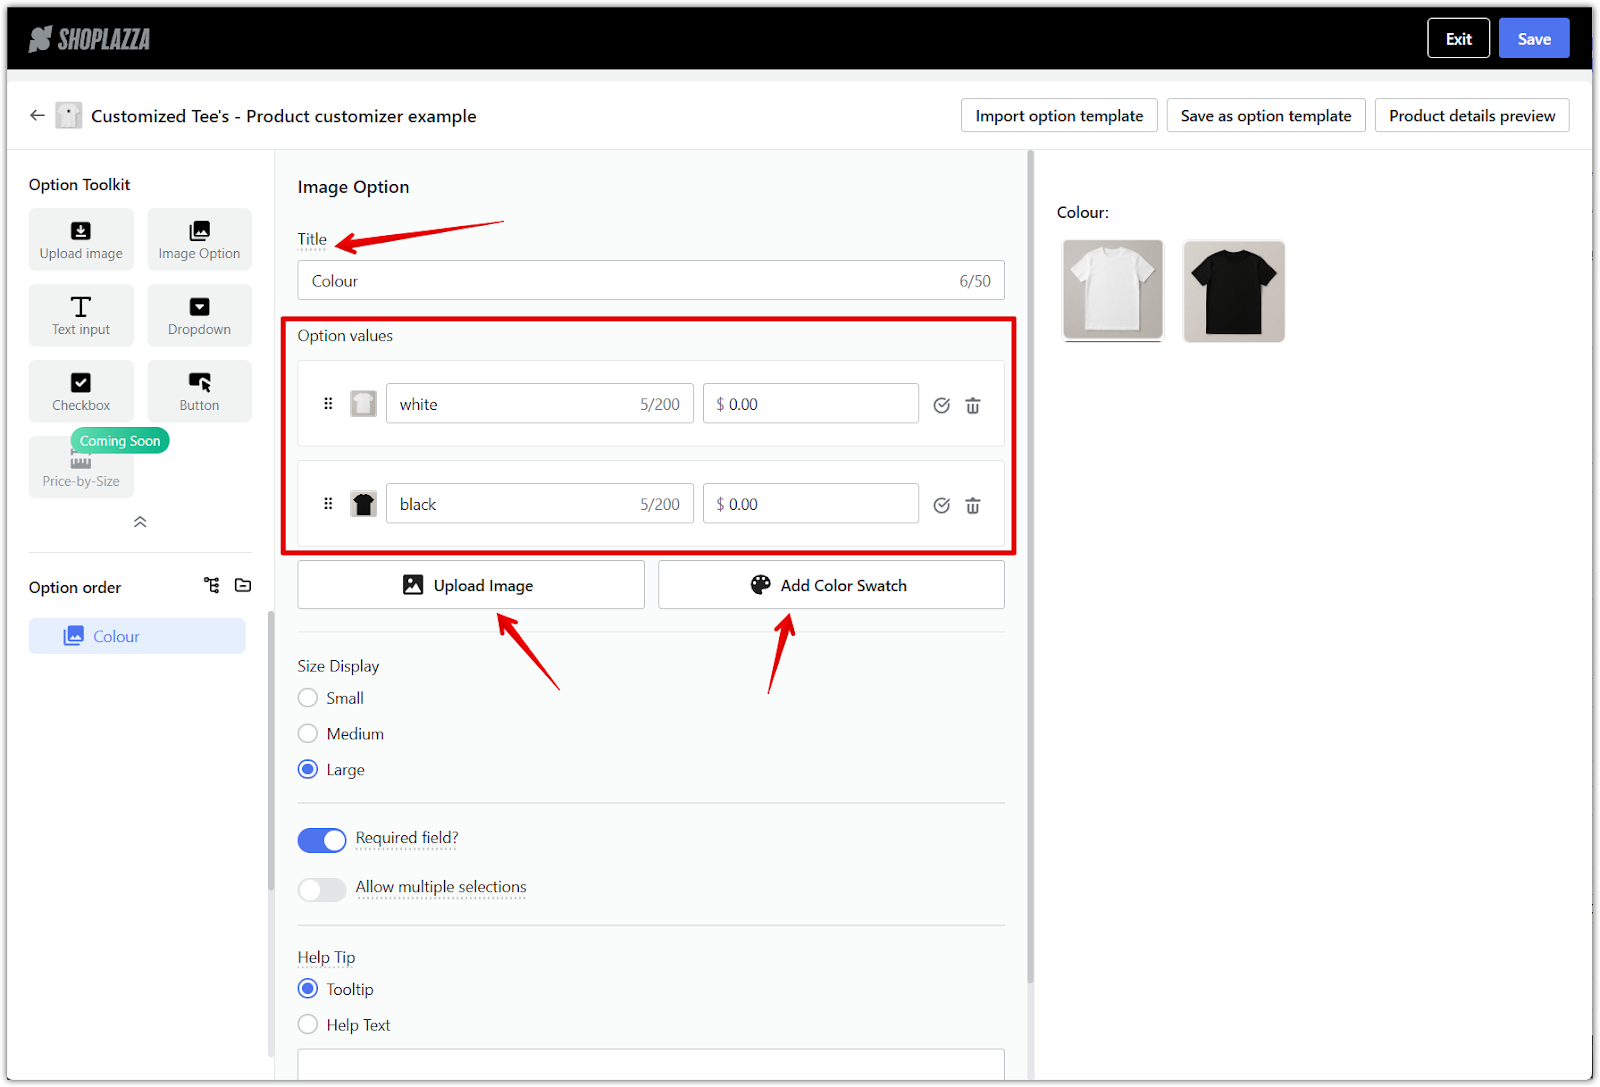
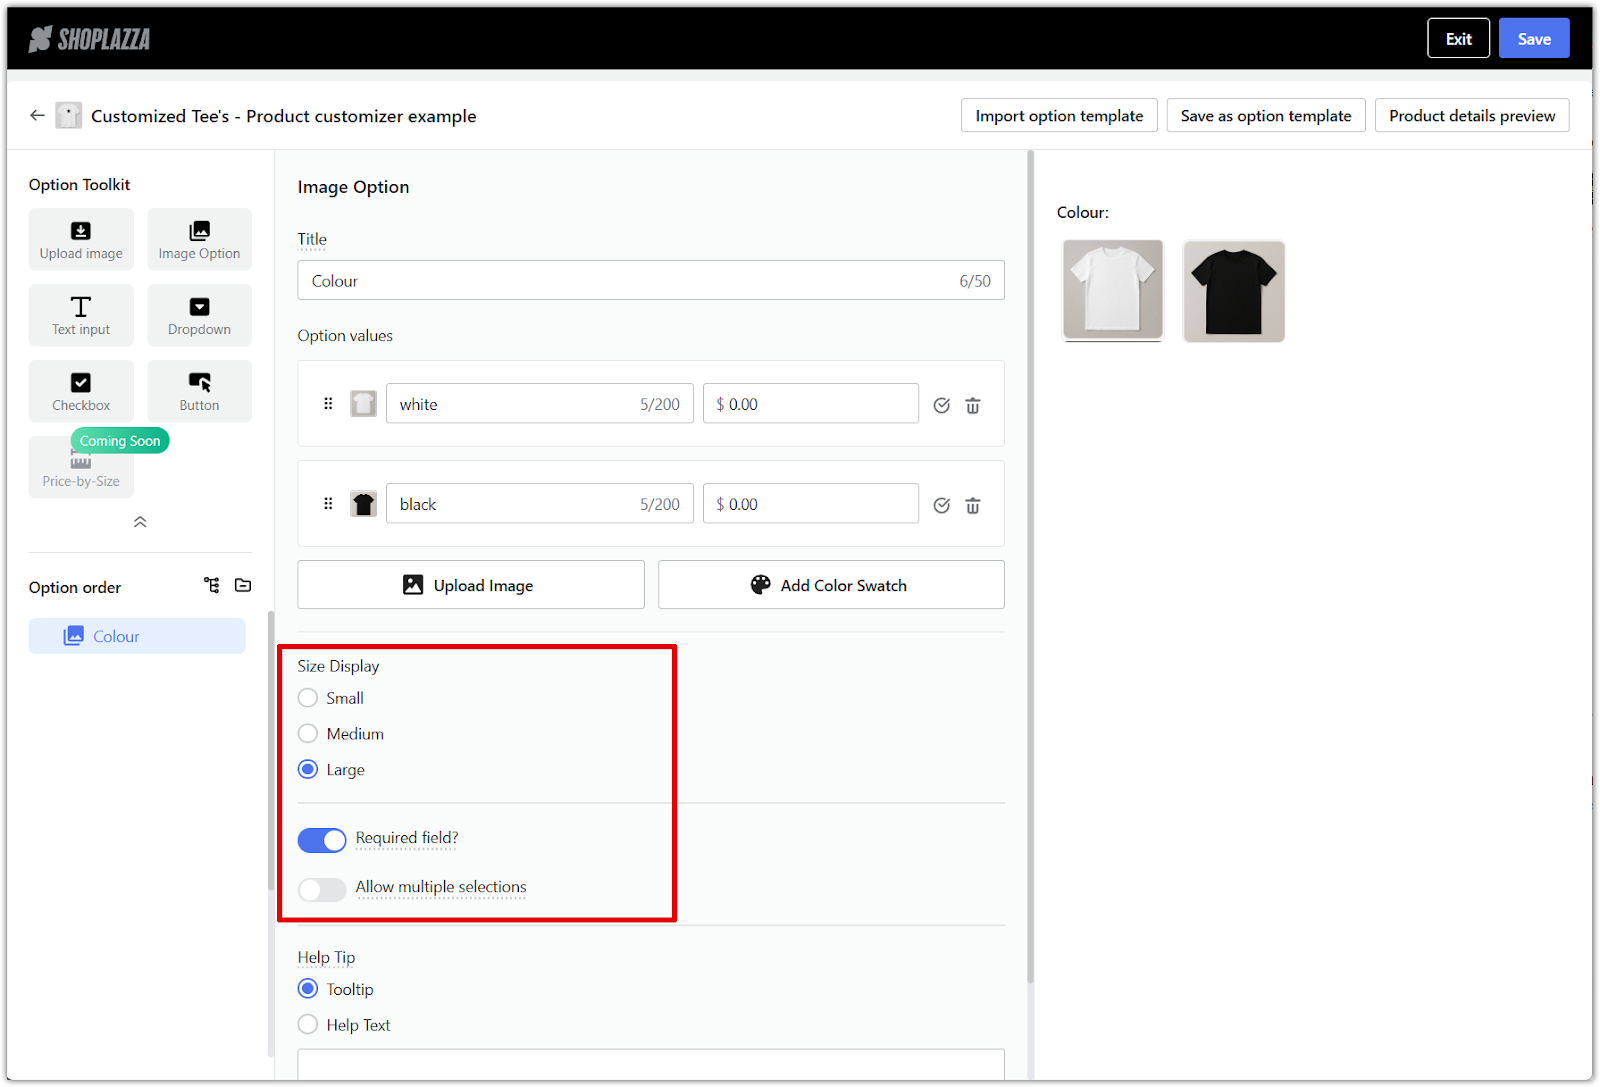
5. Adjust size display and field settings: Choose how option blocks appear by selecting a size under Size Display (Small, Medium, Large). Then toggle Required field? if this option must be selected before checkout, and enable Allow multiple selections if more than one choice is allowed.
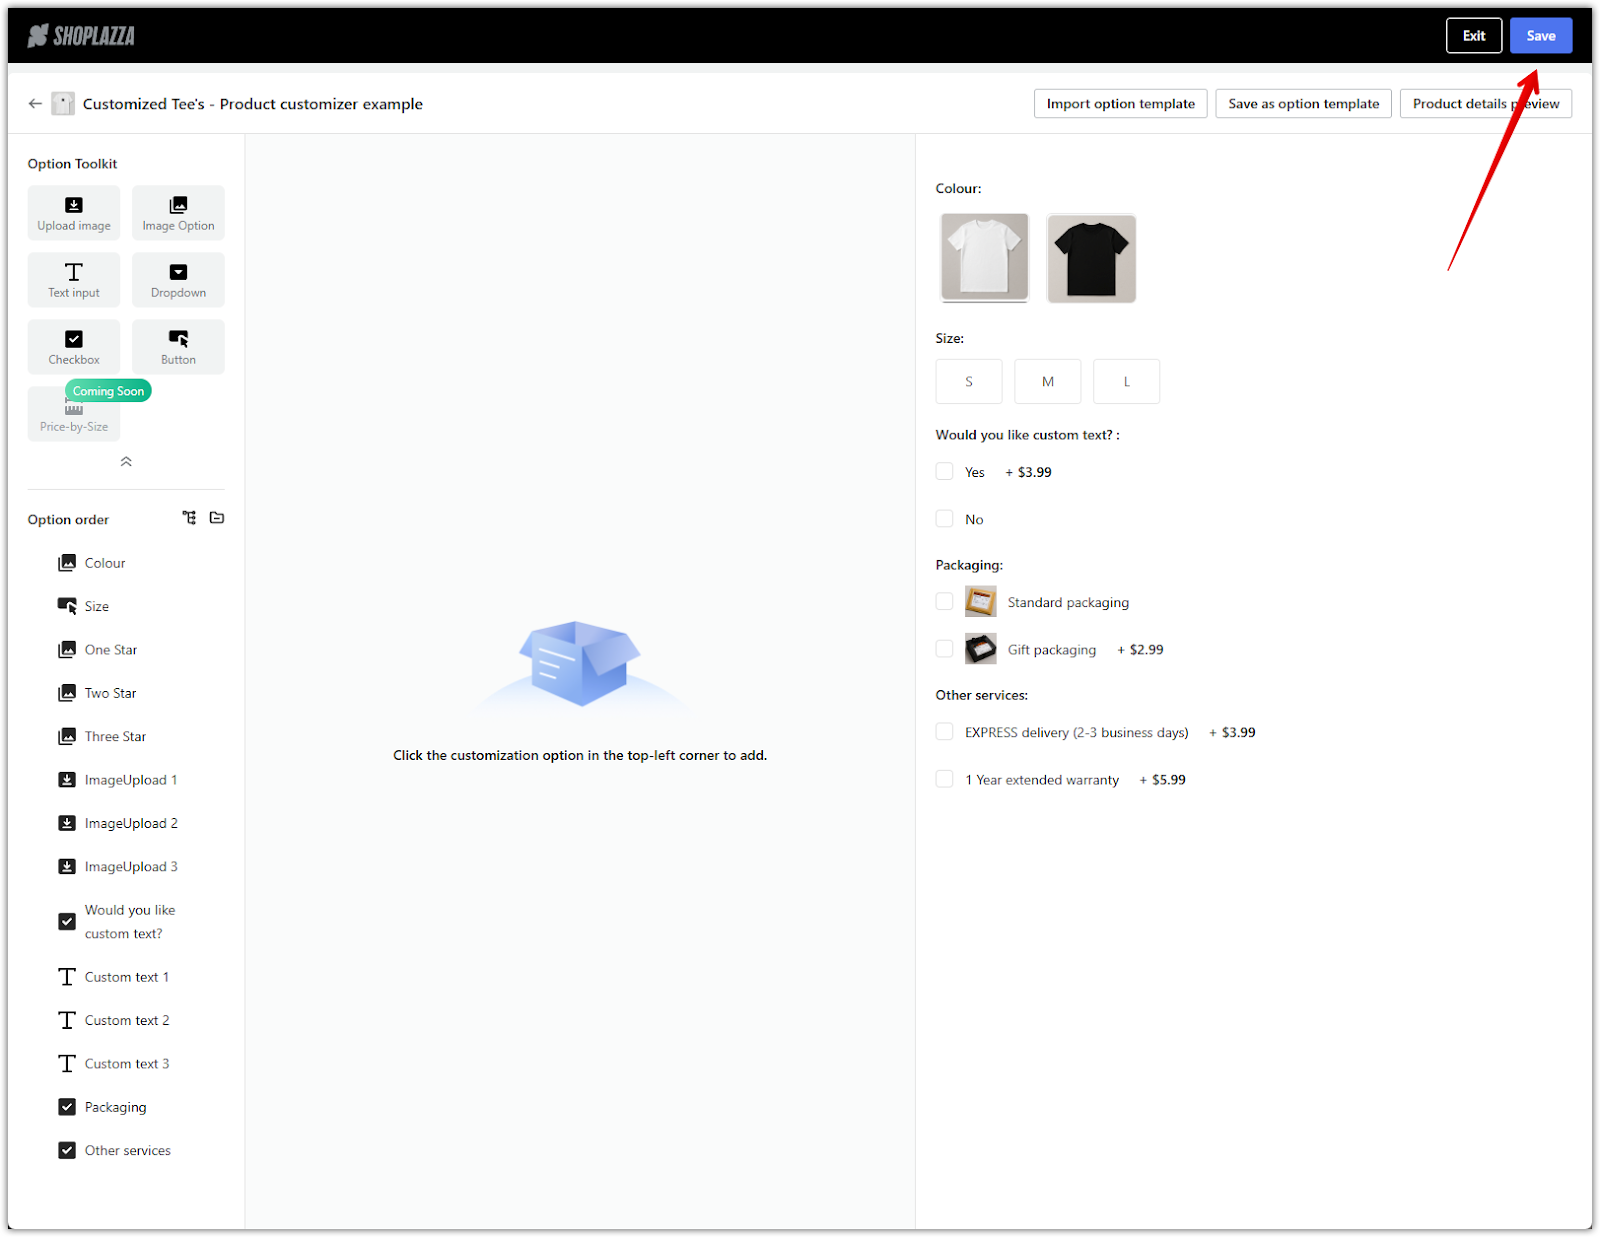
6. Save the option: Once all values and settings are configured, click Save in the top-right corner of the Option Toolkit to apply this option to your product immediately.
7. Continue adding new customization fields: Continue adding new options for each part of your customization flow. For example:
- Custom image groups: Use Image Option to create groups like One Star, Two Star, and Three Star, each with preset images and an upload option.
- Upload fields: Use Upload image to create fields like Upload image 1, Upload image 2, etc., and apply an optional charge.
- Name personalization: Use Text input to collect names for each design area. Label these as Custom text 1, Custom text 2, and so on.
- Extra services and packaging: Use Checkbox to offer upsells such as Gift wrap, VIP support, or 30-day guarantee.

8. Reorder the option list: Drag and drop options in the left-side panel to adjust how they appear on the product page. This controls the order customers see them in the storefront.

Configuring display conditions
Display conditions ensure that only the relevant fields appear based on what the customer has selected. This keeps the page clean and user-friendly.
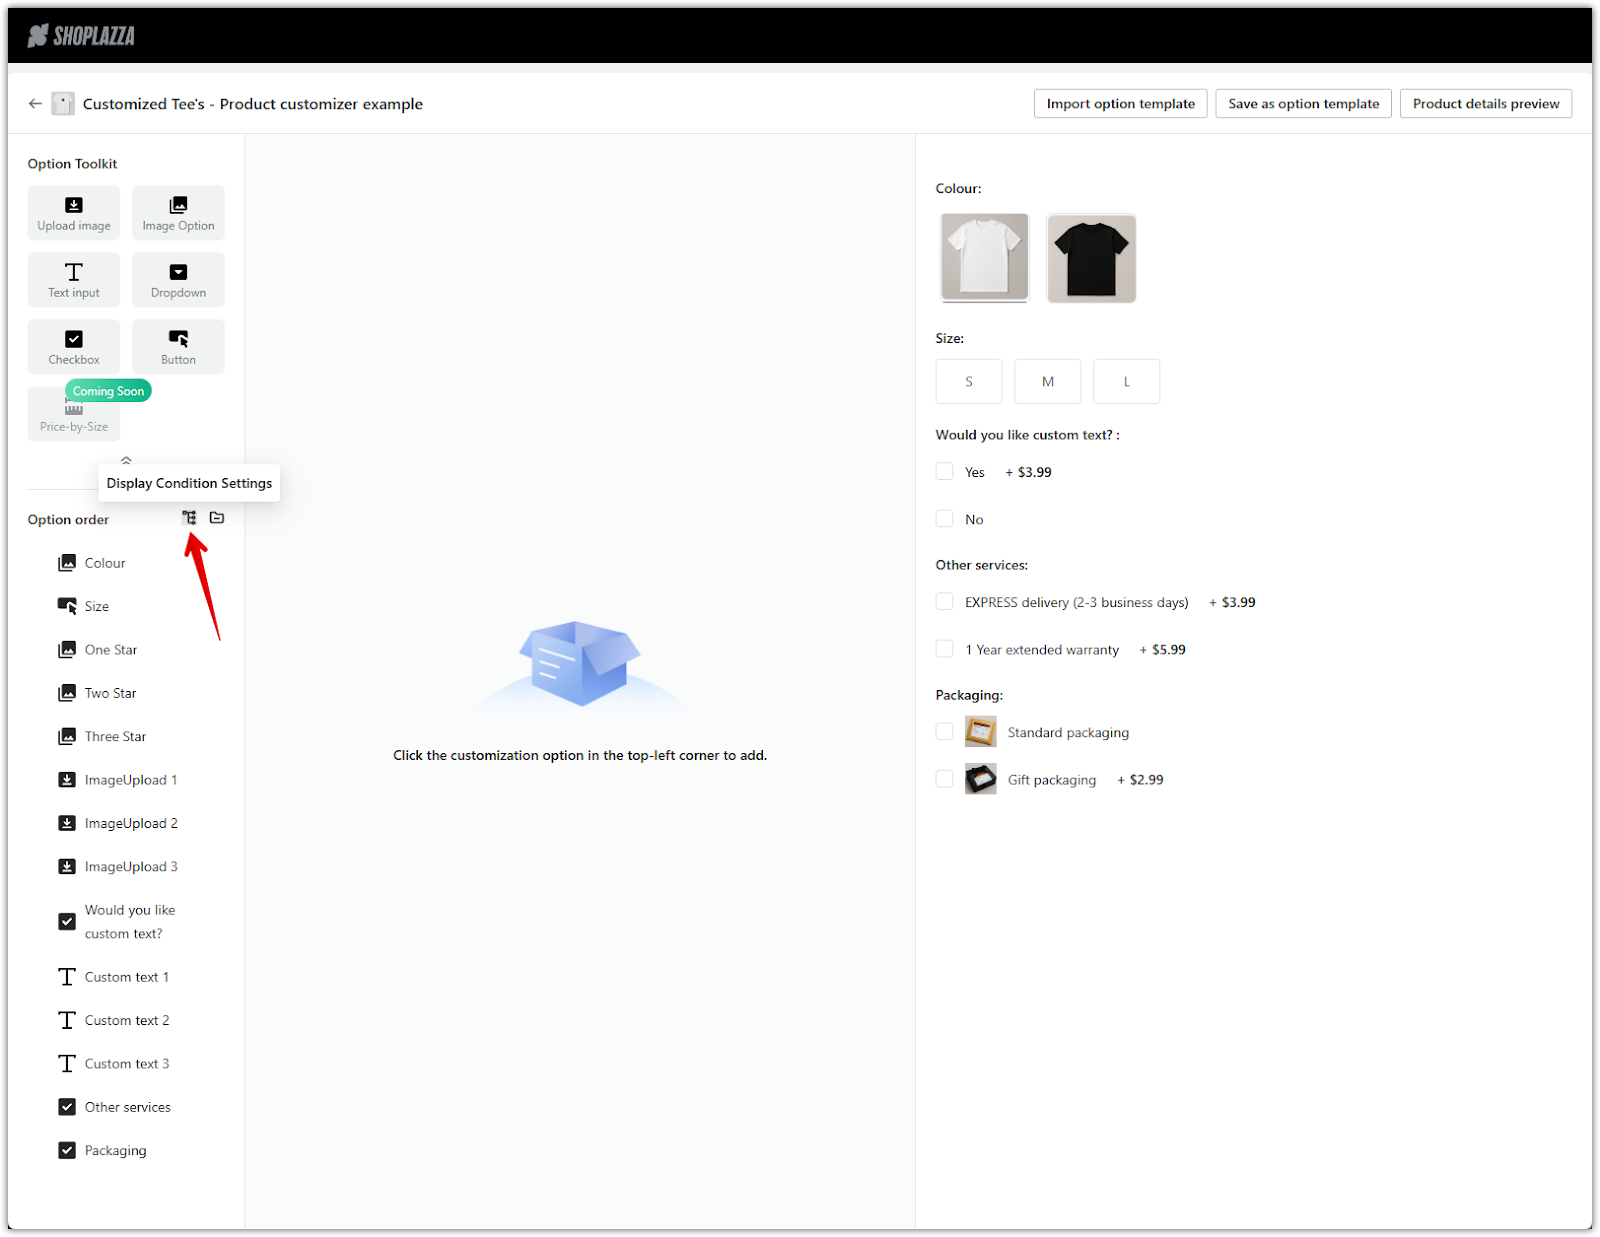
1. Open Display Condition Settings: In the Option order panel, click the Display condition settings icon located near the top of the list. This opens a panel where you can begin adding logic rules to control when specific fields appear based on customer selections.
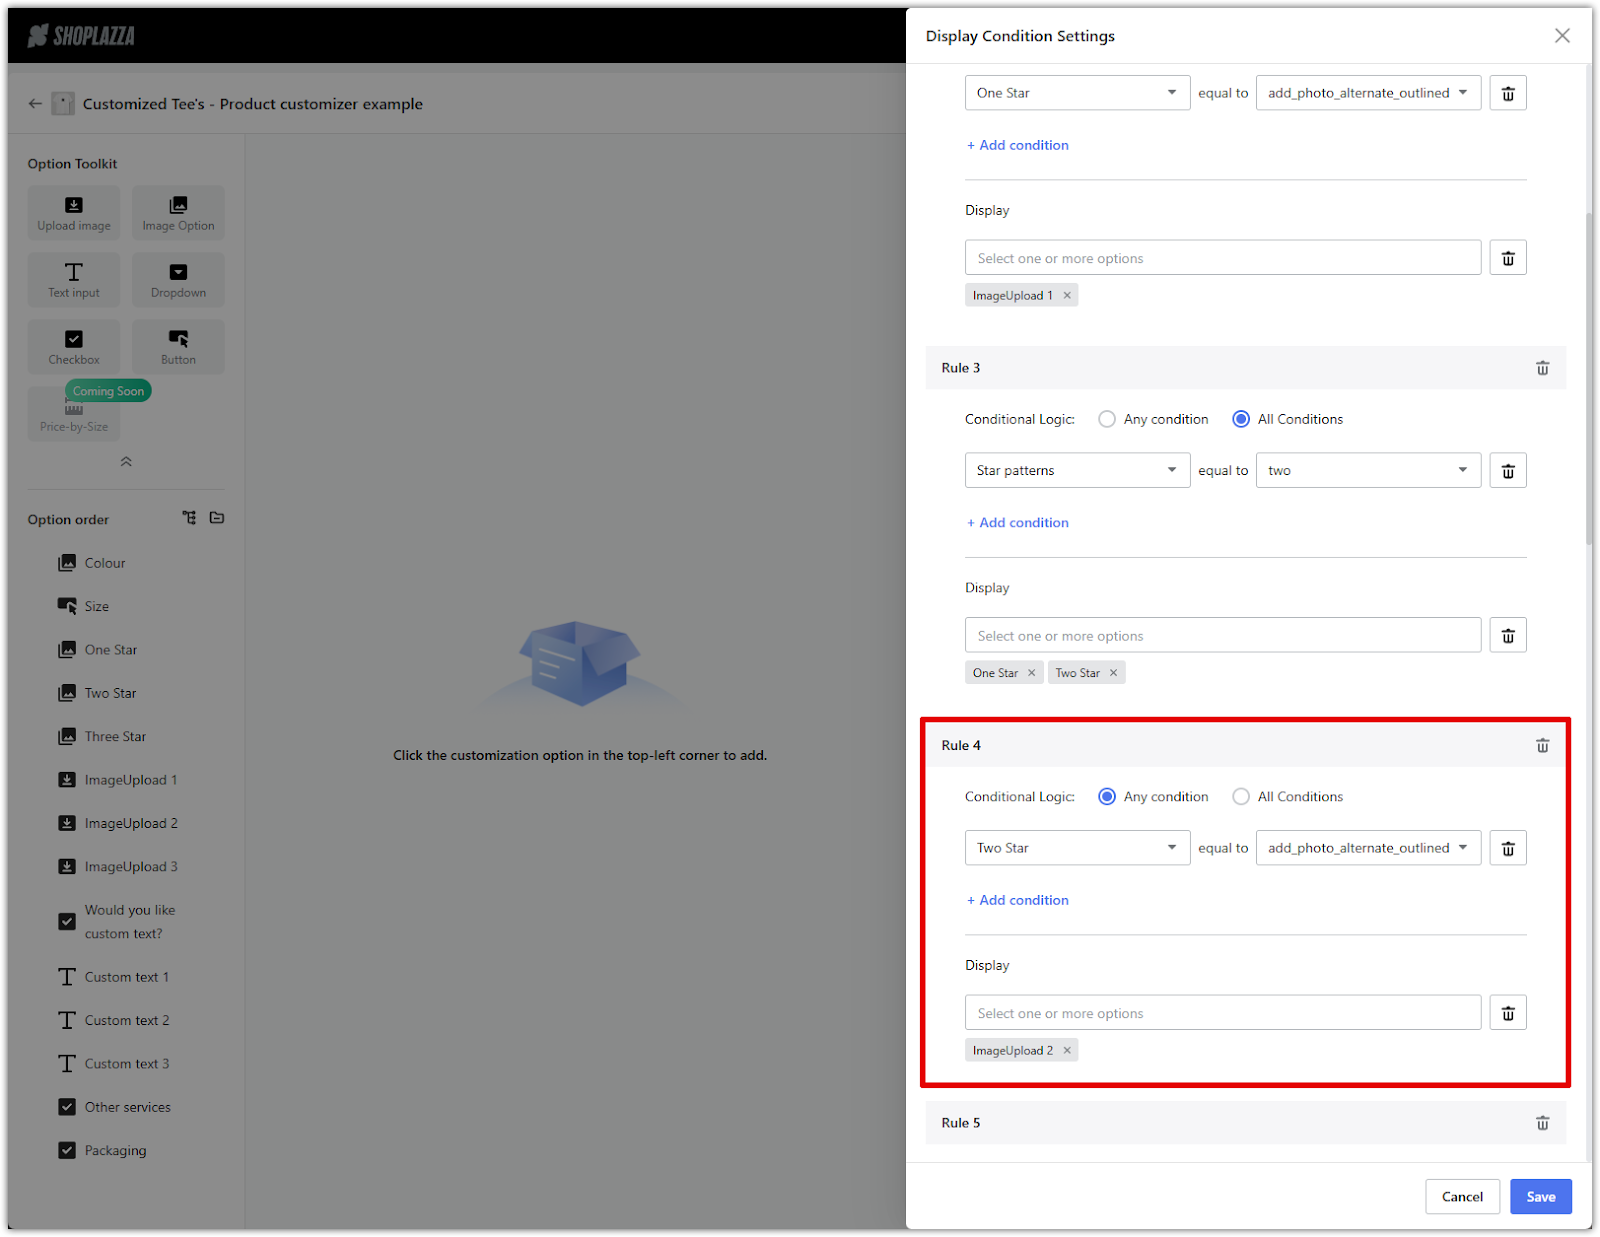
2. Show image groups based on the selected pattern quantity: Use this rule to reveal only the image blocks that match the number of designs selected.
- When Star patterns = one, show One Star.
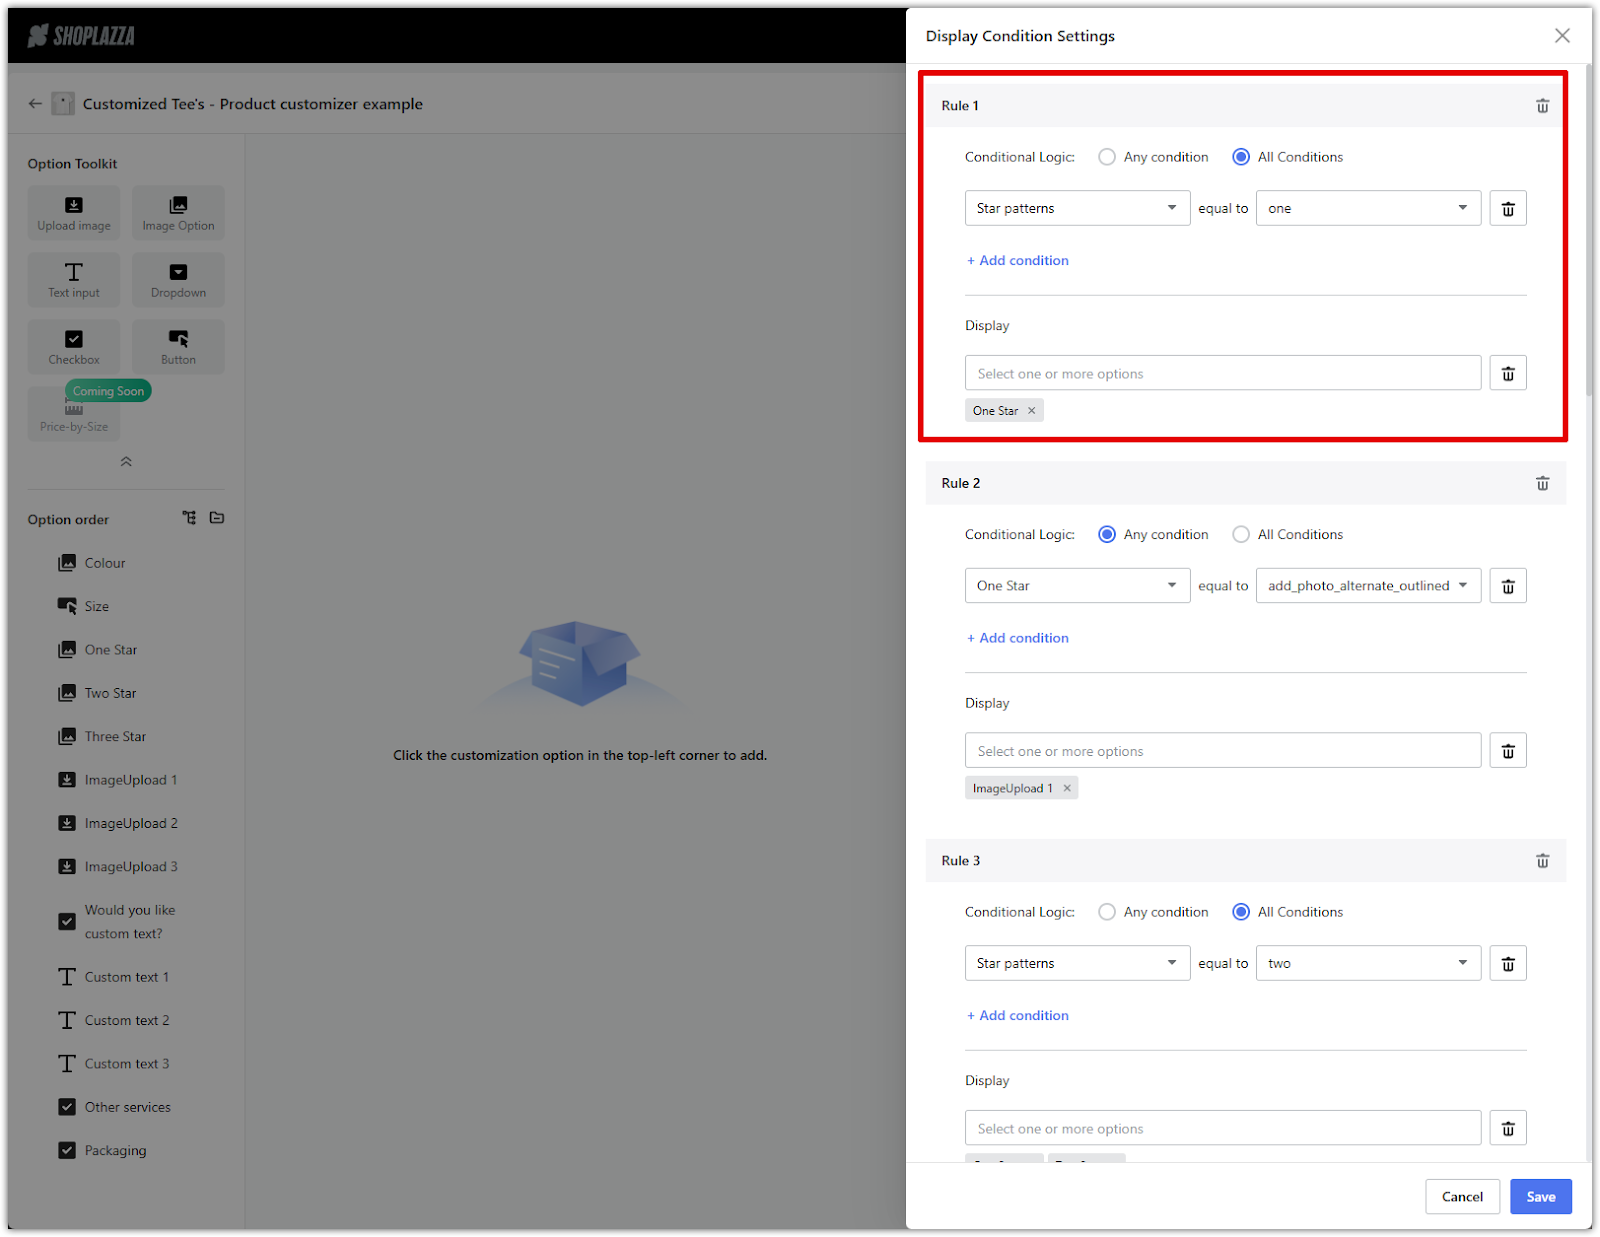
- When Star patterns = two, show One Star and Two Star.
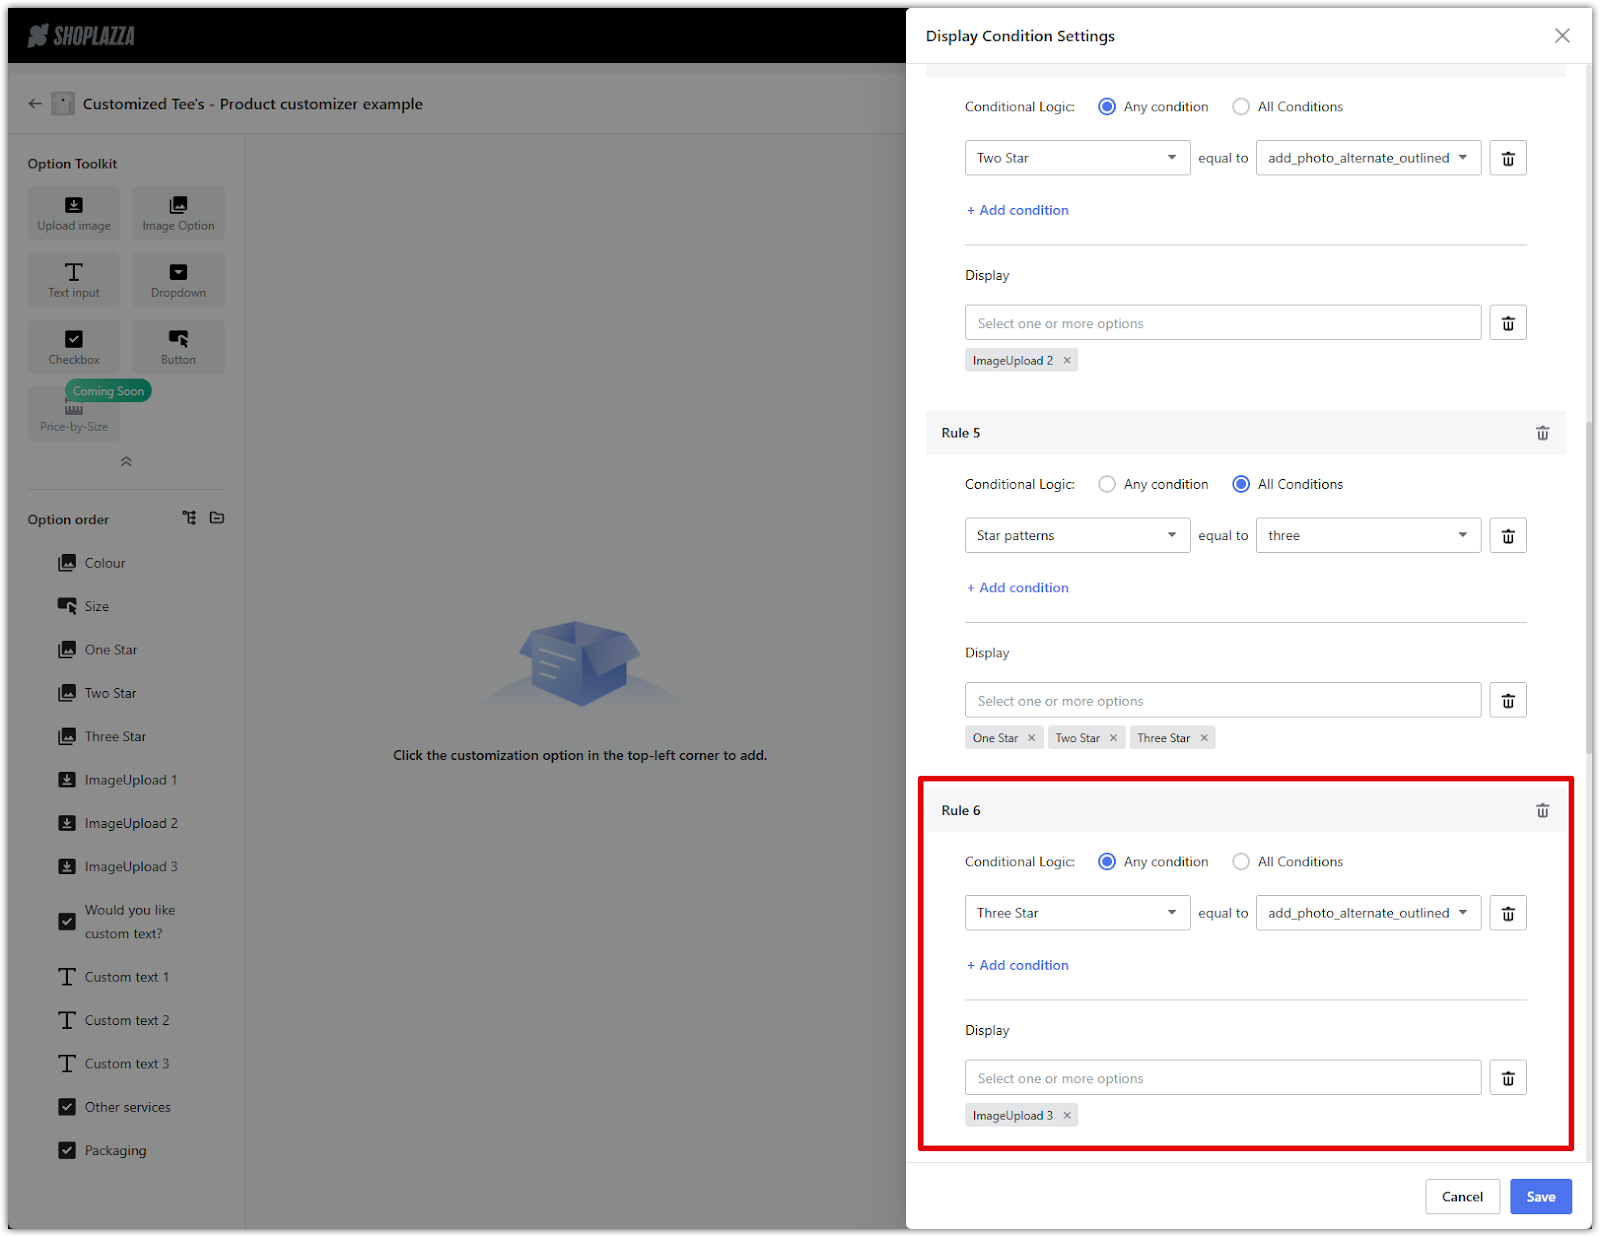
- When Star patterns = three, show One Star, Two Star, and Three Star.
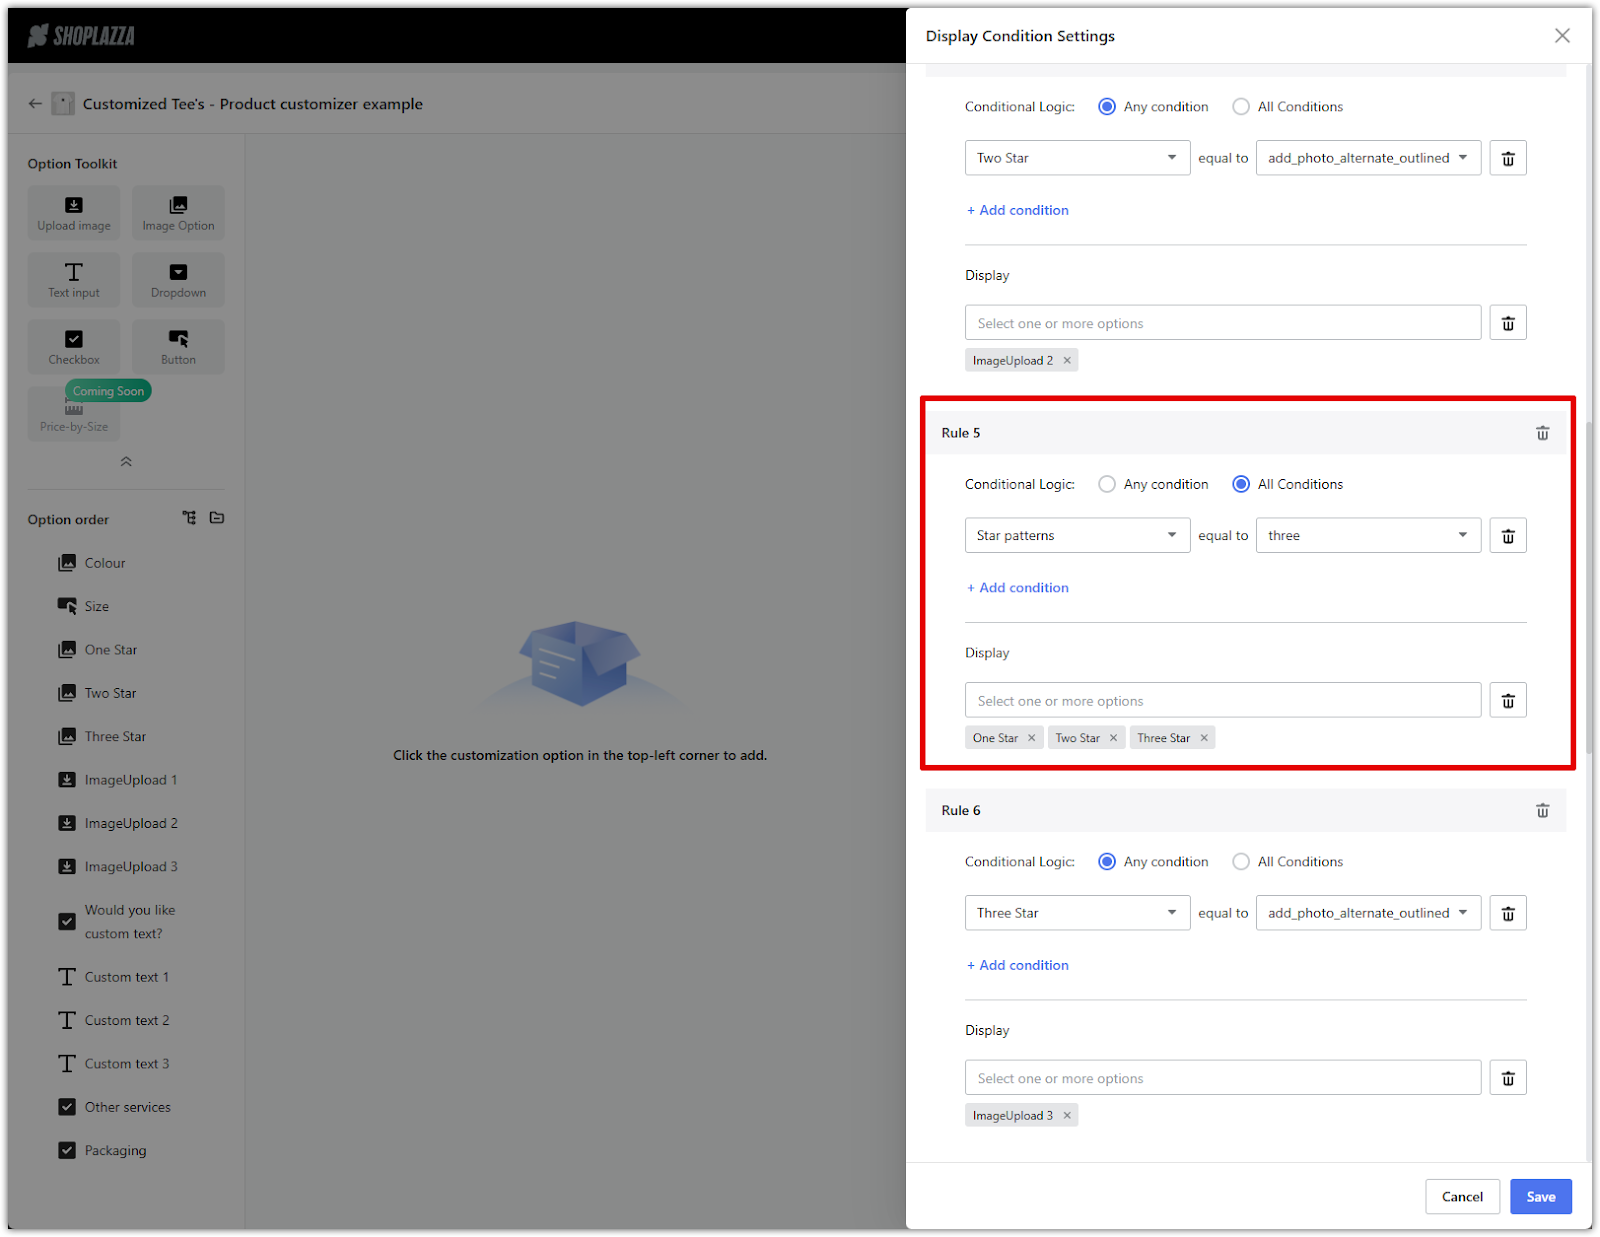
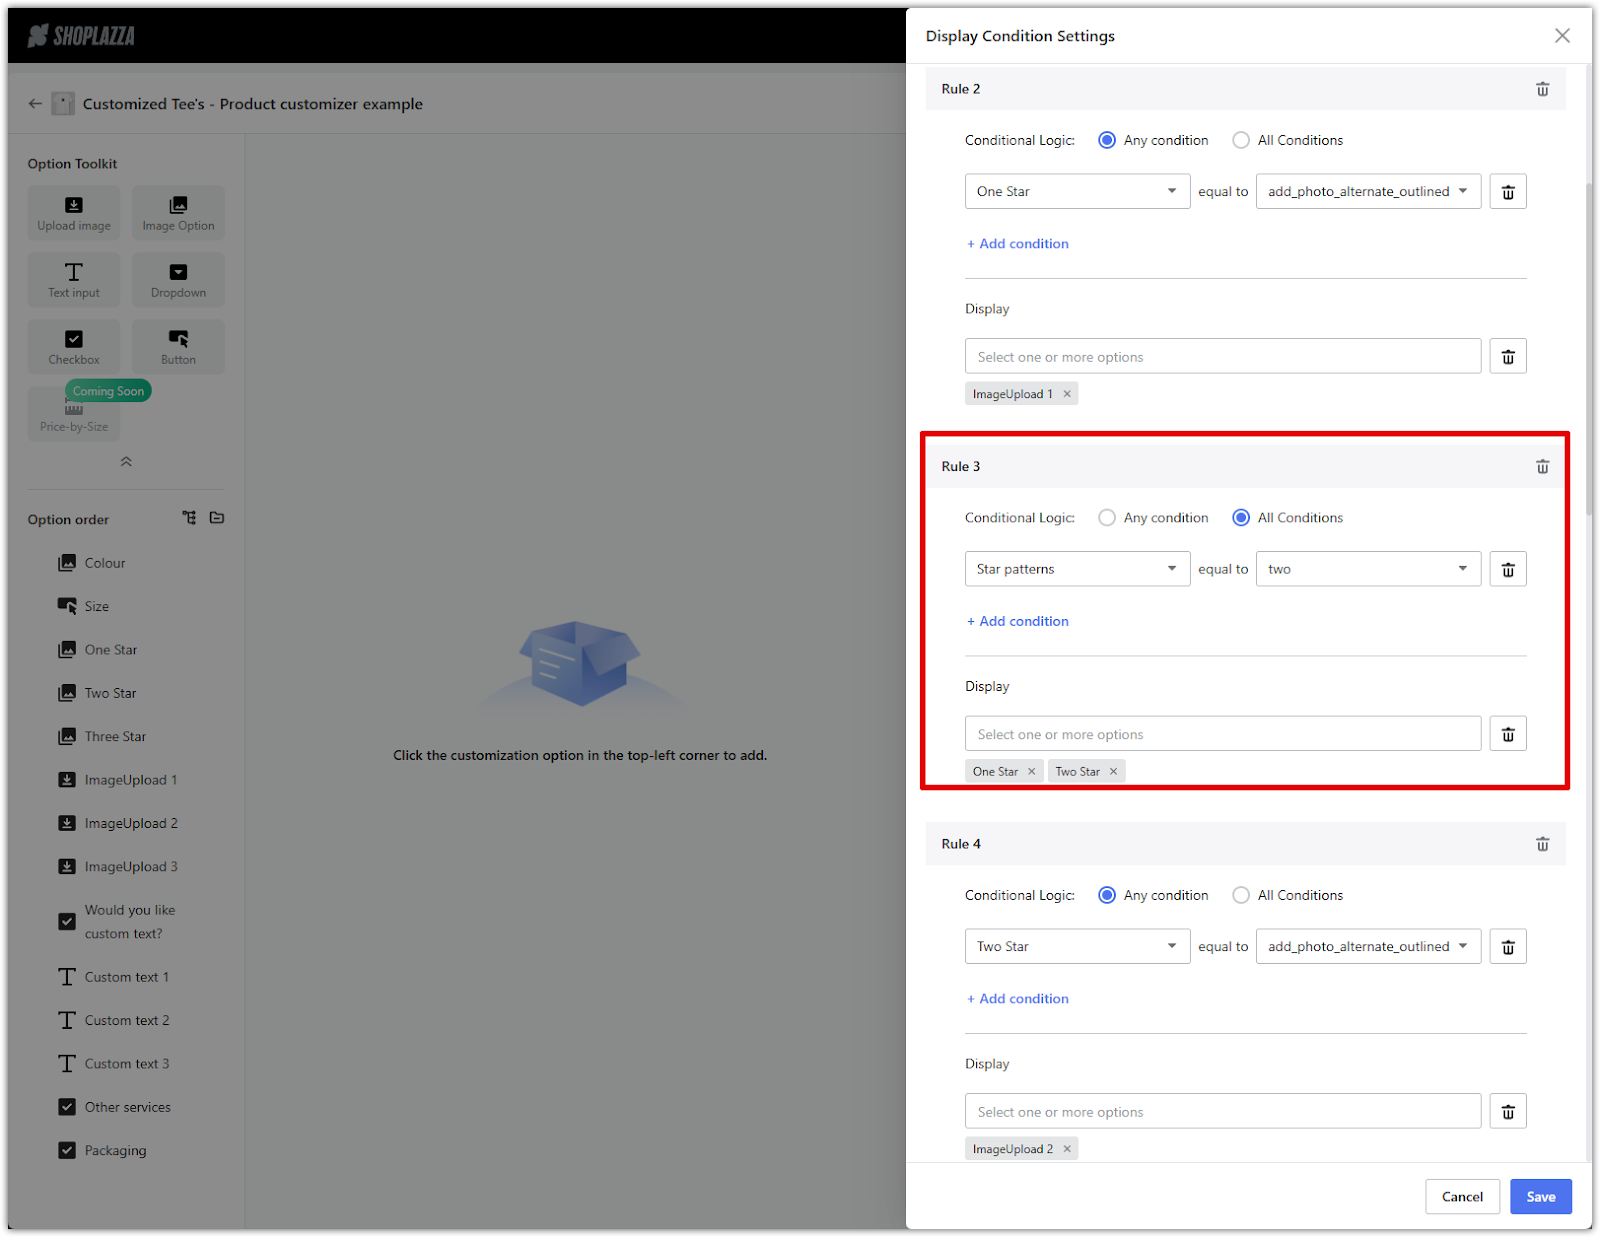
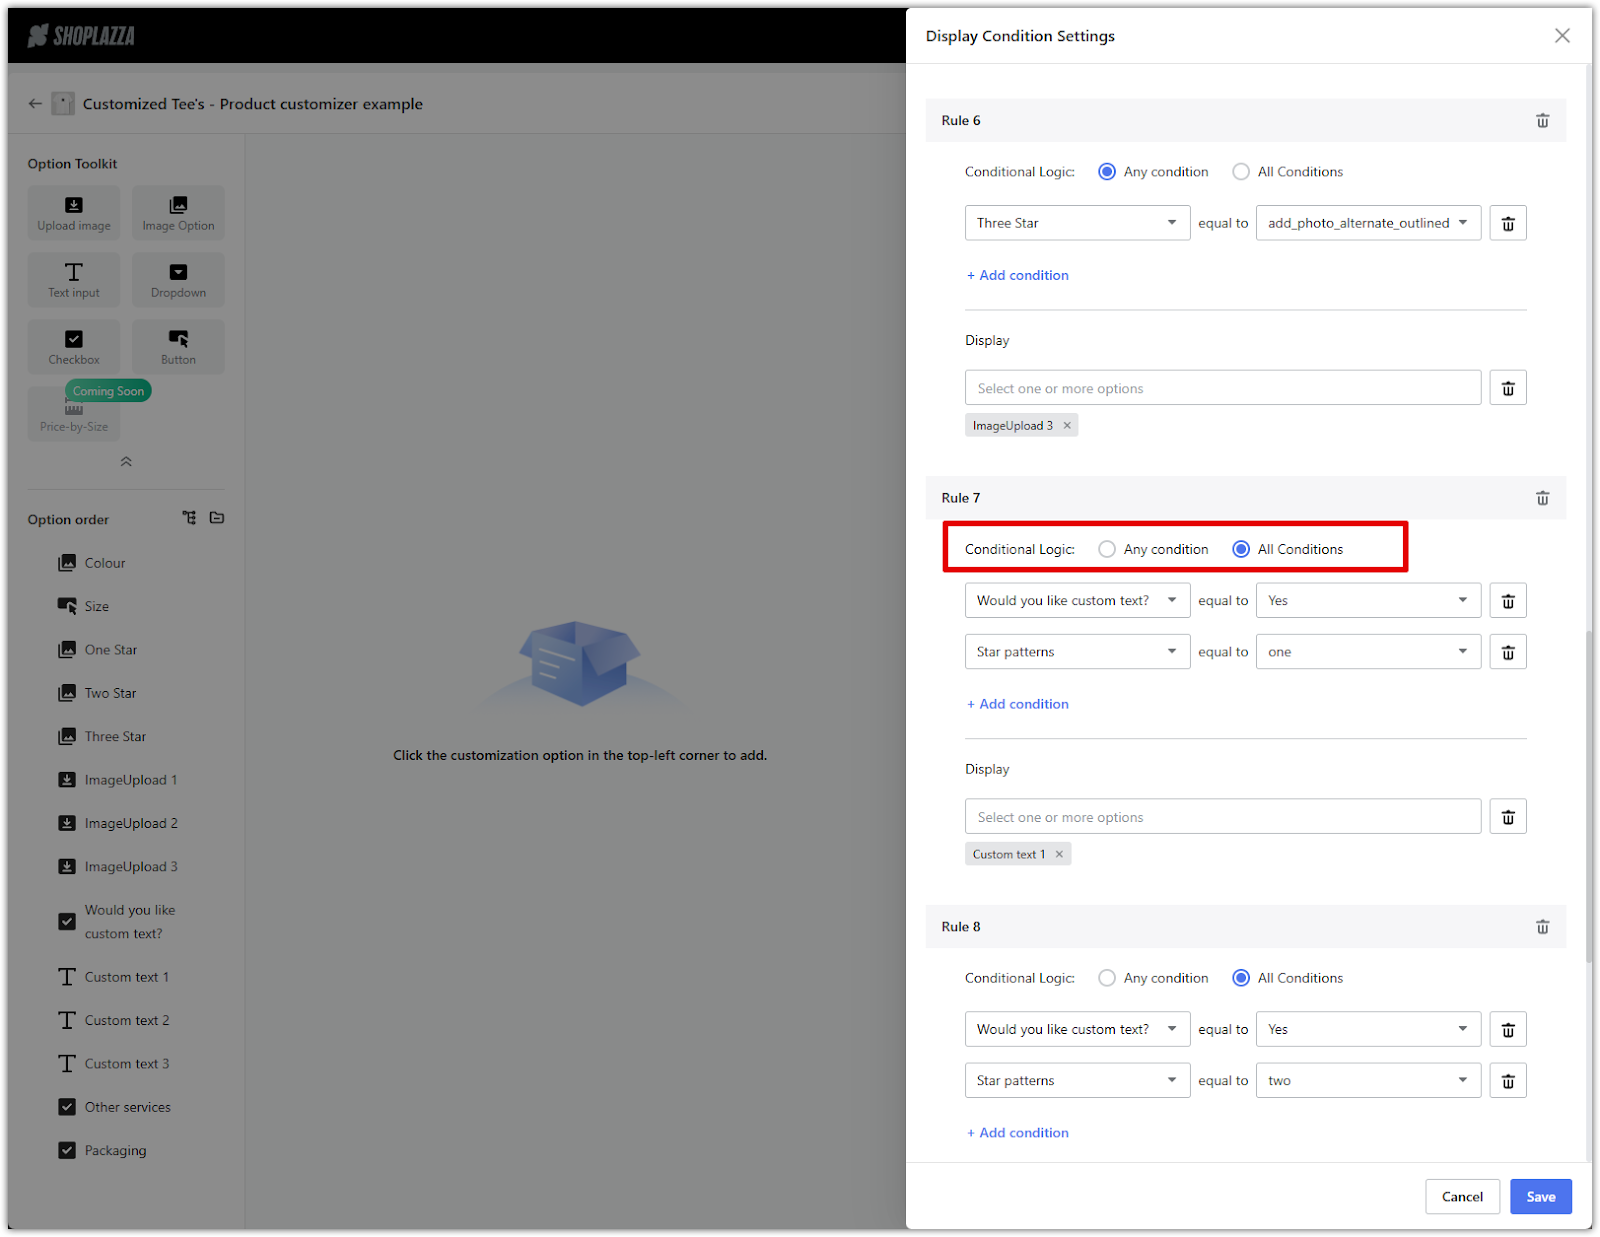
3. Reveal upload fields only when “upload your own design” is selected: These fields appear only when customers upload their own artwork from a selected image group.
- If One Star = upload your own design, show Upload image 1.

- If Two Star = upload your own design, show Upload image 2.
- If Three Star = upload your own design, show Upload image 3.
4. Display name input fields when text personalization is enabled: Show different sets of text boxes depending on the number of patterns and whether the customer has opted to add custom text.
- If Would you like custom text? = Yes and Star patterns = one, show Custom text 1.
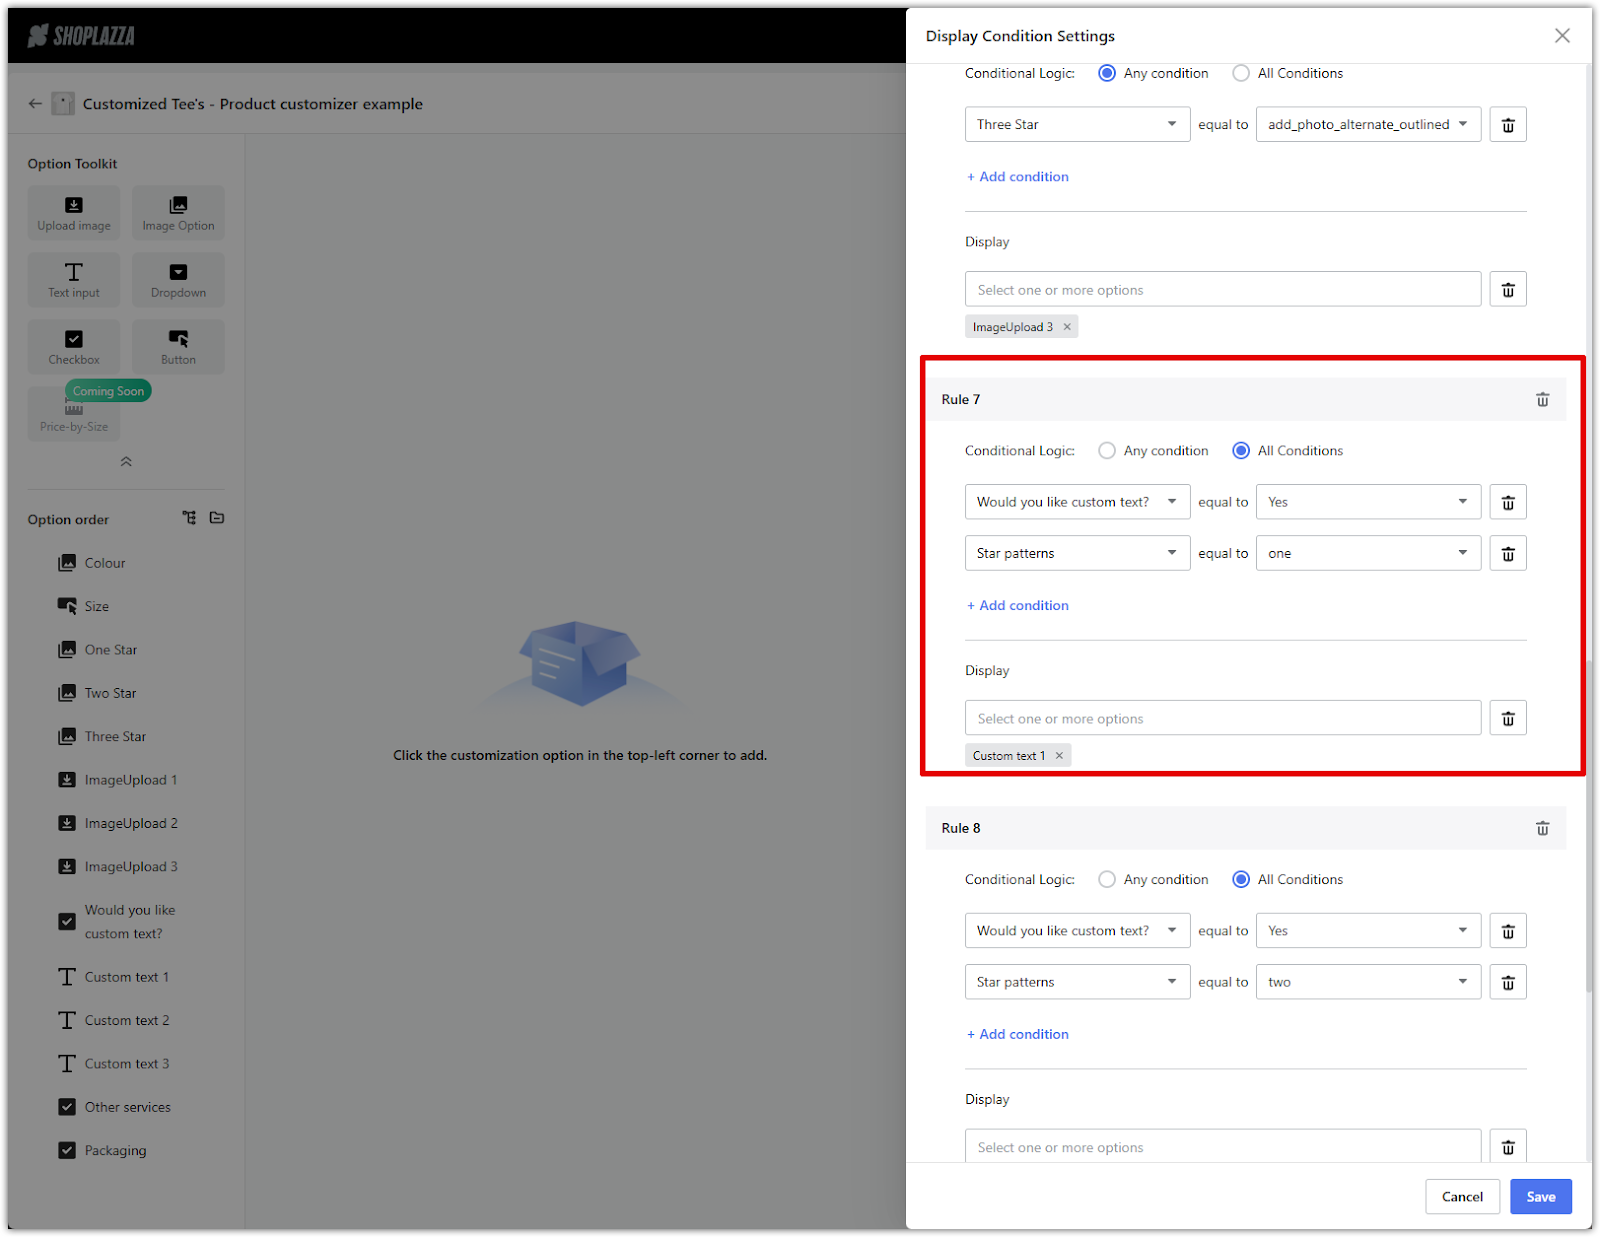
- If Star patterns = two, show Custom text 1 and Custom text 2.
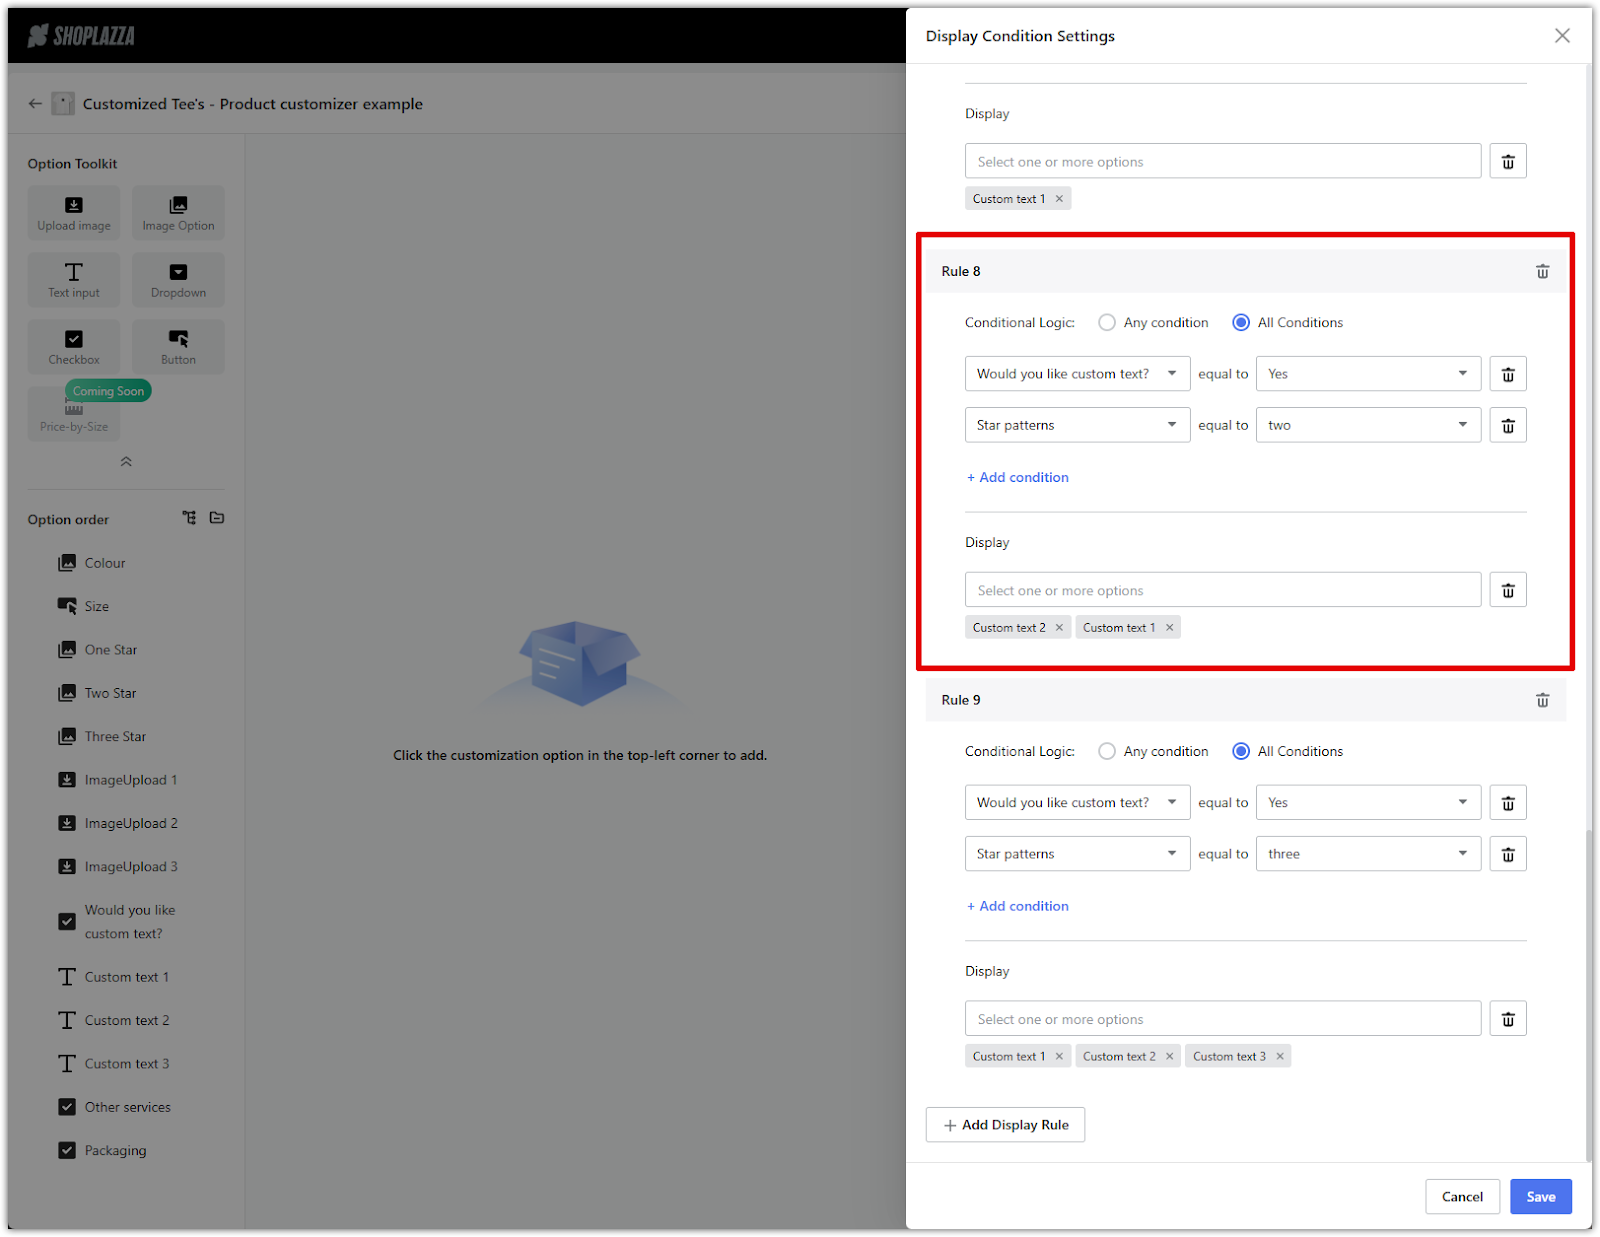
- If Star patterns = three, show Custom text 1, Custom text 2, and Custom text 3.
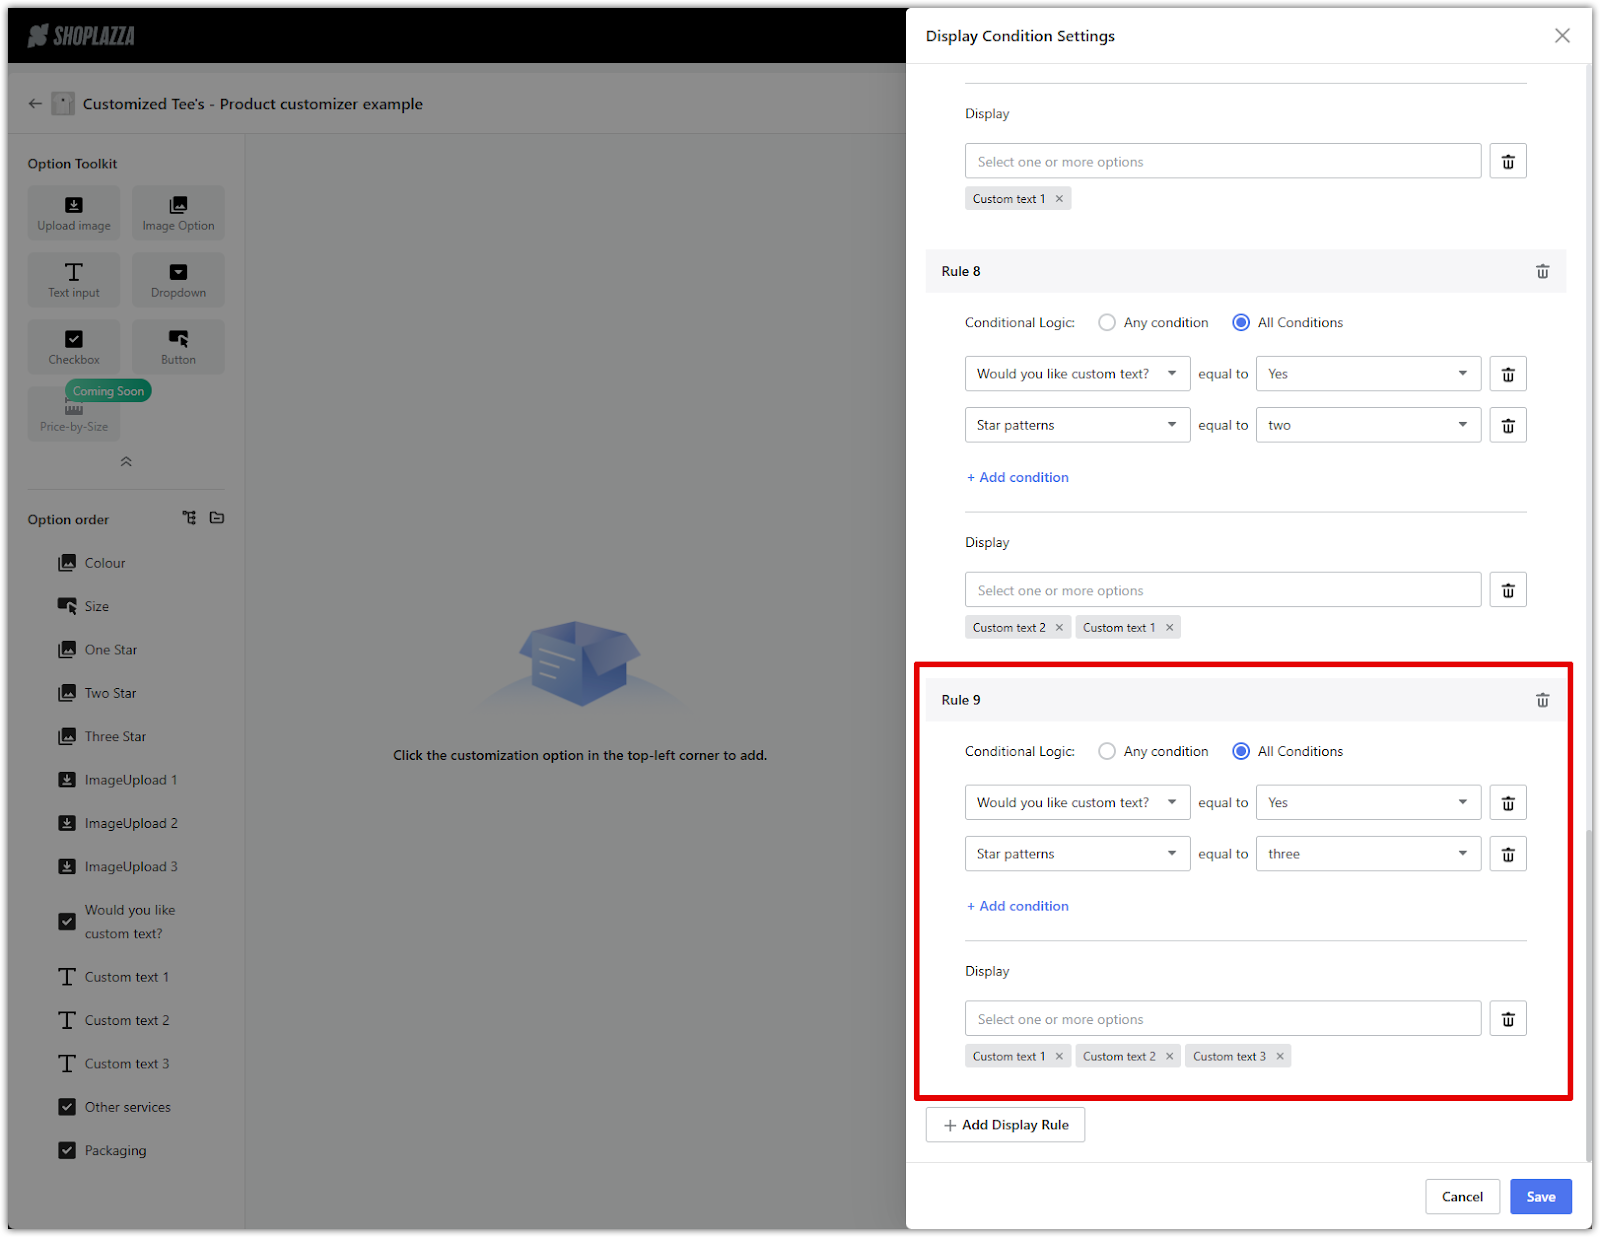
5. Use All Conditions when multiple triggers must apply: Choose All Conditions as the logic type whenever you need a field to appear only if more than one selection is made (e.g. personalization + number of patterns).
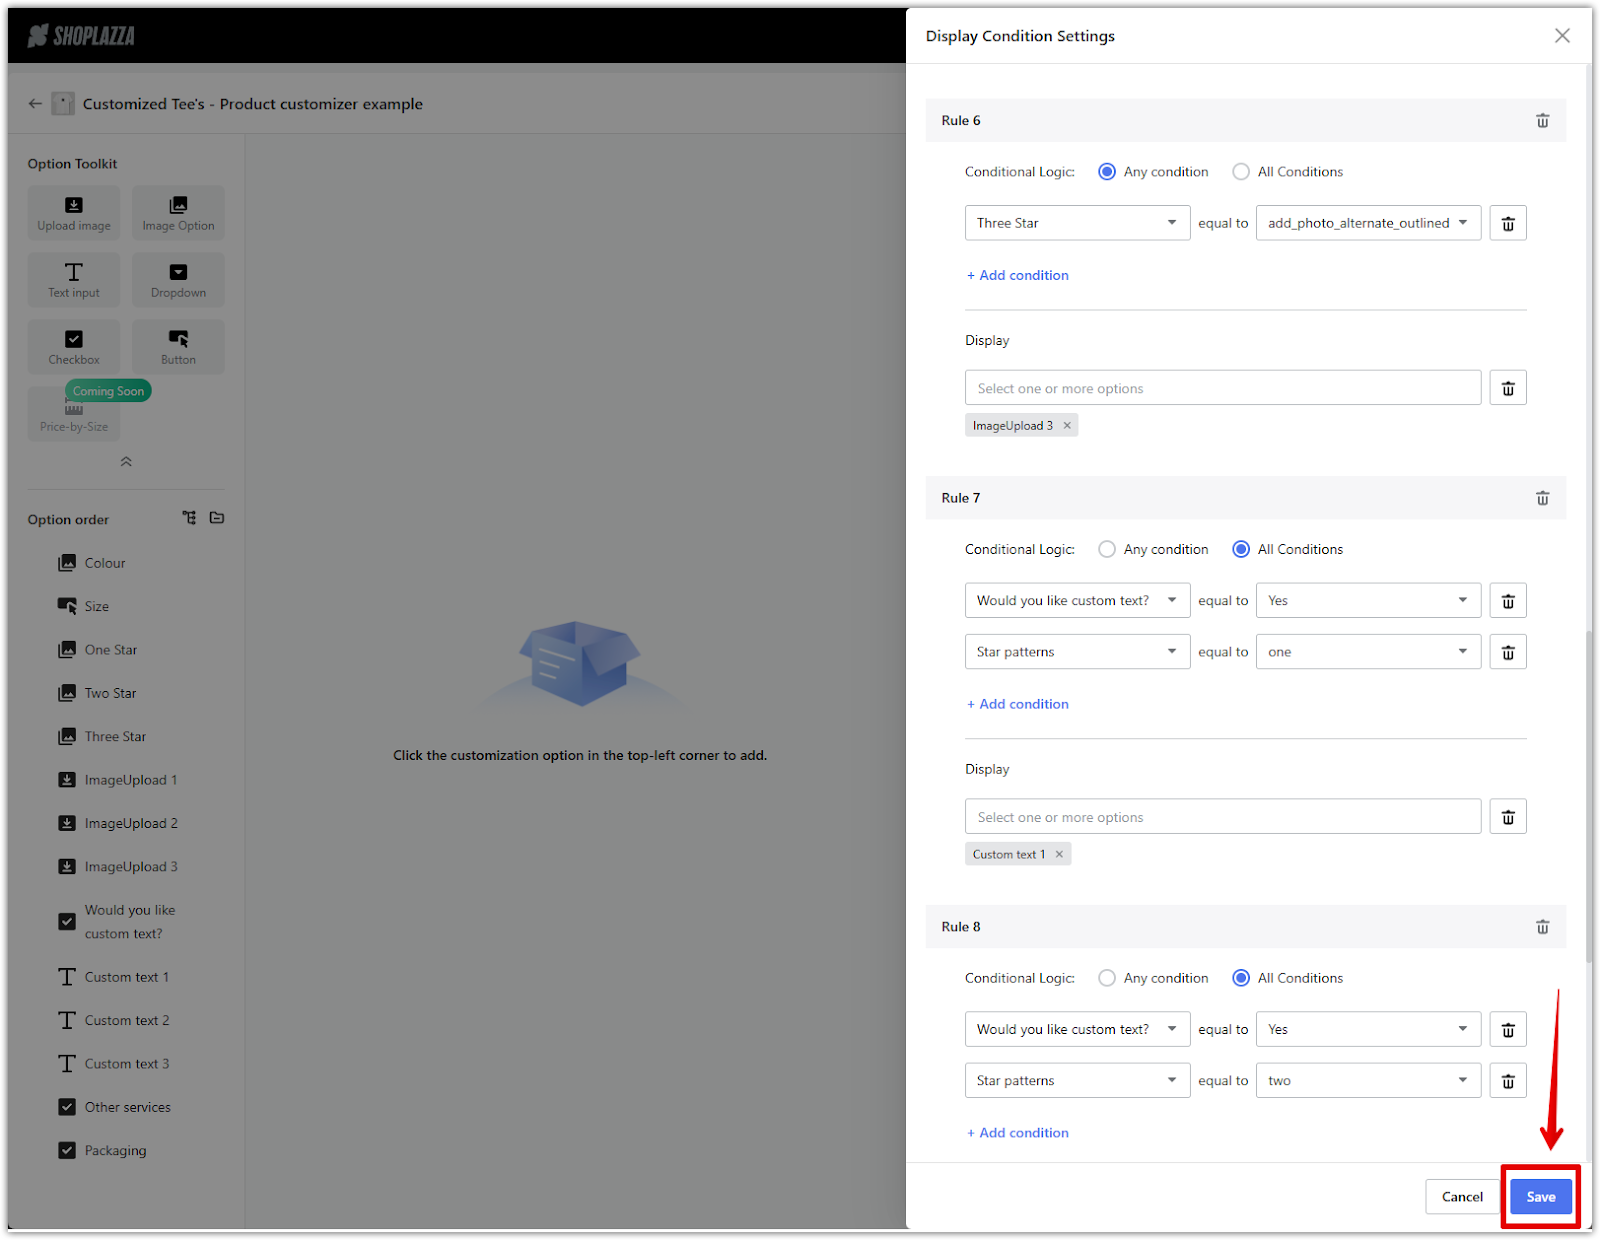
6. Save rules and apply your changes: Once you have applied all your rules, click Save at the bottom of the condition settings, then click Save again in the top-right corner of the editor to finalize the configuration.
Previewing and publishing your configuration
Once your customization flow is complete, activate the Product Customizer section in your theme settings and publish your changes to the storefront.
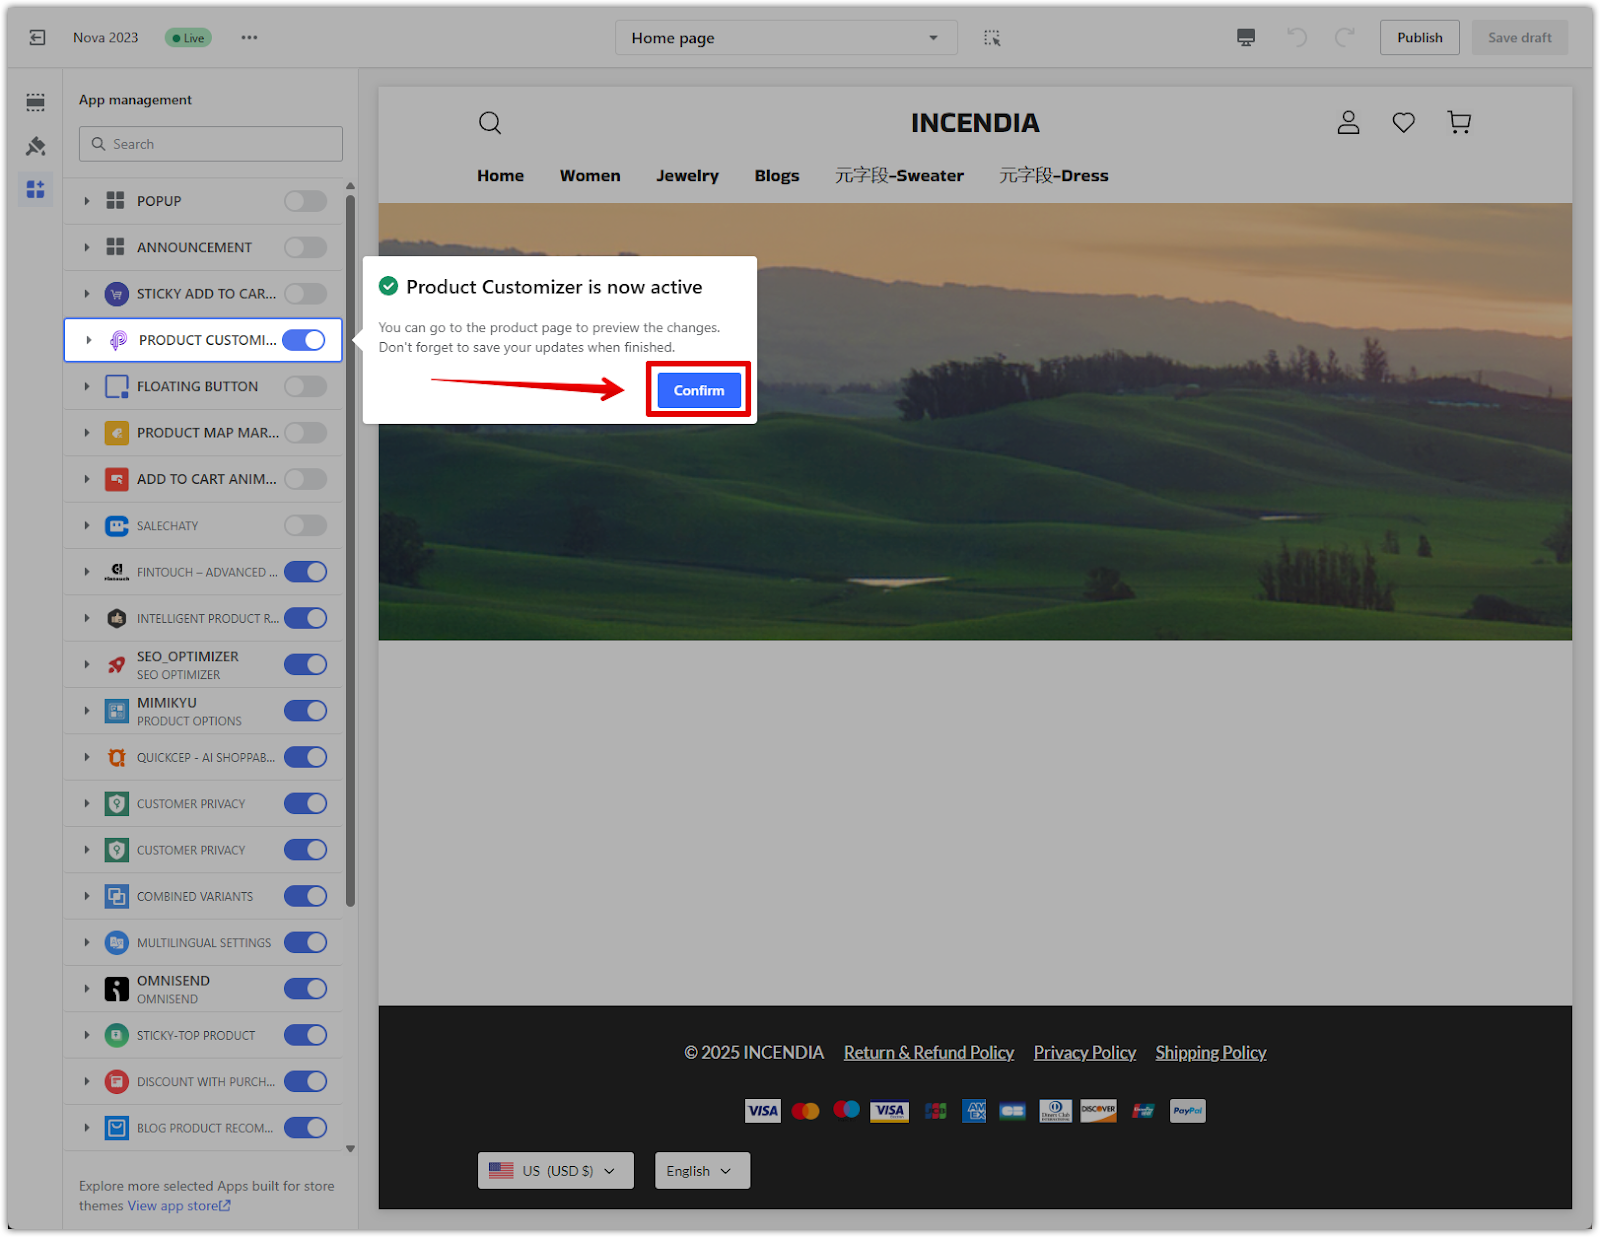
1. Activate the component: From the Product Customizer app homepage, click Activate component. This enables the Product Customizer block in your theme. In the popup that appears, click Confirm.
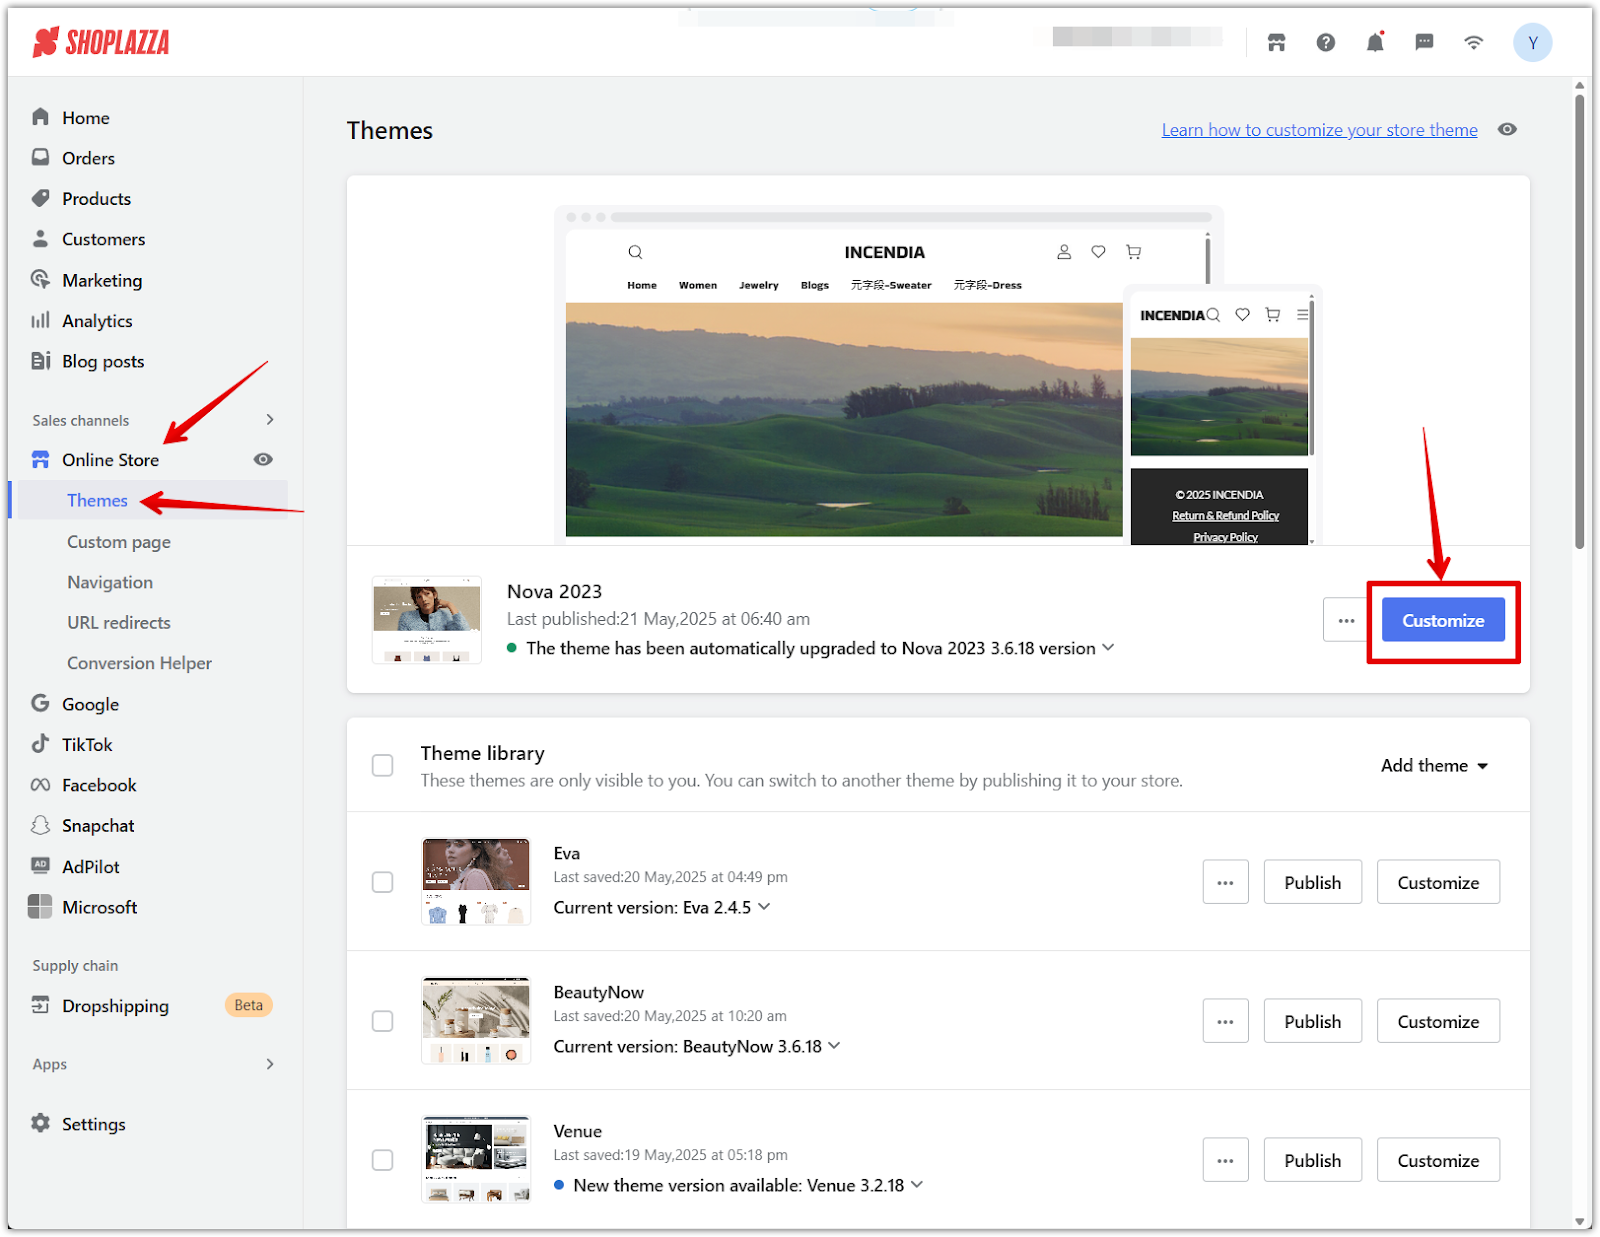
2. Open the theme editor: Go to Shoplazza admin > Themes, then click Customize beside the theme you want to edit.
3. Switch to the product detail page: Use the dropdown at the top to switch to Products, then select the Default product page.
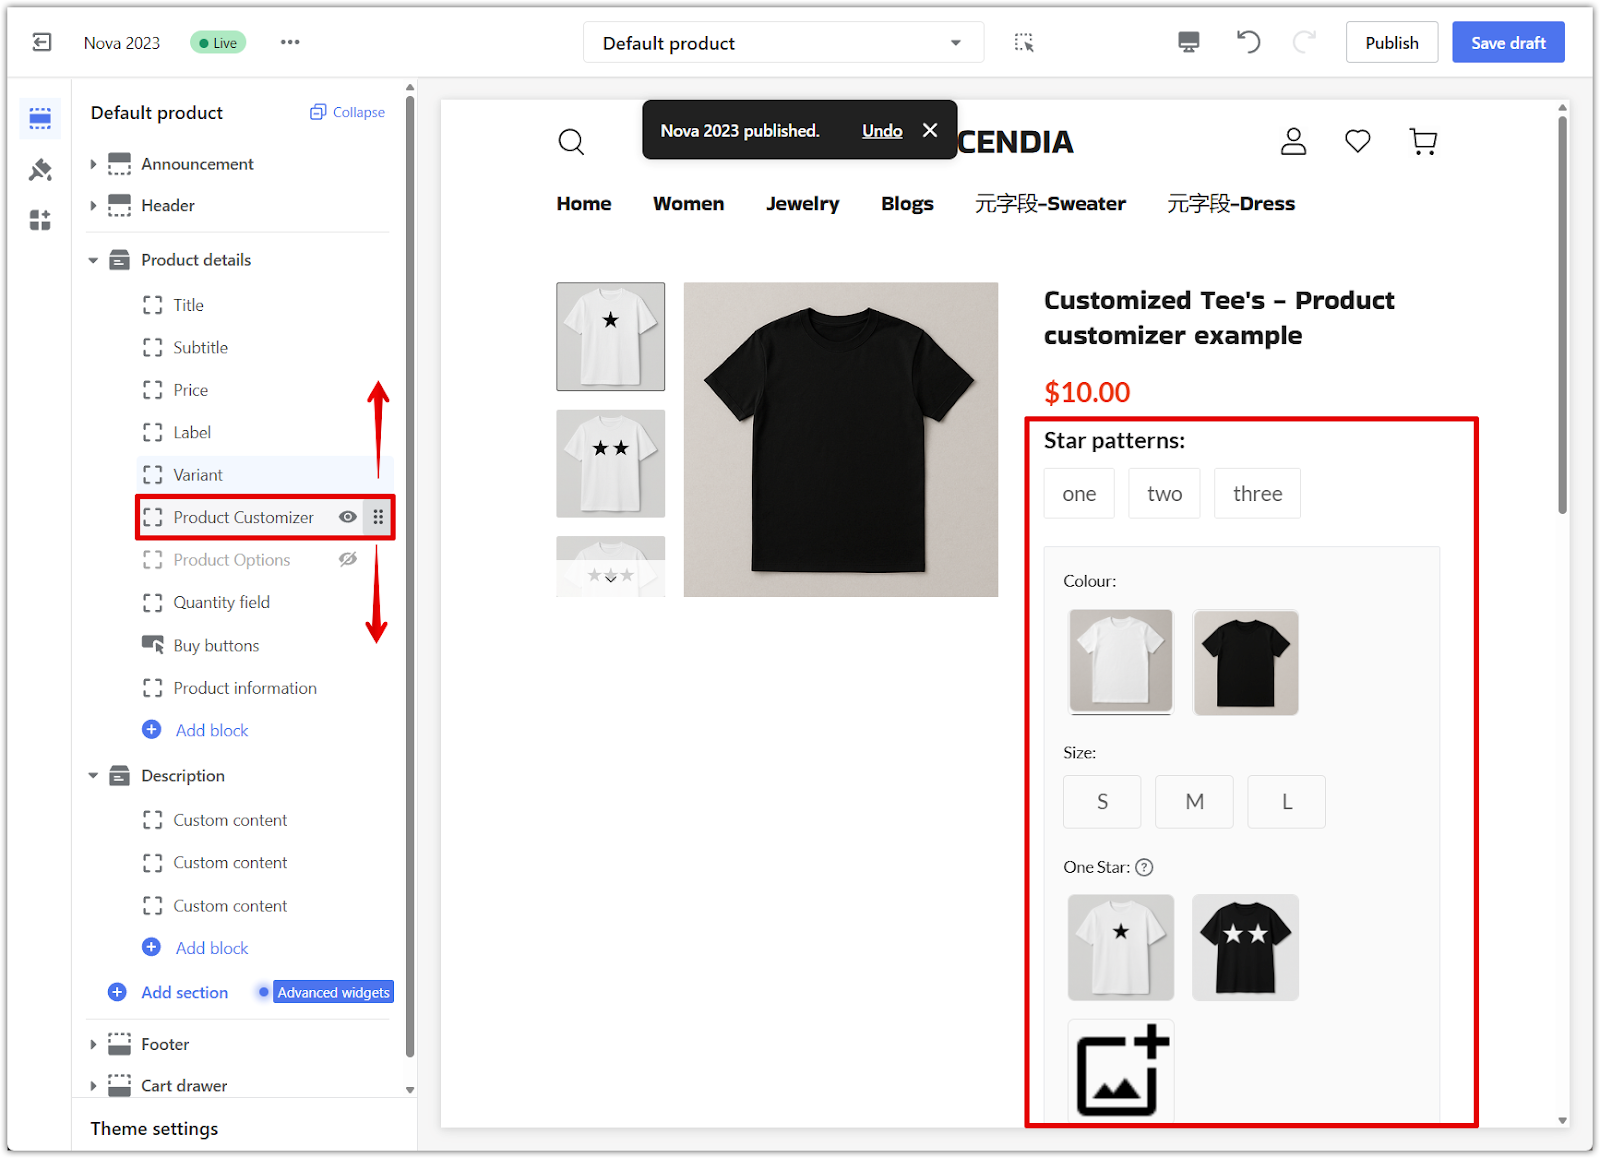
4. Add the Product Customizer block: Under the Product details section in the left panel, click Add block.
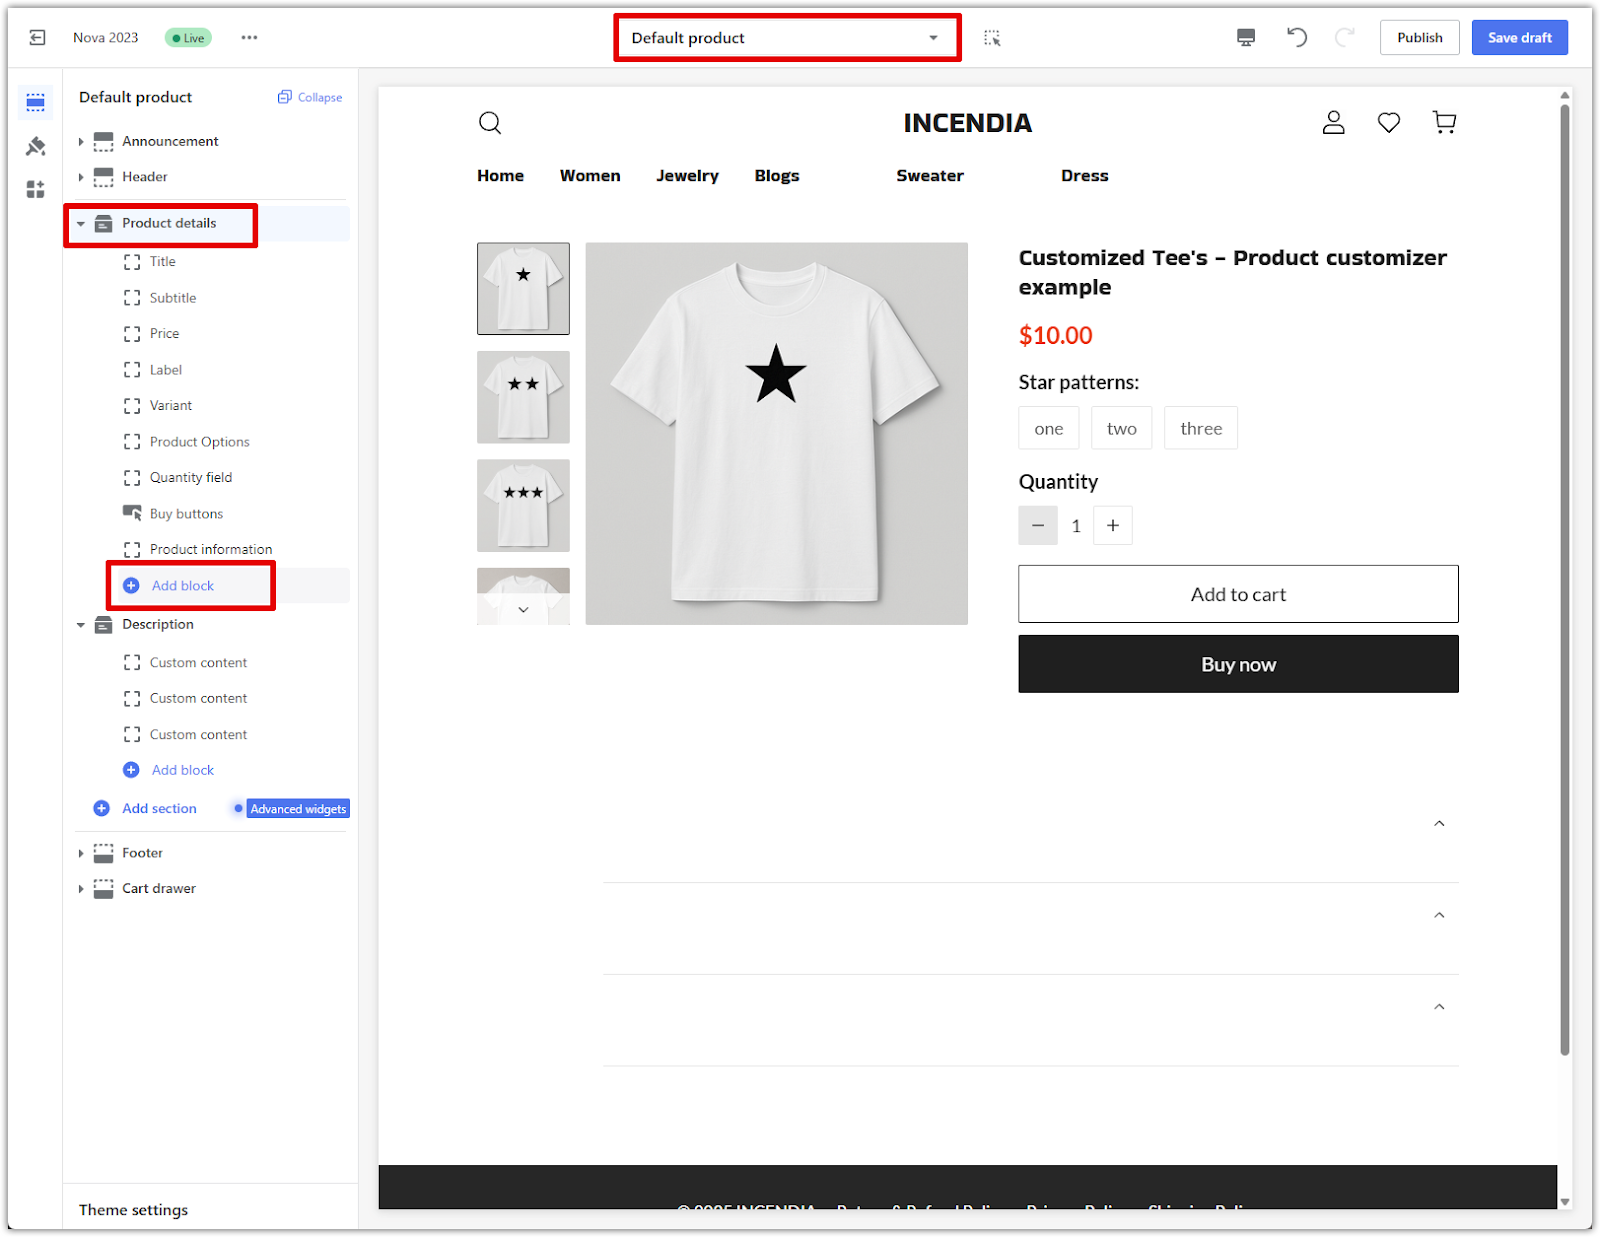
5. Insert the app block: In the Apps section, choose Product Customizer and add it to the layout.
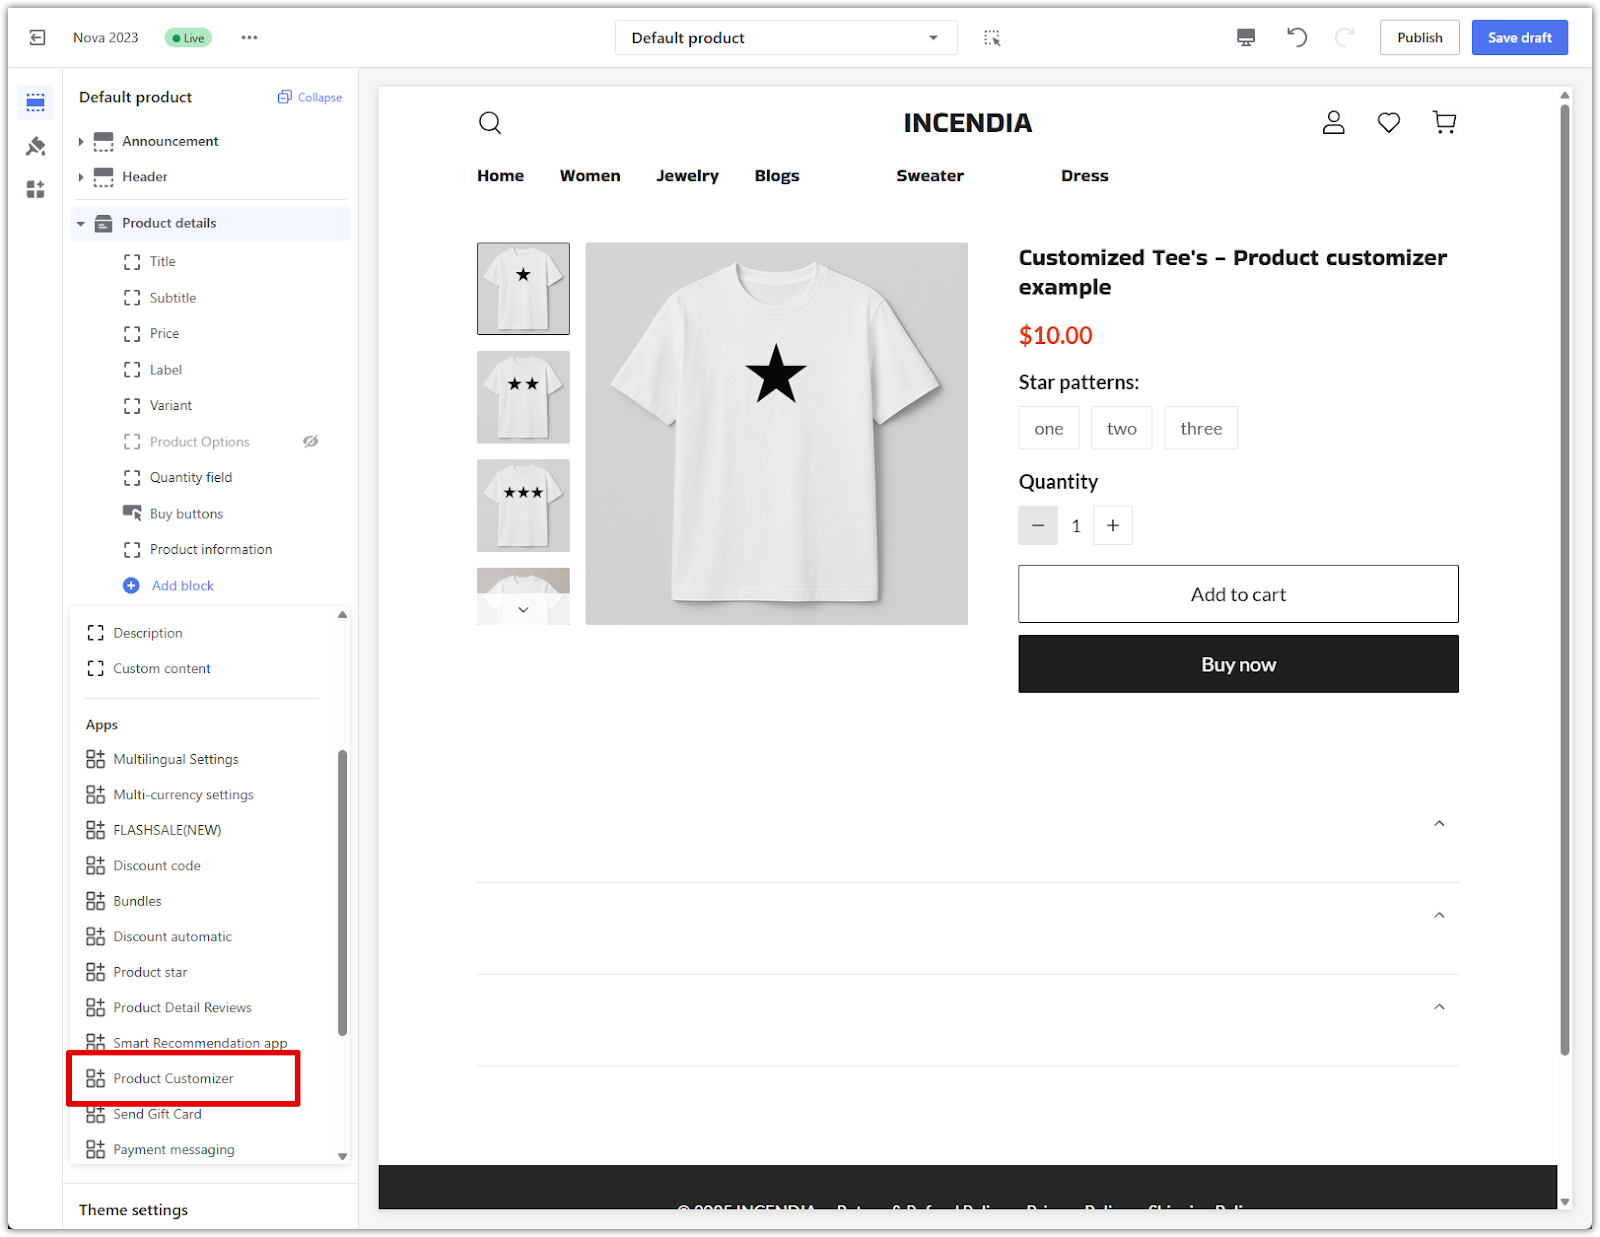
6. Reorder the block: Drag the Product Customizer block just below the Variant block to control where it appears on your product page.
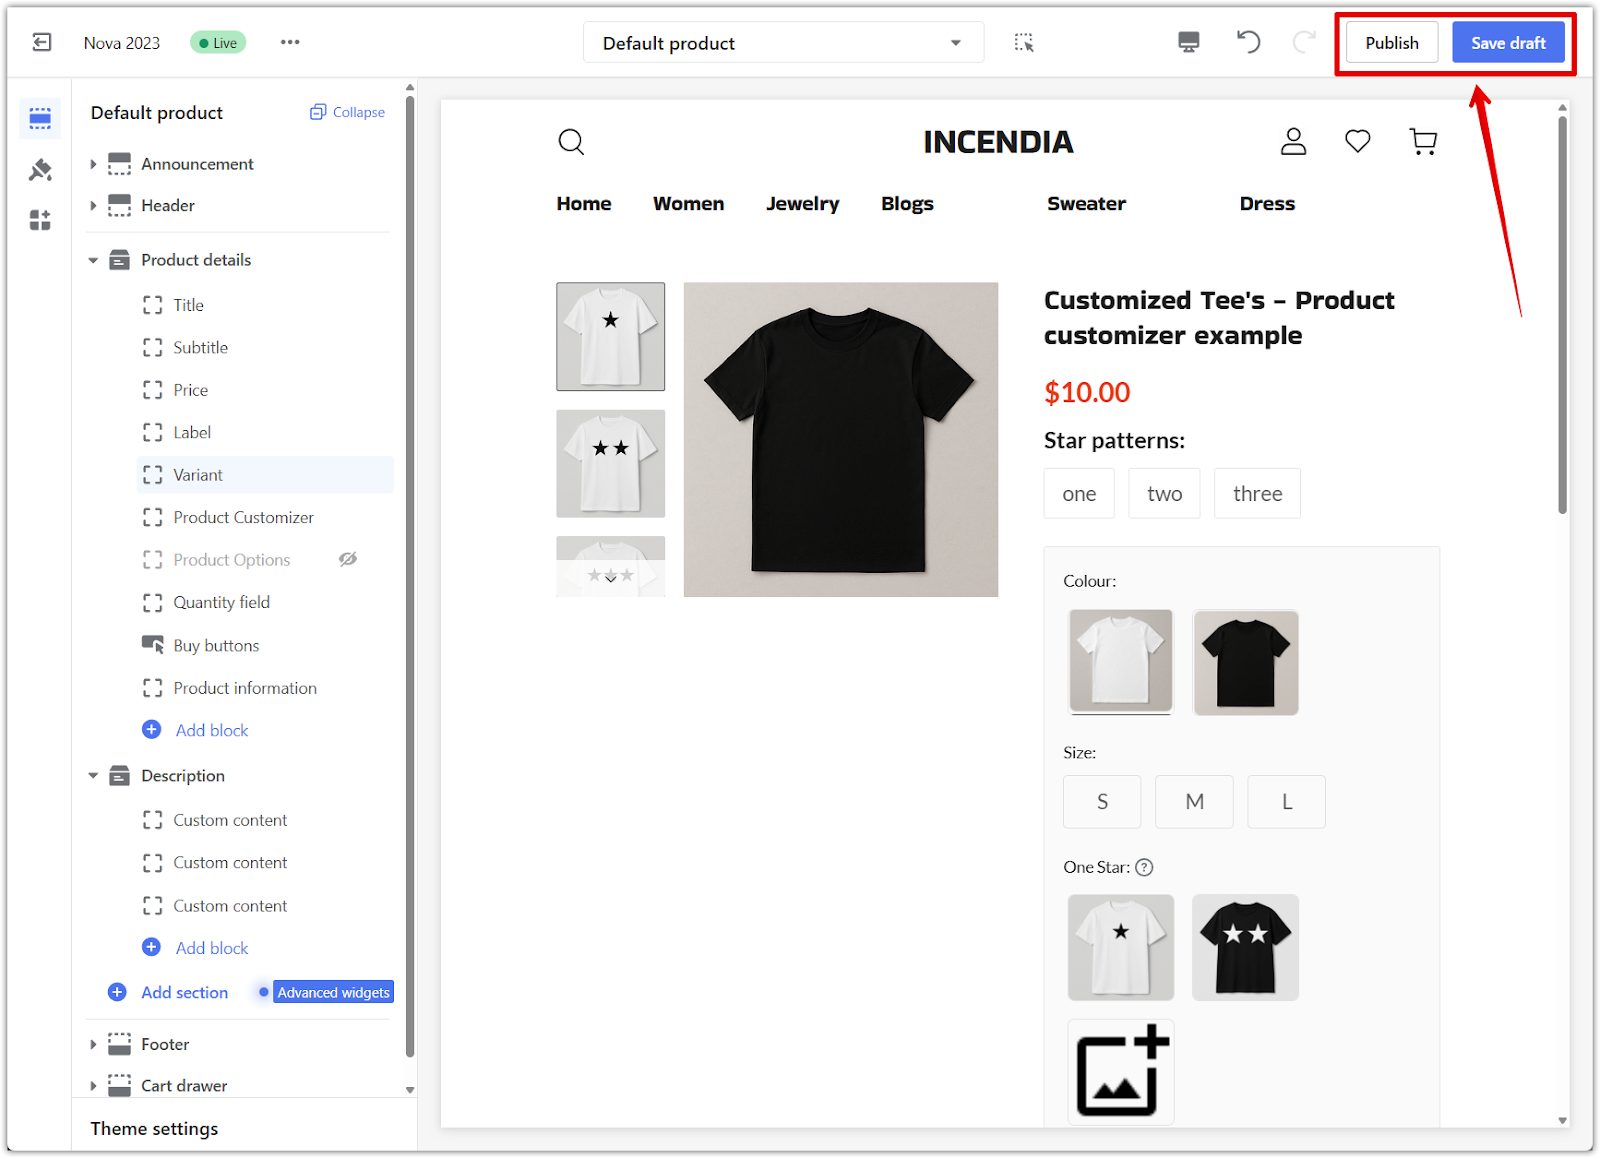
7. Publish the changes: Click Save draft or Publish in the top-right corner to apply your changes.
With Product Customizer, you can create dynamic, easy-to-manage product pages that respond to customer choices in real time—making personalization seamless for both you and your shoppers. This powerful setup helps streamline operations while delivering a tailored experience that stands out.


Comments
Please sign in to leave a comment.