
Verifying your domain with Meta (formerly Facebook) is an essential step if you're running ads, selling products, or managing branded content across Meta platforms like Facebook, Instagram, and WhatsApp. Domain verification proves ownership of your website, gives you control over link previews, and protects your brand identity. This guide walks you through the full setup using Shoplazza’s Custom Code app.
Note
The meta tag shown in this guide is for reference only. Always copy the meta tag directly from your Meta Business dashboard. Avoid using sample tags, as each code is unique to your domain.
Prepare your store for domain verification
Before verifying your domain, ensure your setup is complete to avoid delays or issues during the process.
1. Connect a custom domain to your store: Meta only accepts custom domains like yourstore.com. Do not use temporary URLs or subdomains. Purchase and connect your domain through your Shoplazza admin. Refer to Verifying your domain for detailed instructions.
2. Install the Custom Code app: This app is required to insert the verification tag into your website’s code. Install it directly from the Shoplazza App Store here: Custom Code .
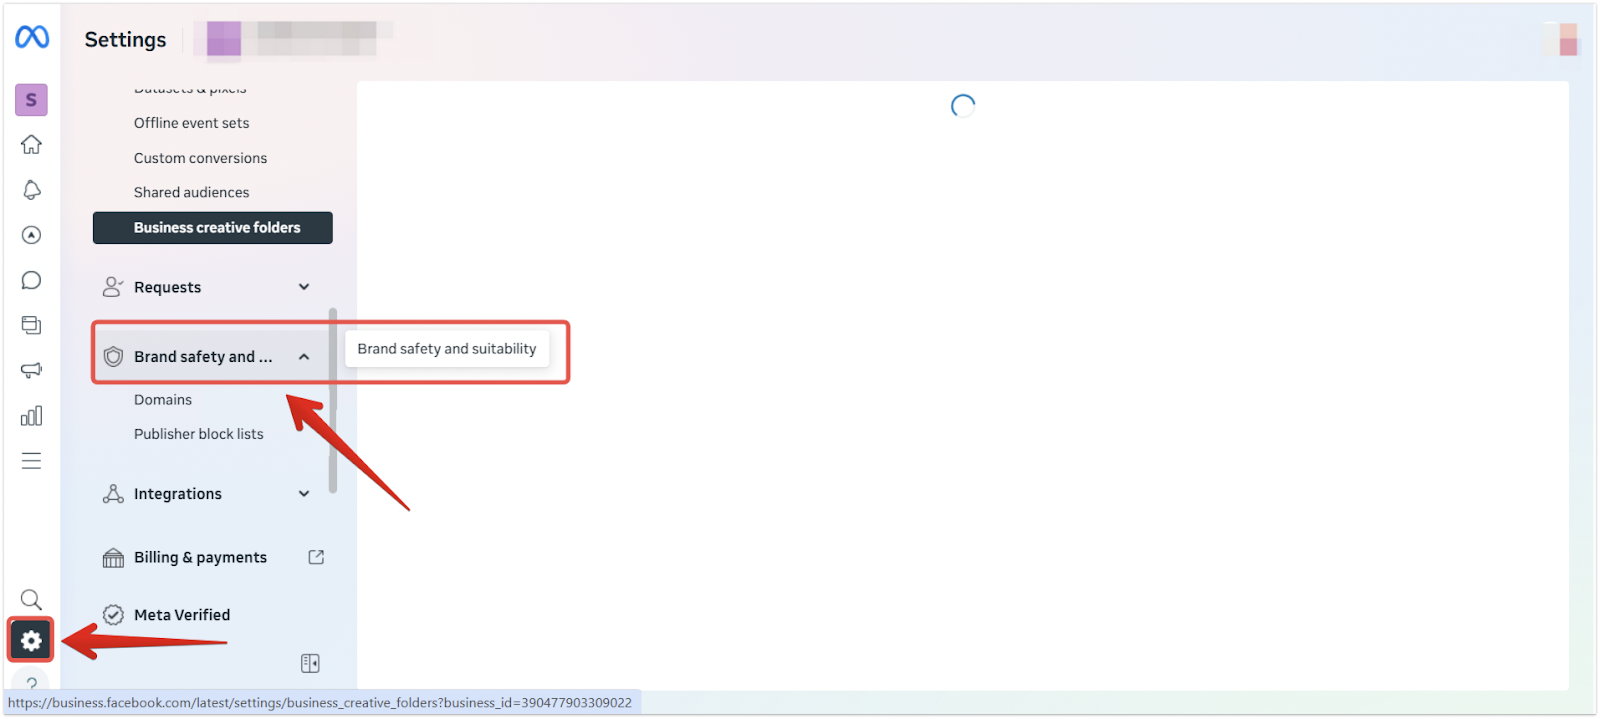
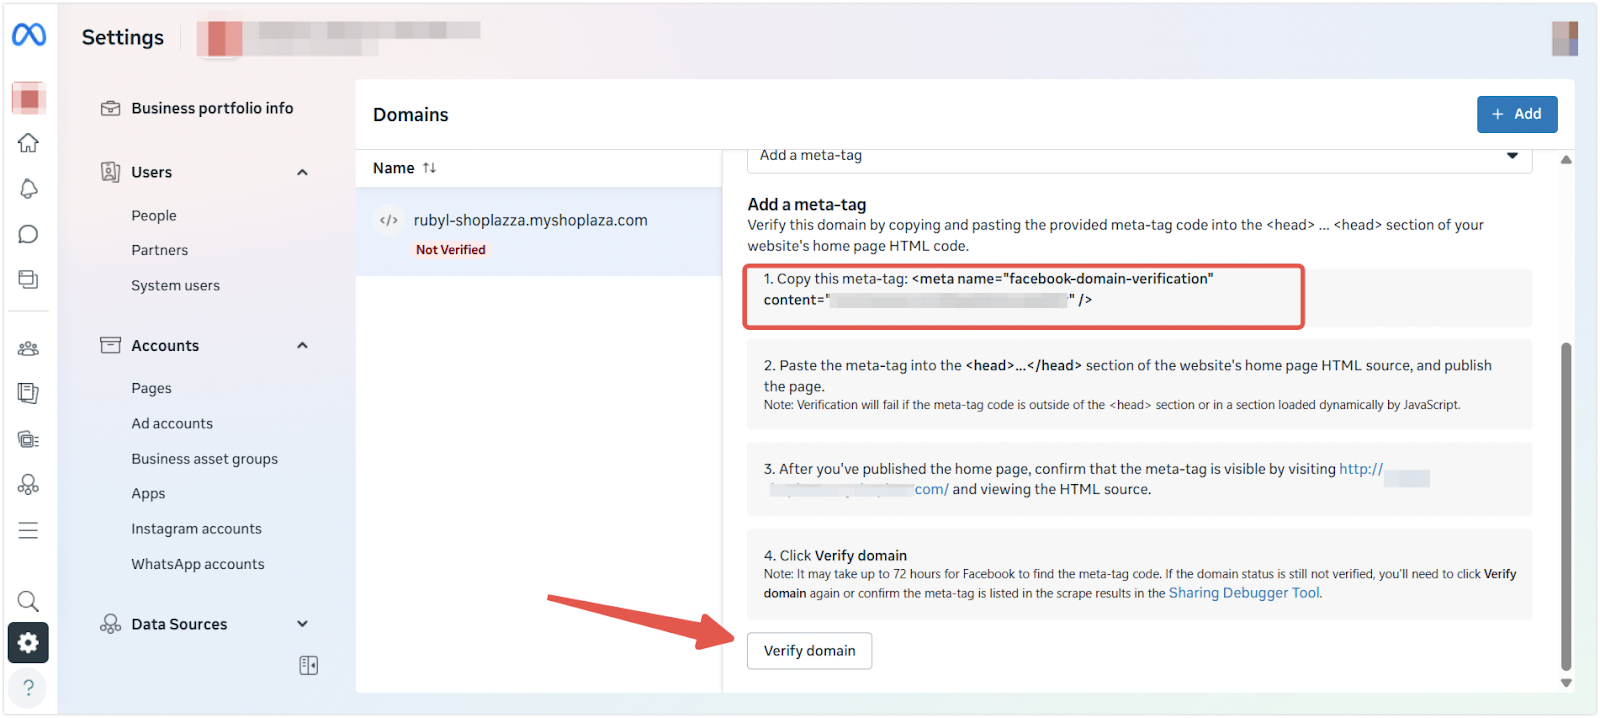
Add your domain to Meta Business
After preparing your store, complete the following steps inside your Meta Business dashboard.
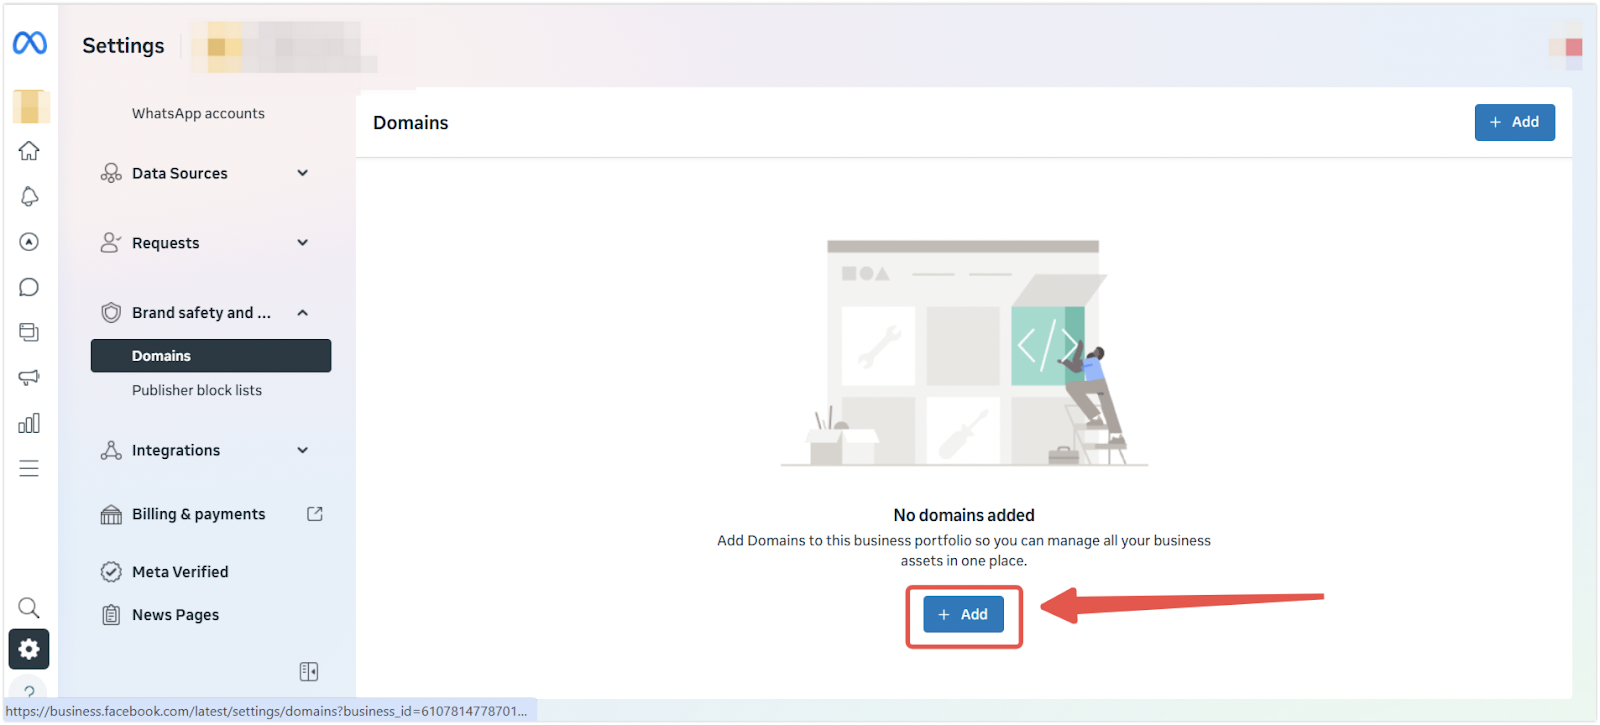
1. Open domain settings: Go to your Meta Business > Settings > Brand safety and suitability > Domains. This section manages ownership of your website within Meta's system.
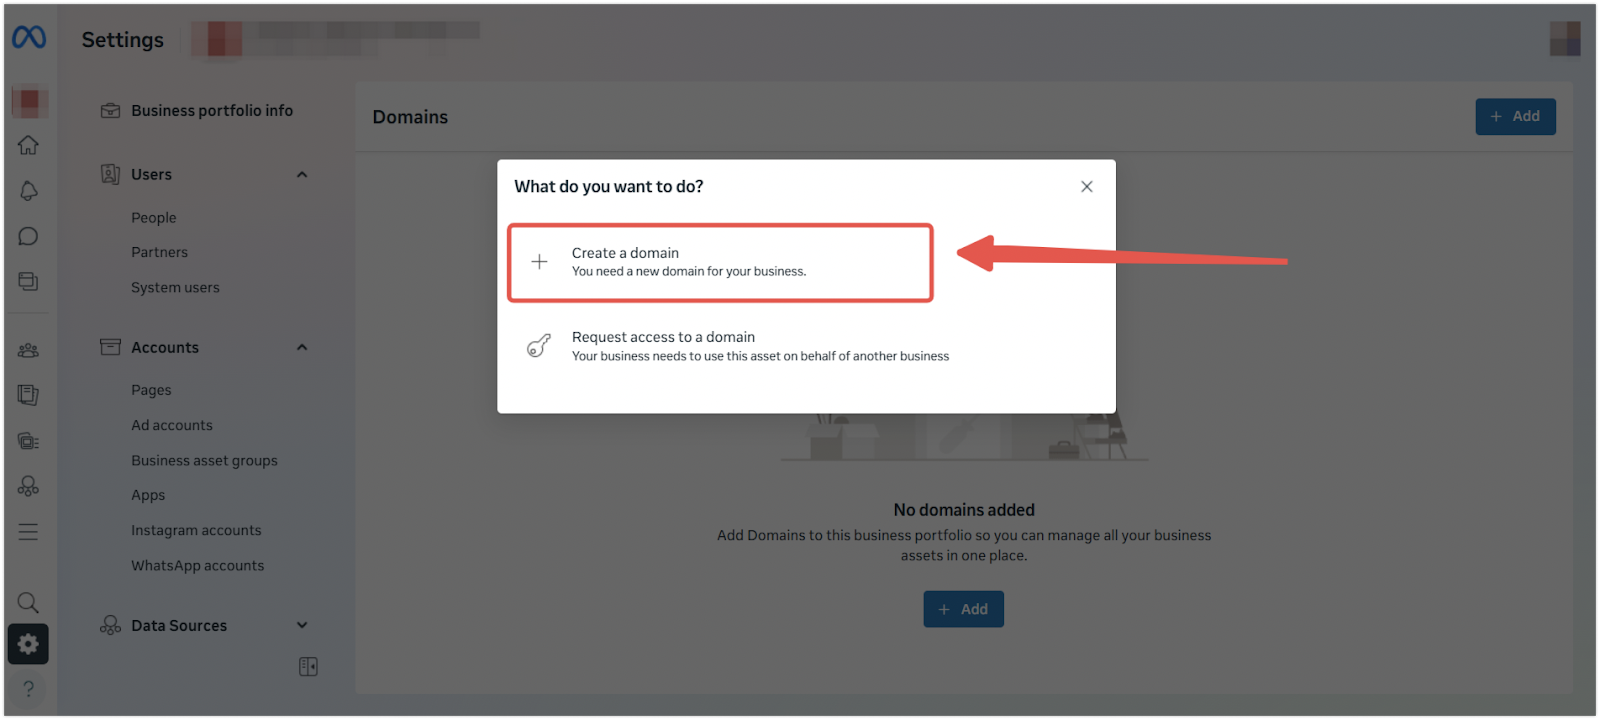
2. Create a new domain entry: Click Add, then select Create a domain to begin the verification process.
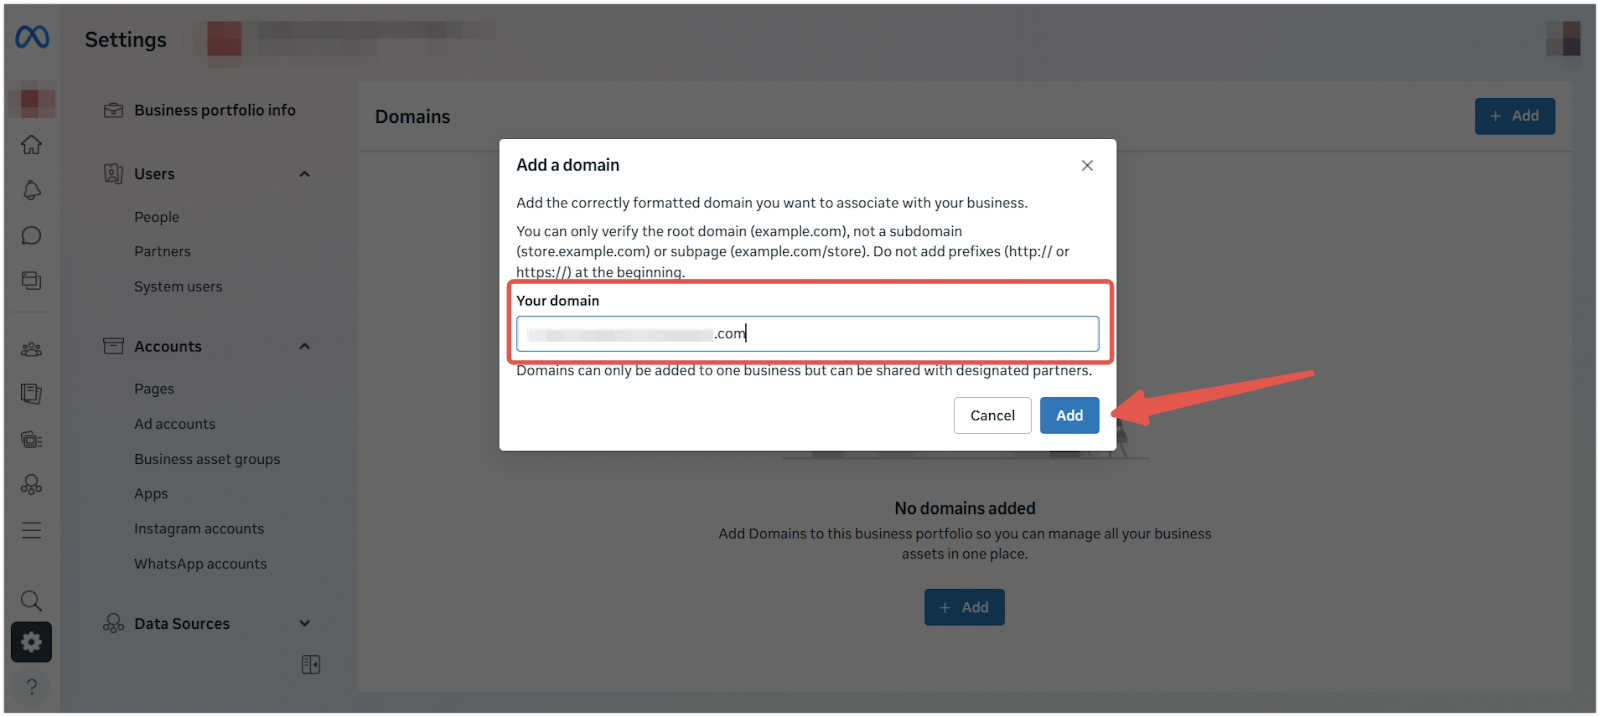
3. Enter your root domain only: Type your main domain (e.g., yourstore.com) without http://, https://, or www.. This is called a root domain or apex domain, meaning it is the highest level of your website address. Do not enter a subdomain or full URL.
Note
- Use: yourstore.com
- Avoid: www.yourstore.com, https://yourstore.com, or yourstore.com/home
Select the meta tag method
Use the meta tag method to verify your domain quickly and without server-side access.
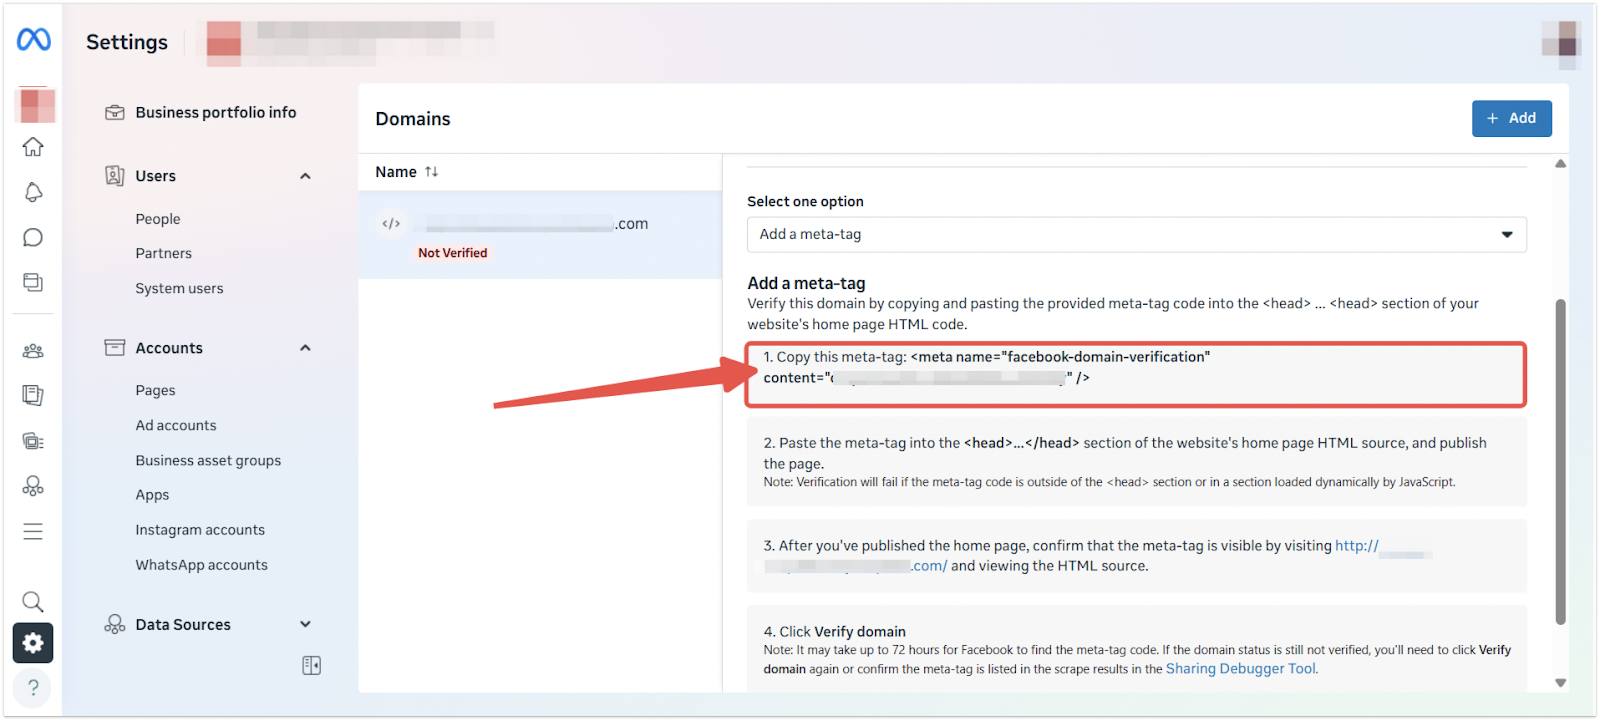
1. Choose meta tag verification: From the available options, select Add a meta tag. This is the simplest method when using Shoplazza.
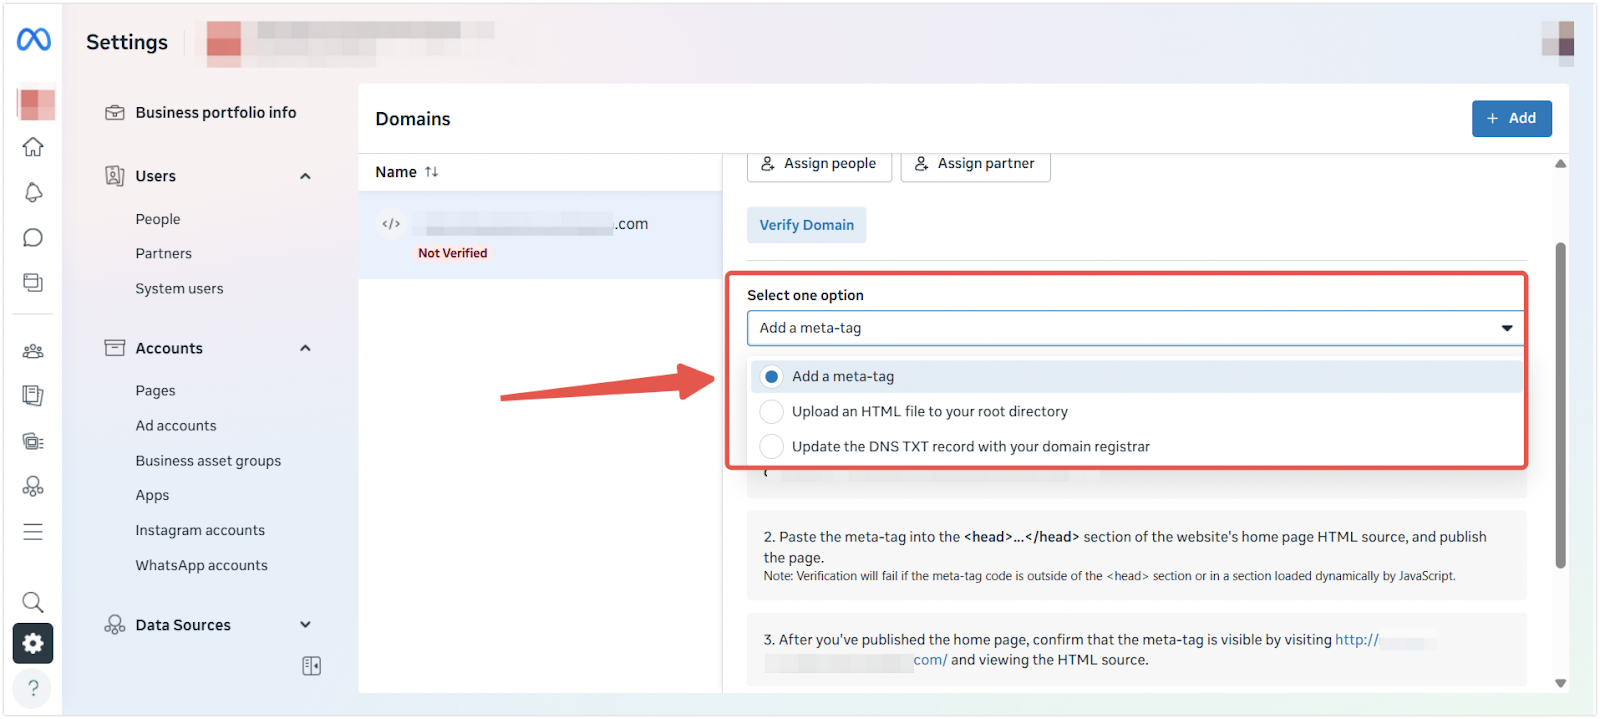
2. Copy your unique meta tag: Click Copy to save the generated tag to your clipboard. Keep this window open so you can return to verify it after the tag is added to your store.
Add the verification tag to your Shoplazza store
Use the Custom Code app to insert the tag into the of your homepage.
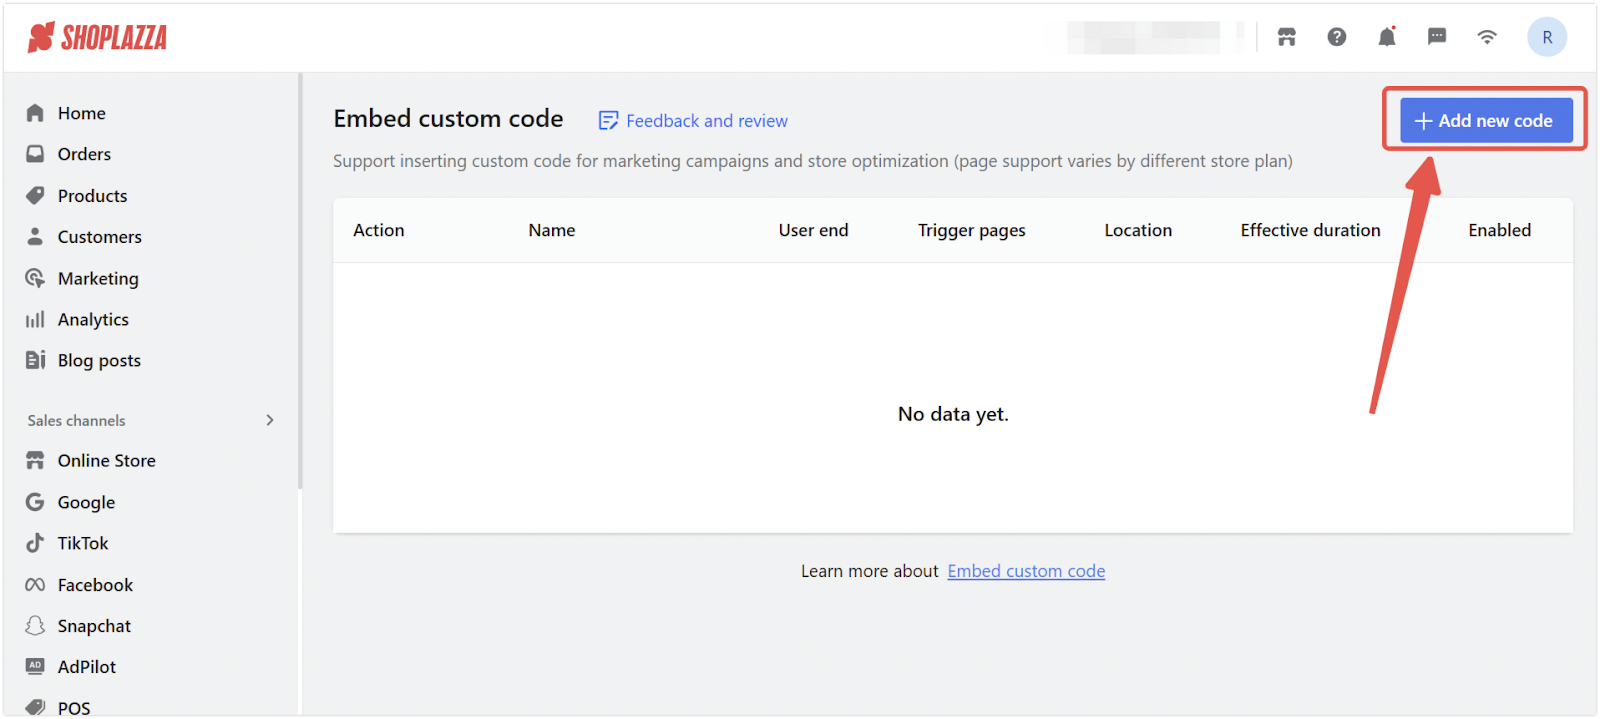
1. Open the Custom Code app and add a new snippet: In your Shoplazza admin, go to Apps > Custom Code and click Add new code to create a new entry.
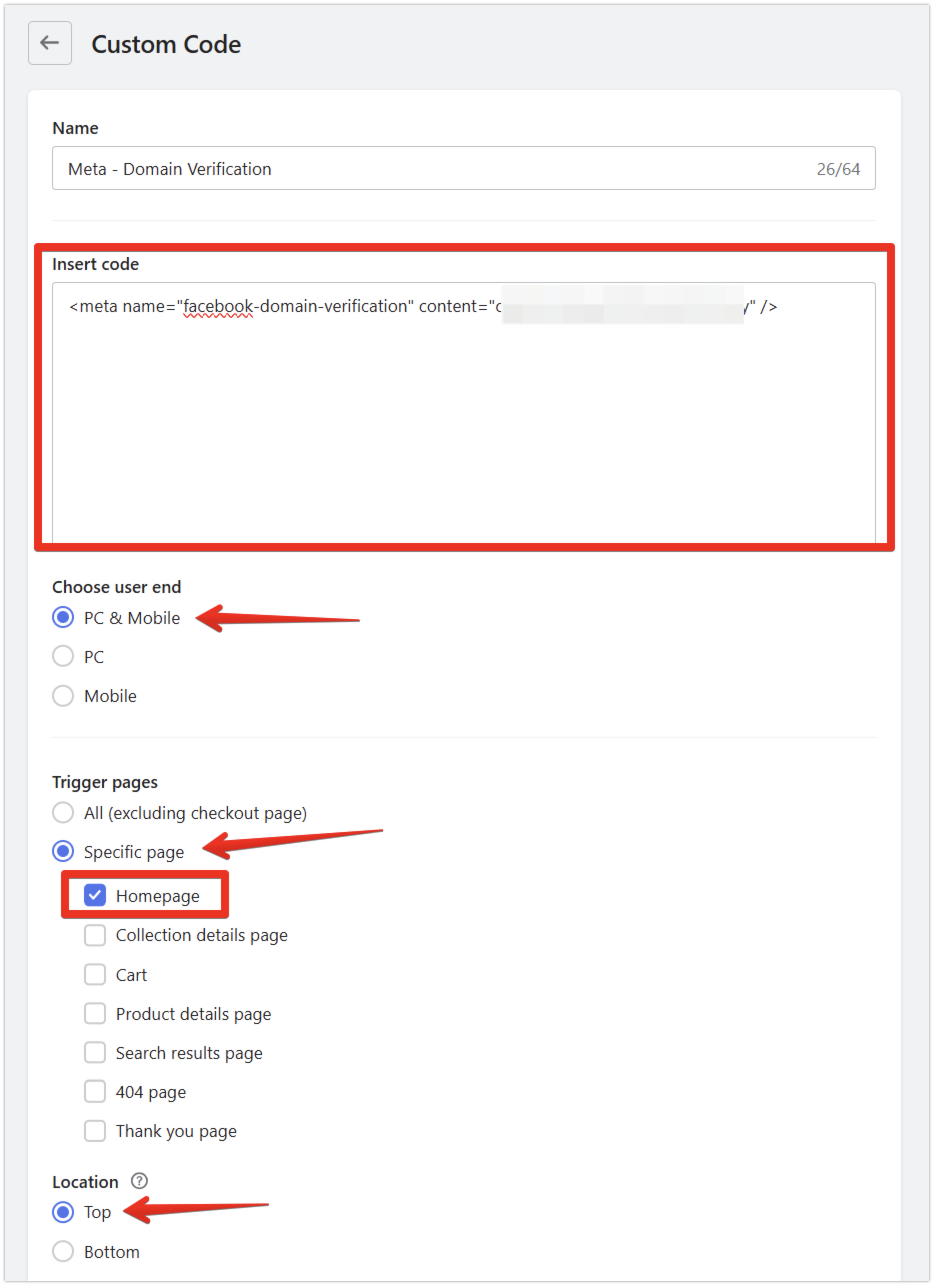
2. Paste the tag and configure the snippet: Add your copied meta tag and adjust the settings to ensure it's properly embedded in your homepage code.
- Name: Enter a clear label like Meta domain verification
- Code: Paste the meta tag into the code box
- User end: Select PC & Mobile
- Trigger pages: Choose Specific page > Home Page
- Location: Set to Top to insert the tag in the
- Click Save to apply the changes
Complete domain verification in Meta
After embedding the tag, return to Meta Business to finish verification.
1. Click “Verify domain” in Meta: Go back to the Domains page in your Meta Business dashboard and click Verify domain. Meta will search for the tag on your site. Verification is often instant, but it may take up to 72 hours.
Troubleshooting if verification fails
If verification does not go through or causes unexpected layout issues, review the following:
- Meta tag not detected: Confirm that the tag is saved correctly in your Custom Code app. Double-check that it is set to trigger on the Home Page, for PC & Mobile, and placed at the Top location.
- Still not verified after 72 hours: Contact Meta support to confirm whether the tag has been detected. Occasionally, delays on their end can affect detection.
- Website layout is broken: If the storefront appears misaligned or distorted after adding the tag, remove the snippet immediately. Review the code for formatting issues and consult a developer or Shoplazza support for guidance.
Domain verification helps you build trust, safeguard your brand identity, and meet Meta’s requirements for link editing, ad delivery, and commerce tools. It is an essential step for serious advertisers and online sellers.
Follow these steps to verify your domain and unlock full Meta functionality. For more information, visit the Meta Business Help Center or contact Shoplazza support for help.


Comments
Please sign in to leave a comment.