
The checkout page is an essential part of your online store, where customers complete their purchases. A clear and user-friendly checkout experience can help build customer trust and improve conversion rates. With the theme editor, you can adjust your checkout page's layout, style, and branding elements to create a cohesive look that aligns with the rest of your store. This guide will walk you through accessing the checkout editor, understanding its layout options, and applying customizations to enhance the checkout experience for your customers.
Accessing the checkout page
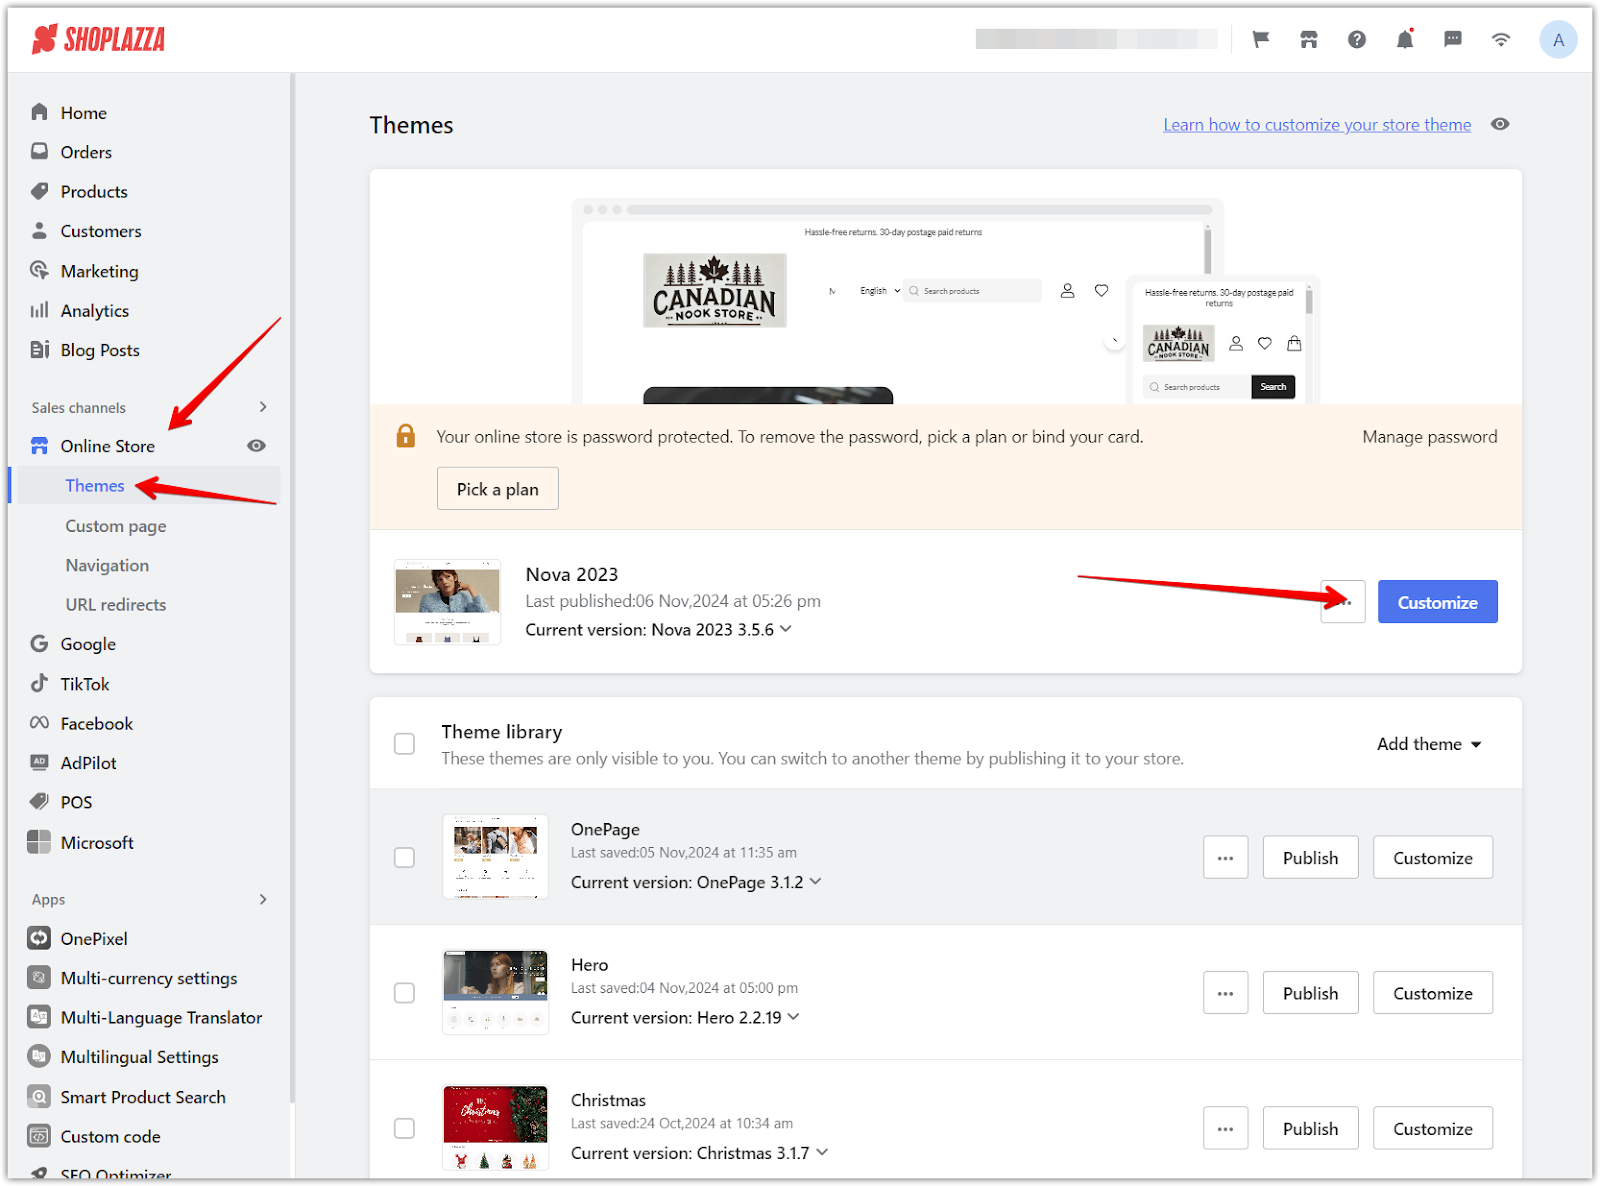
1. Access your theme editor: Go to Shoplazza admin > Online Store > Themes, and click Customize on your target theme.
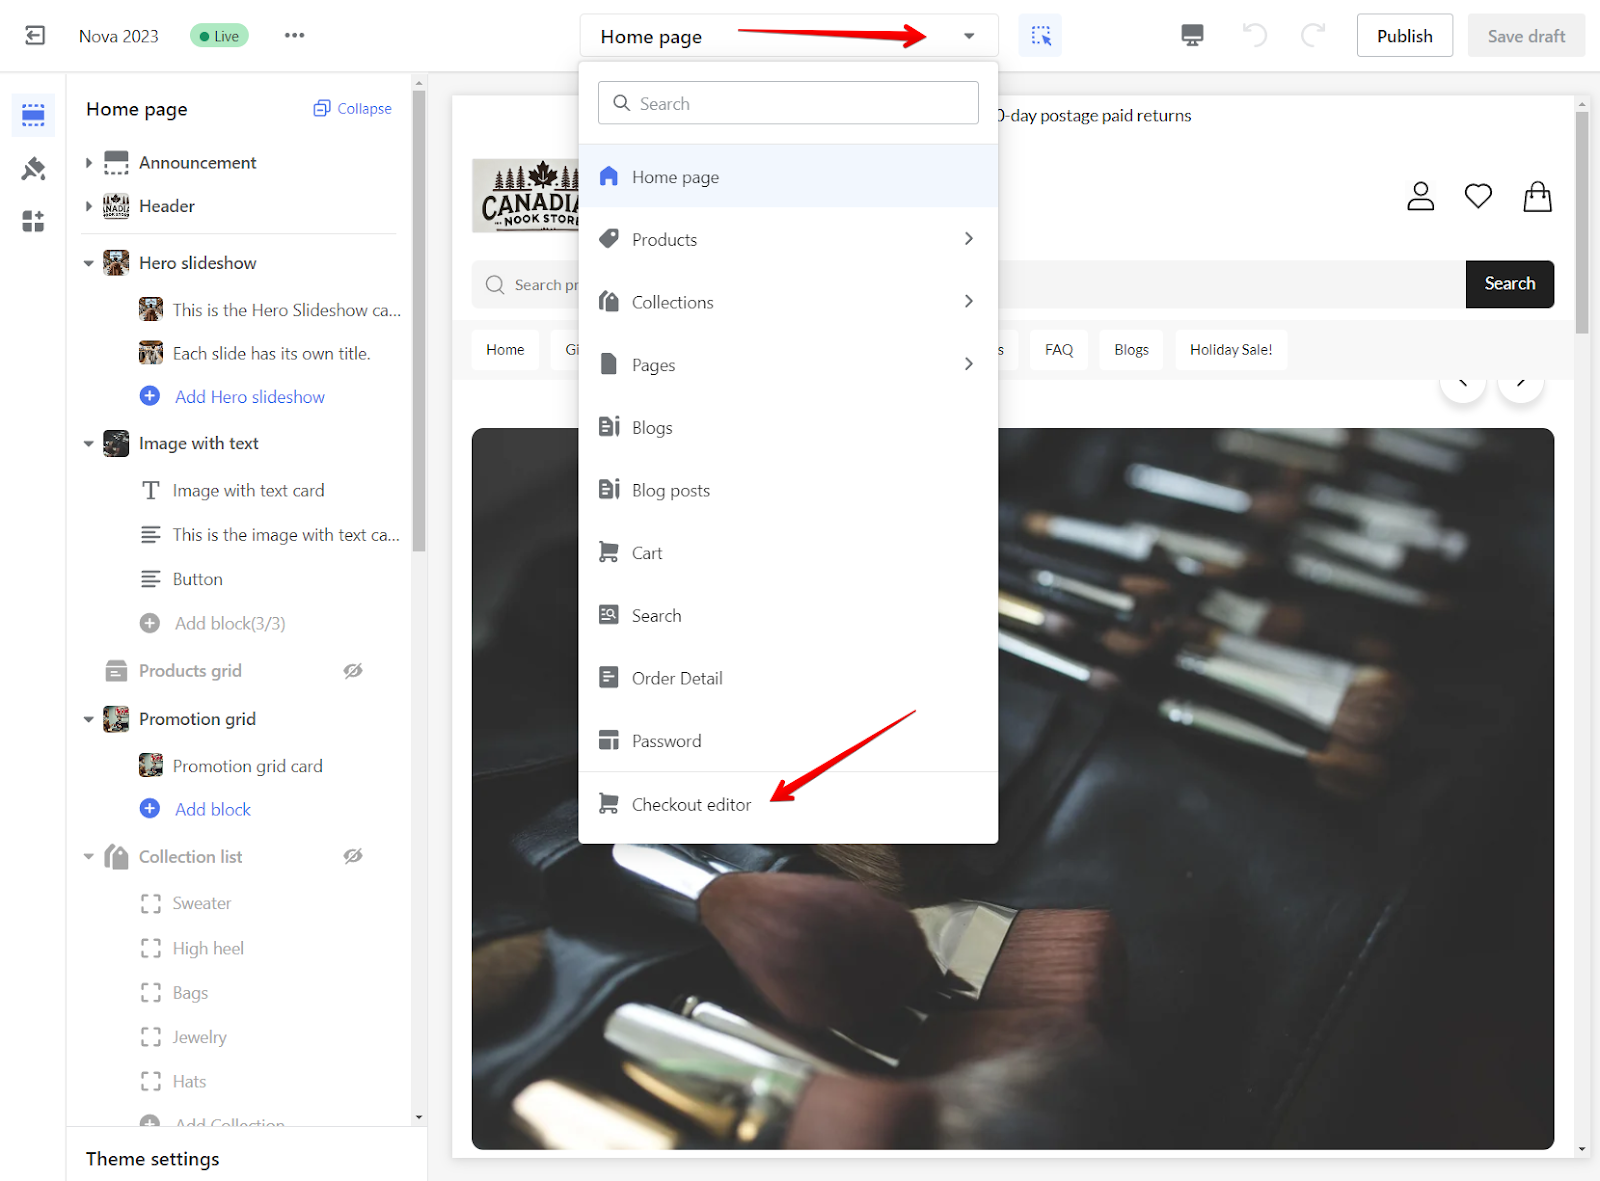
2. Select the checkout page: Use the drop-down menu to select Checkout editor.
Understanding the checkout editor sections
The checkout editor provides different viewing options at the top, allowing you to preview how your changes will look across various stages of the checkout process. These viewing options depend on the page layout you select.
1. One-page layout: The dropdown menu only shows the Checkout page option if you select the One-page checkout layout. This view consolidates all steps—customer information, shipping details, and payment—on a single page, allowing you to see how your design changes will appear in a single-page format.

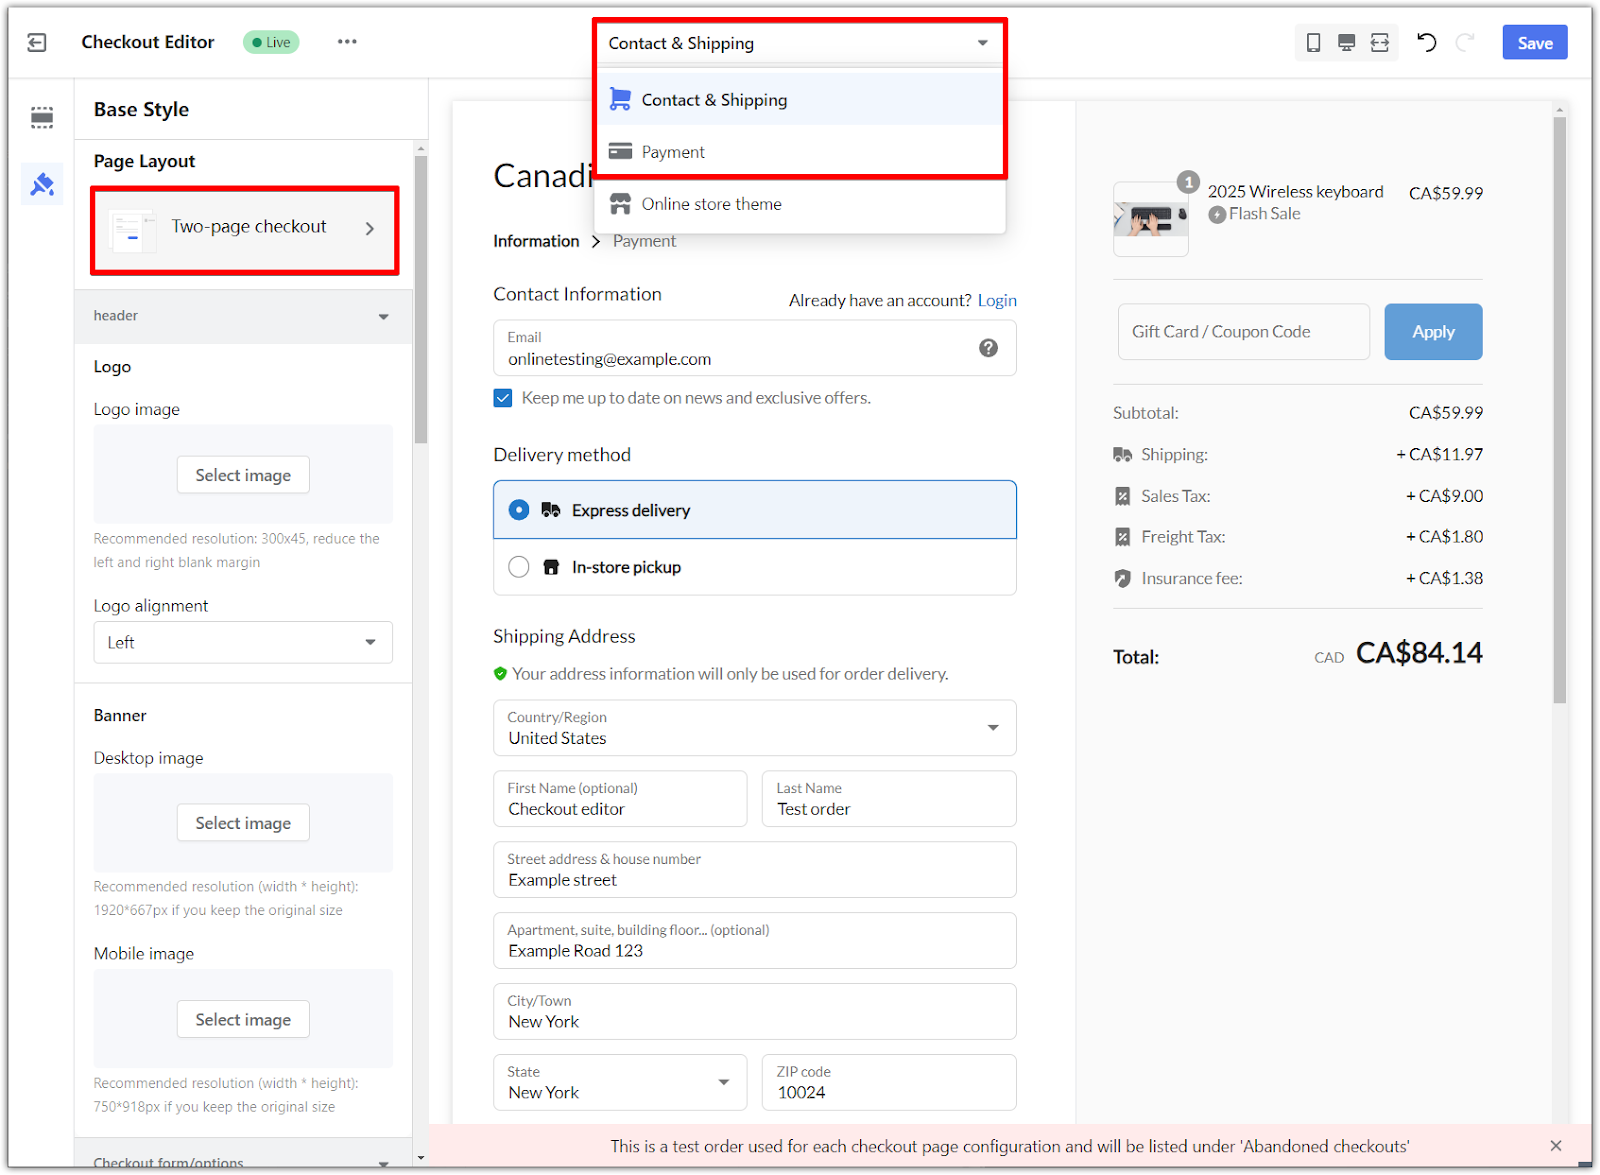
2. Two-page layout: With the Two-page checkout layout, the dropdown menu includes Contact & Shipping and Payment options.
- Contact & Shipping: Customers enter their contact information and shipping details on this page.
- Payment: This view displays the payment page, showing how your design adjustments will look in this section. Any customization you make applies across both pages to keep the look consistent.
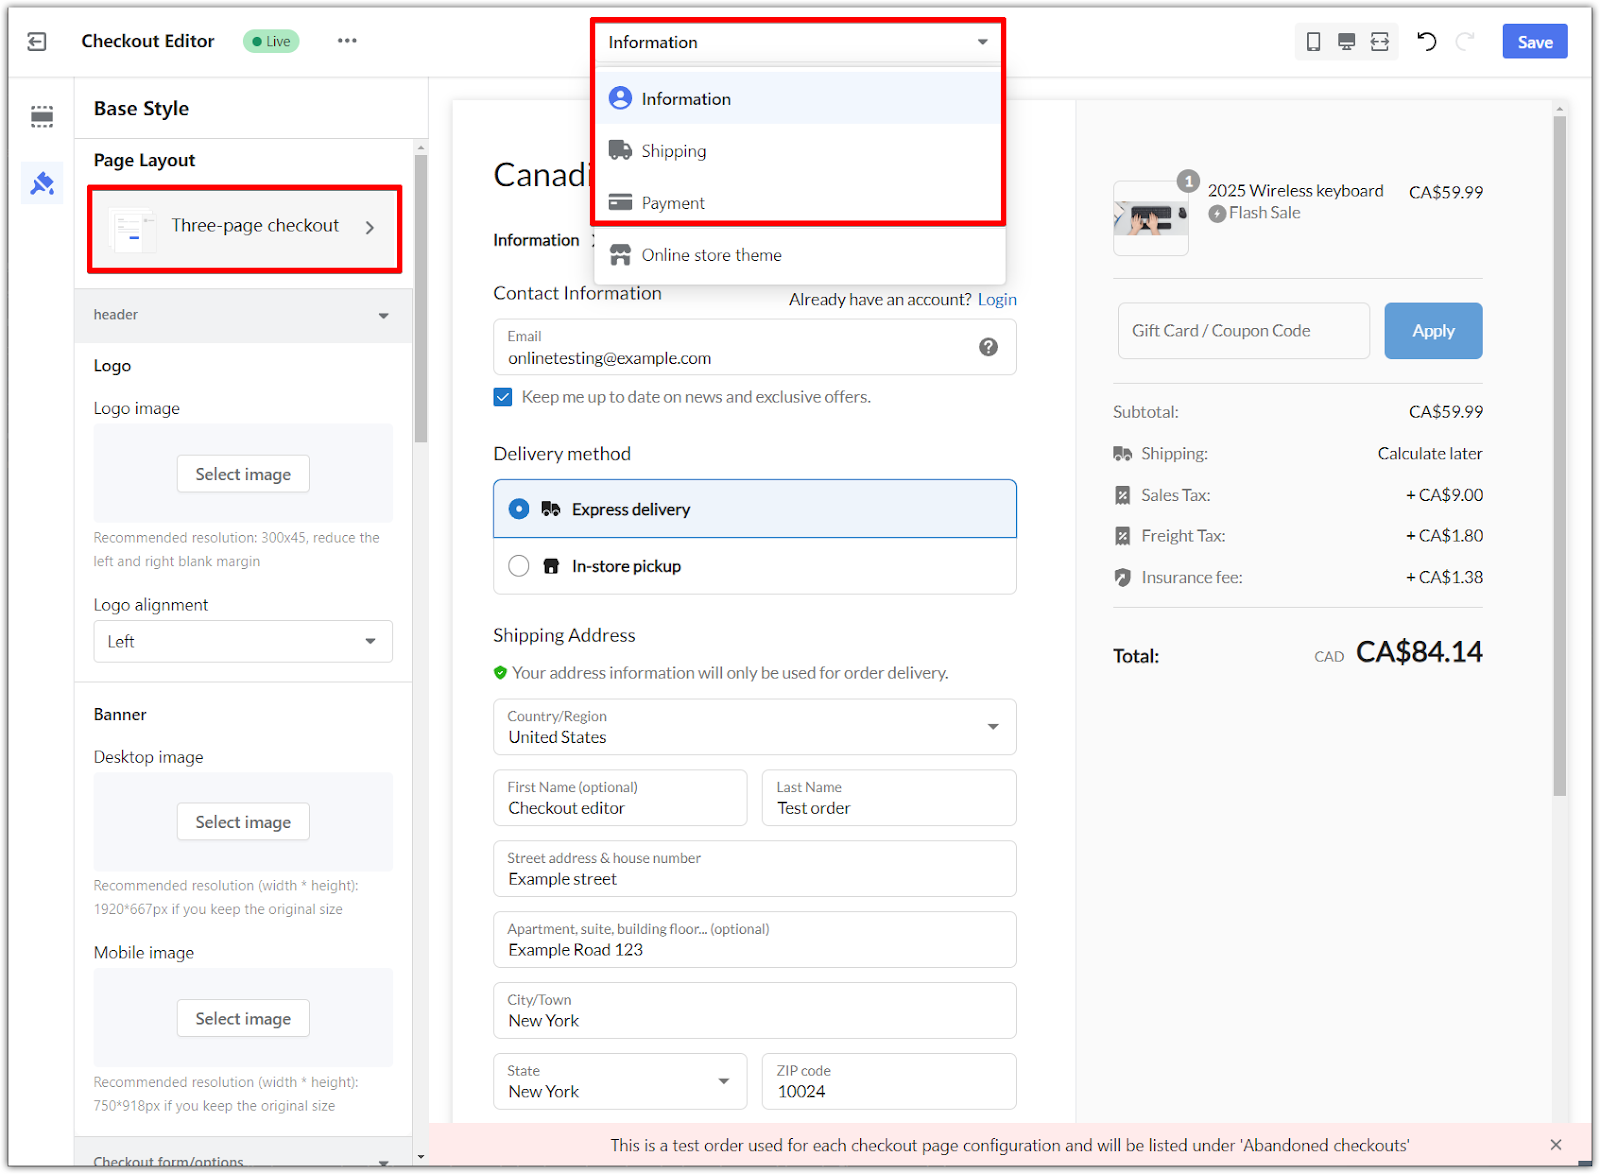
3. Three-page layout: When you choose the Three-page checkout layout, the dropdown menu provides Information, Shipping, and Payment options.
- Information: This view shows the page where customers input their contact information.
- Shipping: This view allows you to preview how the shipping details page will look.
- Payment: This view displays the payment page, showing how your design adjustments will appear. Design changes apply across all three pages to ensure a cohesive experience.
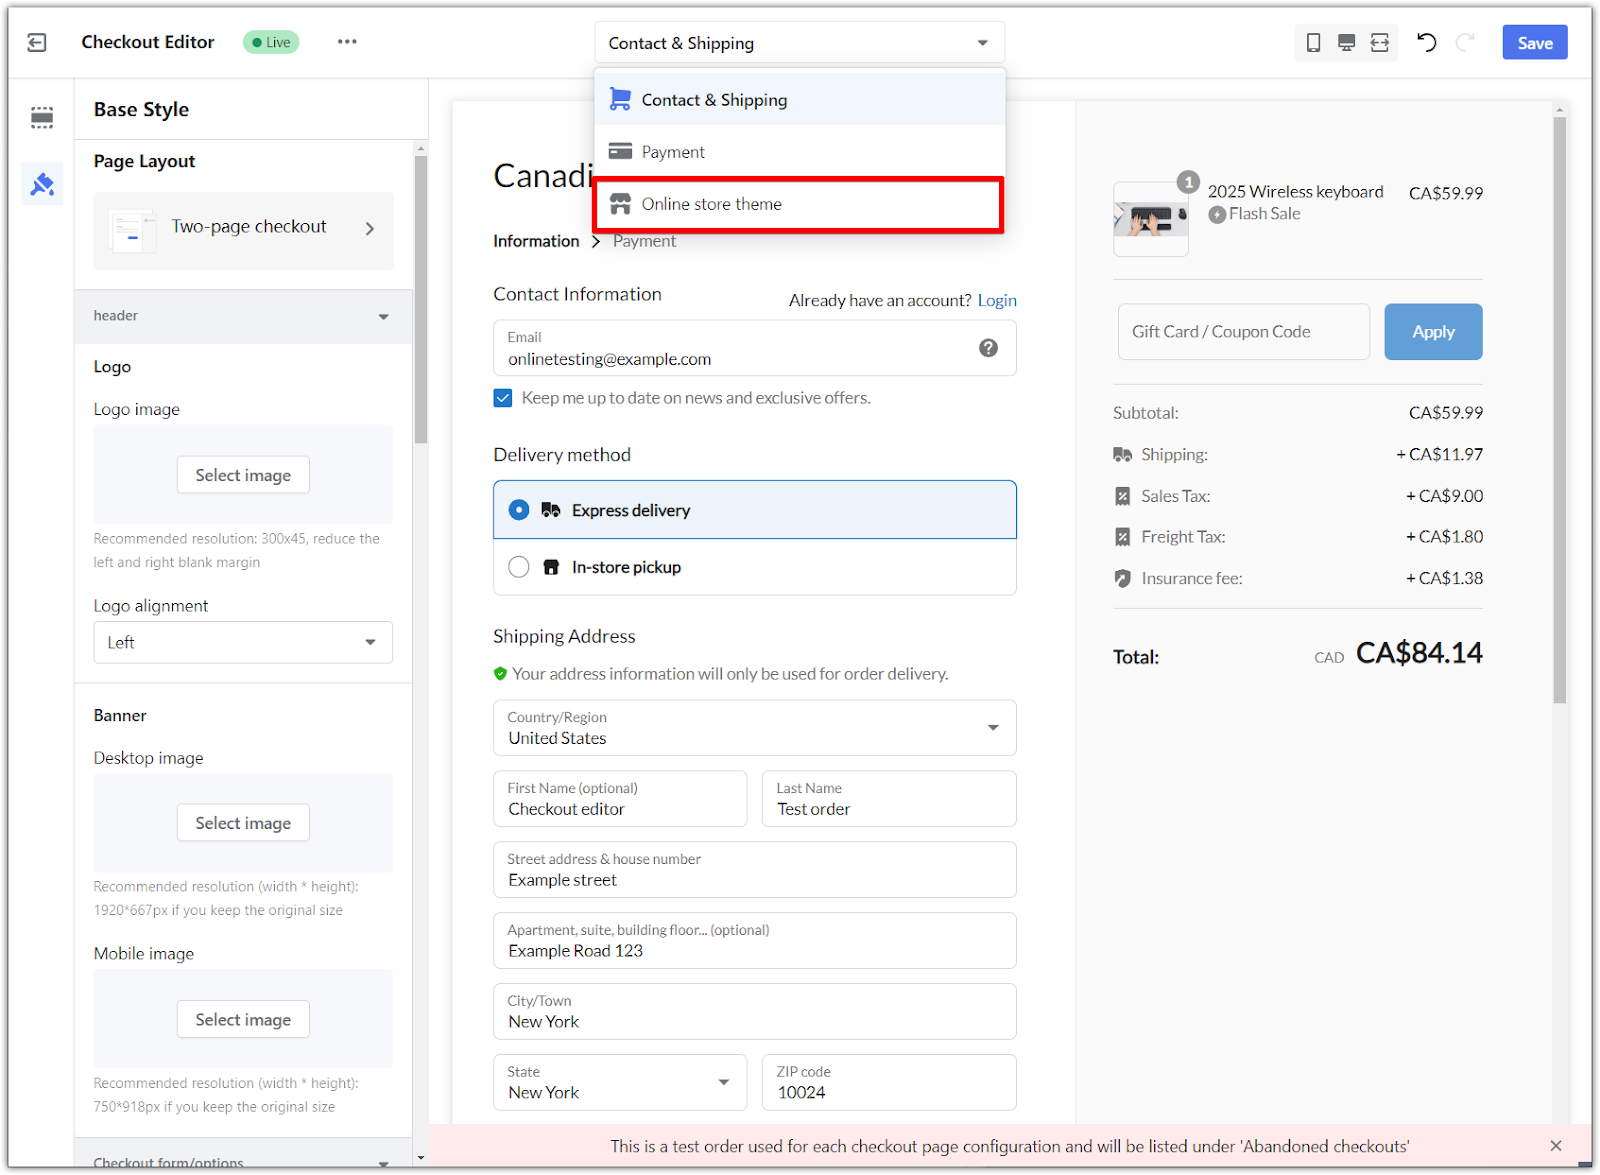
4. Online Store Theme:
- In any layout, selecting Online Store Theme redirects you to the main theme editor, where you can configure the store-wide appearance settings. To return to customizing the checkout, switch back to the Checkout editor and select the appropriate viewing option based on your page layout.
Configuring the page layout
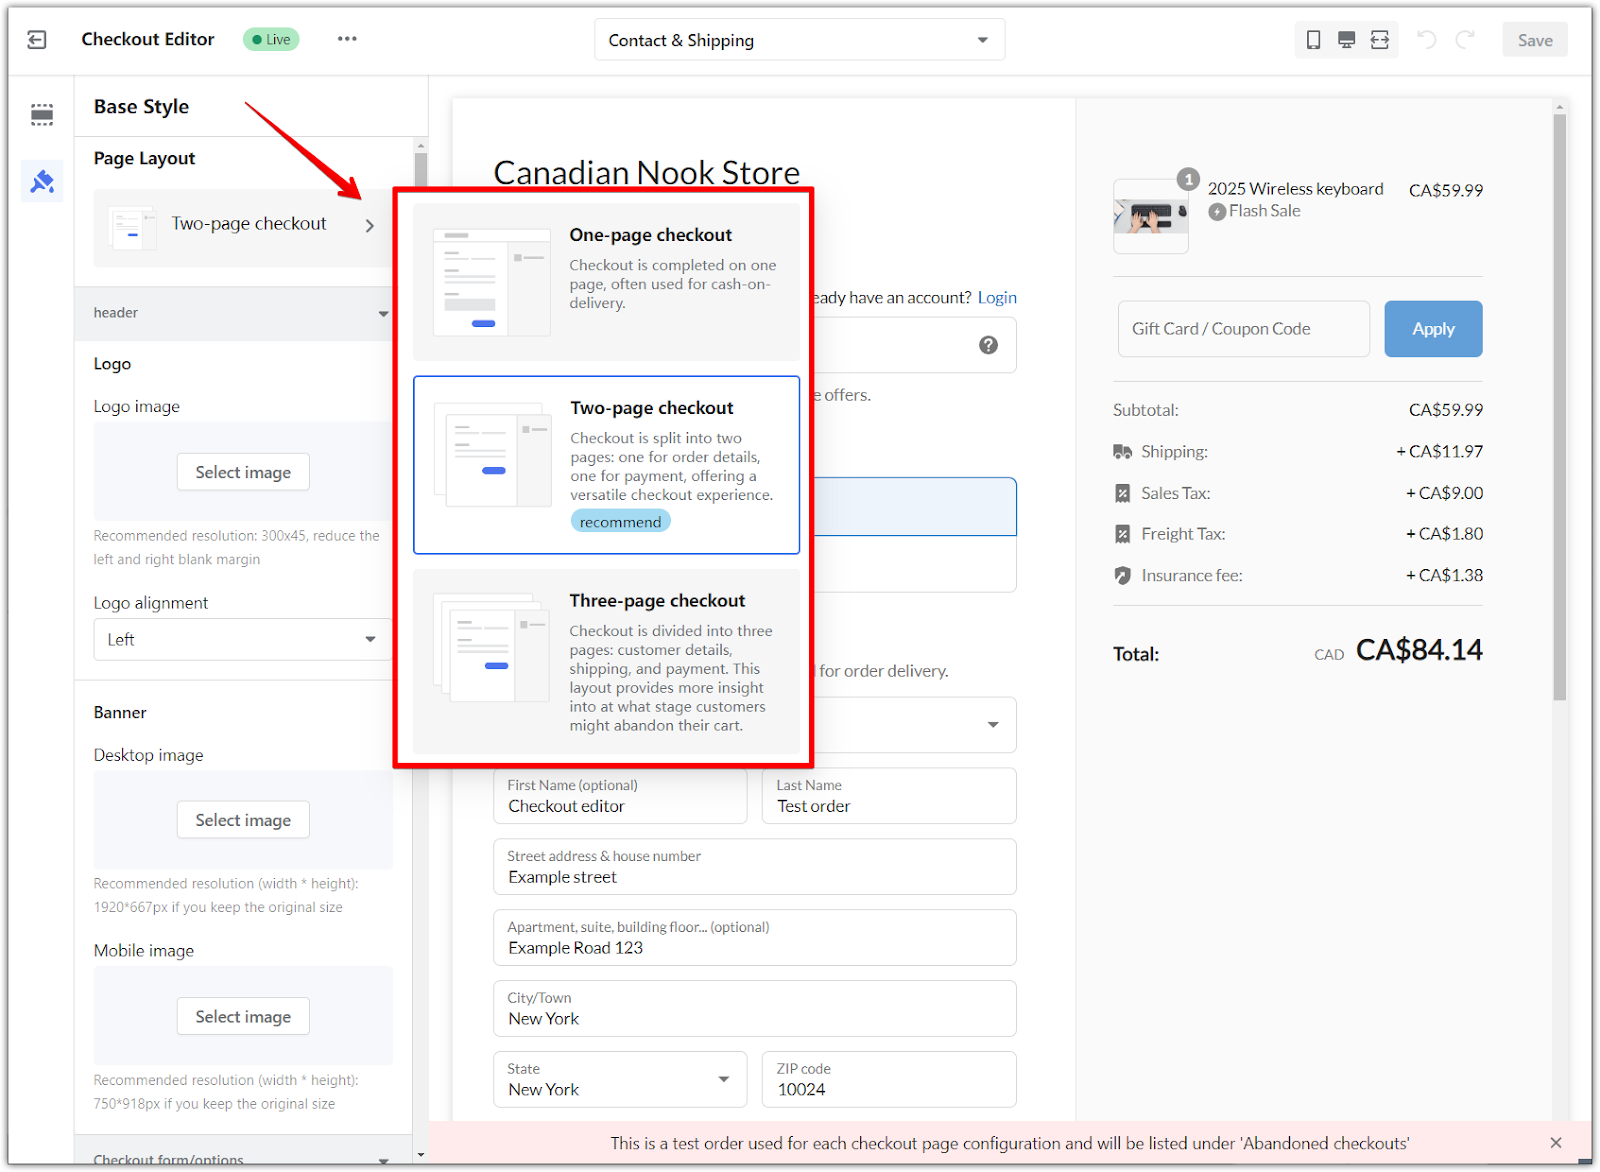
1. Select a checkout layout:
- One-page checkout: A single-page layout that collects all information on one page, often used for simple transactions like cash-on-delivery.
- Two-page checkout (recommended): Splits the checkout into two stages—one for order details and one for payment—offering a streamlined experience.
- Three-page checkout: Divides the process into three sections (customer details, shipping, and payment), helping you see where customers may leave the process.
Customizing header elements
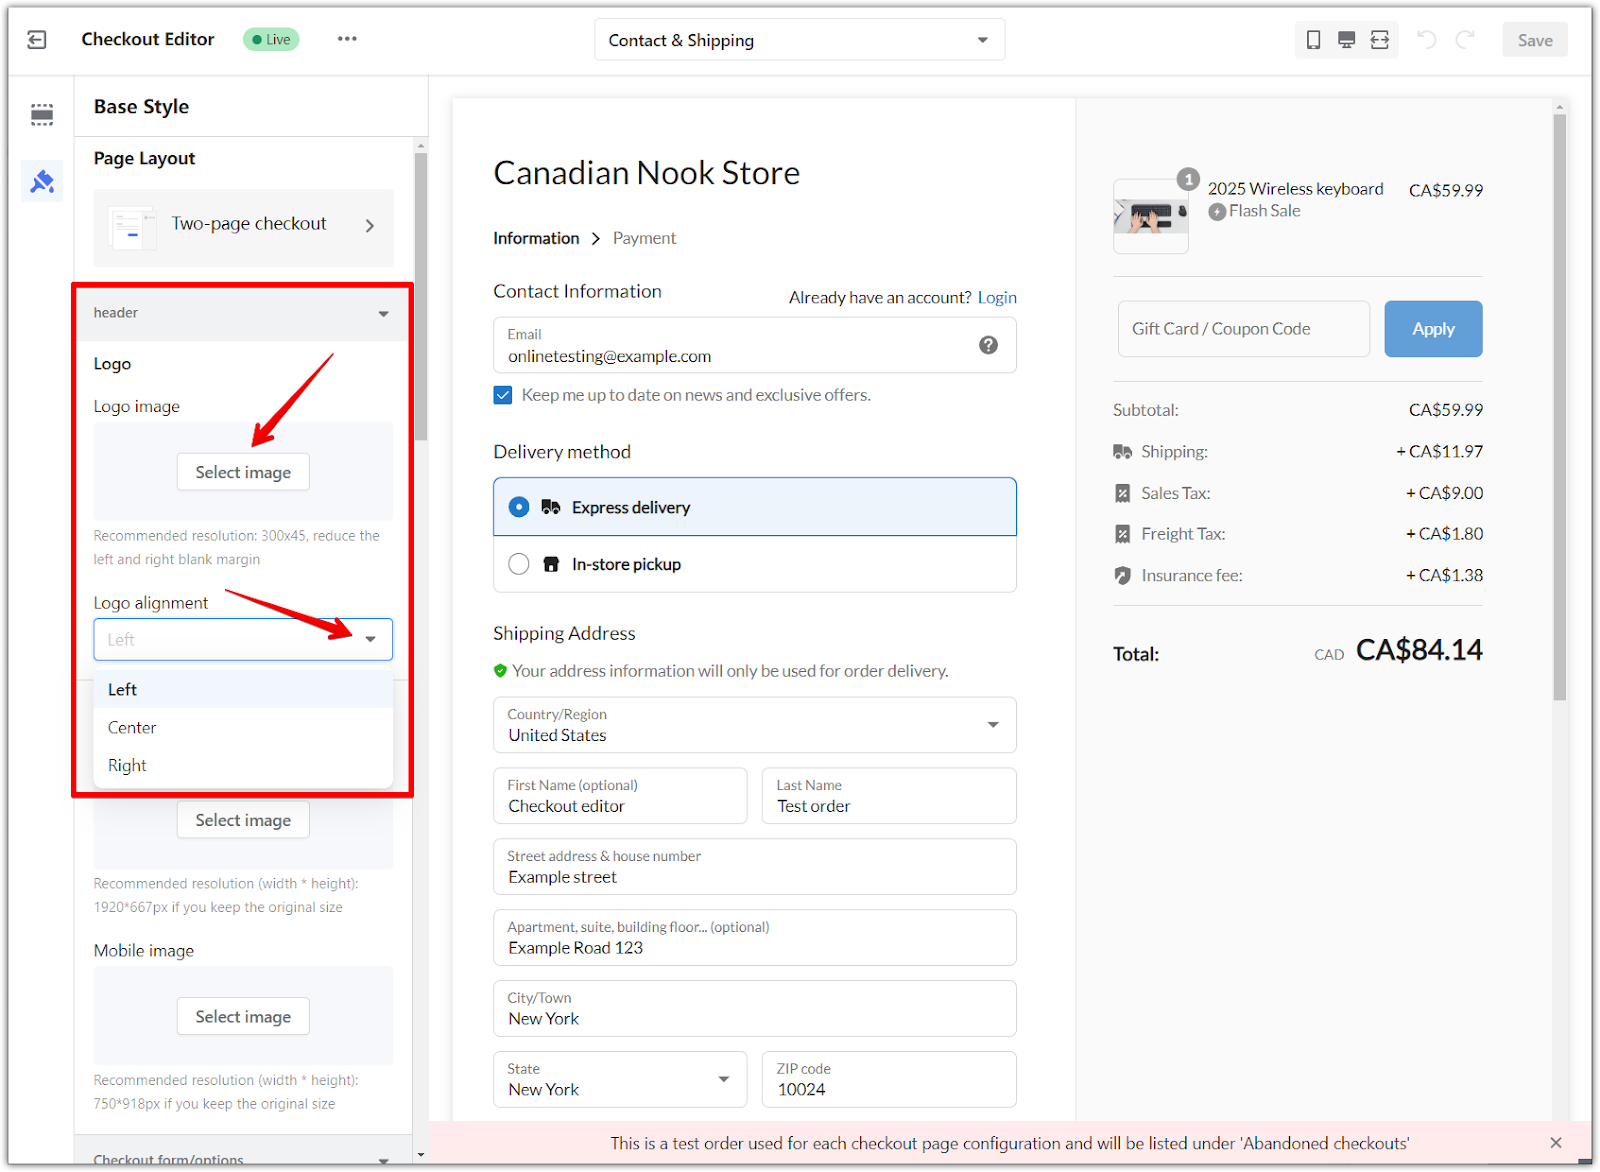
1. Logo:
- Upload or select a logo: Choose an image from your Shoplazza admin or upload a new file.
- Set logo alignment: Position the logo on the header's left, center, or right.
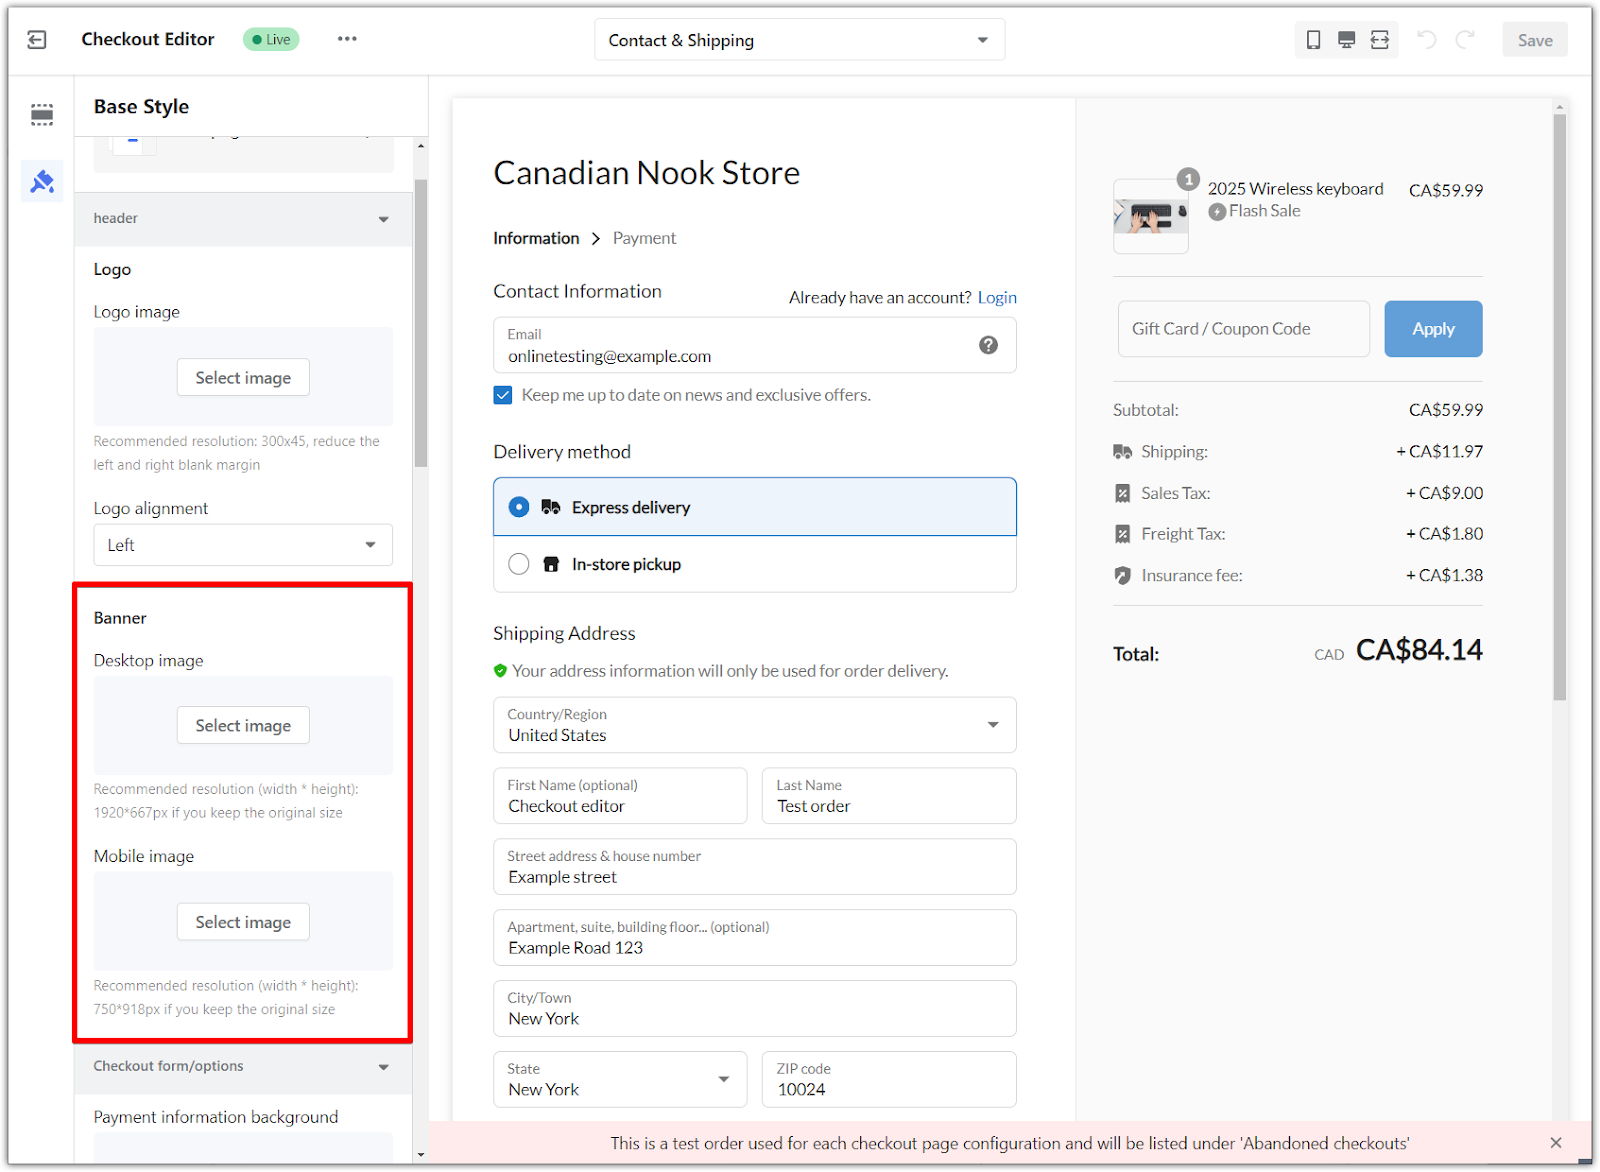
2. Banner:
- Desktop banner: Select an image for the desktop banner (recommended resolution: 1920x667 px) to personalize the top of the checkout page.
- Mobile banner: Choose a banner image for mobile devices (recommended resolution: 750x198 px) to ensure the checkout page looks consistent across all devices.
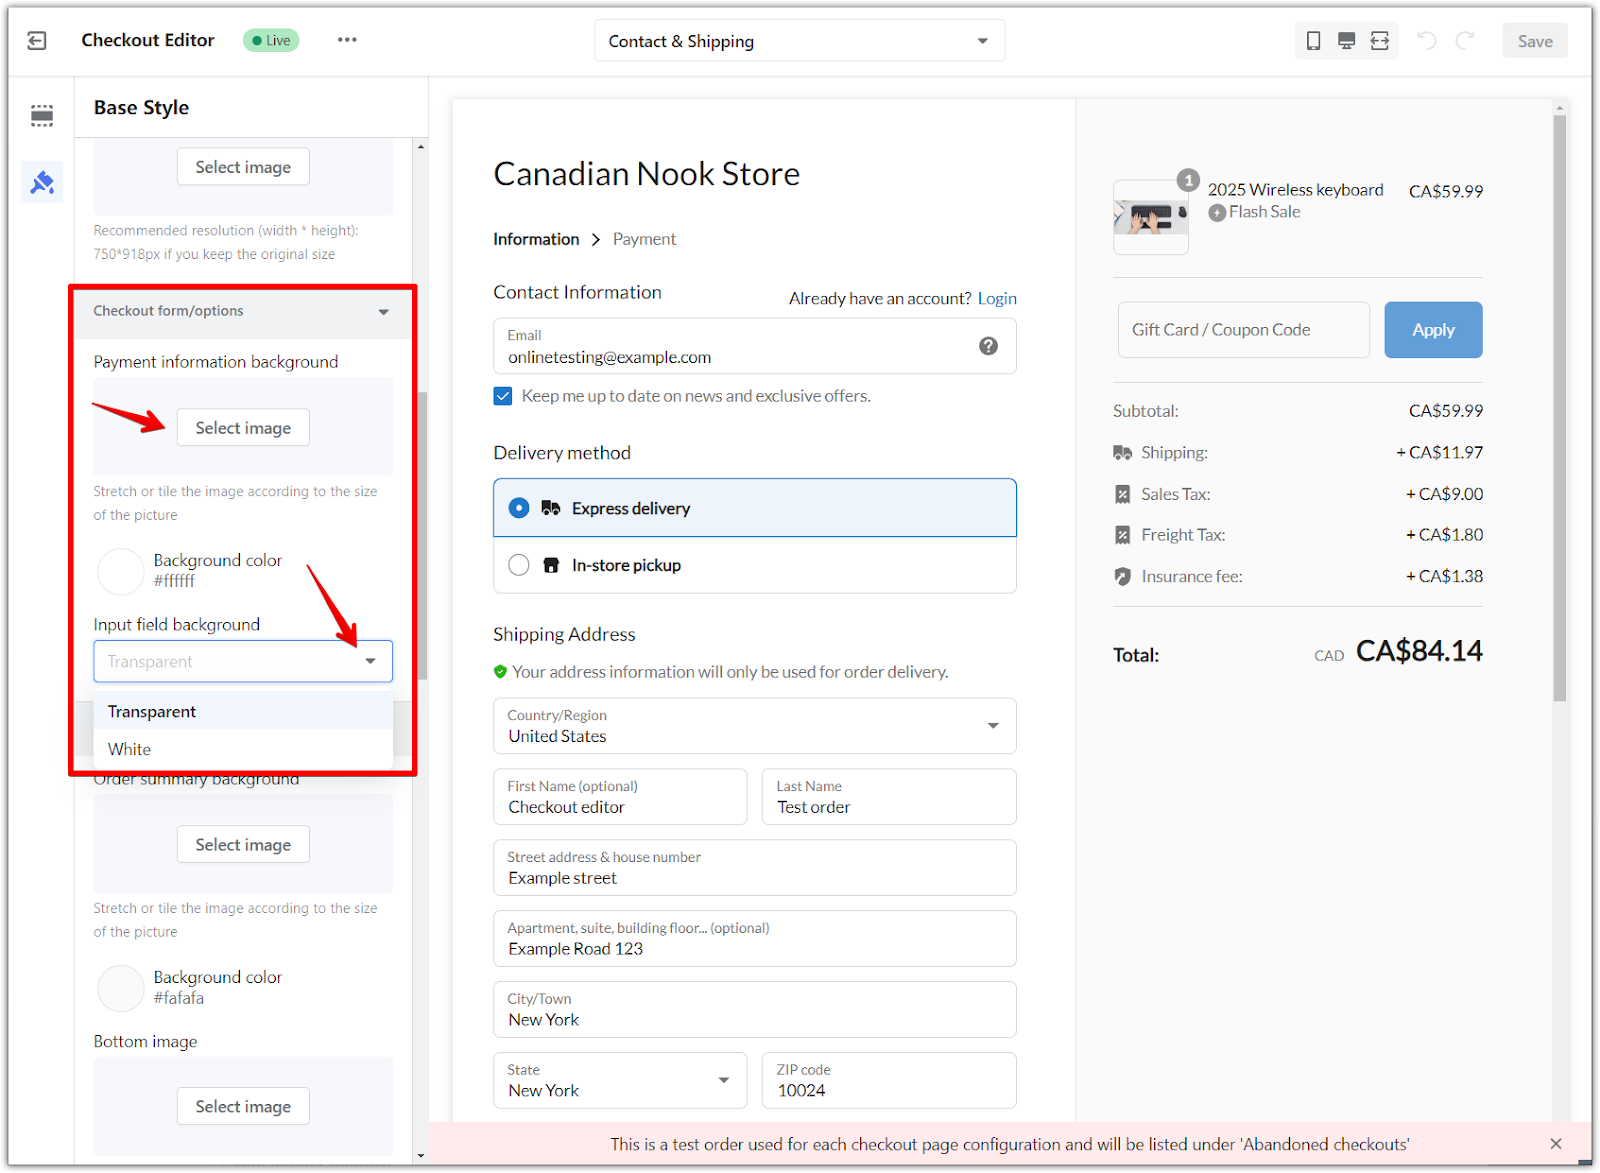
Customizing the payment information background
1. Payment background:
- Background image or color: Choose an image or color for the payment section that complements your brand.
- Input field background: Set the input fields to either Transparent or White for optimal readability.
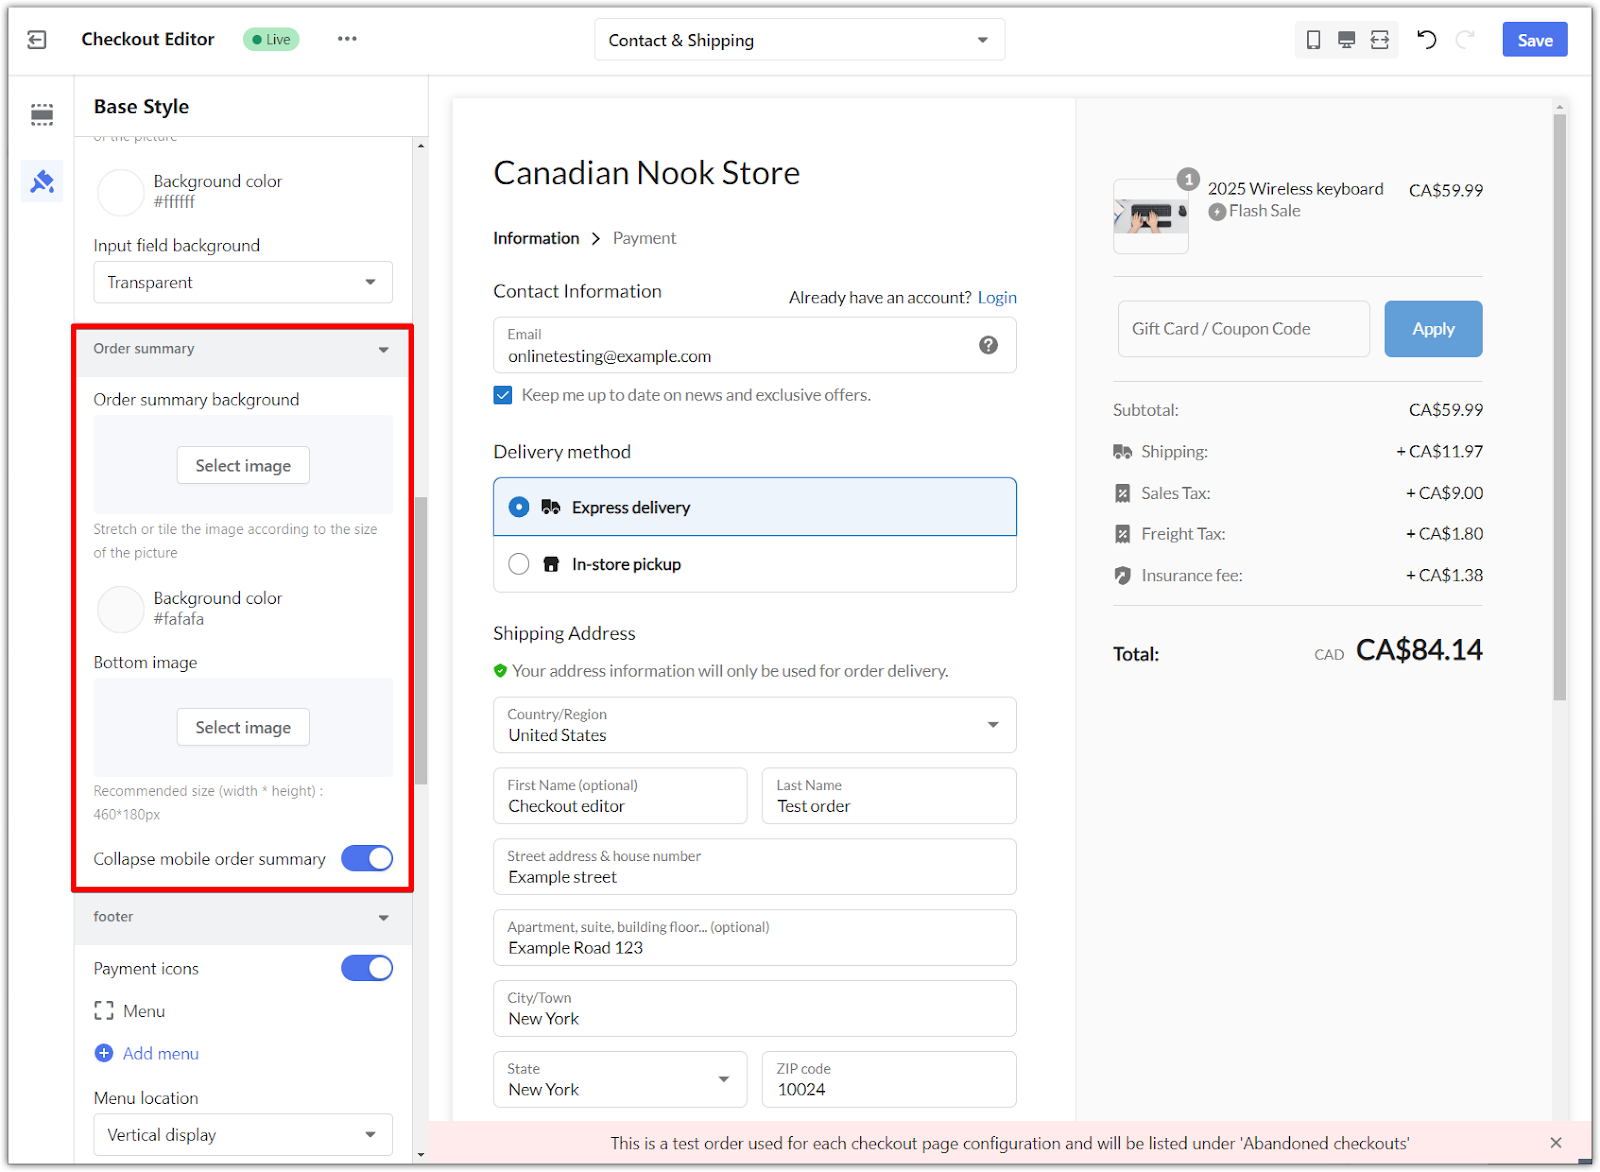
Configuring the order summary
1. Order summary background:
- Background image or color: Choose a background image or color for the order summary section to keep it visually aligned with your brand.
- Add bottom image: Optionally, add an image at the bottom of the order summary section (recommended resolution: 460x180 px).
2. Collapse mobile order summary:
- Enable or disable: Choose whether the order summary is collapsed by default on mobile devices to save space and improve usability.
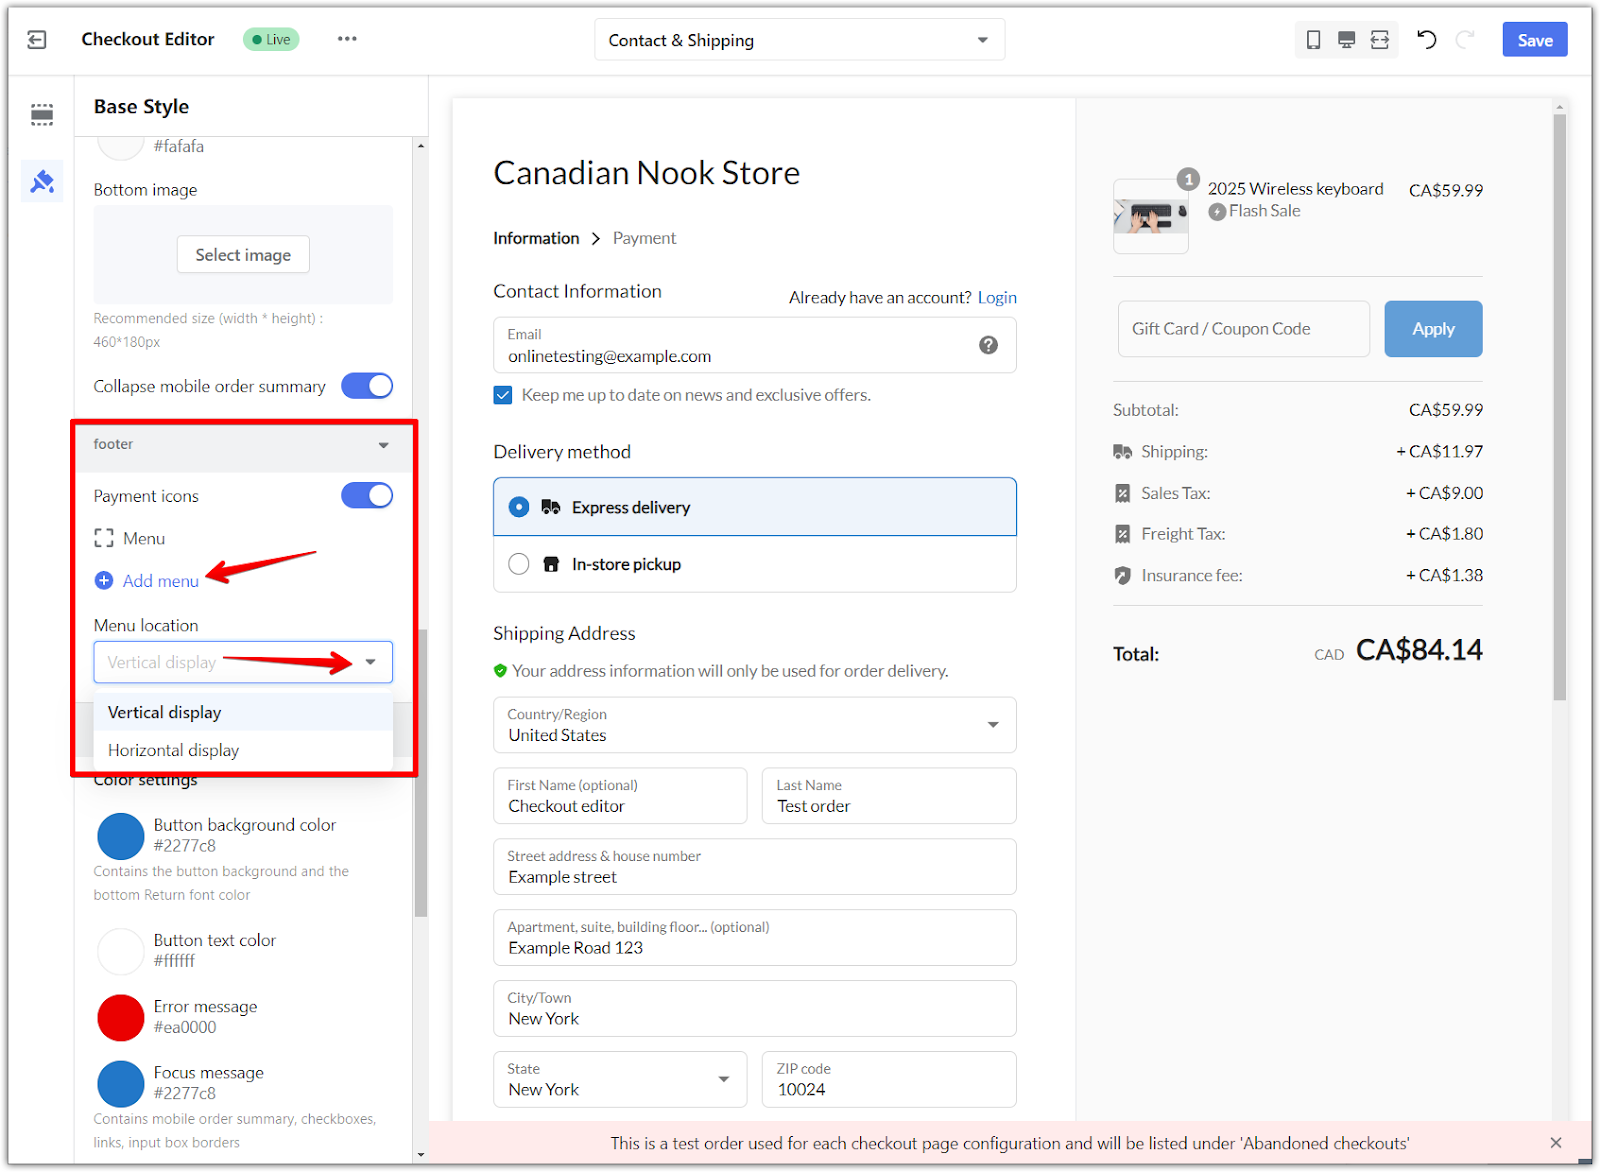
Customizing the footer
1. Payment icons:
- Toggle payment icons: Choose whether to display payment method icons in the footer, helping reassure customers about accepted payments.
2. Footer menus:
- Add custom menus: Click Add Menu to create up to 5 menus in the footer for links to customer support, policy pages, or other relevant information.
- Set link names and URLs: Add a Link name for each item, and specify the Link page or a custom URL.
- Choose menu layout: Select a Vertical or Horizontal display for your footer menus to fit your design.
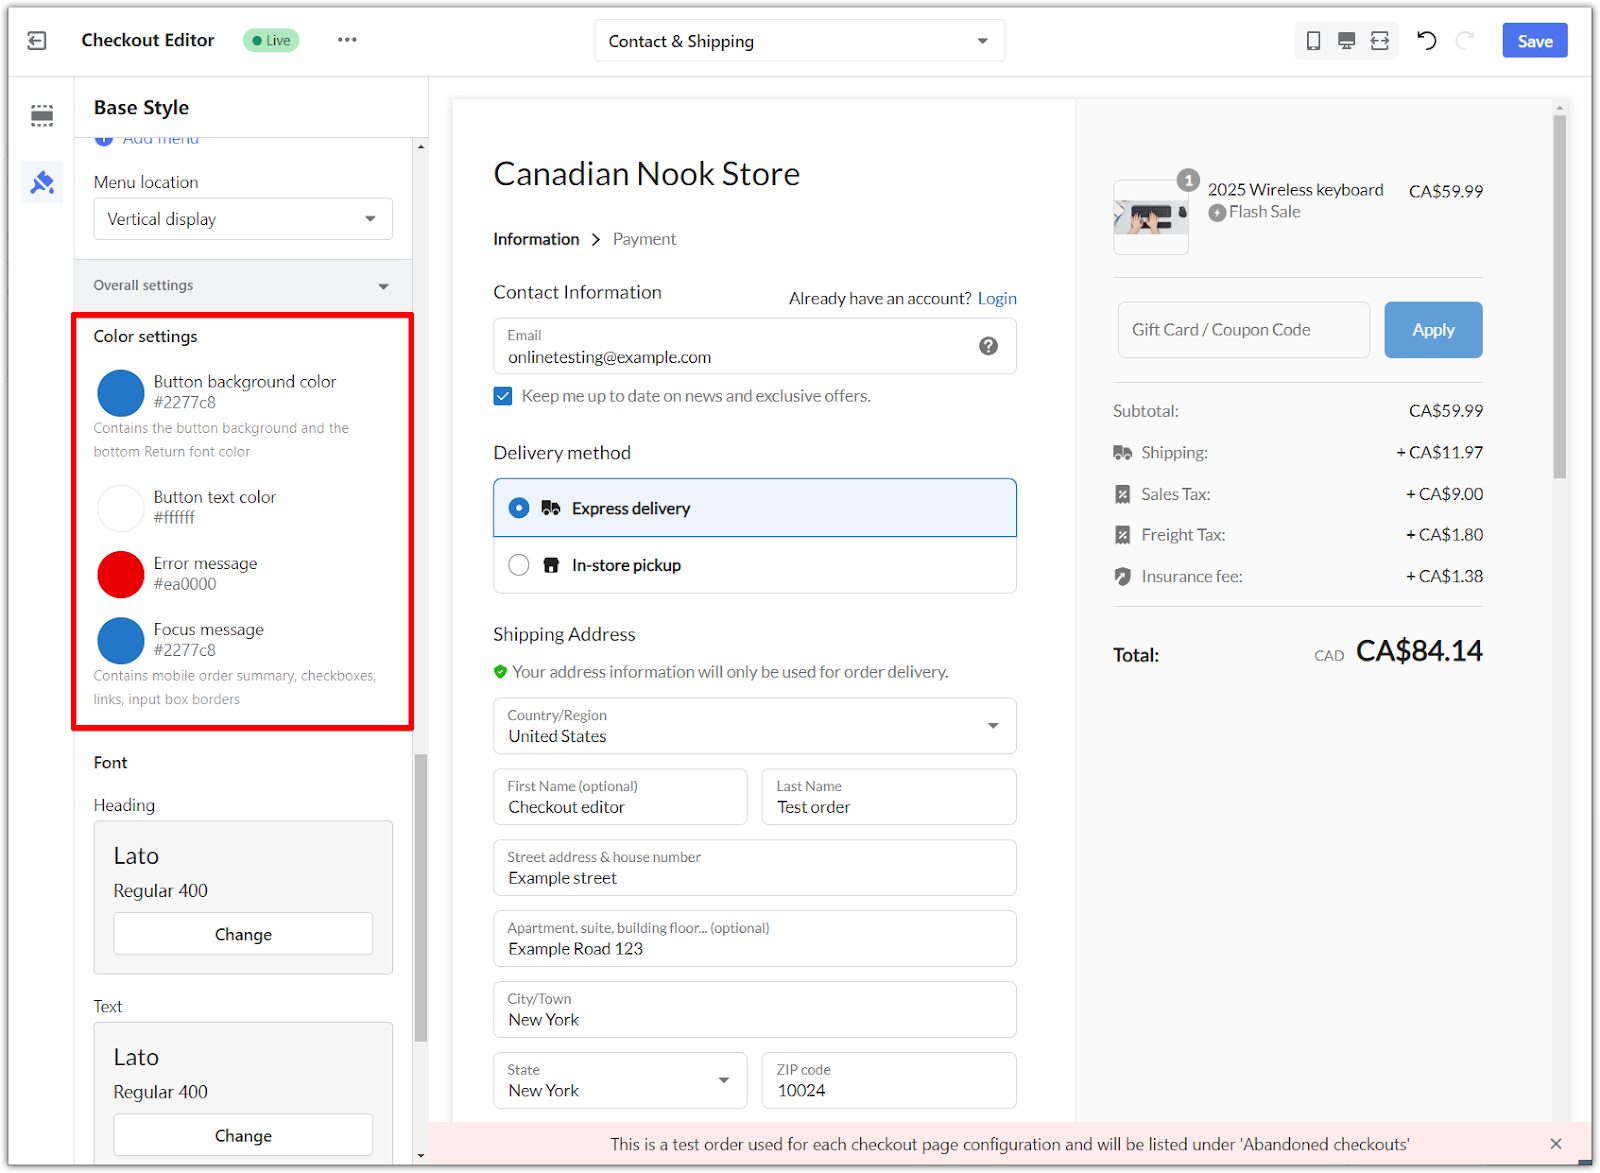
Adjusting color settings
1. Button and message colors:
- Button background: Choose a background color for buttons, such as the checkout button.
- Button text: Set a color for button text to ensure readability.
- Error message color: Choose a color to highlight error messages, making them noticeable.
- Focus message color: Select a color for focus indicators on fields like checkboxes and input borders.
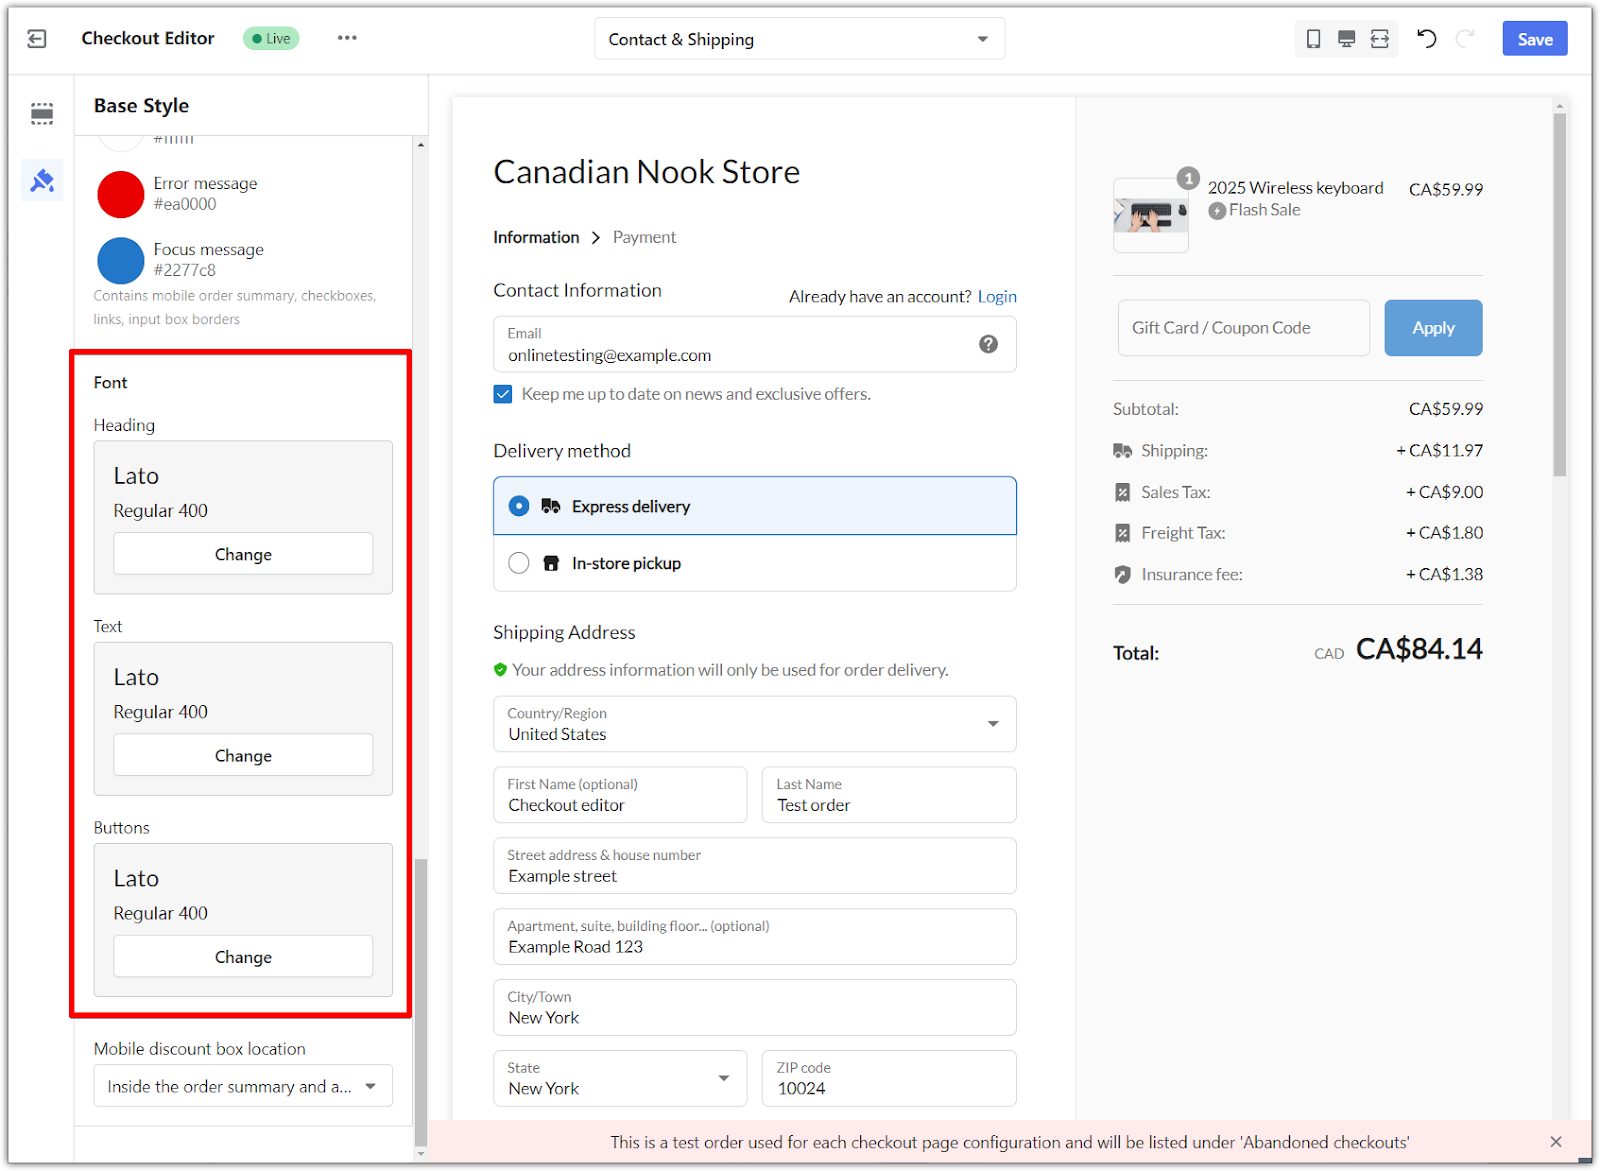
Customizing font settings
1. Set fonts for headings, text, and buttons: Select fonts that align with your brand’s style to create a consistent look across the checkout page.
Setting the coupon box location
1. Mobile discount box location: Set the position of the discount code box on mobile devices, either inside the order summary or above the payment method.


Saving your changes
After customizing the checkout page, remember to save your changes to apply them:
1. Save your work: Once you have completed your adjustments, click the Save button in the upper right corner of the editor. This ensures that all your customizations, including layout, font, color, and image settings, are applied to your live checkout page.
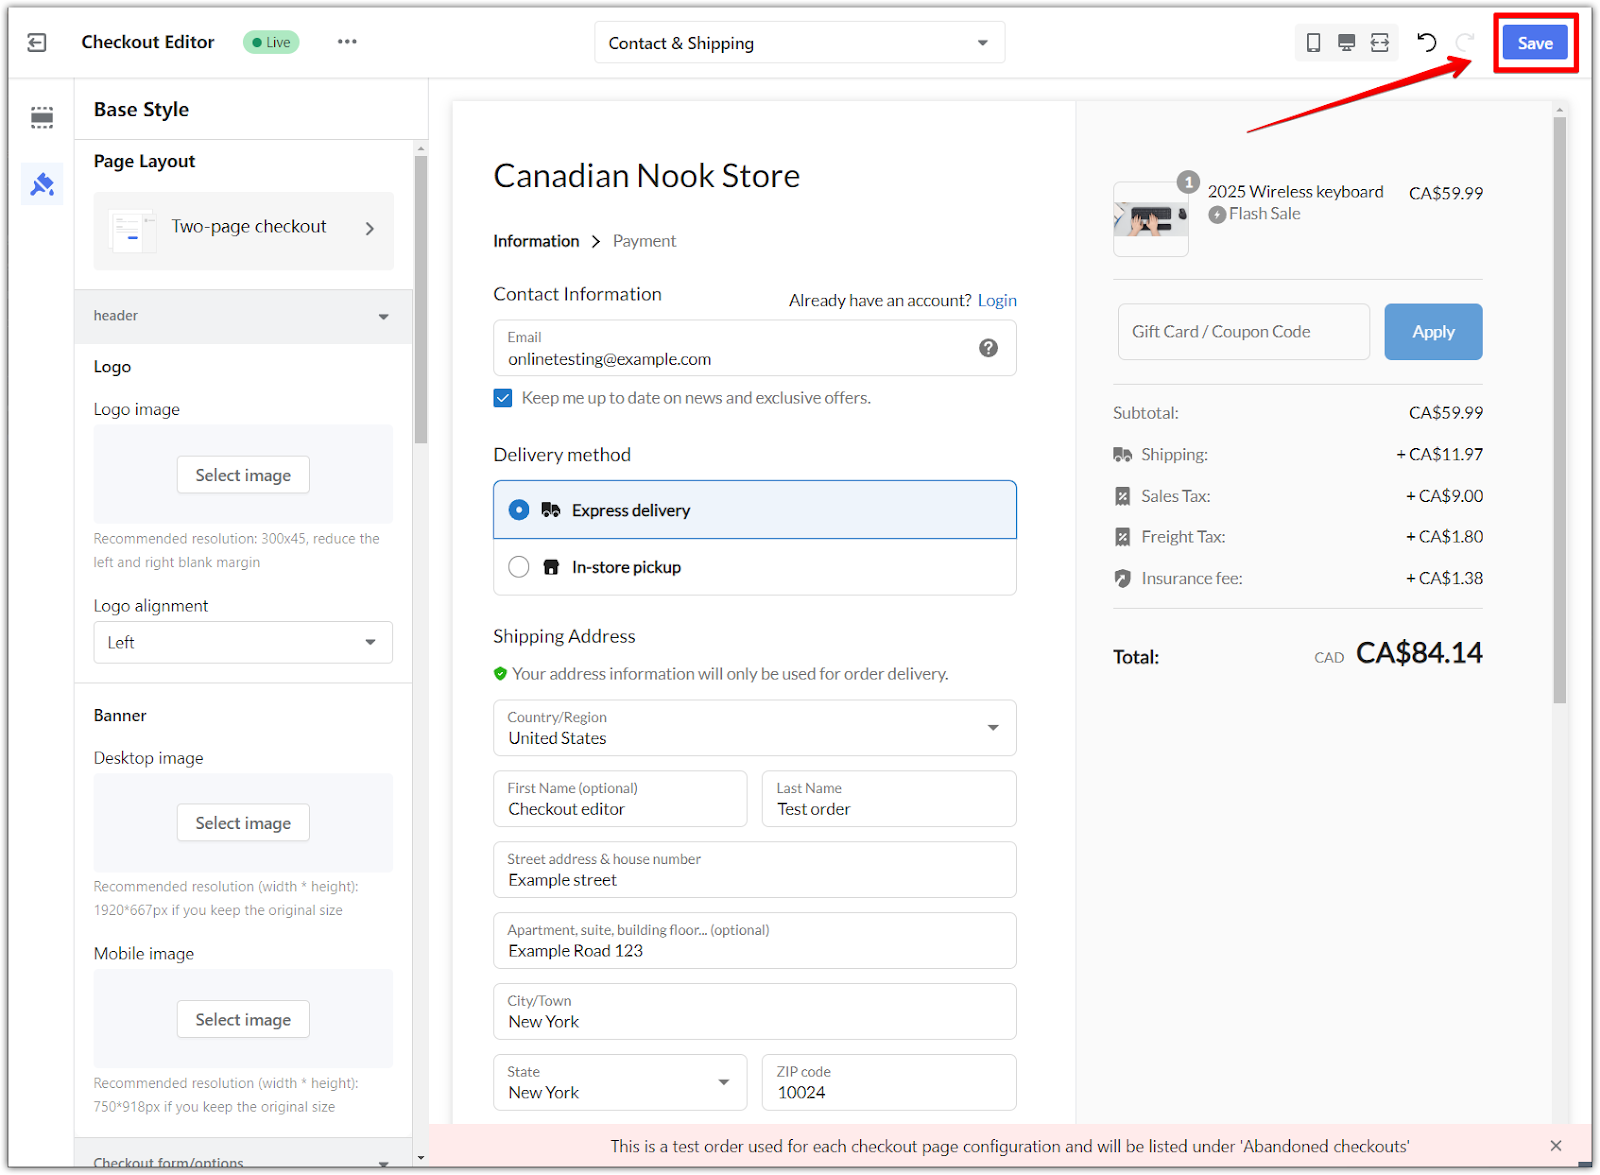
Regularly saving your work while editing helps to secure any progress made, preventing any loss of changes.


Comments
Please sign in to leave a comment.