
Manually adding products to a collection is ideal for stores with a small product catalog or businesses focused on precise product curation. This method offers full control over which items appear in your Shoplazza manual collection and in what order. You can choose to manually select products from your list or upload them in bulk using a spreadsheet. Manual collections are especially useful forthemed collections, limited-time promotions, or other situations where product arrangement matters.
Selecting products manually
Manually add individual products or filtered groups to your collection with flexible selection tools. This is perfect for curated collections or special promotions when you want full control over which items appear.
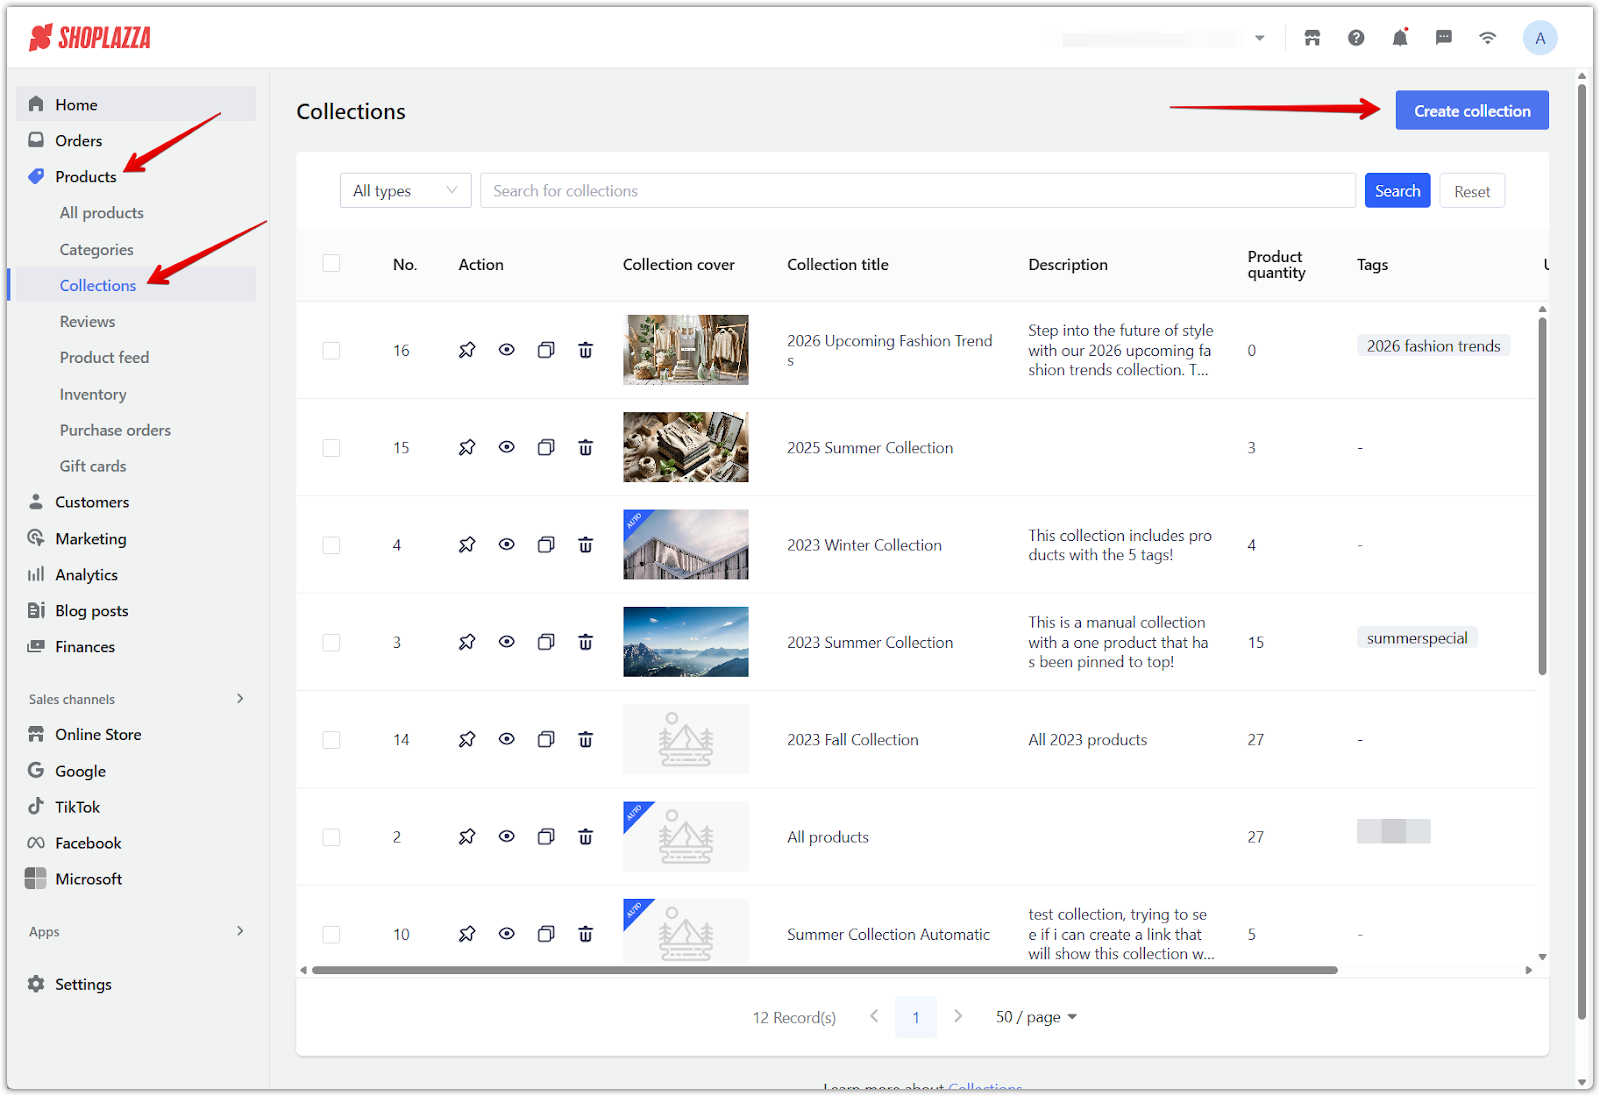
1. Go to your Collections section: From your Shoplazza Admin, click Products > Collections, then click Create collection to begin creating a new collection.
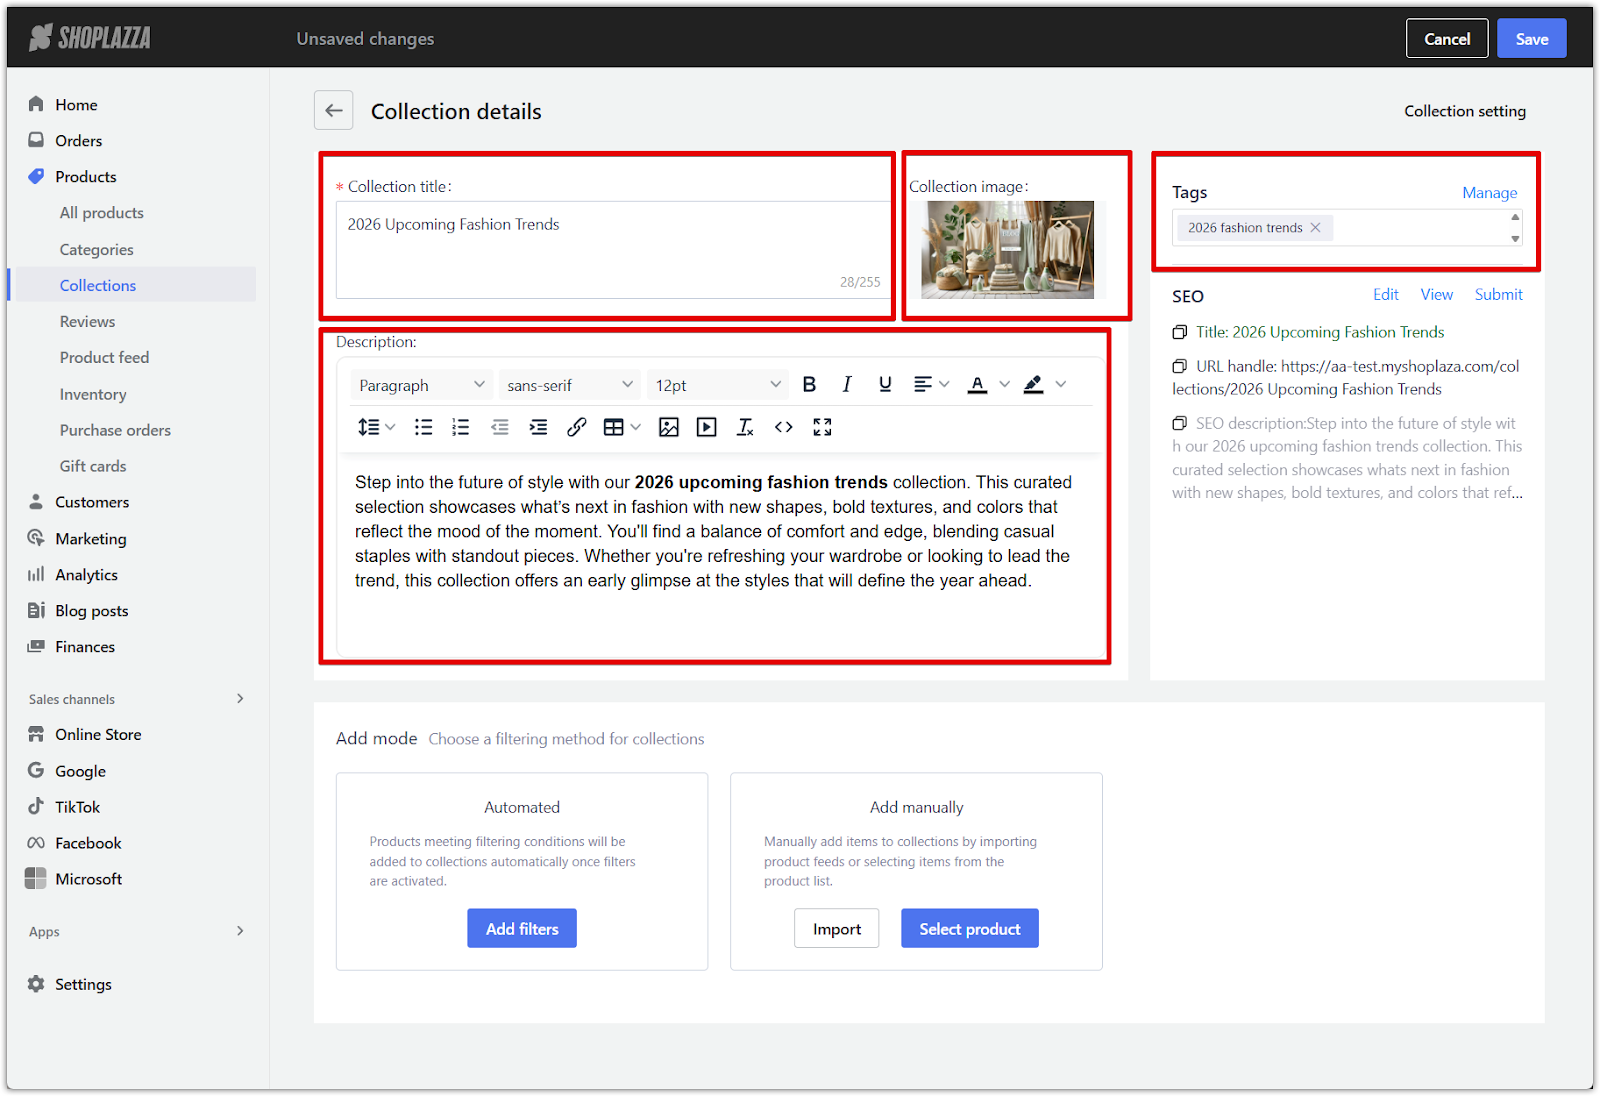
2. Set collection details: Add a collection name that reflects the product group, upload a cover image to represent the collection visually, and write a short description to introduce the collection to your customers. This information appears on the collection page and can improve both branding and SEO.
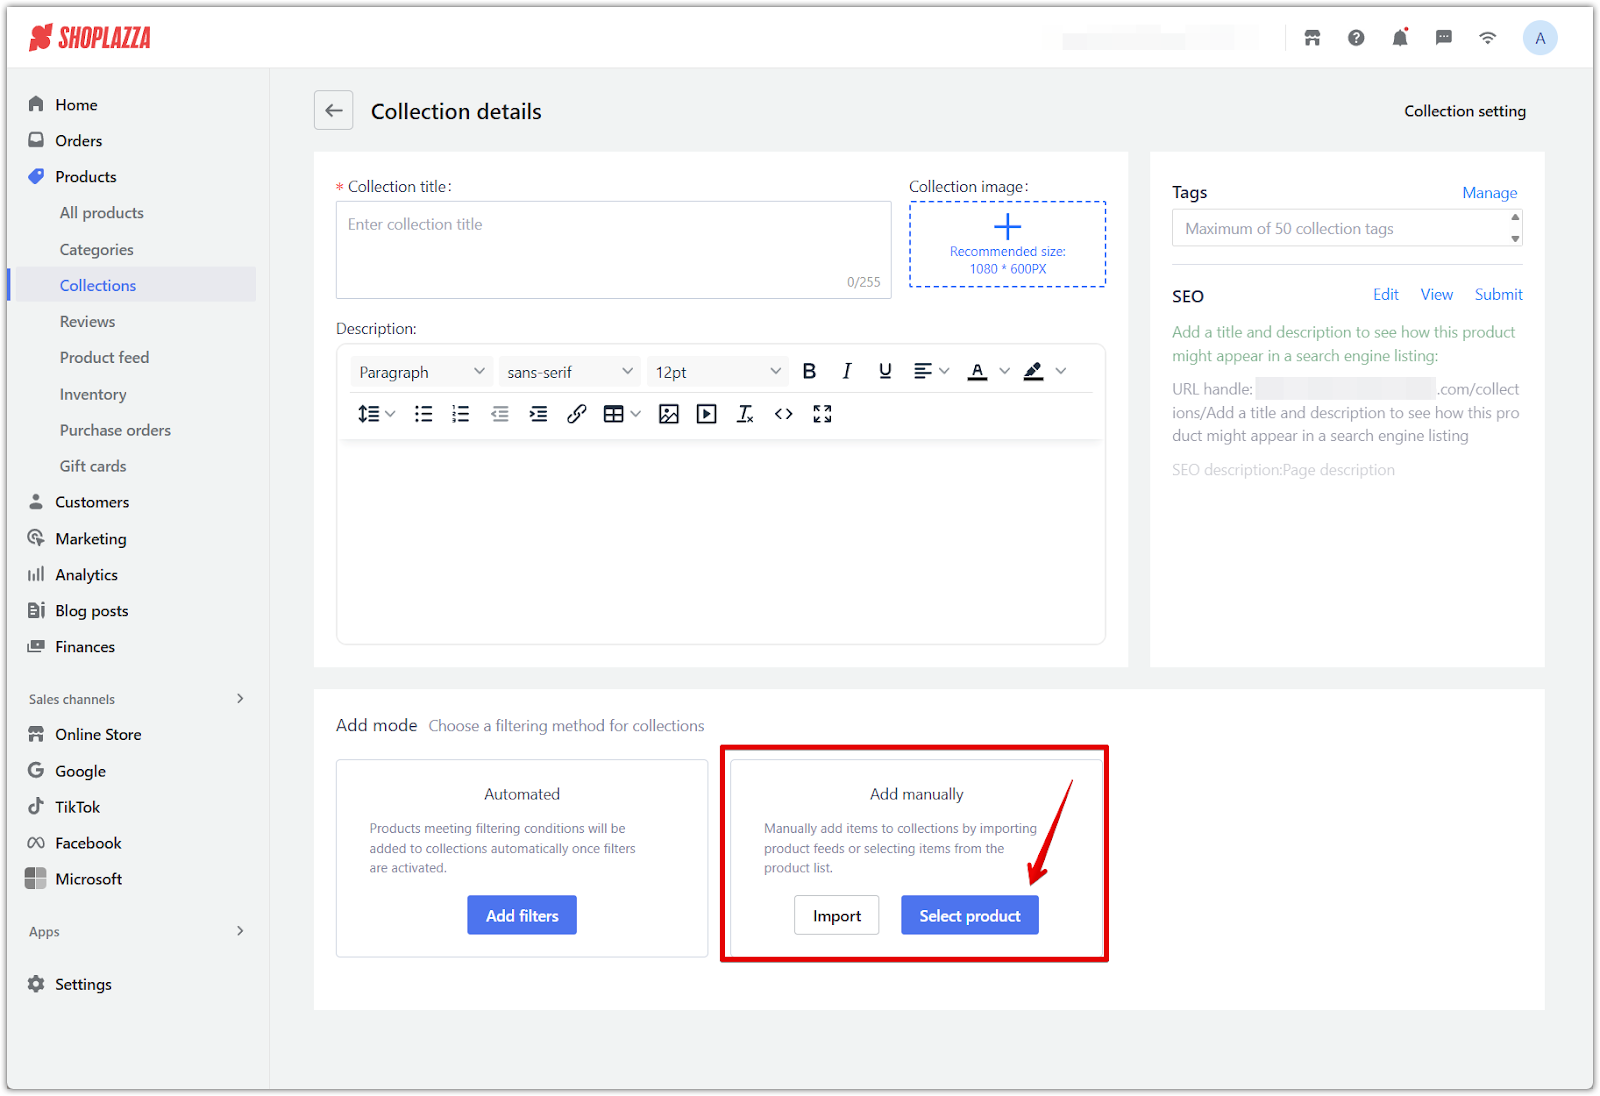
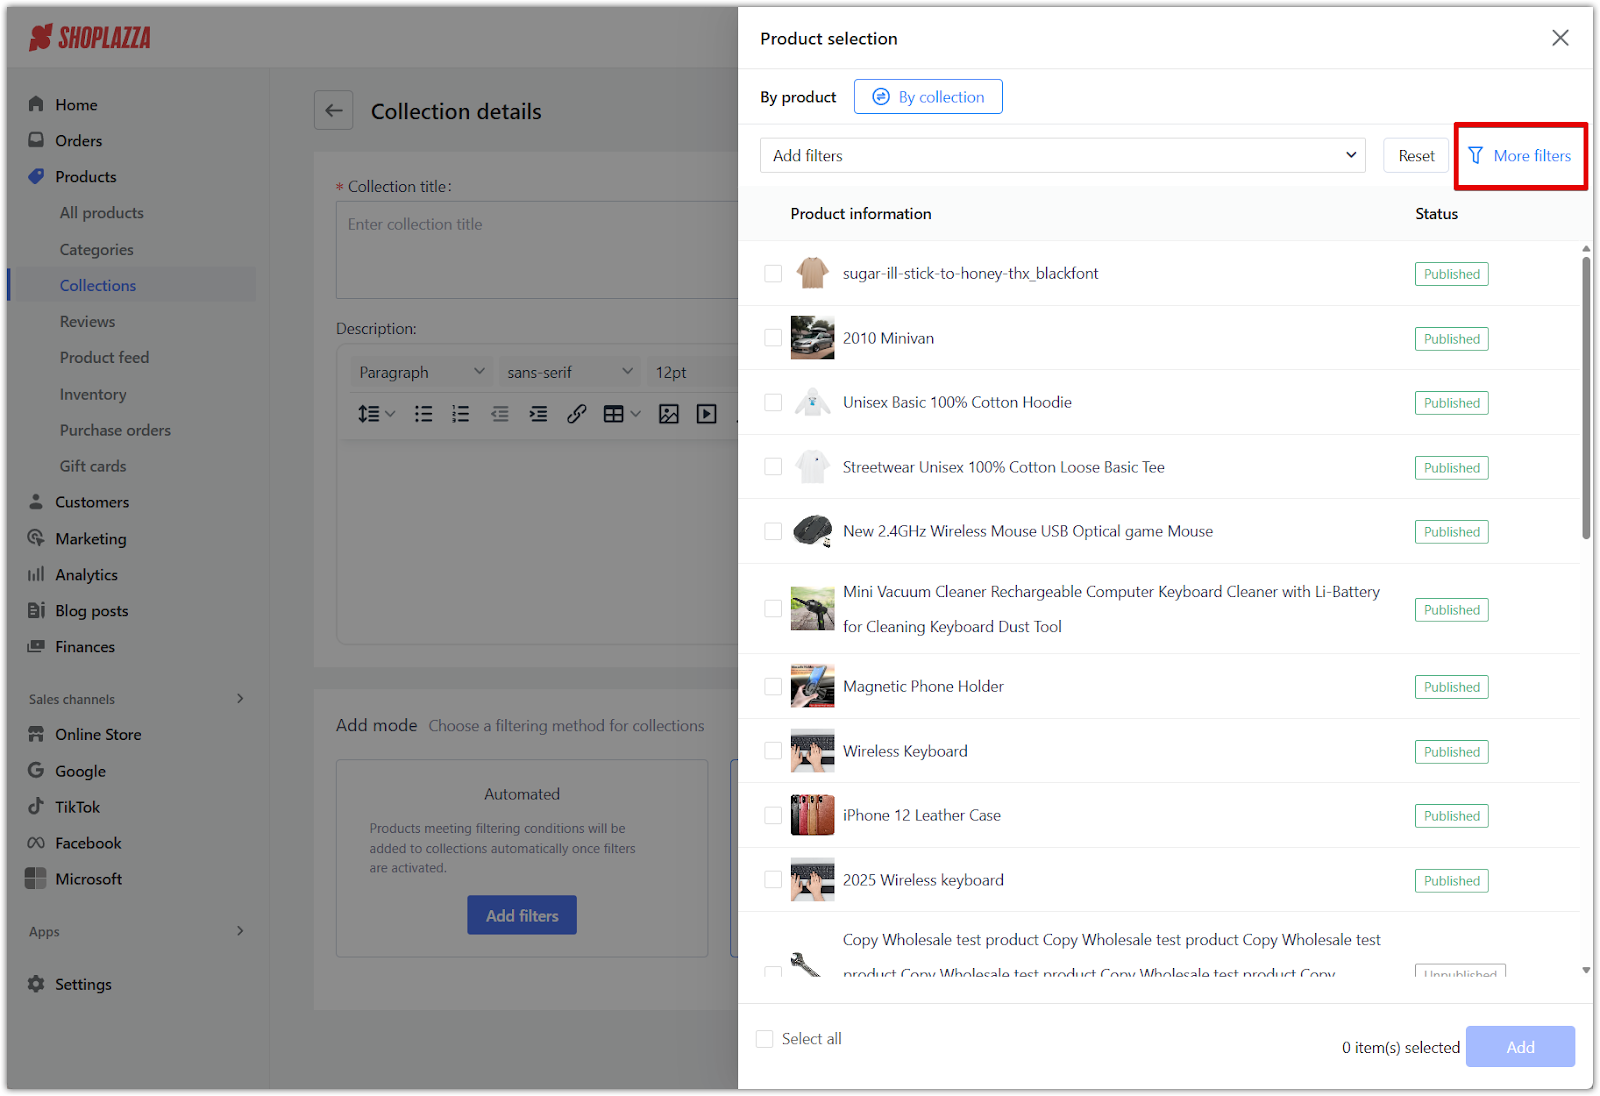
3. Click Select products: In the Add manually section of the collection editor, click Select product to open your store’s product list. You can browse, search, or filter the list before making selections.
4. Use filtering tools: In the product list, you can apply basic filters to narrow down your selection. Filters include product status, collection, price, and keywords. Click Search to see results.
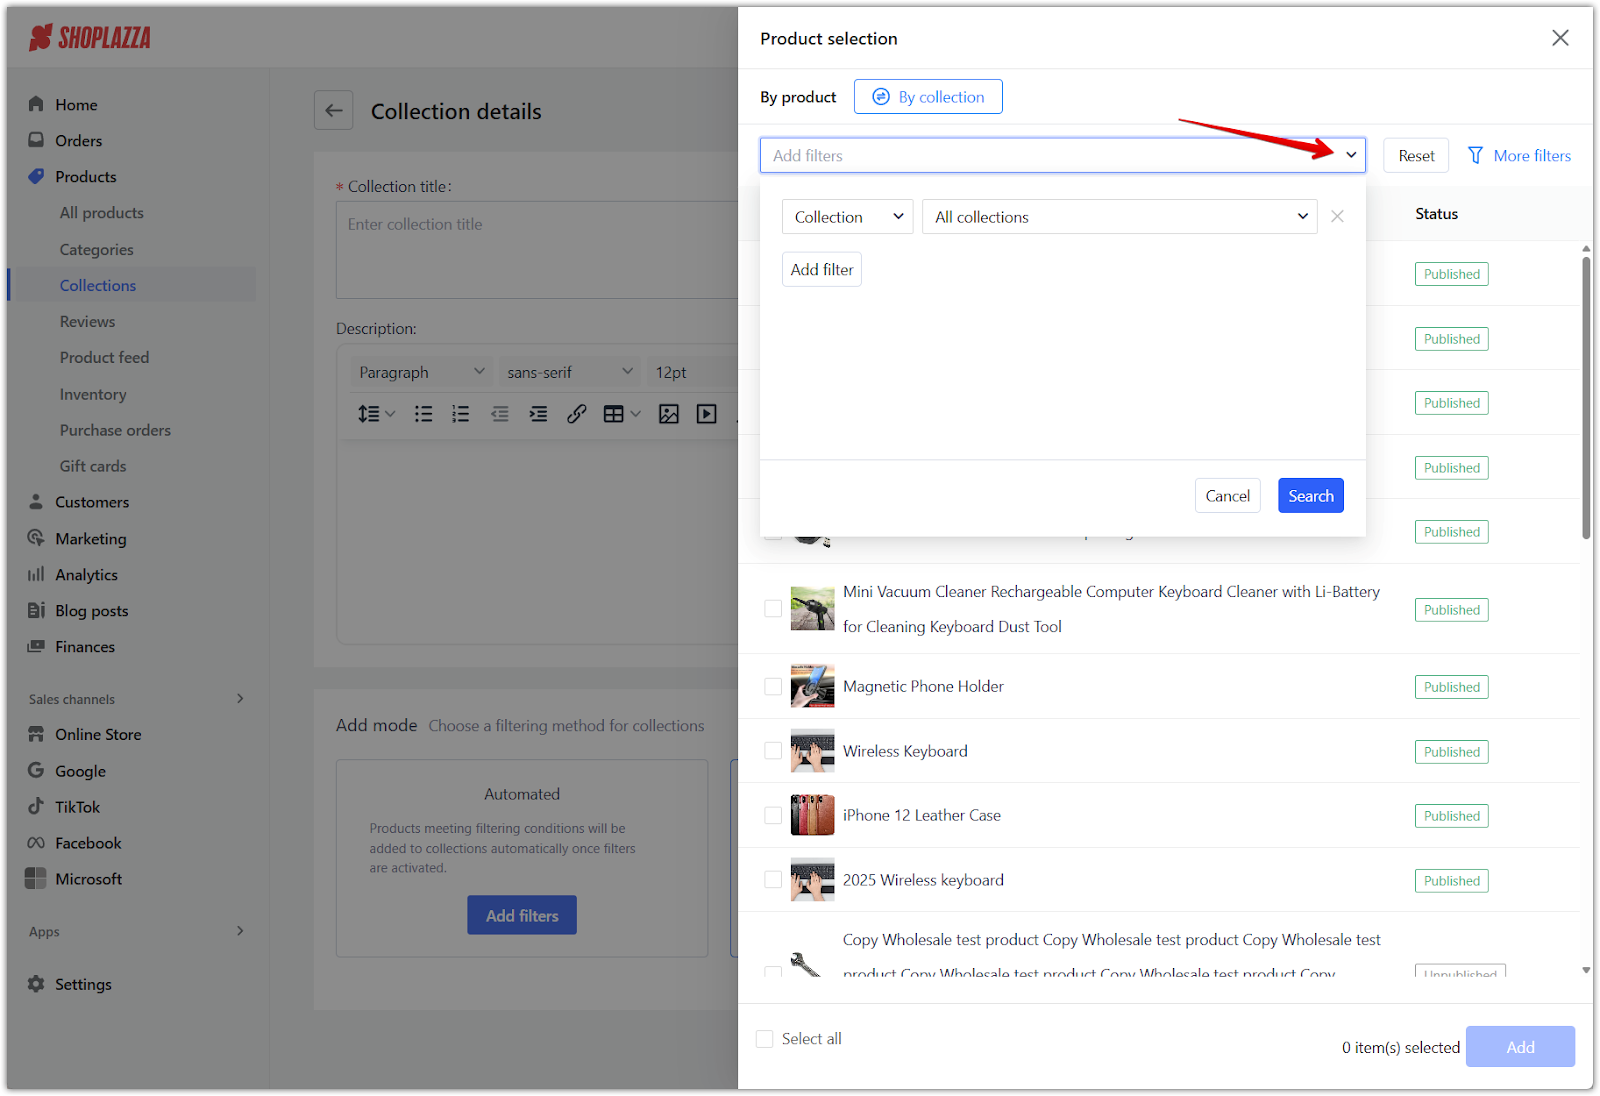
5. Access More filters: For additional filtering options, click the More filters button. This opens more detailed filters to help you refine your product selection even further.
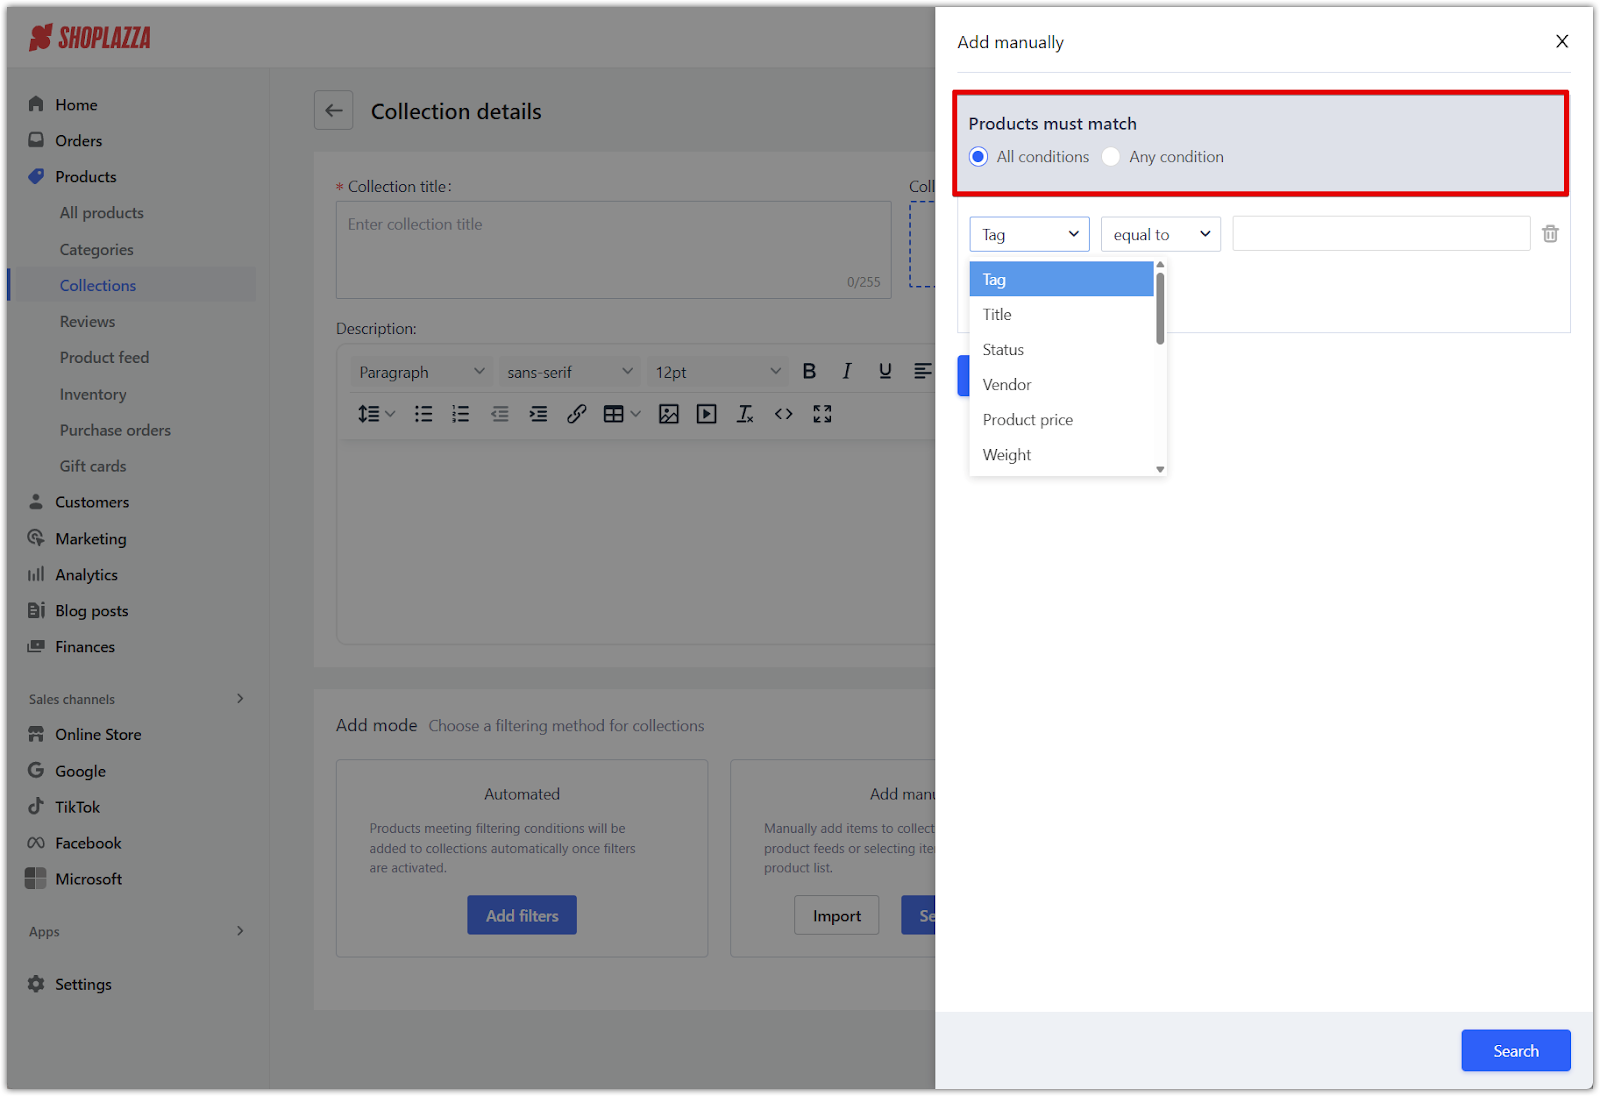
6. Apply advanced filters: In the More filters section, you can apply detailed filtering criteria to pinpoint exactly the products you want to add.
- Filter by tag: Include or exclude products with specific tags.
- Filter by creation date: Use preset ranges like last 7 days, last 15 days, last 30 days, or last 60 days.
- Filter by SPU: Enter one or multiple SPU values, separated by commas (e.g., 123,456,789).

7. Set condition type: For each filter, choose whether the product value should be equal to or is not equal to the value you enter. This gives you basic control over which products are included or excluded based on your selected criteria.
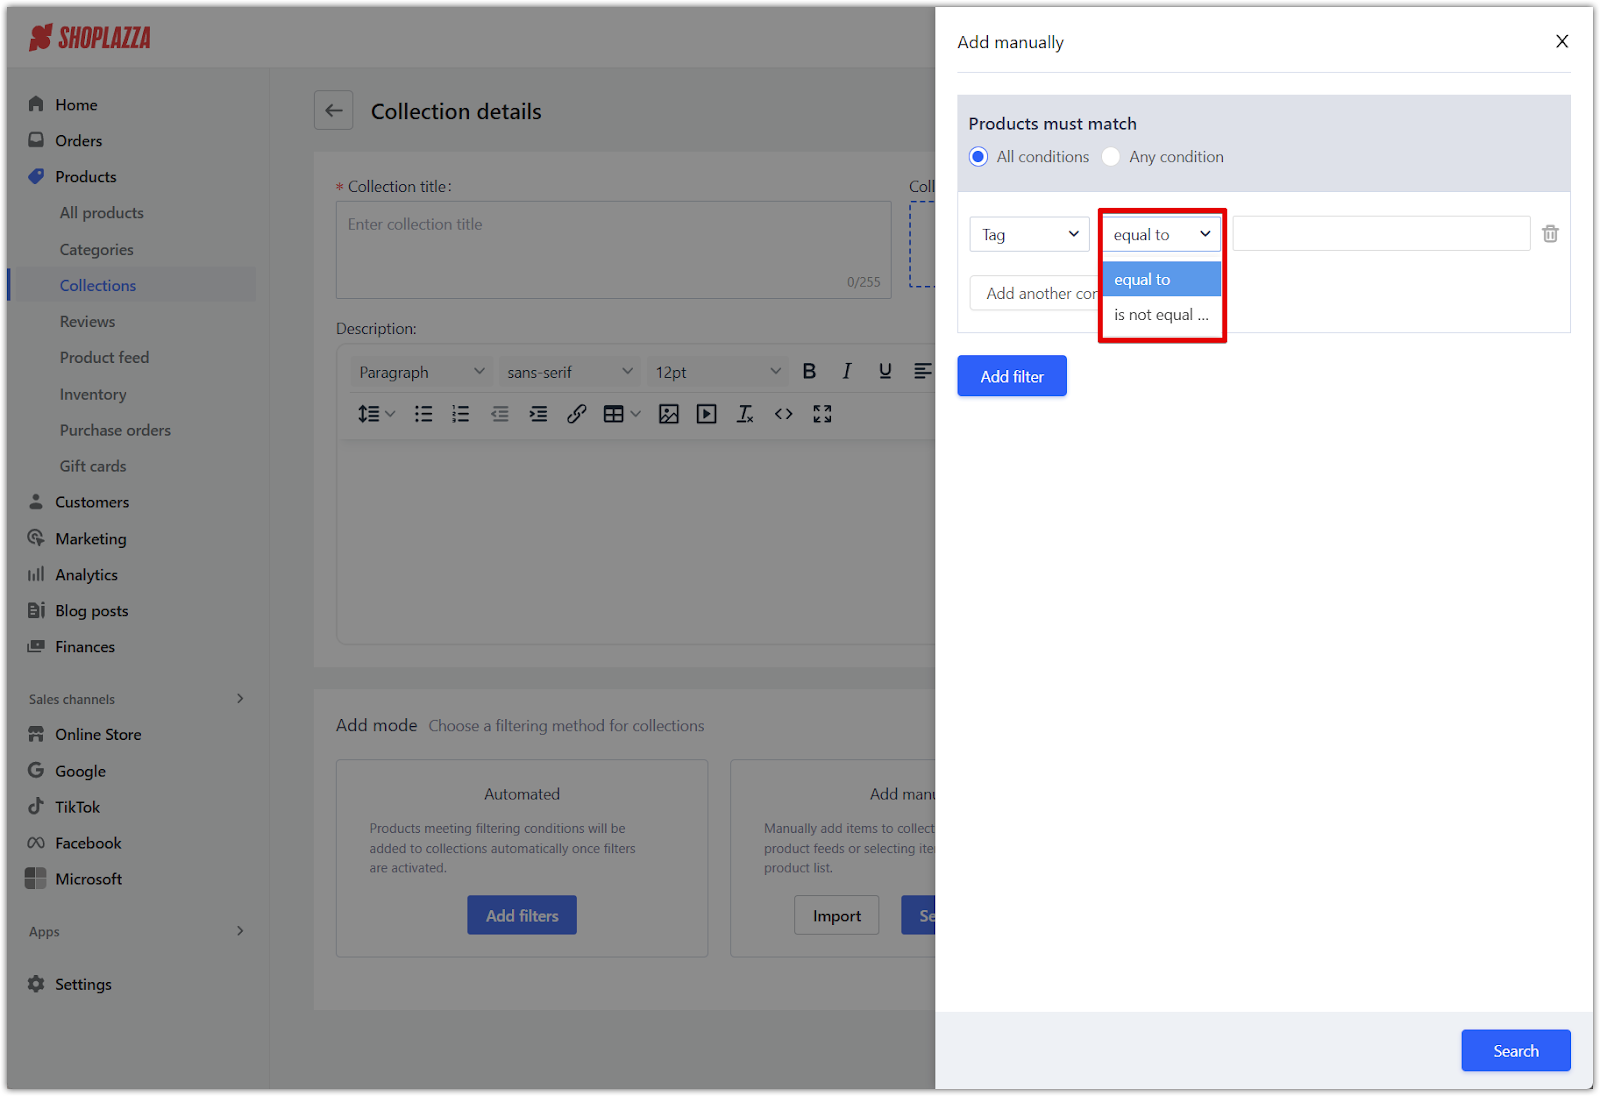
8. Set filter logic: Choose how multiple conditions are applied:
- Any condition met: Products only need to match one of the filters.
- All conditions met: Products must meet every selected condition to be included.
9. Add another condition: If you need to refine your selection even more, click Add another condition within a filter module to create more detailed filtering logic.
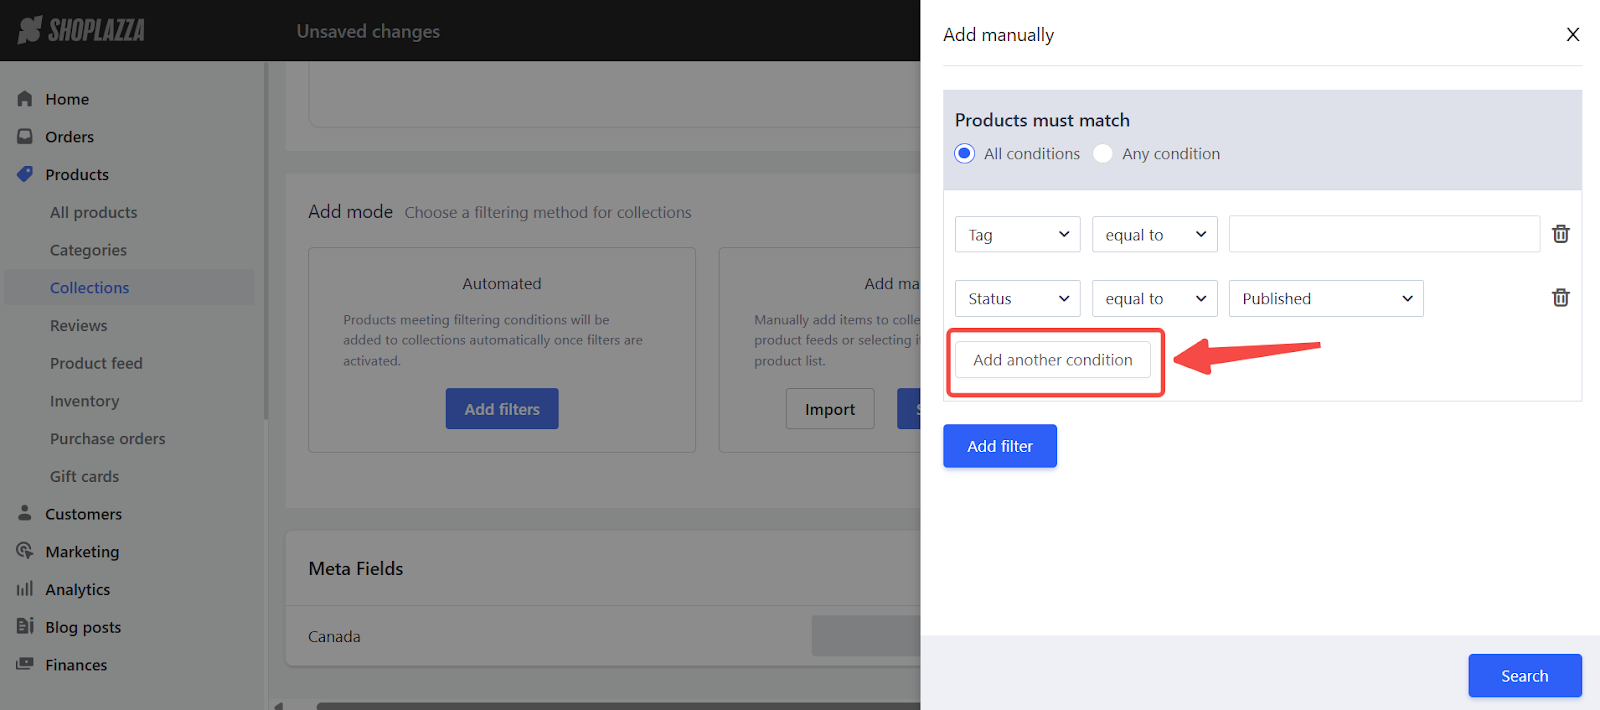
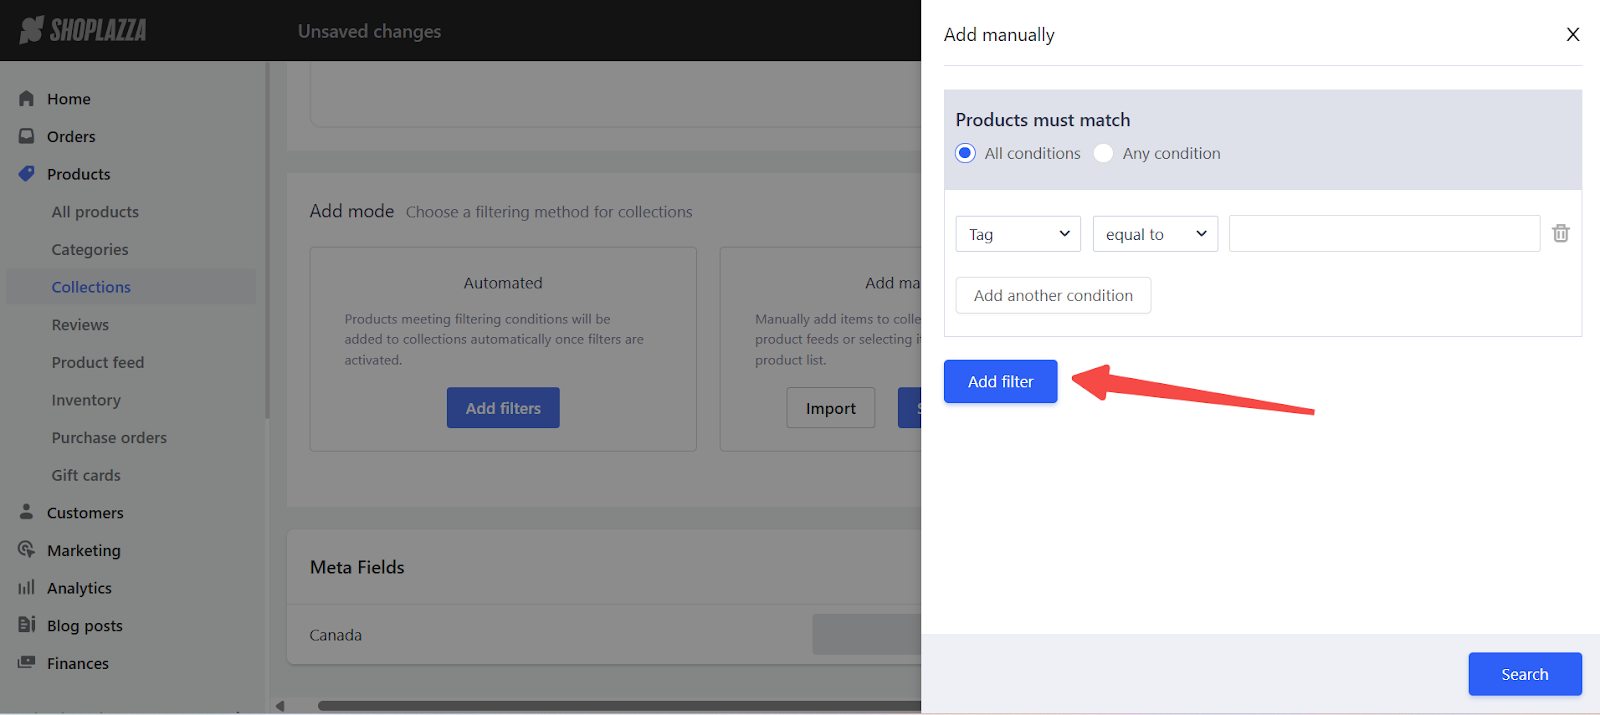
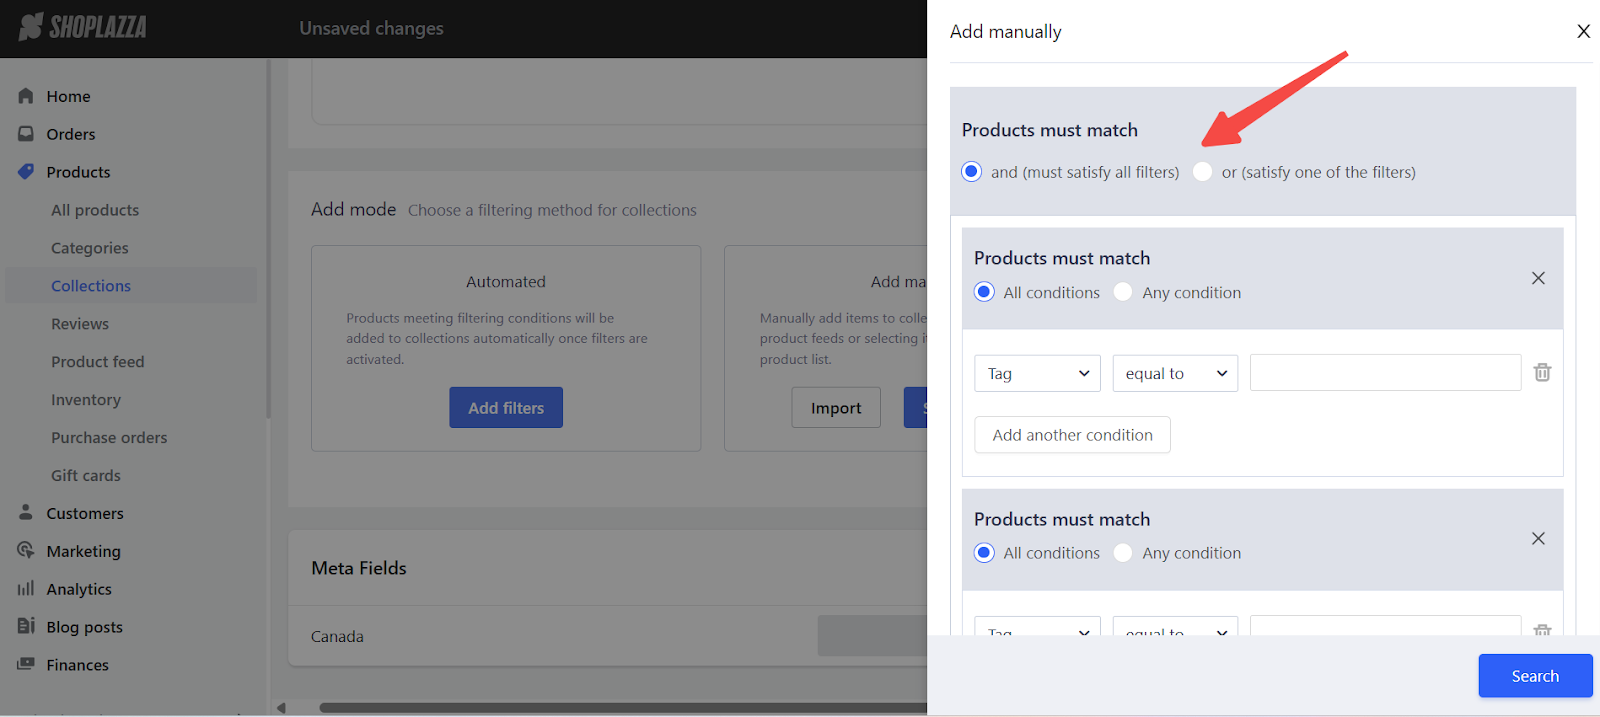
10. Create multiple filter modules: To further refine your product selection, you can click Add filter to create multiple filter modules. Each module can have its own set of filters, and you can decide how these modules work together:
- AND mode: Products must meet the criteria in all modules and the conditions within each module.
- OR mode: Products only need to meet the criteria of any one module to be included.
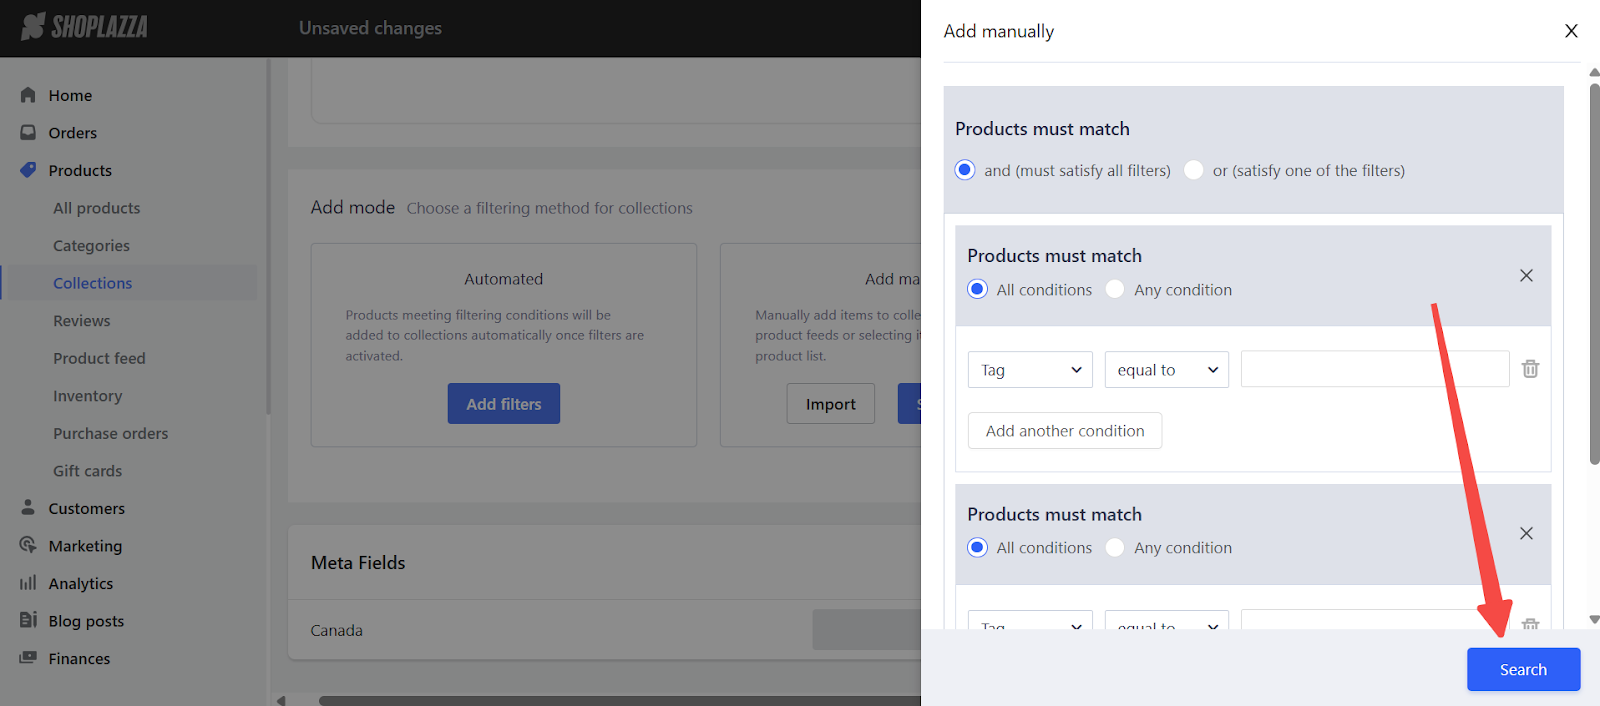
11. Search and view filtered products: After setting your filters, click the Search button to see products that match your criteria.
Note
Filters applied through manual selection are not dynamic. Newly added products that match your criteria will not be automatically added later. You must reselect them manually.
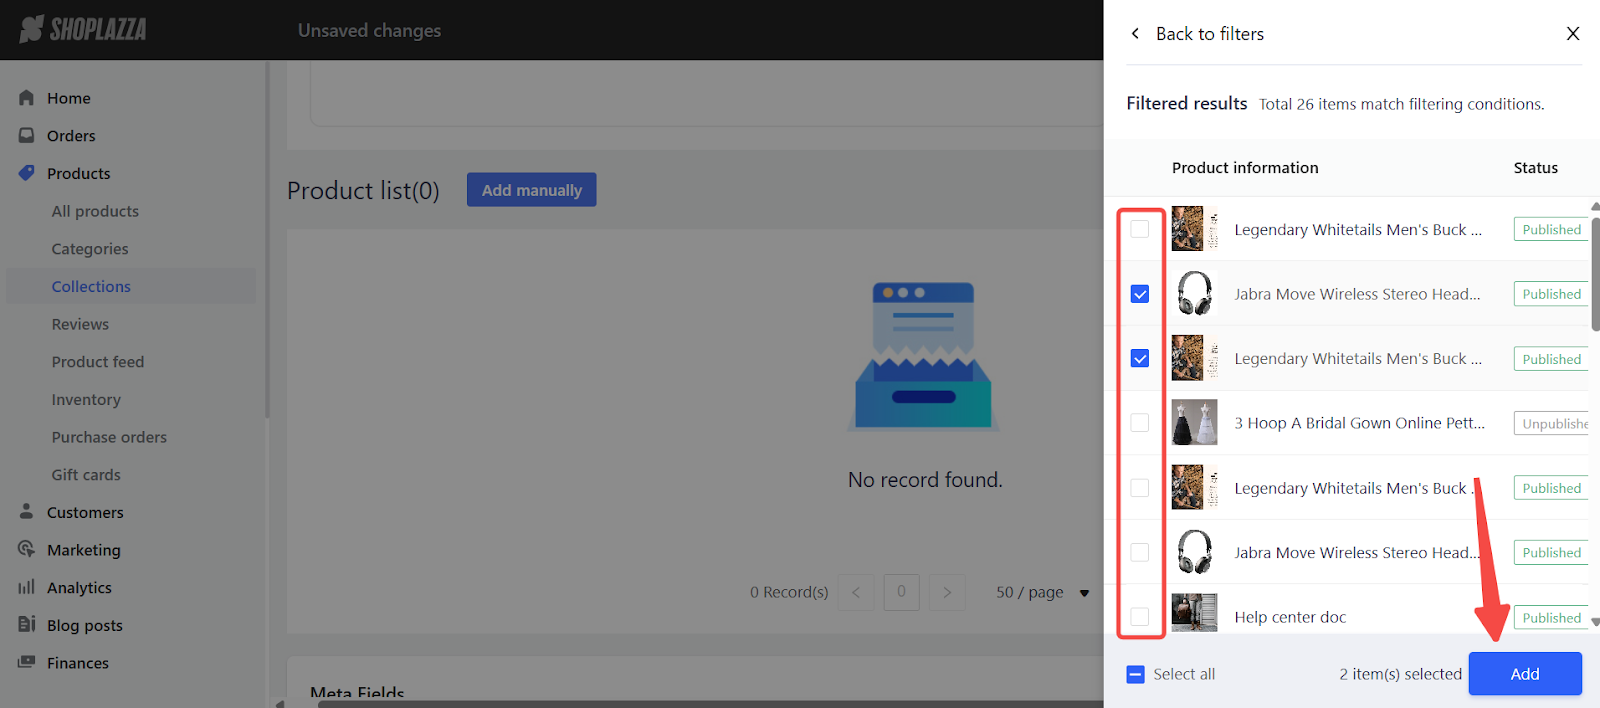
12. Select and confirm products: From the search results, select the products you want to add to the collection. Once done, click Confirm to finalize your selection.
Importing products in bulk
If you have many products to add, importing them via spreadsheet can save time and ensure accuracy. Only products already available in your store can be added through import. External product sources are not supported.
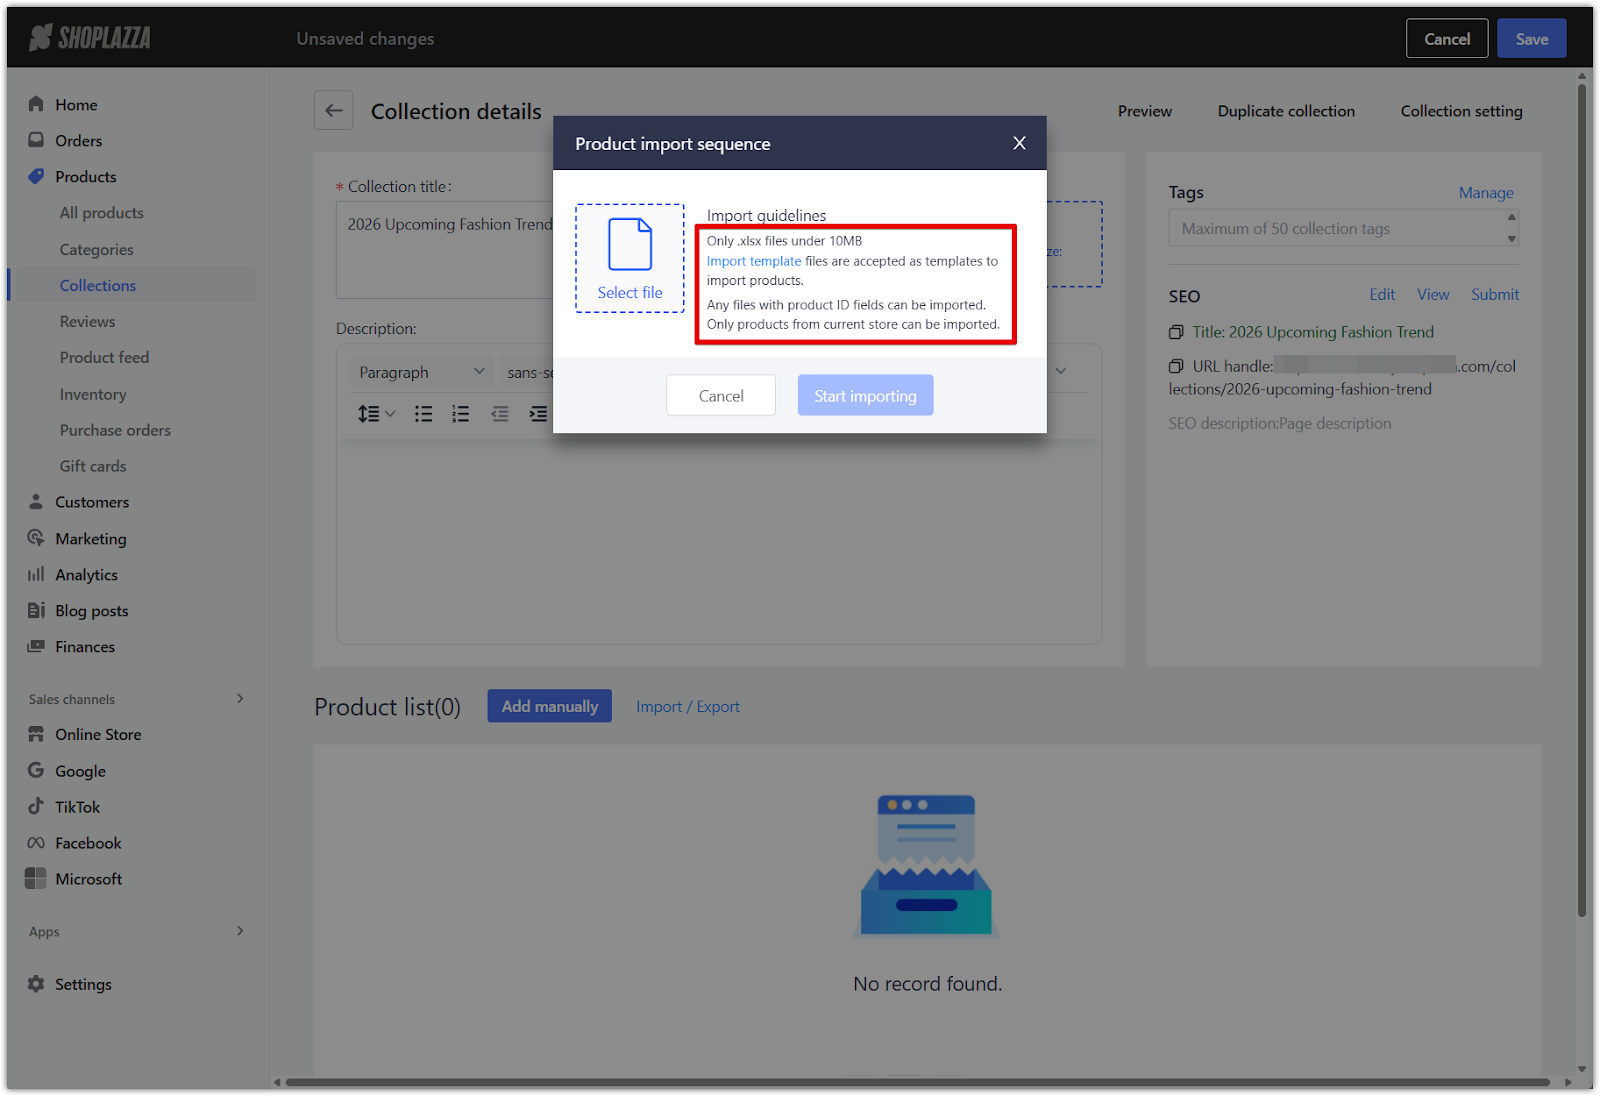
1. Click Import: In the Add manually section, click Import to upload a list of products via file.

2. Prepare your import file: Use a spreadsheet in .xlsx format and ensure it includes valid product IDs. The file must be under 10MB in size. You can also use the Import template, which serves as a guide for how to structure your file correctly.
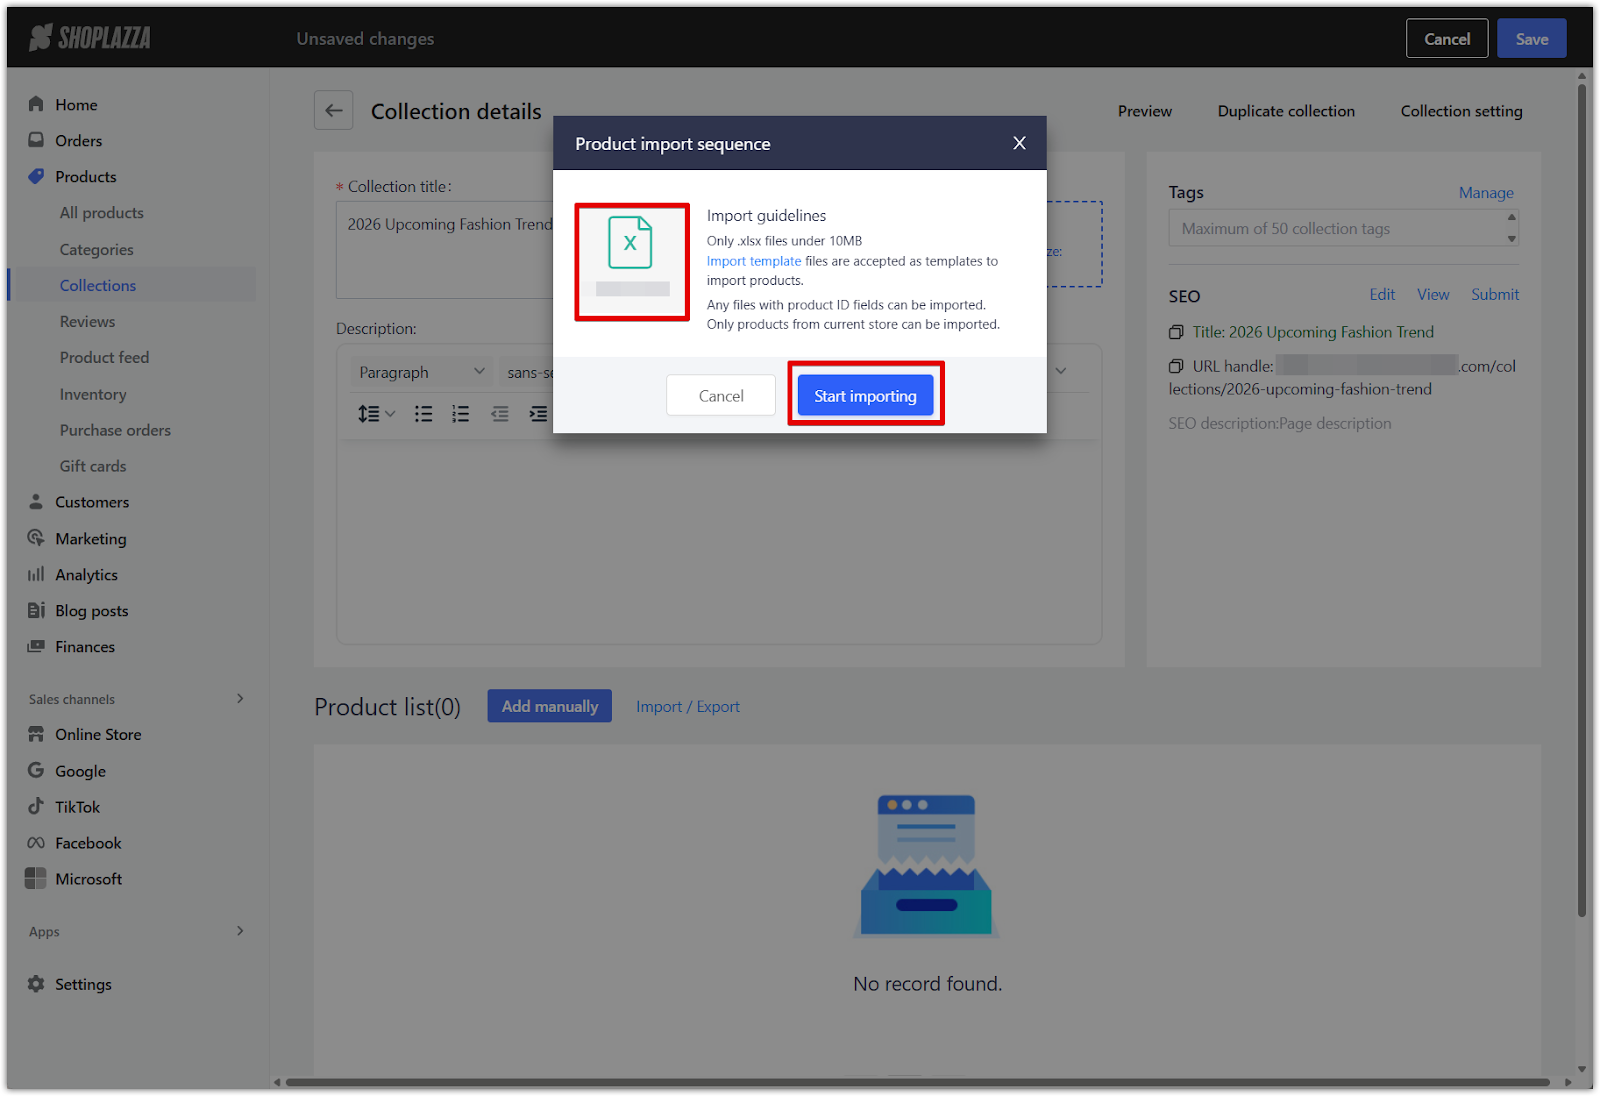
3. Upload your file: Once uploaded, the system will automatically match the product IDs and add those items to the collection.
Setting product display order
After adding products, you can customize how new items appear in the collection. This setting applies to both manually selected and imported products. Items pinned to the top will retain their position regardless of the chosen order for new items.
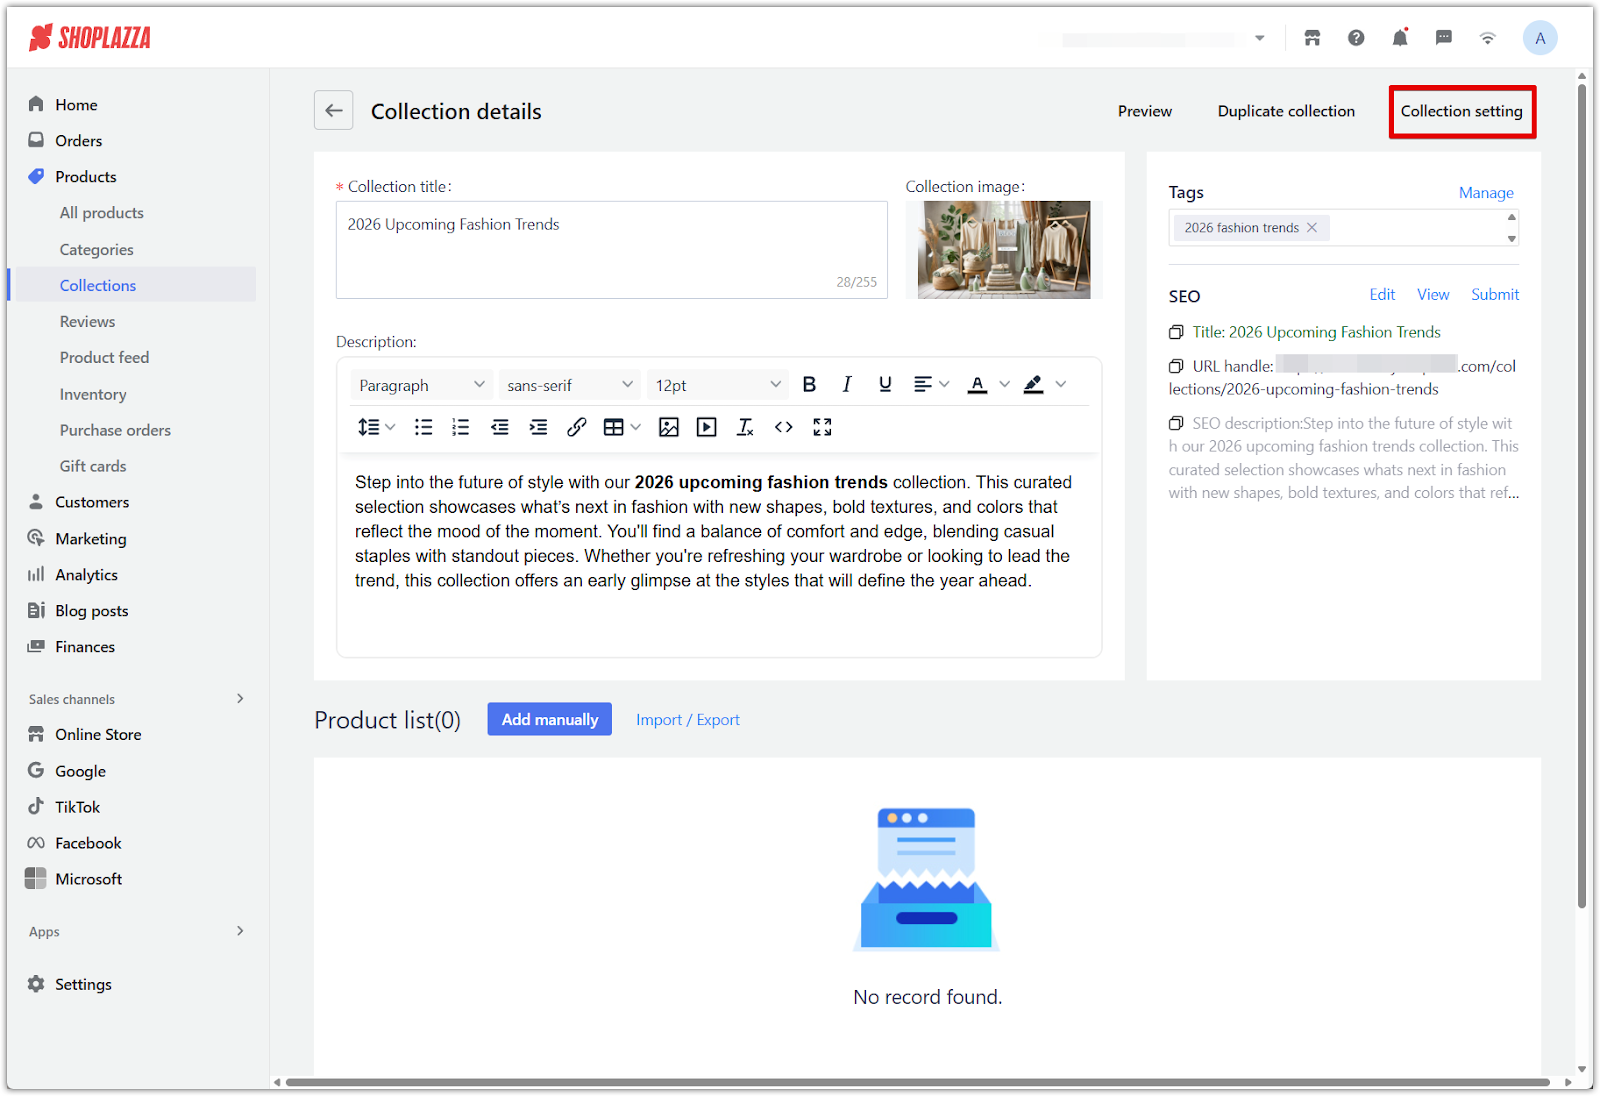
1. Click Collection setting: In the top-right corner of the collection editor, click Collection setting.
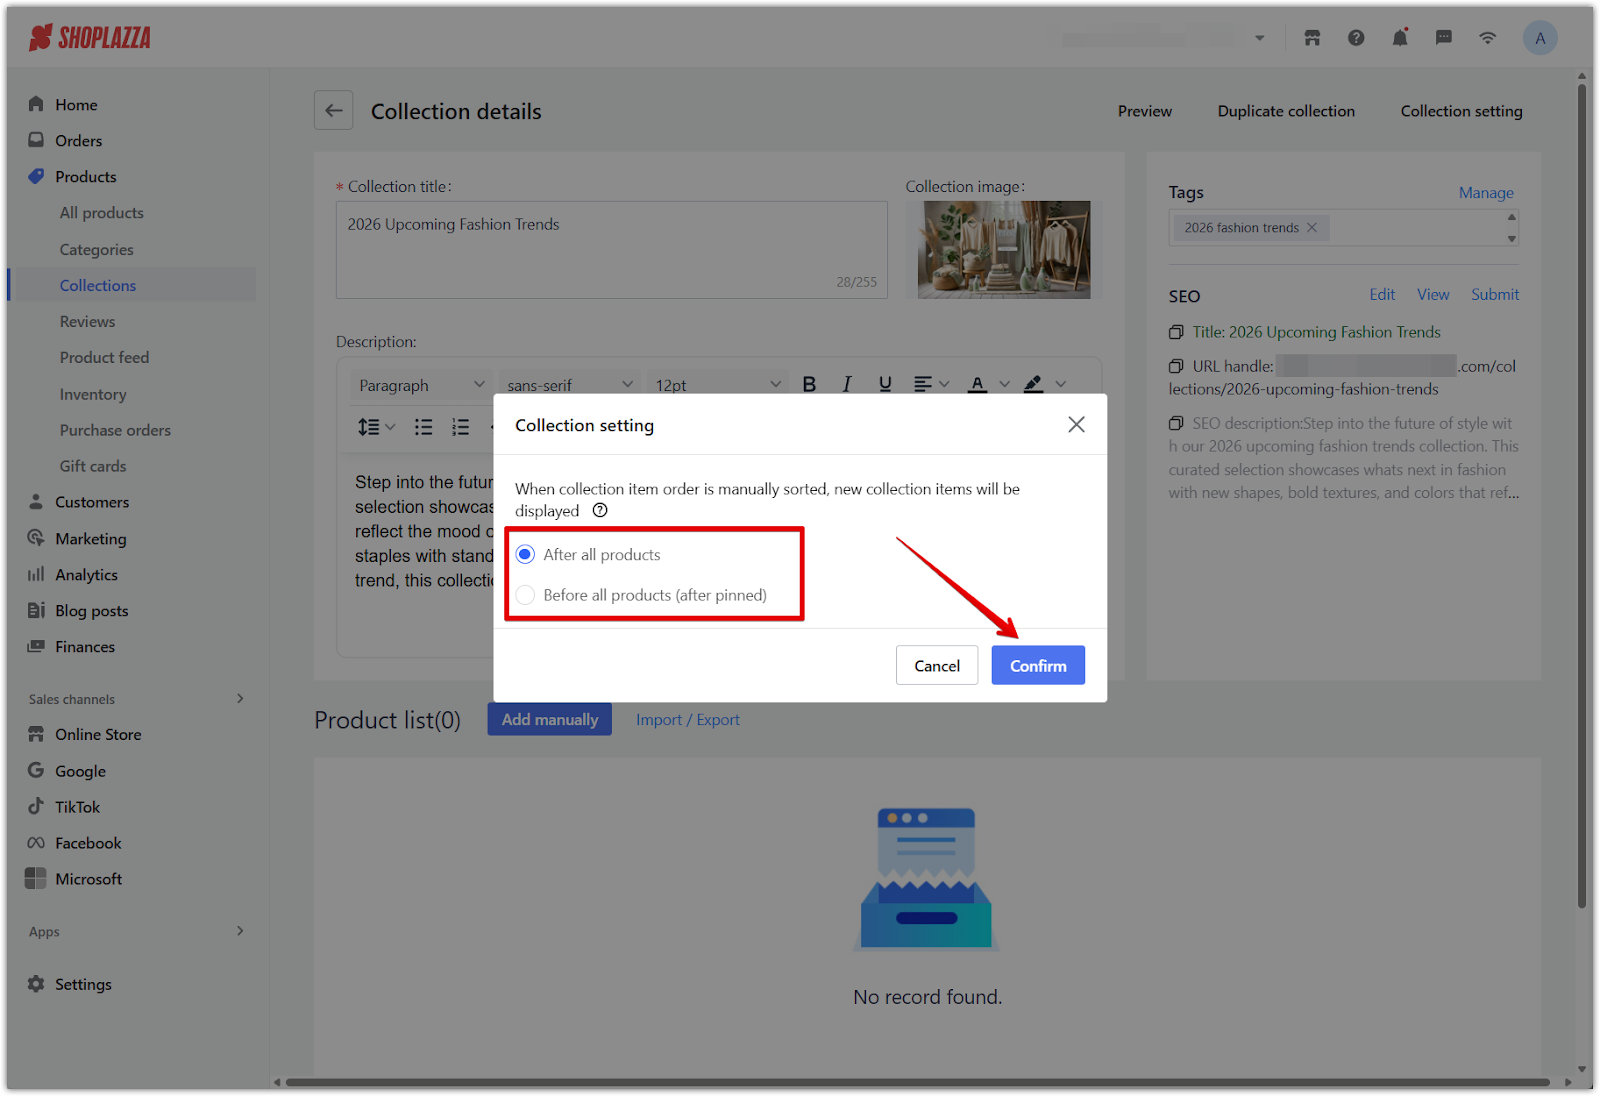
2. Choose the display order: Set whether newly added items appear After all products or Before all products (after pinned). Click Confirm when done.
Manually managing your collections gives you full creative and strategic control over how products are grouped and presented. Whether you’re showcasing featured items or building a custom layout, manual collections offer the flexibility needed to create a tailored shopping experience for your customers. You can also manage products from within the collection list view by selecting a collection and adding products directly there. For more detailed steps, check the guide: Using manual collection to add product.


Comments
Article is closed for comments.