
Customizing your email templates ensures that every message reflects your brand, improves customer communication, and enhances the overall email experience. These templates are triggered by key events such as order placement, fulfillment, or delivery updates. Default templates are provided for each scenario and may be edited directly in your Shoplazza admin or recreated from scratch using HTML email design.
Accessing templates
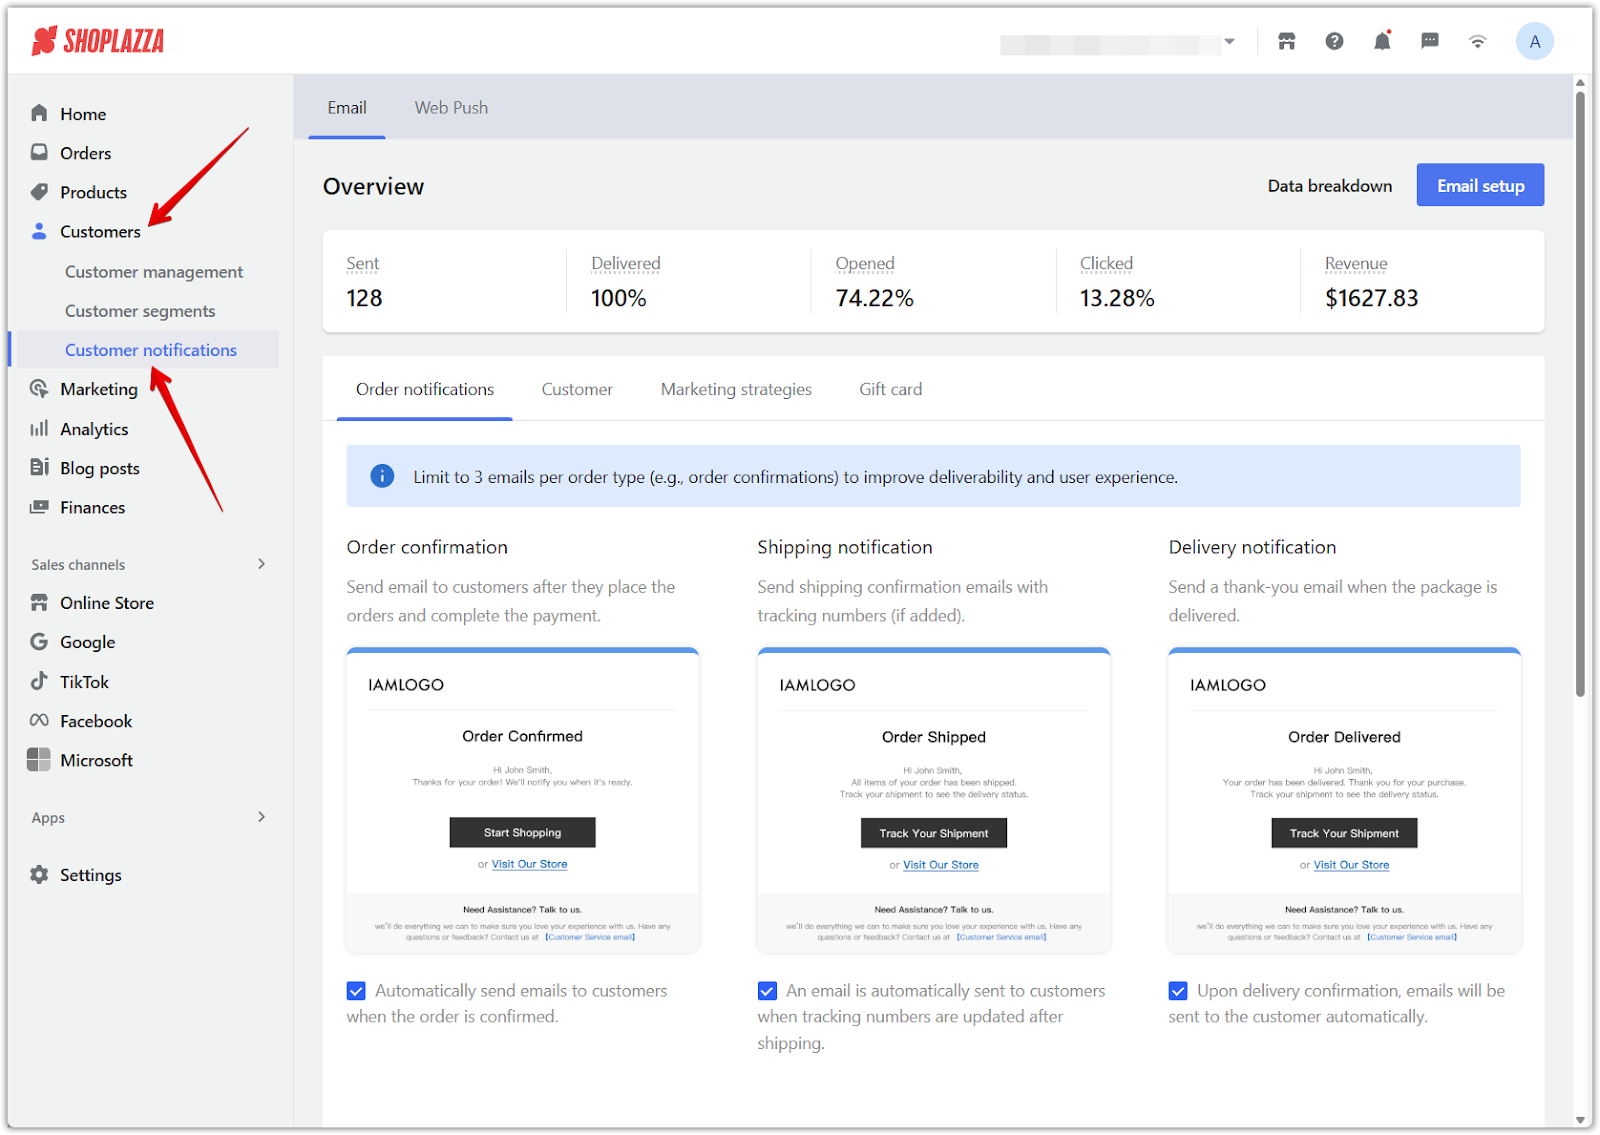
Start by locating your customer email templates in the admin.
1. Access Customer notifications: Go to your Shoplazza admin > Customers > Customer notifications to view all available templates organized by event type, such as orders, customer accounts, marketing, and gift cards.
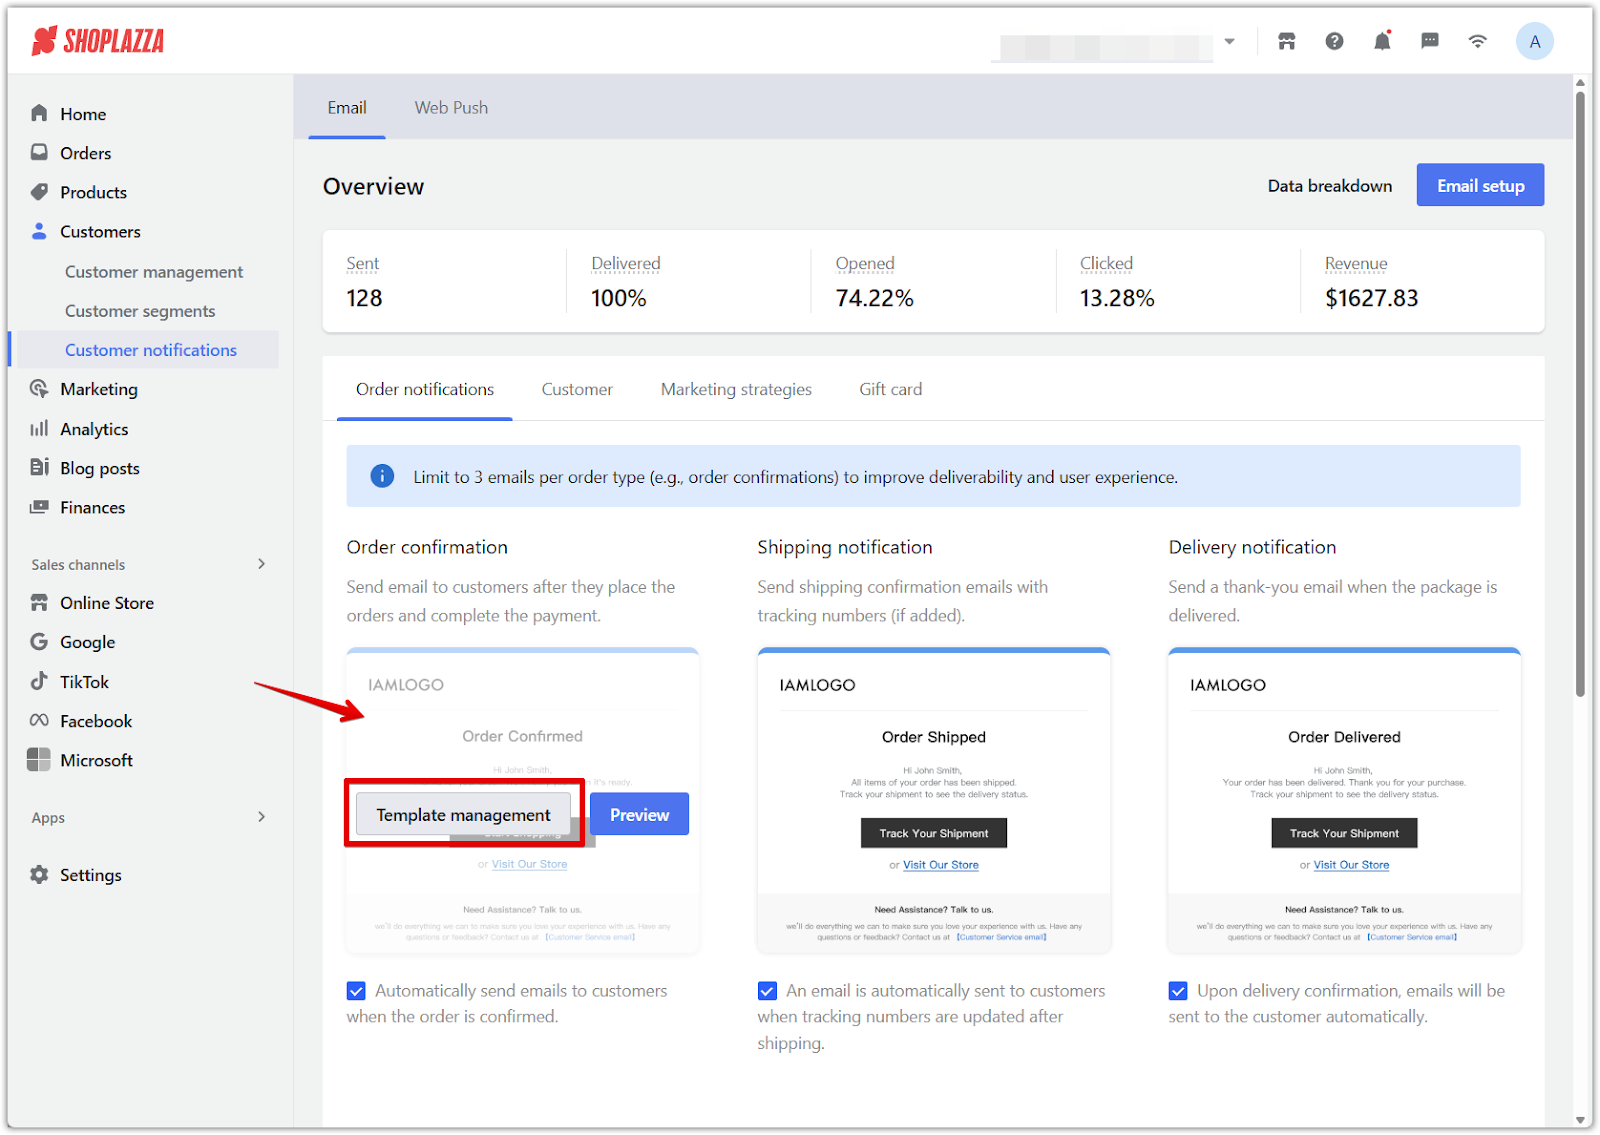
2. Open template manager: Hover over the relevant notification type and click Template management to access the editing area.
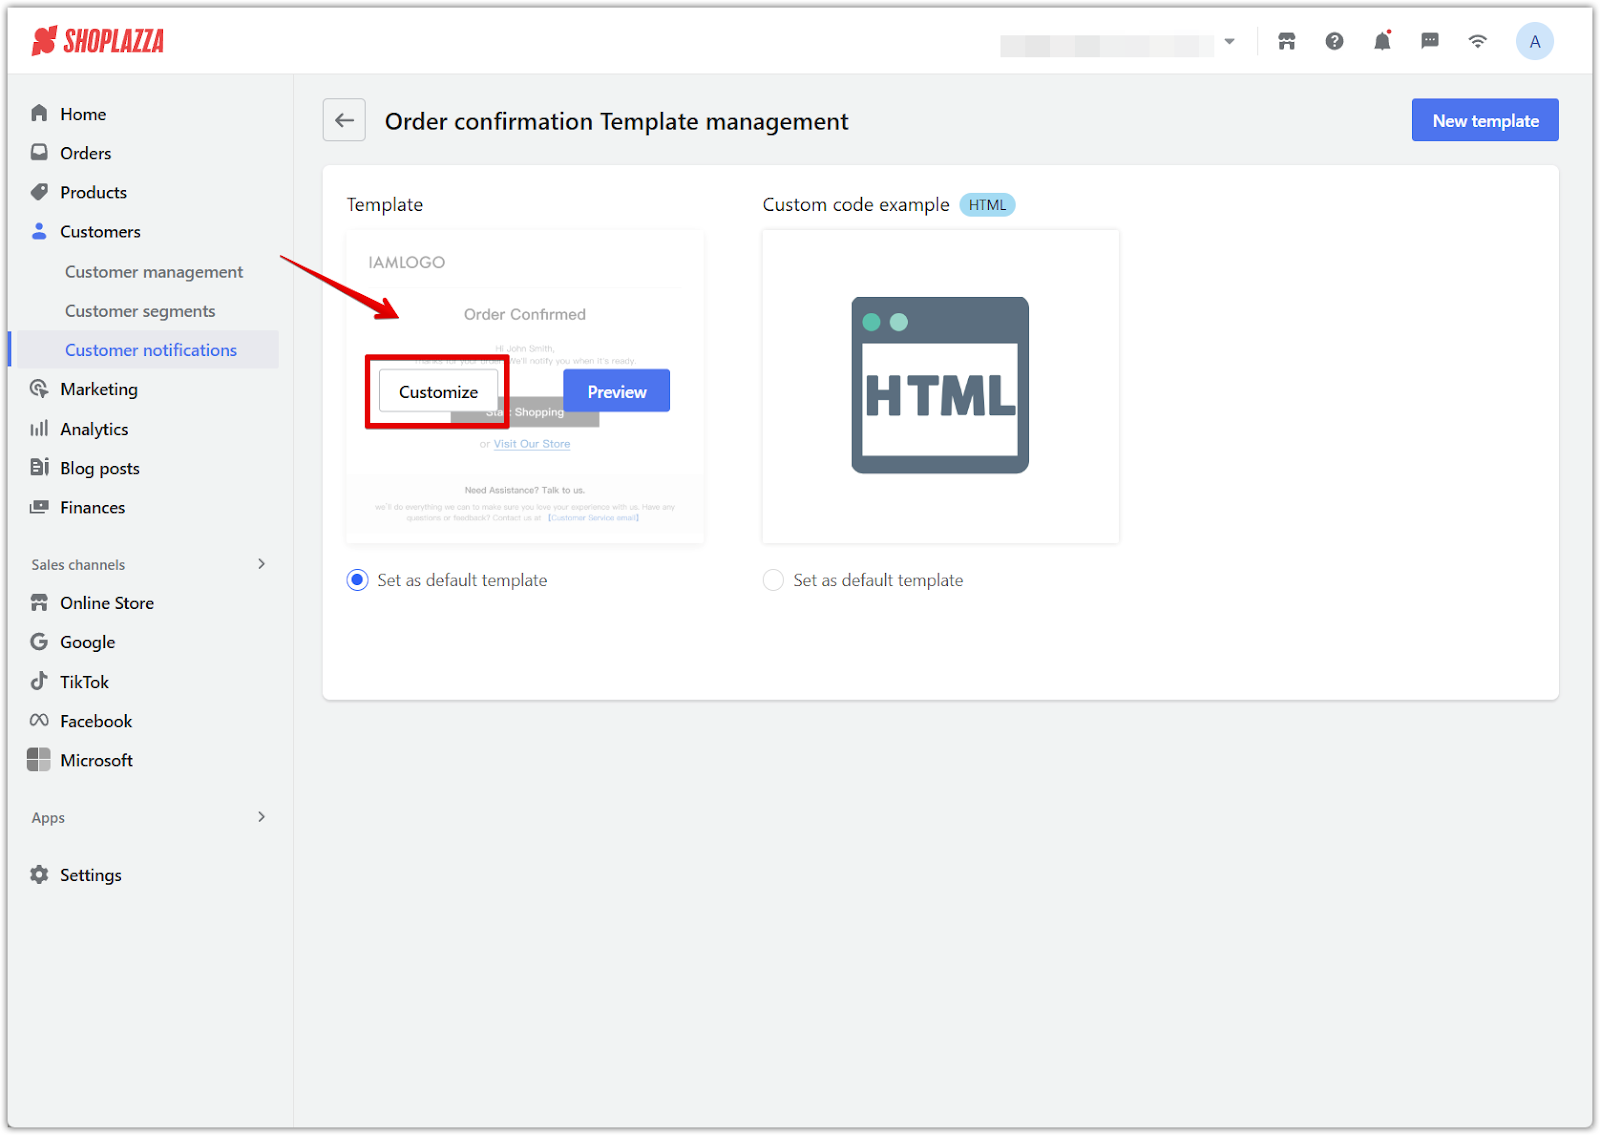
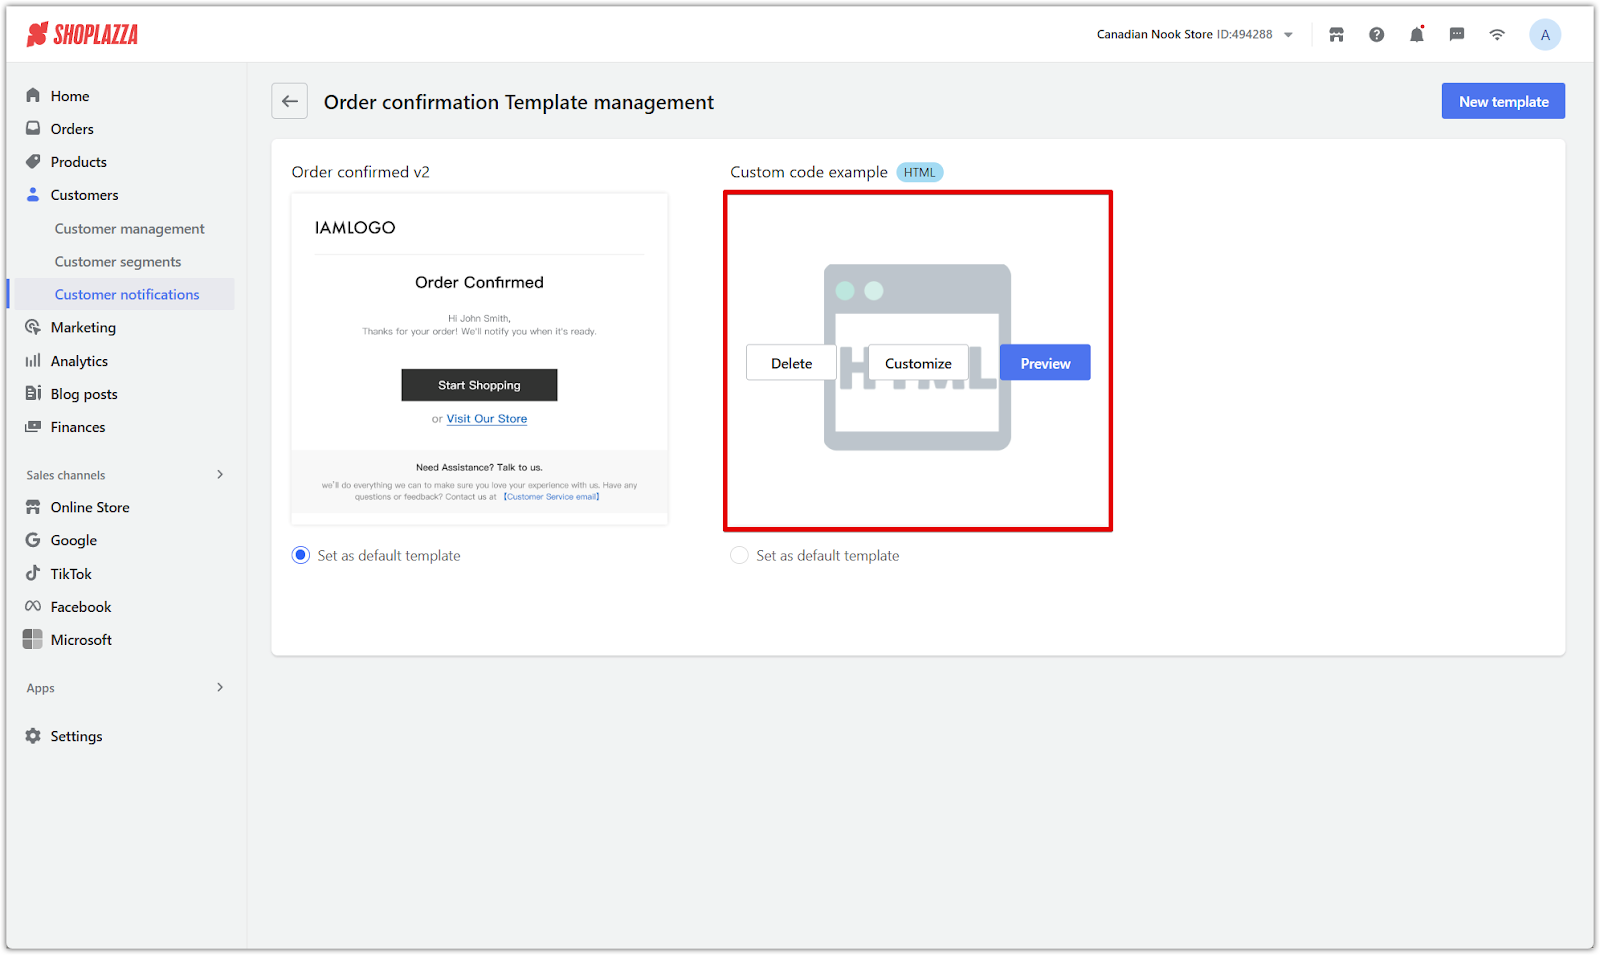
3. Customize an existing template: Hover over the default template and click Customize to modify its layout, content, and design. To create a new template, see the next section.
Creating a new template
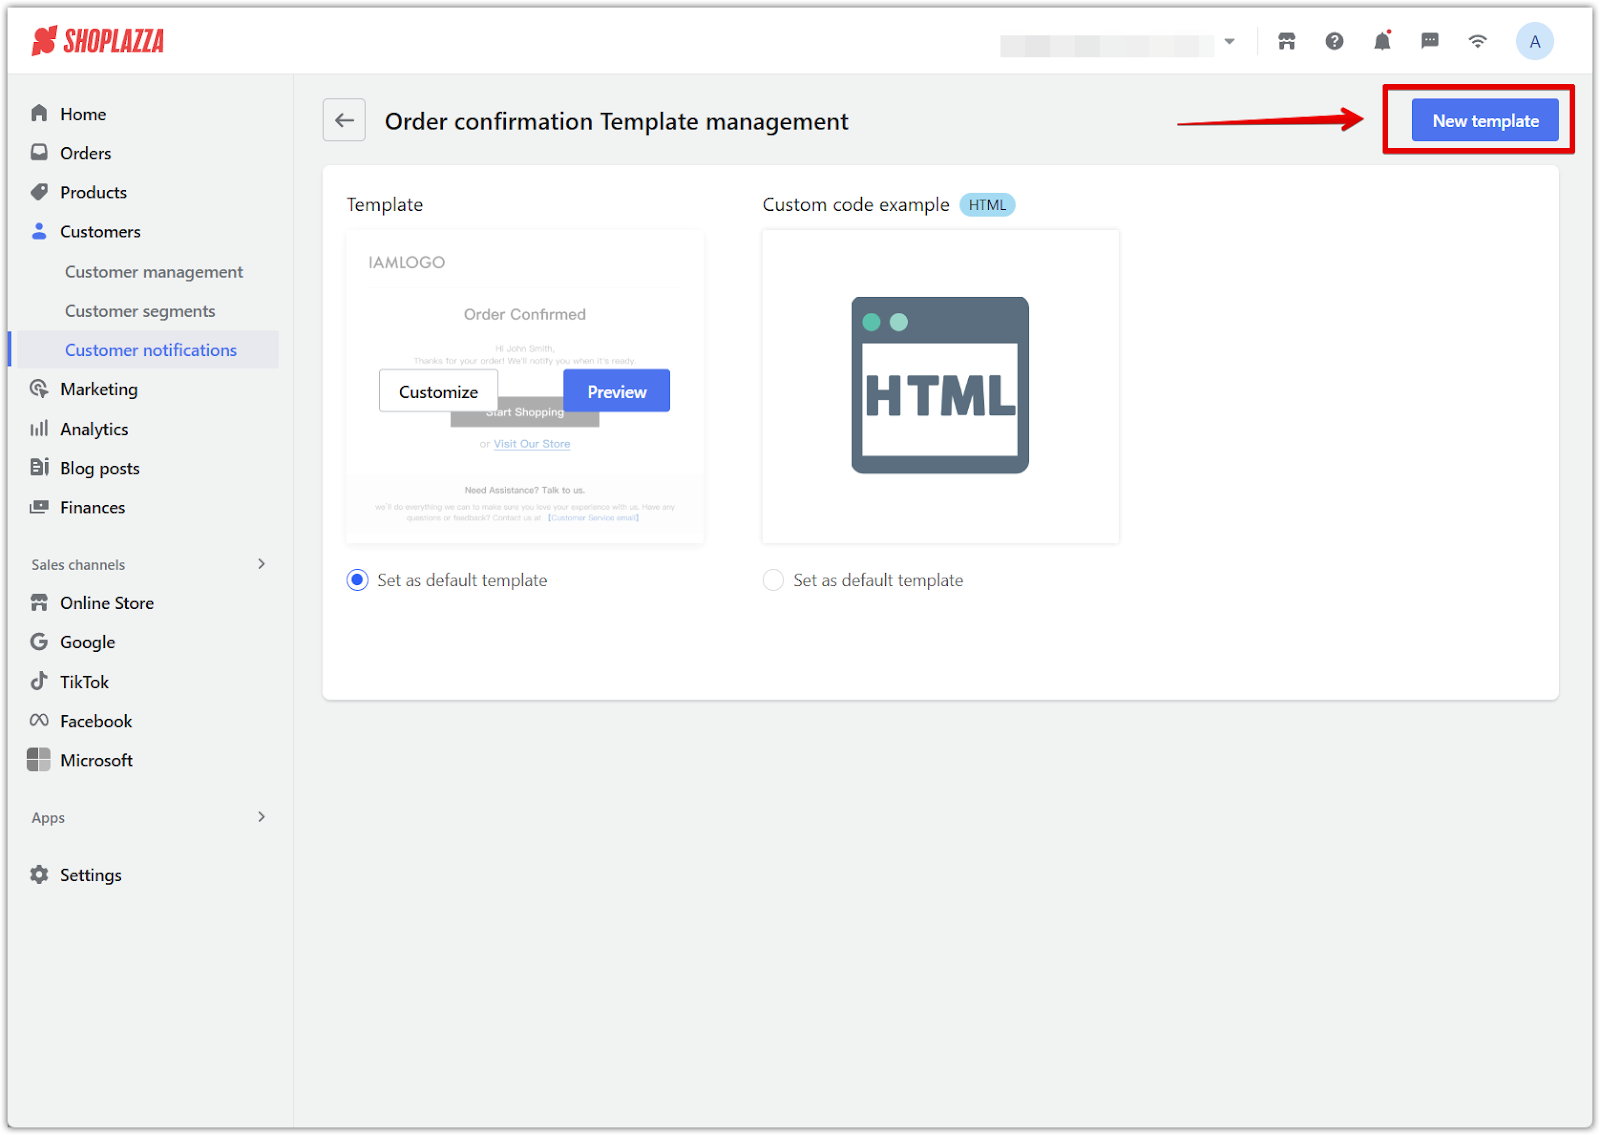
Use the New template option to start from a visual layout or build a custom template from HTML code.
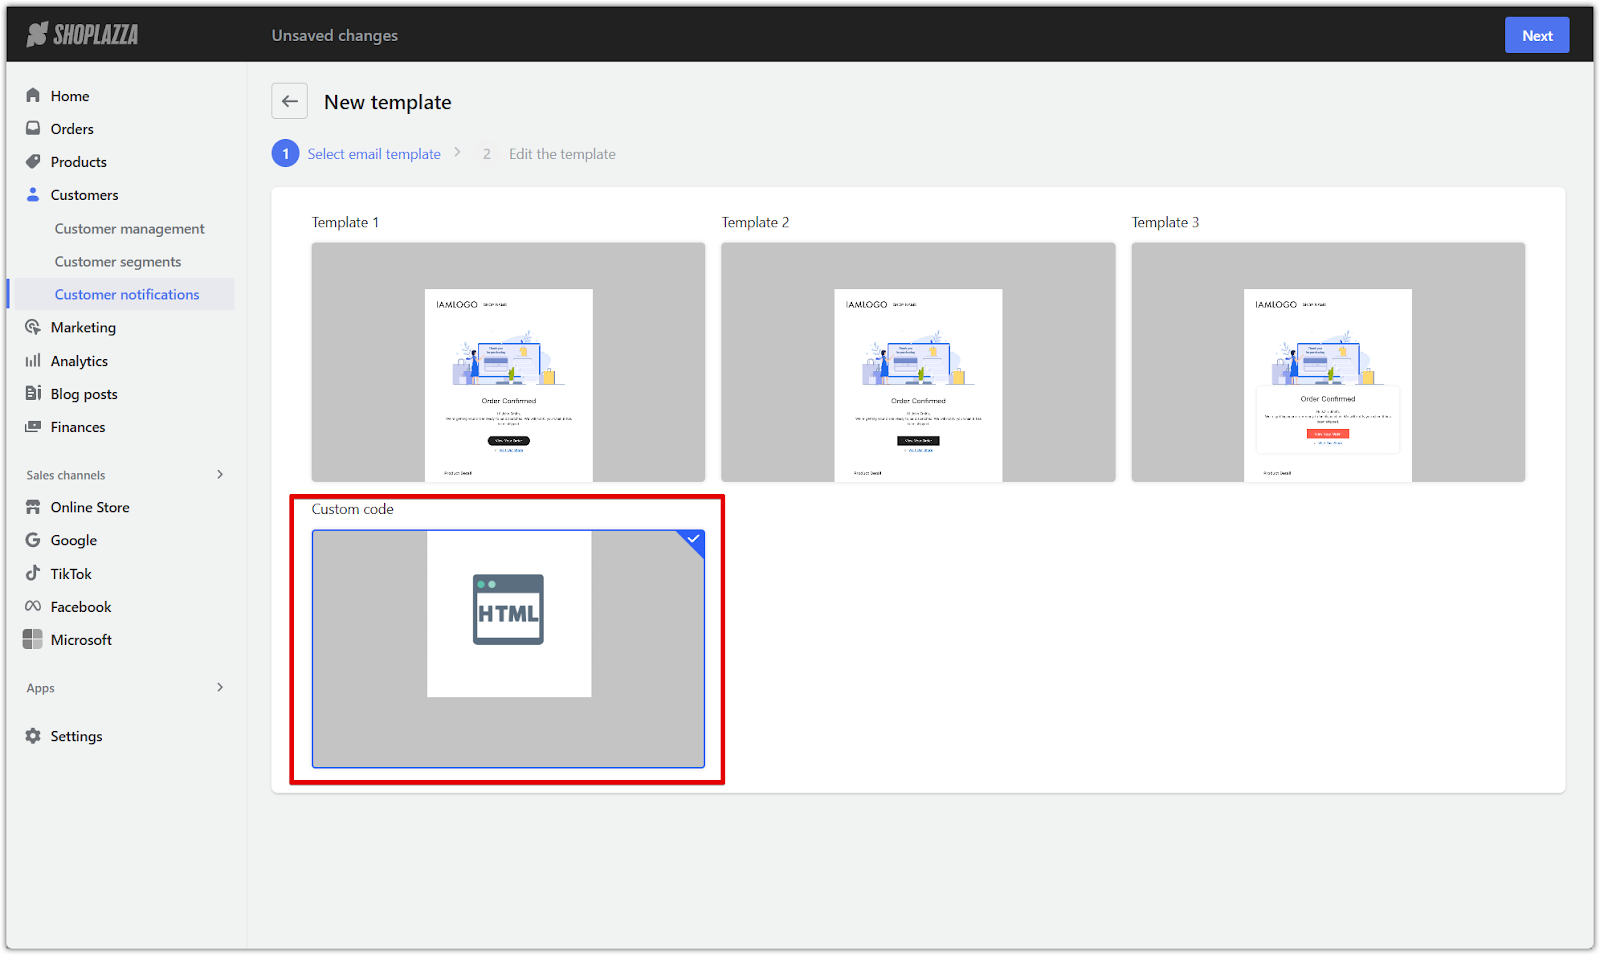
1. Click New template: In the Template management screen, click the New template button in the upper right corner.
2. Select a layout or custom code option: Choose from pre-built visual templates (Template 1, Template 2, Template 3), or select Custom code to build your own HTML email.
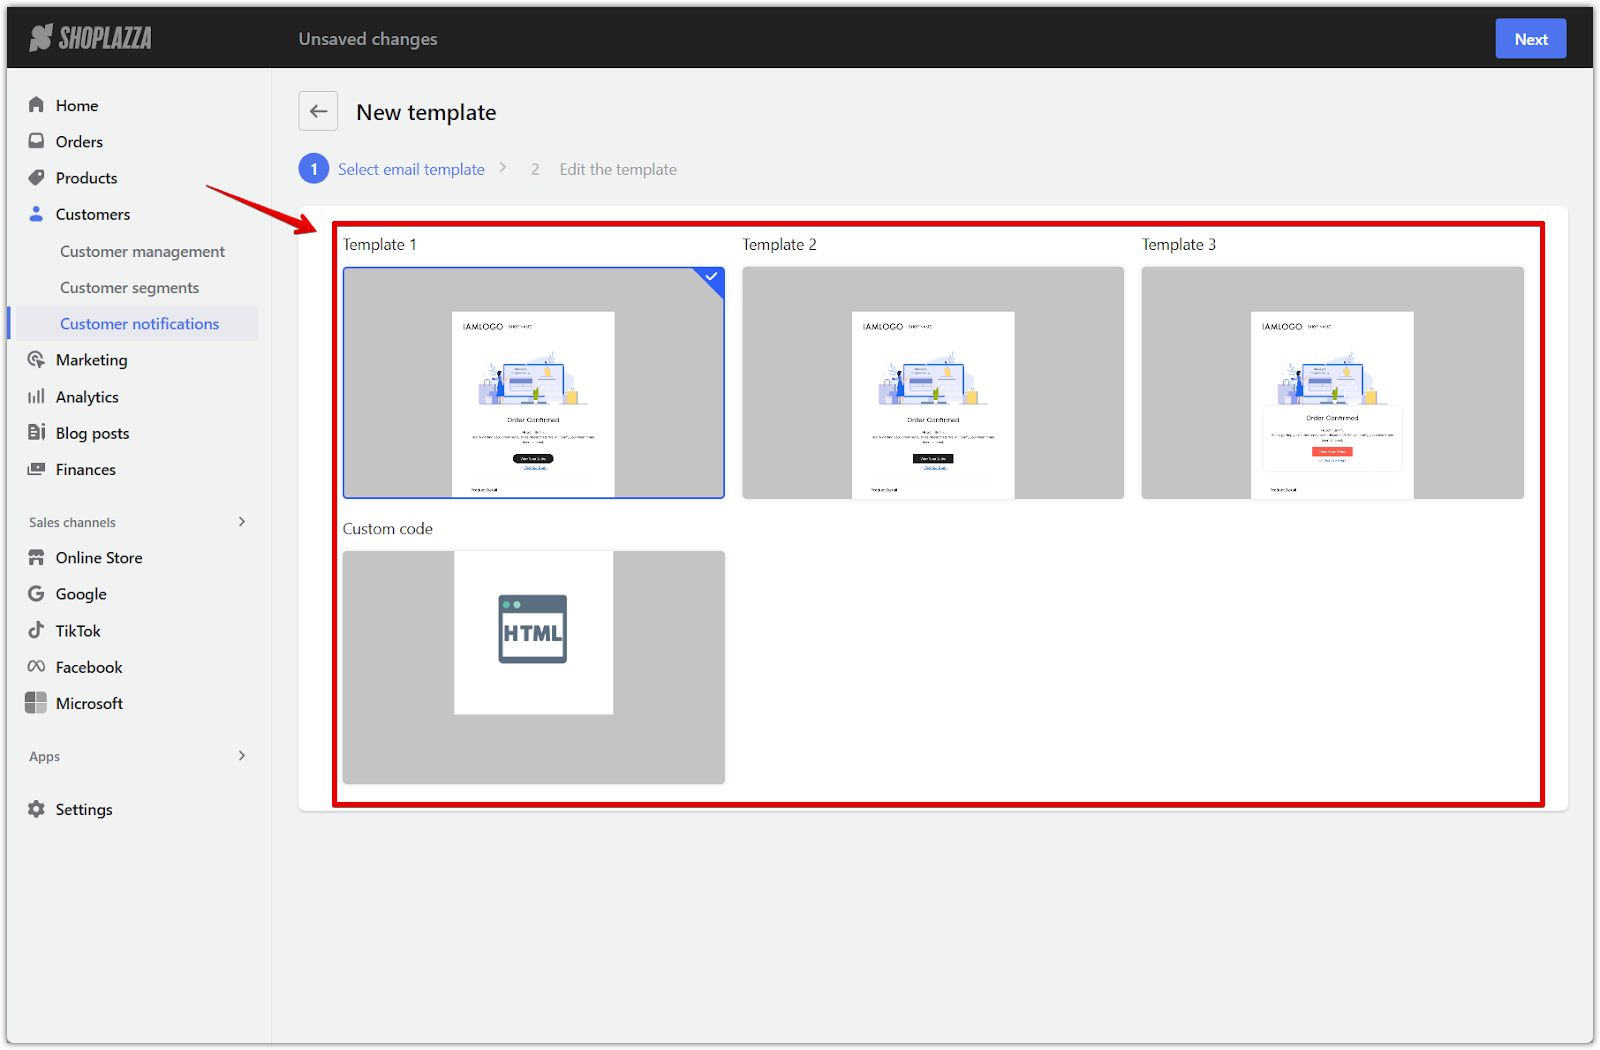
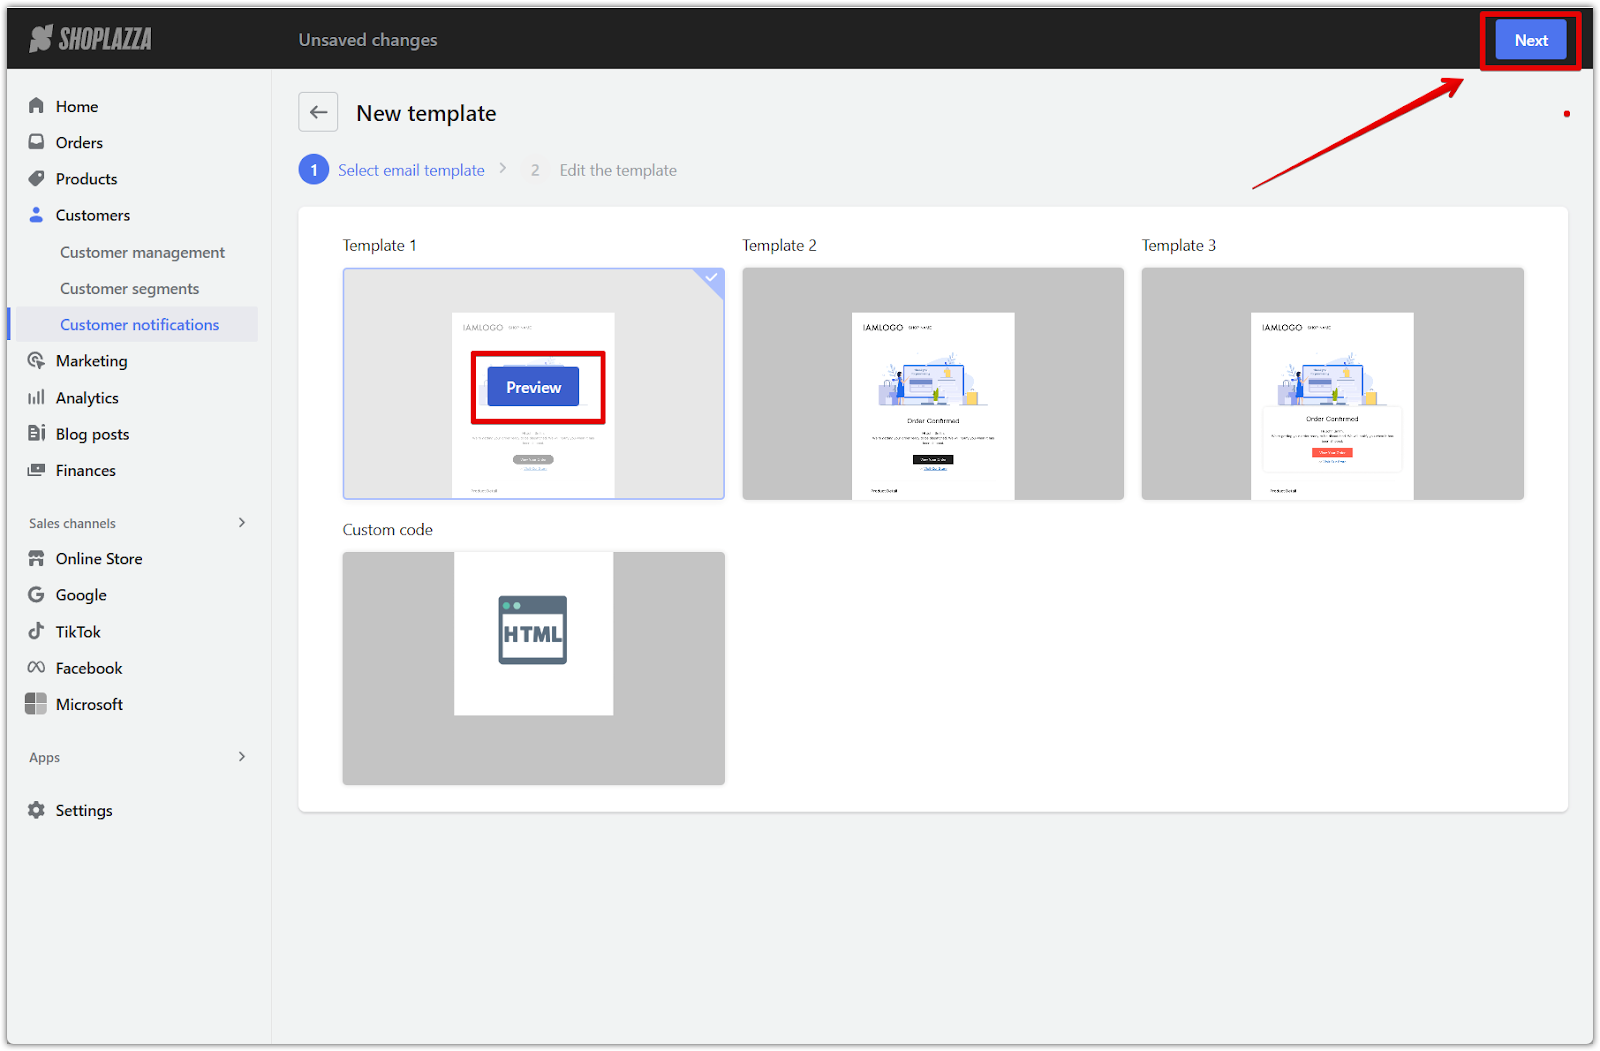
3. Preview your layout (optional): Click Preview on any template to see how it will appear before editing. After selecting your template layout, click Next to proceed to the template editing screen.
Adding brand elements
Each email template can be customized with your store’s logo, name, and visuals to reinforce your branding across all customer interactions.
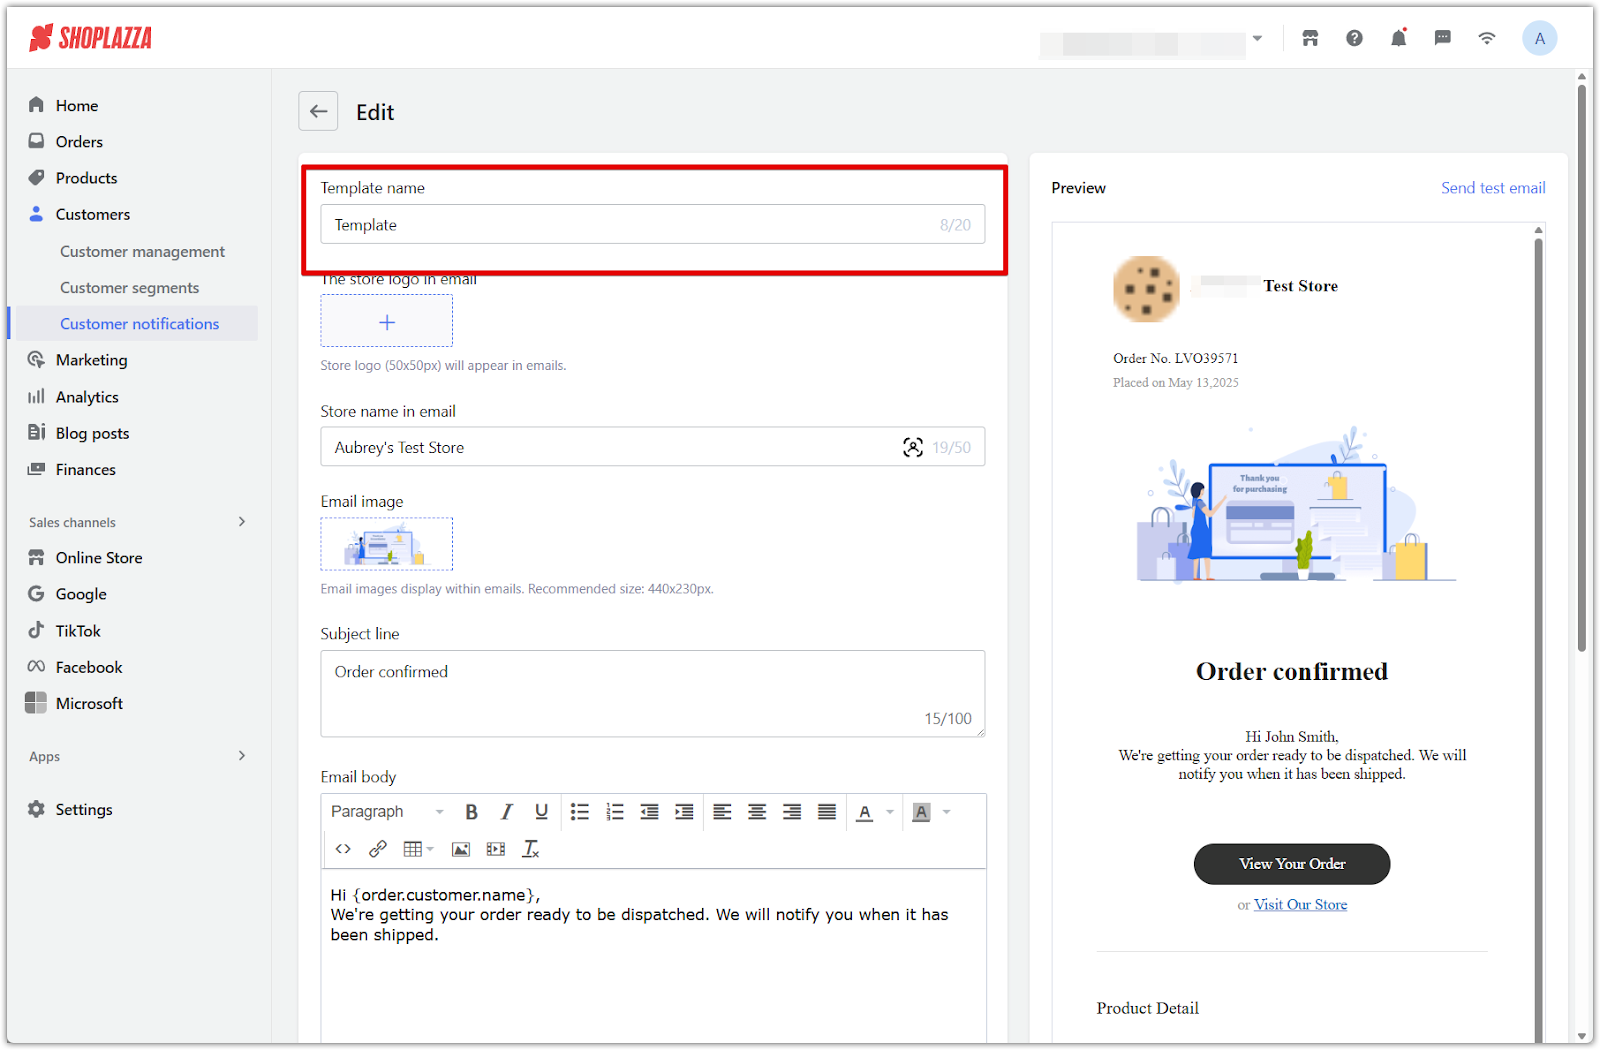
1. Name the template: Enter a name of up to 20 characters. This label helps you organize templates internally and easily identify them later.
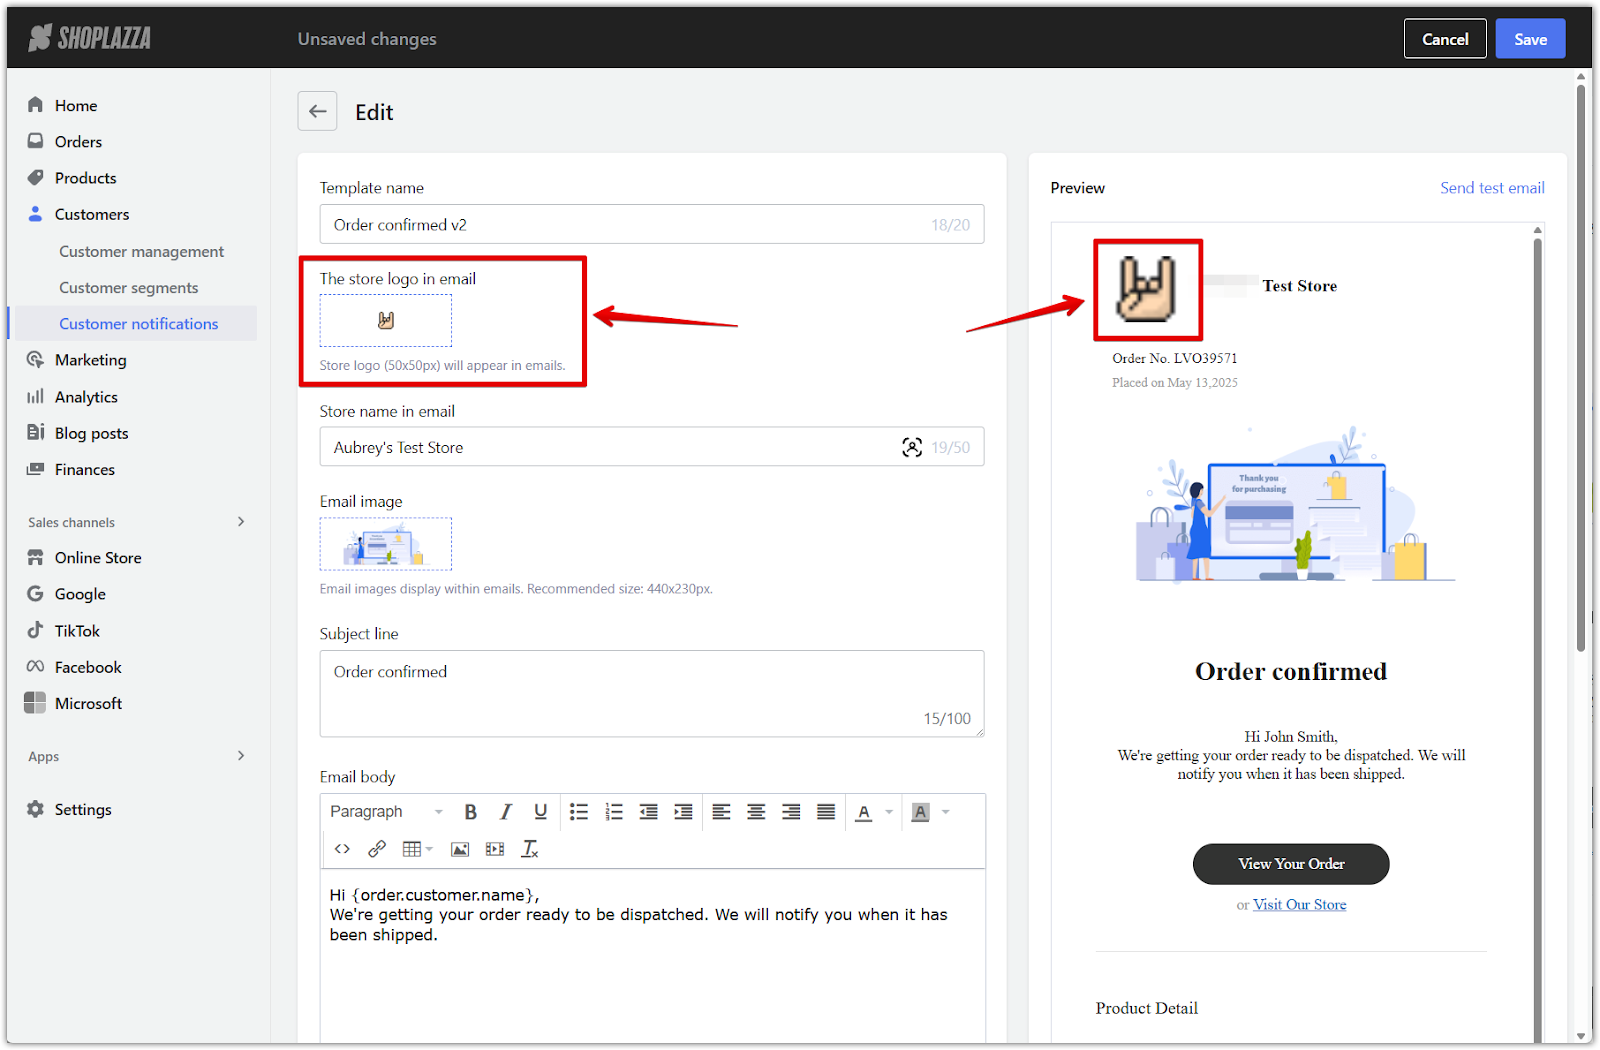
2. Upload your store logo: Click the placeholder to upload your own logo, which appears at the top of every email and helps build brand recognition.
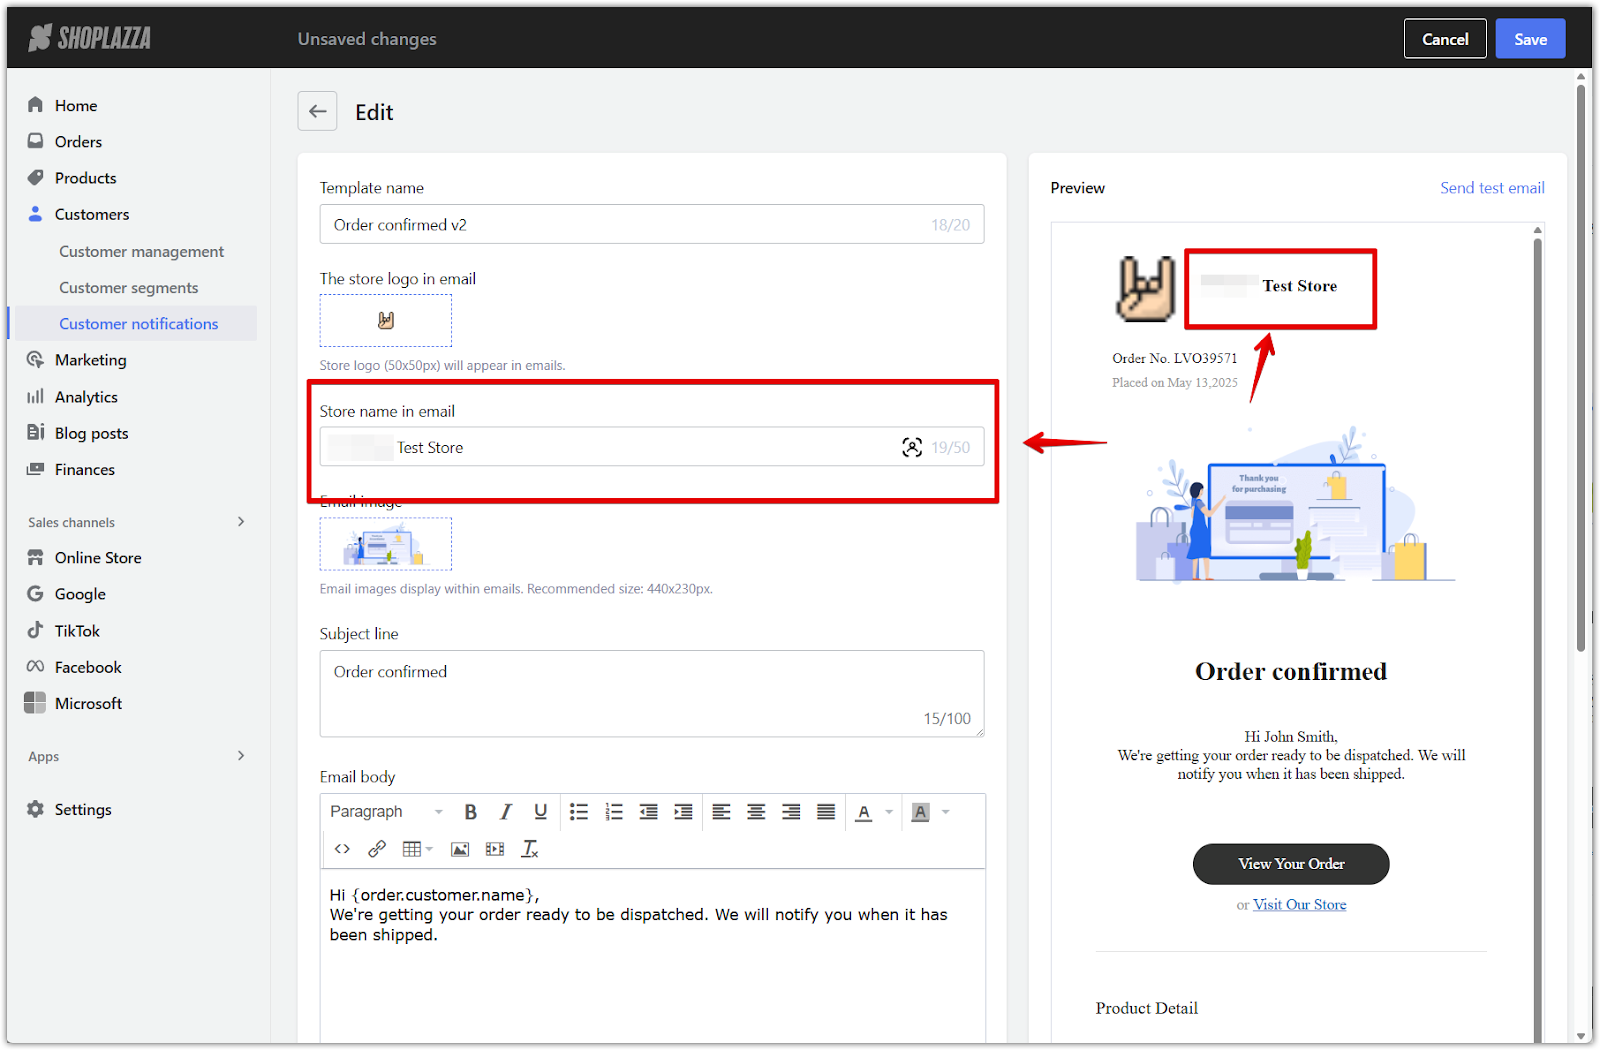
3. Set the store name: Enter the store name that will appear next to your logo in the email layout. This is typically your brand name or store title.
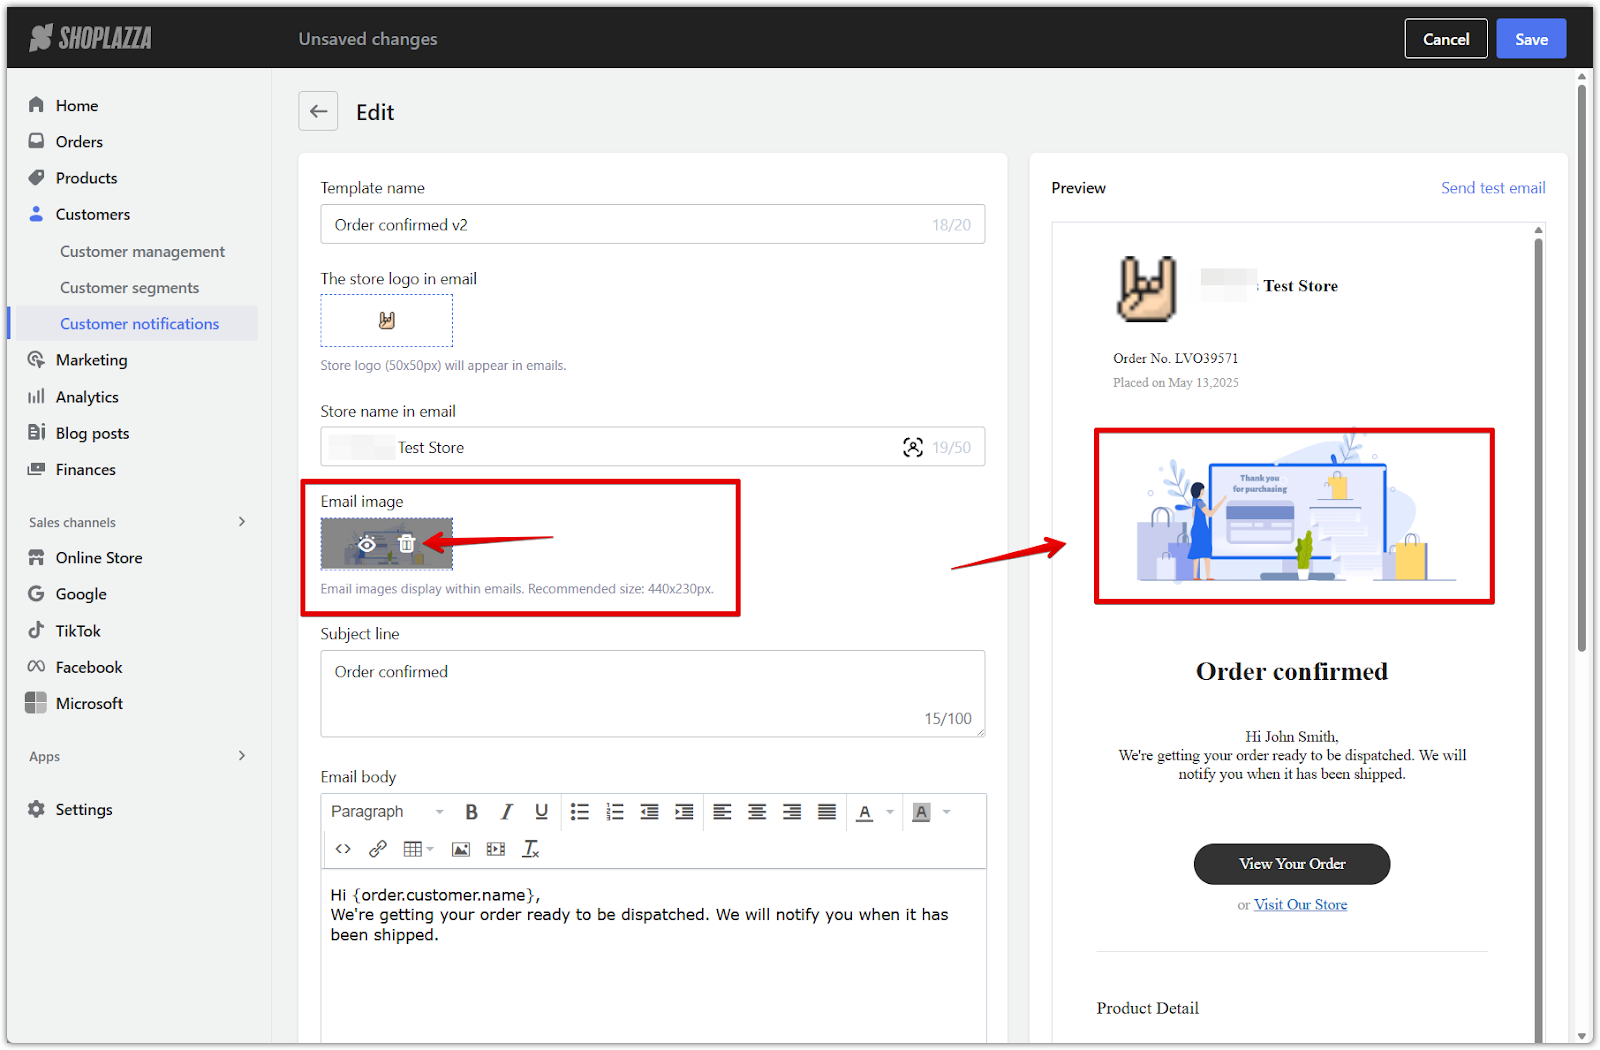
4. Remove the default background image: If a Shoplazza default image is set, click the trash icon to remove it and clear the space for a custom background.
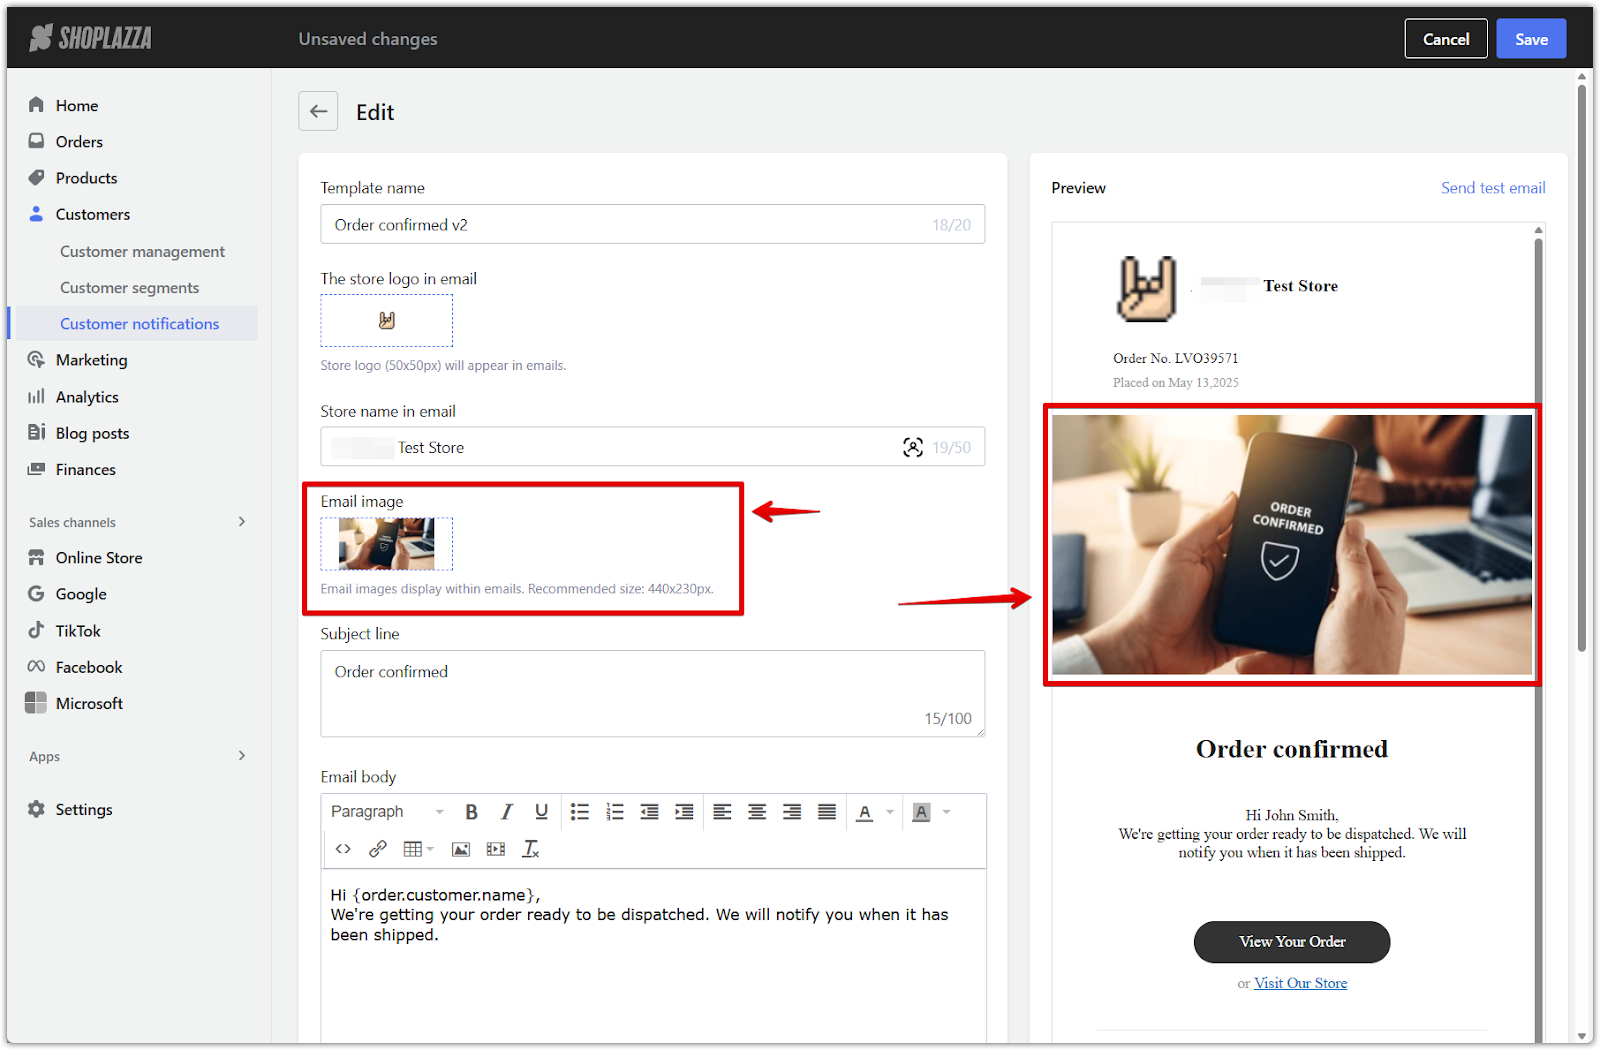
5. Upload a custom image: Click the plus icon to upload an image from your computer. This will serve as the background or header visual for the template.
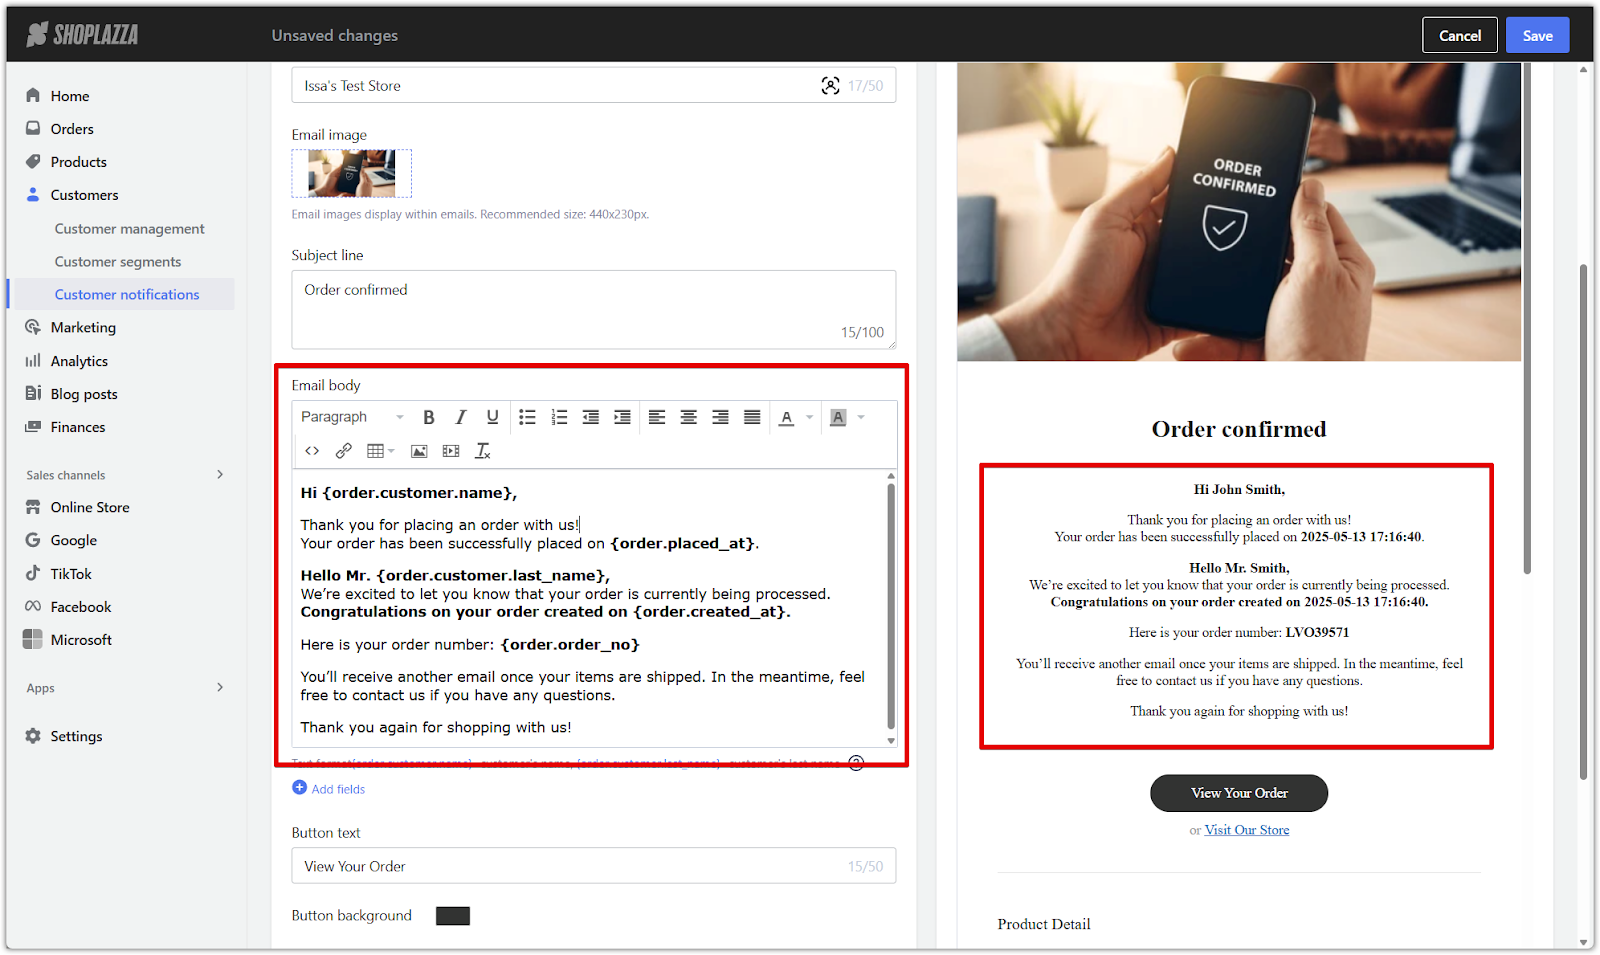
Editing template content
Each email message contains editable text fields for the subject line and body. Use these to customize the tone and content for your audience. Dynamic variables can also be added for personalization.
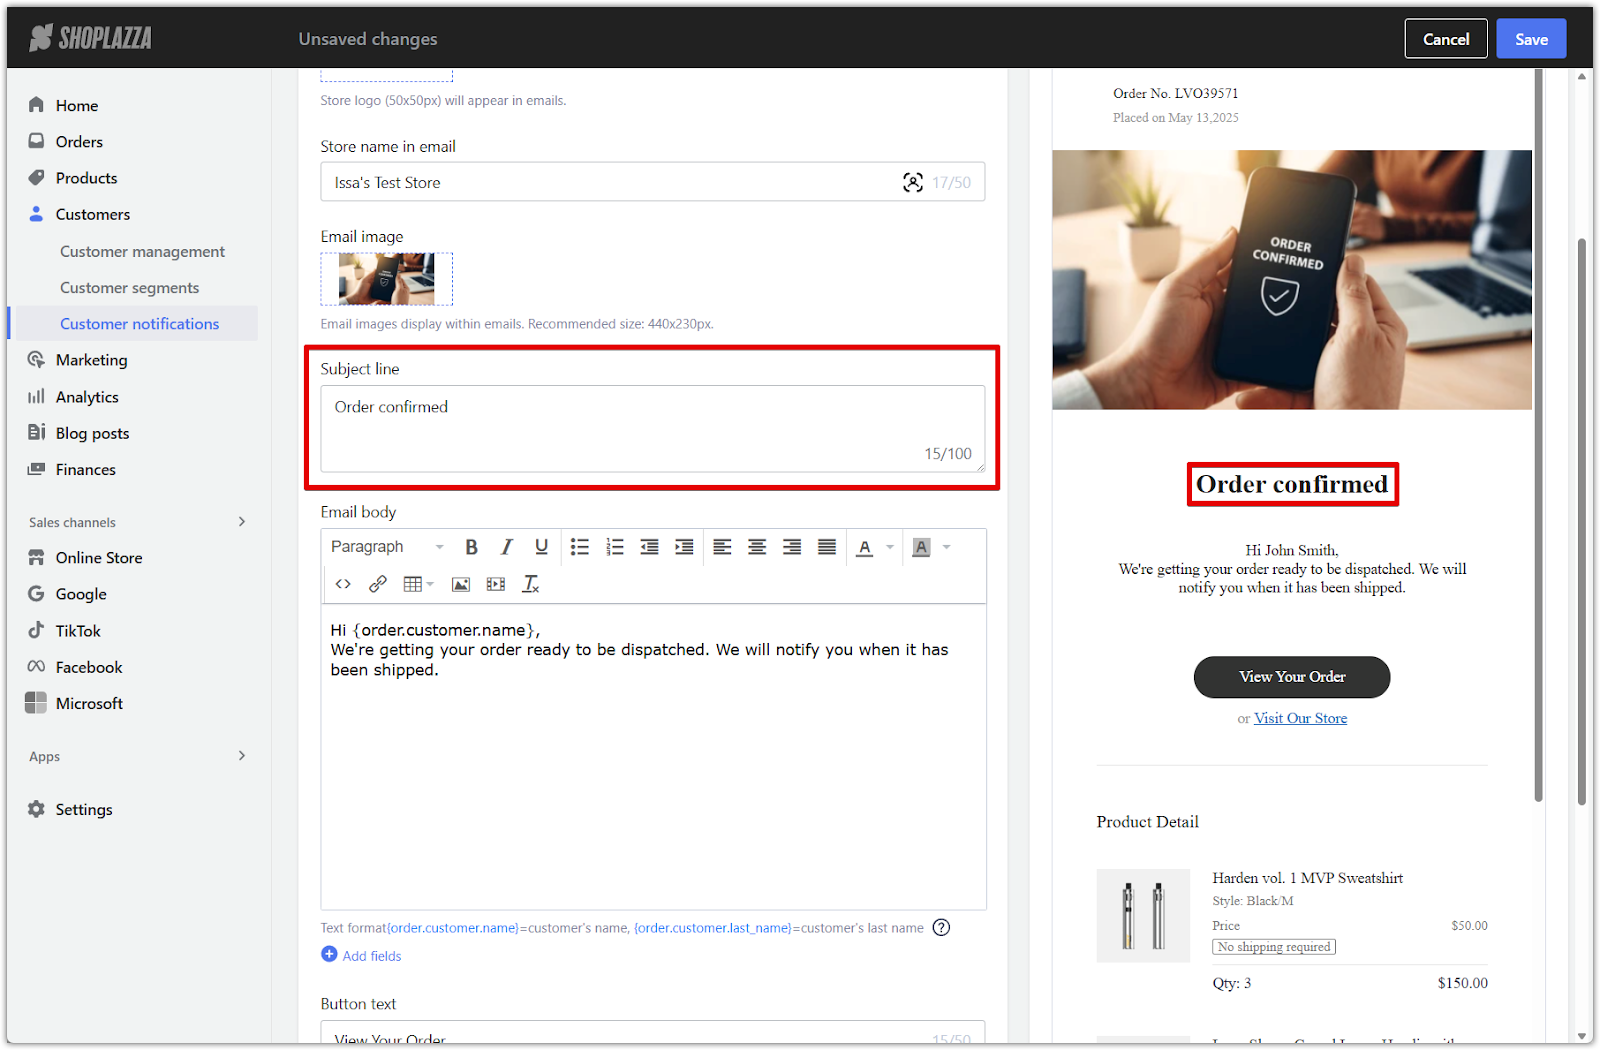
1. Edit the subject line: Enter a concise and clear subject. This is the first thing your customer will see in their inbox.
2. Customize the message body: Write your main message and include dynamic variables to personalize the content. These pull real-time order or customer information into each email.
| Variable | Example output |
| {order.customer.name} | Hi Sarah, thank you for placing an order! |
| {order.placed_at} | Your order has been placed on May 12, 2025 |
| {order.customer.last_name} | Hello Mr. Lee, your order has been placed! |
| {order.created_at} | Congratulations on your order created on May 10, 2025 |
| {order.order_no} | Here is your order number: #897542 |
3. Create advanced templates using HTML (optional): To write fully customized email layouts, refer to the article How to create an email template with custom code.
Adjusting layout and button settings
After the message is written, apply visual styling and layout settings to match your store’s appearance. This includes the call-to-action button and whether product details are included.
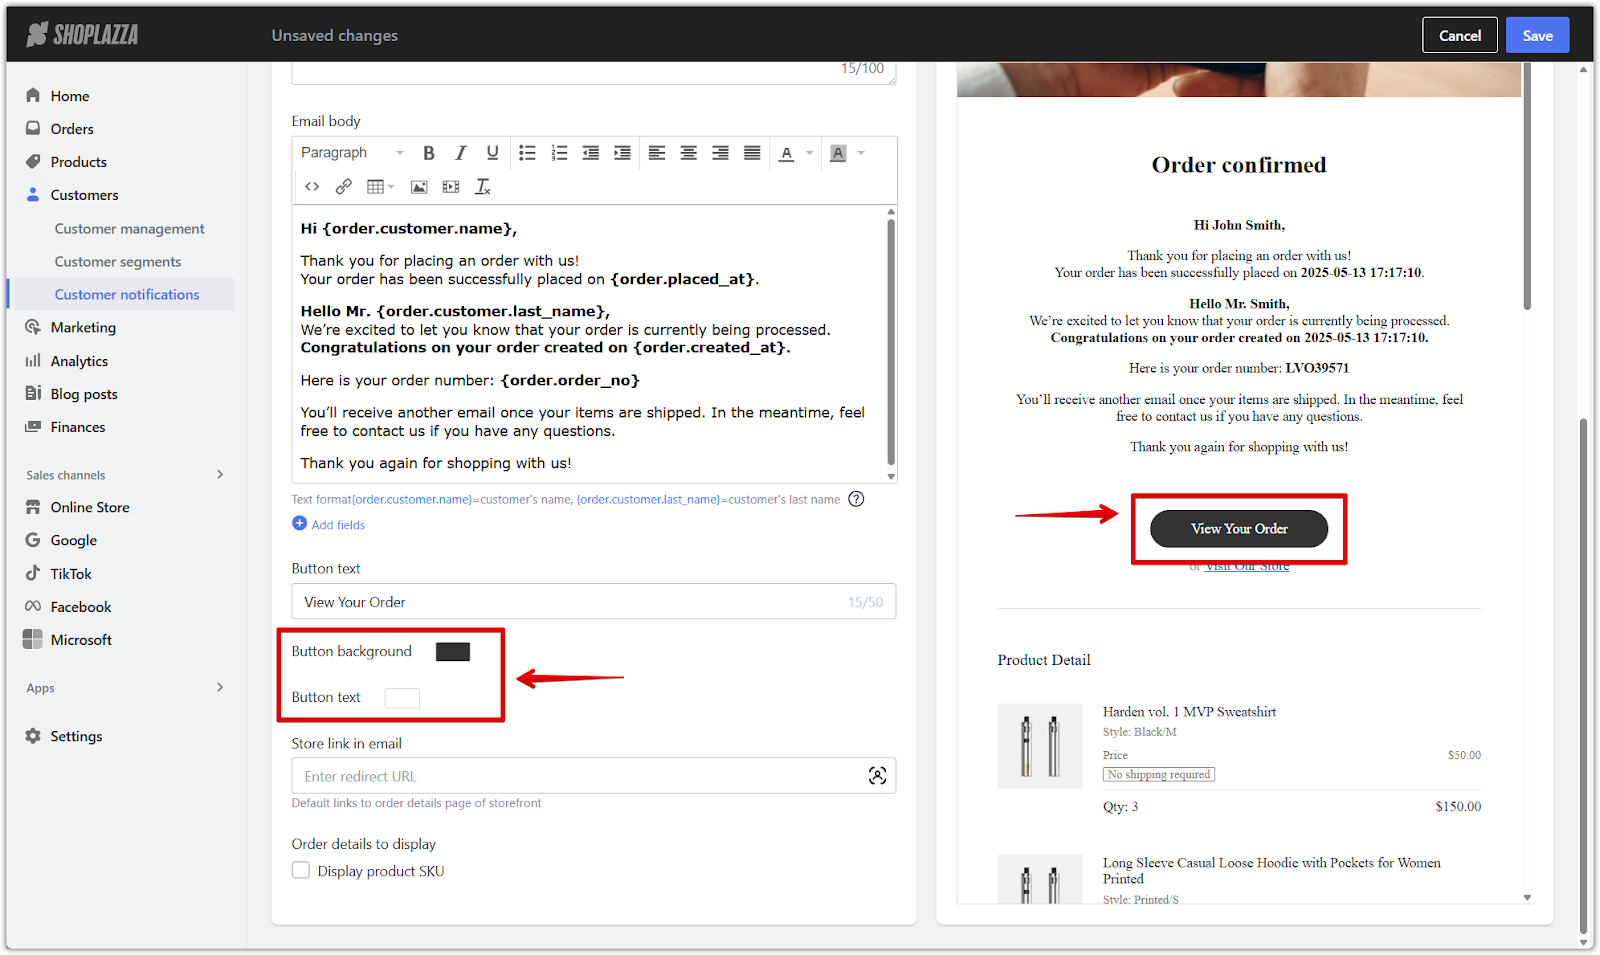
1. Set the button text: Enter a clear action label, such as “View Order” or “Track My Package,” to guide customers effectively.
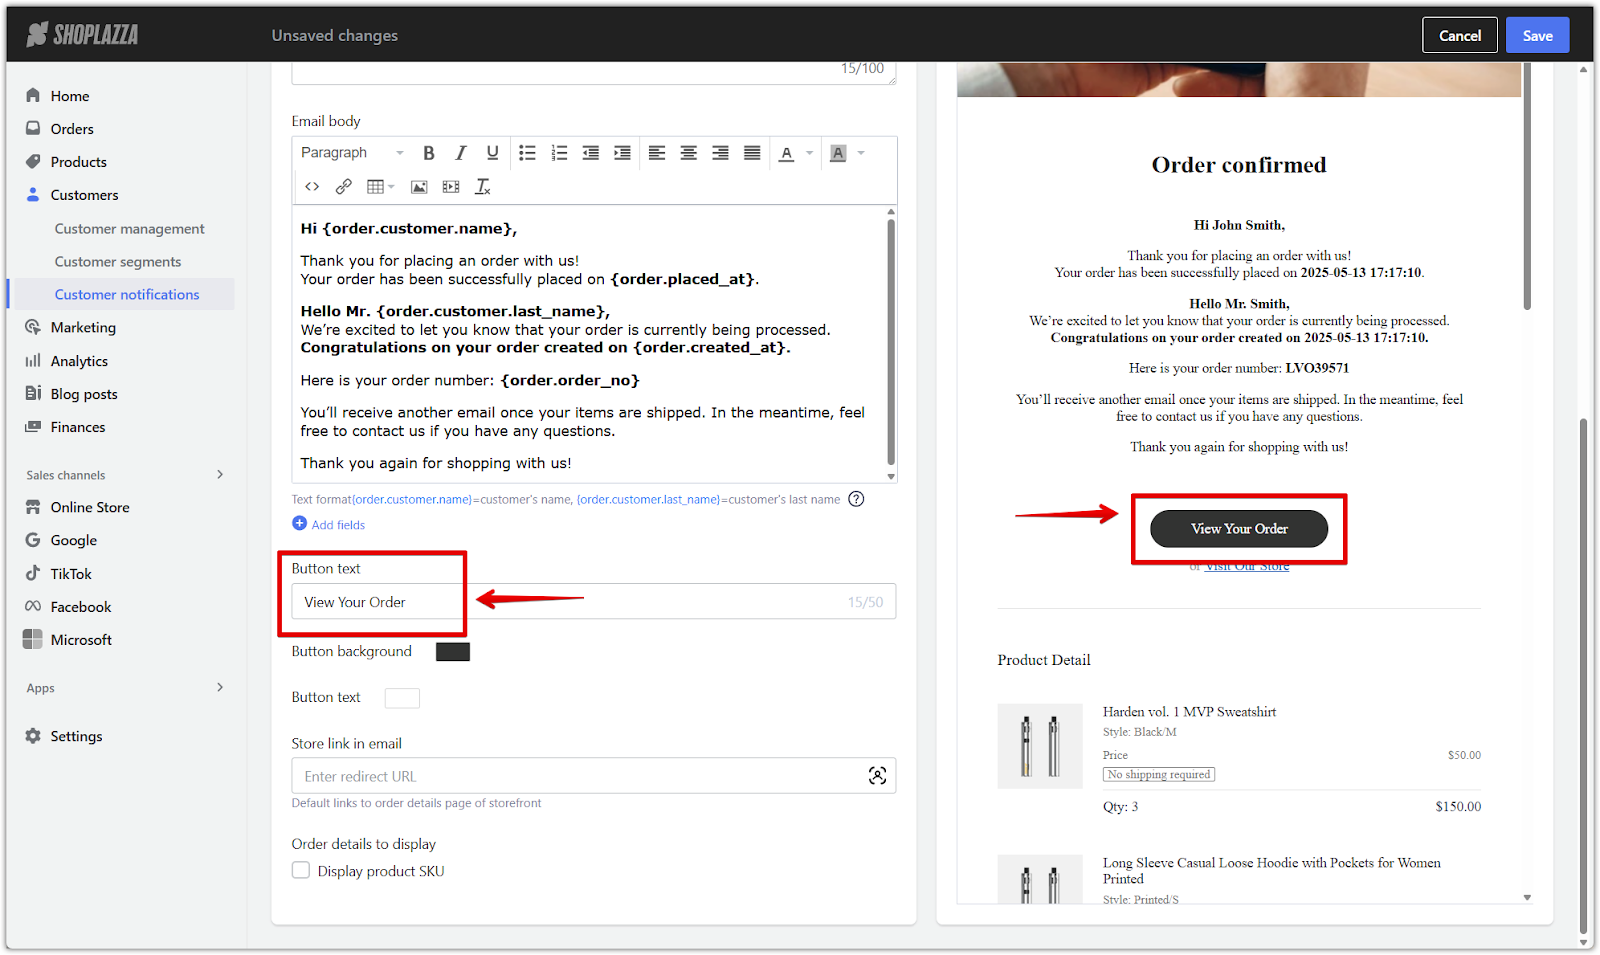
2. Customize the button color scheme: Select background and font colors that align with your store’s design theme for visual consistency.
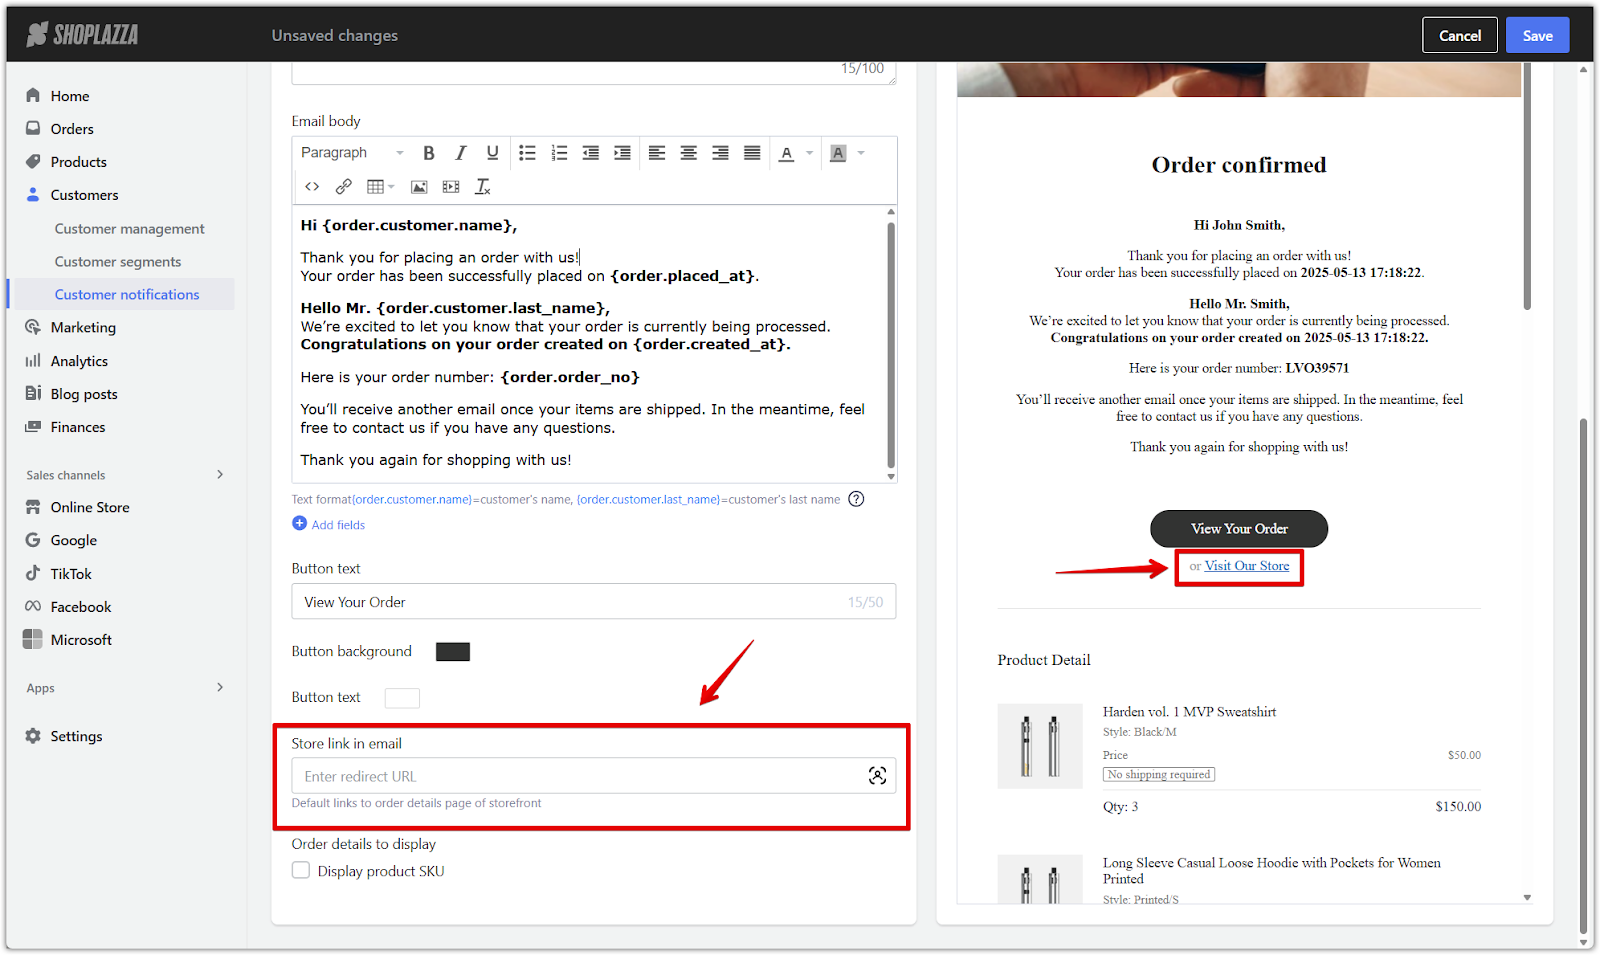
3. Insert a redirect link: Add the destination URL for the button, typically the order status page or customer account area.
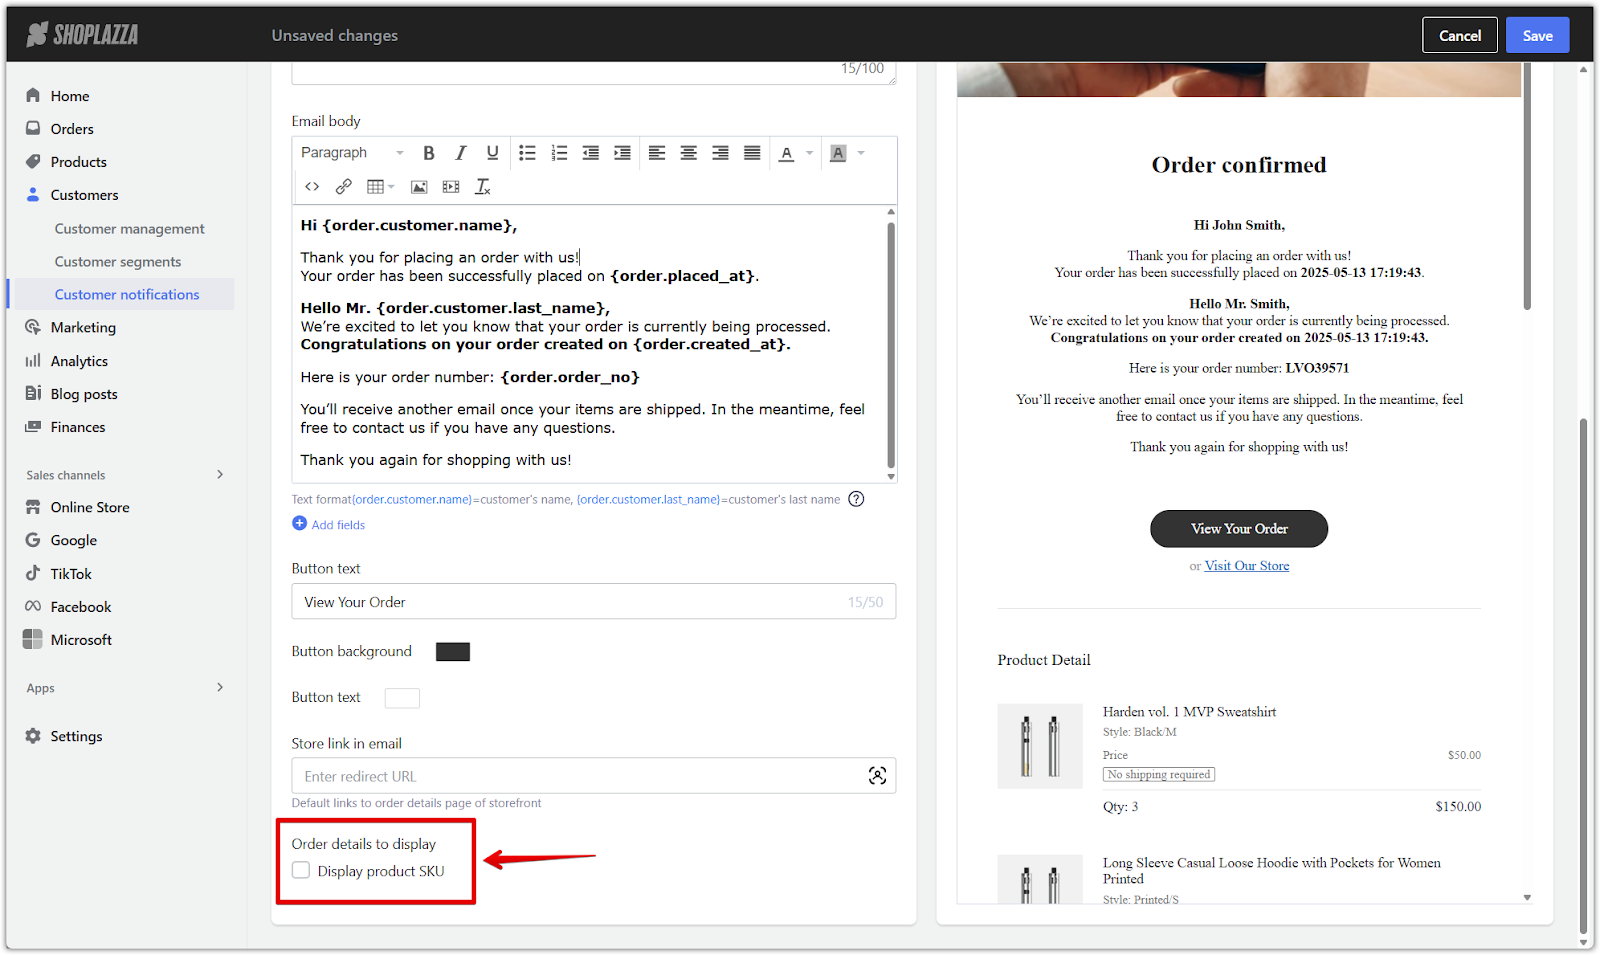
4. Enable SKU display: Turn on this setting to include Stock Keeping Unit (SKU) numbers, helping customers identify specific products in their order.
Note
A SKU is a unique product identifier used to manage inventory and differentiate between variants.
Well-structured email templates improve clarity, boost engagement, and strengthen your store’s professionalism. Every notification is an opportunity to add value, build trust, and strengthen your brand identity. Customizing visuals and messaging ensures a consistent experience across all customer touchpoints.


Comments
Article is closed for comments.