Efficiently managing staff permissions is essential for streamlined operations and team security. With straightforward tools, you can quickly set up and adjust access levels, keeping each team member focused on the tasks that matter.
Staff information and permissions
Modify staff permissions with ease to ensure your team has access to the right tools and information:
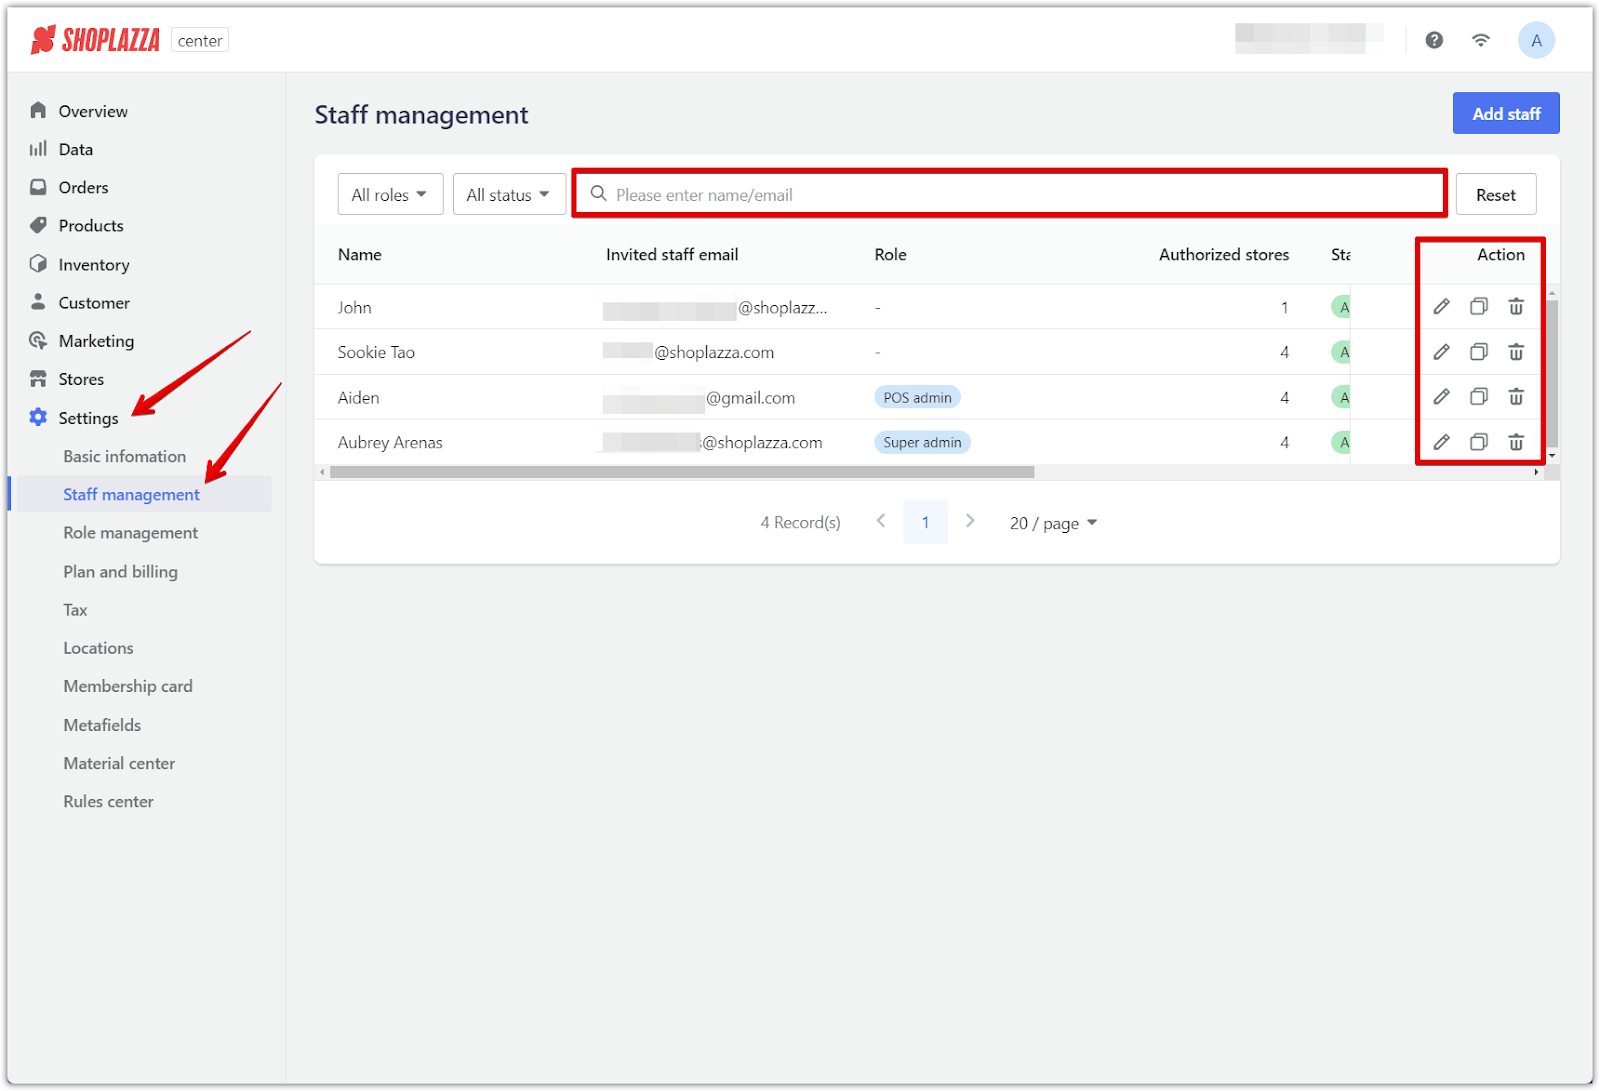
1. Accessing staff settings: Go to Settings > Staff Management. This section is designed to give you a broad overview of all team members and their roles within your organization. Edit, copy, or delete any staff by choosing an action.
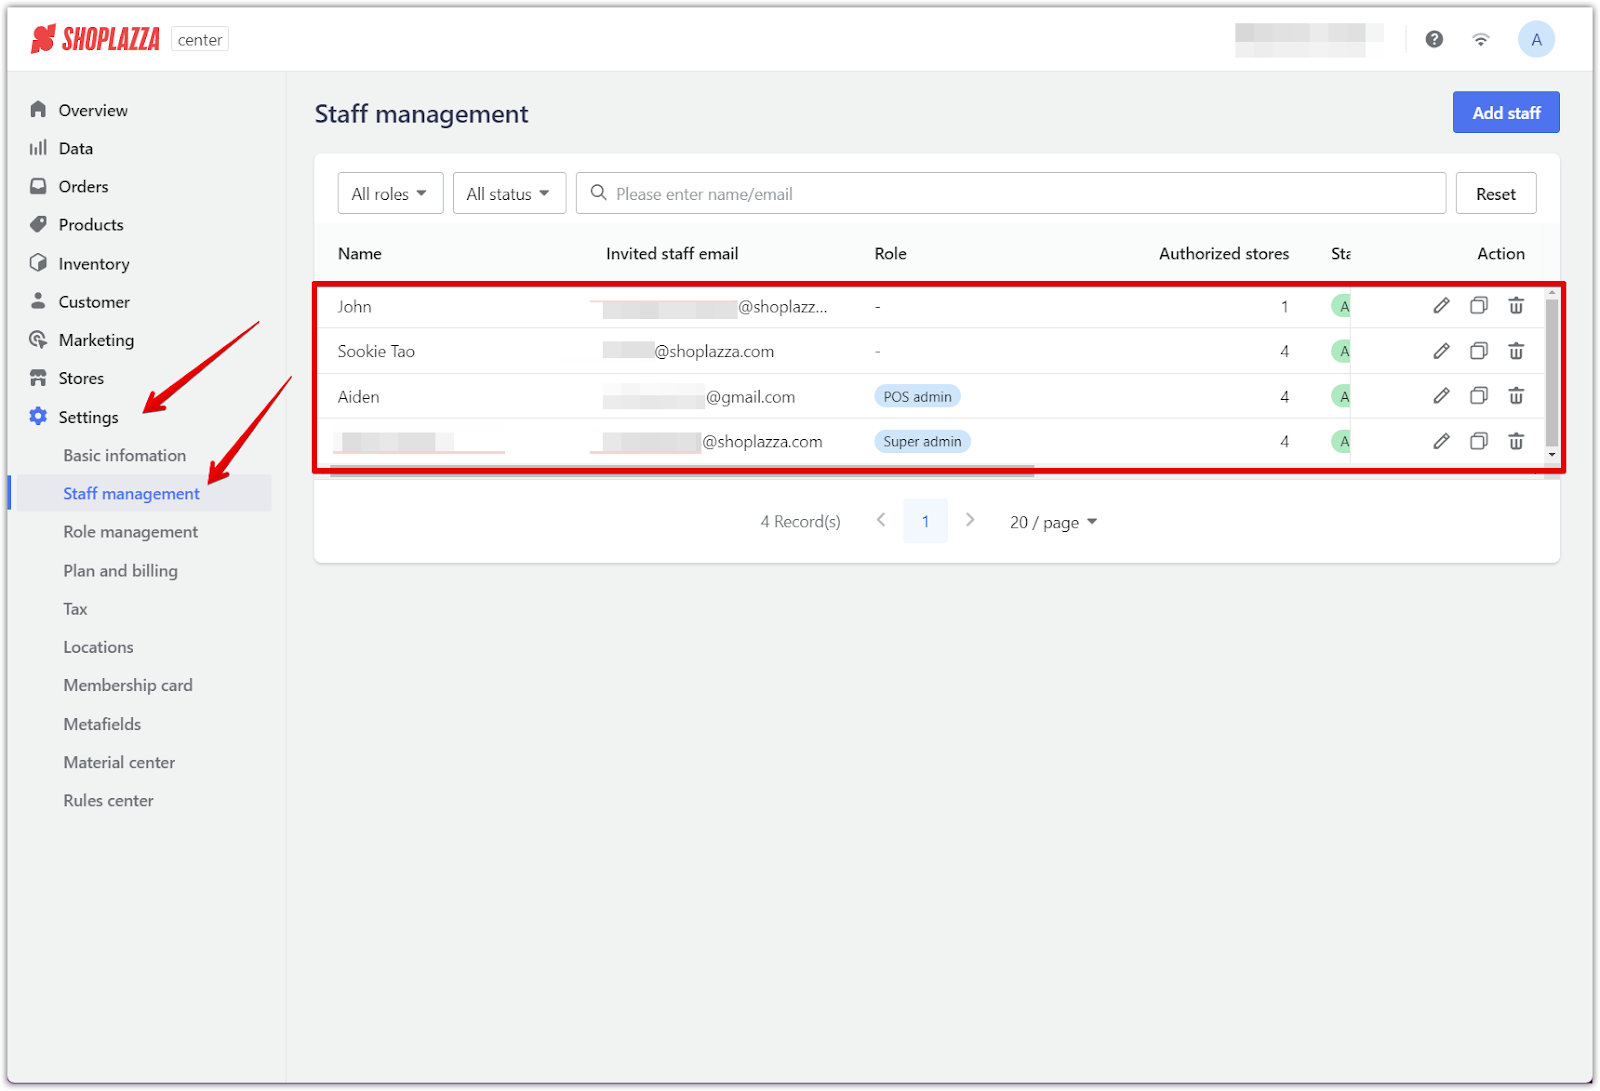
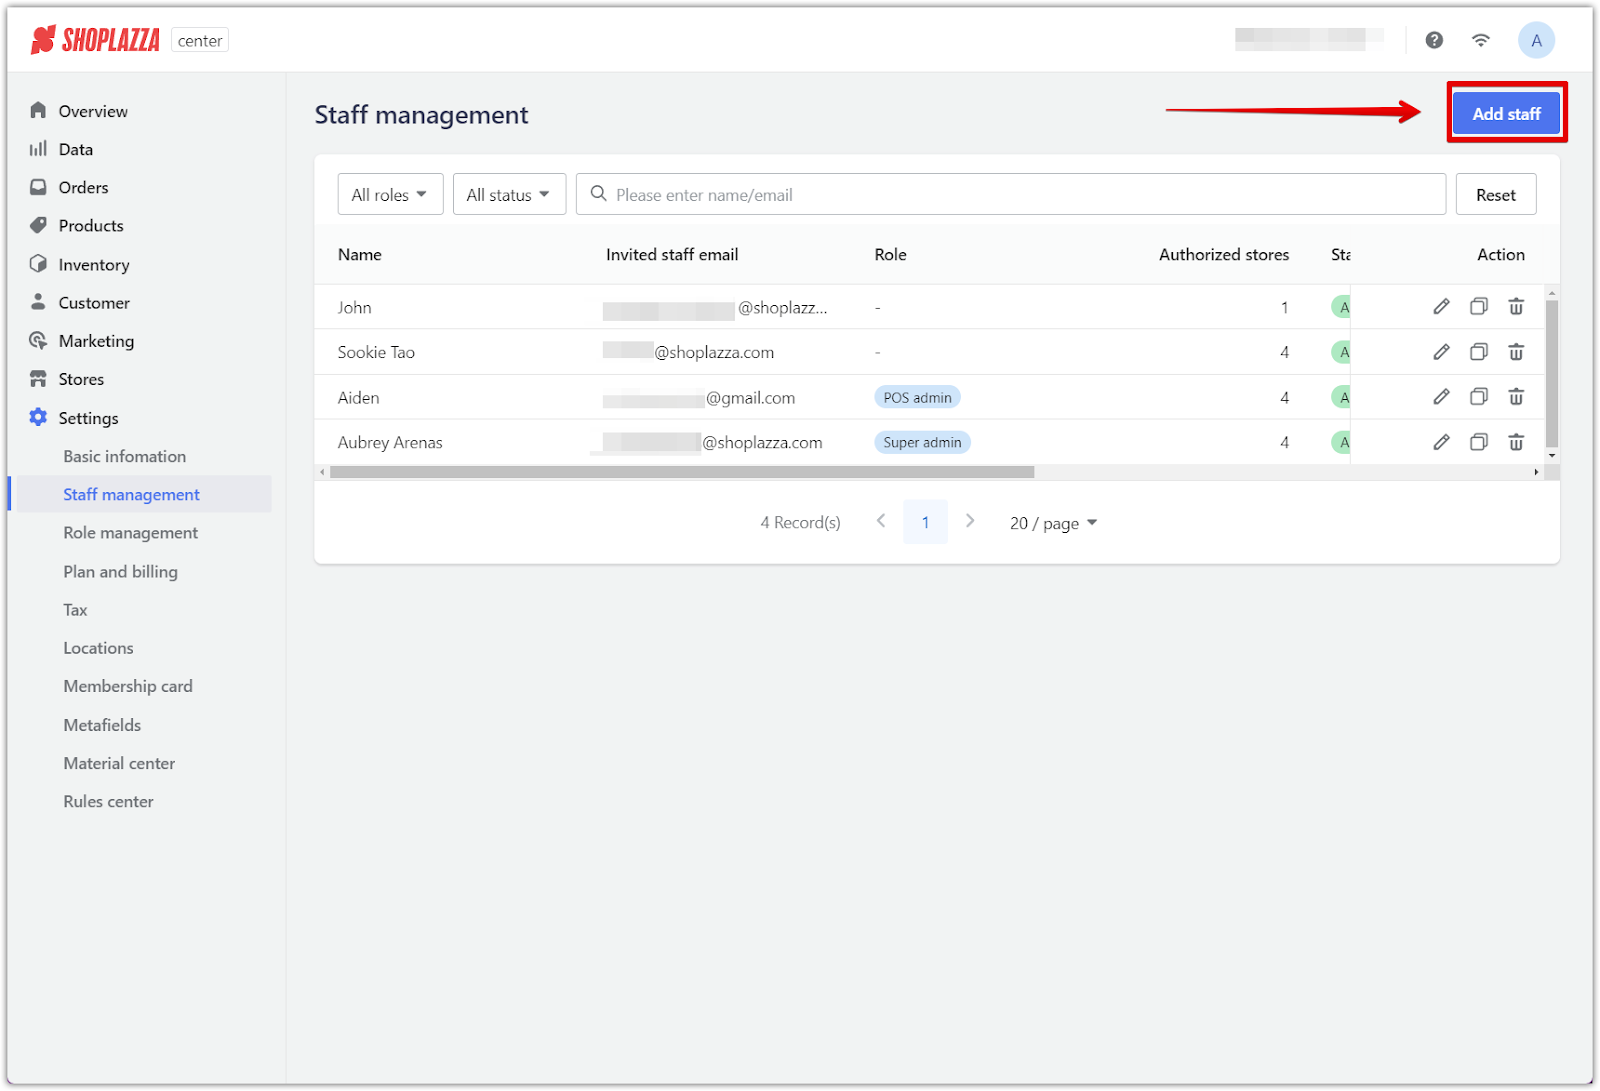
2. Initiate new staff entry: Once in the staff management area, click Add Staff. This will open a new page, which is your first step towards registering a new team member on your platform.
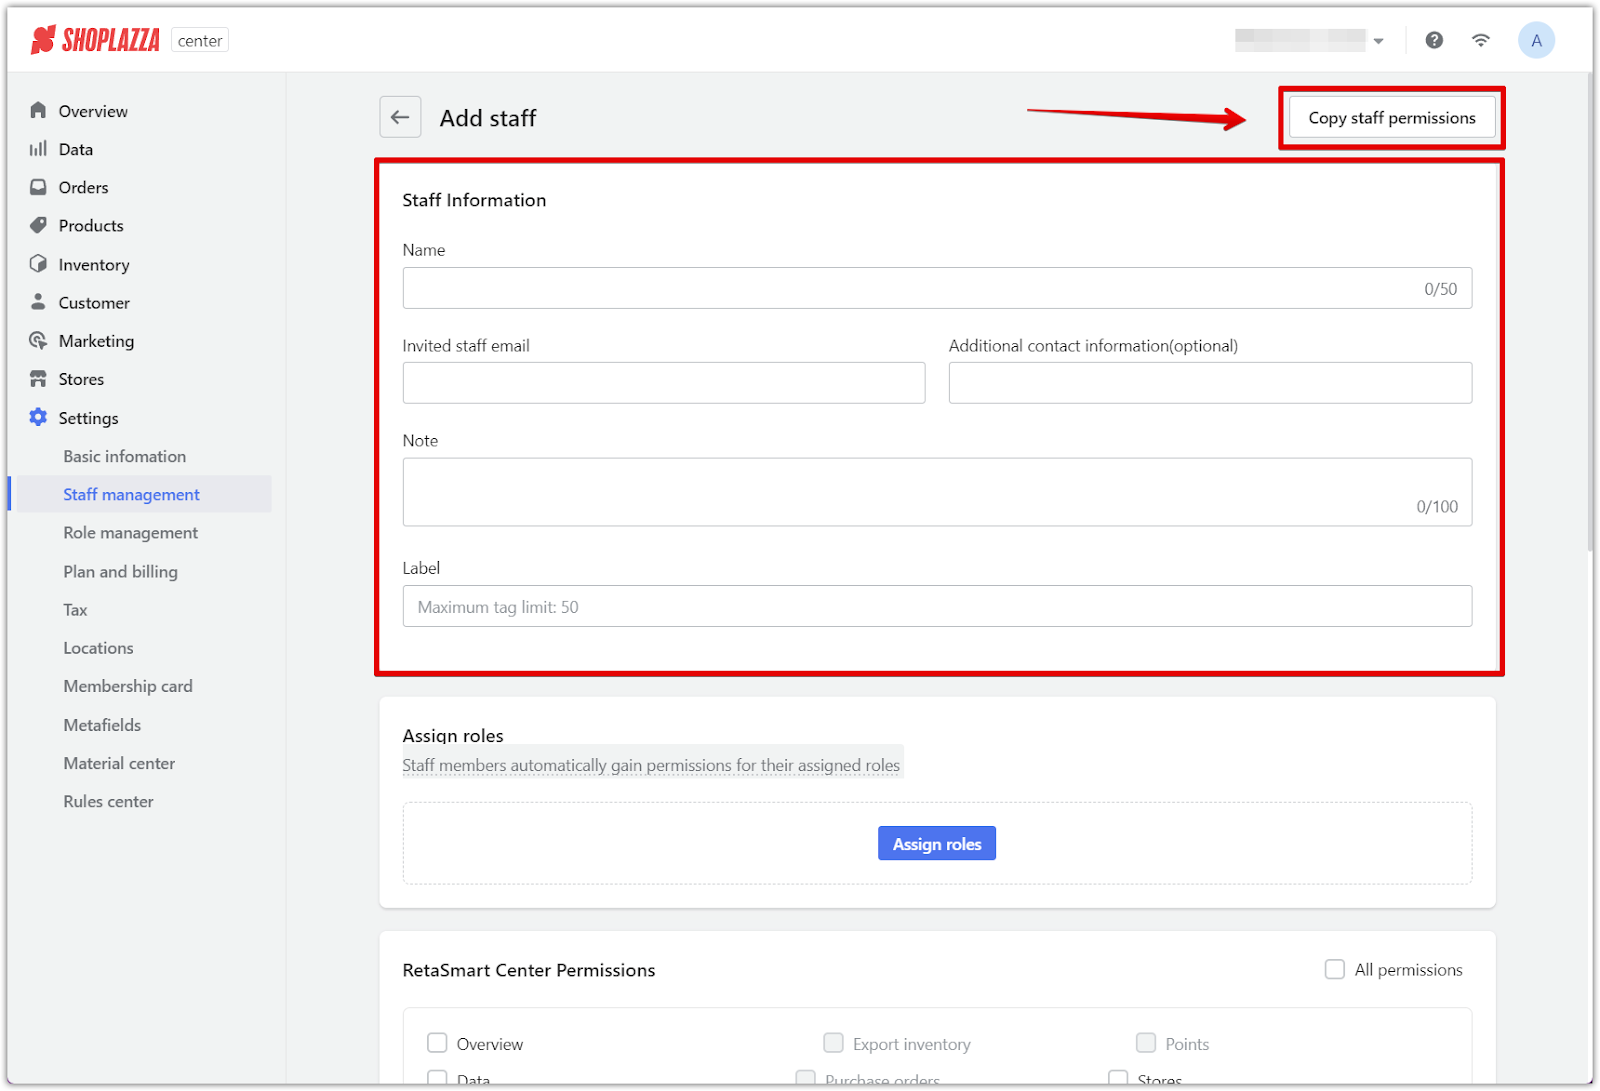
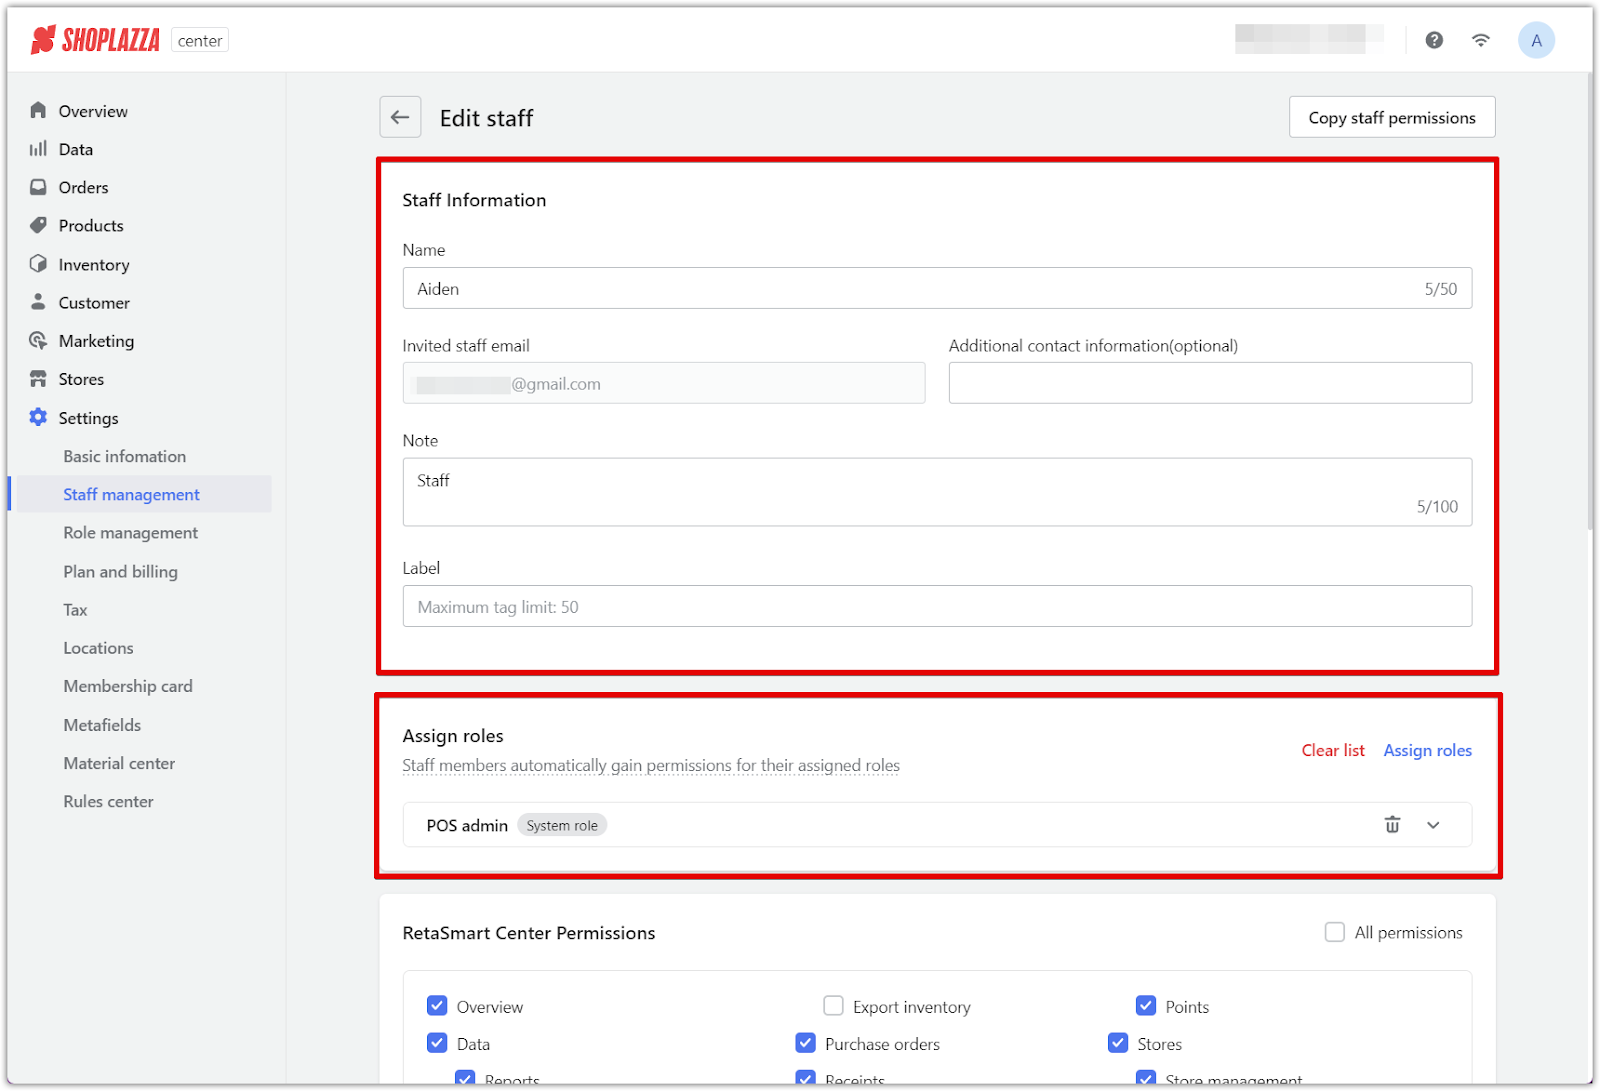
3. Provide essential details: Enter the staff member's full name and associated email address, which is a unique identifier within your system. Remember, the email is permanent once saved and cannot be updated later. If necessary, add a label or a note to help identify the staff member's role or department at a glance. This can be particularly helpful when managing larger teams. If you're adding multiple staff members with similar roles, use the Copy Staff Permissions button to clone the permissions from an existing staff member to the new one, saving time and ensuring consistency across similar roles.
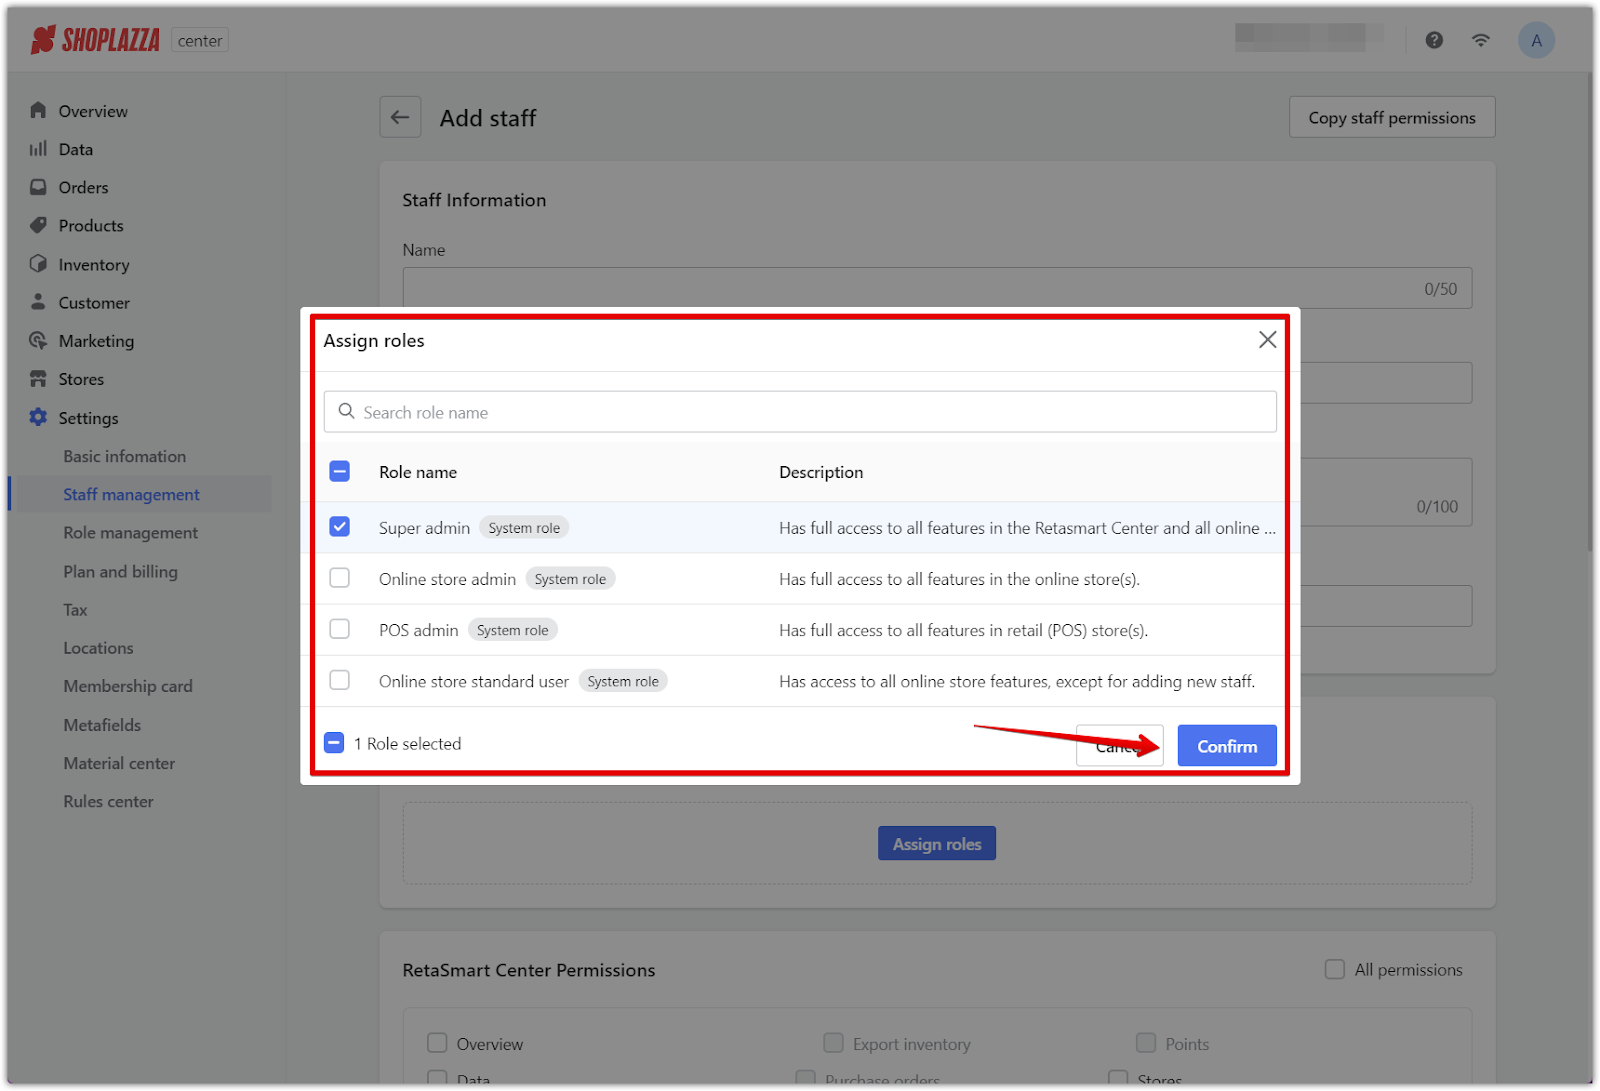
4. Assigning staff roles: Assign your staff a role by clicking on Assign roles. Staff members automatically gain permissions for their assigned roles. Permissions within a role cannot be adjusted here. To modify a role's permissions, go to Role management. A staff member's permissions and any custom permissions are included in their role(s).
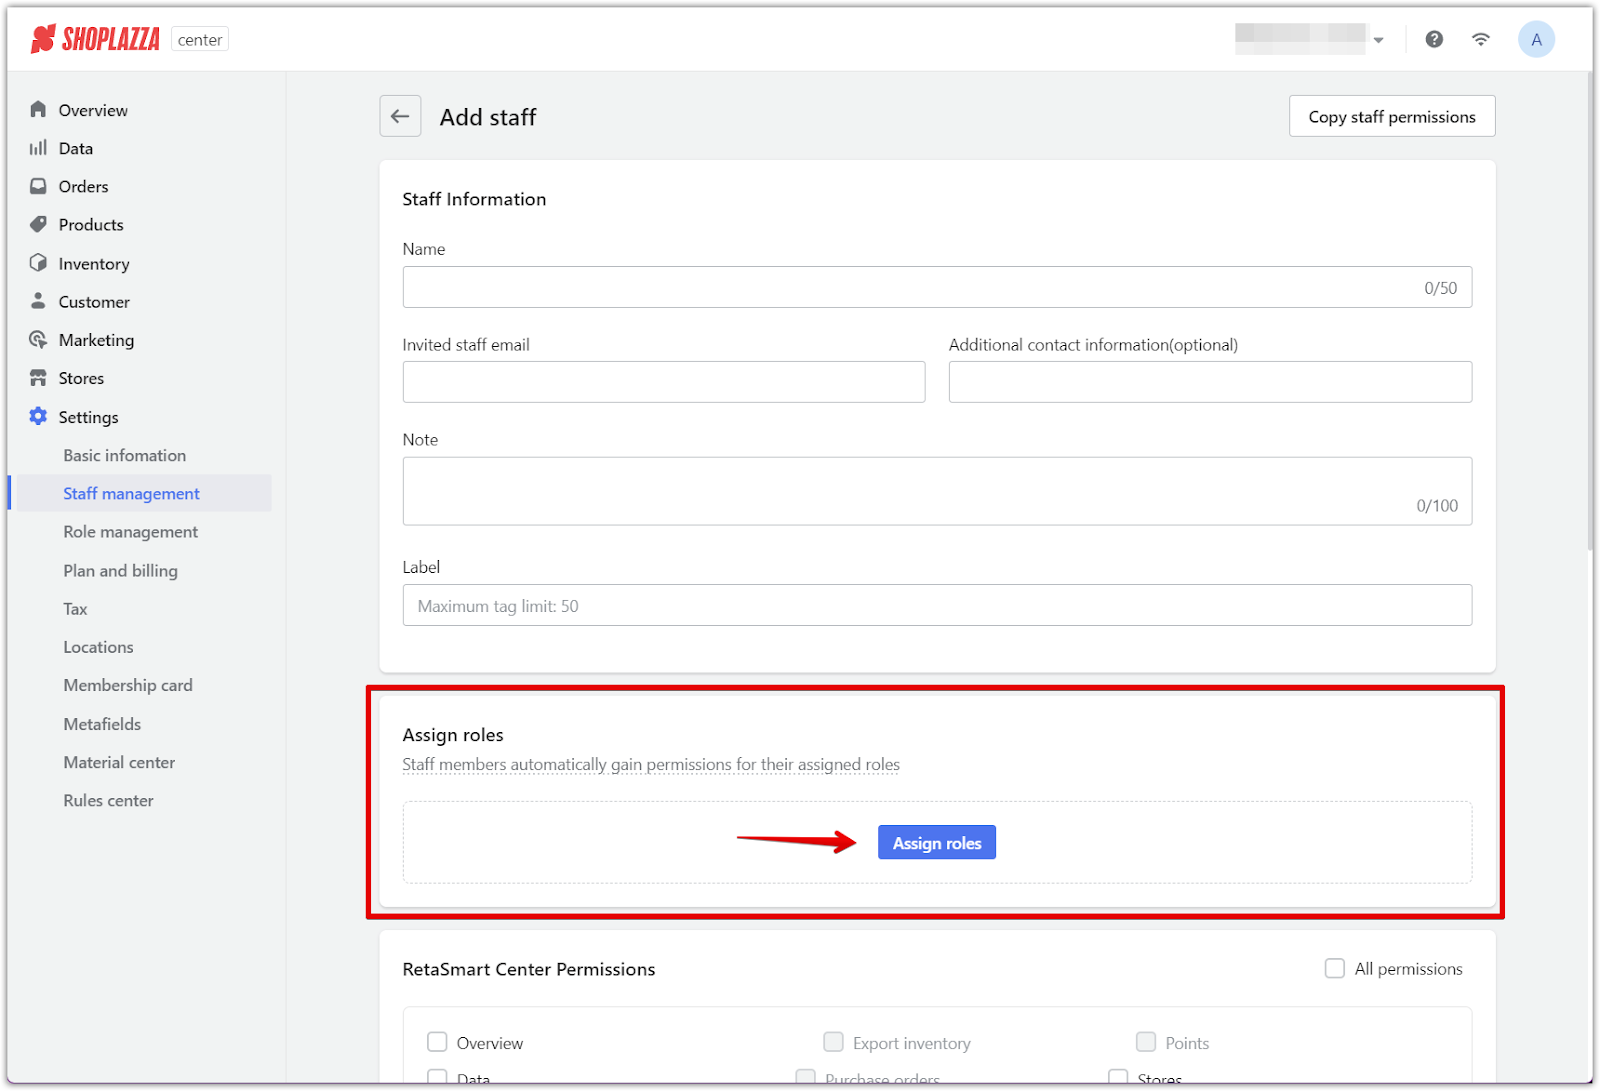
5. Choose a role for your staff: After entering the staff details, the next step is to assign a role to your staff member. Roles define the specific permissions and access levels the staff member will have within your Center Admin. Each role is tailored to suit different responsibilities, ensuring that staff members only have access to the areas necessary for their tasks.
Note
Ensure roles are created before assigning them to staff members. To set up a new role, navigate to Settings > Role Management > Create, where you can define permissions and access scope to meet your organization’s needs. For additional details, refer to Types of accounts with permissions .
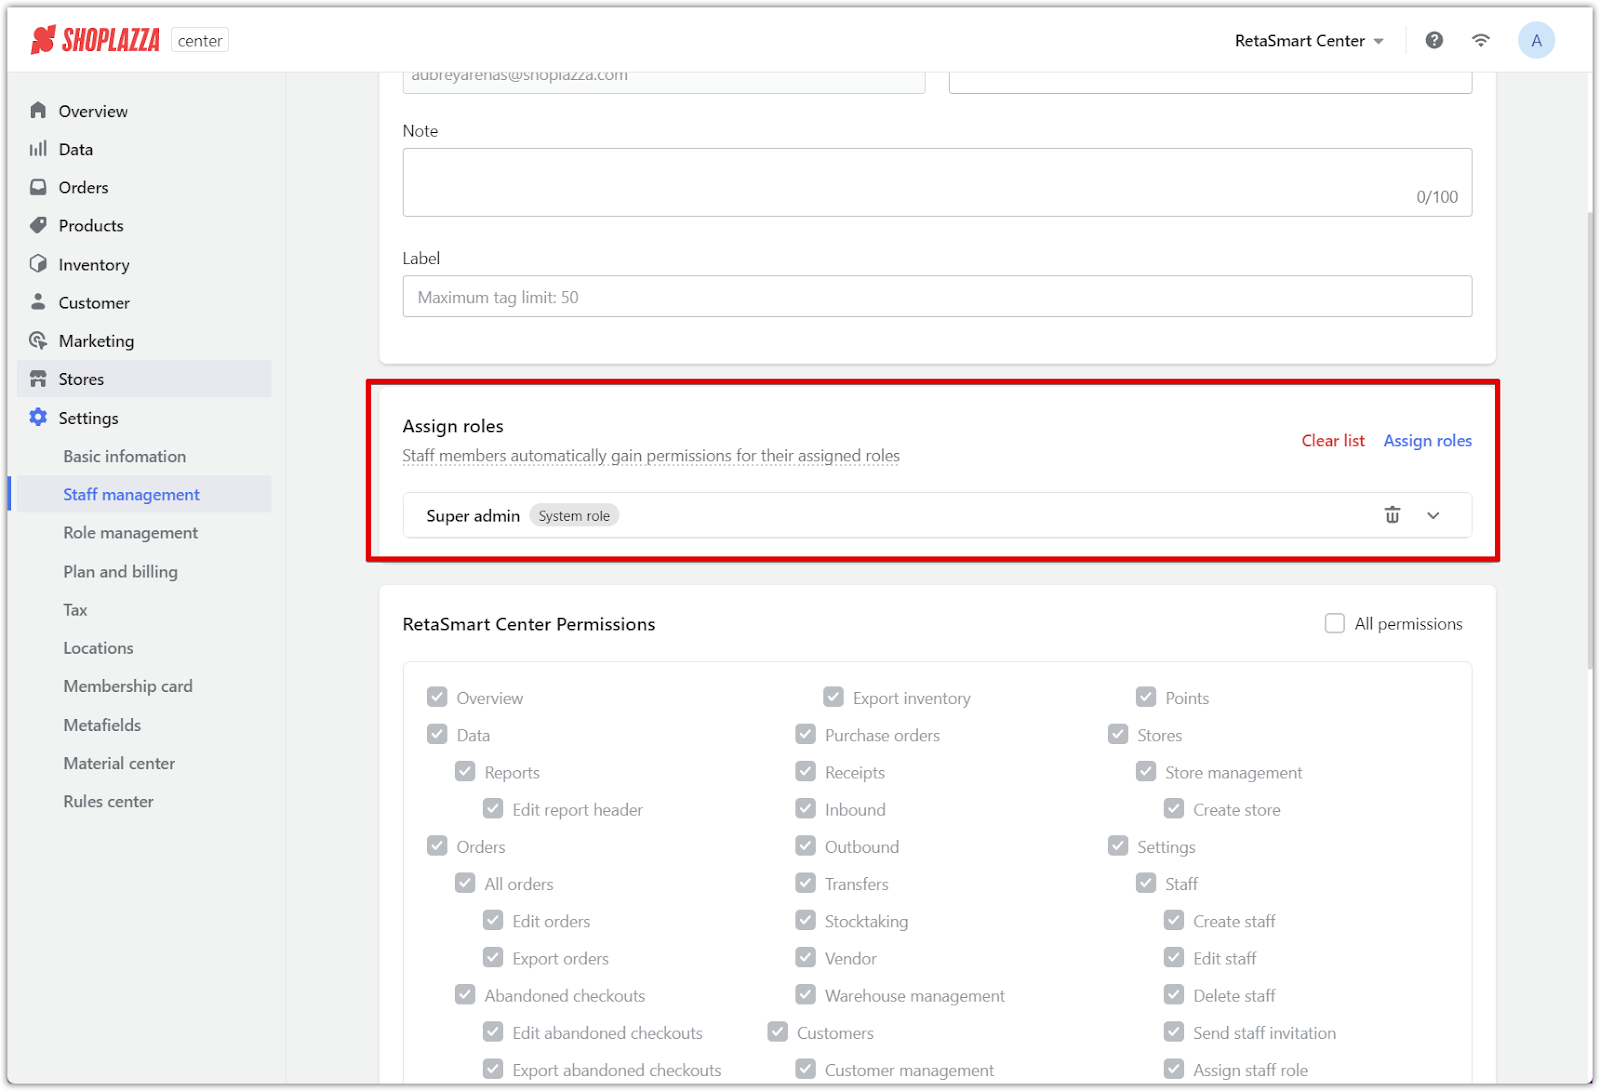
6. Manage assigned roles: Once an assigned role is assigned, you can manage it here. Delete the role or click the down arrow to see specific permissions for this role.
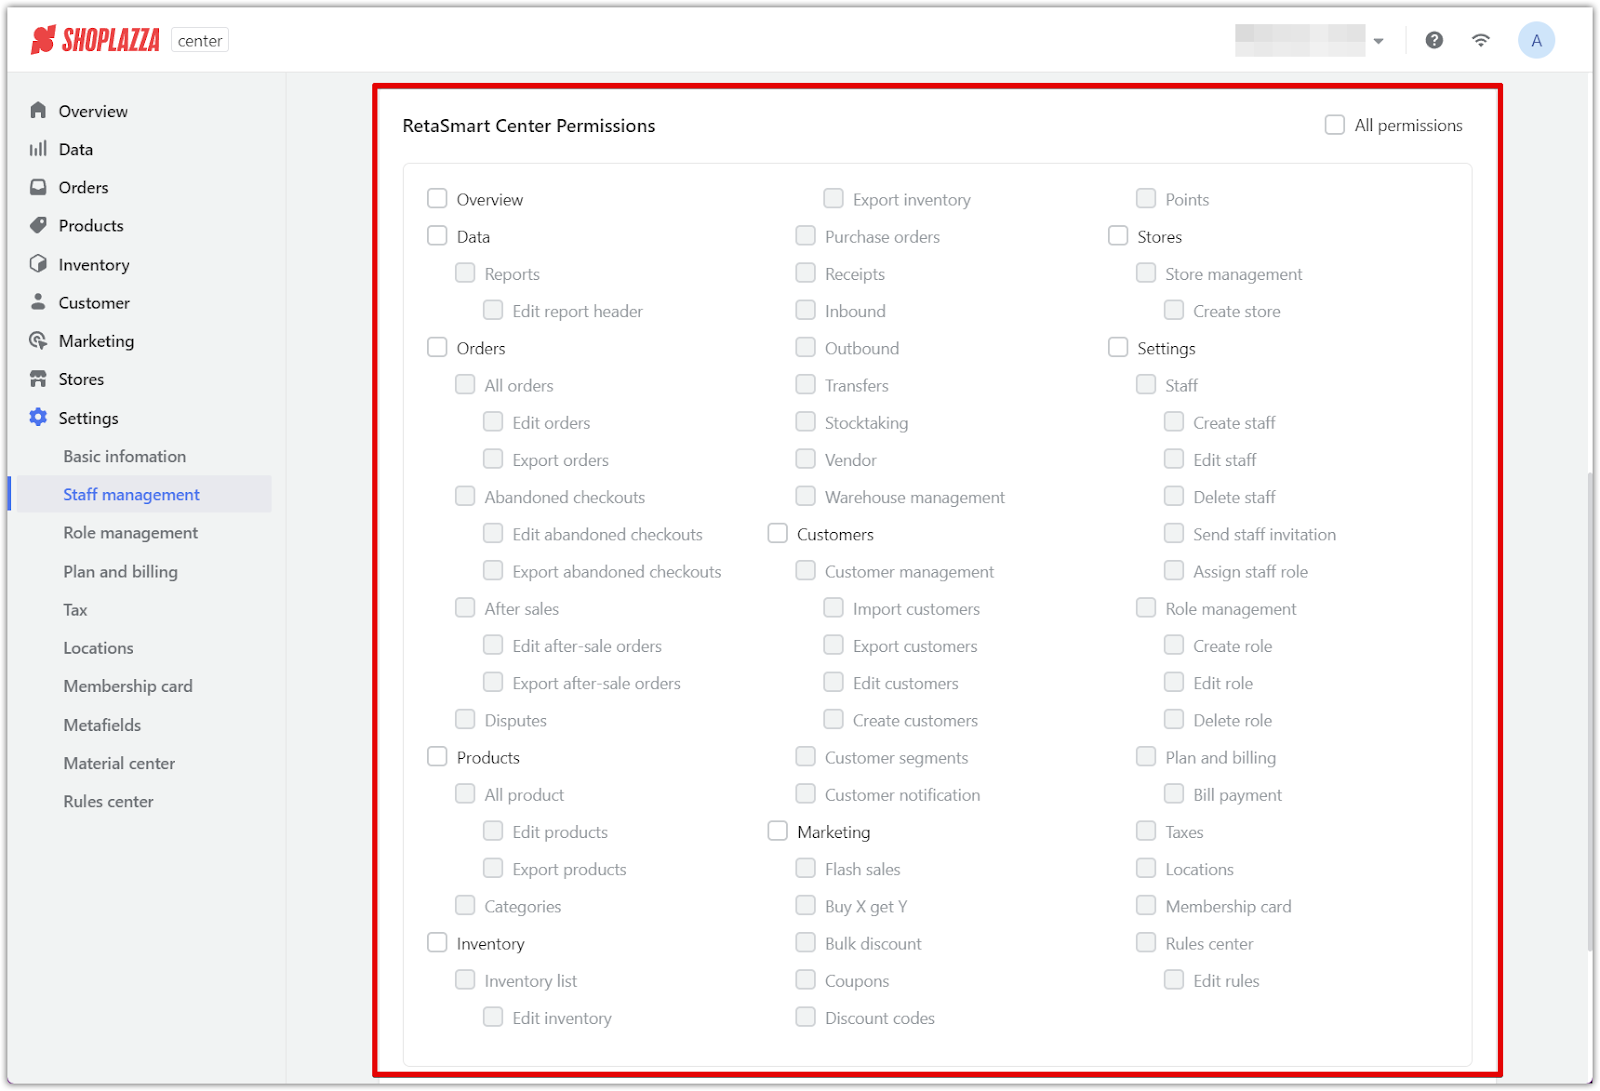
7. Determine access level: The permissions section is important for maintaining the security of your Center Admin. Here, you'll find a comprehensive checklist that allows you to assign specific access rights to each staff member. Consider what aspects of the Shoplazza POS platform each employee needs to interact with to perform their job effectively and select accordingly.
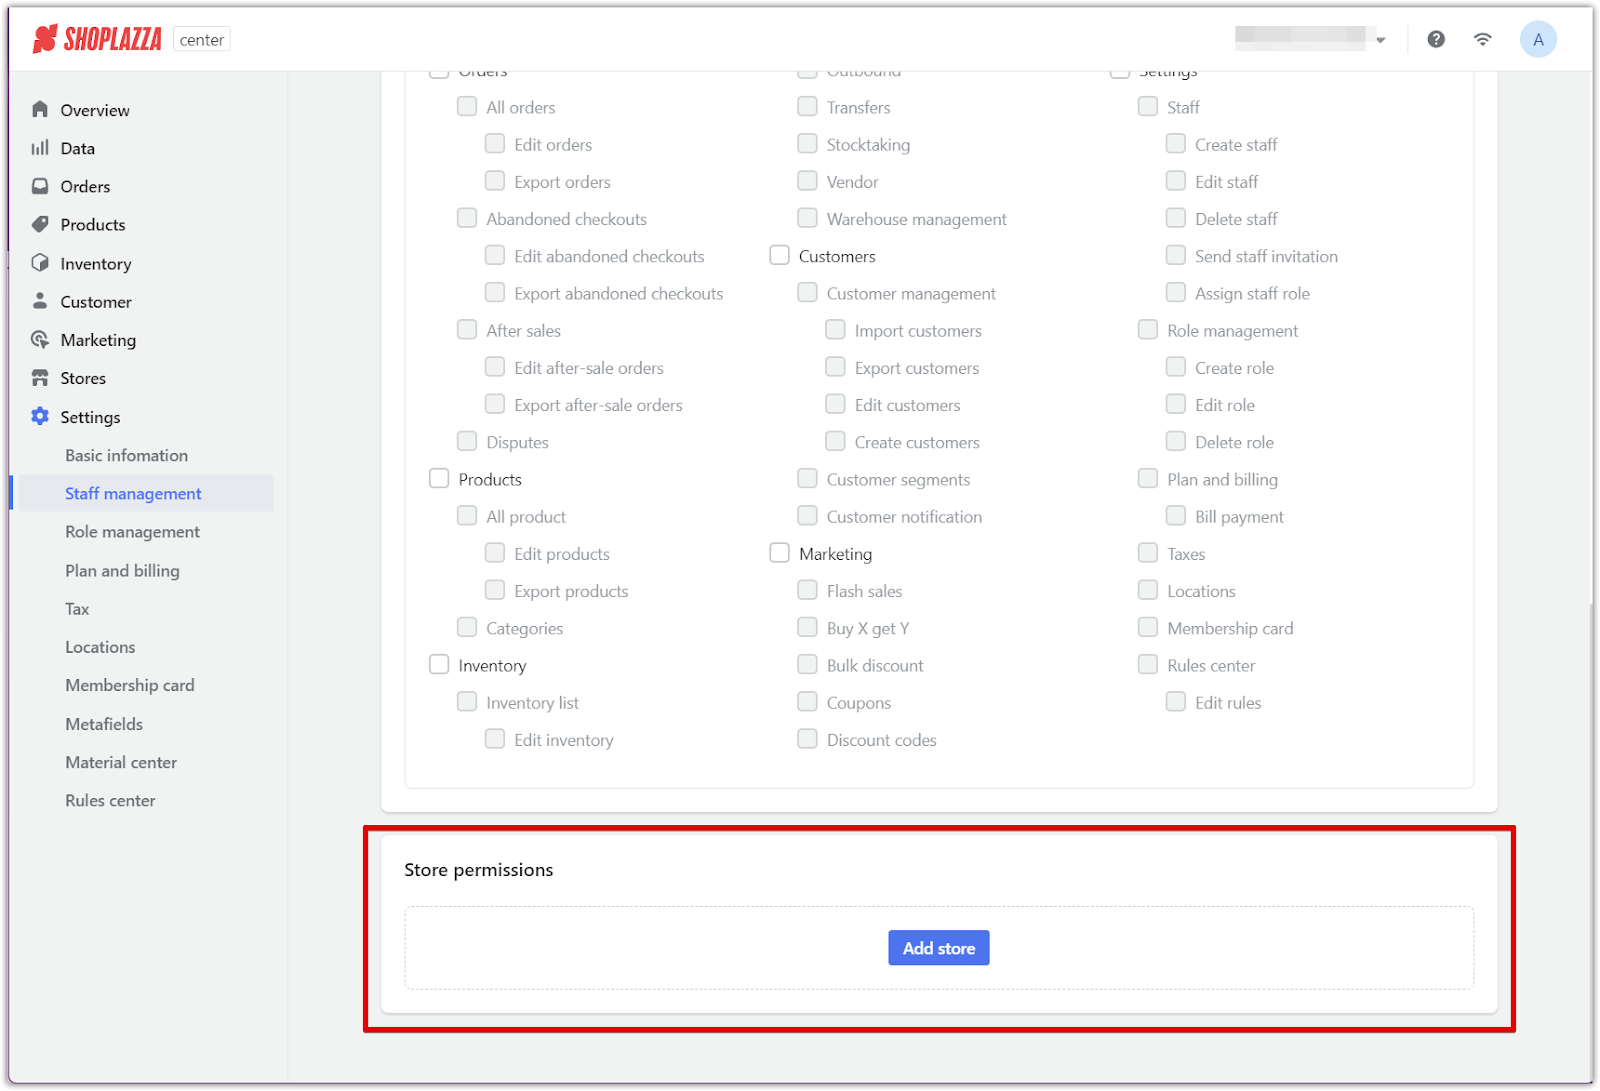
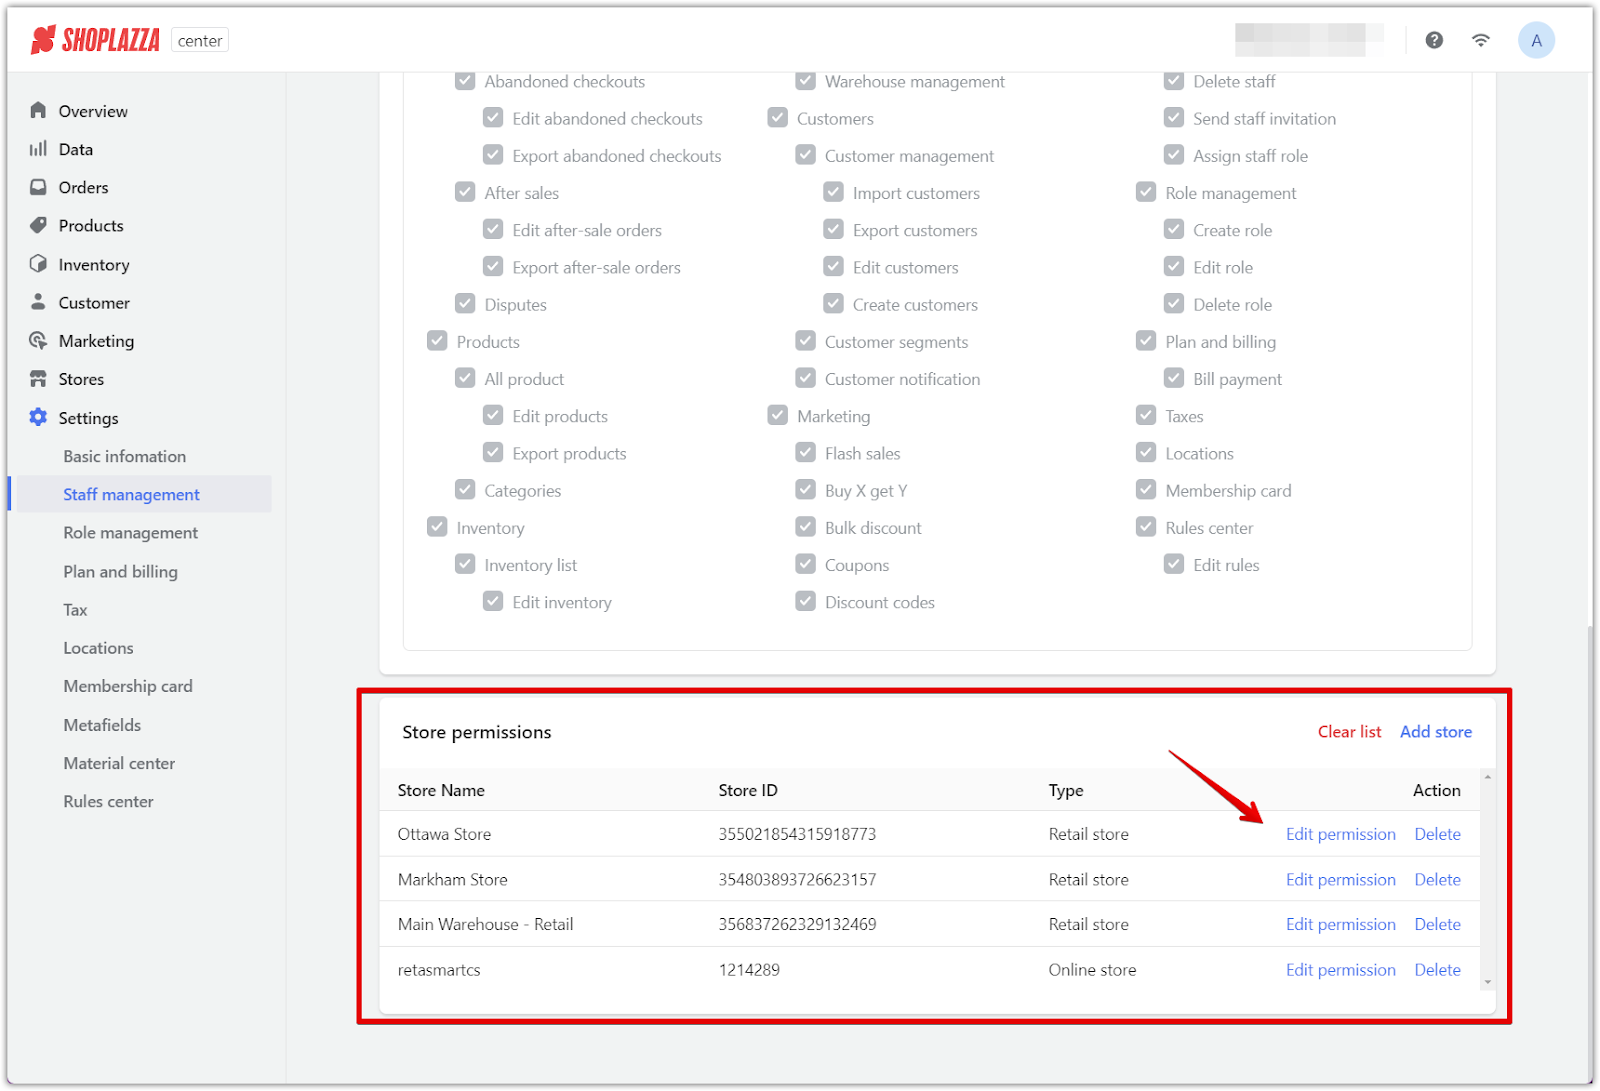
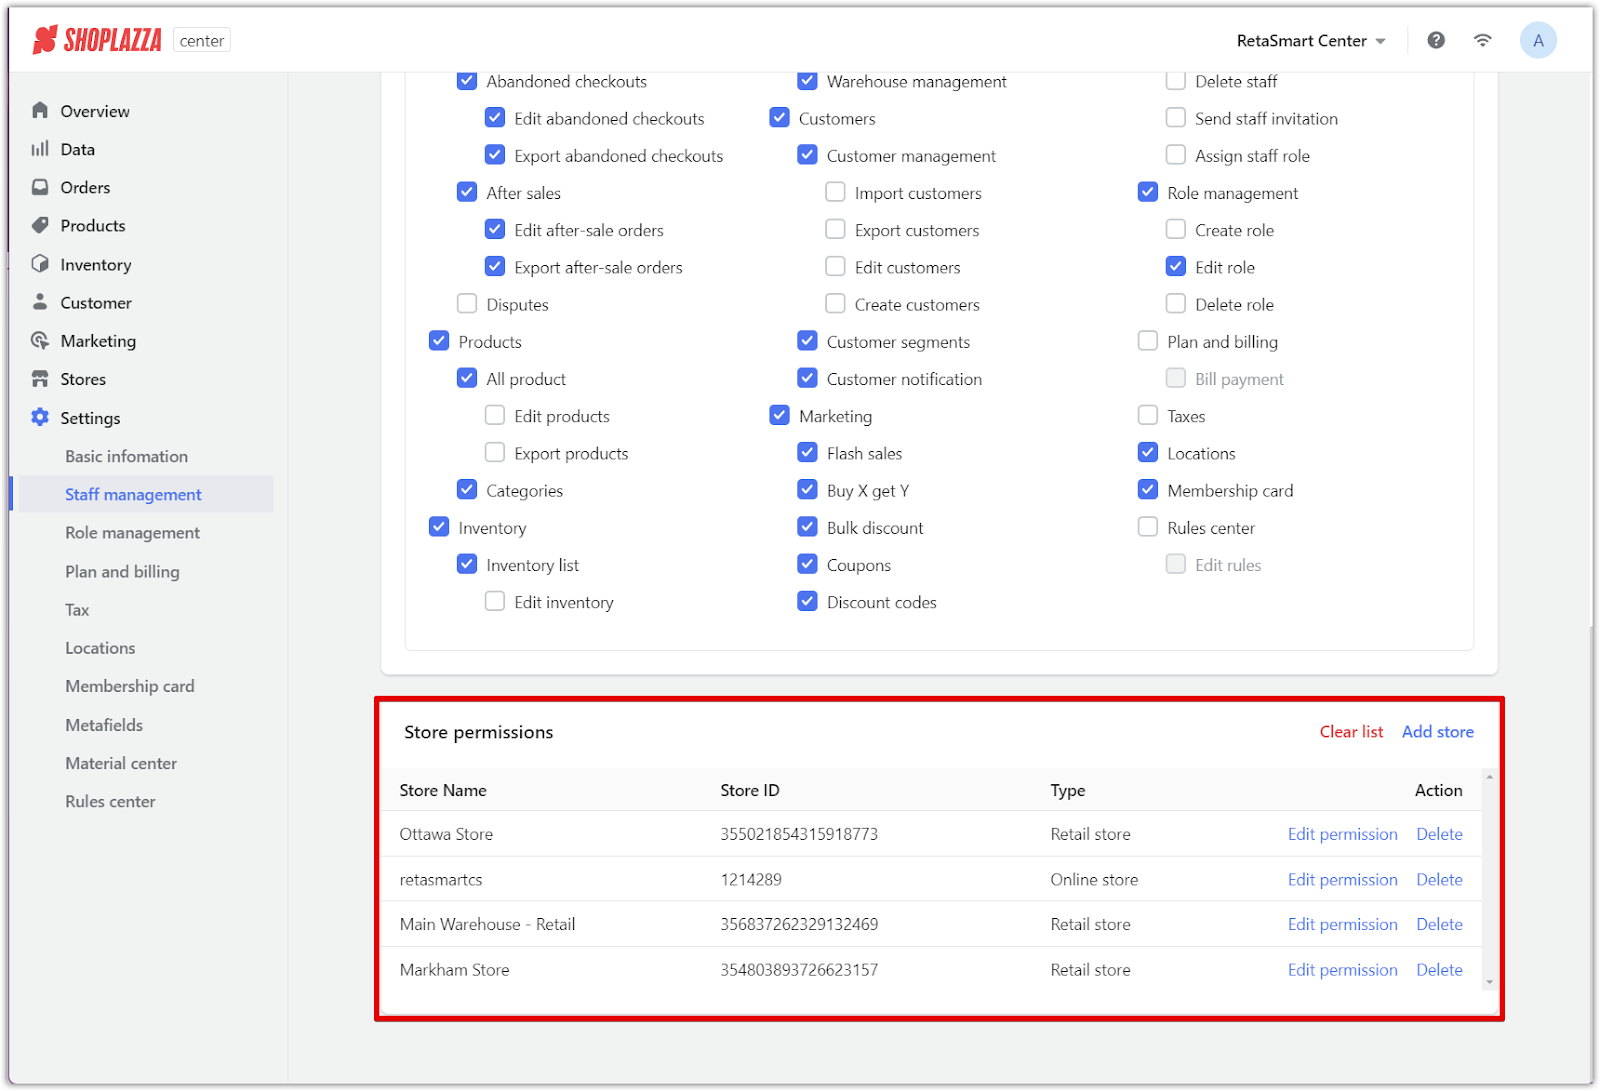
8. Assign to a store: The Store Permissions area is where you align staff members with particular physical locations for which they're responsible. Clicking on Add Store prompts a list of your retail locations, allowing you to select and assign a staff member to a specific one.
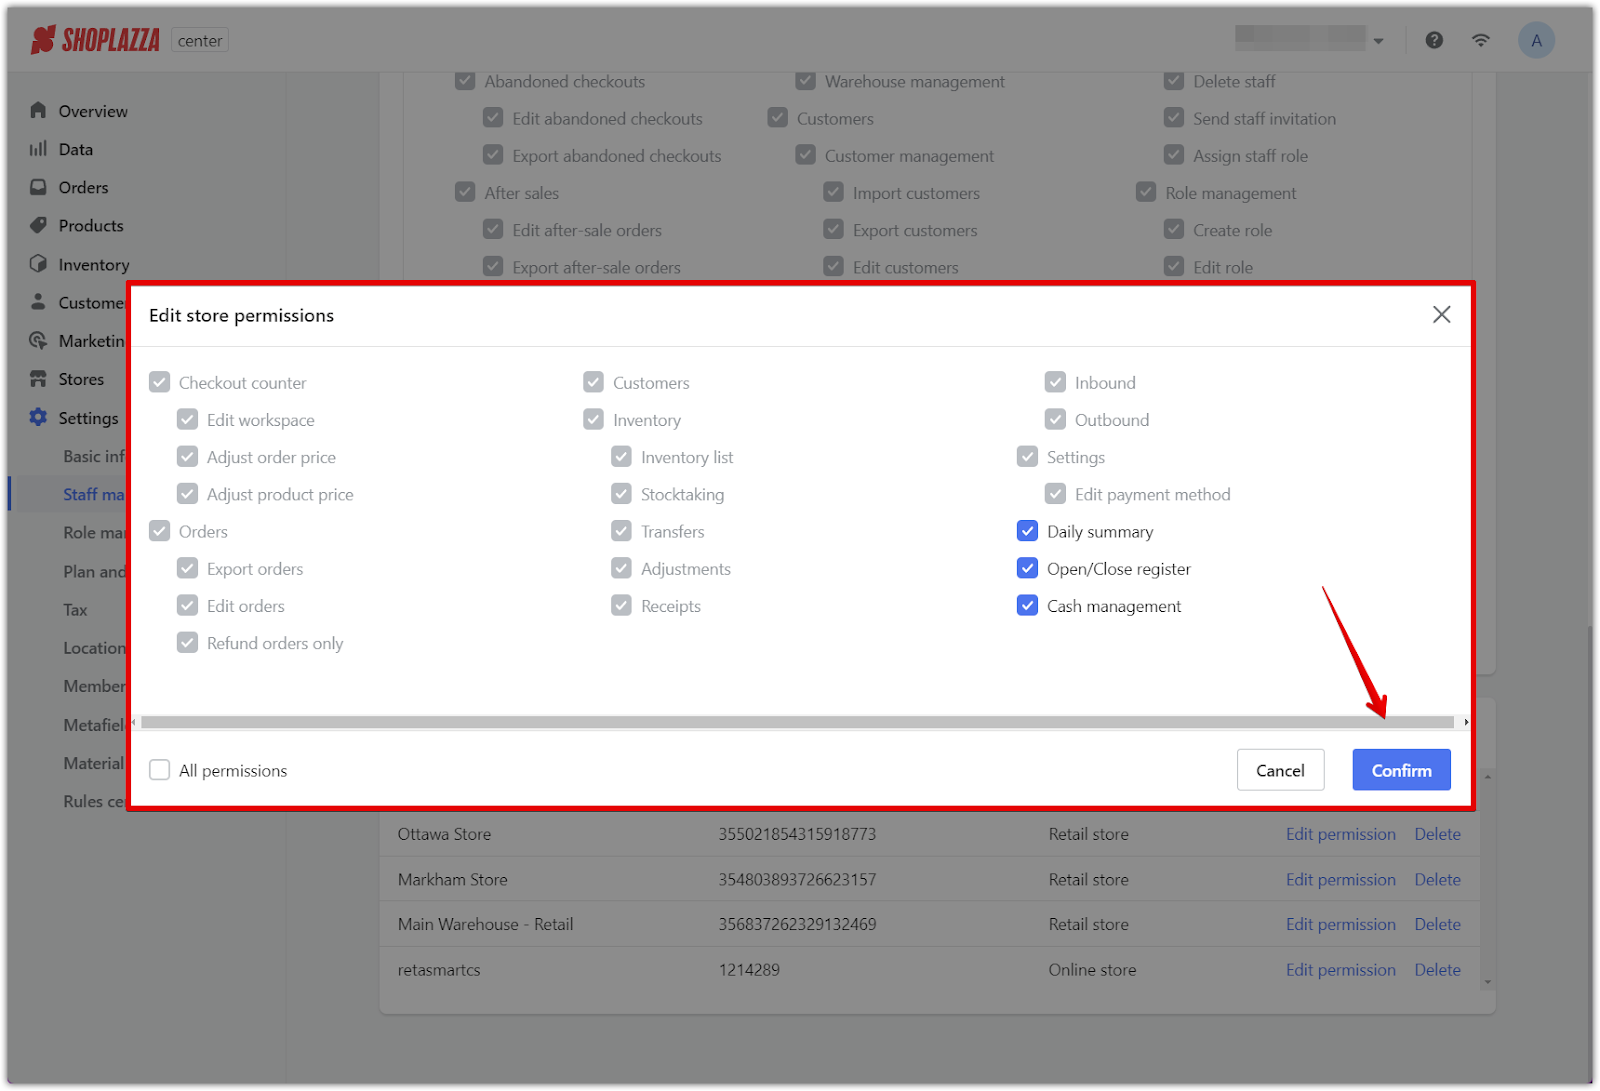
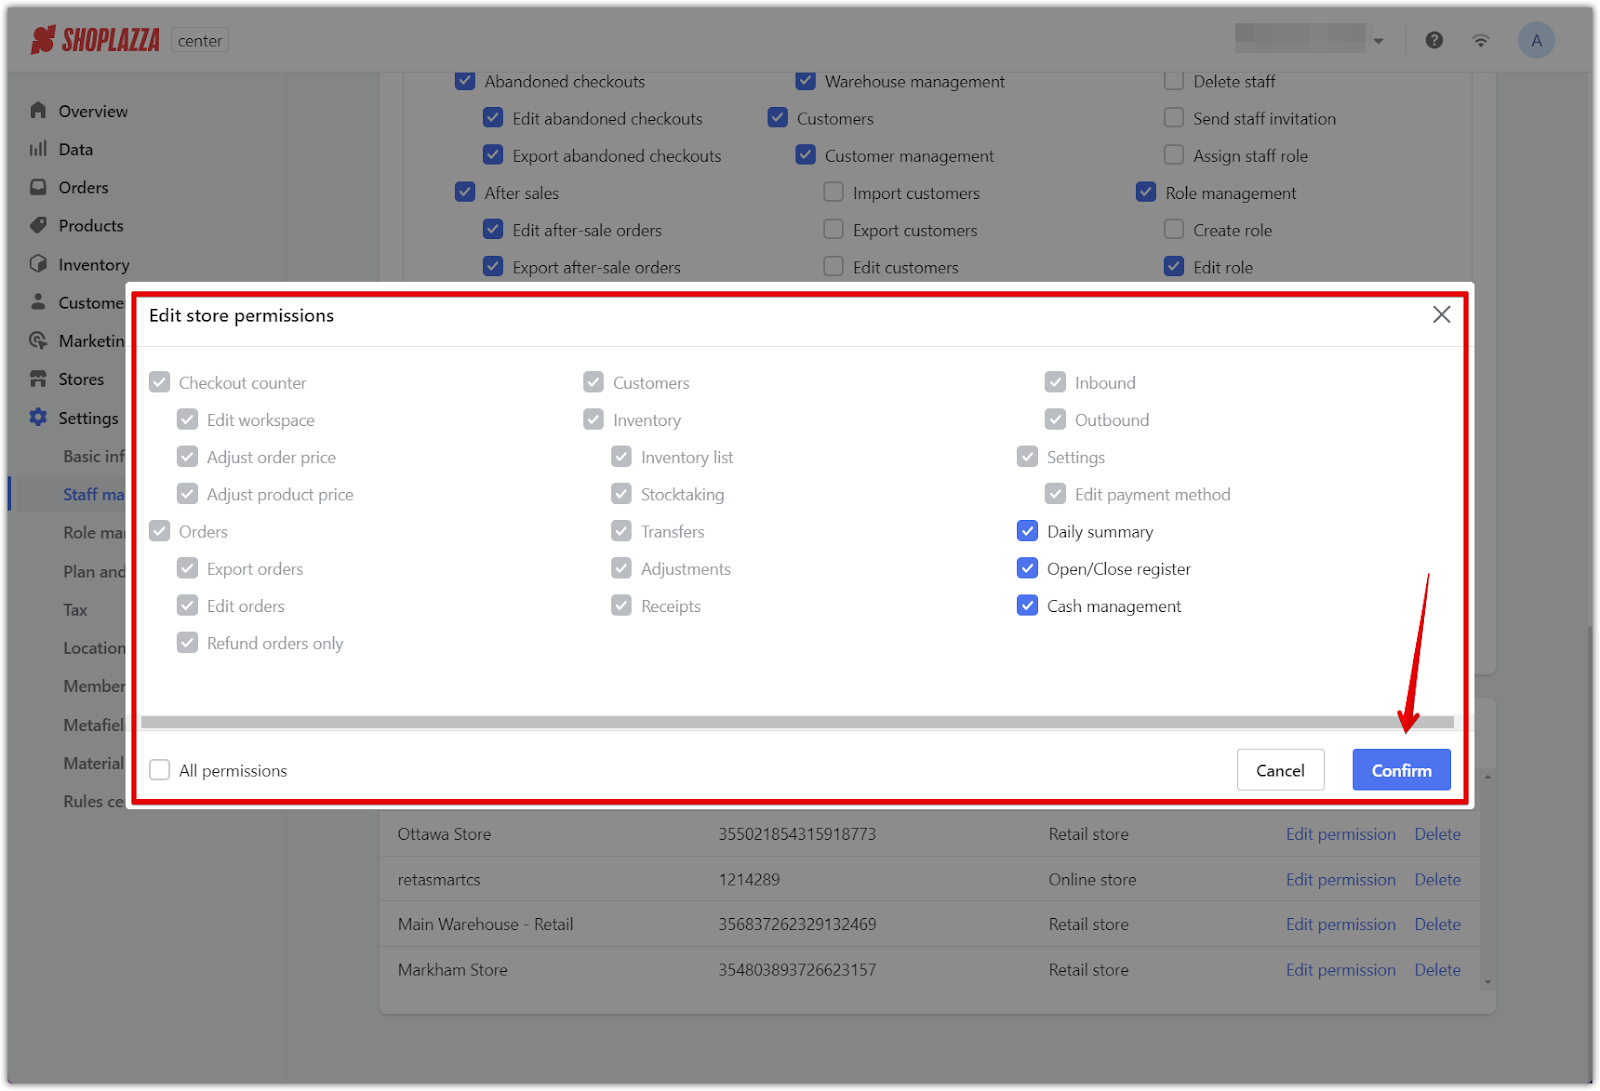
9. Edit store permissions: After assigning a staff member to a store, their profile will expand to include store-specific permissions. Clicking on Edit Permissions creates a detailed checklist where you can grant permissions that dictate what operations they can carry out in their assigned store, from sales processing to inventory management. Provide permissions, then click Yes. Then click Save.
Updating permissions for existing employees
1. Search and select to edit: To update an existing staff member's details, locate them through the Settings > Staff Management page. A search function is available to bring up the staff profile quickly, and an edit option is represented by a pencil icon, along with copy and delete functions.
2. Update staff information: Upon clicking the edit icon, you'll be able to change the staff member's name, role, department, or contact details—except for their email address. It's also an appropriate time to reassess and update their permissions, including their current role, especially if their job responsibilities have evolved.
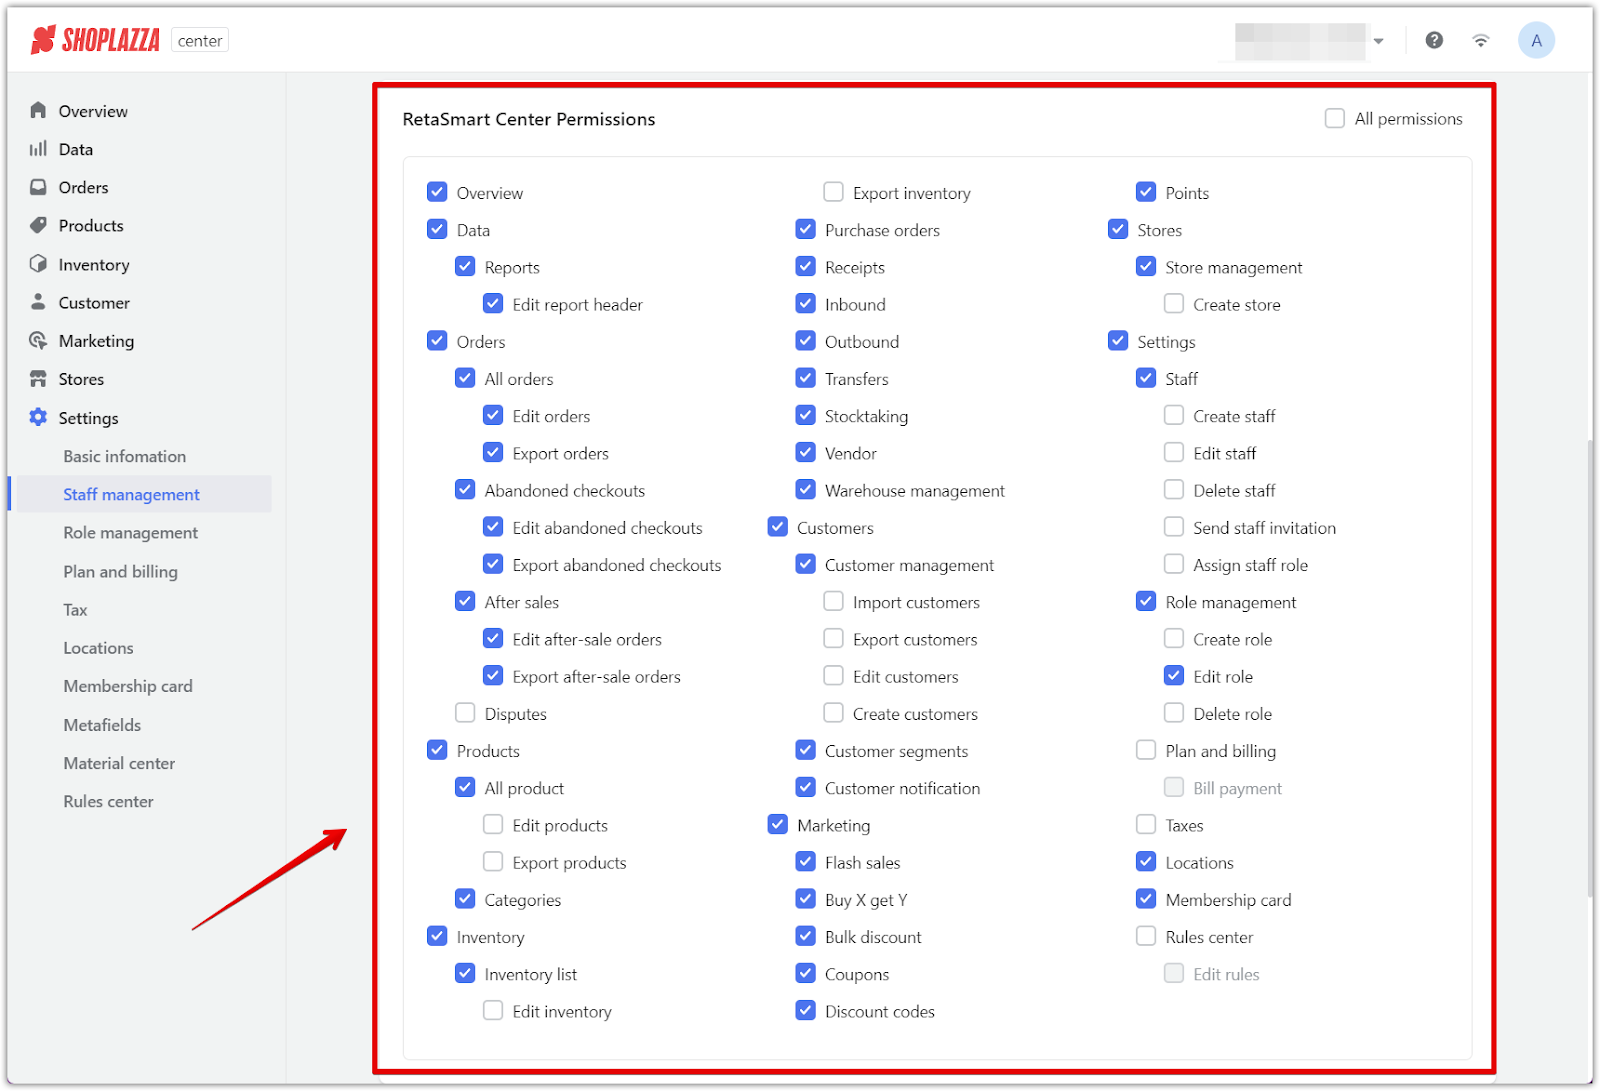
3. Refine store permissions: Just as with new staff, existing employees may have their store assignments and permissions revised. Within their profile, find the store they're linked to and select Edit Permissions to adjust which aspects of the store's operations they can access and manage. After any updates, click Confirm.
Effective staff roles and permissions management creates a secure and productive work environment. Regularly updating access levels and ensuring information accuracy, you help minimize security risks and keep your team aligned with the tools and responsibilities needed to succeed.


Comments
Please sign in to leave a comment.