First-Time Setup
Getting your card reader ready for its first use is a straightforward process that involves a few simple steps. By following these guidelines, you'll be all set to accept payments efficiently and securely. Here’s how to get started:
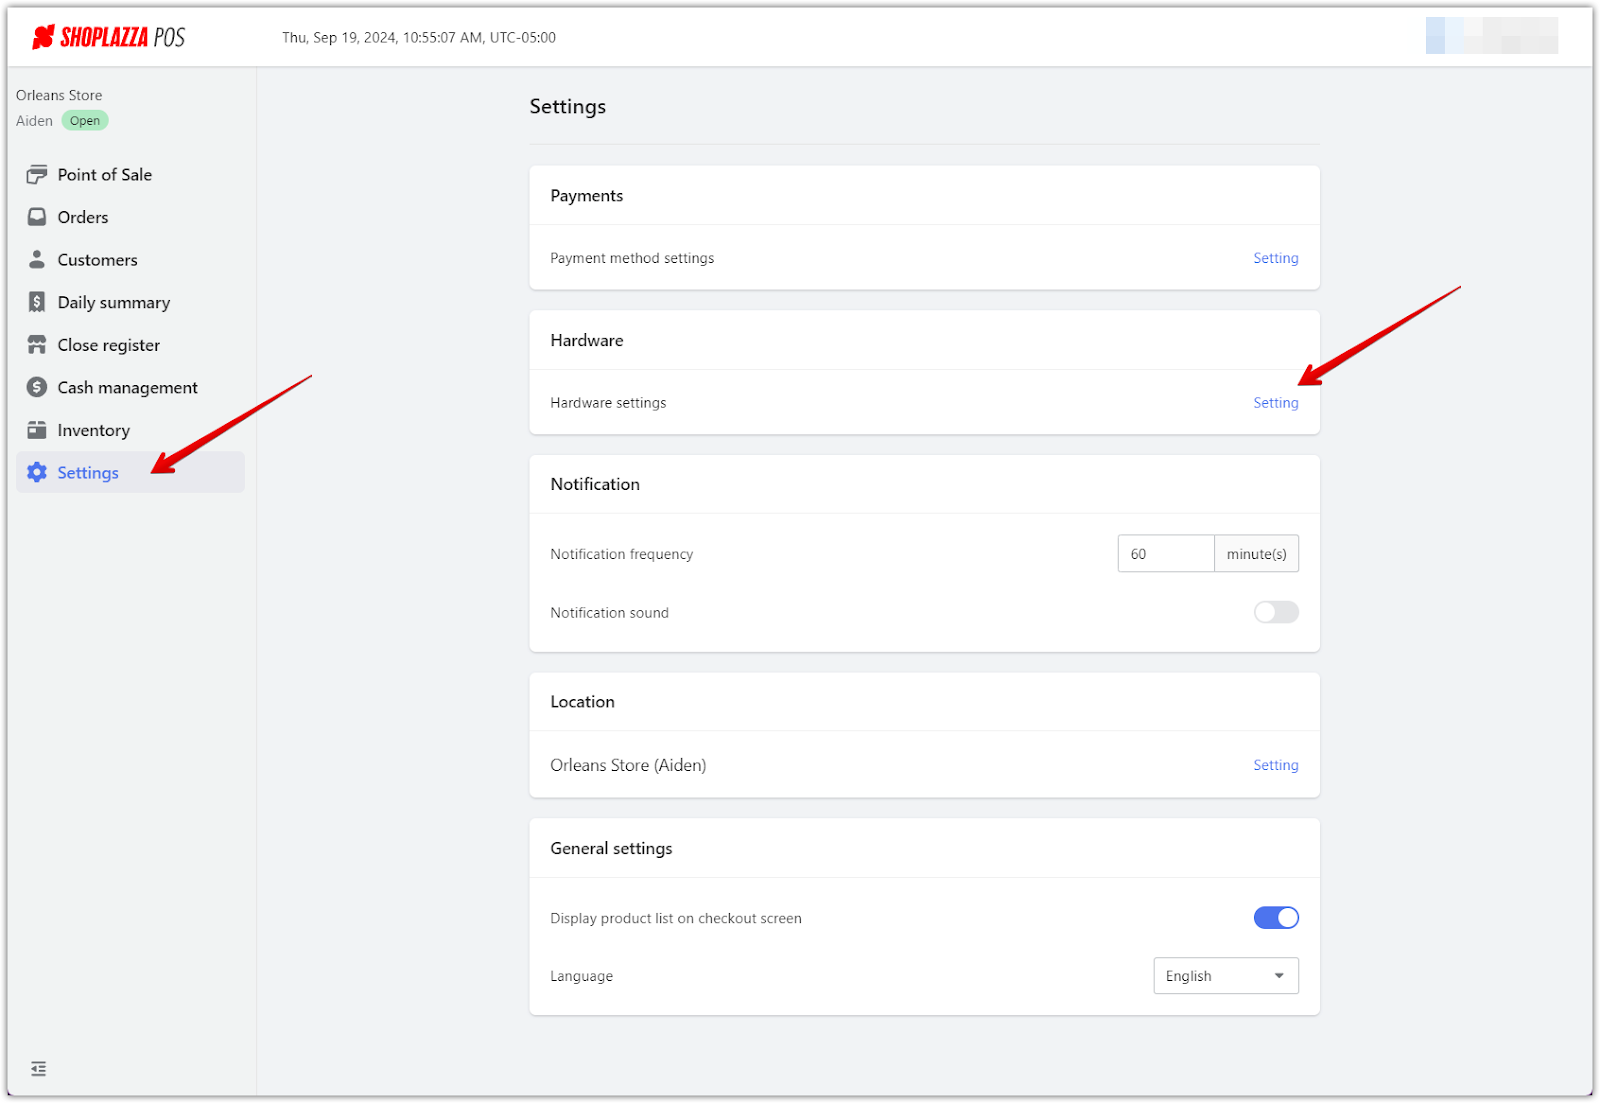
1. Accessing the Shoplazza POS Admin: Log in to your Shoplazza POS Admin, navigate to Settings, and under Hardware, select Hardware settings and click Settings.
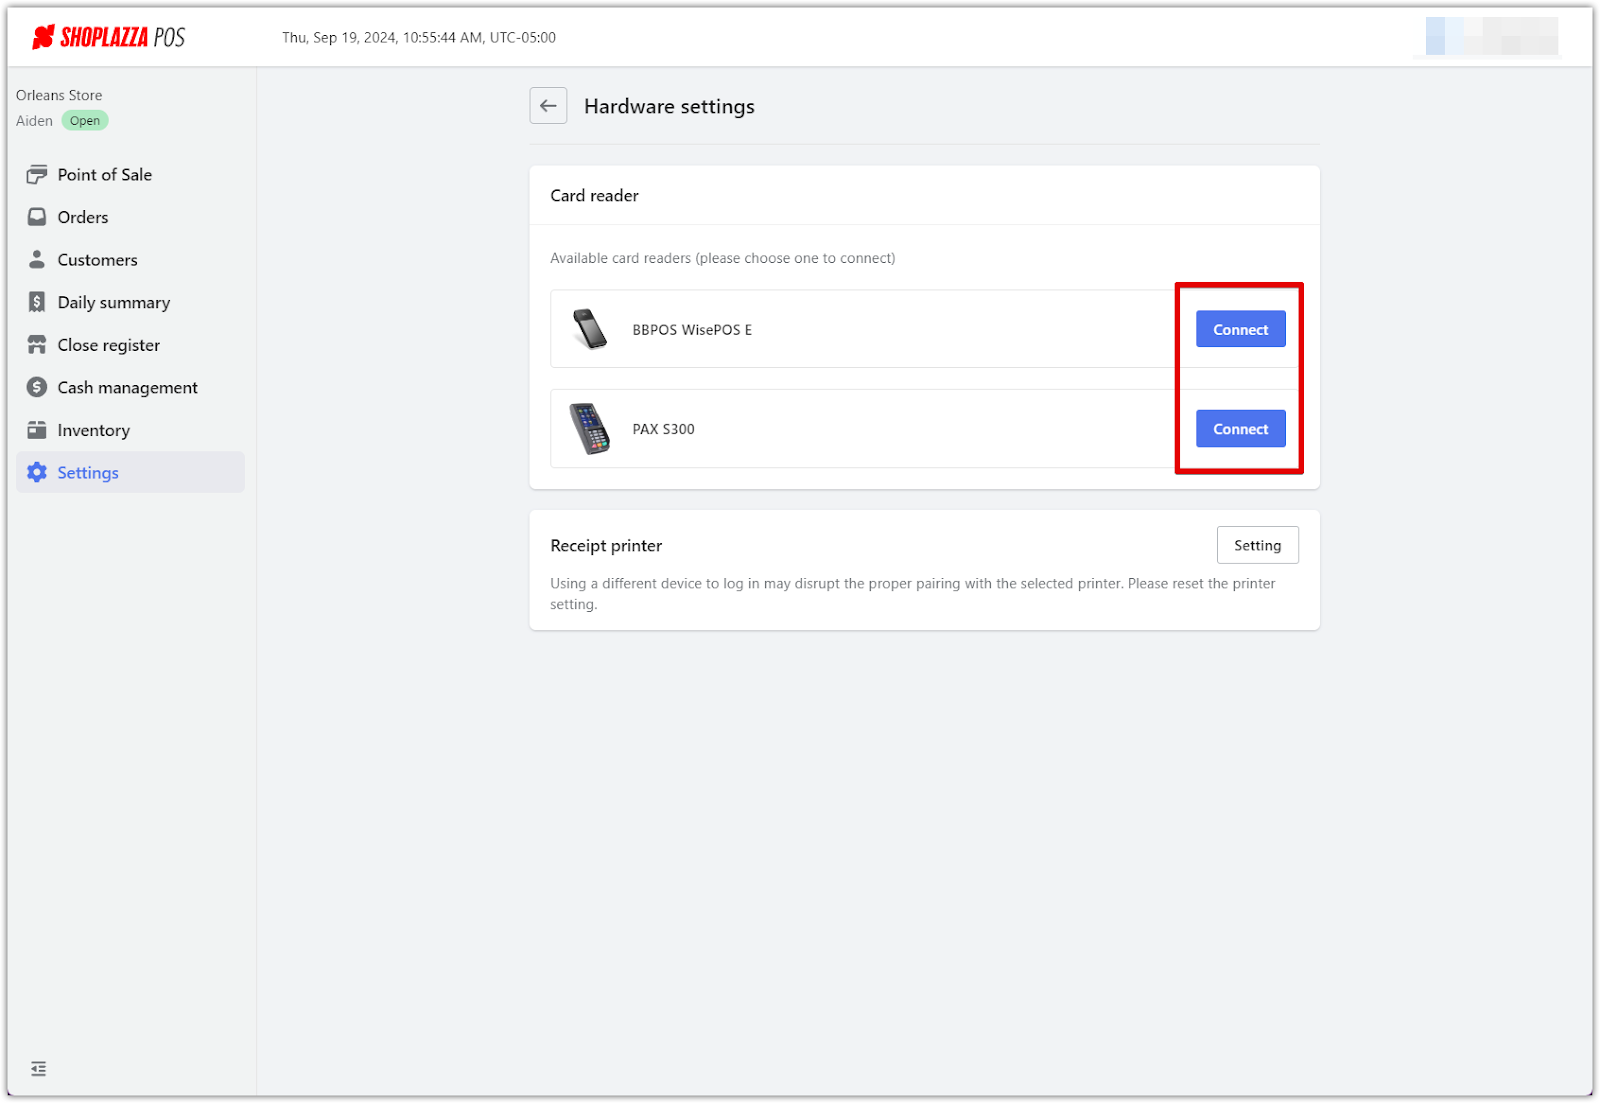
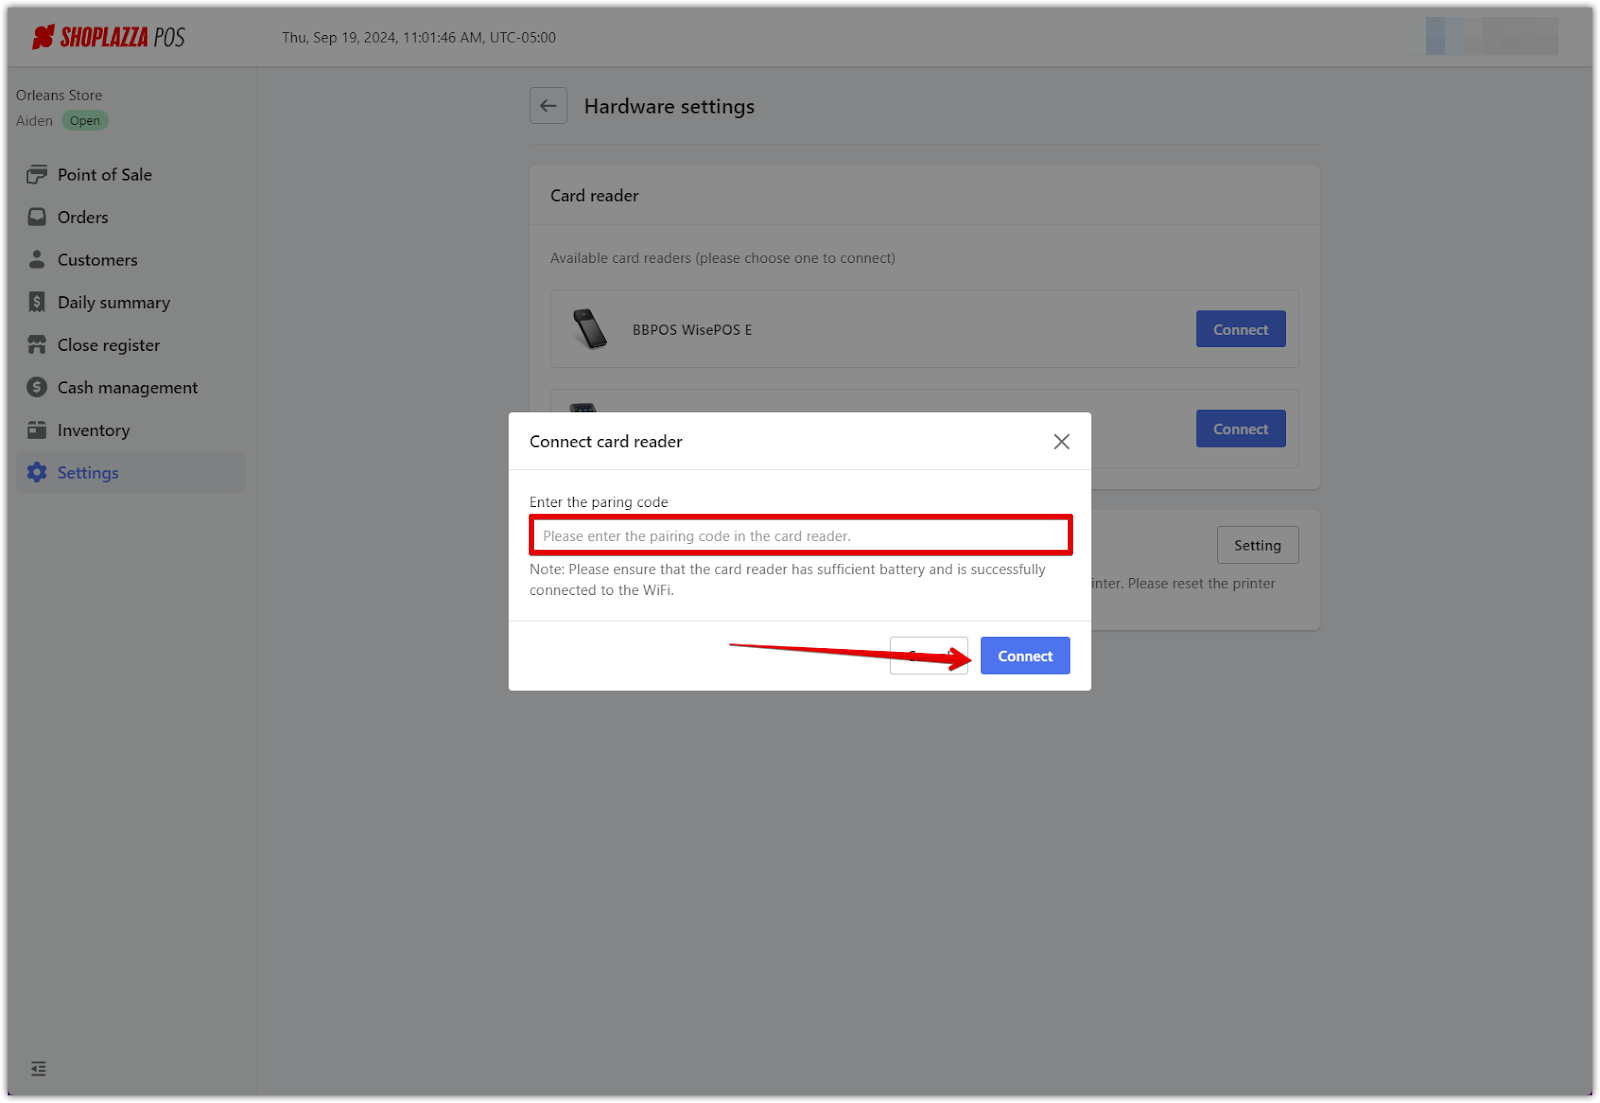
2. Connect the Card Reader: In Hardware settings, find the card reader you are using from the list and click Connect.
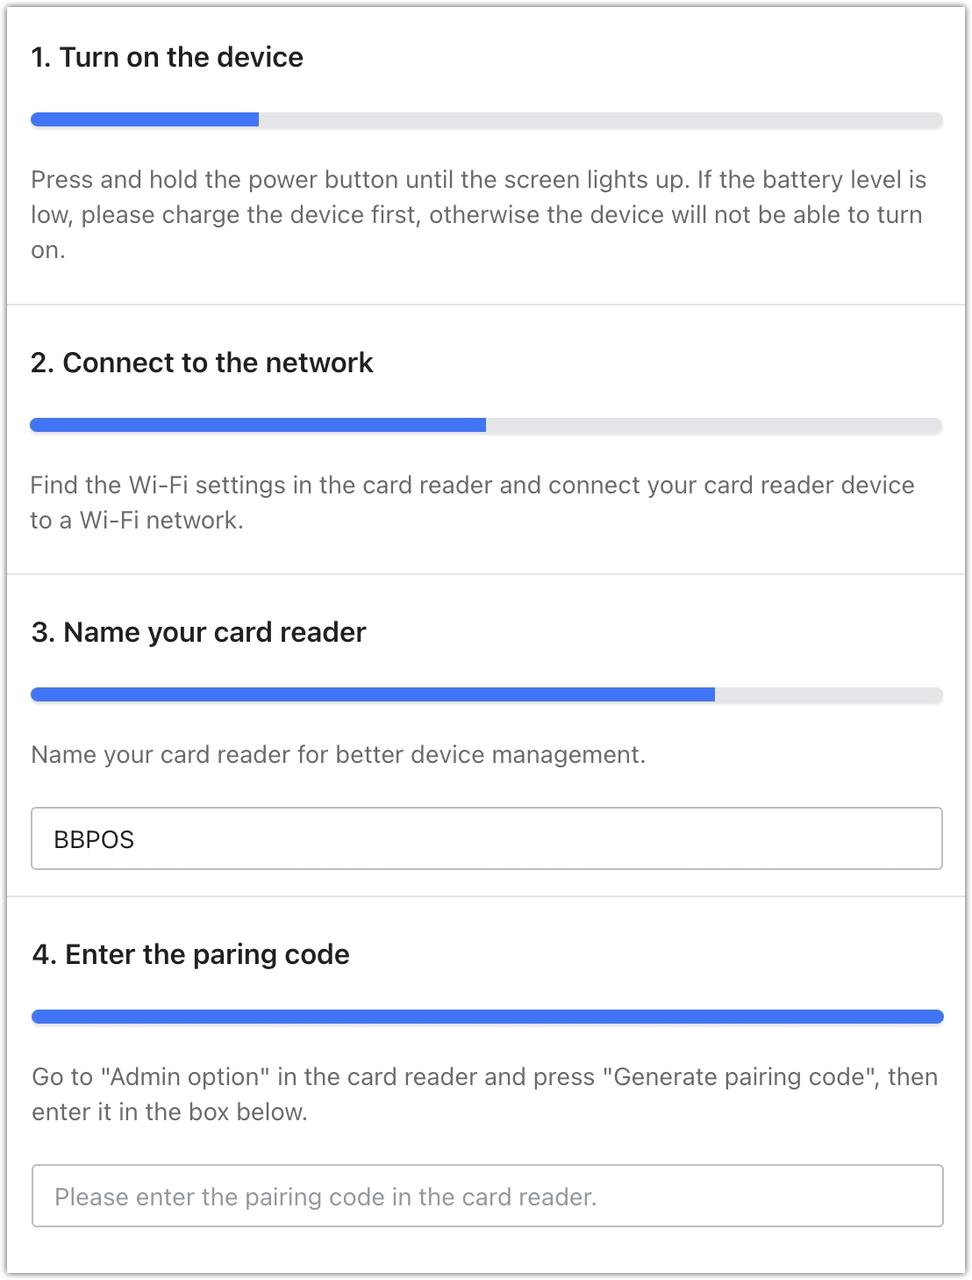
3. Complete the Installation: Follow the prompts on your screen to turn on your device, connect it to WiFi, and generate a pairing code.
Frequently Asked Questions
How do I access card reader settings?
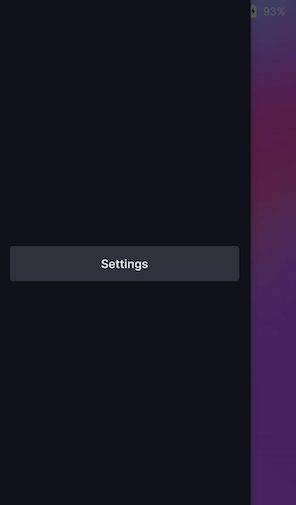
1. On the card reader, tap Settings. If your reader has a touchscreen, swipe right from the left edge of the screen to reveal the settings.
2. Enter the admin PIN (default: 07139).

How do I connect the card reader to WiFi?
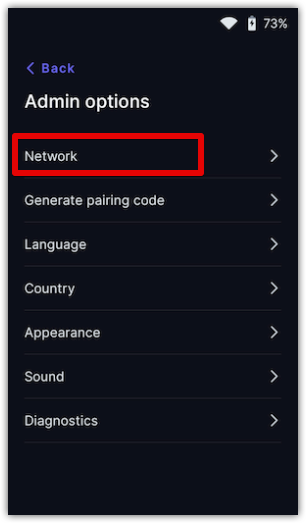
1. Go to Settings and select Network.
2. Select your WiFi network and enter the password.
Note
Your WiFi network must use WPA-Personal or WPA2-Personal encryption. The reader does not support open, corporate, or IPV6 networks.
How do I generate a pairing code?
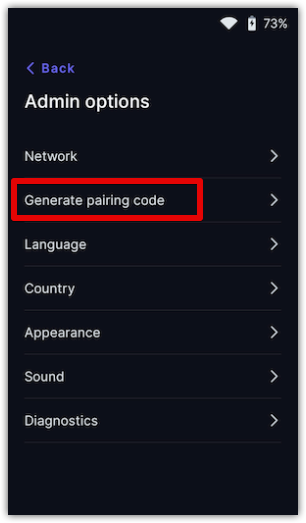
1. From Settings, select Generate pairing code.
2. Enter this code in your Shoplazza POS to complete the pairing.
Once your card reader is installed, you can start accepting payments seamlessly. This will provide your customers a convenient and secure payment option, enhancing their shopping experience.


Comments
Please sign in to leave a comment.