
The store migration app provides you with a simpler, faster, and more accurate store migration service. You can smoothly migrate data from multiple modules such as products, customers, and blogs, allowing you to easily and efficiently start using your shoplazza admin.
Installing the Store migration app
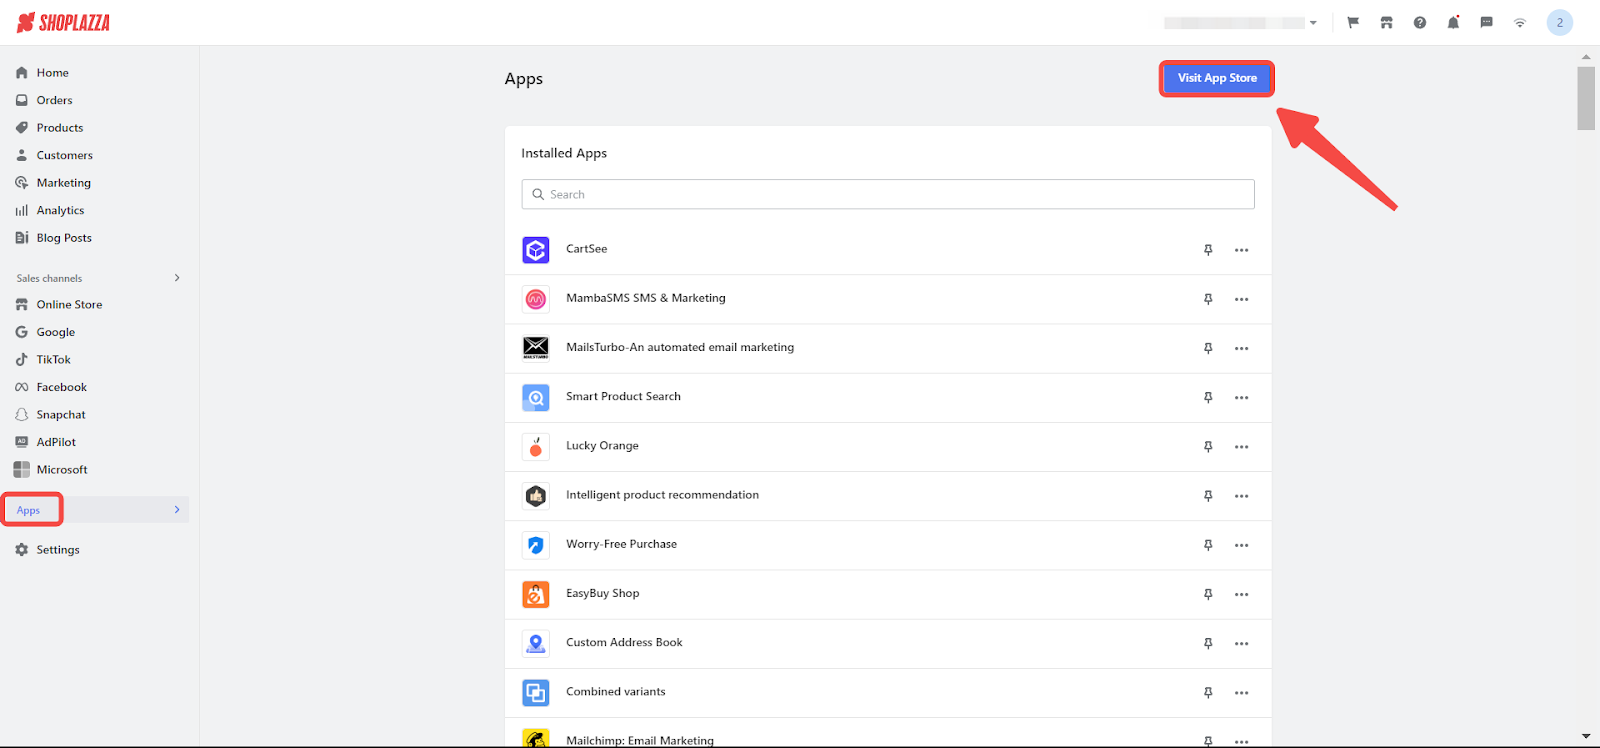
1. Access the app: From your Shoplazza Admin > Apps, click Visit App Store.
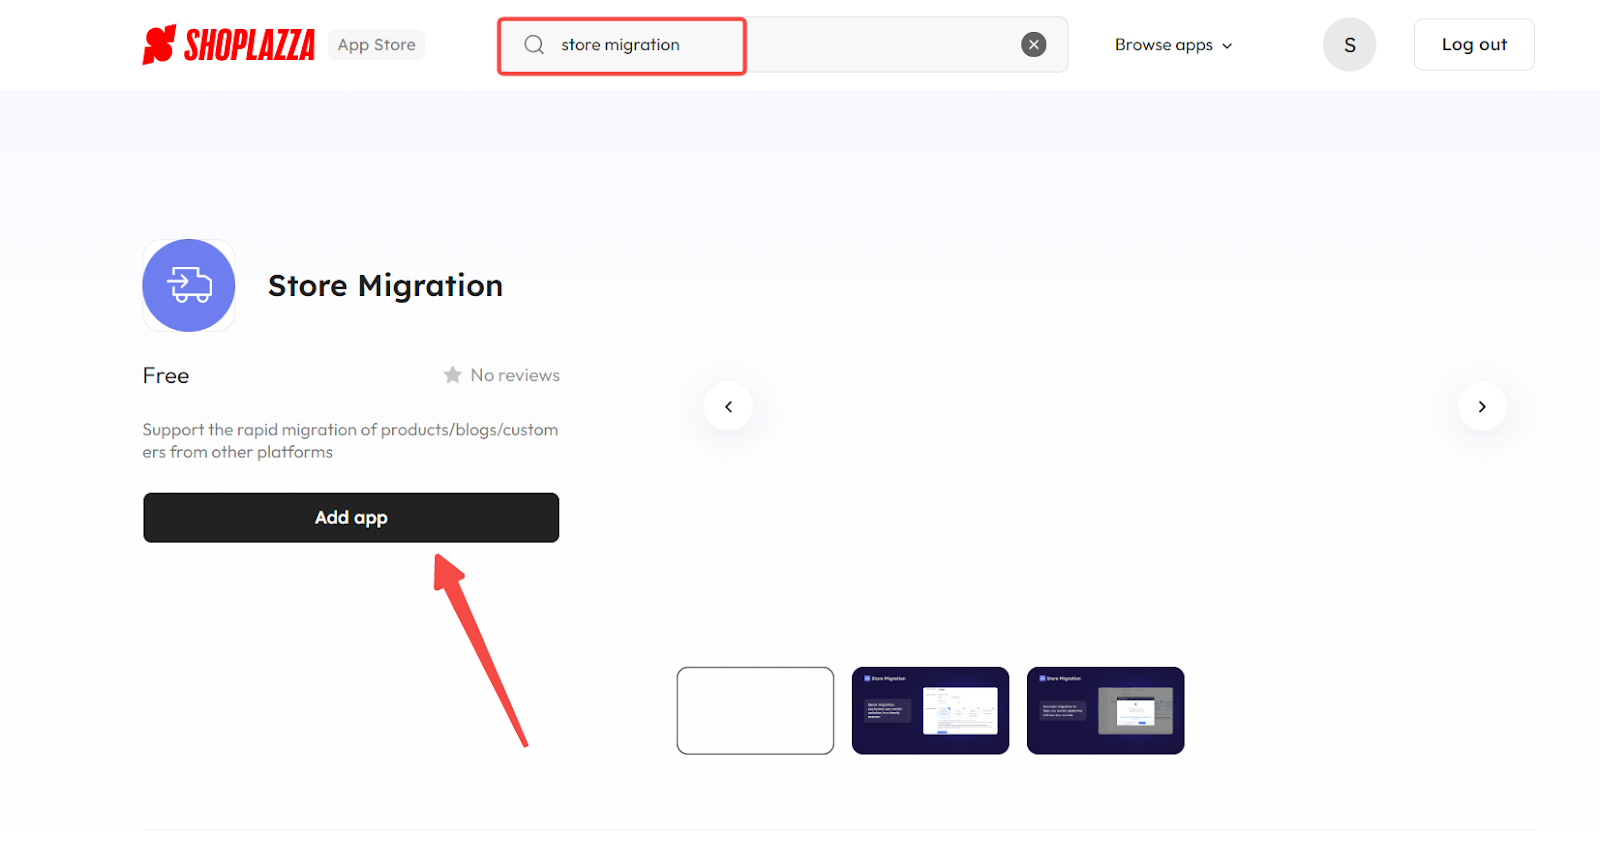
2. Find the app: Search for Store Migration in the search box and click Add app to add it to your store.
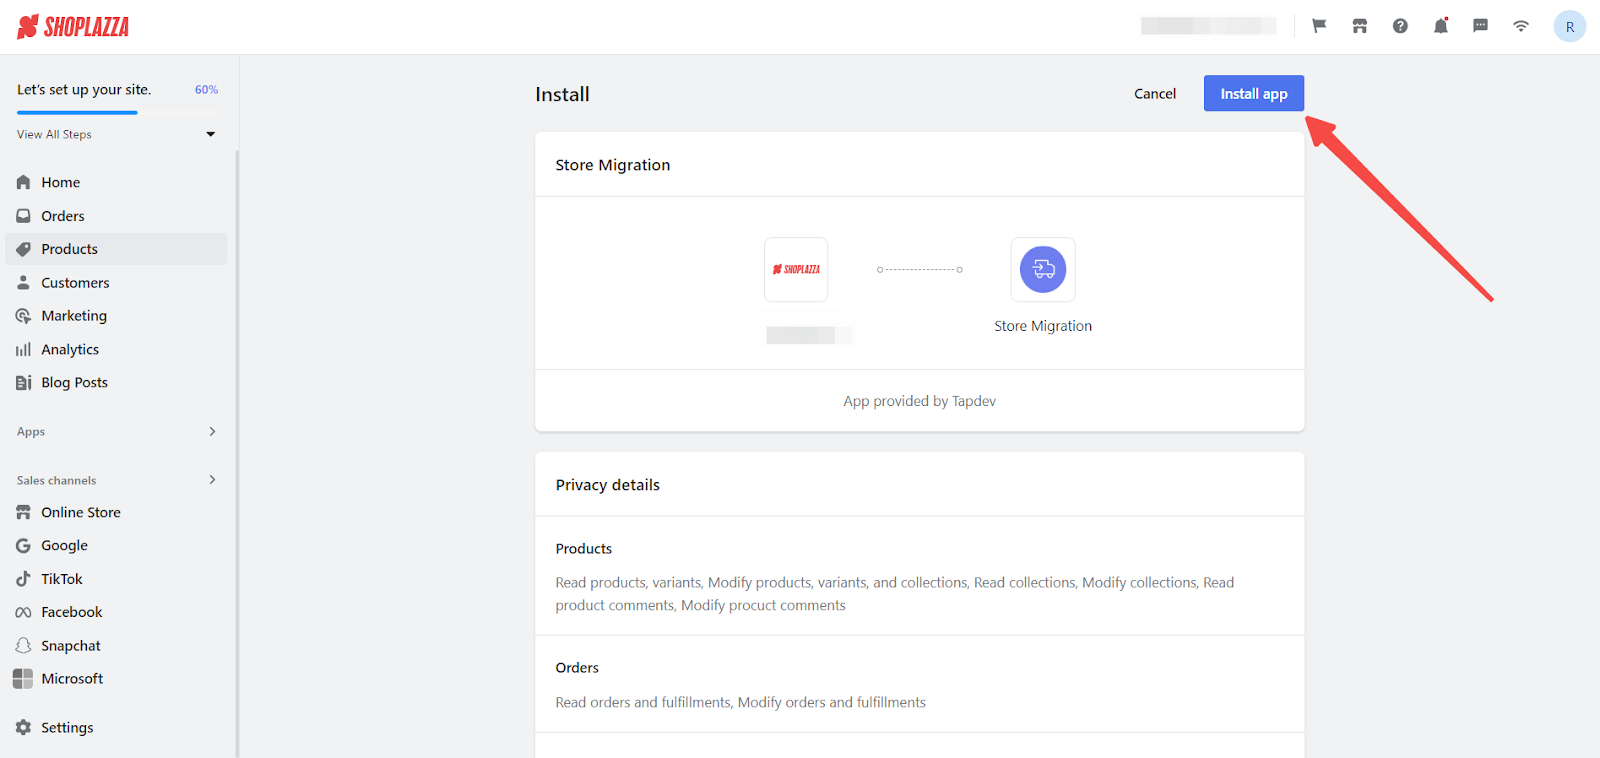
3. Install the app: Click Install app to complete the app installation.
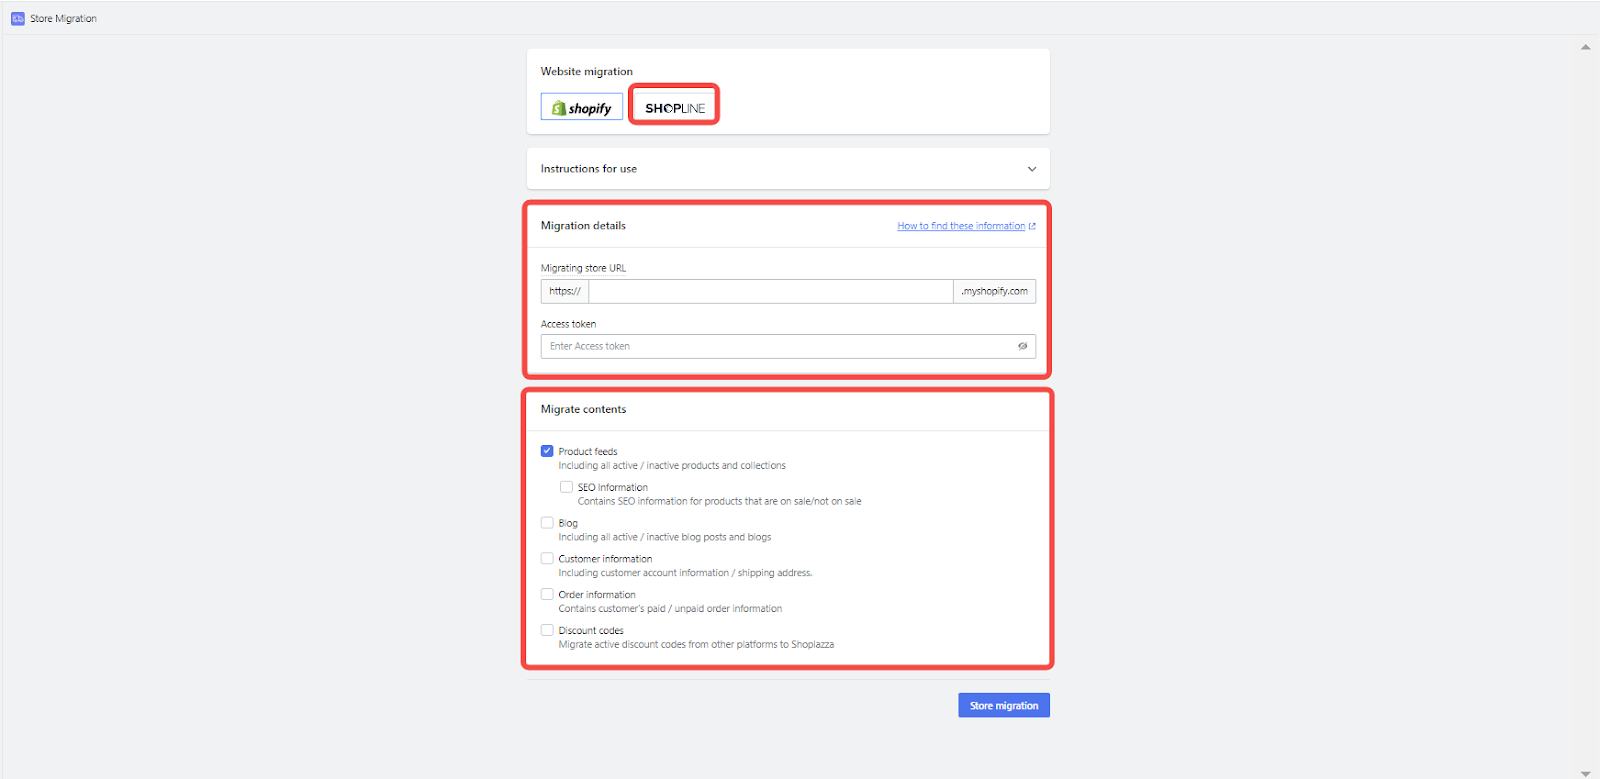
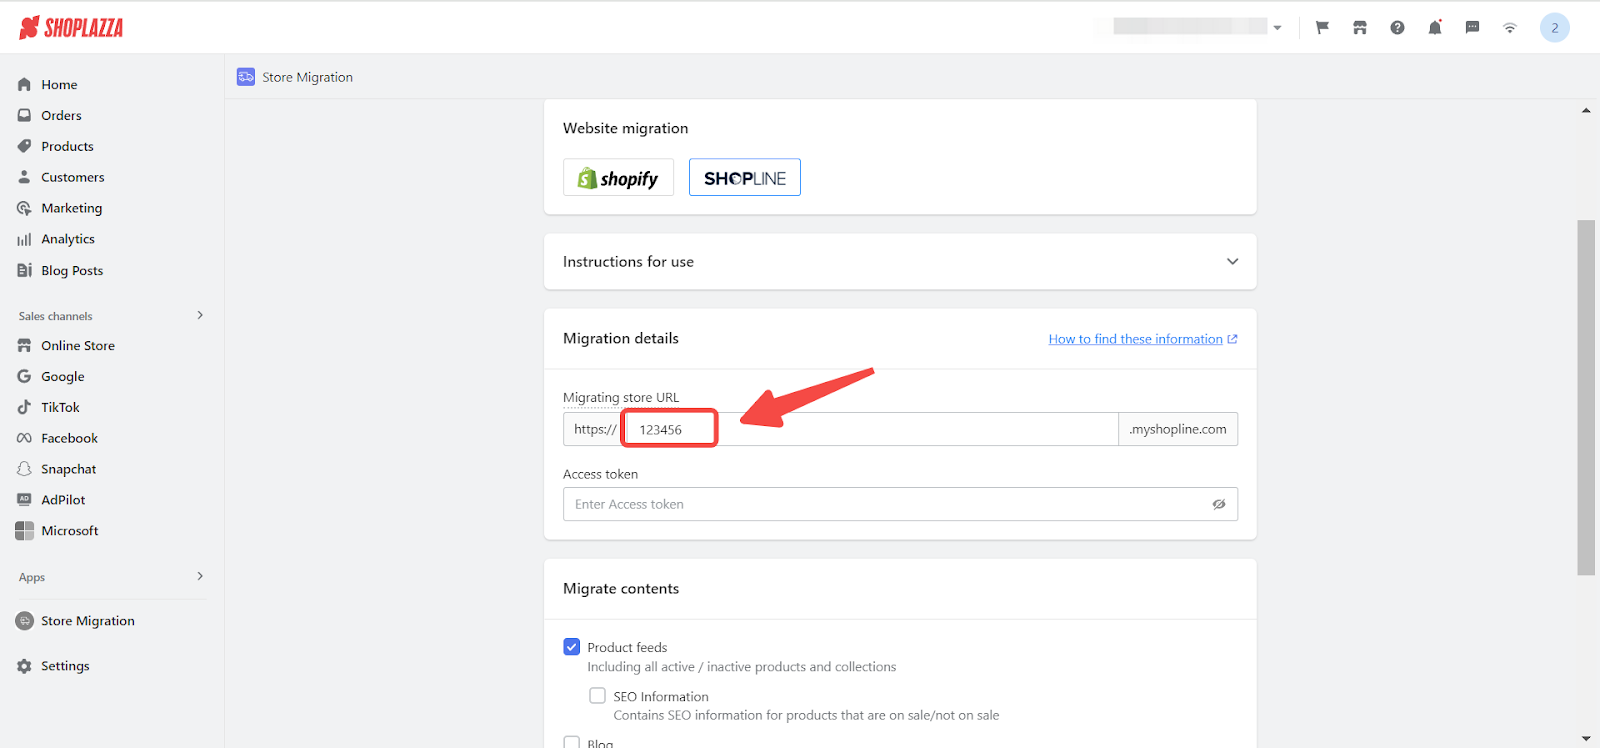
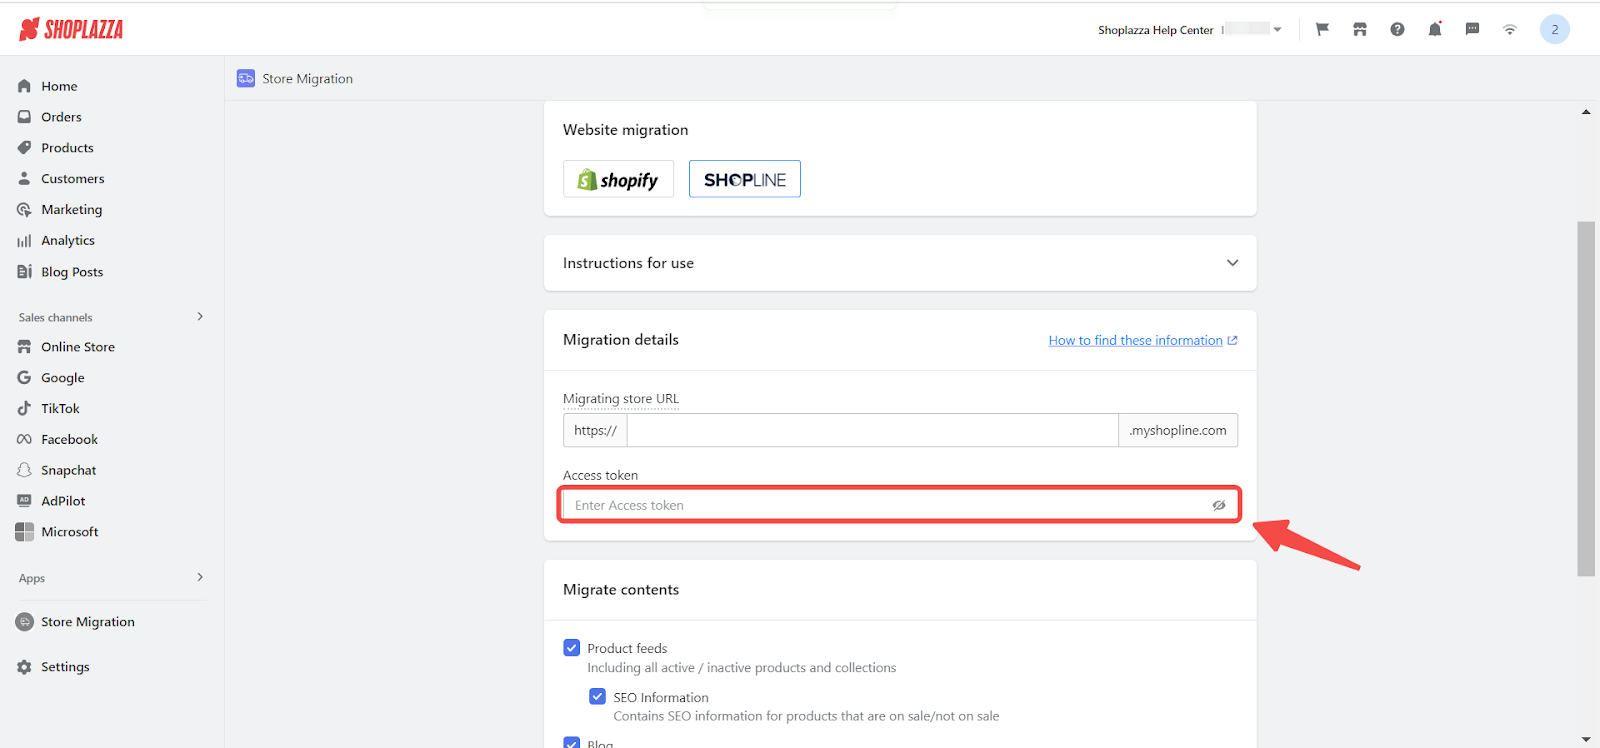
4. Setup migration details: After installation, you'll be directed to the Store Migration app. Here, you'll need to enter the migration store URL and API key to proceed. Follow the detailed steps below to obtain this information from your Shopline store.
Getting the migrating store URL information
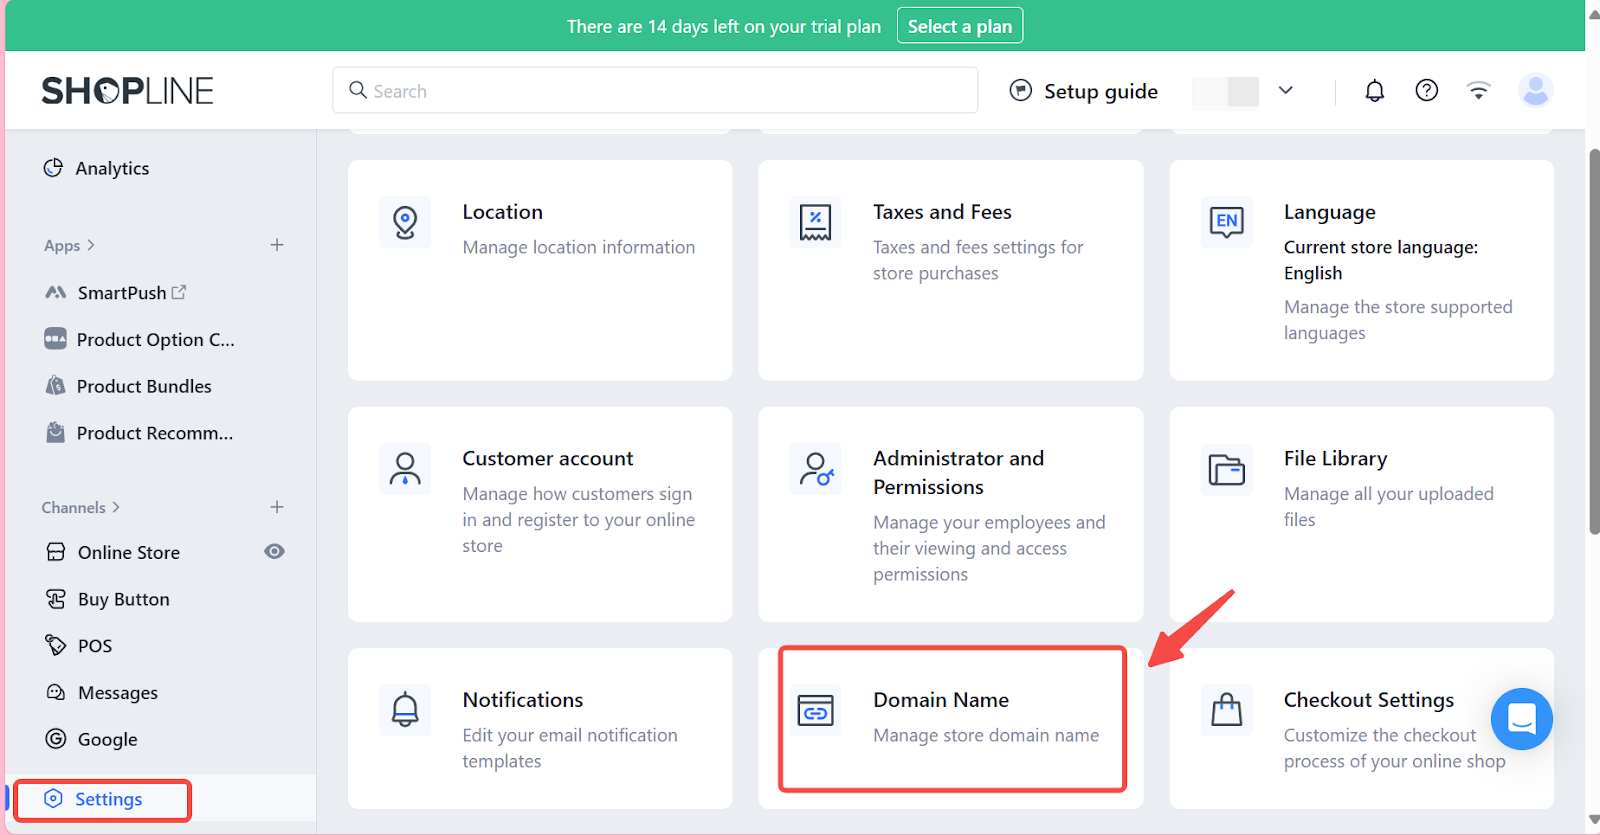
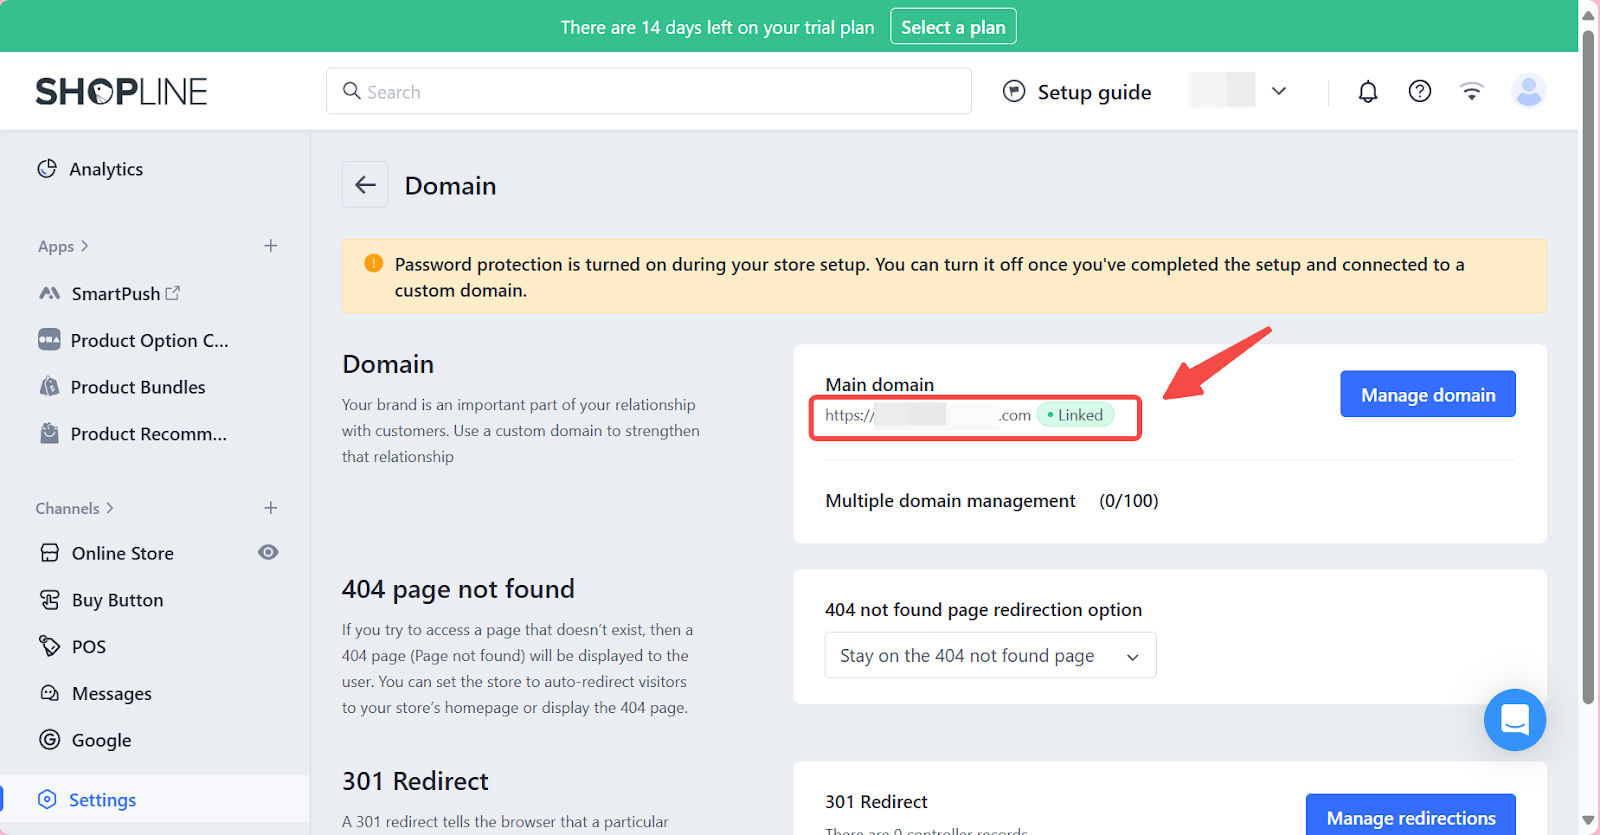
1. Log in to your Shopline Admin: Go to Settings > Domain Name to view your current store's domain information.
2. Copy the domain prefix: For example, if your domain is 123456.myshopline.com, copy "123456" and paste it into the migration store URL section of the Store Migration App.
Getting the API Key
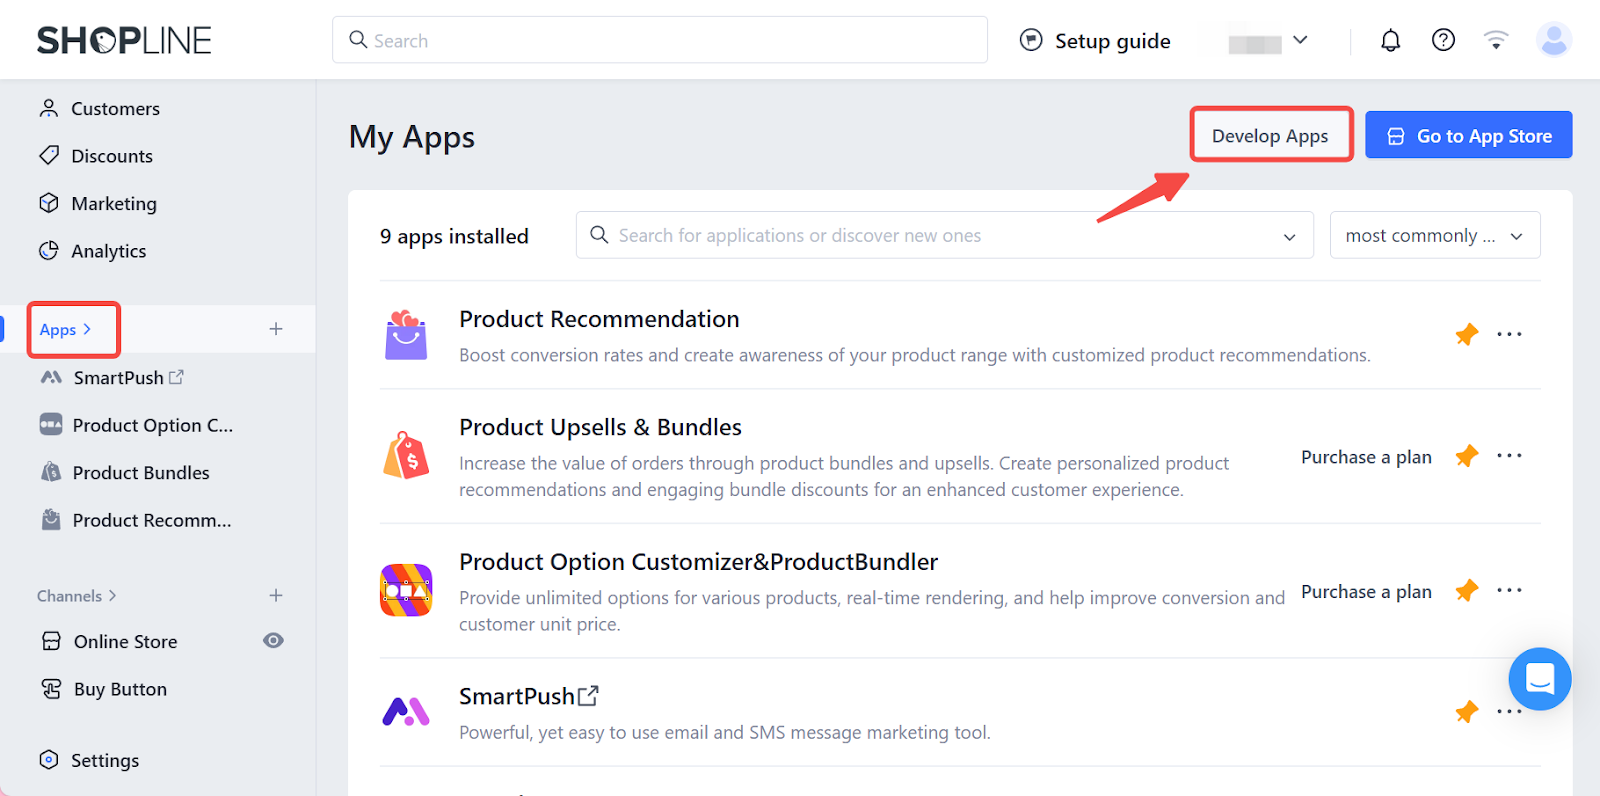
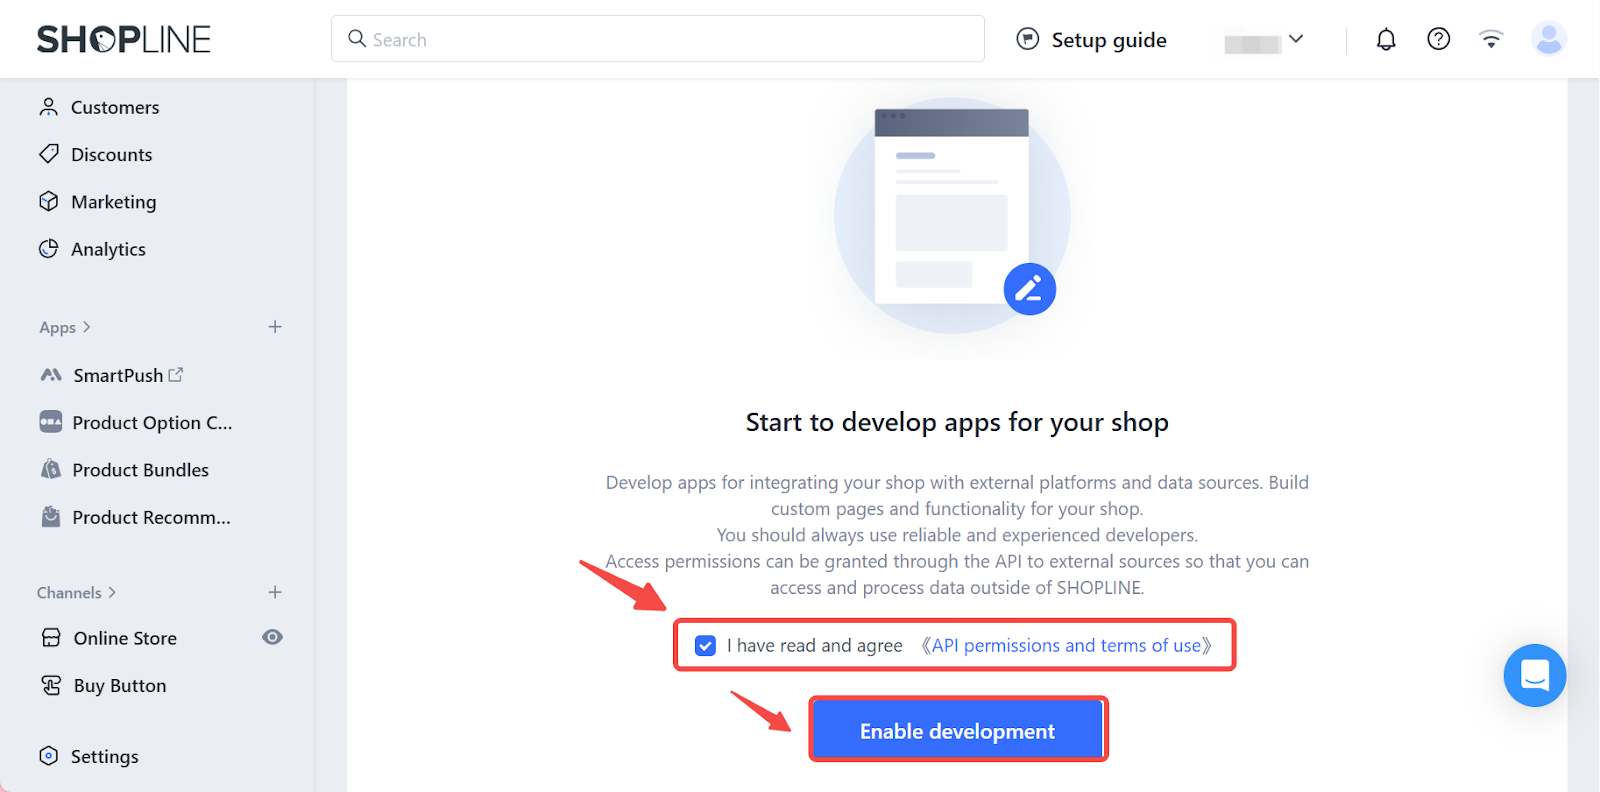
1. Log in to your Shopline admin: Go to Apps > Develop Apps.
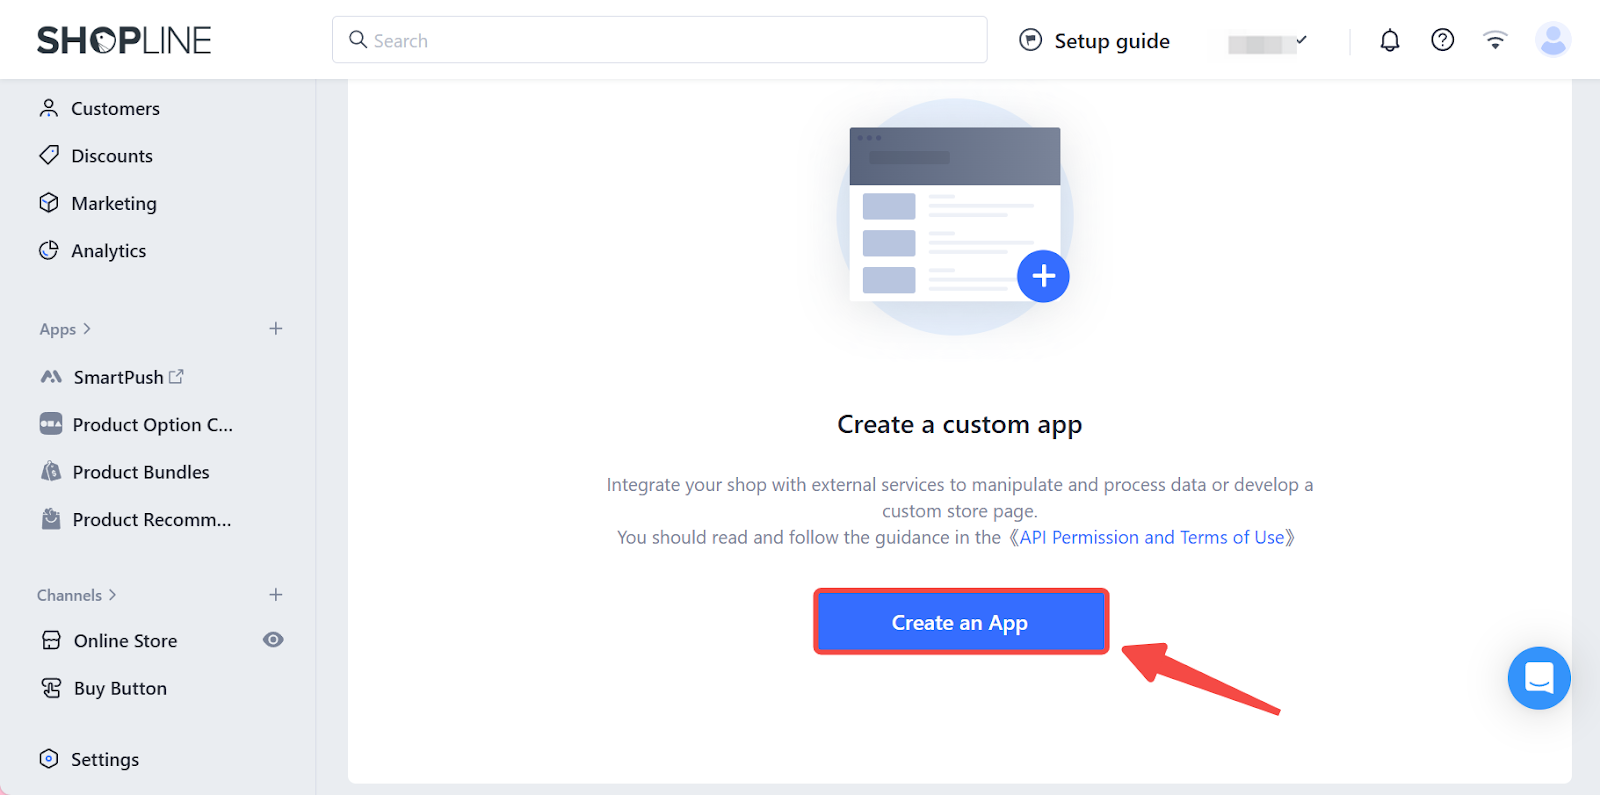
2. Create a new app: Read and check the terms and conditions, then click Enable development to activate development mode and Create an app.
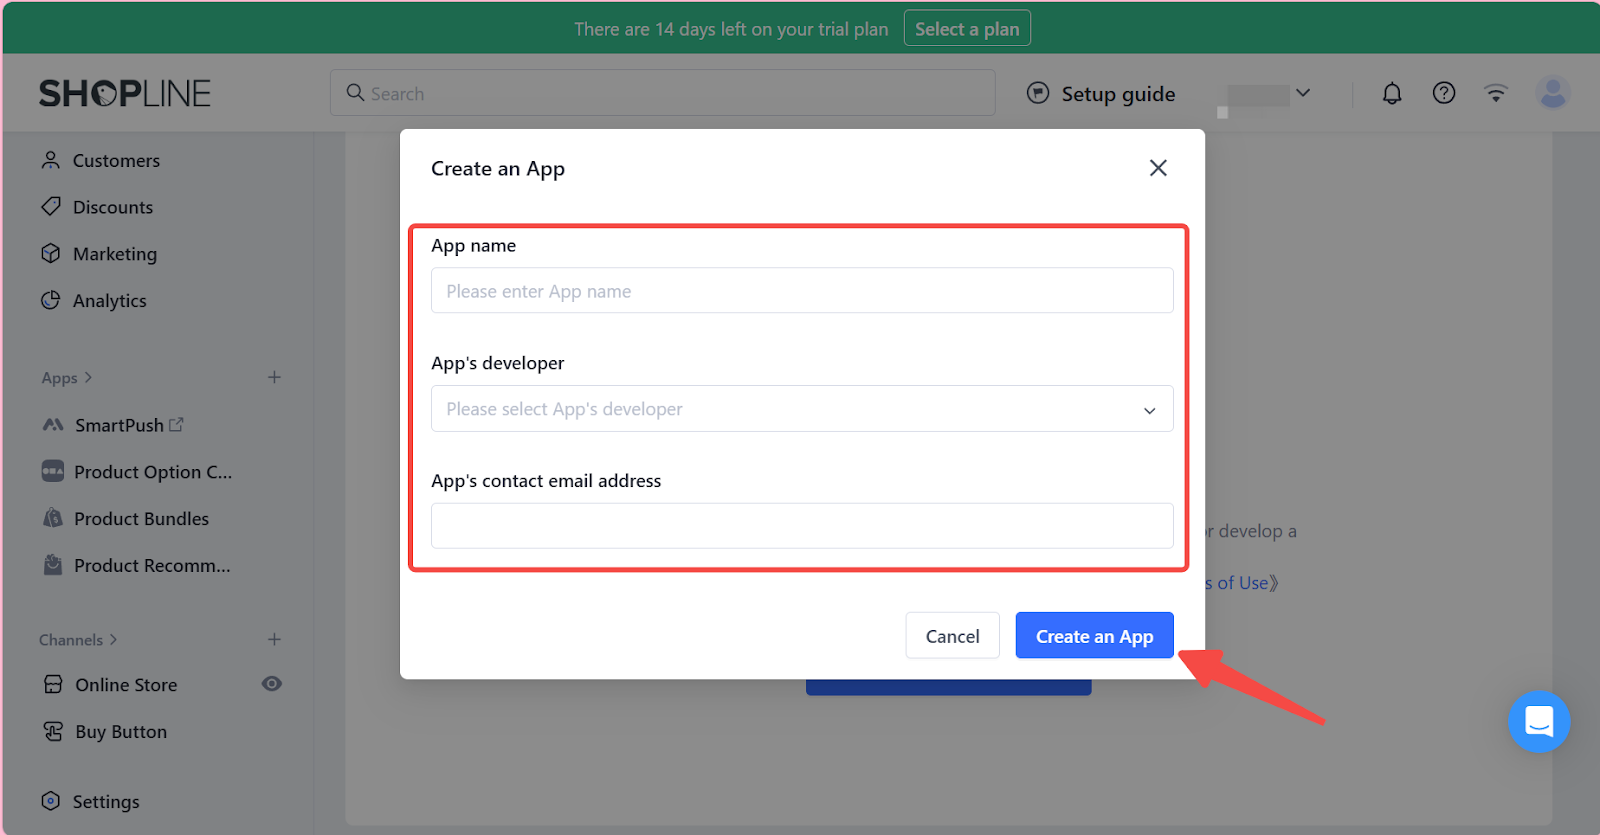
3. Fill in the required information: Complete the form with the necessary details and click Create an App.
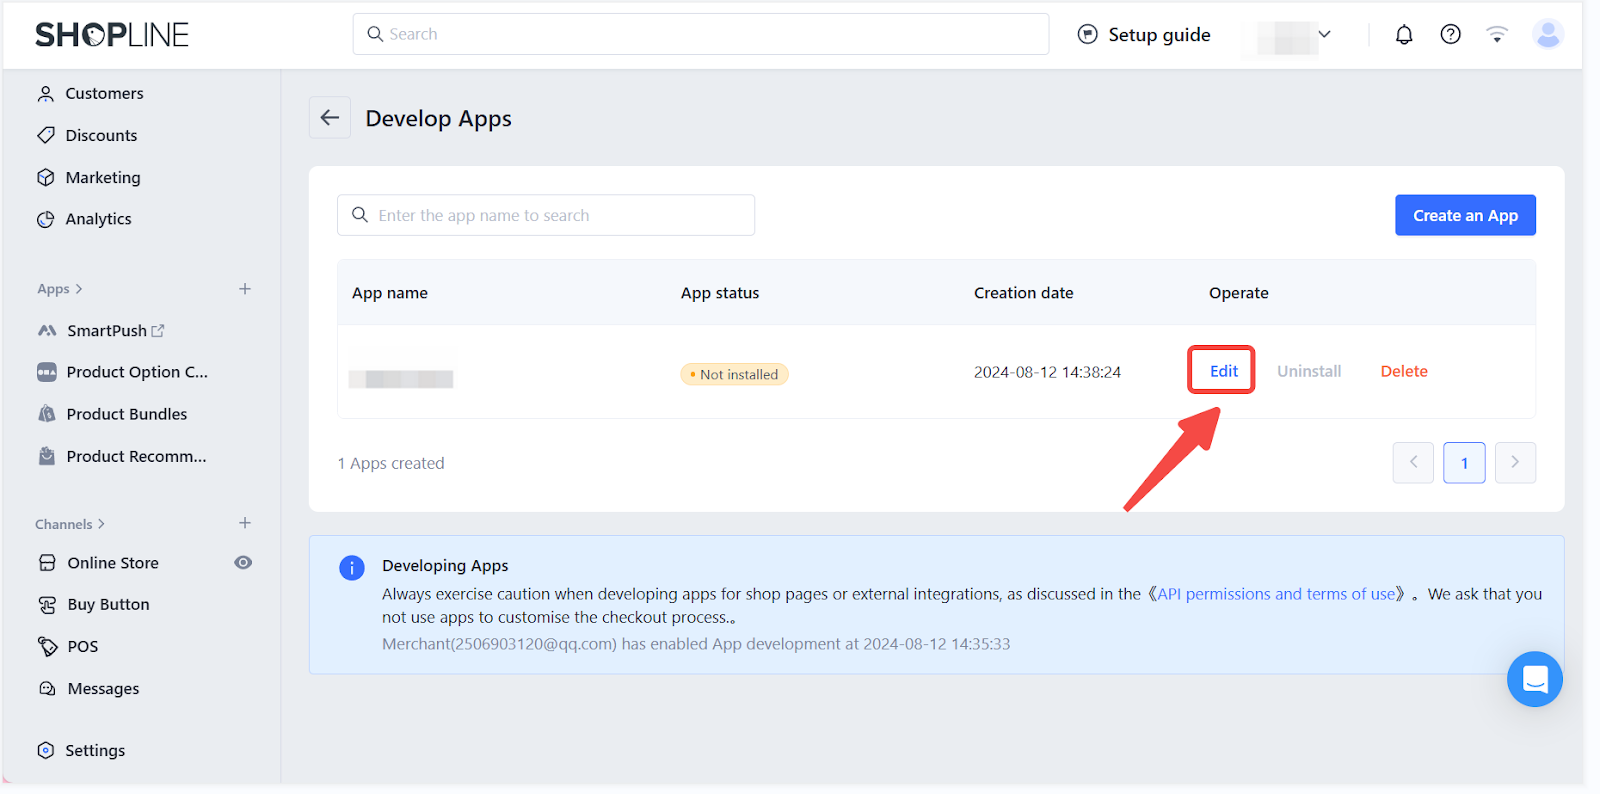
4. Edit the app settings: Click the Edit button next to your newly created app to enter the app settings page.
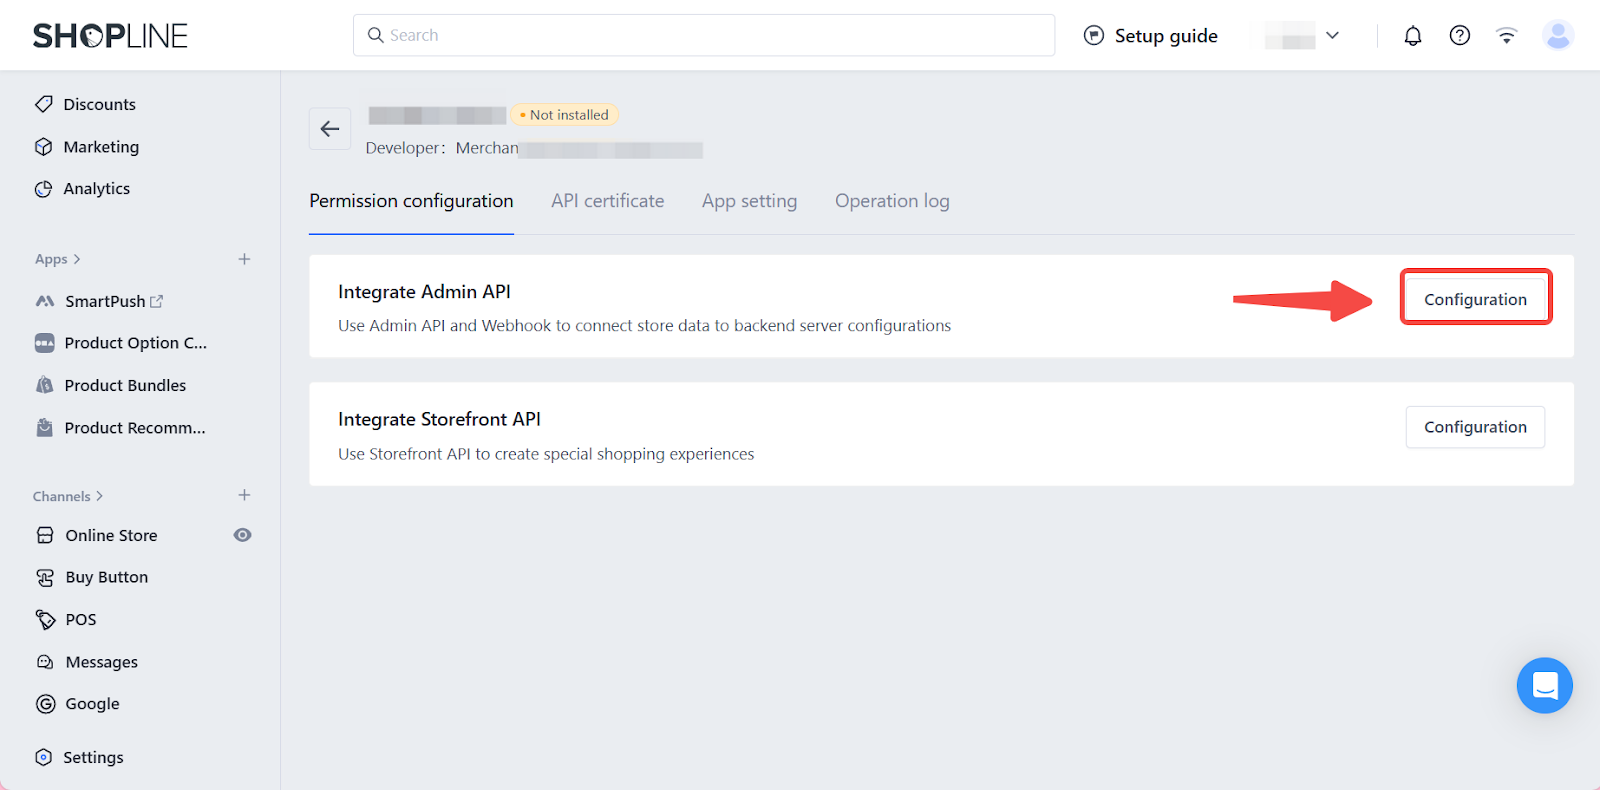
5. Configure API permissions: In the Integrate Admin API section, click the Configuration button to set up your API permissions.
Note
Currently, only the Merchant and Store Manager roles are supported for configuration; the Staff role is not supported at this time.
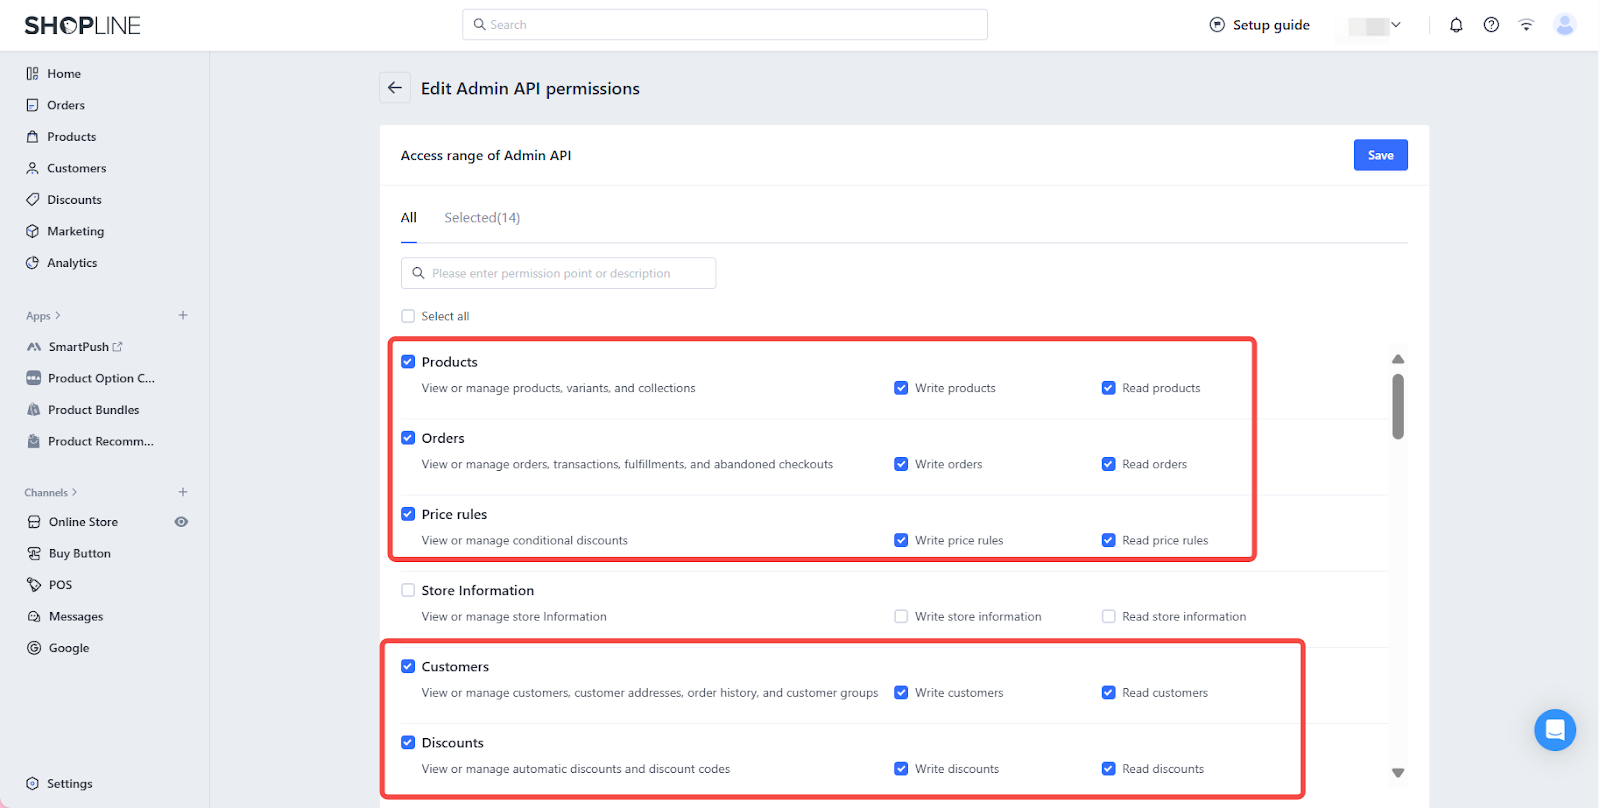
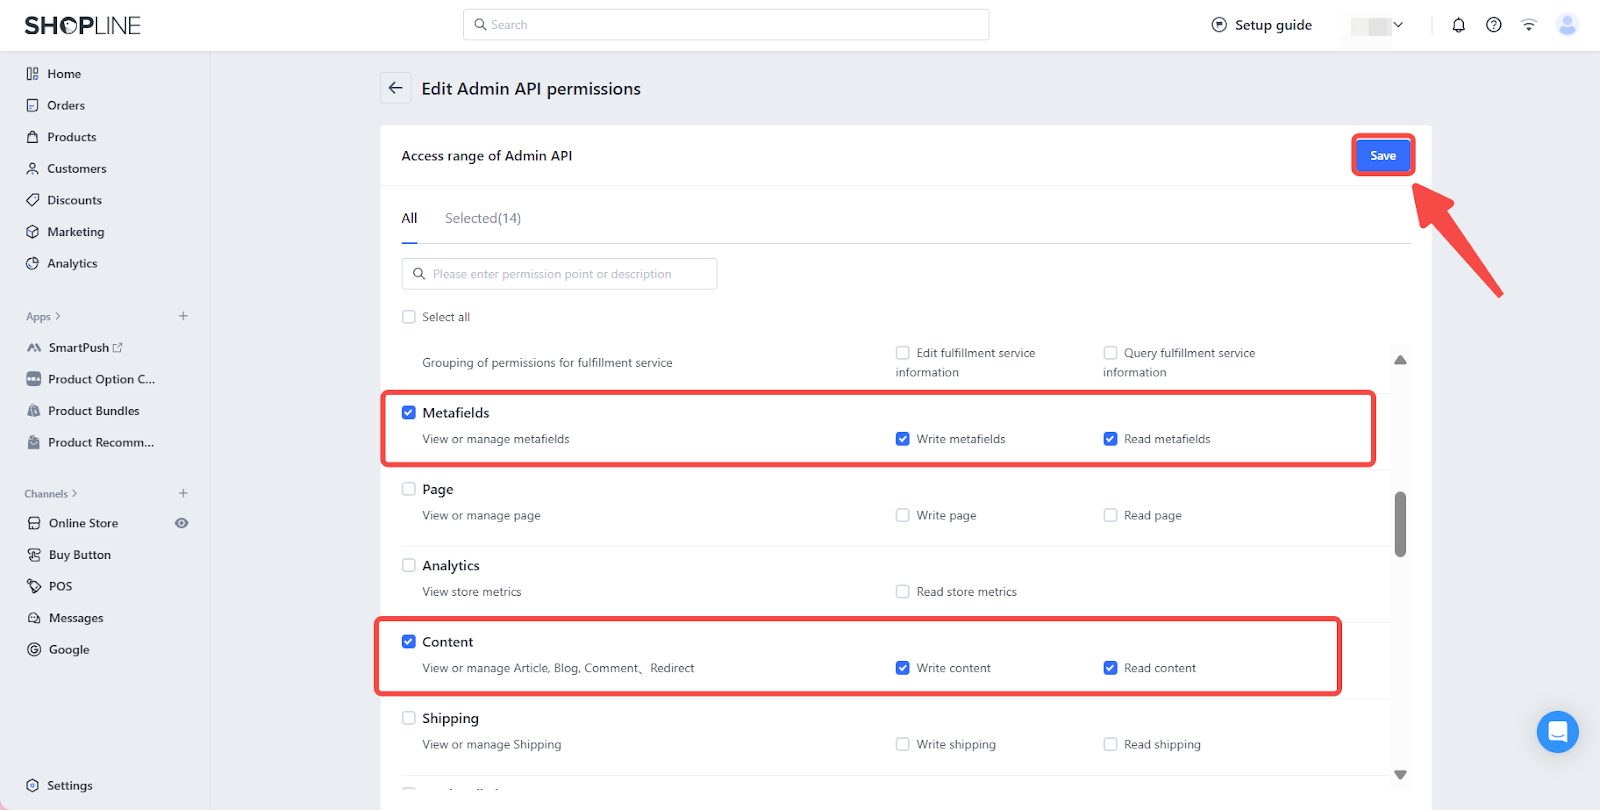
6. Set permissions: Select the necessary permissions for Products, Orders, Price rules, Customers, Discount, Metafields and Content, then click Save to apply the settings.
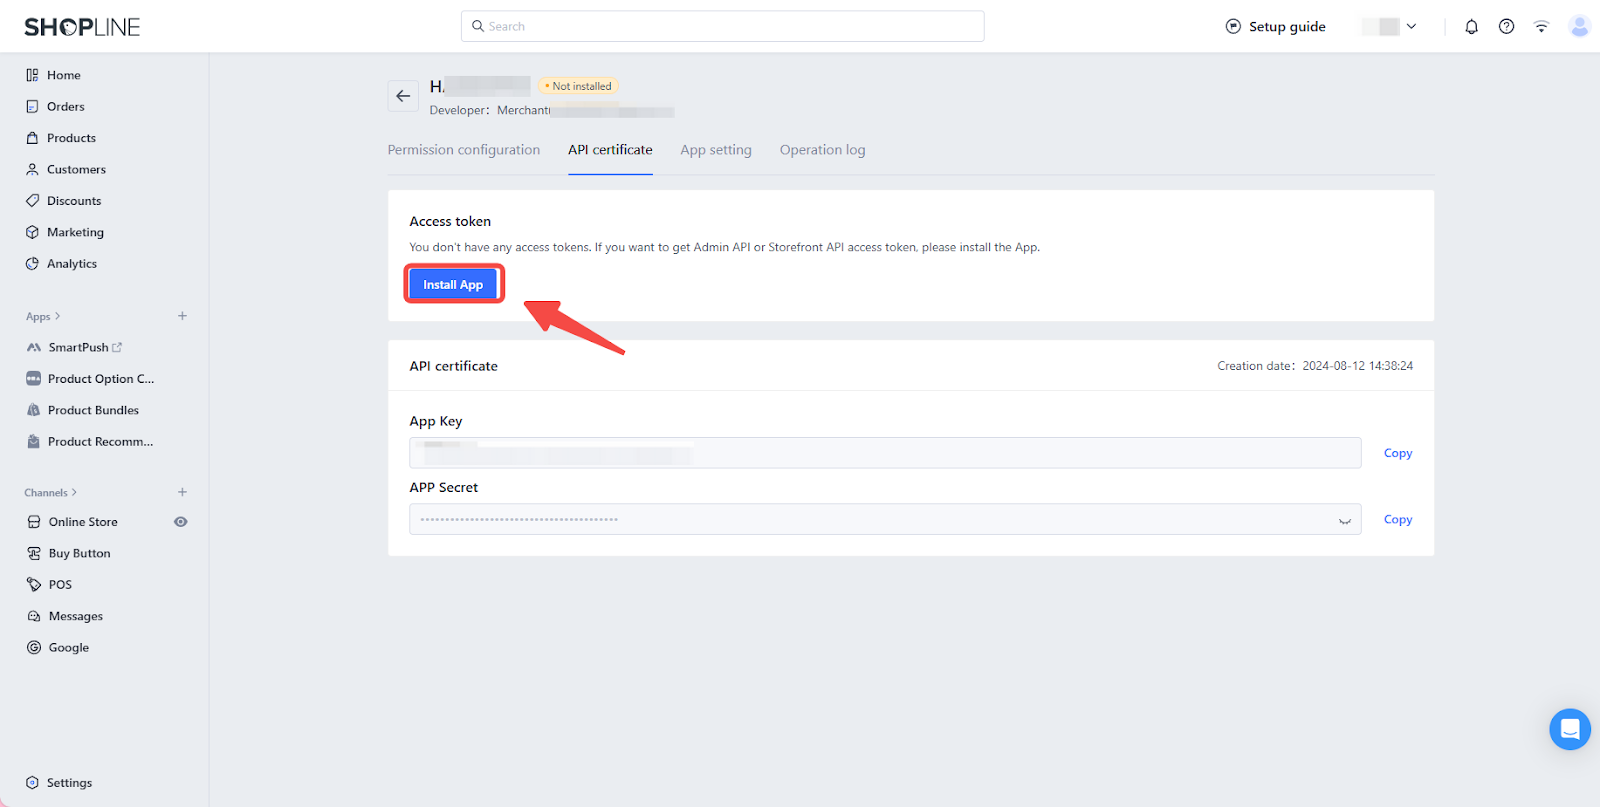
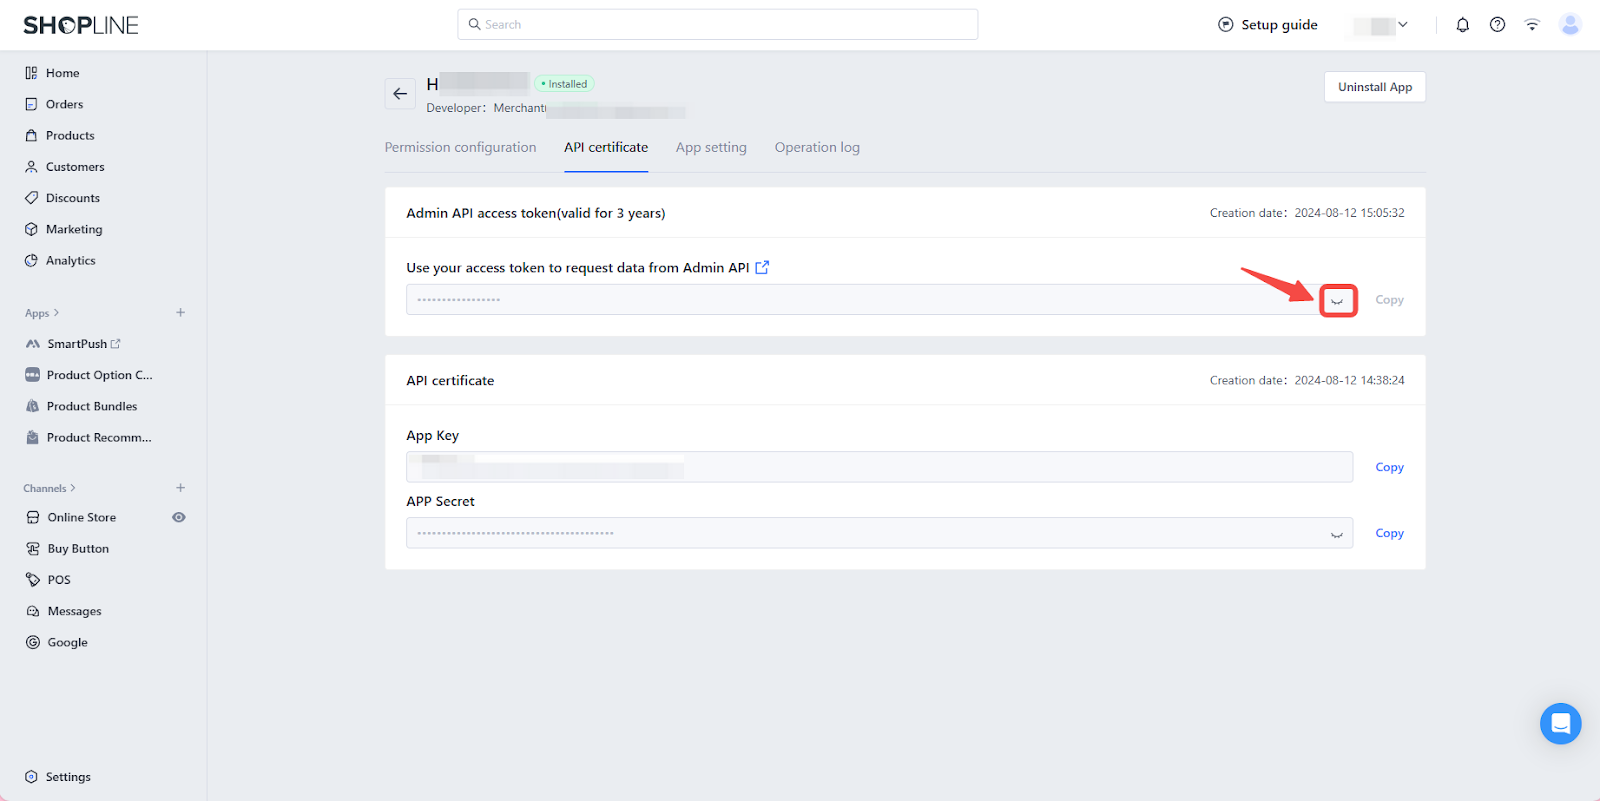
7. Install the app: After saving the permissions, you will be redirected to the app settings page. Click API Credentials and then Install App to complete the installation.
8. Complete installation: Under the Admin API access token (valid for 3 years) section, you will find Use your access token to request data from Admin API. Click the eye icon to view the token.
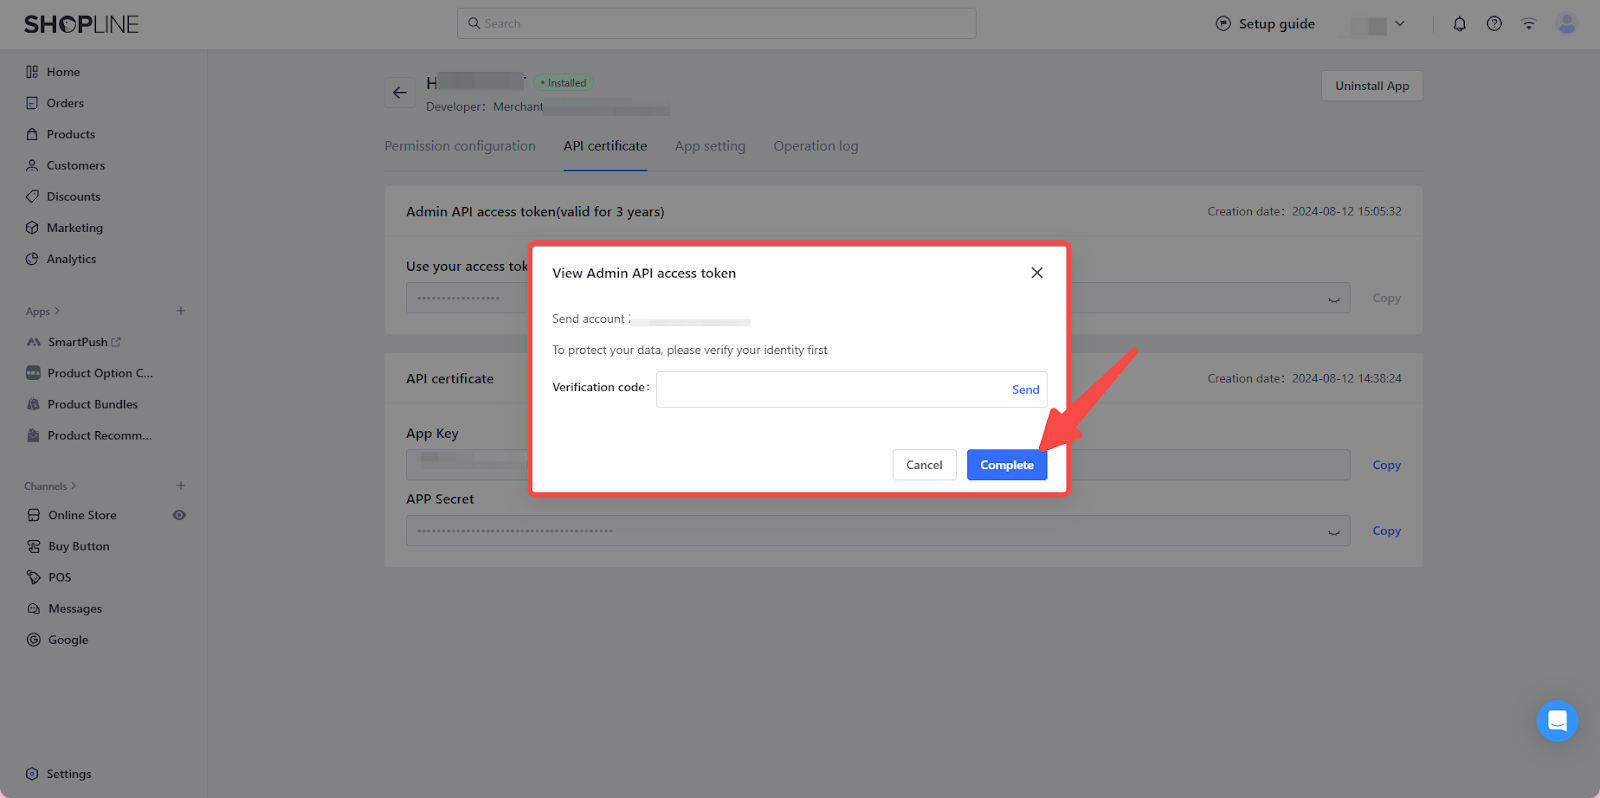
9. Verify the account: Enter the verification code sent to your email in the pop-up window, then click Complete.
10. Copy the API access token: Copy the API key and paste it into the API key section of the Store Migration app.

Selecting content for migration
Choose the data categories you wish to migrate, such as products, blogs, customers, Promo Code and orders.
Keep in mind:
- Inventory tracking: Shopline product variants configured to monitor stock levels will be listed as available in Shoplazza, regardless of inventory status.
- Product images: The absence of images for any Shopline product variant will result in their removal during the migration to Shoplazza.
- Product characteristics: Shopline variants marked as physical items or taxable will maintain these characteristics post-migration in Shoplazza.
For multiple migrations
The system does not support the migration of duplicate data, such as identical order numbers, product names, and customer contact information. Additionally, attempting to migrate product or customer data previously transferred by other means could lead to inconsistencies.
1. Initiate the migration process: Click on Store migration to begin transferring your data.

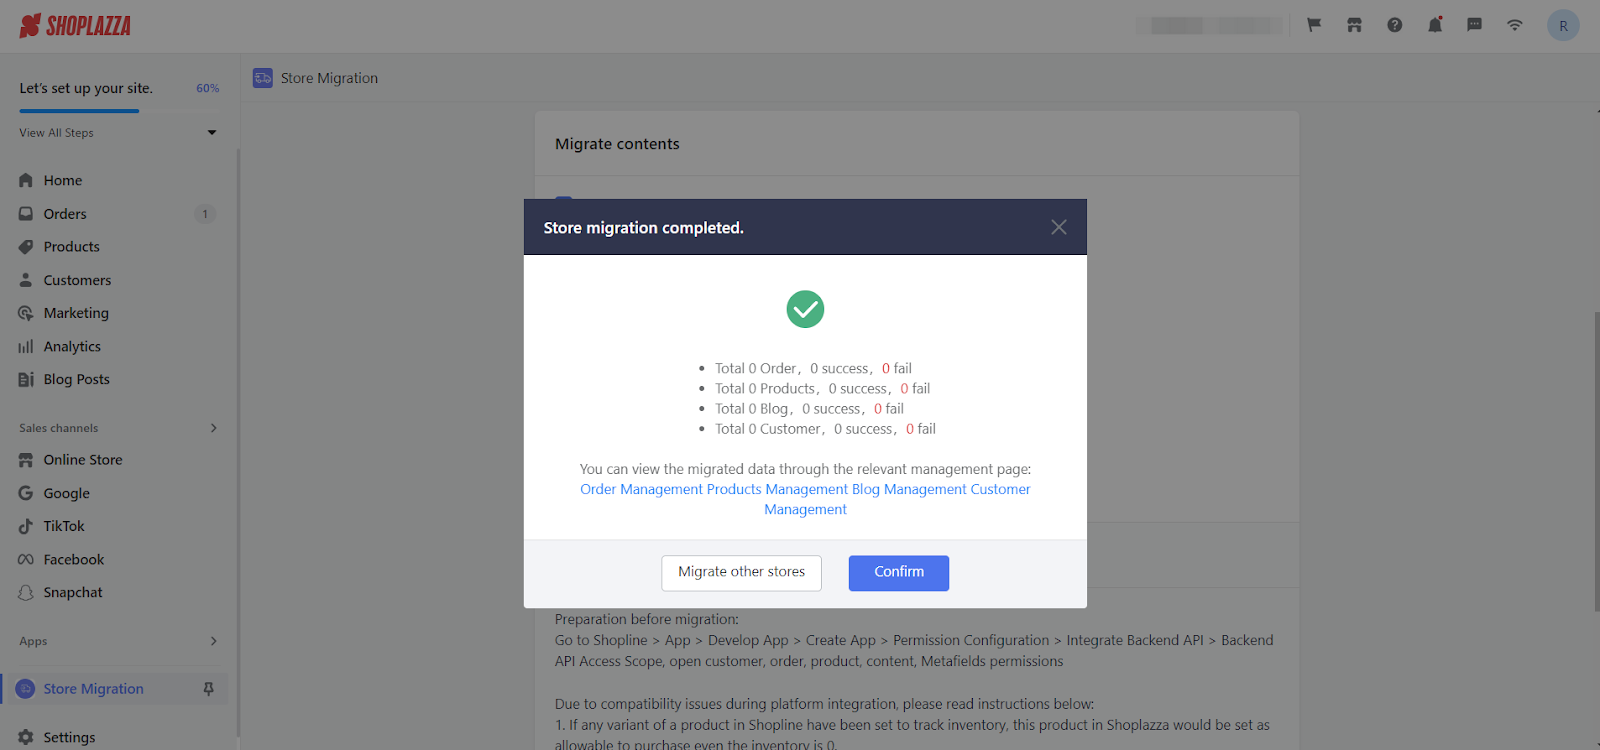
Reviewing migration outcome
1. Monitor the migration progress: The page will display the migration progress. Wait for the migration to complete.
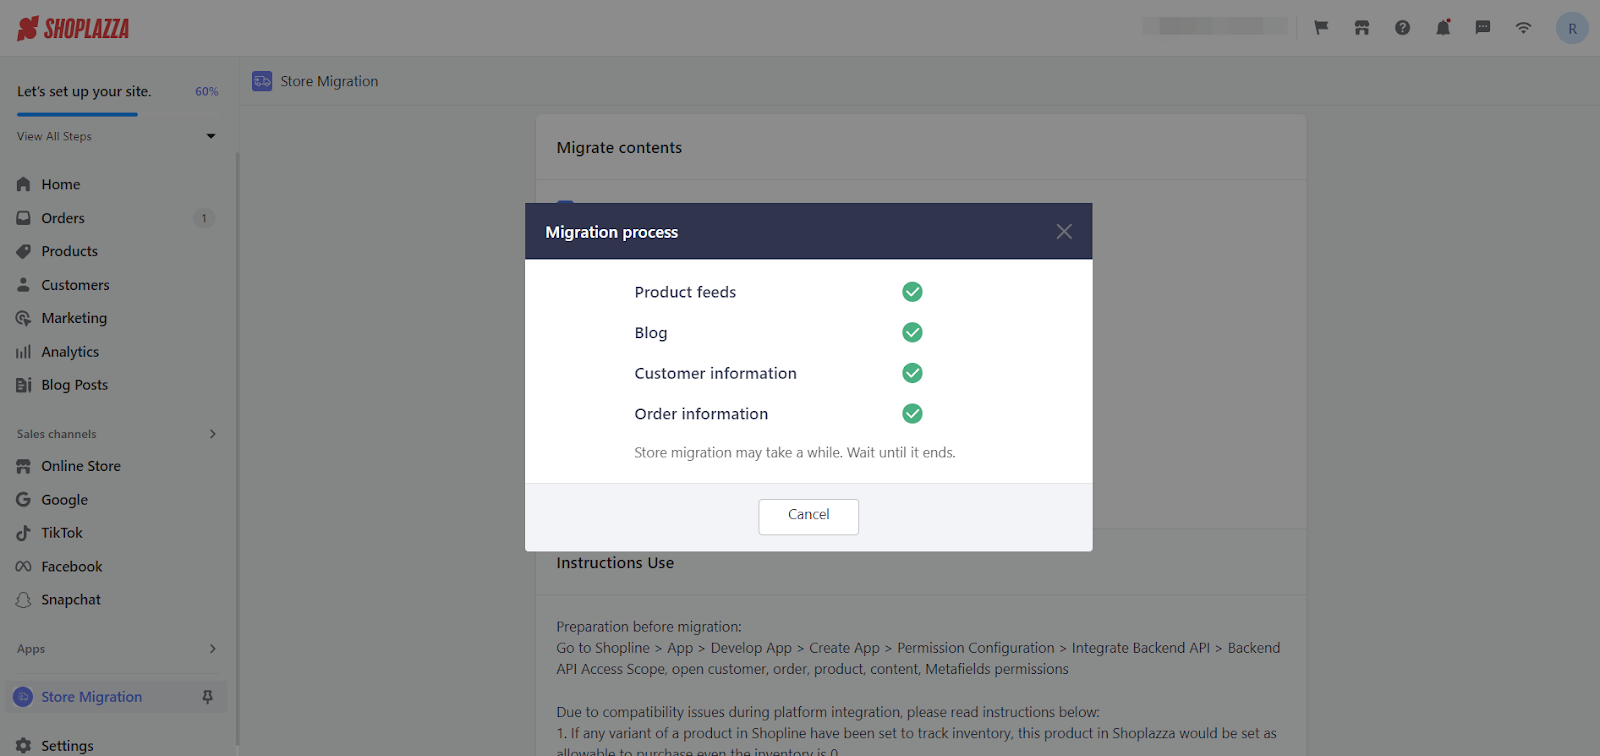
2. View migrated data: Once done, click on Blog Management, Customer Management, Order Management, or Product Management to view the migrated data.
Important things to know before you start
Before you begin the migration process, it's helpful to keep a few things in mind. Understanding these details can save you time and help avoid any issues down the road.
Compatibility notes
1. If any product in Shopline is set to track inventory, it will still be available for purchase in Shoplazza, even if the stock is zero.
2. If a product in Shopline doesn't have an image, Shoplazza will use a default image instead.
3. Products marked as physical items or taxable in Shopline will keep those settings in Shoplazza.
Handling multiple migrations
1. The system is designed to transfer data only once, such as order numbers, product names, or customer information. After it's migrated, it won't be duplicated.
2. If product or customer information was previously migrated using another method, migrating related order data again may cause issues.
3. It's important not to delete any product data or SEO information after migration. If you do, subsequent migrations of that data may not be successful.
Migrating discount codes
When migrating your discount codes from Shopline to Shoplazza, it's important to note that while the migration app does support discount code migration, there are specific limitations and considerations you should be aware of:
1. Customer eligibility settings: If your discount codes in Shopline are configured to apply only to specific customer segments, these codes will not migrate to Shoplazza. The migration tool currently does not support the transfer of discount codes tied to specific customer groups or member tiers.
2. Free shipping discounts: Any discounts in Shopline that offer free shipping will not be migrated. If you rely heavily on free shipping as a promotion, you will need to recreate these discount codes manually in Shoplazza after migration.
3. "Buy X get Y" discounts: For promotions where you offer a discount on a second product when a customer buys the first one (Buy X get Y), if the discount is configured as an "Amount off each" in Shopline, these codes will not transfer over during migration. You'll need to manually set up these types of discounts in Shoplazza.
4. Automatic discounts: Discounts that automatically apply to eligible orders without the need for a code will not be carried over during the migration. You’ll need to manually recreate these automatic discounts in Shoplazza once the migration is complete.
5. One-time migration for coupon codes: Each coupon code can only be migrated once. After a coupon code has been successfully migrated, attempting to migrate it again will not work. If you need to re-import these codes, you’ll have to manage them manually.
6. Combining migrated discounts: By default, migrated discount codes in Shoplazza will not be combined with other discounts. If your promotion strategy involves stacking multiple discounts, you'll need to adjust this setting manually in Shoplazza after migration to ensure your discounts work as intended.
7. Usage data for discount codes: The migration tool does not carry over the usage history of discount codes. If a code has been used by customers in Shopline, this information will not be transferred. Instead, all migrated discount codes will appear as new codes in Shoplazza, with a usage count reset to zero. This means partially used codes will need to be managed manually in Shoplazza.
By following these steps, you can efficiently migrate your Shopline store to Shoplazza, ensuring a smooth transition and minimal disruption to your business operations. Enjoy the enhanced functionality and ease of use that Shoplazza offers.


Comments
Please sign in to leave a comment.