
Offering customized products in your online store enhances the shopping experience, letting customers personalize products with color swatches, uploaded images, and text. Visualization tools for these customizations help customers understand their personalized product's appearance, increasing purchase likelihood by aligning the product with their needs and preferences. Here's a guide to setting up preview effects for customized products in your Shoplazza store, focusing on creativity and customer satisfaction.
Note
- Supported Themes: Ensure your store theme is among those compatible with the app, including Lifestyle, Nova2023, Hero, Eva, Flash, Geek, Impress, and Wind.
- Customization Preview Attributes: Enable preview effects for color swatches, image upload, and text to enhance the customer experience.
- Quick Add-to-Cart Module: The product option does not support the Quick Add-to-Cart module at this time, which may influence the checkout experience for customers seeking speed and convenience.
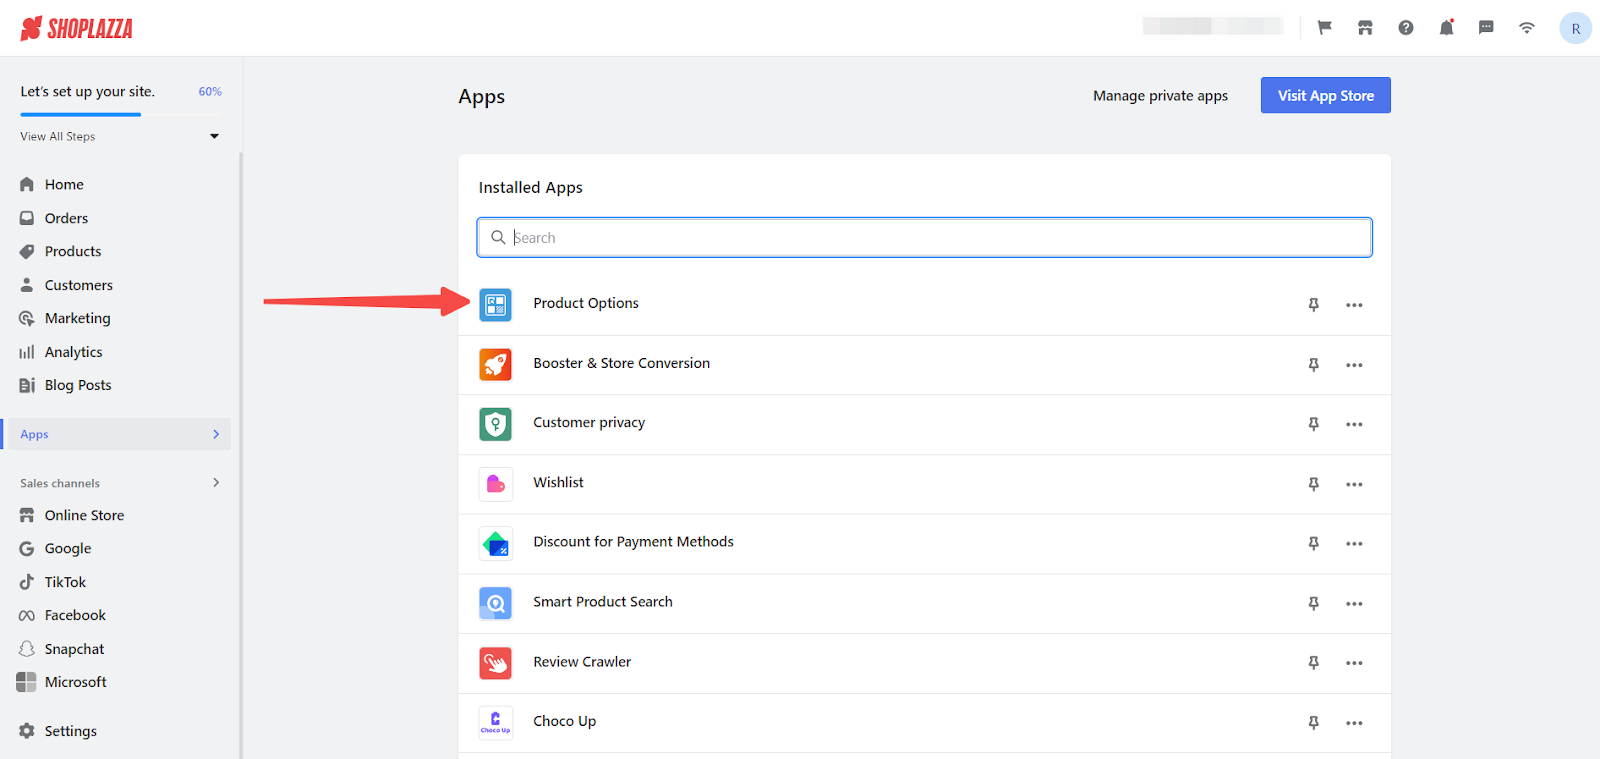
Accessing the Product Option App
1. Access the app: Navigate to the Apps section in your Shoplazza admin, find the Product Options app among your installed apps, and open it.
Selecting Products for Customization
1. Choose your canvas: Selecting the right products for customization is essential. This step involves choosing products that will benefit from added customization options. For detailed guidance on adding or selecting product attributes for customization, consult the dedicated guide titled Product option | Setting Customized Product Attributes.
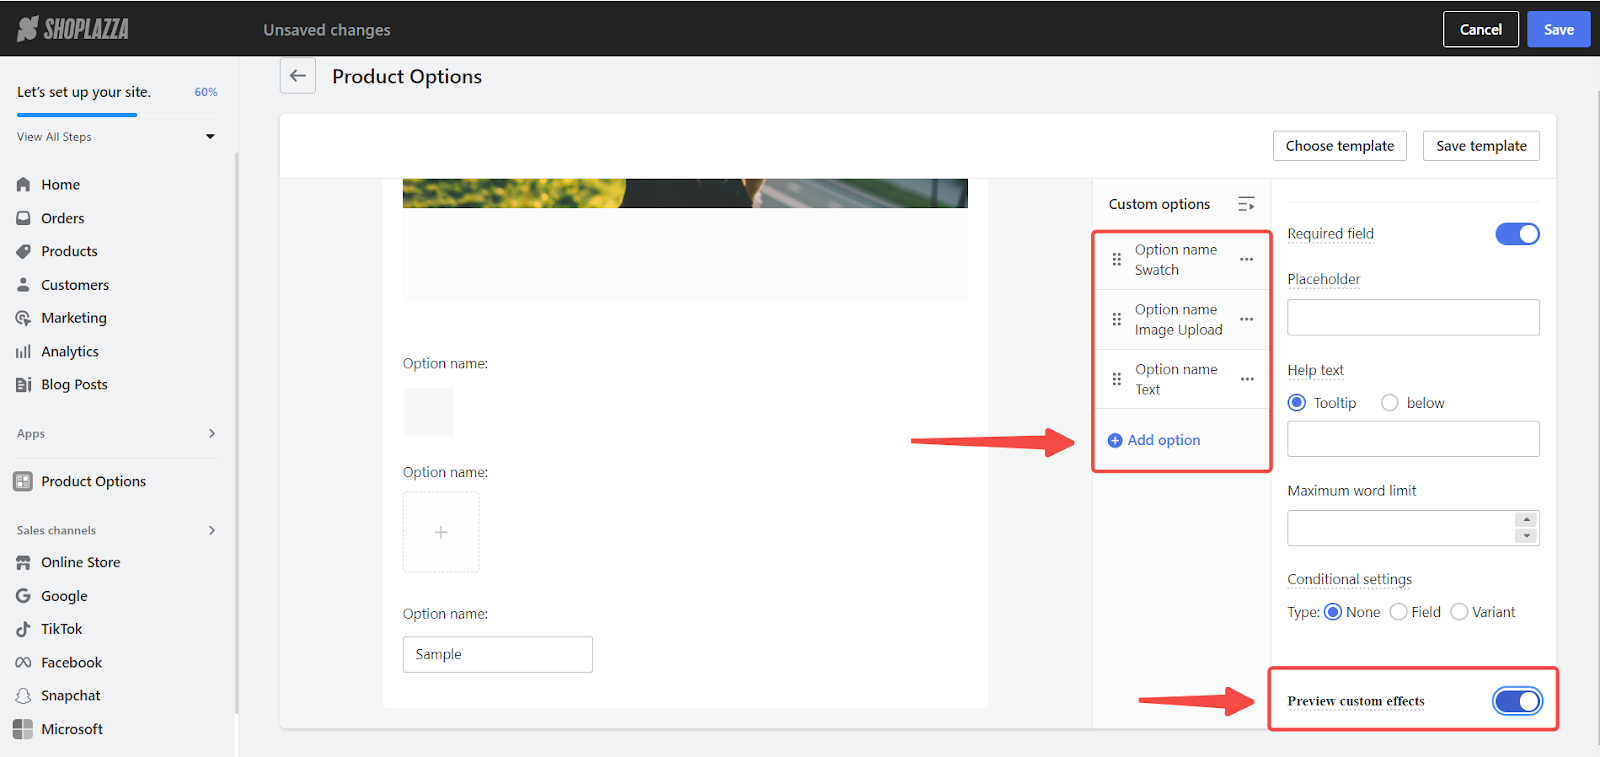
Implementing Preview Effects
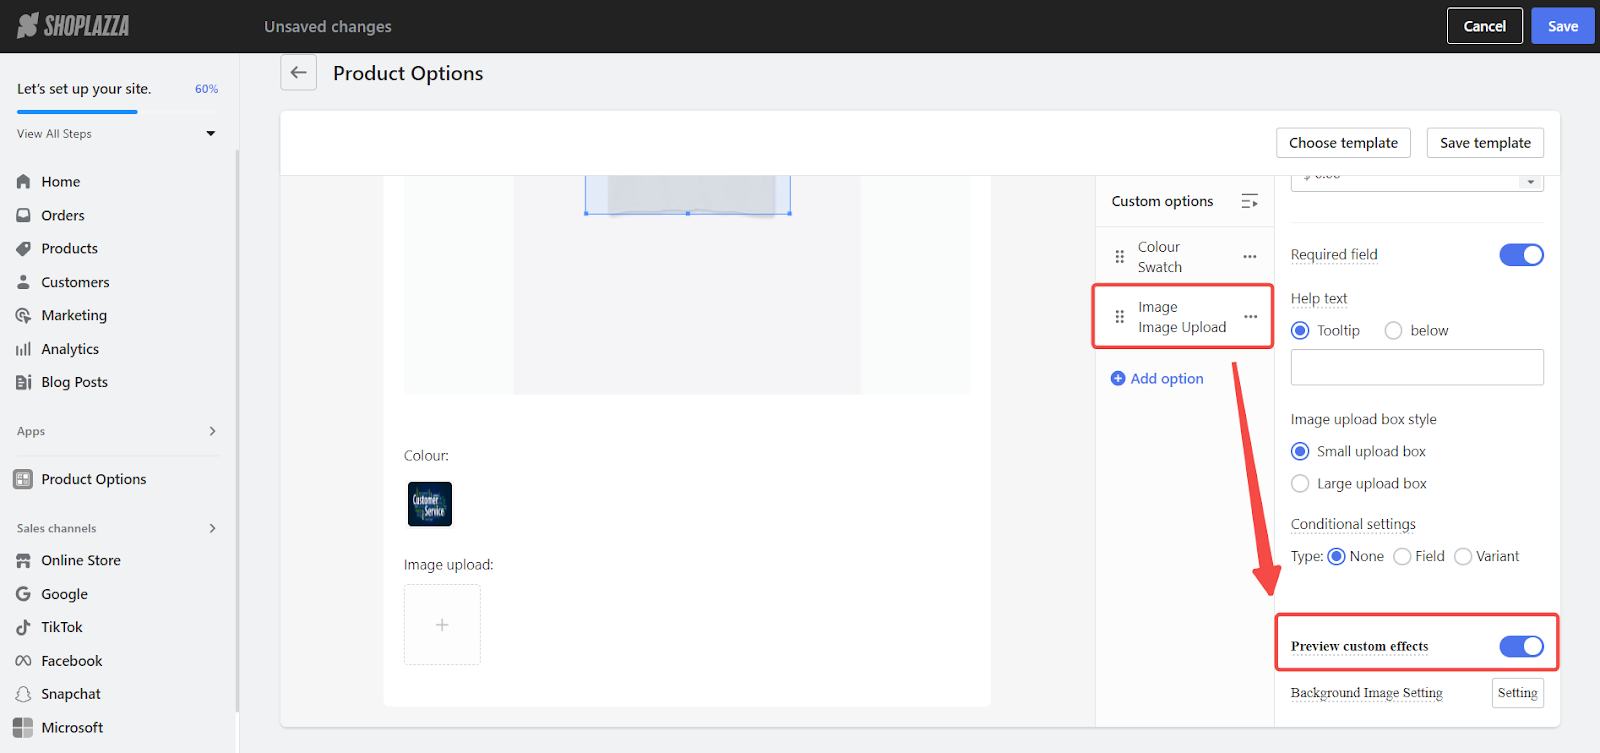
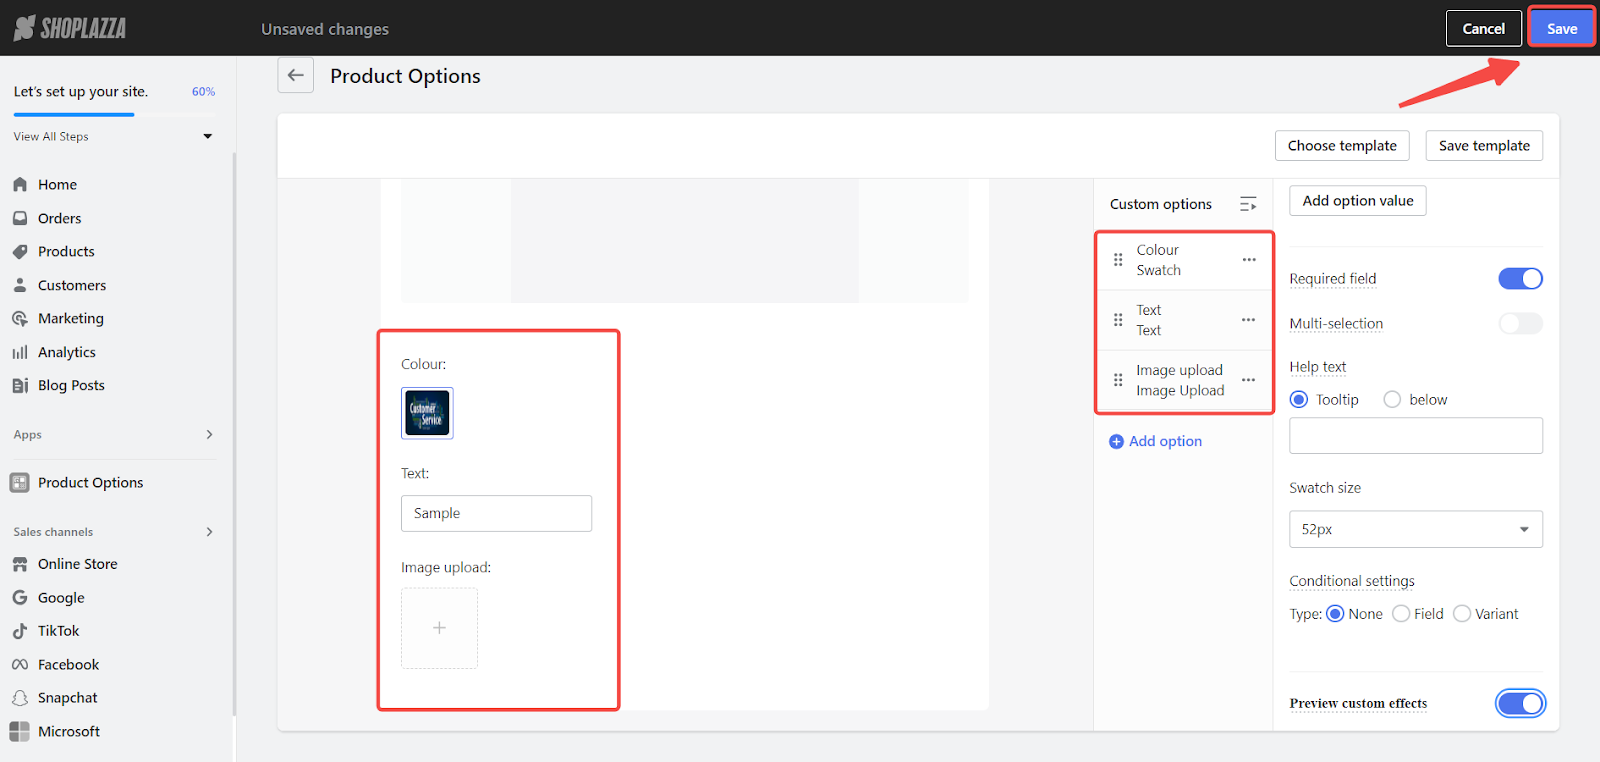
1. Enable preview for custom attributes: In the custom options section, activate preview custom effects for color swatch, image upload, and text to allow customers to visualize their customizations in real-time.
For Color Swatches with custom uploads
1. Understanding preview availability: The Preview custom effects feature becomes available for color swatches when you provide custom uploaded print images. This means customers can see a live preview of how these prints will look on the product. To utilize the Preview custom effects feature, create a color swatch option that includes your uploaded images for custom prints instead of the color picker selections. This way, customers can browse through the available custom prints and select one to see its preview on the product.


Note
The Preview custom effect feature is not available for swatches that use colors selected from the default color picker. To enable the Preview custom effects, the swatches must consist solely of uploaded images for custom prints.
2. Activate feature and define print position: Activate the Preview custom effects feature. While customers can choose from your array of custom prints, the positioning of these images on the product is preset by you. This differs from the image upload and text customization options, where customers have the ability to adjust the placement themselves. The fixed positions for 'Custom Prints' ensure product design integrity and brand consistency.

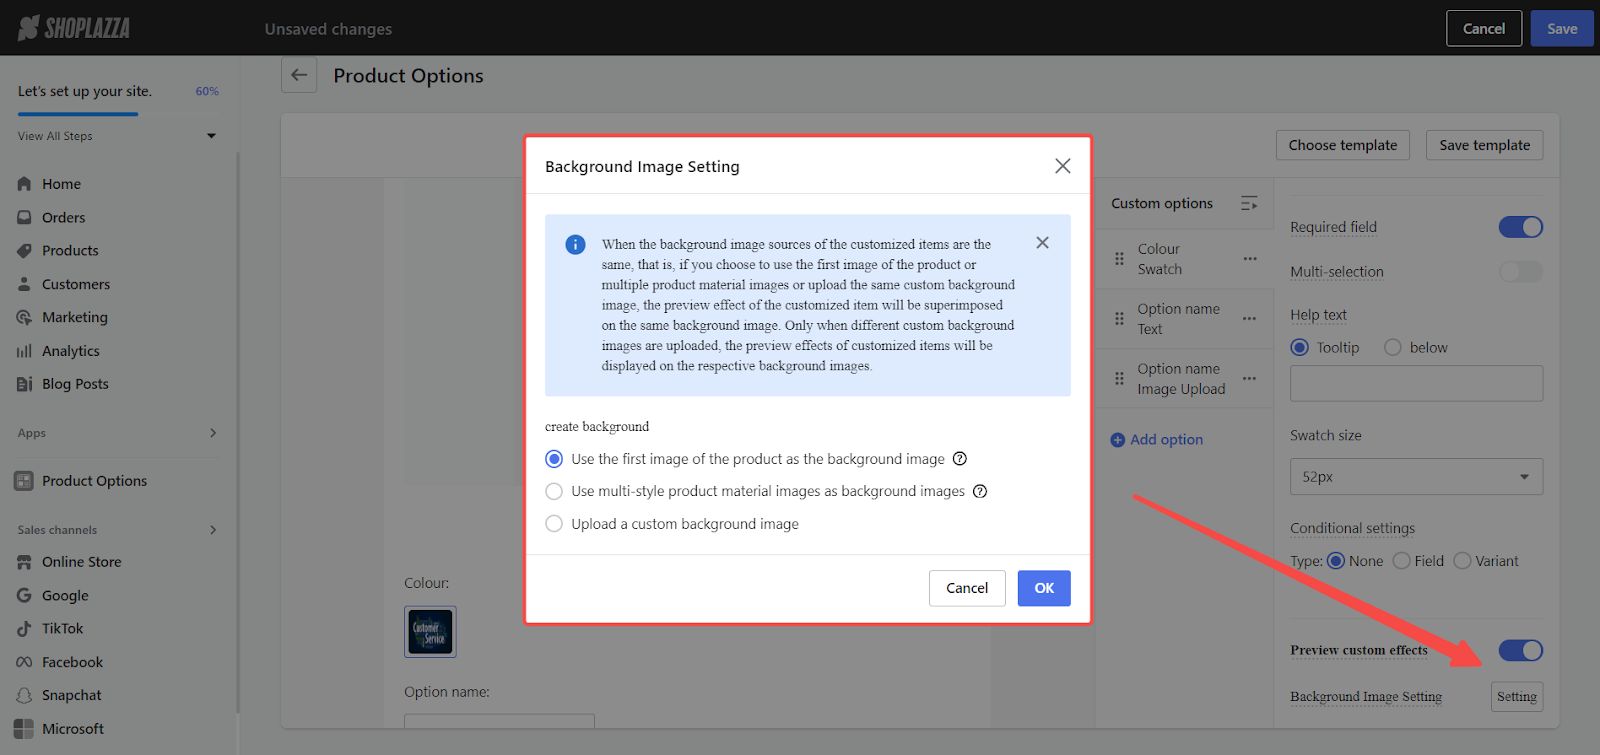
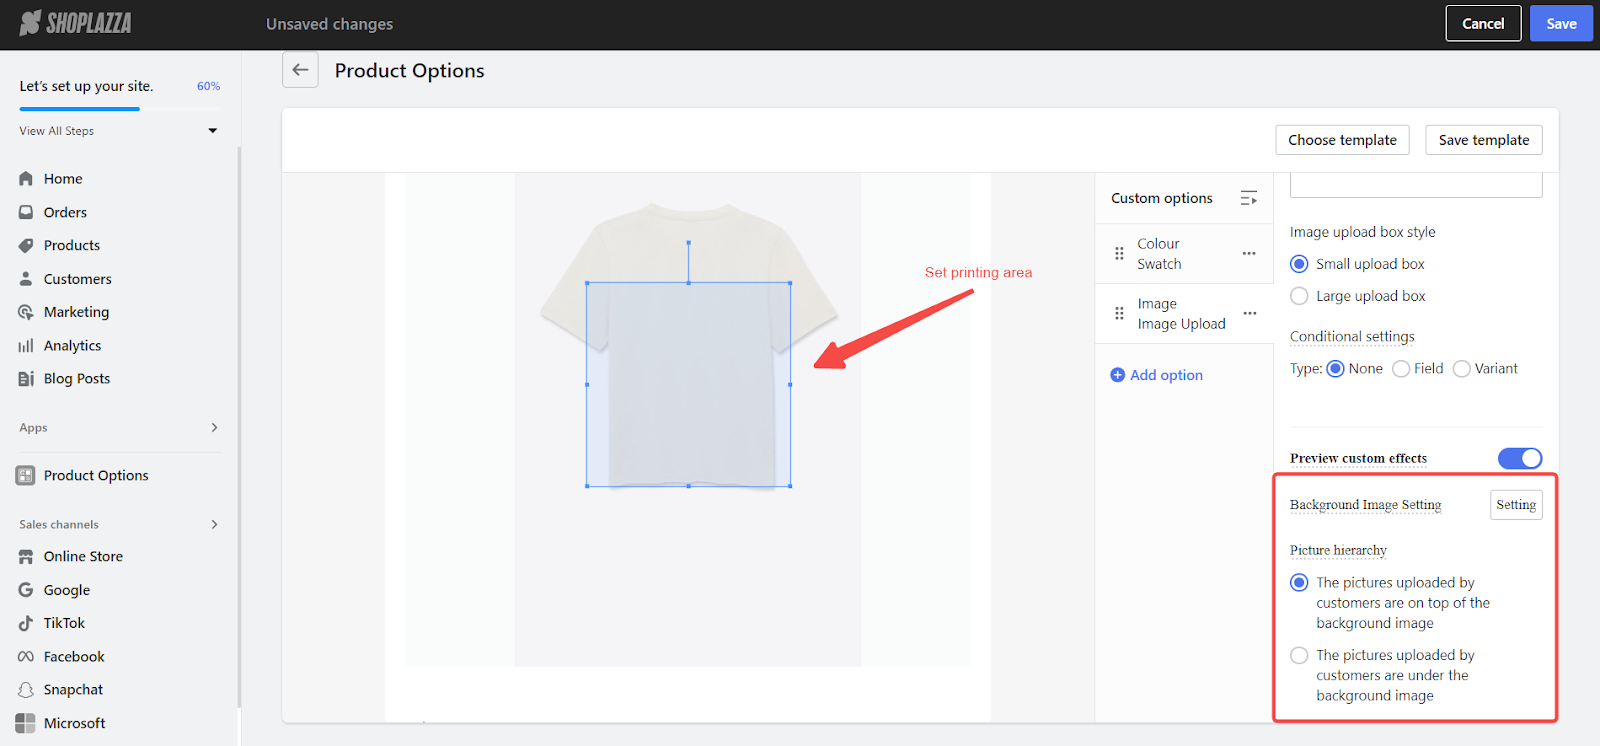
3. Background settings: Improve visualization by setting a background image. Options include using the product's main image by default, a custom image, or images from multiple product styles.
Note
The system only accepts image uploads smaller than 560x560 pixels.
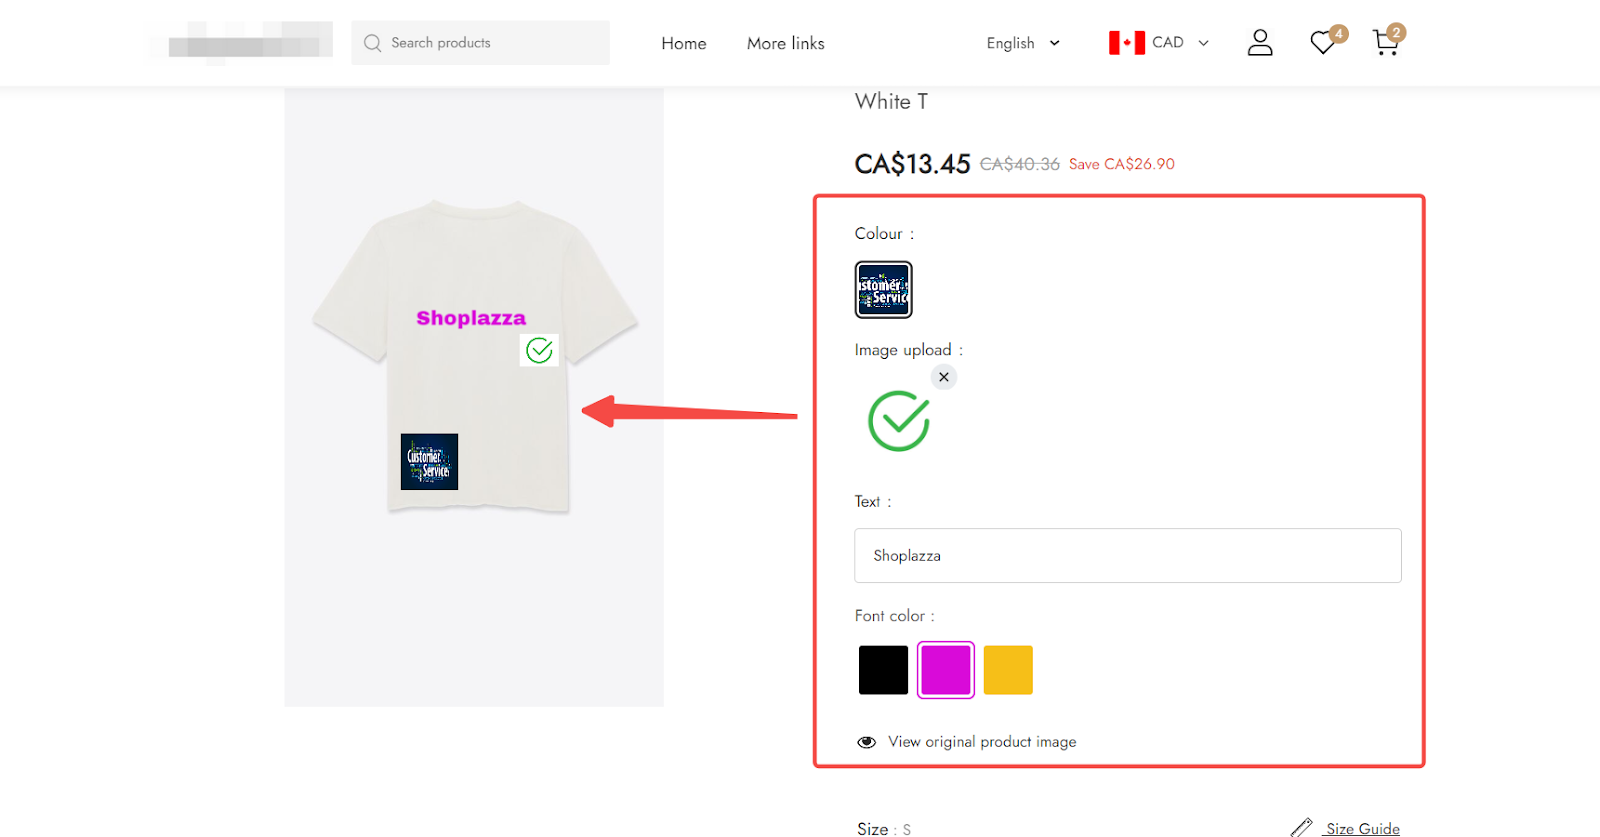
4. Customer interaction: Following the setup, customers have the flexibility to choose a custom print with the pre-defined print area.

5. Preview box transition: The preview box is designed to fluidly transition from the original product image to the customized preview image. When a customer selects a customization option, the preview box will update to display their choice, appearing in the specific position you've predefined in the app's settings. This visual transition helps customers clearly see how their custom selections will alter the appearance of the final product.

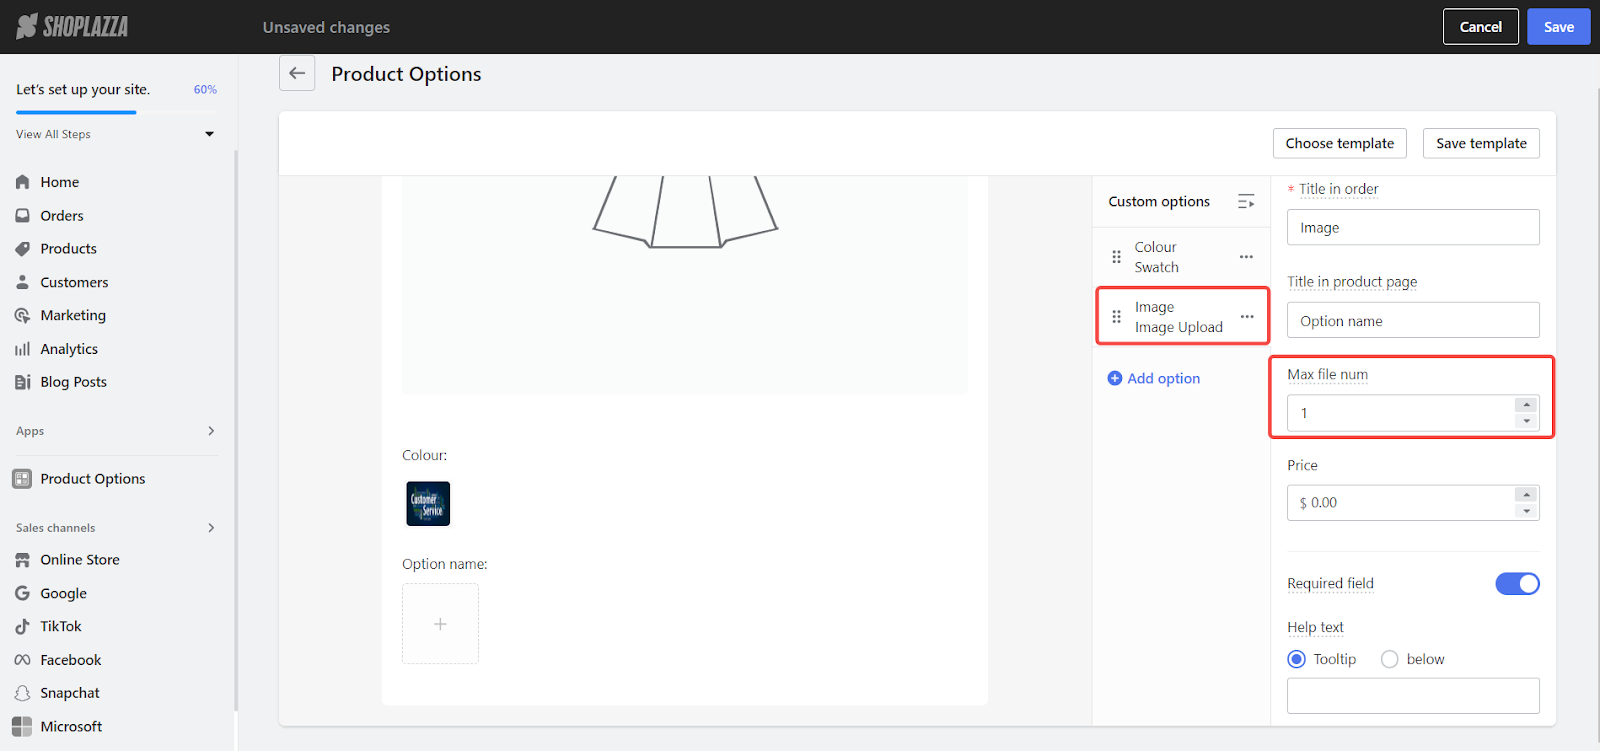
For Image Uploads
1. Add image upload attribute: Set the maximum upload quantity to one to facilitate preview effects, ensuring customers can upload and adjust their image on the product.
Note
The image upload feature is designed to accept only a single image per customer. Ensure the upload limit is set to one to enable this functionality. Exceeding this limit by uploading more than one image, the preview feature will not be available.
2. Enable preview effects: Activate this feature to allow customers to see how their uploaded image will look on the product.
3. Set printing area: Define where the uploaded image will appear with the background, catering to customization types like clothing or accessories.
4. Customer interaction: Customers can move, scale, or rotate their uploaded image within the specified printing area on the storefront.

For Text Customizations
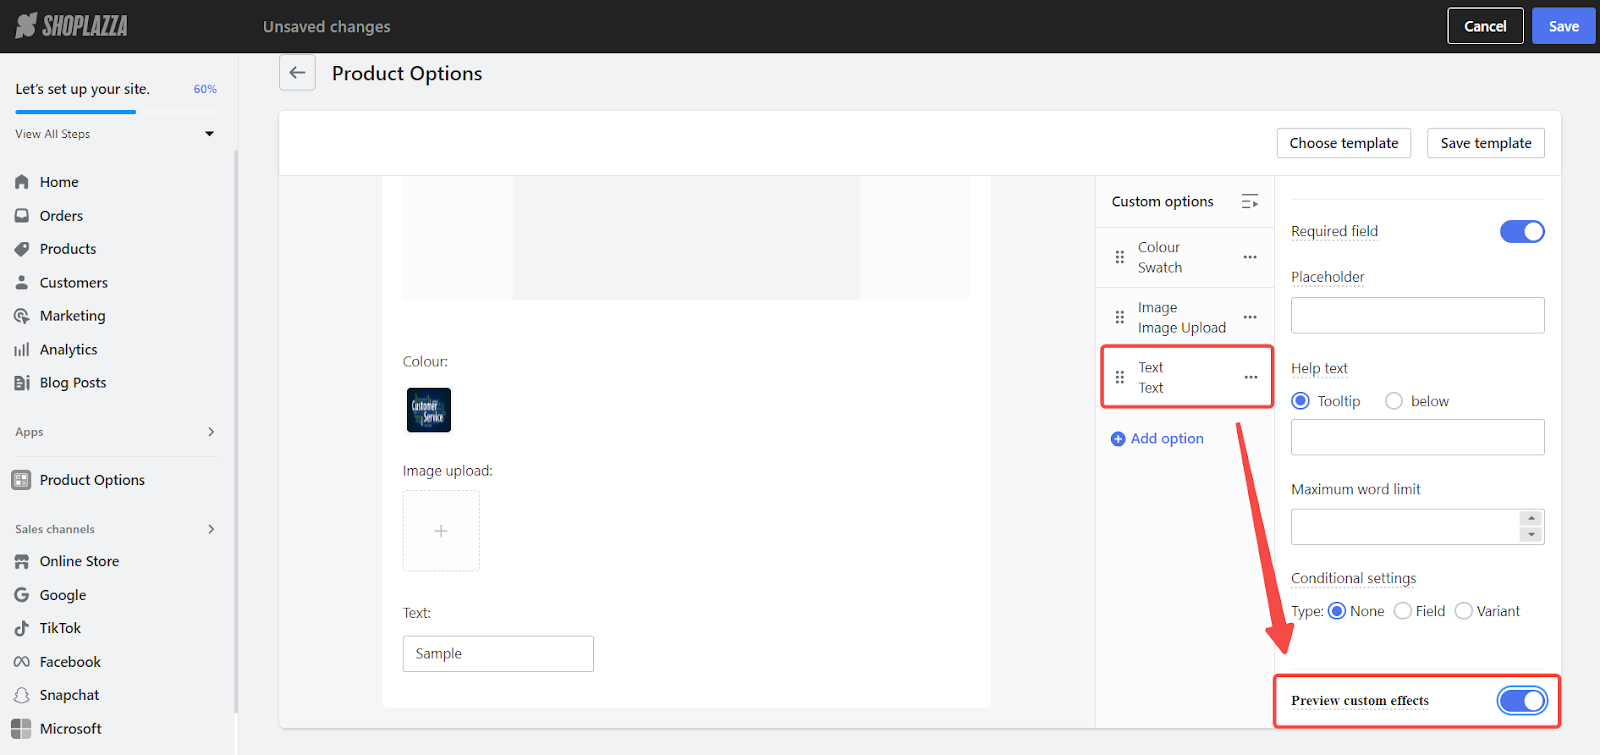
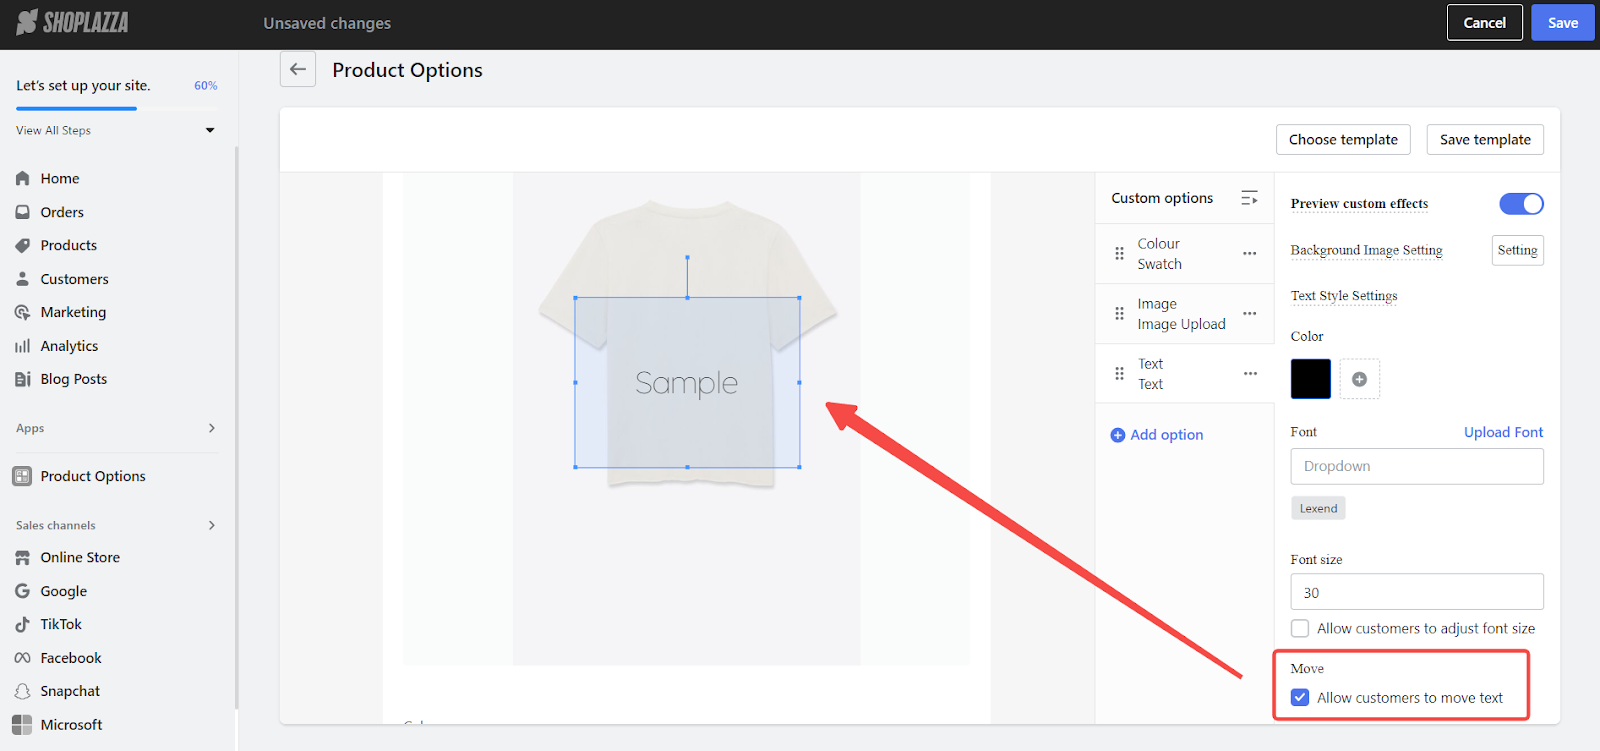
1. Text attribute settings: Activate the preview effects for text customizations.
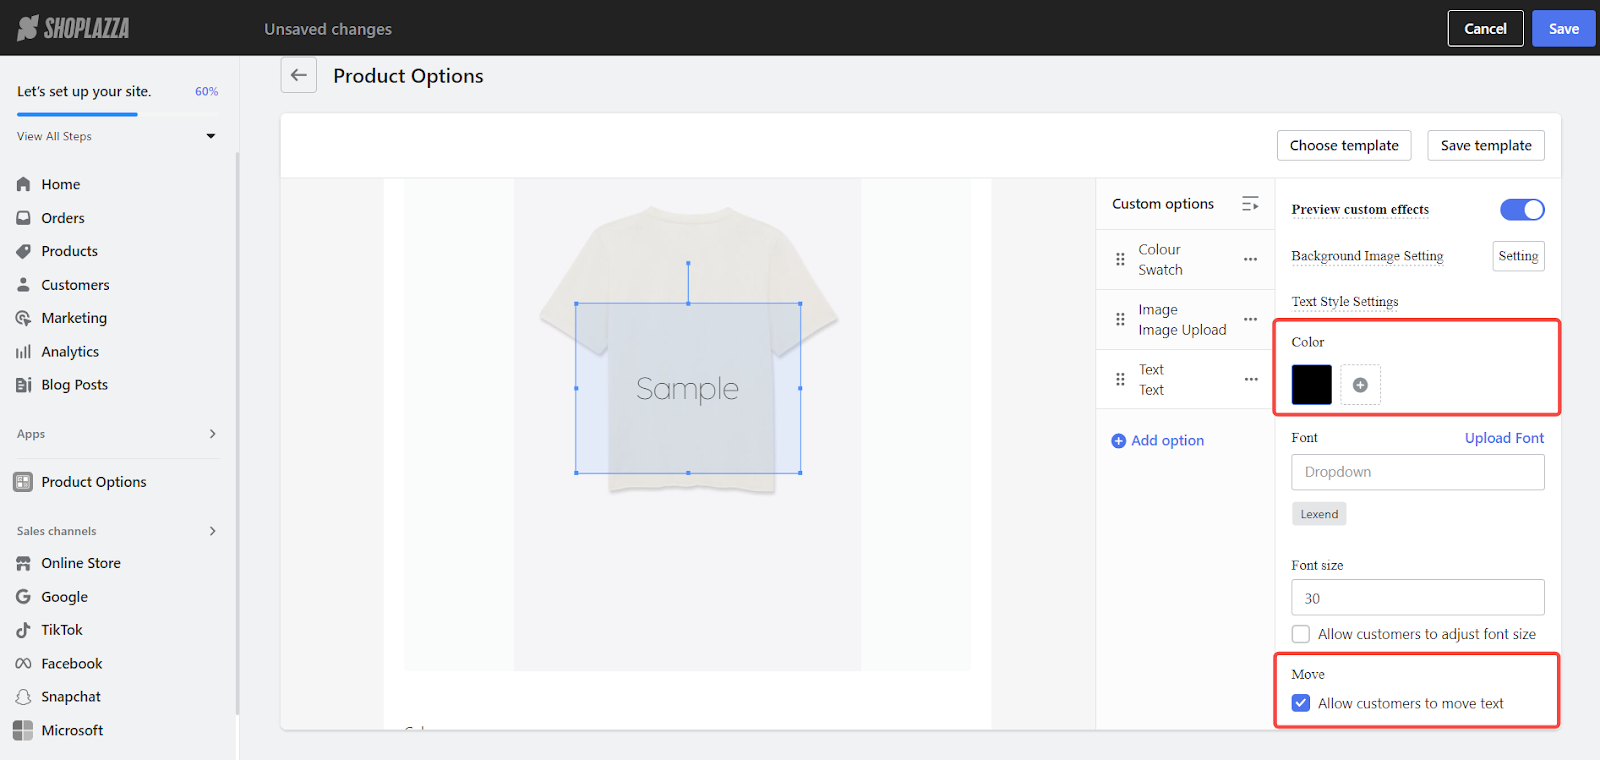
2. Adjust text placement and style: Modify the text position and style according to your product design, providing options for color, font size, and the ability to upload fonts. Decide whether customers can adjust font size directly.
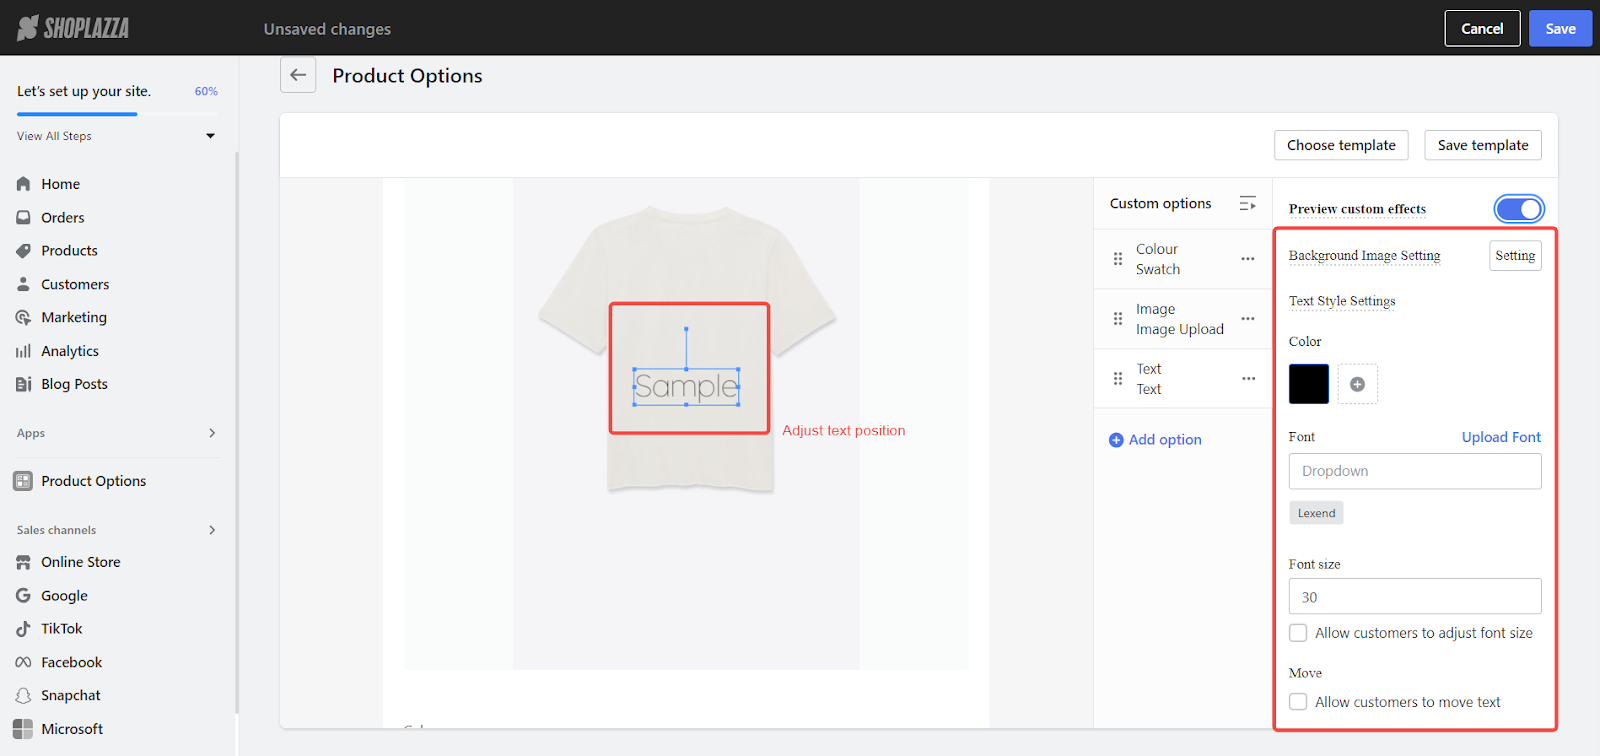
3. Setting the printing area: If you allow customers to move the text, click on Allow customers to move text, then define the printing area.
Note
Before adjusting the printable area for text customizations, it's essential to decide whether you'll allow customers to move the text. This option should be selected first before you define the printable area, otherwise the option to "Allow customers to move text" becomes fixed. Click Cancel to update the option.
4. Single text style: If there's only one text style, the storefront will not display style options. If moving text is not allowed, the text will be shown in the position set on the product page.
- Preview:

- Multiple text styles: When multiple text styles are available, the storefront will offer style selection options for customers. If moving text is allowed, customers can move, rotate the text within the designated printing area.

- Preview:

Finalizing your configuration
1. Finalize your updates: After setting up the customization options and preview effects, customers can engage with these features firsthand, tailoring the customizations to fit their preferences. The preview box will faithfully showcase the selected customizations, providing a precise visual depiction of the final product. To complete the process, ensure you hit the Save button, locking in the changes.
By integrating these steps, you enable advanced personalization in your Shoplazza store, simplifying the process for customers to visualize and purchase customized products. This strategy not only enhances customer satisfaction but also streamlines the production process, providing clear guidelines for creating customized products.


Comments
Please sign in to leave a comment.