
The Product Options app makes it easy to offer customizable products with smart, responsive . Instead of relying on rigid variants, you can create an intuitive experience where customers select how many patterns they want, upload their own designs, and optionally personalize each design area with custom text. This guide walks you through configuring Product Options from start to finish and shows you how to avoid variant conflicts for a cleaner, more dynamic setup.
Understanding the customization flow
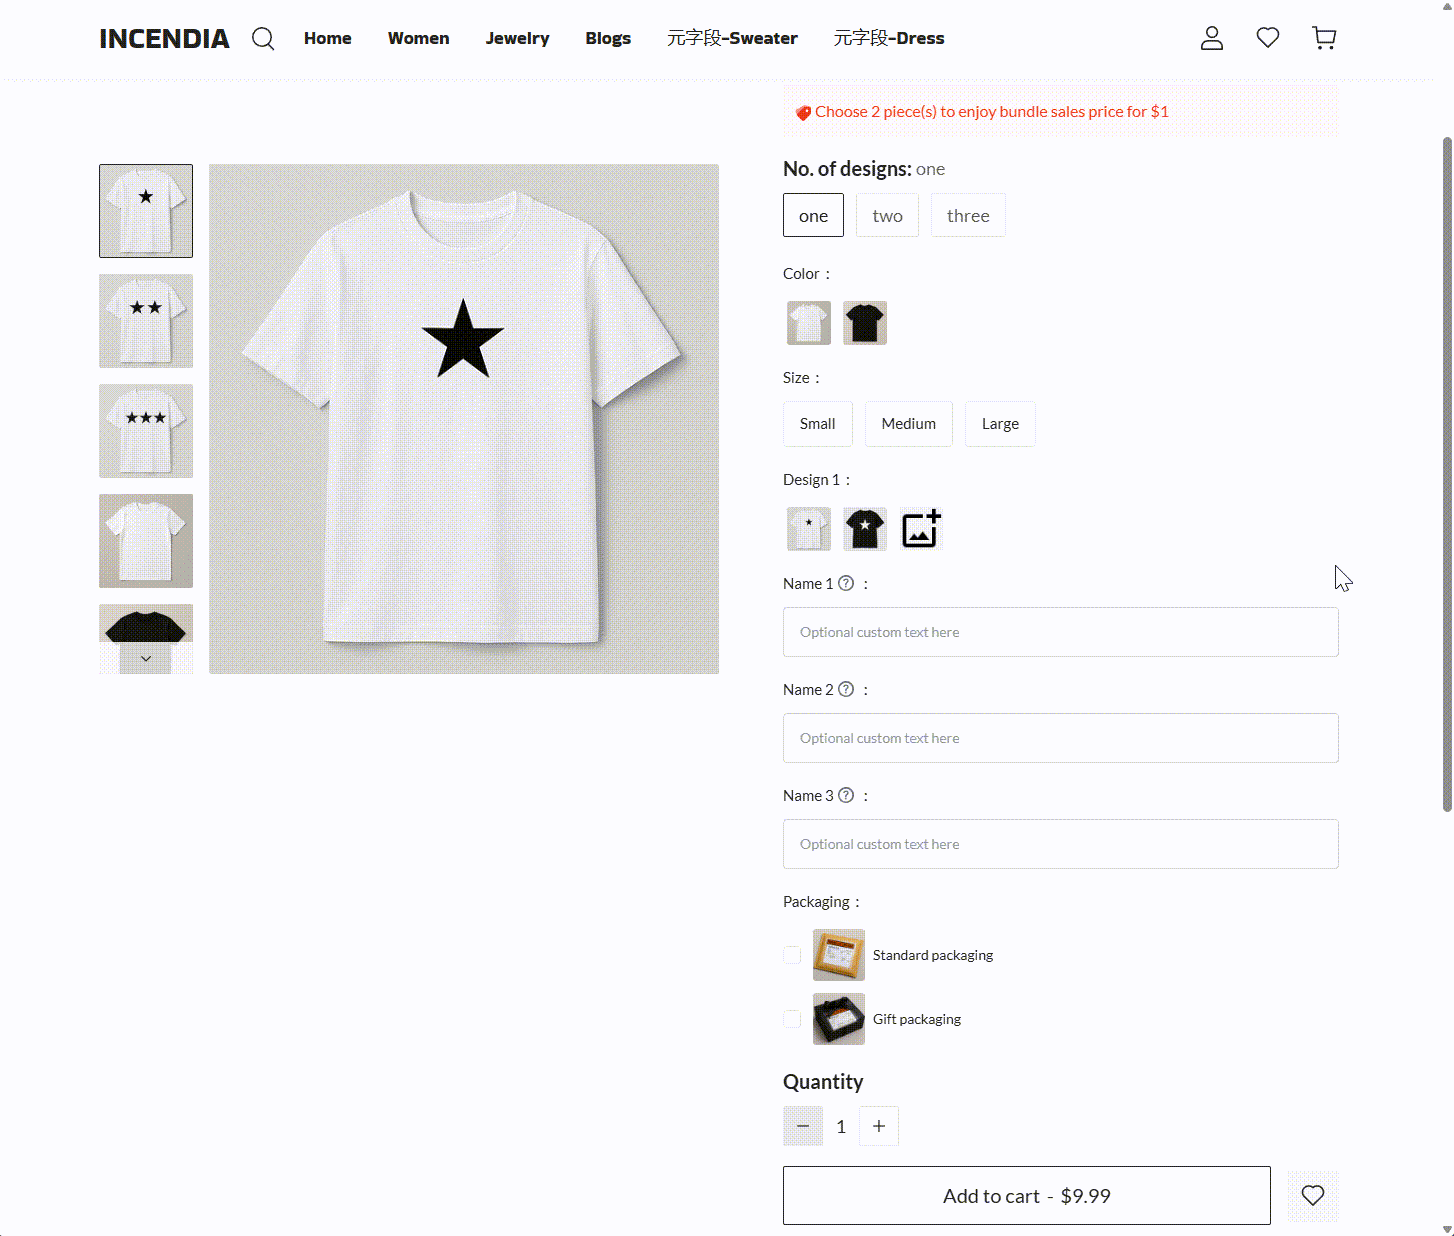
Before setting up your fields, it helps to outline the expected customer experience. For example, a customizable product might follow this structure:
- Choose color and size: Standard fields similar to variants, used to define appearance and fit.
- Select number of patterns: A button field that controls how many design areas (and upload/name fields) are displayed.
- Choose a design or upload your own: Customers can either select from preset designs or upload their own image for each area.
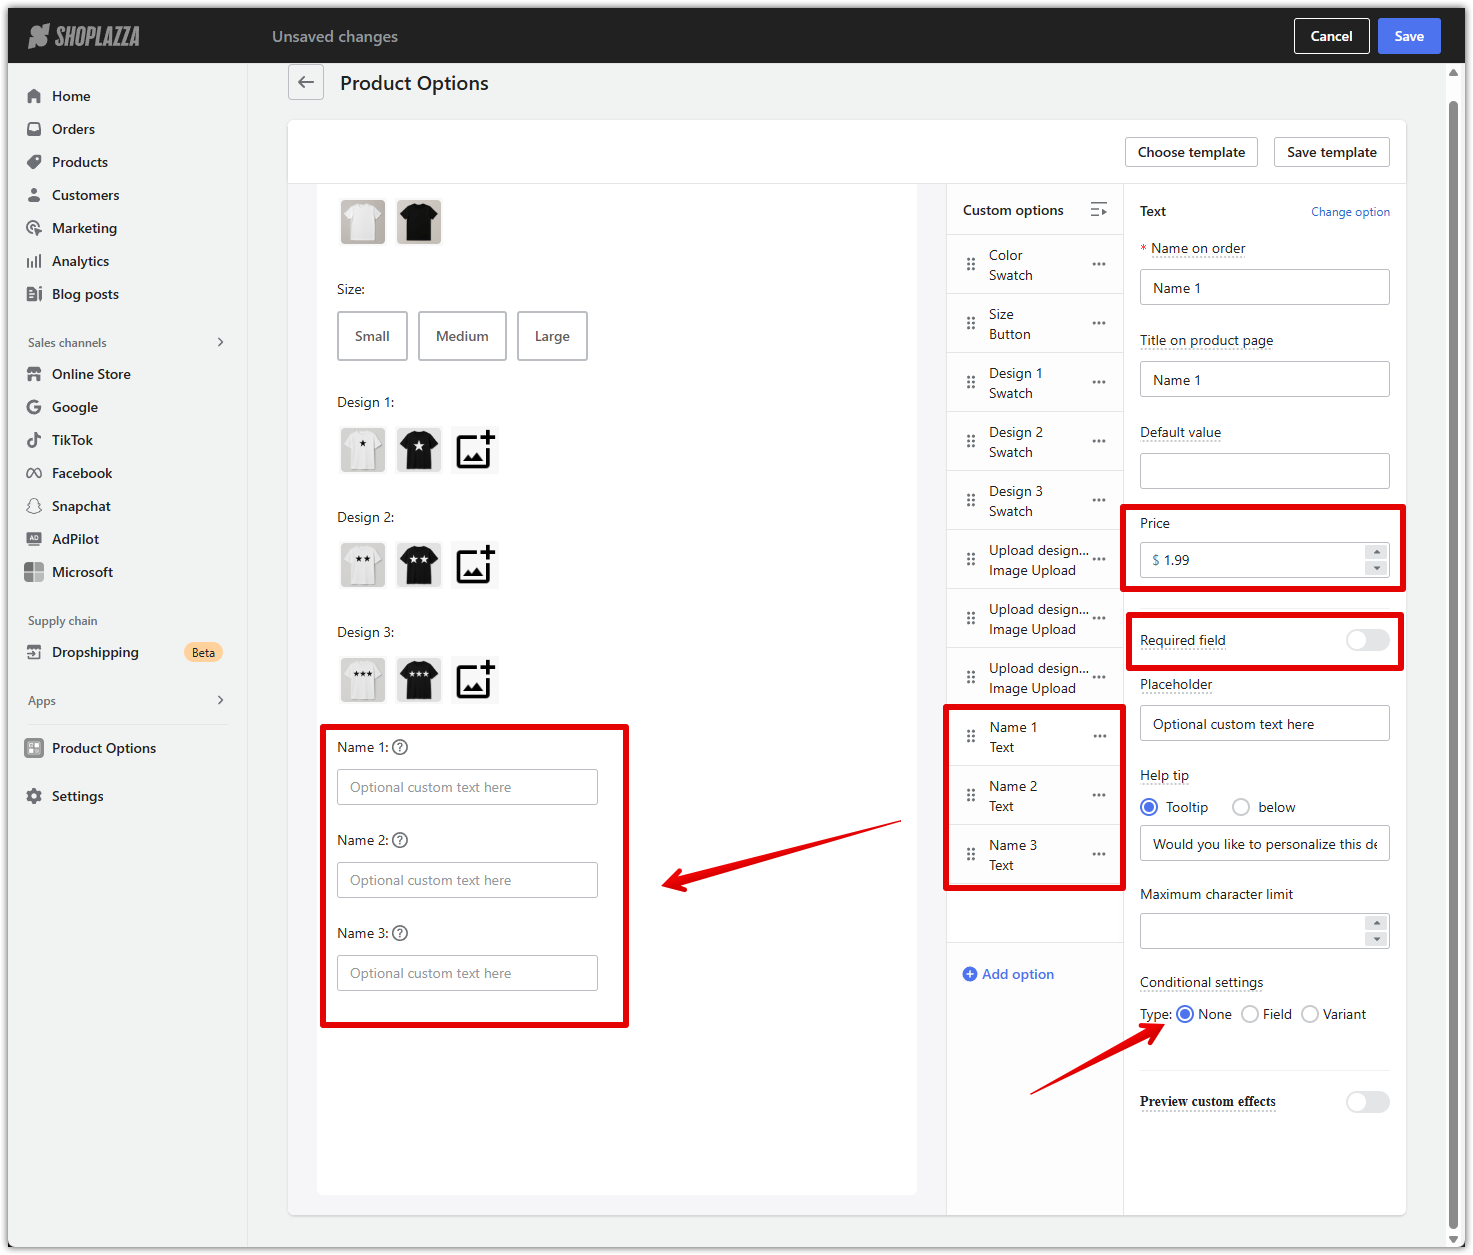
- Enter name(s): All name fields remain visible at all times. Each one adds an additional charge only when text is entered.
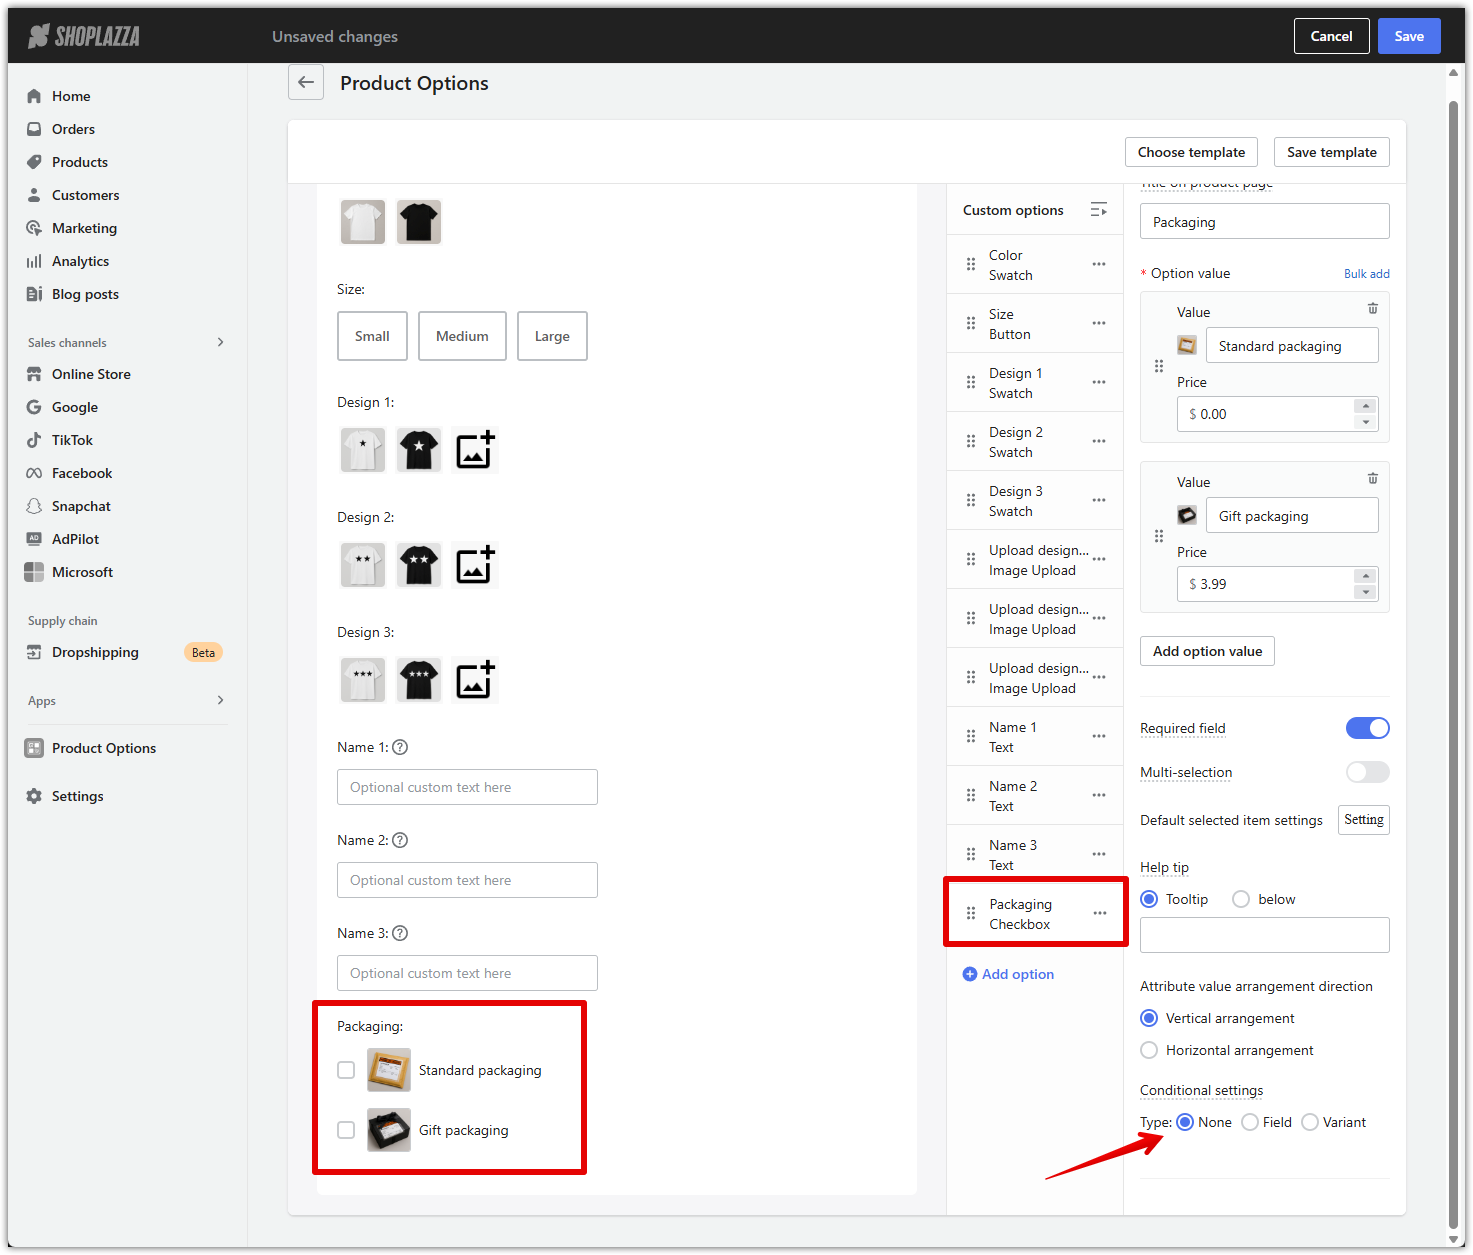
- Choose optional packaging or services: Upsell options like gift wrapping can be added at the end.
Preparing your product listing
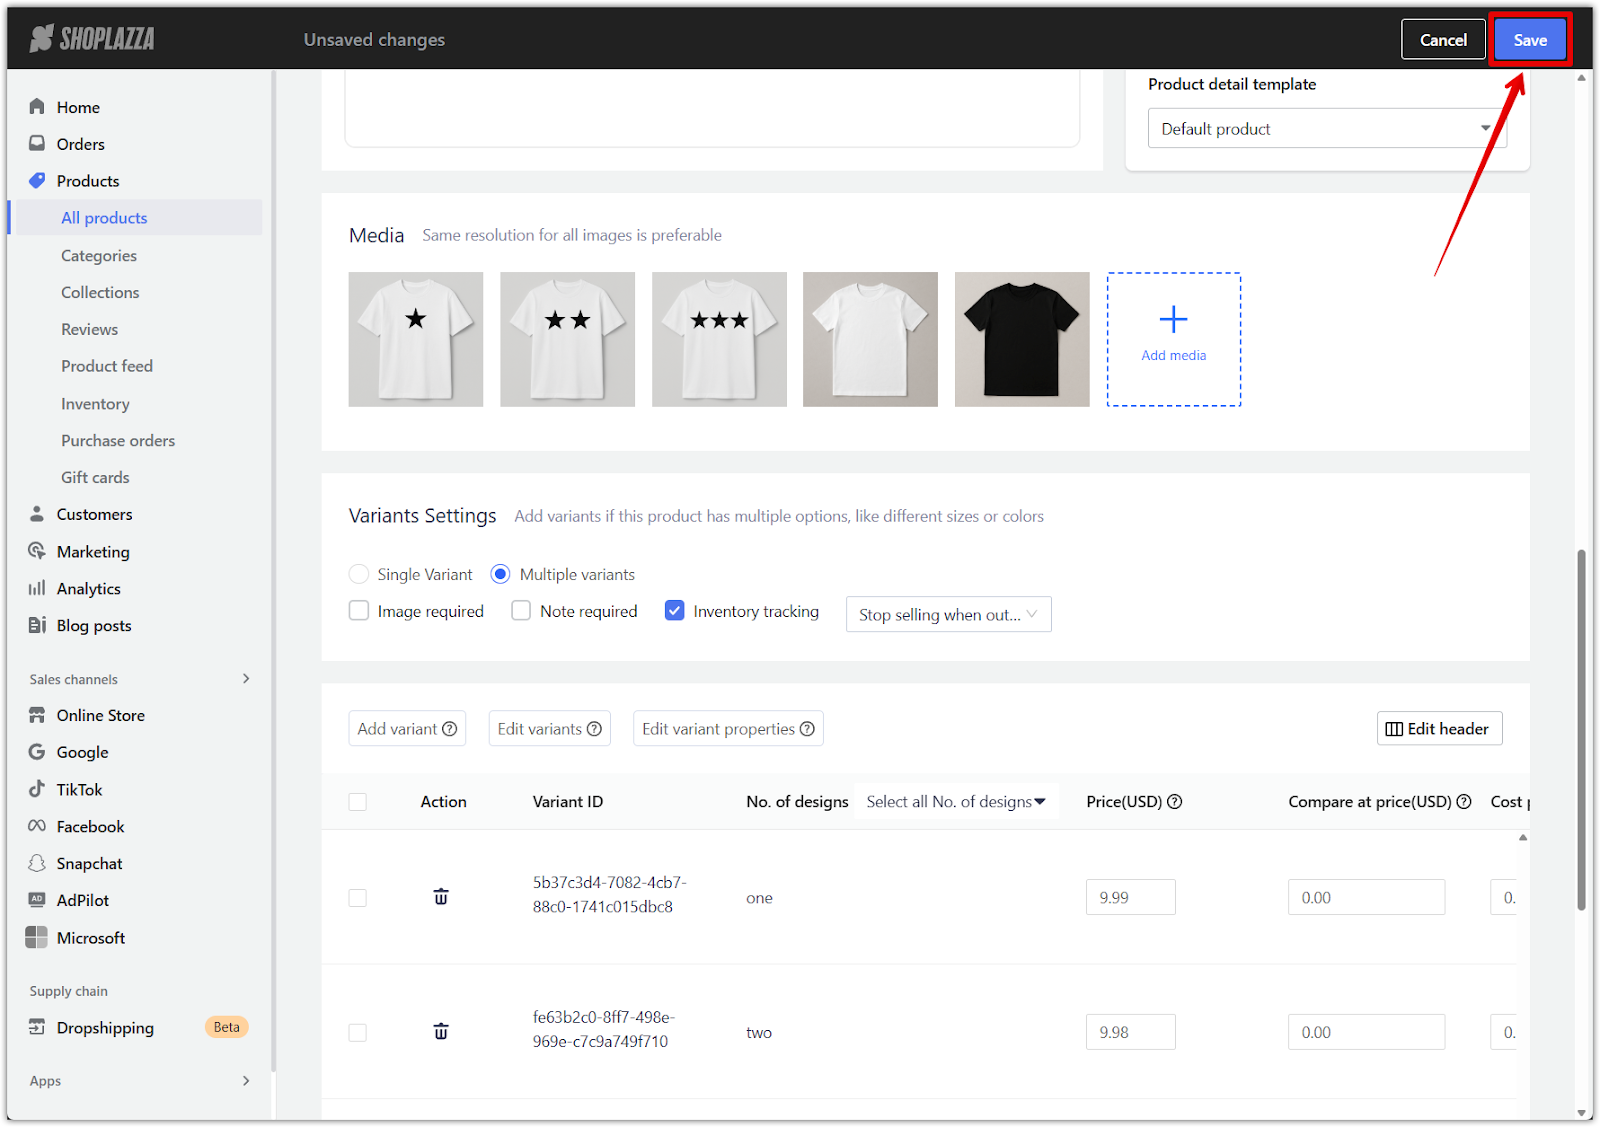
Start by simplifying your product setup in the admin panel to avoid conflicts with custom options.
1. Open your product in the admin: Go to your Shoplazza admin > Products, then click on the product you want to customize to view its details and variant settings.
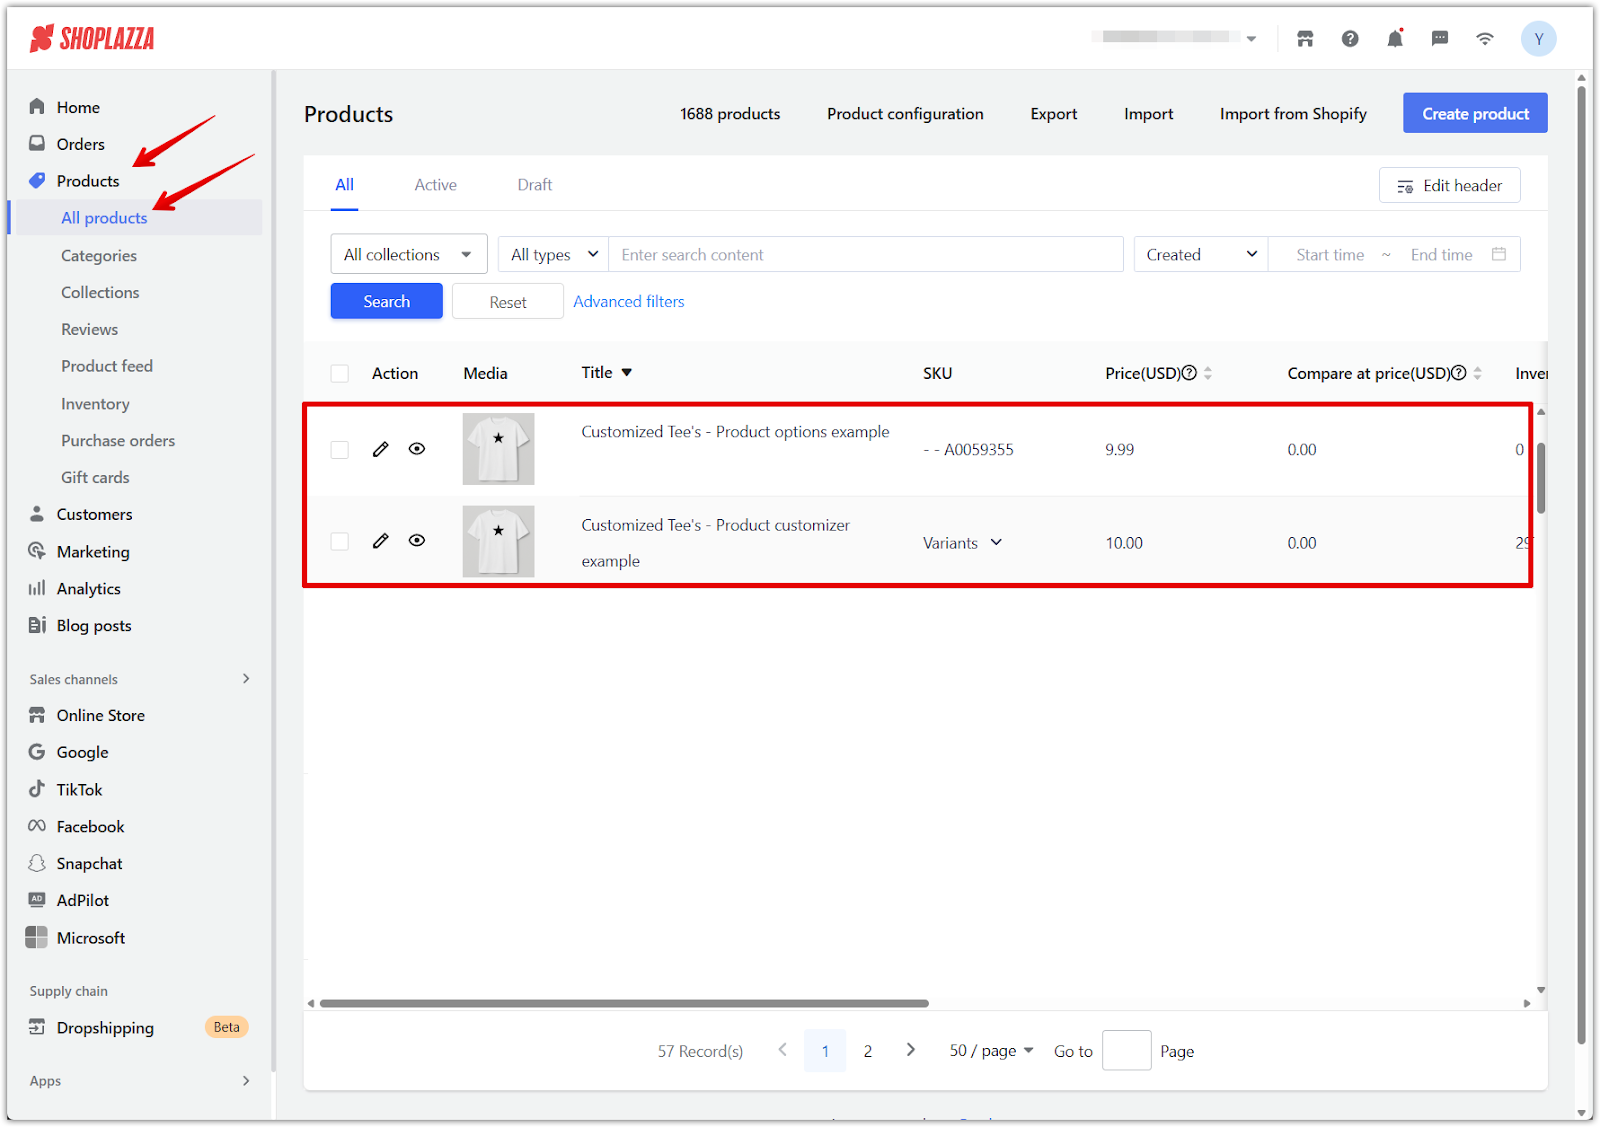
2. Enable multiple variants: In the Variant Settings section, ensure that Multiple variants is selected. This lets you manage core product options like size and color while layering on additional customization through the Product Options app.
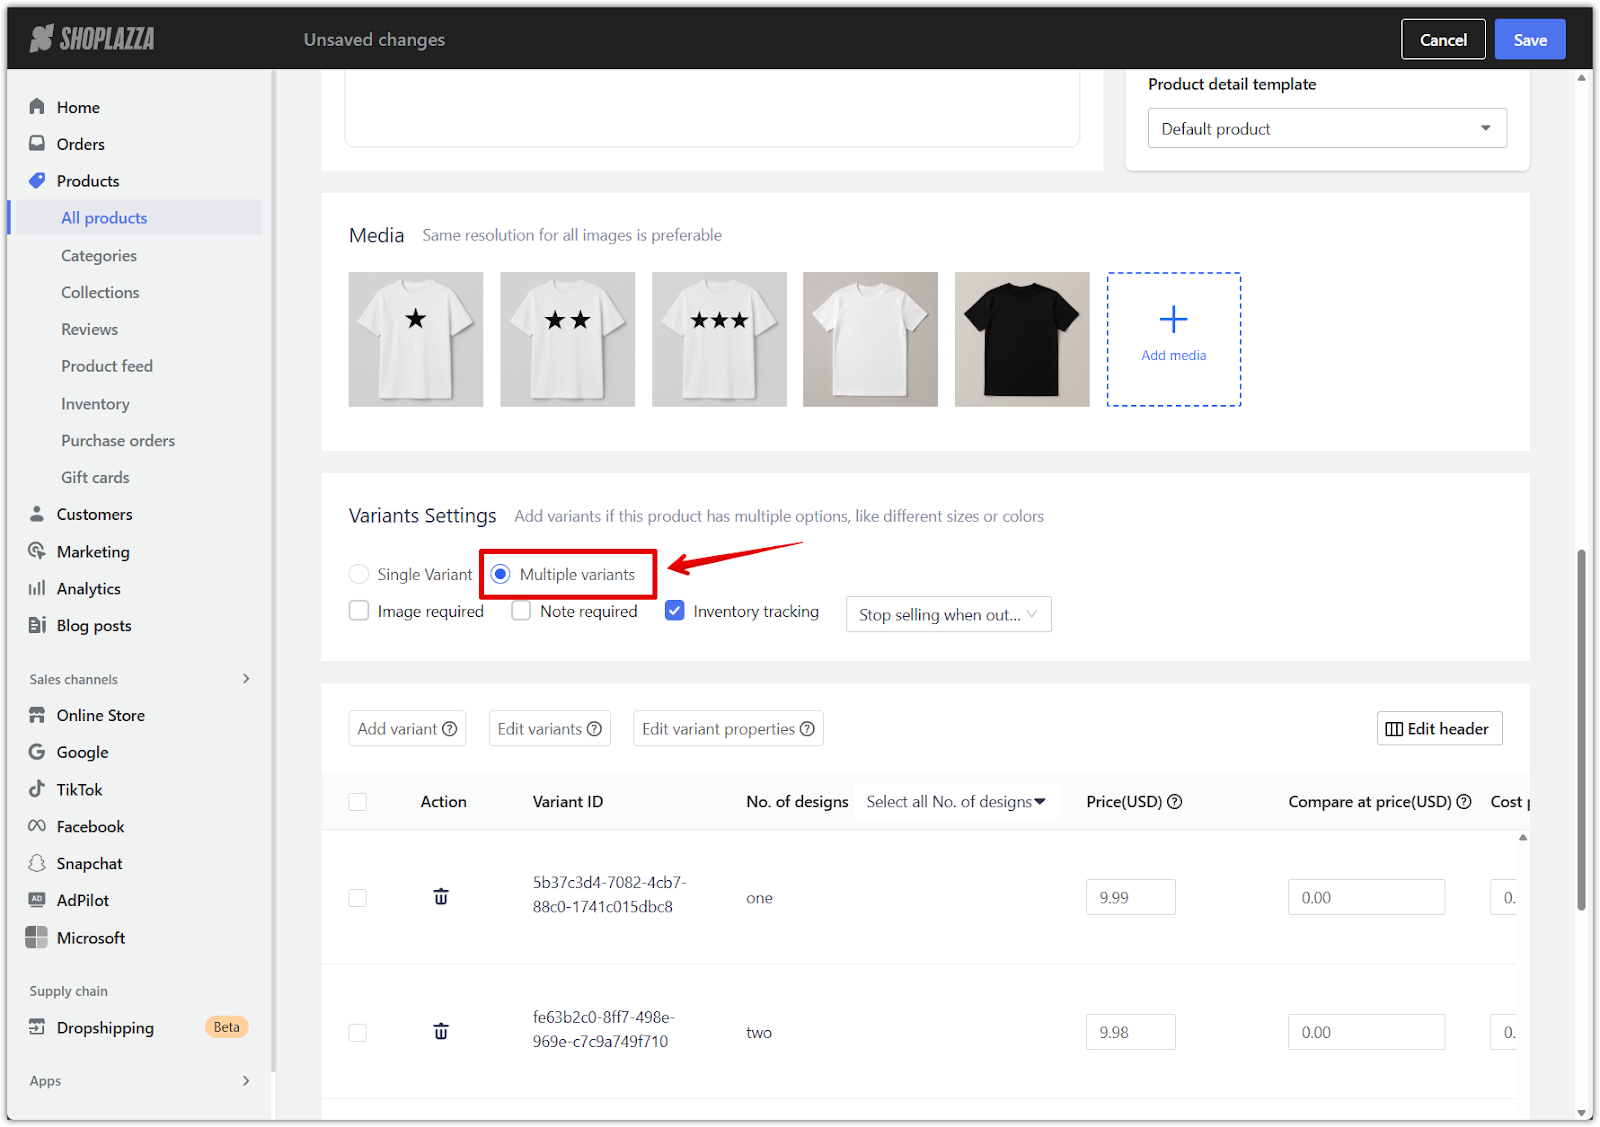
3. Save changes: Confirm by clicking Save to ensure the change is applied.
Creating option fields in Product Options
The following steps walk through how to build every component of your product customization form using the Product Options app.
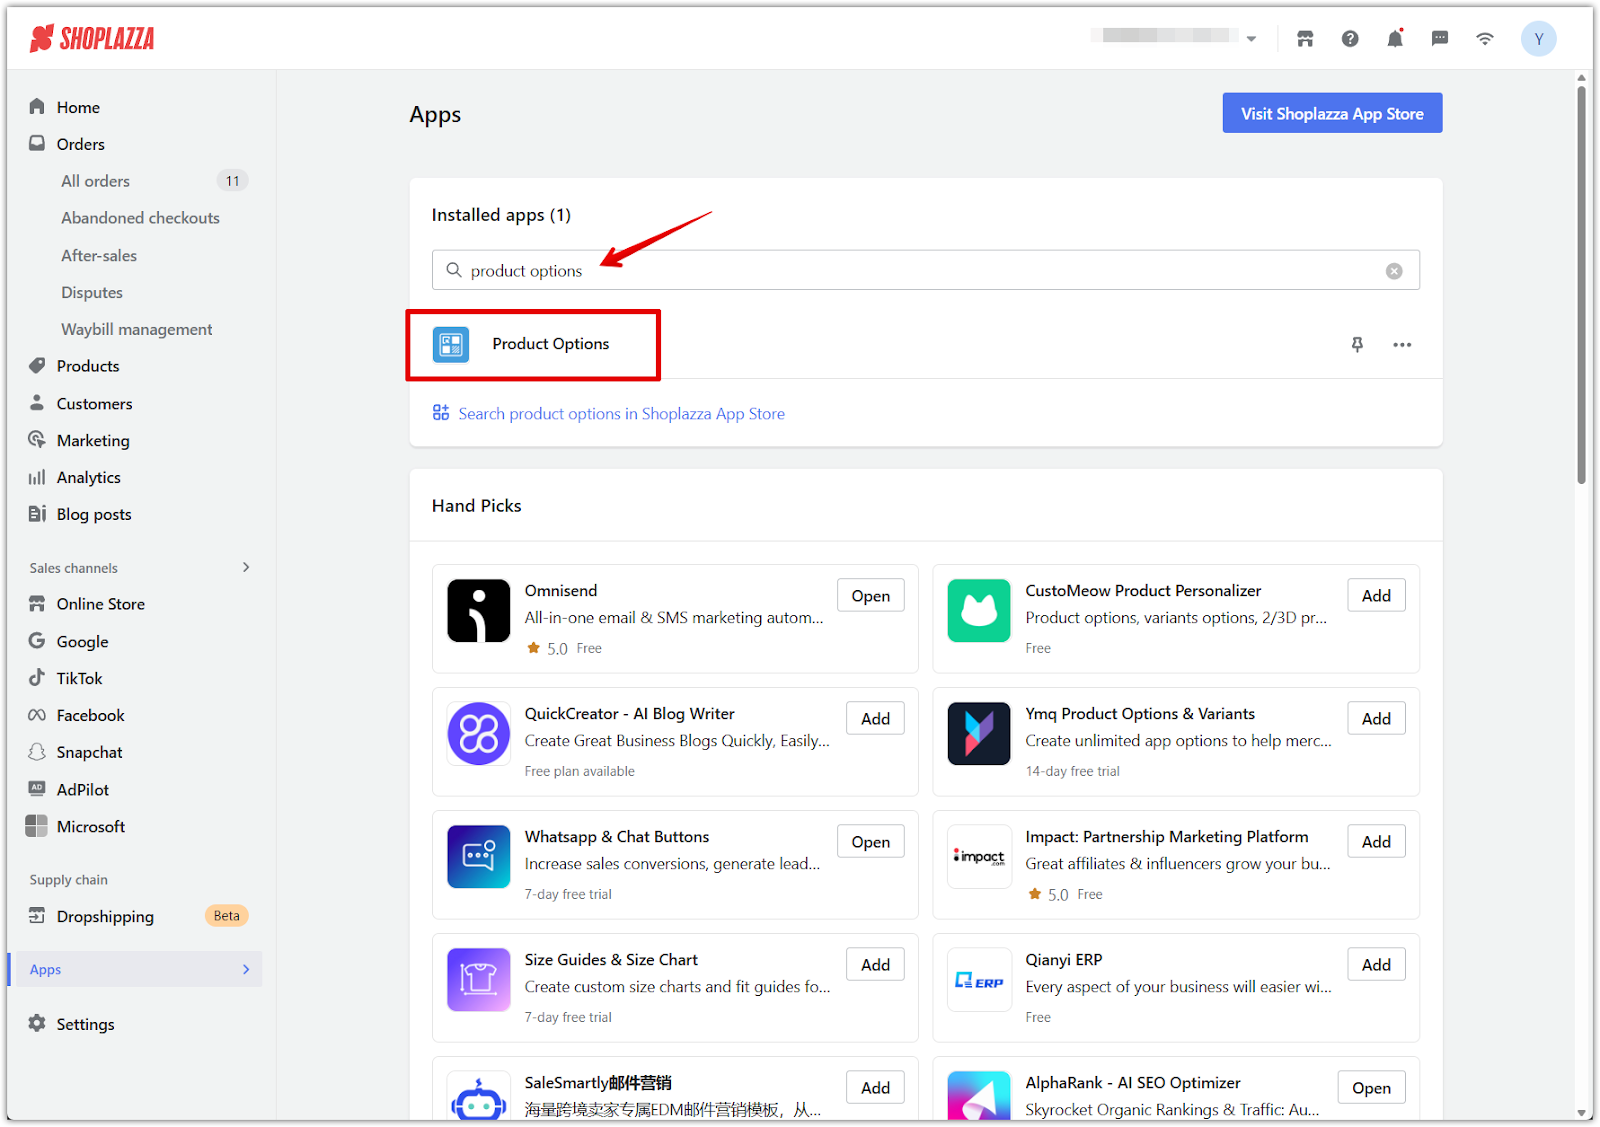
1. Go to Product Options: Navigate to your Shoplazza admin > Apps > Product Options. If you haven’t already installed the app, go to the Product Options page in the Shoplazza App Store and click Install.
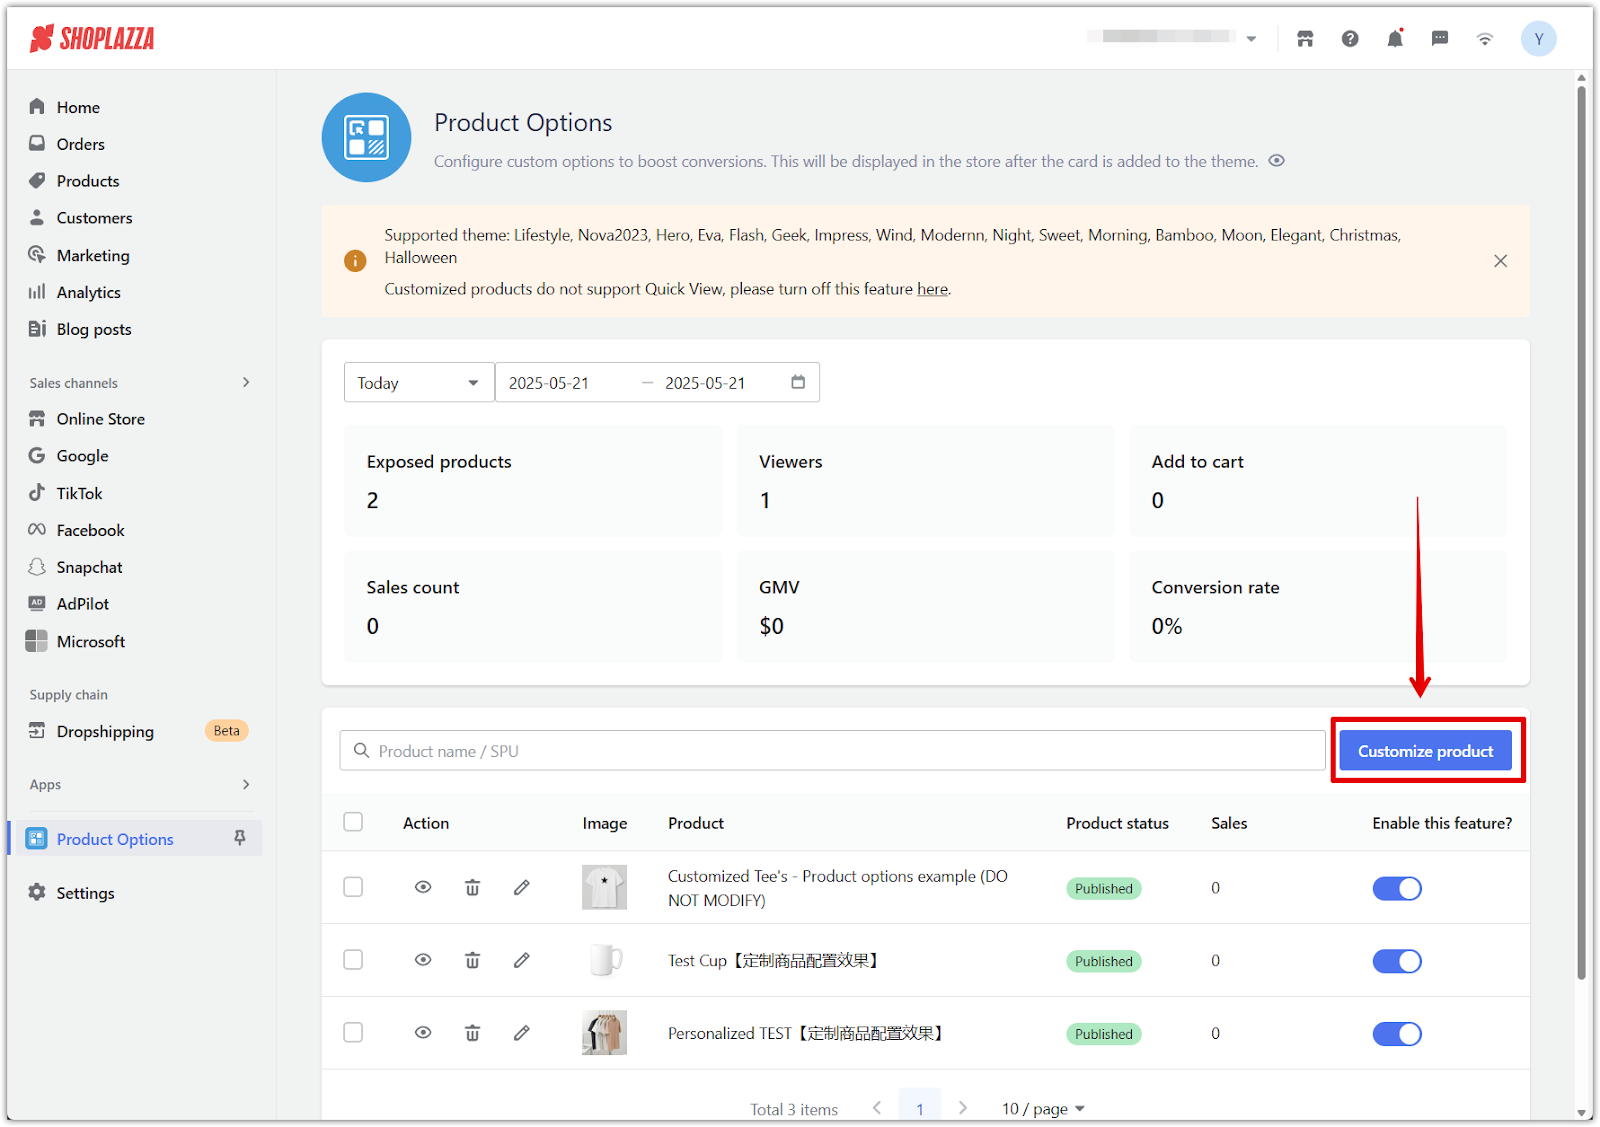
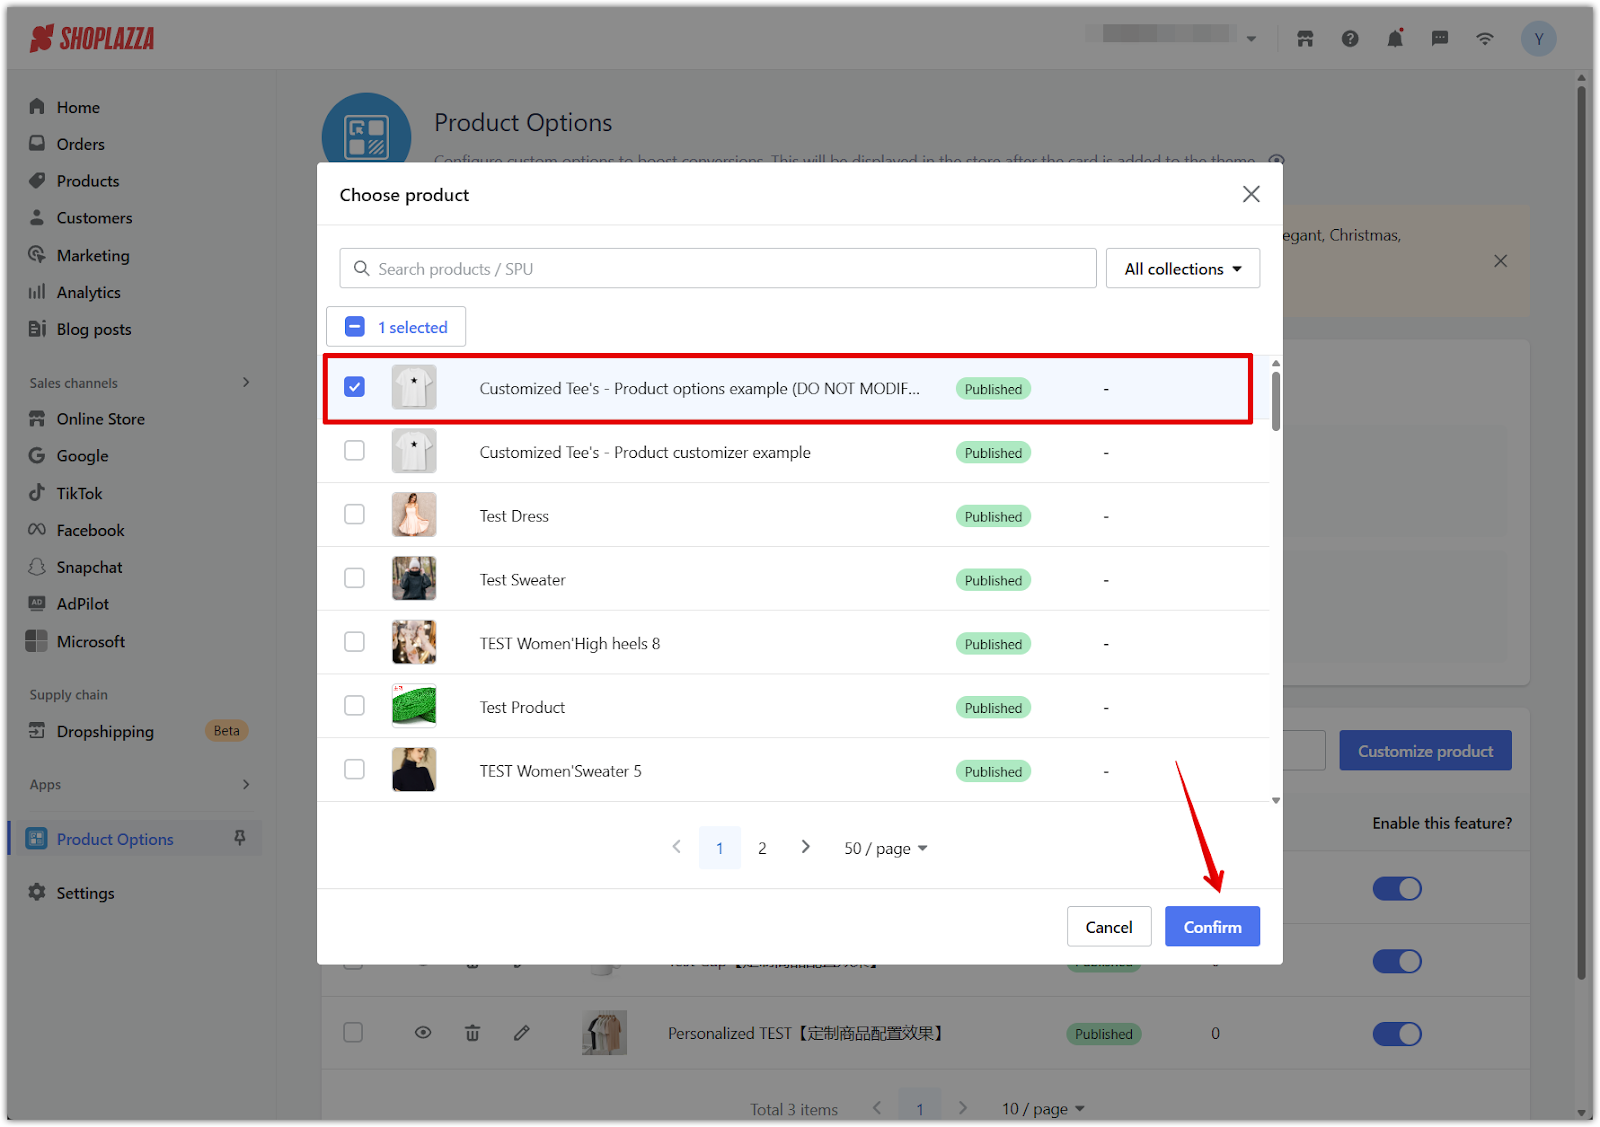
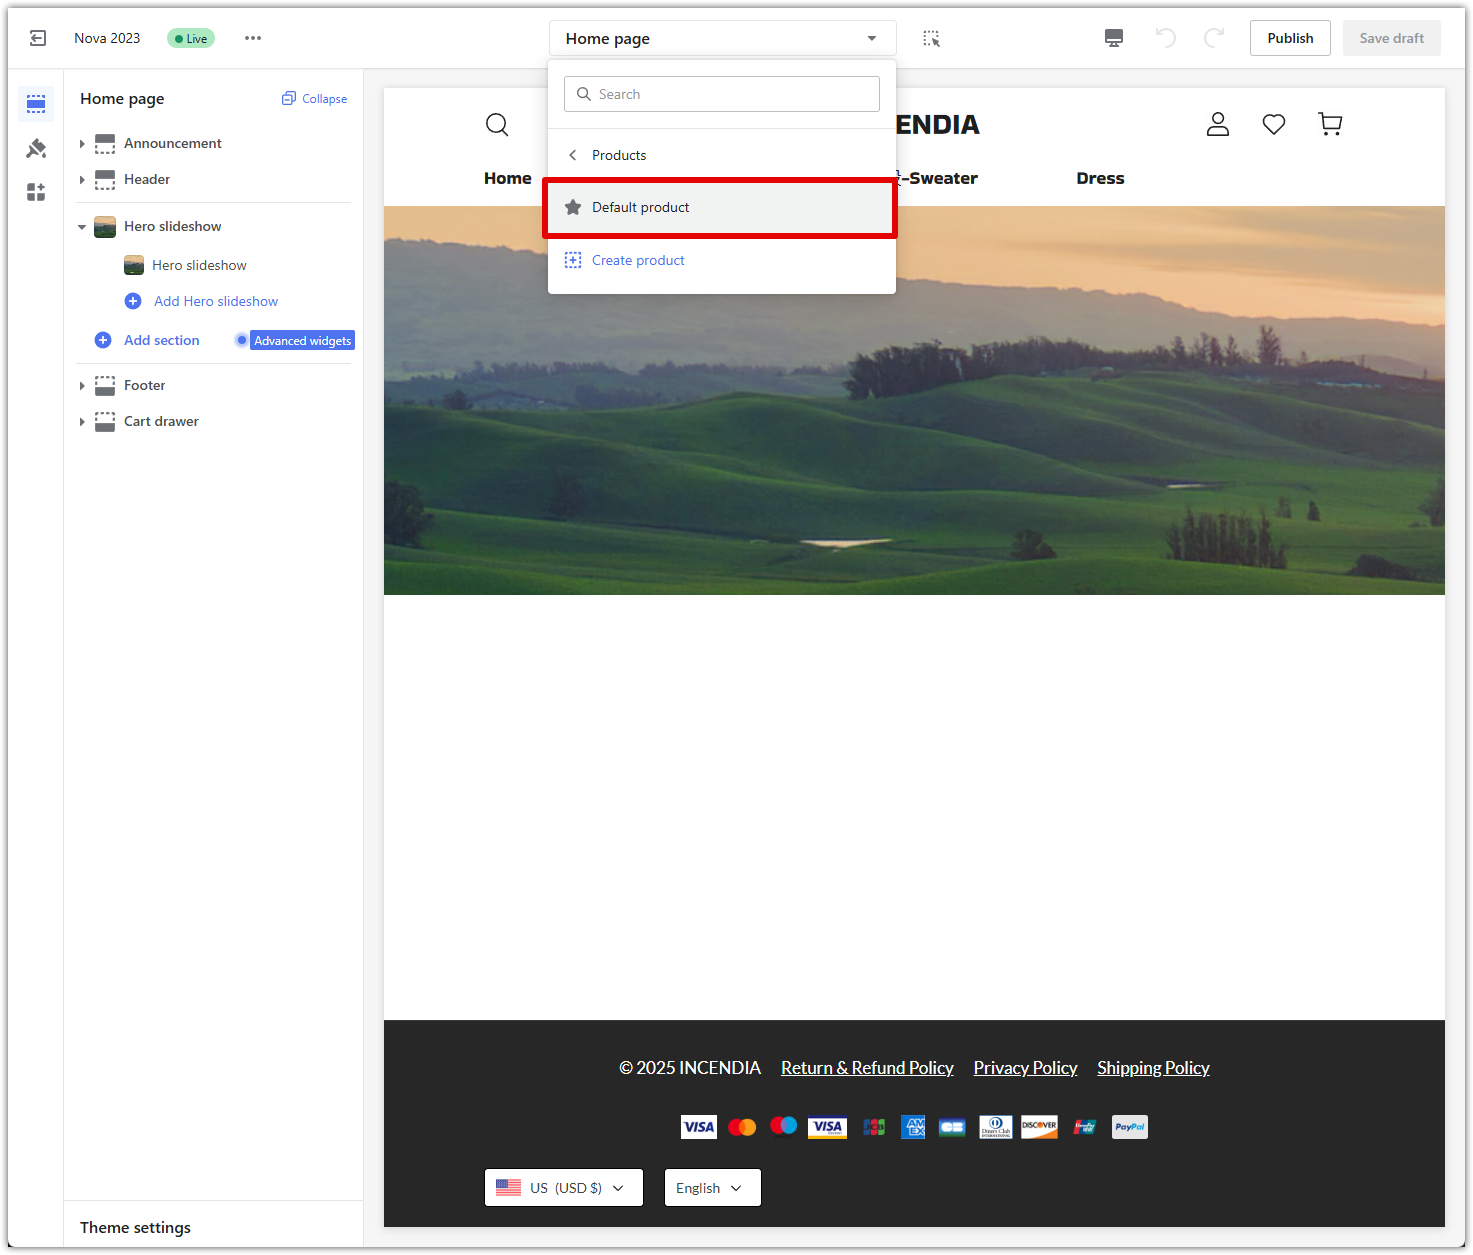
2. Select your product: Click Customize product, then choose the product you want to configure from the list and select Confirm.
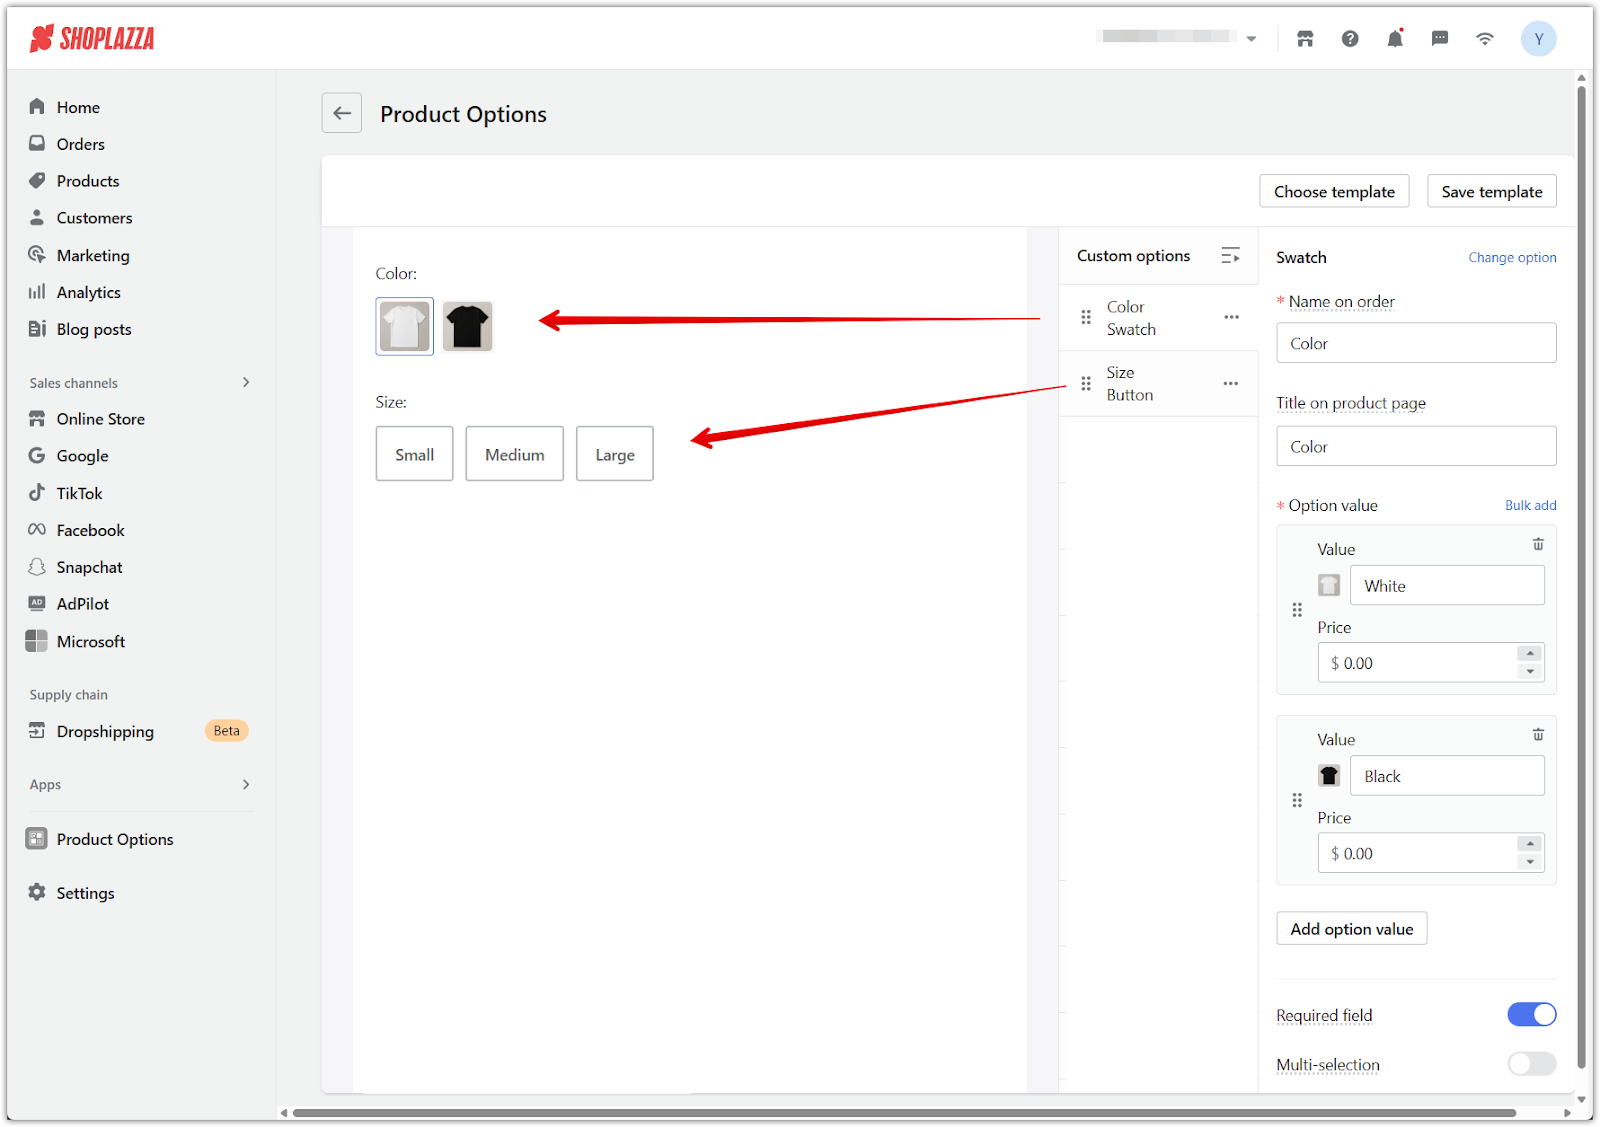
3. Add base fields: Create standard variant-style fields using swatches and buttons by clicking Add option.
- Color (Swatch): Add color options such as White, Black, Red, etc.
- Size (Button): Add button values such as S, M, L, or any size options relevant to your product.
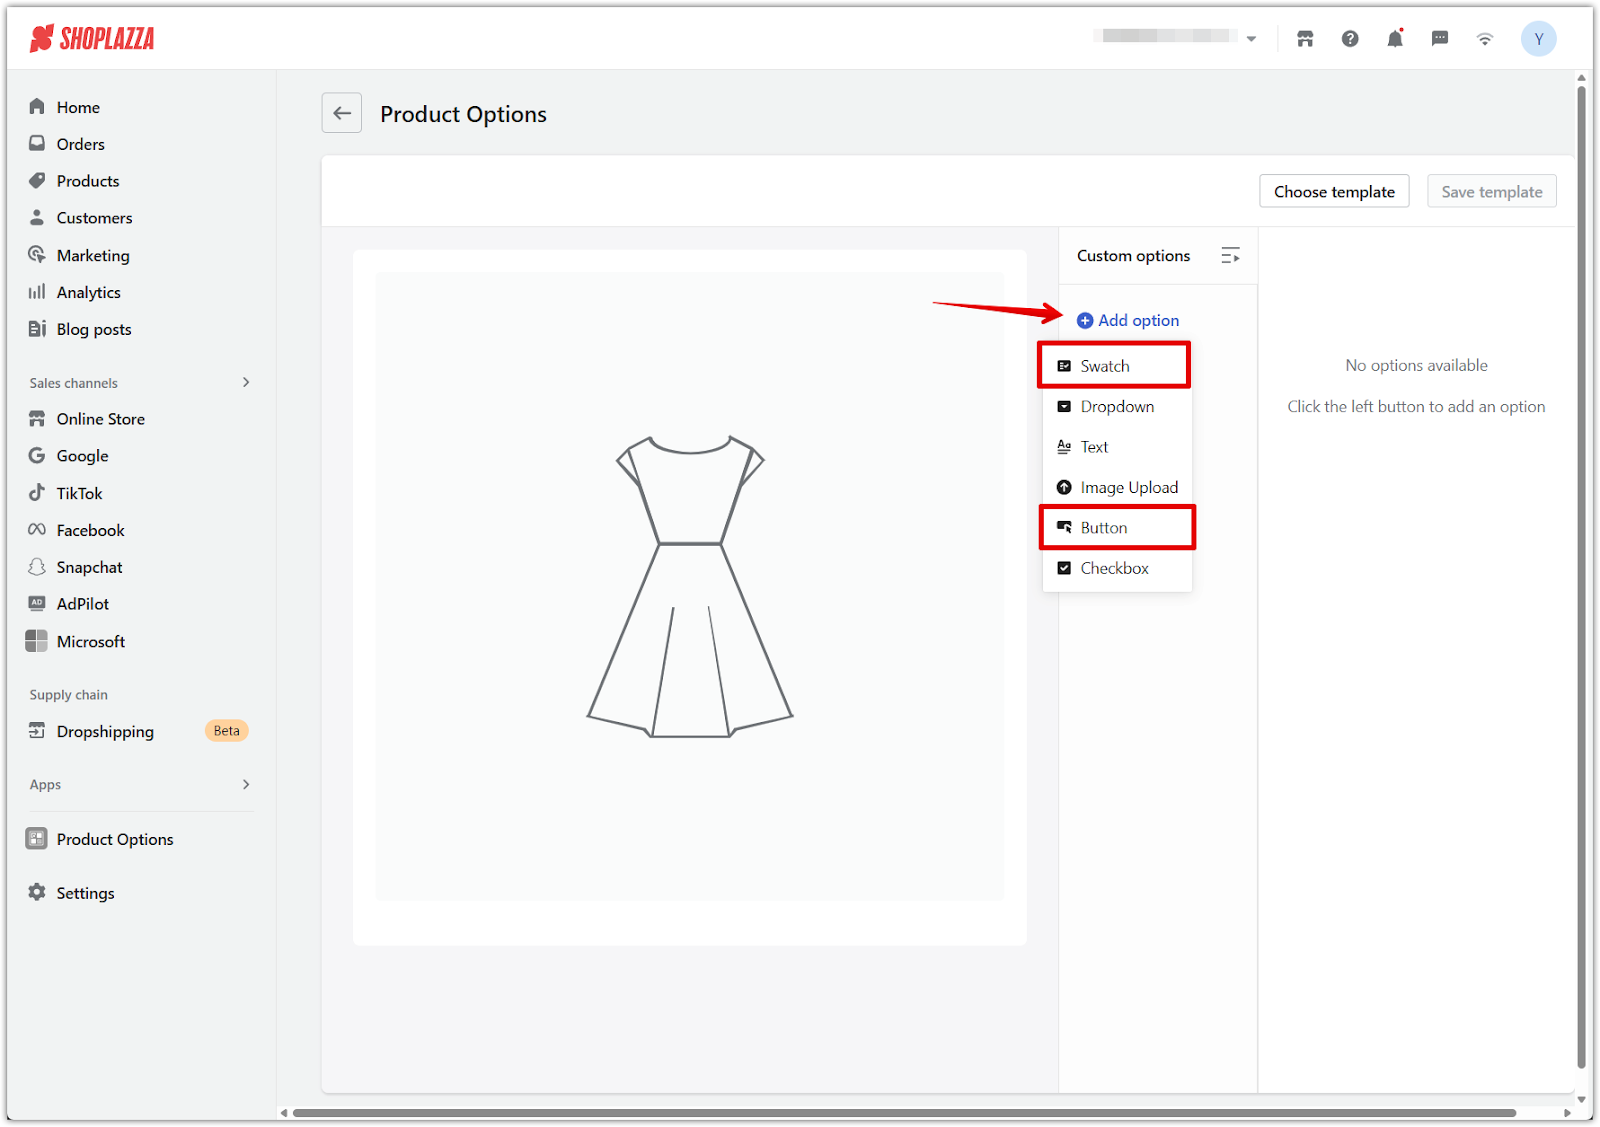
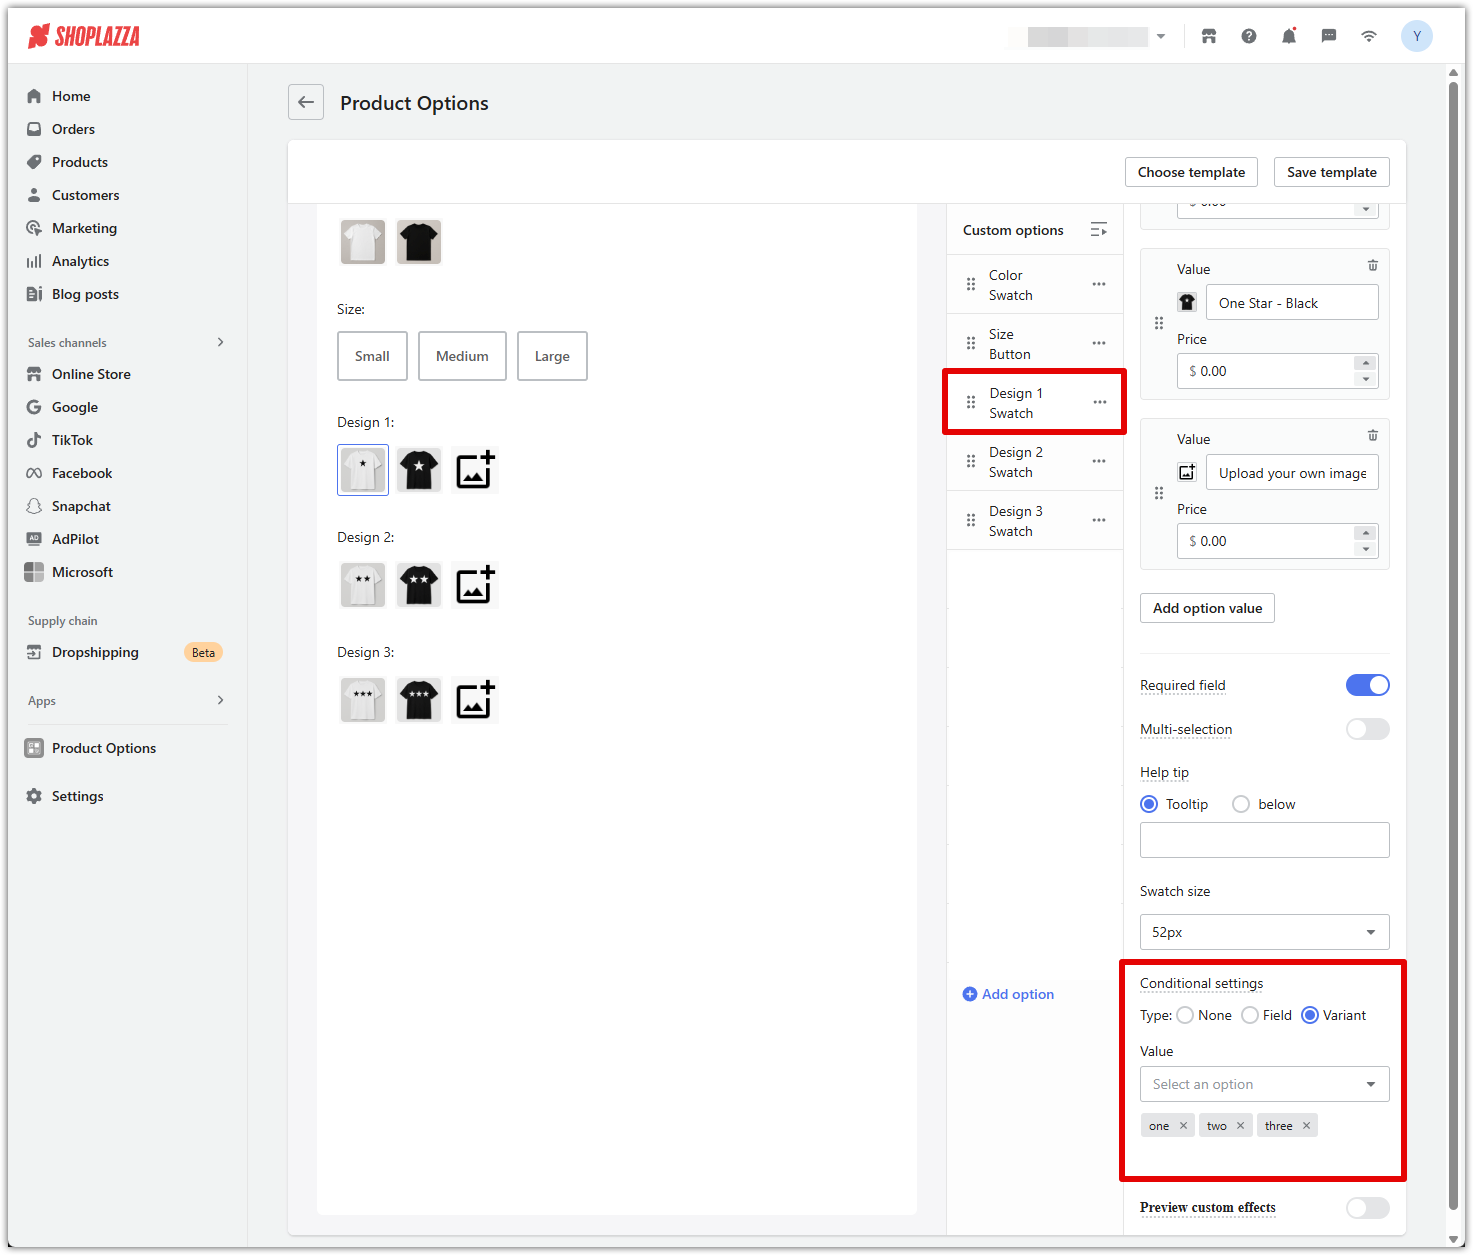
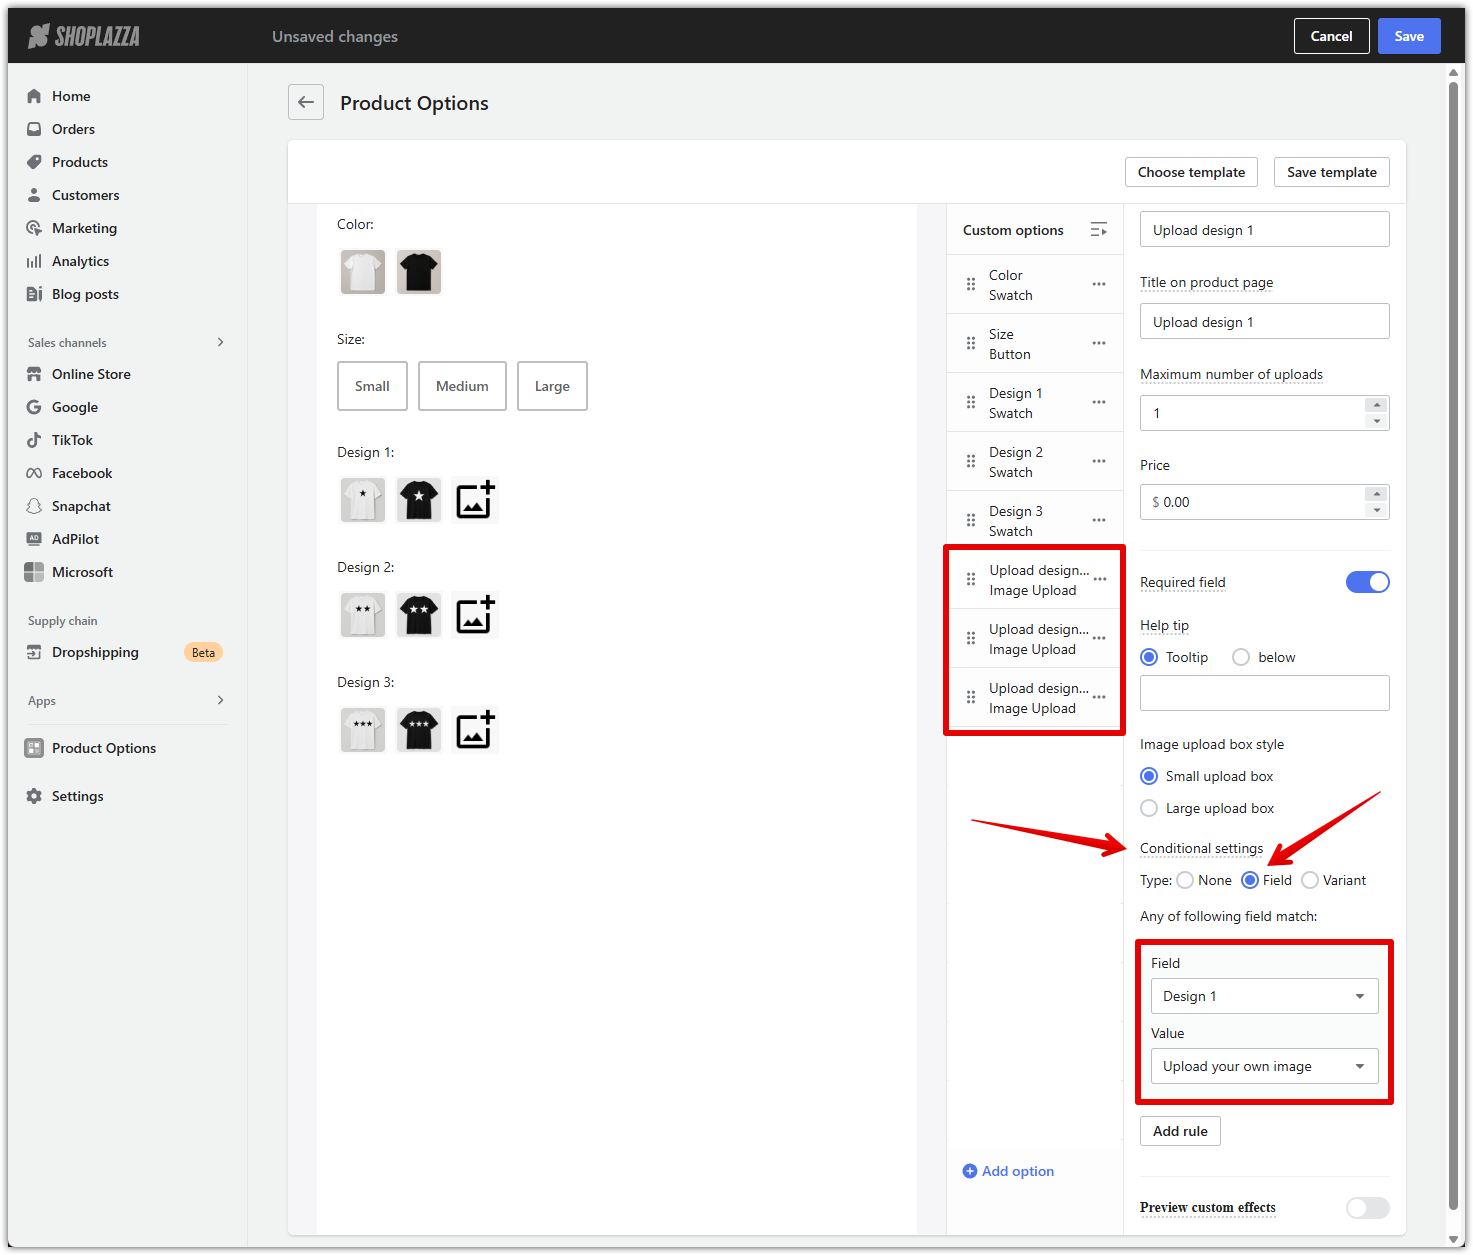
4. Add Design fields (Swatch): Create a swatch field for each design area so customers can choose from preset designs or select Upload your own design.
- Design 1: Upload your preset designs here and add an option labeled Upload your own design. Set conditional type to Variant and select values: one, two, three.
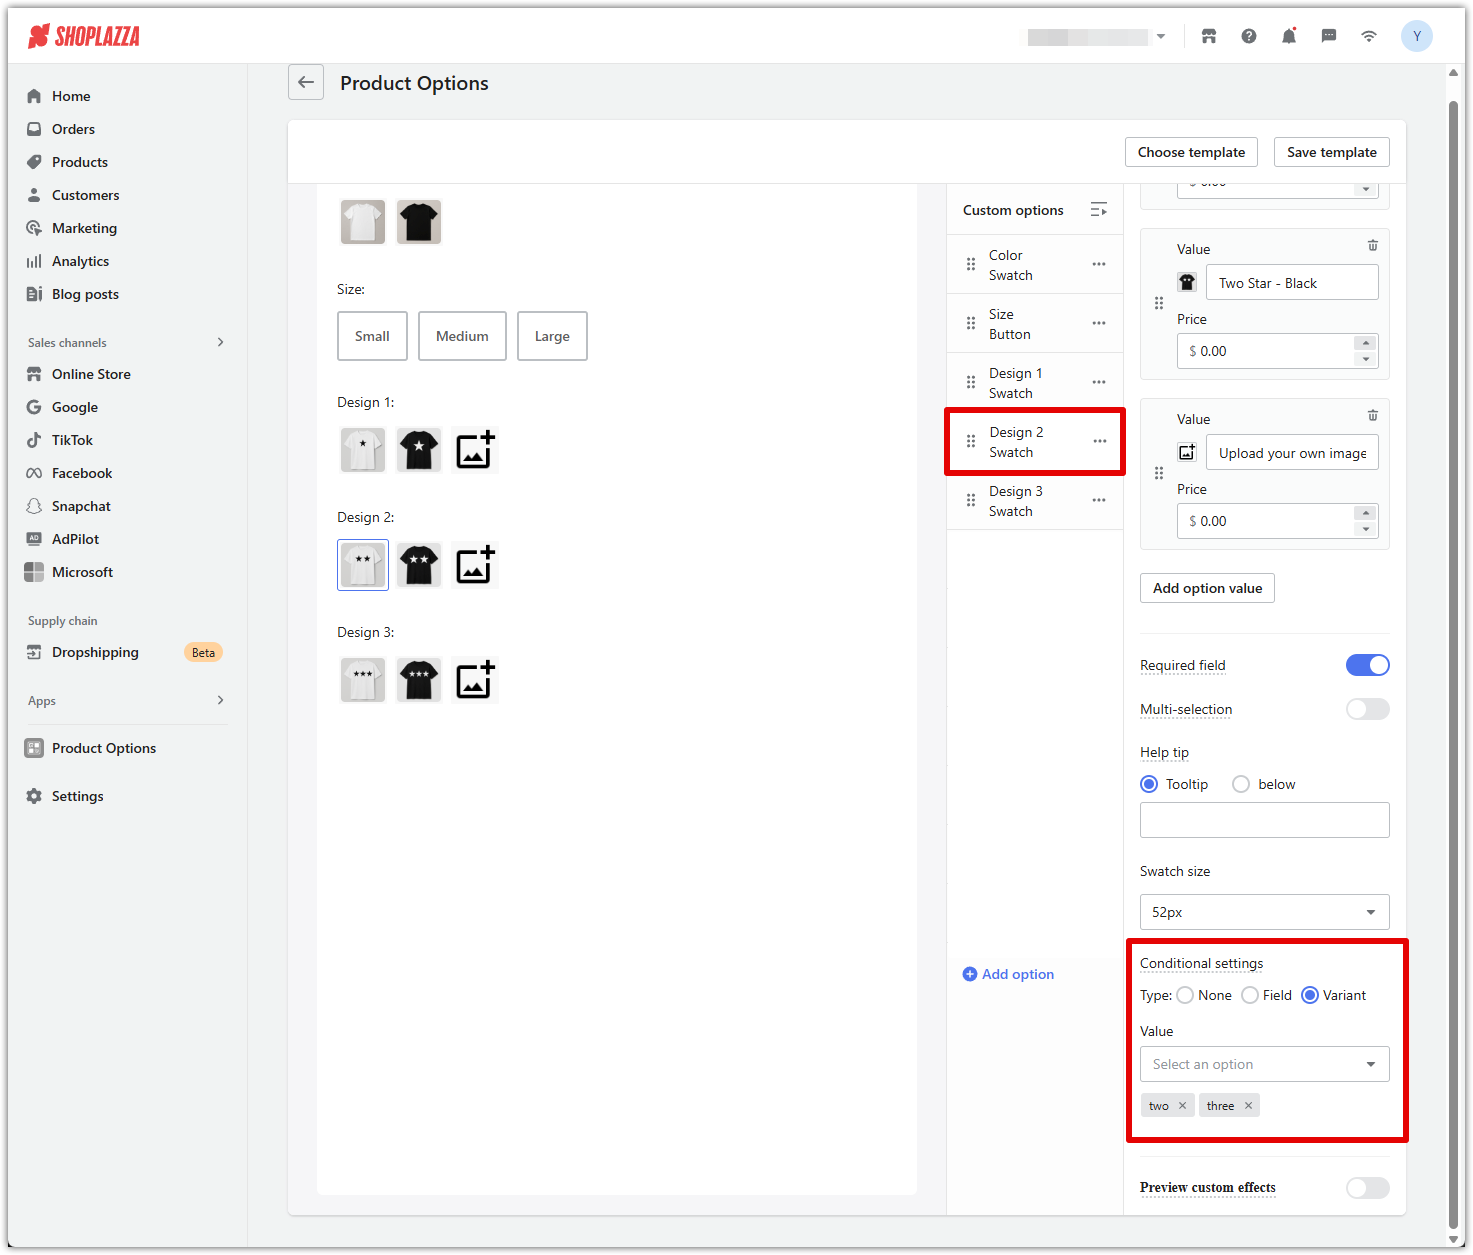
- Design 2: Use the same preset designs and include Upload your own design. Set conditional type to Variant and select values: two, three.
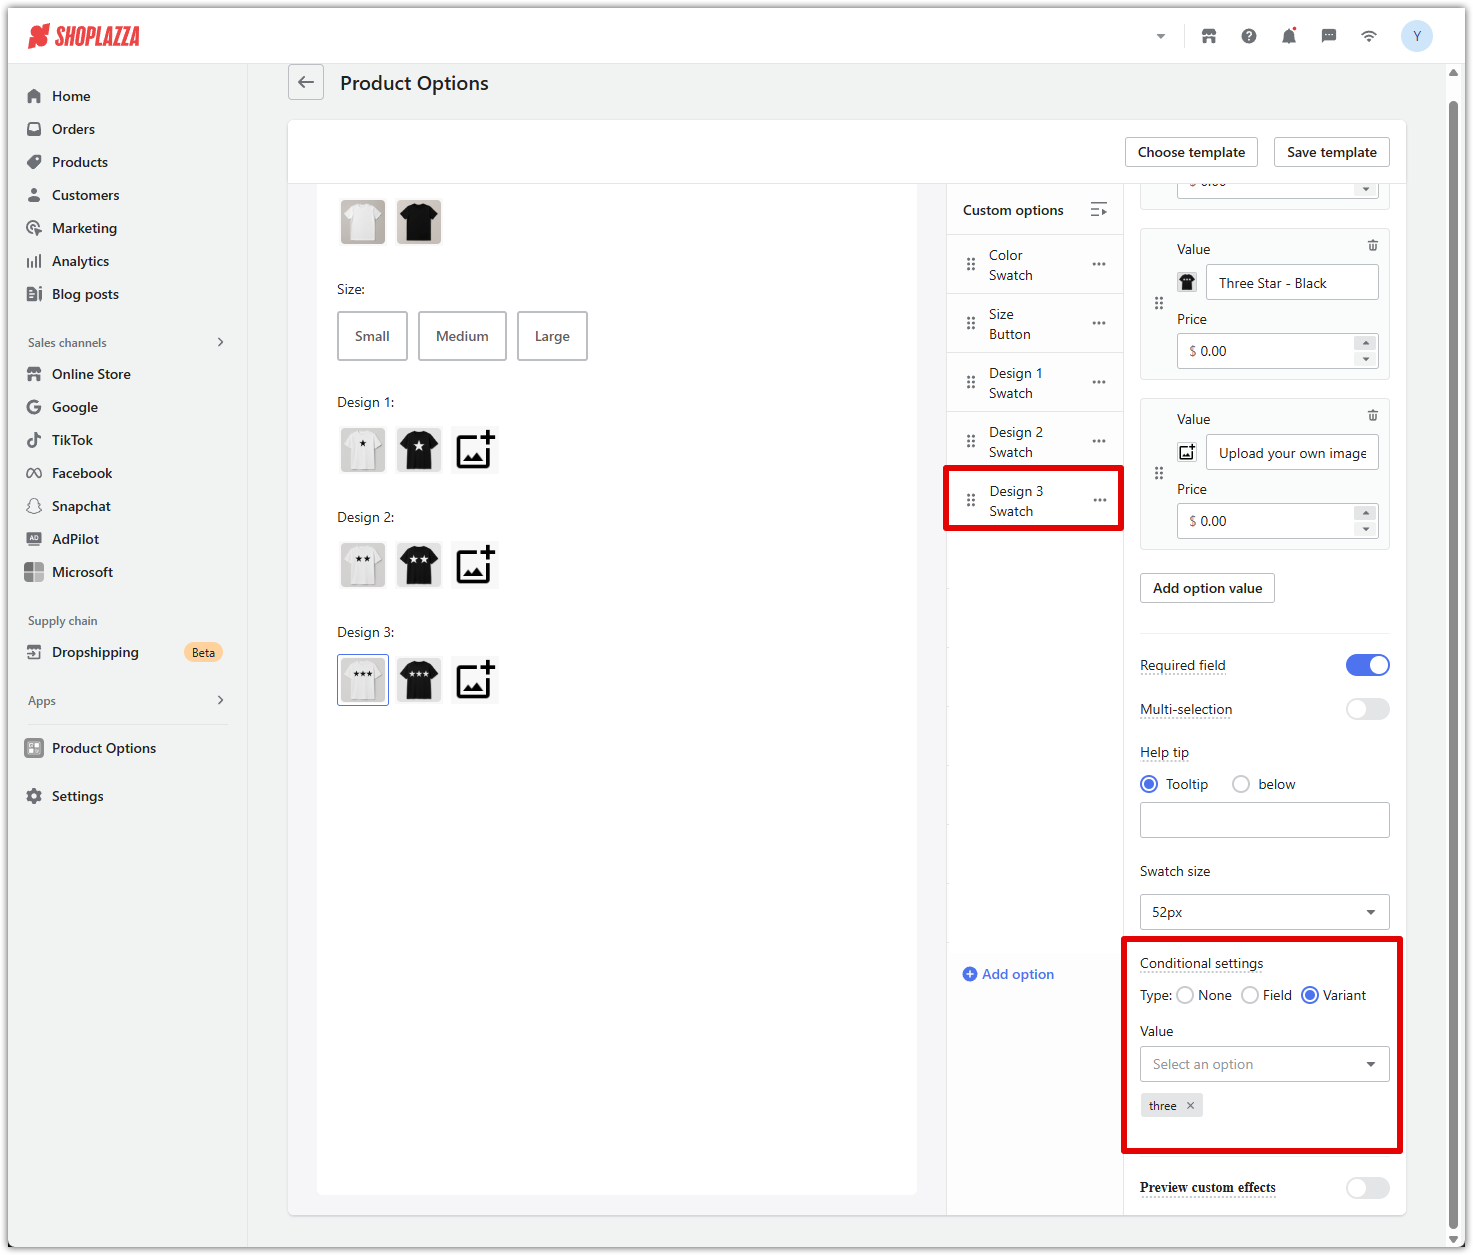
- Design 3: Use the same structure. Set conditional type to Variant and select value: three.
5. Add Upload fields (Image Upload): Create image upload fields for customers who want to use their own artwork.
- Upload Design 1: Set conditional setting to Field, and display only when Design 1 = Upload your own design.
- Upload Design 2: Same logic as above, tied to Design 2.
- Upload Design 3: Same logic as above, tied to Design 3.
6. Add Name fields (Text): These fields should always be visible and only charge when text is entered. No conditional settings required.
- Name 1: Set Required Field to Off and enter your per-name price (e.g., $1.99).
- Name 2: Same settings as Name 1.
- Name 3: Same settings as Name 1.
7. Add optional fields (Checkbox): Use checkboxes to offer additional services or packaging options such as VIP handling, gift wrapping, or rush production. Set prices for each value as needed.
Displaying the Product Options block in your storefront
Once your product options are ready, embed them into your storefront using the theme editor.
Note
Supported themes include: Bamboo, Beautynow, Christmas, Elechub, Elegant, Eva, Flash, Geek, Halloween, Hero, Impress, Life Style, Modern, Moon, Morning, Night, Nova2023, Petonly, Sweet, Venue, Wind.
1. Open the theme editor: Go to your Shoplazza admin > Online store > Themes, then click Customize on your current theme to launch the editor.

2. Switch to the product page view: Use the dropdown at the top of the theme editor to navigate to Products default product page. This ensures you are editing the correct template for products.
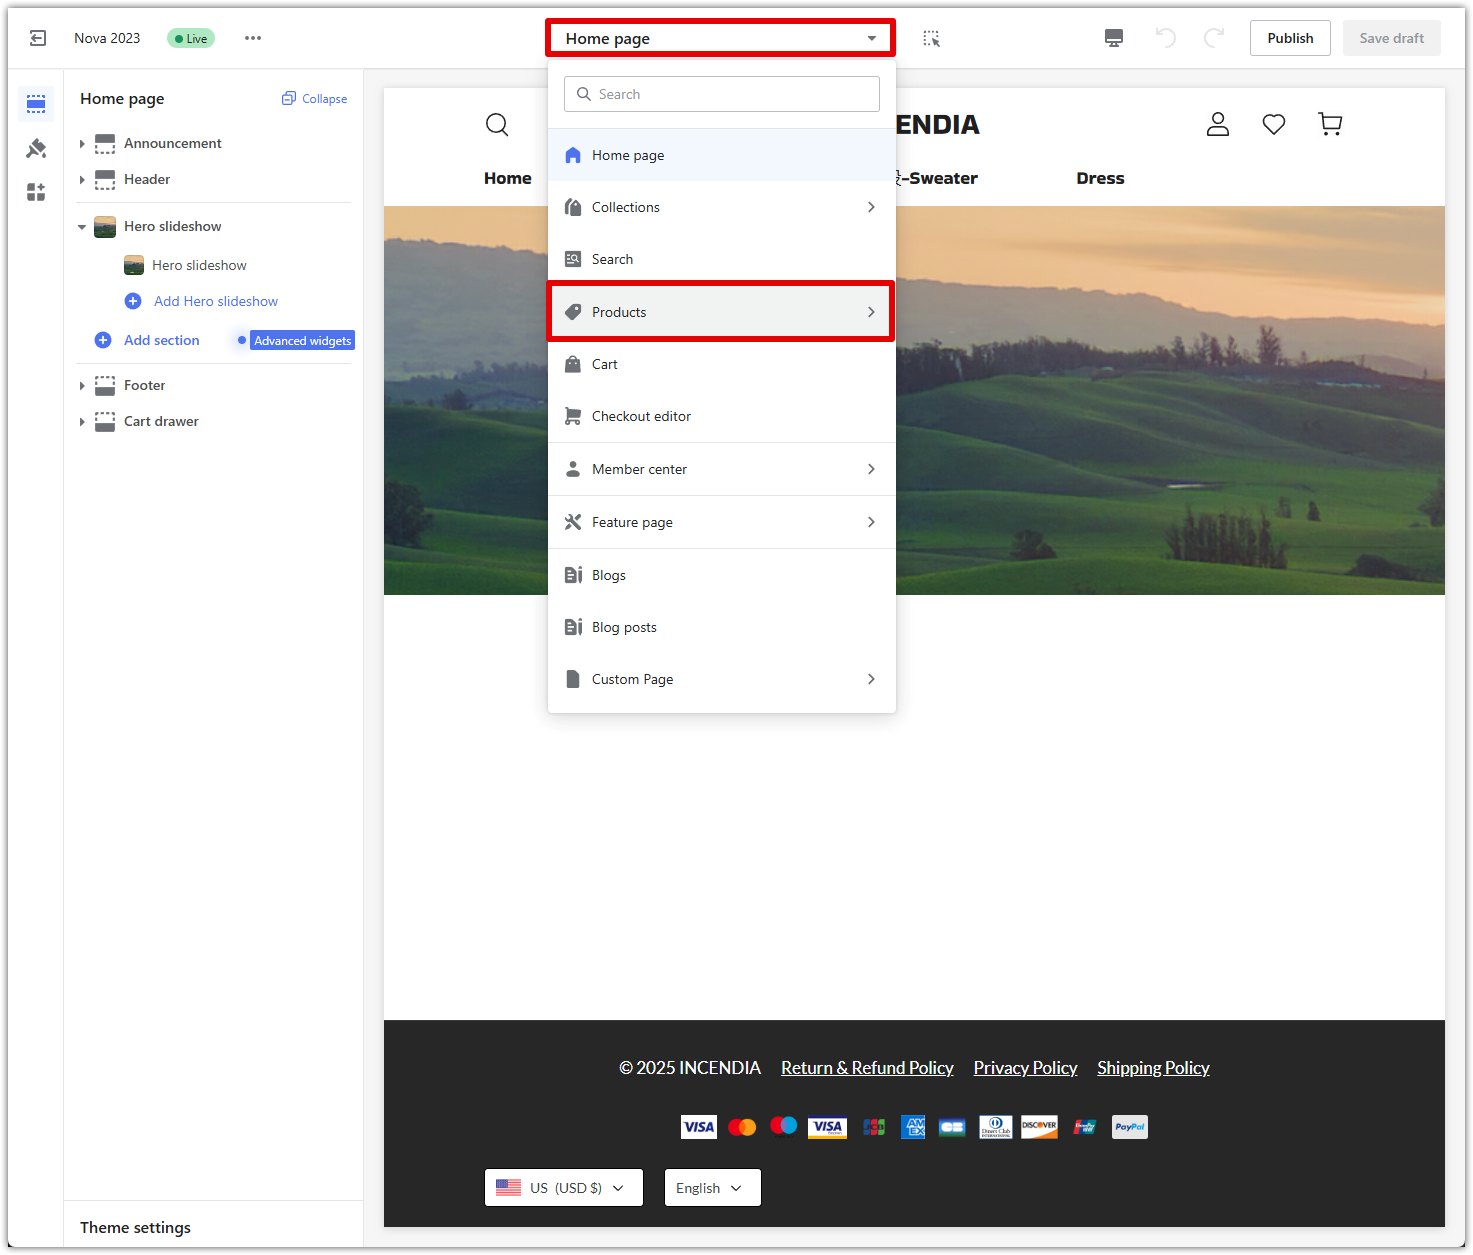
3. Add a new block: In the left panel under Product details, click Add block to insert a new section into the product page layout.
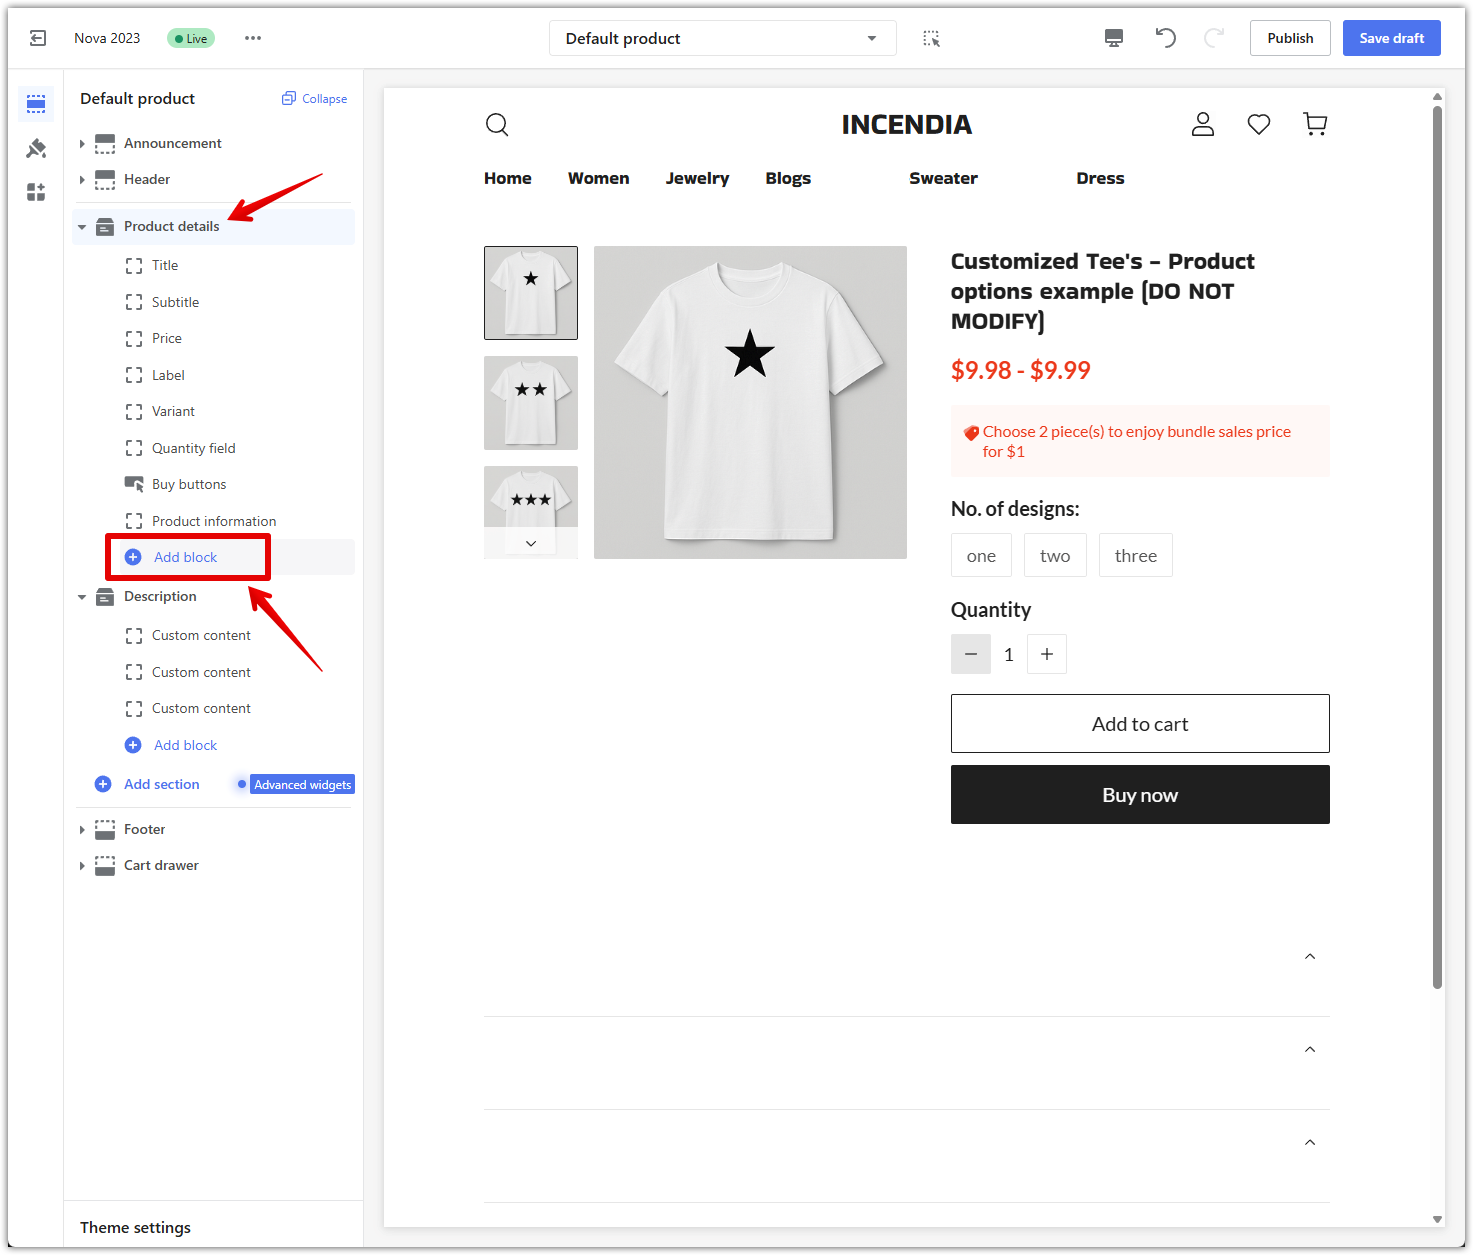
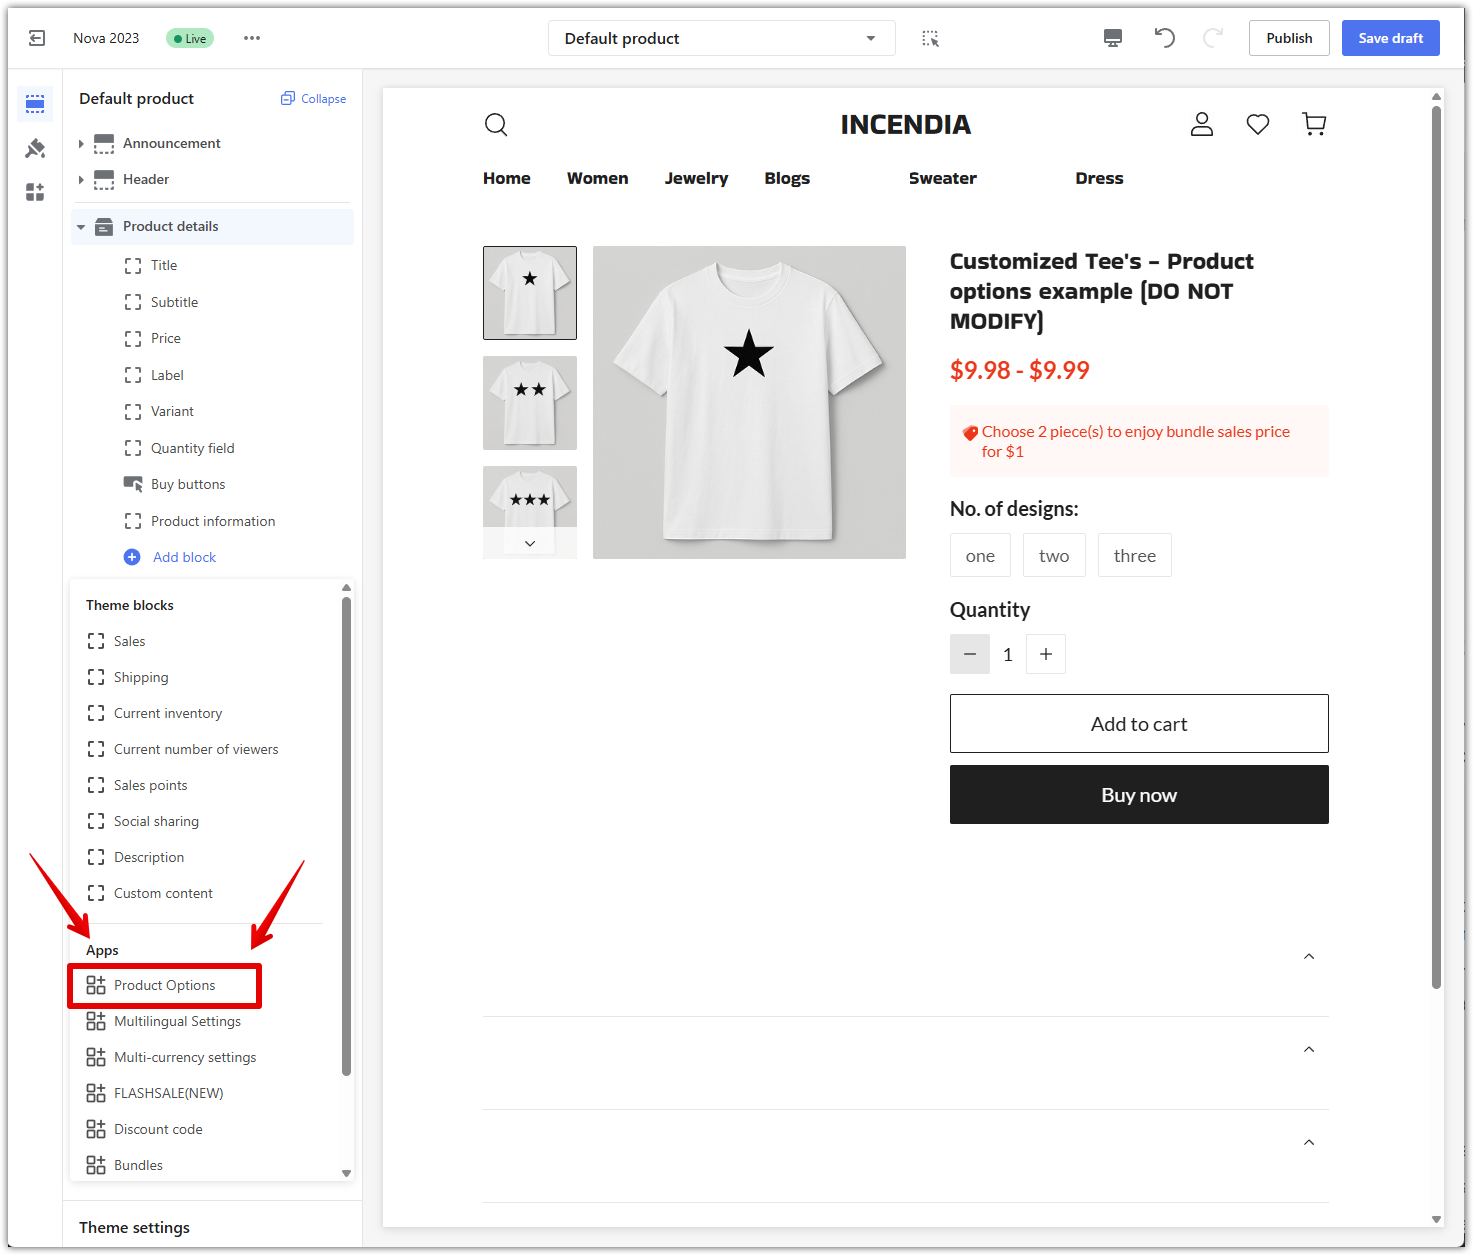
4. Insert the Product Options block: In the list of available blocks under Apps, select Product Options. This block will render the custom fields you configured earlier.
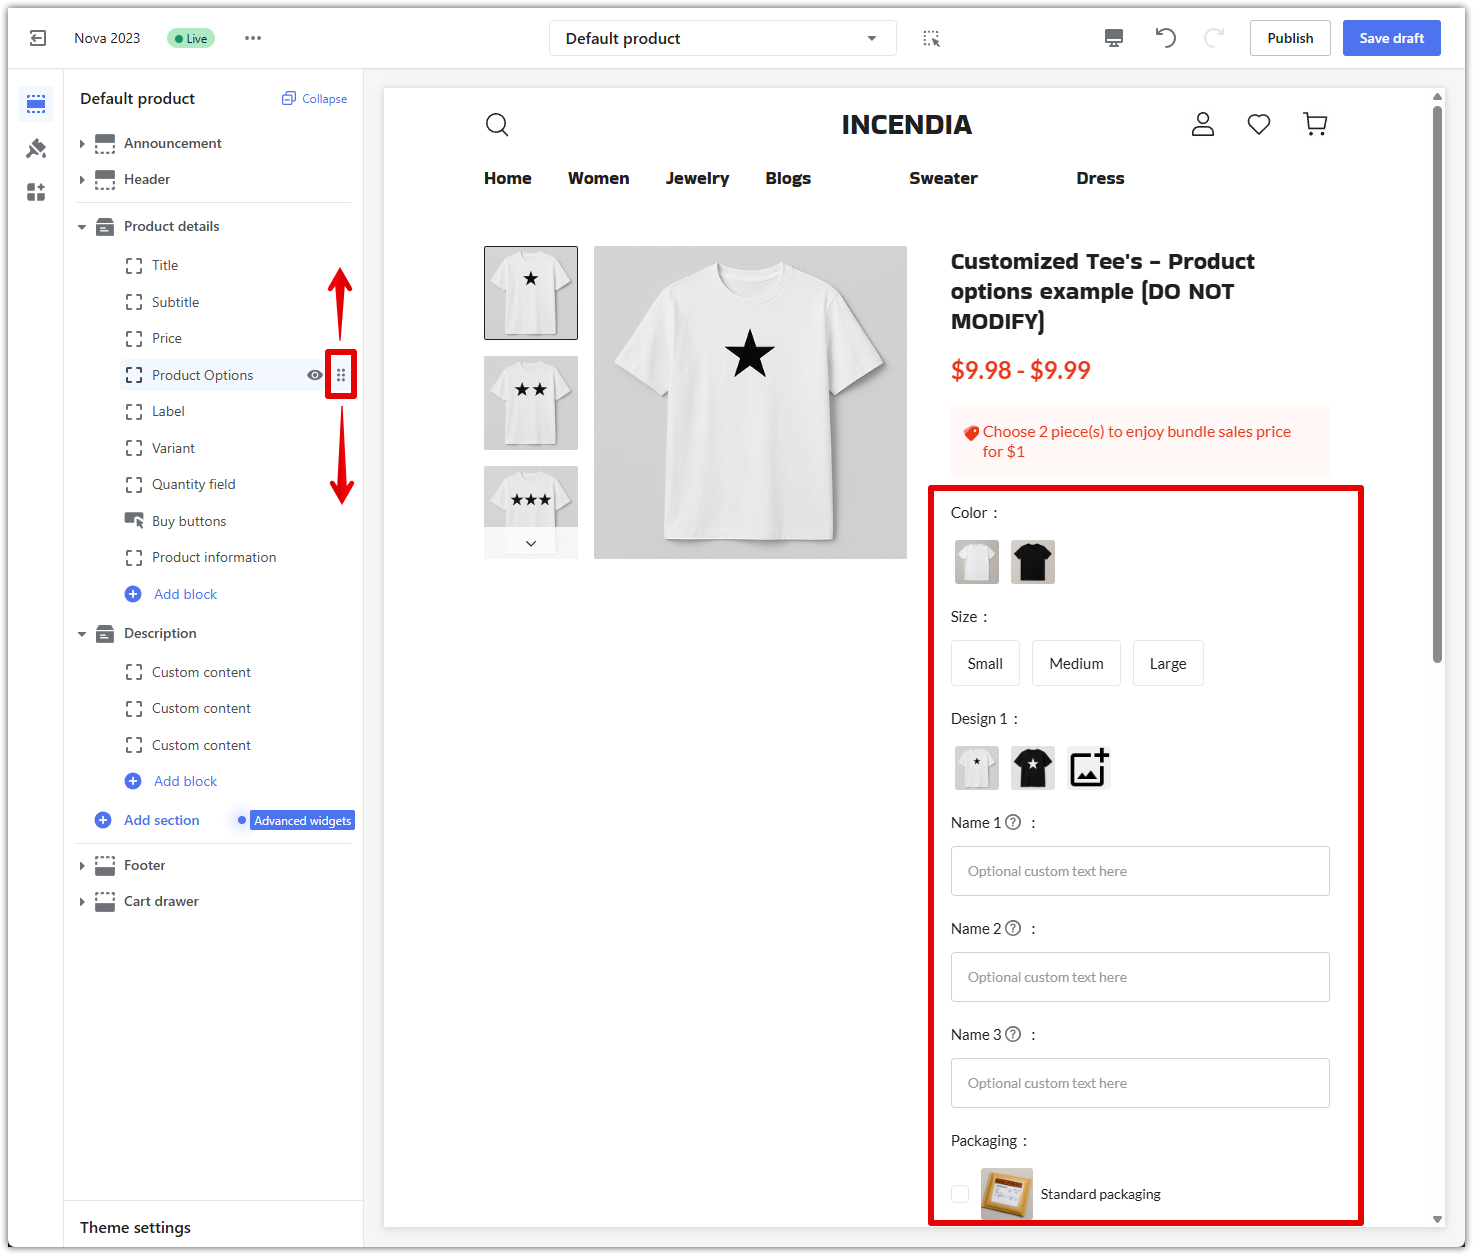
5. Reposition the block as needed: Drag the Product Options block into the correct location on the page, typically just below price or variant selectors for maximum visibility.
6. Save your changes: Click Publish or Save draft in the top-right corner to apply your layout changes. The customization interface will update your store’s live product page if you’re editing the published theme.

Using the Product Options app in this way allows you to offer personalized products without cluttering the page or overwhelming the customer. The setup supports conditional visibility, charges only when relevant fields are filled out, and integrates seamlessly with your existing variants. This approach improves clarity, increases upsell opportunities, and delivers a smooth customization experience that encourages conversions.


Comments
Please sign in to leave a comment.