Customizing products, particularly through Print-on-Demand (POD) services, demands a superior level of craftsmanship, materials, and labor to satisfy the individual preferences and tastes of each customer. The Product Option app facilitates the configuration of prices for each customization option under an attribute, enabling you to offset the costs associated with the customization process while ensuring profitability from the sale of customized goods. This guide provides essential insights into setting up pricing for customizable options within your Shoplazza store, aiming for a balanced approach to cost coverage and profitability.
Note
- Supported themes: Ensure your store theme is among those compatible with the app, including Lifestyle, Nova2023, Hero, Eva, Flash, Geek, Impress, and Wind.
- Price setting for attributes: he app supports price adjustments across various attributes, such as color swatches, dropdown menus, text inputs, image uploads, buttons, and checkboxes.
- Quick Add-to-Cart module: Currently, the Quick Add-to-Cart module is not supported, which may impact the checkout experience for customers prioritizing speed and convenience.
Accessing the Product Option app
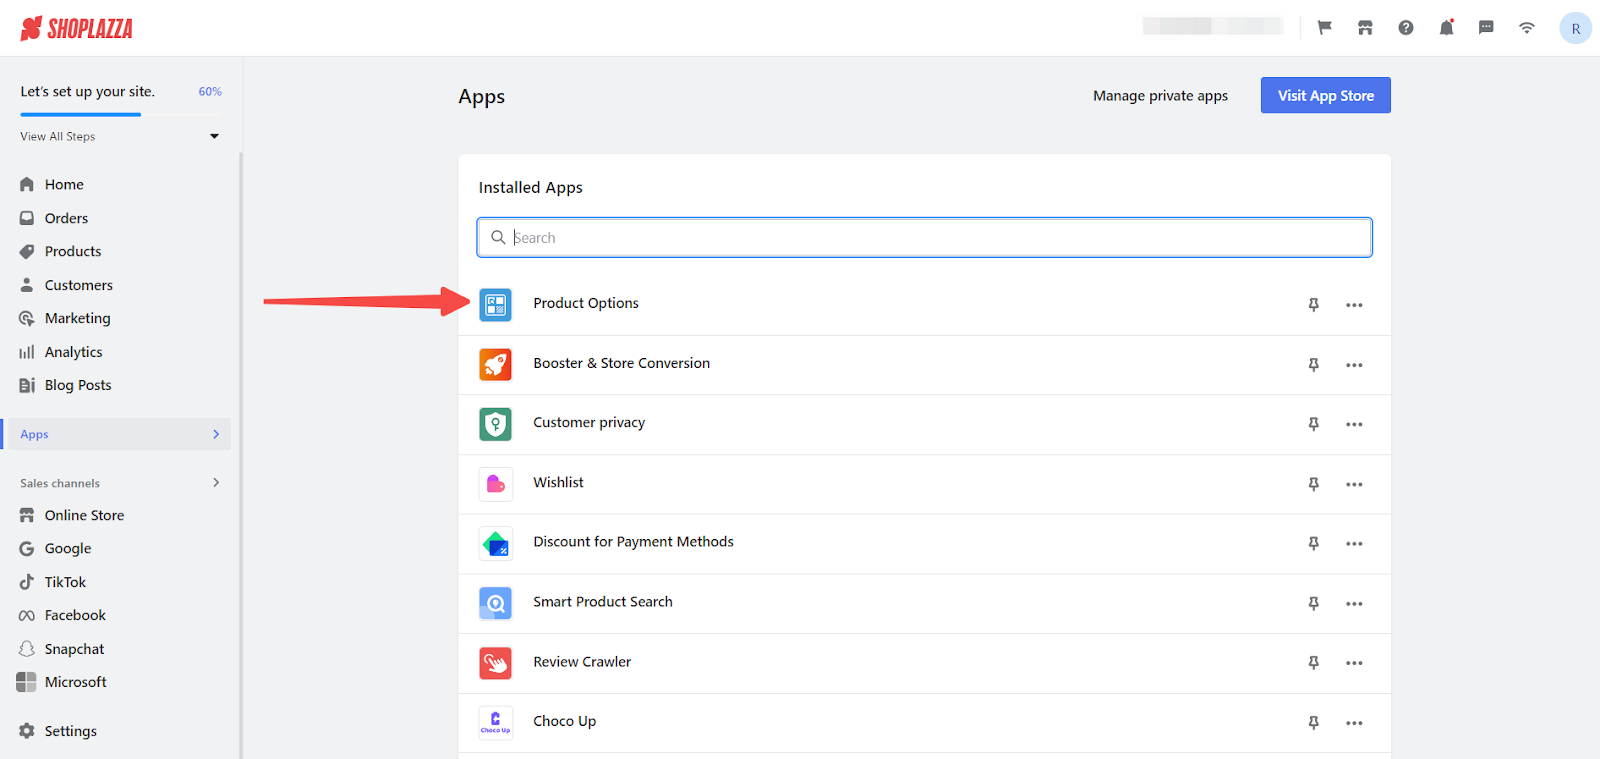
- Access the app: Navigate to the Apps section in your Shoplazza admin, find the Product Options app among your installed apps, and open it.

Selecting Products for Customization
1. Choose your canvas: Selecting the right products for customization is essential. This step involves choosing products that will benefit from added customization options. For detailed guidance on adding or selecting product attributes for customization, see the guide titled Product option | Setting Customized Product Attributes.
Setting Prices
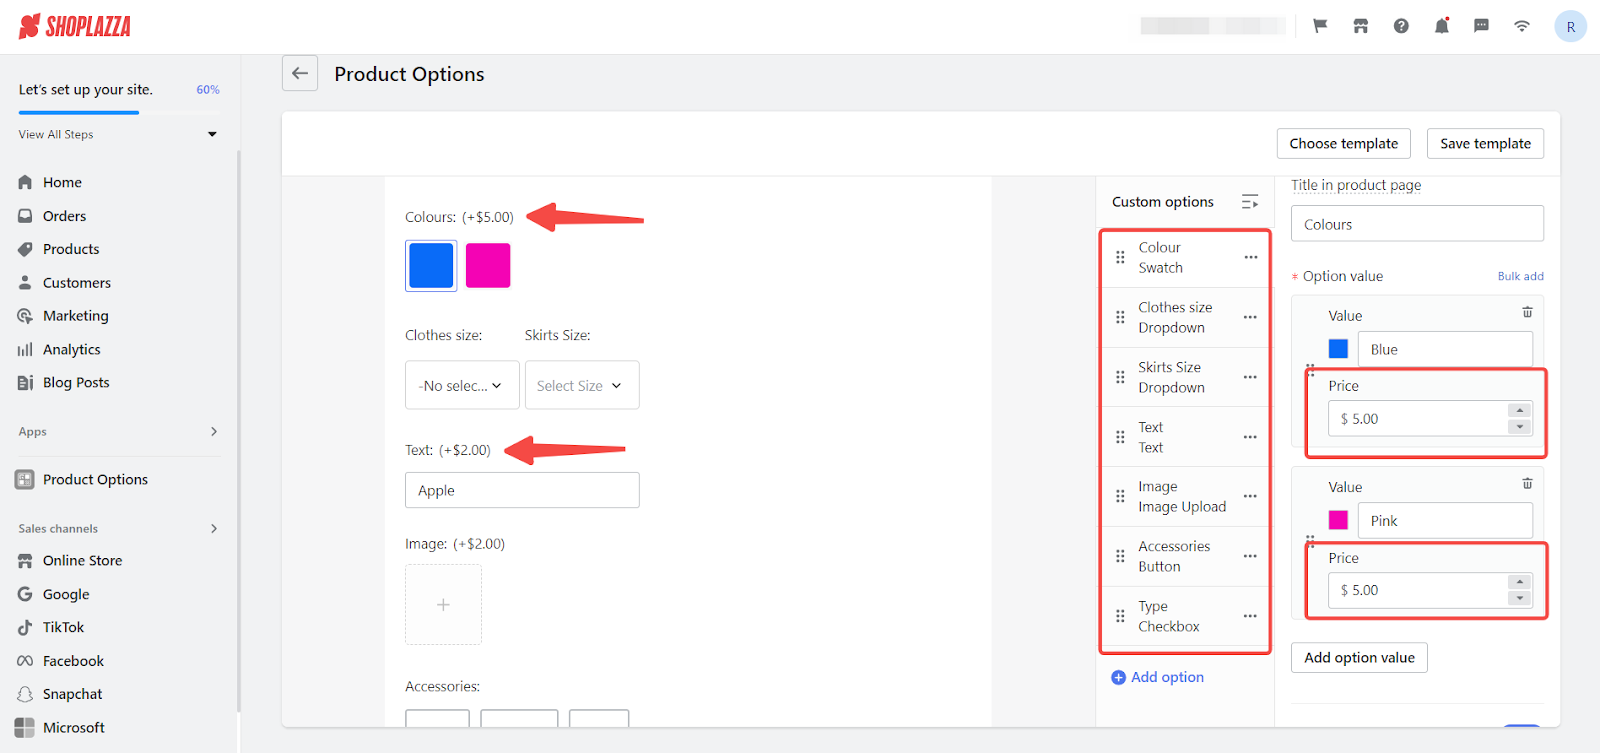
1. Craft your pricing model: Individual prices can be set for each attribute option, allowing for the addition of specific costs to the base product price for each unique customization option. For example, an additional color option may incur a cost of $5.00, while custom text could add $2.00 to the base price.

Showcasing Customizations
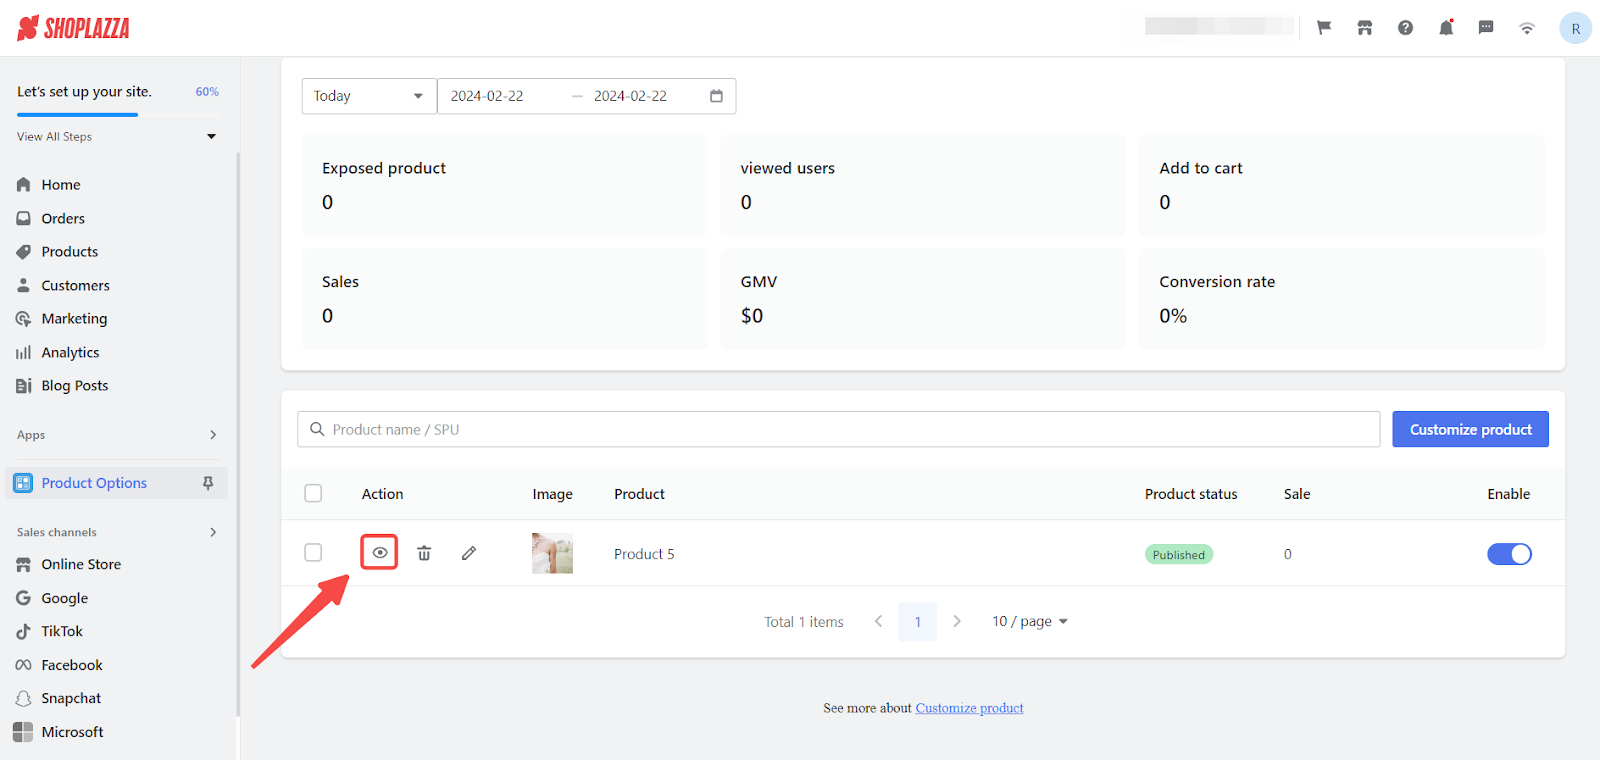
1. Visual confirmation: Once you've completed the setup, you can easily preview the product's appearance on your storefront directly from the app's homepage. Simply locate the desired product and click the 'eye' icon to preview the current display settings.

2. Ensure accurate display: The preview feature is essential in confirming that attribute names and prices are displayed correctly on various pages, including the product detail, shopping cart, and checkout pages, ensuring your customizations are represented exactly as you intend.
- On the product detail page: Here, customers get their first in-depth look at the customized product, making it essential that all customization options are clearly and correctly displayed.

- Within the shopping cart page: This page confirms for the customer that their custom selections have been recognized and added to their cart, reinforcing the accuracy of their customization choices.

- At the checkout page: The final step in the purchasing process, where customers review their custom product one last time before purchase. Ensuring that customizations are correctly displayed here is paramount for customer confidence in their purchase.

Note
Custom attributes must be added as cards within your theme to be displayed on the storefront. For step-by-step instructions on adding these cards, refer to the help document: Product option | Setting Customized Product Attributes
By carefully following the outlined steps to configure pricing for customizable options through the Product Option App, you can strike an optimal balance between covering the inherent costs of customization and achieving profitable returns. This approach not only enhances the value offered to your customers by catering to their unique preferences but also ensures your business remains competitive and financially healthy in the dynamic market of customized products.


Comments
Please sign in to leave a comment.