
The Product Option App by Shoplazza introduces a seamless way for businesses to offer customizable products through Print-on-Demand (POD) services. It allows customers to personalize products to their liking using a variety of attributes such as color swatches, dropdown menus, text fields, image uploads, buttons, and checkboxes. This guide provides step-by-step instructions on how to enable and configure this app to enhance your e-commerce platform's functionality.
Note
Ensure compatibility by checking if your store's theme is among those supported, including Lifestyle, Nova2023, Hero, Eva, Flash, Geek, Impress, and Wind. Currently, the Quick Add-to-Cart module is not supported, which may affect the checkout experience for customers prioritizing speed and convenience.
Accessing the Product Option App
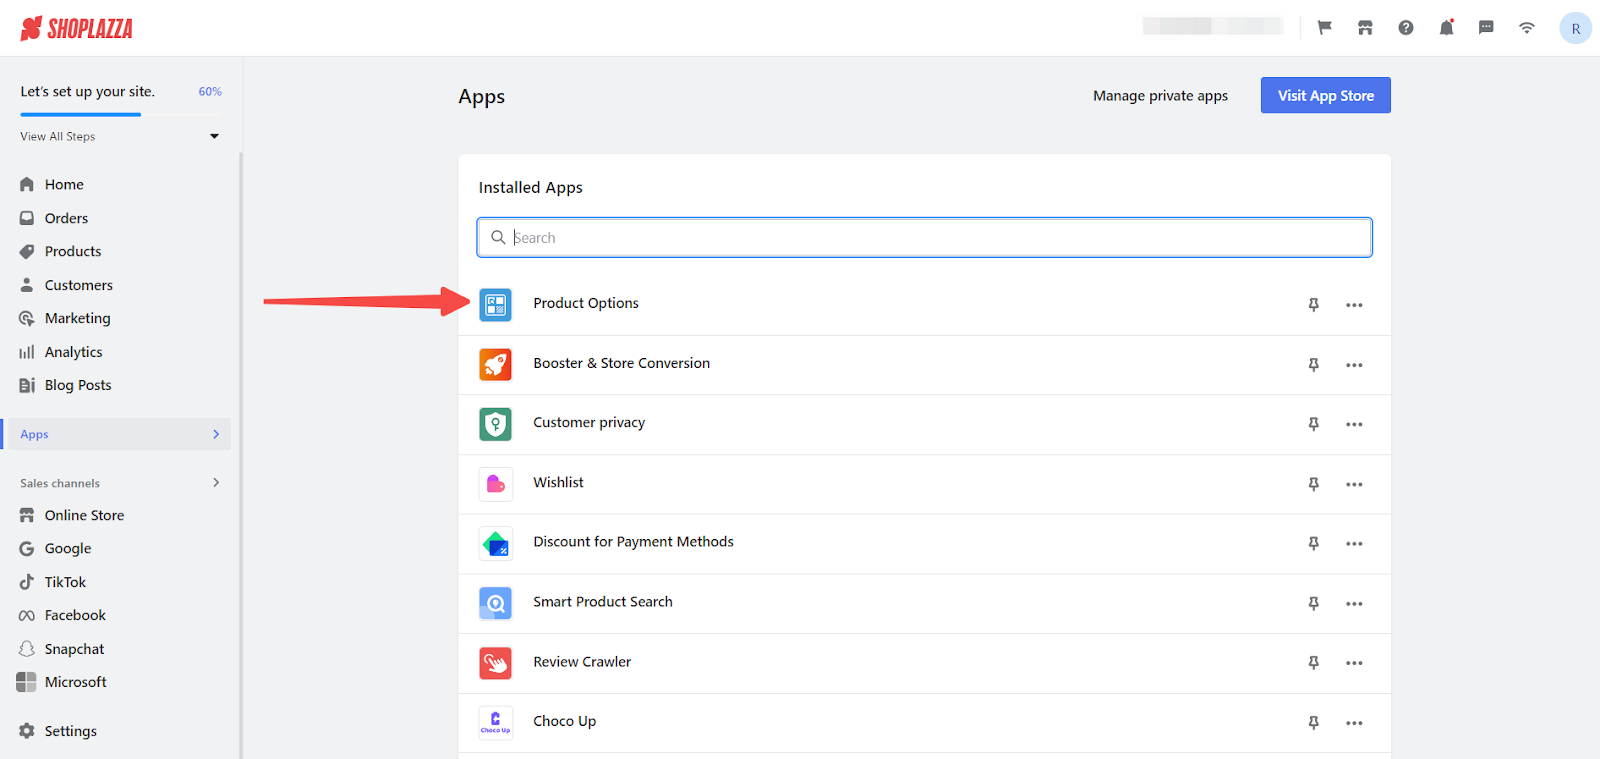
- Access the app: Navigate to the Apps section in your Shoplazza admin, find the Product Option app among your installed apps, and open it.
Customizing product attributes
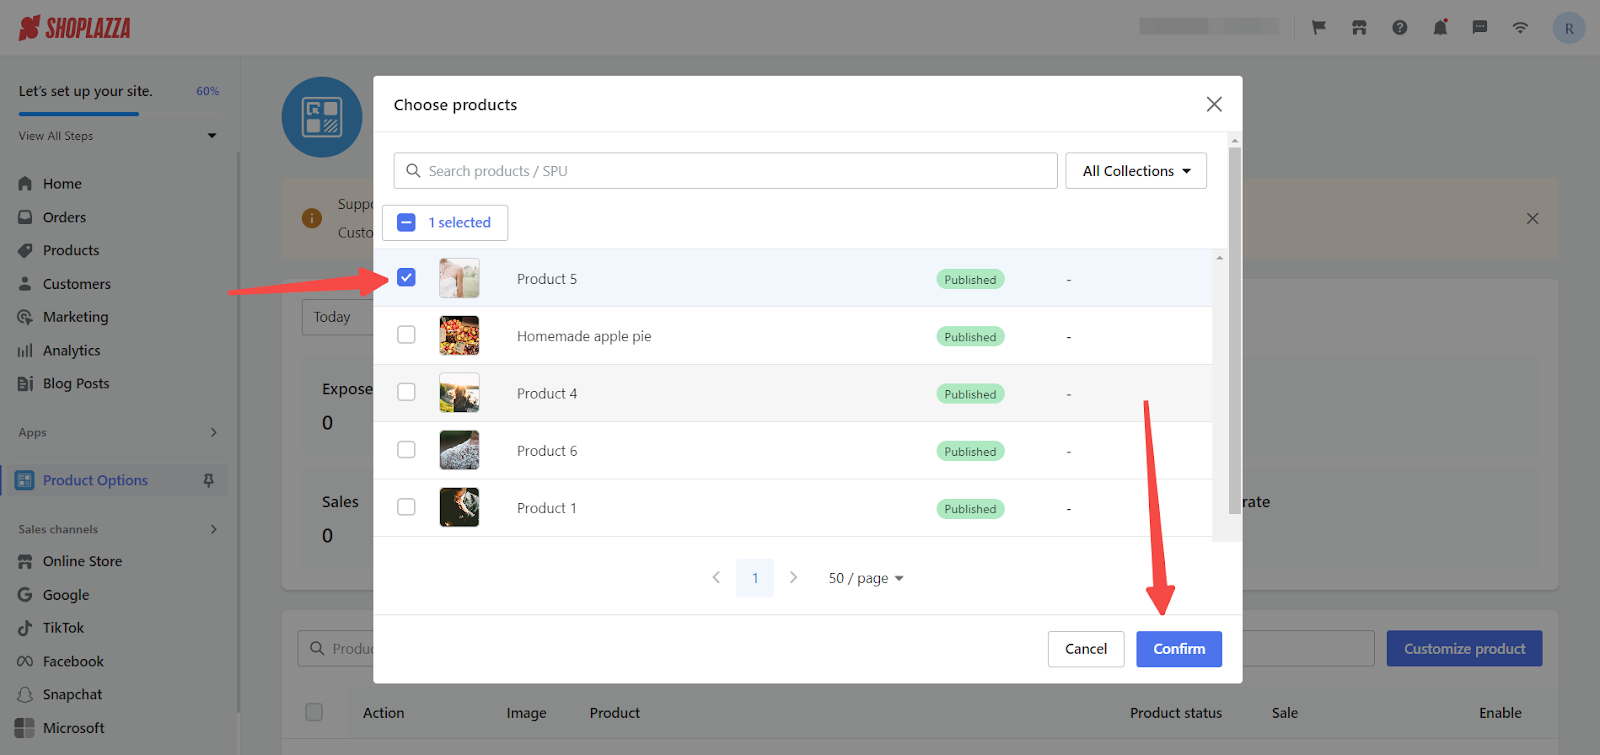
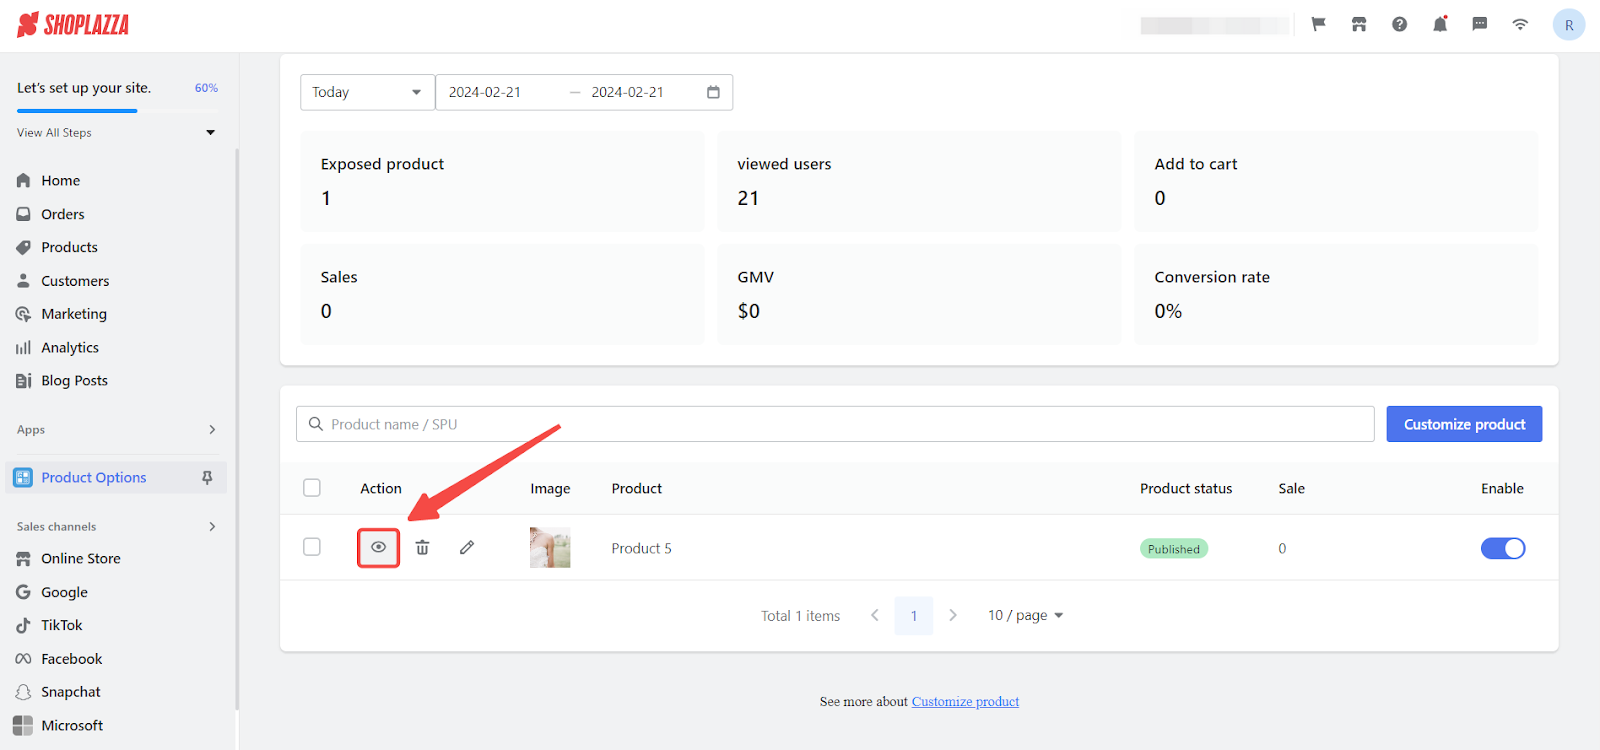
1. Enter customization mode: Click on Customized product to select and customize your product.

2. Select the product: Choose the product to customize and Confirm your selection to proceed.
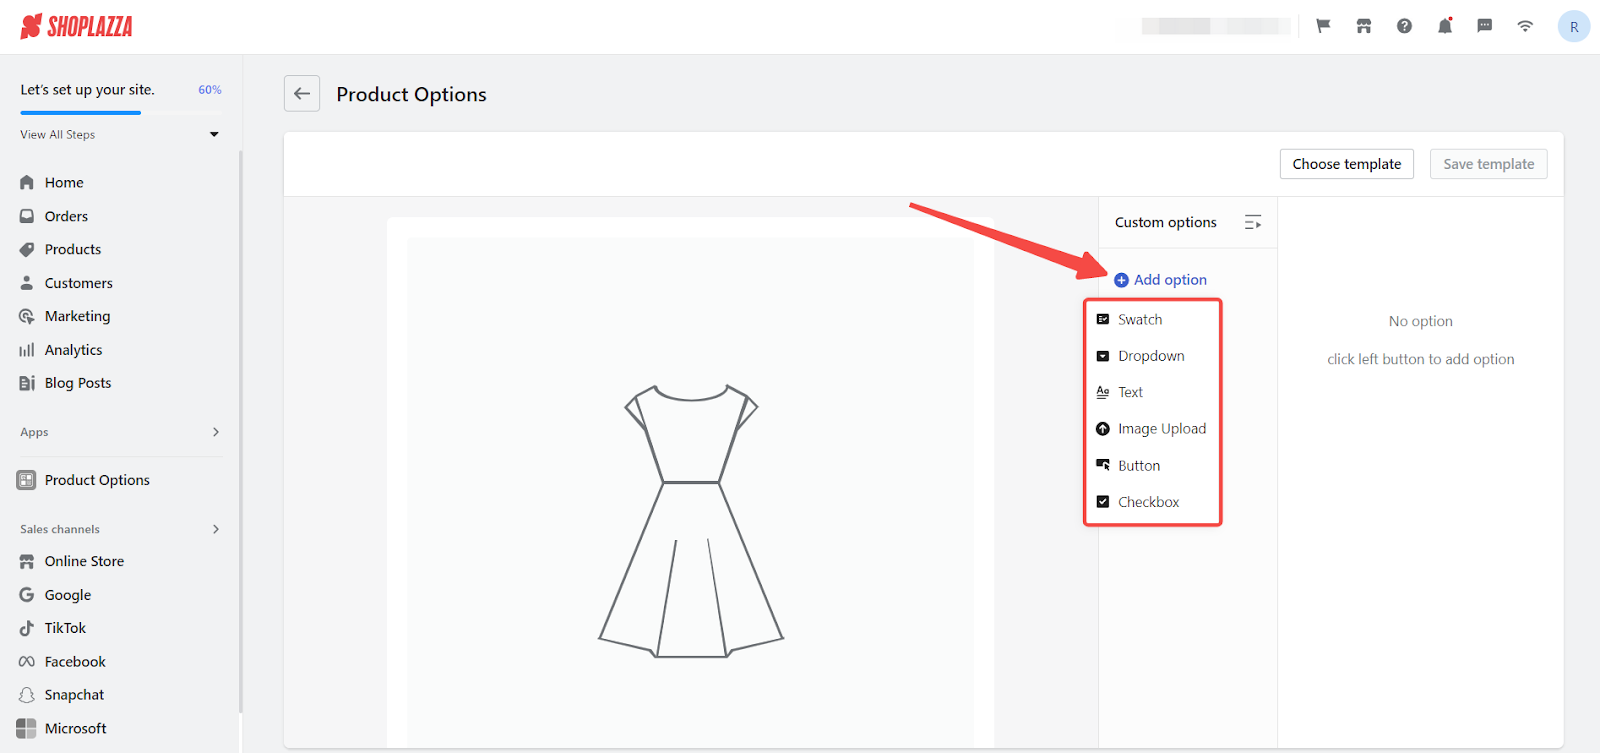
3. Add options: With your product chosen, start adding customizable attributes by clicking on Add option. Choose from supported types like Swatches, Dropdown, Text, Image Upload, Button, and Checkbox to align the product with customer preferences.
Configuring attributes
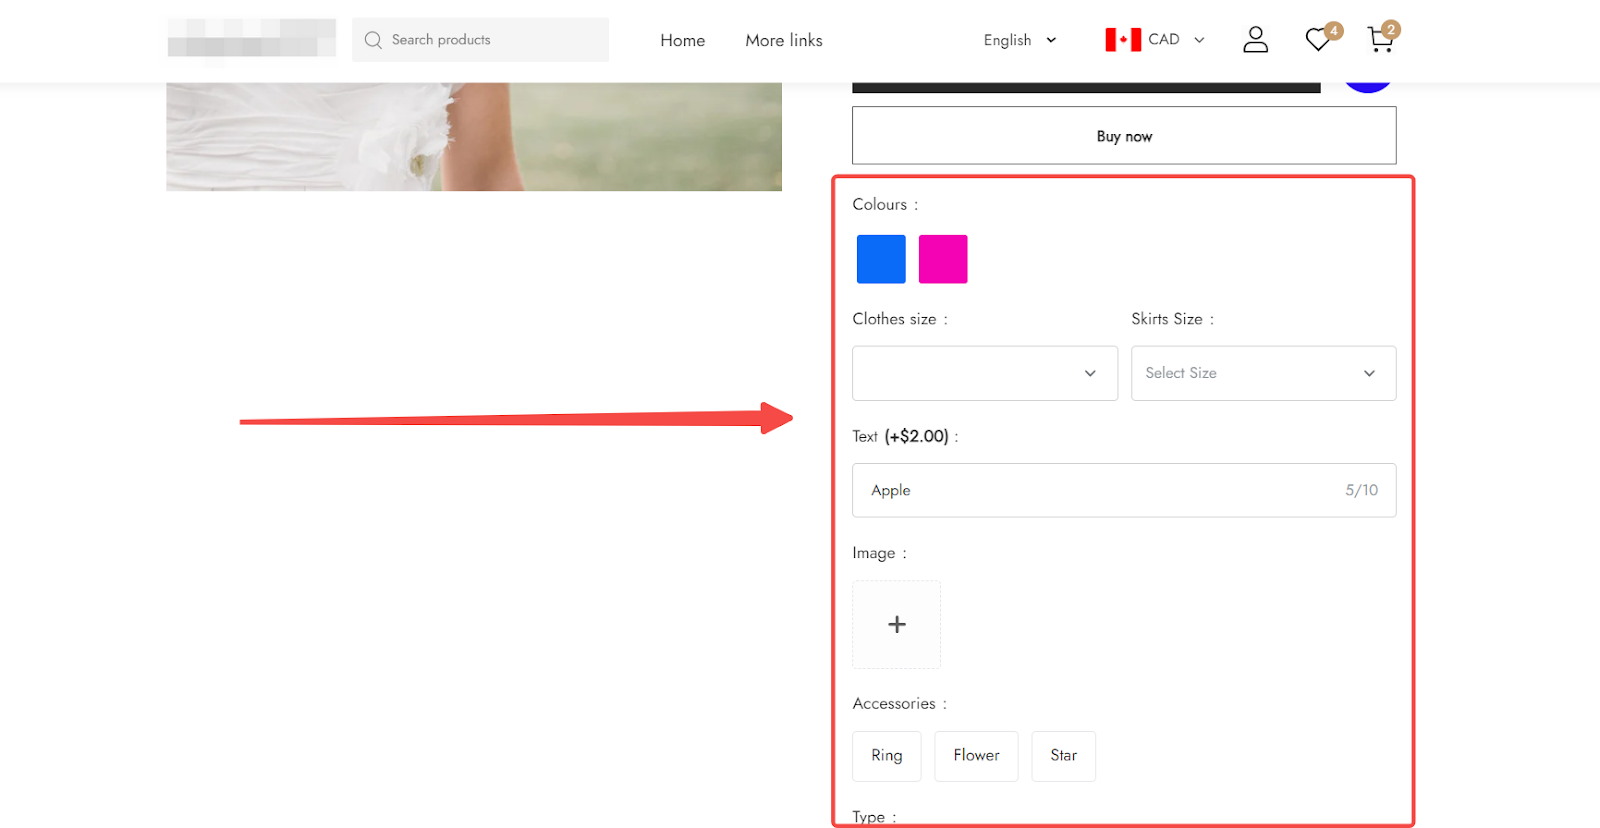
Swatches
1. Define titles: Set clear titles for your swatches to appear on both order and product detail pages to ensure clarity for your customers.
Note
The information filled in for the "Title in product" page will be displayed on the product pages. while "Title in order" shows on the order and checkout pages.
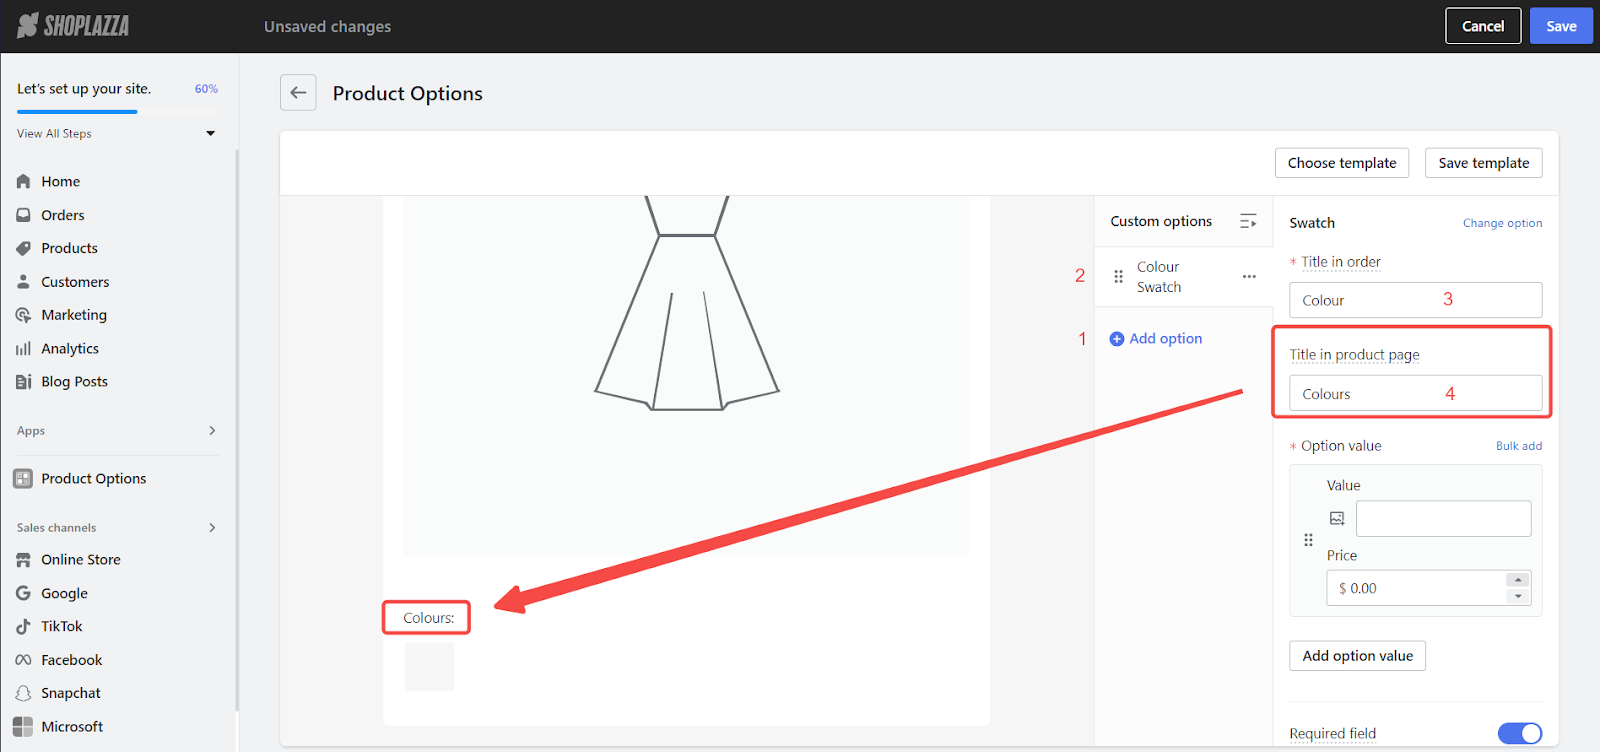
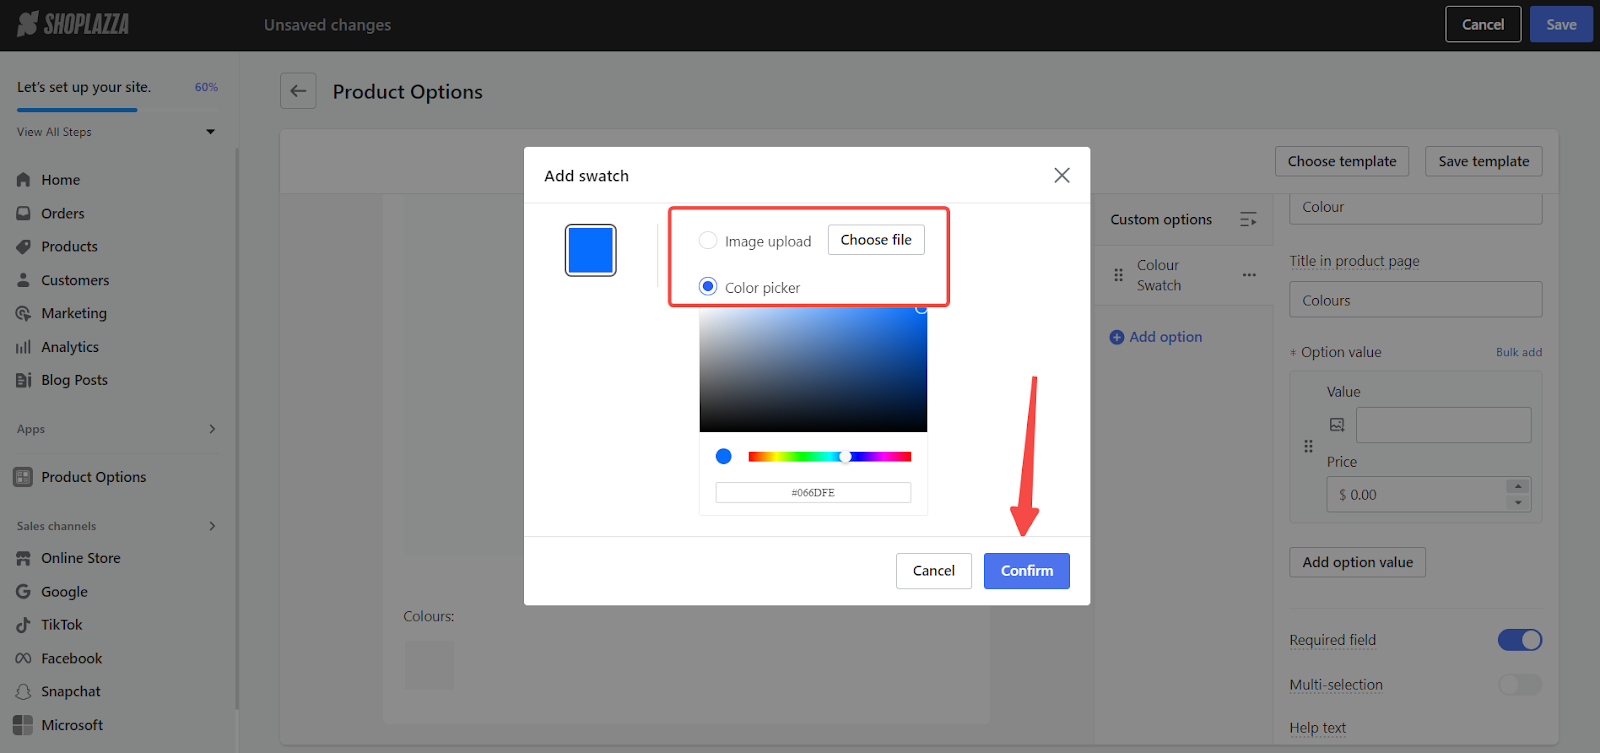
2. Add color swatches: Use the image button to incorporate color swatches, allowing visual selection for customers.
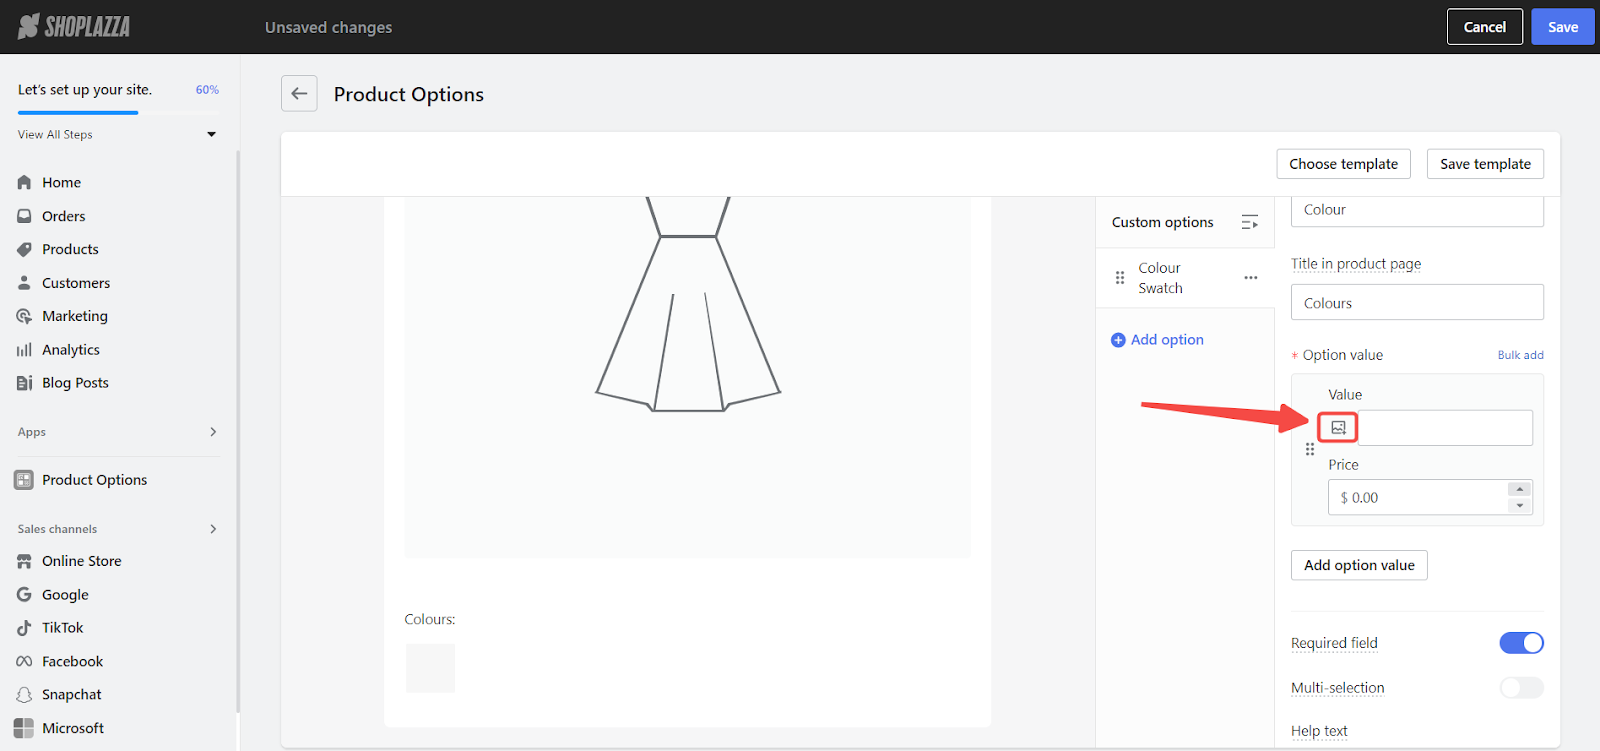
3. Select colors: Provide a color palette or upload custom images for swatches to enhance visual appeal.
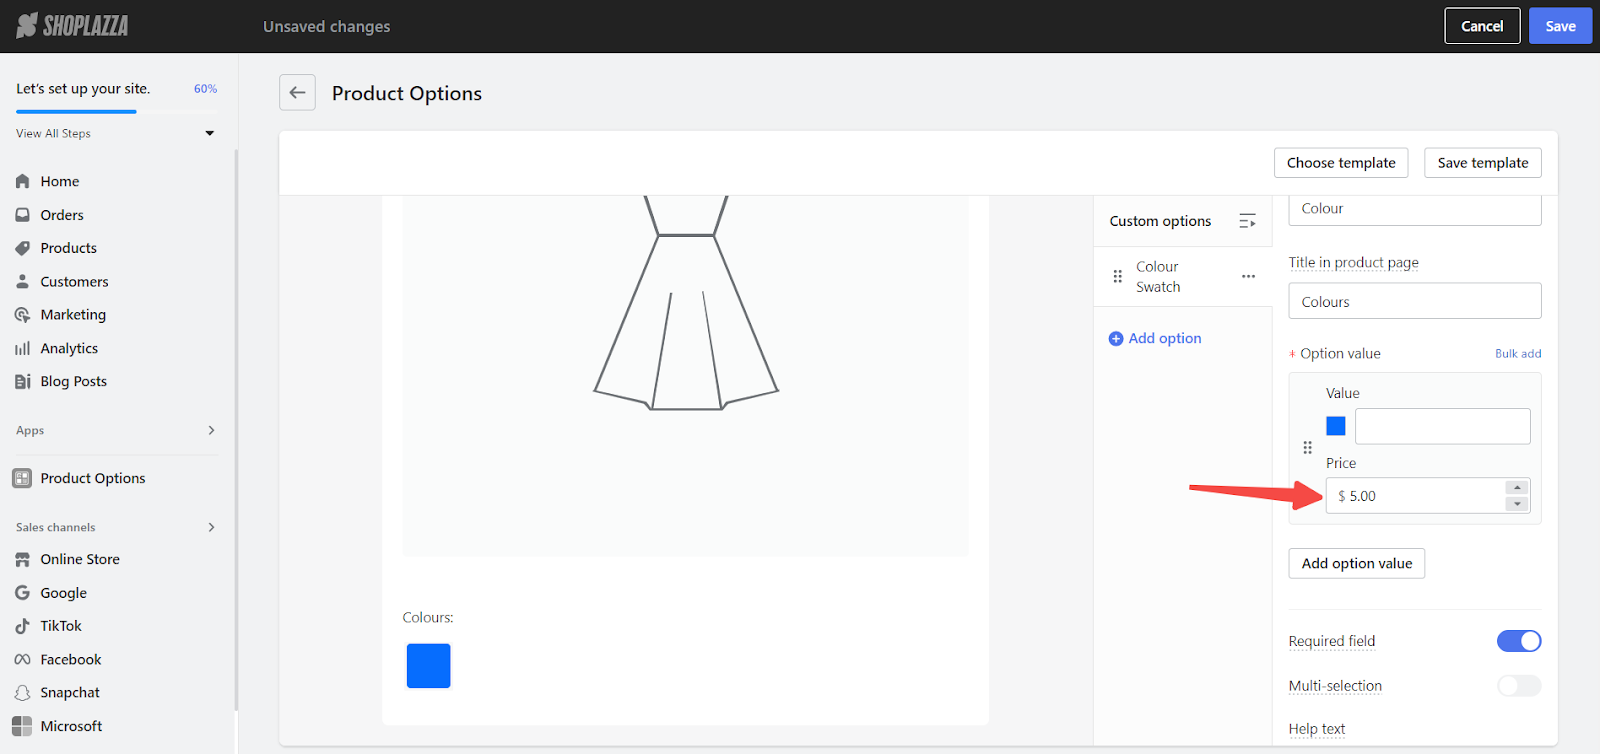
4. Adjust pricing: Apply additional charges for this attribute, if necessary, to cover customization costs.
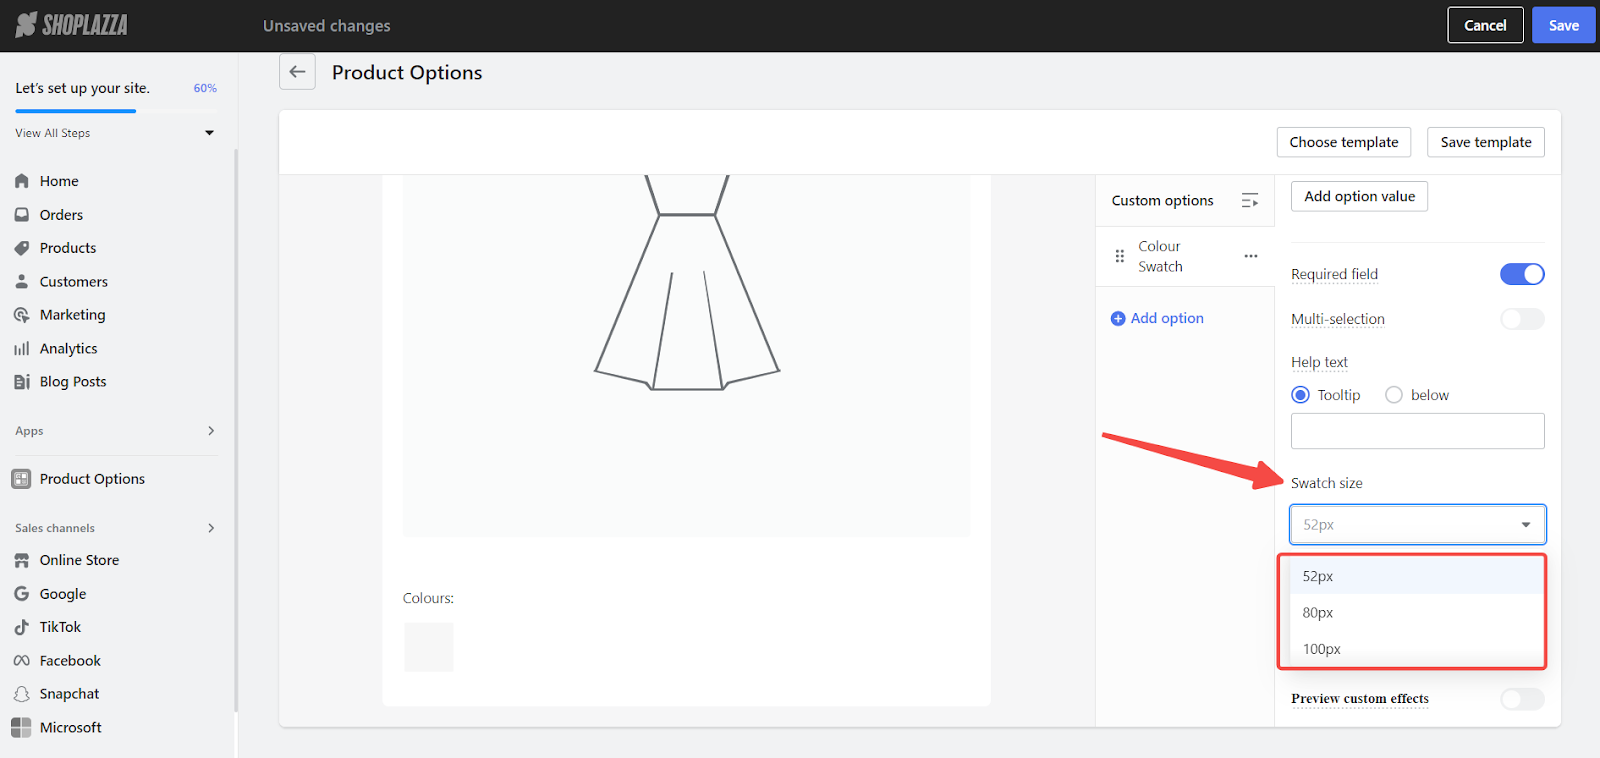
5. Swatch size configuration: Ensure swatches are easily selectable and appropriately sized for the product page.
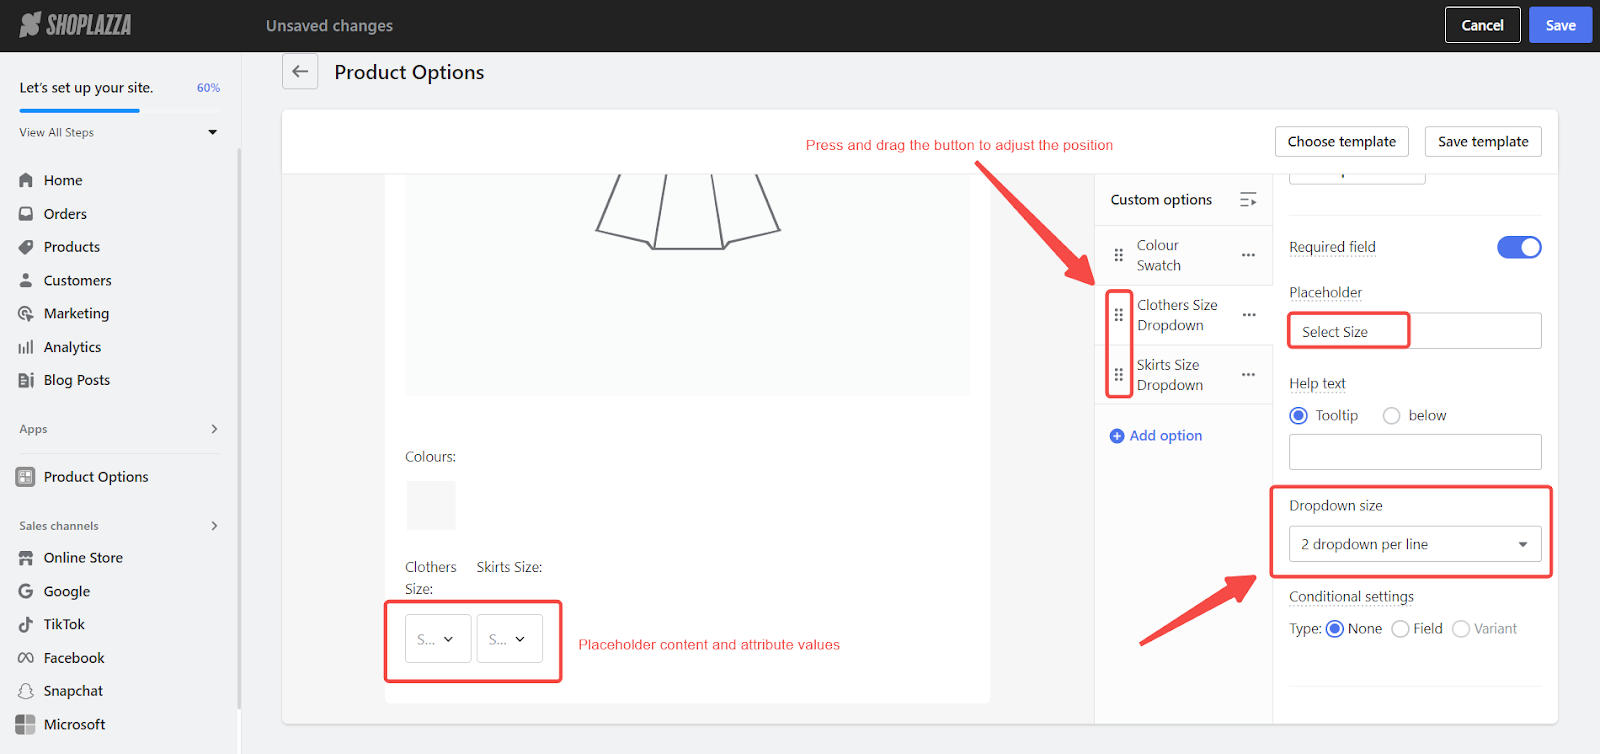
Dropdowns
1. Title input: Clearly label your dropdown menus with titles that appear on both the order and product detail pages.
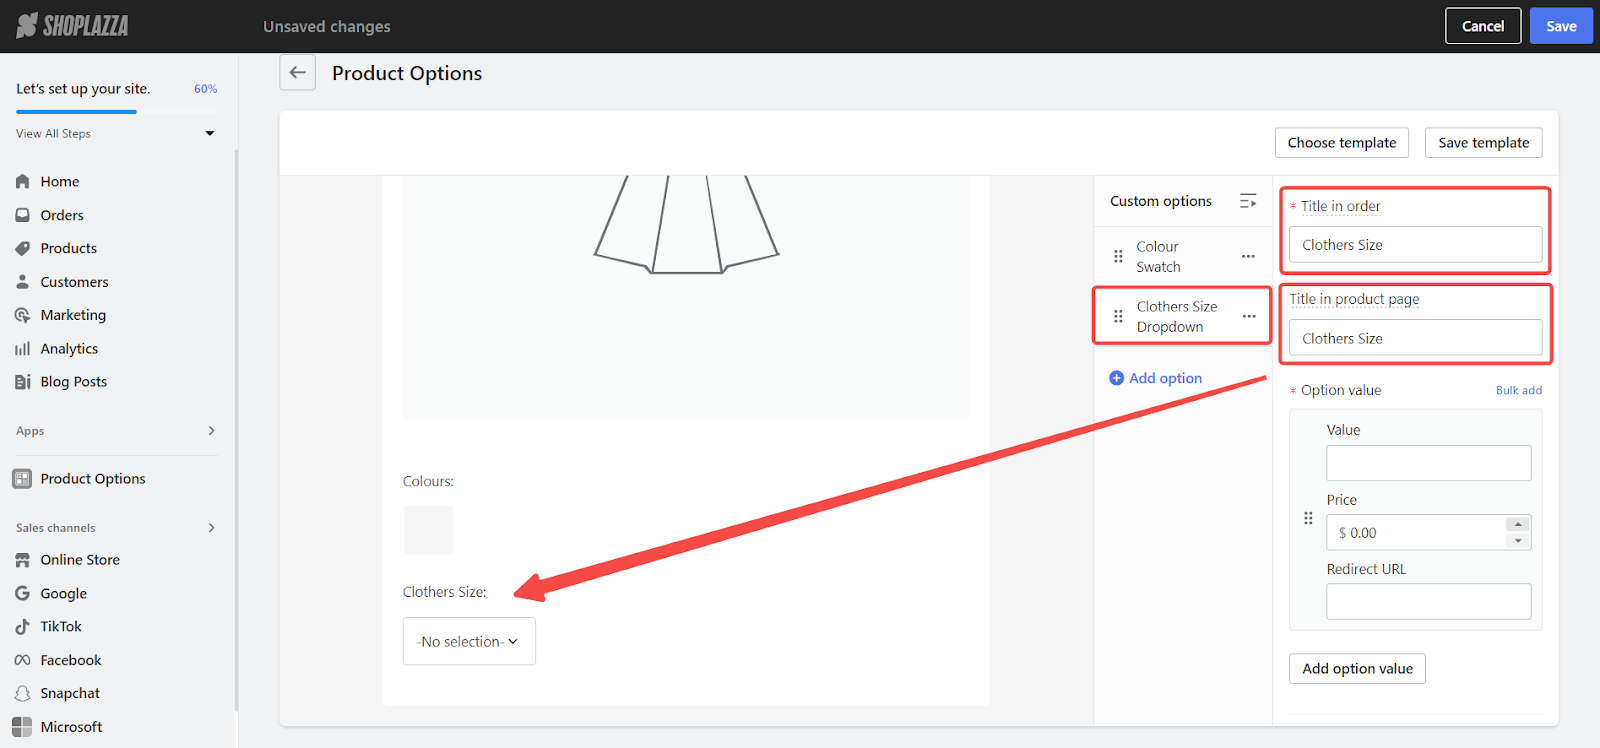
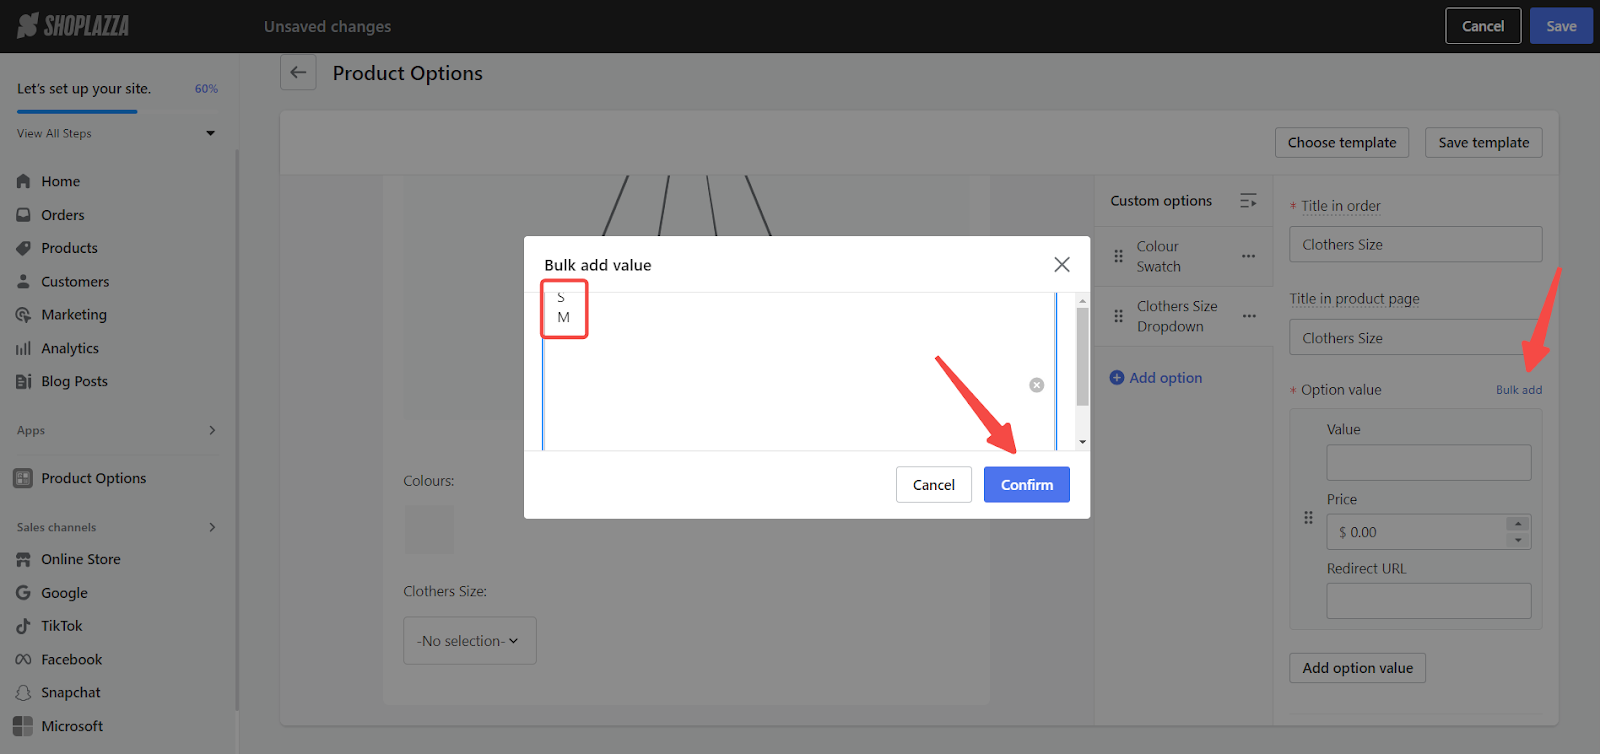
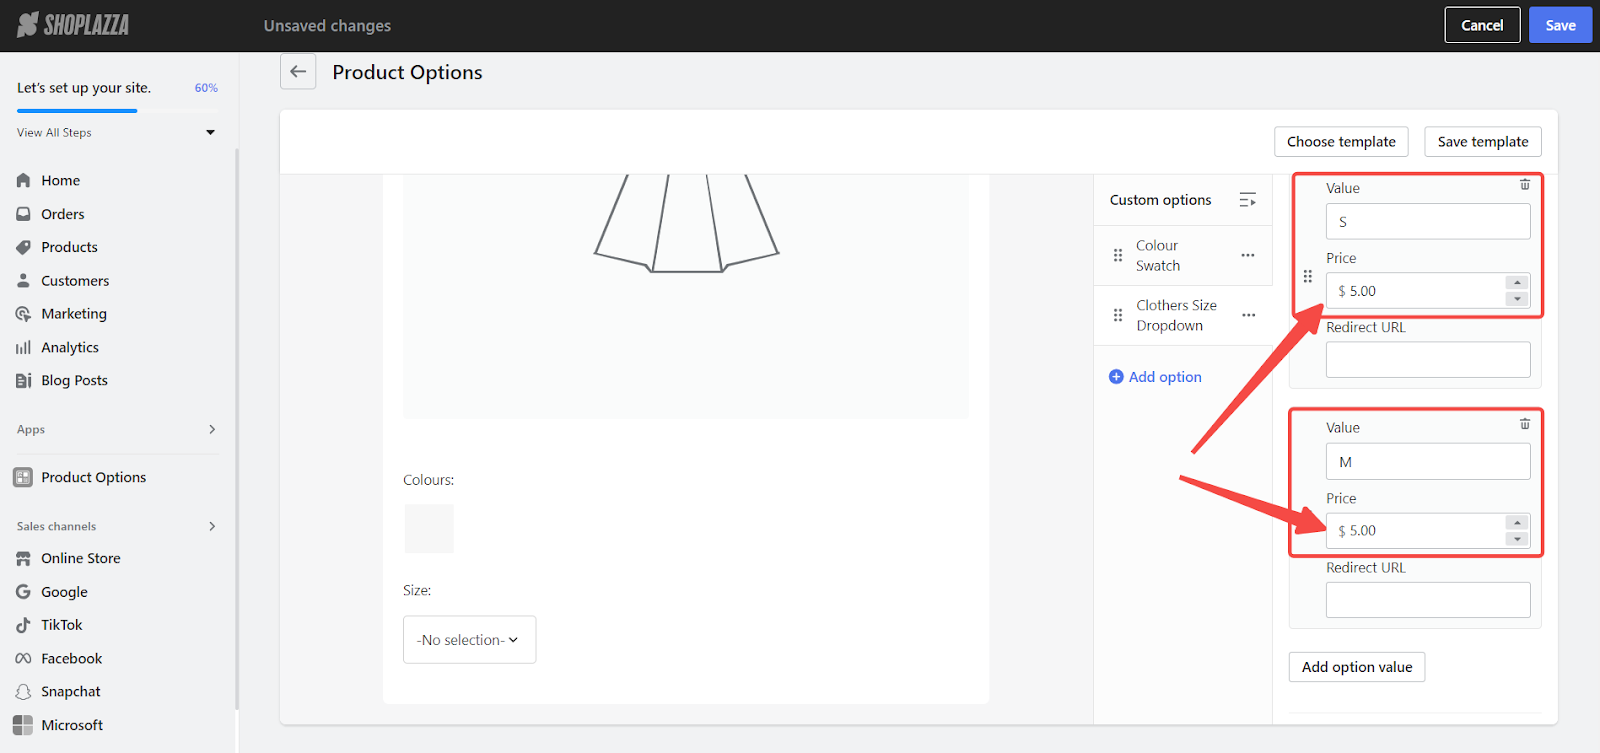
2. Add attribute values: Enter the available options for each attribute. Leverage the Bulk add feature to simultaneously input multiple variant names, optimizing the setup process for greater efficiency.
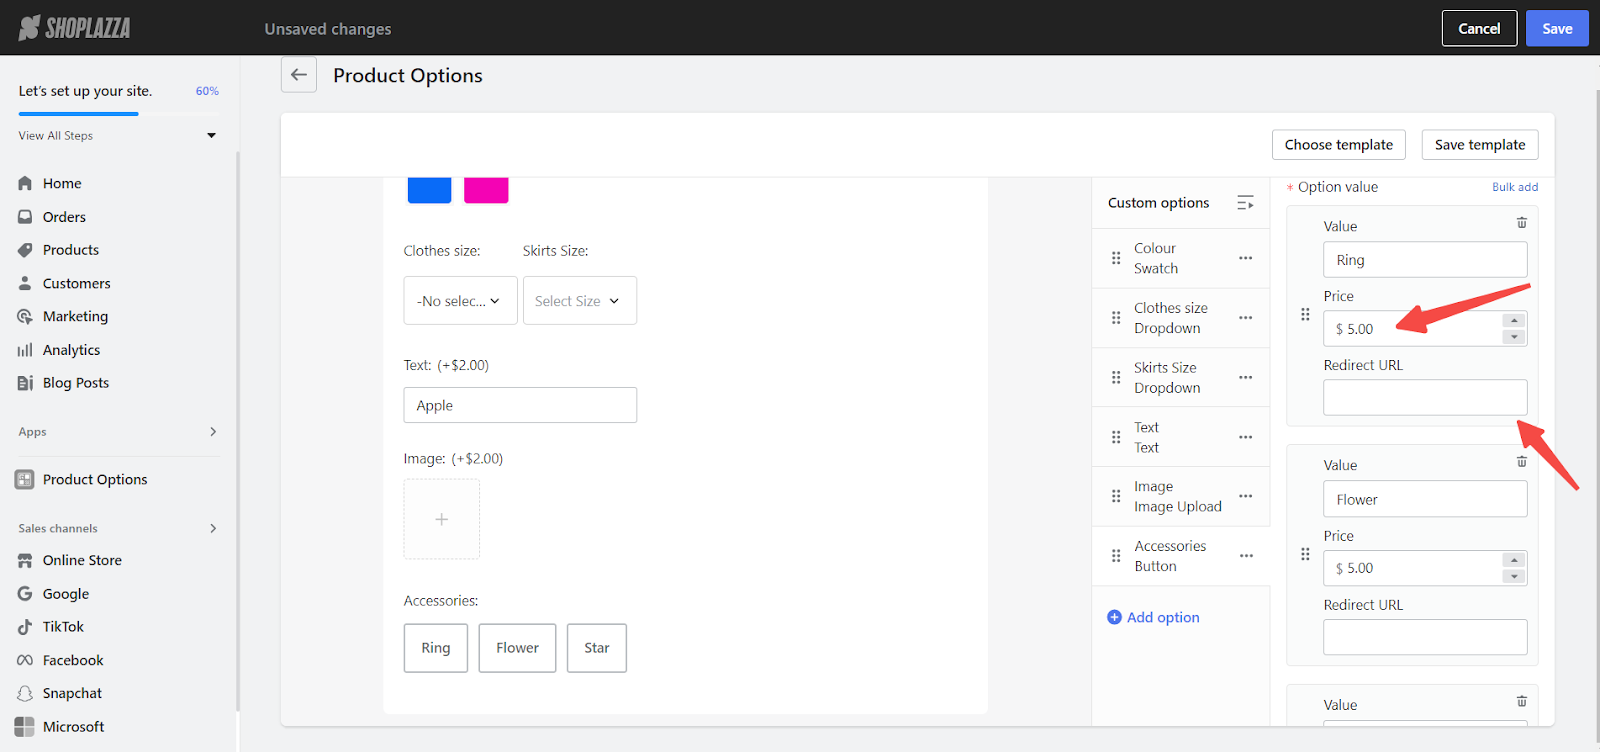
3. Set prices: Adjust prices for dropdown selections to reflect the customization value.
4. Include redirect links: Optionally, provide redirect links for attribute values, guiding customers to related products or information.
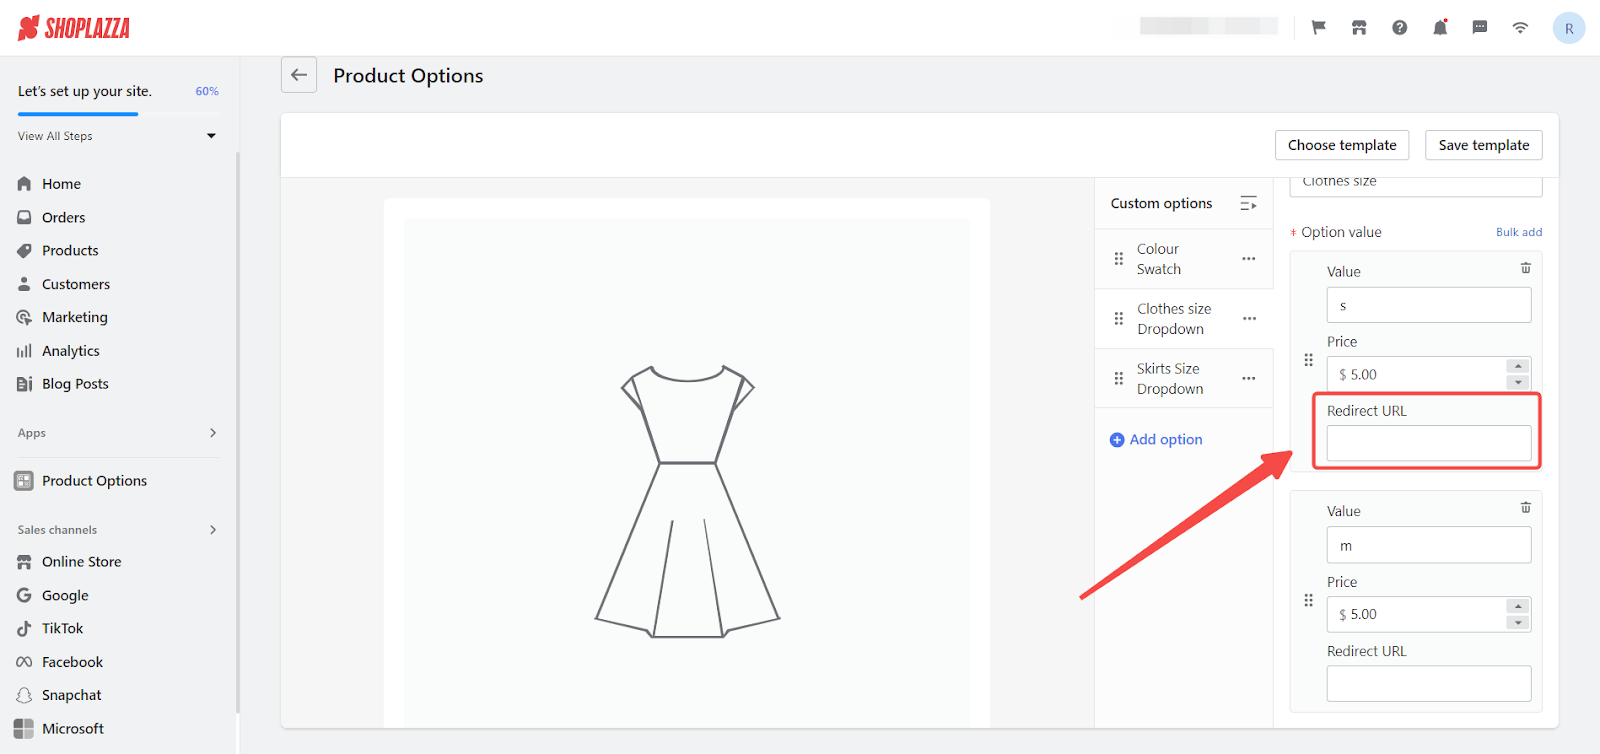
5. Dropdown adjustment: When featuring multiple dropdowns, adjust their size and alignment to display them in a cohesive, user-friendly manner. (Ensure both dropdowns are set to display two or more options per row to enable side-by-side arrangement.)
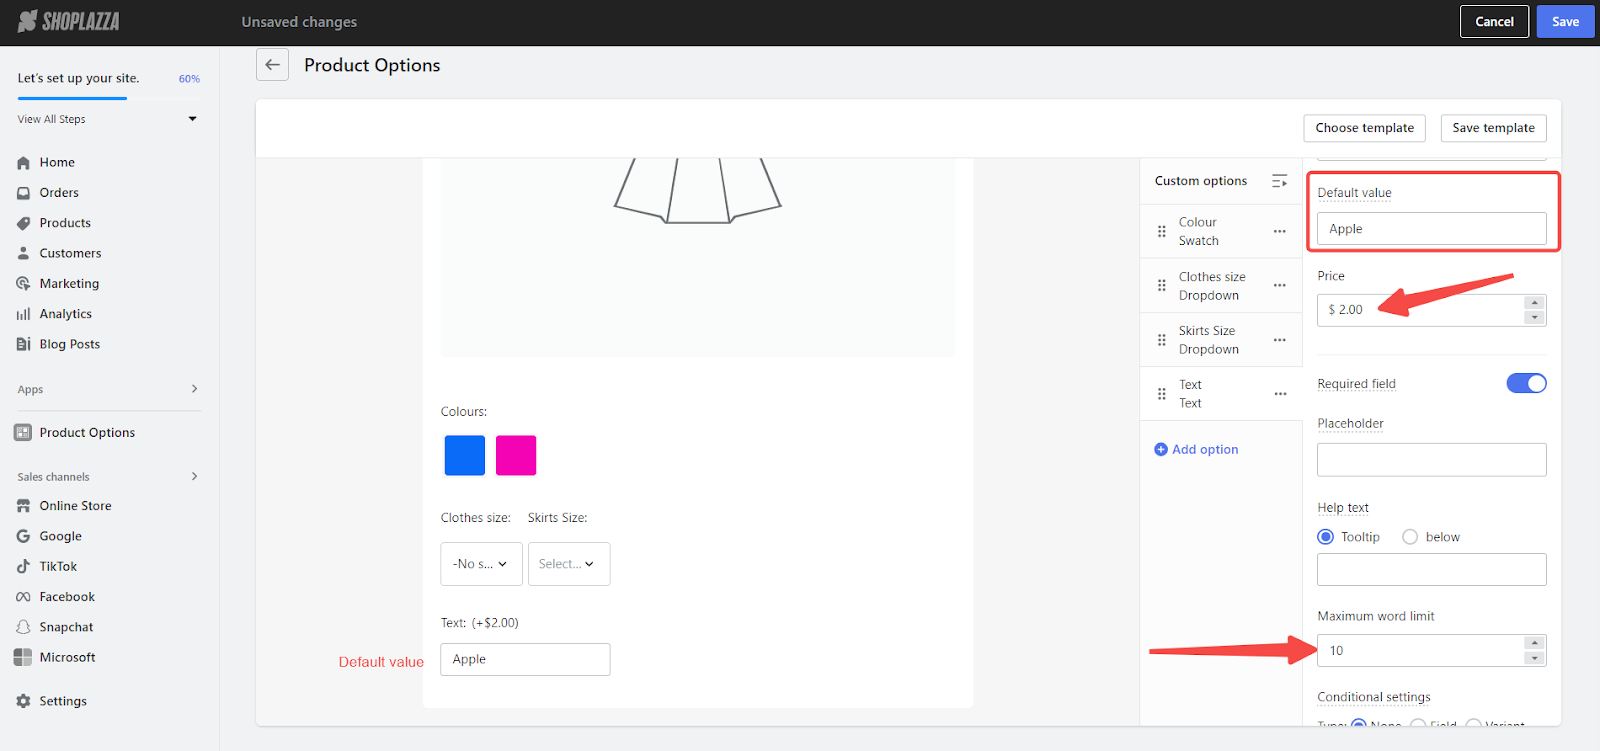
Text
1. Specify titles: Provide clear titles for text fields to guide customers on the required information.
2. Set default value: Offer a default text that customers can customize to their preference.
3. Apply price adjustments: Add an extra charge for this personalization option.
4. Limit Characters: Set a character limit up to 500 characters, to balance customization with design aesthetics.
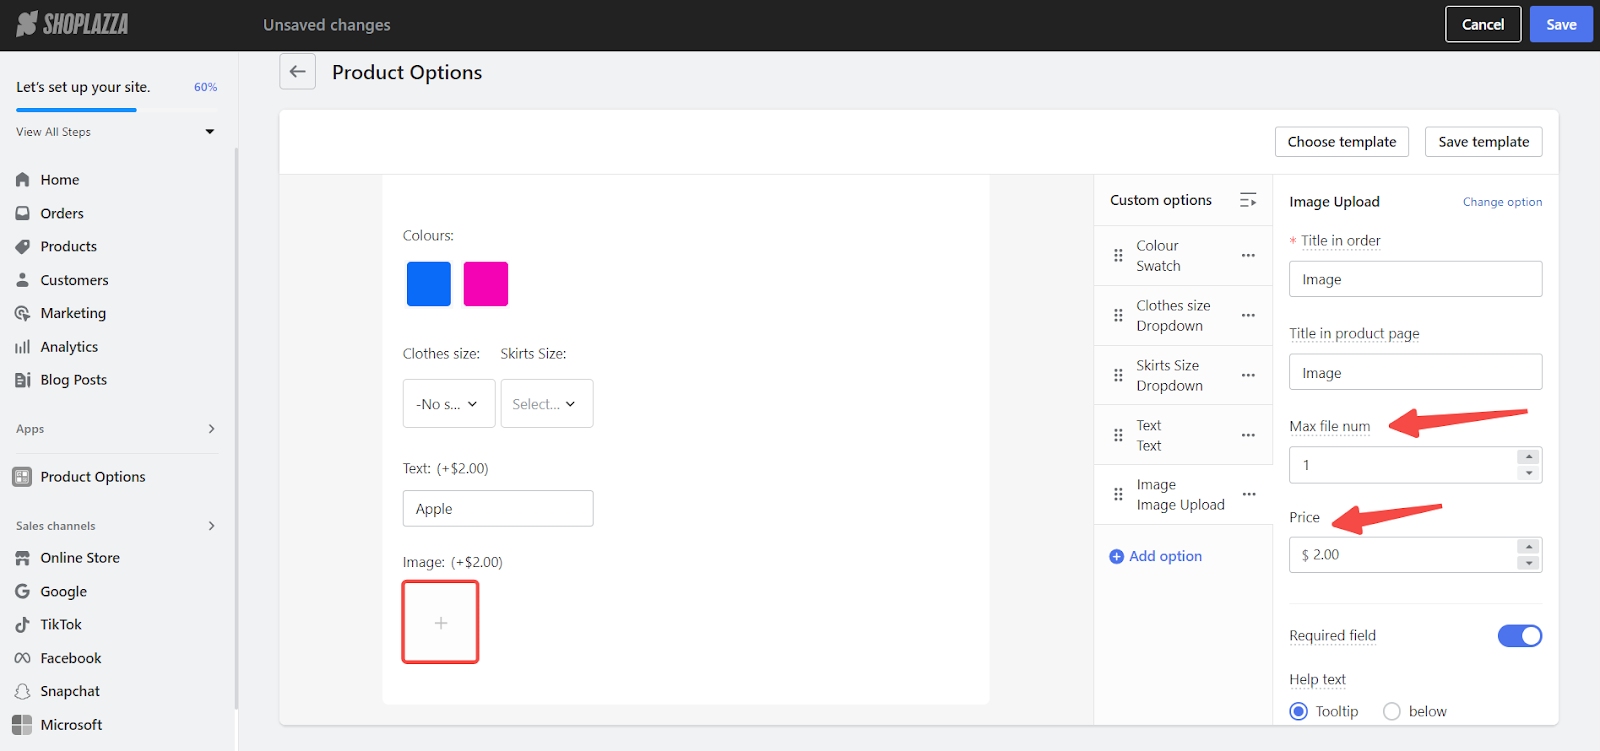
Images
1. Specify titles: Clearly describe the image upload purpose with a concise title.
2. Upload instructions: Explain the upload process, noting supported formats like JPG and PNG.
3. Upload limit: Set a maximum number of images that can be uploaded to ensure the customization remains manageable.
4. Apply price adjustments: Include an additional fee for this service, if needed, to cover extra processing or production costs.
Buttons
1. Name titles: Ensure buttons are clearly named for easy identification in orders and on product detail pages.
2. Text input: Leverage the Bulk add feature to simultaneously input multiple button names, optimizing the setup process for greater efficiency.
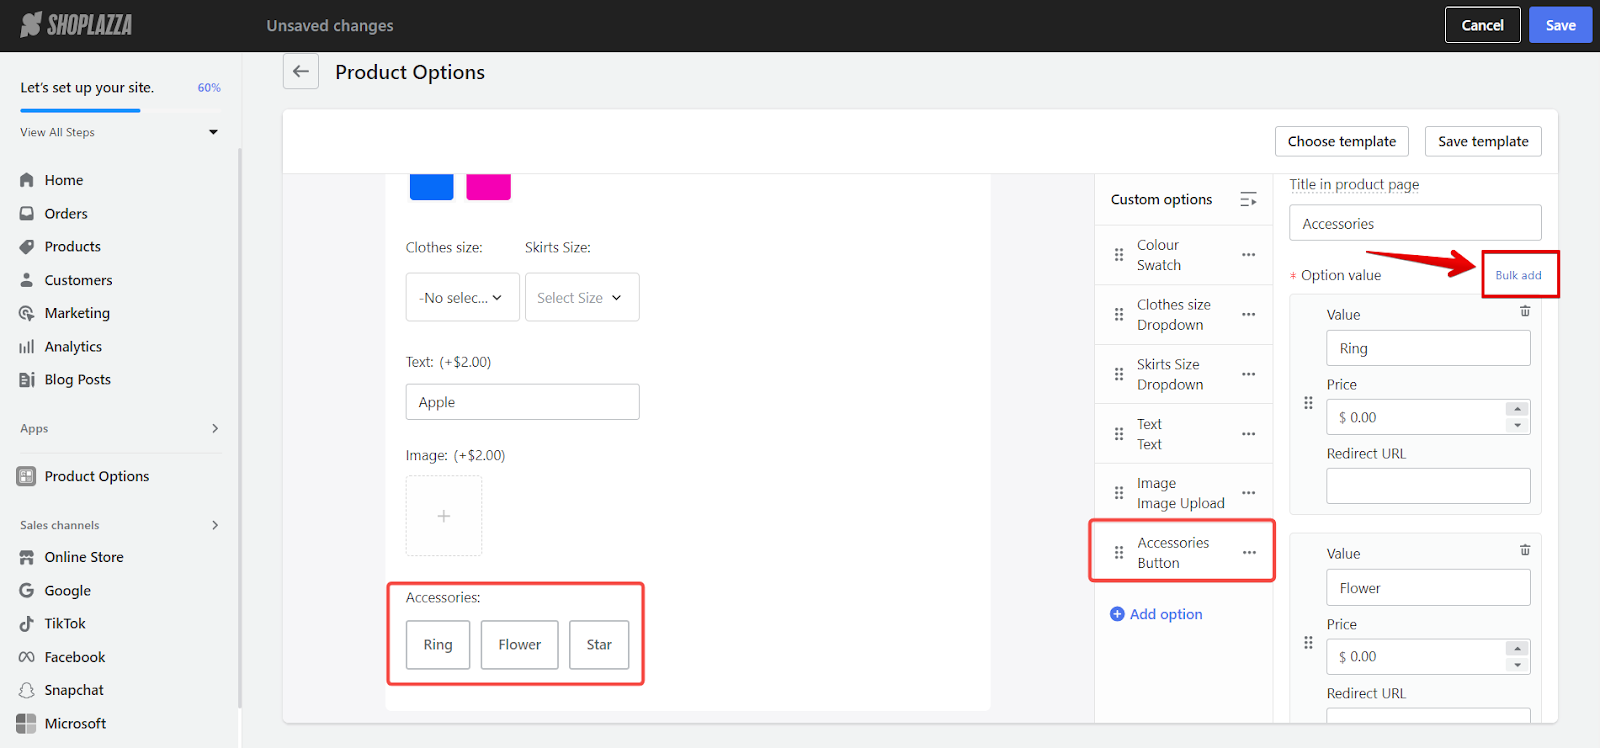
3. Pricing options: Specify prices for each button selection, clarifying any additional costs.
4. Embedding redirects: Use redirect links within button attributes to improve the shopping experience.
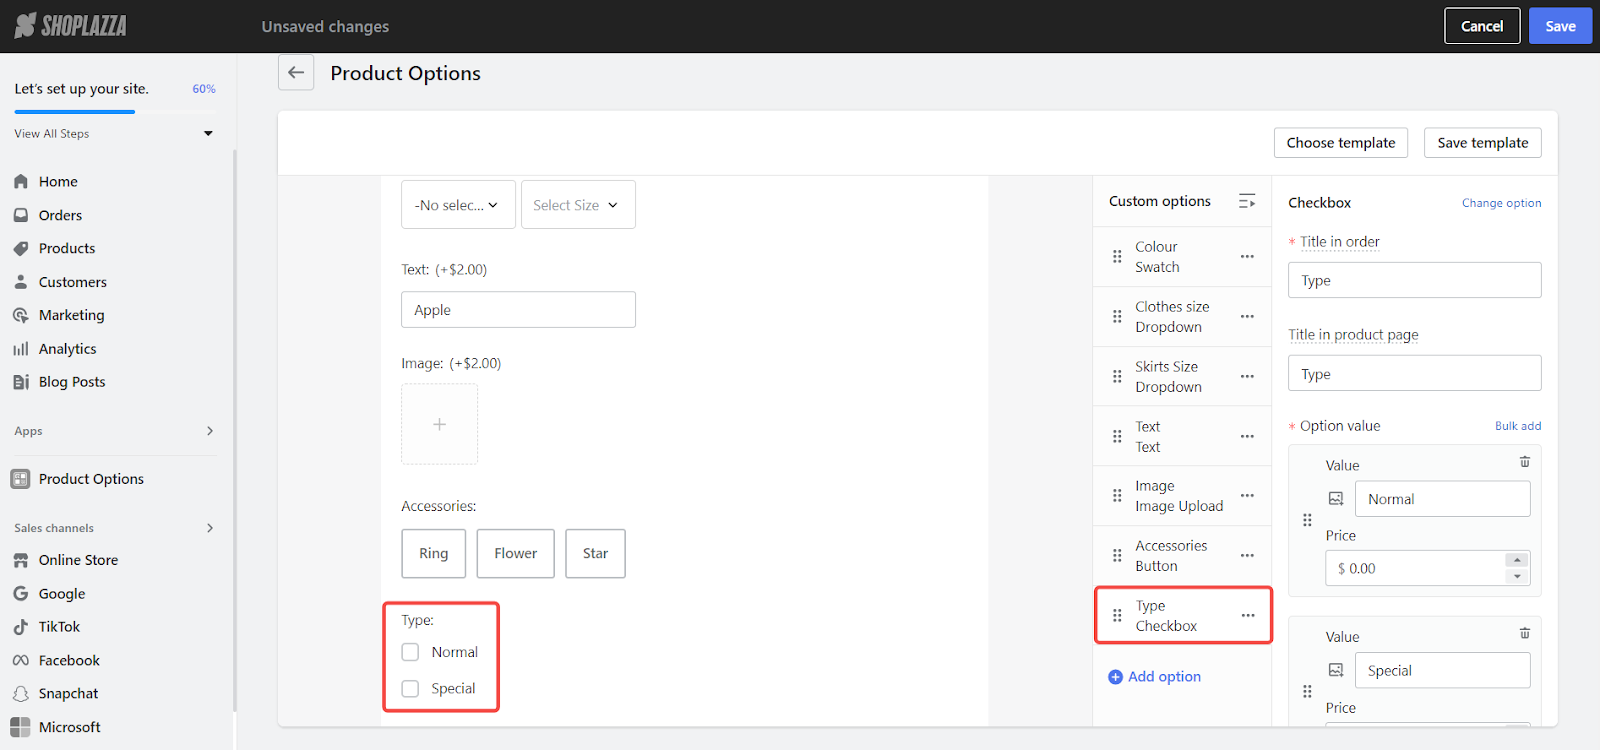
Checkbox
1. Title naming: Use clear, descriptive titles for checkbox attributes, ensuring they are easily identifiable in orders and on product detail pages.
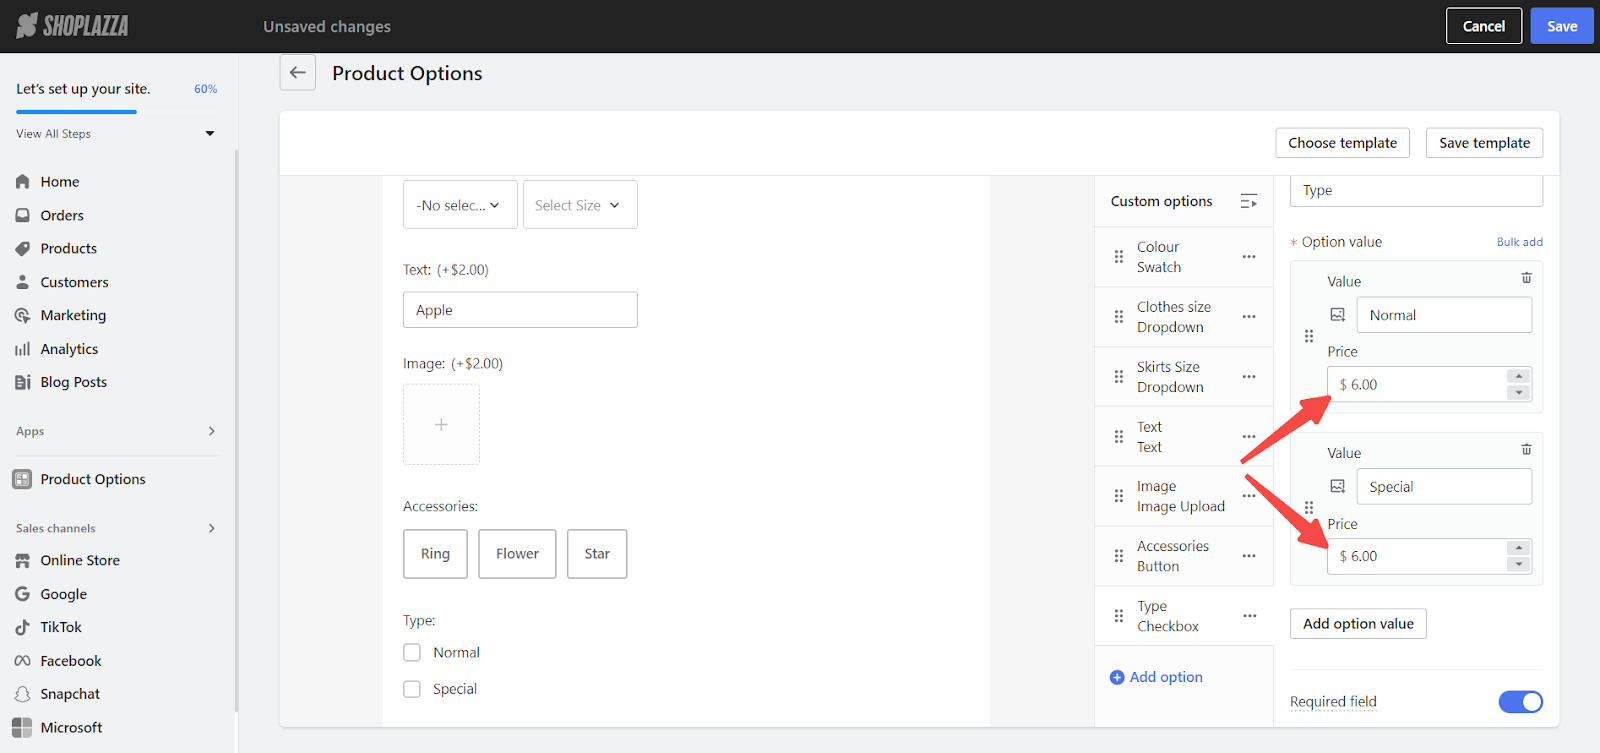
2. Set prices: Indicate any additional fees for checkbox selections .
3. Redirect functionality: Although less common with checkboxes, adding redirect links can offer a more enriched customization experience, directing users to further content or related products.
Finalizing your configuration
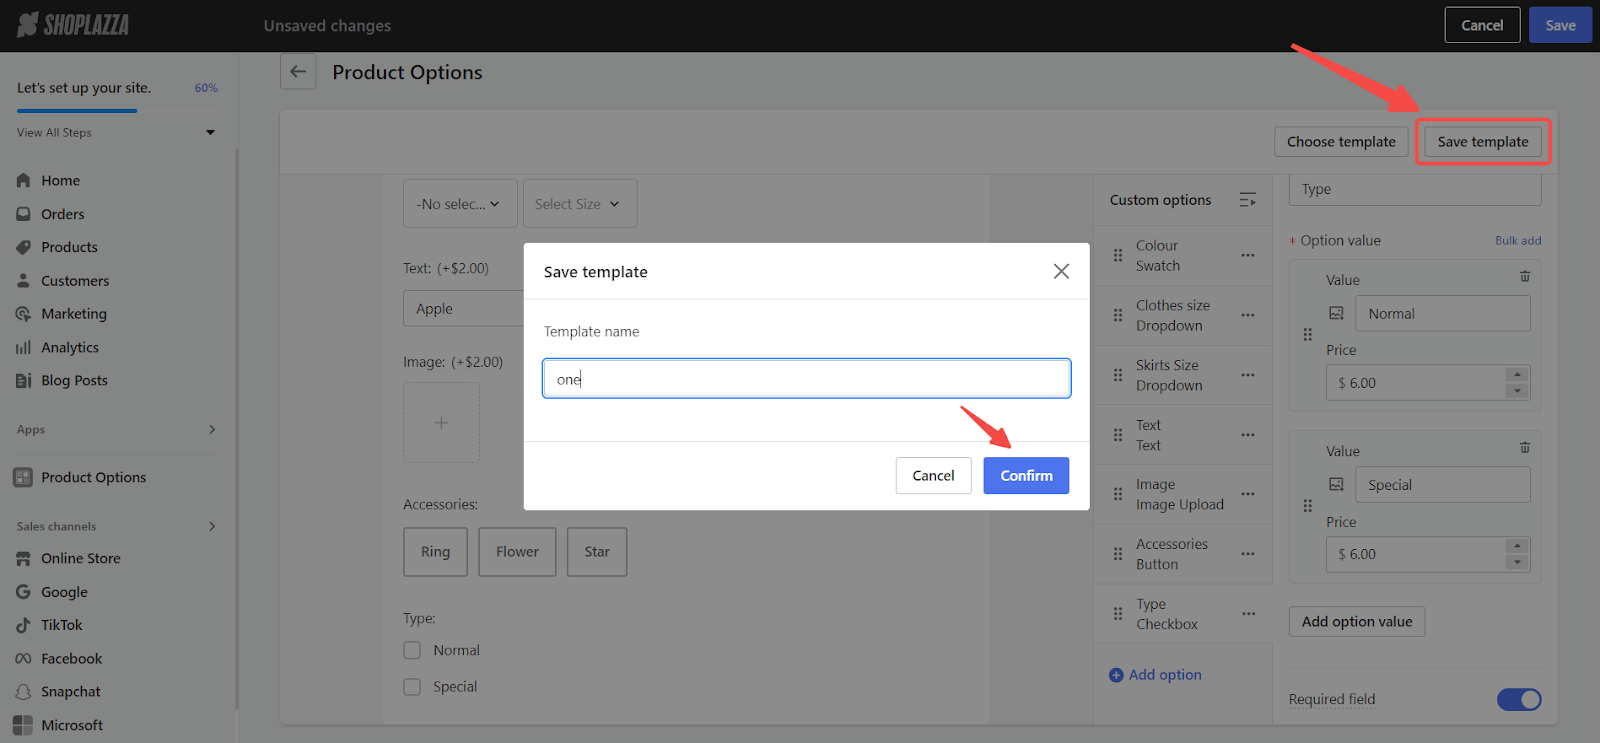
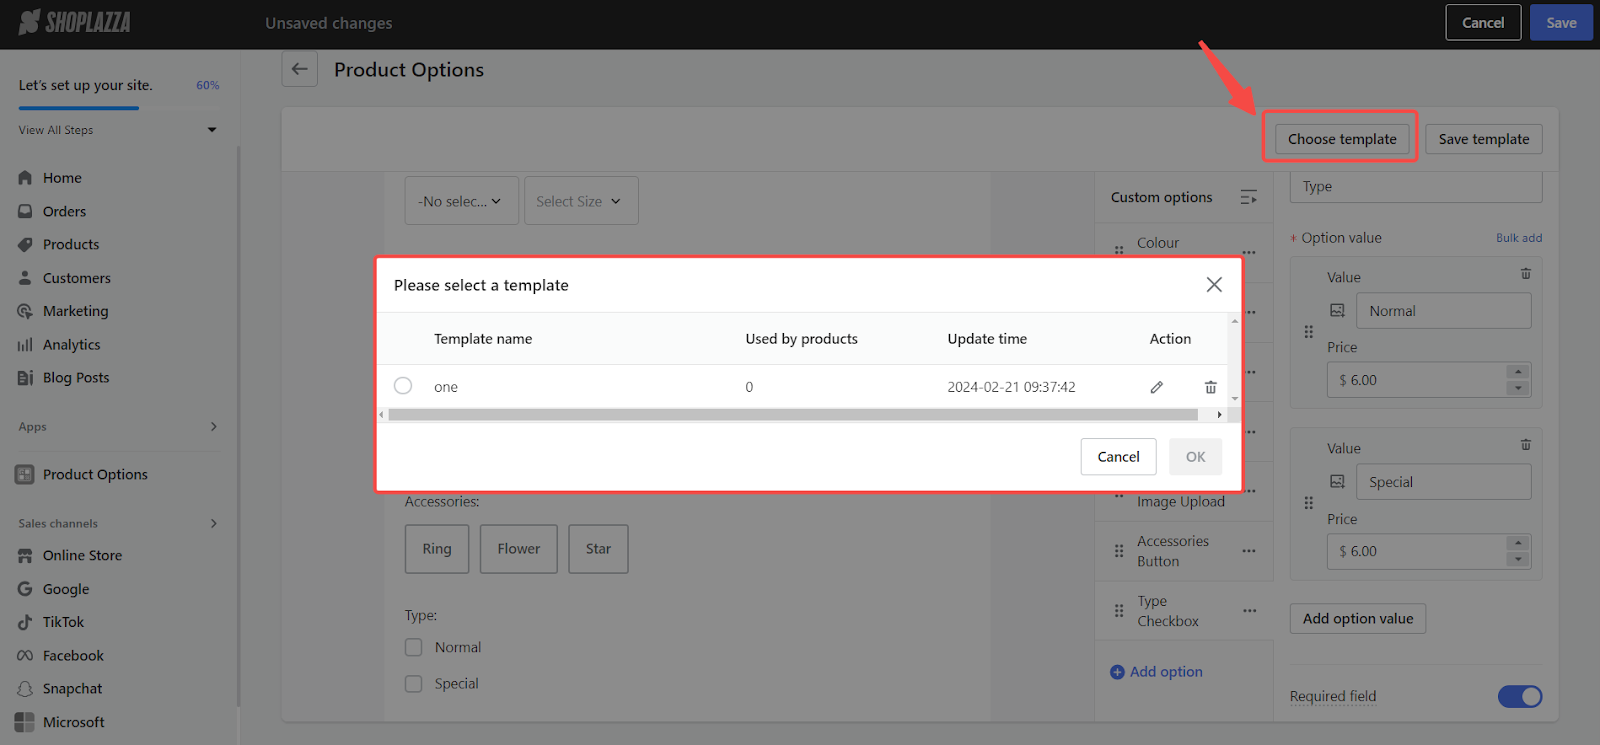
1. Save your configuration as a template: To streamline future customizations, click on Save Template to preserve your current settings as a template. This allows for easy application of these settings to other products by selecting a previously saved template under the Choose template option for instant configuration.
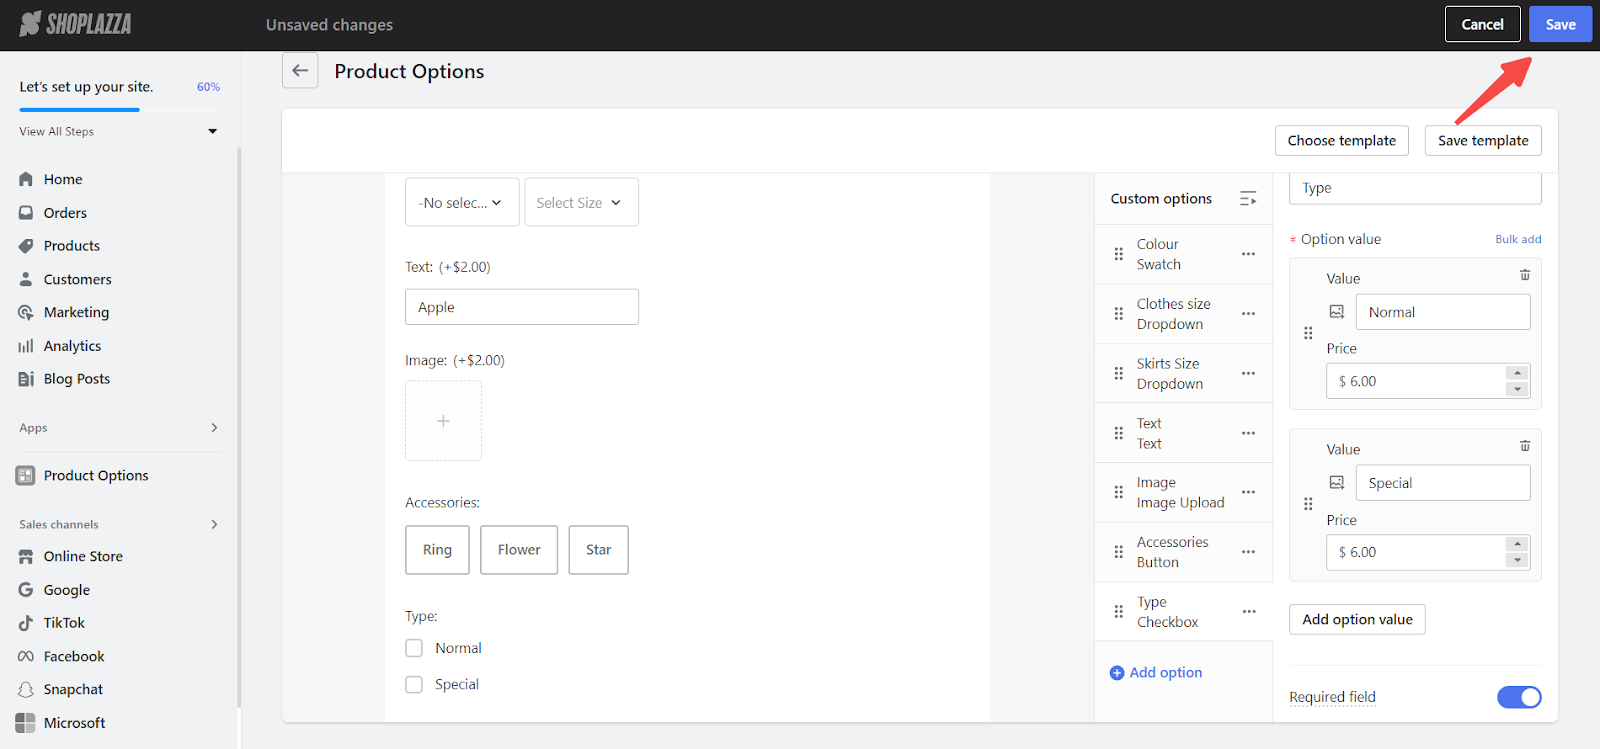
2. Saving your configuration: Confirm all adjustments by clicking on Save, applying your configurations to the selected products.
Adding apps in the theme editor
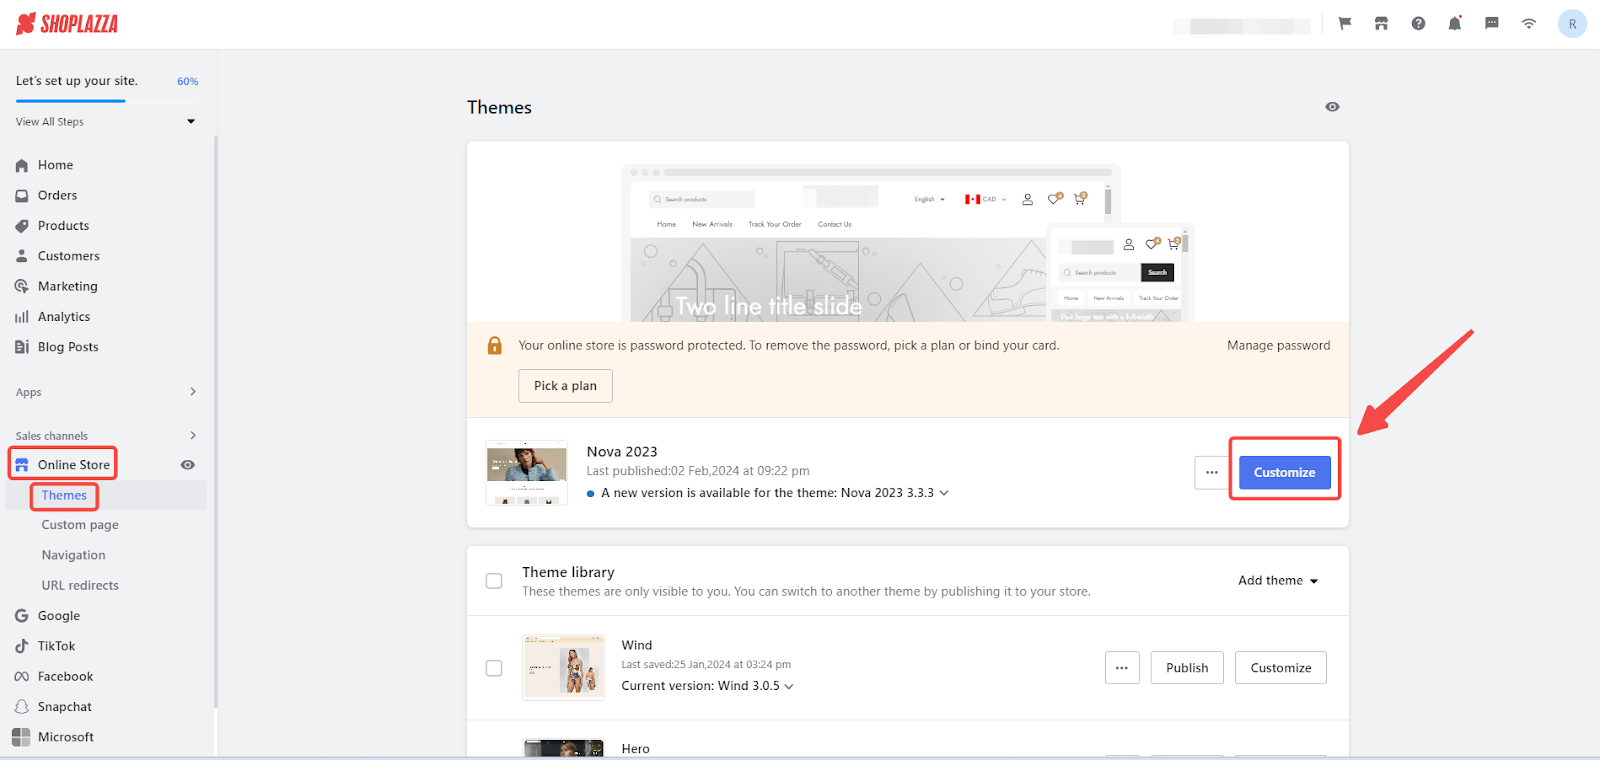
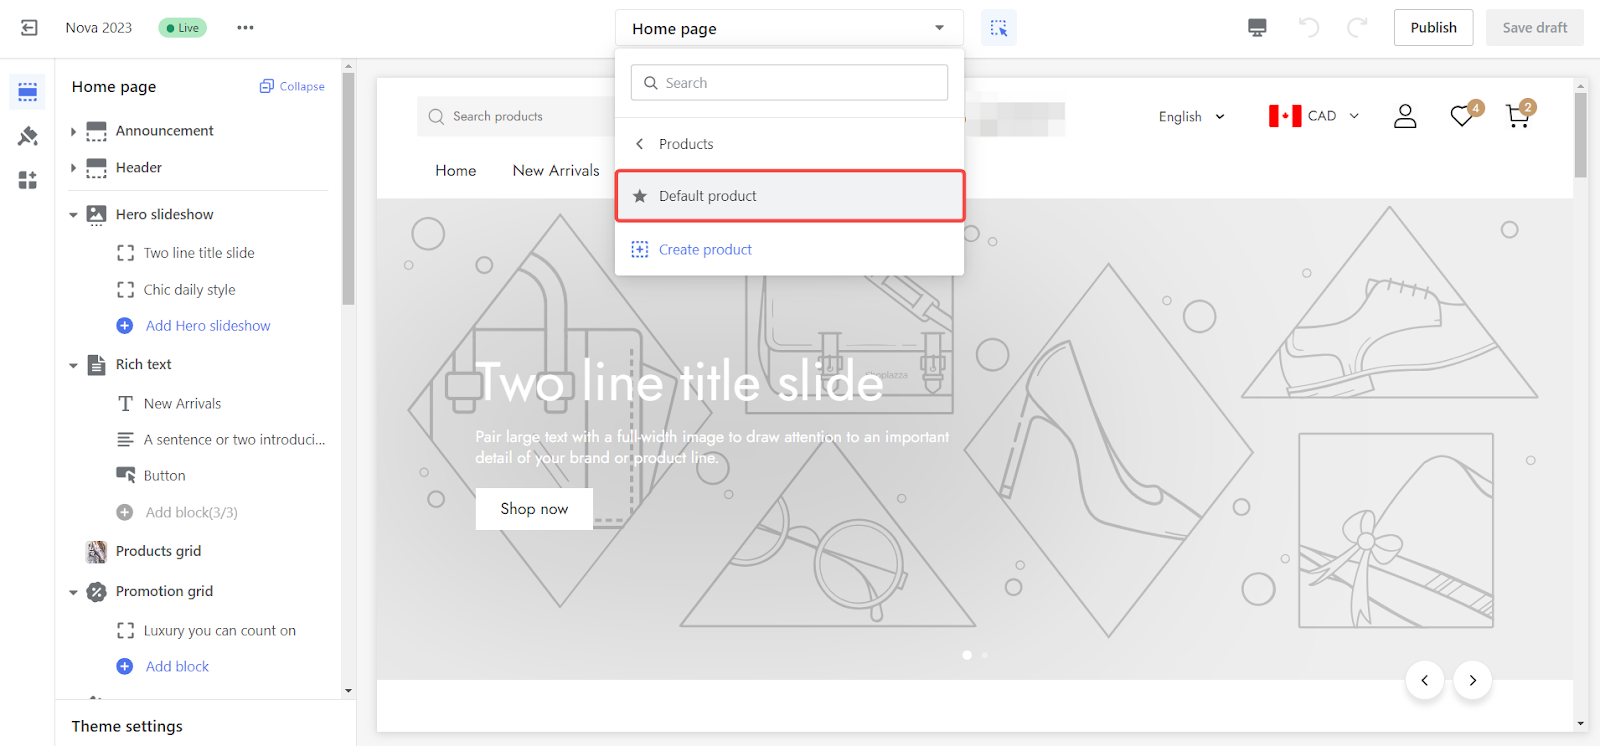
1. Access theme editor: Return to your Shoplazza admin, select Online Store, go to Theme, and click Customize.
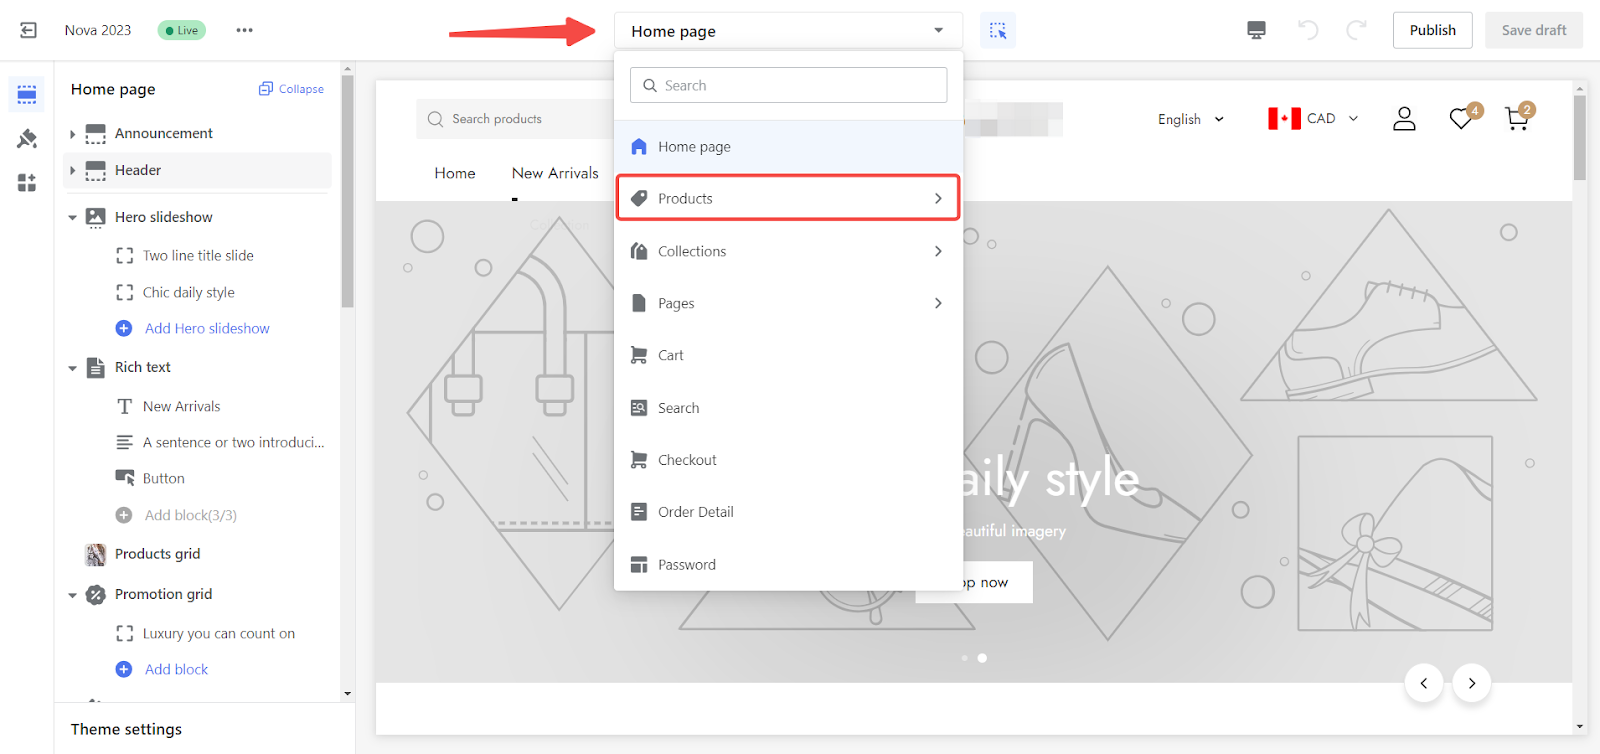
2 .Find product details section: Within the theme editor, locate the dropdown and select Products > Default product.
3. Add block: In the Product details section, click on Add block.
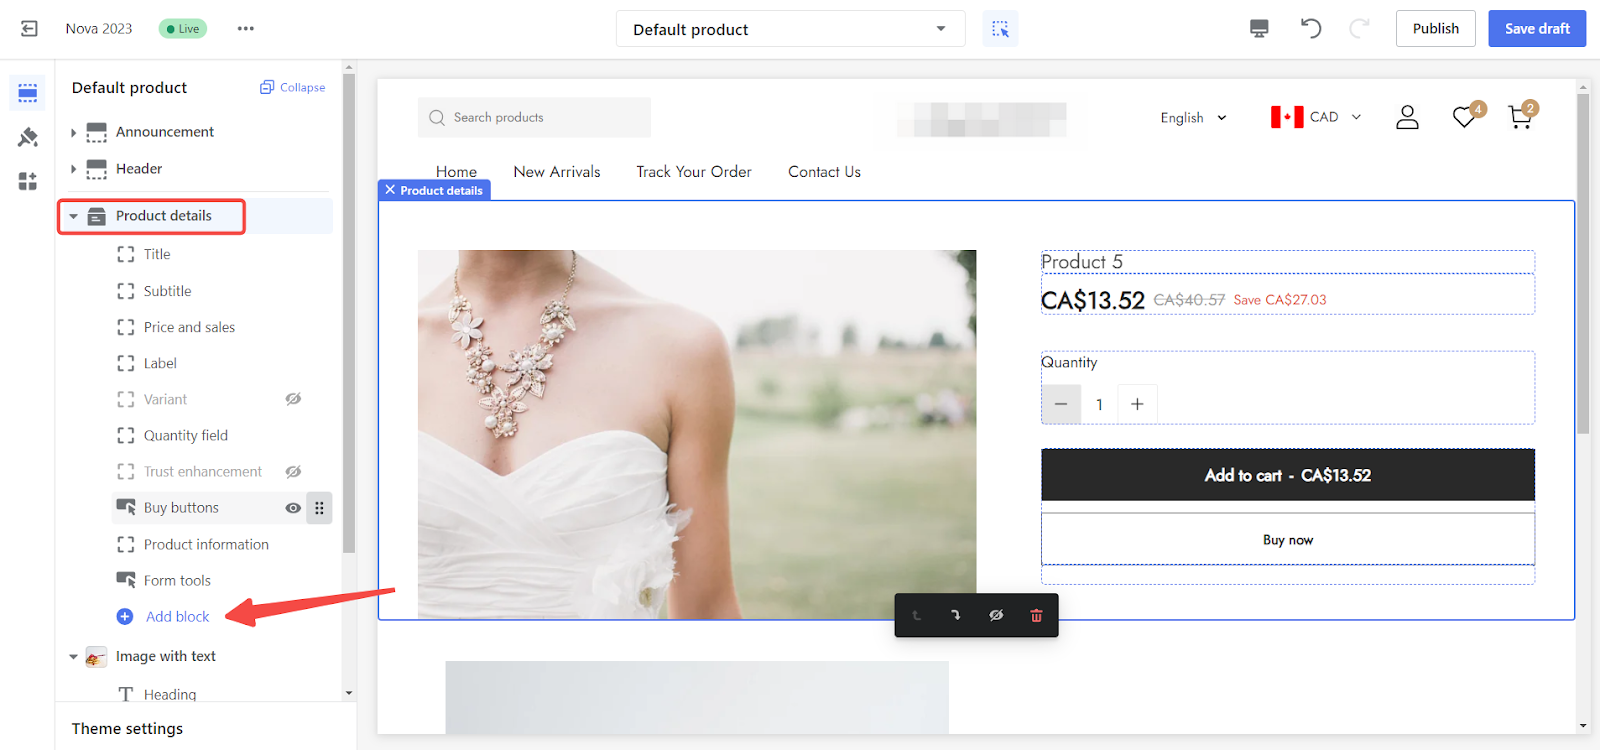
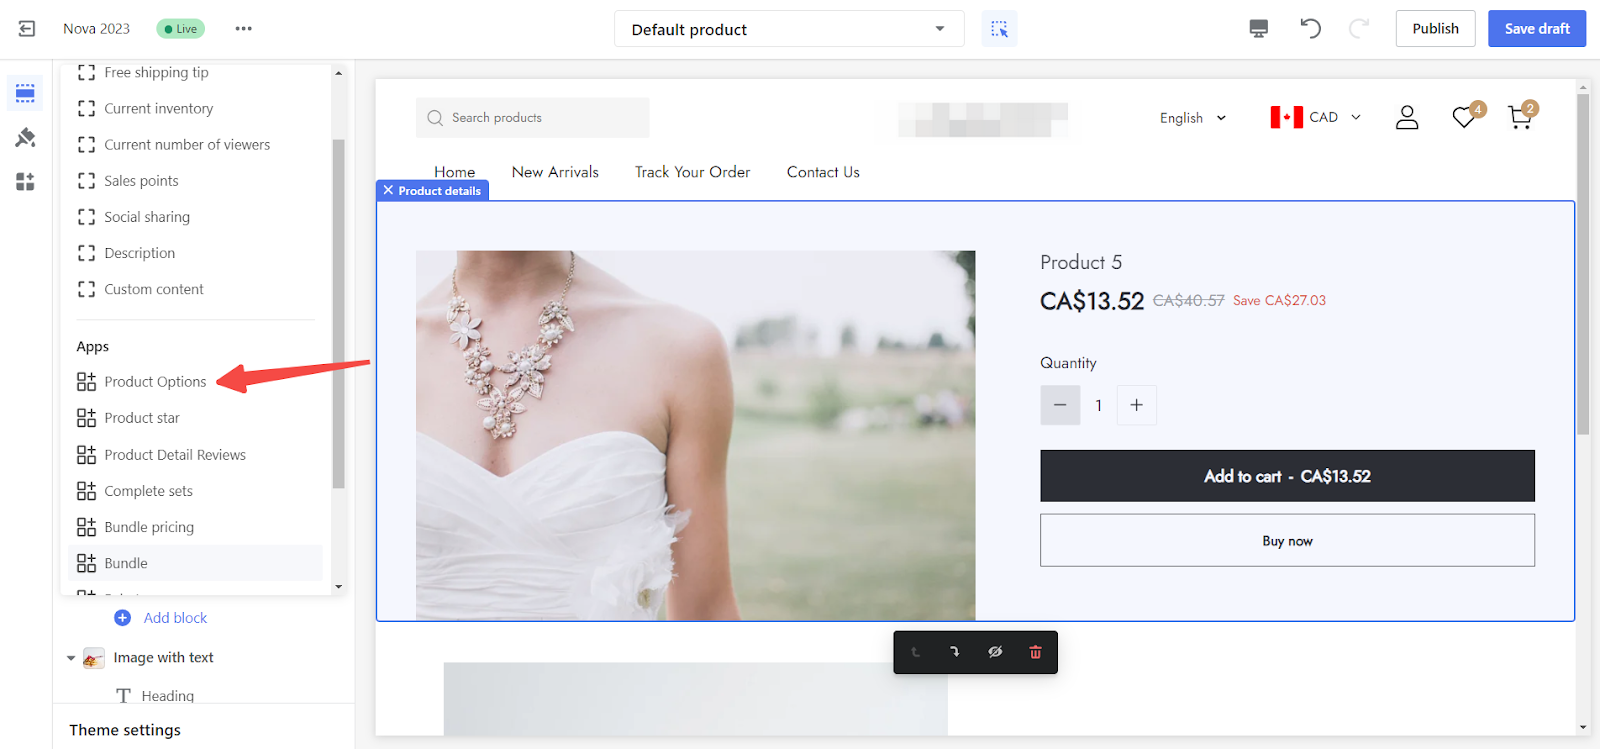
4. Integrate the product option app: From the Apps section, choose the Product options app to integrate it into your theme.
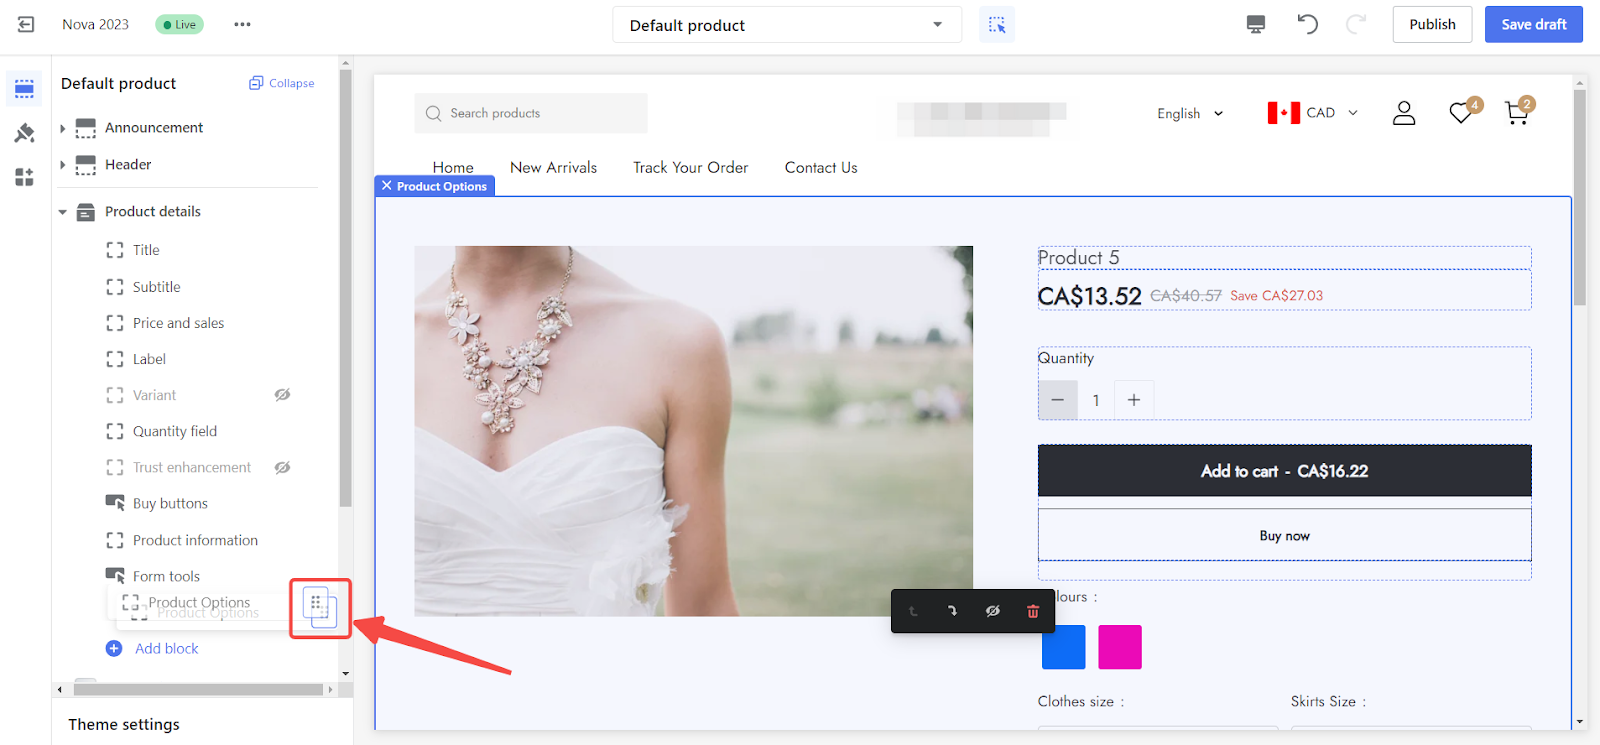
5. Adjust app placement: After adding the app, you may want to adjust its placement for optimal layout. Use the Drag indicator feature to move the app block to your desired location within the theme.
6. Publish or Save draft: To finalize the setup, click on Publish to immediately apply changes or Save Draft if you prefer to review or activate the changes at a later time.

Previewing your customization
1. If you’ve saved a draft, use the Preview button in your Shoplazza admin to see how the customized product will appear on your storefront before going live.
By meticulously following these steps, you can effectively finalize your configurations and seamlessly integrate the Product Option App into your Shoplazza store's theme, enriching your e-commerce platform with personalized product options that cater to your customer's preferences.


Comments
Please sign in to leave a comment.