
Customily is a powerful app designed to help you customize products in a user-friendly way. With Customily, you can create unique templates and apply them to your products to enable customers to see an interactive preview of their personalized items. This guide will walk you through the simple steps to set up and enjoy the benefits of product customization, enabling you to engage more deeply with your customers and stand out in the marketplace.
Initial Setup and Installation
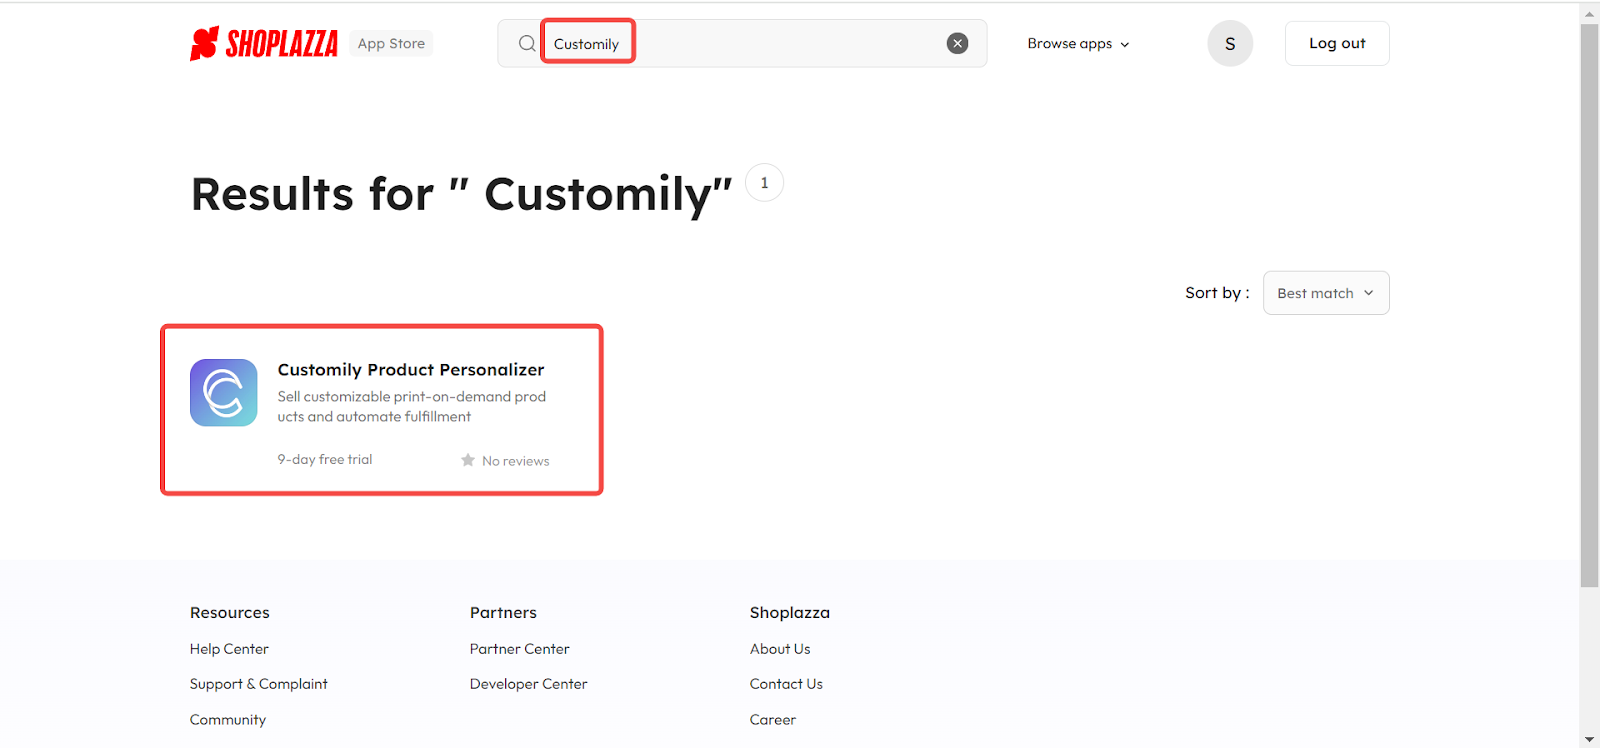
1. Access the App Store: From your Shoplazza Admin, navigate to Apps > Visit App Store.

2. Find the app: Enter Customily in the search bar and click on Add App.
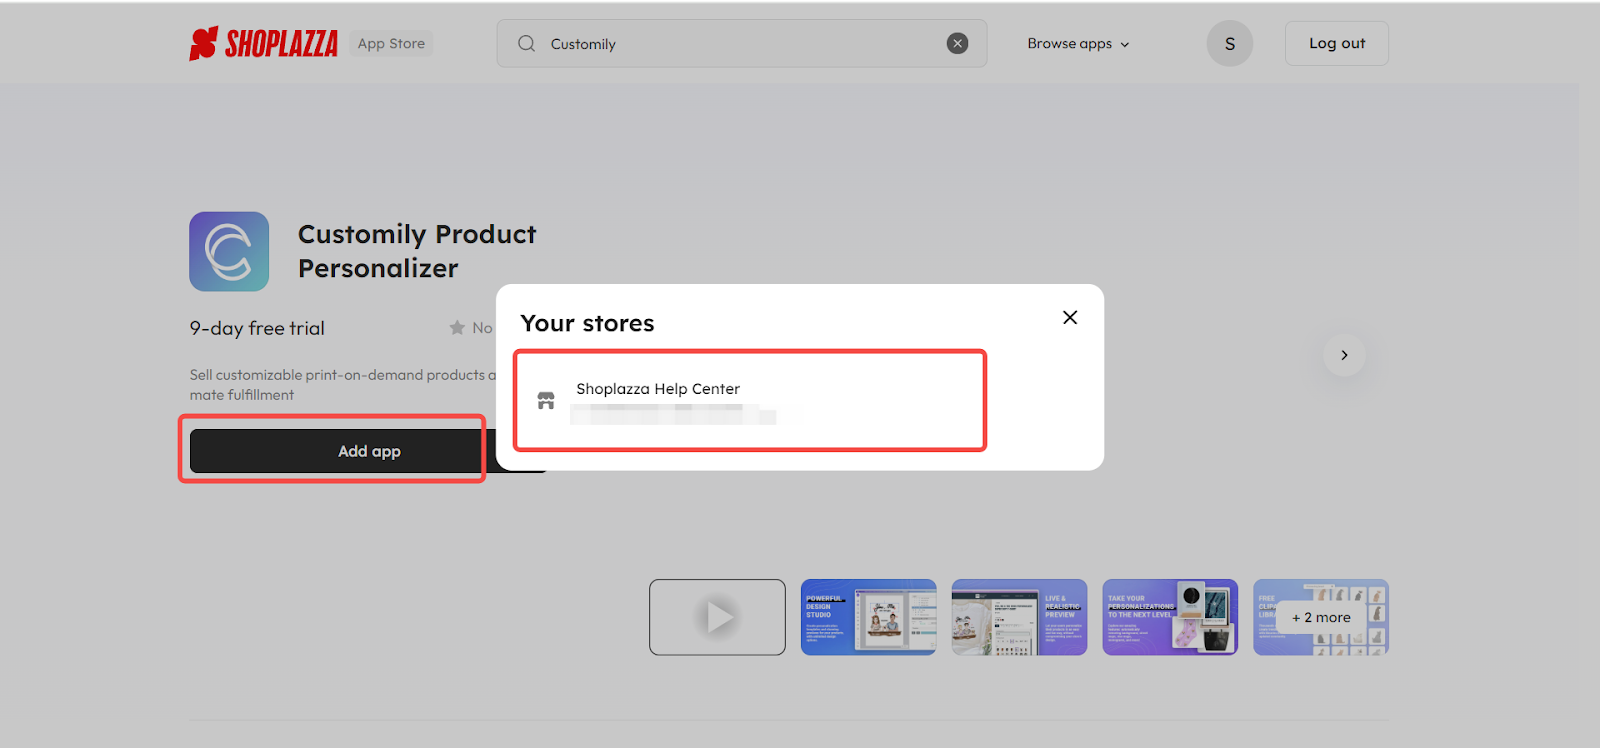
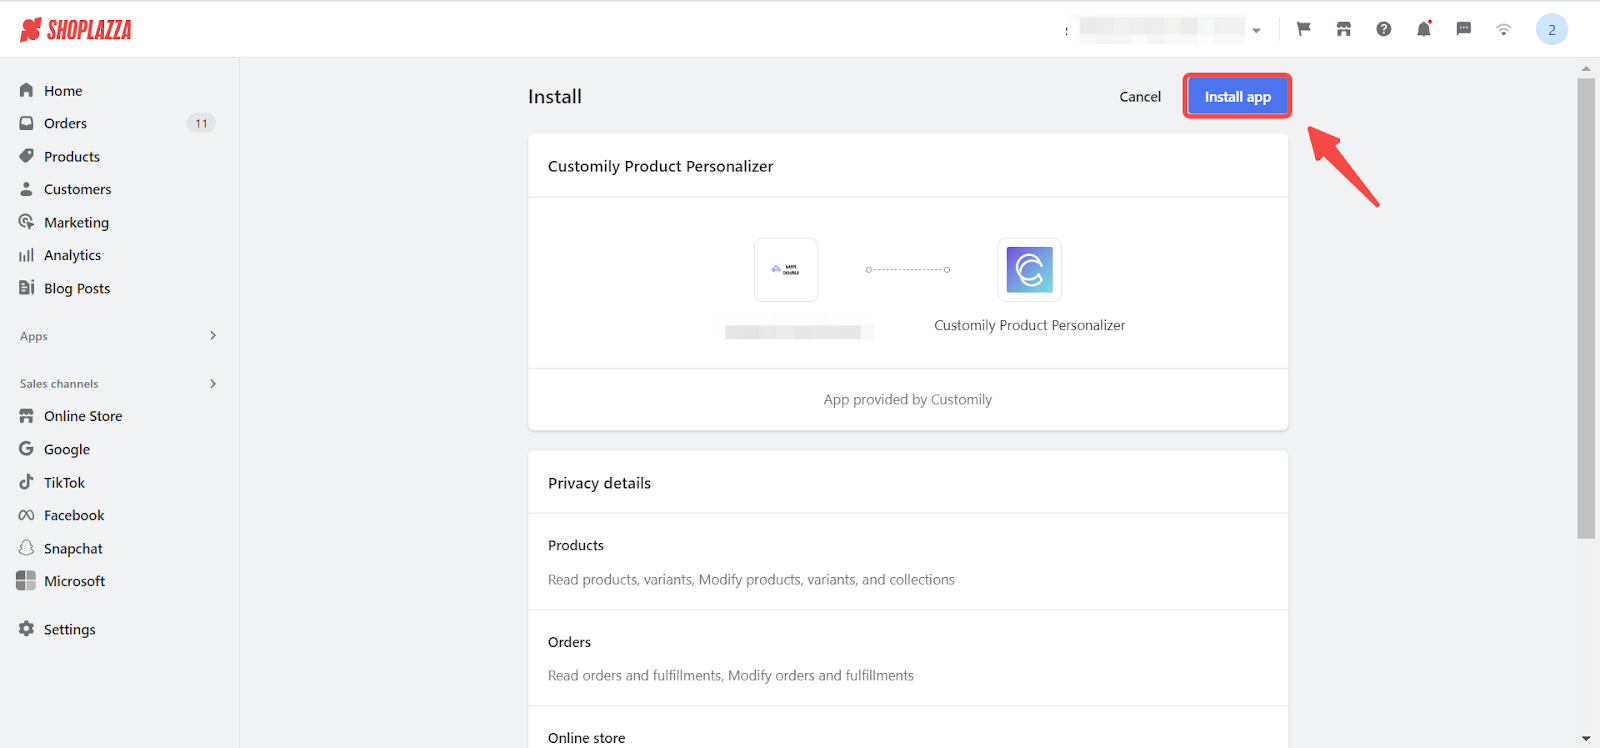
3. Install the app: Click Install App to finalize the app installation.
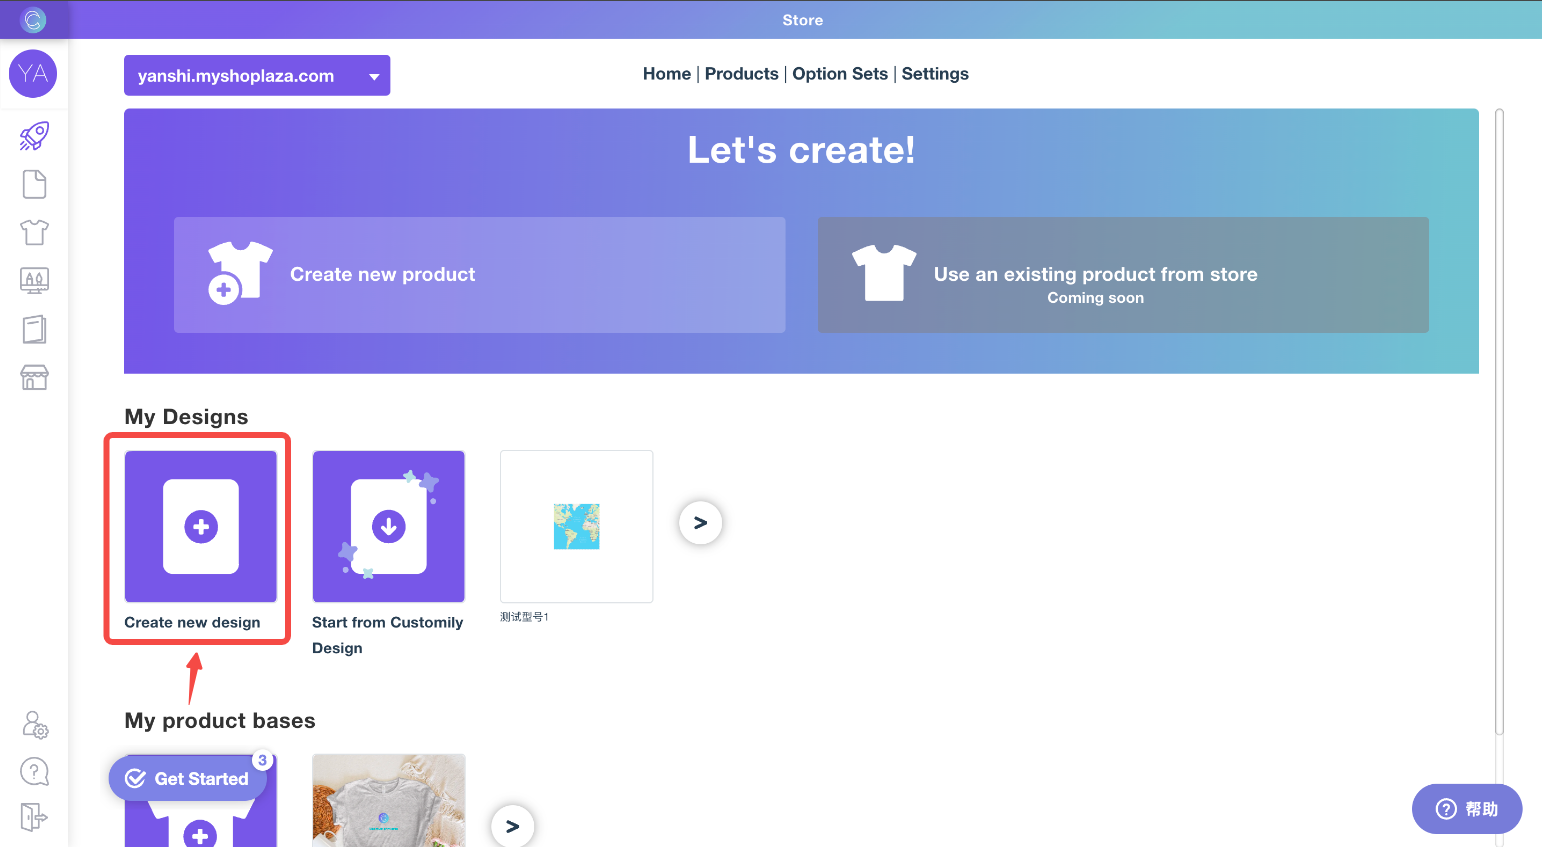
Starting the template setup
Set the foundation for your product customization by initiating the template setup, an important step for crafting your initial designs.
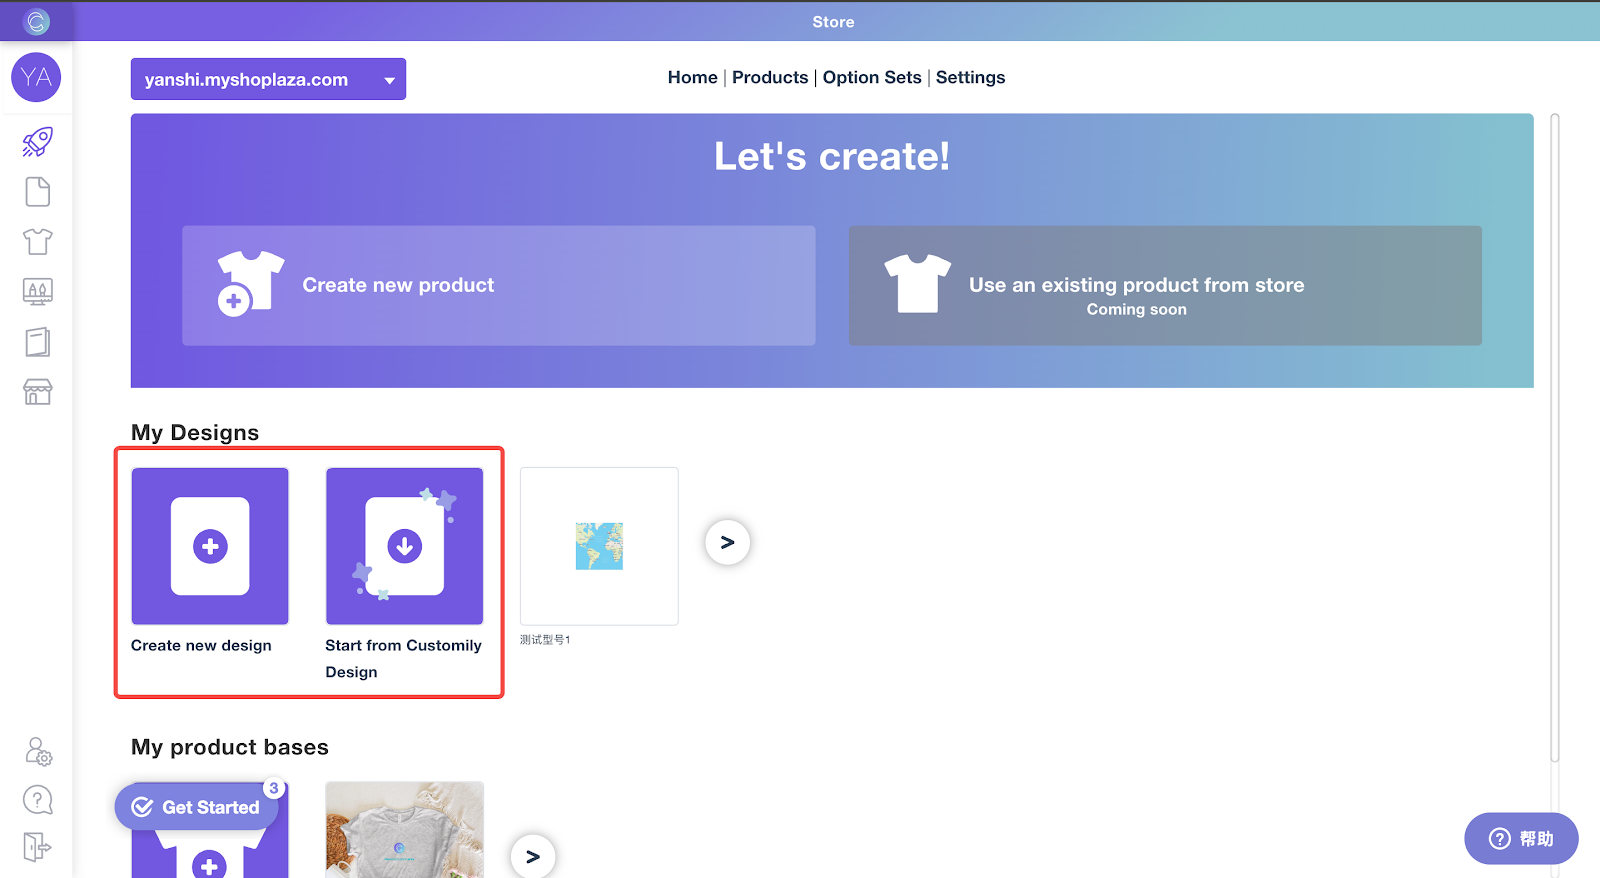
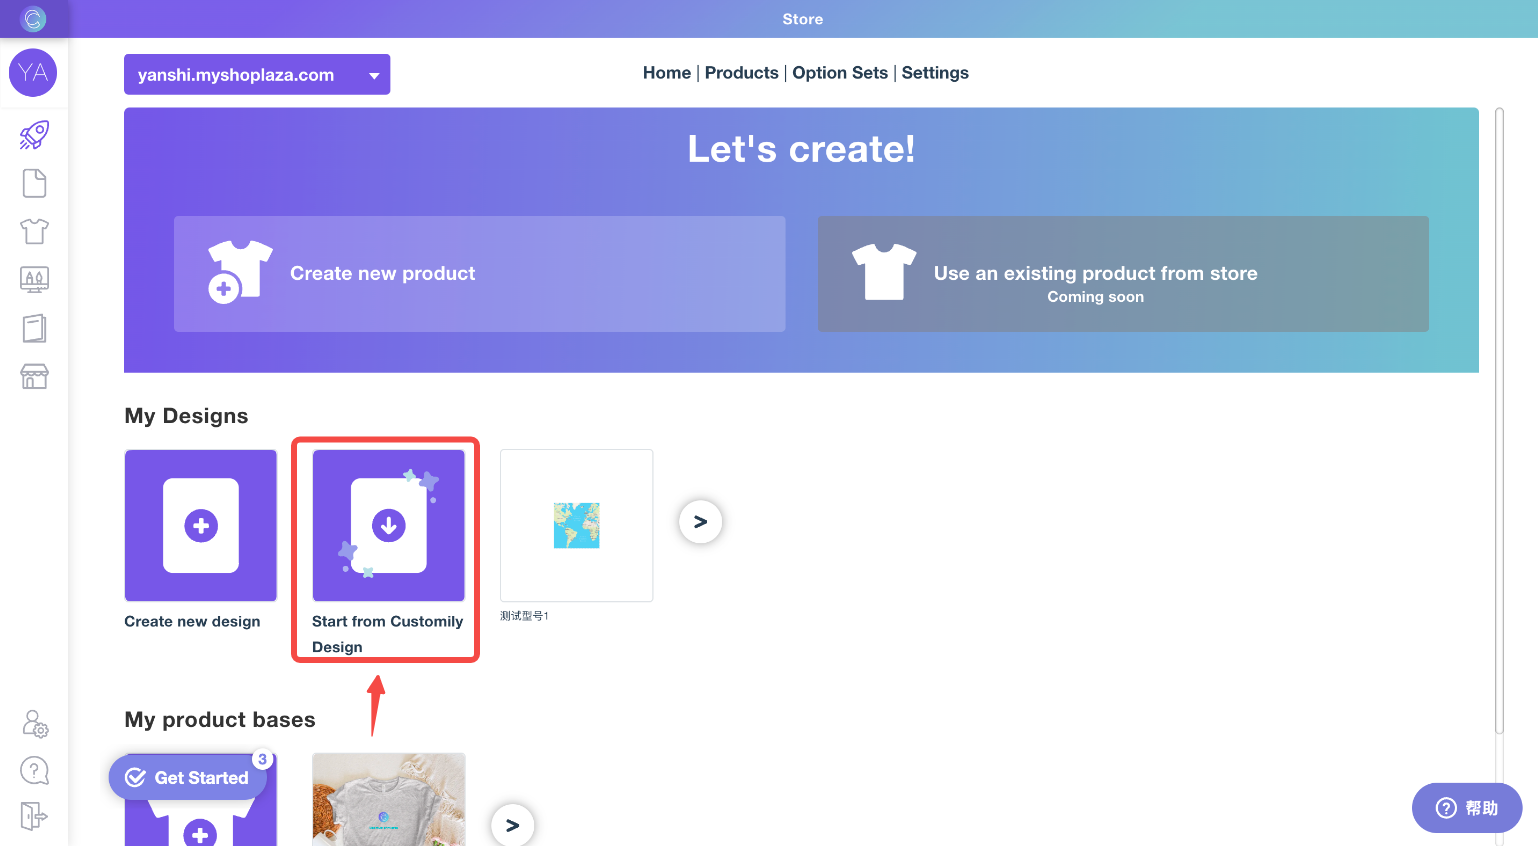
1. Initiate template setup: Open Customily and select either Create new design or Start from Customily Design. This step begins the process of creating your custom template, giving you a choice to start from scratch or modify an existing design.
Customizing your template
Here, you’ll choose between starting from new or modifying existing templates to better match your product vision.
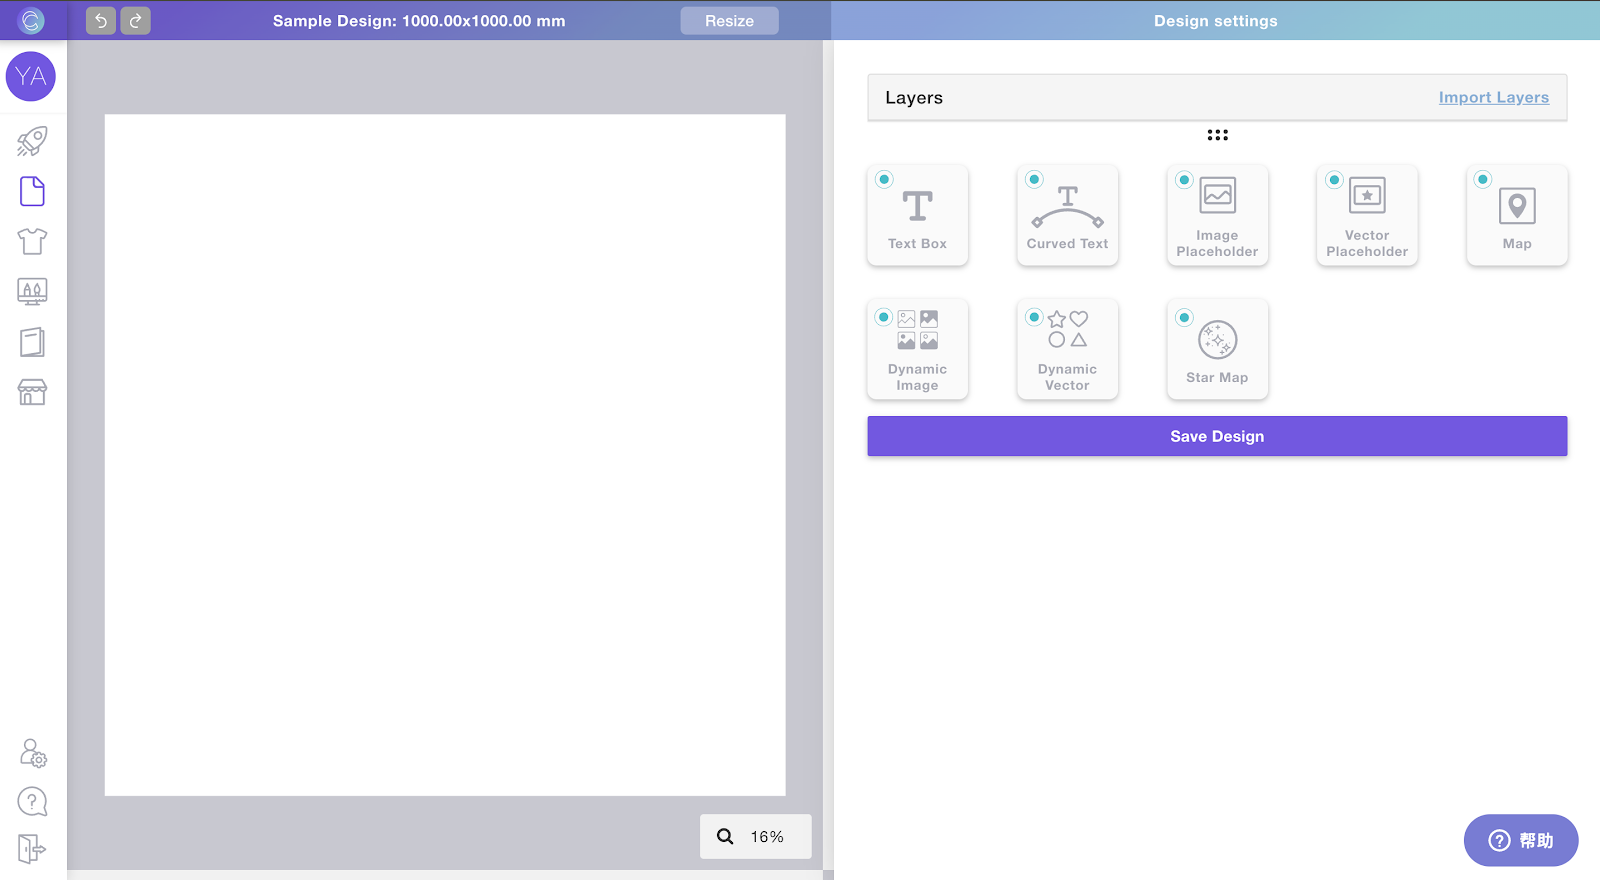
1. Create a new design: If you choose to create a new design, click on Create new design. This option allows you to build a custom template from the ground up, offering maximum flexibility and creativity.
2. Modify an existing design: Alternatively, if you select Start from Customily Design, you can choose from pre-existing templates. This is a quick way to adjust an existing design to better fit your needs or to ensure consistency with your brand's aesthetic.
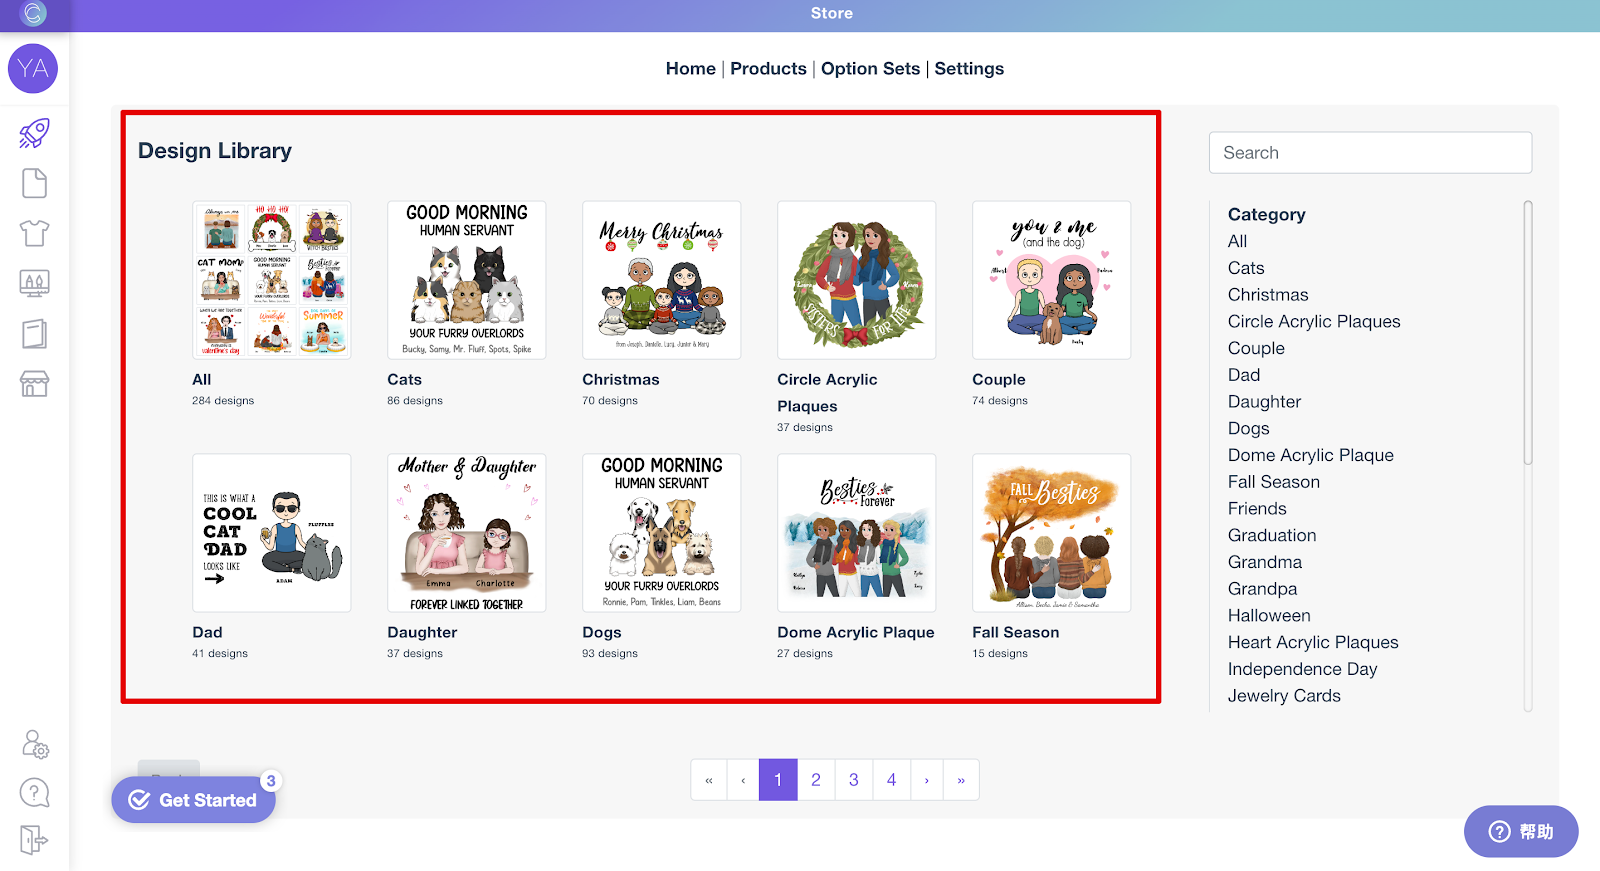
Selecting and adjusting templates
Select and fine-tune your templates. This stage focuses on refining the design elements to ensure they align with your brand and meet customer expectations.
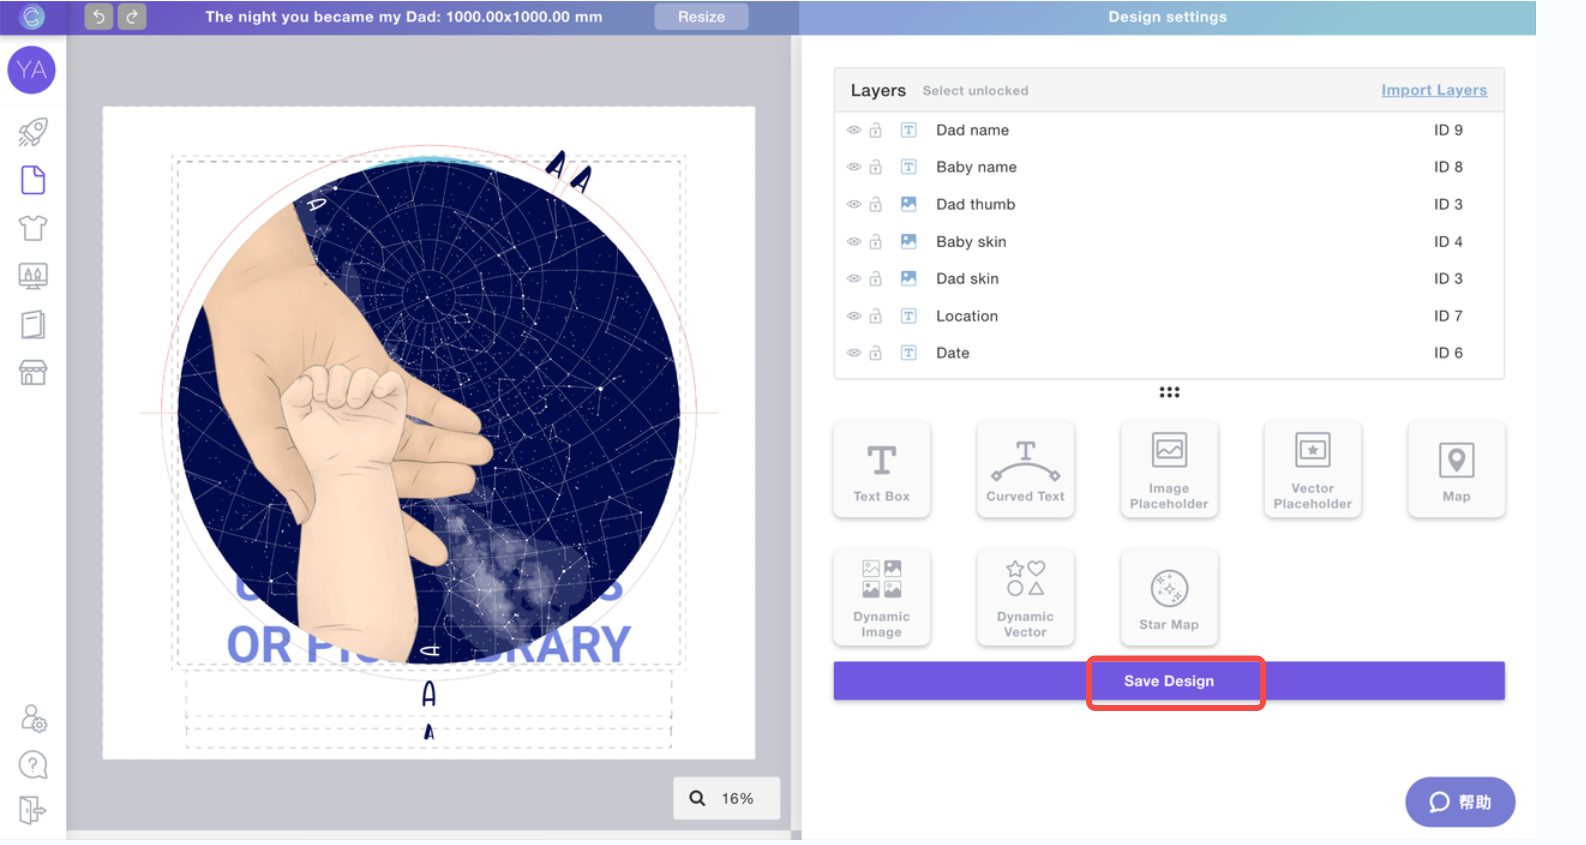
1. Choose a template: After deciding on the initial design path, select one of the available Customily templates that fits your product best. Select an existing template.
2. Adjust your template: Customize the selected template by editing its content. Make sure to adjust text, colors, and other elements to match your brand and product needs. After making the necessary changes, click on Save Design to save your template.
Applying templates to products
Apply your customized templates to your products. These steps ensure that the personalized templates are correctly linked to the appropriate items in your inventory.
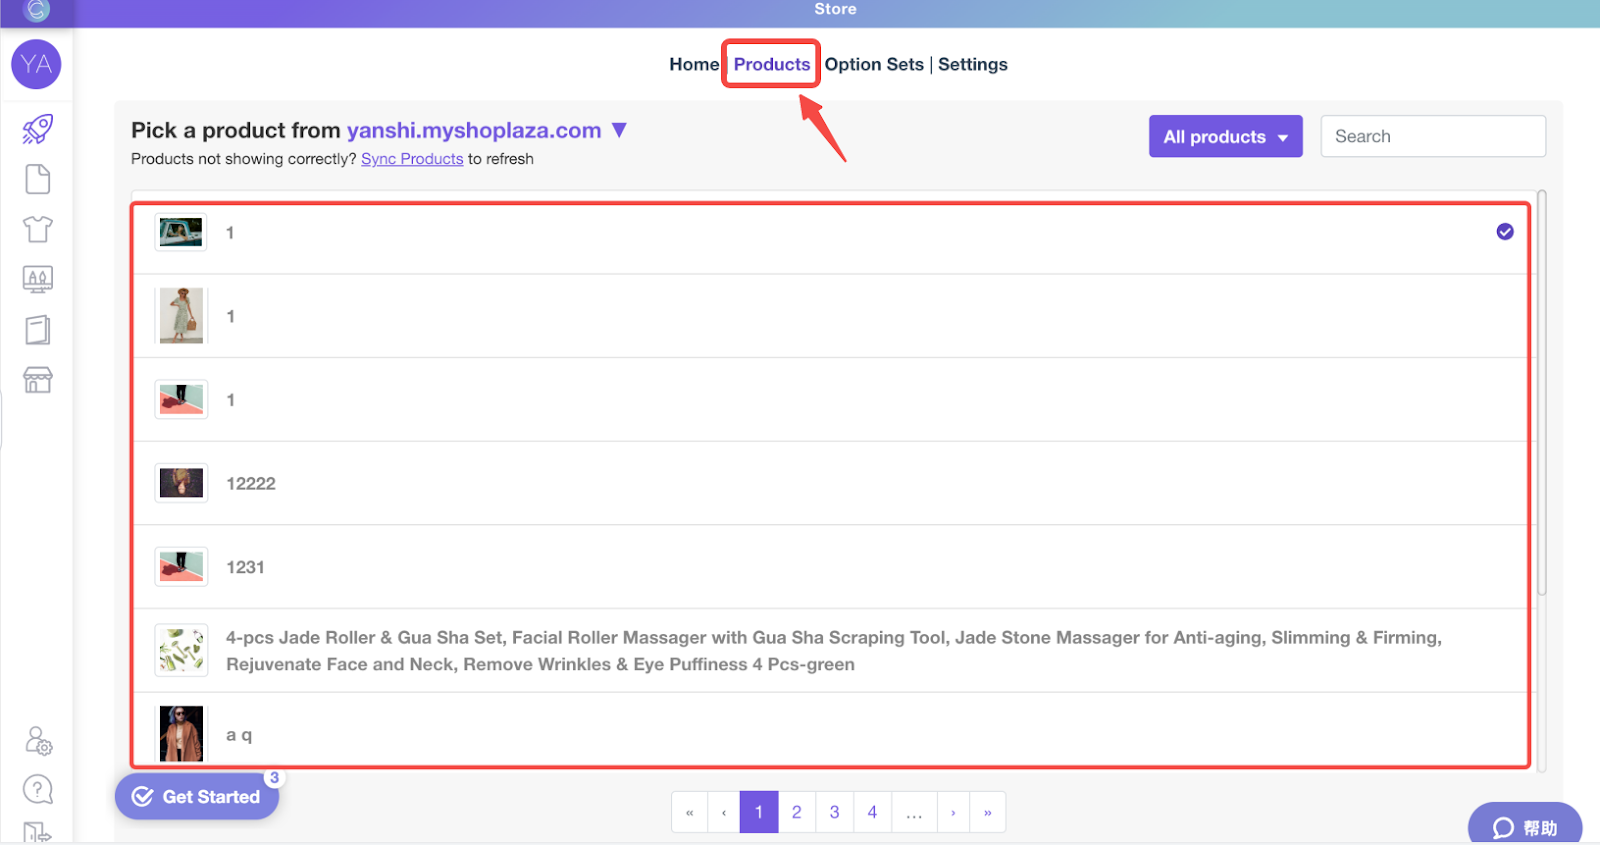
1. Select a product: Go to the Products section in Customily and select the product you want to apply the template to. This step syncs the template with a specific product available in your store.
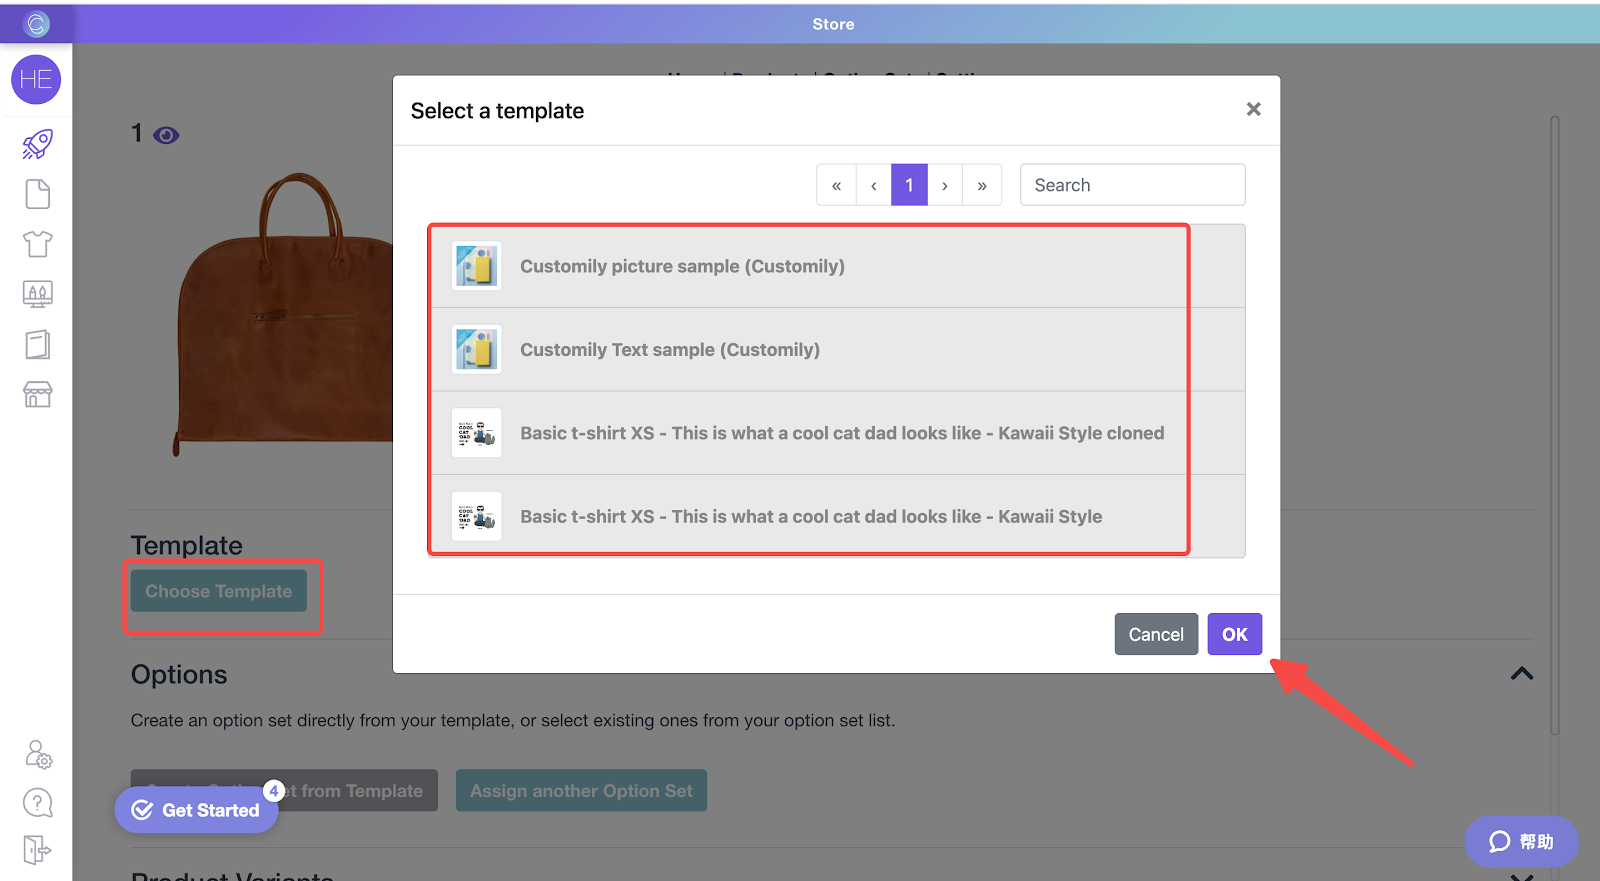
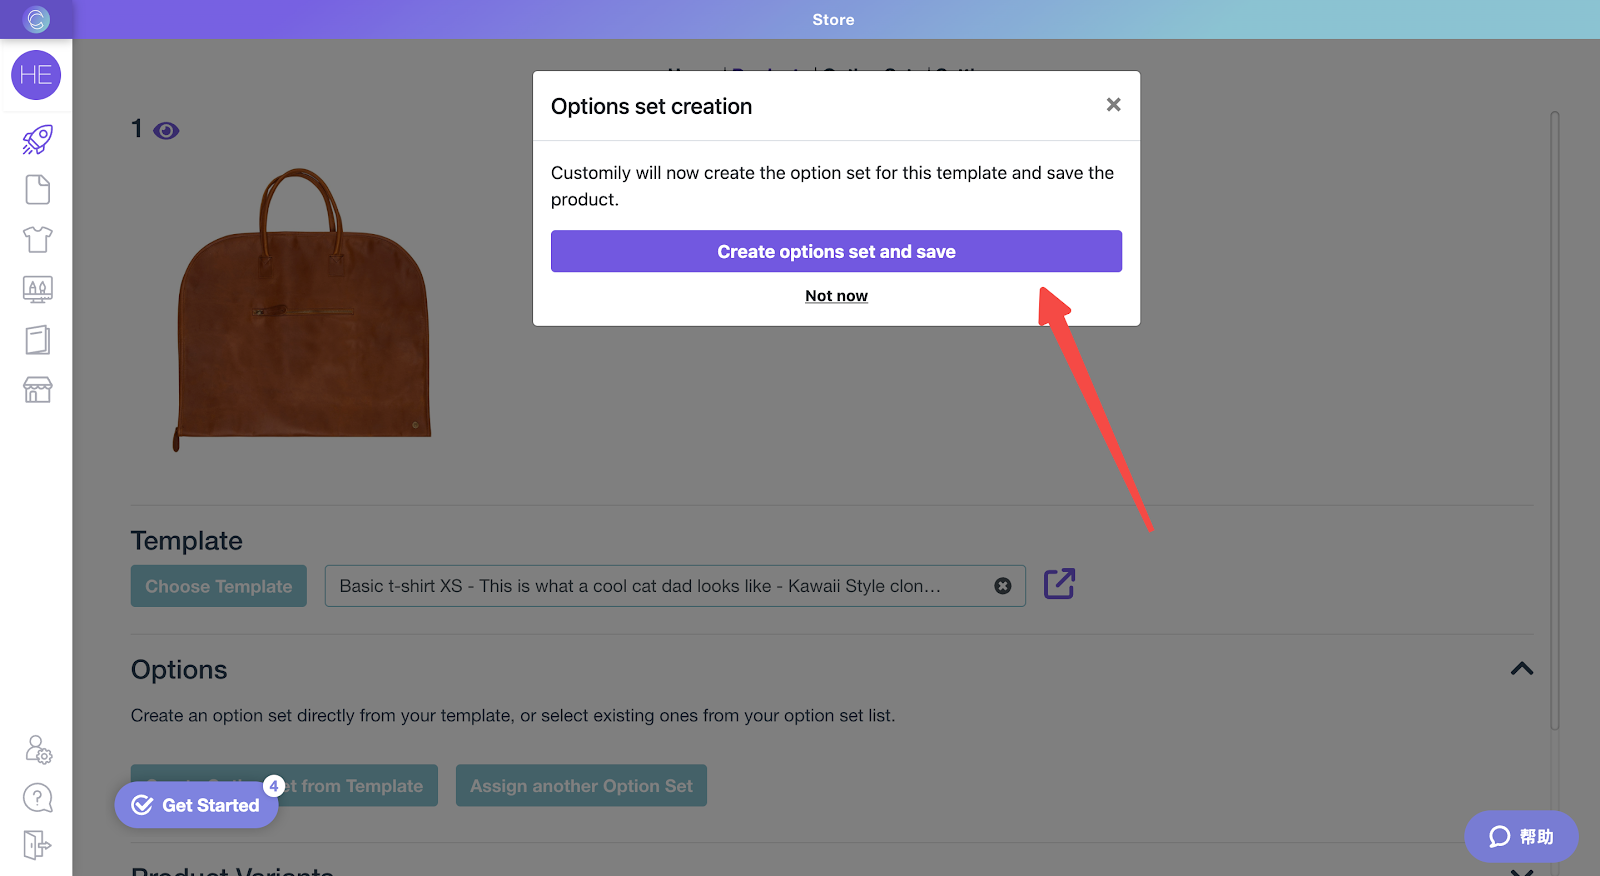
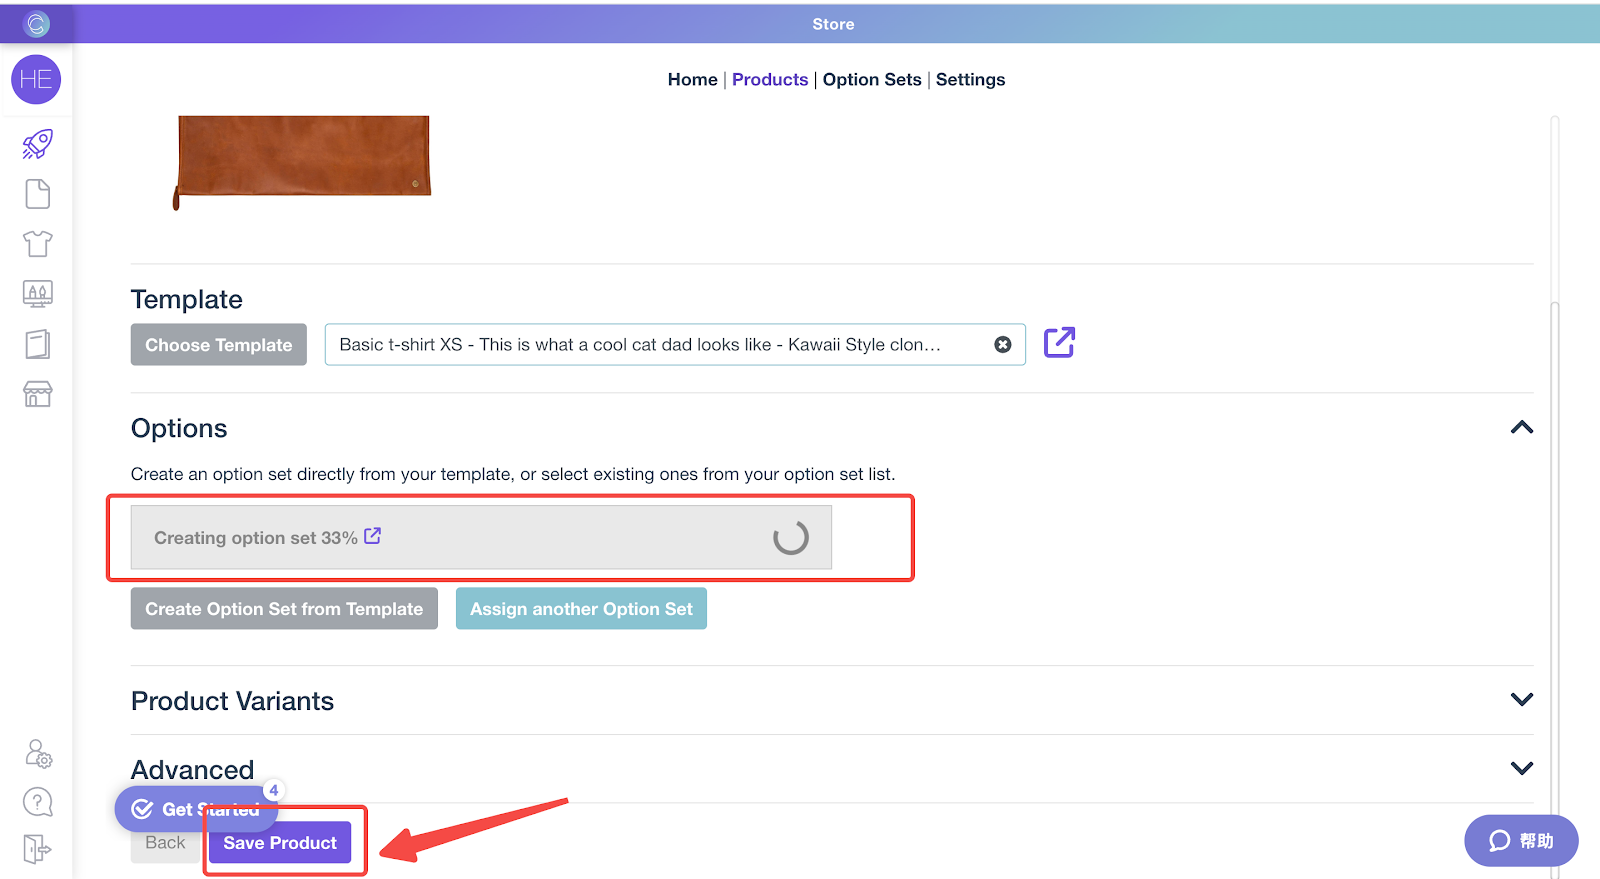
2. Attach the template: After selecting a product, click on Choose Template. Pick the template you've created or modified, then click OK followed by Create options set and save. This step finalizes the customization options for your product.
3. Save the product: To complete the process, click Save Product. This action applies the customized template to your product, making it ready for customers to view and personalize in your online store.
Reviewing the final setup
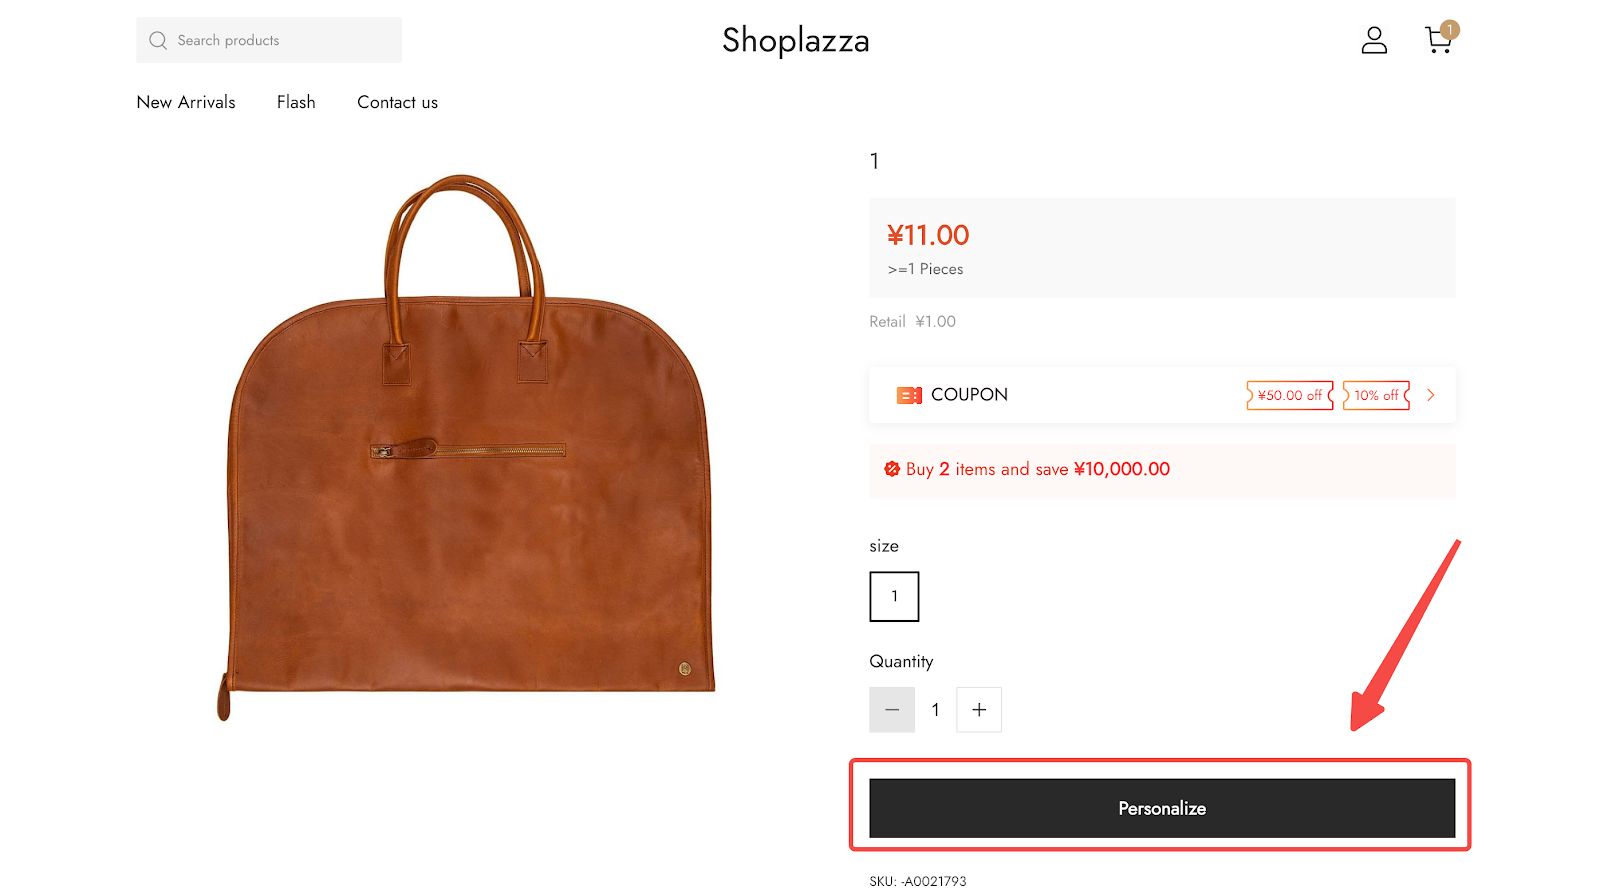
Review the customization display on the Product Details Page. This step allows you to see how the templates function in a live environment, ensuring everything works seamlessly from a customer’s perspective. Evaluate how the customization options appear on your product details page.
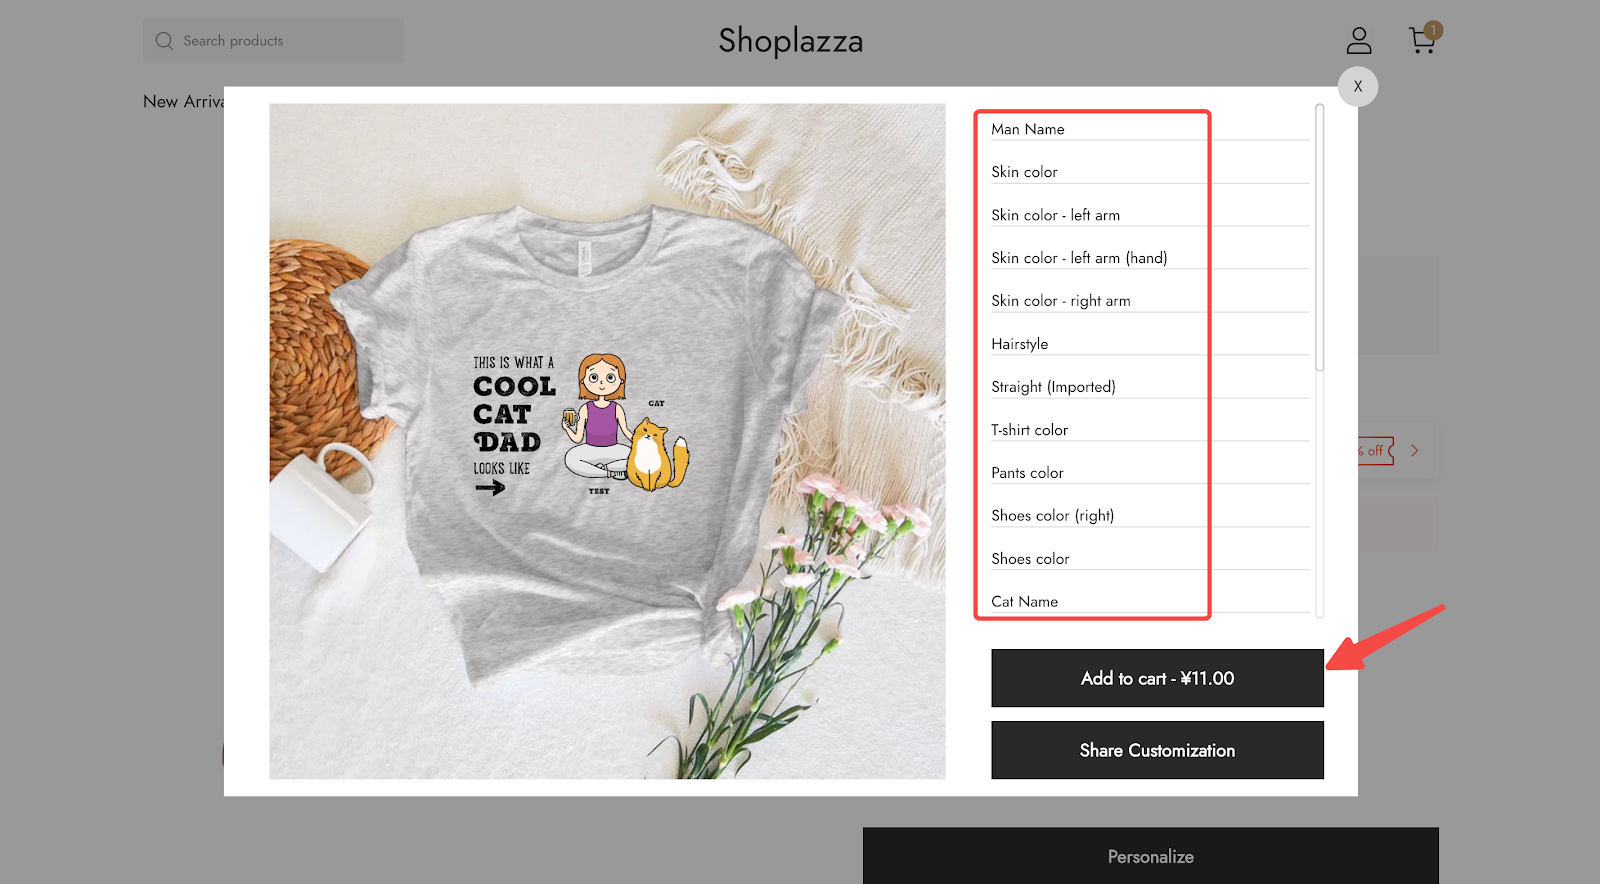
1. Personalize the view: Click Personalize to open the customization options for customers.
2. Add to cart: After customizing, customers can add the product to their cart by clicking Add to cart.
Viewing customization across different locations
Ensure that customized items are displayed correctly across various parts of your online store. This section covers the essential checkpoints for both customers and administrators to view and verify customized products.
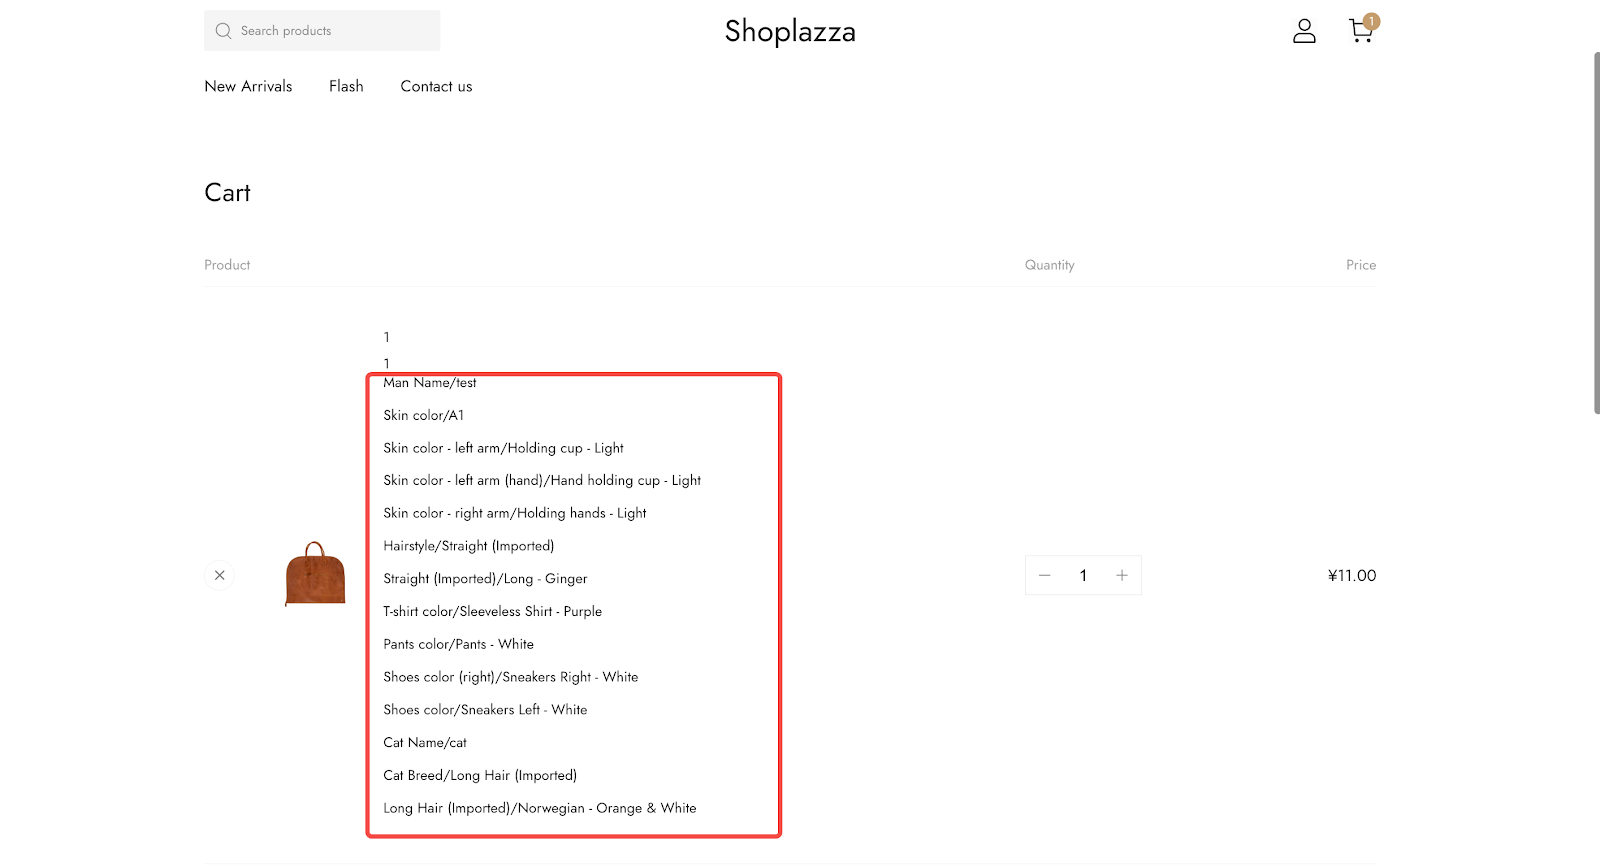
1. Shopping cart page: Review the customized items in your shopping cart. This allows both you and the customer to confirm the customizations before proceeding to checkout.
2. Checkout process: During the checkout, customers can view their customized items again. This is another chance to ensure that all customizations are correct before completing the purchase.
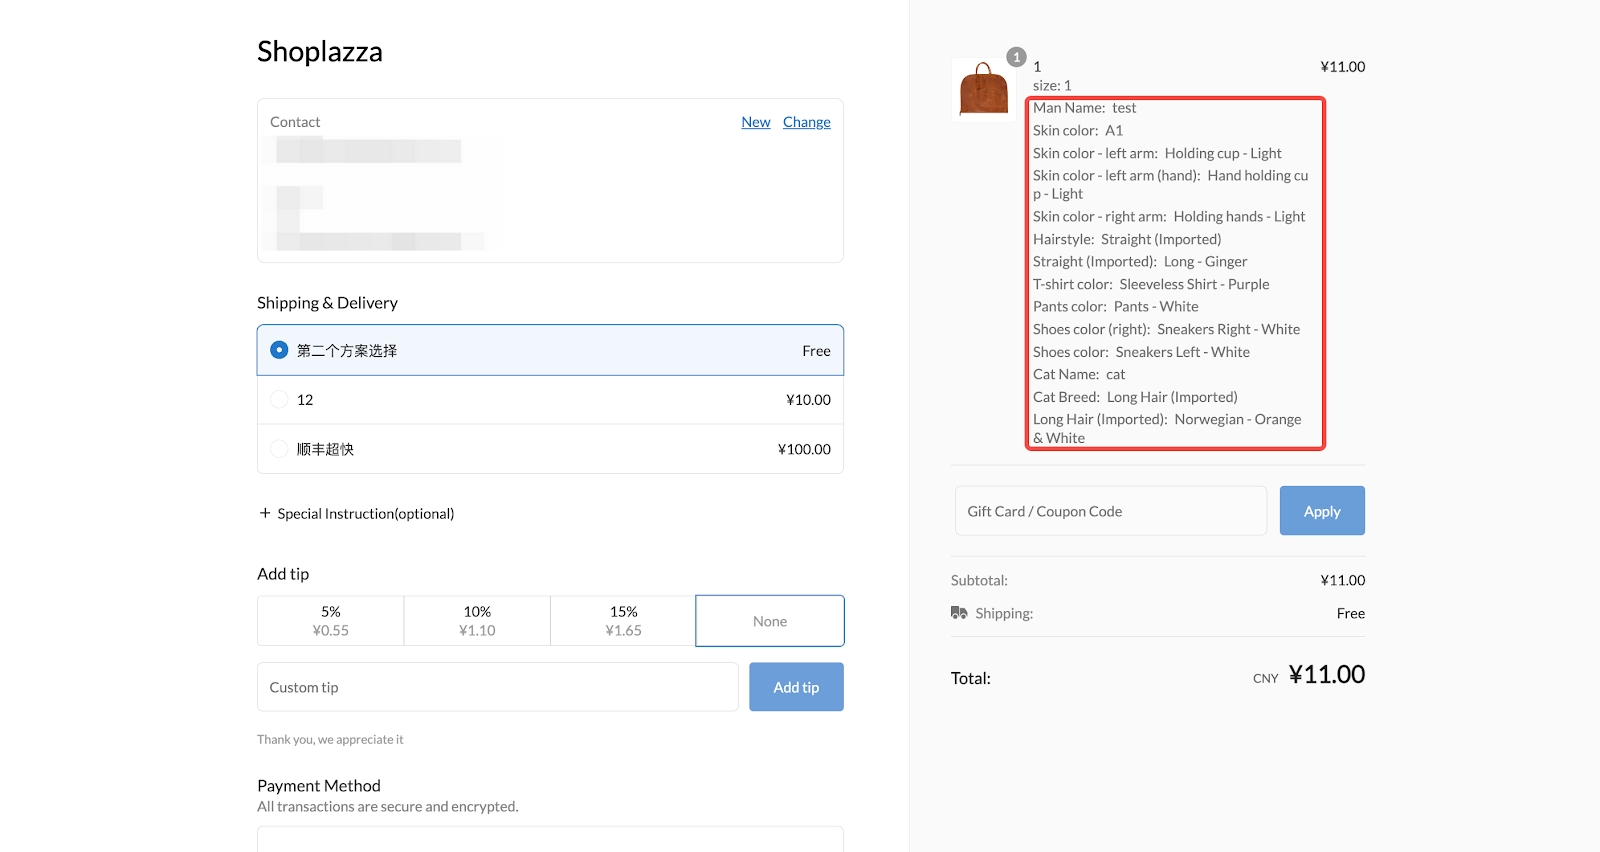
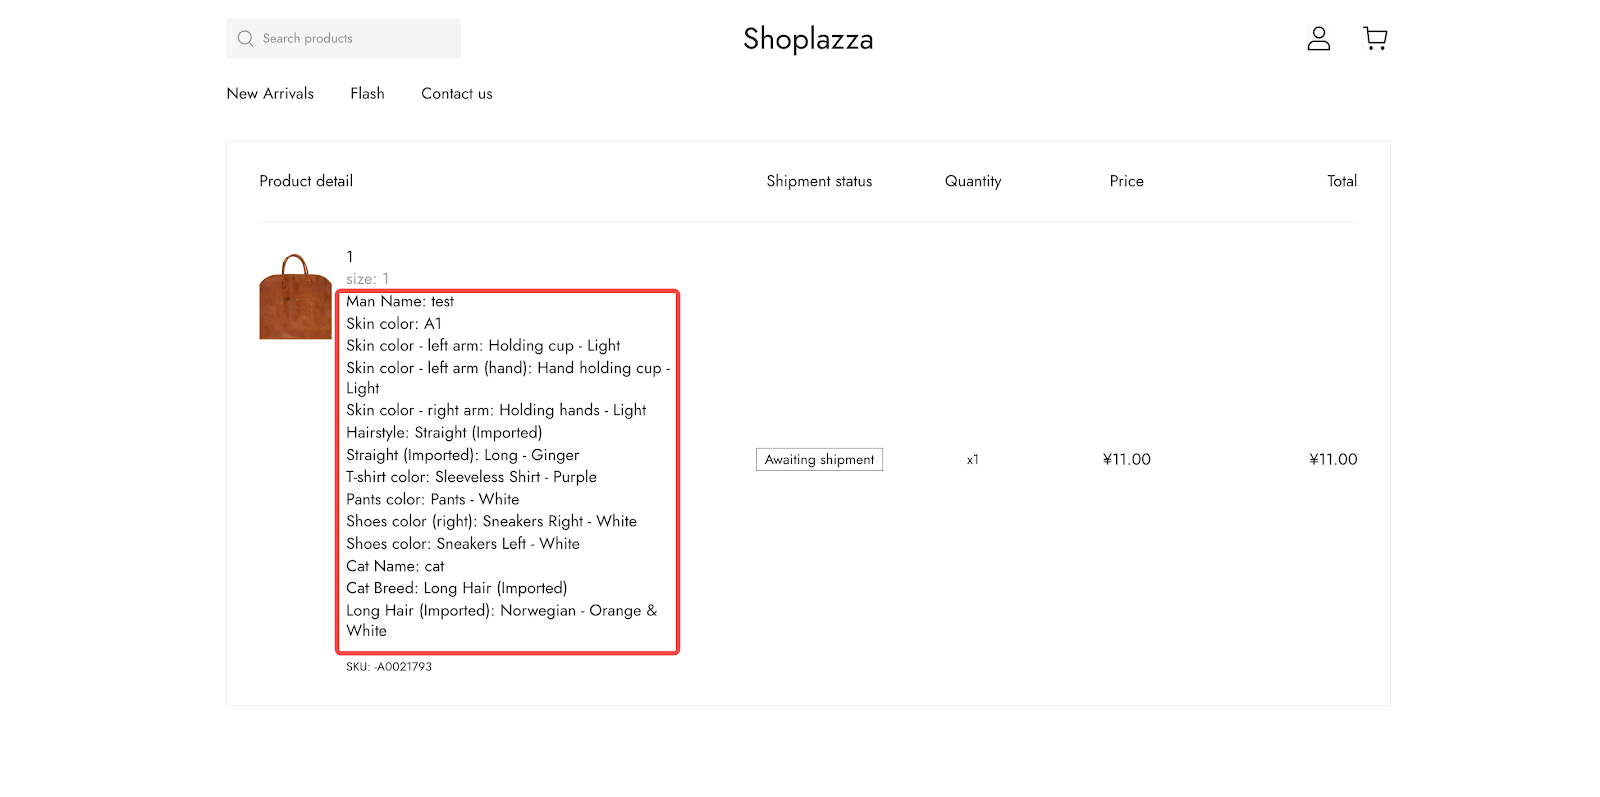
3. Personal center: Customers can access detailed views of their customized orders by navigating to the Personal Center and selecting the order details page. This section provides a comprehensive look at all customization details for each order.
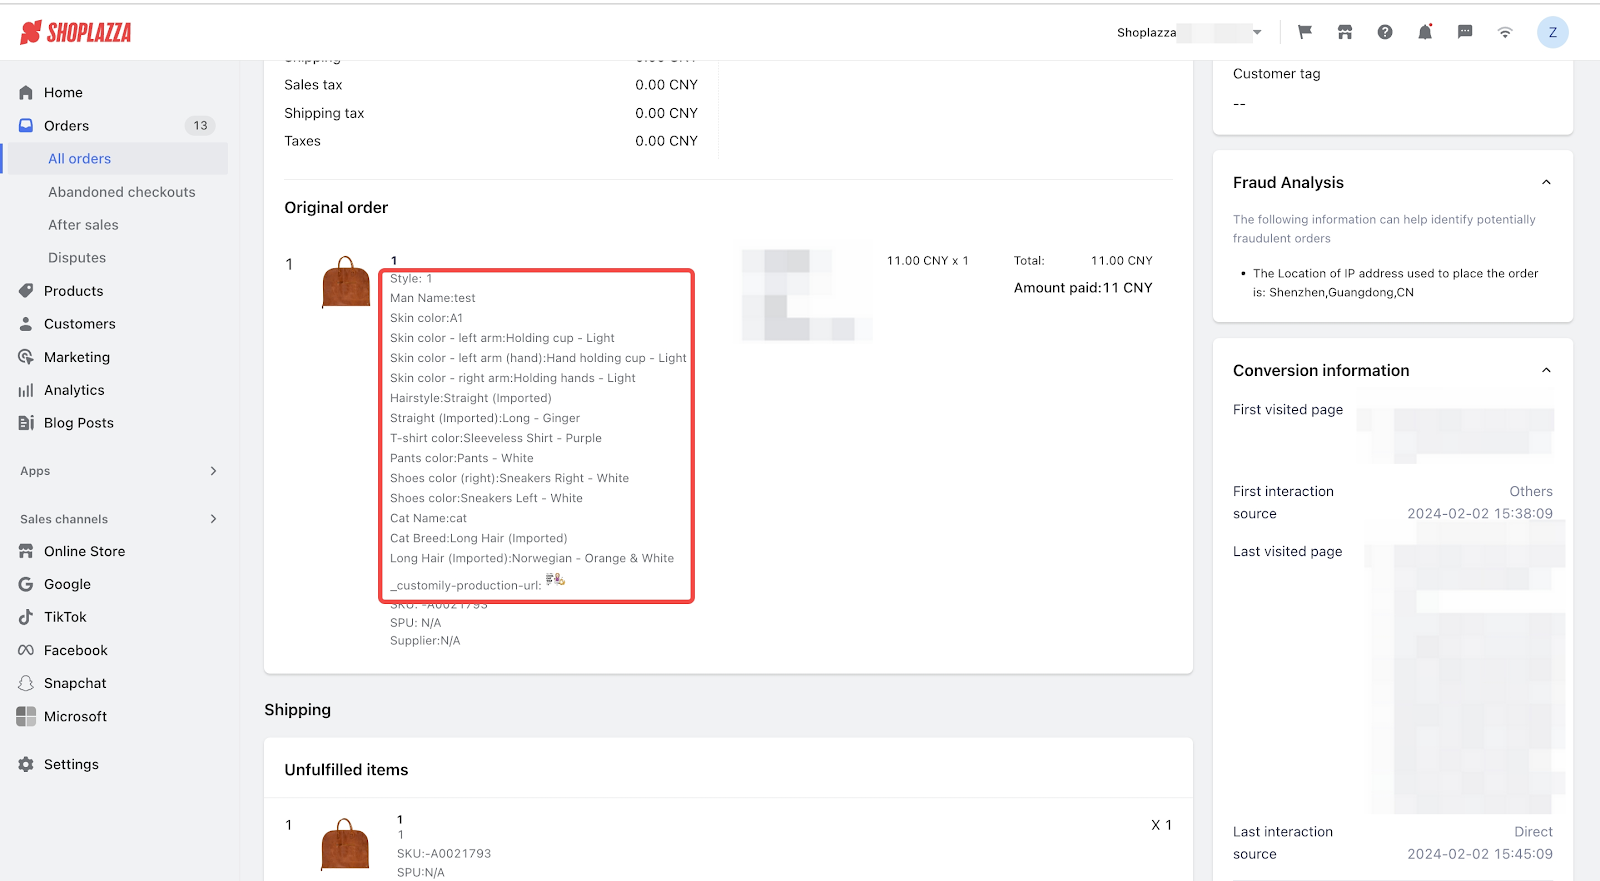
4. Admin order details: As a store admin, you can inspect all customization details through the Shoplazza admin order details page. This is important for verifying order accuracy and preparing for fulfillment.
These comprehensive steps are designed to make the customization process as clear and straightforward as possible, enhancing your ability to offer personalized products and improving customer satisfaction. For additional support and detailed guides, please visit the Customily Help Center .


Comments
Please sign in to leave a comment.