
A visually appealing and user-friendly store is essential for establishing a strong brand presence. This guide provides a comprehensive walkthrough of setting up and personalizing your store’s theme using Shoplazza's theme editor. Learn how to back up your theme, add new themes, organize sections, and integrate apps—all without writing any code. Whether you're updating an existing theme or building your store from scratch, this guide will help you tailor its look to perfectly reflect your brand identity.
Backing up your theme
Before making any changes to your store, it is important to create a backup of your current theme. This safeguards your work and prevents any accidental loss of progress, ensuring you can always revert to a previous version if needed.
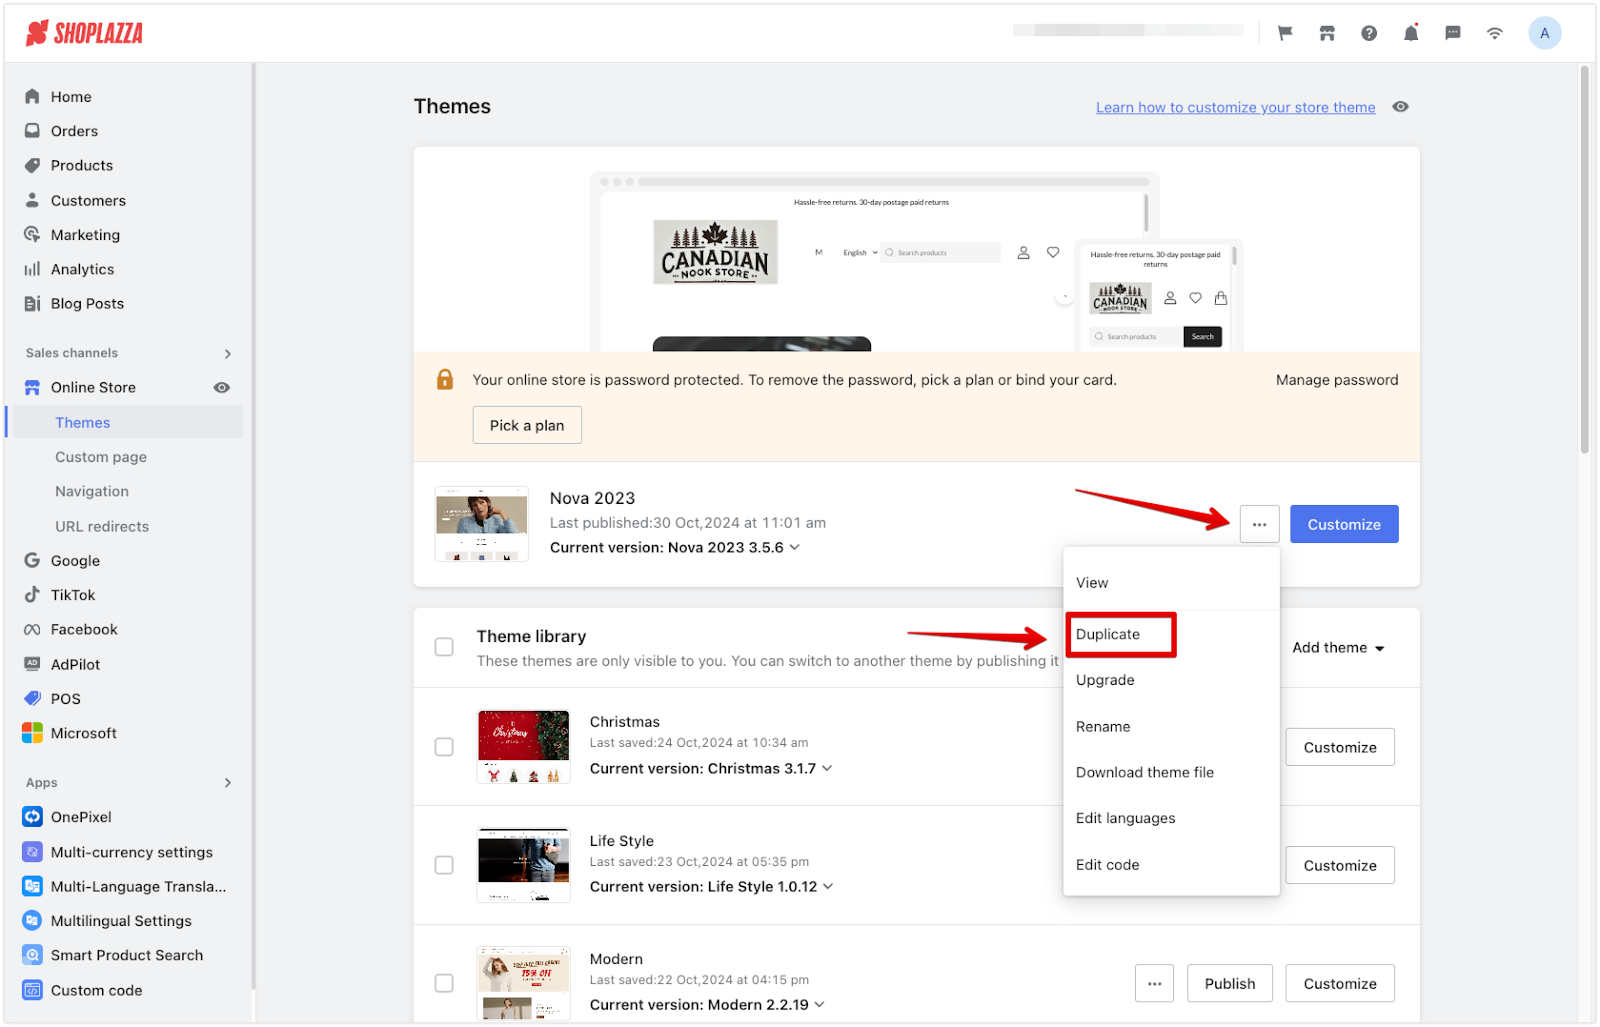
1. Duplicate the theme: Go to Online store > Themes in your Shoplazza Admin. Click the more options icon next to your current theme and select Duplicate. This creates a backup version that keeps your work safe while you make changes.
Setting up a new theme
After backing up, you can choose and install a theme that aligns with your brand. Themes provide a solid foundation, simplifying the process of building your store’s layout by offering pre-designed structures and styles.
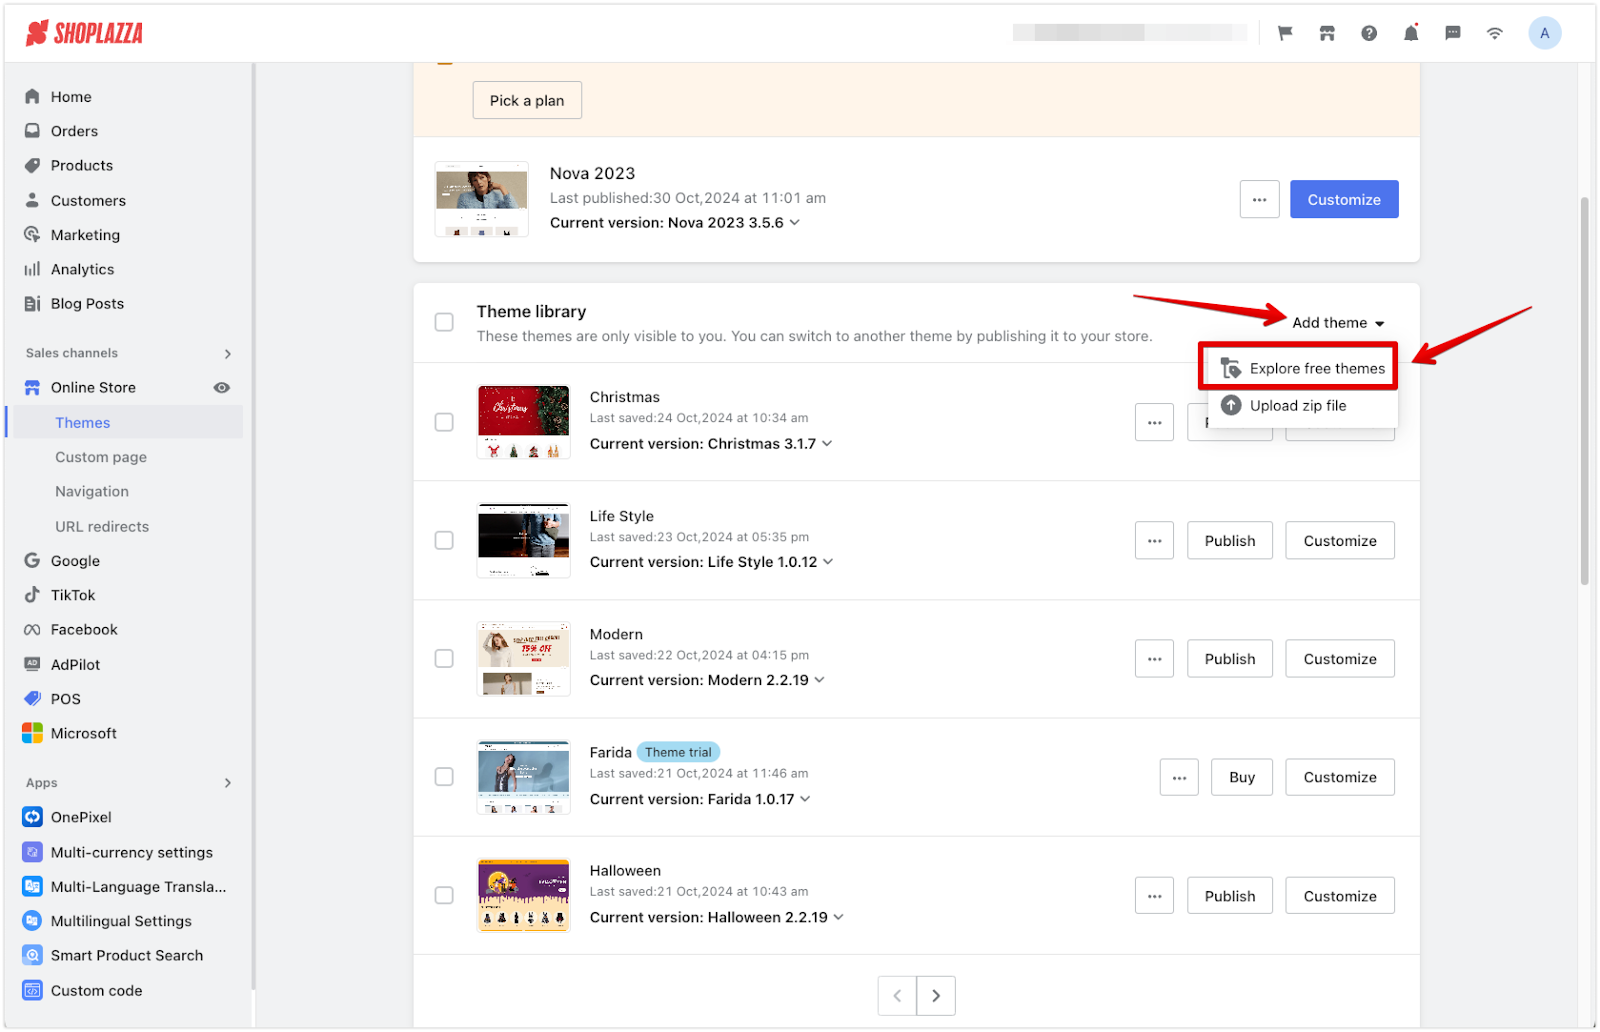
1. Add a theme: In your Shoplazza Admin, navigate to Online store > Themes, click the Add theme drop-down, and select Explore free themes to choose and install a theme that fits your business. Browse through the available options, previewing each theme to see how it would look with your store's content. Consider factors like layout, style, and features when making your choice.
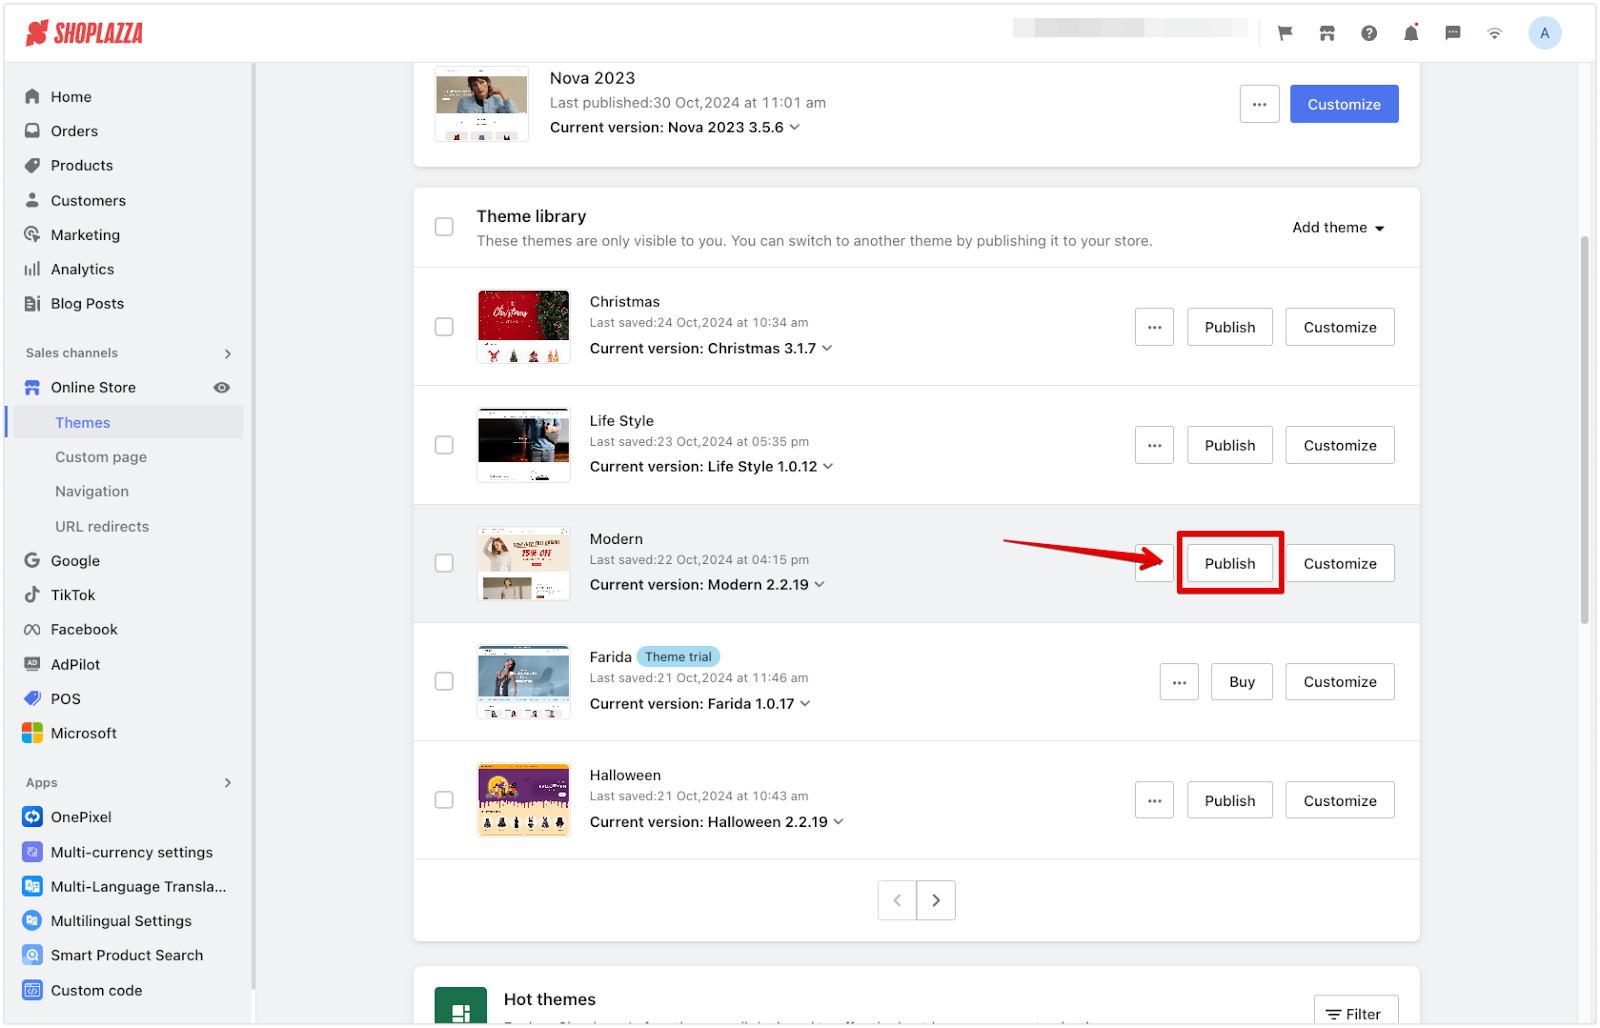
2. Make the theme live: After installation, set the theme as your live template to activate it on your store by clicking on Publish. This makes the new theme visible to your customers. Until you make it live, your current theme will remain active.
Personalizing your theme
After adding a theme, you can begin customizing its design in the theme editor. The editor is intuitive, allowing modifications to most design elements without any coding. Your changes will be visible in the preview, but they won't be live on your store until you click Publish.
1. Open the theme editor: Click Customize in your Shoplazza Admin to access the theme editor and modify your store’s appearance. This will open the theme editor, where you'll find all the tools and options for customizing your theme.

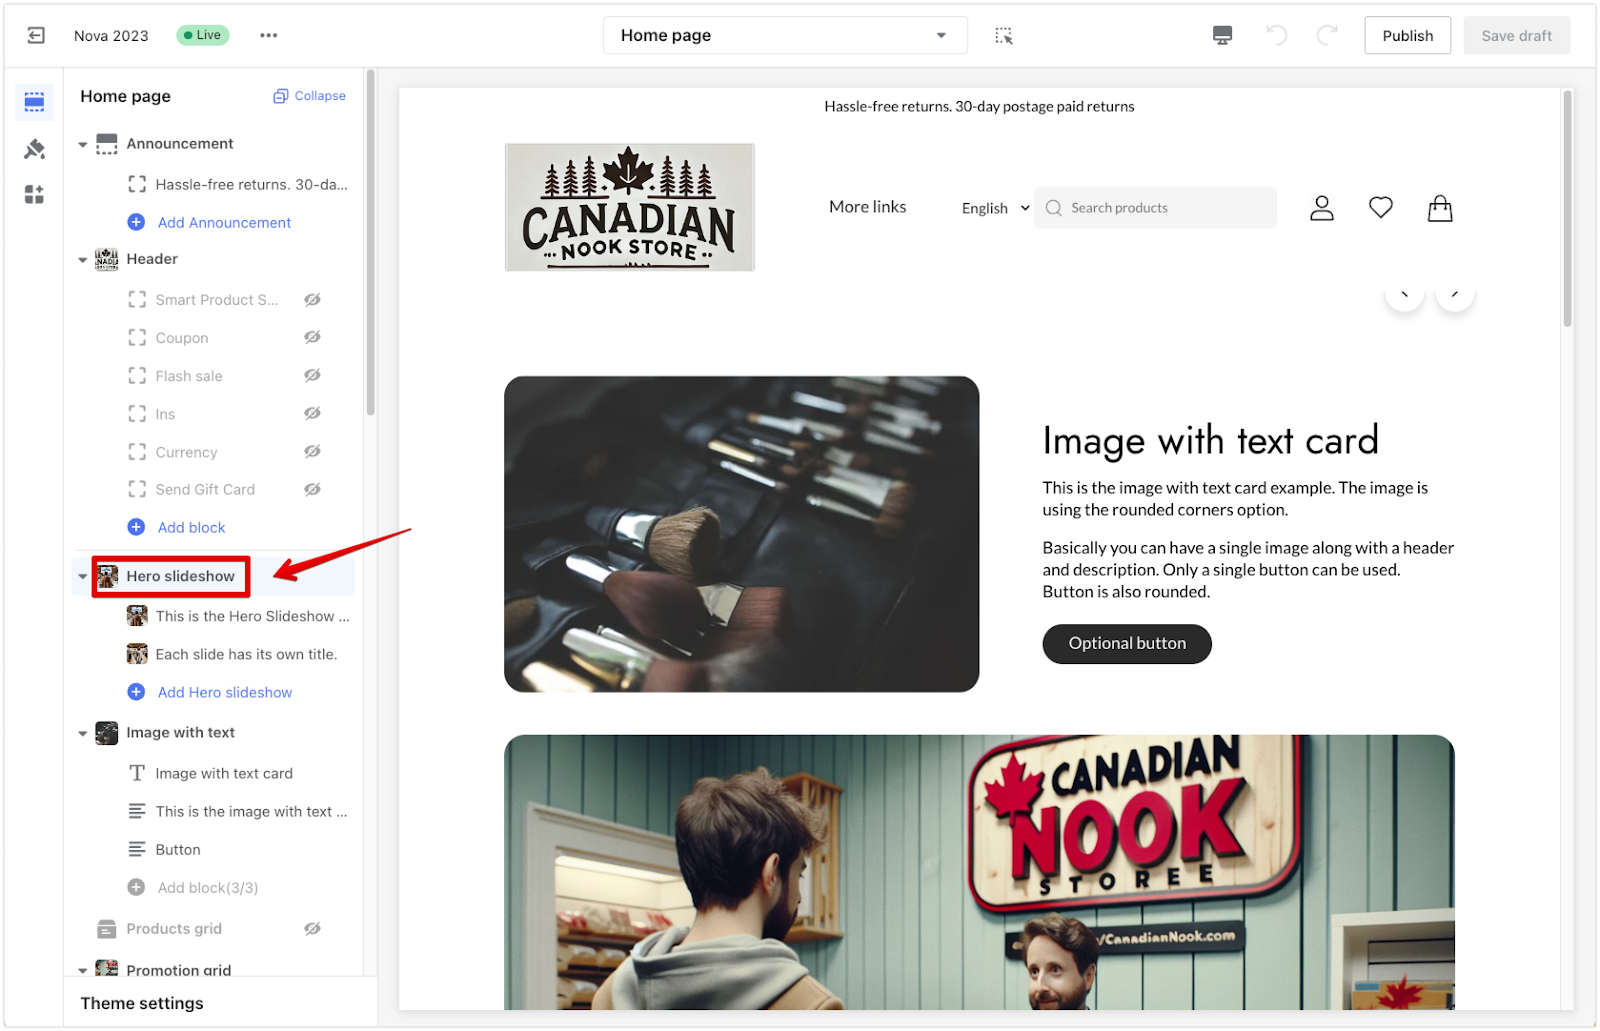
2. Adjust sections: The left panel contains sections that align with your store’s structure. Click on a section to adjust its settings. Each section controls a specific part of your store's layout, such as the header, footer, or product listings.
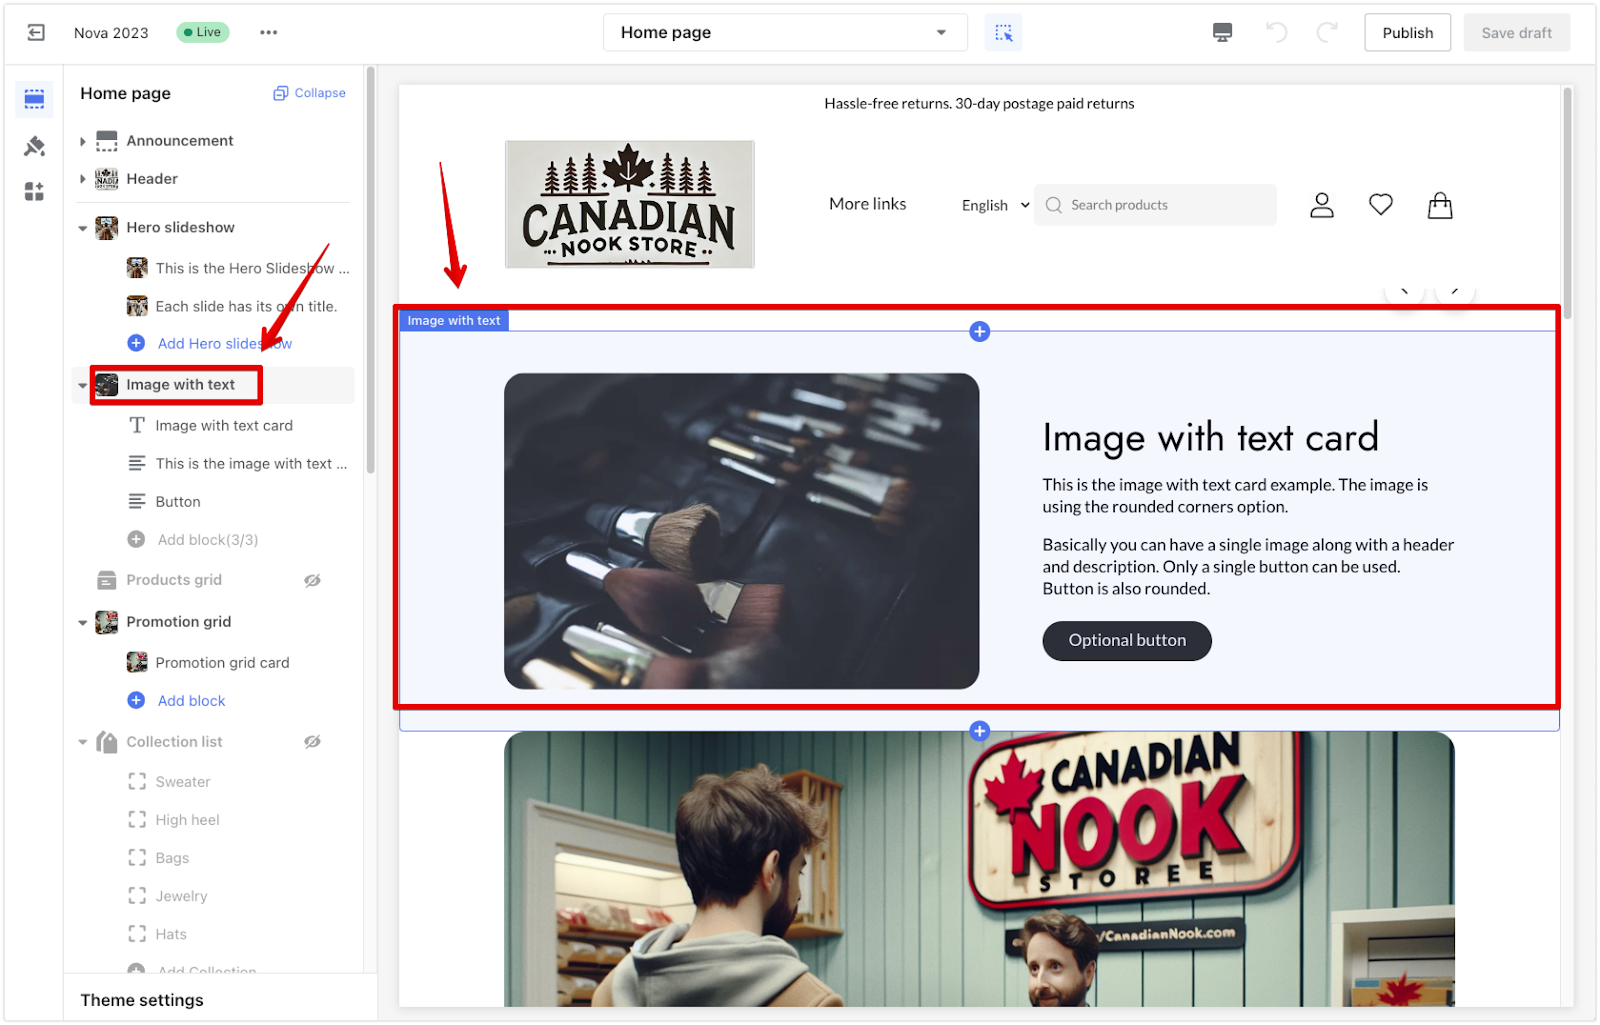
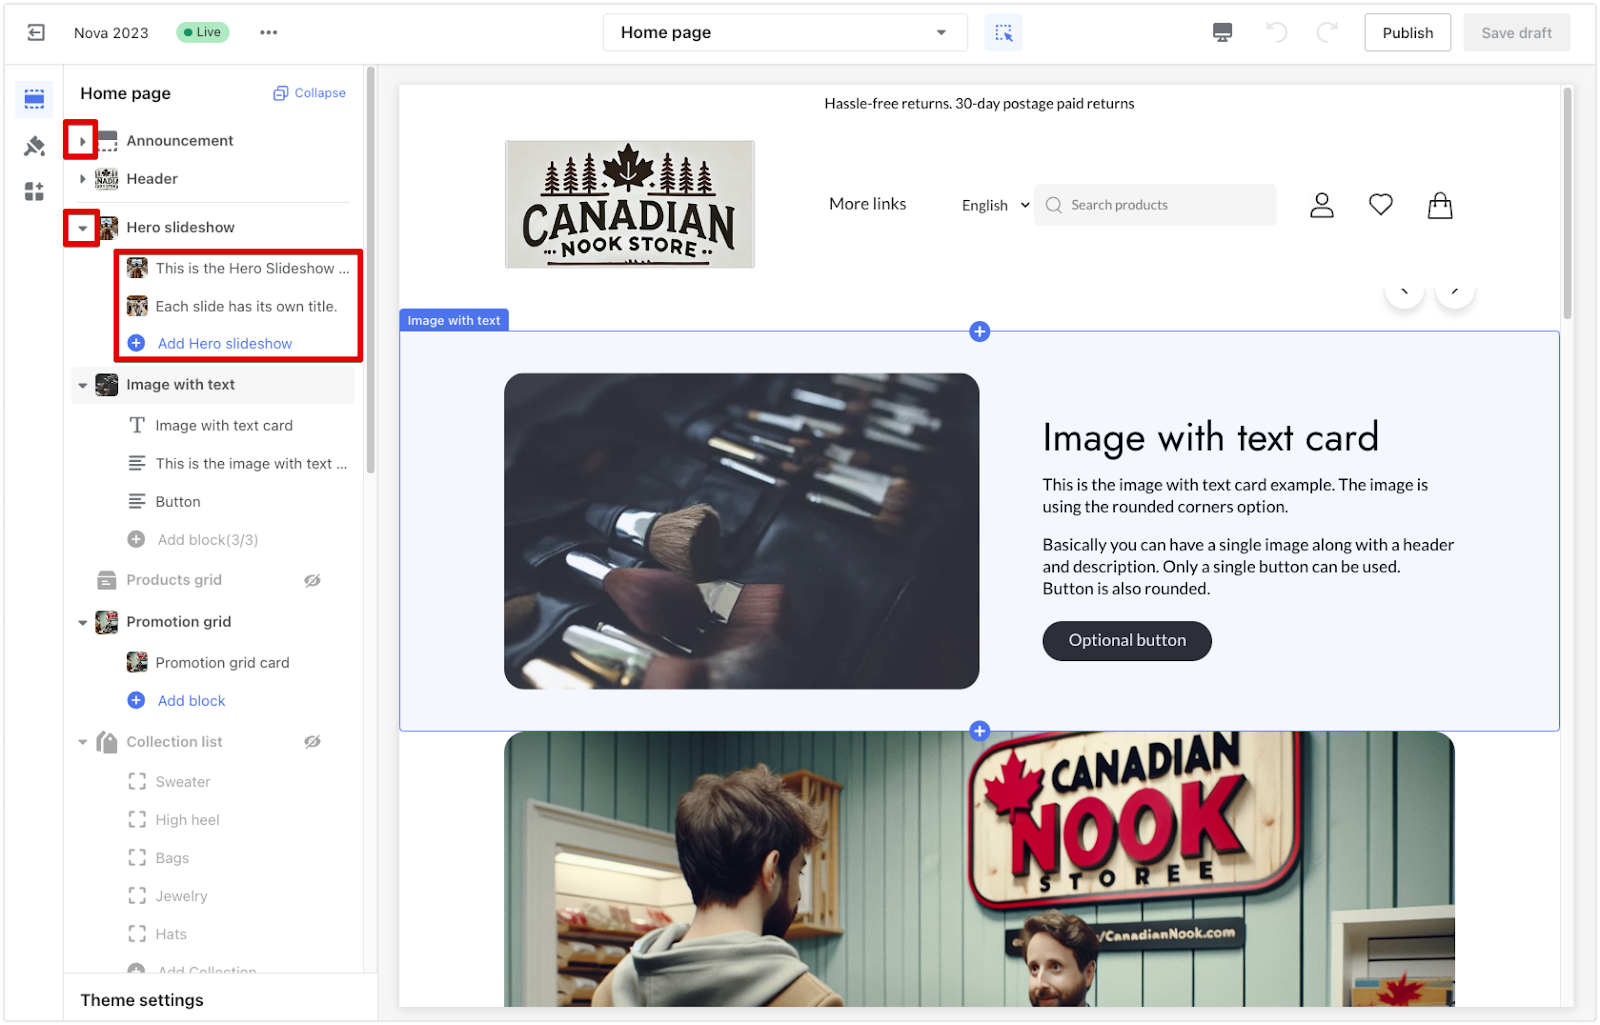
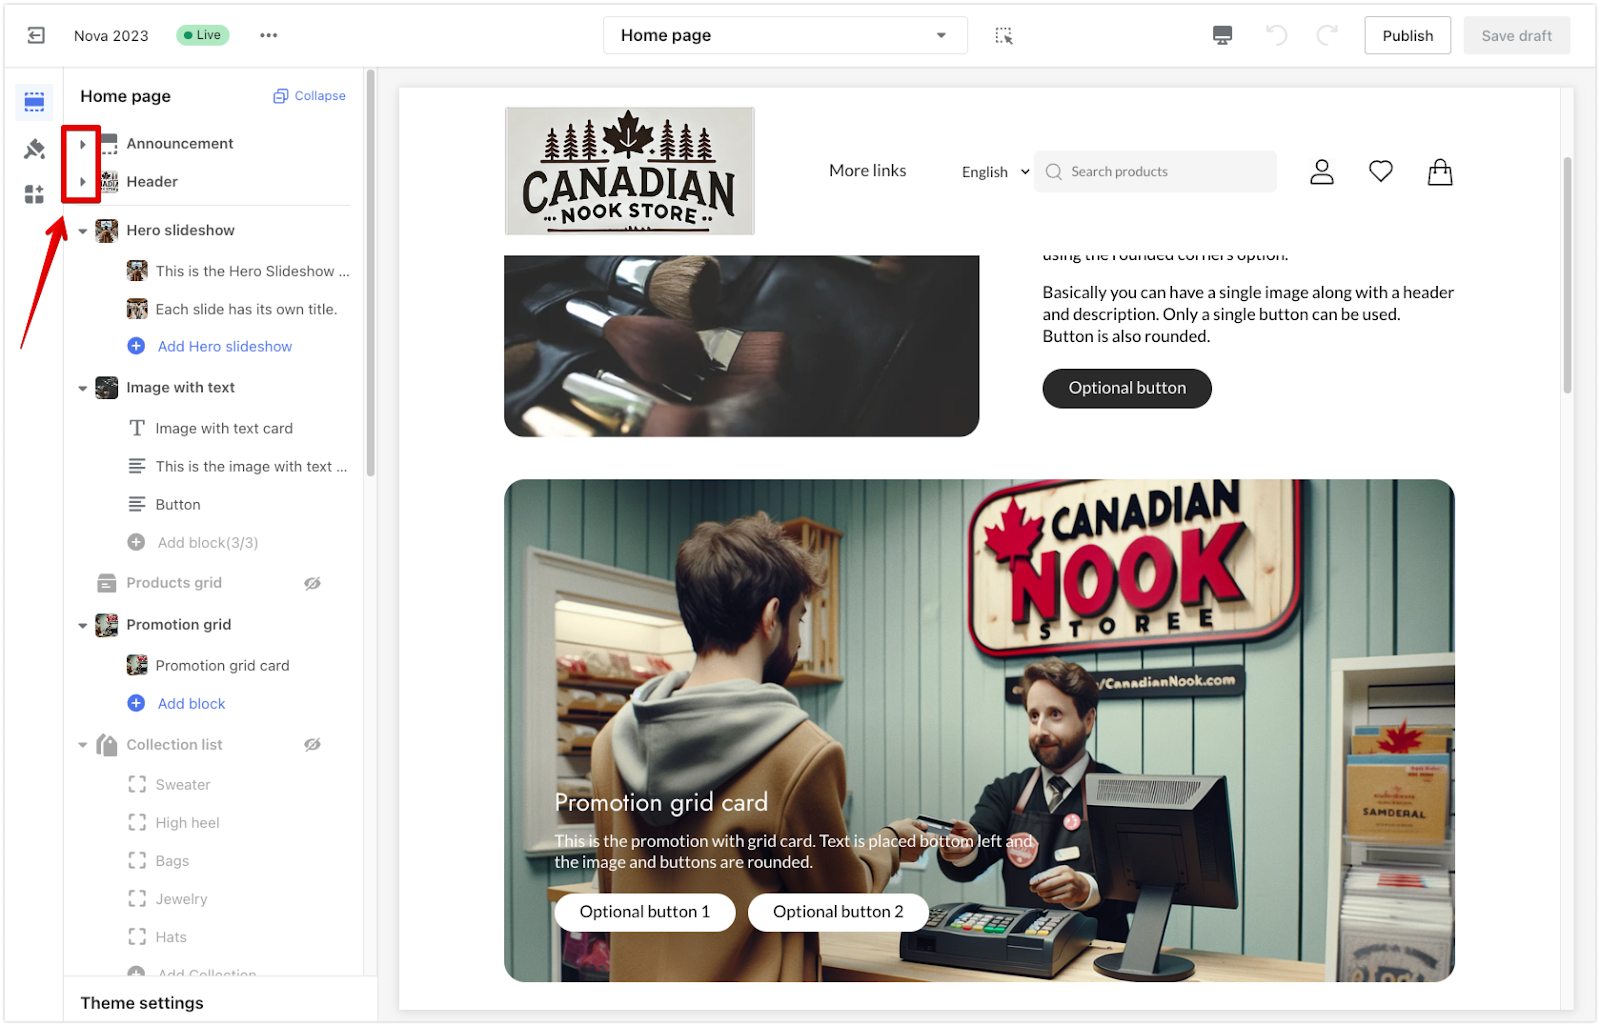
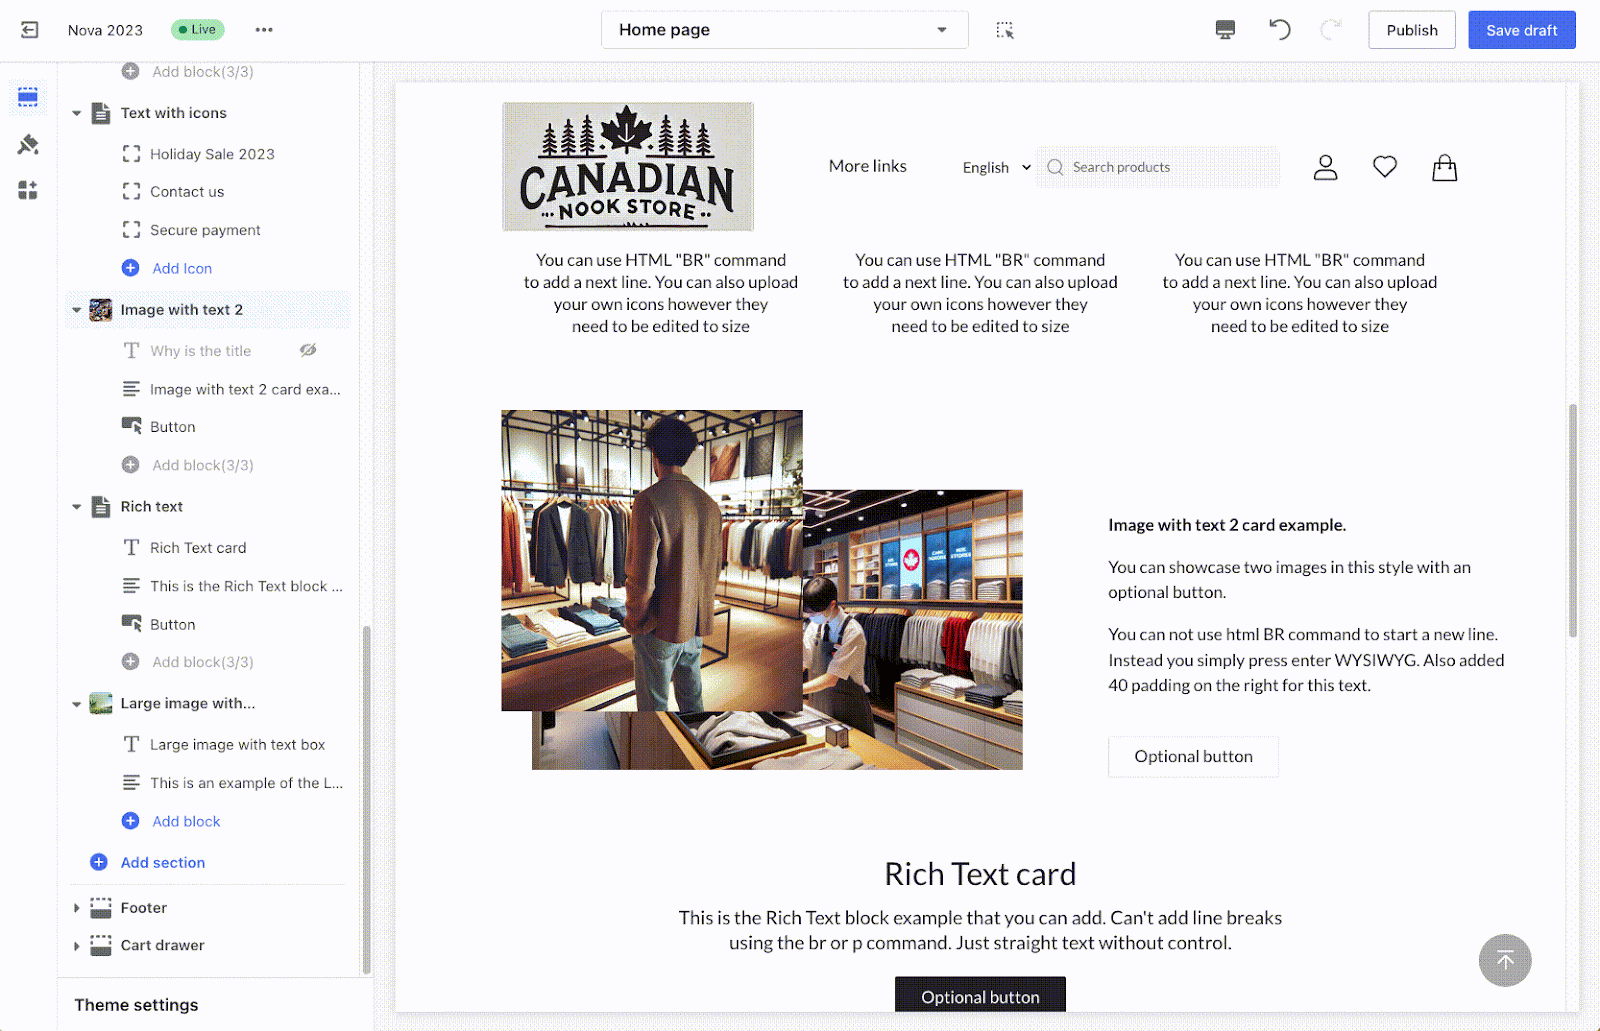
3. Use the tree view: Work from top to bottom in the tree view to ensure a smooth and organized design process. The tree view provides a hierarchical representation of your store's sections and blocks, making it easier to understand the structure and navigate to specific elements.
Organizing sections and blocks
Sections and blocks provide a flexible way to arrange your store’s layout without code editing.
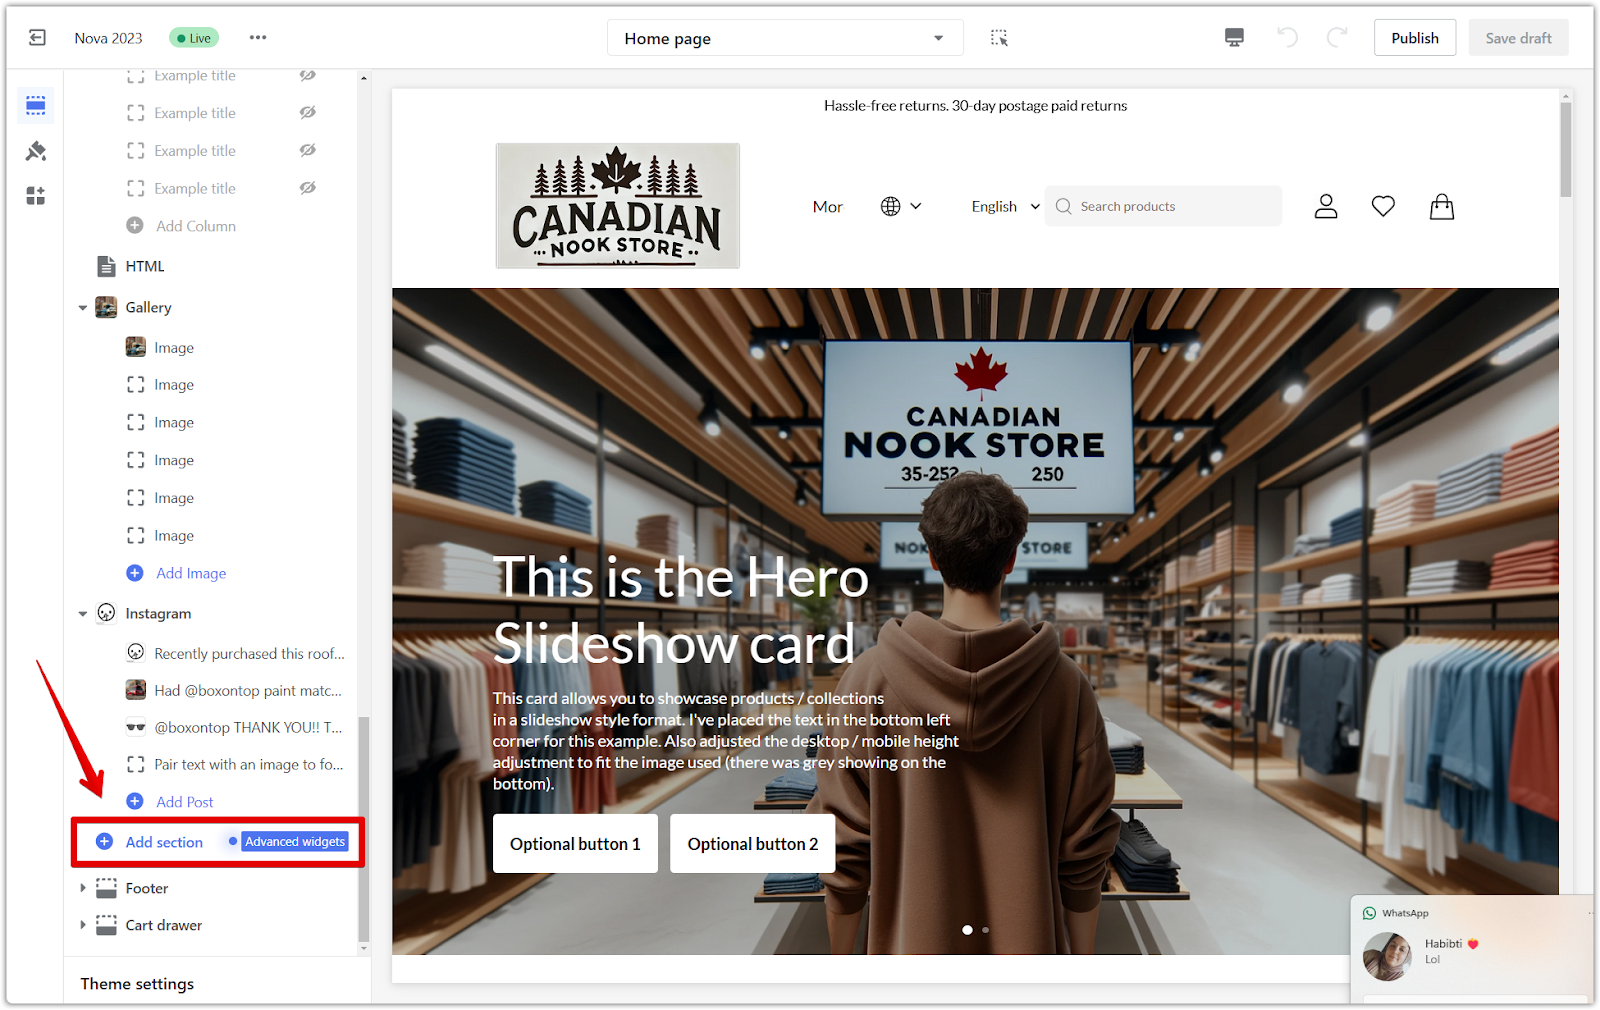
1. Add different sections: By default, the section tree in the editor is expanded. To add a new section, scroll down to the end of the list and click Add section.
- Theme sections: Unique to specific themes and tailored to their design. Click Show more to see all available sections for the current theme. These sections are designed to work seamlessly with the overall style and functionality of the chosen theme.
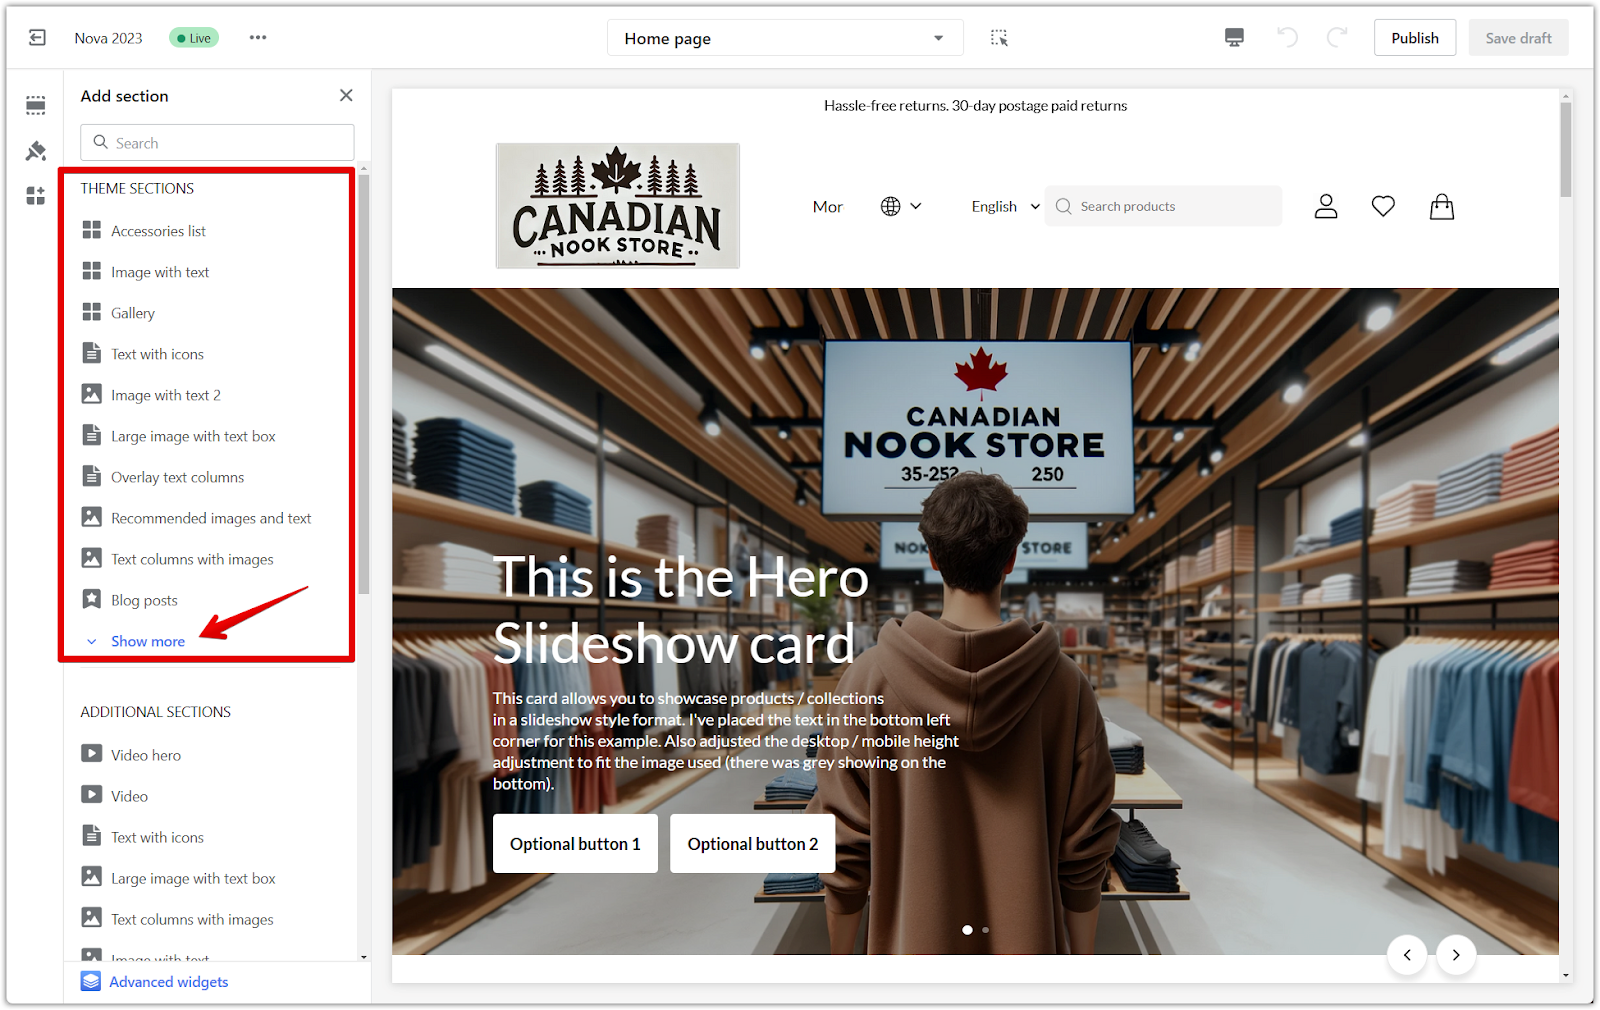
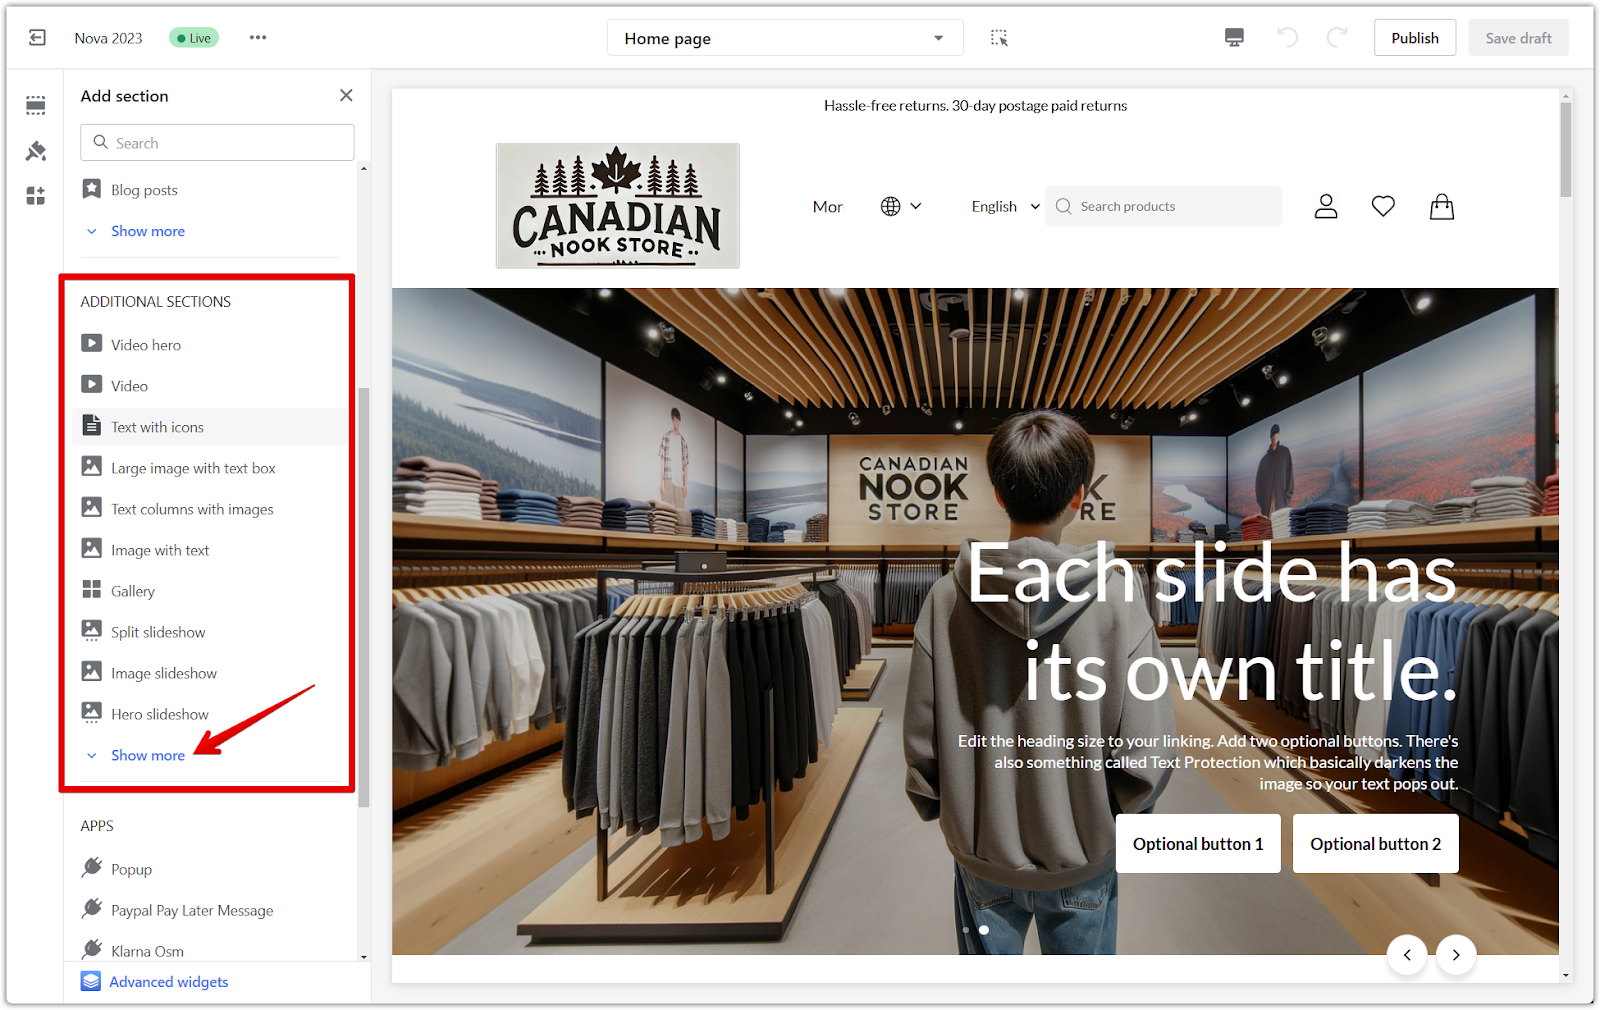
- Additional sections: Standard options that work across all themes. These sections offer common layout elements that can be used regardless of the specific theme you've selected. Click Show more to see all available sections for the current theme.
- Apps: If you have any apps installed that support embedded blocks, they’ll be listed here. Adding these blocks extends your store’s functionality without coding.

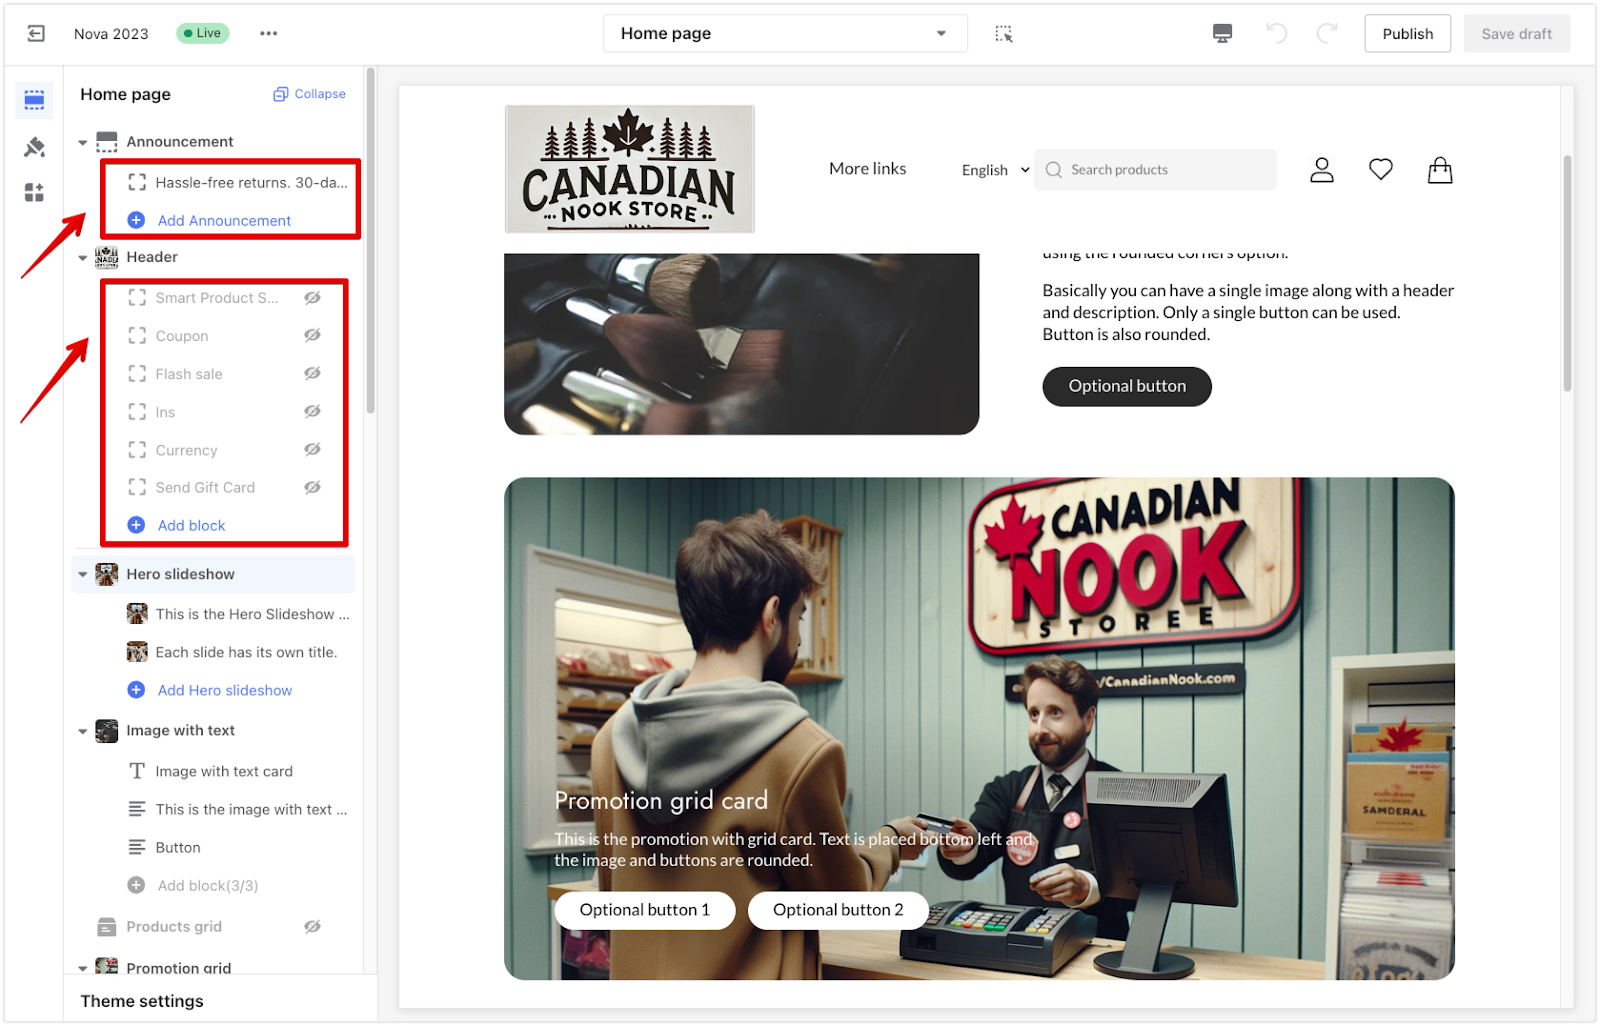
2. Expand blocks: The announcement, header, and footer sections are initially minimized. Click the expand icon to view and edit their blocks. Expanding these sections reveals the individual blocks that make up each section, allowing you to customize their content and appearance.
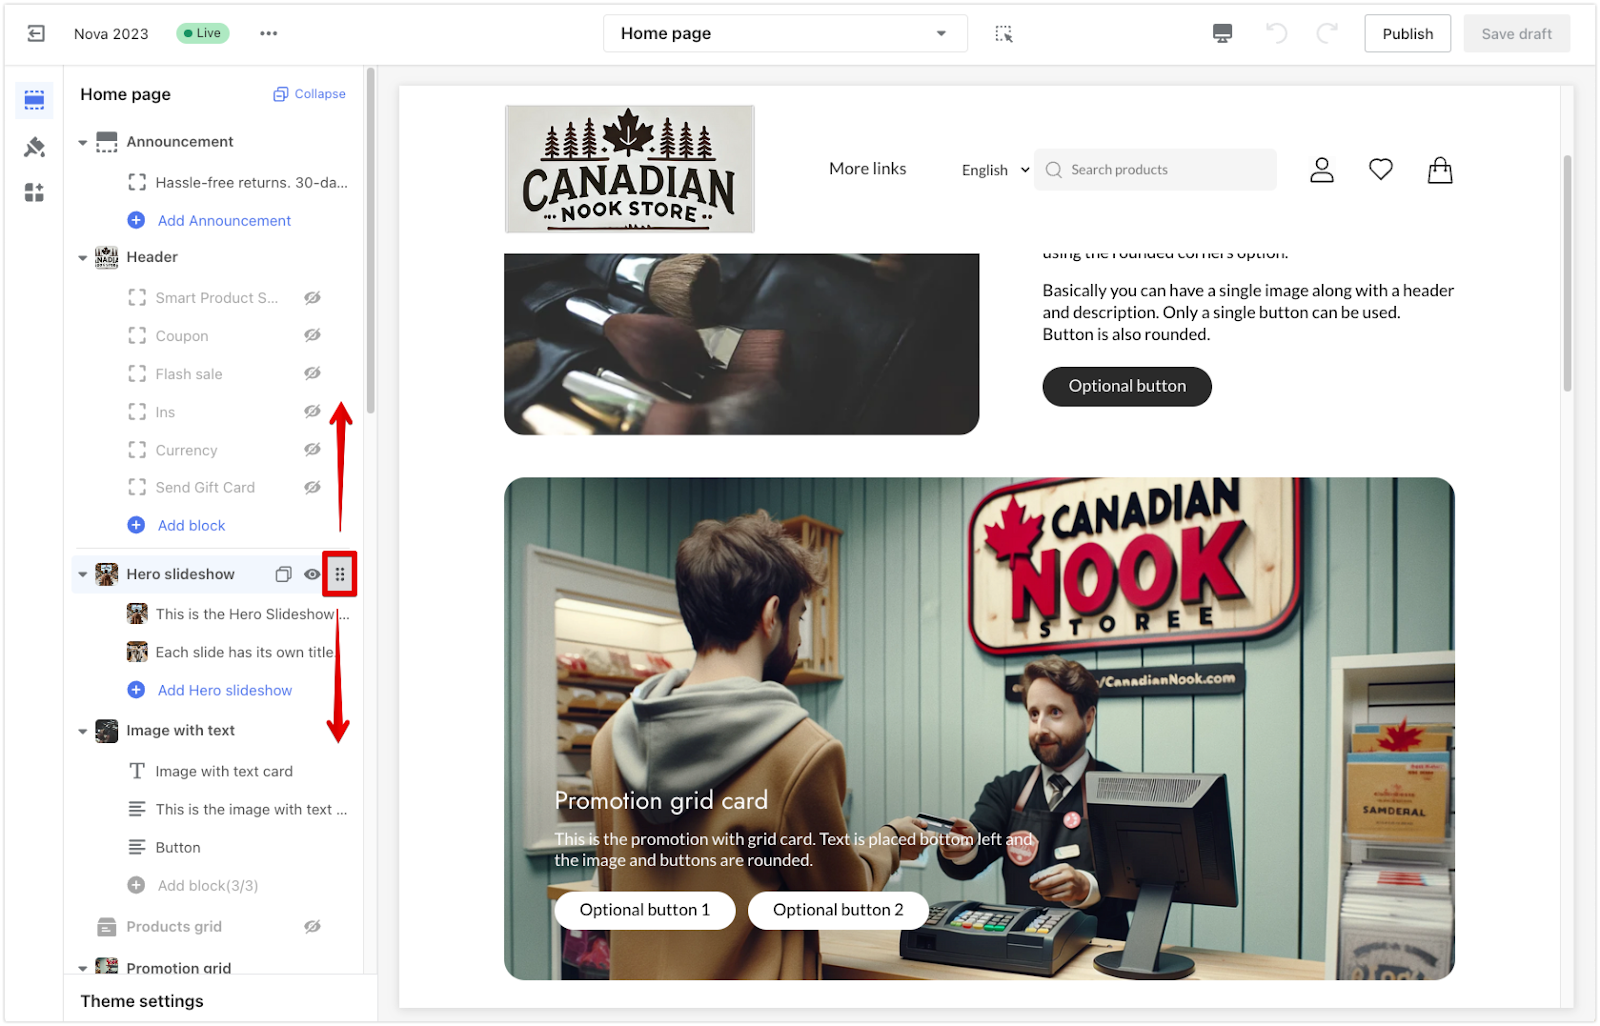
3. Reorder sections: Use the drag icon to move sections to your preferred positions. This allows you to control the order in which sections appear on your store pages, influencing the overall flow and layout of your content.
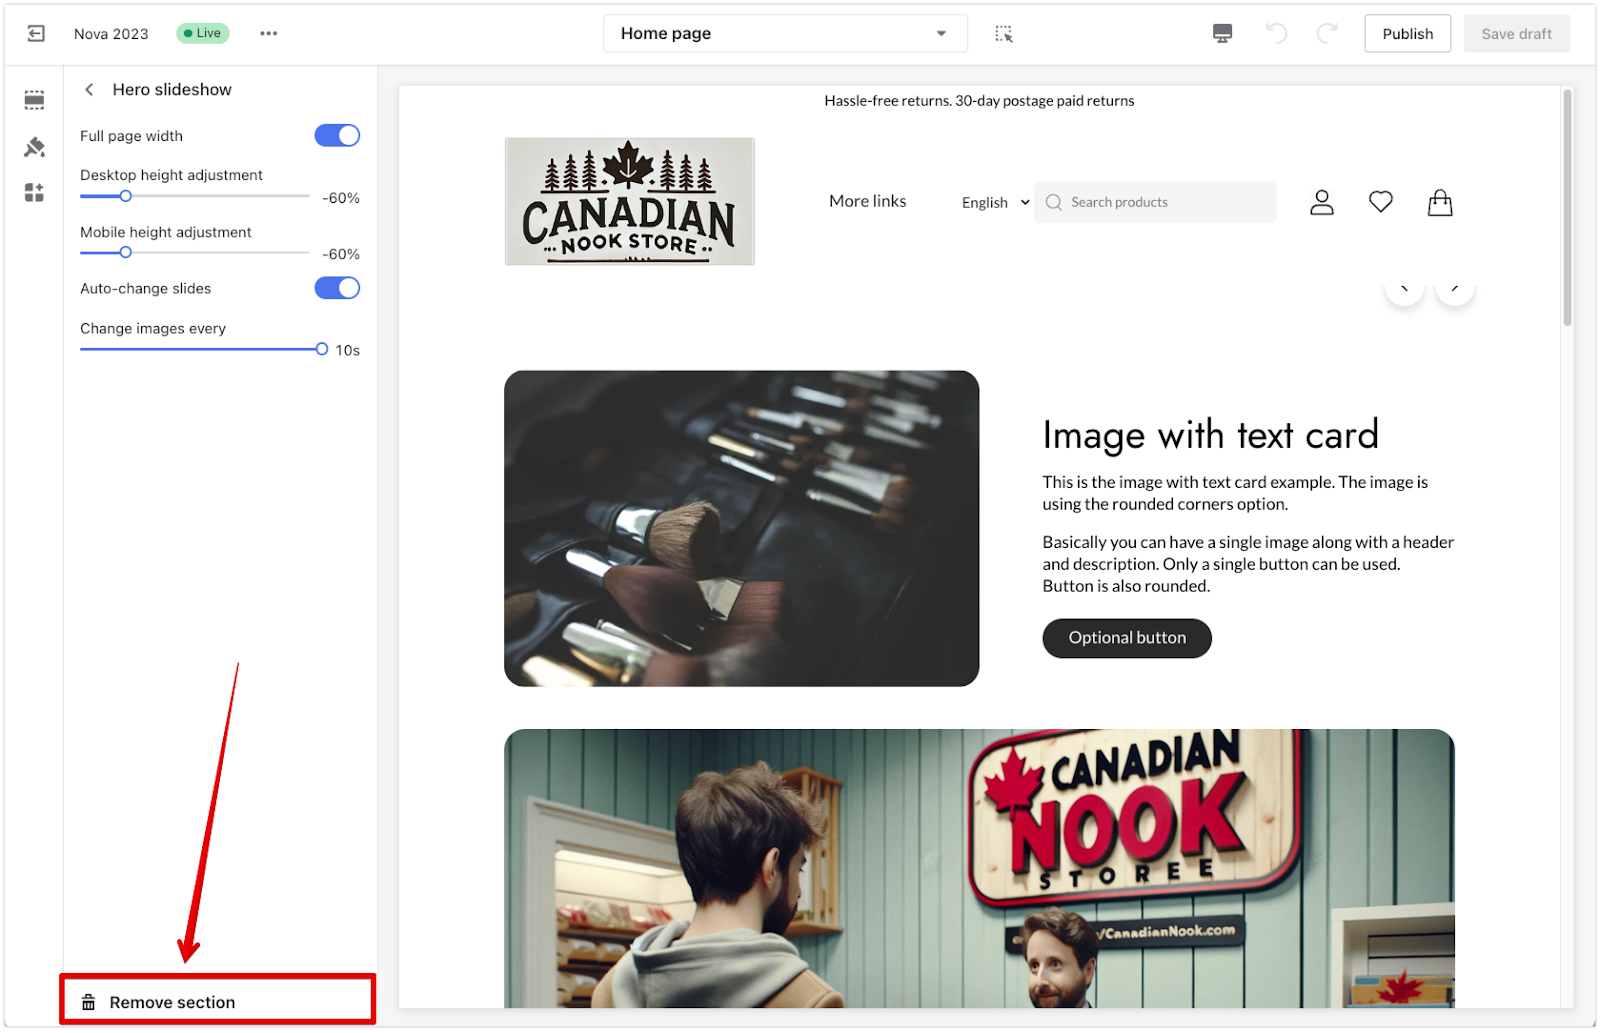
4. Remove sections: Sections can be removed through the settings panel or by the preview inspector.
- From the settings panel: Click the section title in the section tree, scroll down, and click Remove section. This is a straightforward way to delete an entire section from your store's layout.
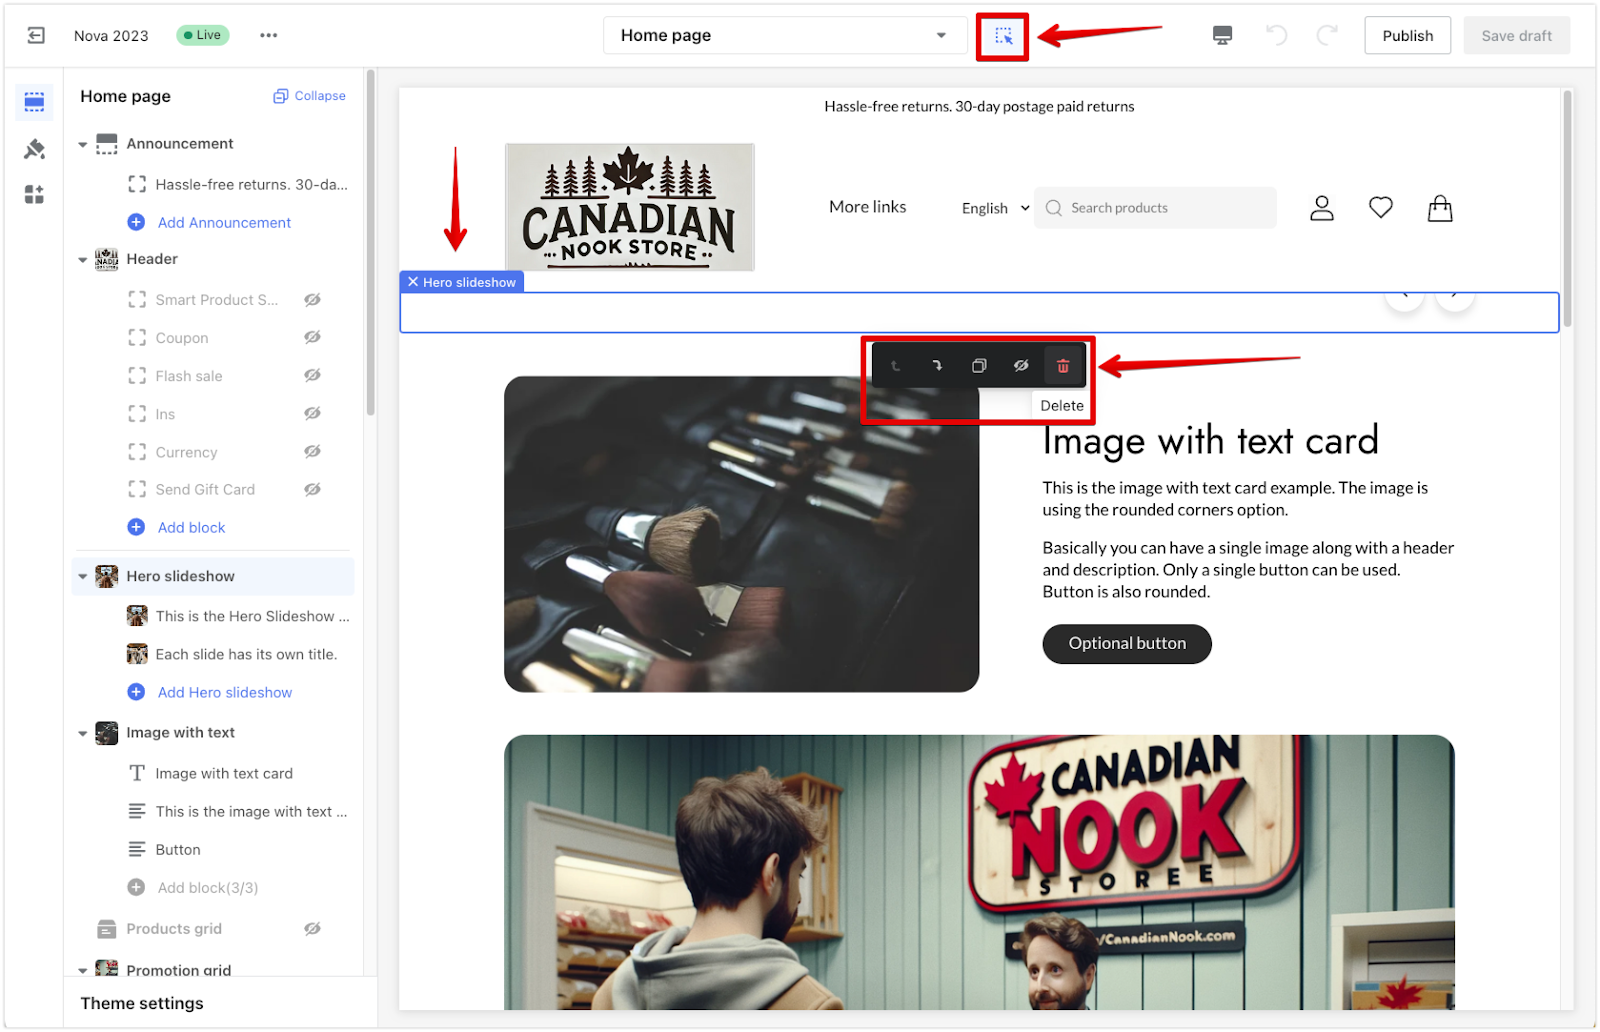
- Using the preview inspector: Activate the preview inspector, find the section, and click the trash can icon next to the section you wish to delete. The preview inspector allows you to visually select and remove sections directly from the preview of your store.
Enhancing functionality with apps
Apps extend your store’s capabilities by adding new features. Install apps through the Shoplazza App Store in your admin before managing them in the theme editor.
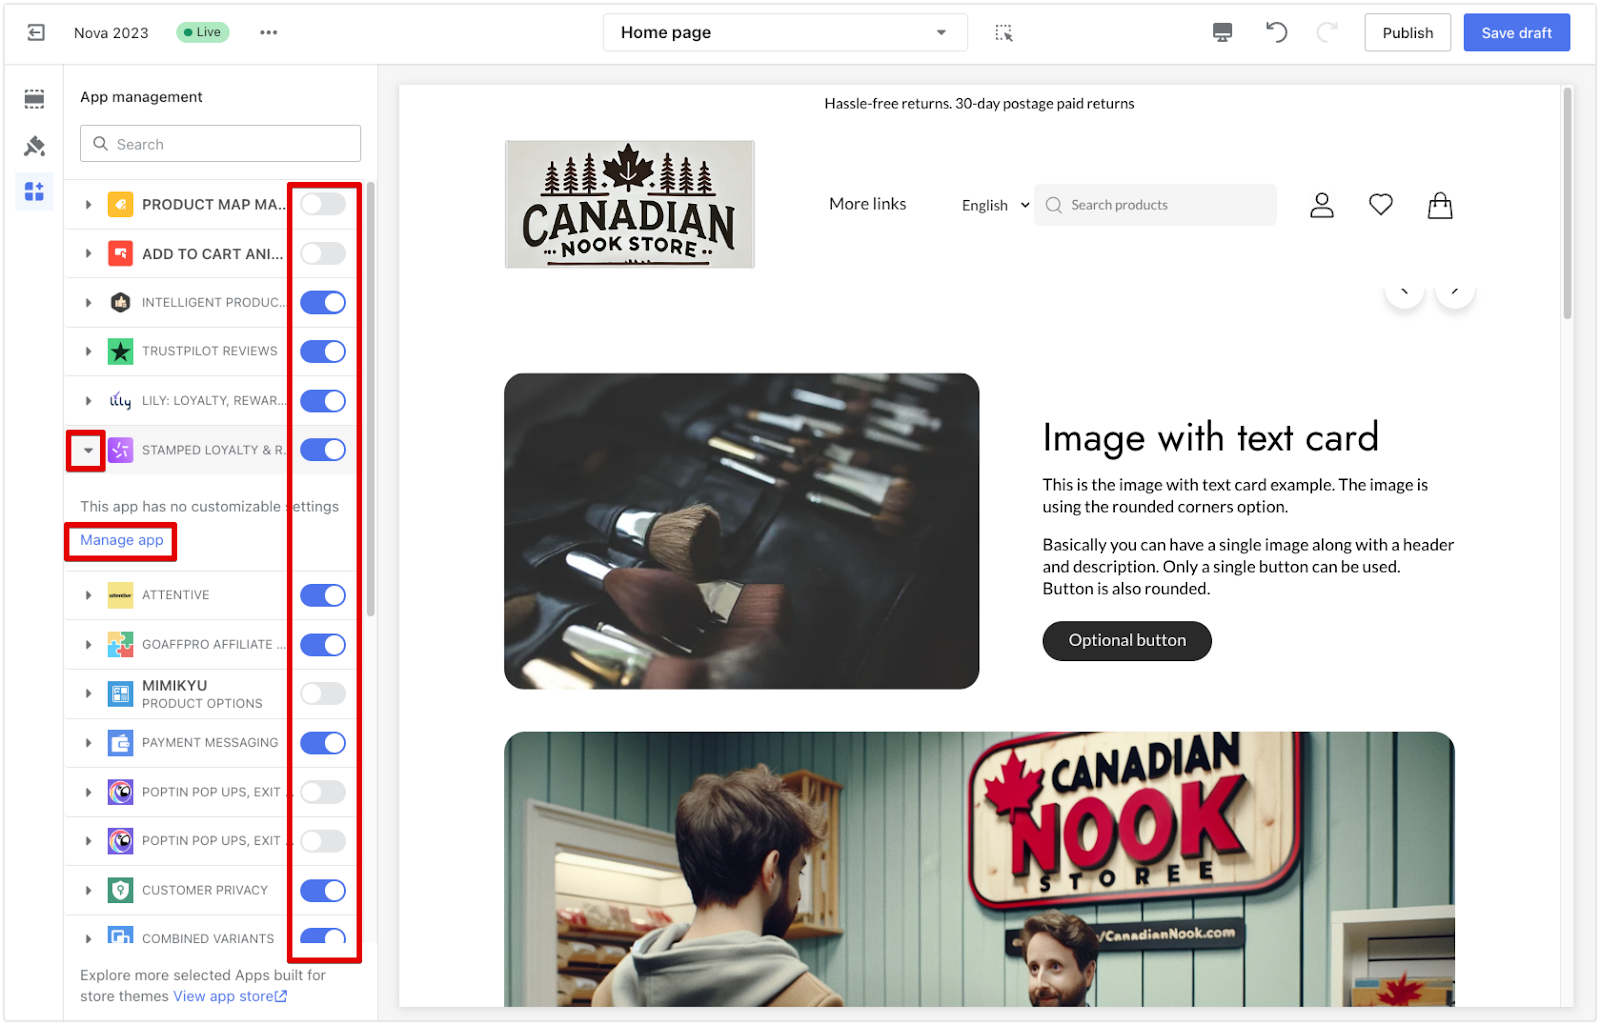
1. Manage installed apps: Click the App icon in the theme editor to view and manage your installed apps. Adjust app settings and enable or disable features as needed. This gives you centralized control over the apps that are integrated with your store's theme.
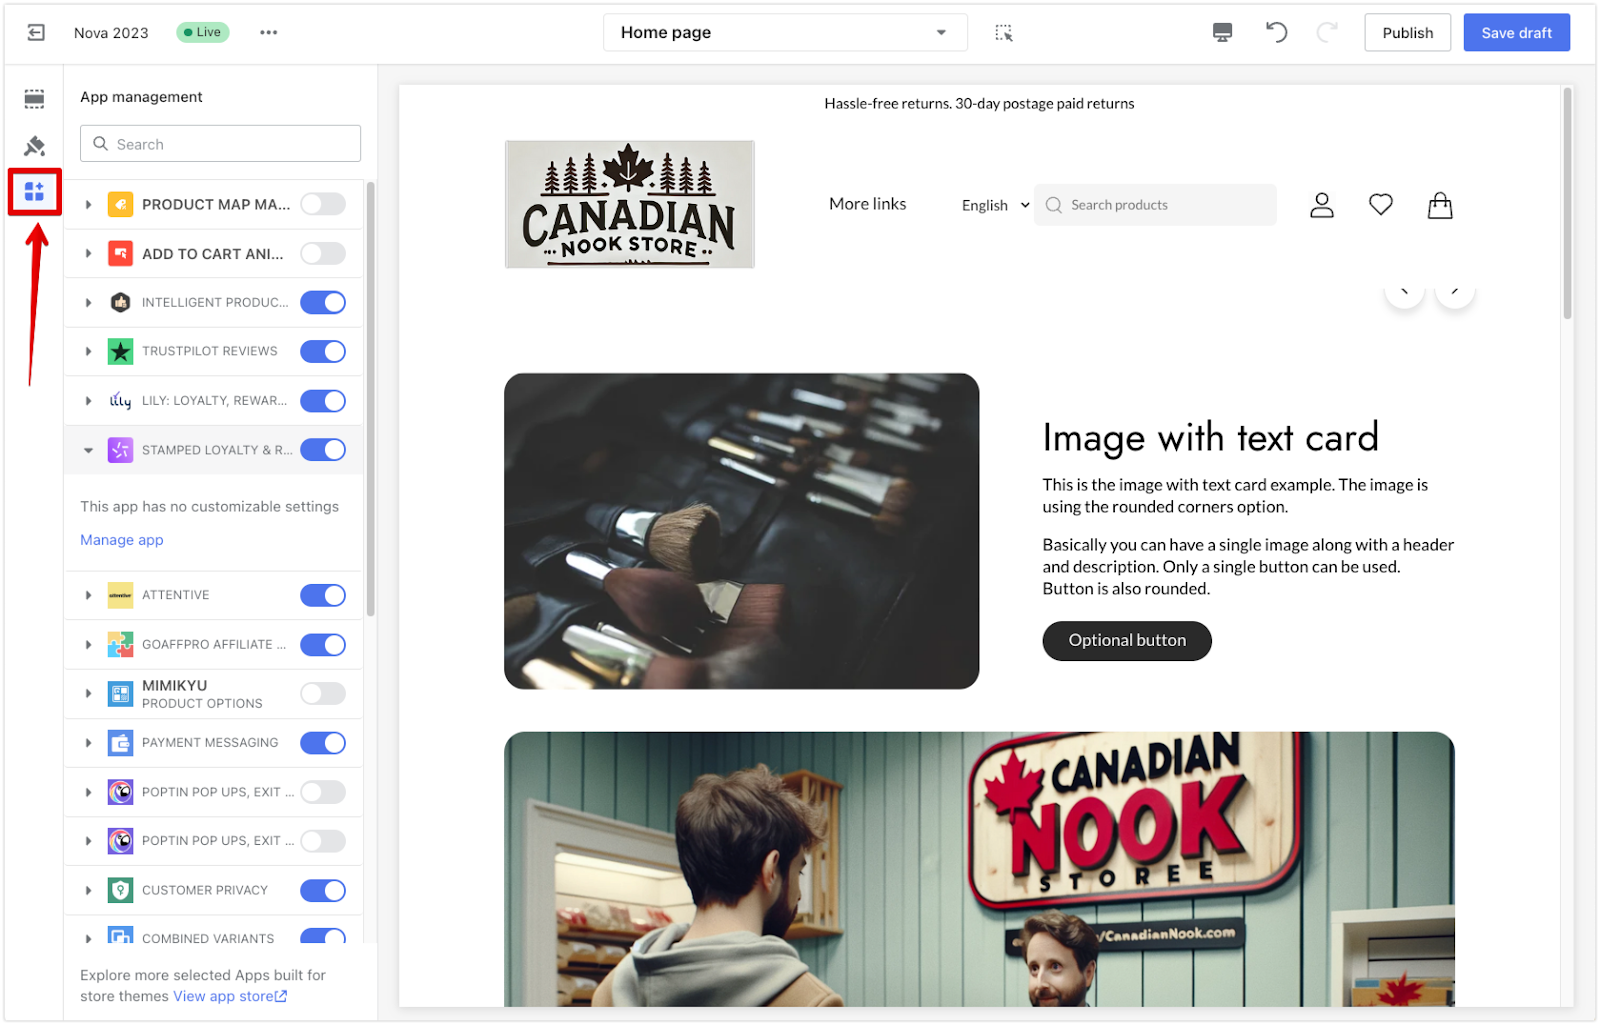
2. Configure app settings: Use the toggles beside each app to enable or disable the app. You can also click the Manage app for more configuration options. This allows you to fine-tune the behavior and appearance of each installed app within your store.
Using the preview inspector
The preview inspector allows you to adjust sections and blocks quickly within the preview window.
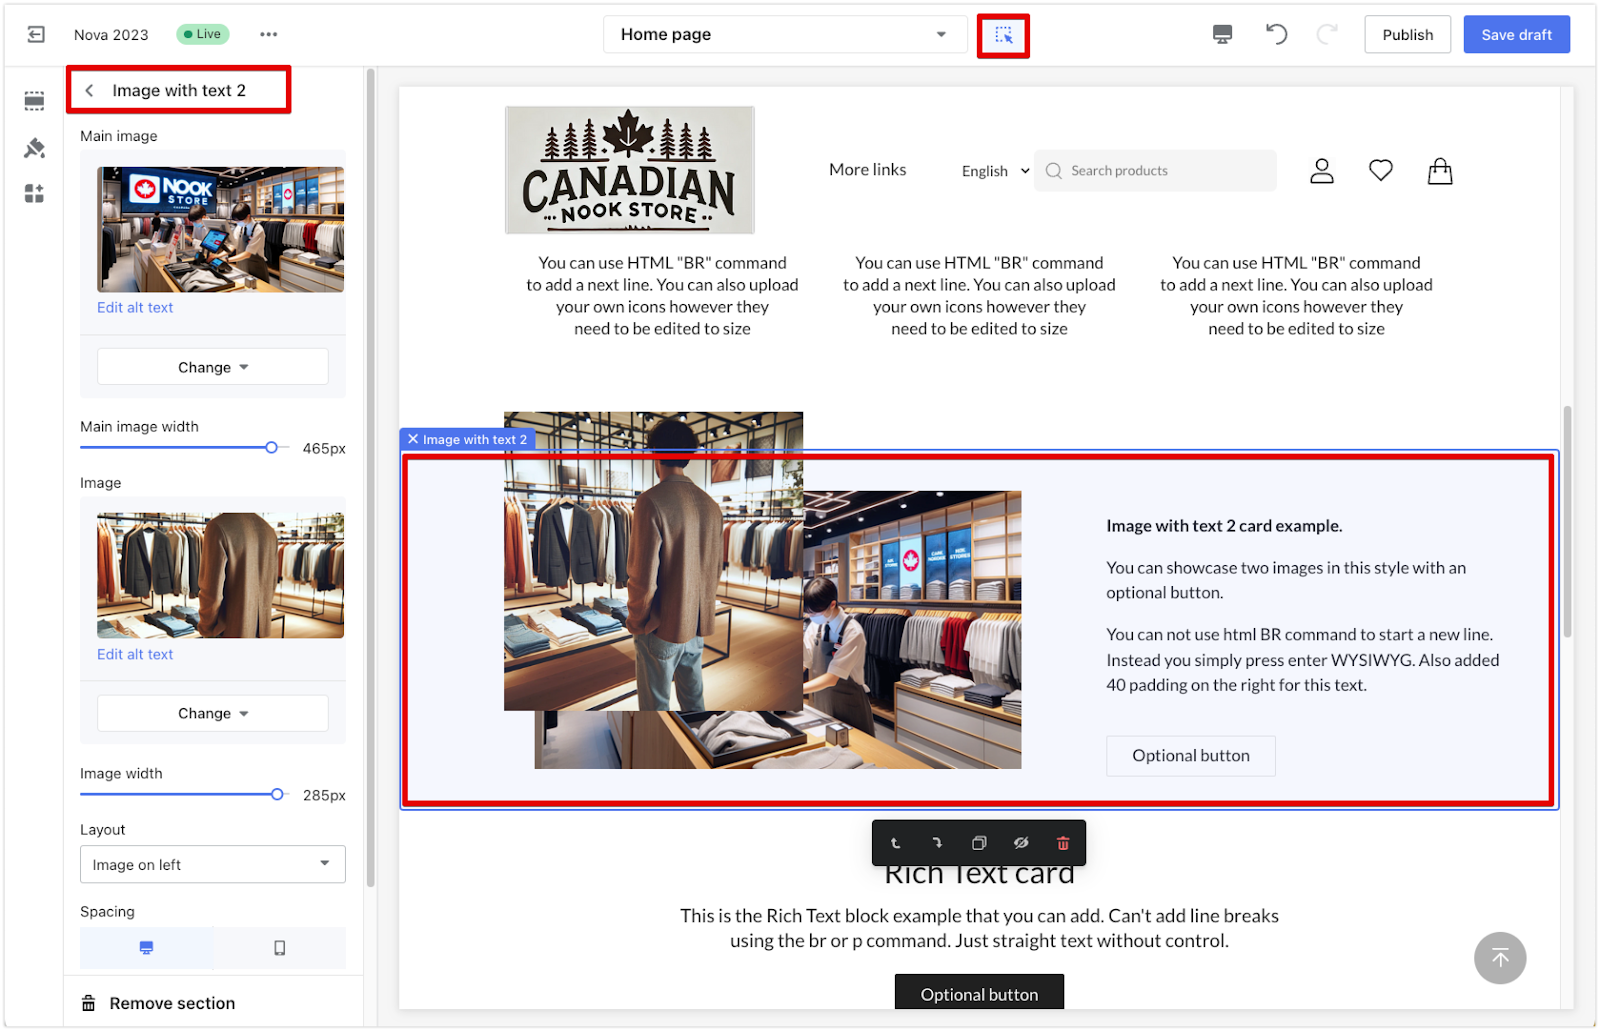
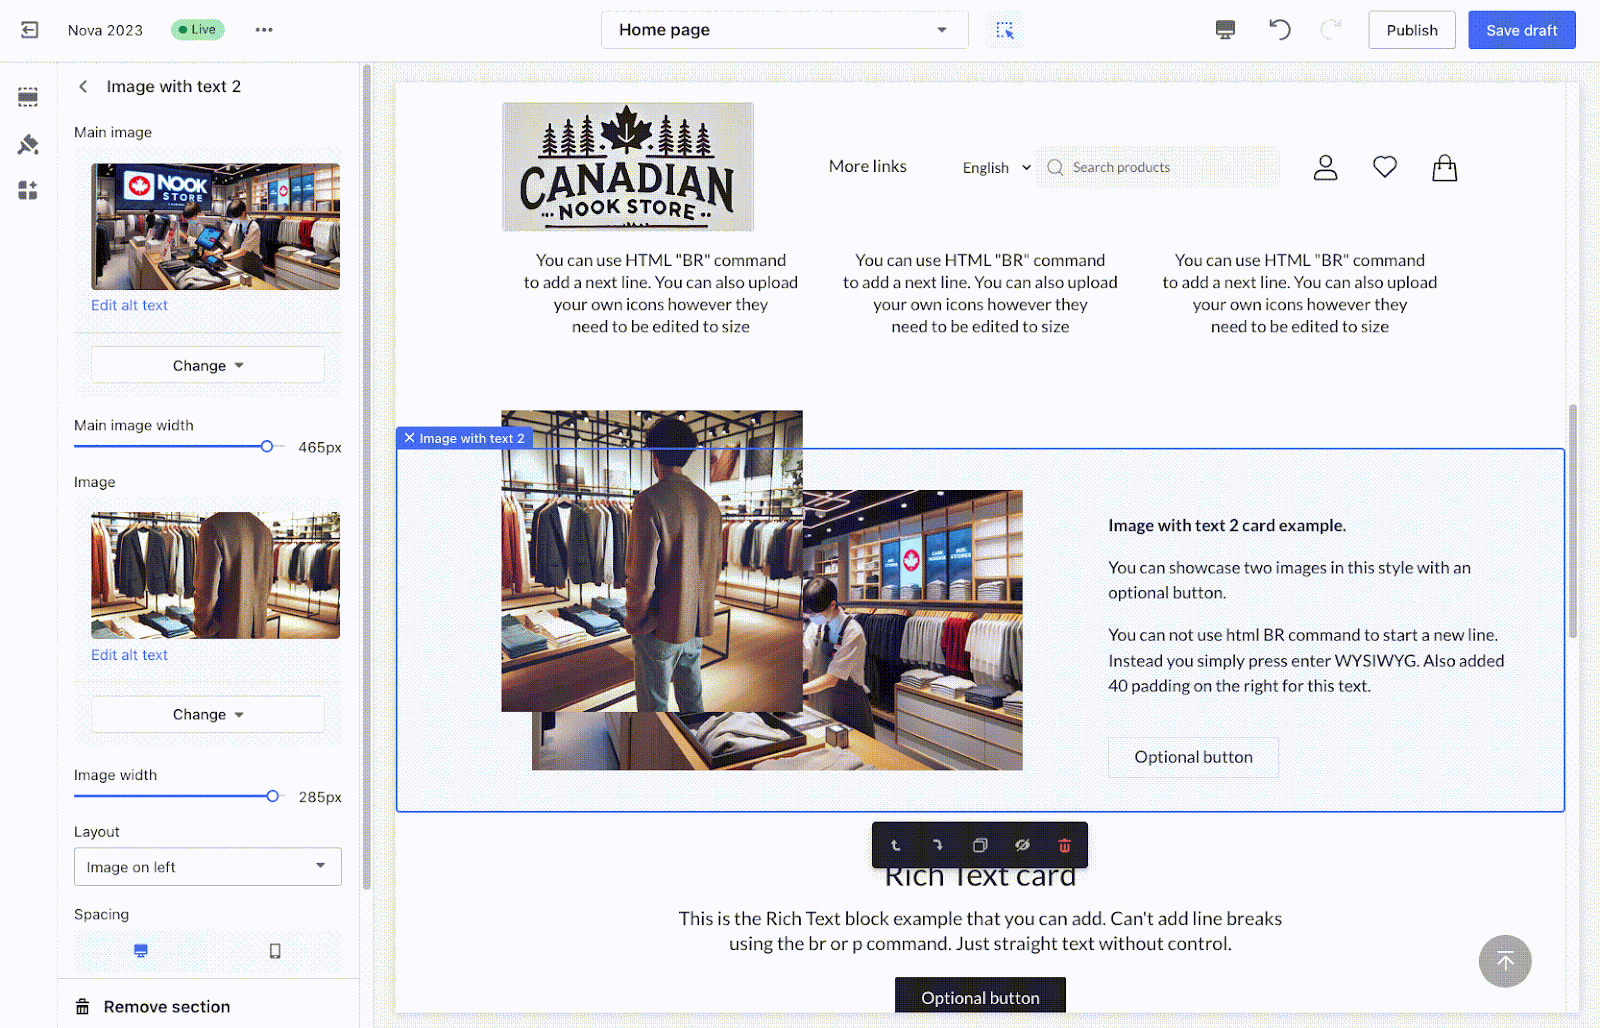
1. Activate the preview inspector: Hover over any section or block to see its outline, then click to edit its settings. This is a convenient way to directly access the settings for specific elements on your store pages.
2. Add new sections: Hover over the + symbol where you want to insert a new section or block and click Add section. This allows you to visually place new sections within your store's layout using the preview window.
3. Adjust sections: Use the toolbar to reposition, duplicate, hide, or delete sections. The preview inspector provides a set of tools for quickly modifying sections directly within the preview of your store.

Navigating the pages dropdown menu
The template dropdown menu at the top of your screen allows you to switch between page templates or create new ones, simplifying the process of building a fully functional store. Use dropdown menu for more content customization and managing custom content templates. This is essential for customizing the layout and content of different pages on your store, such as product pages, collection pages, and about us pages.
Note
For more content customization, use Pages in the drop-down menu to manage custom content templates.
This guide empowers you to take full control of your store’s design, from initial theme setup and backup to detailed customization. By using these tools and following the steps outlined, you can create a tailored shopping experience that truly reflects your brand. Remember to explore the theme editor, experiment with different sections and blocks, and leverage app integrations to make your store stand out.


Comments
Please sign in to leave a comment.