
Linking blogs to your store header provides easier access for your customers to view your content. It helps showcase your knowledge and expertise in your industry. You can build trust and credibility with your customers by sharing helpful and insightful content. It also boosts your brand's visibility. As more people find and share your content, more people become aware of your brand, which can lead to more customers and sales. For more details about creating blogs, see Creating and Managing Blogs.
Adding your blog or individual blog posts to your store's header navigation is straightforward. This allows customers to easily discover and engage with your content. Here's how:
Steps to link a Blog
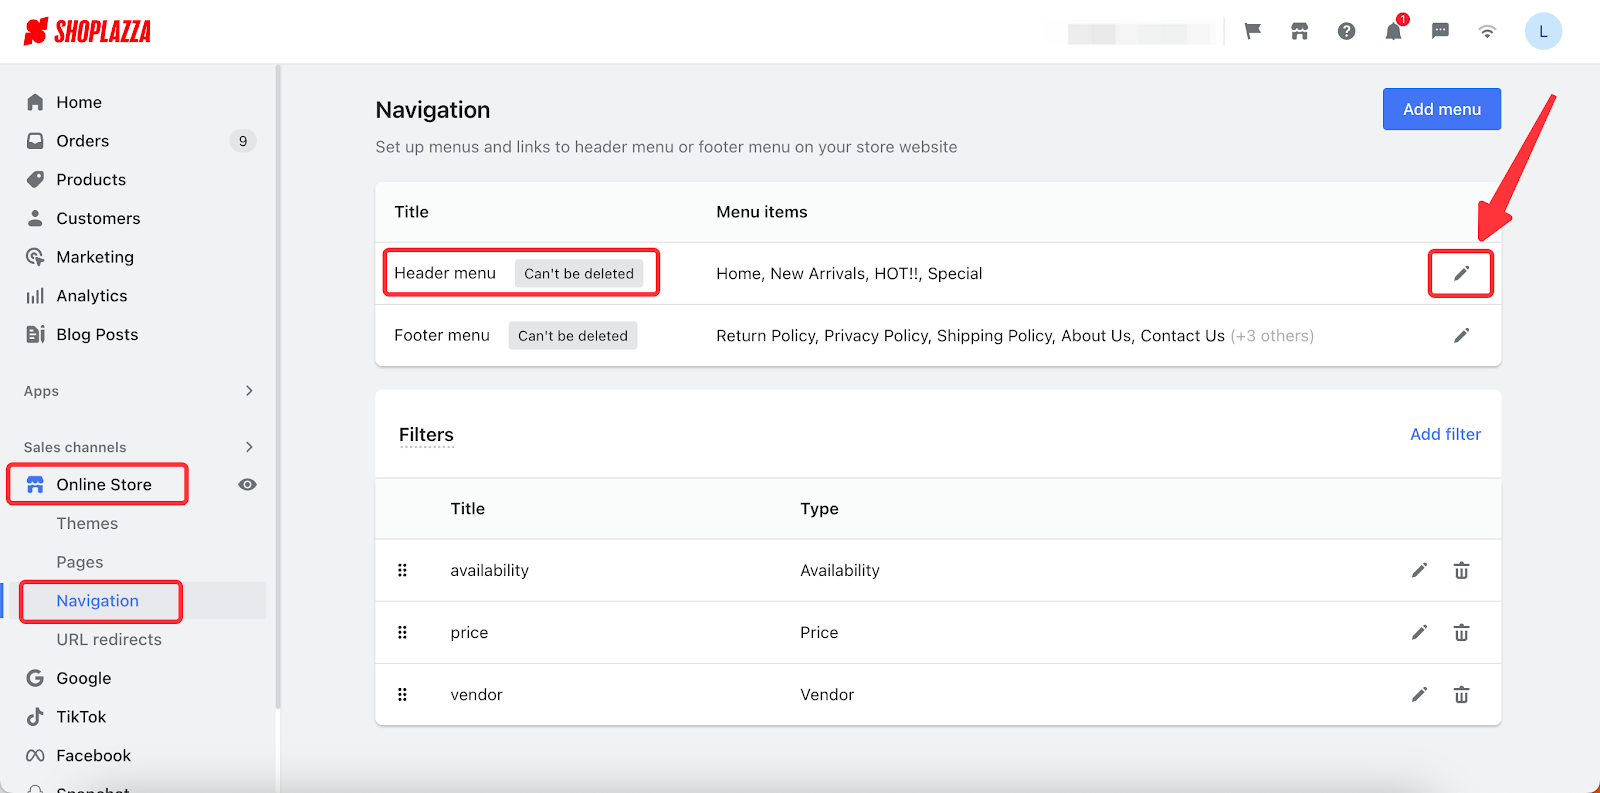
1. Edit header menu: From your Shoplazza admin, navigate to Online Store and select Navigation. Click the pencil icon next to the Header menu to begin editing. This will open the header menu editor, where you can add or modify links.
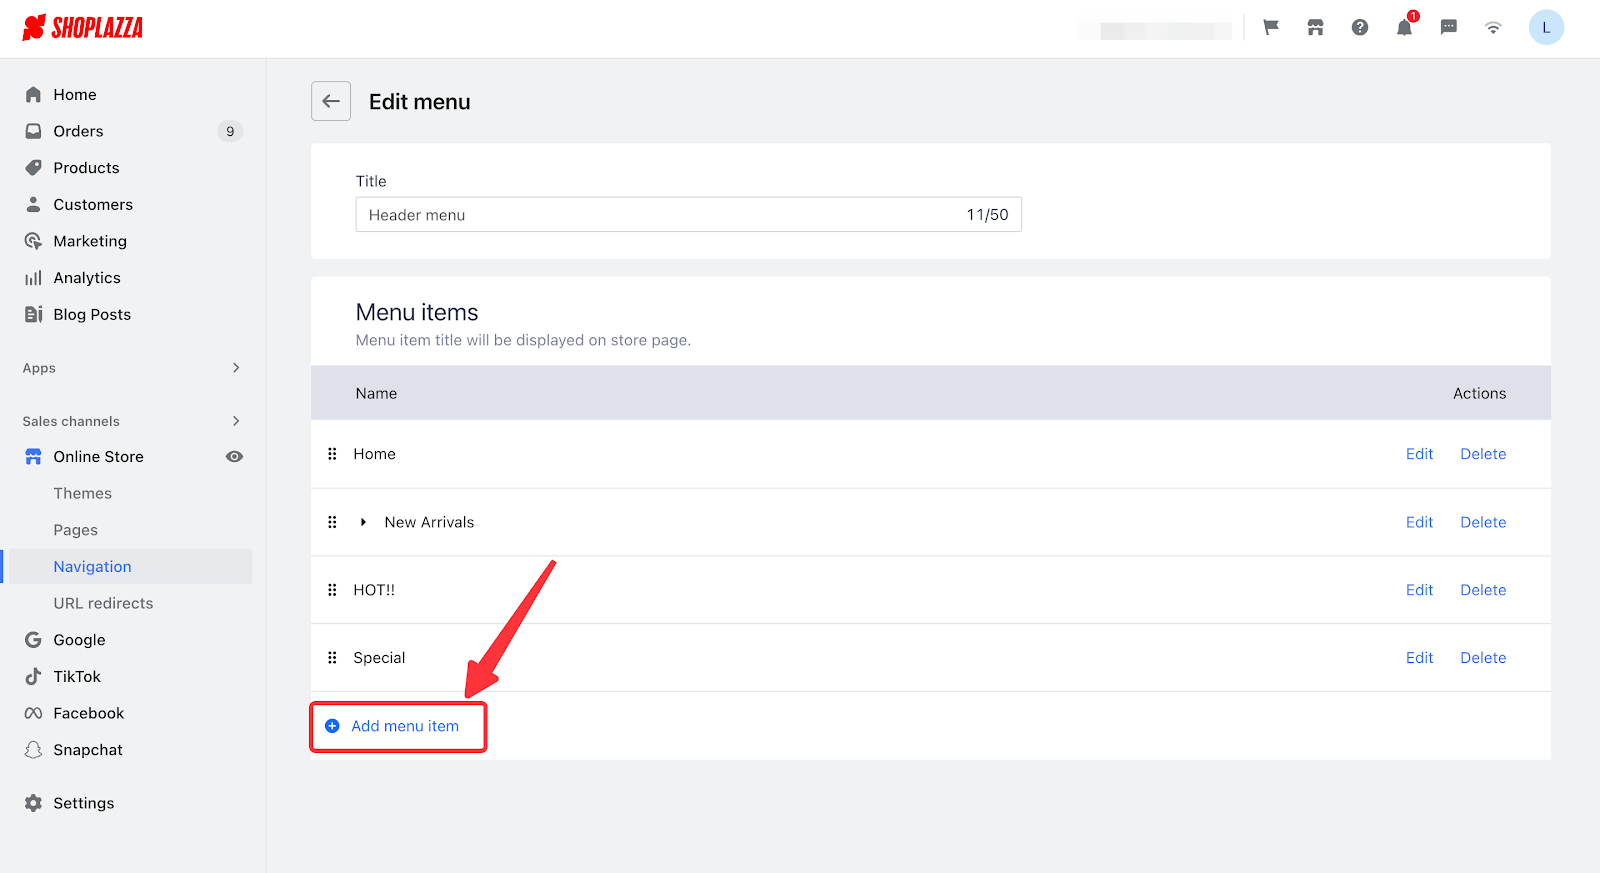
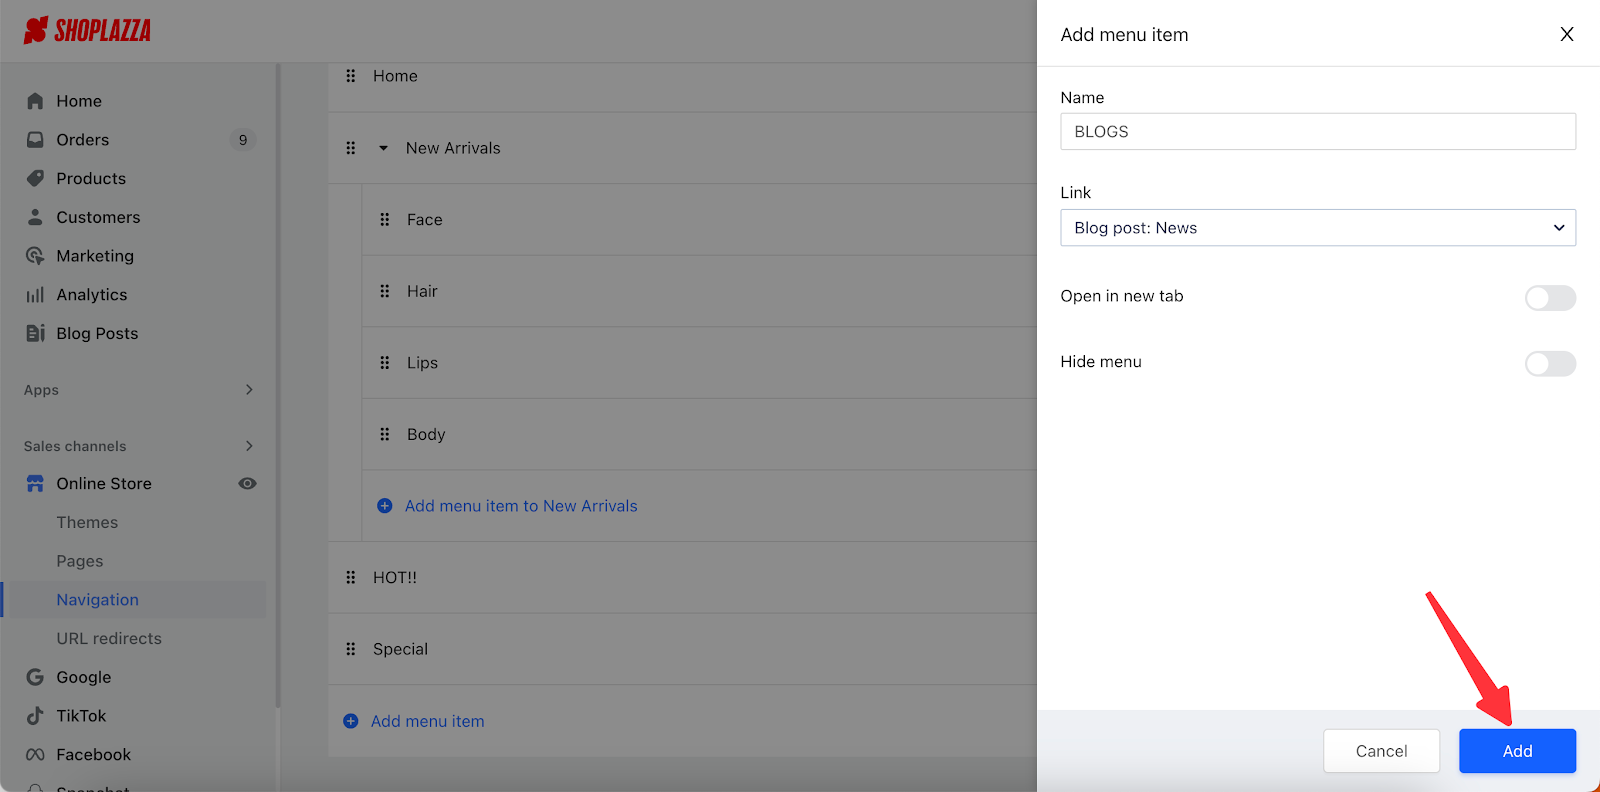
2. Add menu item: Within the header menu editor, click the Add menu item button. This will open a new section where you can configure the link to your blog or a specific blog post.
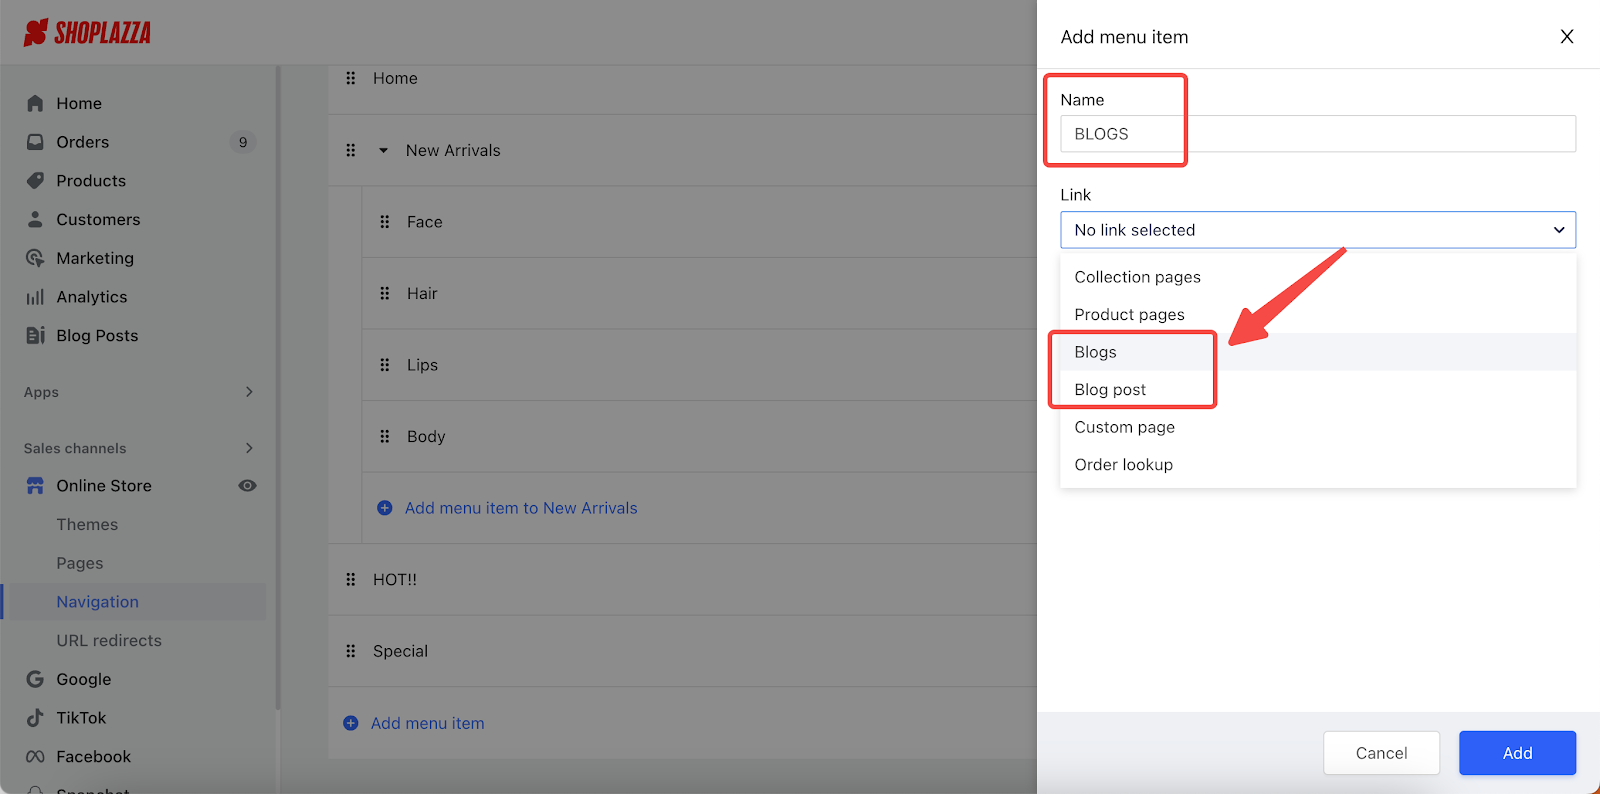
3. Name menu item and select a blog or blog post: Give your new menu item a clear and descriptive name (e.g., "Blog," "News," "Insights," etc.). This is the text that will appear in your header navigation. From the dropdown menu, choose Blogs to link to your main blog page or a Blog post to link to a specific individual post.
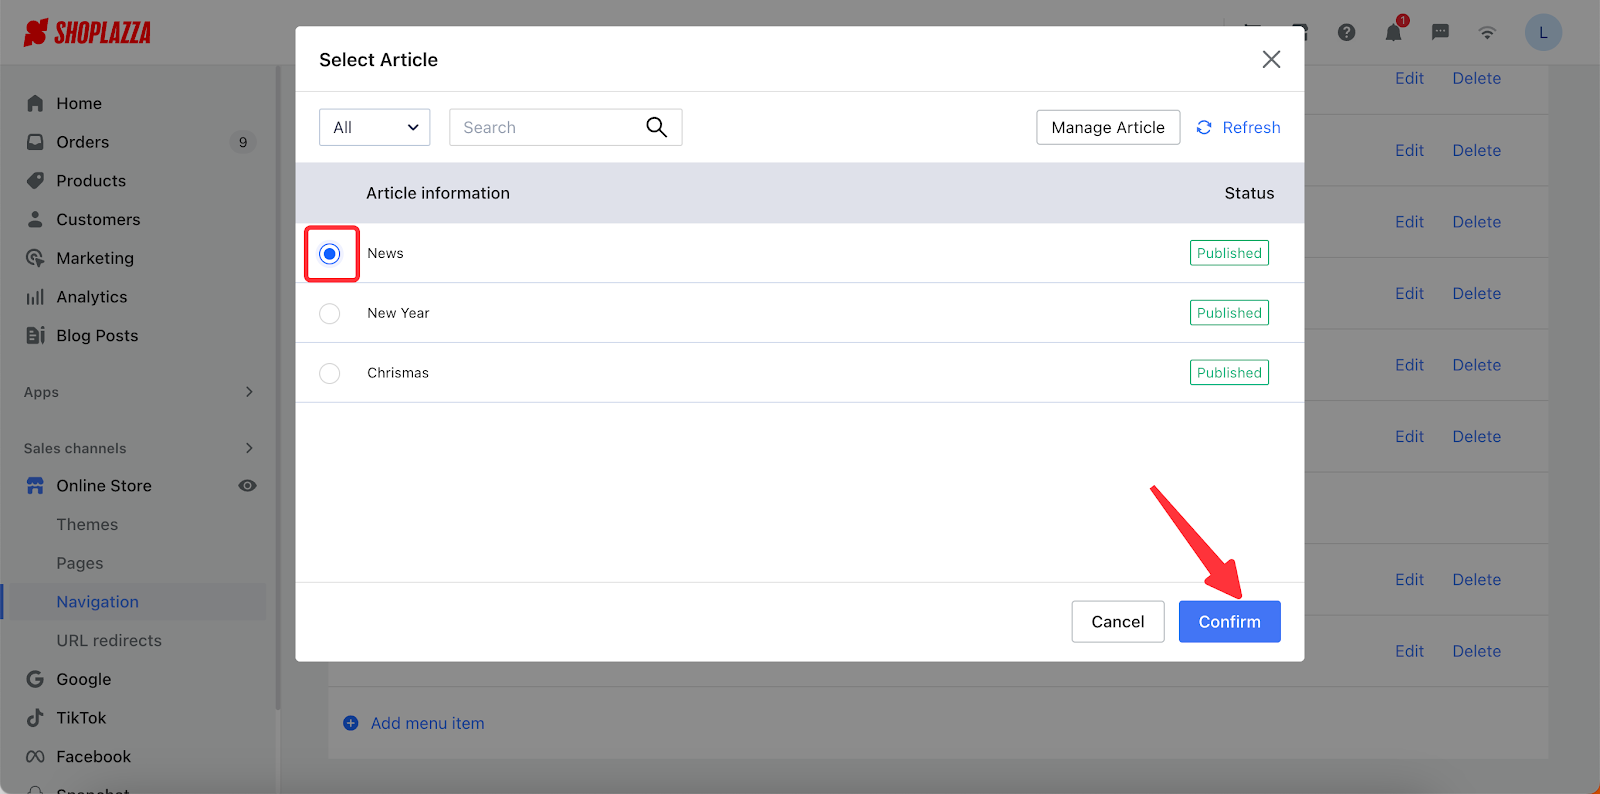
4. Select the target blog or blog post and confirm: If you choose Blogs, you'll likely see a list of your available blogs. Select the correct one. If you choose a Blog post, you'll see a list of your published blog posts. Select the specific post you want to feature in your header. After making your selection, click Confirm.
5. Add menu item: After confirming your blog or blog post selection, click the Add button. This will add the link to your header menu, but it won't be live on your site yet.
6. Save changes: Once you're happy with the new menu item's name and target, click the Save button in the header menu editor. This will publish the changes to your store's header navigation.

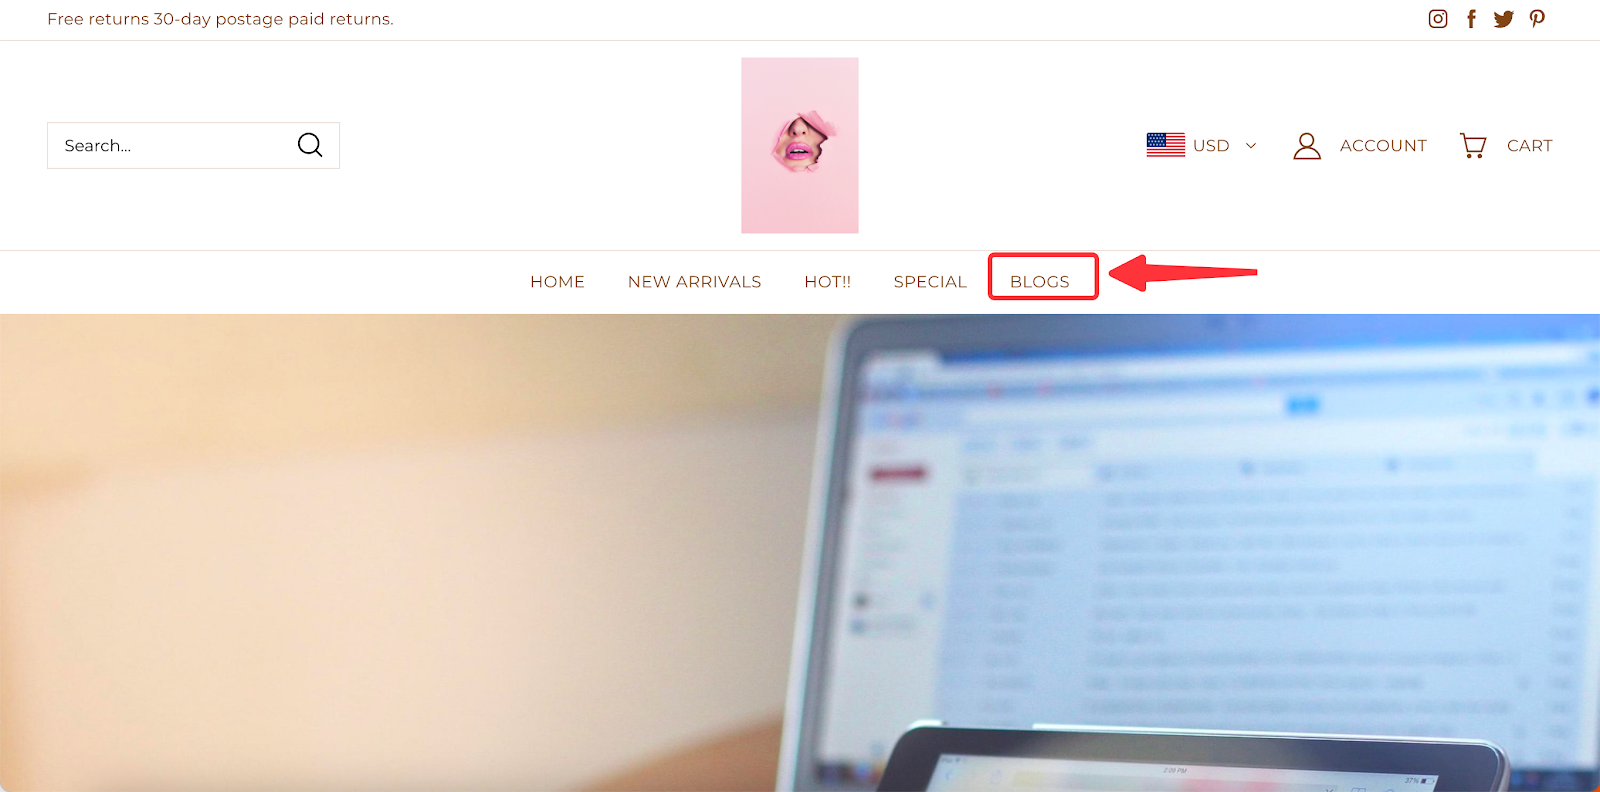
7. View final appearance: Visit your store's website to see the new link in your header navigation. Click it to ensure it takes customers to the correct blog page or blog post. The screenshot below displays the final appearance once set up. Customers will be directed to the blog or post when they click the link.
By following these steps, you can effectively integrate your blog or blog posts into your store's header navigation, improving customer access and engagement with your valuable content. This direct link makes it simple for customers to stay informed and connected with your brand.


Comments
Please sign in to leave a comment.