
Migrating your store to Shoplazza is now easier than ever! With the Store Migration Tool, you can seamlessly transfer your Shopify data while saving time and effort. This guide walks you through the step-by-step process, from setting up your Shoplazza account to verifying your migration results.
Before you migrate
- Shopify's Basic plan has limited access to customer data. Here's what you need to know when migrating:
- Orders: Orders will be migrated without customer details (name, address, phone, email, etc.).
- Customer Records: Direct migration of customer profiles is not available.
- Discount Rules: Discount settings will transfer, but any customer-specific conditions will be removed.
- To fully migrate customer data, you’ll need to upgrade to the Shopify, Advanced, or Plus plan.
If you only need customer information (without orders or discount codes), simply export the customer list from Shopify and import it into Shoplazza. Follow this step-by-step guide to import customers:Customer management | Importing customer information
Preparing your transfer
Before you begin, ensure you have everything ready for a smooth transition.
1. Create a Shoplazza account
If you haven't already, go to Shoplazza.com and sign up for a free trial store. This will provide you with access to the Shoplazza Admin control panel, where you'll manage your online store.
2. Gather your Shopify API key and Access token
To connect Shopify with Shoplazza, you need an API key and access token. You can generate these by creating a Shopify App. Follow these steps to set it up.
Note
If you're unsure where to create an app or need extra support, contact Shopify Support to obtain your API key and access token.
Installing the Store Migration App
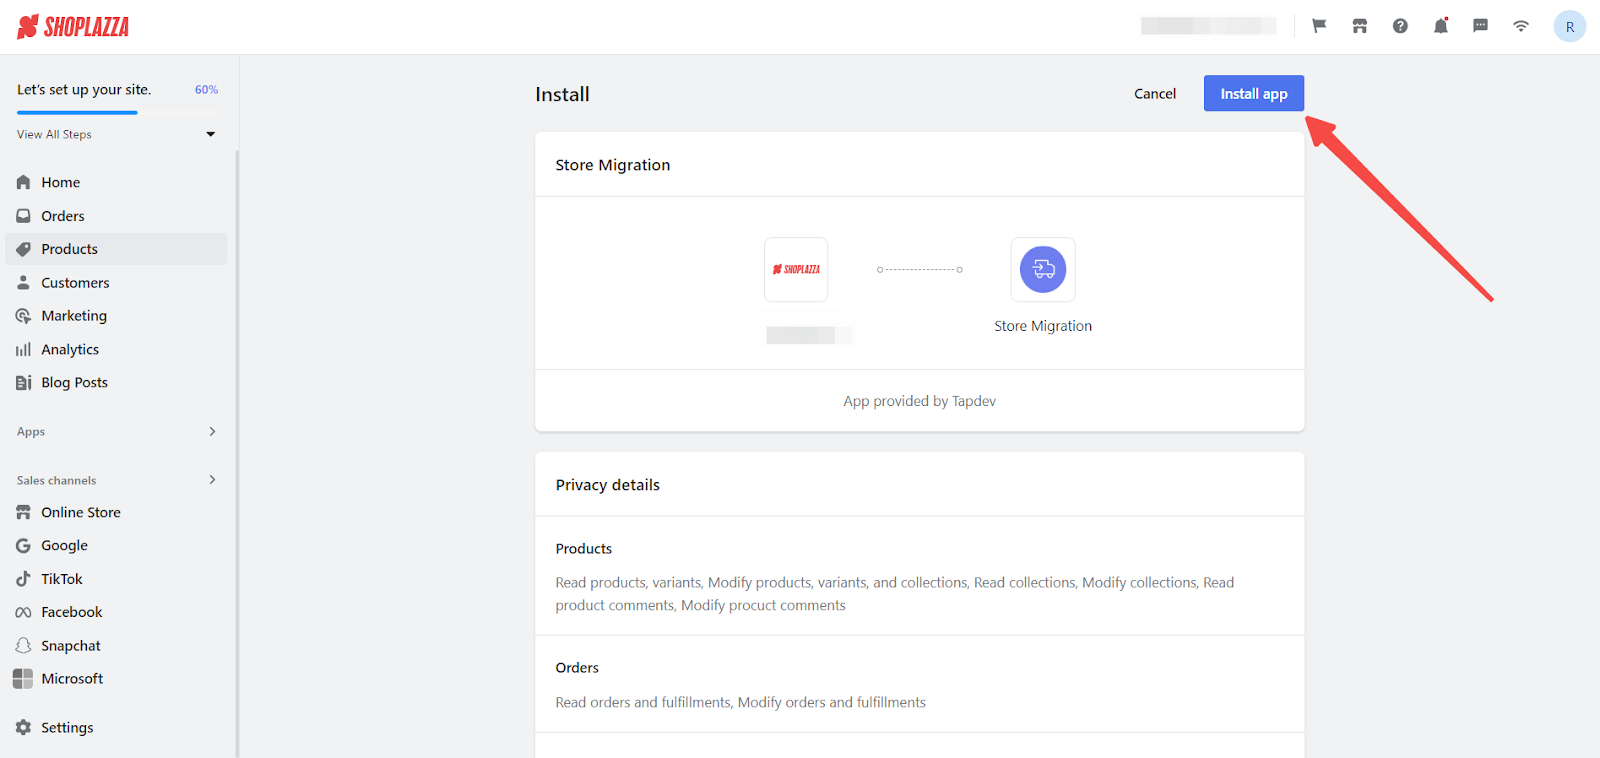
1. Access the app: From your Shoplazza Admin > Apps, click Visit App Store.
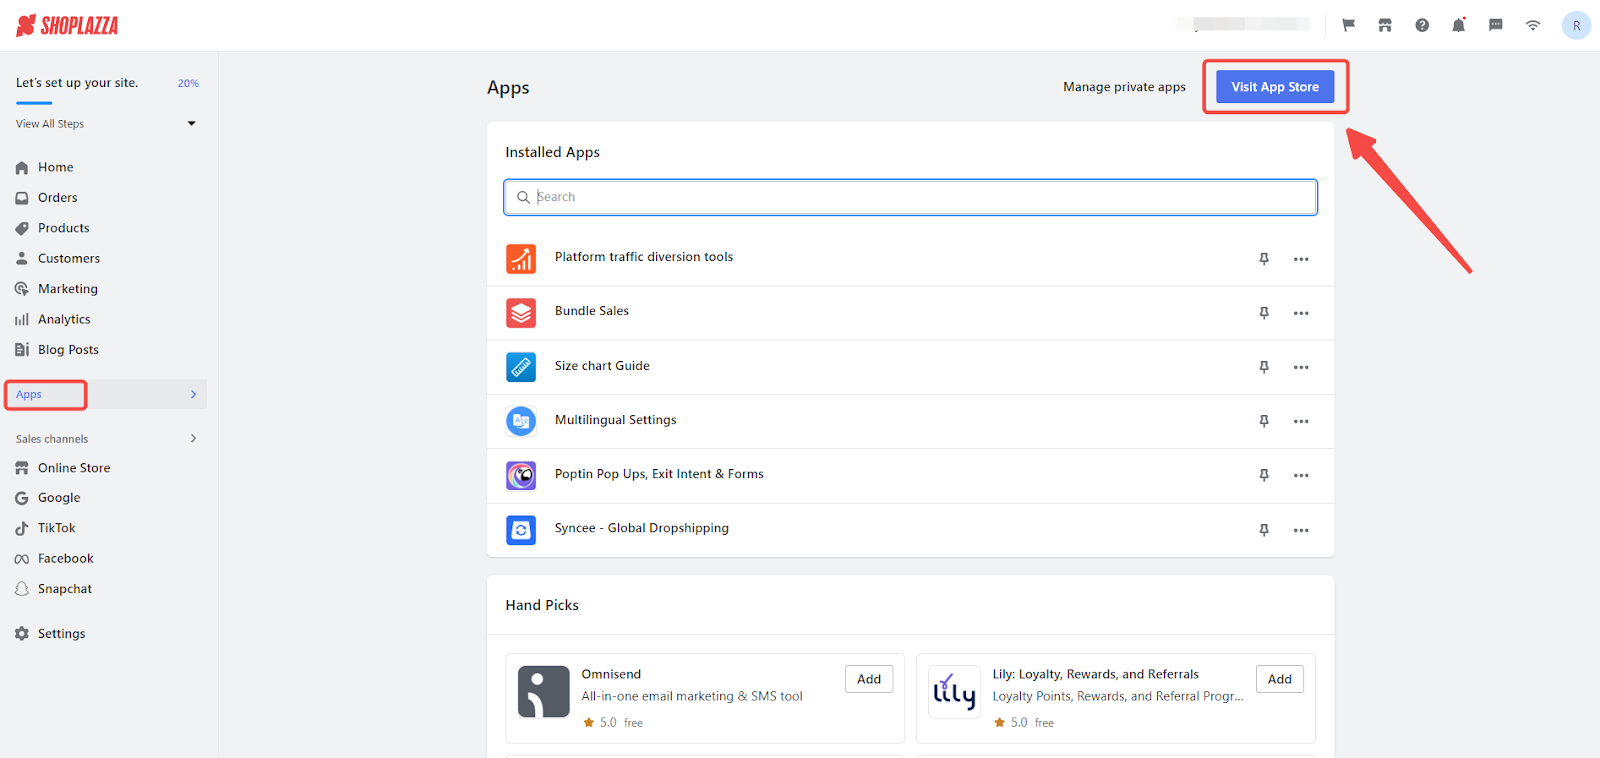
2. Find the app: Search for Store Migration in the search box and click Add app to add it to your store.
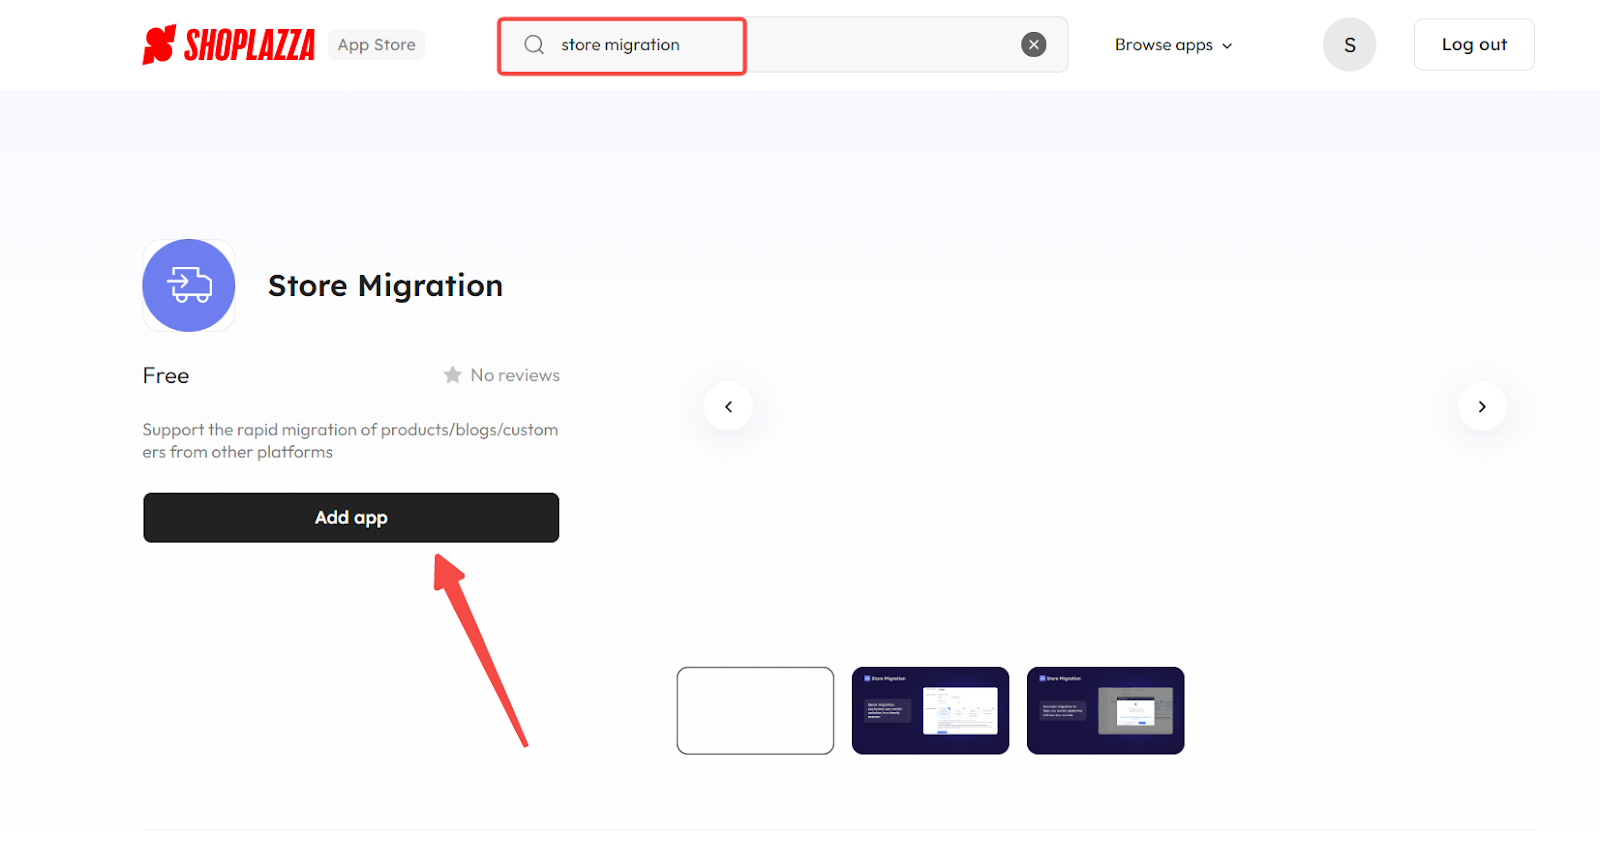
3. Install the app: Click Install app to complete the app installation.
Connecting your Shopify store
After installing the Store Migration app, you need to authorize Shoplazza to access your Shopify data.
1. Select source platform: In the Store Migration app, select Shopify as your source platform, then click Start Migration to proceed.
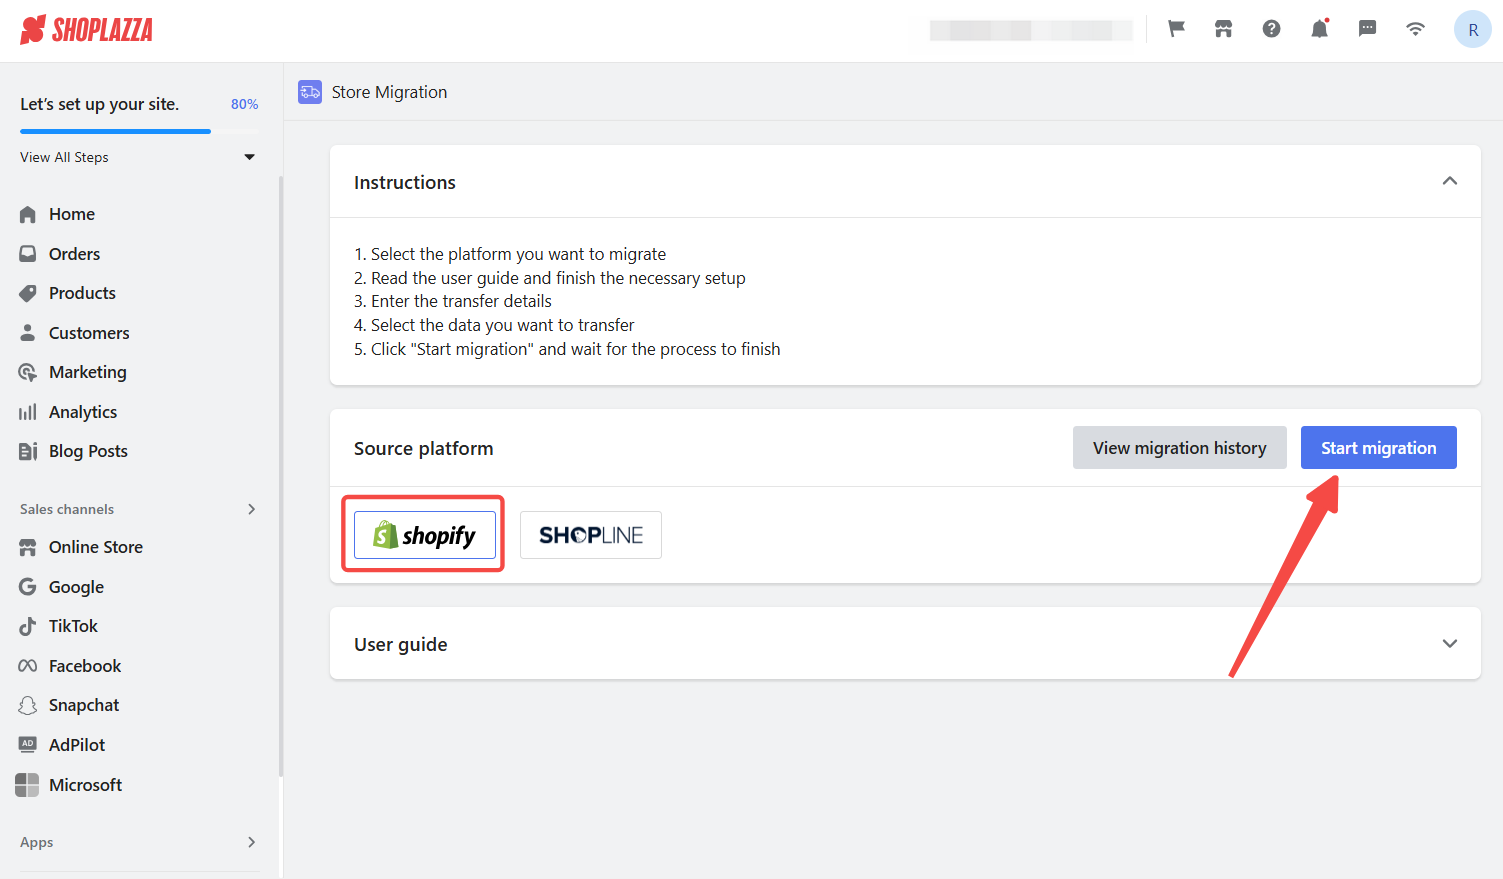
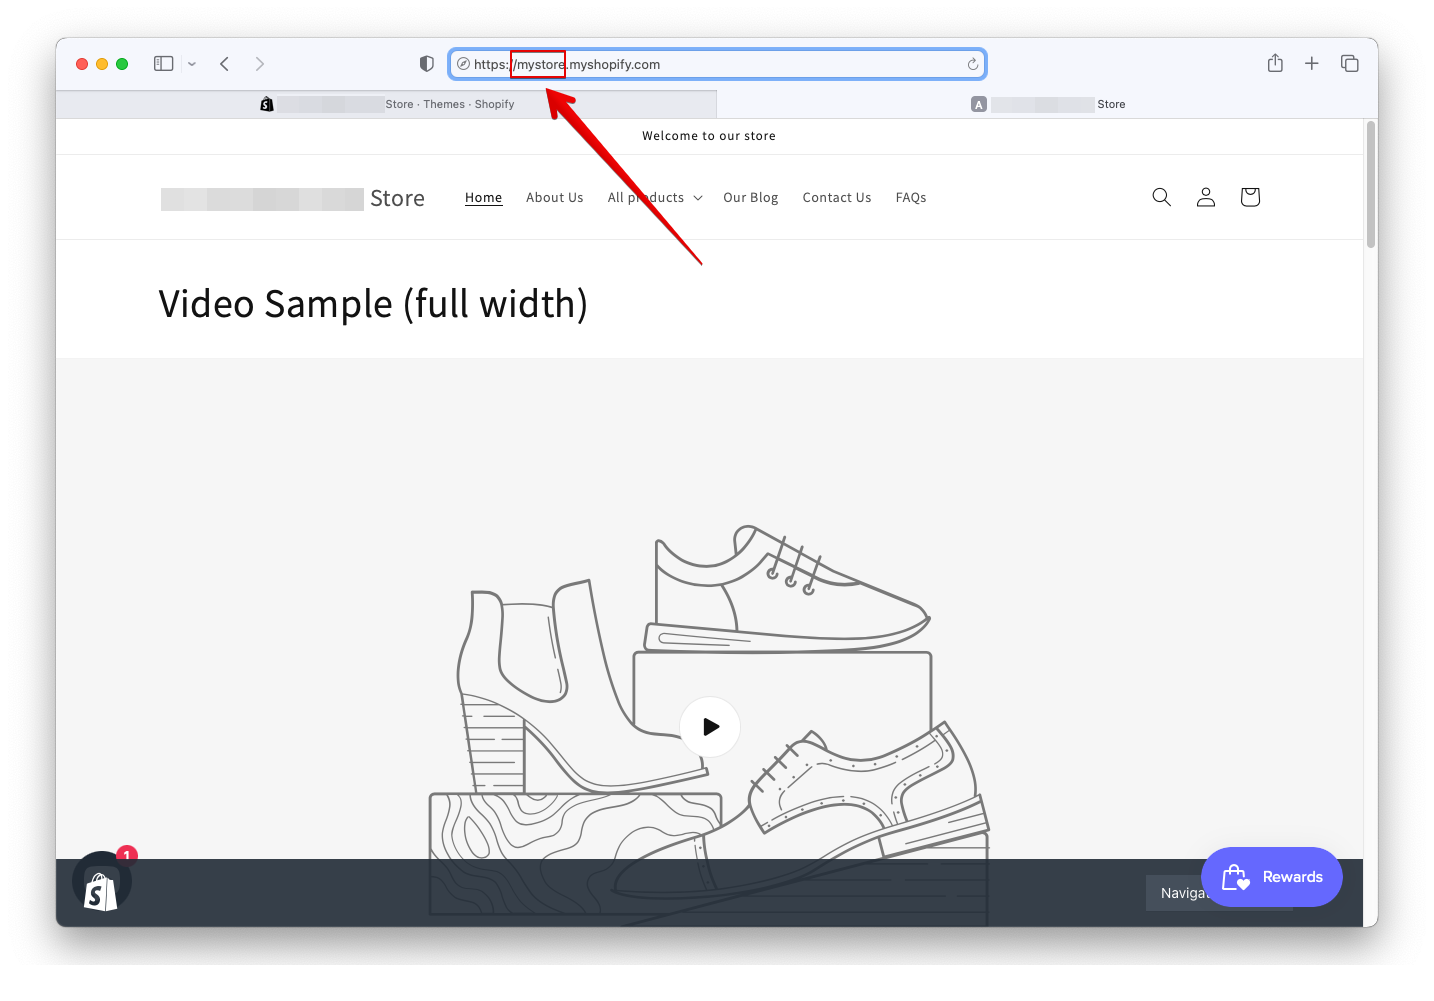
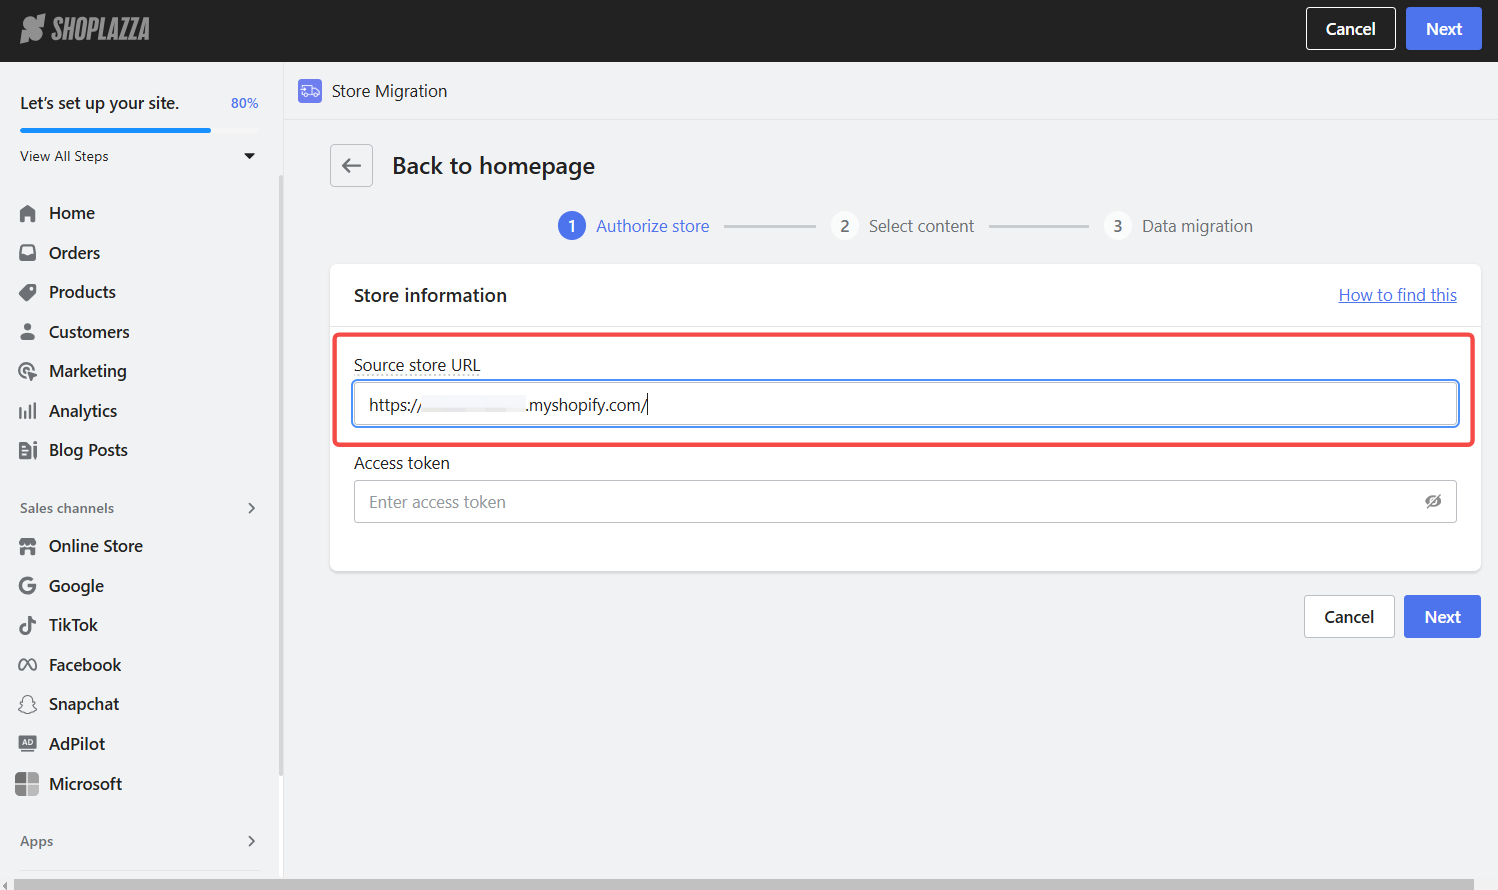
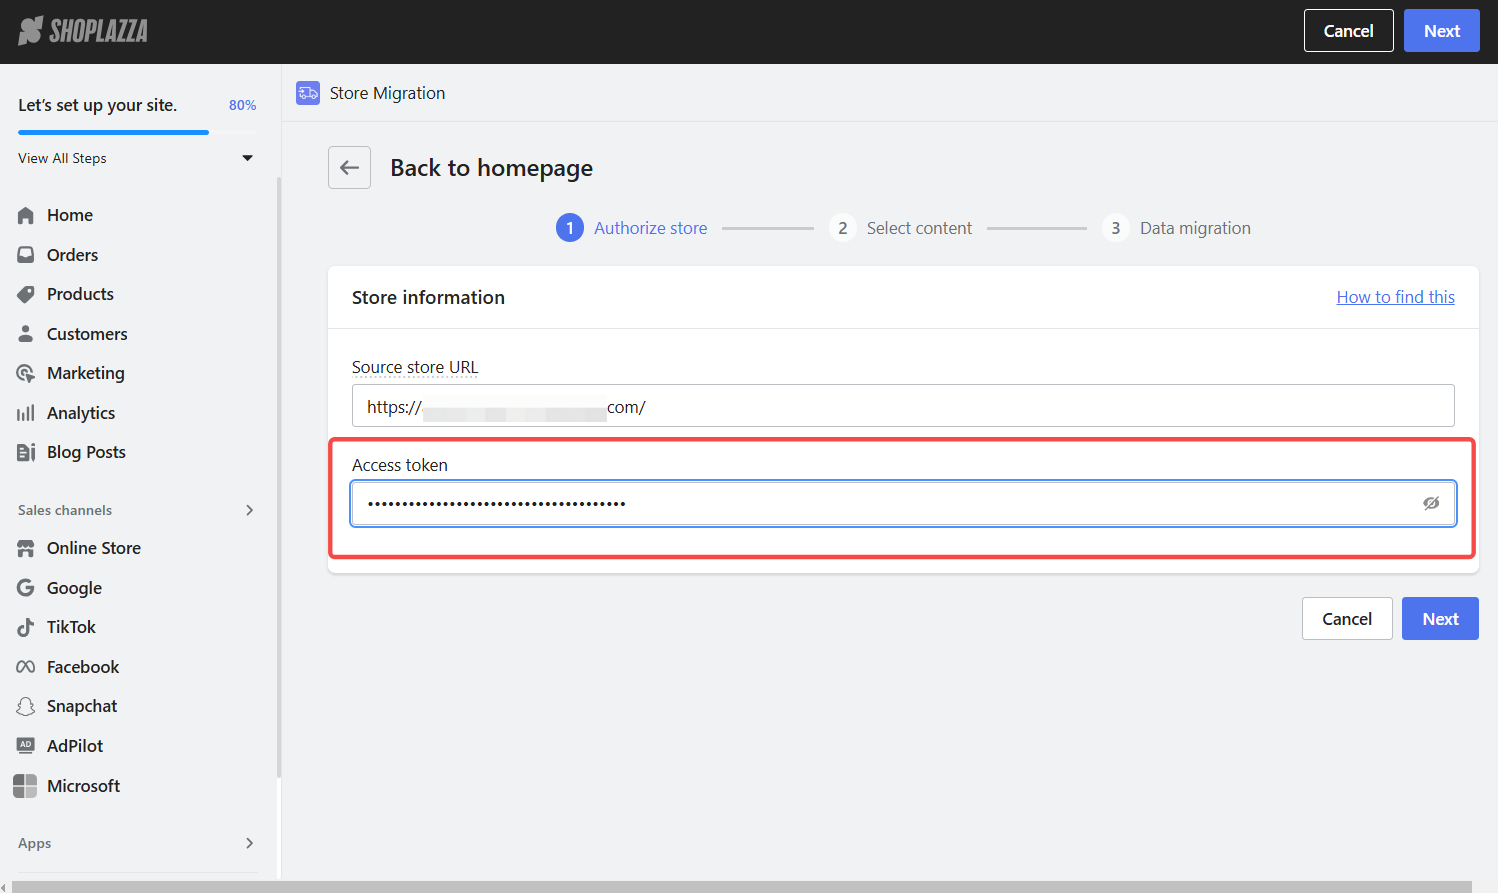
2. Enter your Shopify URL: Input your Shopify URL address into the Shoplazza migration store URL field.
3. Generate your API key & access token: To allow Shoplazza to transfer data from Shopify, you must create a Shopify app by following these steps:
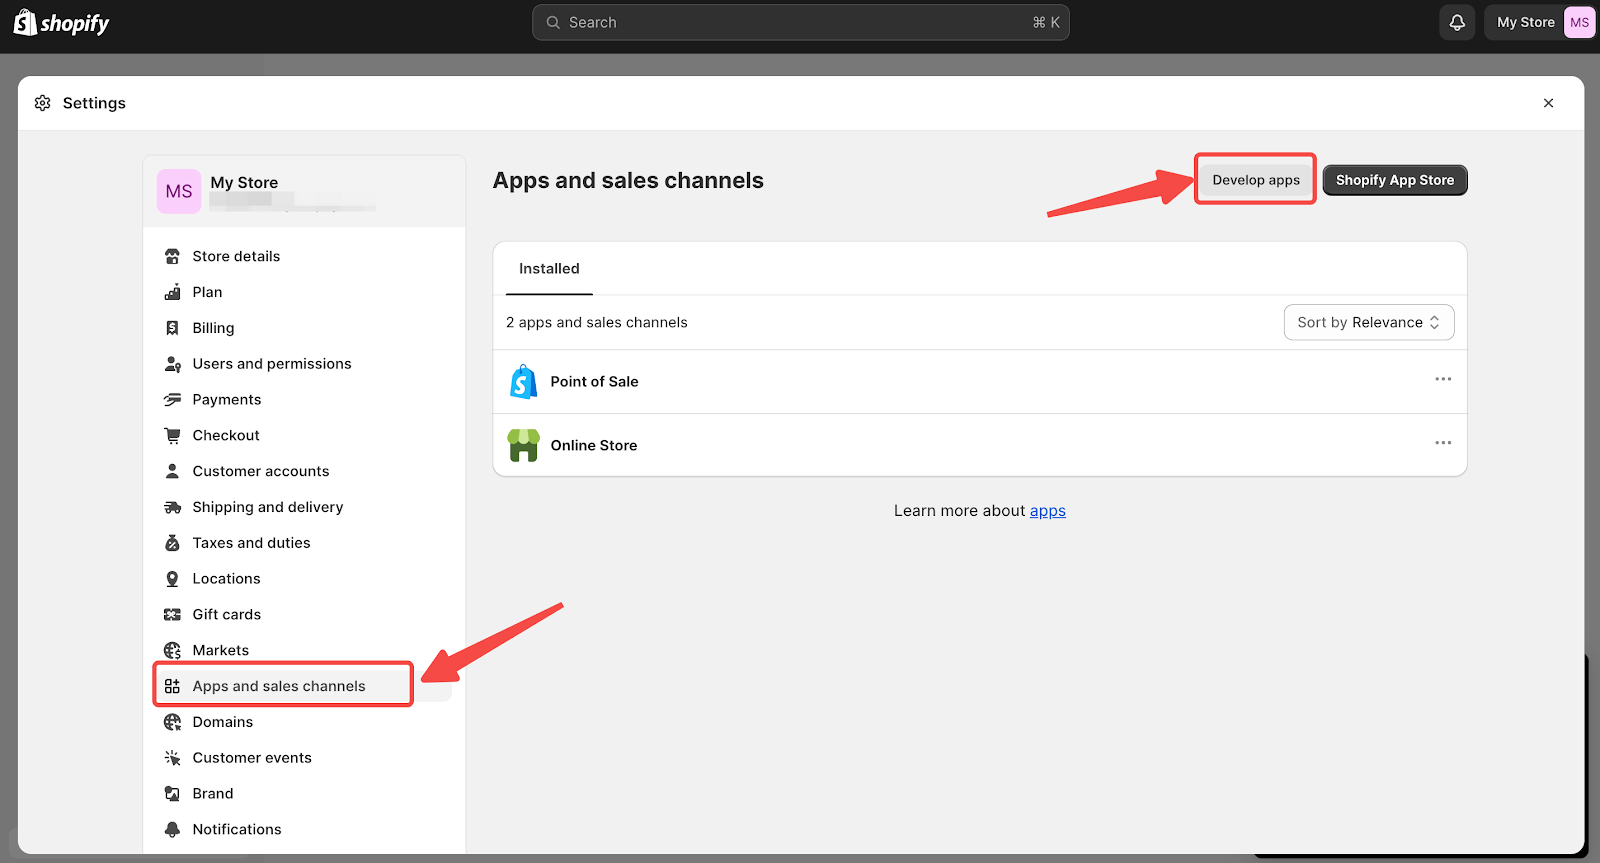
- Create a Migration App in Shopify: Open a new window and navigate to your Shopify Admin > Settings.

- Proceed to app development: In Shopify's settings, go to Apps and sales channels, then Develop apps for new projects or see the note for apps created before.
Note
For Apps Created Before: To find your API key, navigate to Settings > Apps and sales channels > Develop apps in your Shopify admin. Click on the app, then API credentials. More details can be found in the Custom apps and Shopify Admin API guide.
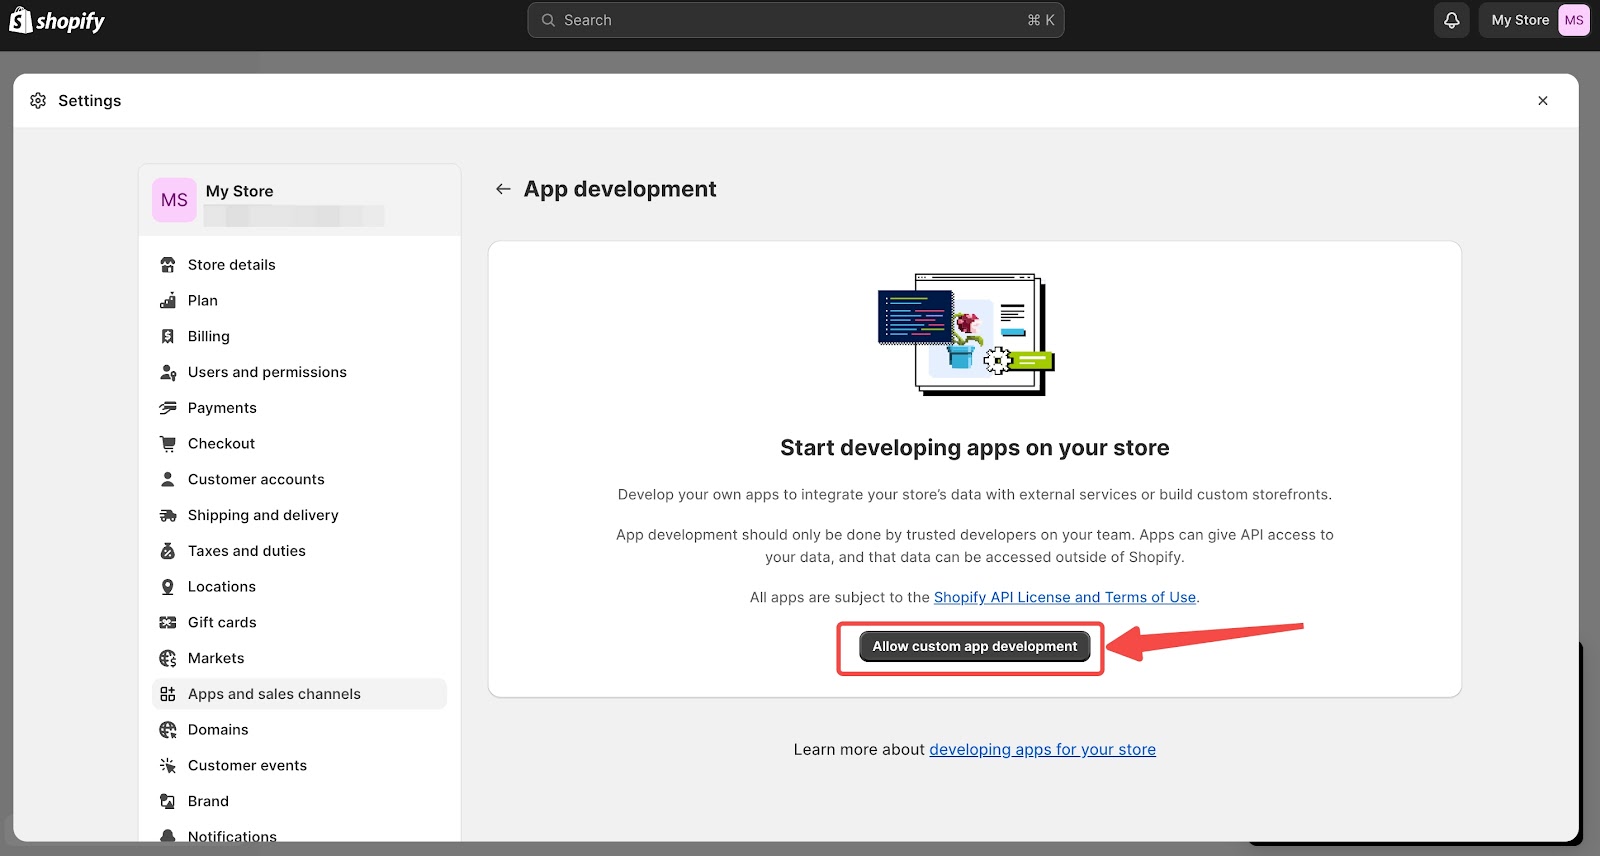
- Begin app and API setup: If this is your first app, initiate the process by selecting Allow custom app development and then clicking on Create an app.
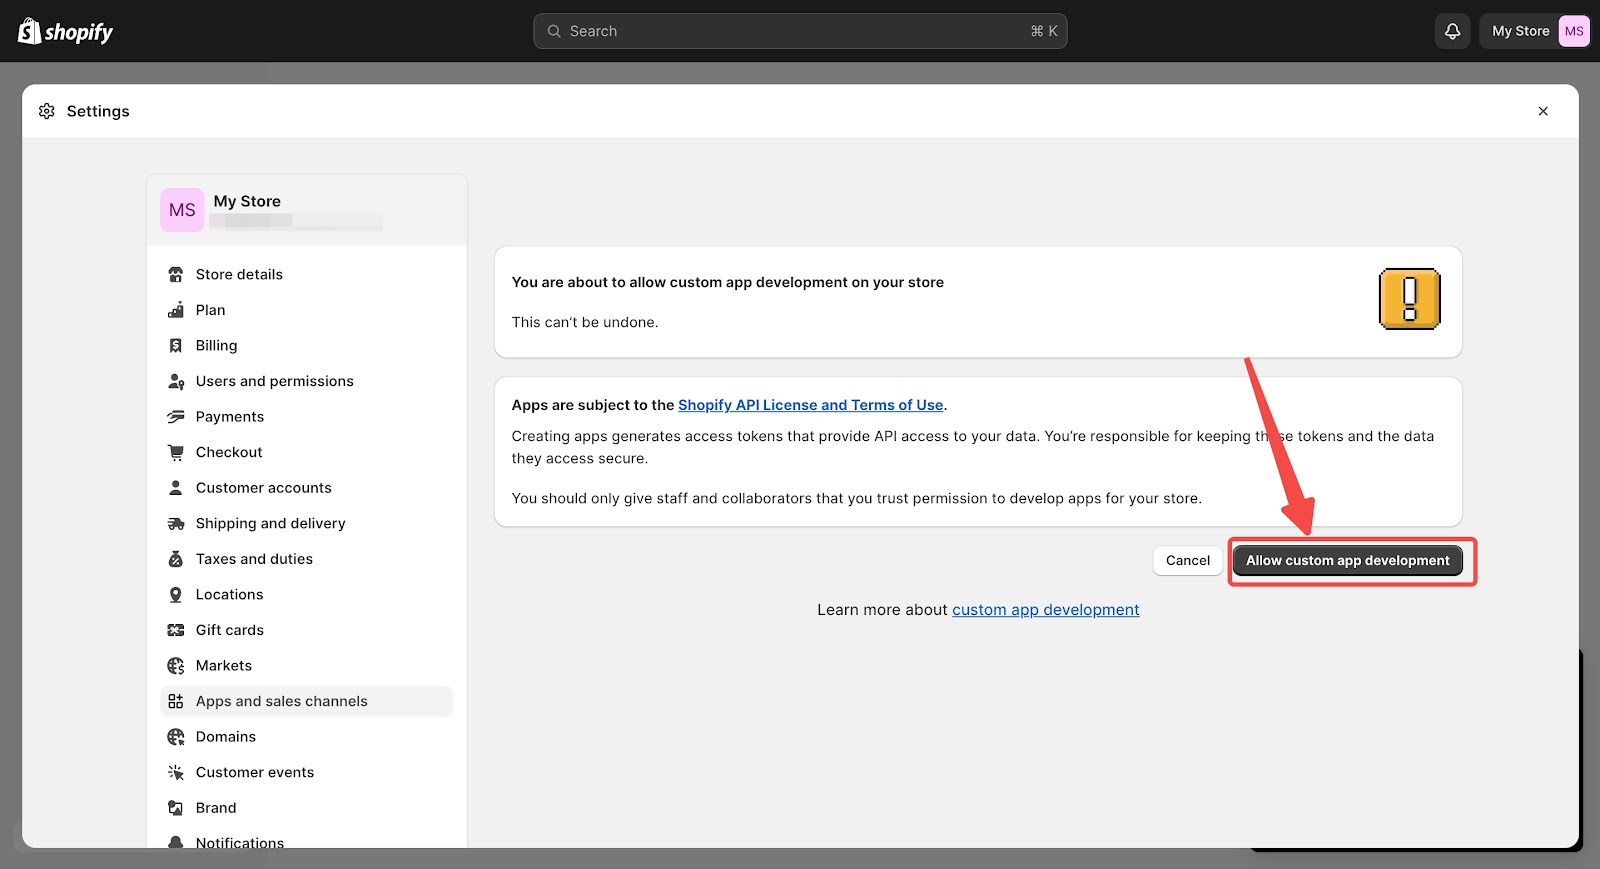
-
Configure app details: A popup will appear prompting you to input essential details about your new app. Here, you'll need to:
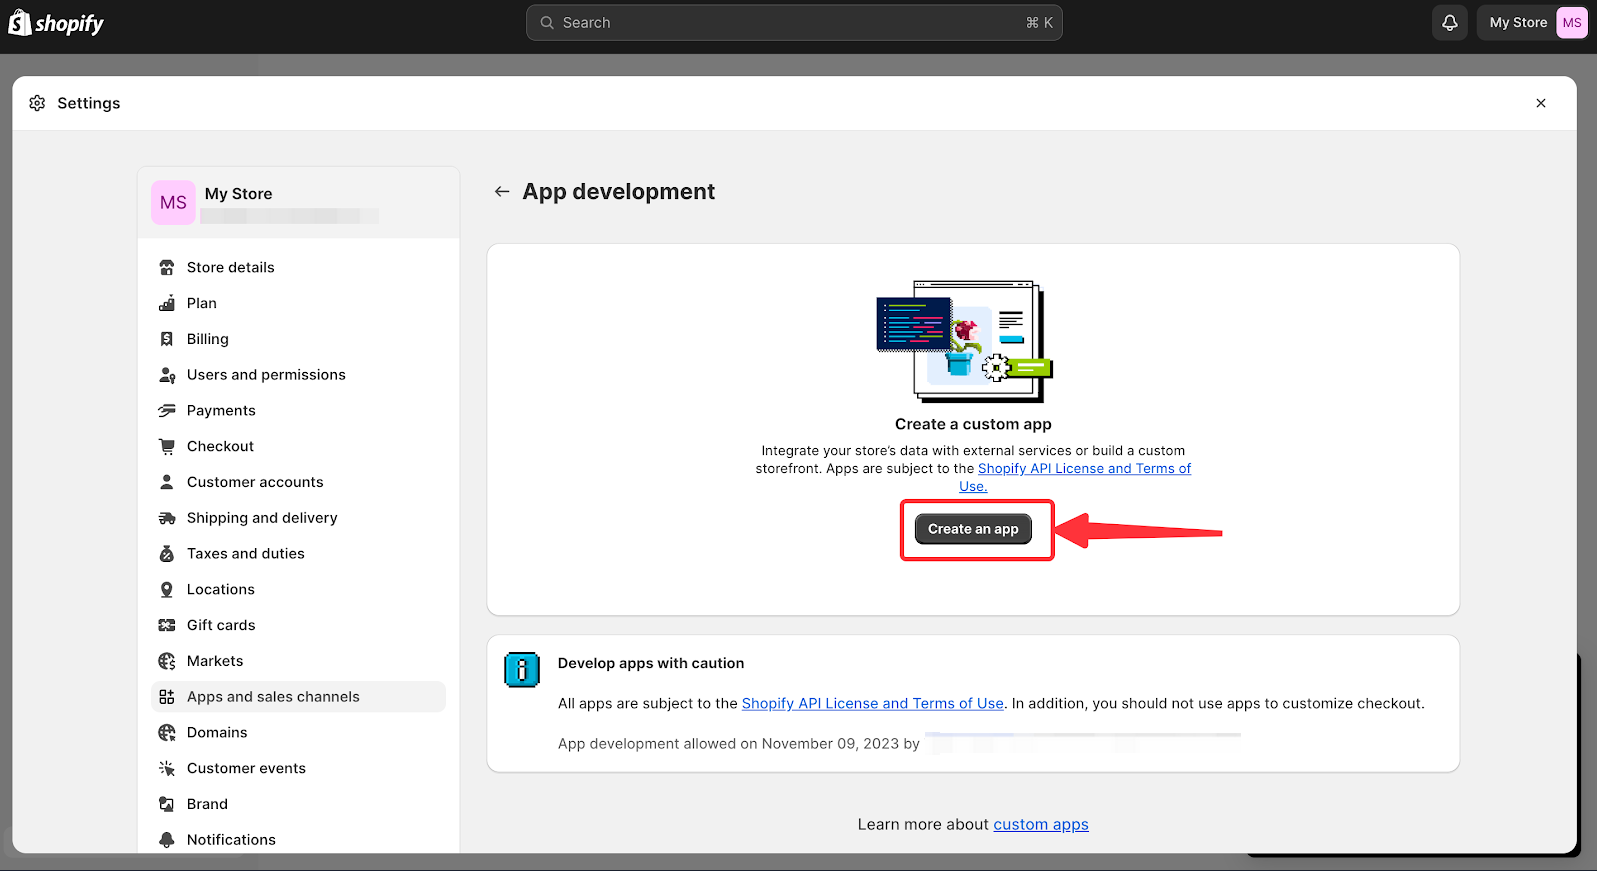
- Name your app: Input a name for your app in the designated field. Since the primary goal is to obtain an API for migration, the specific name of the app isn't critical.
- Assign a developer email: Choose the email address associated with the app developer from the dropdown menu.
- Finalize app creation: Confirm the details by clicking on Create app to proceed with the app's setup.

- Configure admin API integration: Navigate to the Configuration section and select Configure located under Admin API integration.
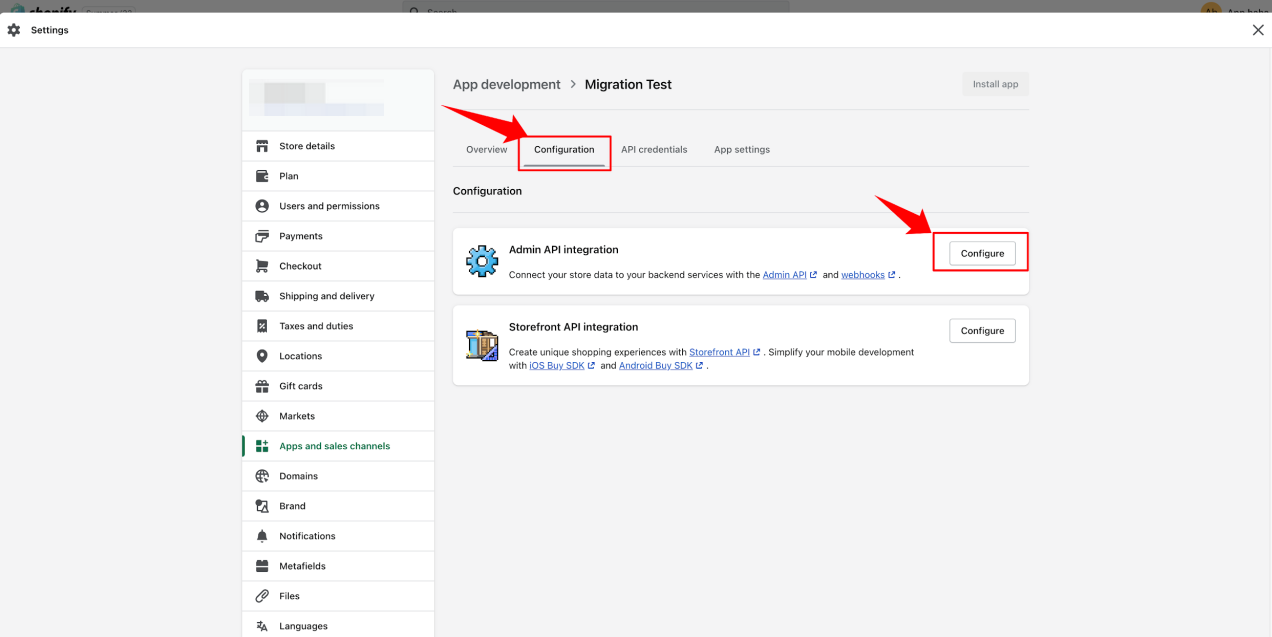
-
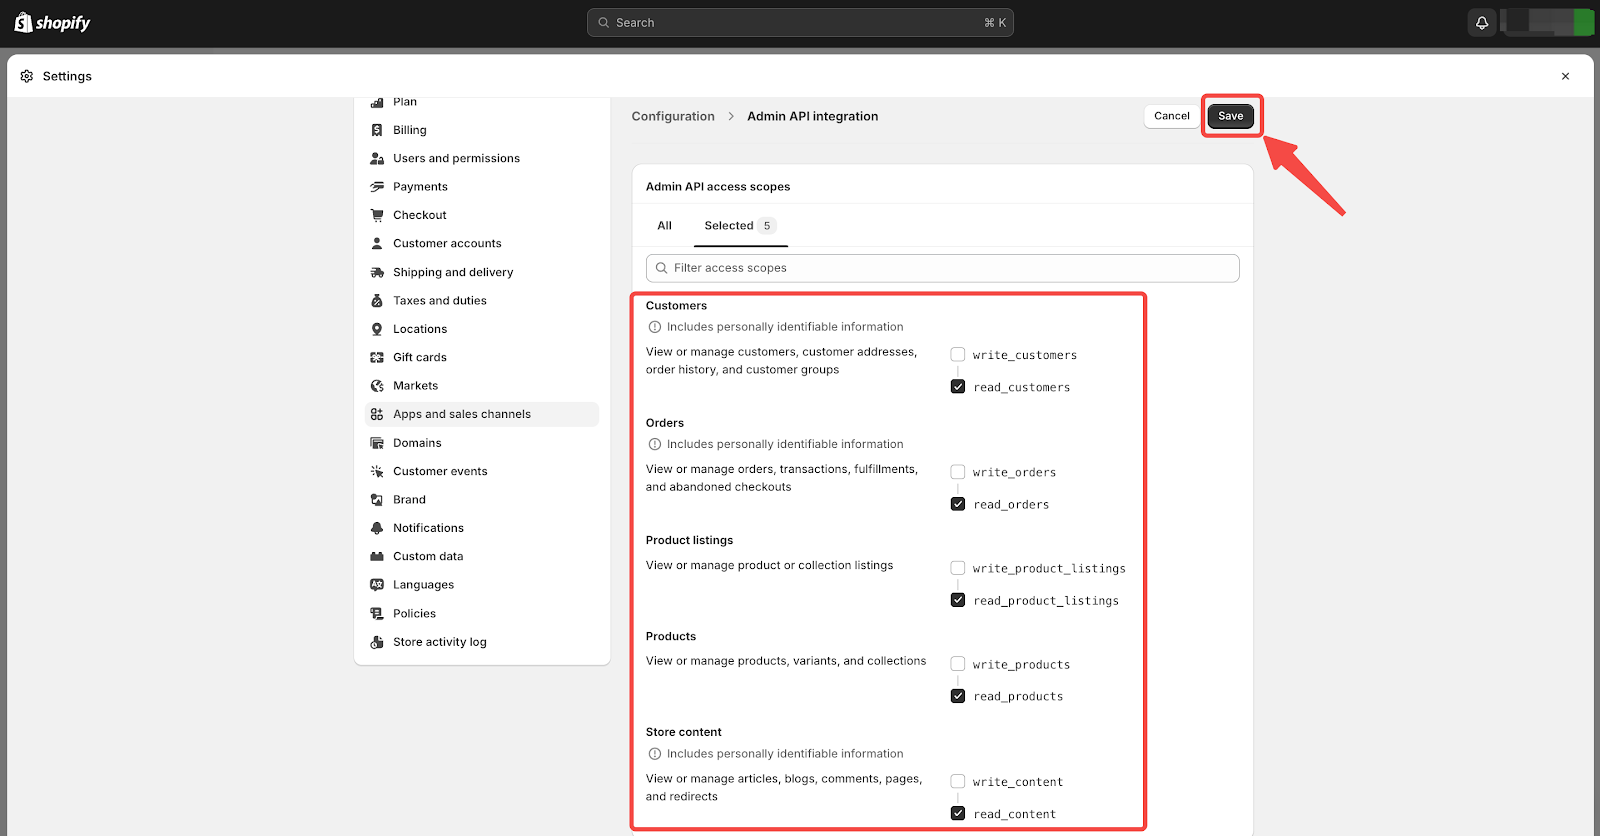
Select admin API access scopes: Identify and choose the appropriate Admin API access scopes that align with the types of data you plan to migrate.
- Enable the "read" function for the following scopes:
- Customers
- Orders
- Product listings
- Products
- Store content
- After selecting the necessary scopes, click Save.
- Enable the "read" function for the following scopes:
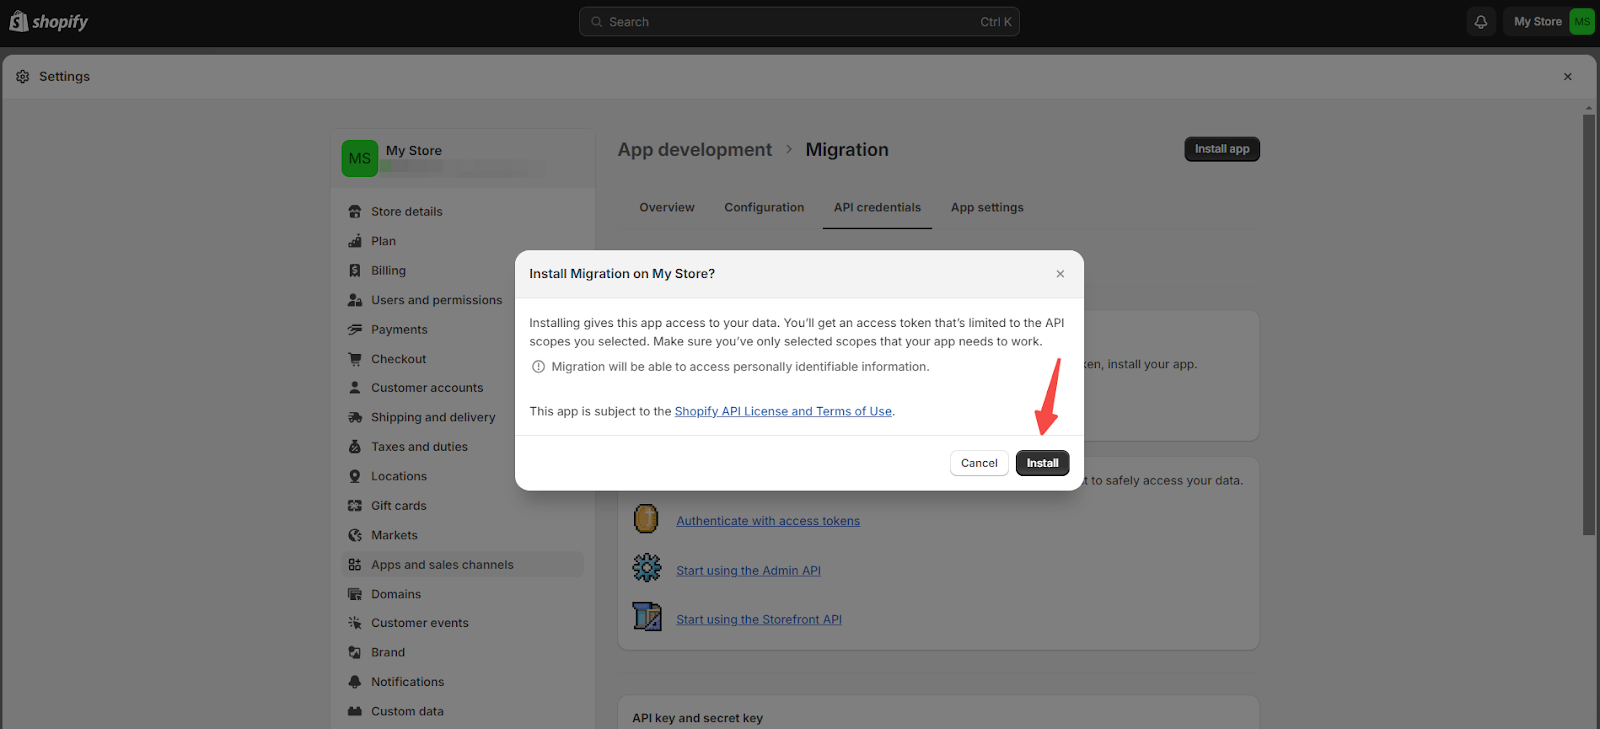
- Install the application: After adjusting the API settings, proceed to API credentials within the app's configuration and click on Install app found under Access tokens. This action initiates the installation of your migration-specific app, enabling the actual data transfer process.

- App installation confirmation: A popup window will emerge asking for your confirmation to complete the app installation. By agreeing to this step, you authorize the app to access and migrate your store data. Click Install to confirm and proceed.
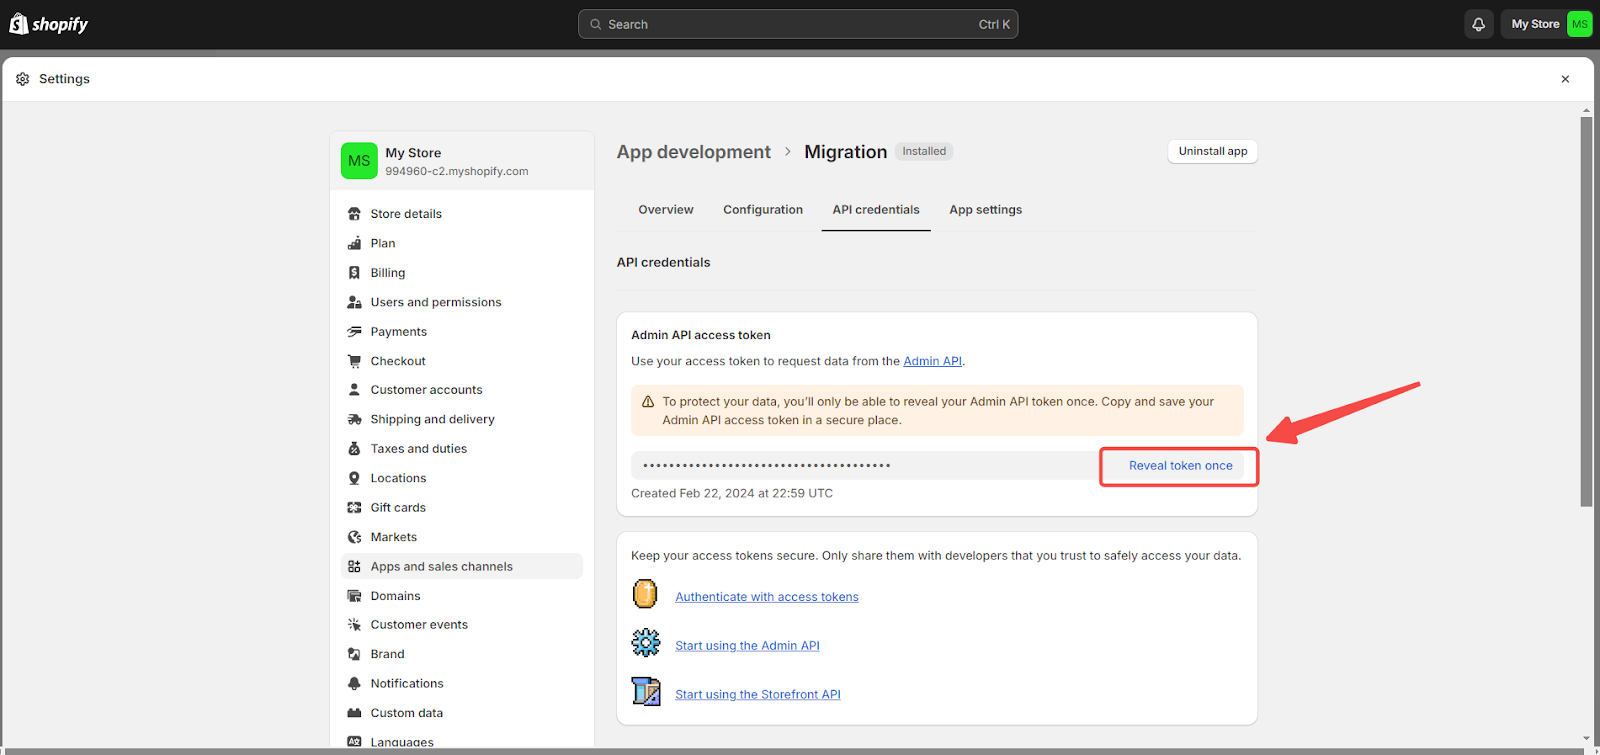
- Reveal admin API access token: Once the app is installed, you'll have the option to view your Admin API access token by selecting Reveal token once. This token is a very important component for authorizing the migration process in Shoplazza.
Note
The Admin API access token is displayed only once. It's essential to securely note down this token immediately upon reveal to prevent loss of access.
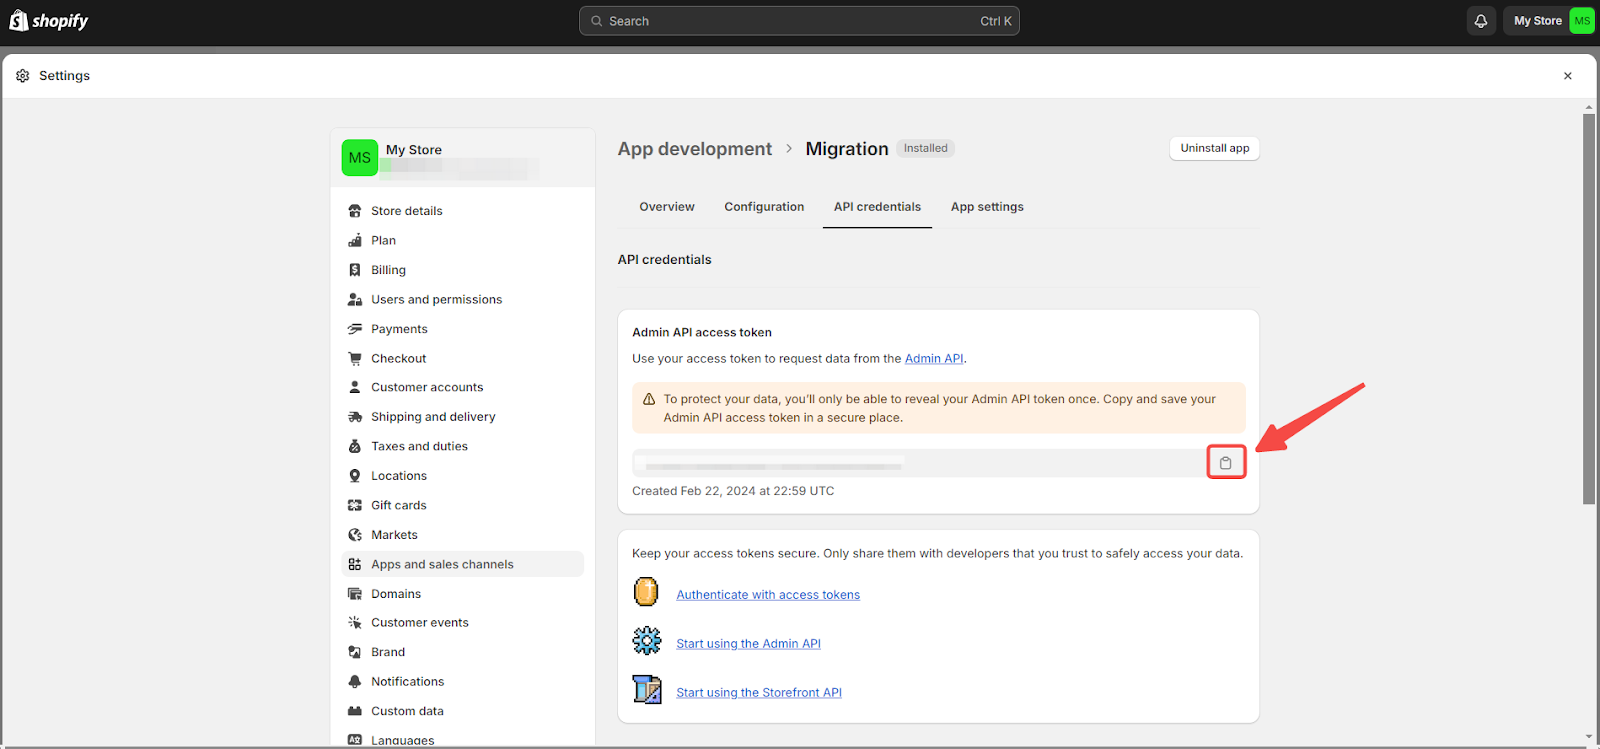
- Return to Shoplazza: Copy the Admin API access token, go back to the Store Migration app in Shoplazza, and paste it into the required field.
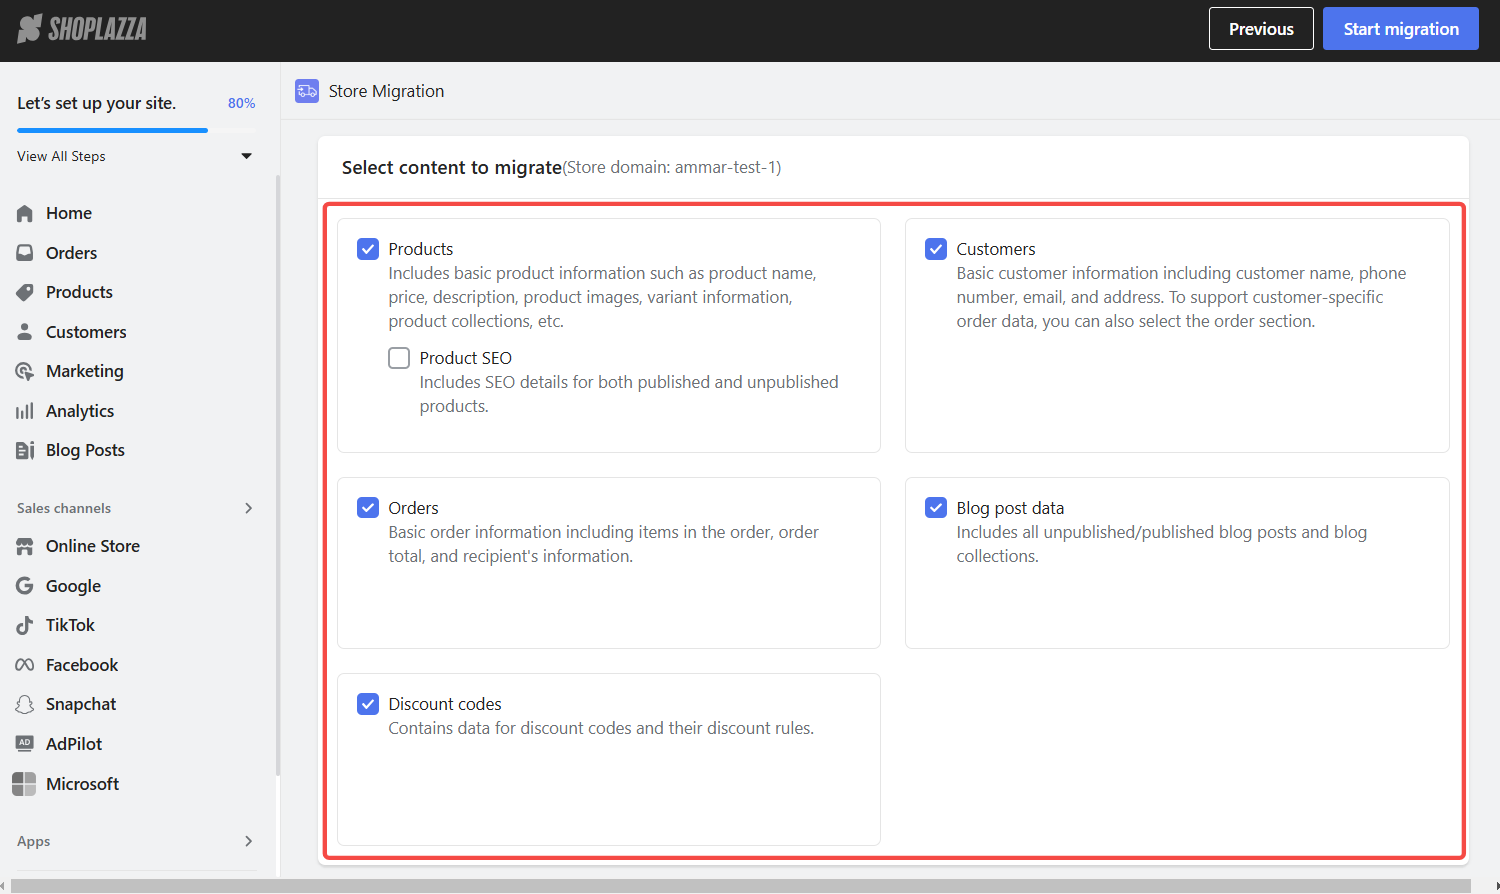
Selecting content for migration
In the Store Migration dashboard, choose the types of data you want to migrate:
- Products – Includes product names, descriptions, prices, images, variants, and collections.
-
- Optionally migrate SEO details by selecting "Product SEO."
-
Customers – Transfers basic customer details, including names, phone numbers, emails, and addresses.
- For customer-specific order data, also select "Orders."
- Orders – Transfers order details, including items, order totals, and recipient information.
- Blog post data – Migrates all published and unpublished blog posts and blog collections.
- Discount codes – Moves discount codes and their associated rules.
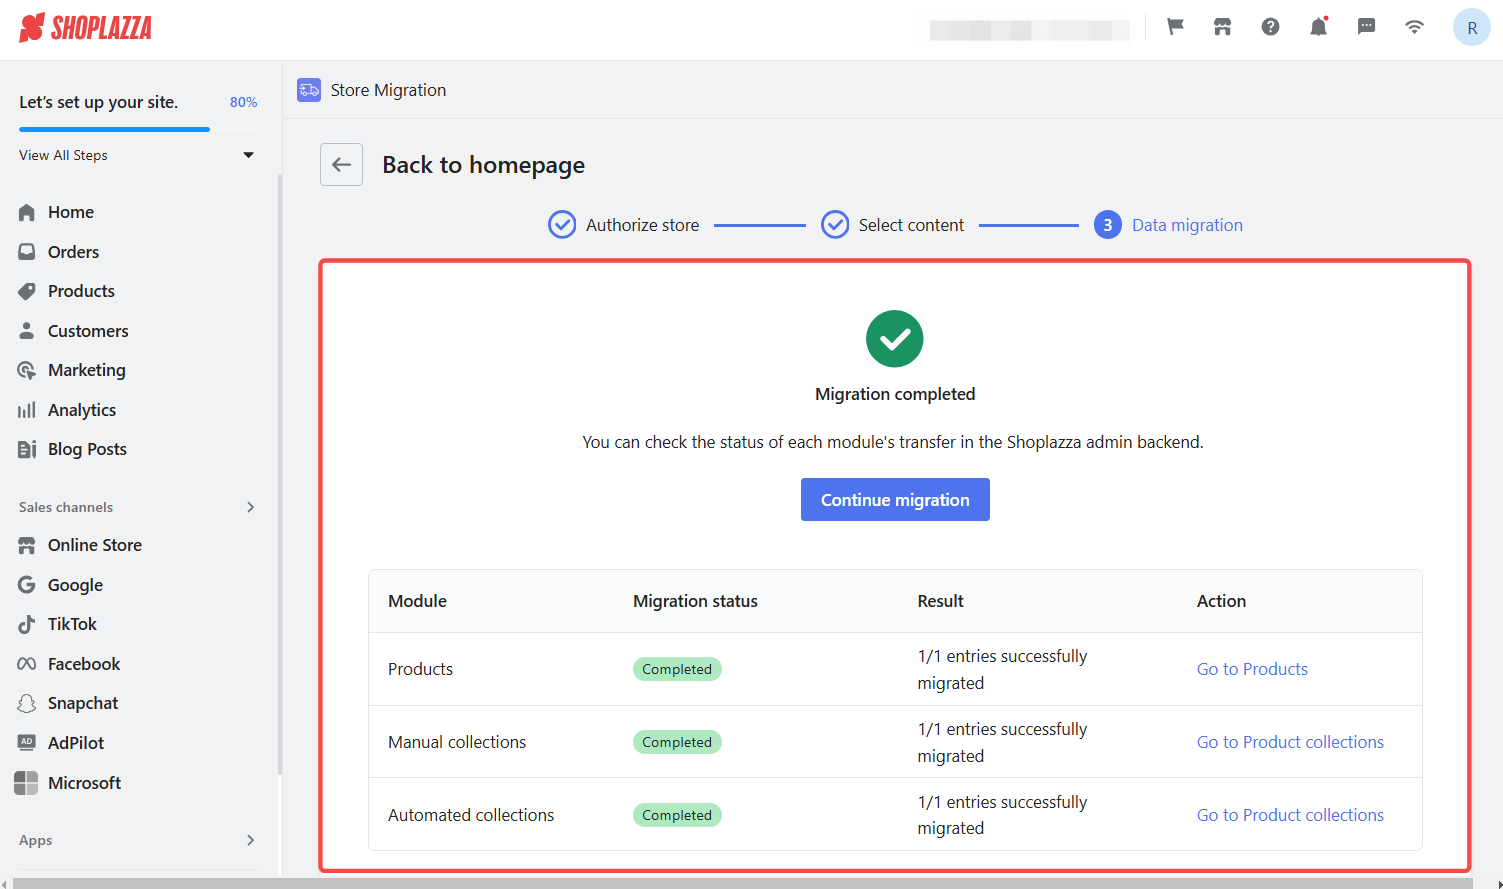
Reviewing your migration results
Once migration is complete, verify that all data has been successfully transferred.
- Monitor migration progress – A dedicated dashboard keeps you updated in real-time.
- Verify data after migration – Cross-check product listings, orders, and customer details to ensure everything transferred correctly.
- Troubleshoot if needed – If data is missing, check your API credentials and retry the migration.
Following these steps and utilizing the Store Migration tool simplifies the transition to Shoplazza. This guide is designed to make your migration experience straightforward and efficient, ensuring a successful transfer of your store's valuable data. With the right preparation and understanding of the process, moving your store to Shoplazza can be a smooth and manageable task.


Comments
Please sign in to leave a comment.