
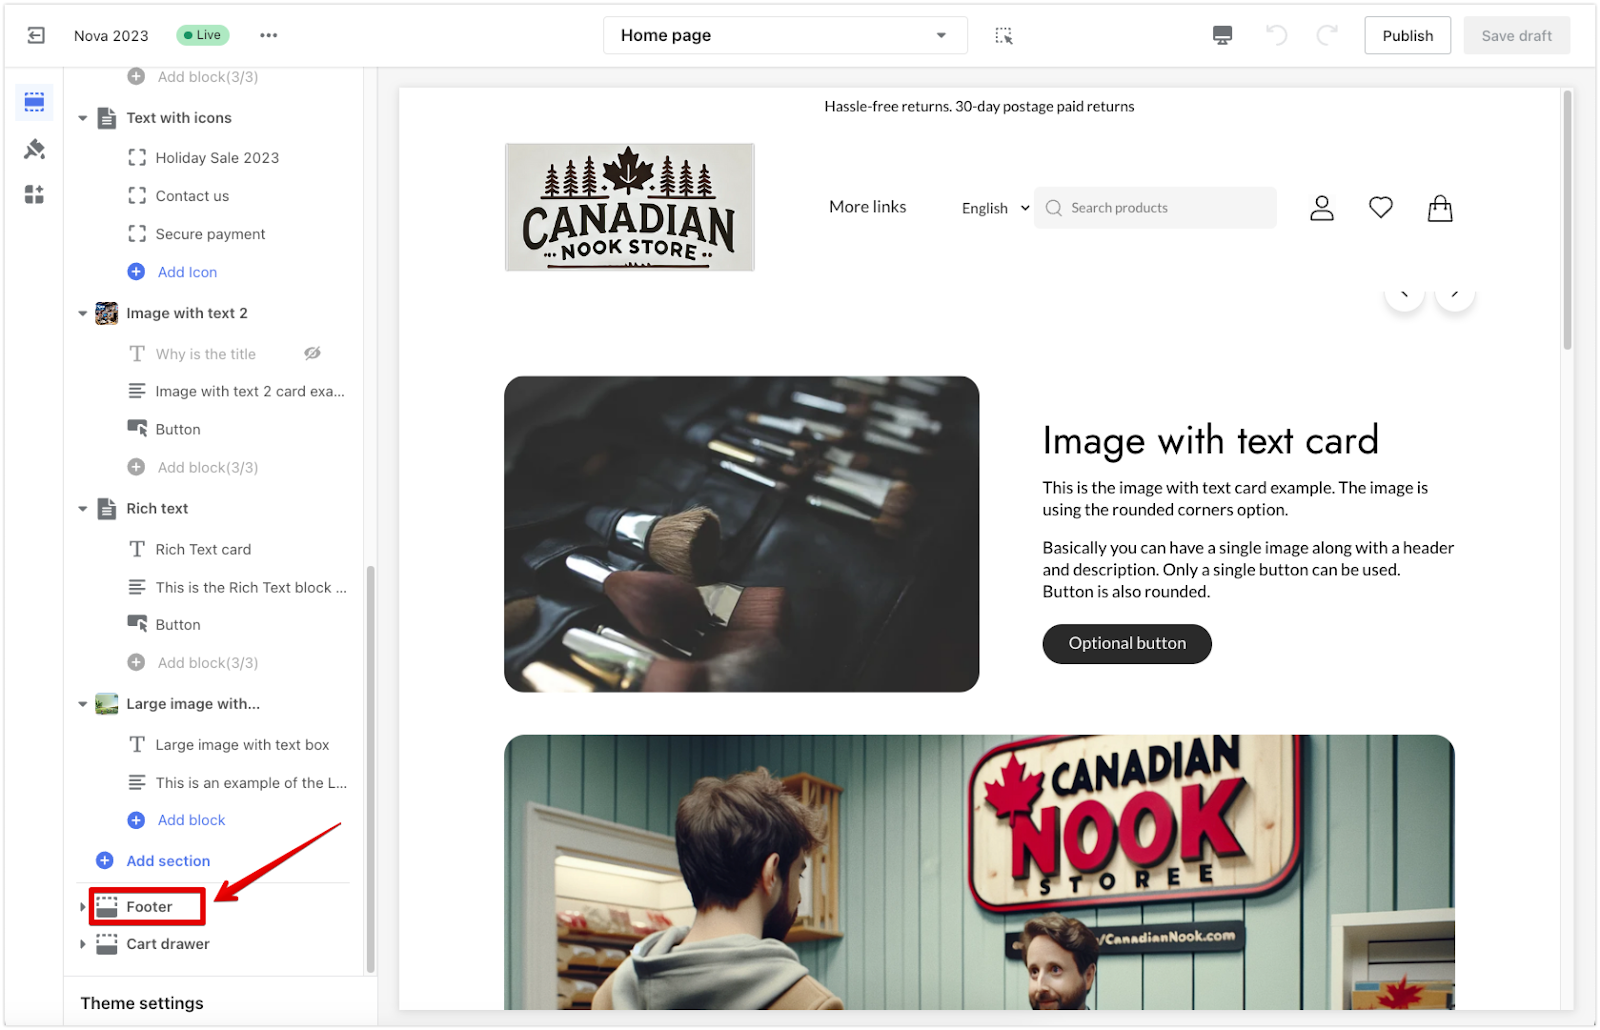
The footer section is the navigation at the bottom of your web pages, providing quick access to important links like store policies, terms, and introductions. It helps build trust and improves user experience by making it easy to find information. The Hero theme, for instance, has a well-organized footer layout. Depending on the Shoplazza theme you are using, certain features in the footer may or may not be available. An example of this can be seen in the Nova 2023 theme below.
Configuring footer section
1. Start from Shoplazza admin: Navigate to your Shoplazza admin > Online Store > Themes, then click Customize next to the theme you want to modify.
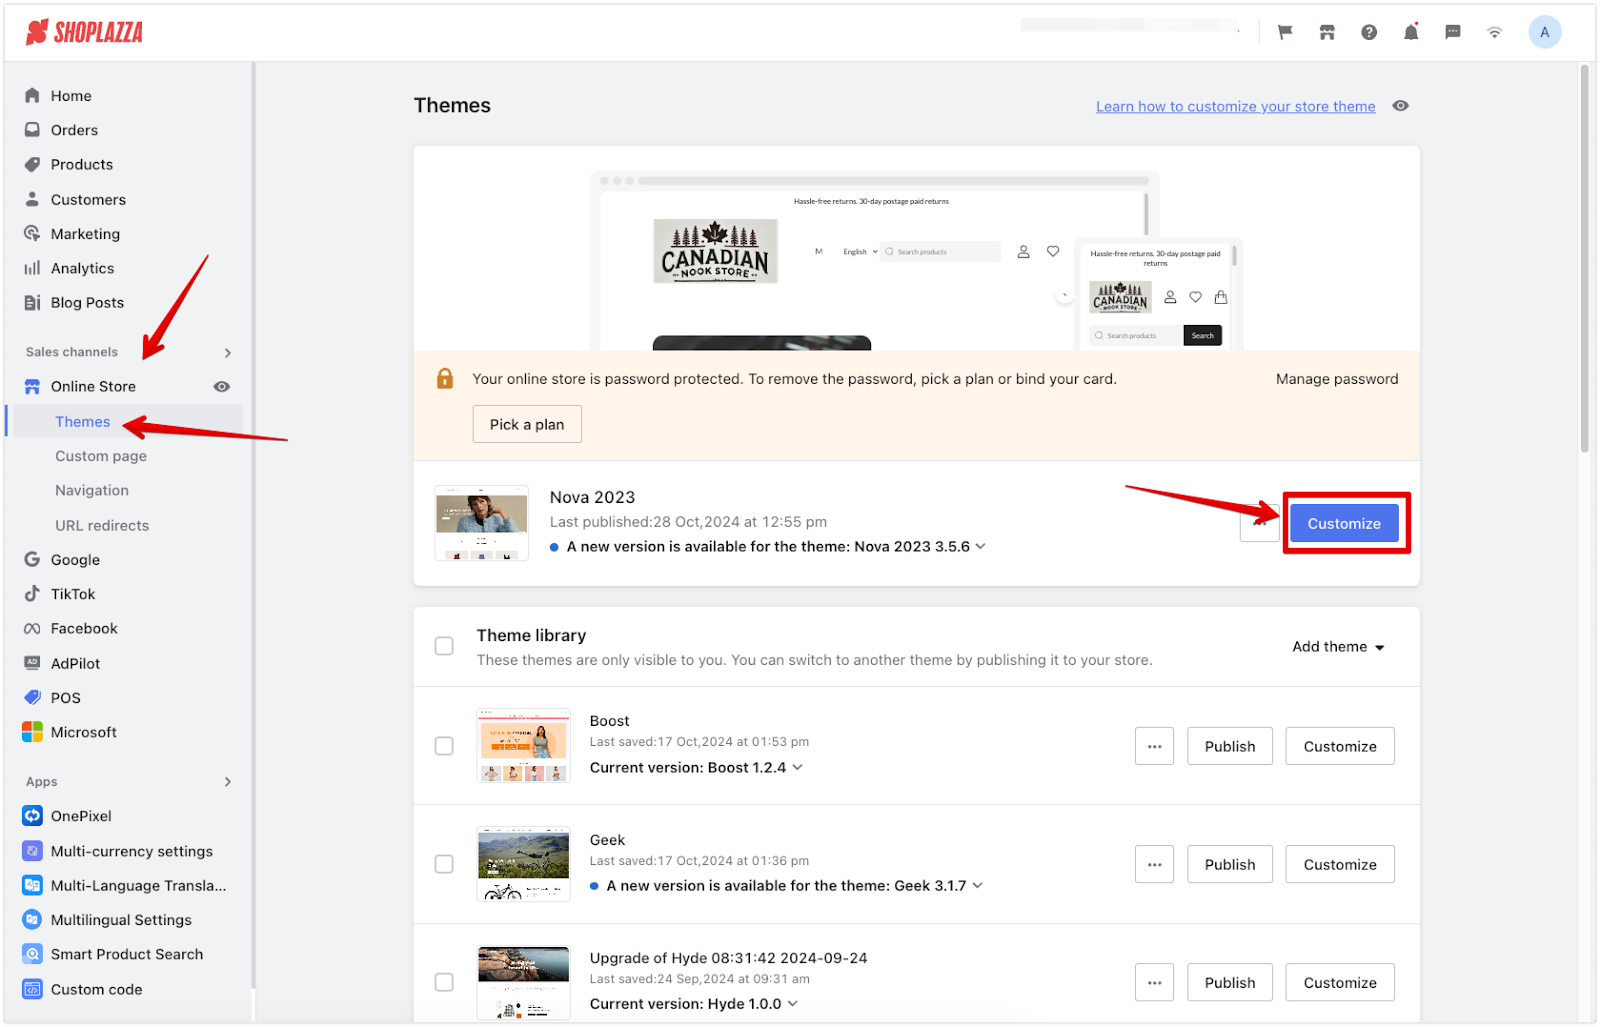
2. Edit the footer: Scroll down and click the Footer title to modify its properties.
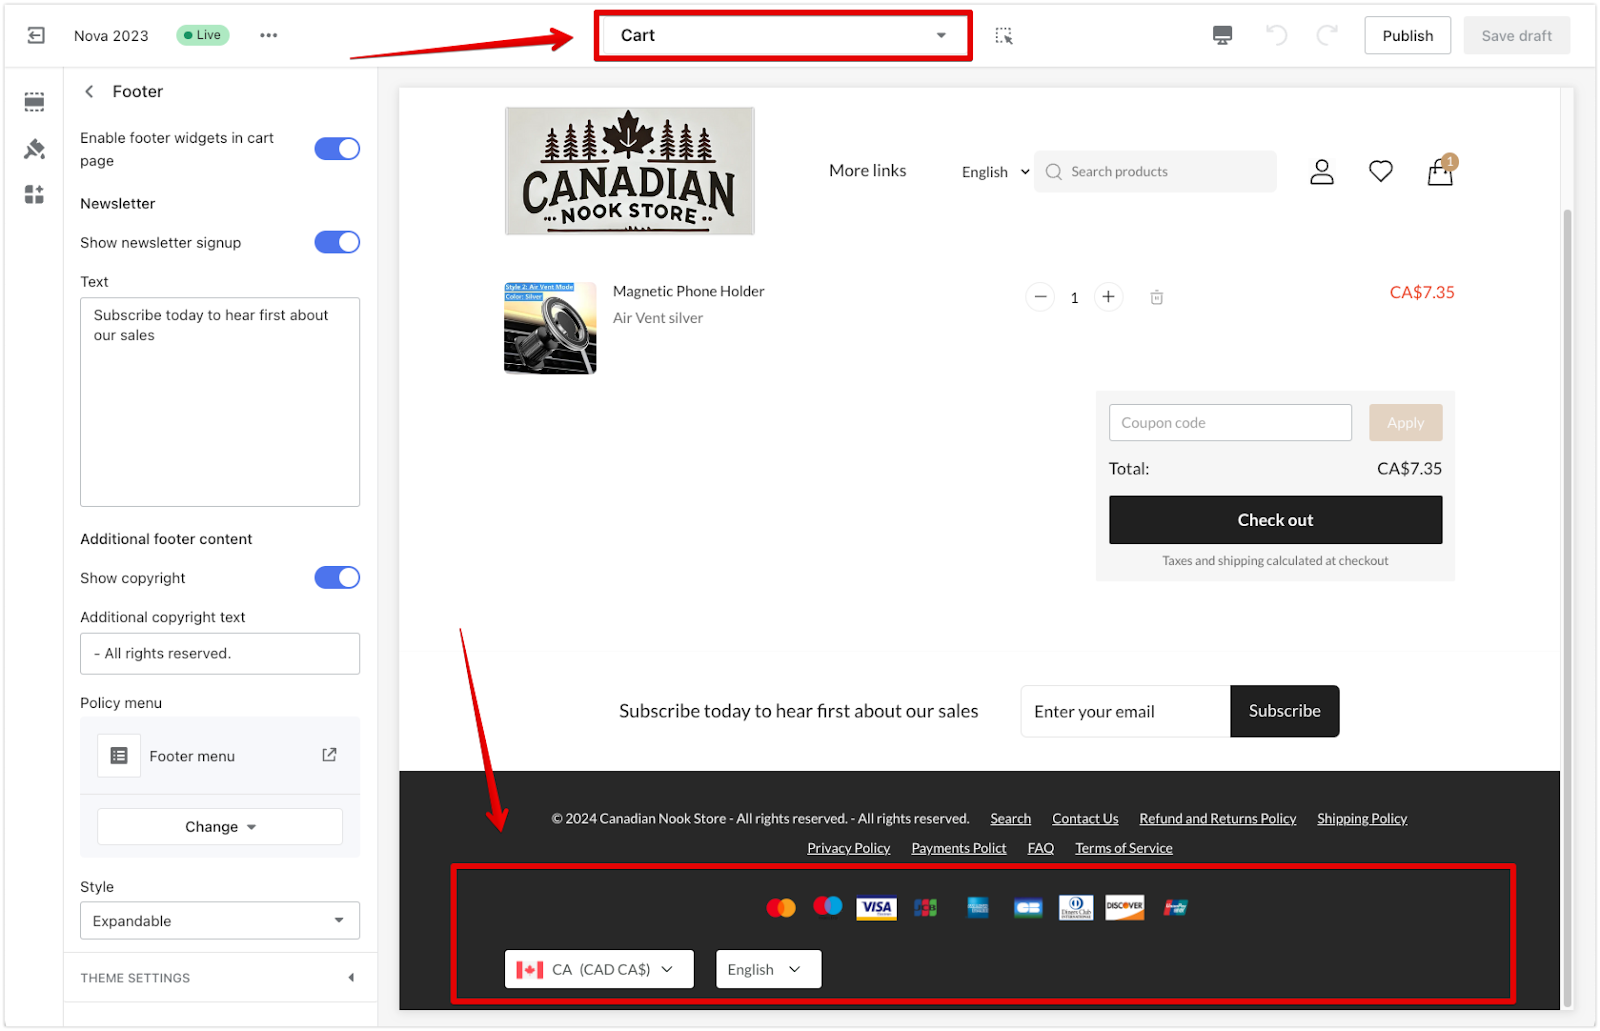
Enabling footer widgets on the cart page
This feature allows you to display footer widgets directly on the cart page, providing users with easy access to essential information even during checkout.
1. Activating widgets in the cart: Toggle the Enable footer widgets in the cart page setting to allow footer widgets to appear.
Newsletter subscriptions
Including a newsletter signup module in your footer encourages visitors to stay updated with store news and offers.
1. Enable the signup module: Activate the newsletter signup option in the footer menu.
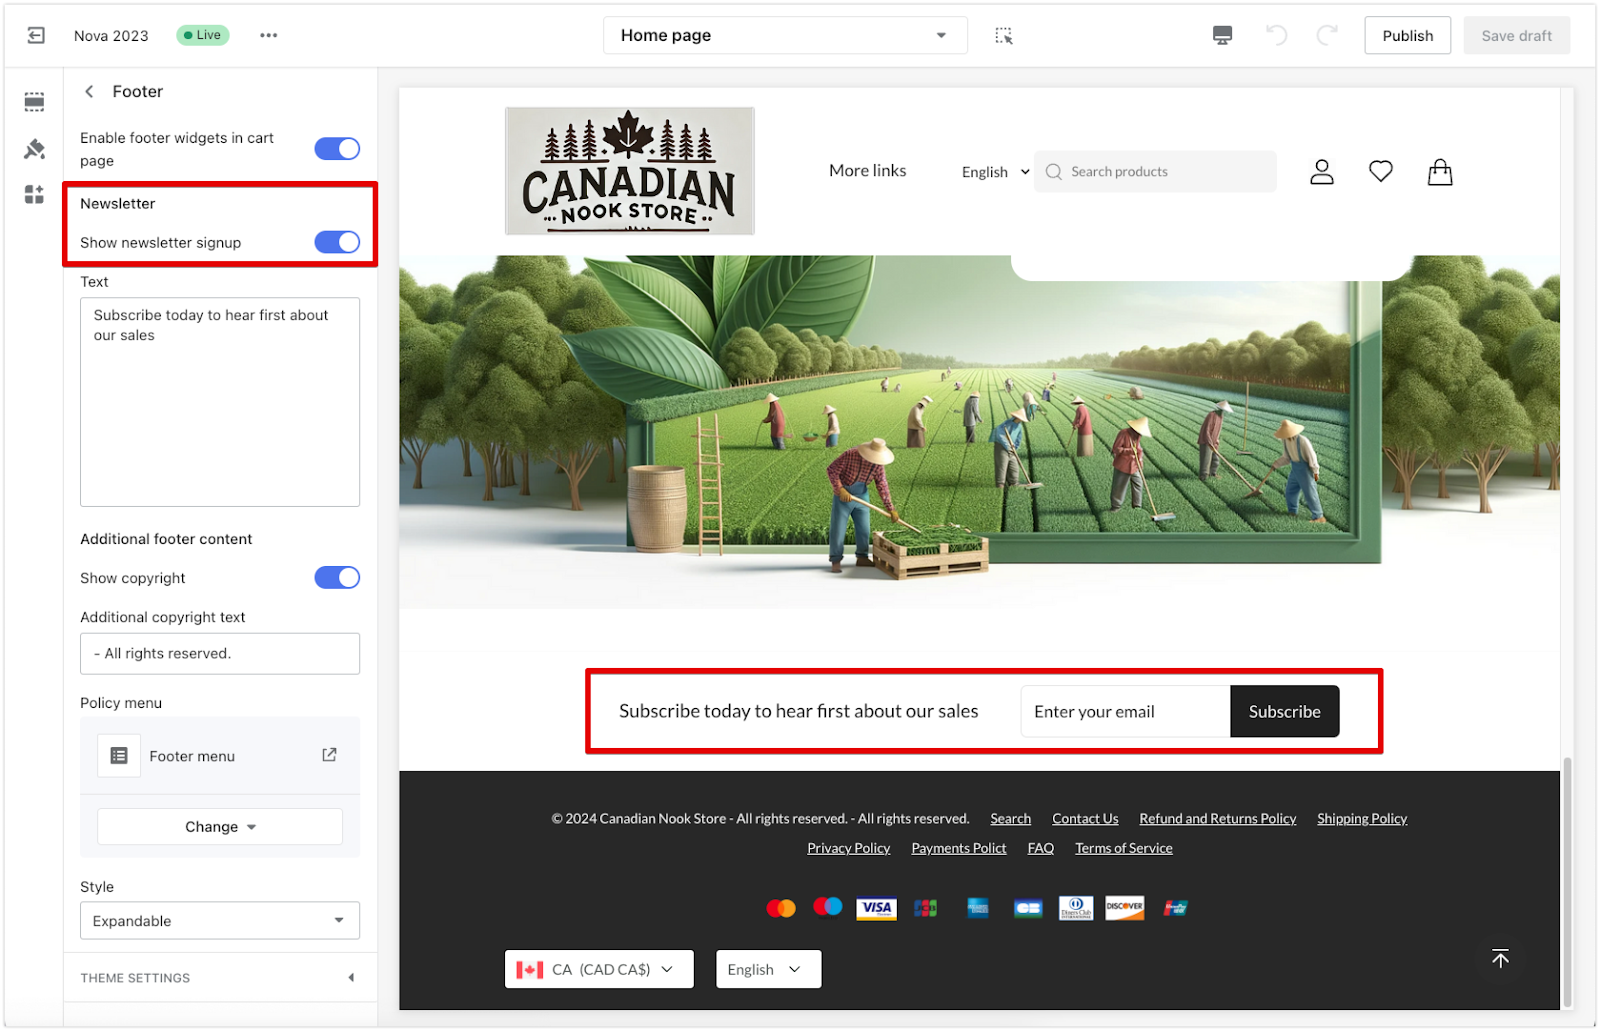
2. Customize the signup message: Use the text box to edit the signup message displayed to visitors.

Note
For detailed instructions on adding your own newsletter section instead of using the built-in footer option, refer to this guide.
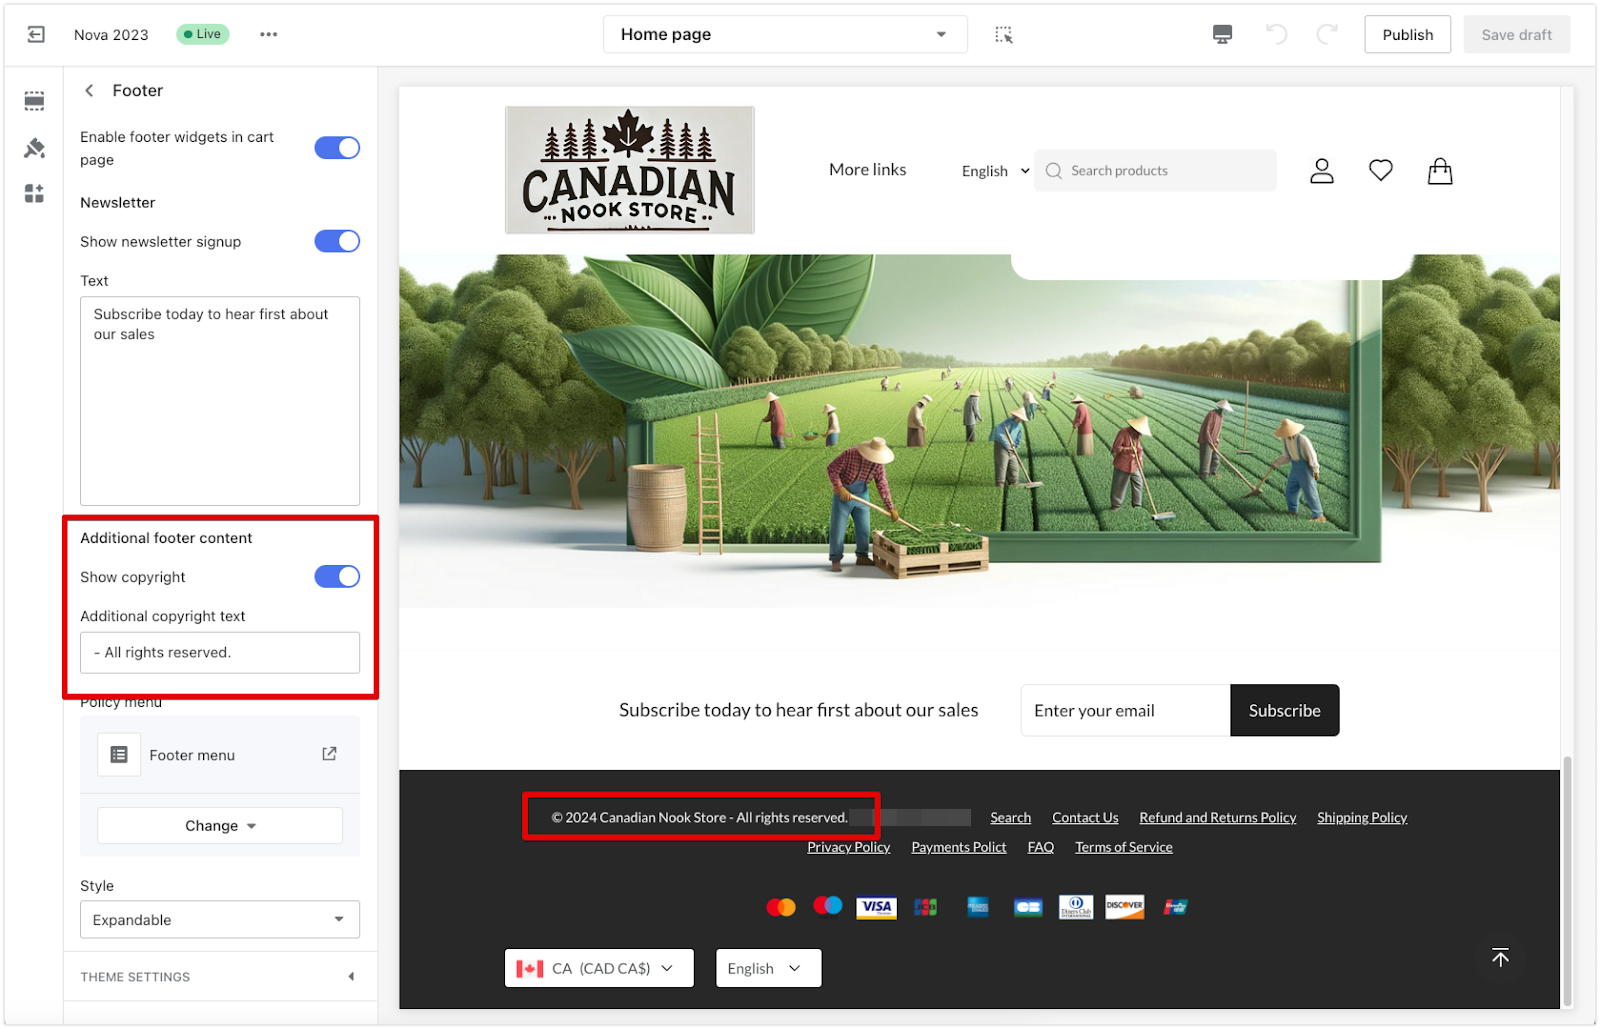
Copyrights
This section allows you to customize the copyright text displayed in the footer.
1. Editing the copyright text: Adjust the copyright text to match your store’s branding.
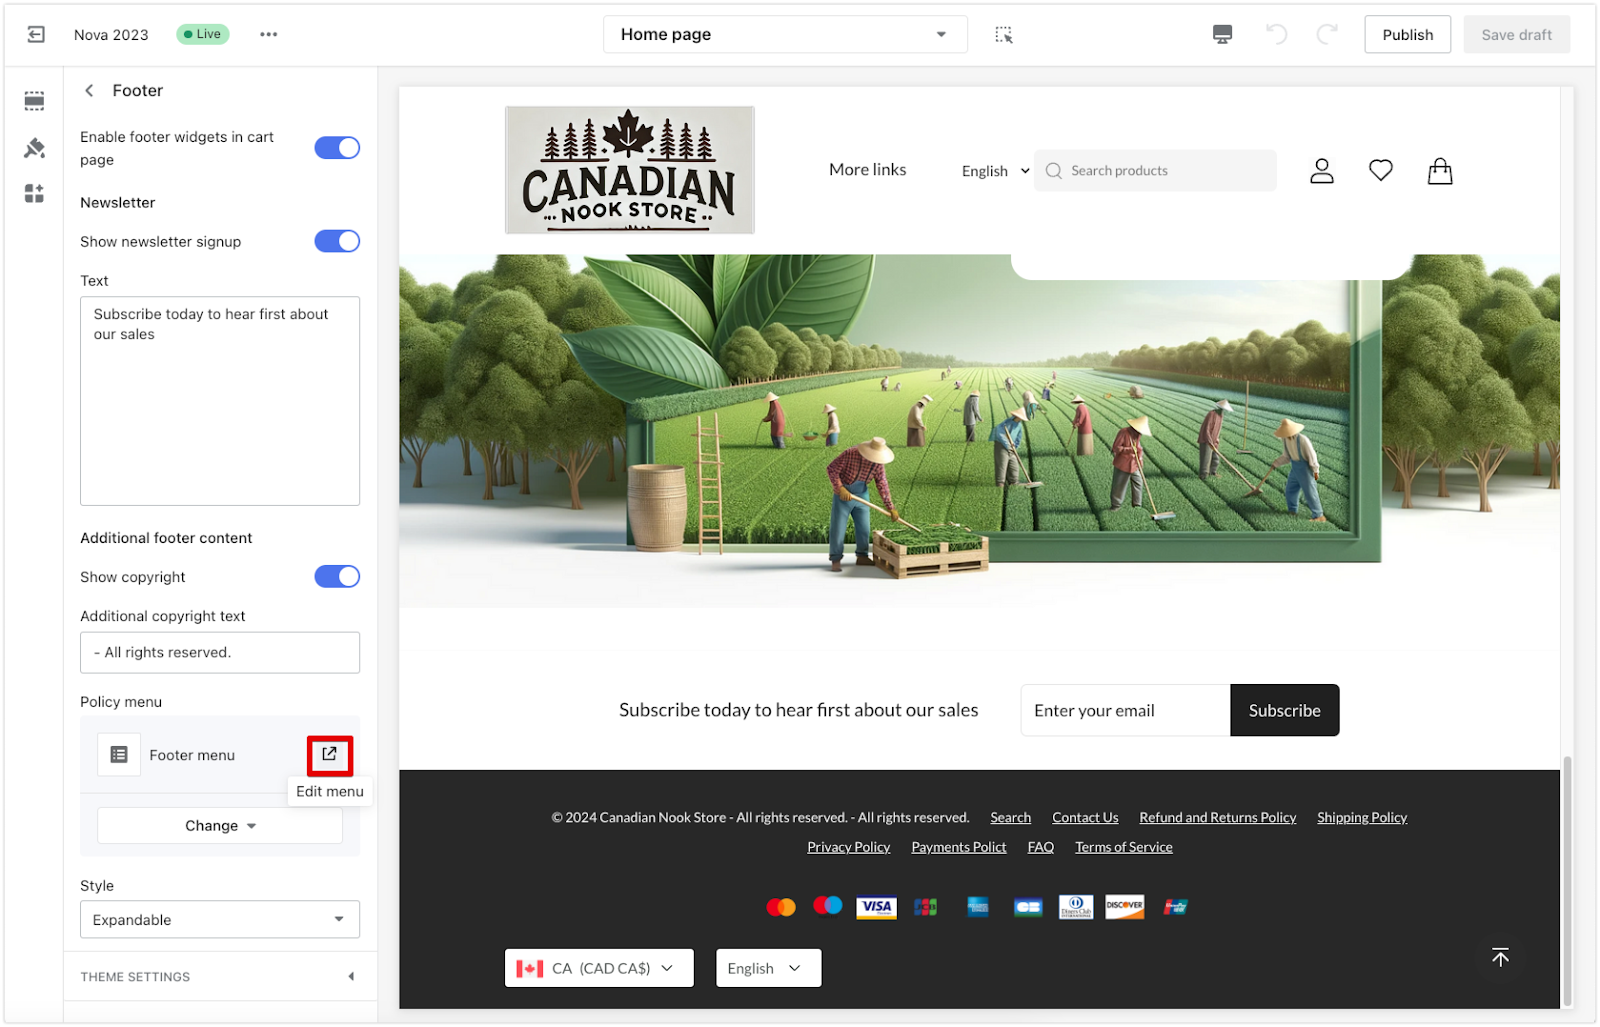
Policy menu
The policy menu lets users directly access important pages like return policies or terms and conditions from the footer.
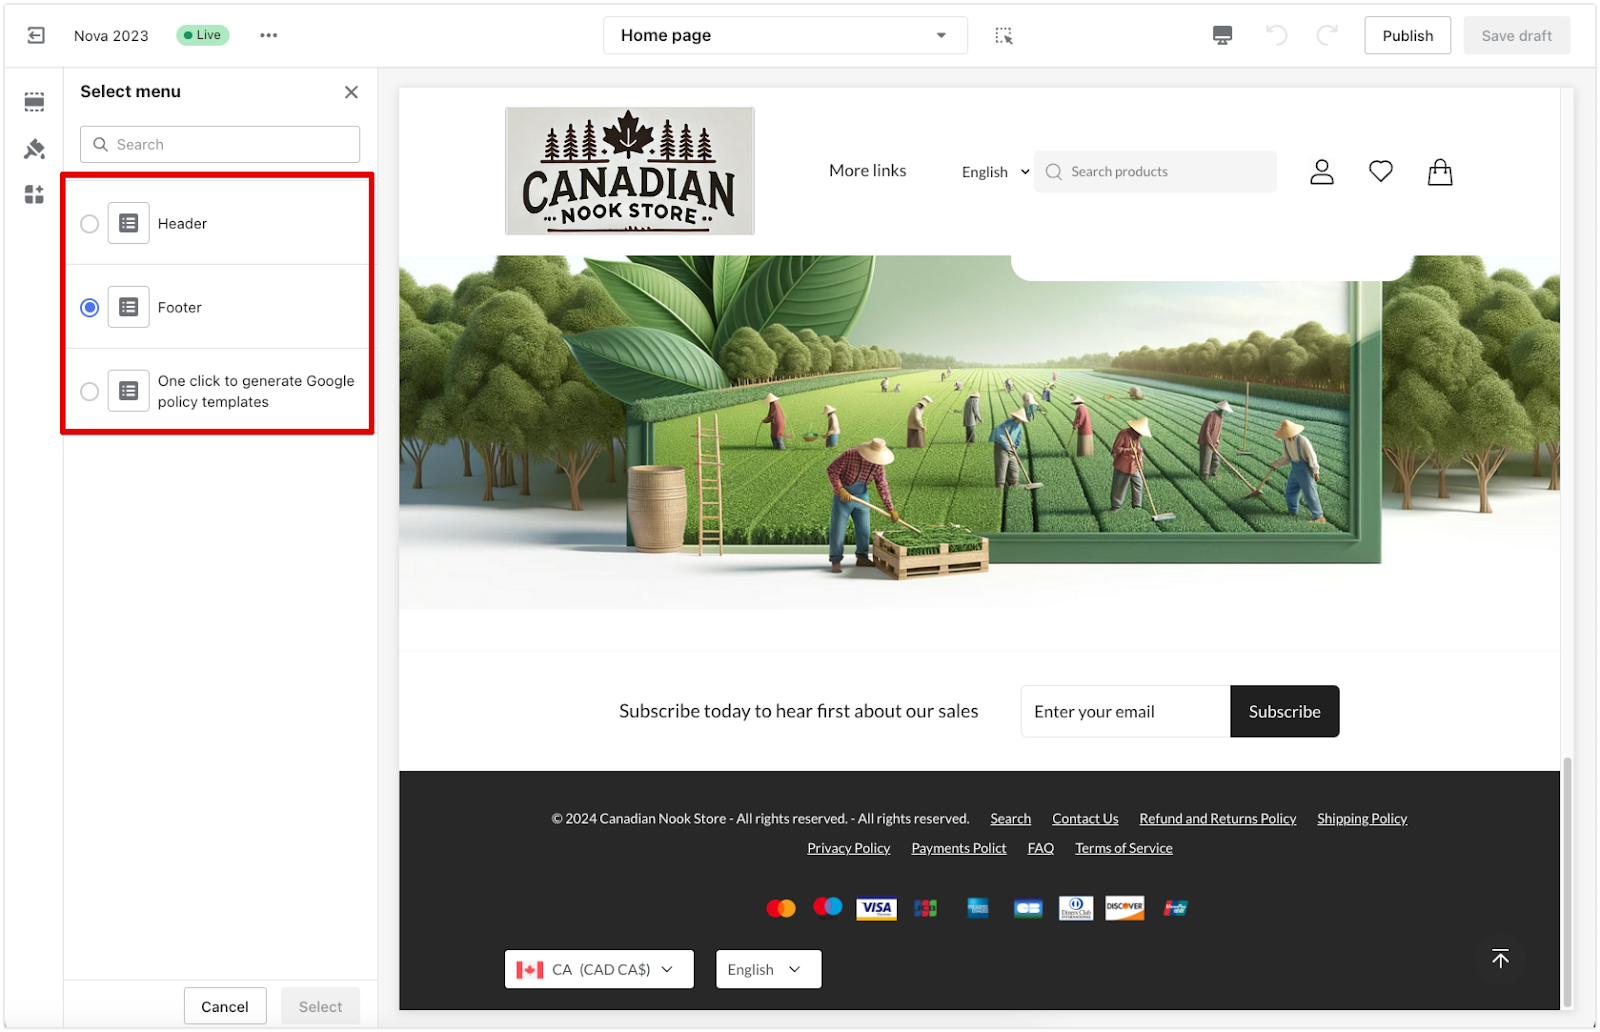
1. Editing the policy menu: Click the Edit menu icon from the main editing page. This action will take you to the Navigation settings page, where you can customize your navigation menus. For more details about navigation menu settings, refer to this guide.
2. Adjusting navigation menus: Use the menu editor to change or remove menus as needed. You can assign the updated menu as a template for the active theme.

3. Modify assigned menus: Use the menu editor to change or remove menus as needed.
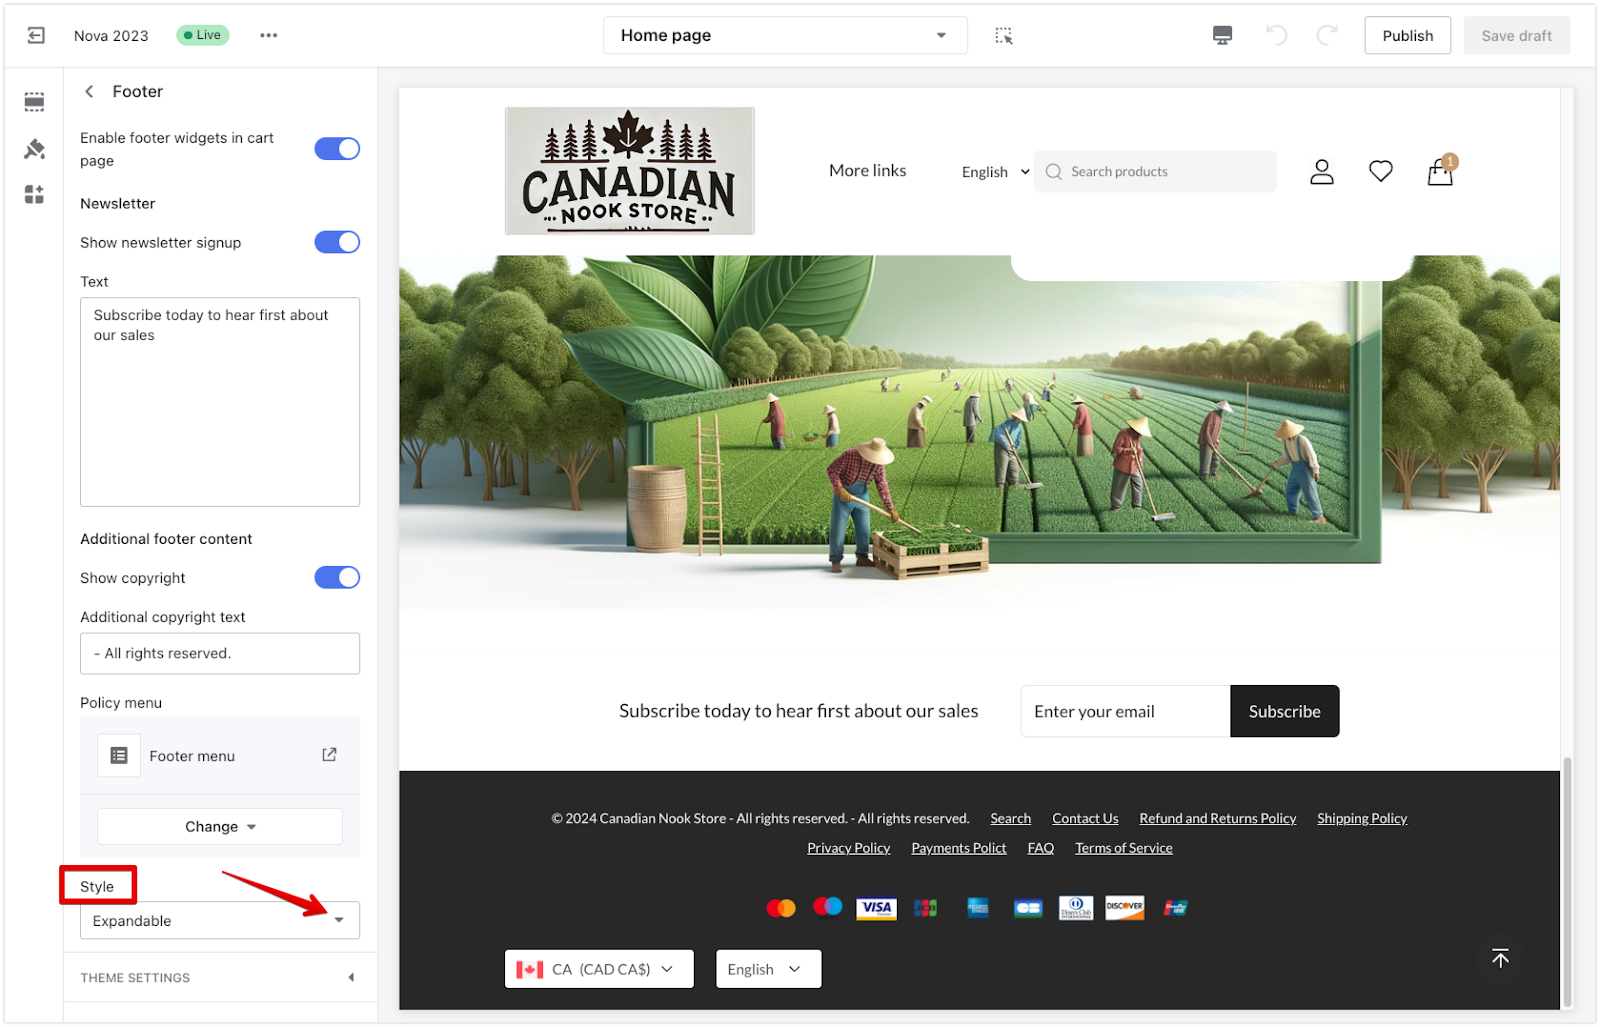
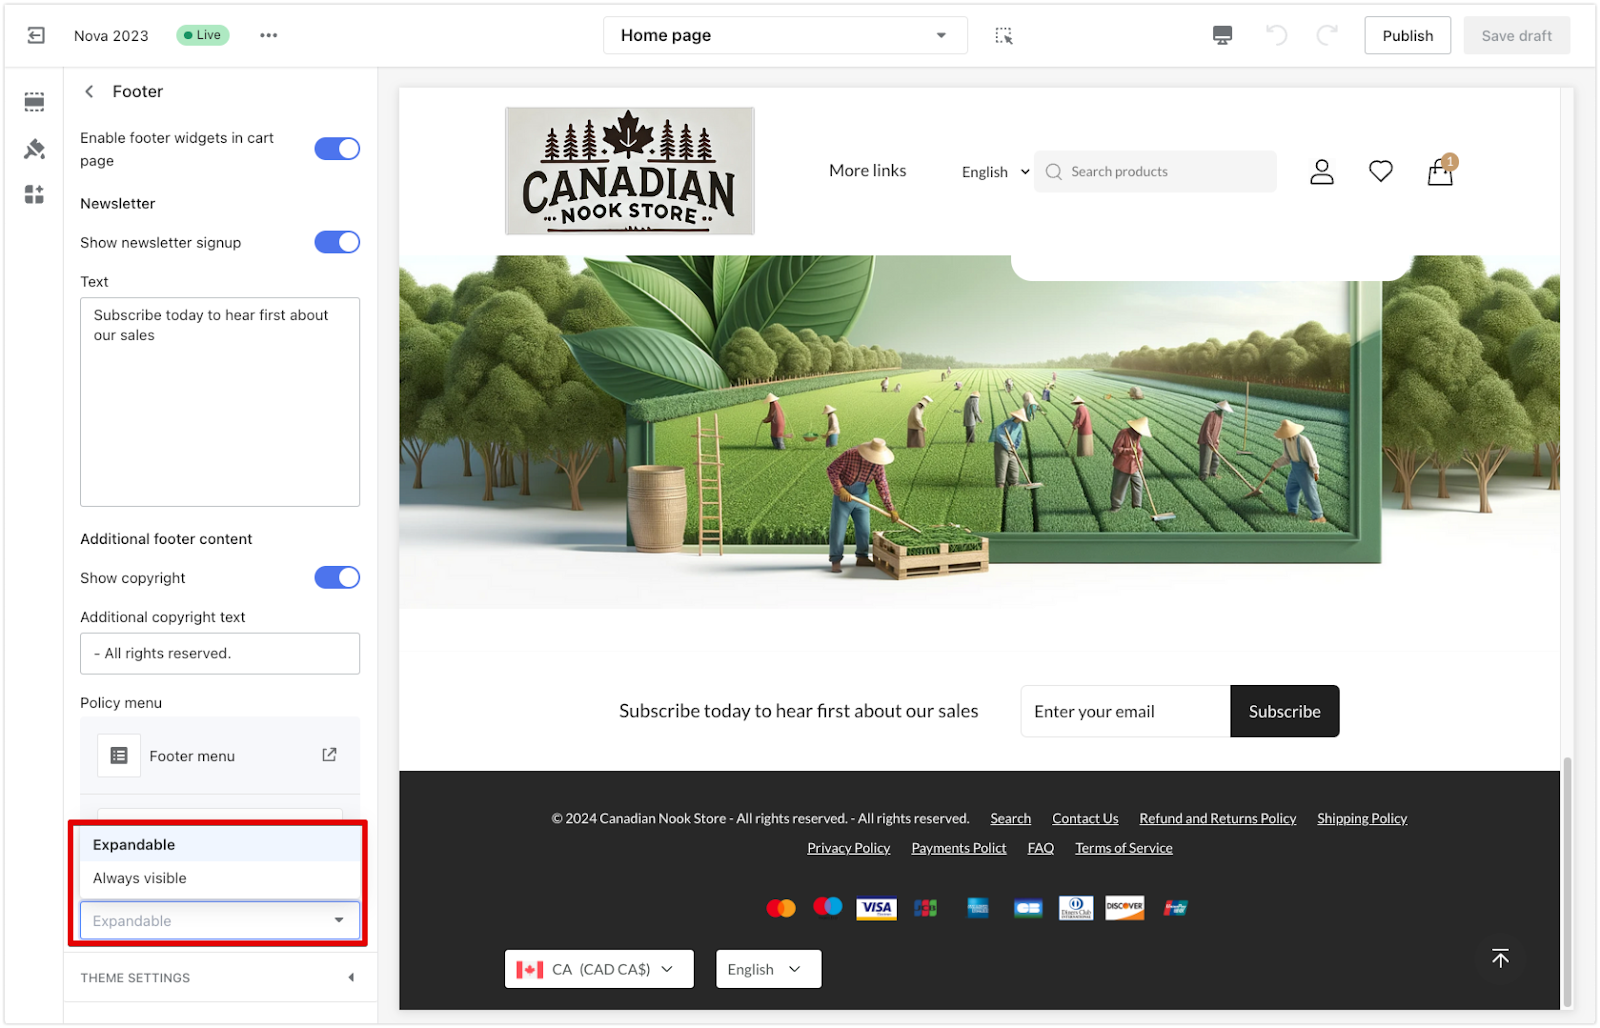
Style
The style / layout of your footer on mobile devices is optimized for easy navigation. You can choose to have the footer menu either expandable or always visible, making it simpler for users to scan content.
1. Choose layout options: Set the footer to be either expandable or always visible, based on your preference.
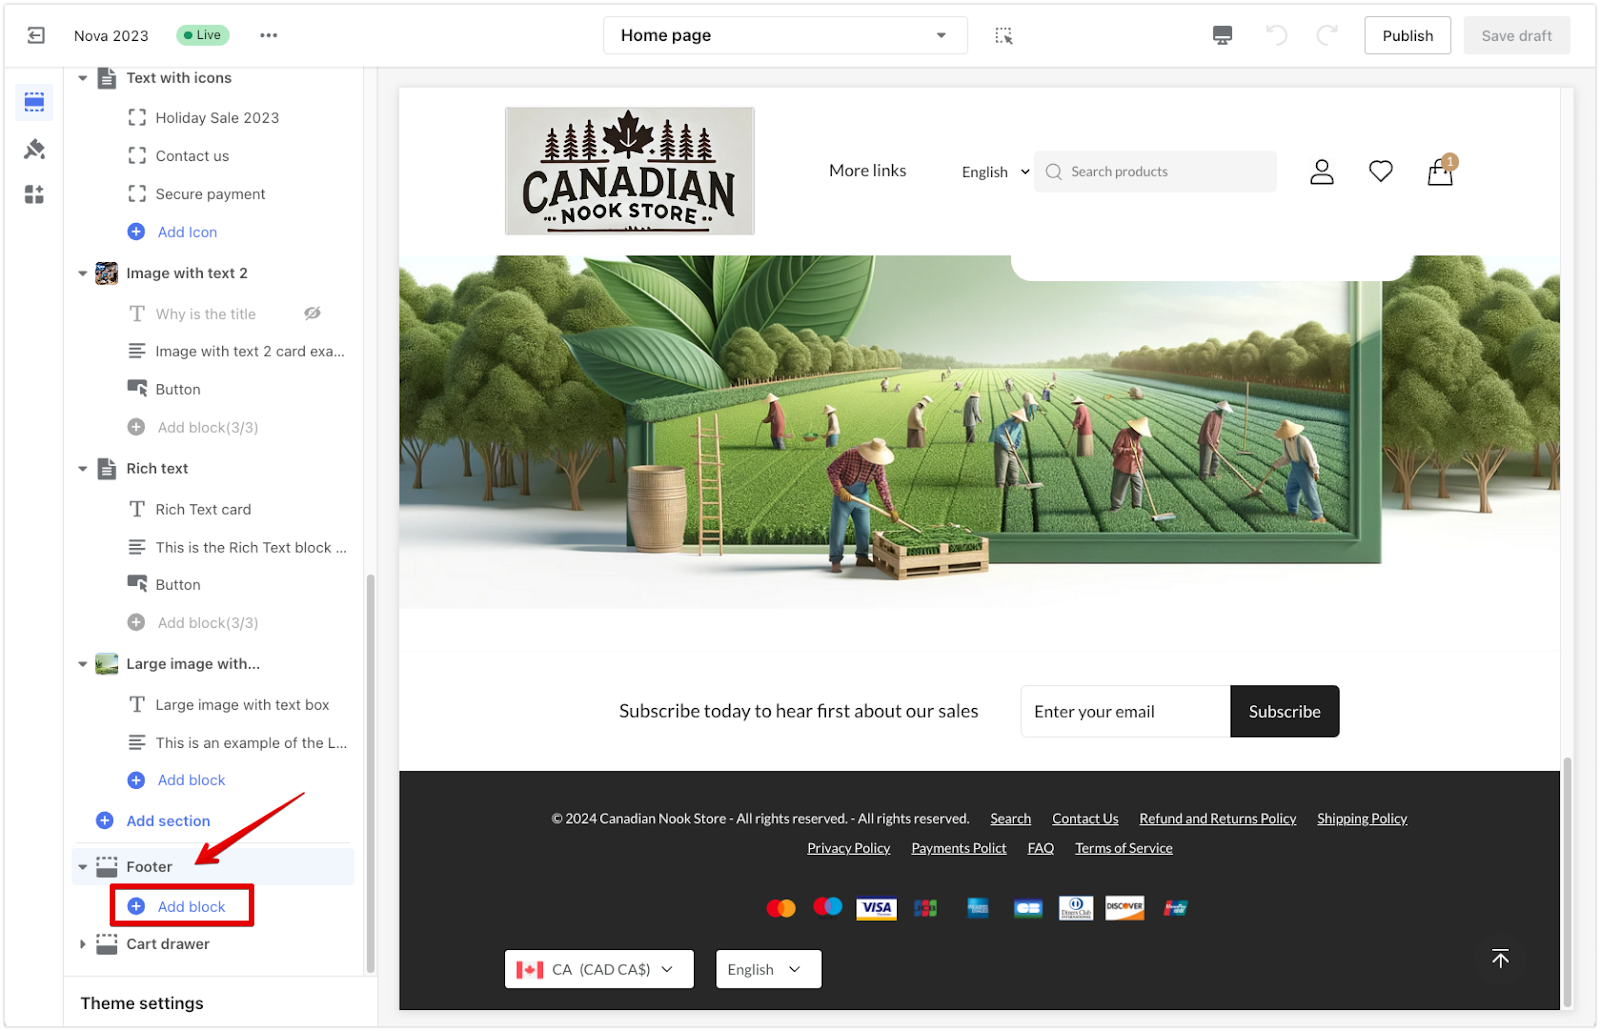
Theme blocks
Adding more content blocks helps provide additional information about your store in the footer.
1. Add content blocks: Add various blocks to display different types of information about your store, such as additional navigation menus, contact and social media accounts, and accepted payments. To add blocks, click the dropdown arrow in the Footer section and select Add block.

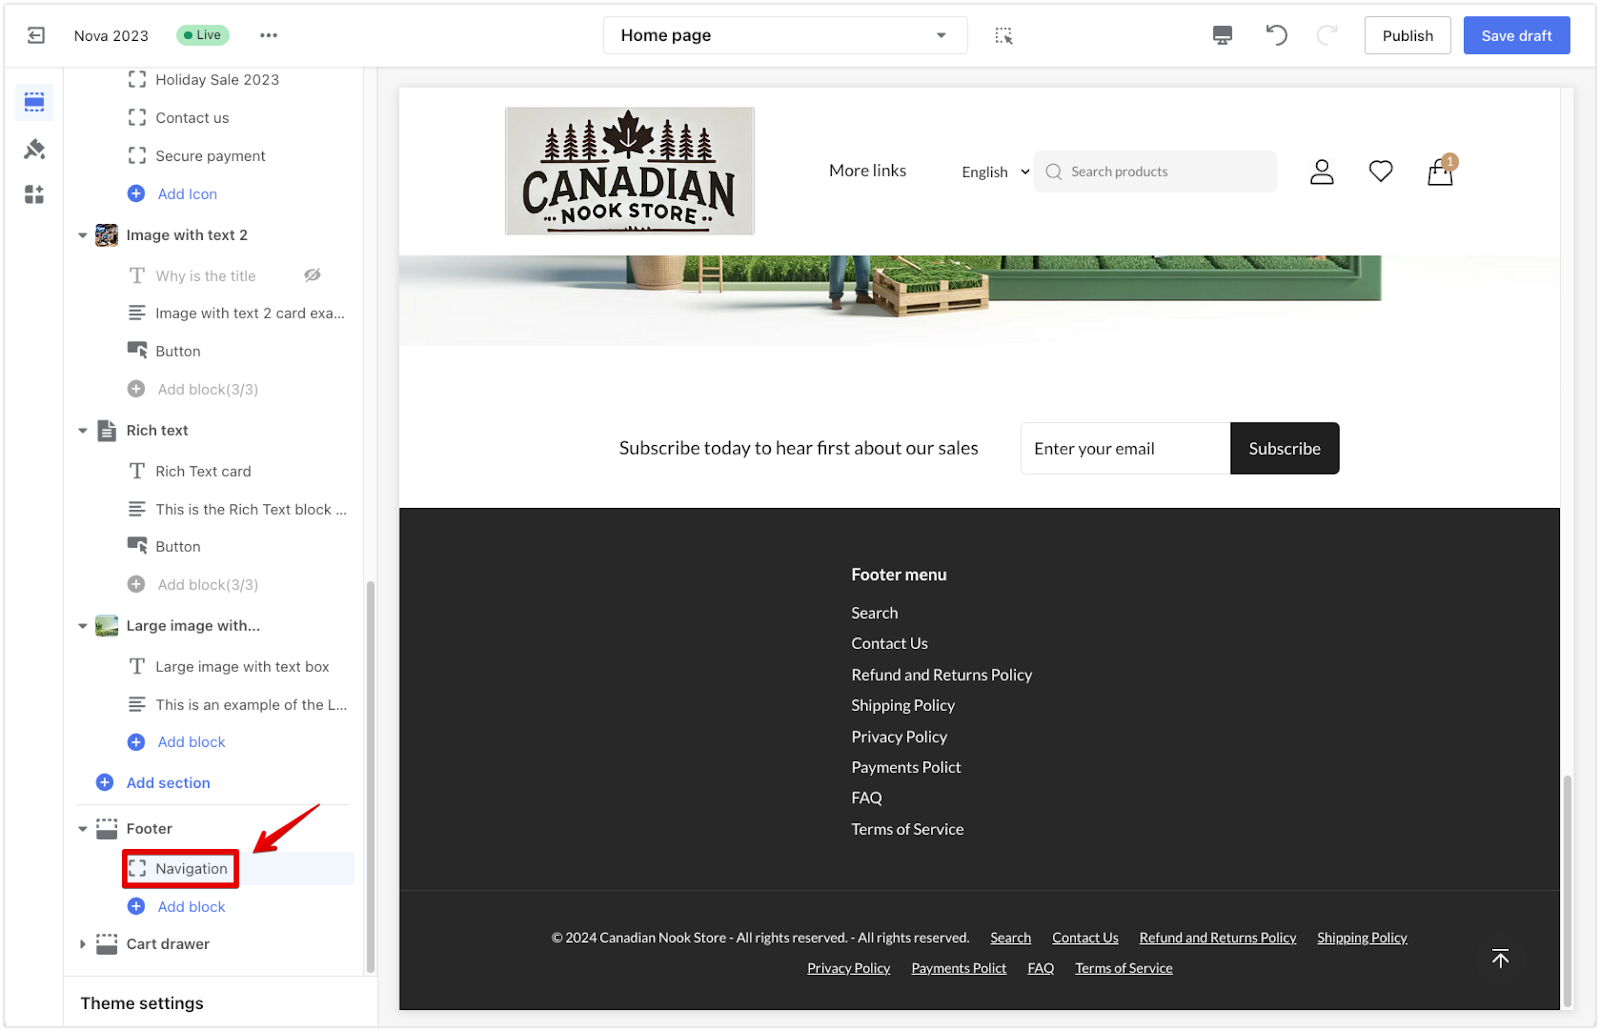
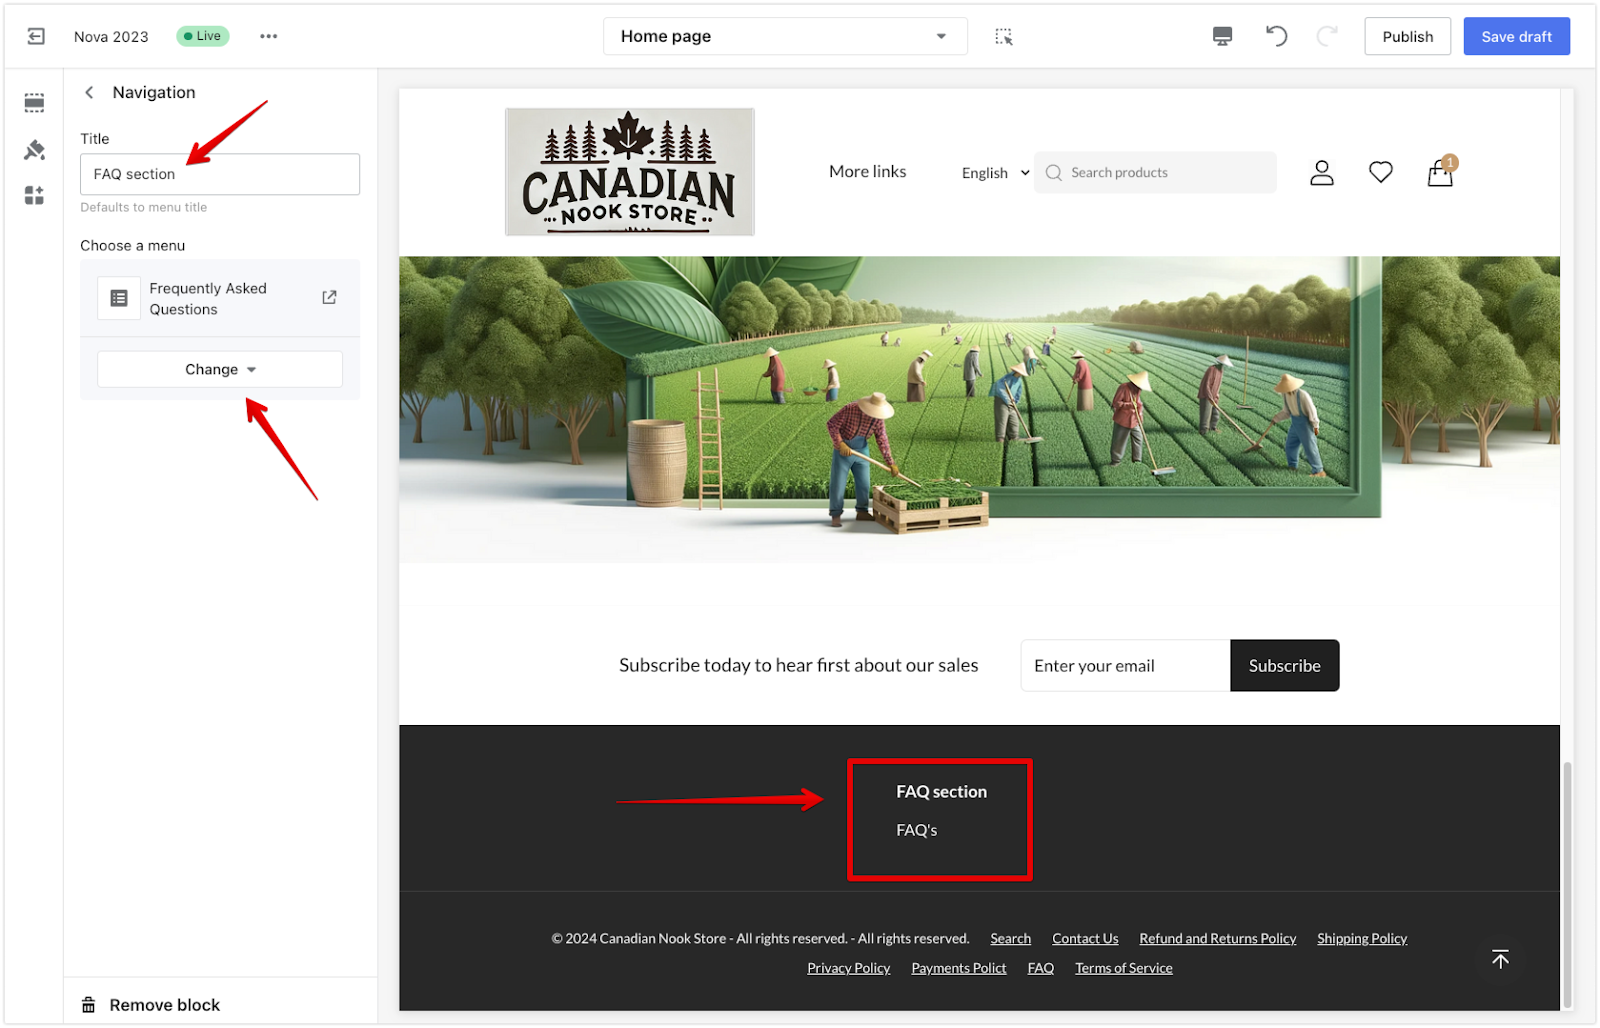
Navigation block
Organizing your footer navigation improves accessibility for users, helping them quickly locate relevant information and resources. This makes navigation smoother and encourages more interaction with your website.
1. Assigning a menu: After adding a Navigation block, click the Navigation title to configure it. Choose a menu and update the title. This helps you maintain clear and intuitive navigation, enabling users to find necessary pages like FAQs or customer support pages directly from the footer.
Contact and social block
Adding contact information to the footer allows users to quickly find ways to reach you, enhancing trust and credibility. It gives users multiple contact options, making it easy to ask questions, request support, or learn more about your store.
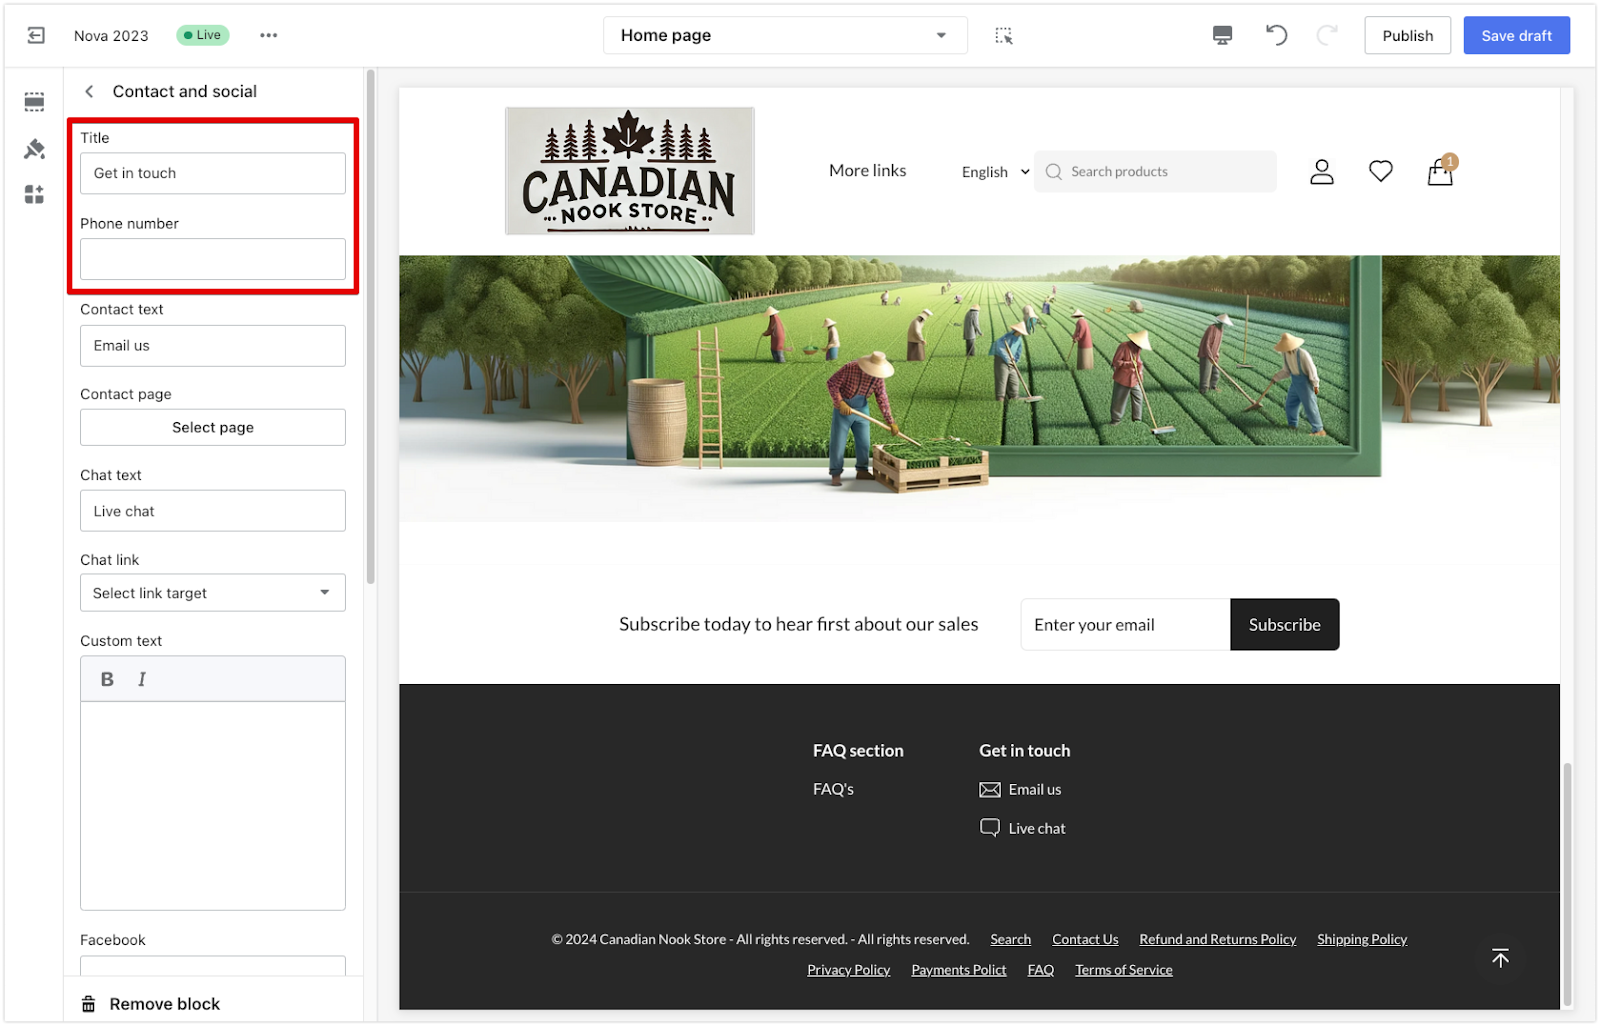
1. Adding a contact block: After adding the Contact and social block, click the Get in touch title to manage contact information.

2. Managing the block title: Add or edit the block title and phone number as needed.
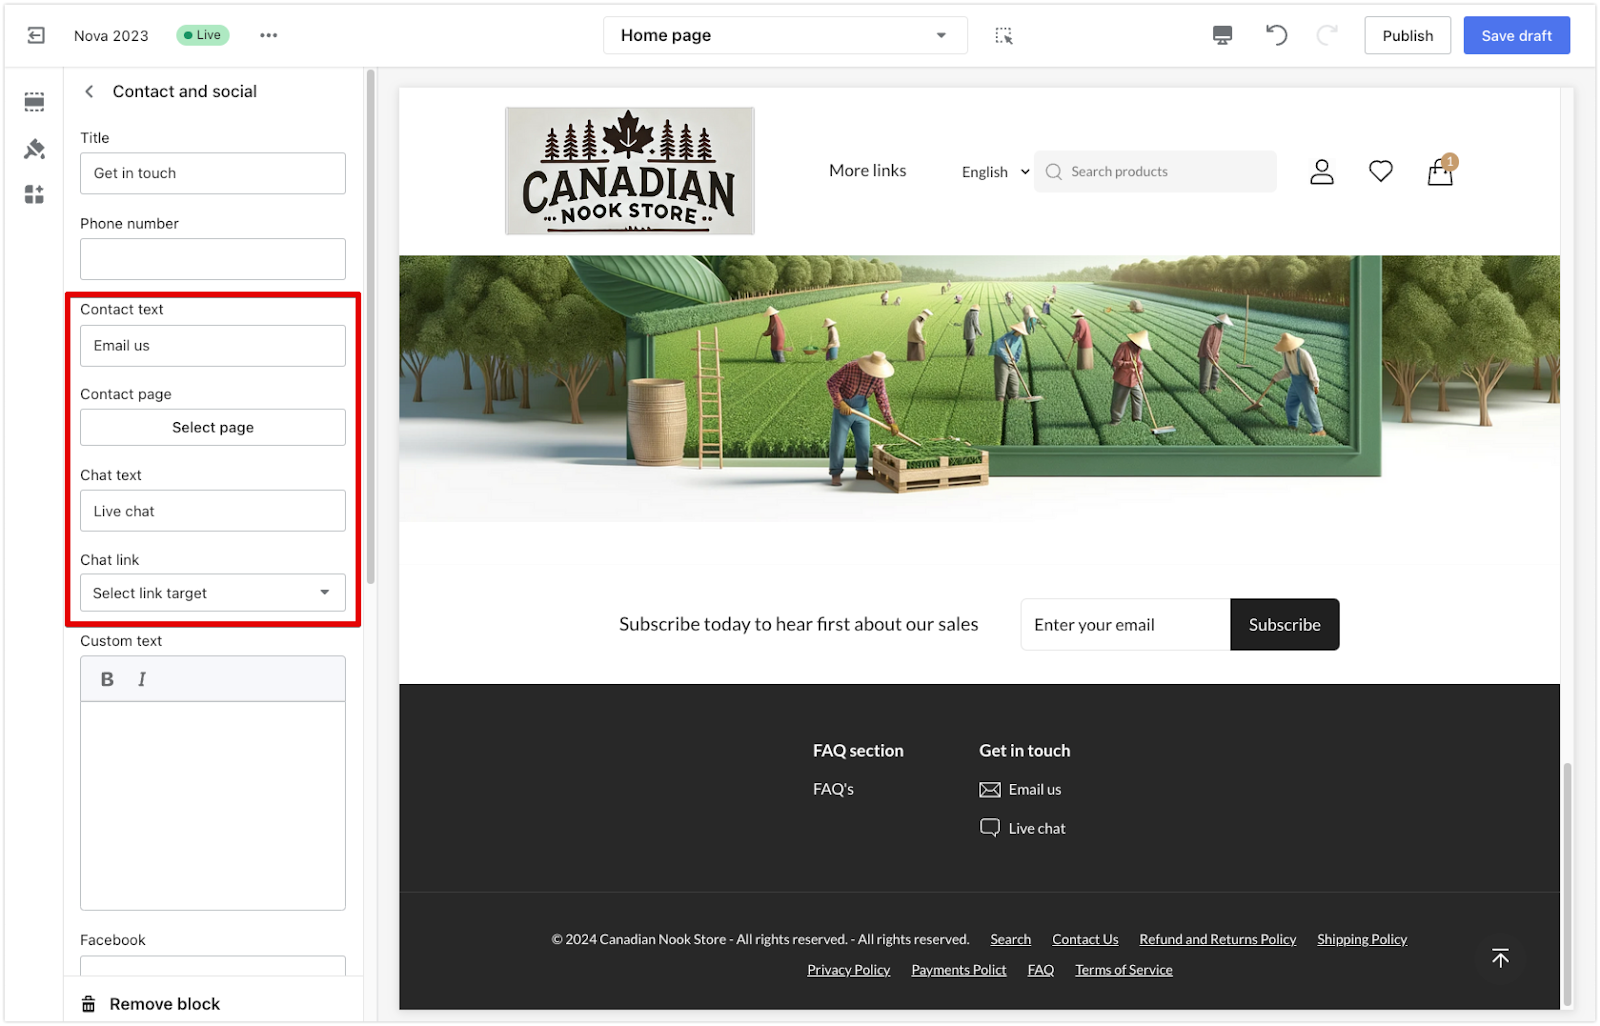
3. Linking pages: Customize the Contact text and Chat text fields to display options like “Email us” or “Live chat.” Use the Contact page and Chat link dropdowns to select specific pages or link targets, enabling users to access different communication methods directly from the footer.
4. Adding additional information: Use the text box to add additional information, such as email addresses or customer service hours.

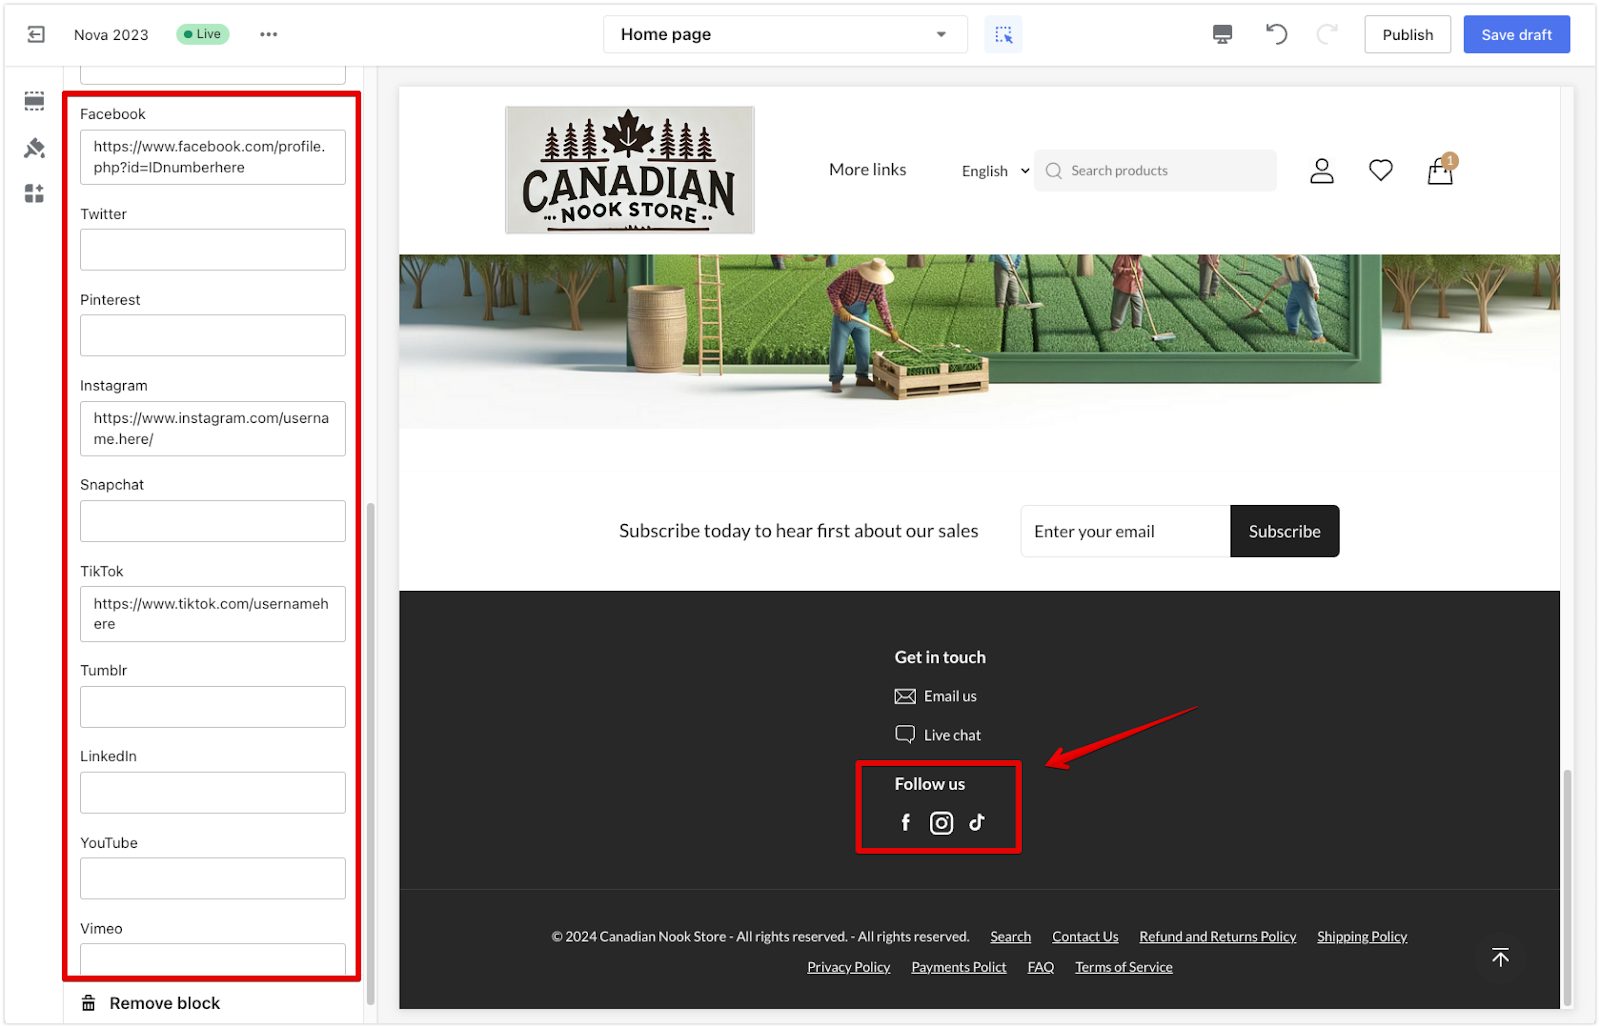
5. Enabling social proof: In the footer, add direct links to your social media accounts, allowing users to connect with your store on trusted platforms. Enter the URLs of your social media pages in the provided fields so users can access them directly from the footer.
Note
To configure the image that appears when sharing your store’s link on social media, navigate to your main Theme settings > Social Media in your theme editor.
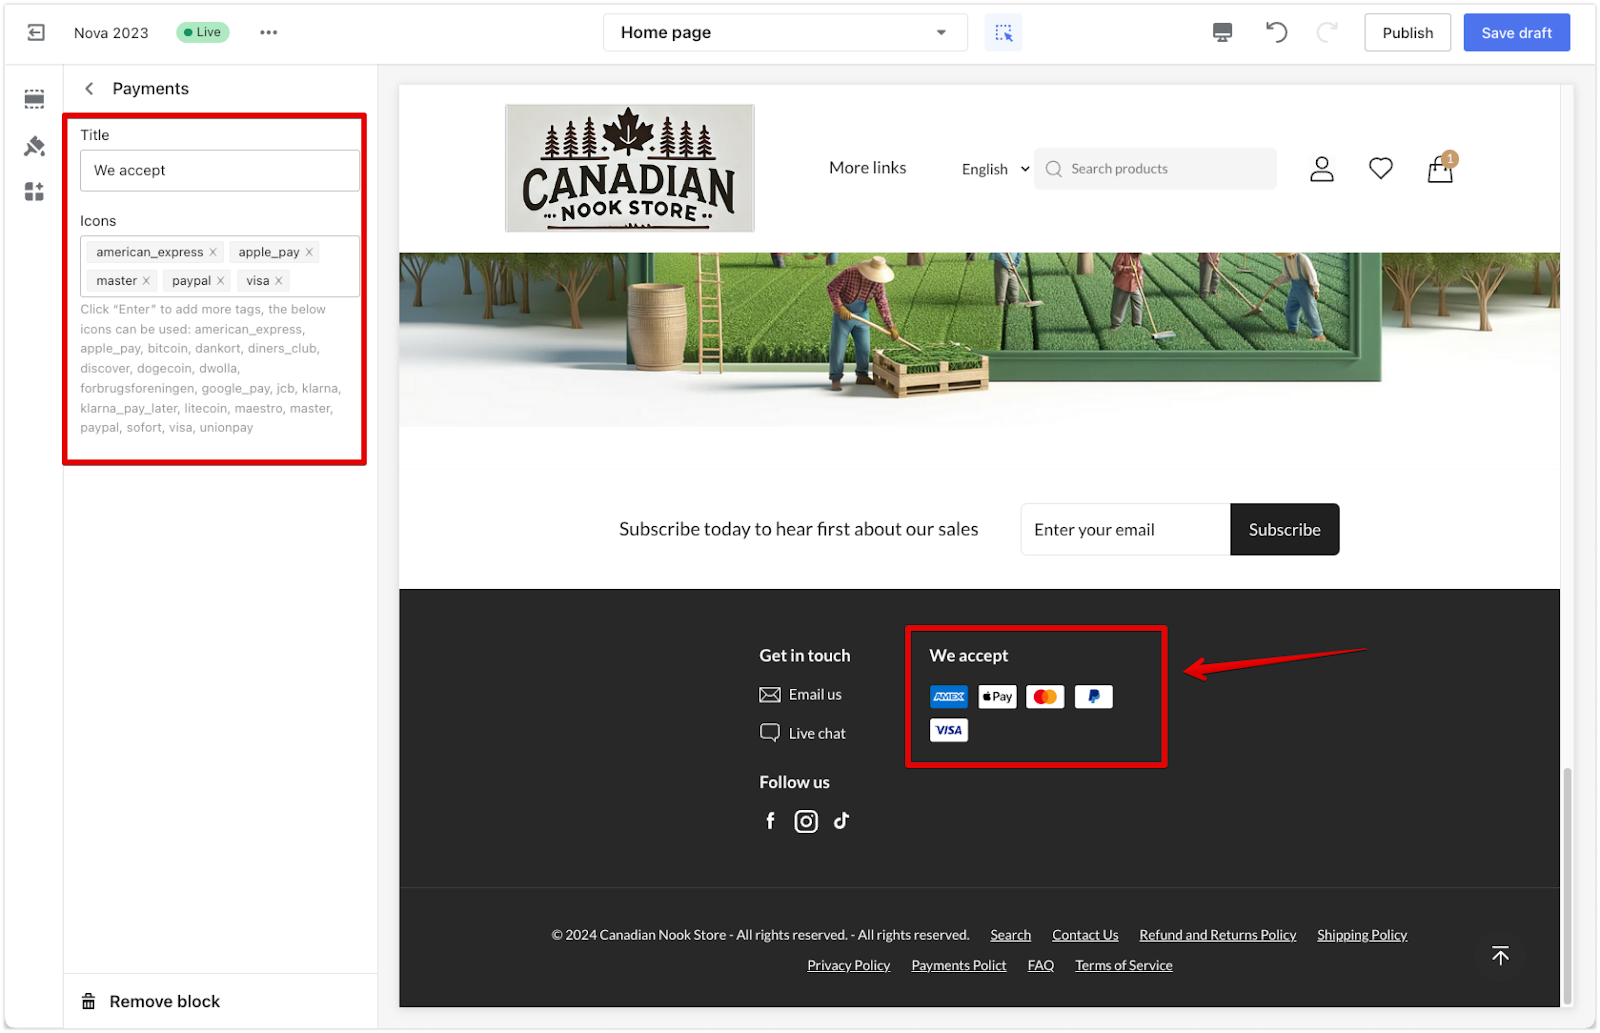
Payments block
Displaying available payment methods in the footer adds transparency, helping users understand their options when checking out. It also reassures users that they can use their preferred payment methods, making them more likely to complete their purchases.
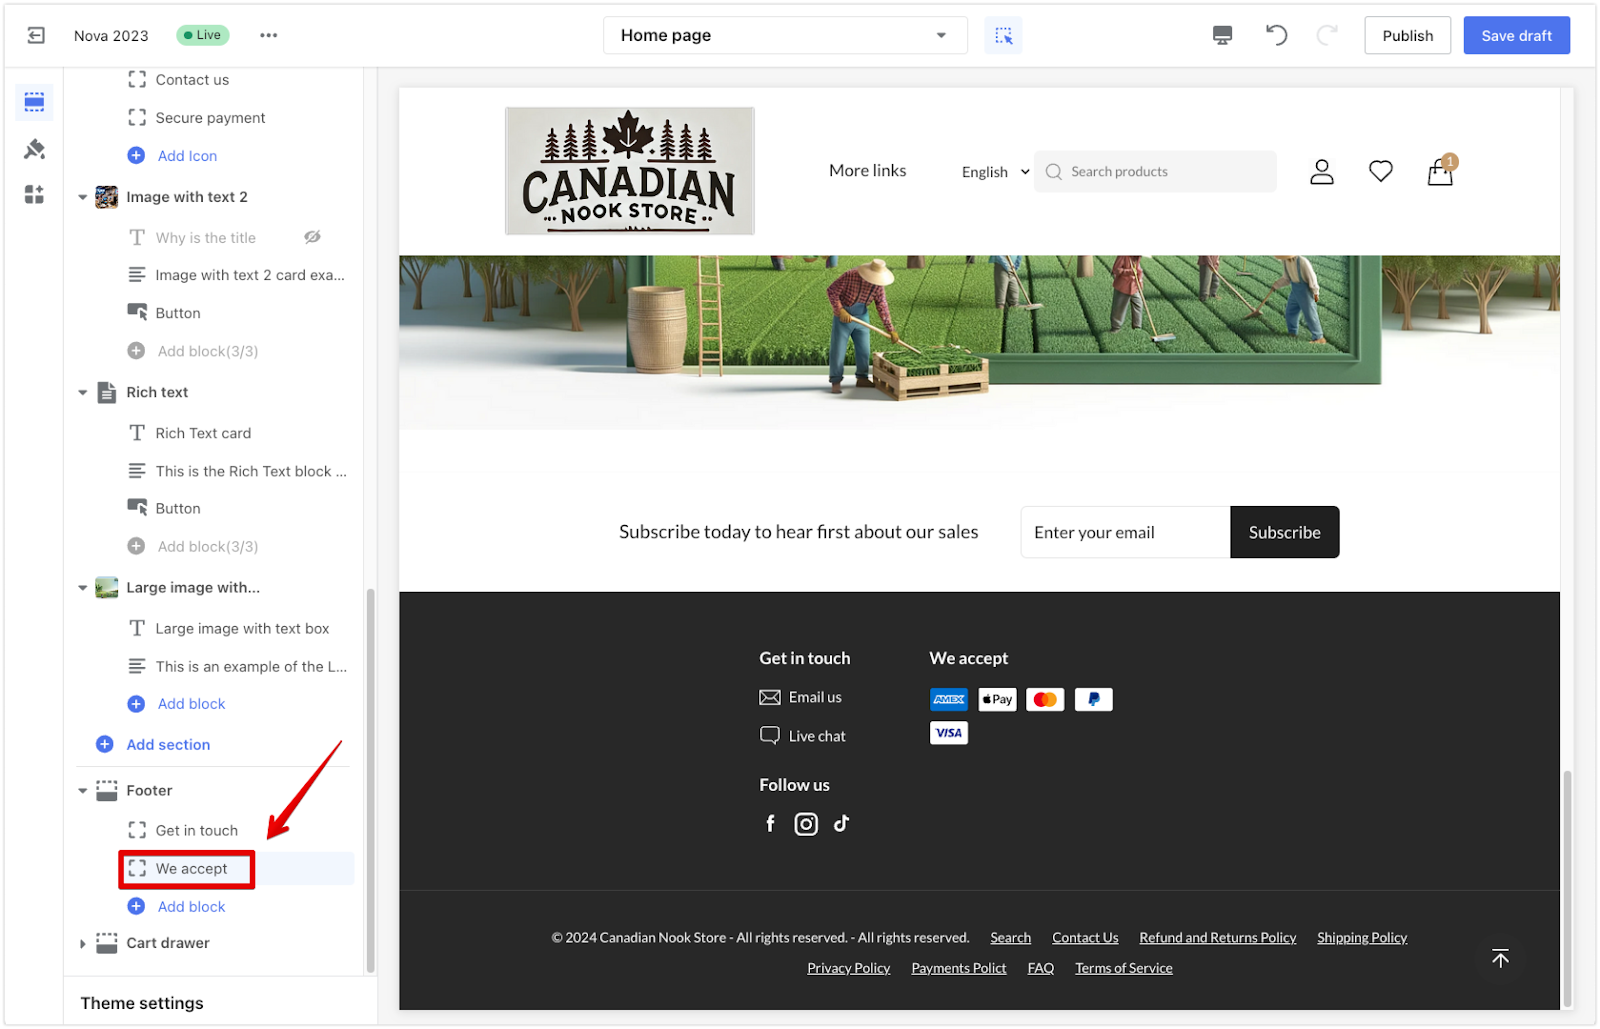
1. Editing the block title: After adding the Payments block, adjust the title by clicking on the We accept title. Modify the list of payment icons to reflect the methods available in your store, such as typing “Paypal” and pressing “Enter” to add the PayPal icon.
Note
Ensure the icons are written correctly so they display properly.
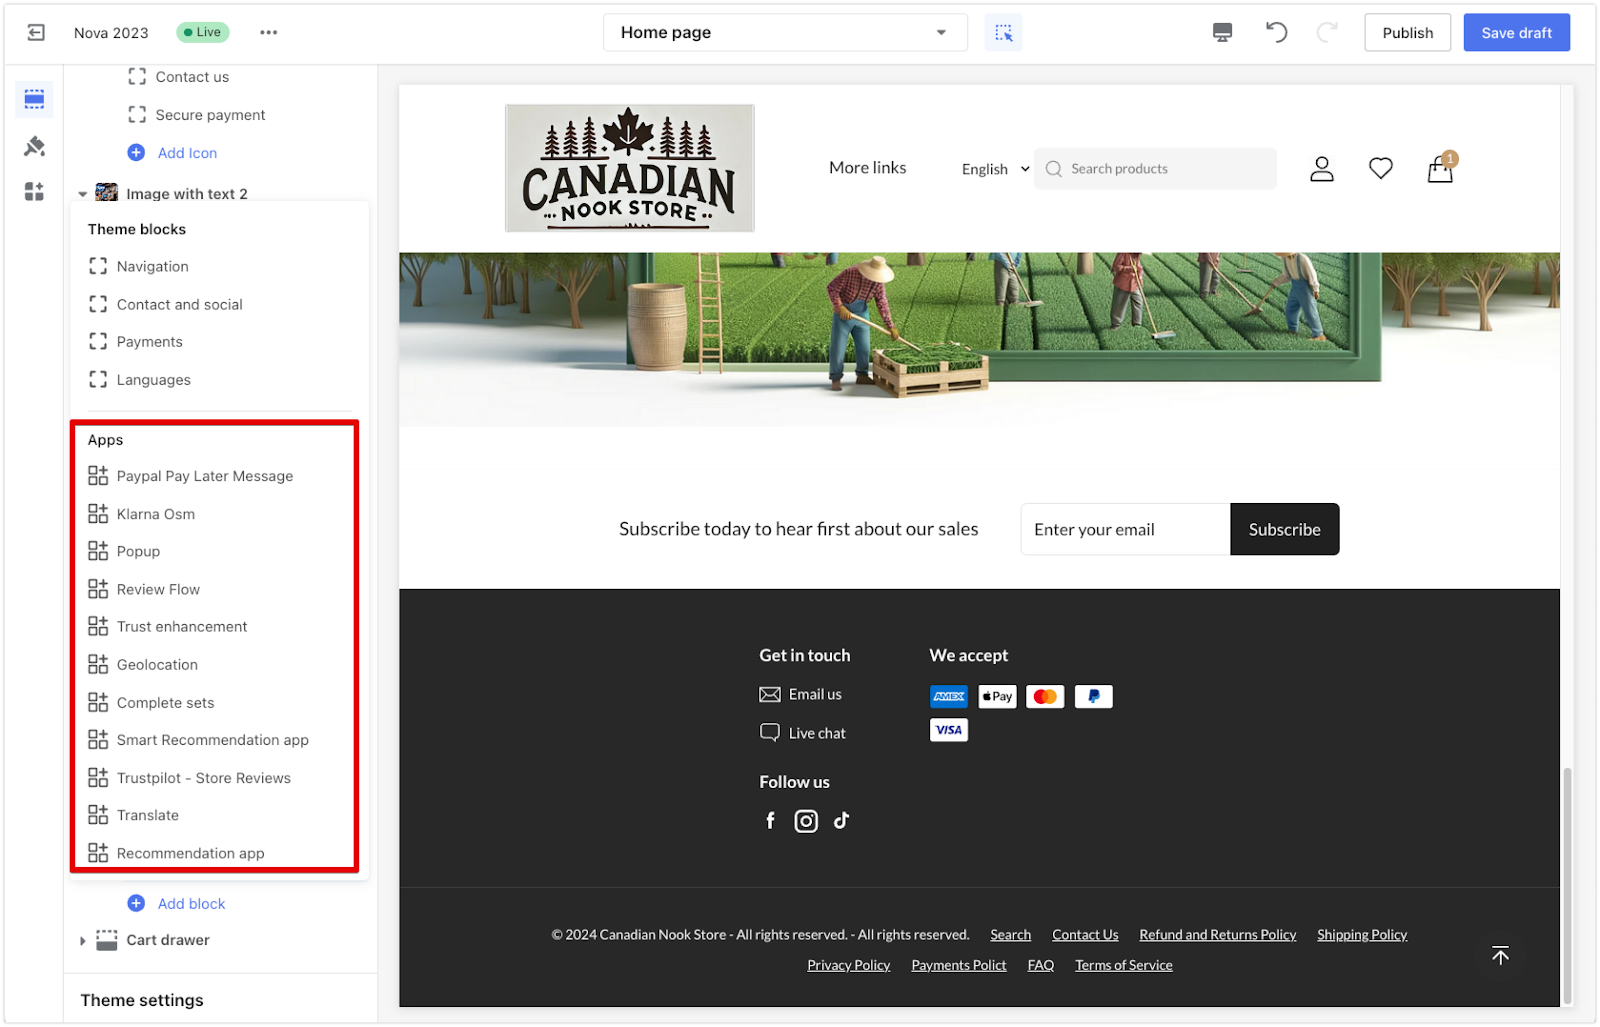
Adding apps
Integrating apps in the footer enhances functionality and provides additional features to boost user engagement and conversion rates. The available apps will depend on what has been installed in your Shoplazza store.
1. Adding apps in the footer: From the Theme blocks menu, navigate to the Apps section, where you’ll see a list of apps you installed in your store. These may include options like “Paypal Pay Later Message,” “Review Flow,” “Geolocation,” and more.
A well-organized footer enhances usability, guiding users to essential links that might need to be present in the main navigation. It also serves as a reminder of your store’s other offerings.


Comments
Please sign in to leave a comment.