
Managing access to your online store is essential for maintaining security and smooth operation. By controlling IP addresses, you can block unwanted visitors by adding their IP addresses to the blacklist or ensure trusted IP addresses have uninterrupted access by adding them to the whitelist. Here’s a detailed guide on how to do this:
Adding IP addresses
1. Log in to your Shoplazza admin: From your Shoplazza admin, go to Settings > Domains. This will take you to the domain management page where you can view and manage your store's domains.
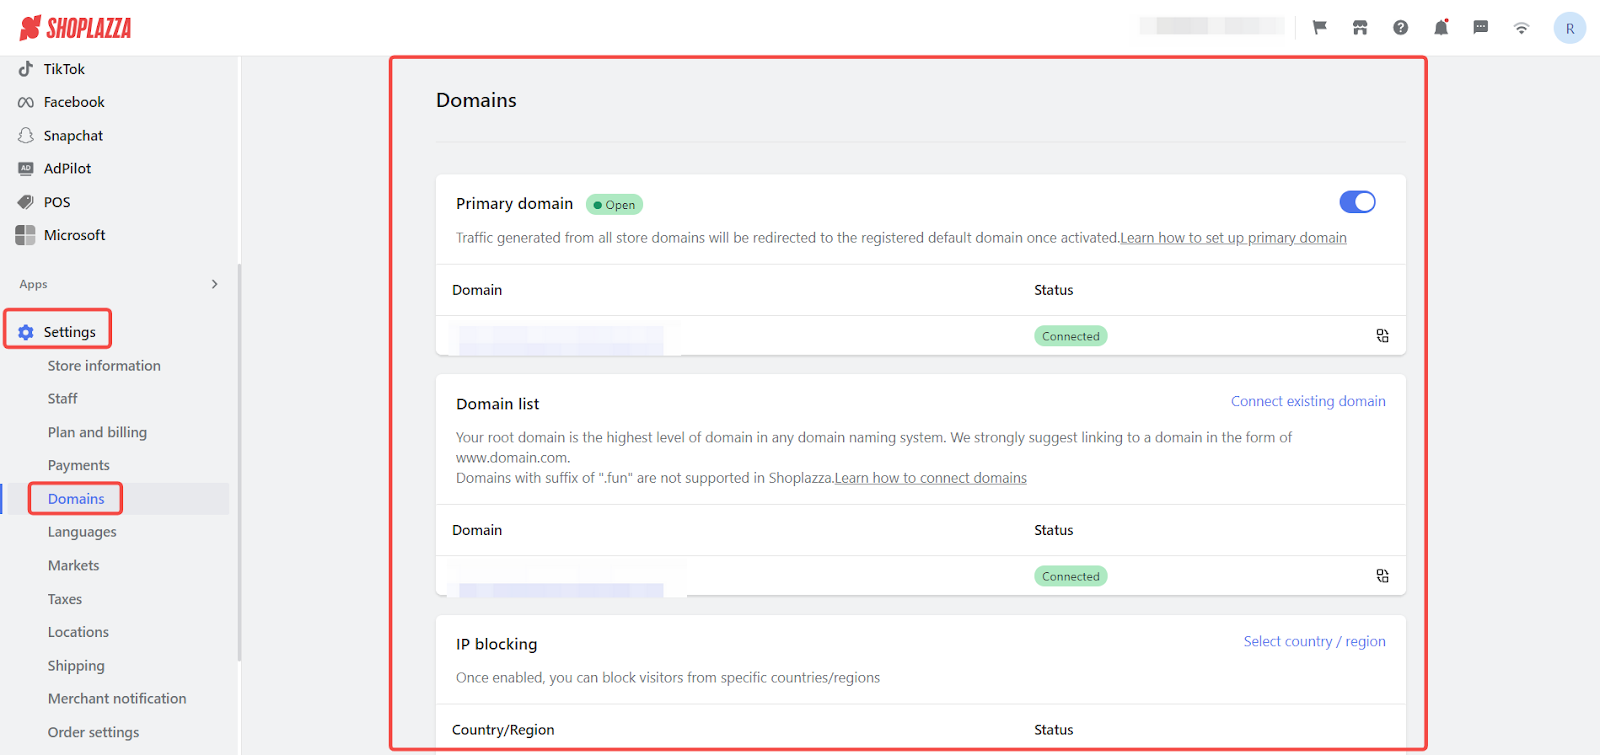
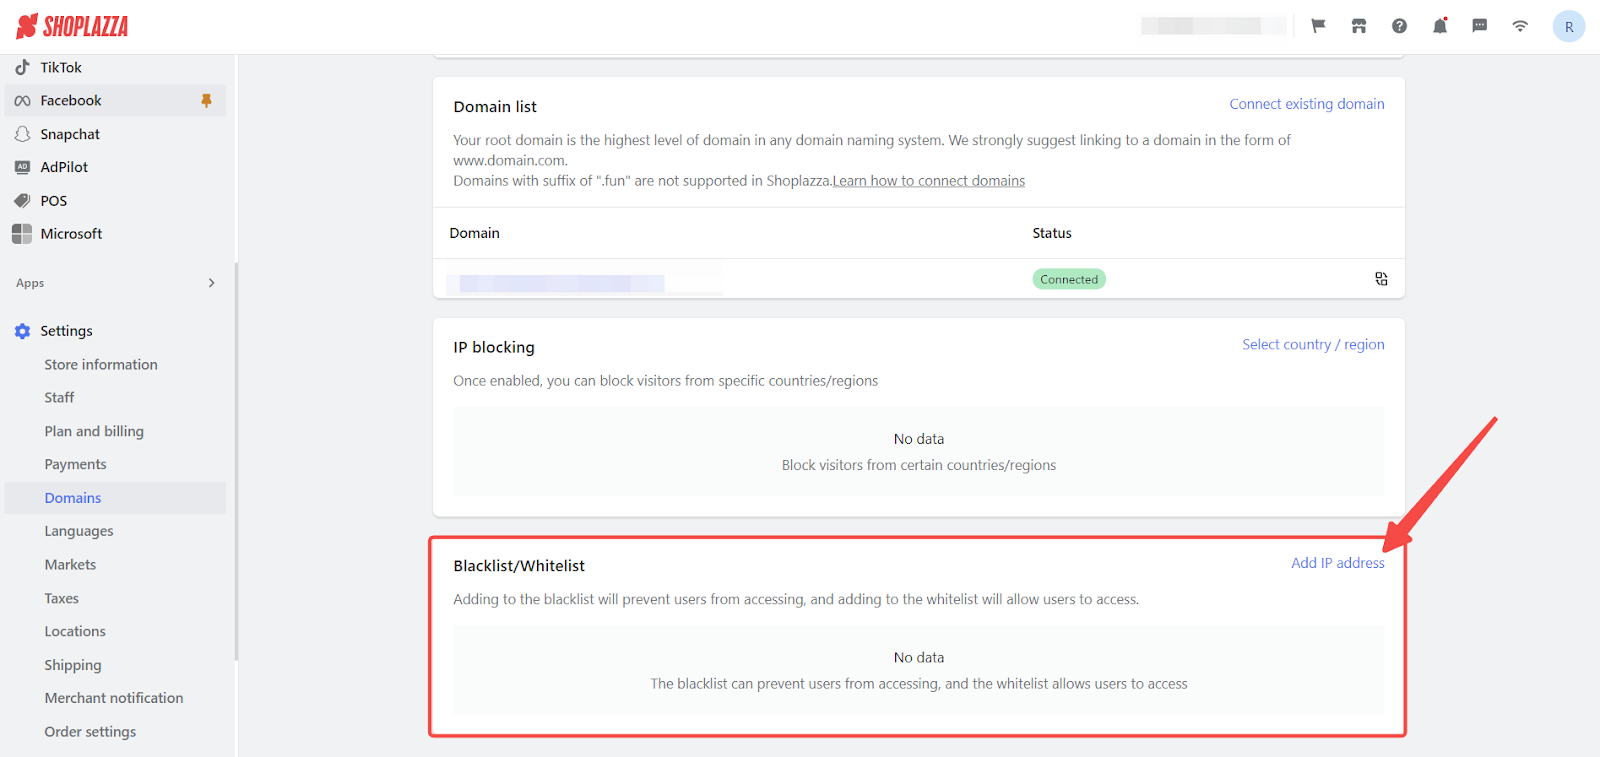
2. Locate the Blacklist/Whitelist section: Scroll down to find the section labeled Blacklist/Whitelist. Click on the Add IP address.
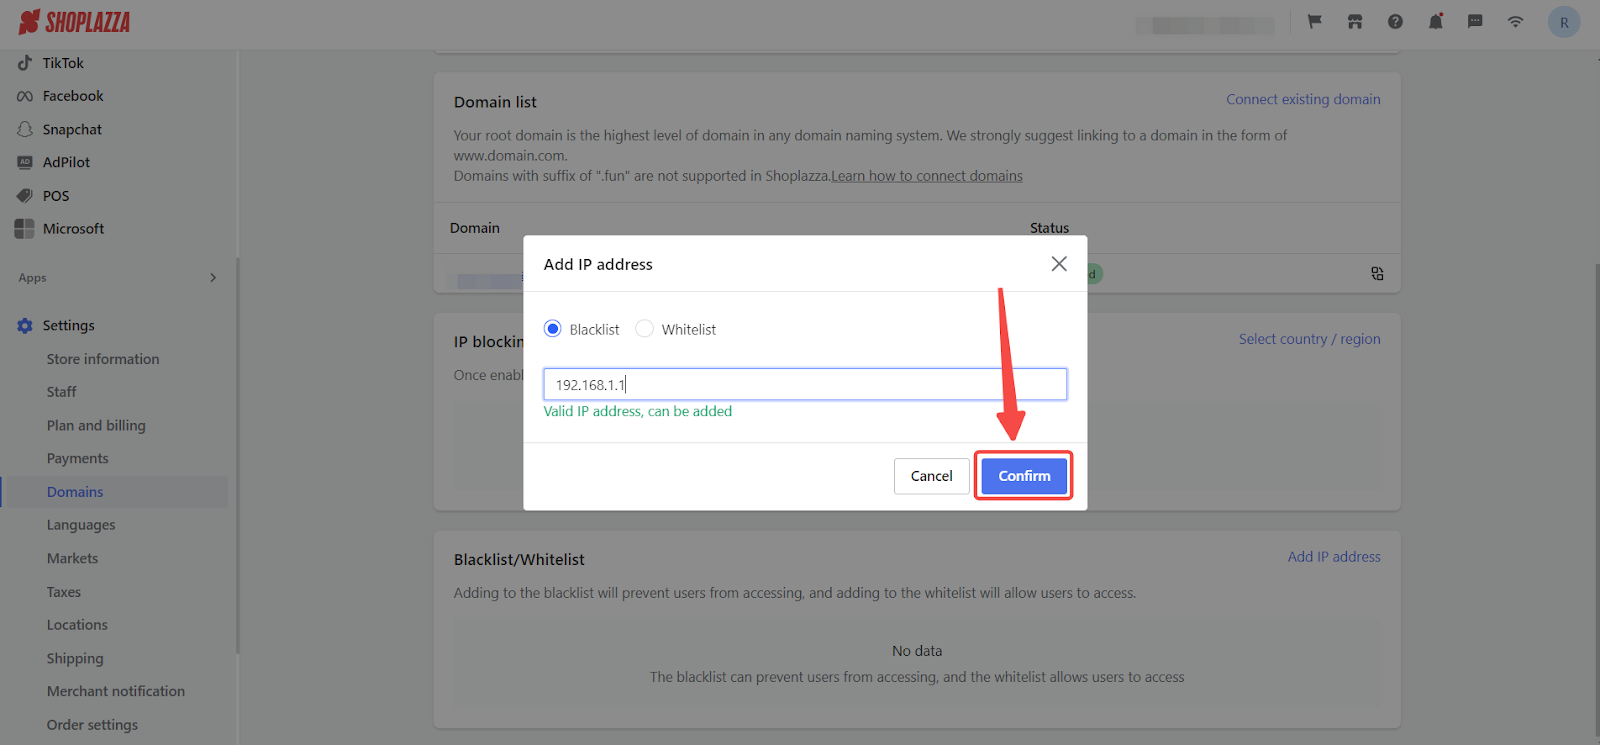
3. Add the IP address: In the popup window that appears, you will see options to add an IP address to either the blacklist or whitelist. Select the appropriate option based on whether you want to block or allow the IP address. Enter the IP address you wish to add in the provided field. Ensure the IP address you enter is in the correct format (e.g., 192.168.1.1). If you enter an invalid IP address, an error message will prompt you to correct it.

4. Confirm the addition: After entering a valid IP address, click the Confirm button to save the changes. A success message will appear, indicating that the IP address has been successfully added to the blacklist or whitelist.
Note
Add up to 10 IP addresses to the whitelist and up to 300 IP addresses to the blacklist. Regularly review your blacklist and whitelist to ensure they are up-to-date and reflect the current access needs of your store. Use reliable tools to check the IP address you need to whitelist or blacklist.
Implementing these steps will allow you to manage store access effectively, boosting security and ensuring smooth operation.


Comments
Please sign in to leave a comment.