
Correctly categorizing products ensures accurate tax rate application at checkout and supports product visibility across sales channels like Facebook. You can choose between custom categories tailored to your store or Google categories that meet marketplace listing requirements.
After setting up your category structure, the next step is to link each product to the appropriate category. This connection is essential for filtering, search visibility, automated collections, and ensuring accurate tax and product information across different platforms.
Note
- Product categories are for internal use only and will not appear on your storefront.
- To display products or categories in your store navigation, create collections and follow this guide: Store Navigation | Displaying products and collections.
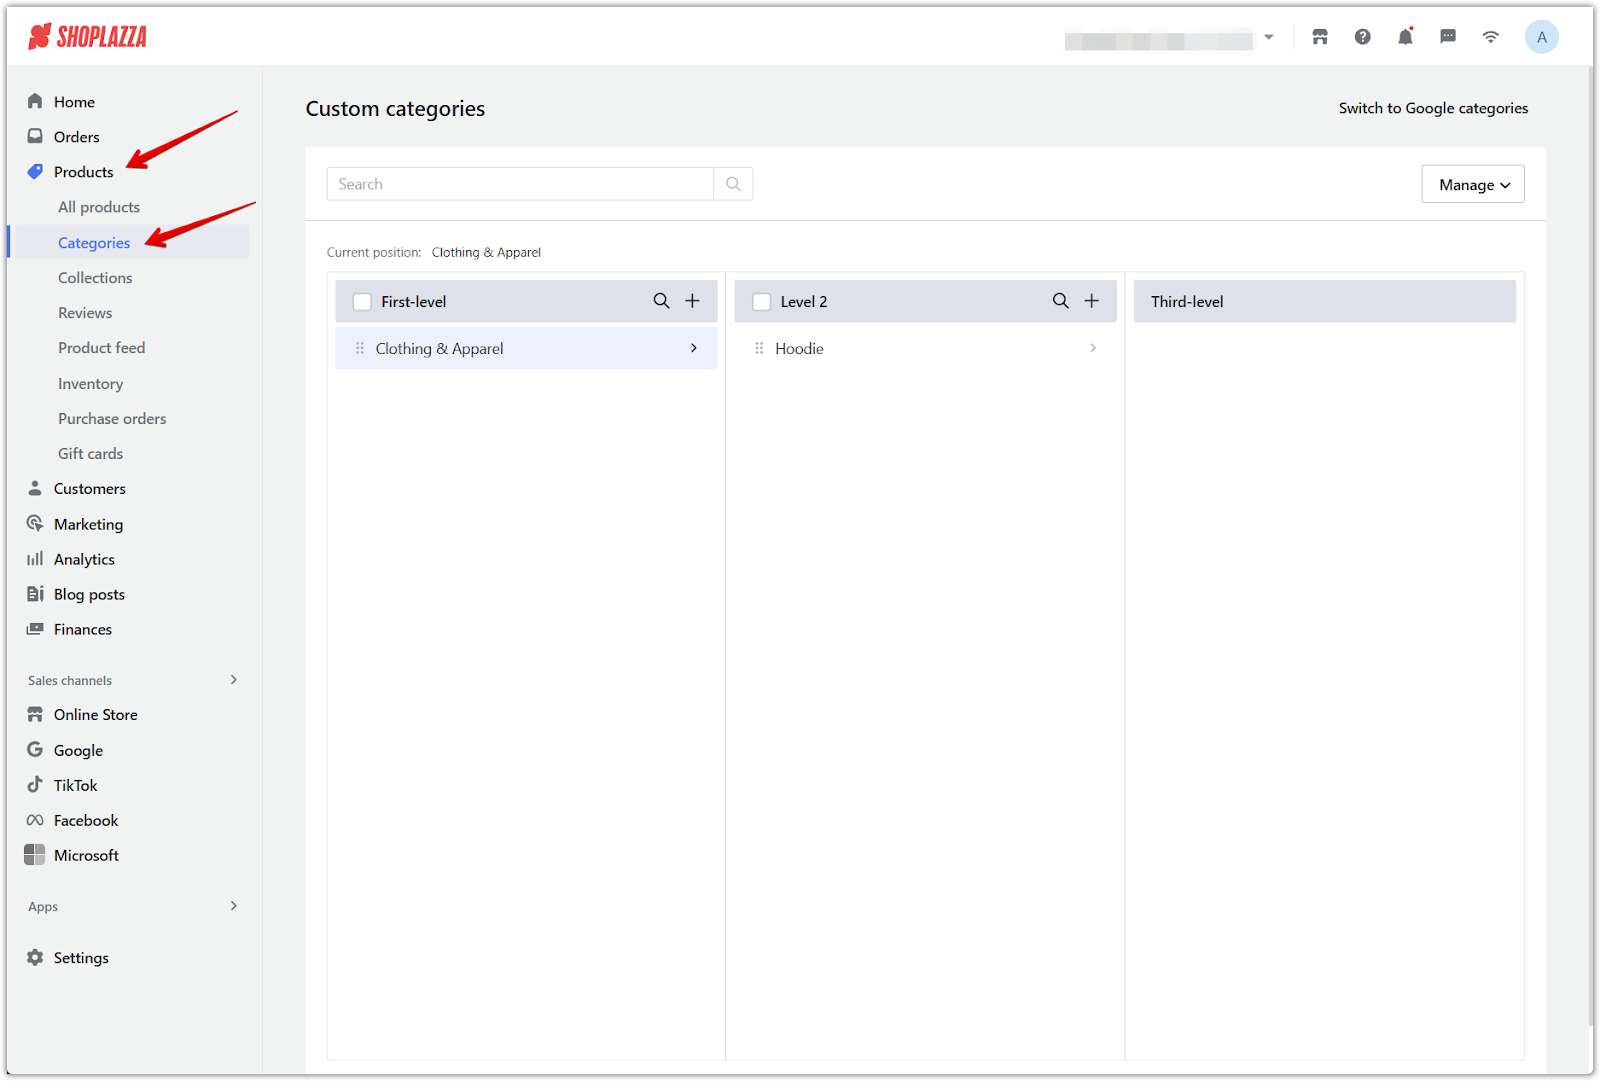
Organizing with custom categories
Organize products using custom categories based on your business structure.
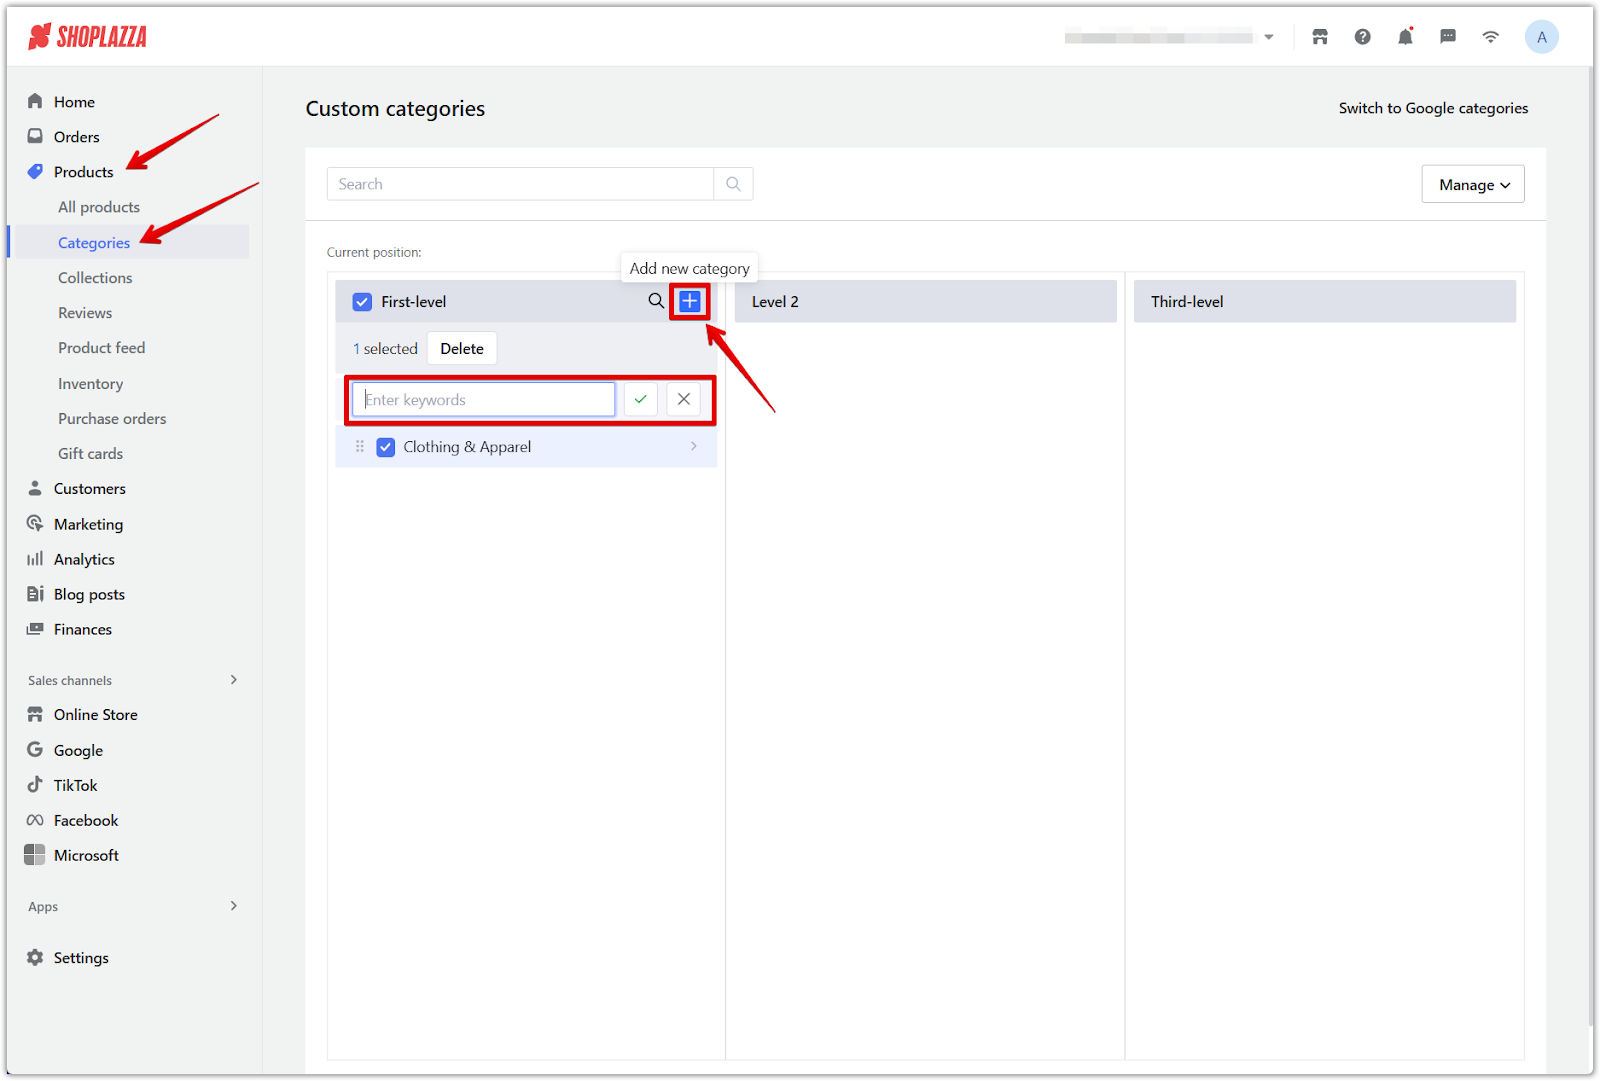
1. Access the categories page: Go to your Shoplazza Admin > Products > Categories and choose the categories you want to create.
2. Create a first-level category: Click the + icon, name your new top-level category, and save it.
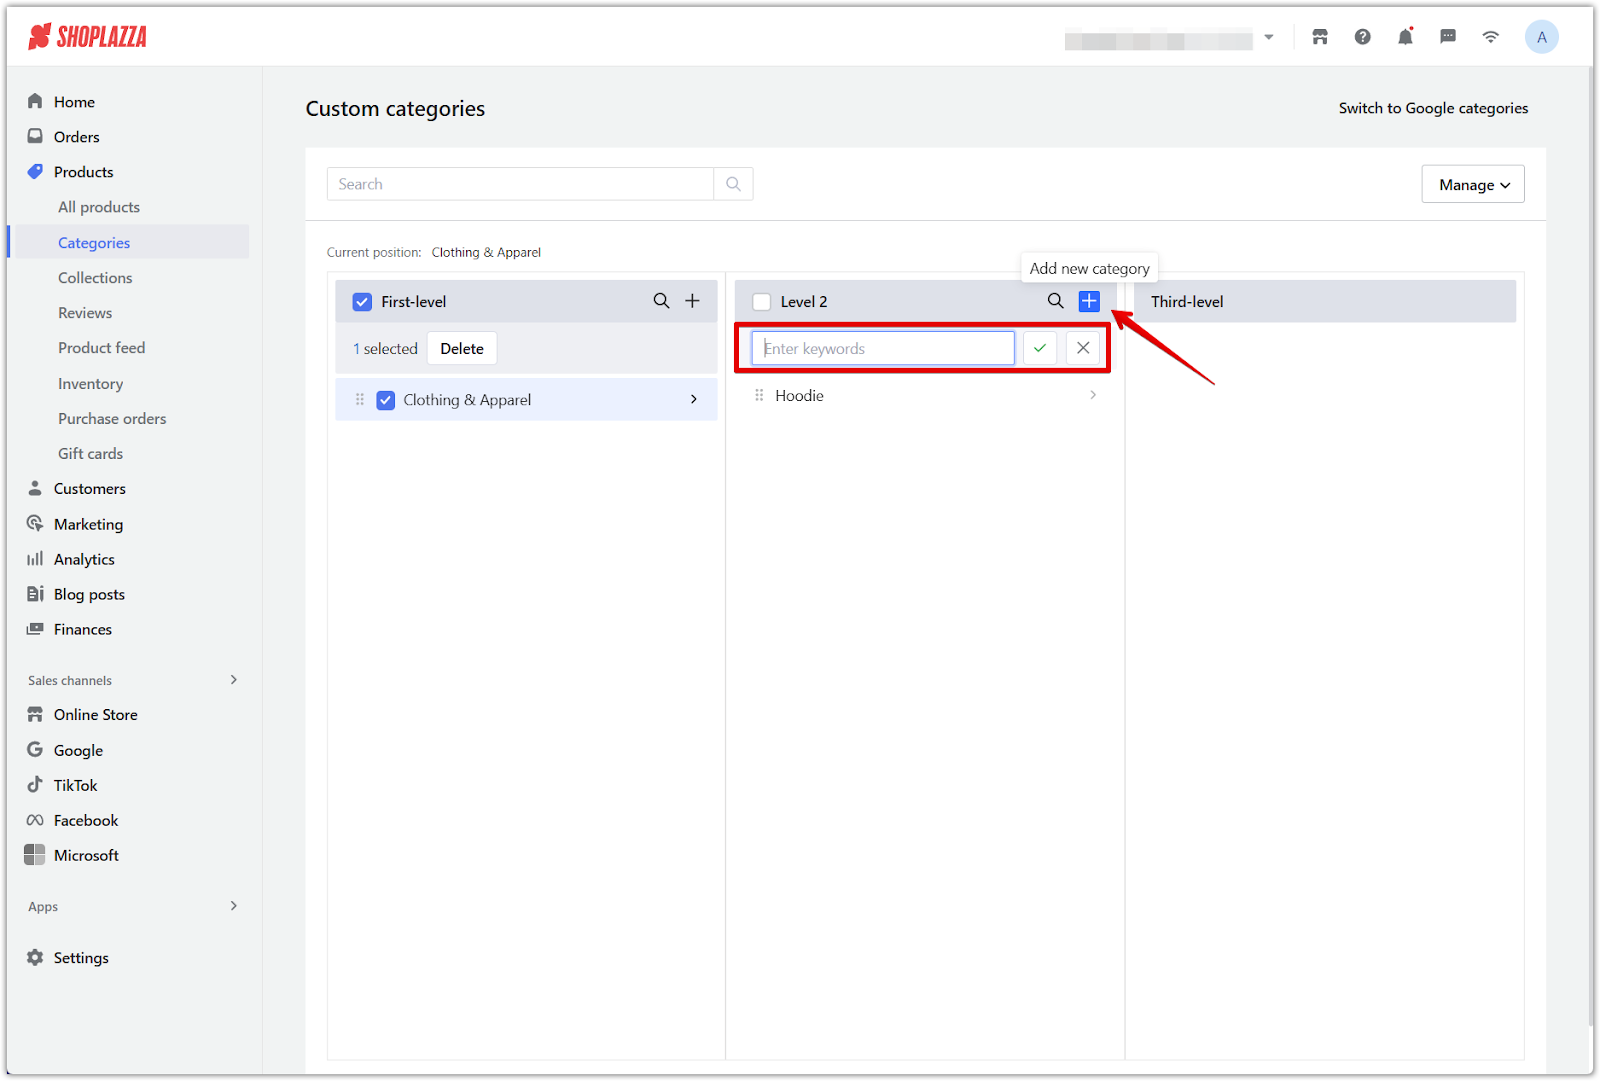
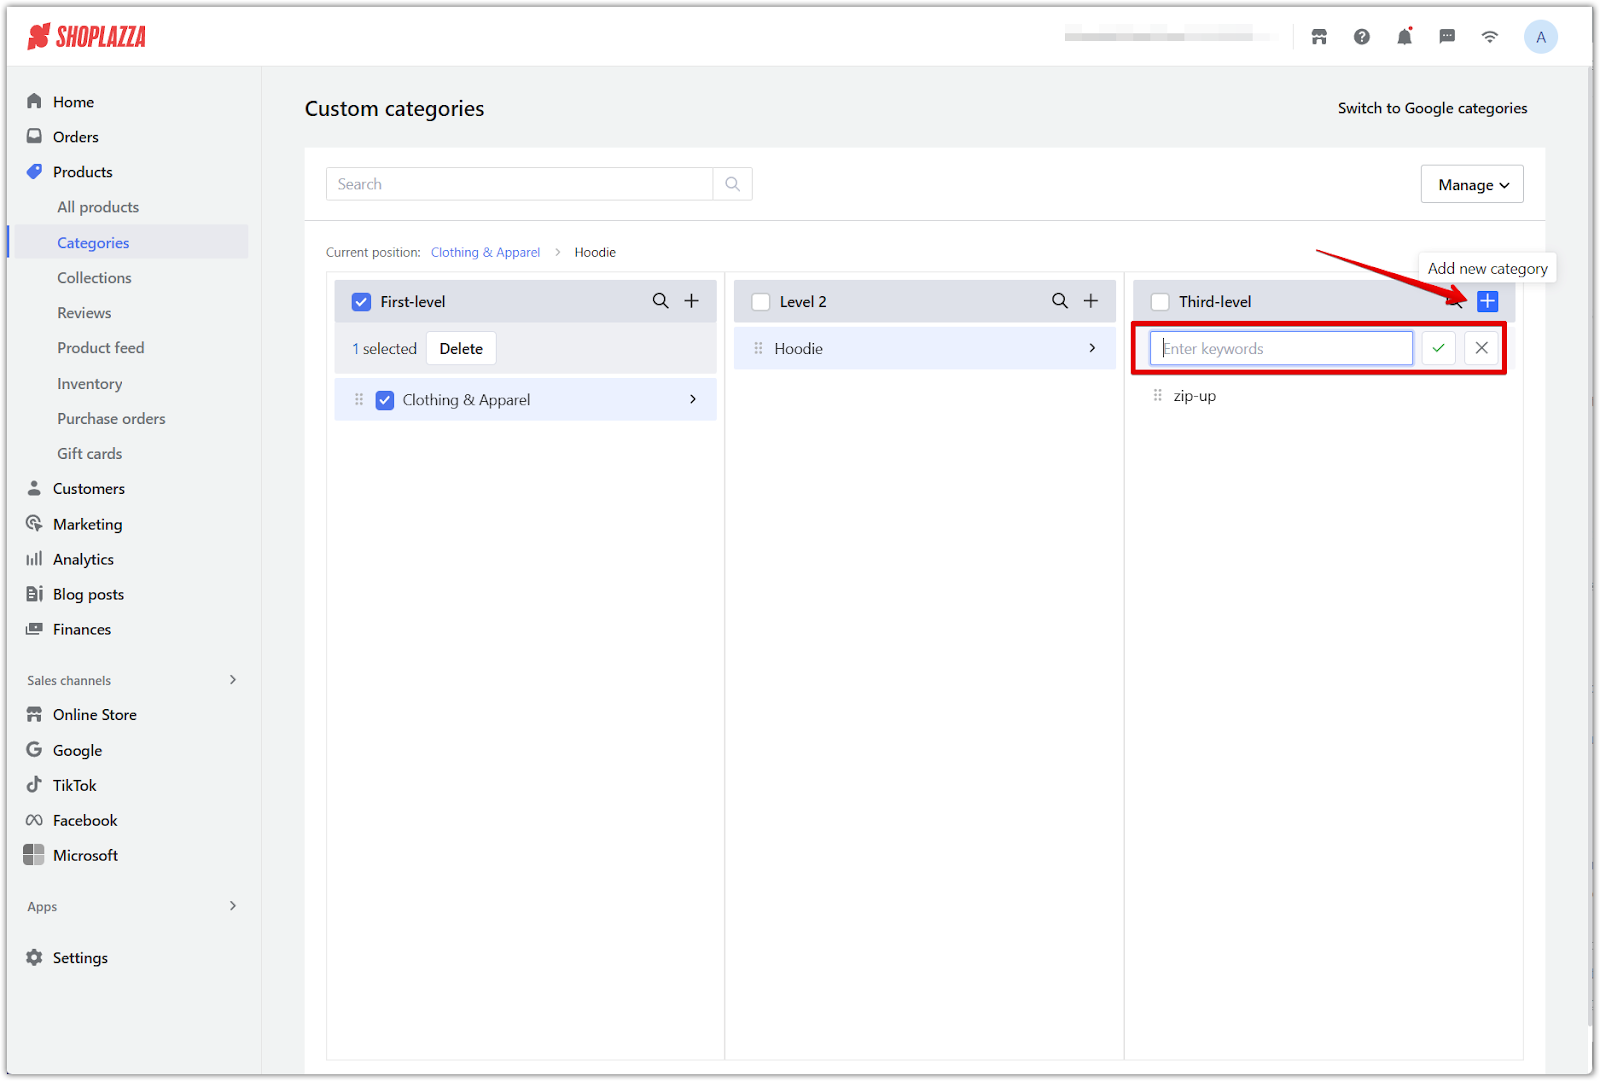
3. Add second- and third-level categories: Create subcategories under each parent category using the + icon to build a nested structure.
4. Adjust category order: Drag and drop to rearrange categories and control their display sequence.
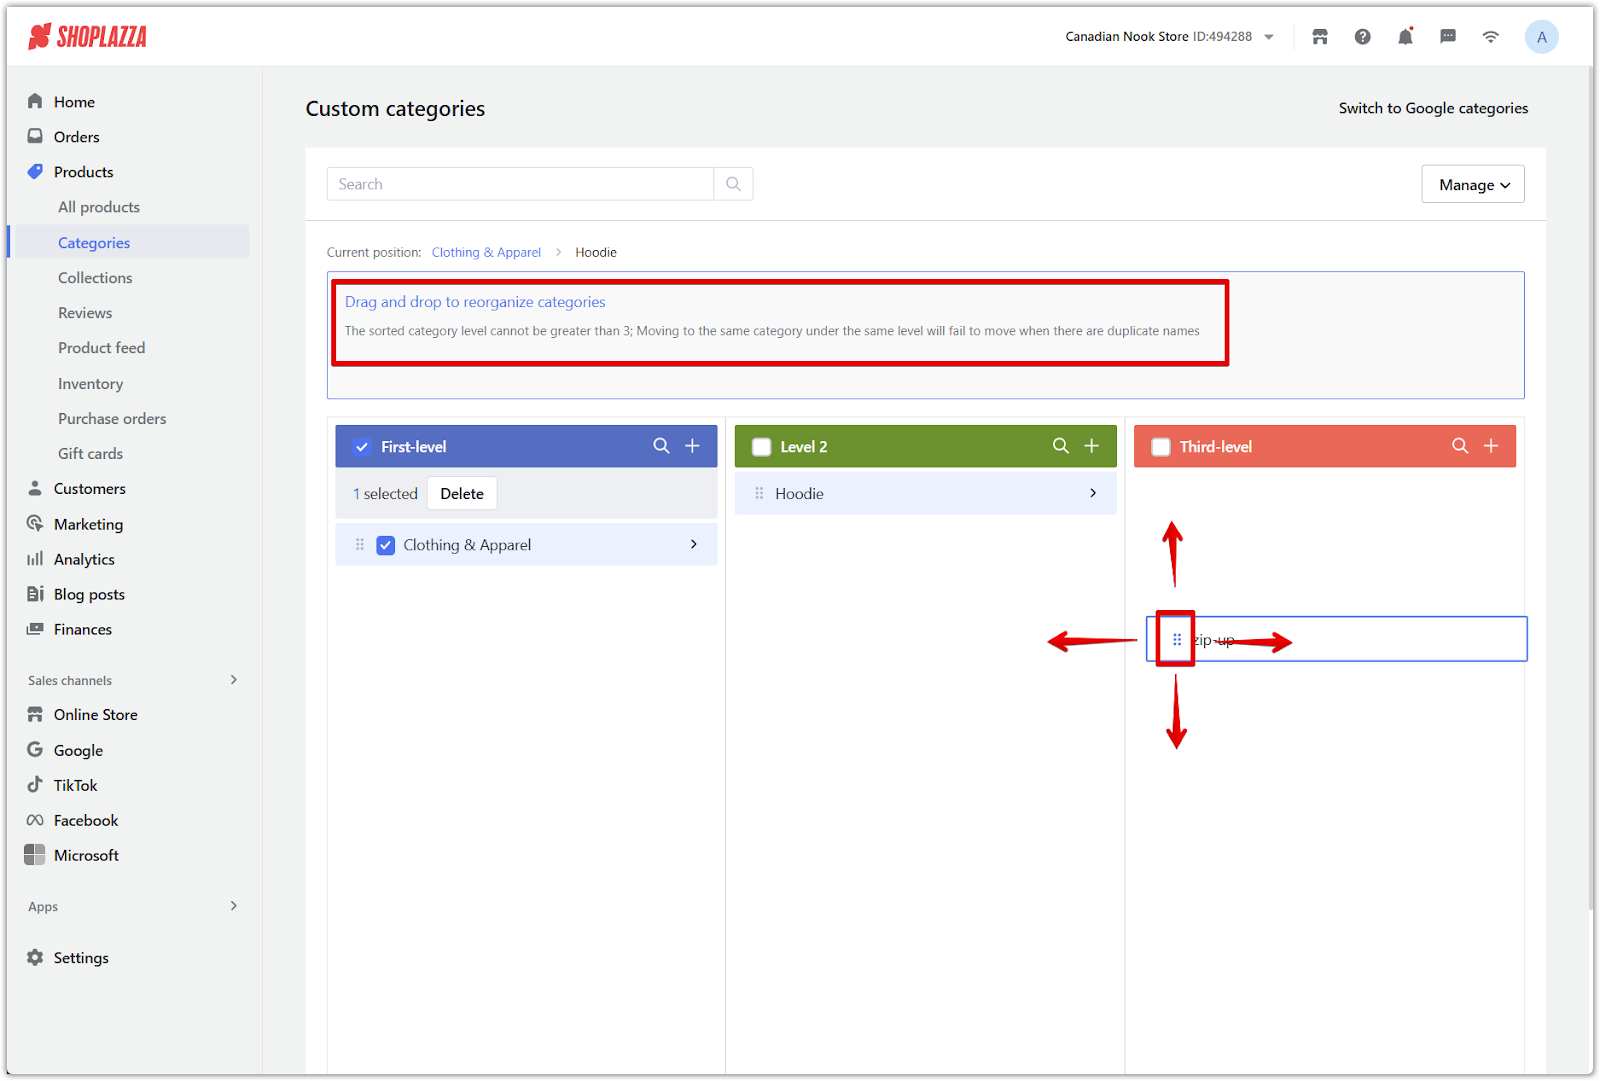
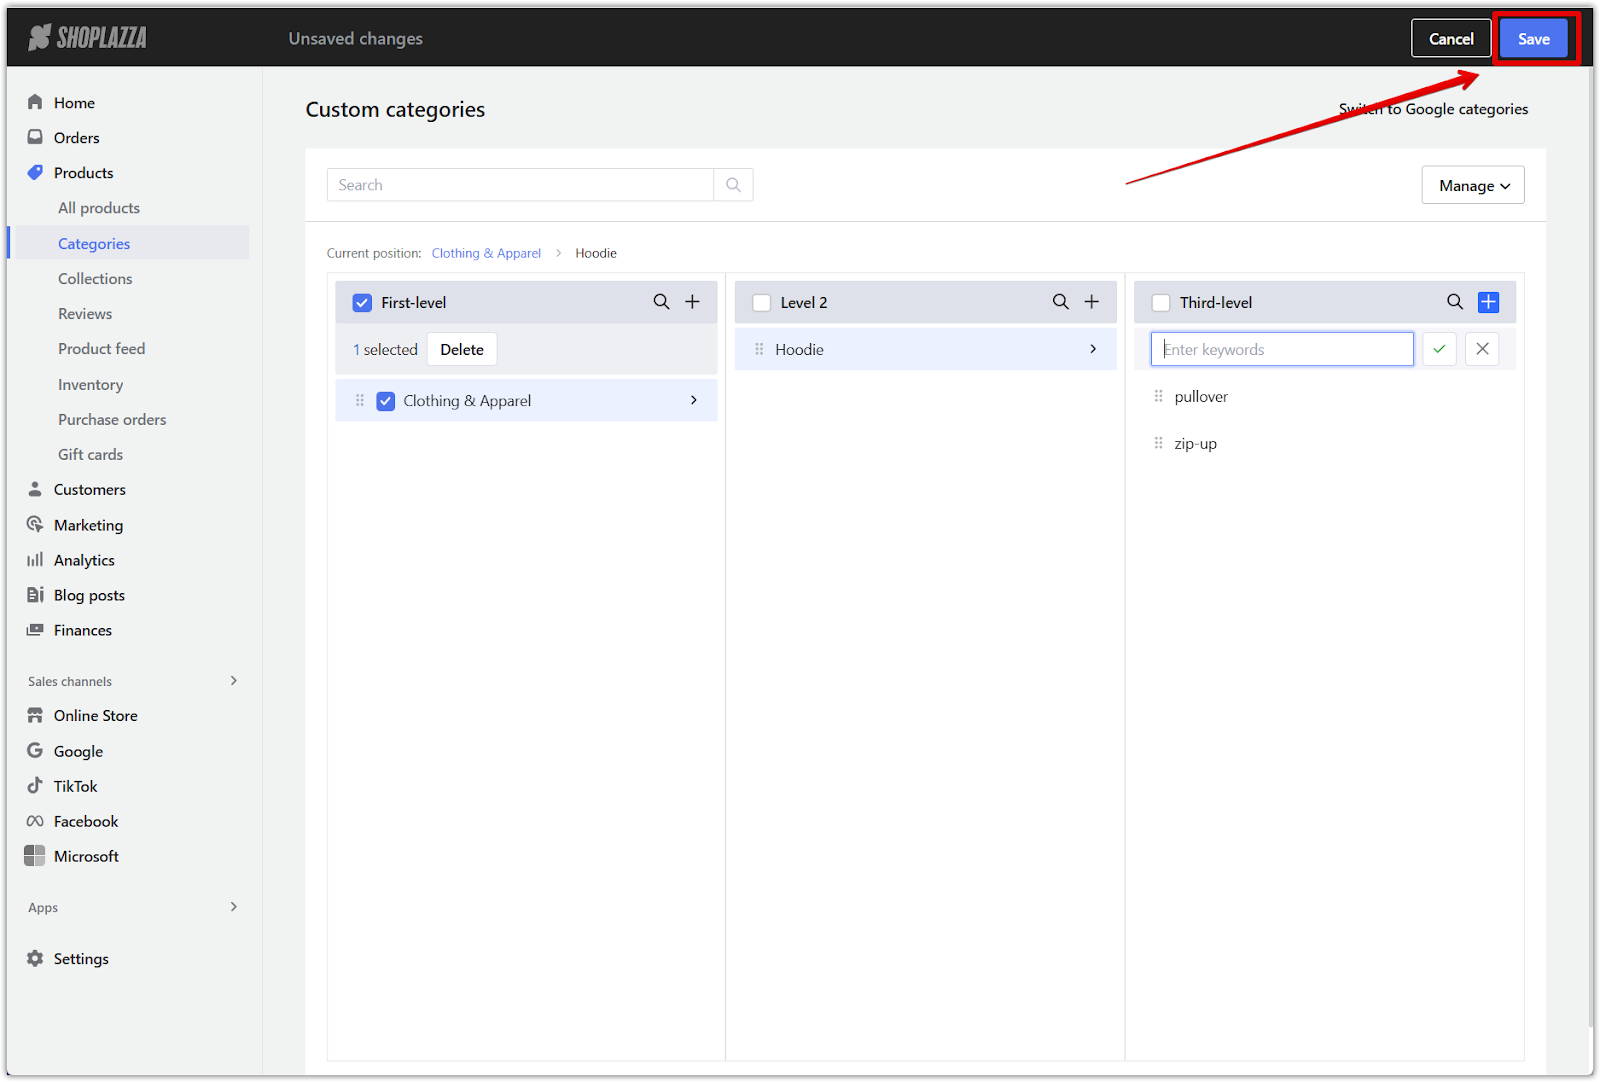
5. Save your changes: Click Save after completing your category setup.
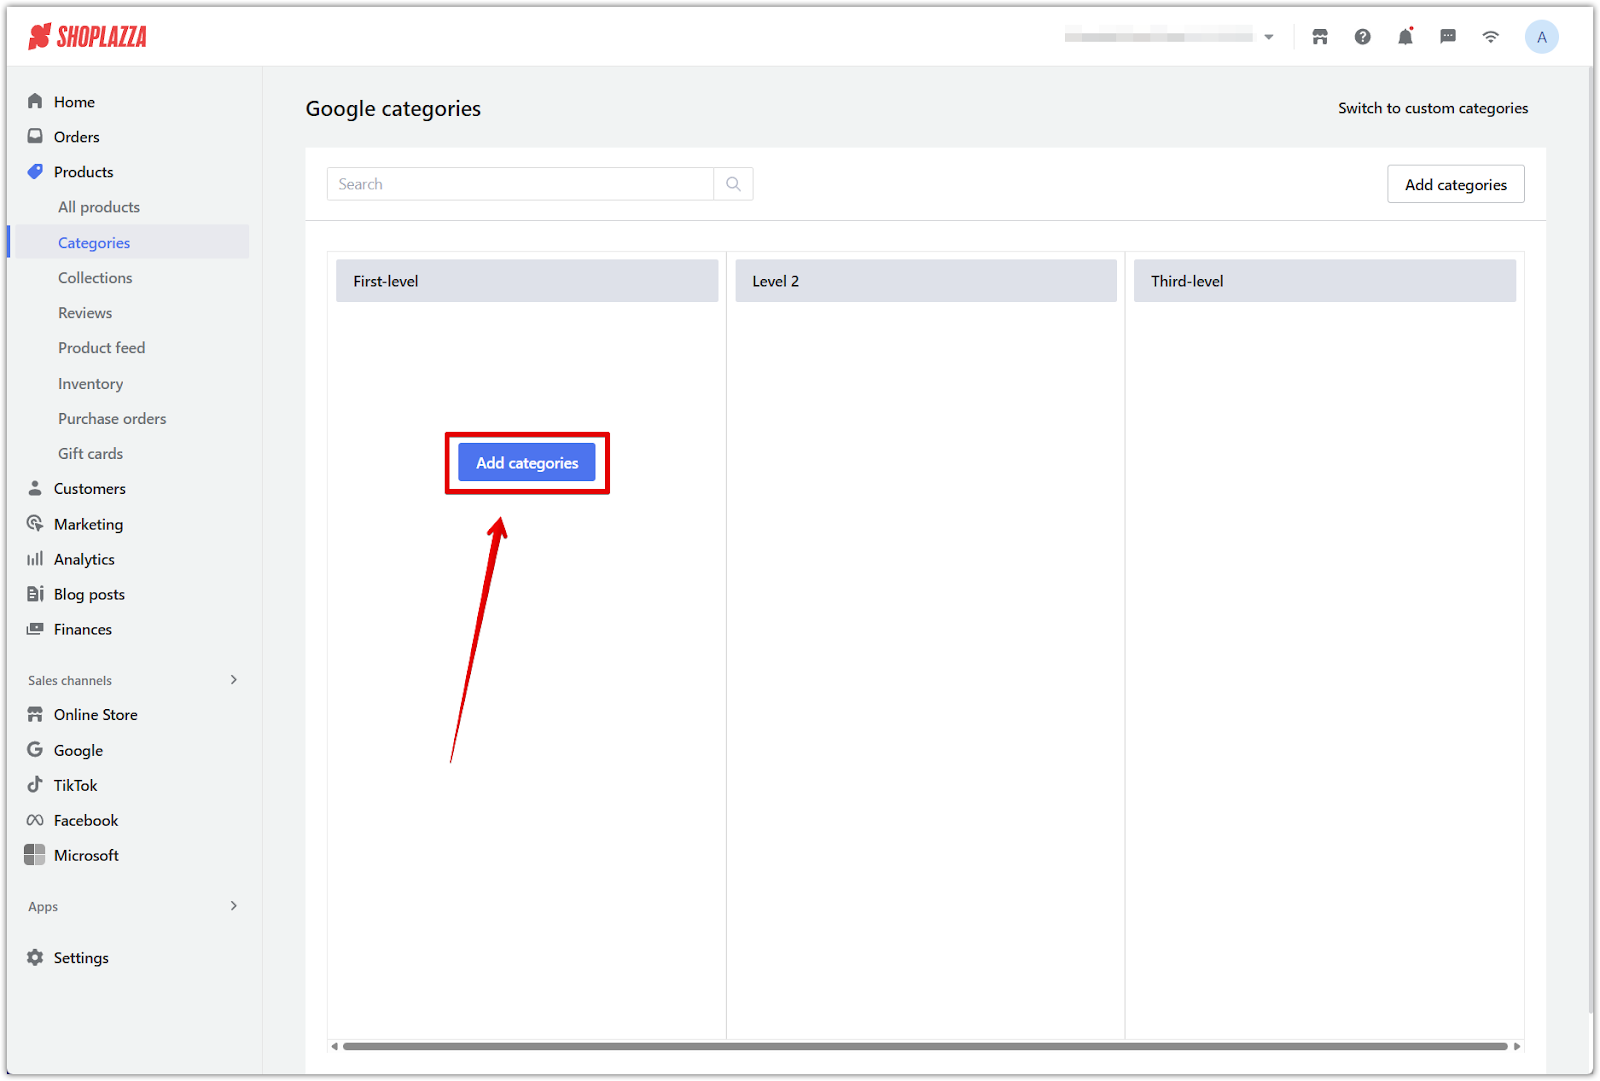
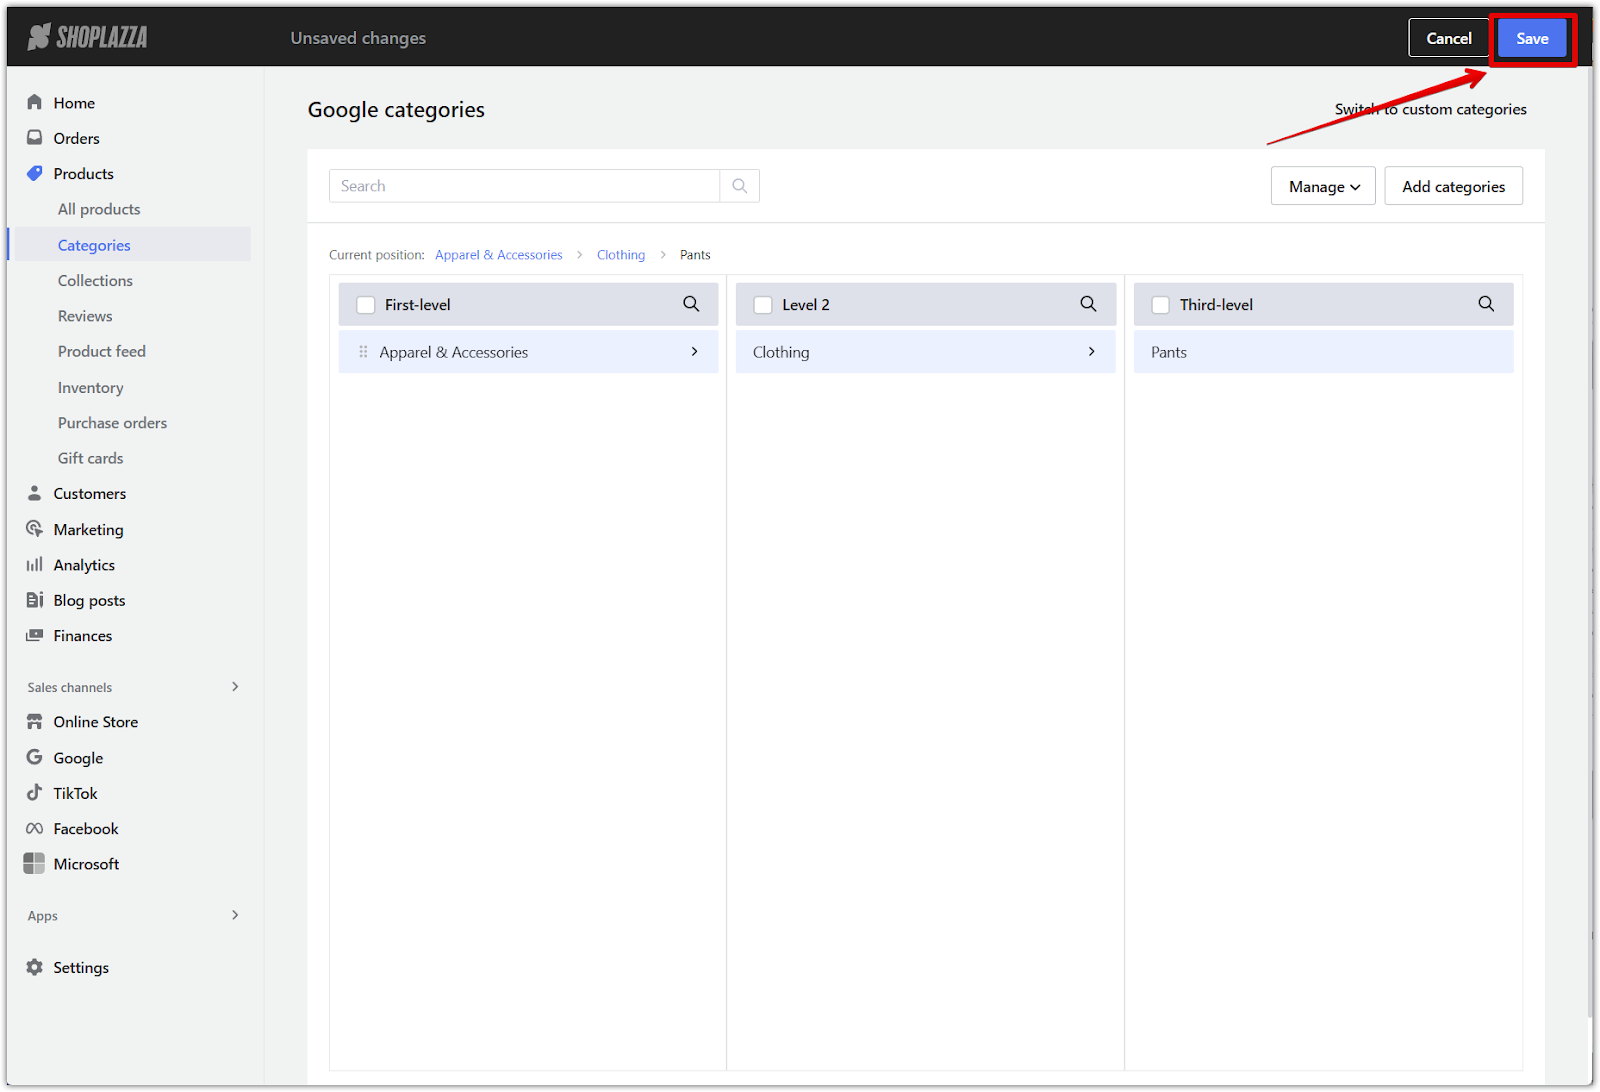
Setting up Google categories
Google categories help standardize product listings for external channels that require specific category structures.
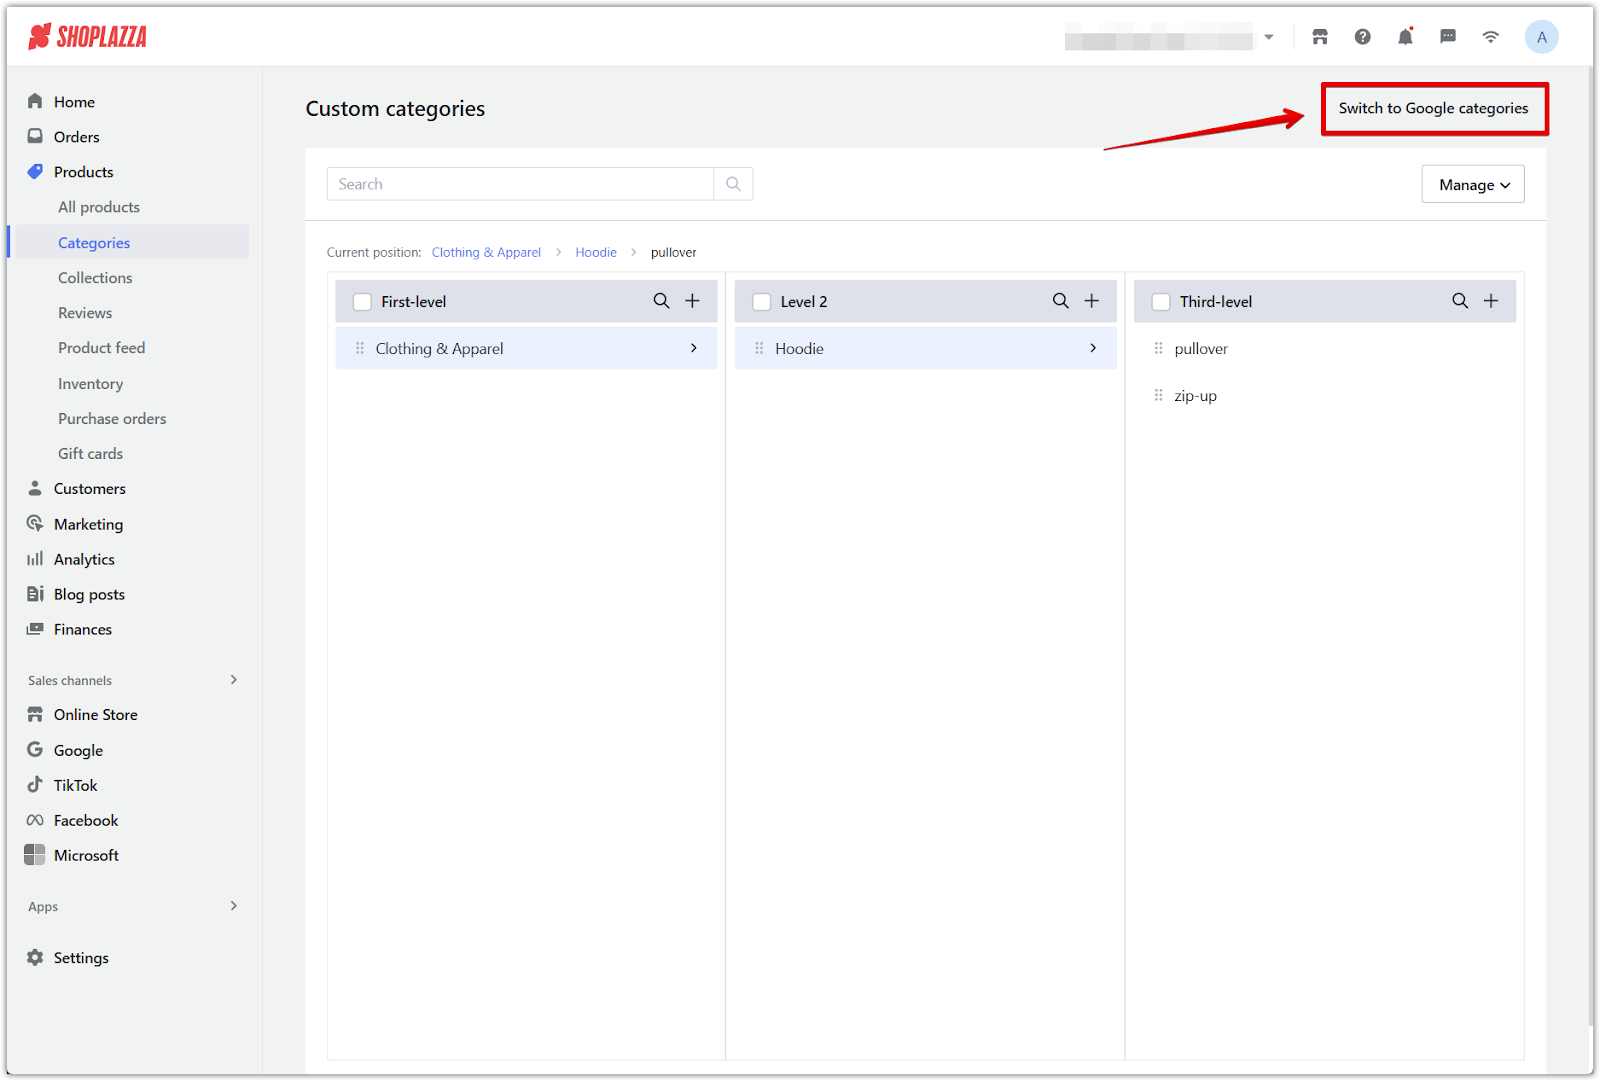
1. Switch to Google categories: Click Switching to Google Categories, then click Switch in the confirmation dialog.
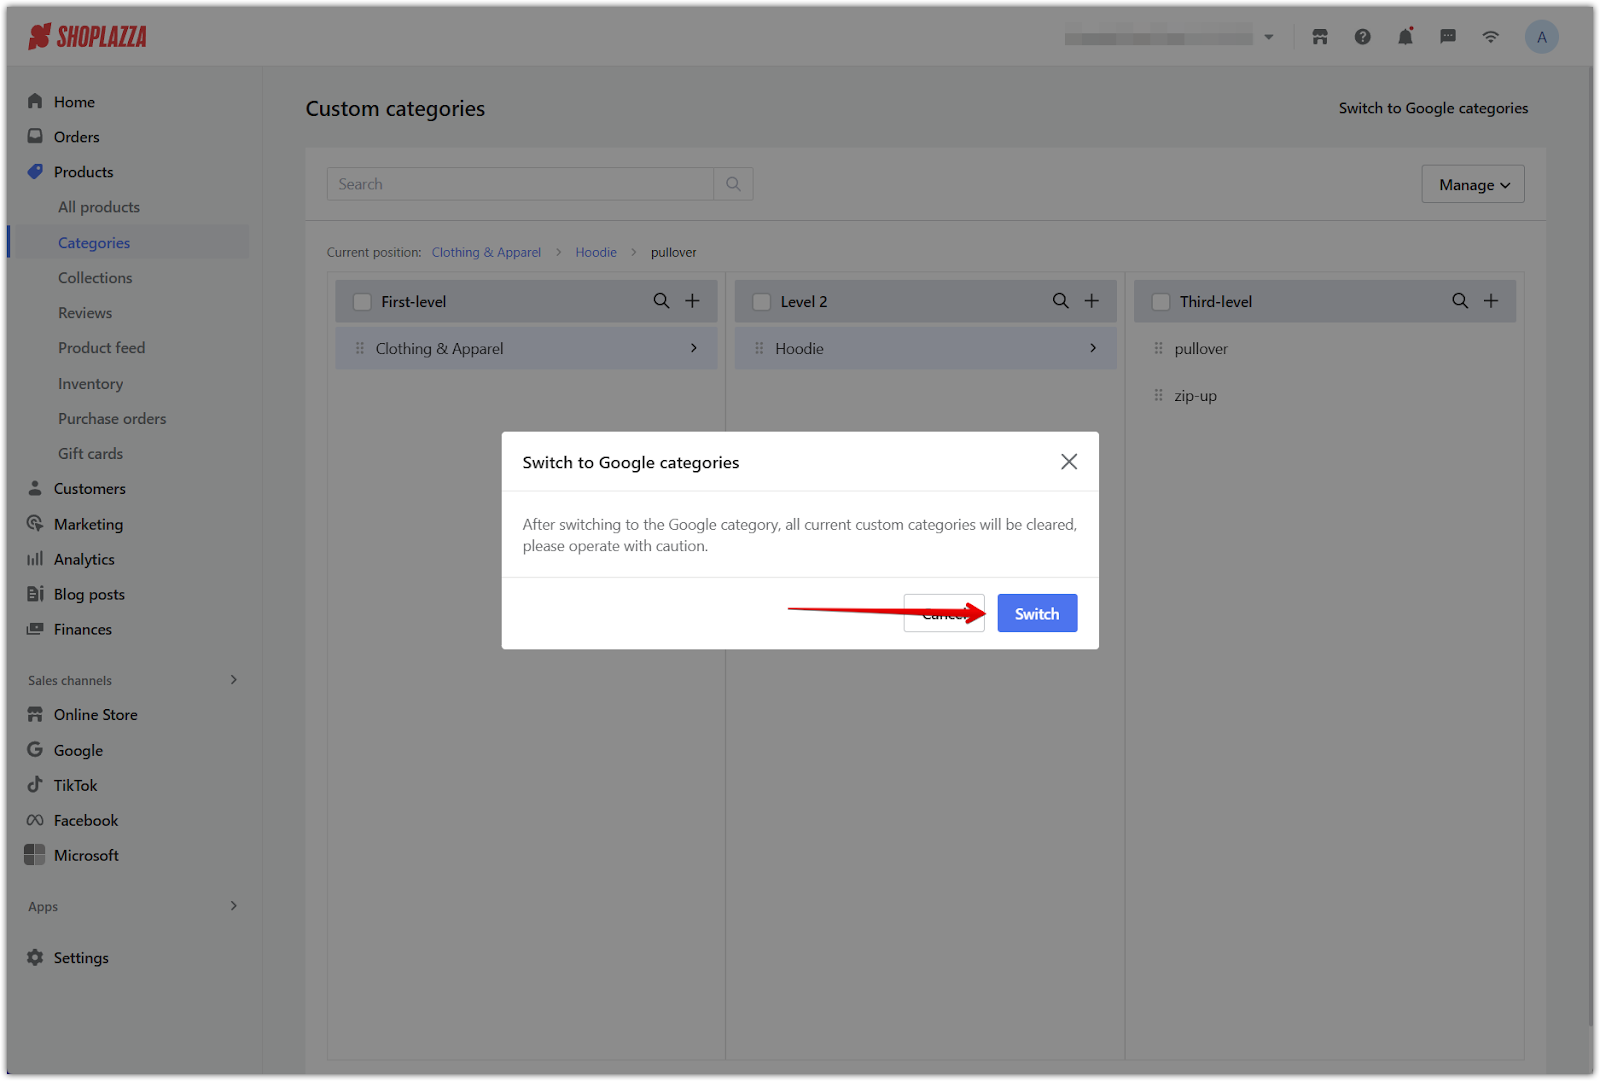
Note
When switching to Google categories, all existing custom categories will be permanently cleared. This action cannot be undone, so proceed with caution.
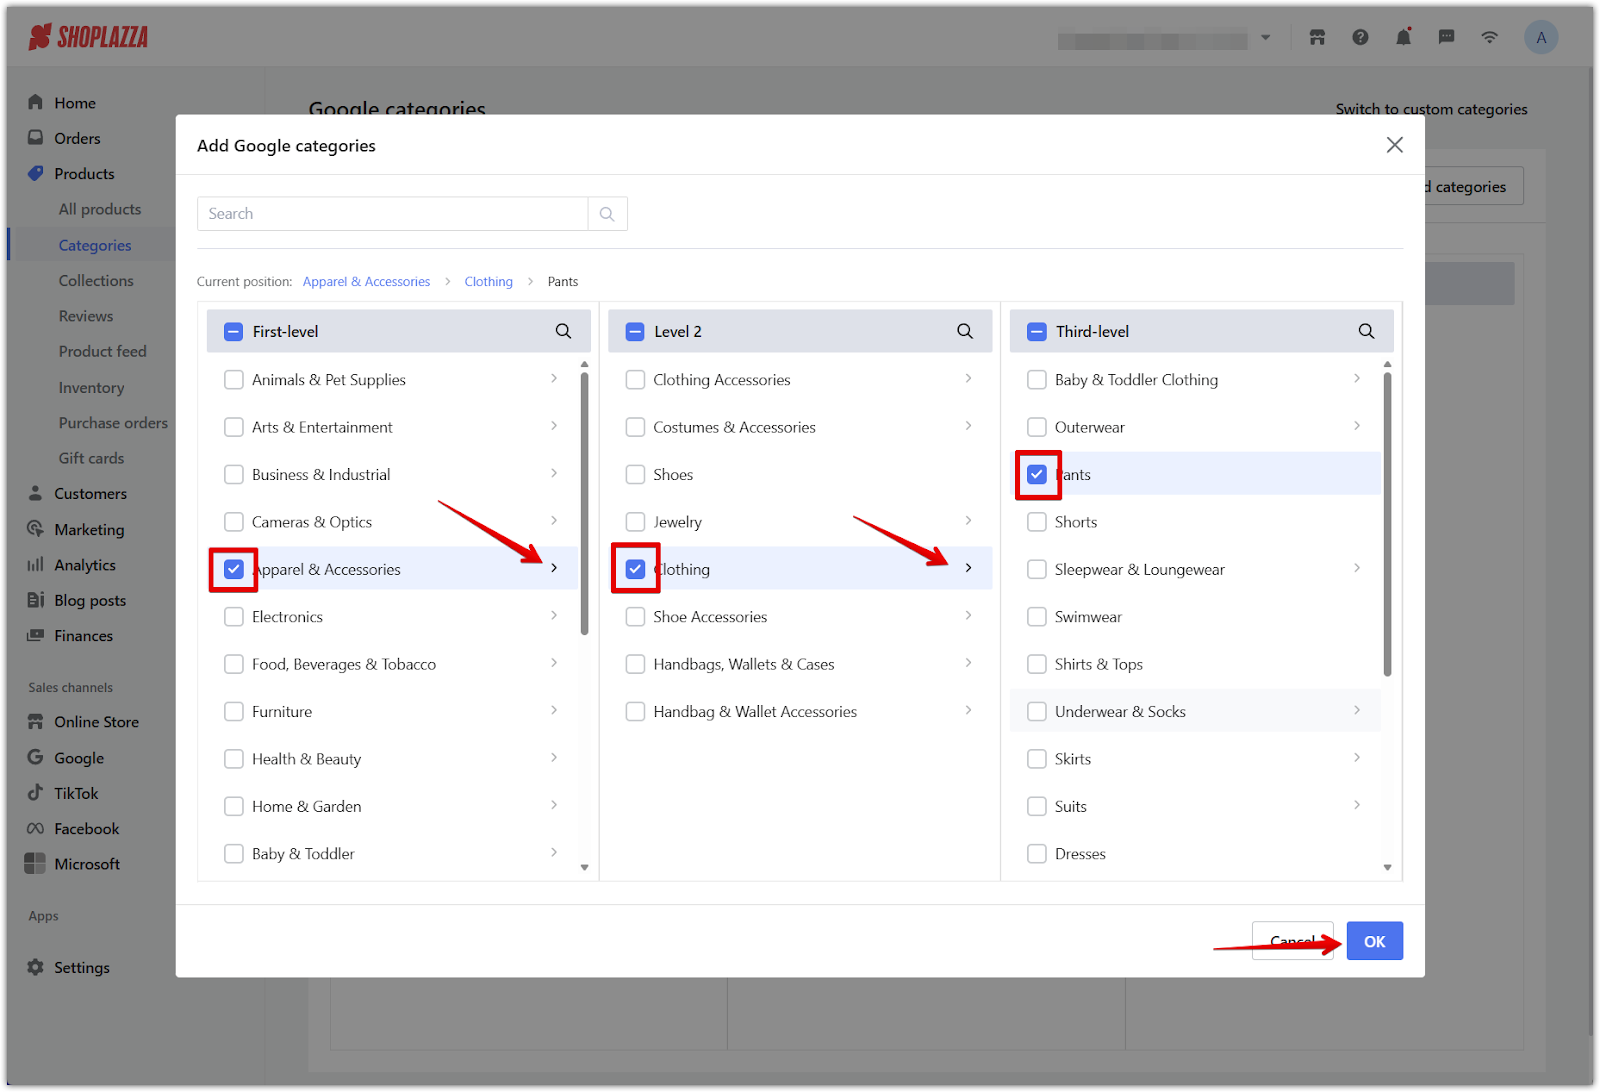
2. Add Google categories: Click Add categories, select the appropriate category, and choose any subcategories you want to include.
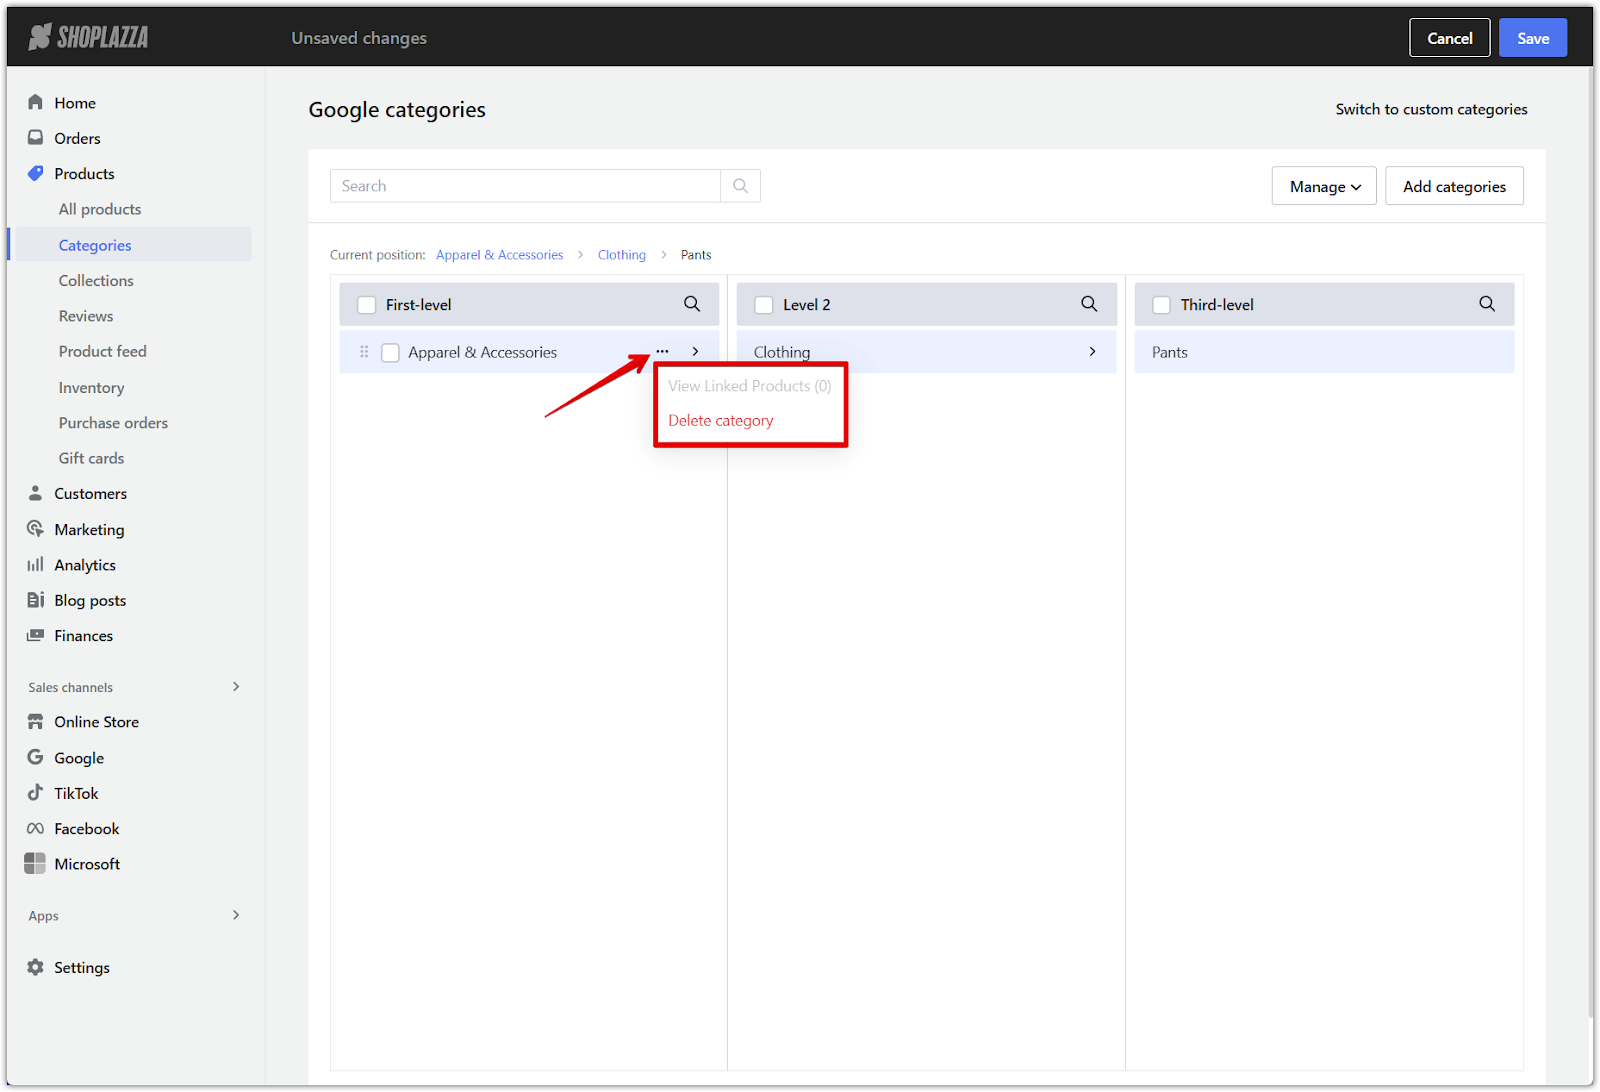
3. Manage existing category links: To reassign products to a new structure, delete current categories or unlink all products before creating new links.
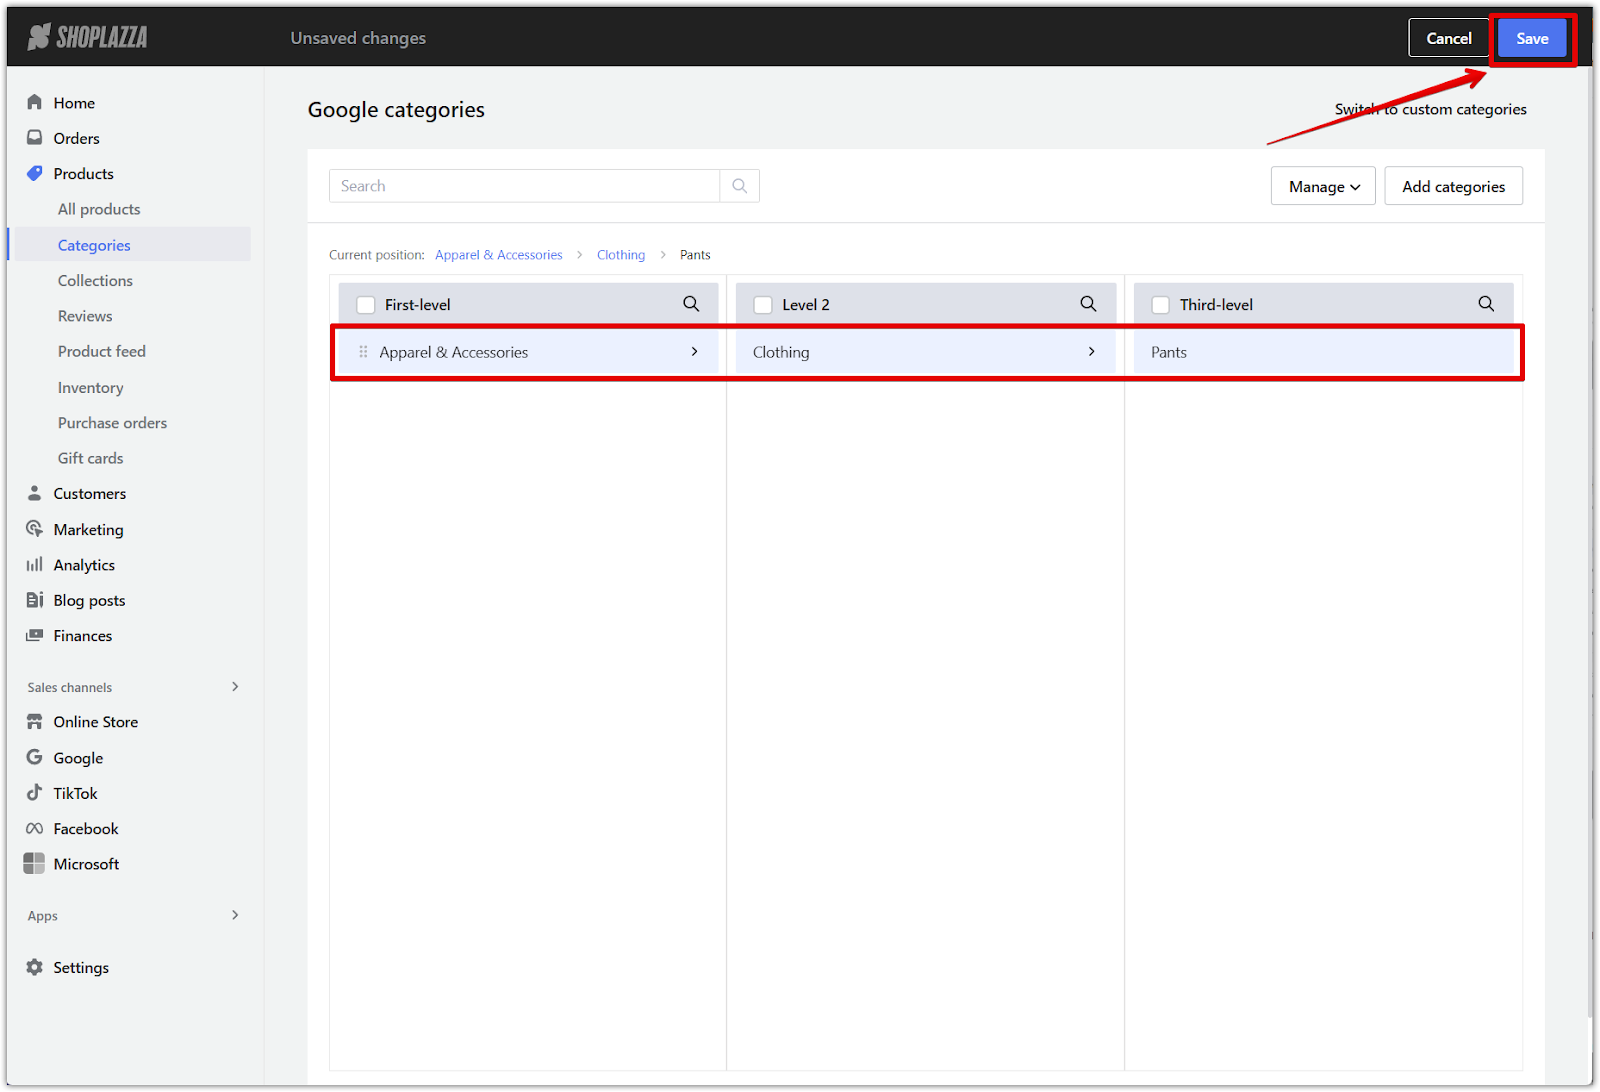
4. Save your changes: Click Save after finalizing the category selection.
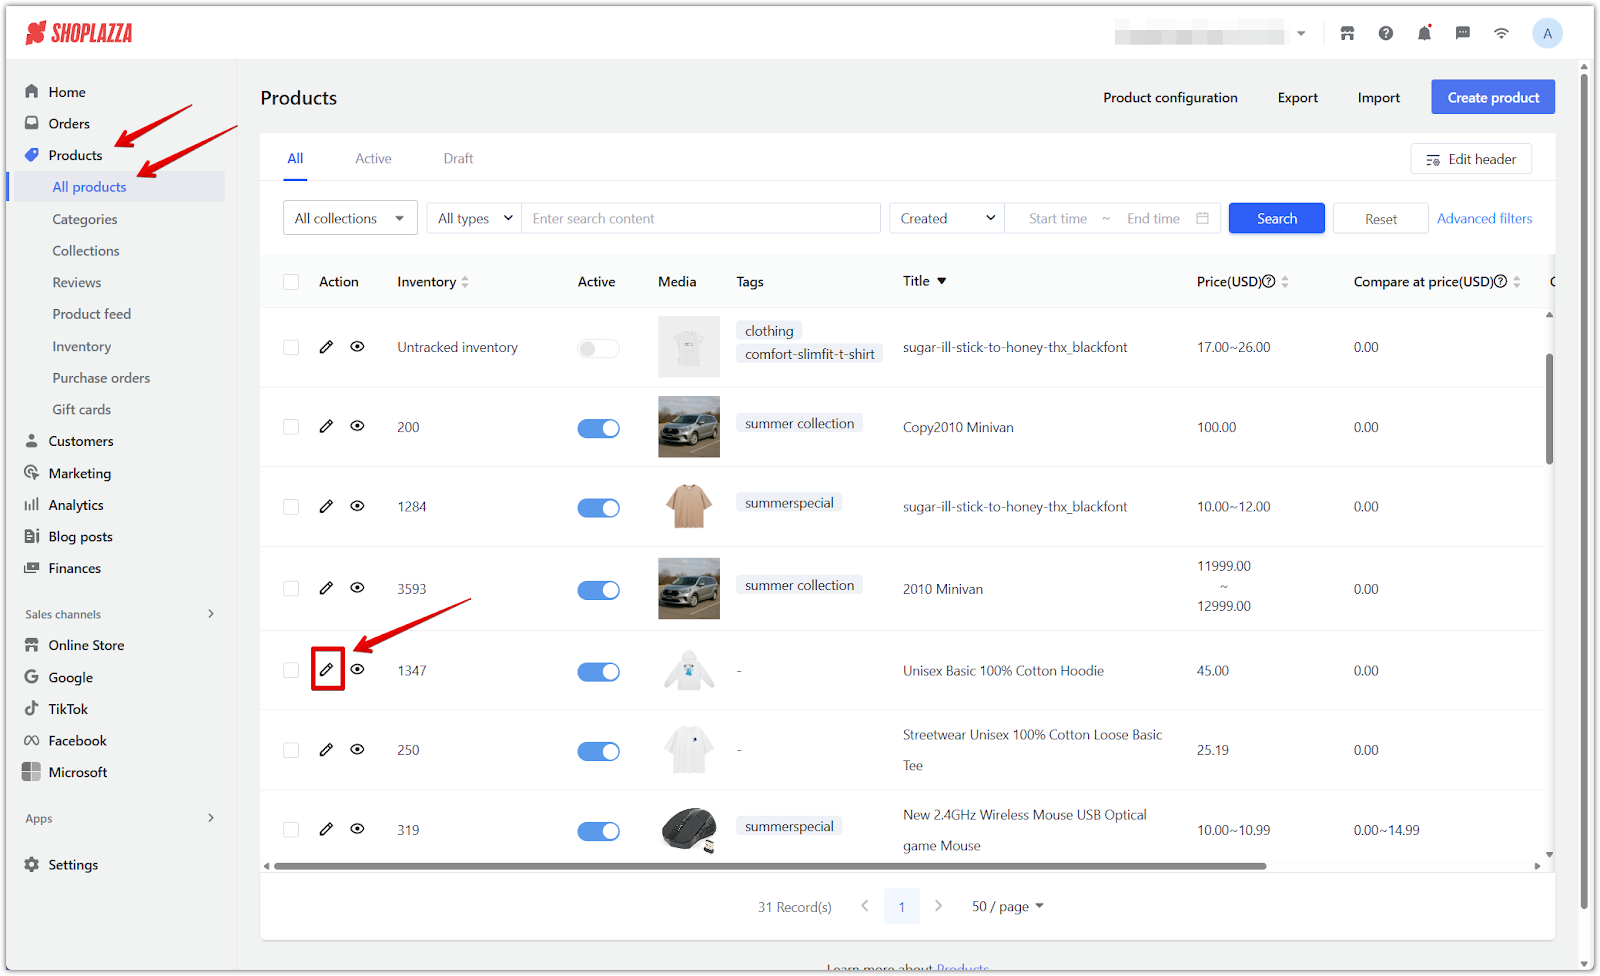
Linking products
After setting up your product categories, the next step is to assign each product to the appropriate category. This step ensures that your category structure is actually applied to your catalog, enabling accurate filtering, search visibility, tax application, and platform integration.
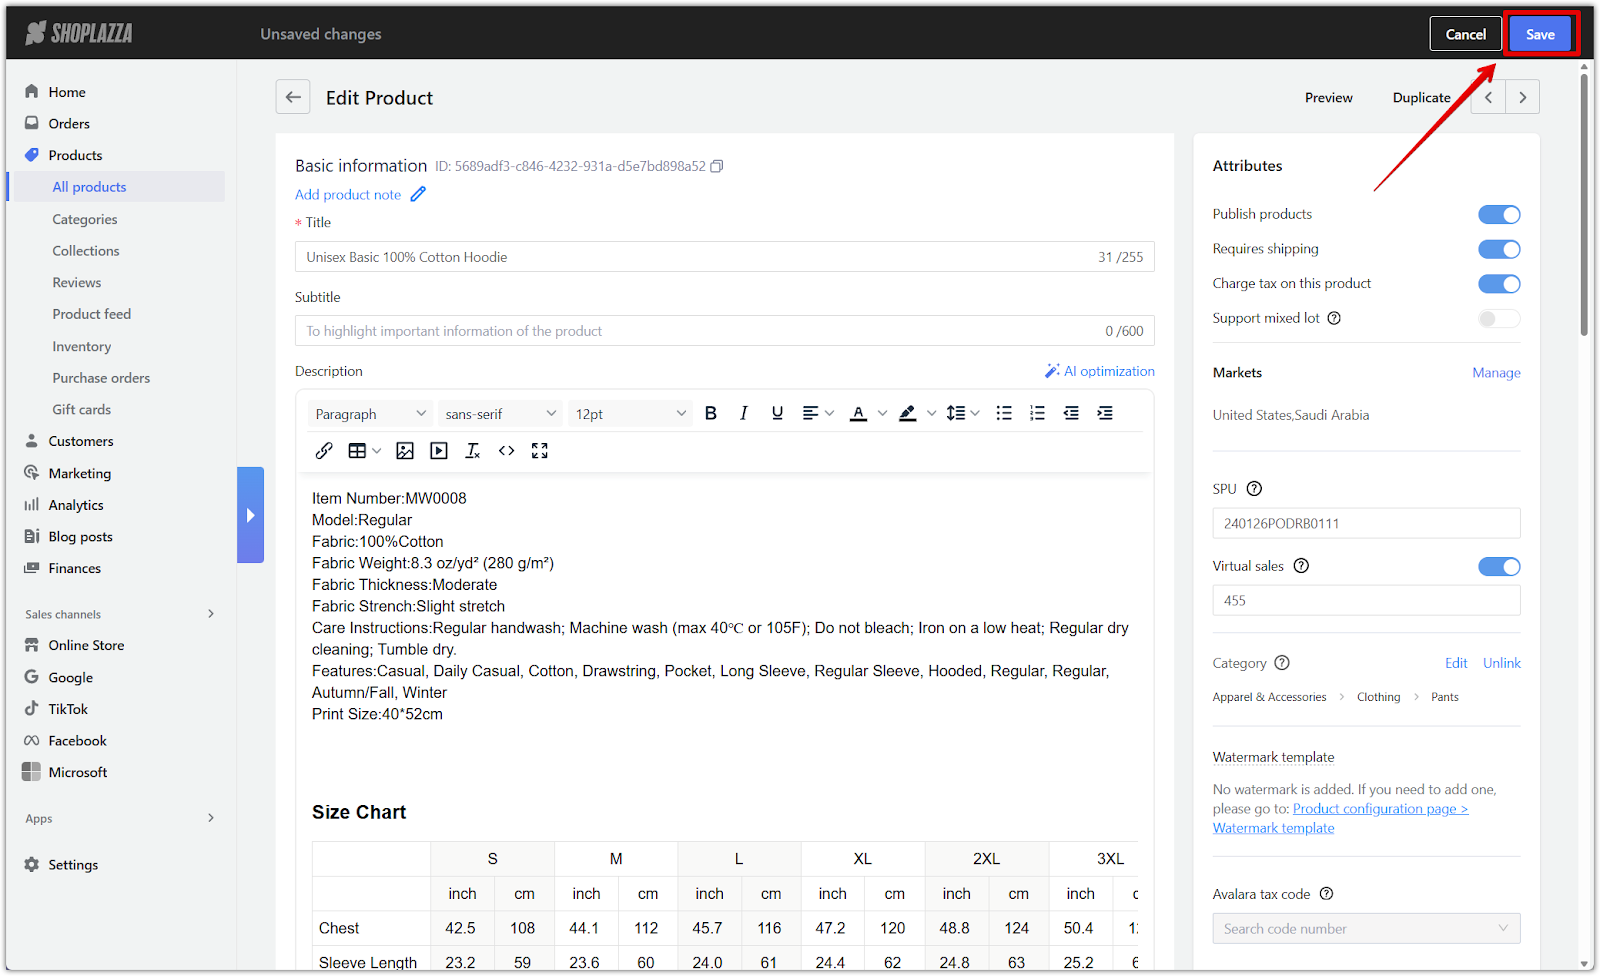
1. Edit the product: Go to your Shoplazza Admin > Products > All products, select the product, and click the pencil icon to edit.
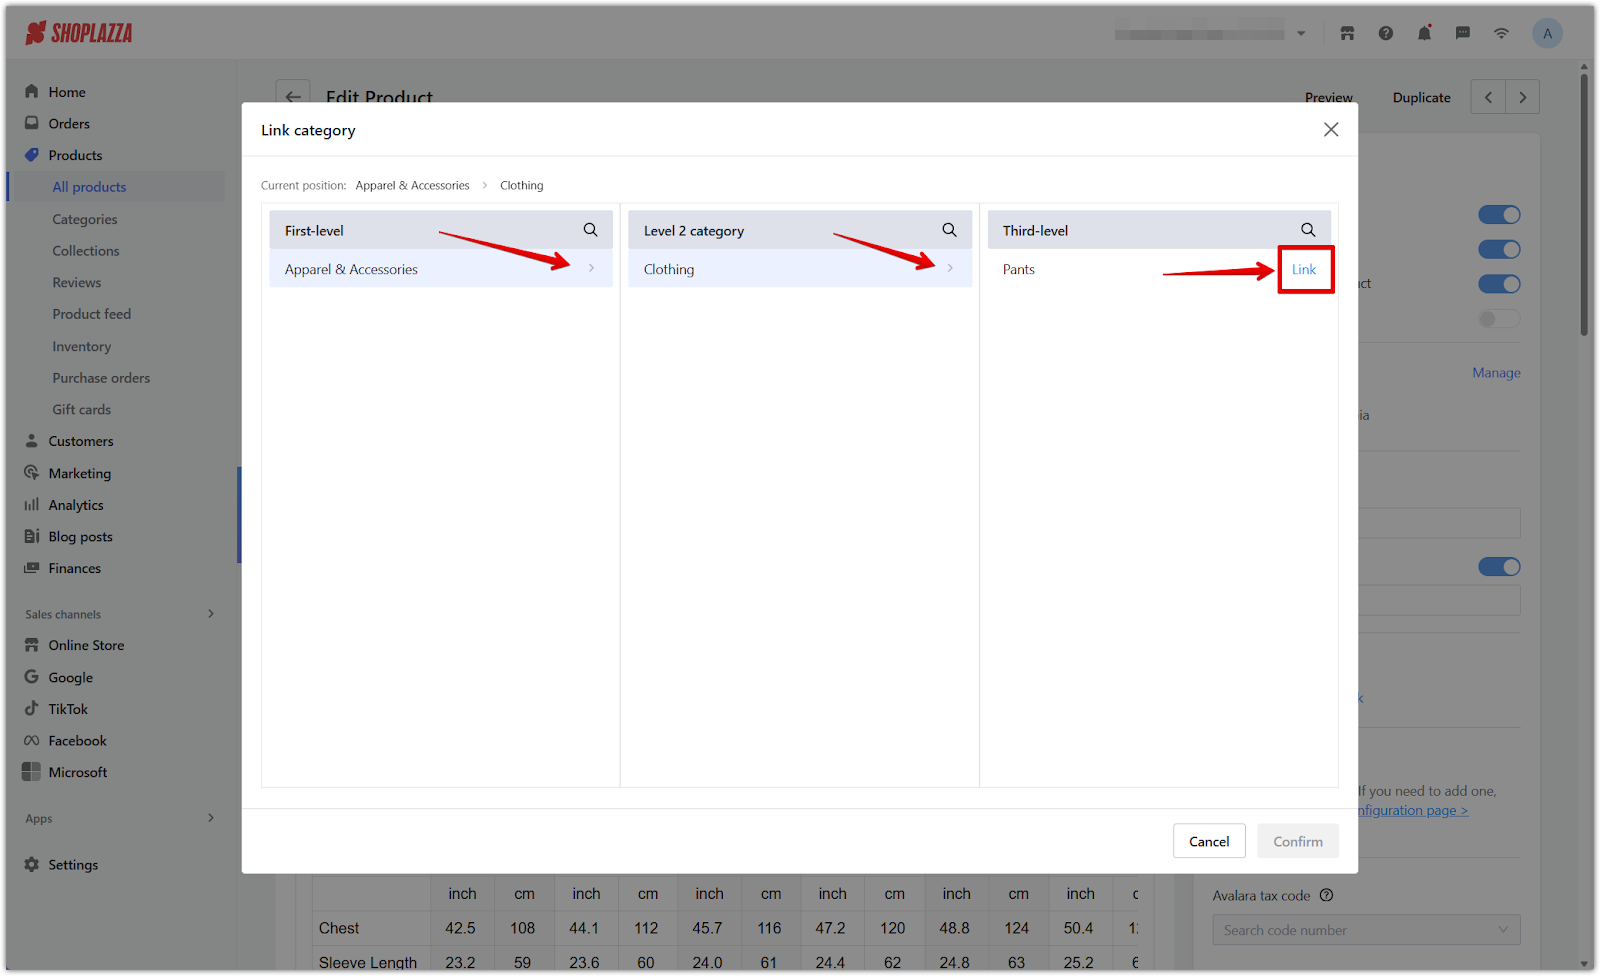
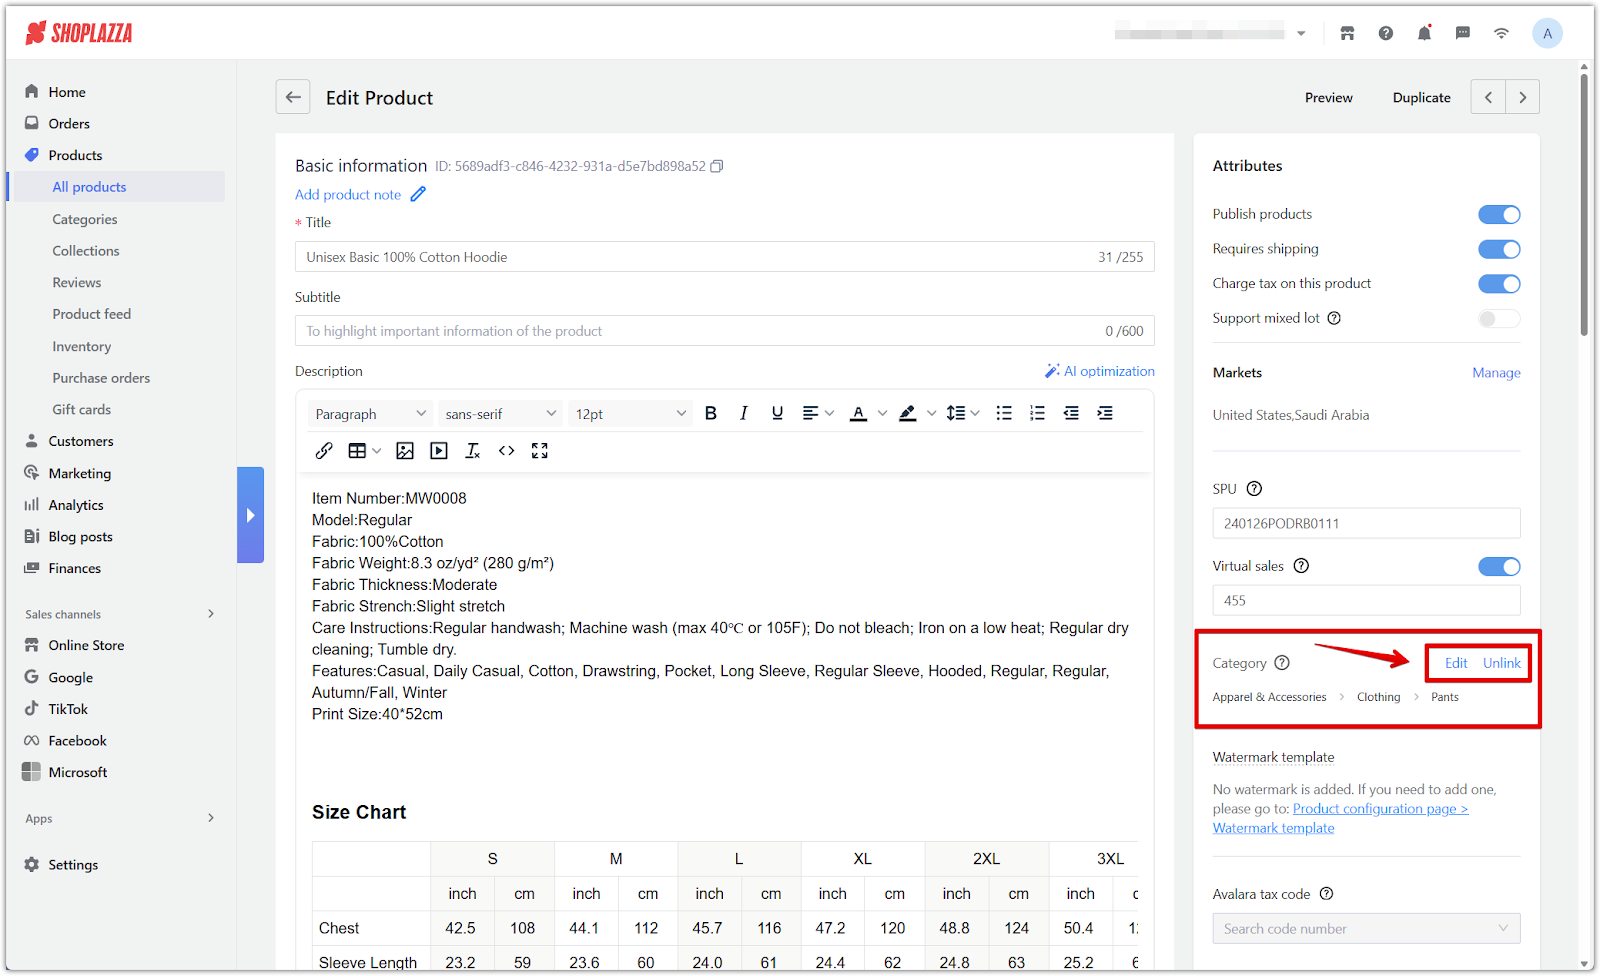
2. Locate the category section: In the right-hand panel, click Link under the Category section.

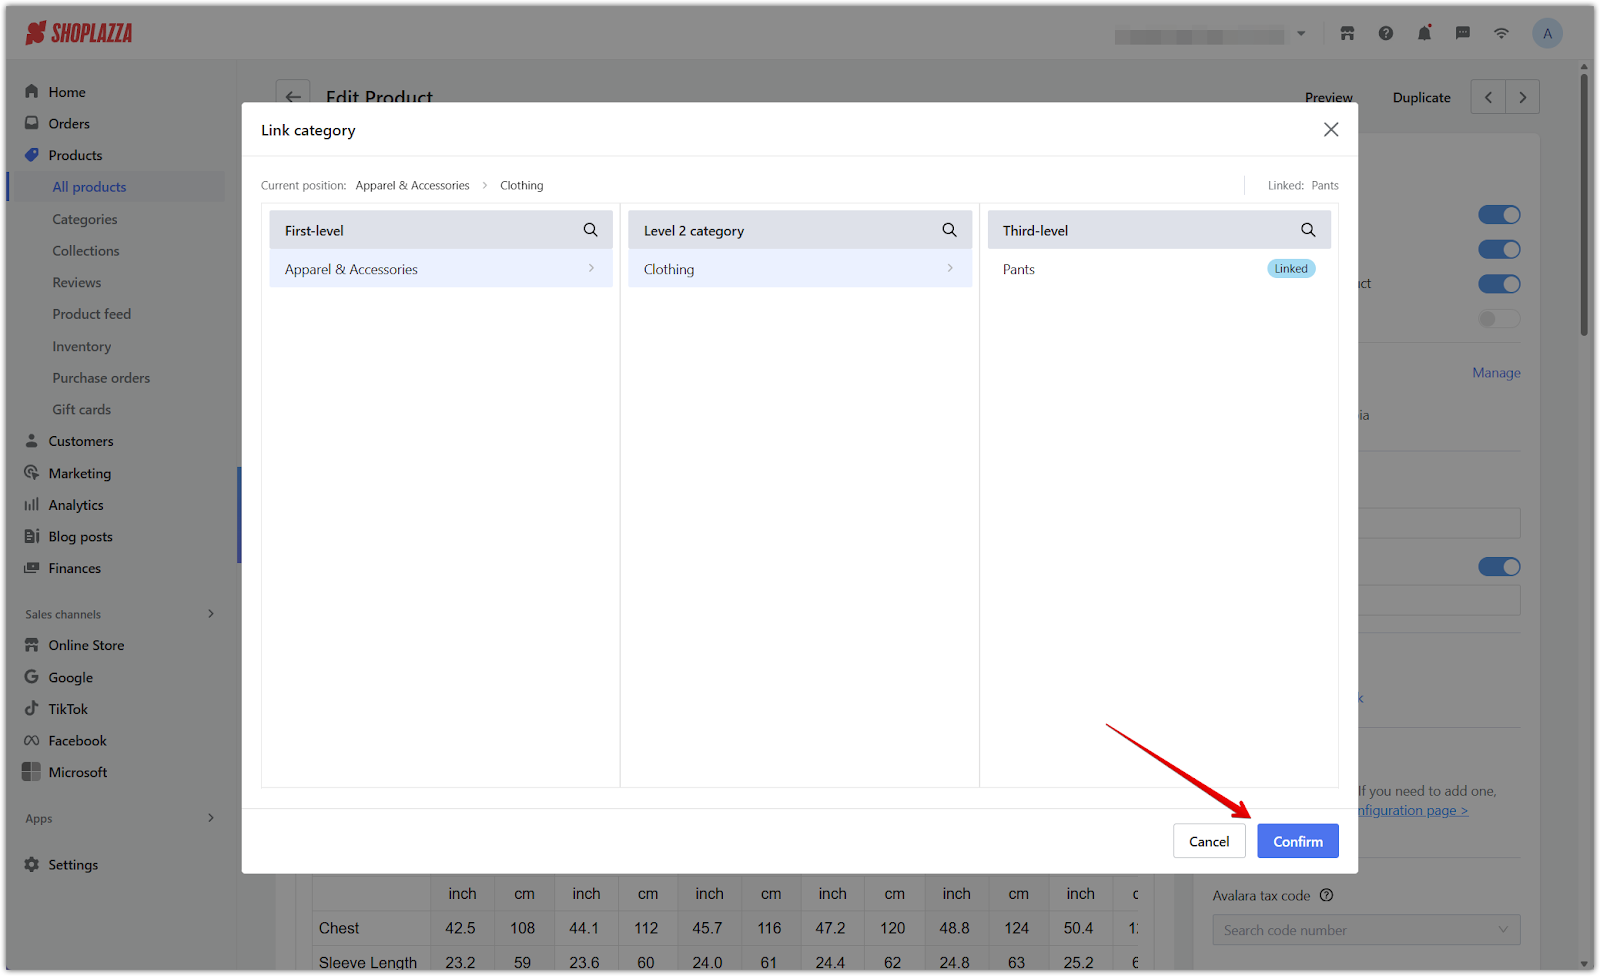
3. Select and confirm the category: Choose the category for the product and click Confirm.
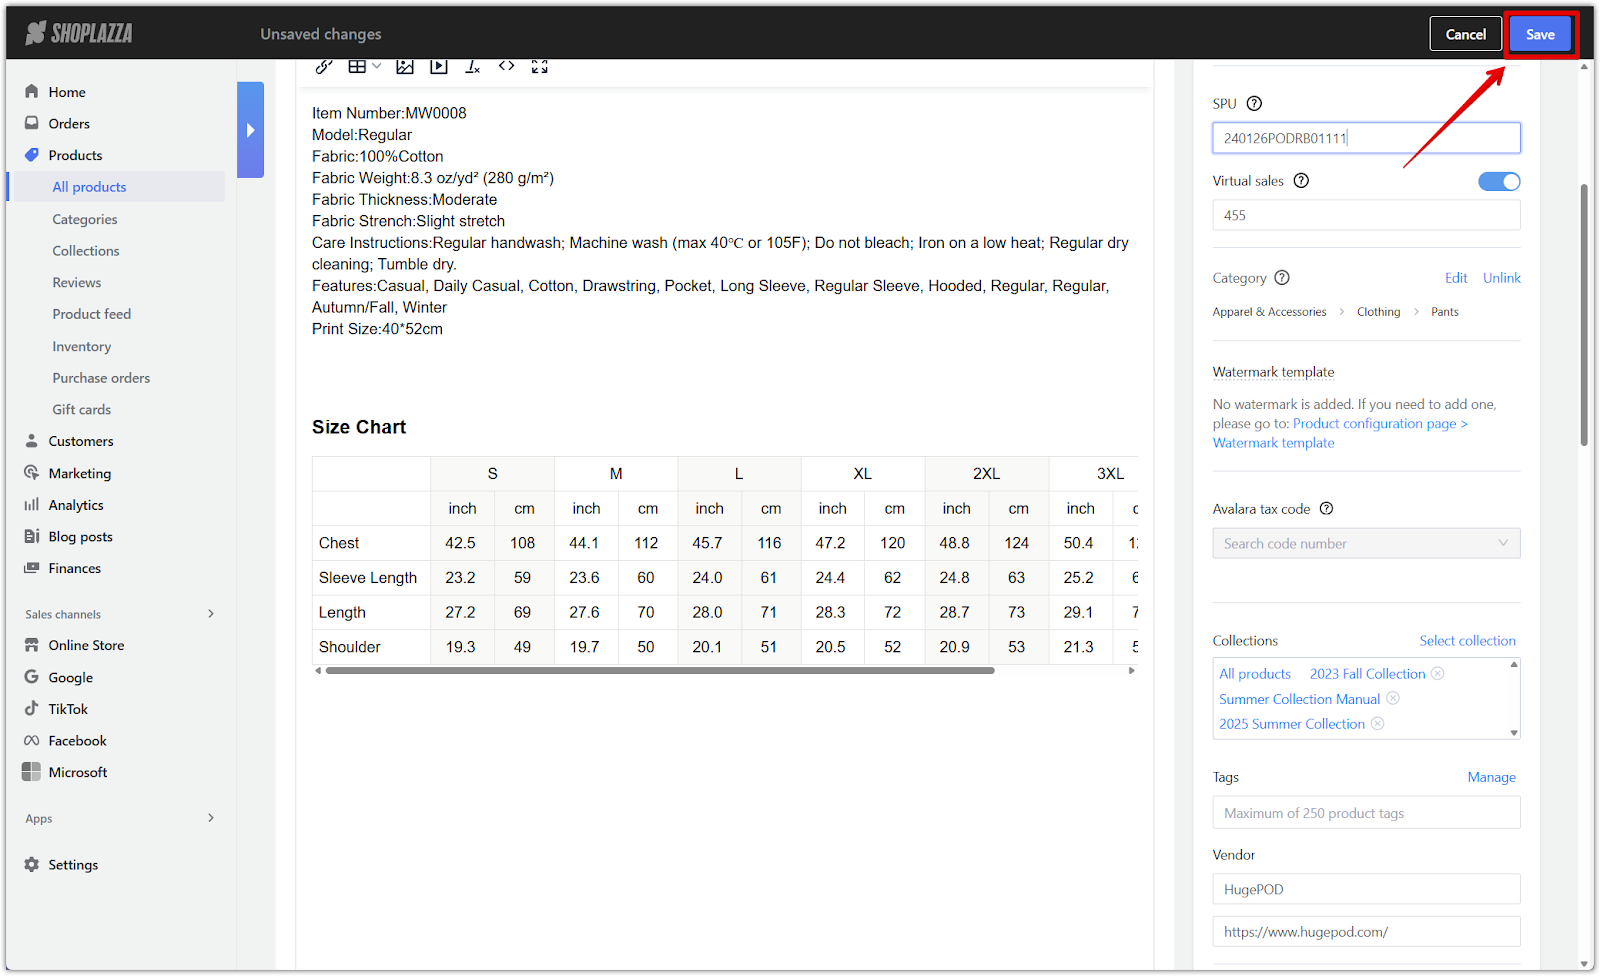
4. Update or unlink category: On the Edit Product page, Edit or Unlink the assigned category as needed, then click Save.
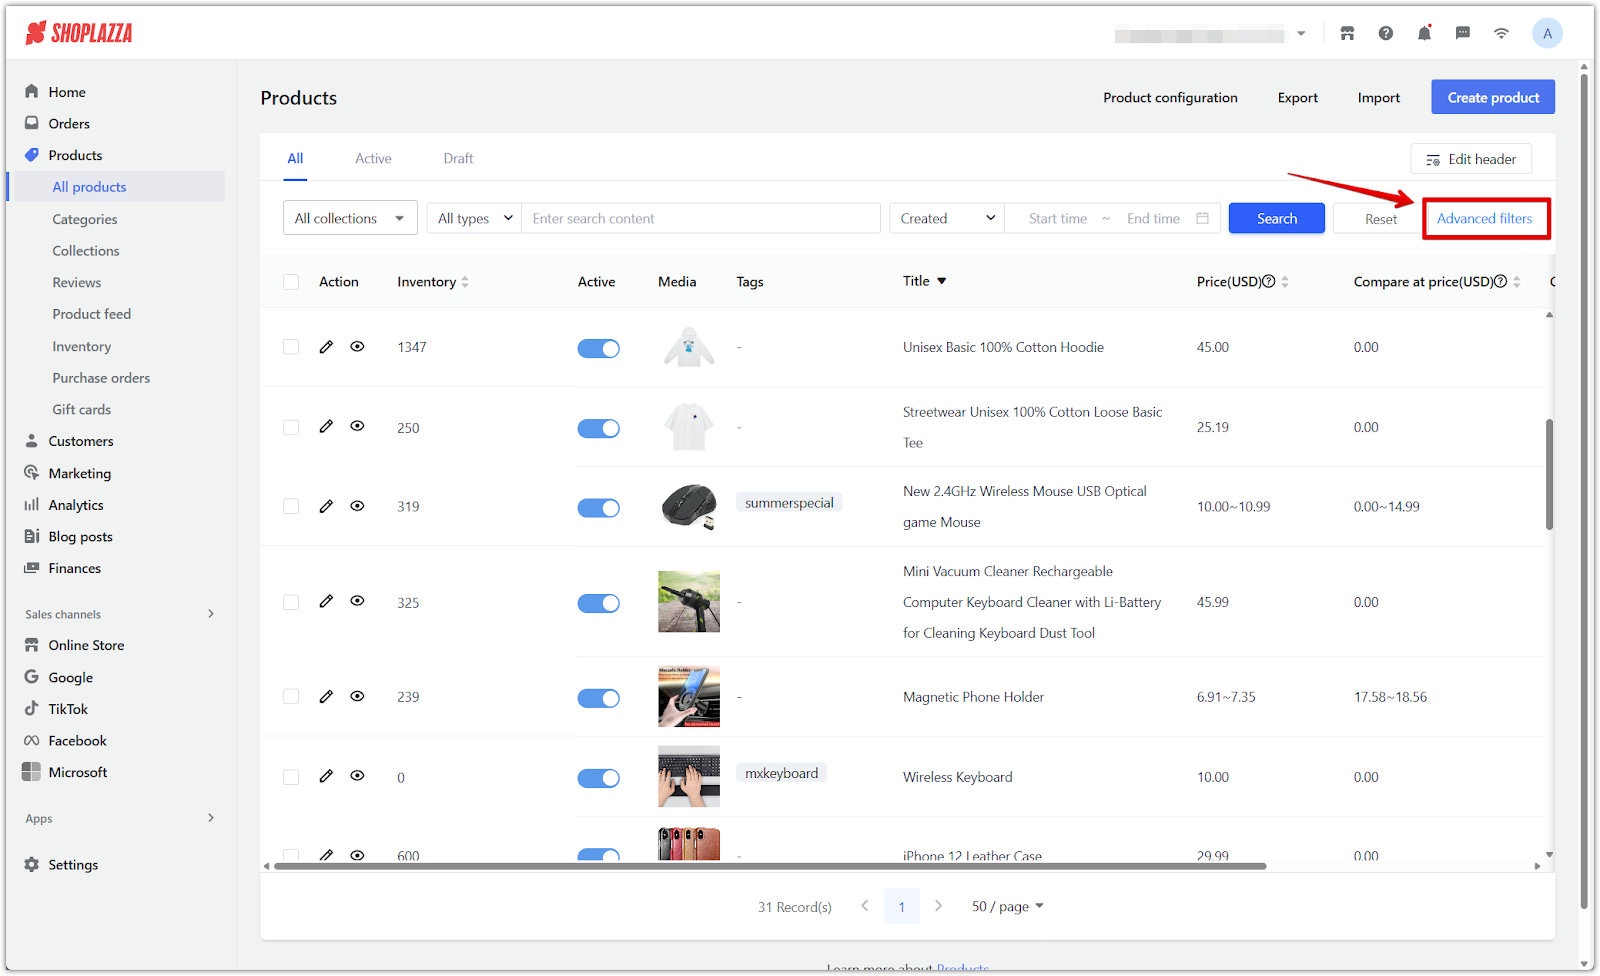
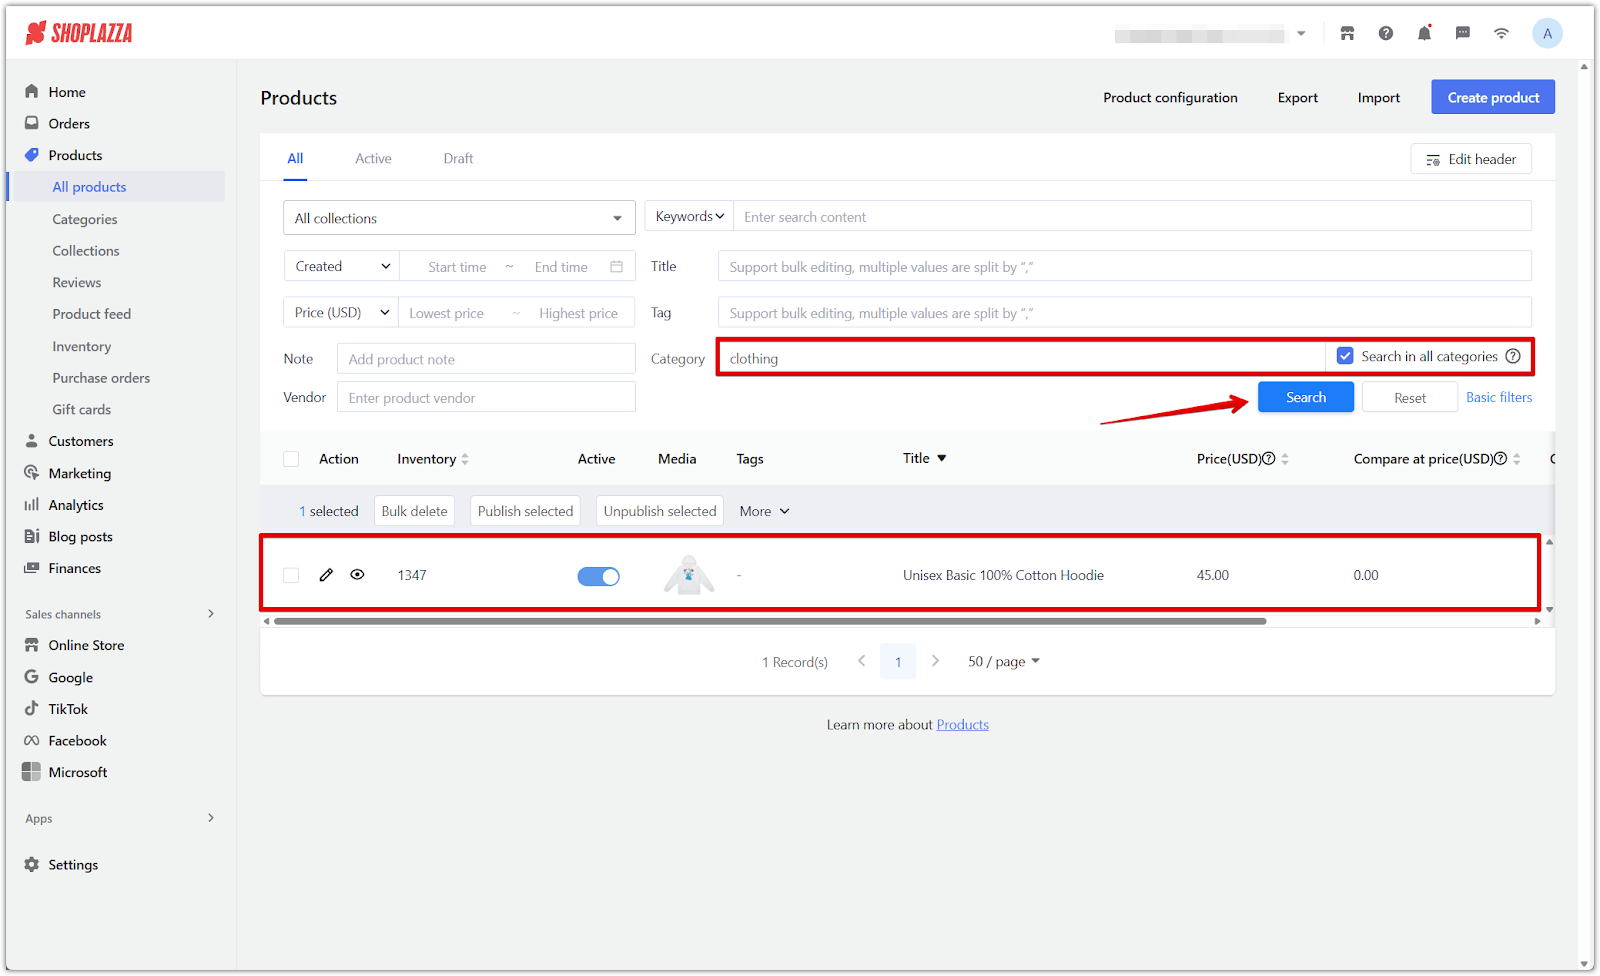
5. Search by category: In the product list, click Advanced filters, choose Category as the filter condition, and select the desired category to locate linked products.
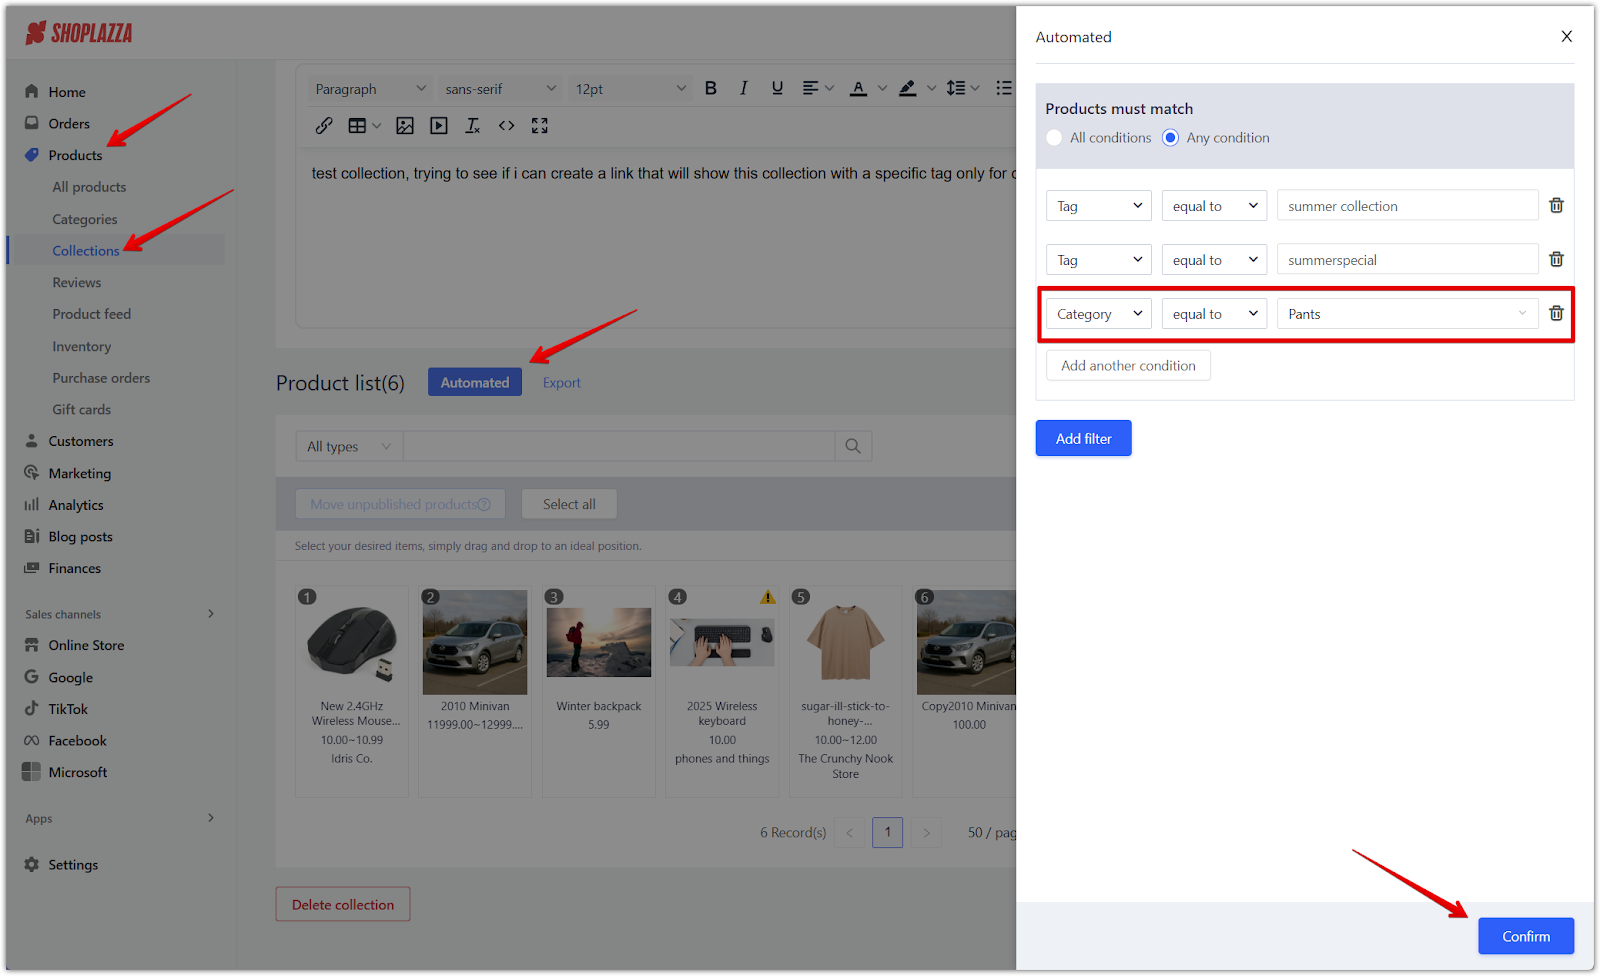
6. Filter in collections: Go to your Shoplazza Admin > Products > Collections, select an existing Automated collection or create a new one, then click the Automated button. Set Category as a filter condition to automatically include all products linked to a specific category, then click Confirm to apply the filter.
Organizing your catalog with product categories improves checkout accuracy, enables seamless integration with other sales channels, and enhances search engine discoverability.


Comments
Please sign in to leave a comment.