Incorporating 3D model media into your store's product pages can provide a more comprehensive view of your products. These 3D models allow customers to see items in full detail, from every angle, helping them gain a better understanding of what they're considering purchasing. This article will guide you through the process of adding 3D models to your product listings.
Note
Please make sure you have a 3D model of your item ready to use. For guidance on creating a 3D model for your product, you can find more information here.
Steps
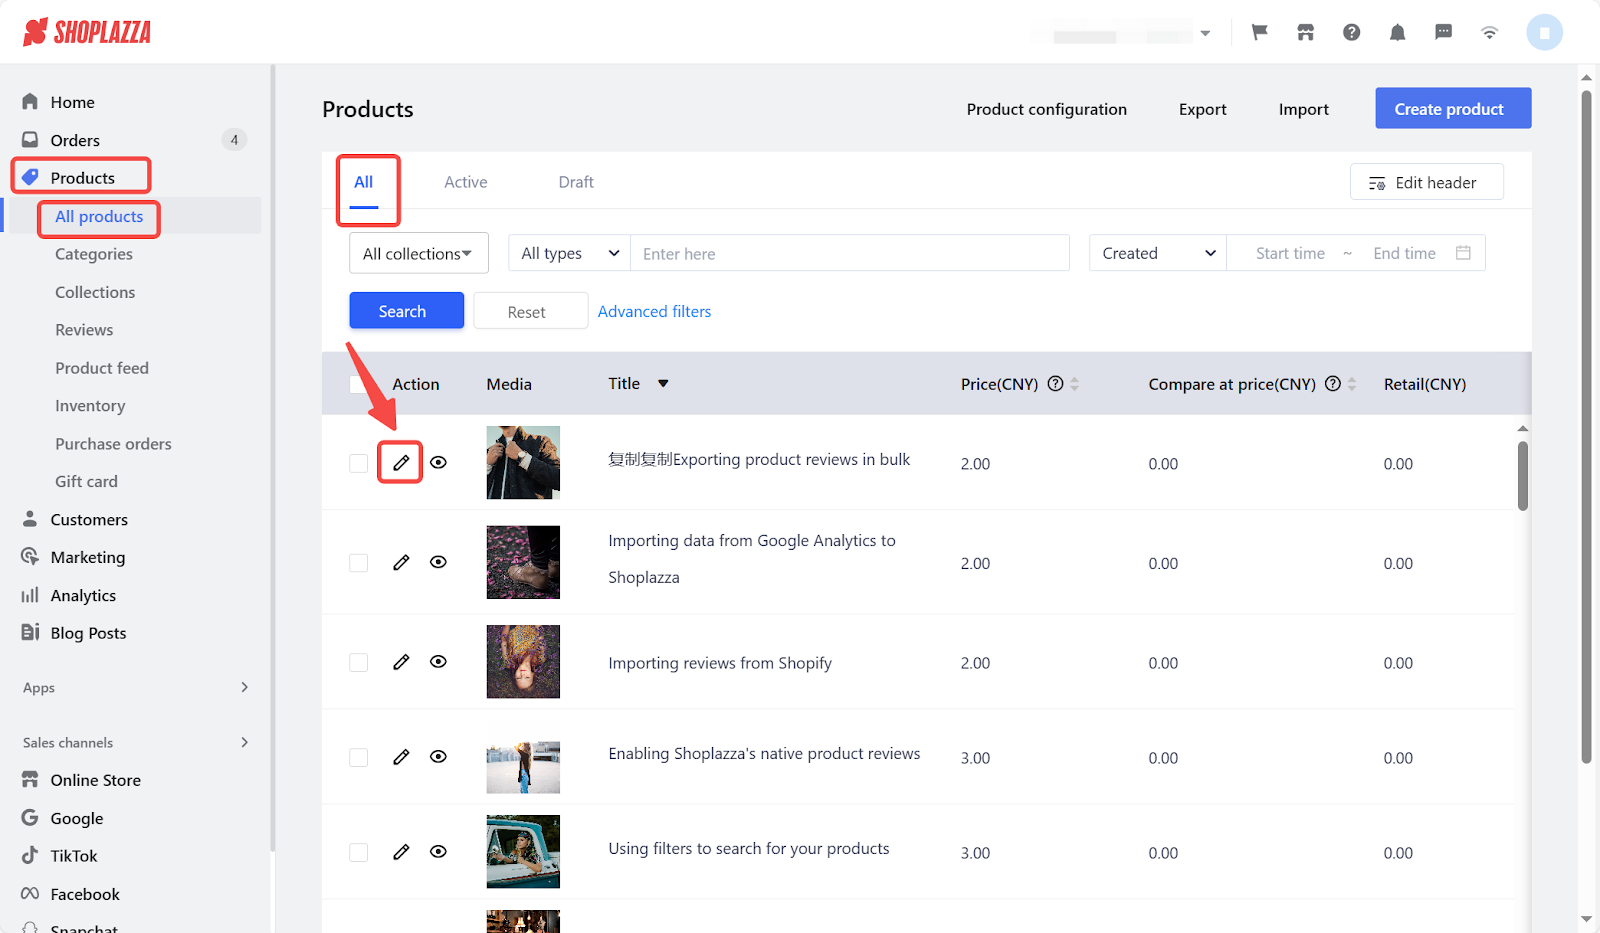
1. From your Shoplazza Admin > Products > All products, choose a product and click the Pen icon to edit.

2. On your product editing page, click Add media.

3. Upload your model in GLB format. GLB is a 3D file format that's efficient for storing and sharing 3D content, especially for web applications. It allows for a more streamlined viewing experience. Remember, the maximum file size is 500MB. After uploading, preview the 3D model.

4. Drag the 3D model to see it from different perspectives.

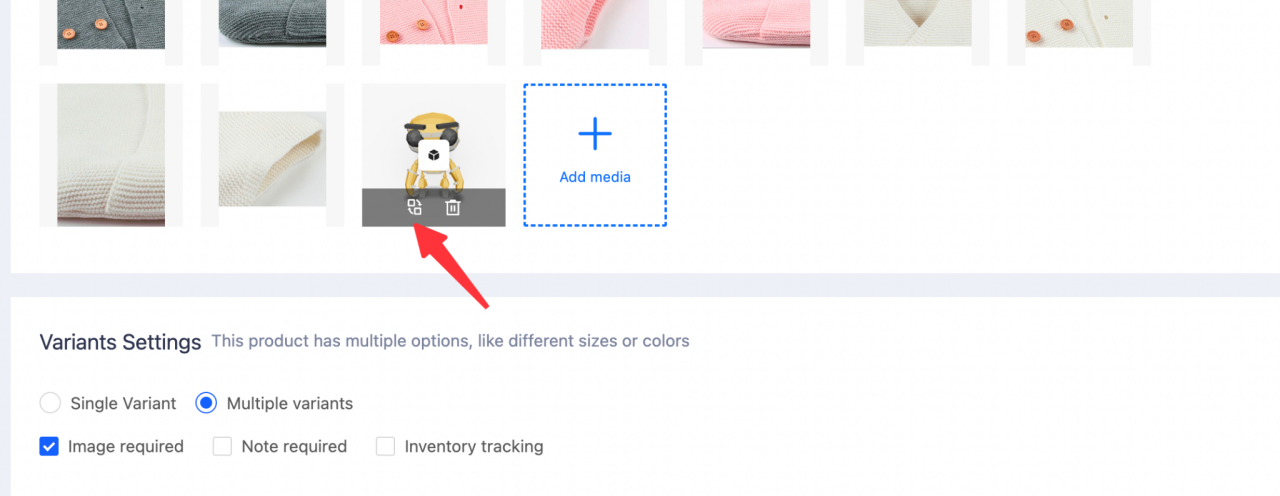
5. To change the thumbnail of your 3D model, click the switch icon and select a new image.

Adding 3D media offers a more dynamic view of your products, potentially enhancing customer engagement. This feature provides an edge by showcasing your products beyond traditional 2D images, aiding in customer understanding and interaction with your items.


Comments
Please sign in to leave a comment.