
Web push notifications are clickable alerts from your store that appear on desktop or mobile browsers, similar to mobile app messages. They help increase engagement, boost conversions, and retain customers by delivering targeted updates and promotional offers. These alerts do not require customer contact information and are a cost-effective addition to your marketing strategy. This guide explains how to configure, customize, and manage web push notifications directly from yourShoplazza admin.
Configuring your web push notifications
Start by setting up how and when your notifications appear to visitors.
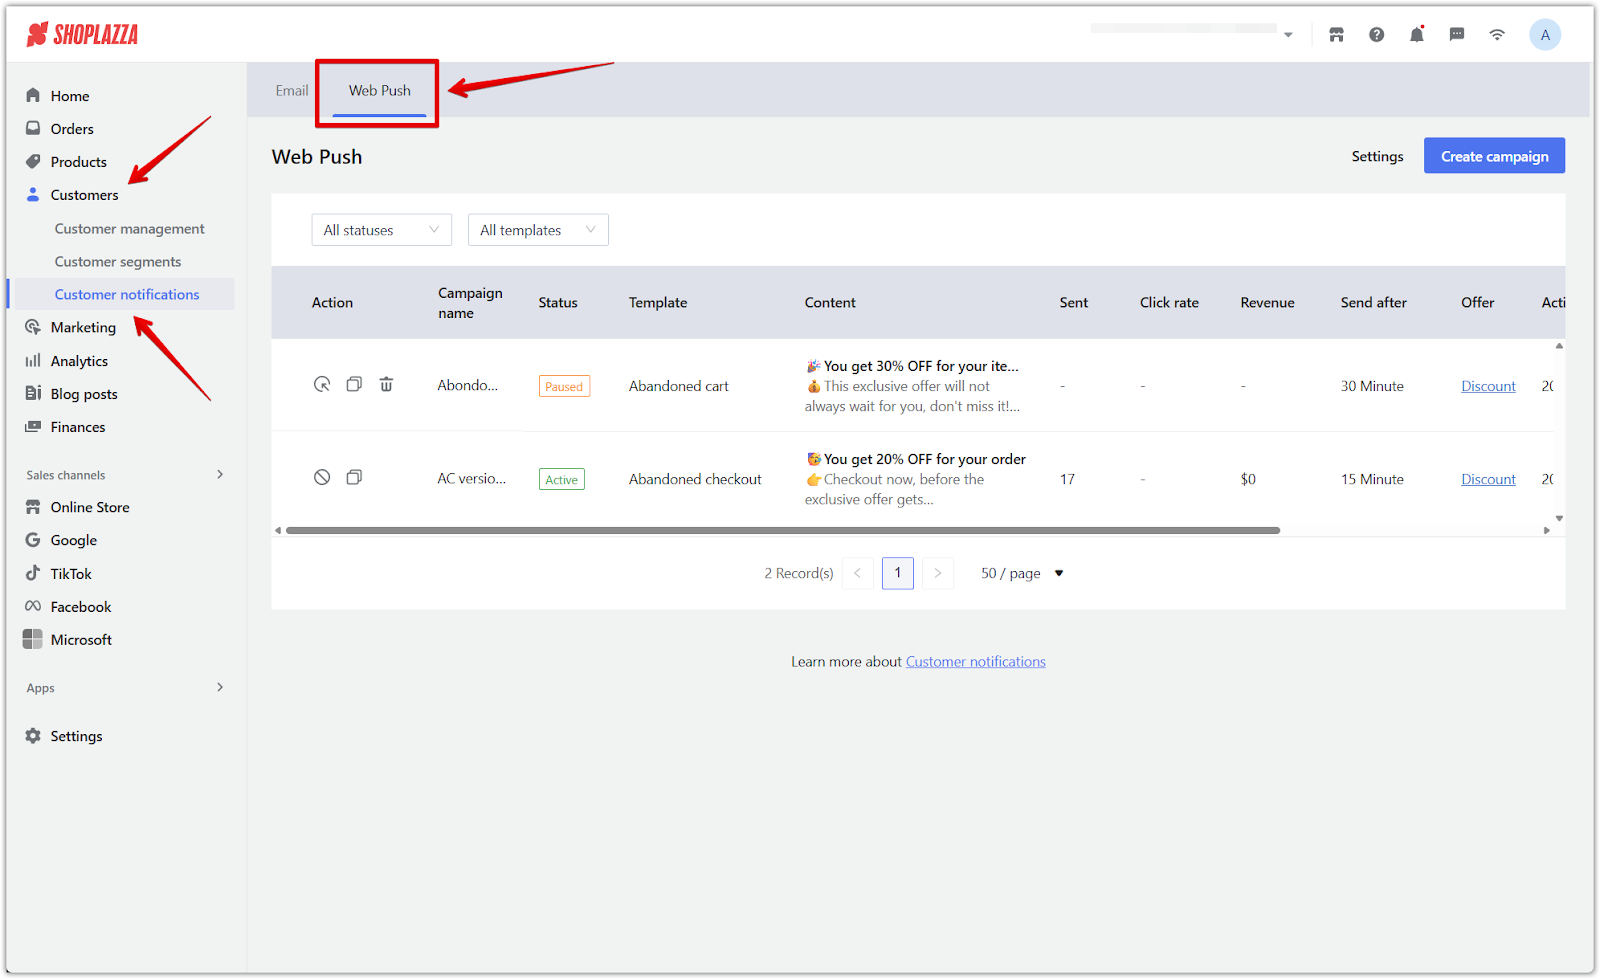
1. Access web push settings: Go to Shoplazza admin > Customers > Customer notifications, then switch to the Web Push tab.
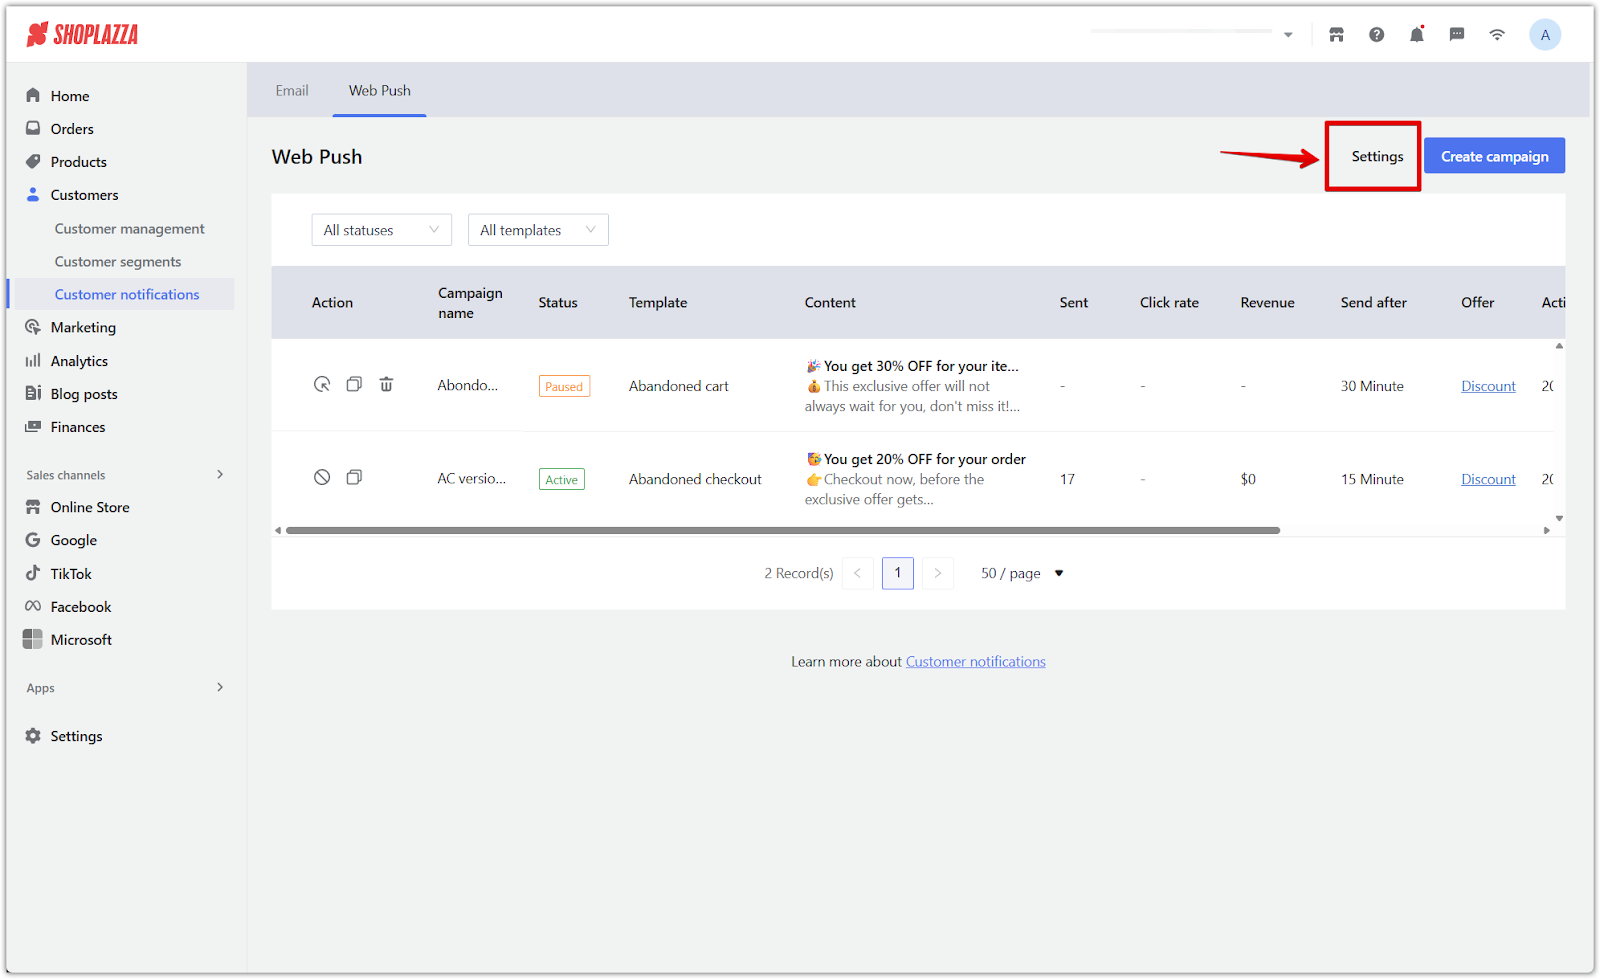
2. Open push settings: Click Settings in the Web Push tab.
3. Set opt-in timing: Choose when the authorization pop-up appears. Set a delay between 5 to 60 seconds. Use an overlay to highlight the pop-up and avoid browser restrictions. Click Save to apply your changes.
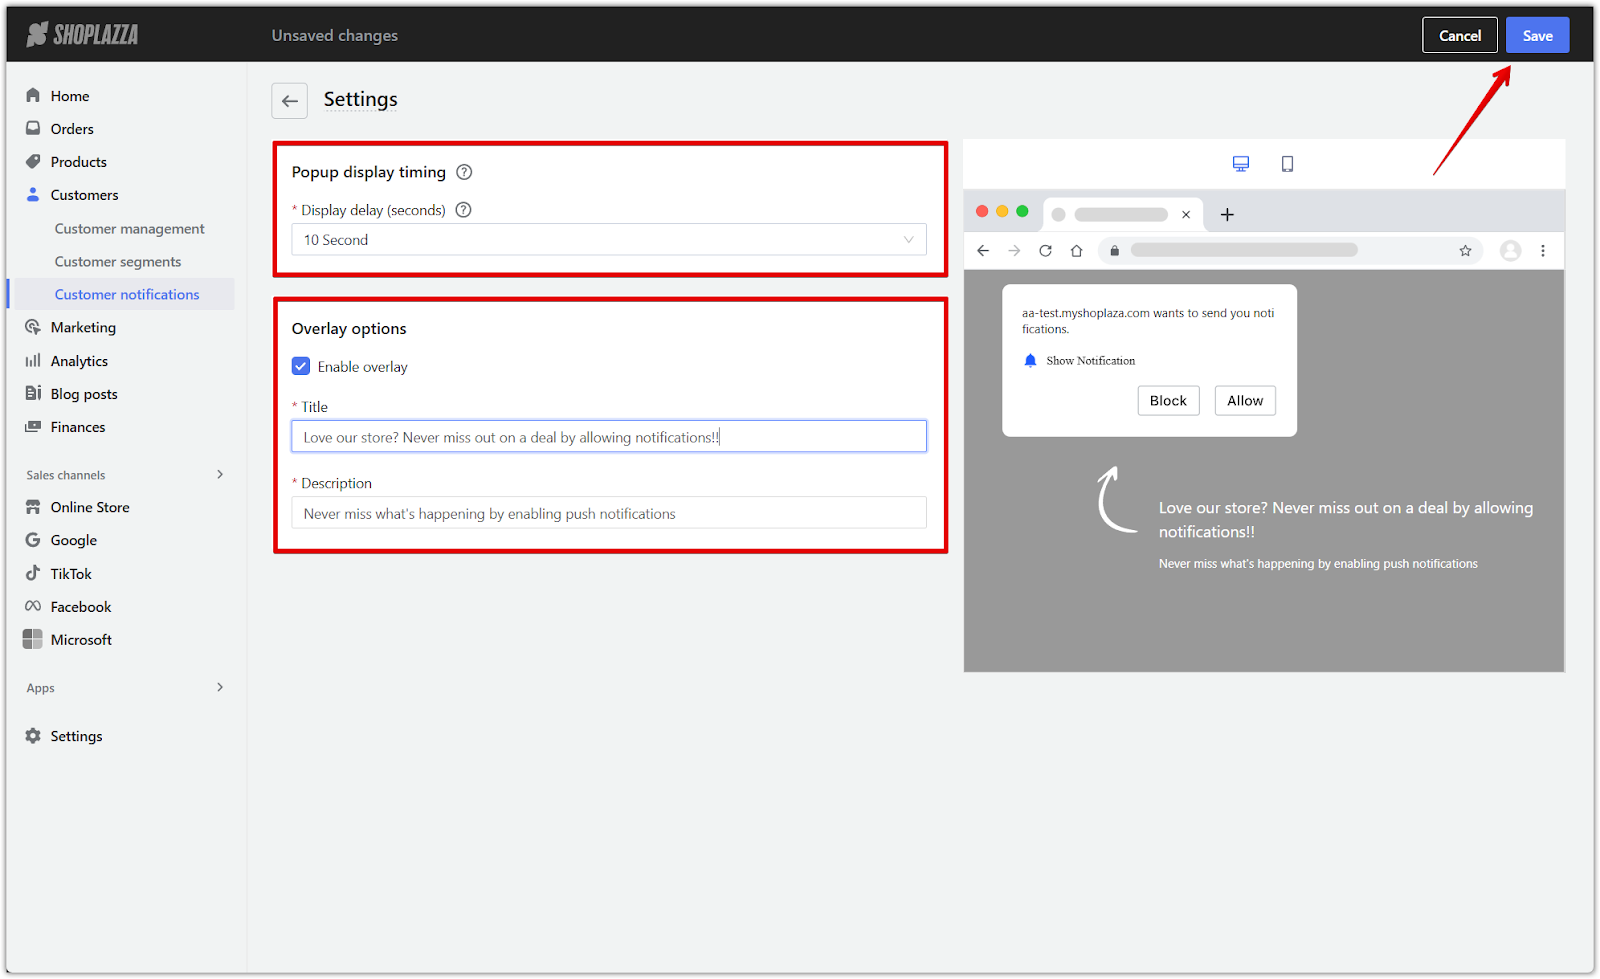
Note
- The authorization prompt will only appear once every 24 hours to prevent being blocked by Chrome.
- Overlay is not supported on Android.
Sending web push notifications to customers
Once your settings are in place, you can create campaigns and select when notifications are sent.
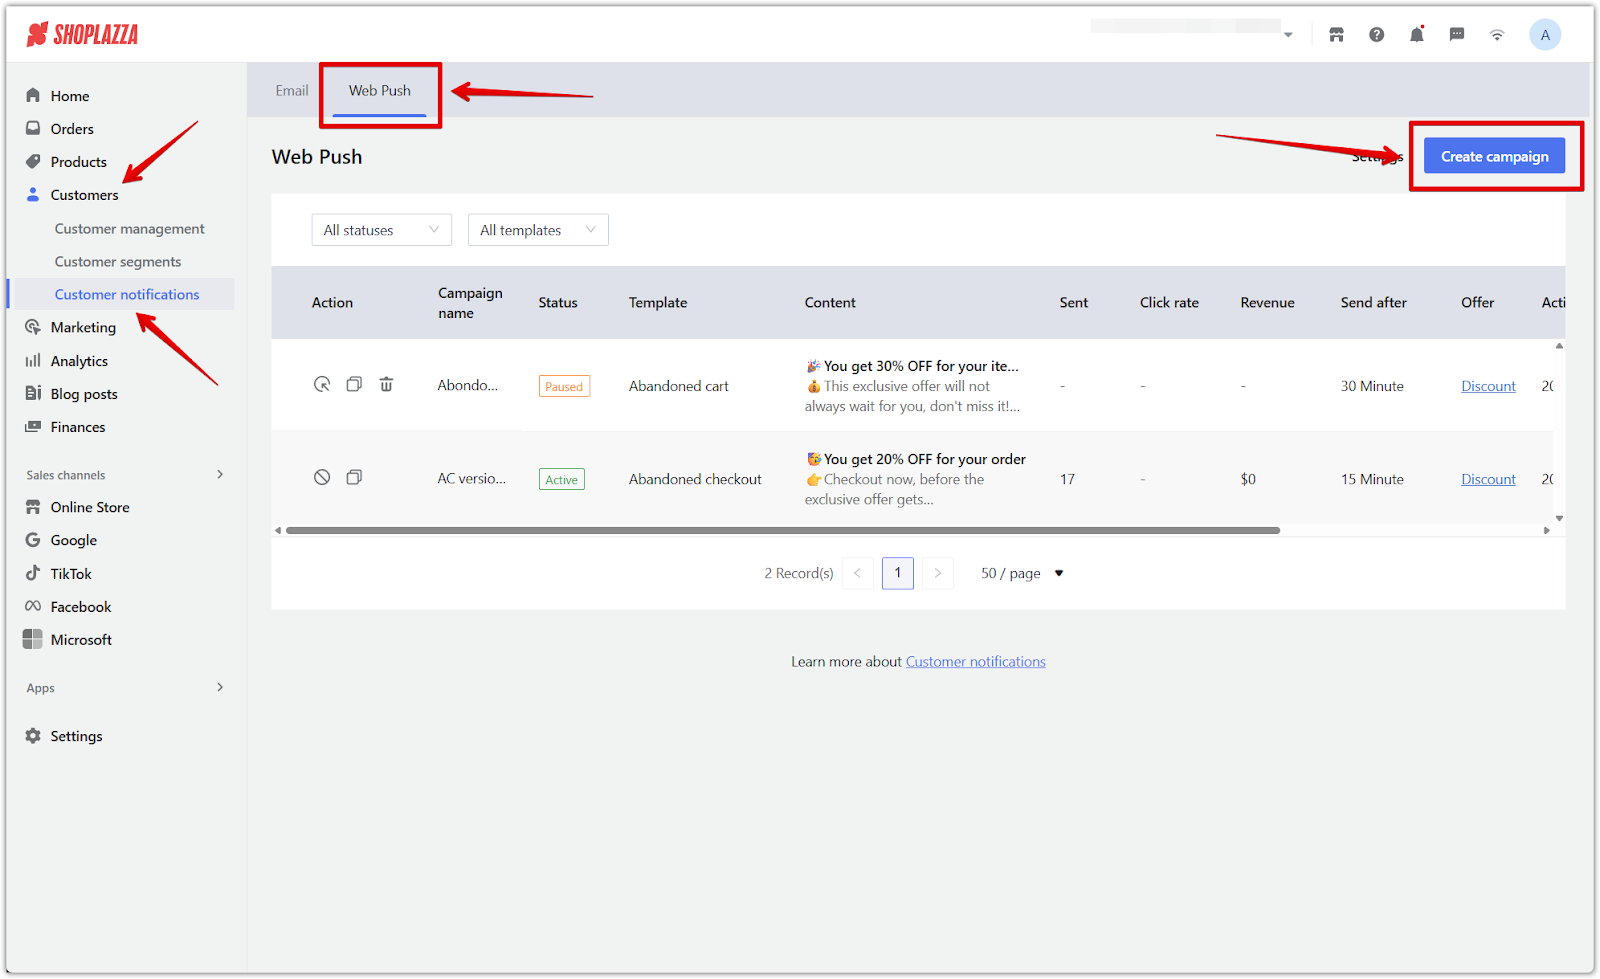
1. Create a campaign: From Shoplazza admin > Customers > Customer notifications, switch to Web Push and click Create campaign.
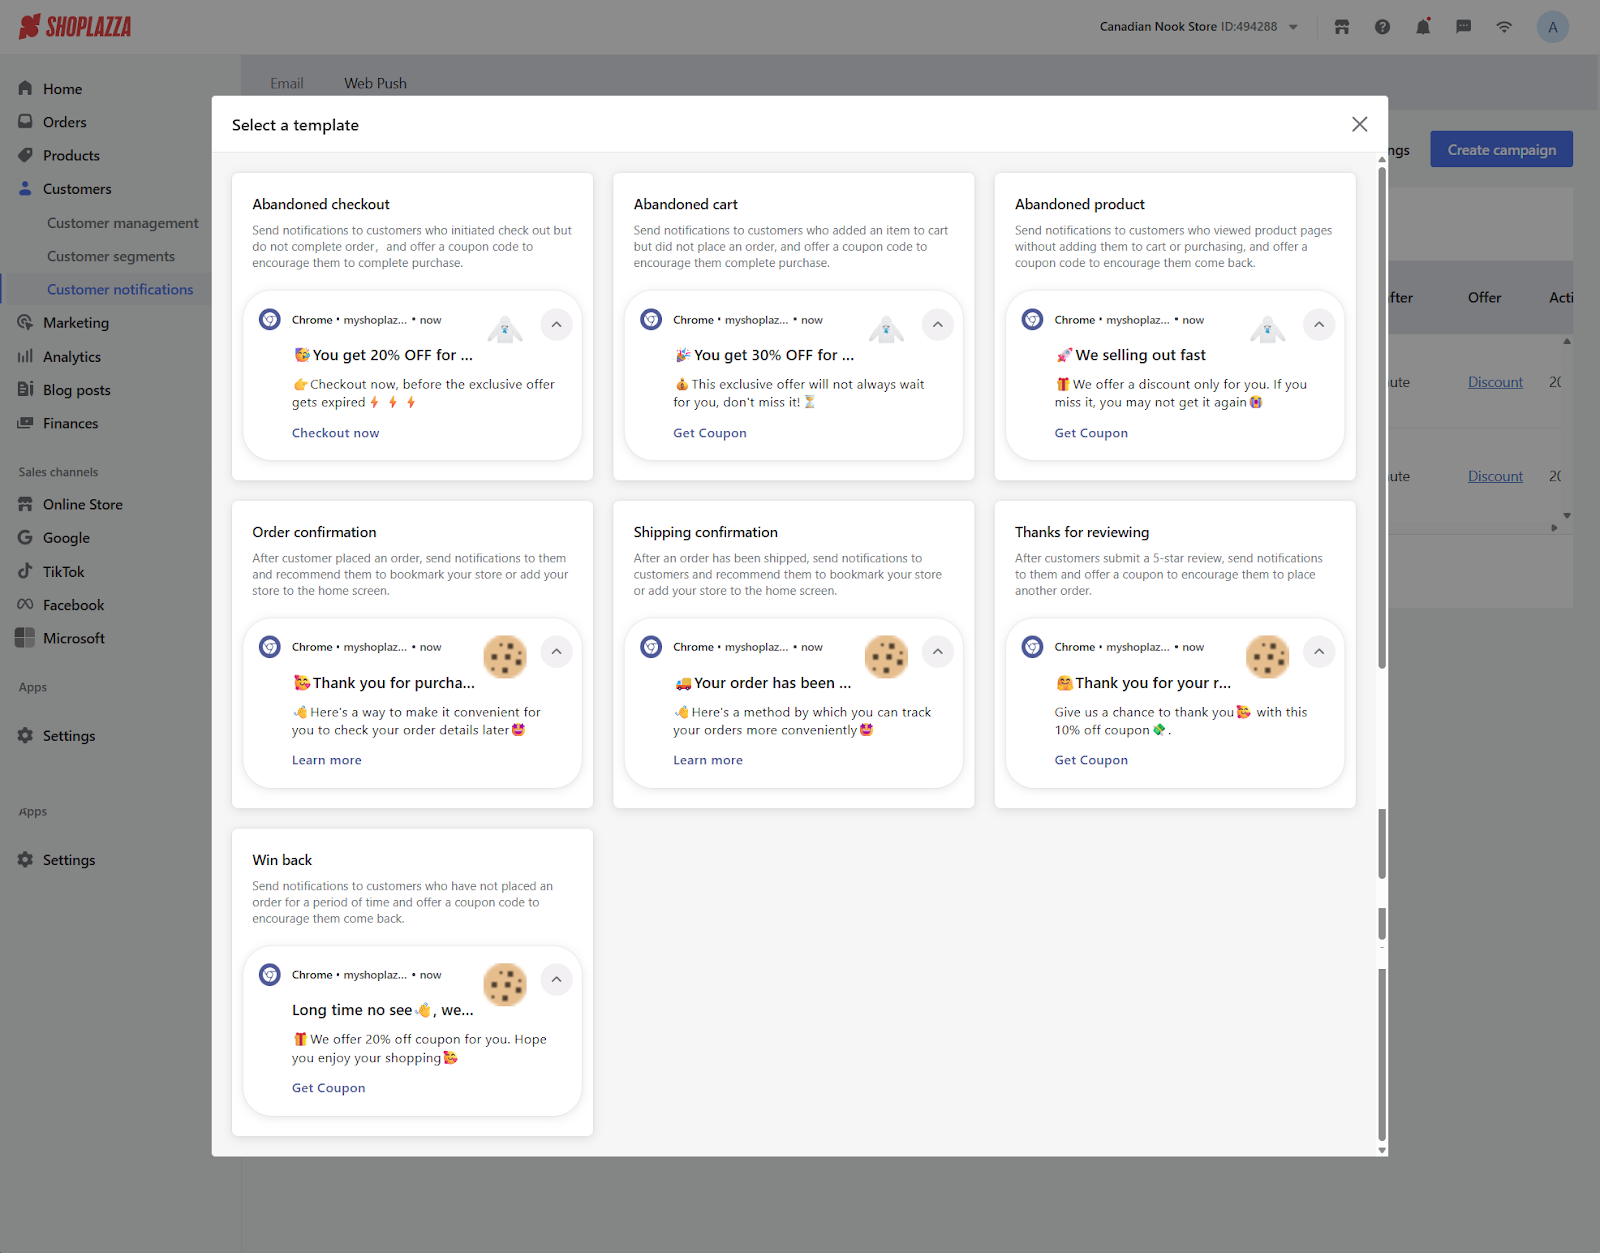
2. Choose a template: Select one of seven preset templates and click Customize to edit it. Notifications are sent automatically based on the conditions you define.
- Abandoned checkout: Sends a reminder to complete the purchase, along with an exclusive offer.
- Abandoned cart: Notifies customers of forgotten items in their cart and includes a discount.
- Abandoned product: Promotes the most-viewed product with a special offer after a customer browses without buying.
- Order confirmation: Encourages bookmarking your store or adding it to the home screen after purchase.
- Shipping confirmation: Suggests saving the store to the home screen after the order ships.
- Thanks for reviewing: Sends a coupon after a 5-star review to encourage future orders.
- Win back: Re-engages customers who haven’t purchased in a while with a timed discount.
Configuring your template
Each template comes with editable fields for content and display settings.
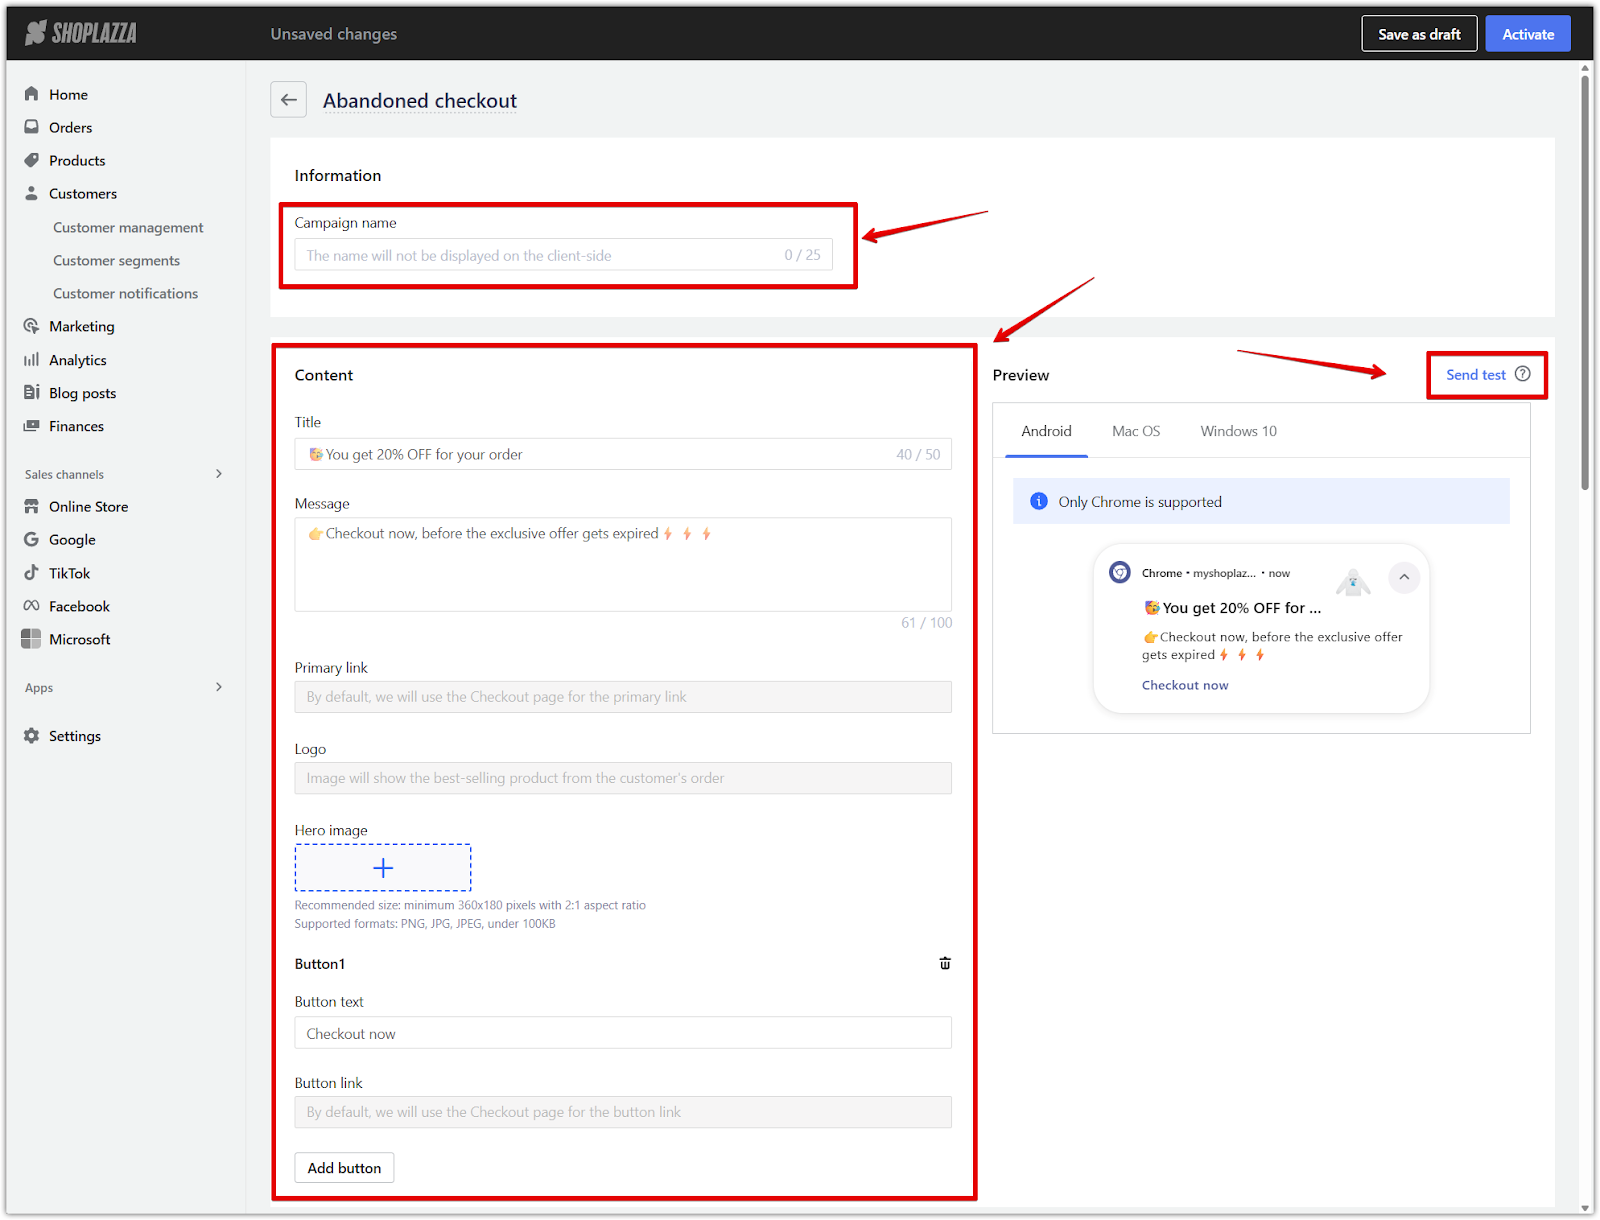
1. Edit campaign content: Fill out the campaign name and notification text, and review the preset links and images.
- Primary link: Opens when the user clicks the notification. This link is fixed and cannot be changed.
- Logo: Displayed in the notification. Defaults are provided and not currently editable.
- Hero image: Only supported on Android and Windows devices.
- Add button: Click Add to create a custom button with your preferred text and link.
- Send test: Click Send test to preview the message. Test messages will not include discount offers. Chrome notification permissions must be enabled.
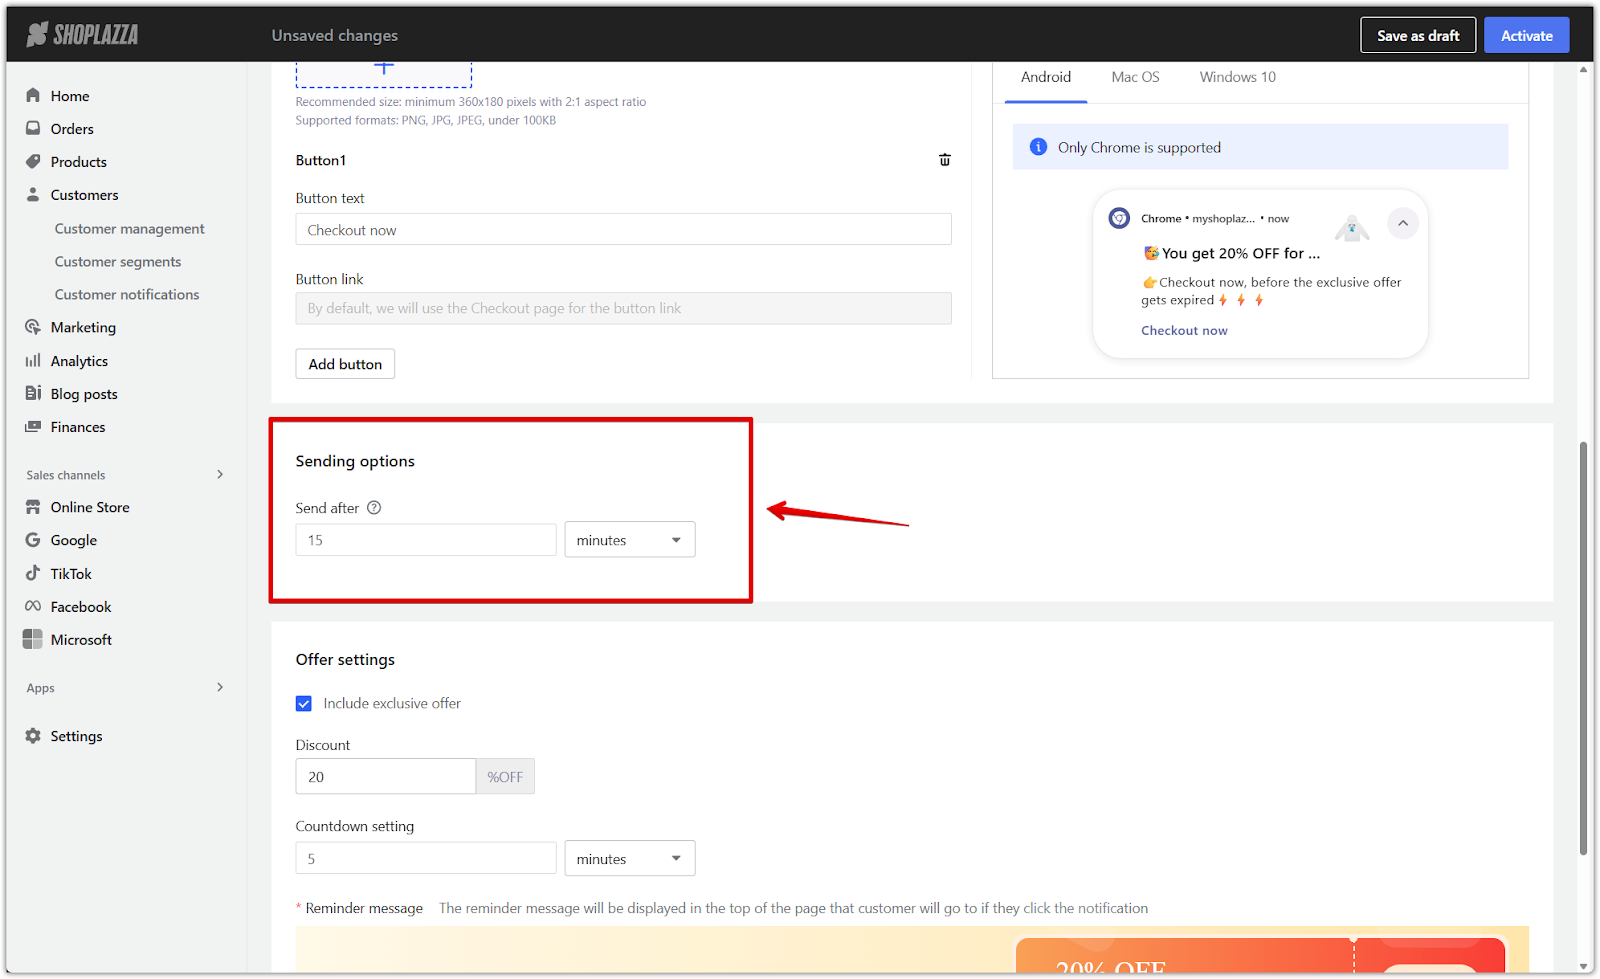
2. Set send timing: Each template includes its own timing options. Choose how long to wait after the triggering event.
Note
If both the order confirmation and shipping confirmation templates are active, only one will be sent per order to avoid multiple notifications.
Offer settings
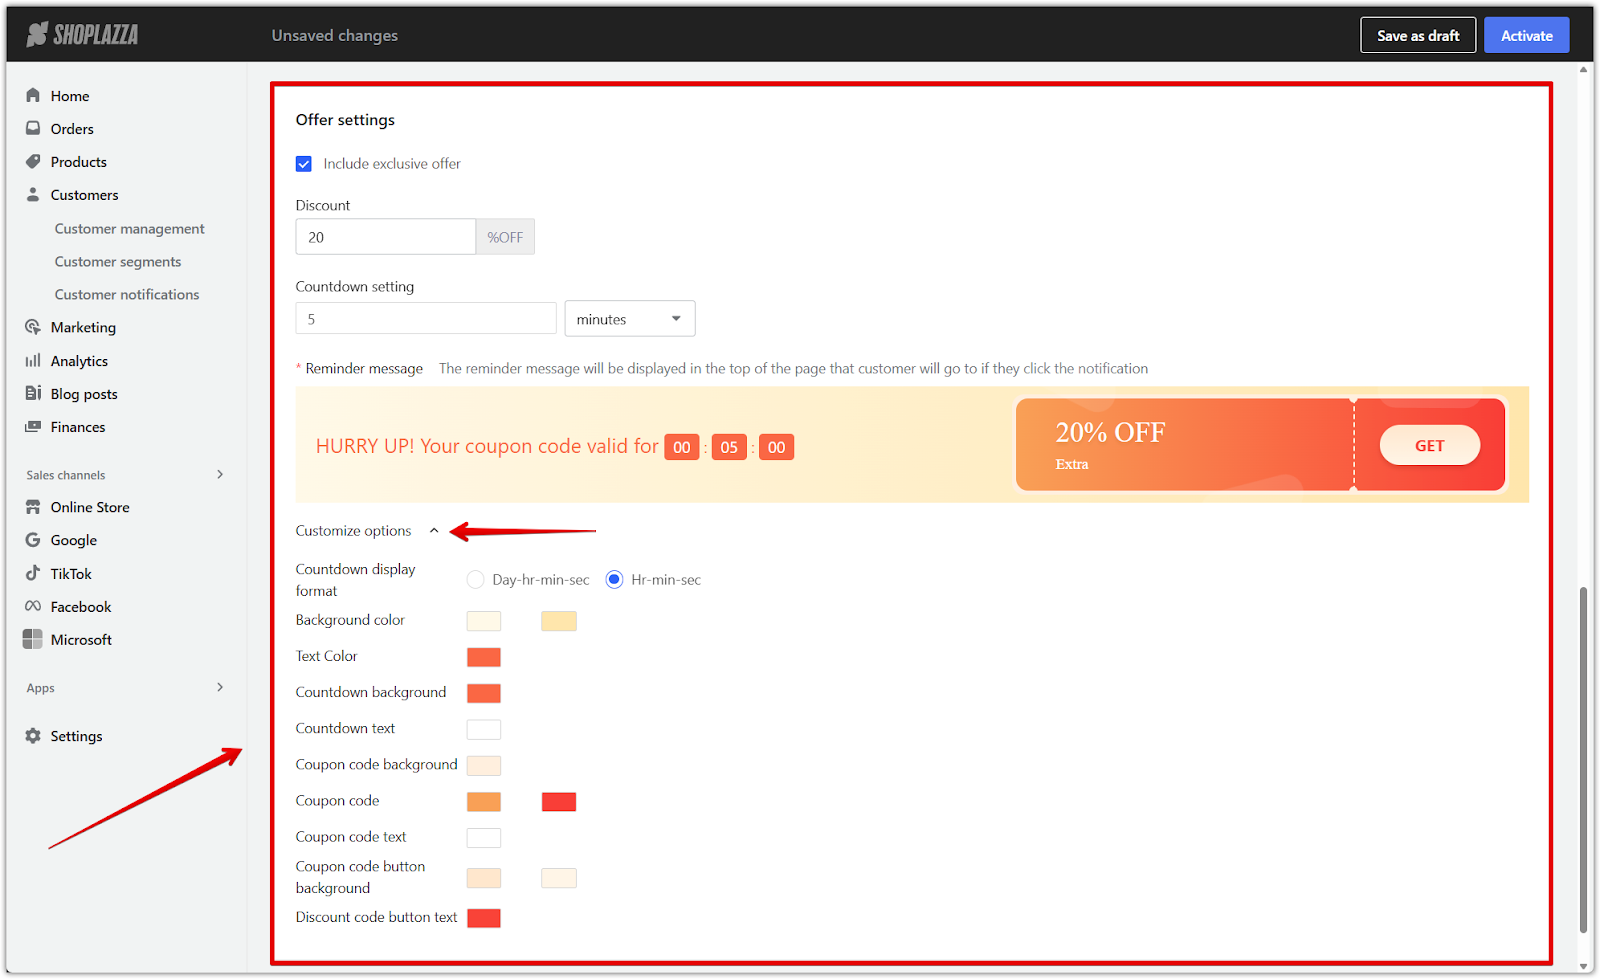
Incentivize customer actions by including exclusive discounts in selected templates.
1. Set up offers: The Abandoned checkout, Abandoned cart, Abandoned product, Thanks for reviewing, and Win back templates support default offers. Adjust the message style and colors to match your brand.
Note
When a customer clicks the notification:
- A discount code will be applied automatically.
- A countdown banner appears at the top of the screen and expires when the timer ends.
- The code will auto-fill in the discount field at checkout if the customer clicks through from the notification.
Overlay settings
Overlays appear after customers click certain types of notifications.
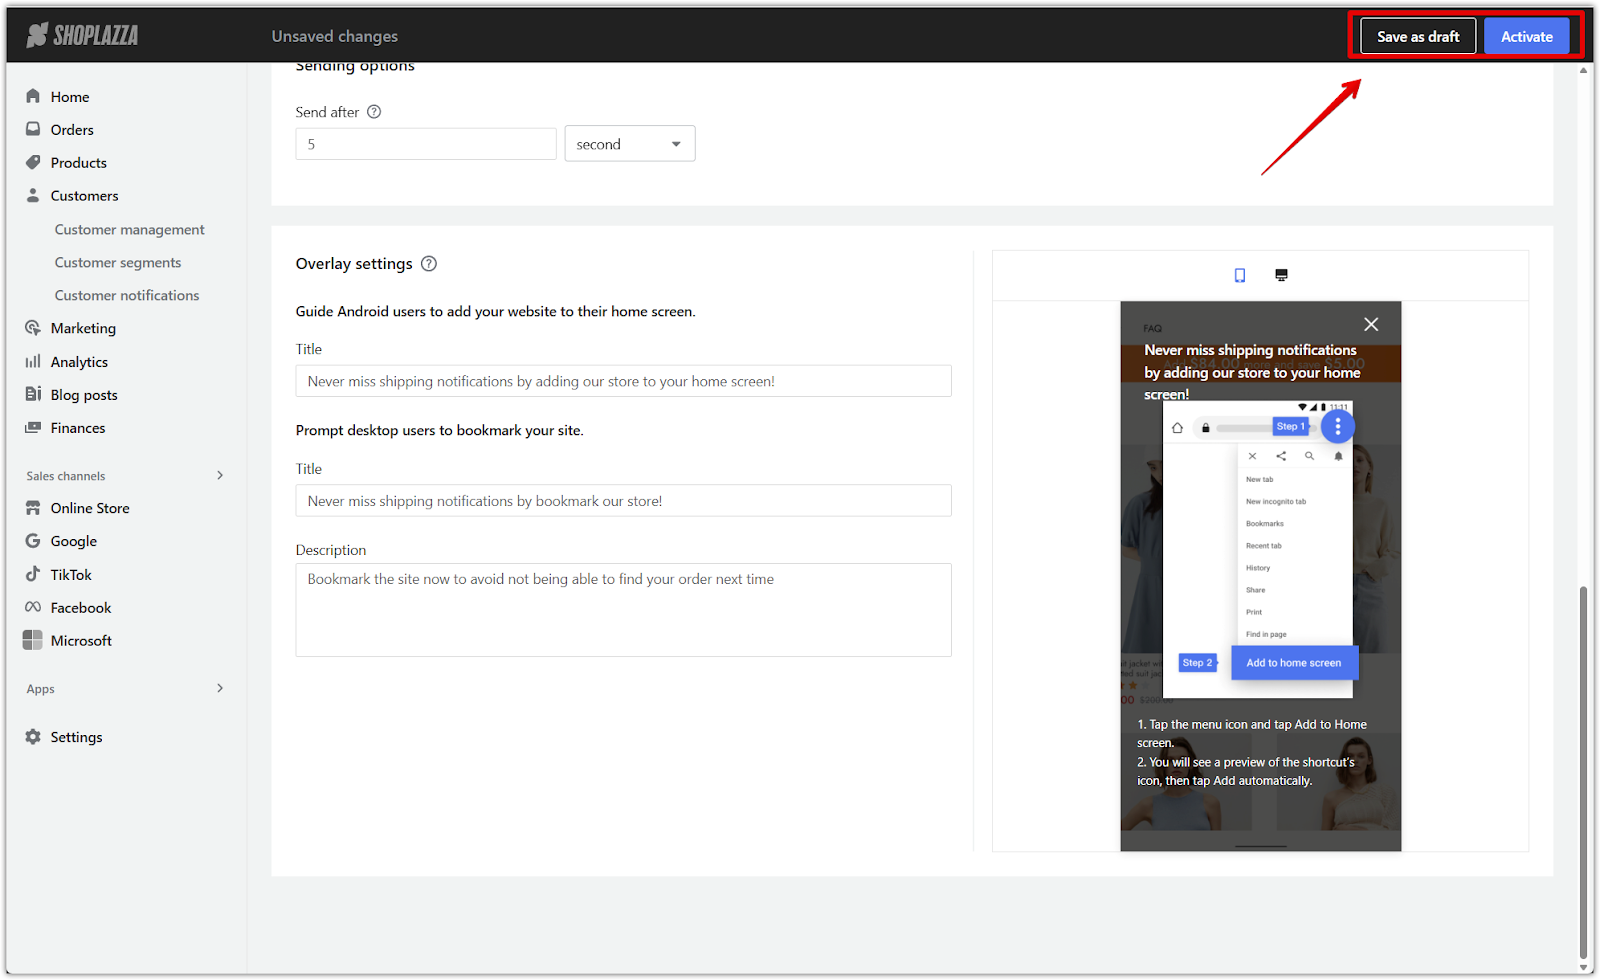
1. Preview and adjust overlay text: For the Order confirmation and Shipping confirmation templates, preview the overlay effect and edit the content that appears on screen.

2. Activate or save as draft: Click Activate to start the campaign immediately or Save as draft to publish later.
Managing your campaigns
Control and monitor your campaigns from the Web Push list.
- Pause a campaign: Click Pause to stop notifications temporarily.
- Duplicate a campaign: Click Copy to duplicate an existing campaign as a draft.
- Review performance: View data for active campaigns directly from the list.
- Delete a campaign: Pause the campaign first. Then click the trash icon to remove it permanently.

Web push notifications help you reach customers across desktop, mobile, and tablet browsers without requiring contact information. They offer personalized, timely updates based on customer behavior, and are supported on Windows, macOS, and Android devices using Google Chrome. Display and functionality may vary slightly depending on the device or browser used.


Comments
Please sign in to leave a comment.