
A well-structured navigation menu is essential for a positive user experience. This guide provides clear steps to create and customize your navigation menu, enabling customers to find what they're looking for easily. A clear navigation menu can improve your site's usability and boost customer satisfaction. We'll cover creating the menu, adding top-level items, and building nested sub-menus.
Add top-level menu items
Next, we'll populate the main menu with top-level categories. These are the main sections of your website that users will see first. This process begins with creating the menu container itself.
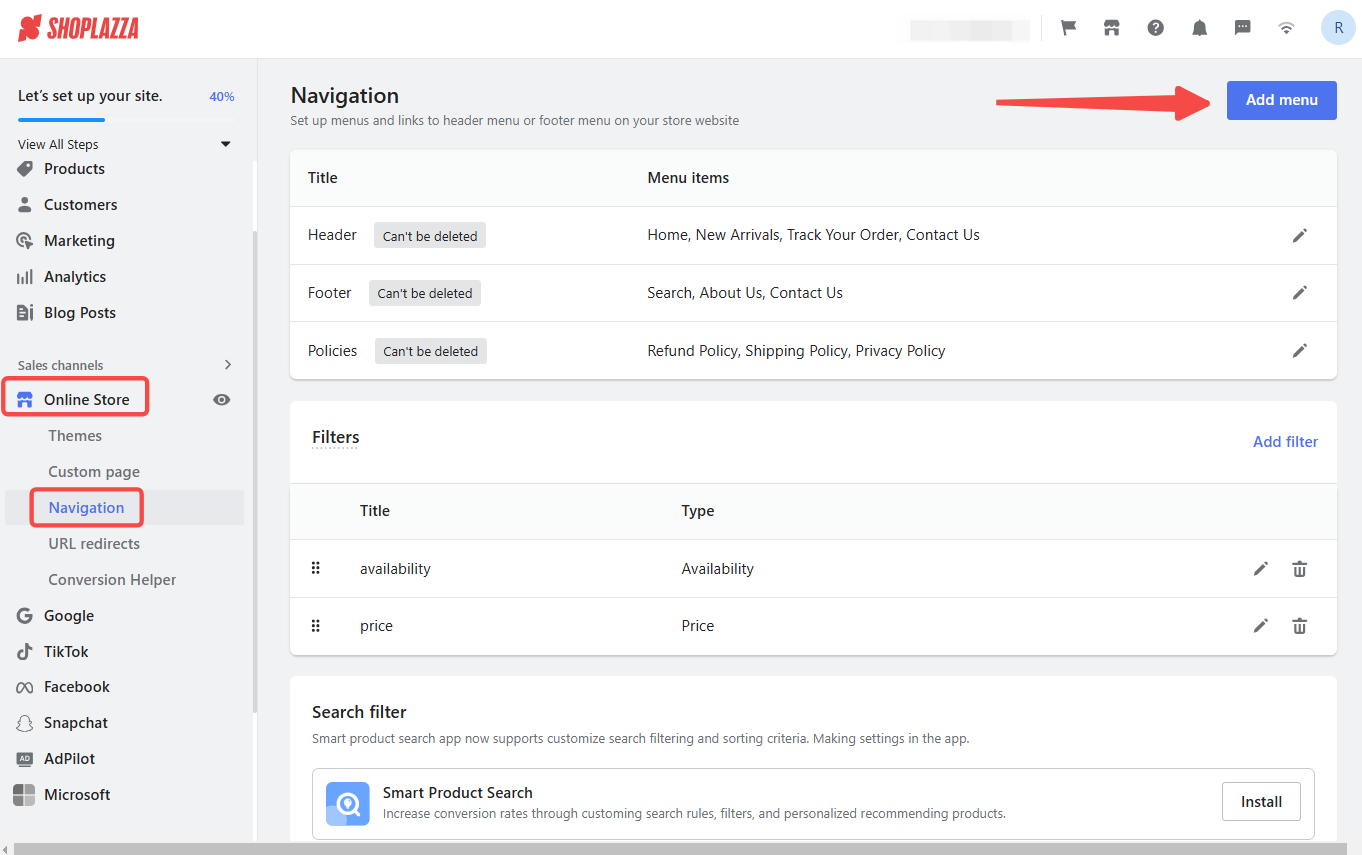
1. Make a menu: In your Shoplazza admin, go to Online Store > Navigation. Click Add menu. This will take you to the menu setup area.
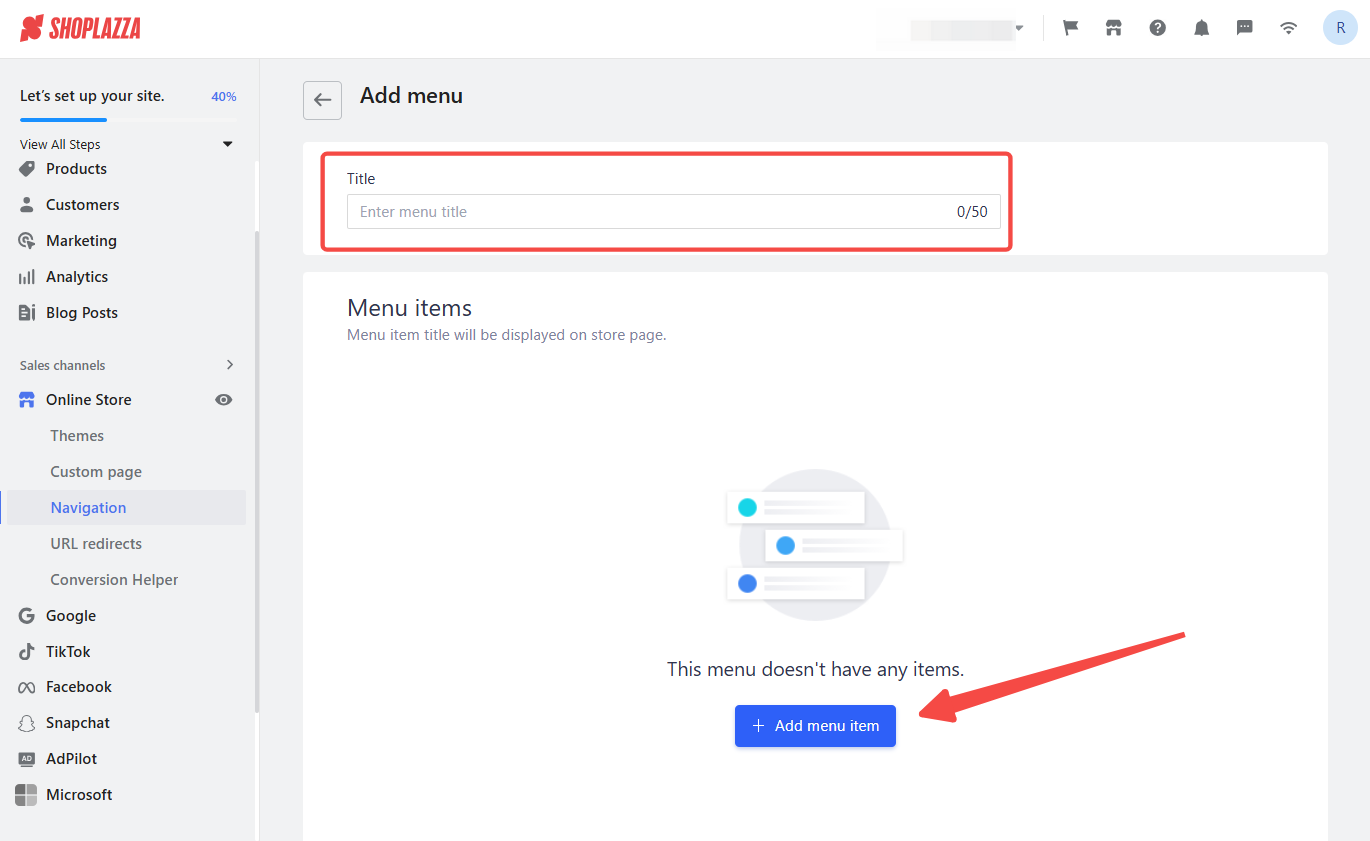
2. Name the menu and add the first item: In the Menu title field, enter a title for your menu. This title is primarily for your reference in the admin, so choose something descriptive. This action creates the basic menu structure. Click Add menu item to create your first top-level menu item. This opens a dialog box where you can configure the menu item.
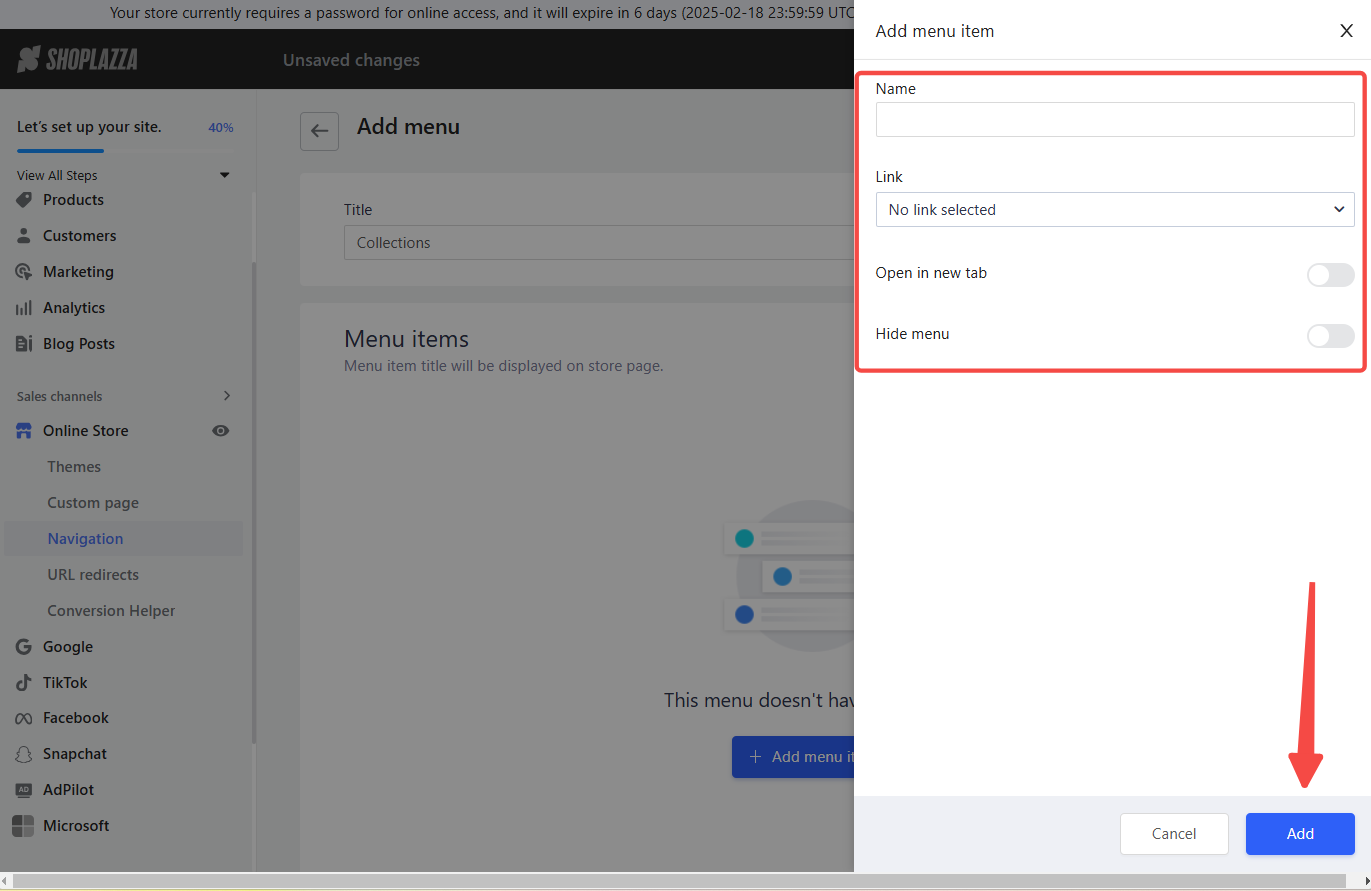
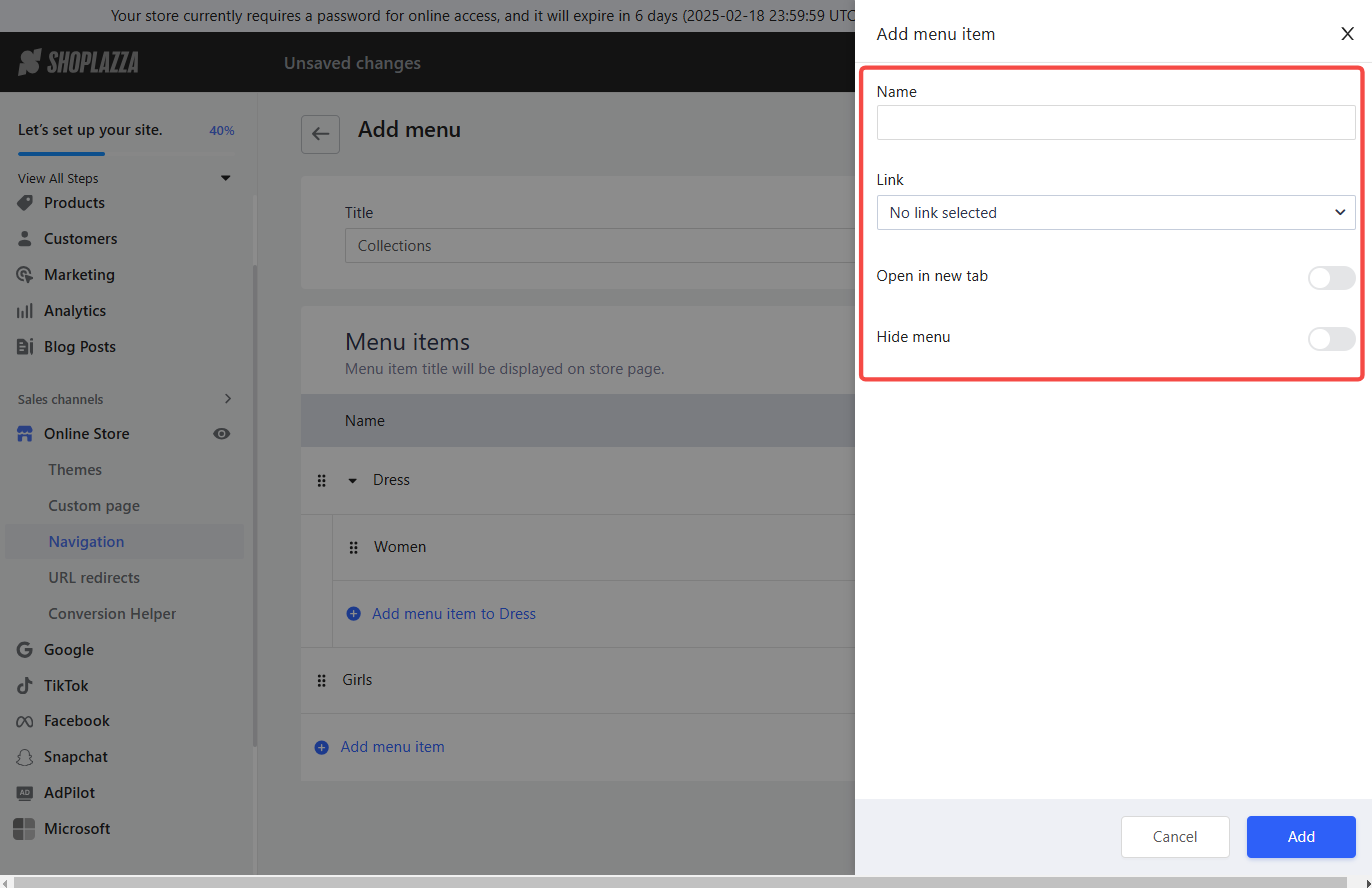
3. Configure item: Set up the menu item by entering the name as it should appear in the menu and linking it to the appropriate page or collection, then click Add.
Note
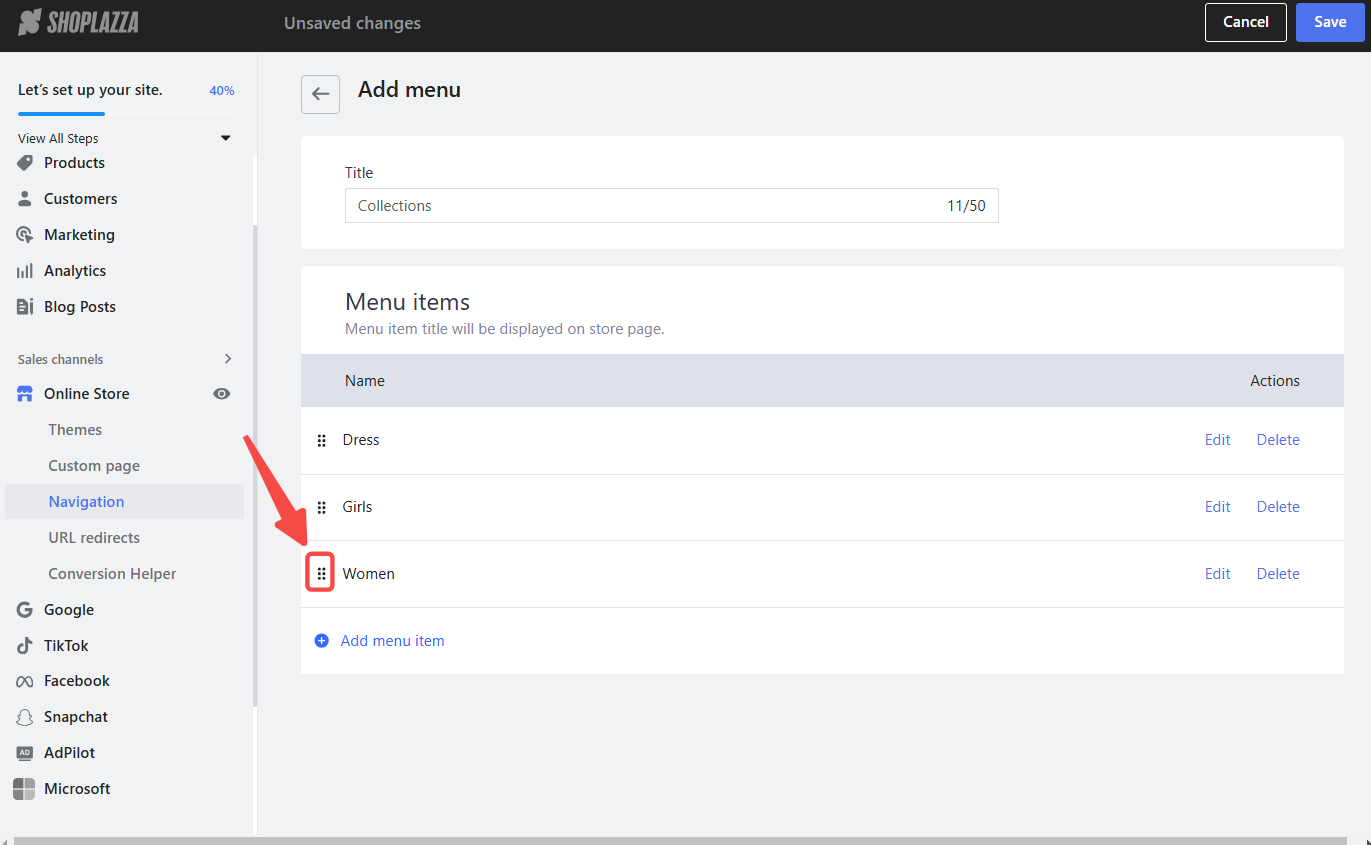
Repeat steps 2 and 3 to add additional top-level menu items. Consider your site's main categories of products or content.
Create second-level menu items
Now, we'll create a sub-menus for your main categories. These allow you to organize your products or content further into more specific sections.
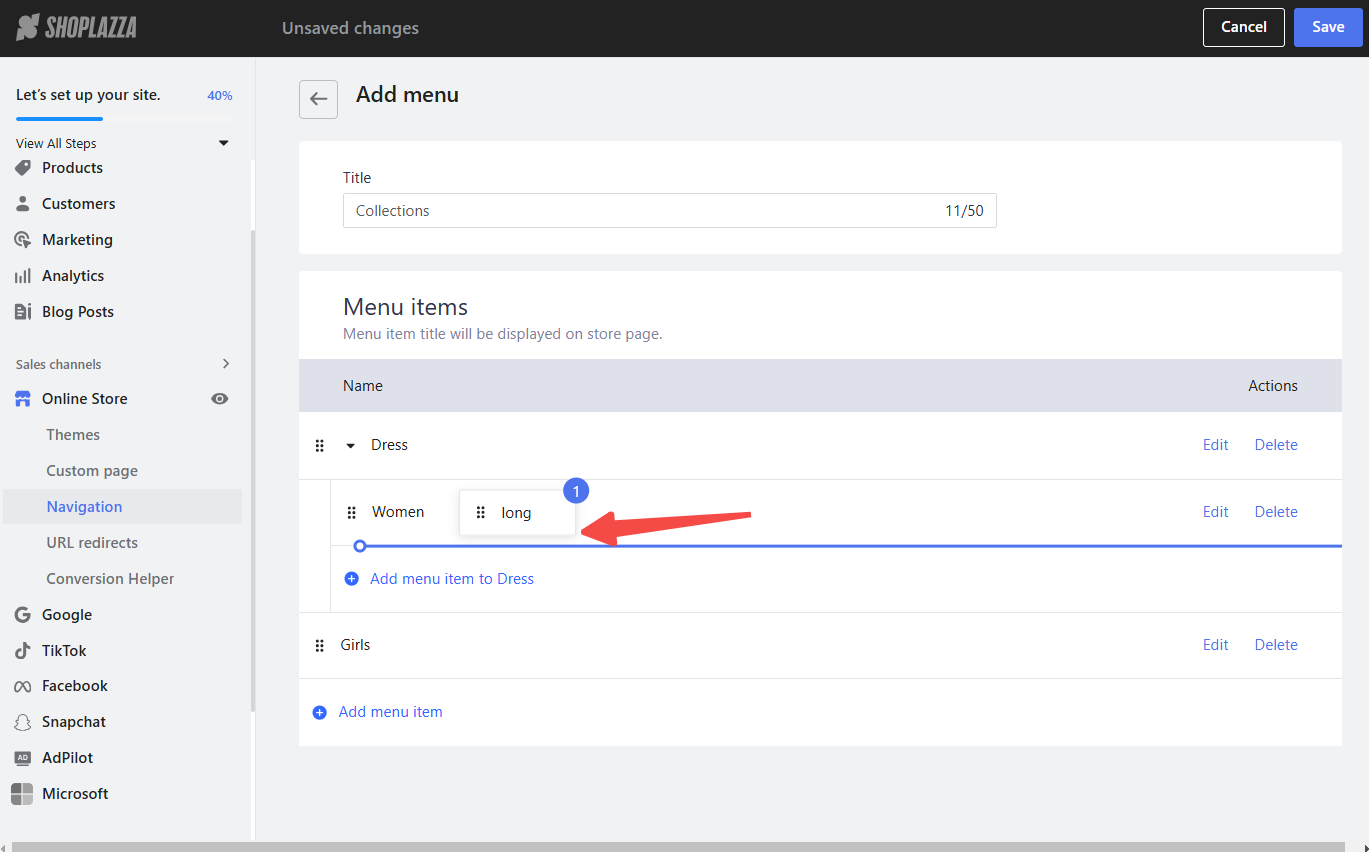
1. Create second-level item: After you create a menu item, drag a menu item below a first-level menu item. This action automatically creates a second-level menu item, visually indicating a sub-menu. The indentation signifies the hierarchical relationship.
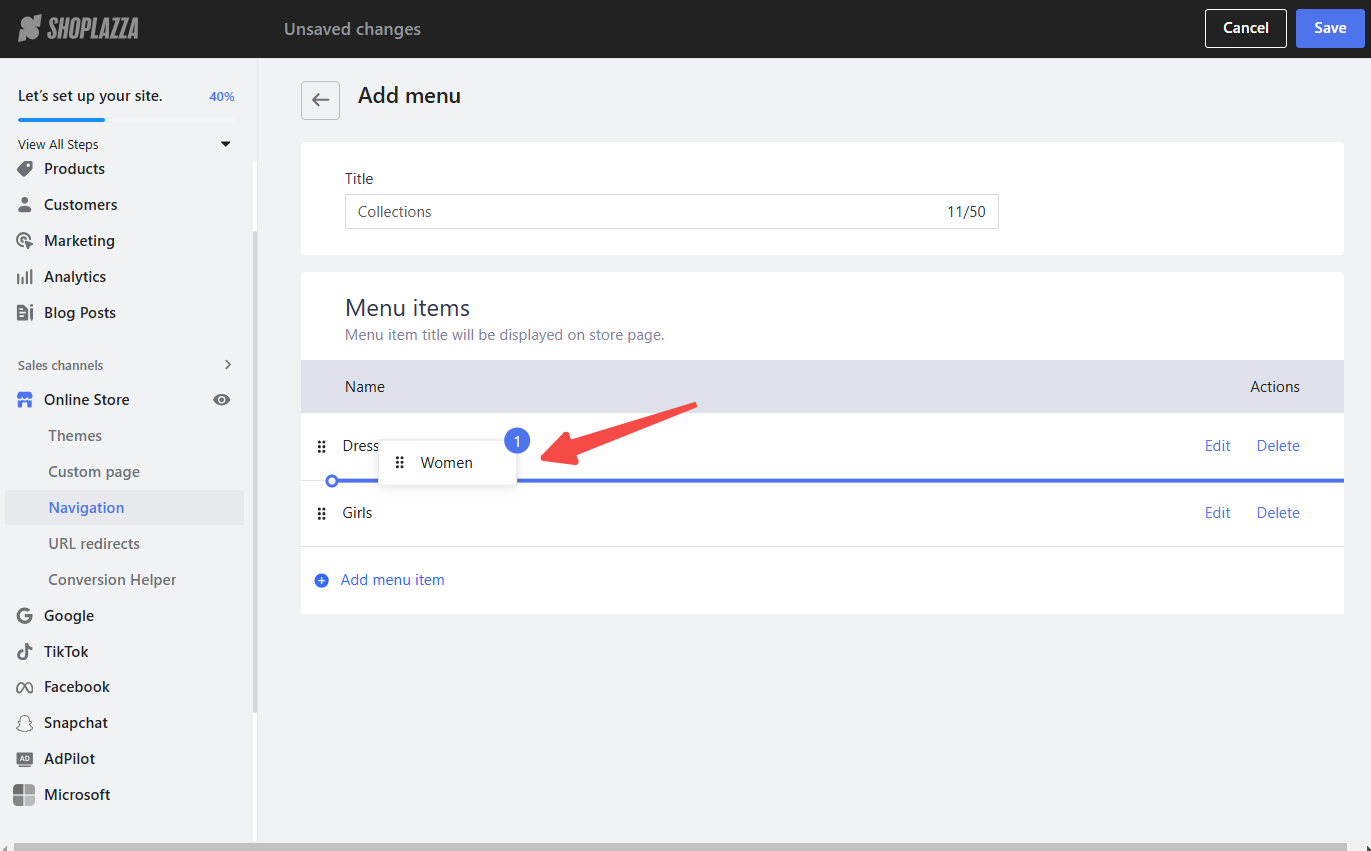

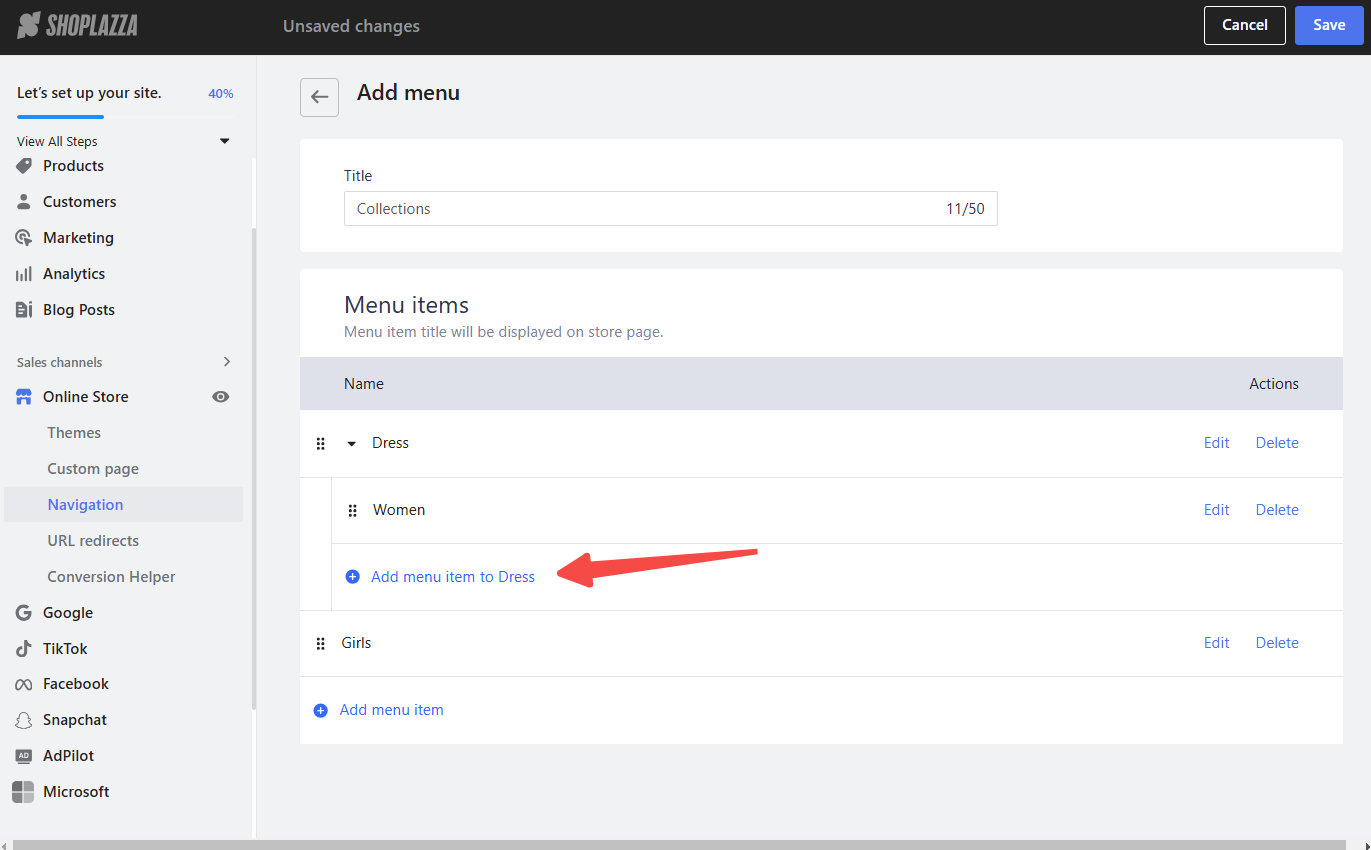
2. Configure the second-level item: Click Add menu item (to menu name) and set up the second-level menu item. Give it a descriptive name and link it to the relevant page or collection.
Note
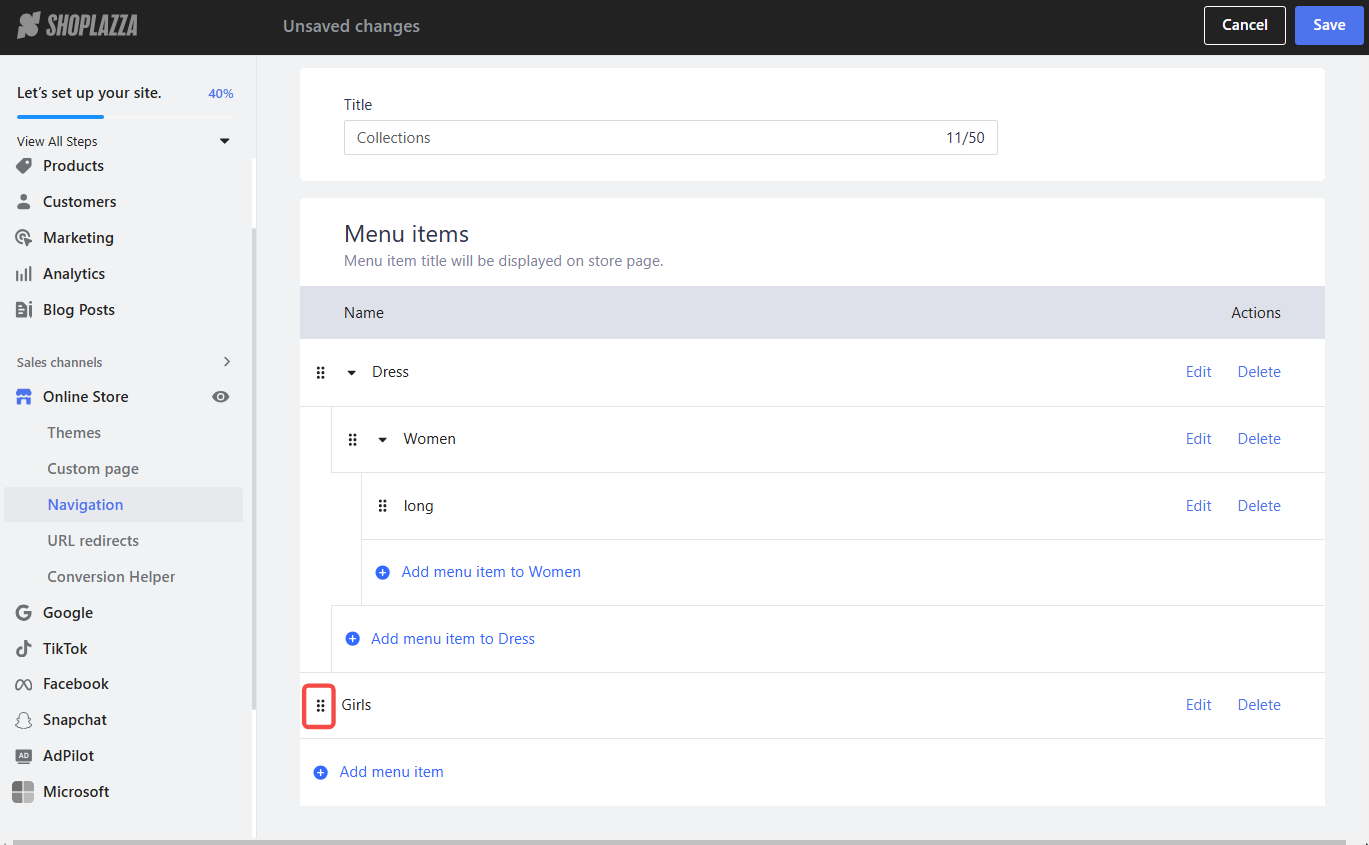
Repeat the process to add other second-level menu items under the same first-level item. This lets you build out a more detailed sub-menu structure.
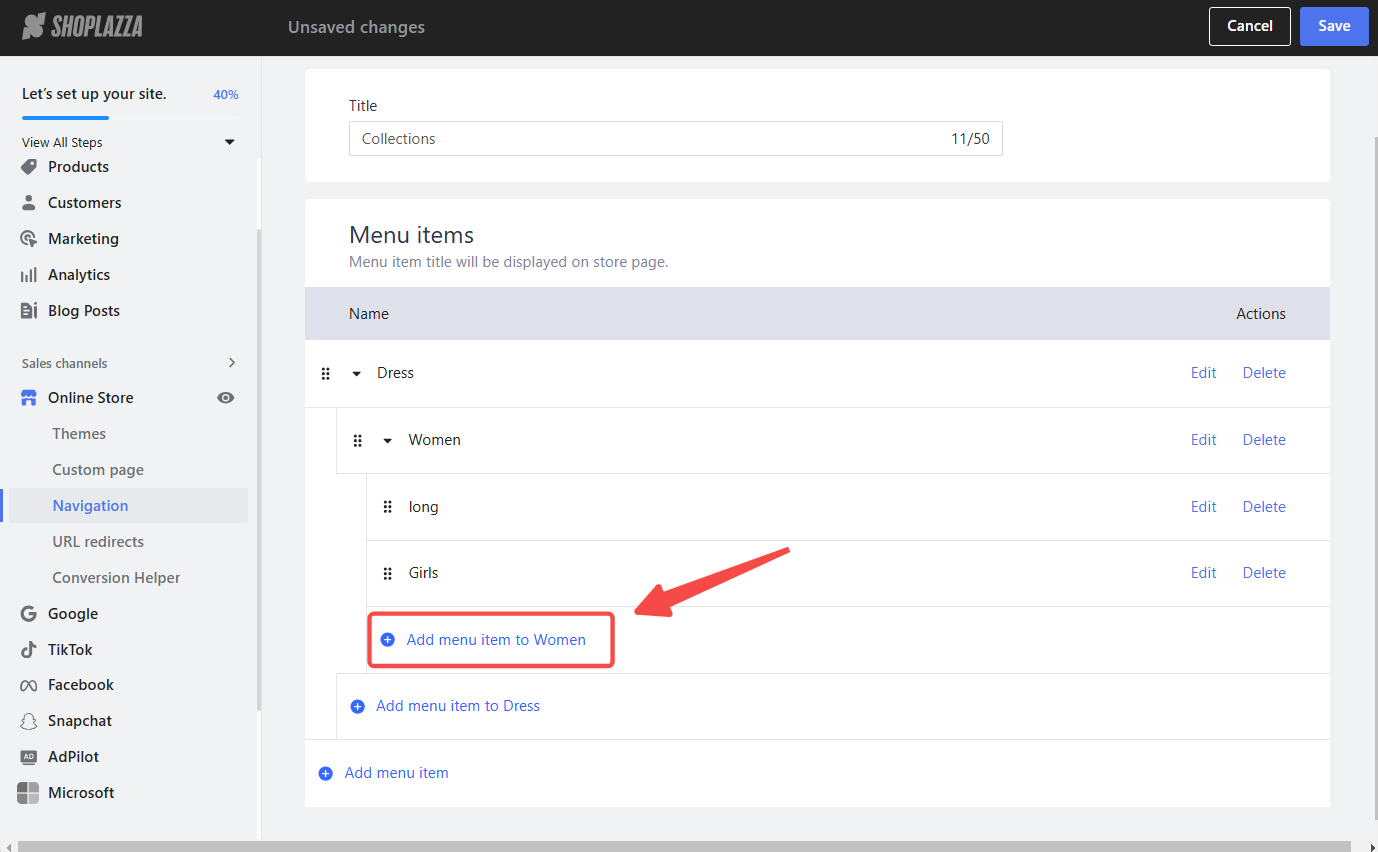
Establish third-level menu items
Finally, we'll create a more granular sub-menus under your second-level items. This is useful for sites with extensive product catalogs or complex content structures.
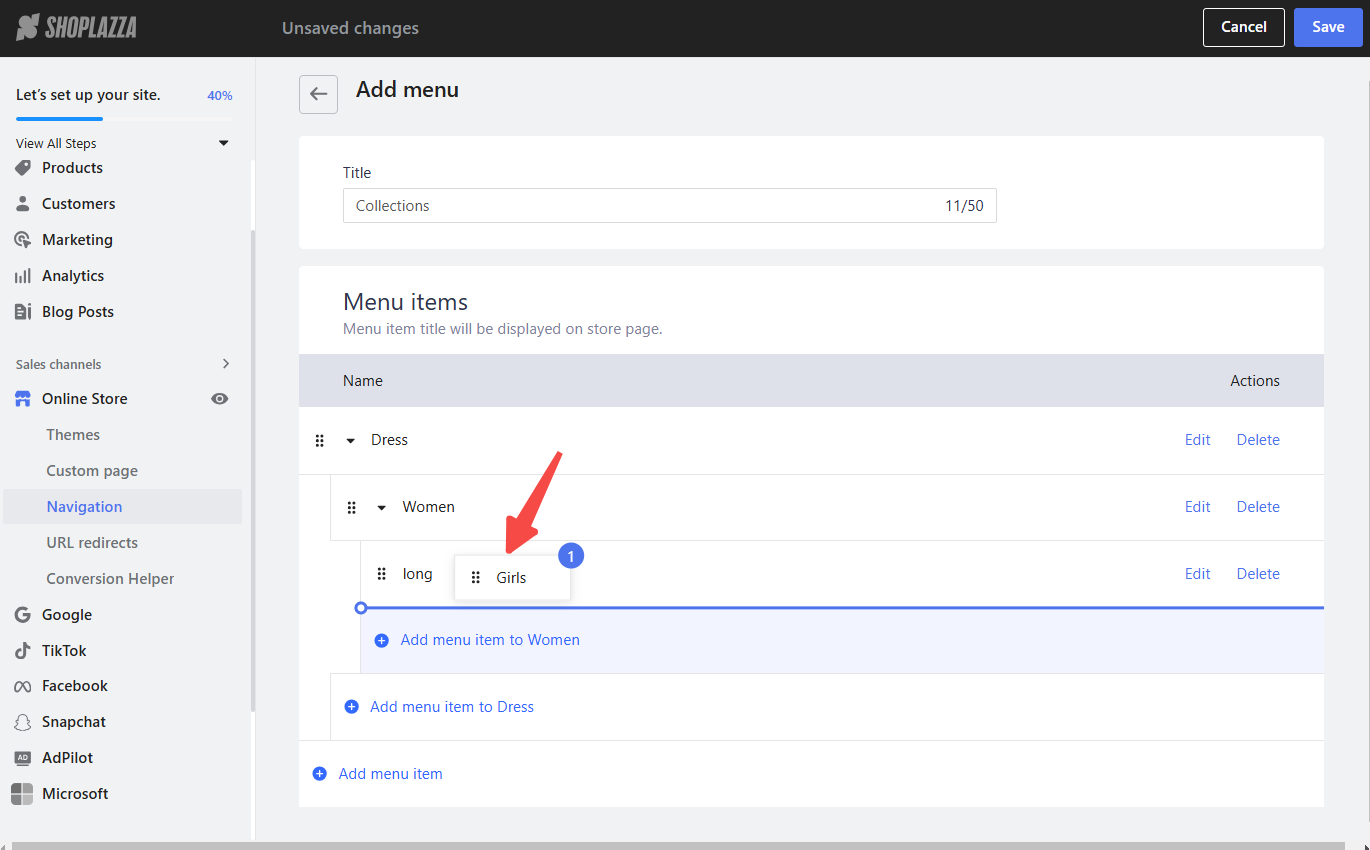
1. Create third-level item: Drag a second-level menu item below another second-level menu item to create a third-level menu item. The further indentation shows it is a sub-menu of a sub-menu.
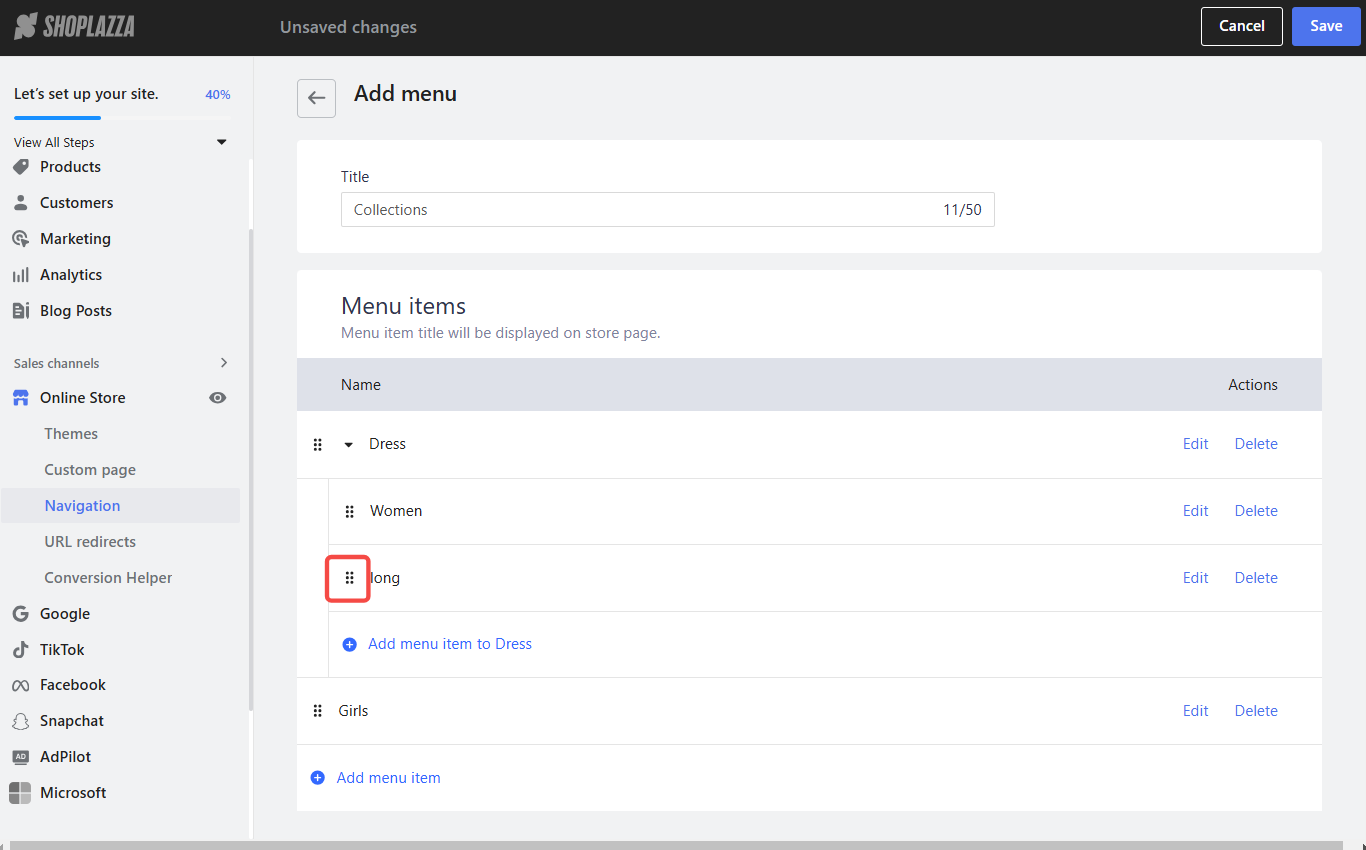

2. Alternative third-level item creation: You can also drag a first-level menu item below a second-level menu item to create a third-level item. This allows you some flexibility in your menu structure.
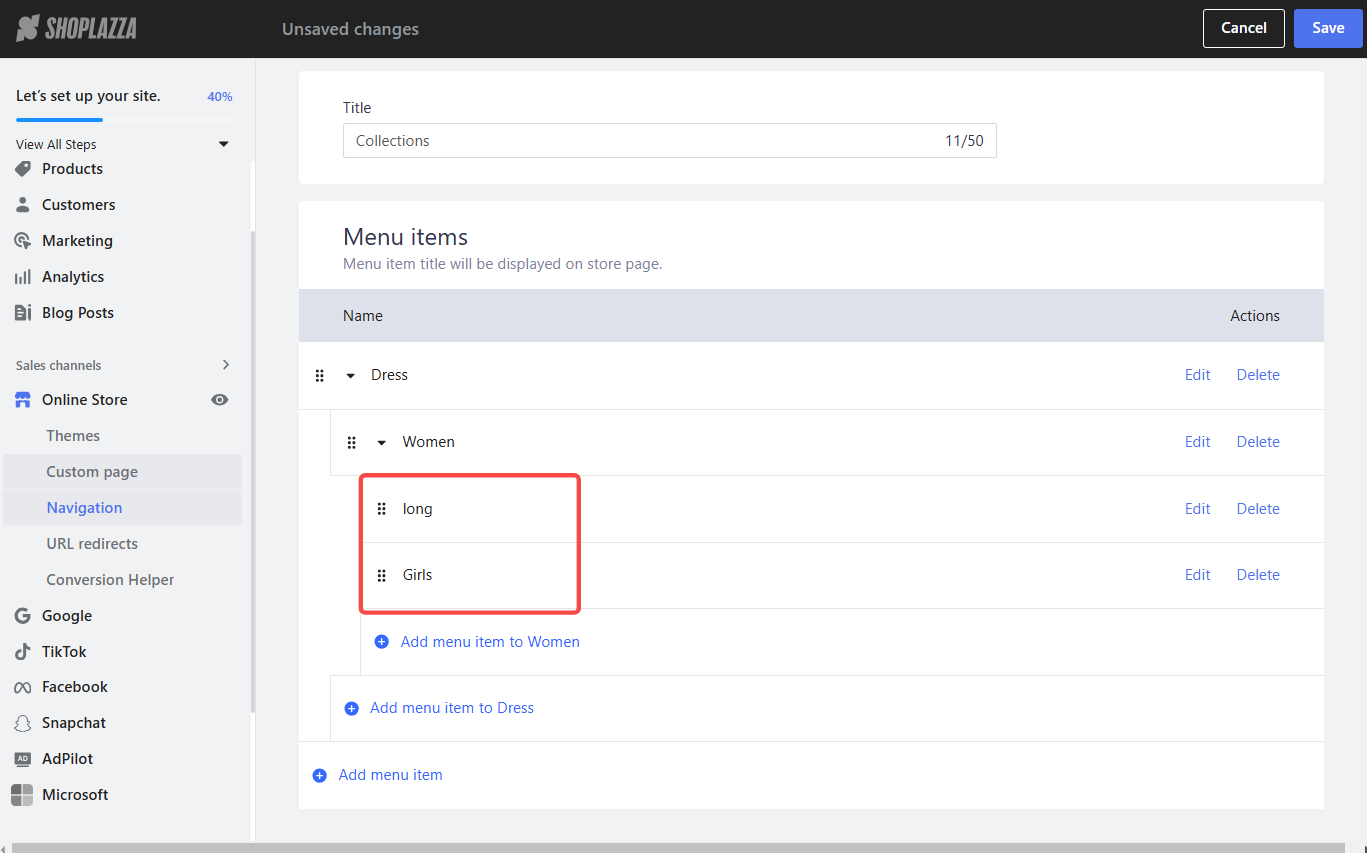
3. Add more third-level items: Click Add menu item and configure to create additional third-level menu items. Continue to add items as needed to categorize your offerings fully.

By following these instructions, you can design a navigation menu that is both user-friendly and aesthetically pleasing. A well-organized menu allows your customers to easily navigate your store, contributing to a better overall shopping experience. Remember to keep your menu structure logical and intuitive for your customers.


Comments
Please sign in to leave a comment.