
In today’s digital marketing landscape, understanding how to add advertisements to your own website has become a key focus for many website operators. This article will guide you through the process of installing the Outbrain Pixel and setting up conversion tracking. Please follow the steps below to complete the configuration.
Note
- The code examples provided in this article are for reference only. Please contact the relevant advertising platform to obtain the code specific to your account.
- If conversion events or tracking do not work as expected, we recommend contacting the advertising platform’s support team to verify the accuracy of the code.
- If you encounter front-end display issues, the problem may be caused by incompatibility between the added code and your website theme, or conflicts with other scripts on your site. In such cases, please remove the related code immediately, check its integrity, and consult your technical team for further assistance and support.
How to Install the Outbrain Pixel
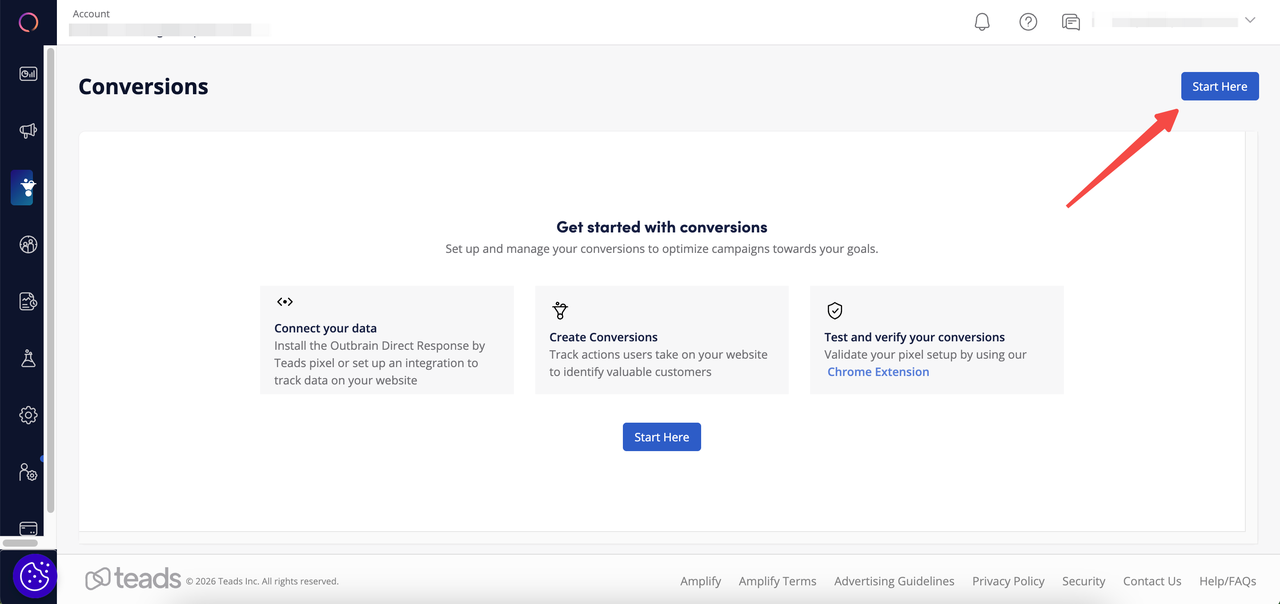
1. Log in to the Outbrain dashboard, go to the Conversions tab, and click on Outbrain Pixel.
2. Select Manual Pixel, enter your website URL, then scroll down and click the "Copy Pixel Code" button to copy the code.


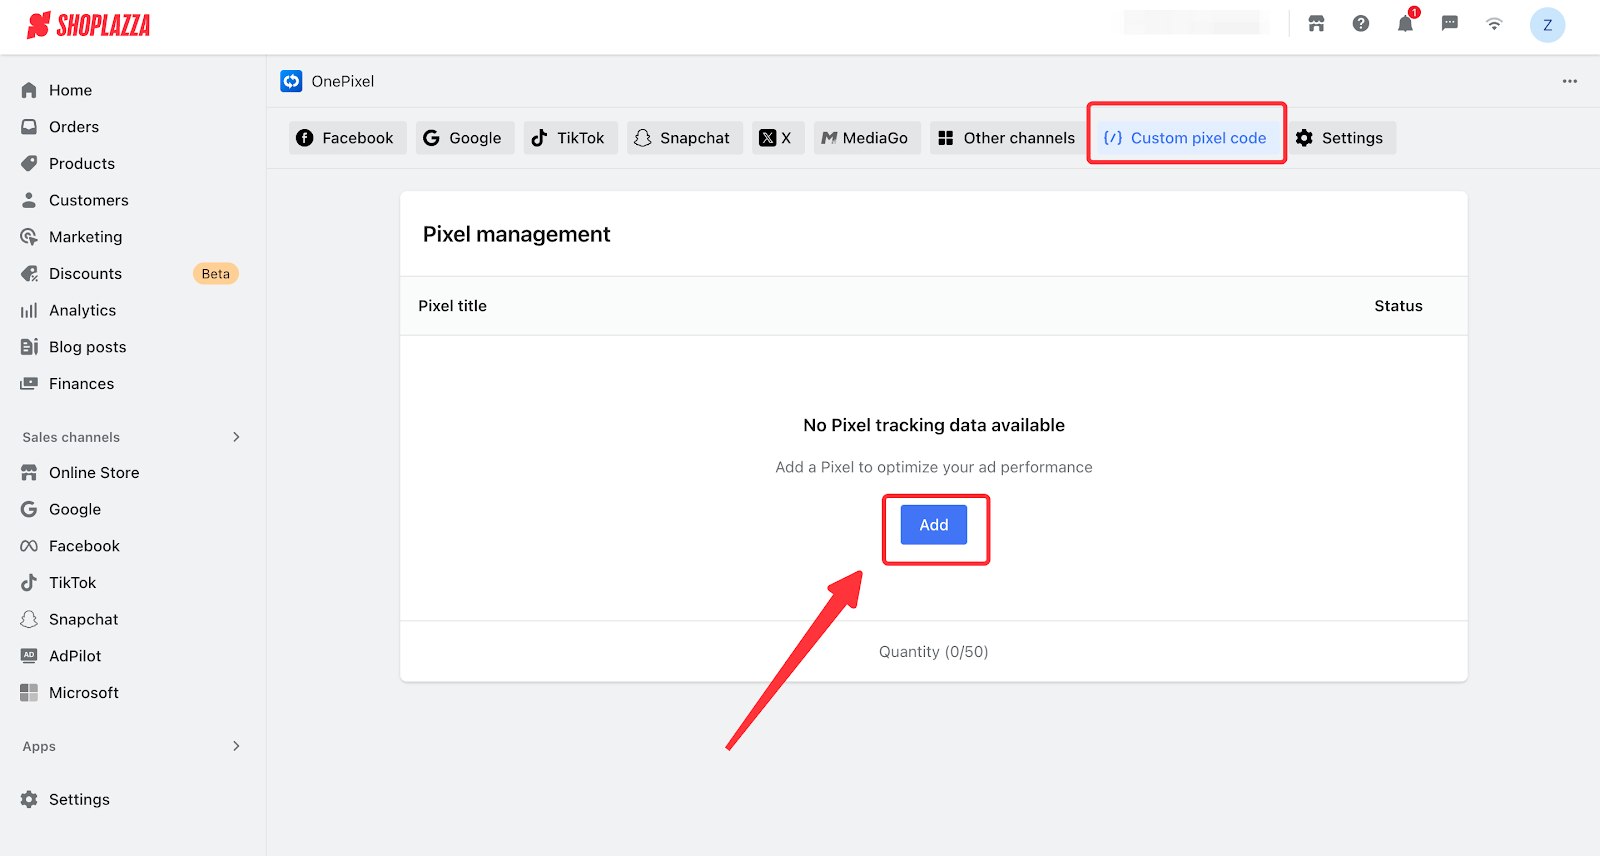
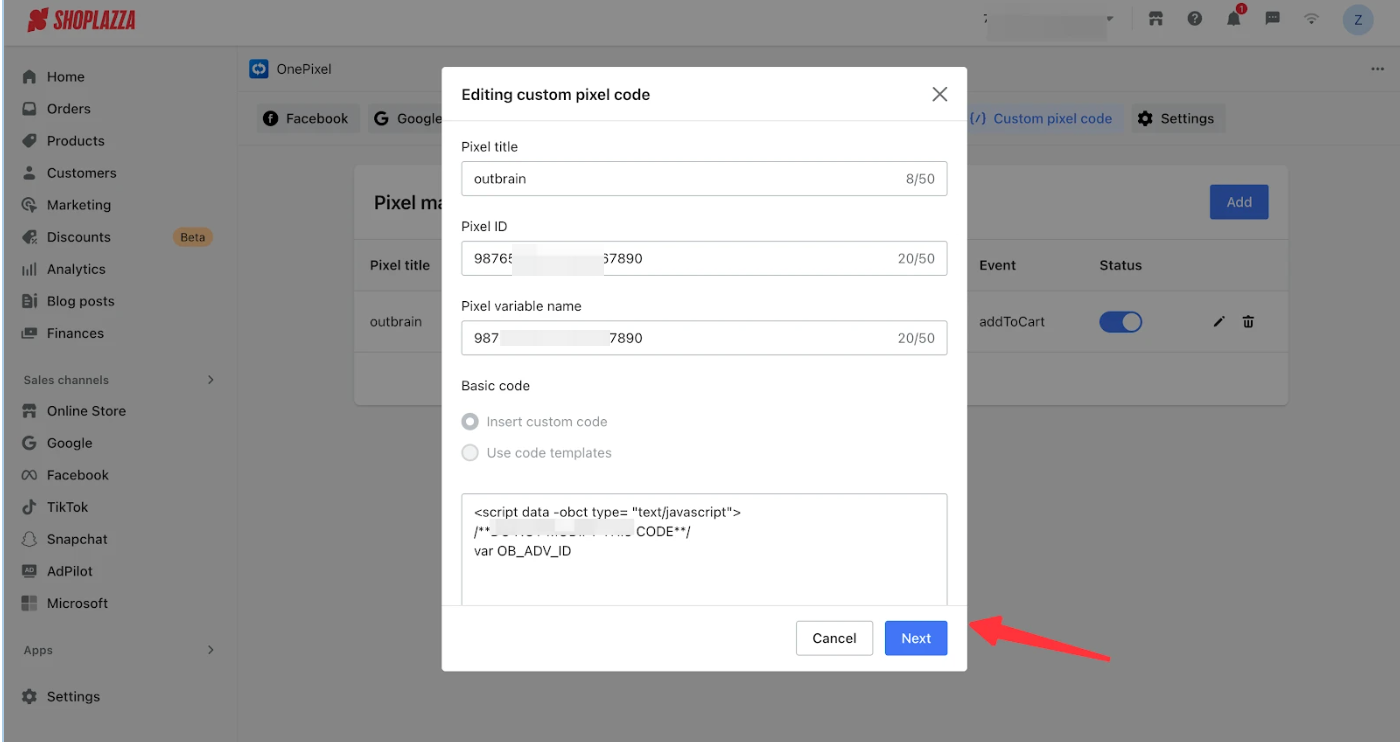
3. Go to the Shoplazza admin > Apps > One Pixel. Select Custom Pixel Code and click the Add button.
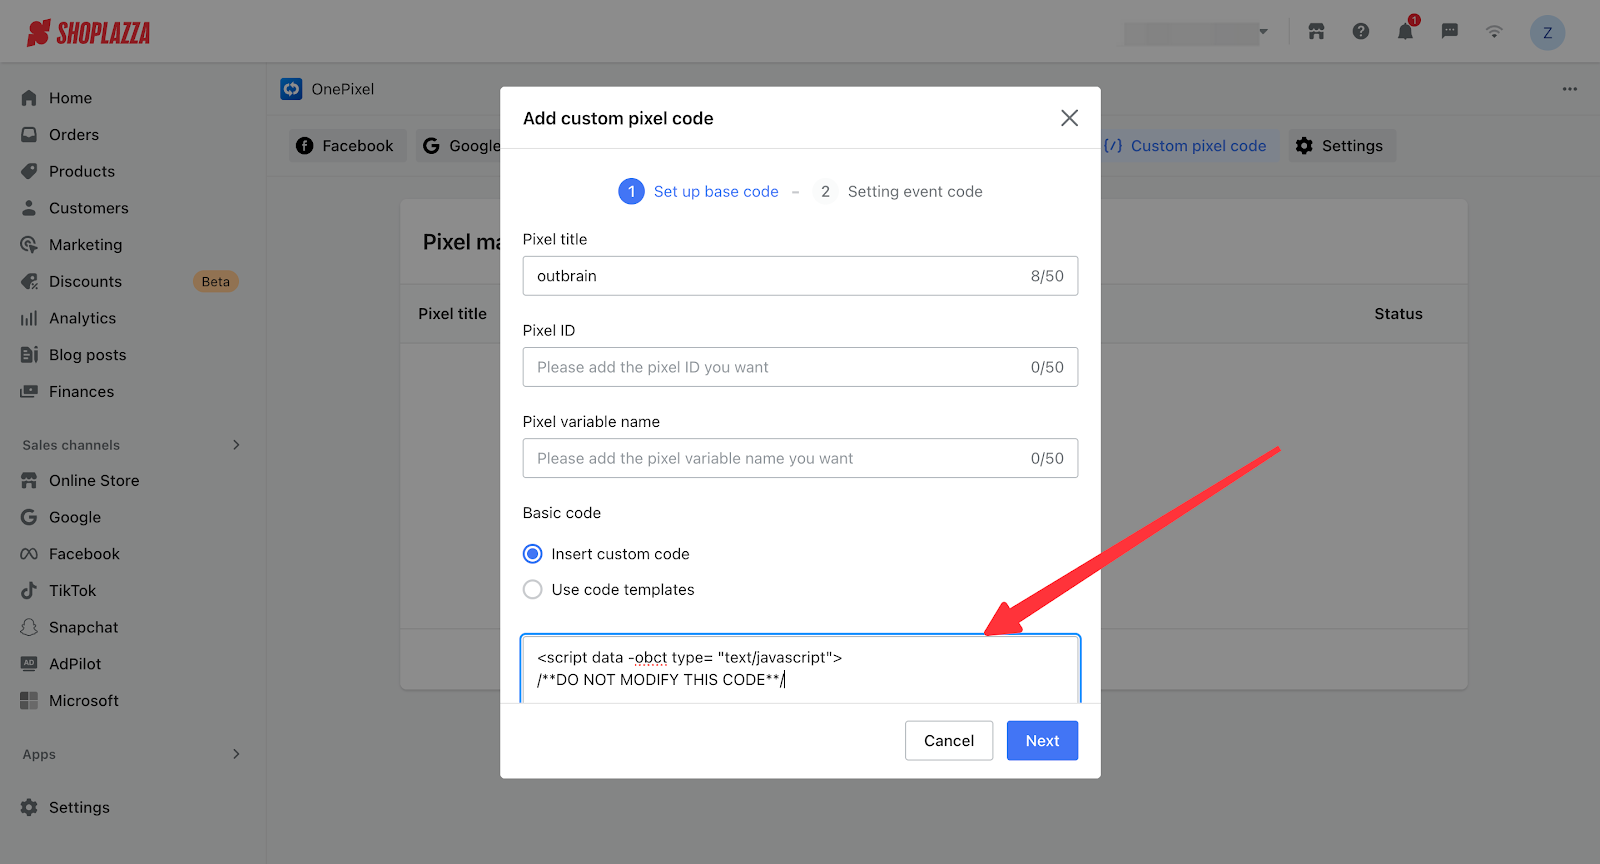
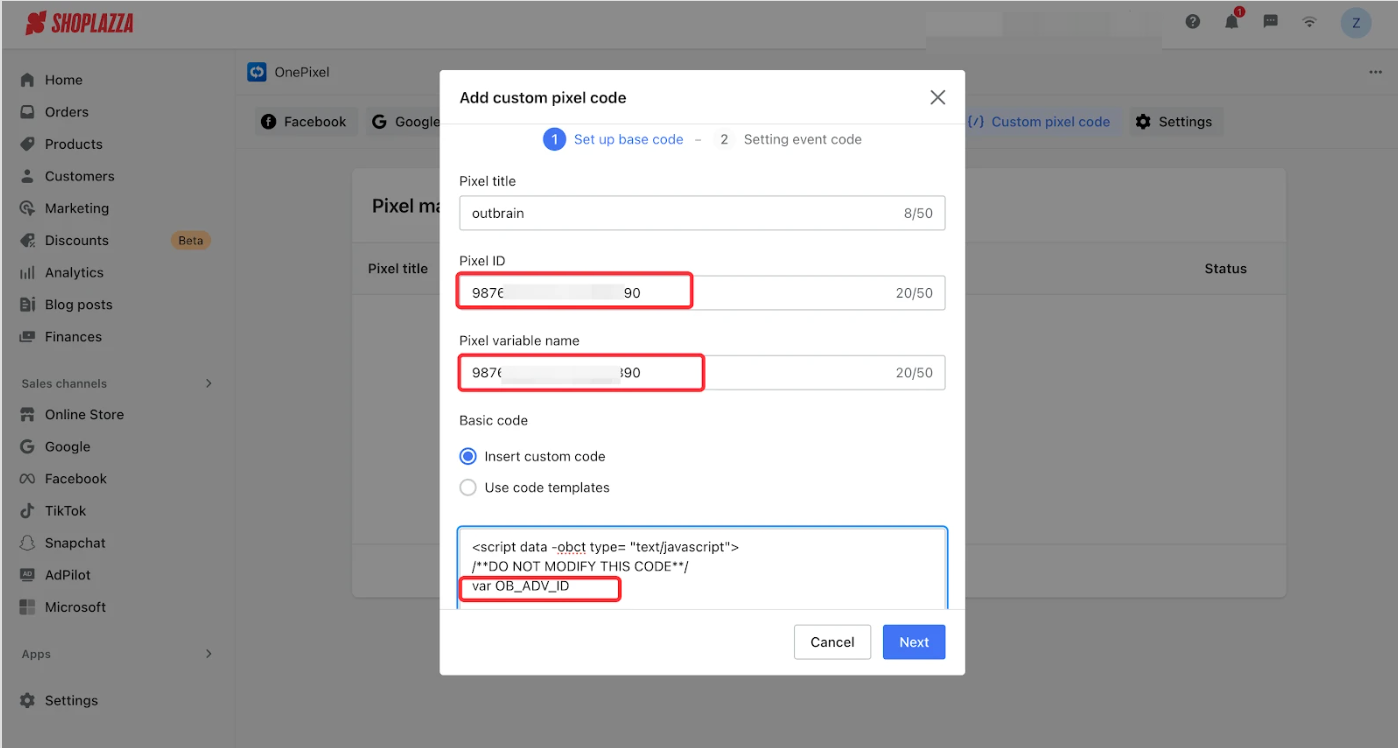
4. Paste the code into the input box. Copy the ID following var OB_ADV_ID in the code and enter it into both the Pixel ID and Pixel Variable Name fields. Click the "Next" button and keep this page open.
5. Return to the Outbrain dashboard and click "Next".
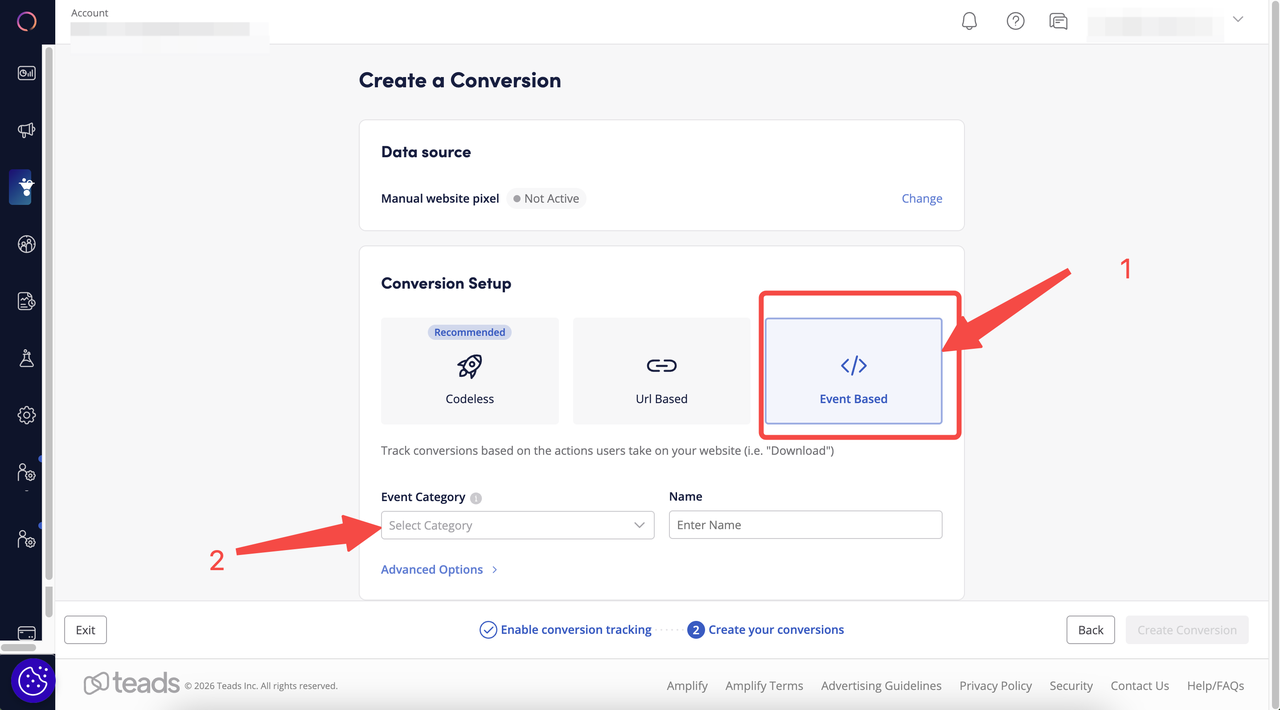
6. Select the "Event Based" type, and choose the conversion event you want to add in the Event Category field.
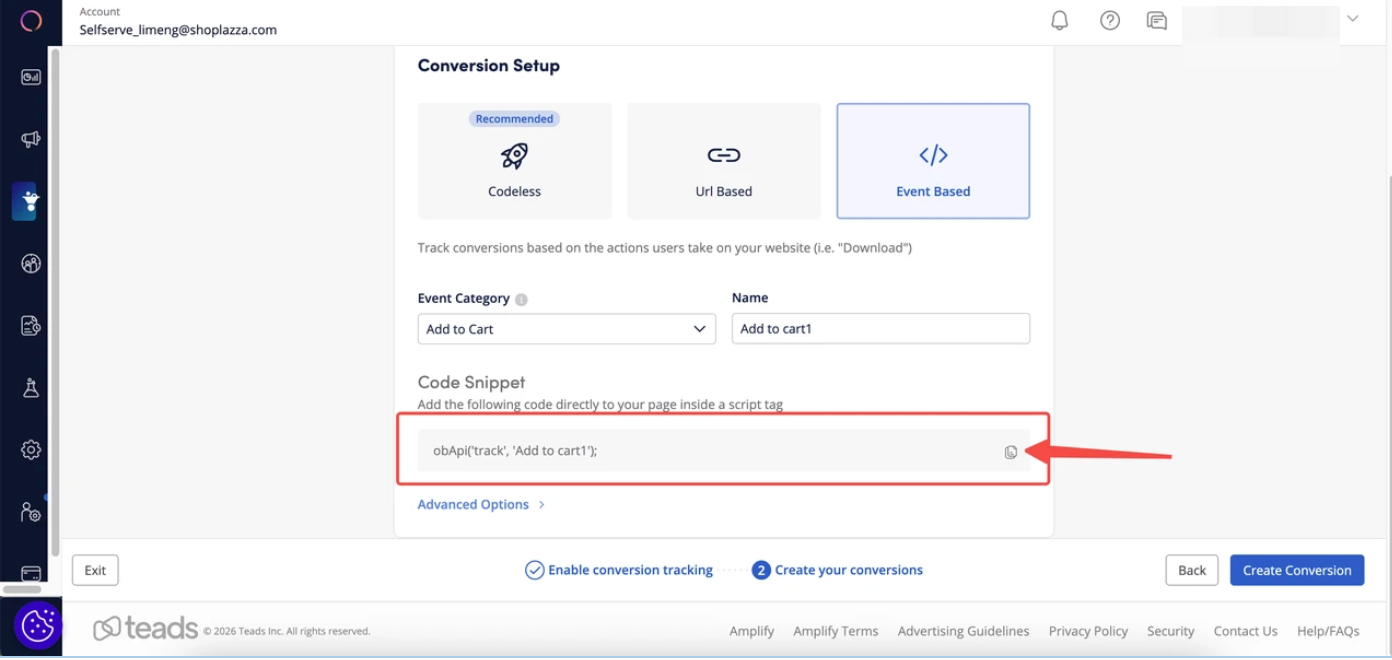
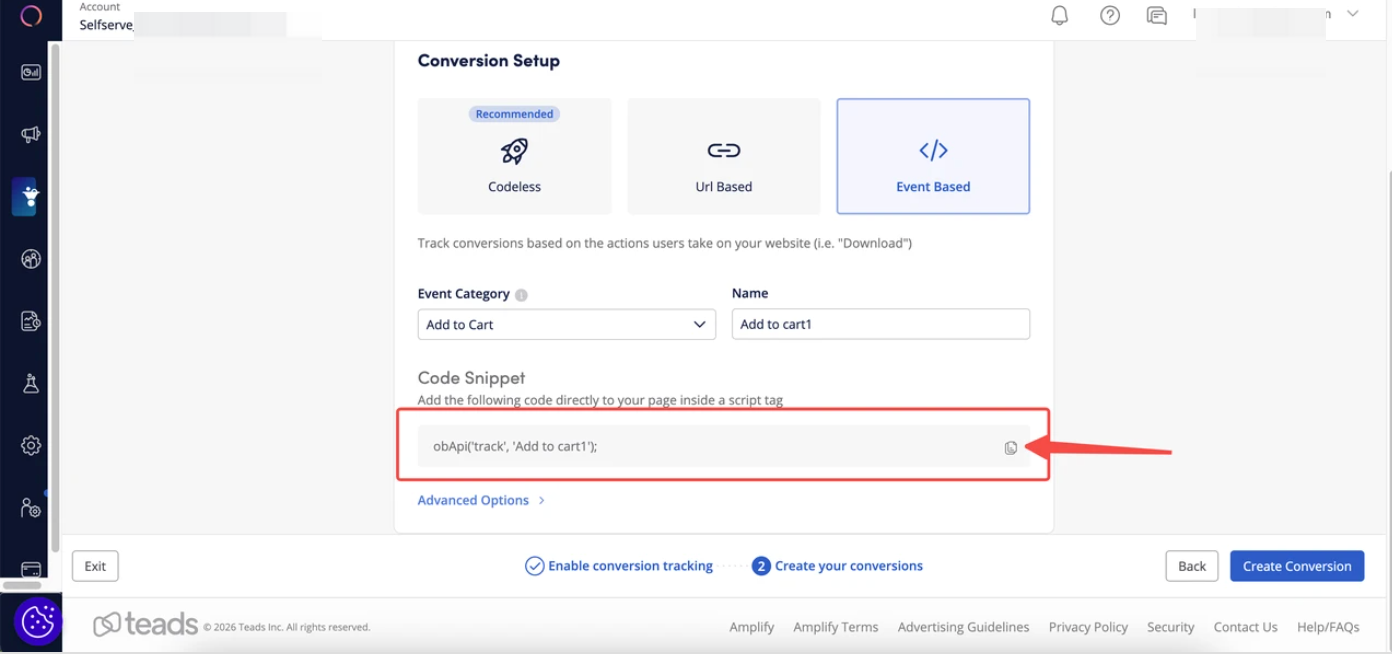
7. After copying the event code, click Create Conversion.
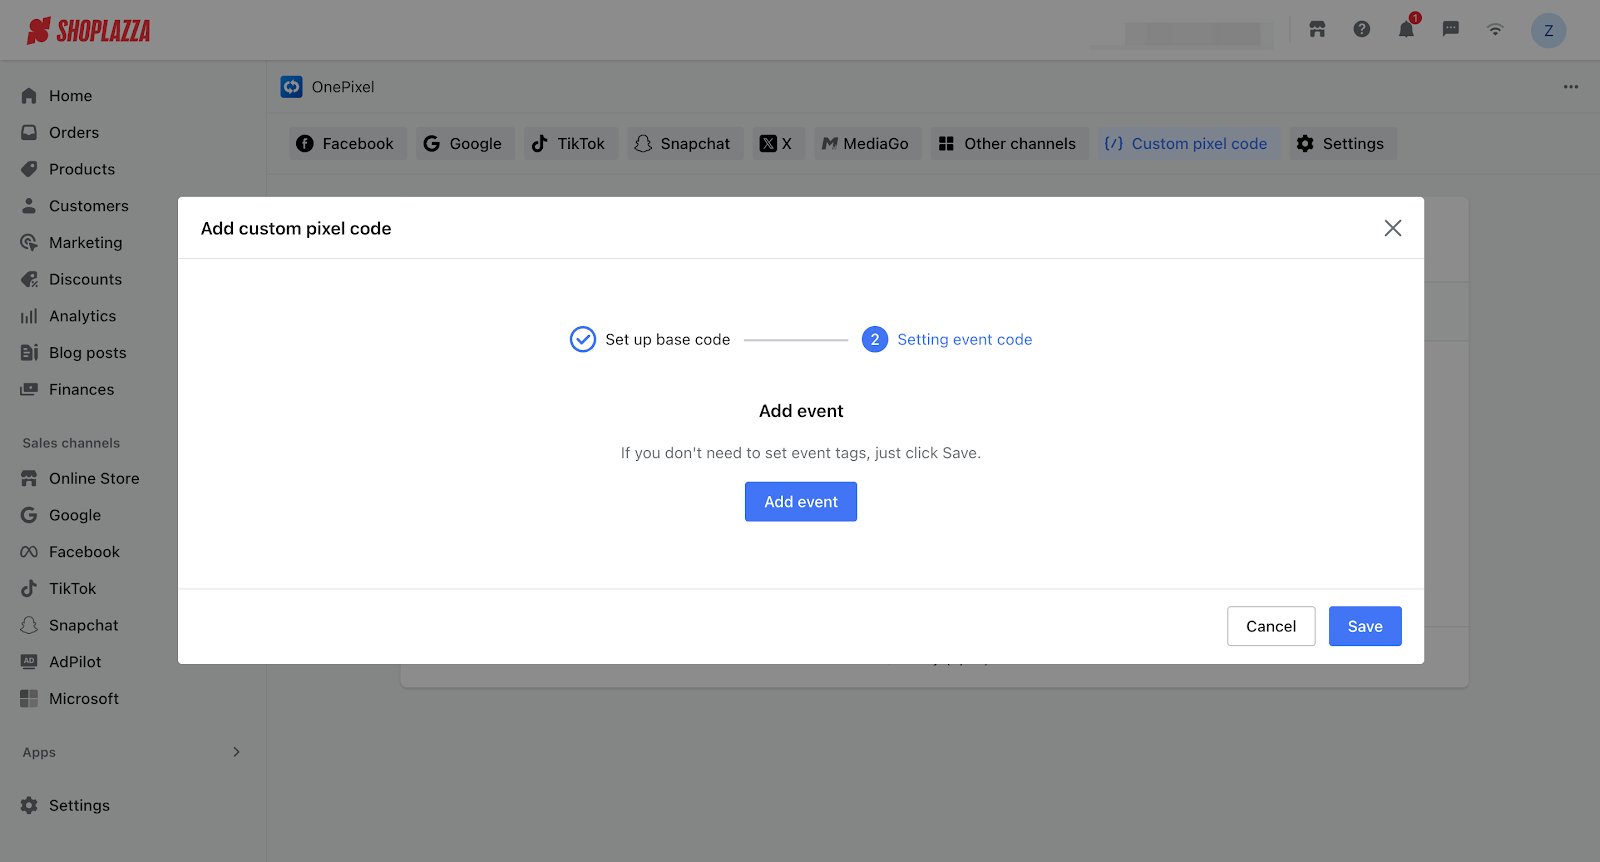
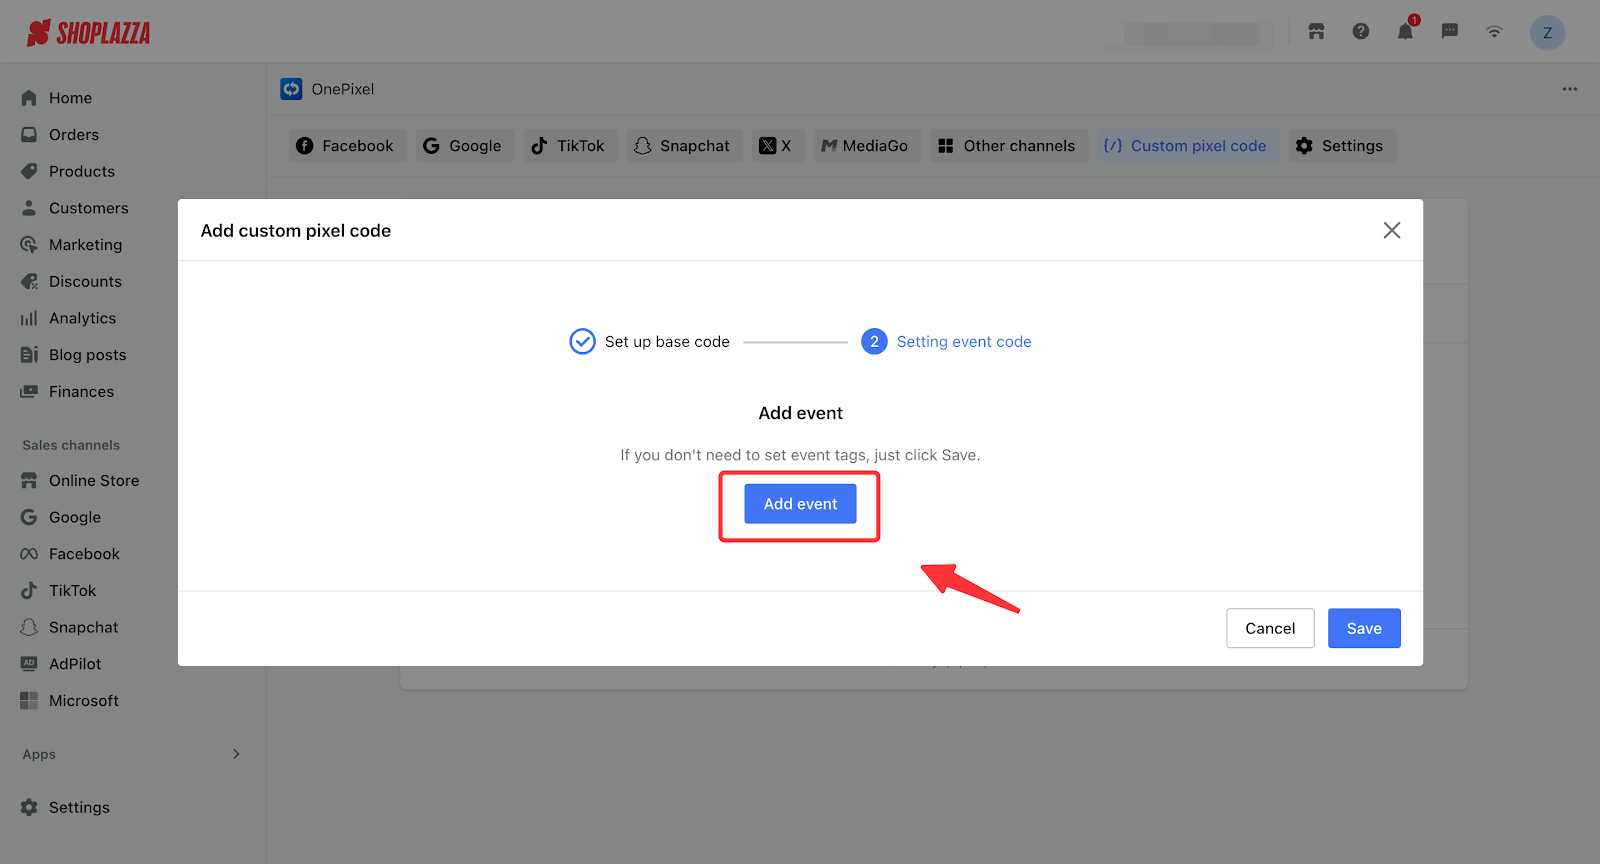
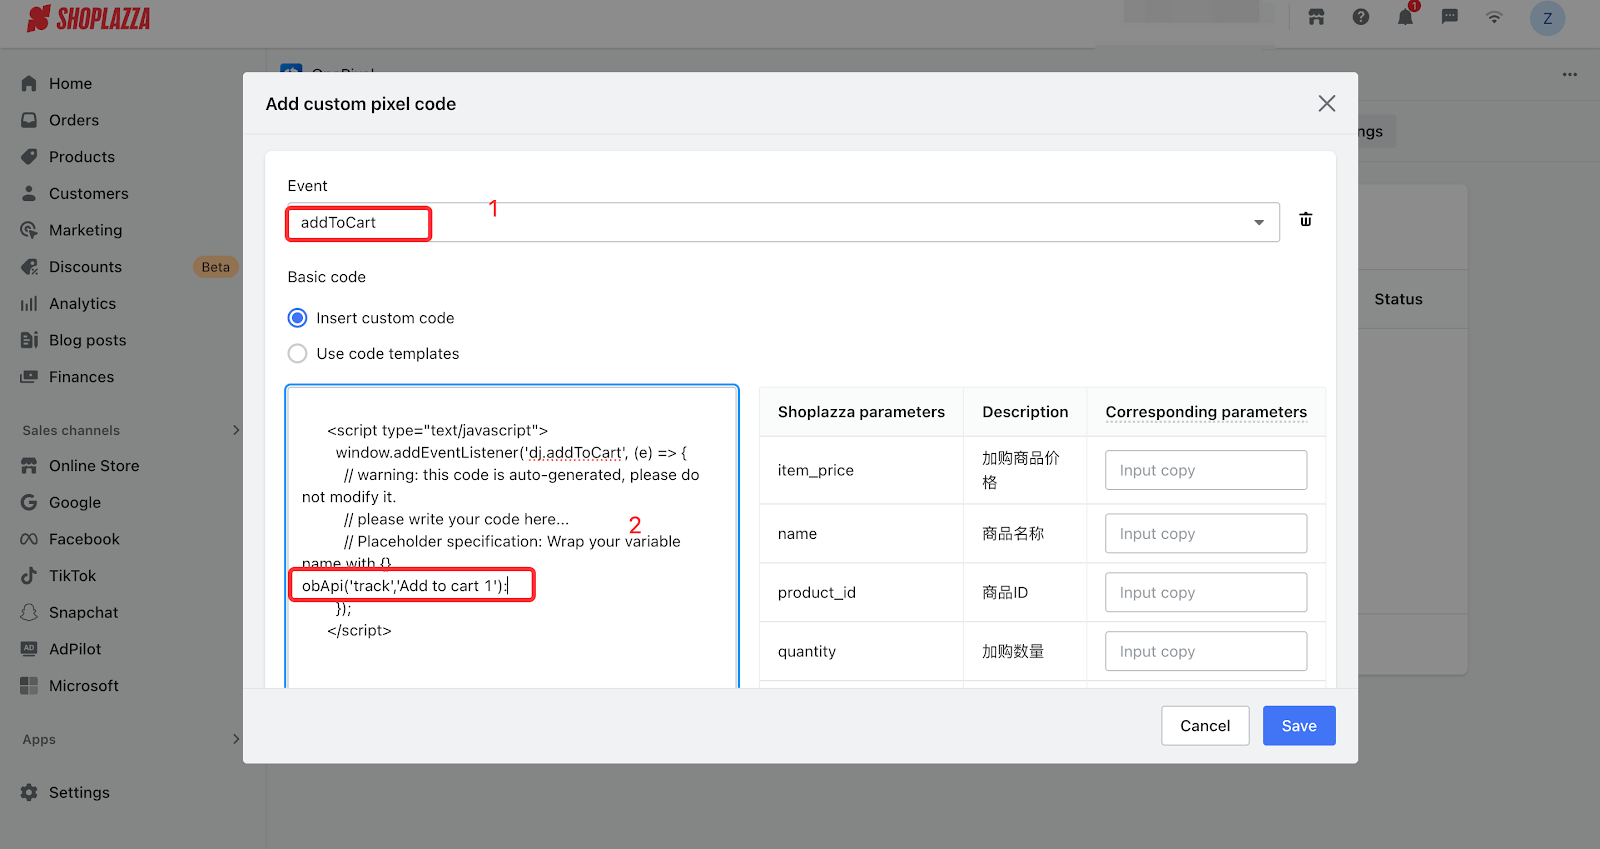
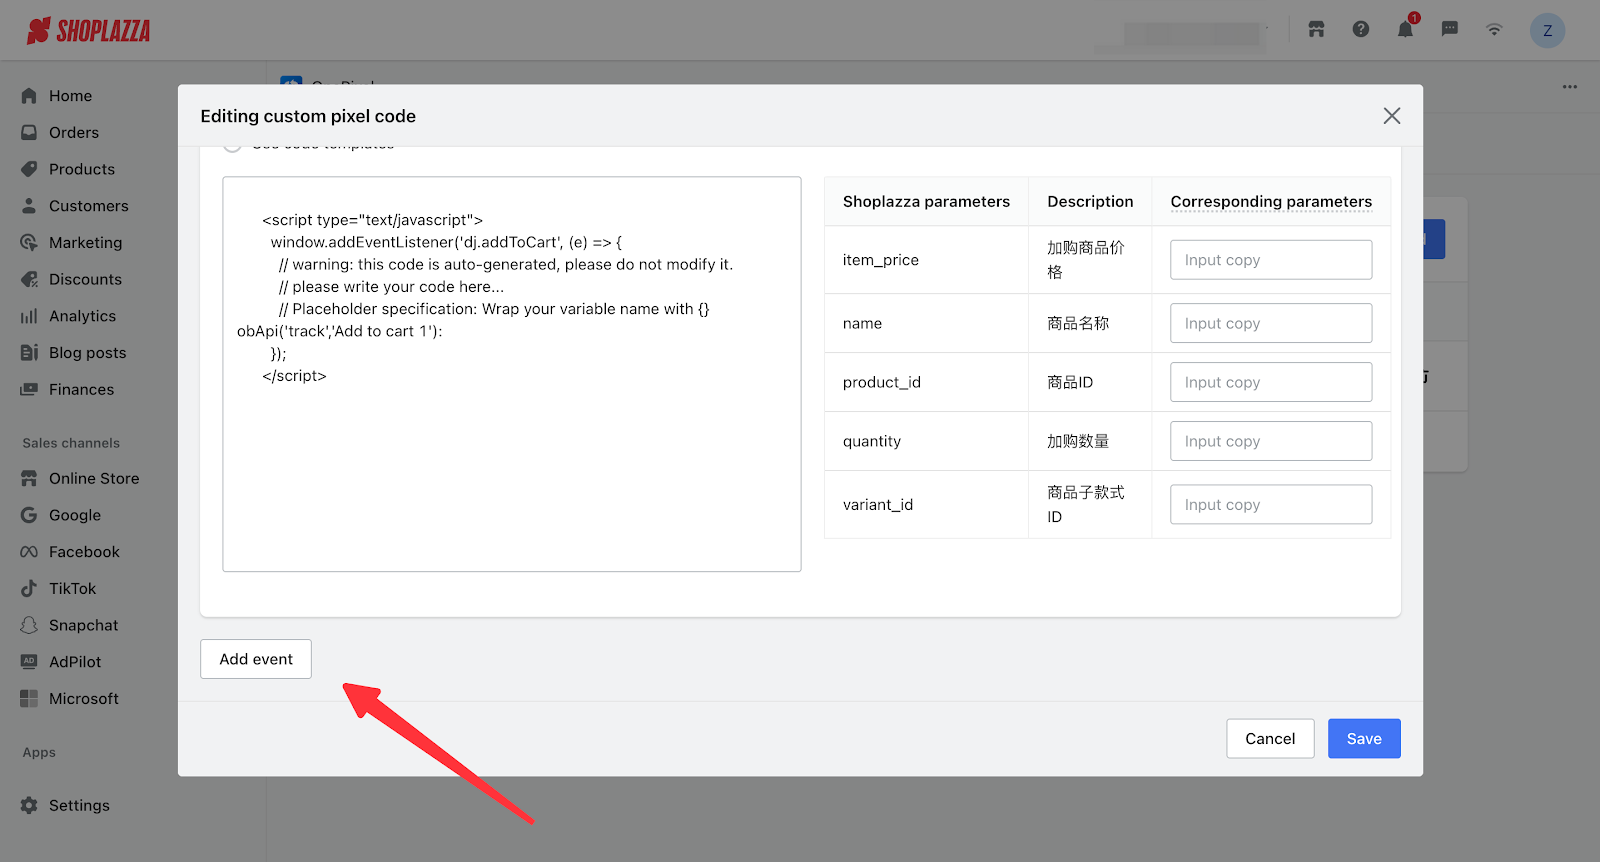
8. Return to the One Pixel app, click "Add Event", and select the conversion event you previously created in Outbrain from the dropdown menu. Paste the event code into the designated field as shown in the diagram, then click Save to activate it.
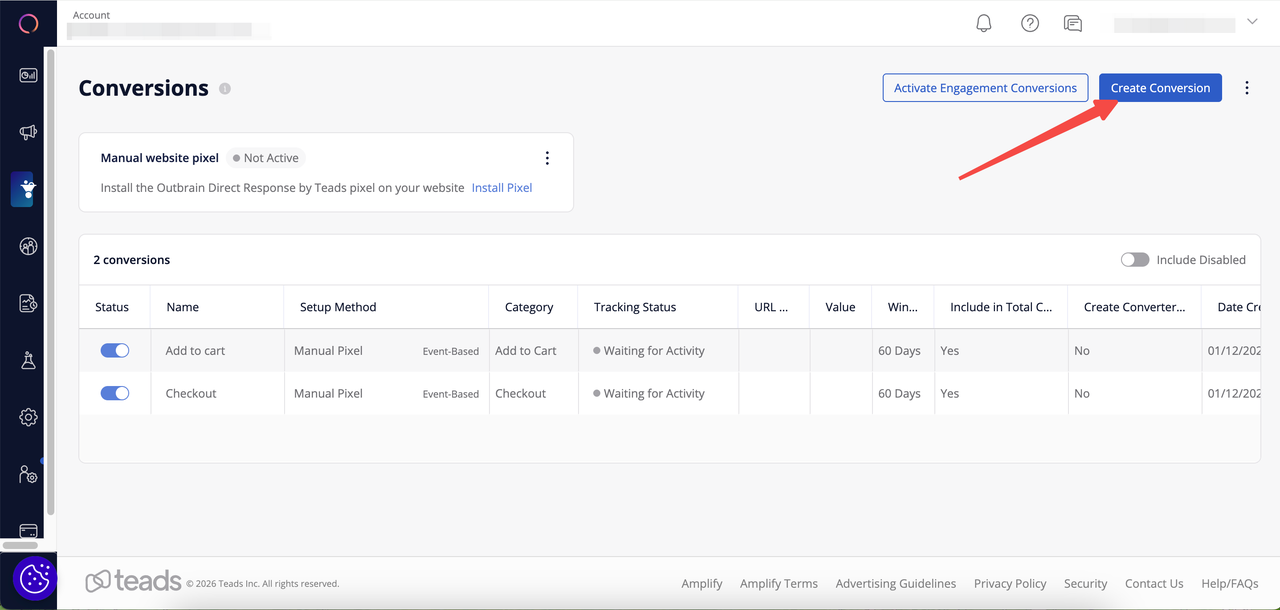
9. If you need to track additional events, go to the Outbrain dashboard and click "Create Conversionto create more conversion events. Repeat steps 6–7, then return to the Aggregated Pixel app, select the custom pixel code you created earlier, and click Edit.
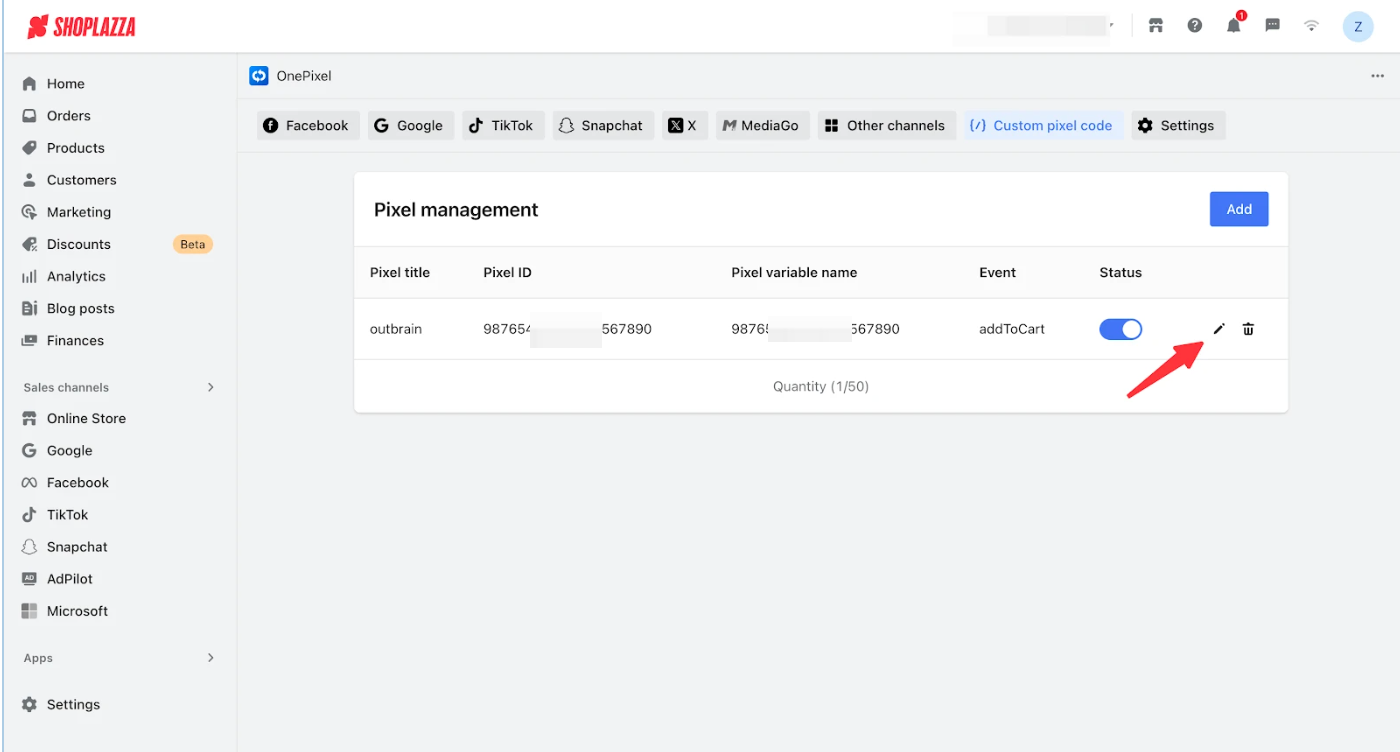
10. Click "Next", then click "Add Event". Select the corresponding event, paste the associated event code, and click "Save" to activate it.
Note
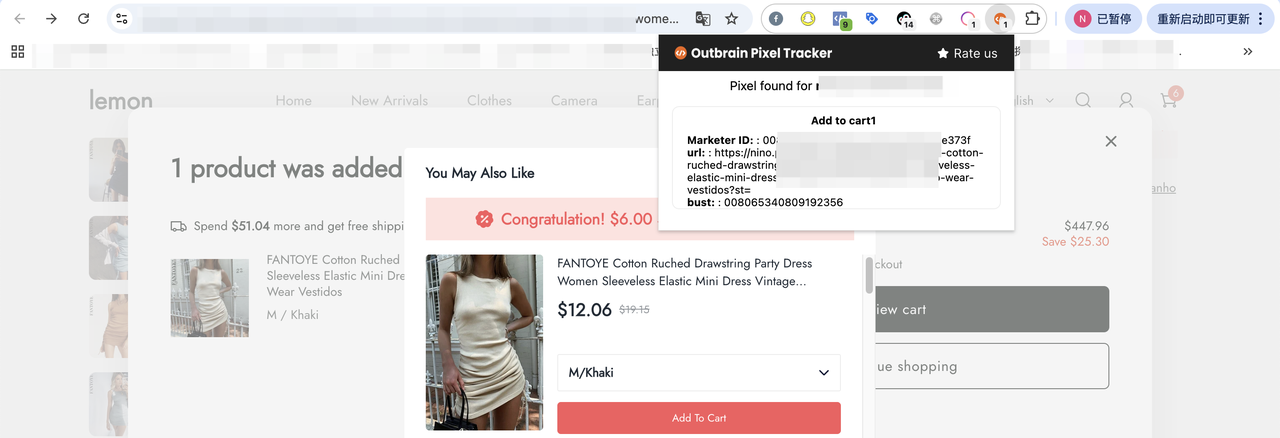
After installing the above event codes, you can use the Outbrain Pixel Tracker to verify them.


Comments
Please sign in to leave a comment.