Keeping product quantities up to date is essential for smooth operations and accurate fulfillment. Whether you're updating a single item or using the bulk edit tool to adjust multiple SKUs at once, built-in inventory tools ensure efficient management and help maintain consistent stock levels across your store.
Editing individual product inventory
Use this method to update the stock of a single product or SKU directly from the inventory list.
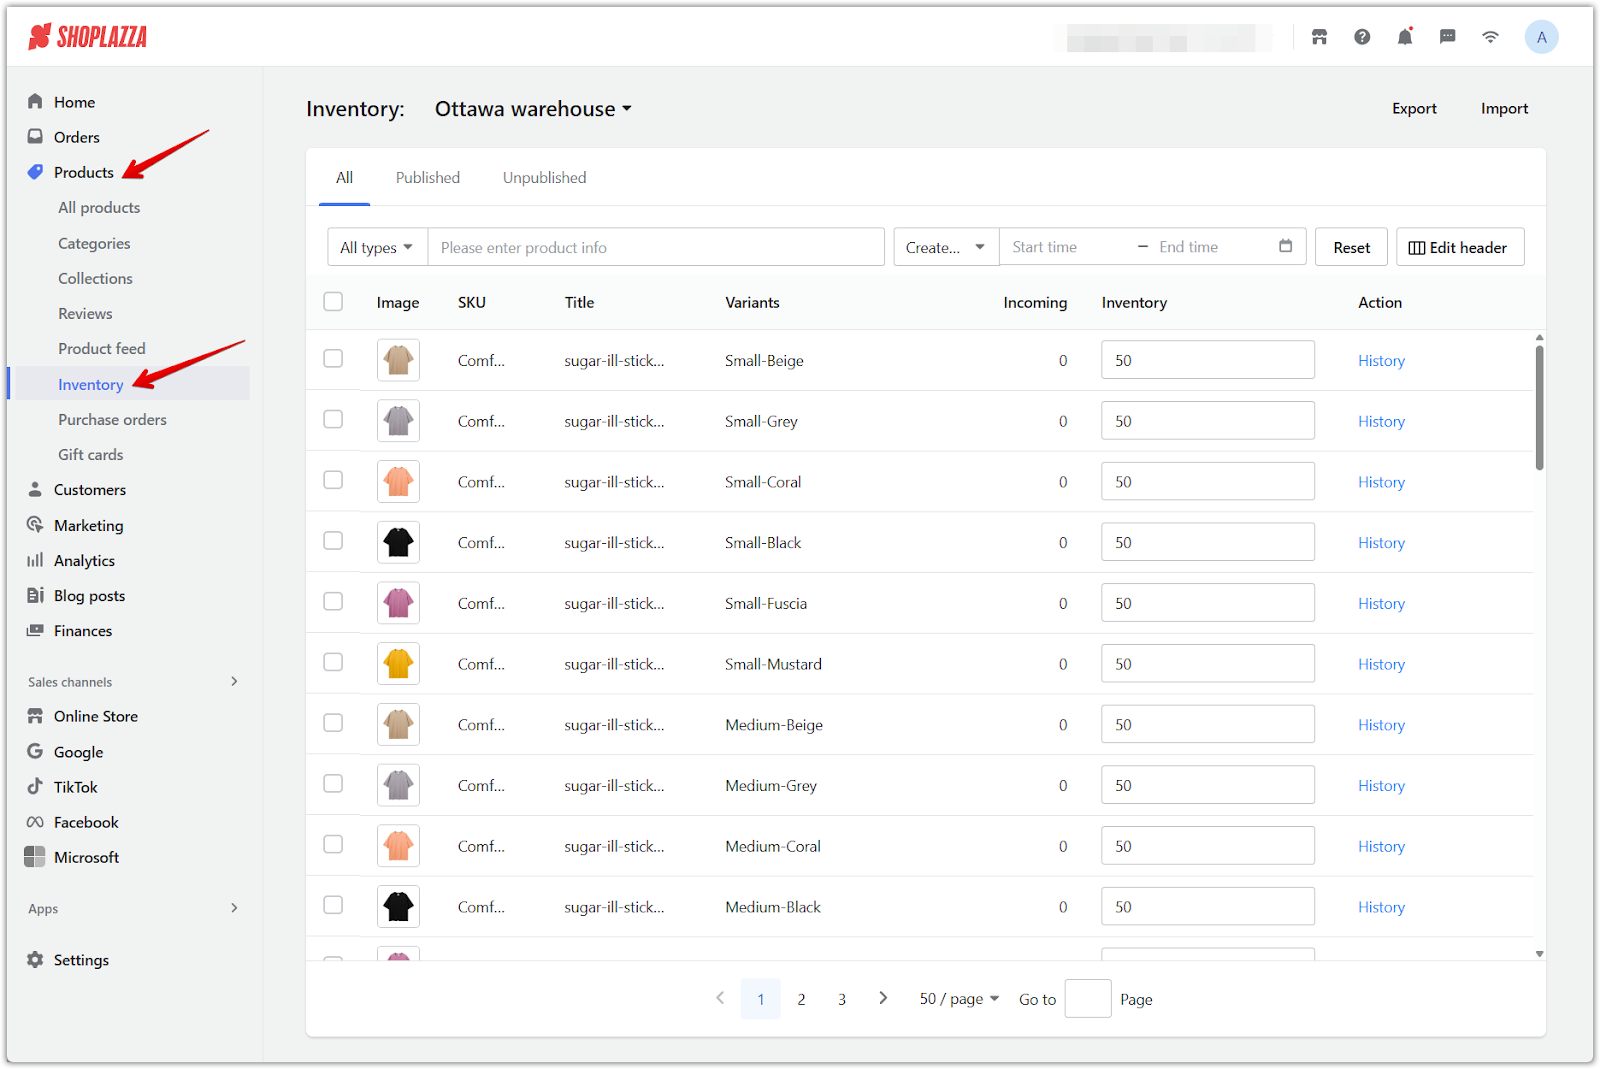
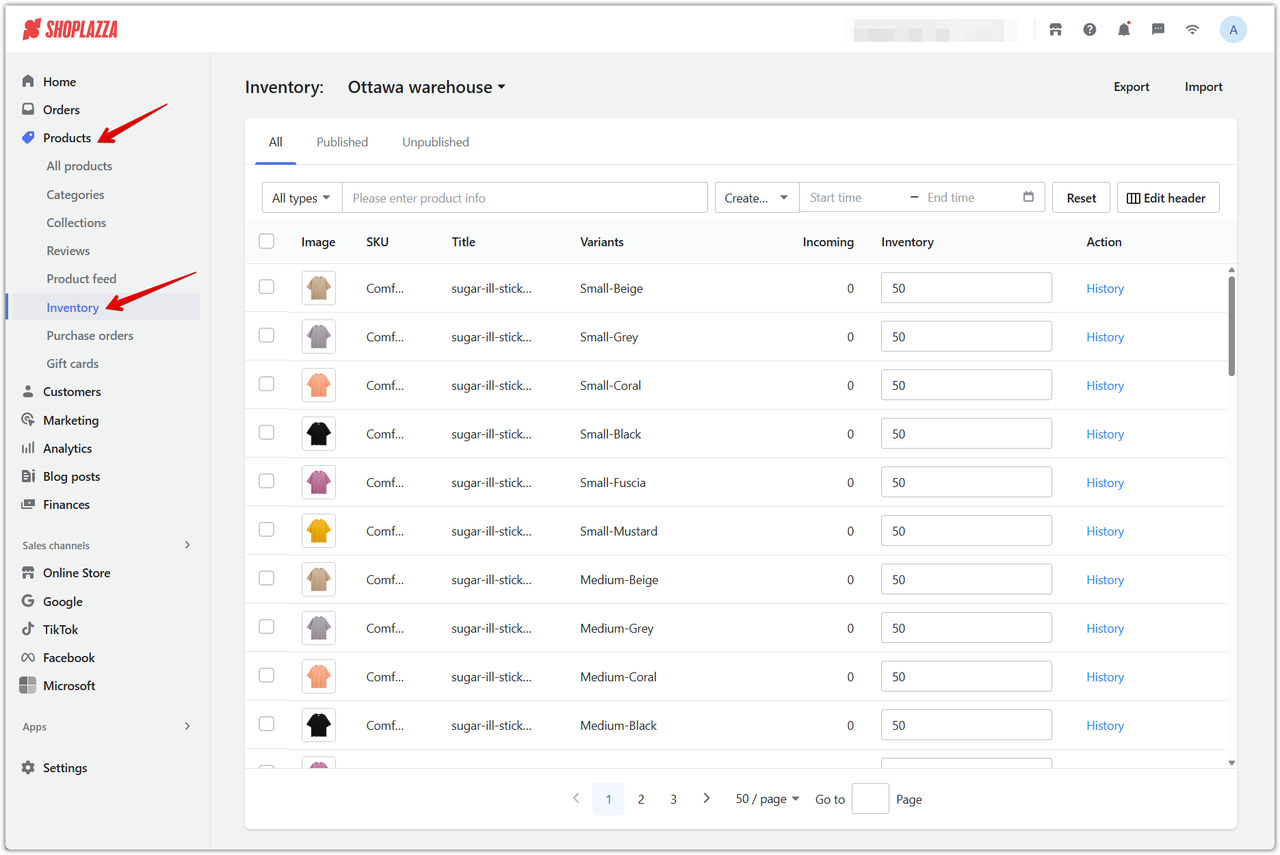
1. Go to the Inventory section: Log in to your Shoplazza admin, then navigate to Products > Inventory.
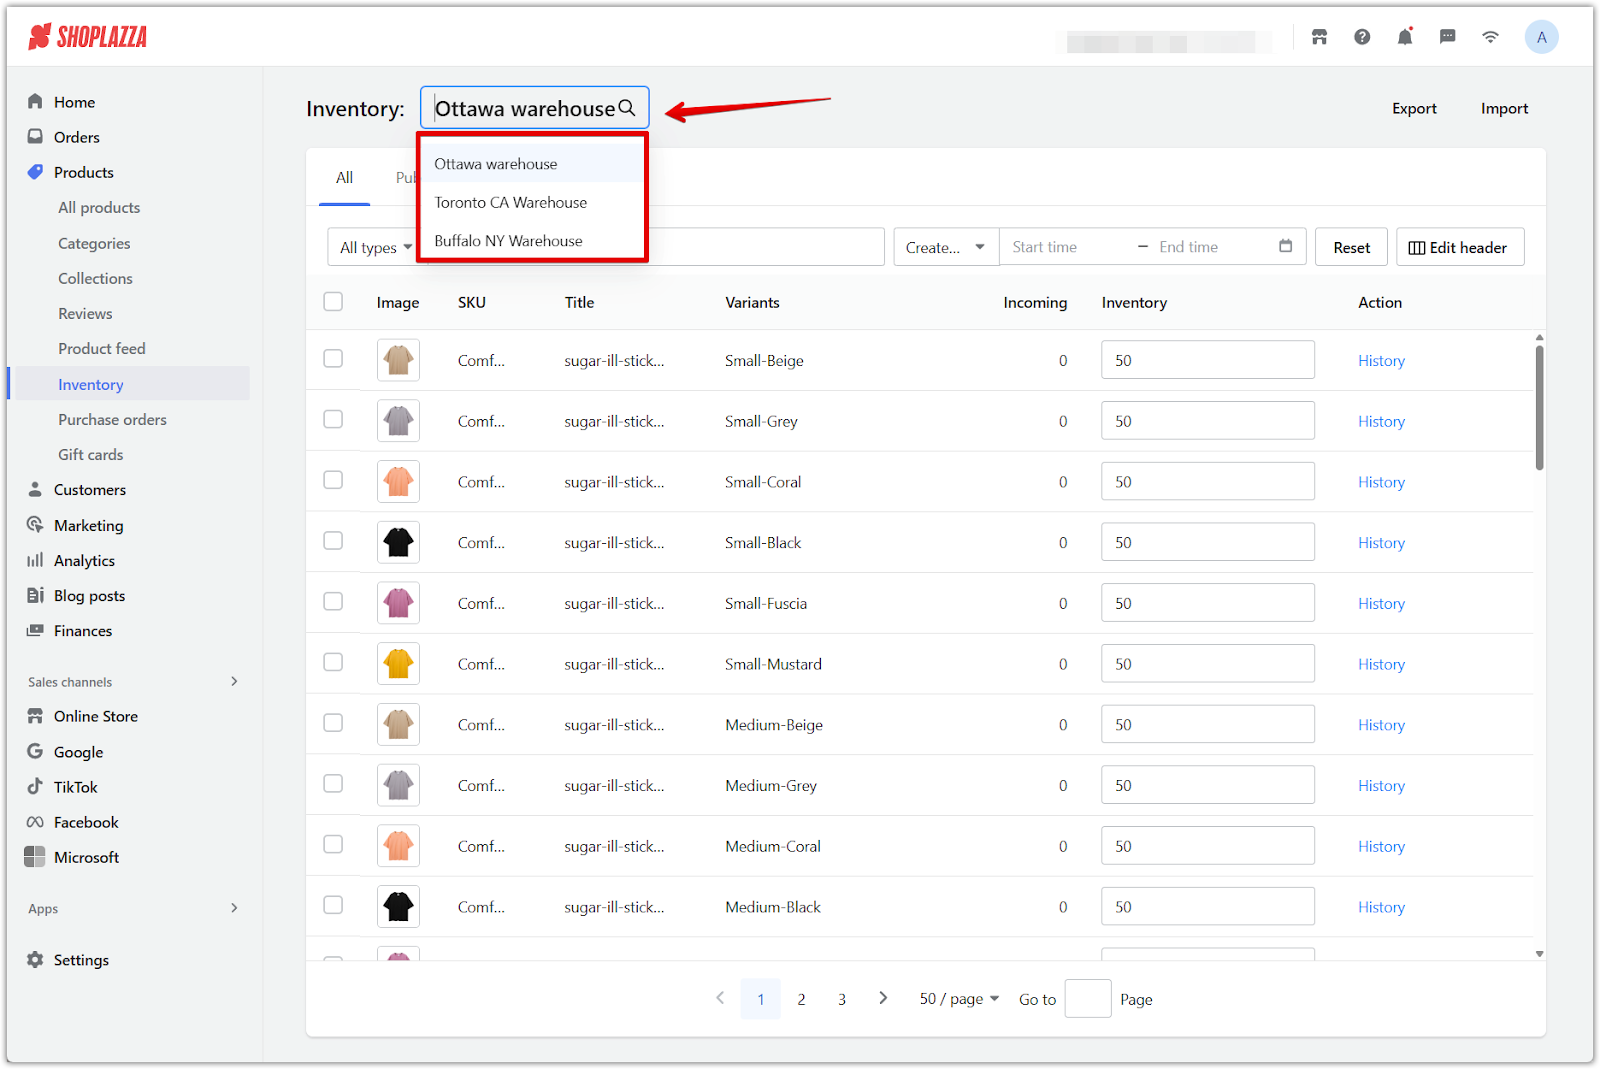
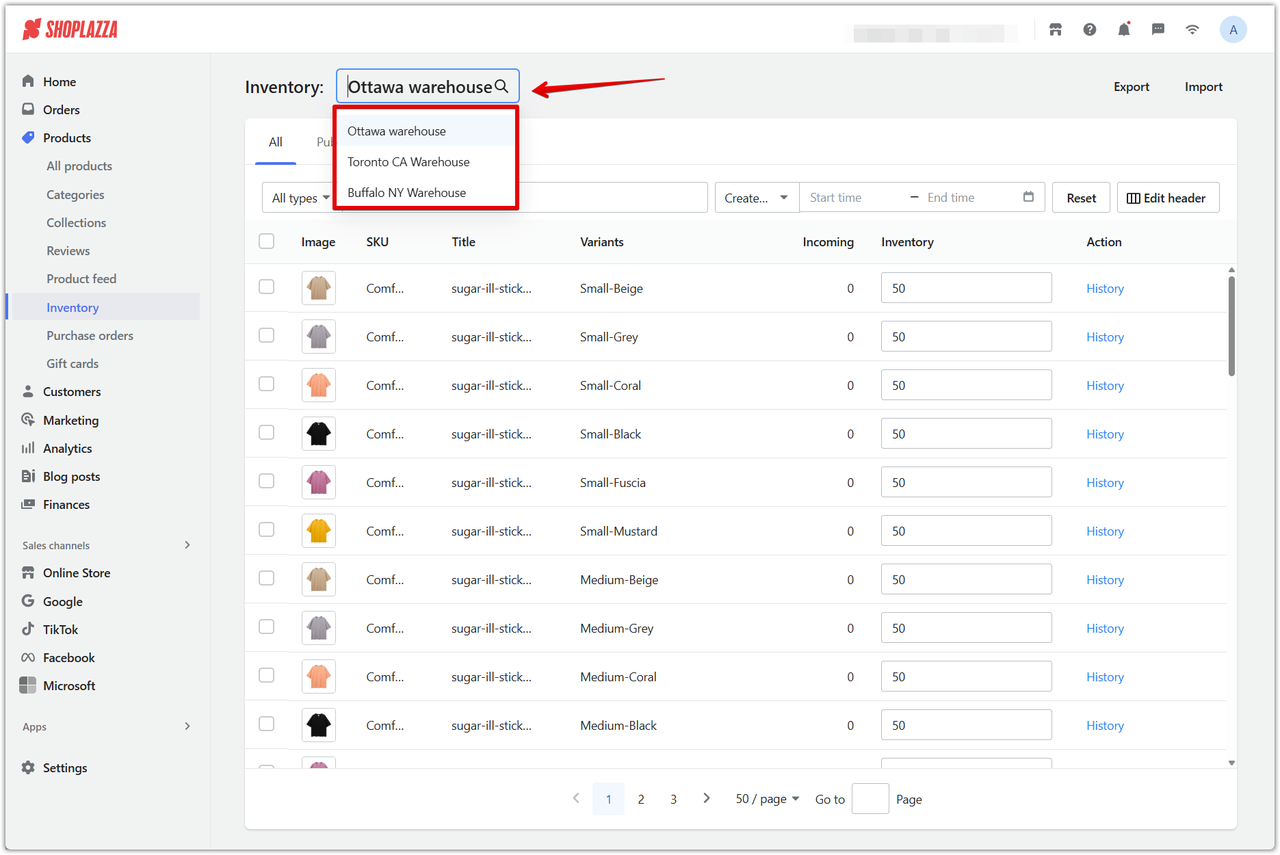
2. Choose a location: Use the dropdown menu at the top of the page to select the warehouse or location you want to update.
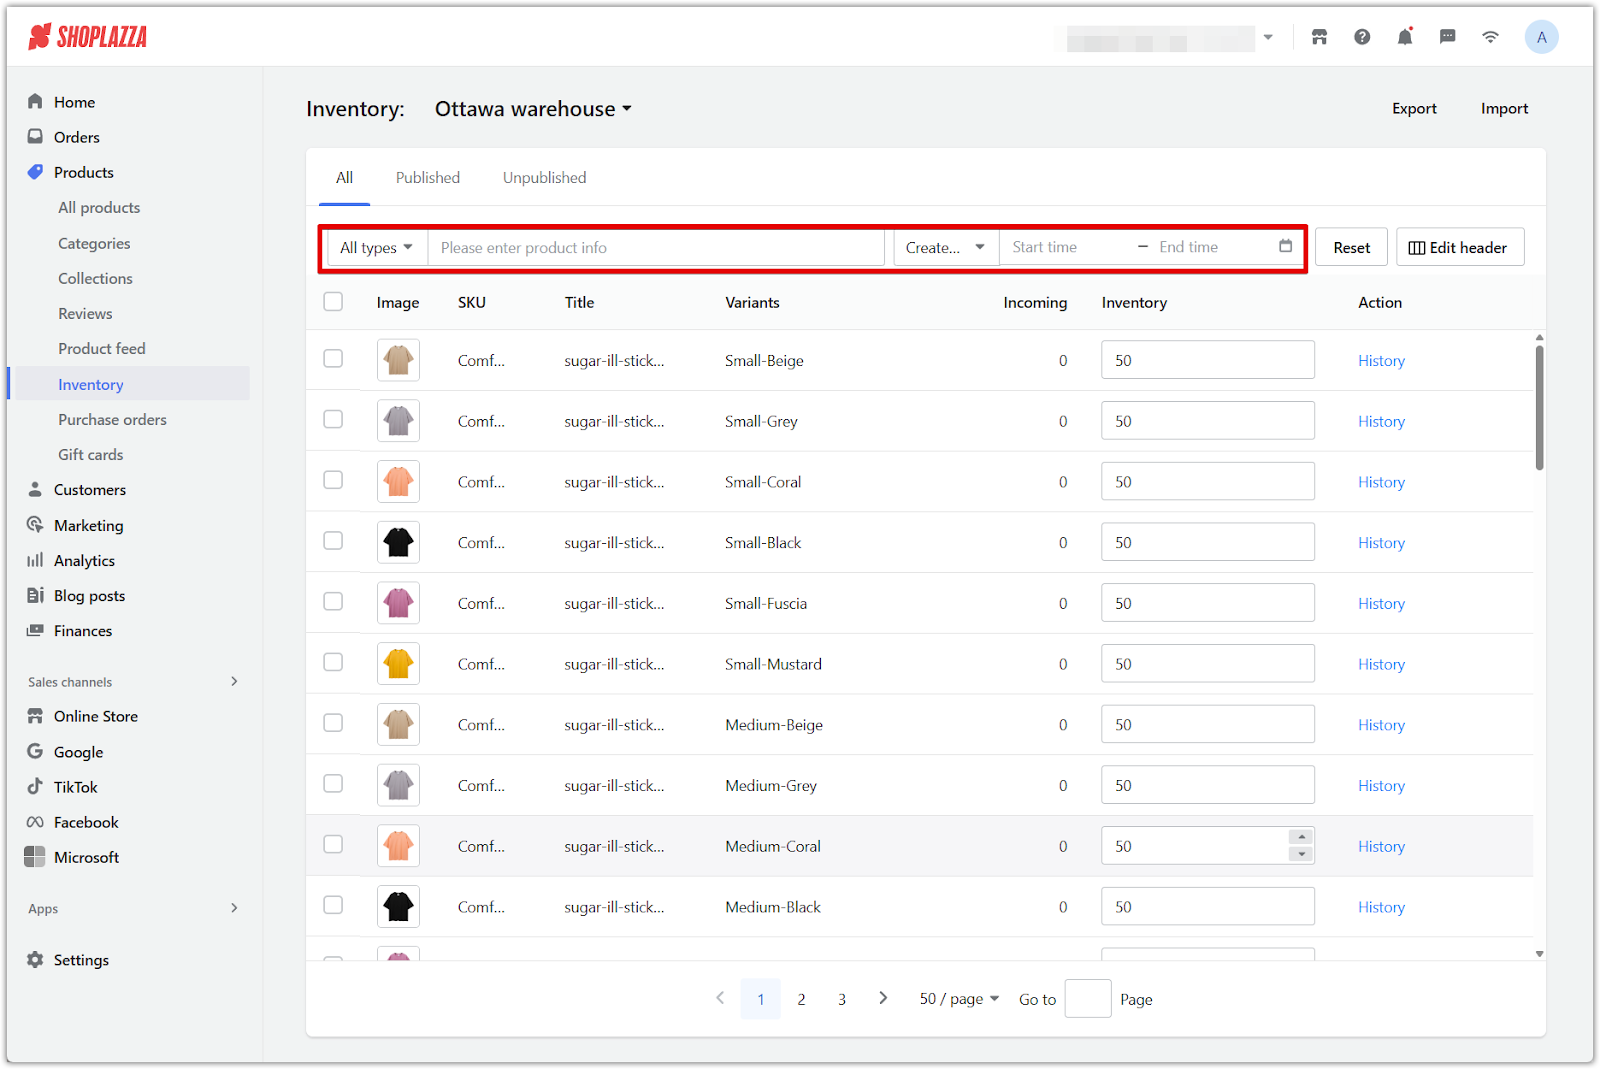
3. Search for the product: Enter search criteria such as the product name or SKU to locate the item you want to update.
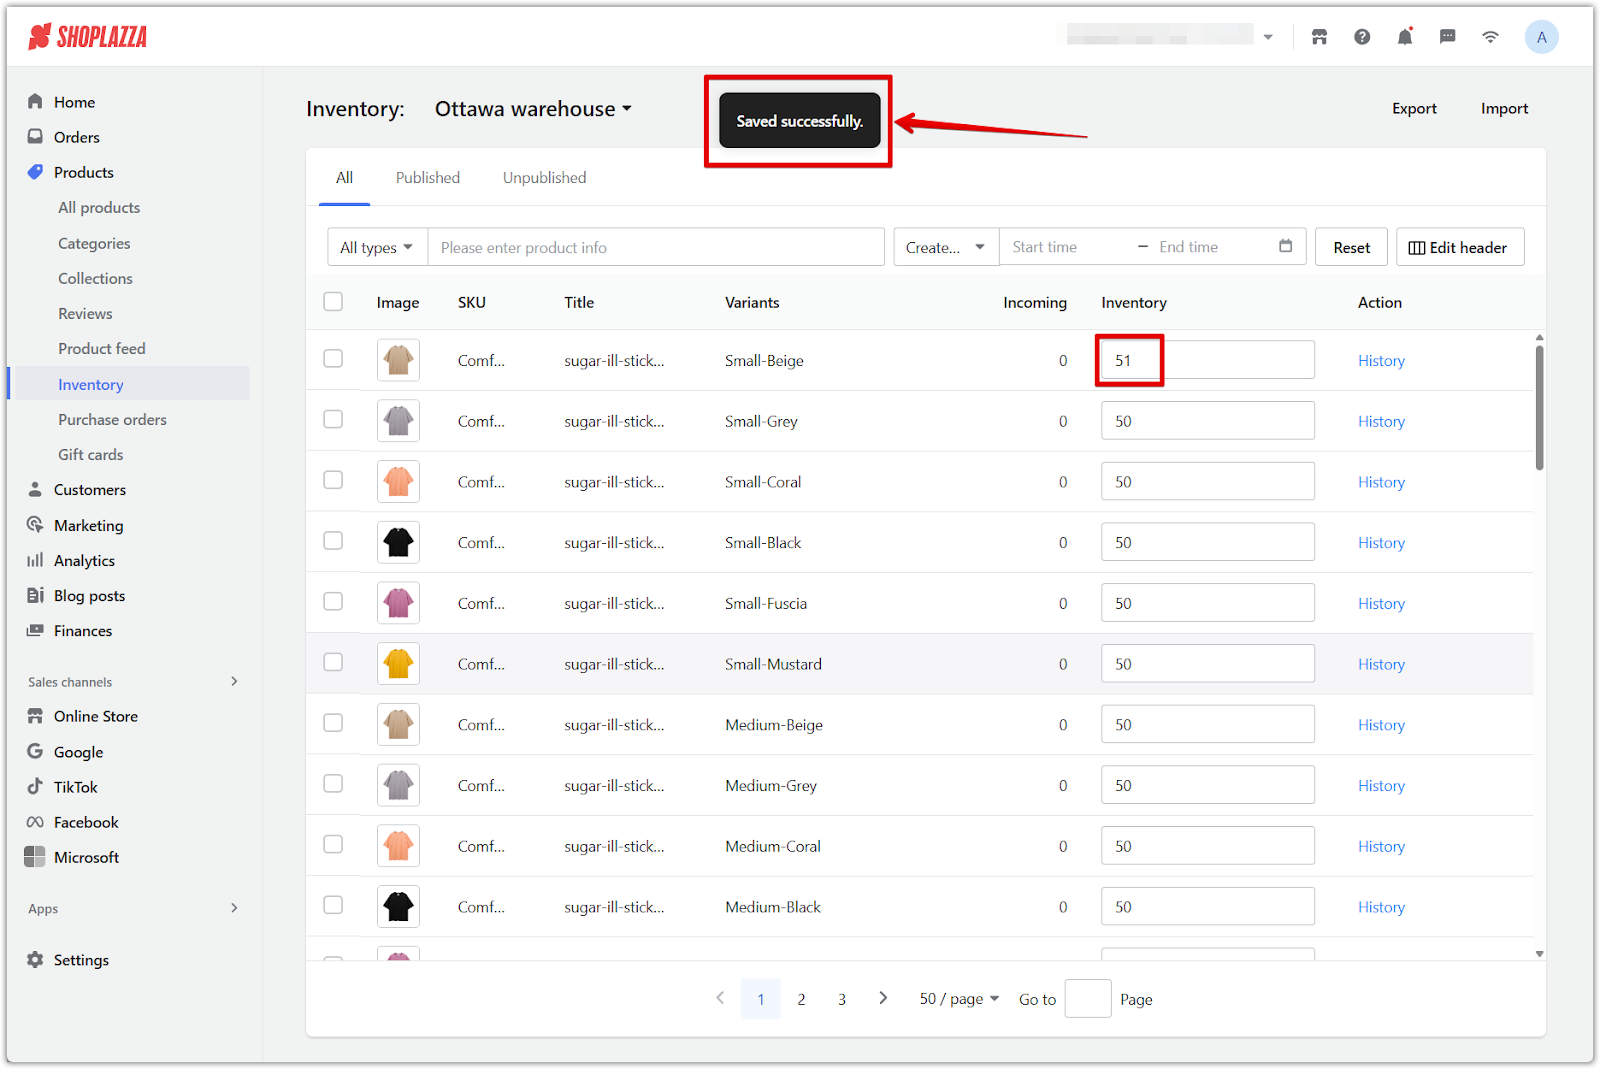
4. Update the inventory quantity: Click the inventory field next to the product, enter the new quantity, and click the green check mark to confirm.
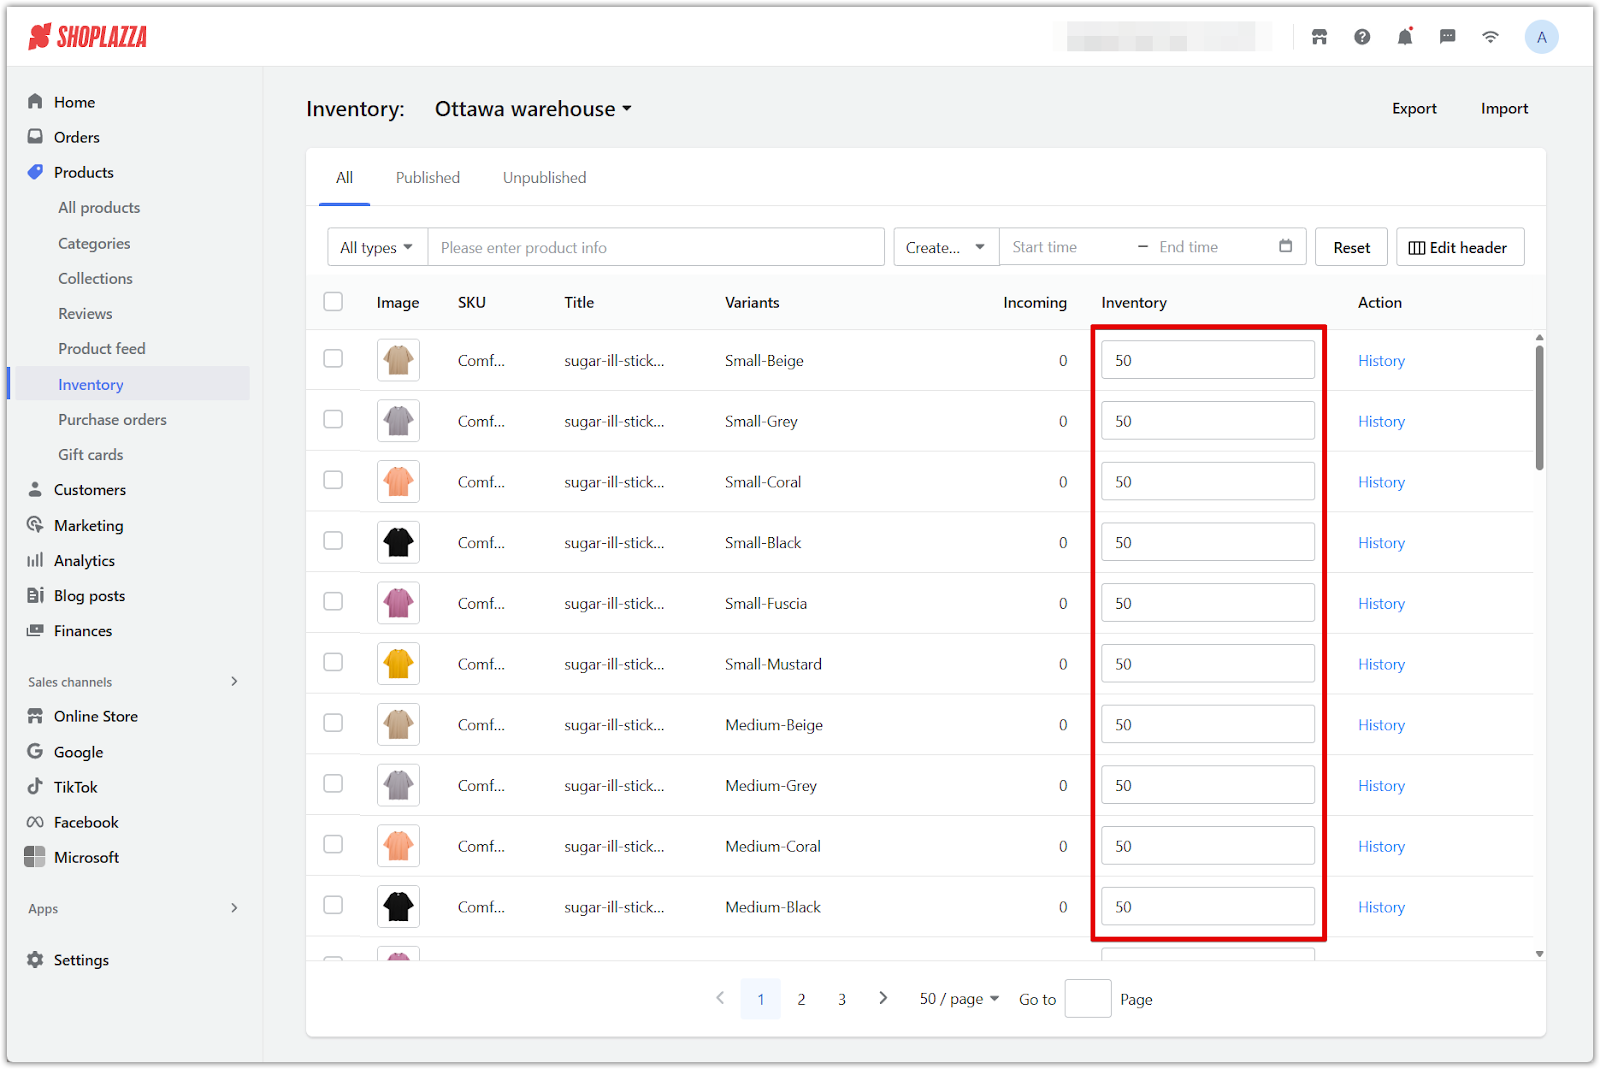
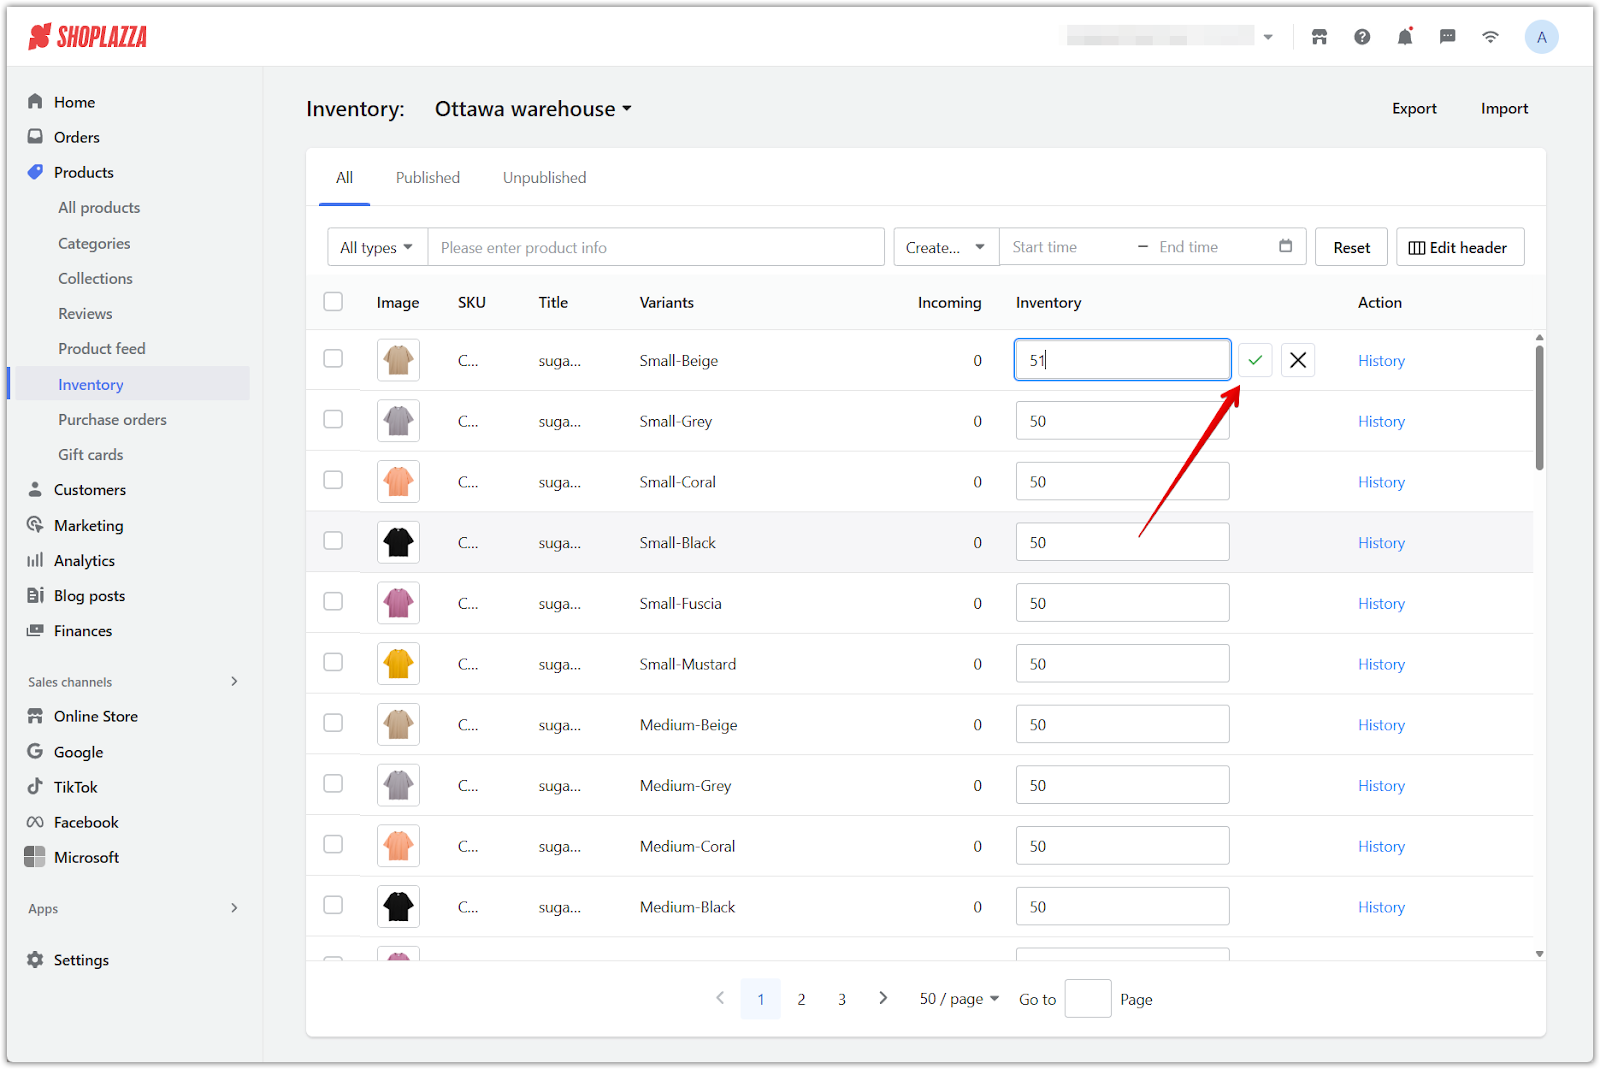
5. Inventory sync: Once saved, the changes apply to the selected location and are immediately reflected in the inventory list.
Editing inventory in bulk
Use the bulk edit tool to update inventory quantities for multiple products or variants at the same time.
1. Go to the Inventory section: Log in to your Shoplazza admin, then navigate to Products > Inventory.
2. Choose a location: Use the dropdown menu at the top to select the warehouse or location where you want to apply inventory changes.
3. Filter the product list: Use the search bar to enter product name, vendor, or SKU to narrow down the results.

4. Select multiple products: Use the checkboxes beside each item to select the products or variants you want to update.
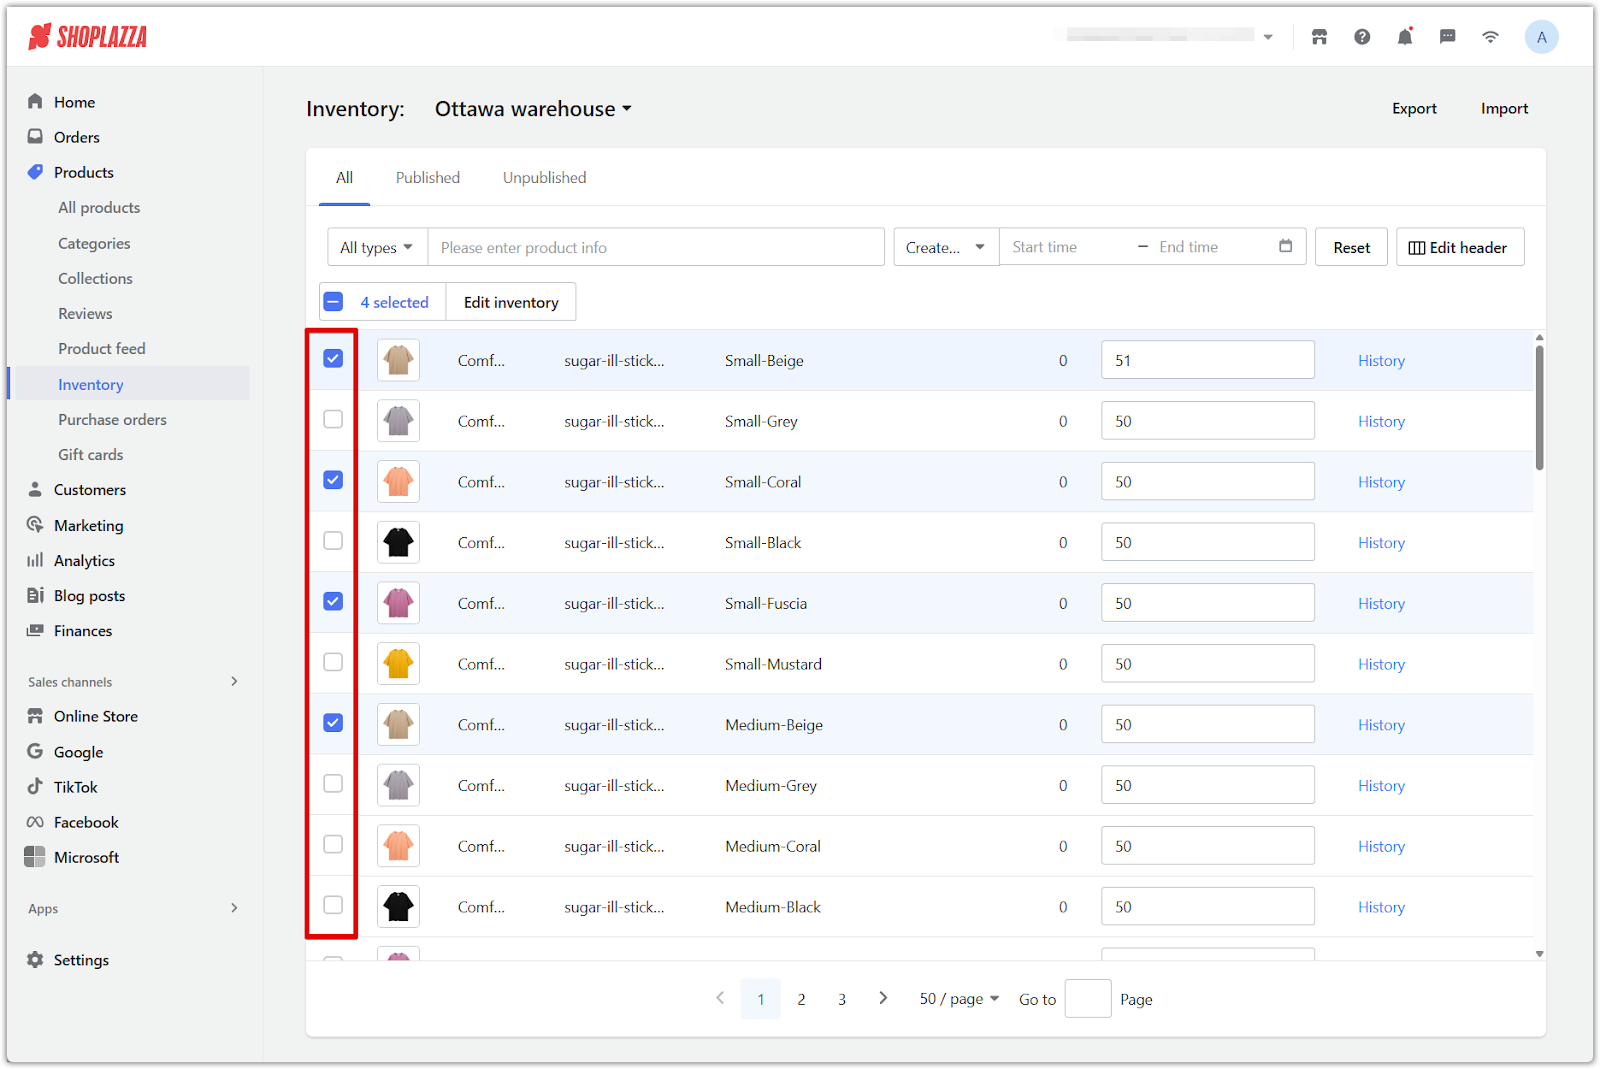
5. Click Edit inventory: Open the bulk edit panel by clicking the Edit inventory button at the top right of the table.
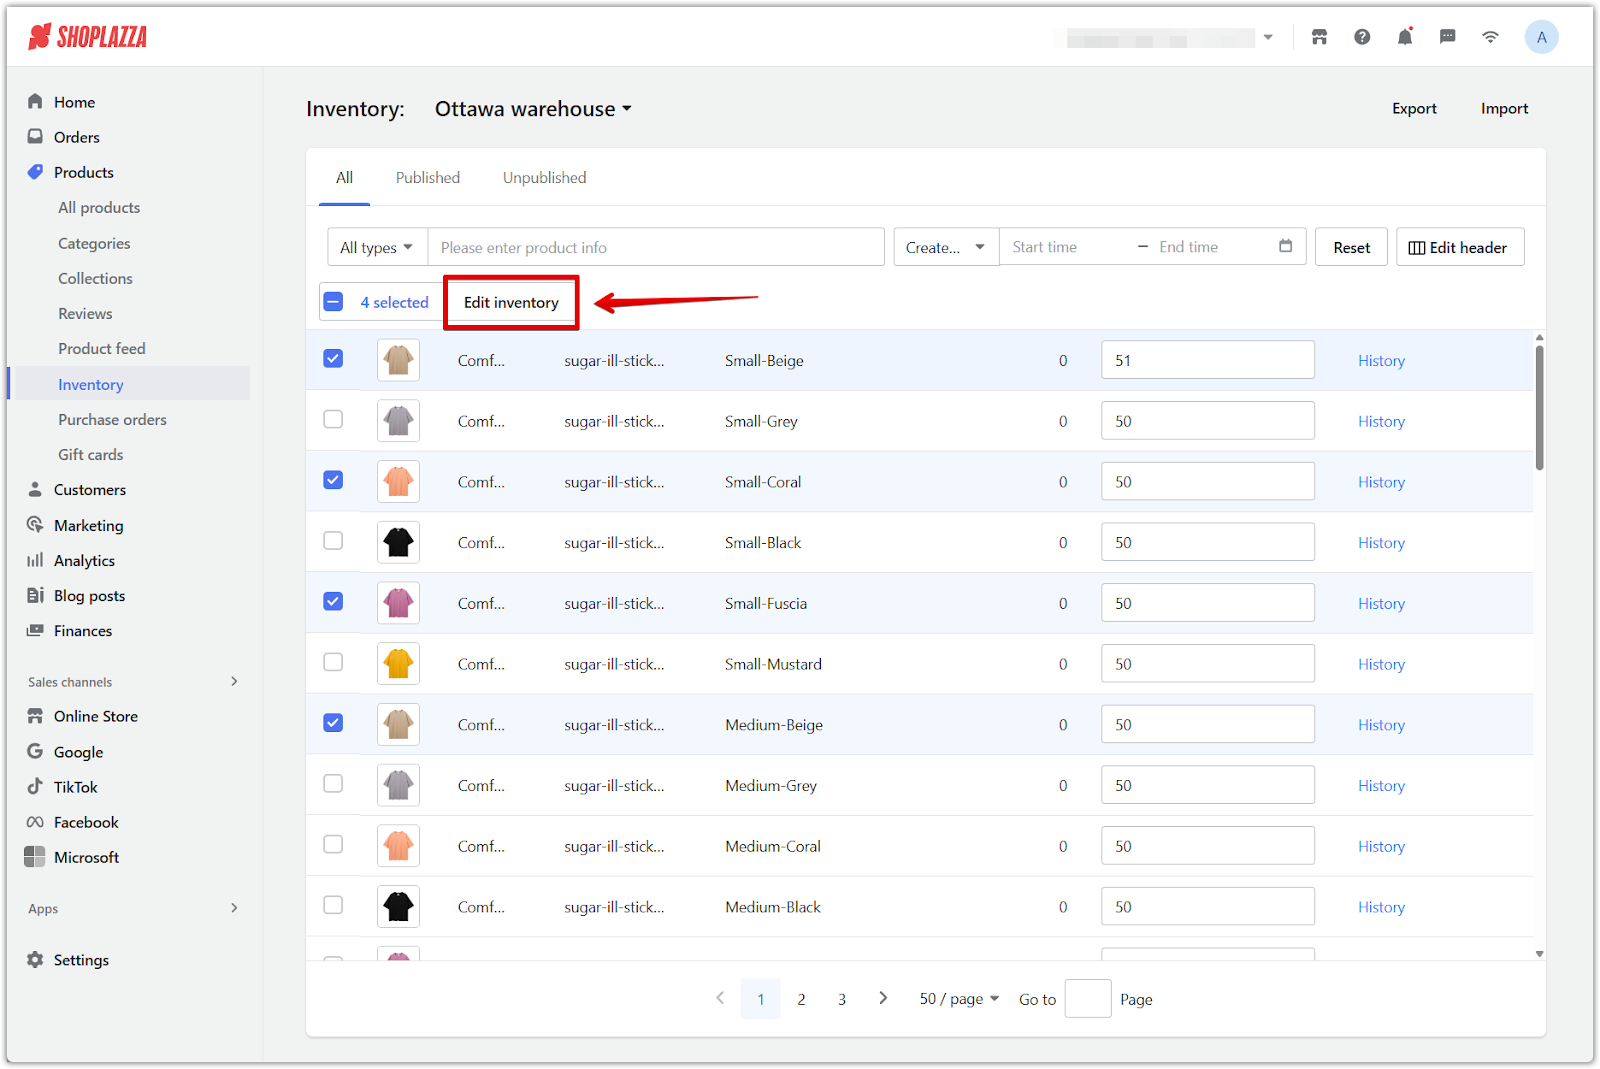
6. Choose how to apply changes: Use one of the following methods to adjust inventory values for the selected products, then click Edit to apply your changes:
- New inventory: Enter a fixed quantity to overwrite the current inventory level.
- Inventory formula: Increase or decrease existing stock by a specific amount (e.g. add 3 to a current quantity of 30 results in 33).
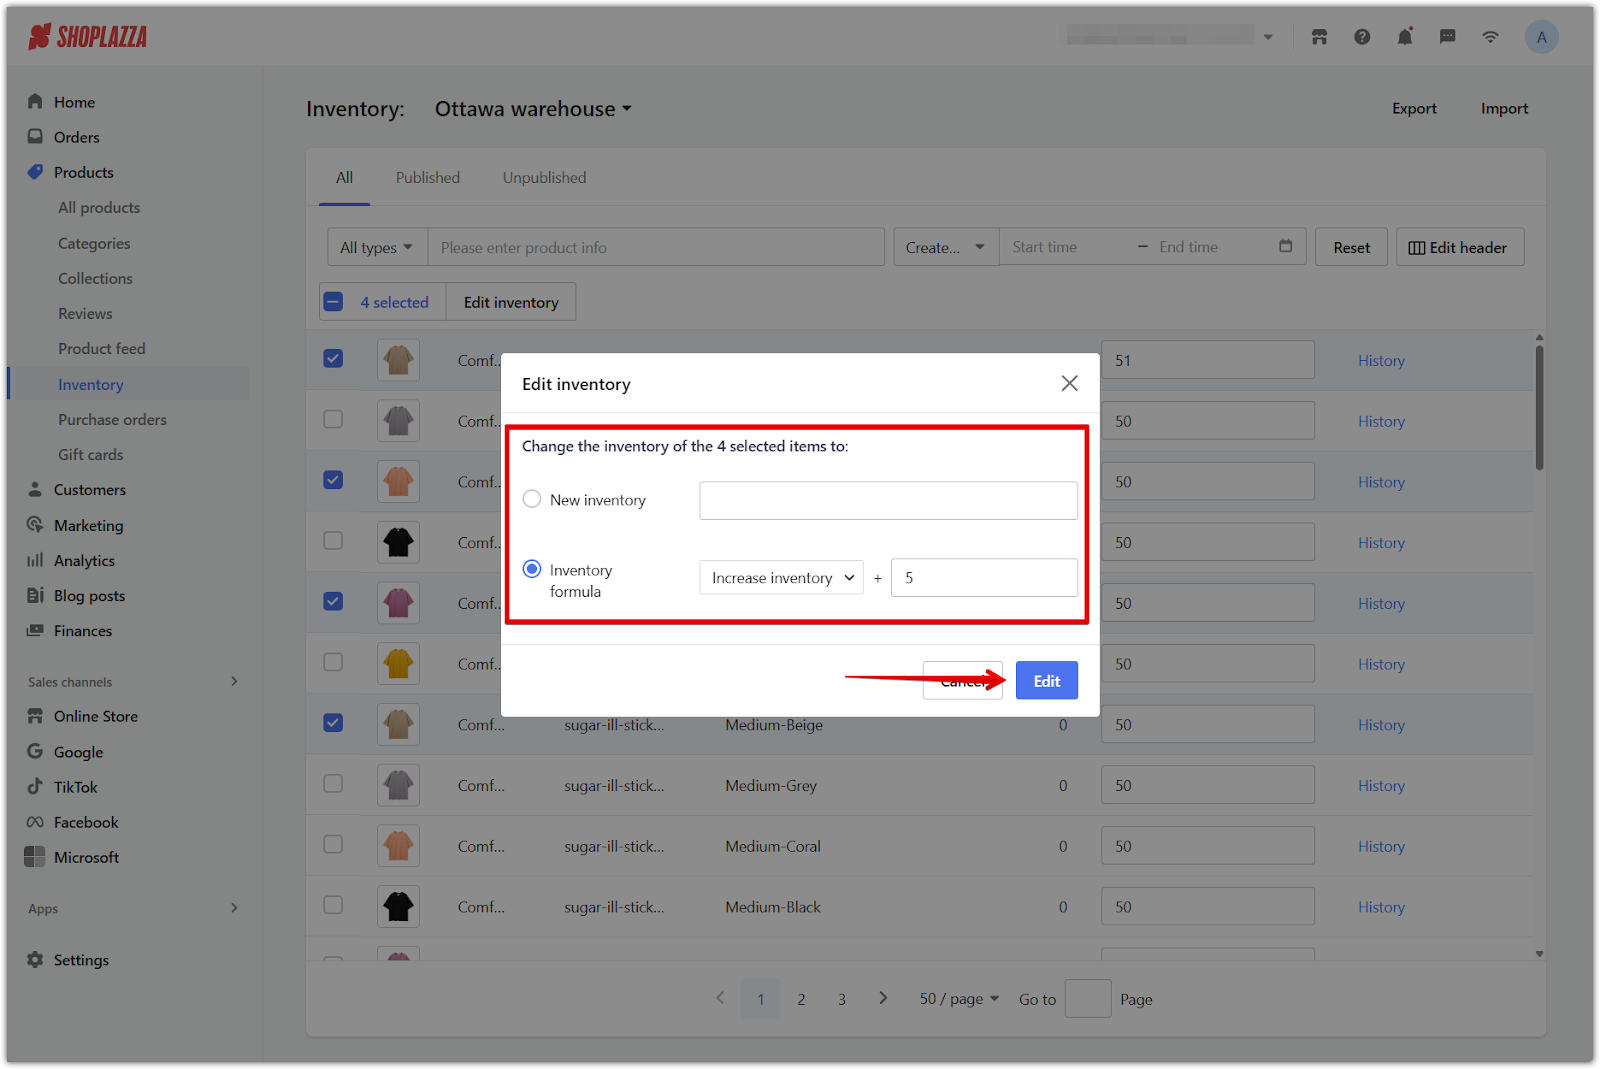
7. Inventory sync: All updates are automatically saved and reflected across the selected warehouse or location.
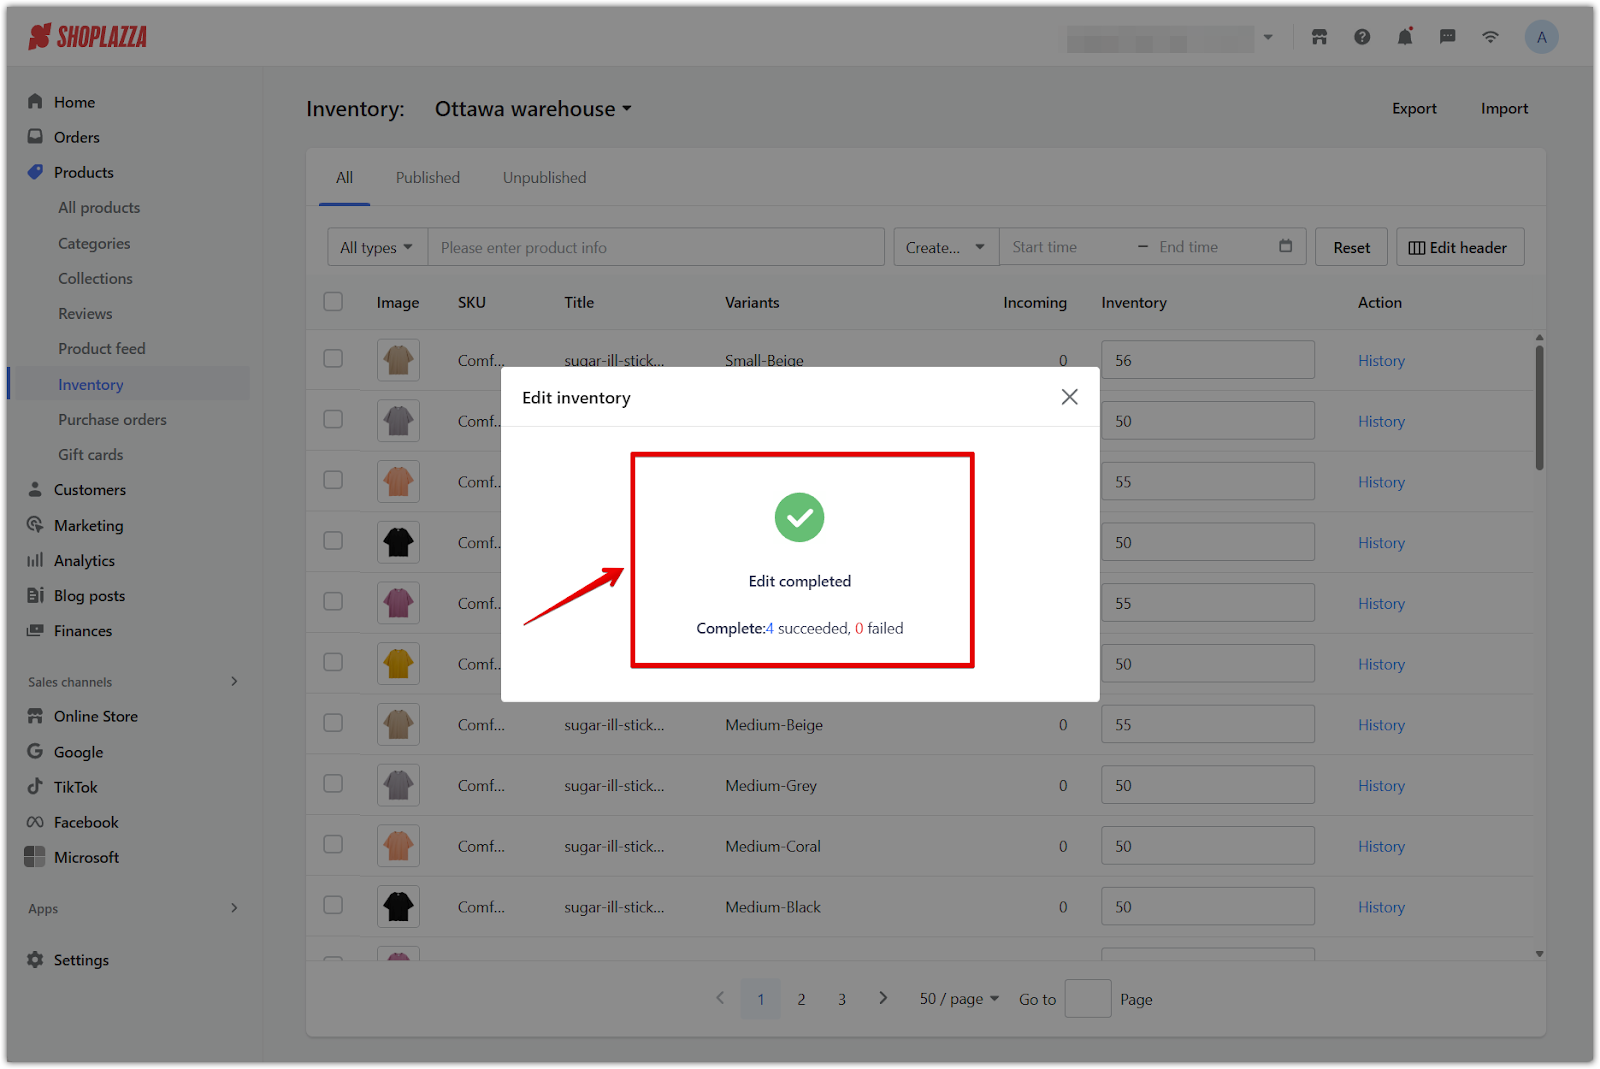
Handling inventory edit failures
If inventory tracking is disabled for a product while editing, the change will not be applied and the item will be removed from the list view. To resolve this:
- Re-enable inventory tracking for the affected product.
- Go to the Failed list to reapply the inventory update.
Accurate inventory tracking is essential for seamless fulfillment and customer trust. Use individual edits for quick changes and the bulk edit tool for efficient updates across multiple products, ensuring your store stays organized and ready to meet demand.


Comments
Please sign in to leave a comment.