Maintaining accurate product inventory records is crucial for preventing stockouts, overstocking, and fulfillment errors. Viewing the inventory history helps you trace product movement and quantity changes in detail, allowing you to identify trends, catch mistakes, and ensure all stock updates are properly recorded. This feature supports better inventory planning and transparency across your operations.
Accessing inventory history
Inventory history is available for individual products, helping you track exactly when and how stock levels were updated.
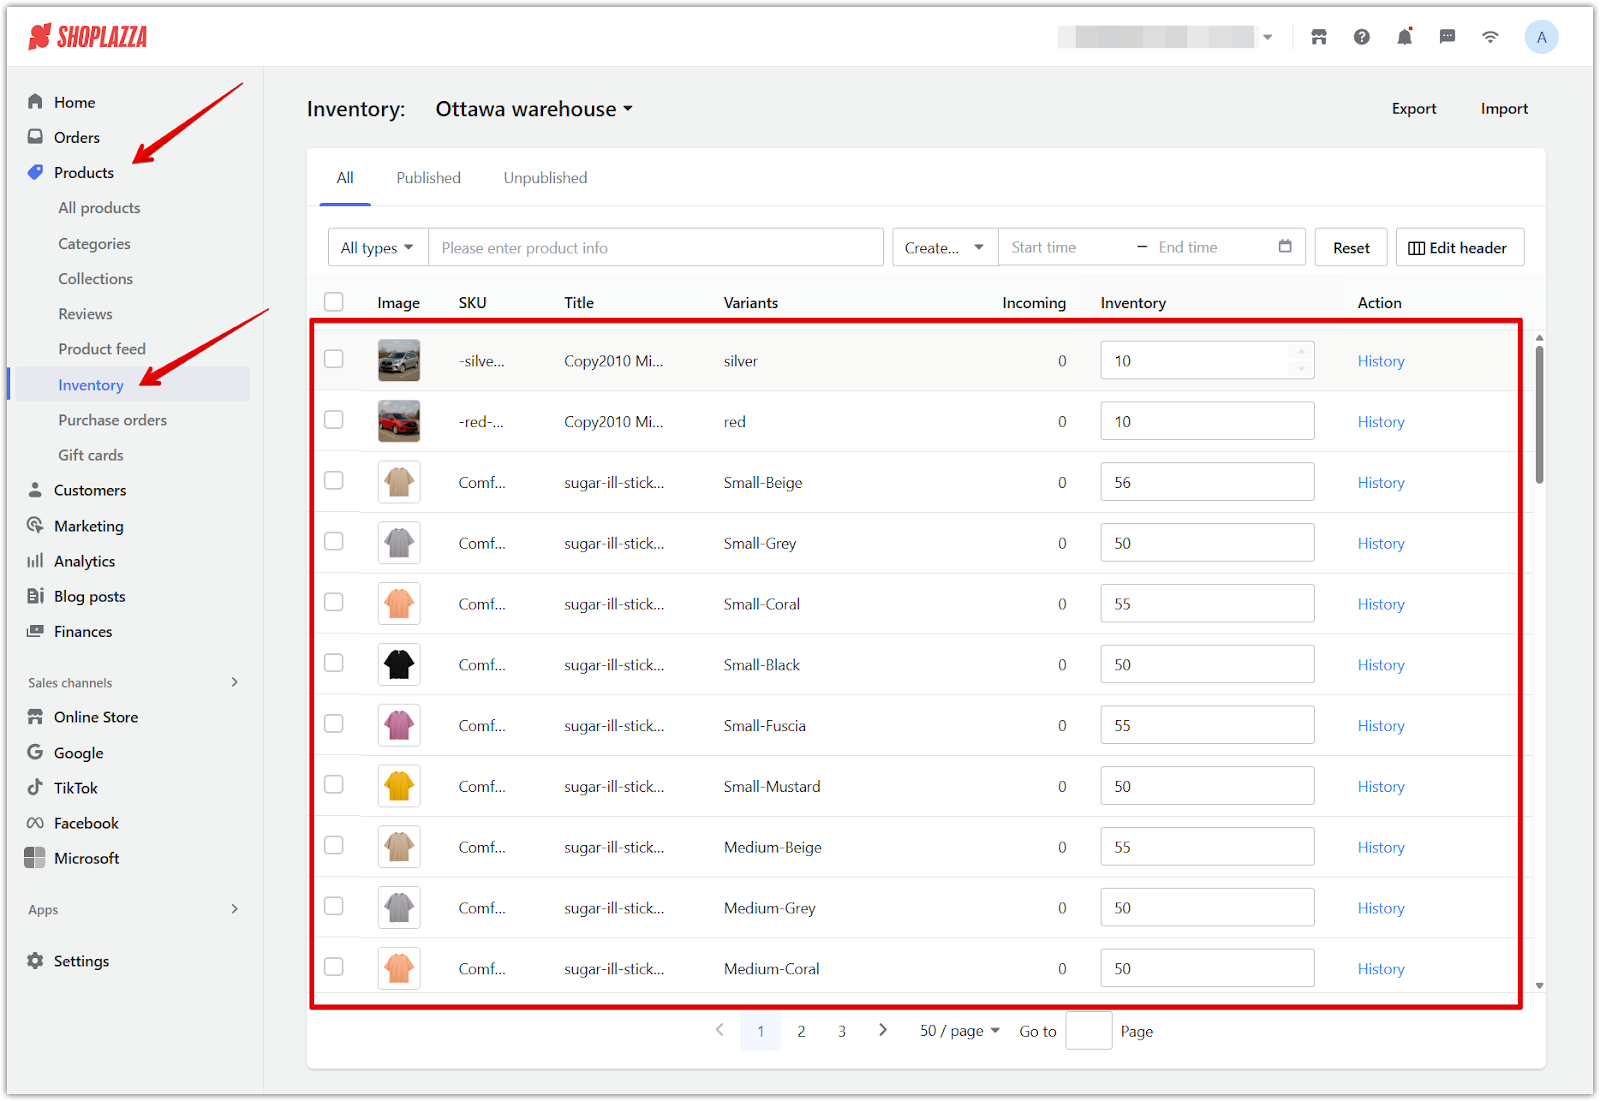
1. Go to your Shoplazza admin: Navigate to Products > Inventory to open your inventory dashboard, where all current product stock levels are listed and managed.

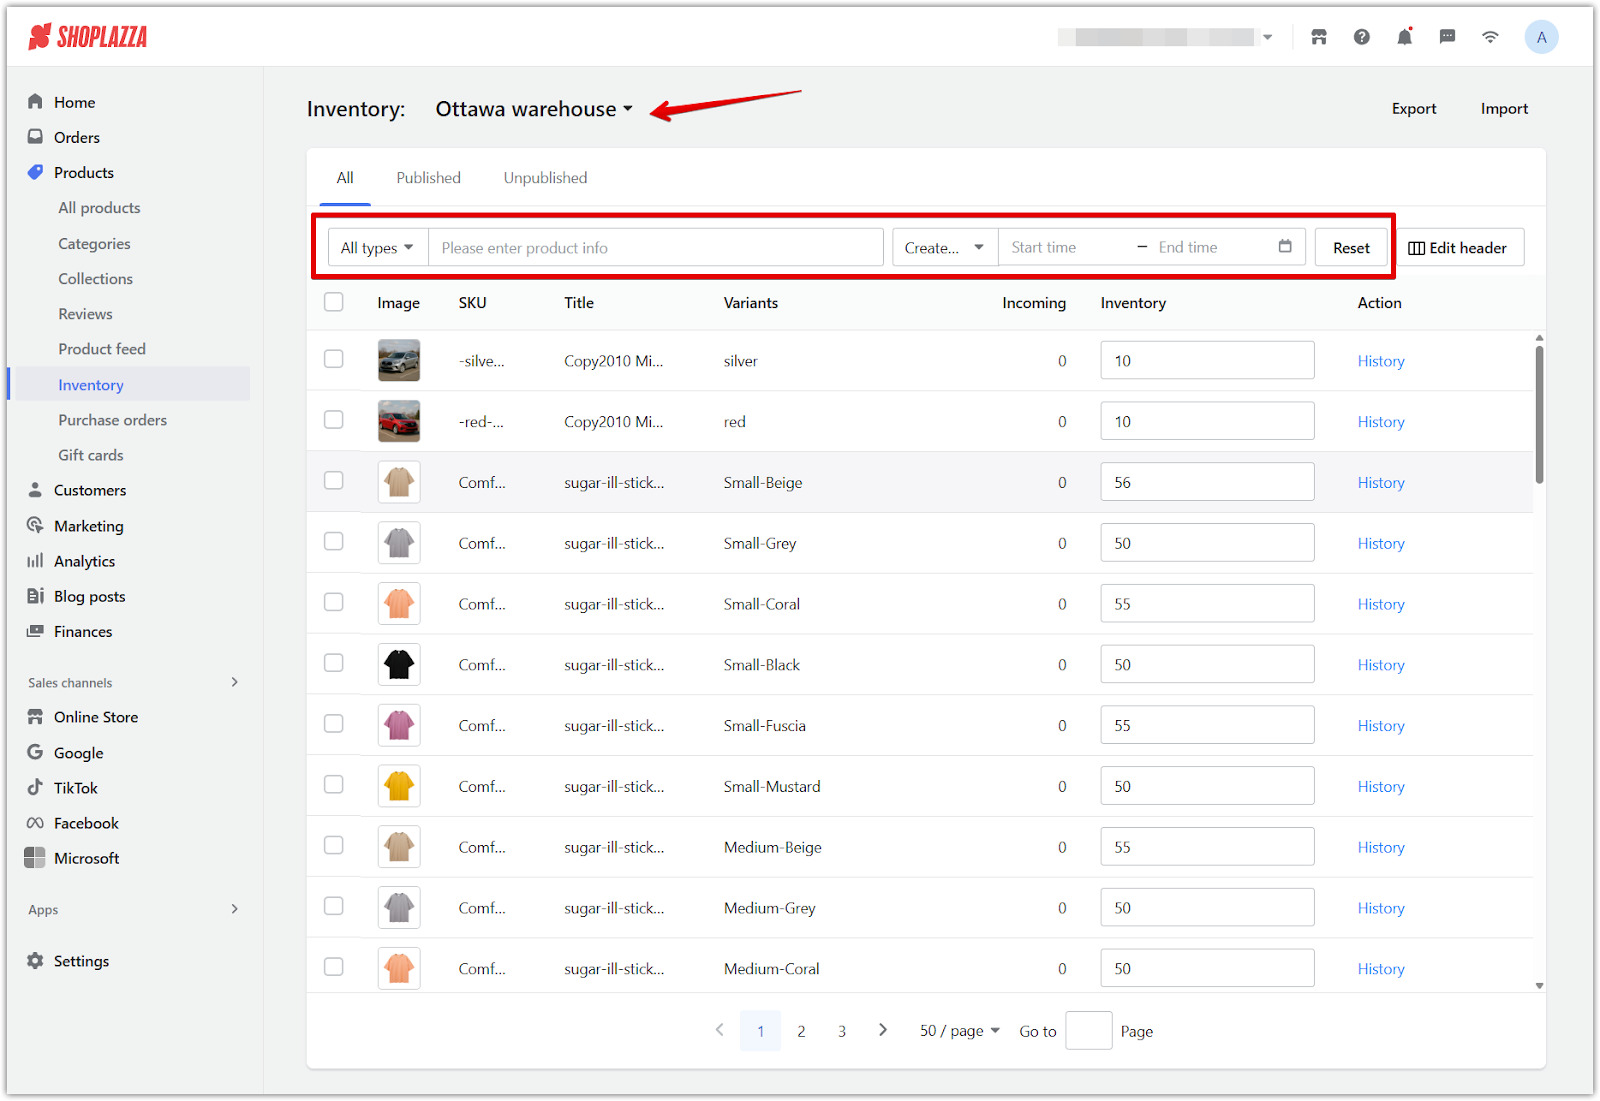
2. Search for the product: Use the filters at the top of the Inventory page to narrow down your results. If your store has multiple locations, select a warehouse from the dropdown. Then choose a search type (such as title, SKU, or product ID), enter a keyword, and optionally filter by creation date or publication status. Press Enter to begin the search. Click Reset to clear all filters.

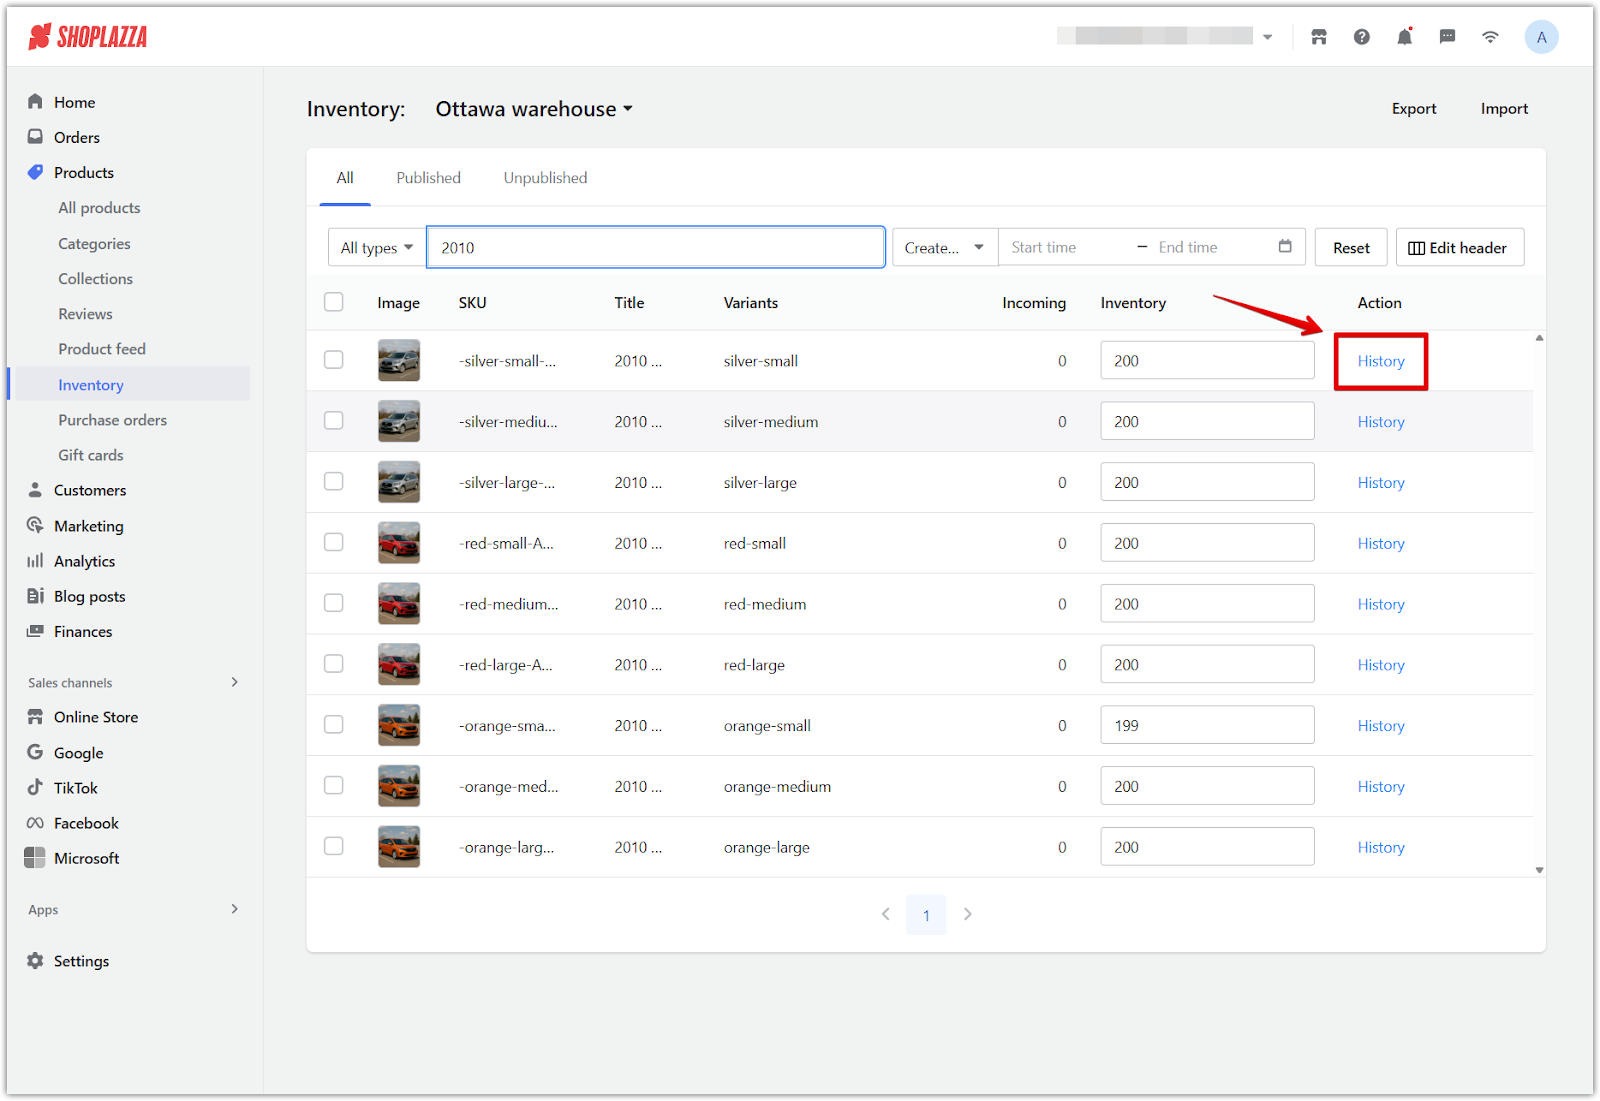
3. Open stock history: Once the product appears in the search results, click History to open a detailed log of all inventory changes associated with that product. This includes past edits and adjustments made over time.

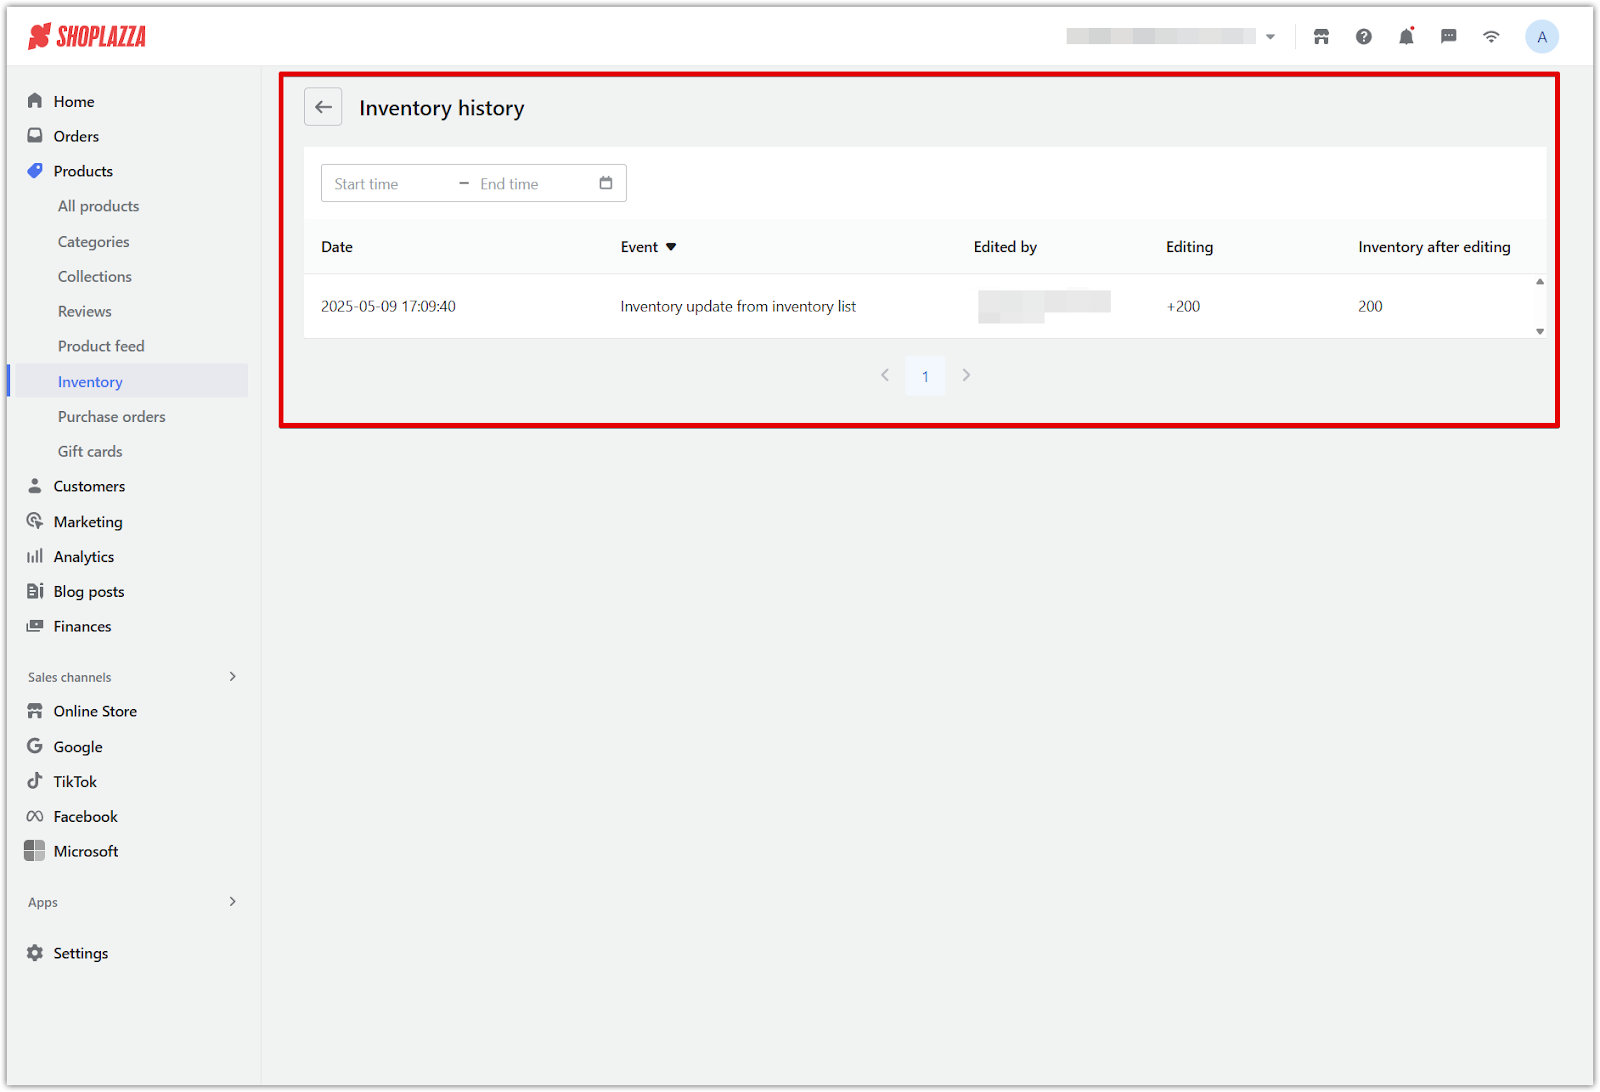
4. View inventory history: Each entry provides full details about a stock change:
- Date: The time and date when the inventory was updated.
- Event: The type of update, such as a manual adjustment, product import, or system update.
- Edited by: The staff member or system account who made the change.
- Editing: The amount added or removed from inventory.
- Inventory after editing: The total quantity after the change was applied.

Note
You can only view the inventory history for one product at a time. To check another item, repeat the search and review steps.
Reviewing your inventory history regularly helps catch errors early and ensures your stock records stay accurate, and using this tool supports better inventory management and keeps your store running smoothly.


Comments
Please sign in to leave a comment.