
AdValet is an AI-powered intelligent advertising tool. It analyzes website content to automatically generate ad creatives, headlines, and copy, while also providing smart advertising strategy recommendations. With simple operations, merchants can launch ads on the Meta platform with just one click, helping to reduce customer acquisition costs and improve conversion efficiency.
Applicable Business Scenarios
- Small and medium-sized merchants with little or no advertising experience: No need to master complex ad platform operations, as AI automatically handles asset setup and strategy optimization.
- Limited creative capabilities: AI automatically analyzes URLs or product information to quickly generate high-quality ad creatives.
- Teams requiring efficient ad management: Monitor performance data in a unified dashboard in real time and dynamically adjust strategies through AI algorithms.
Key Features
1. One-click campaign creation: Simply enter a website URL or select specific products/collections, and AI will automatically perform full-funnel analysis and generate ad creatives.
2. AI-powered intelligence: Automatically analyzes webpage content to generate the most suitable advertising strategy.
3. Closed-loop data tracking: The system synchronizes real-time performance data (such as total spend, conversions, CPR), helping merchants clearly understand budget allocation.
4. Flexible account management: Supports both AI-generated new ad accounts and manual connection of existing accounts.
Function Path
1. Log in to your Shoplazza admin panel.
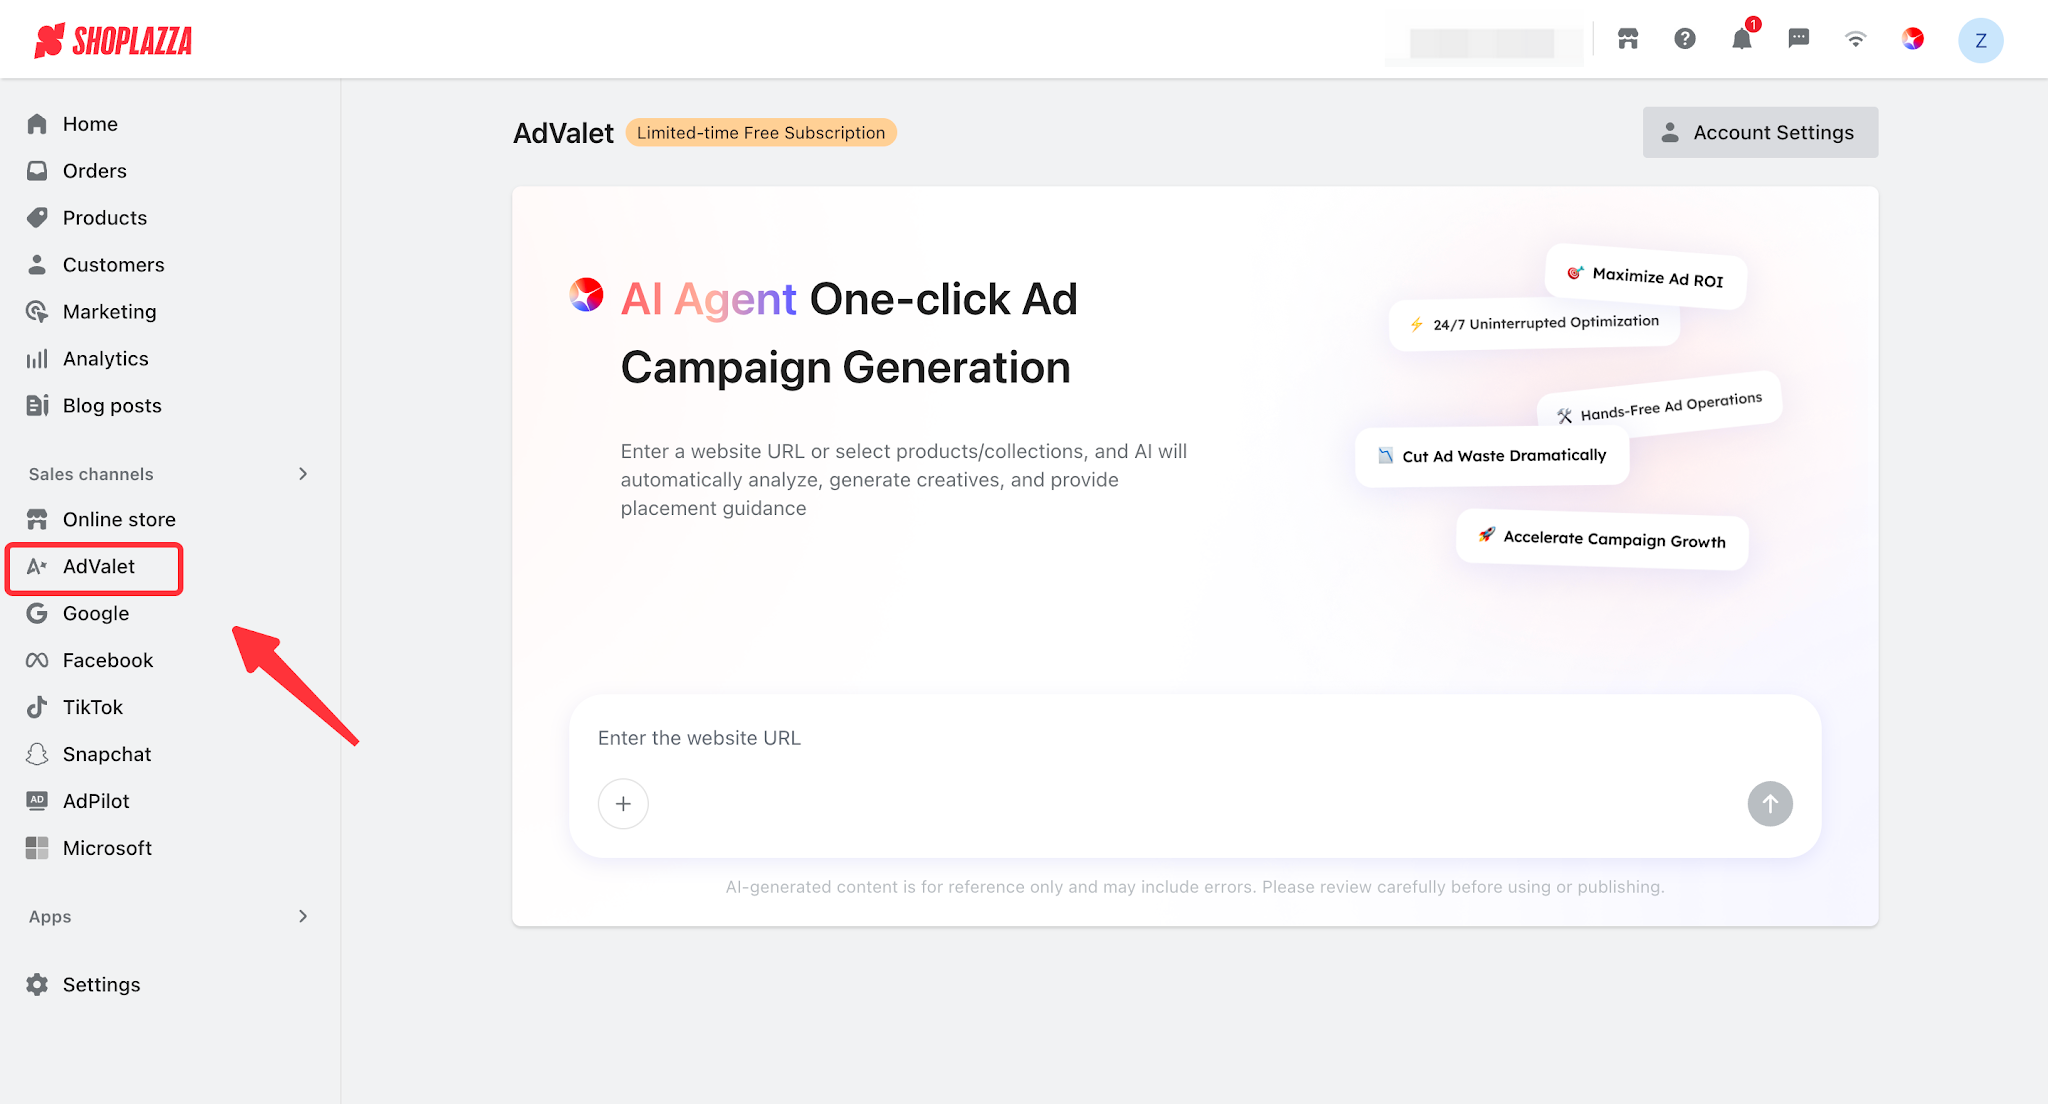
2. In the left navigation bar, under Sales Channels, click AdValet.
Steps for Use
Step 1: Account Setup and Connection
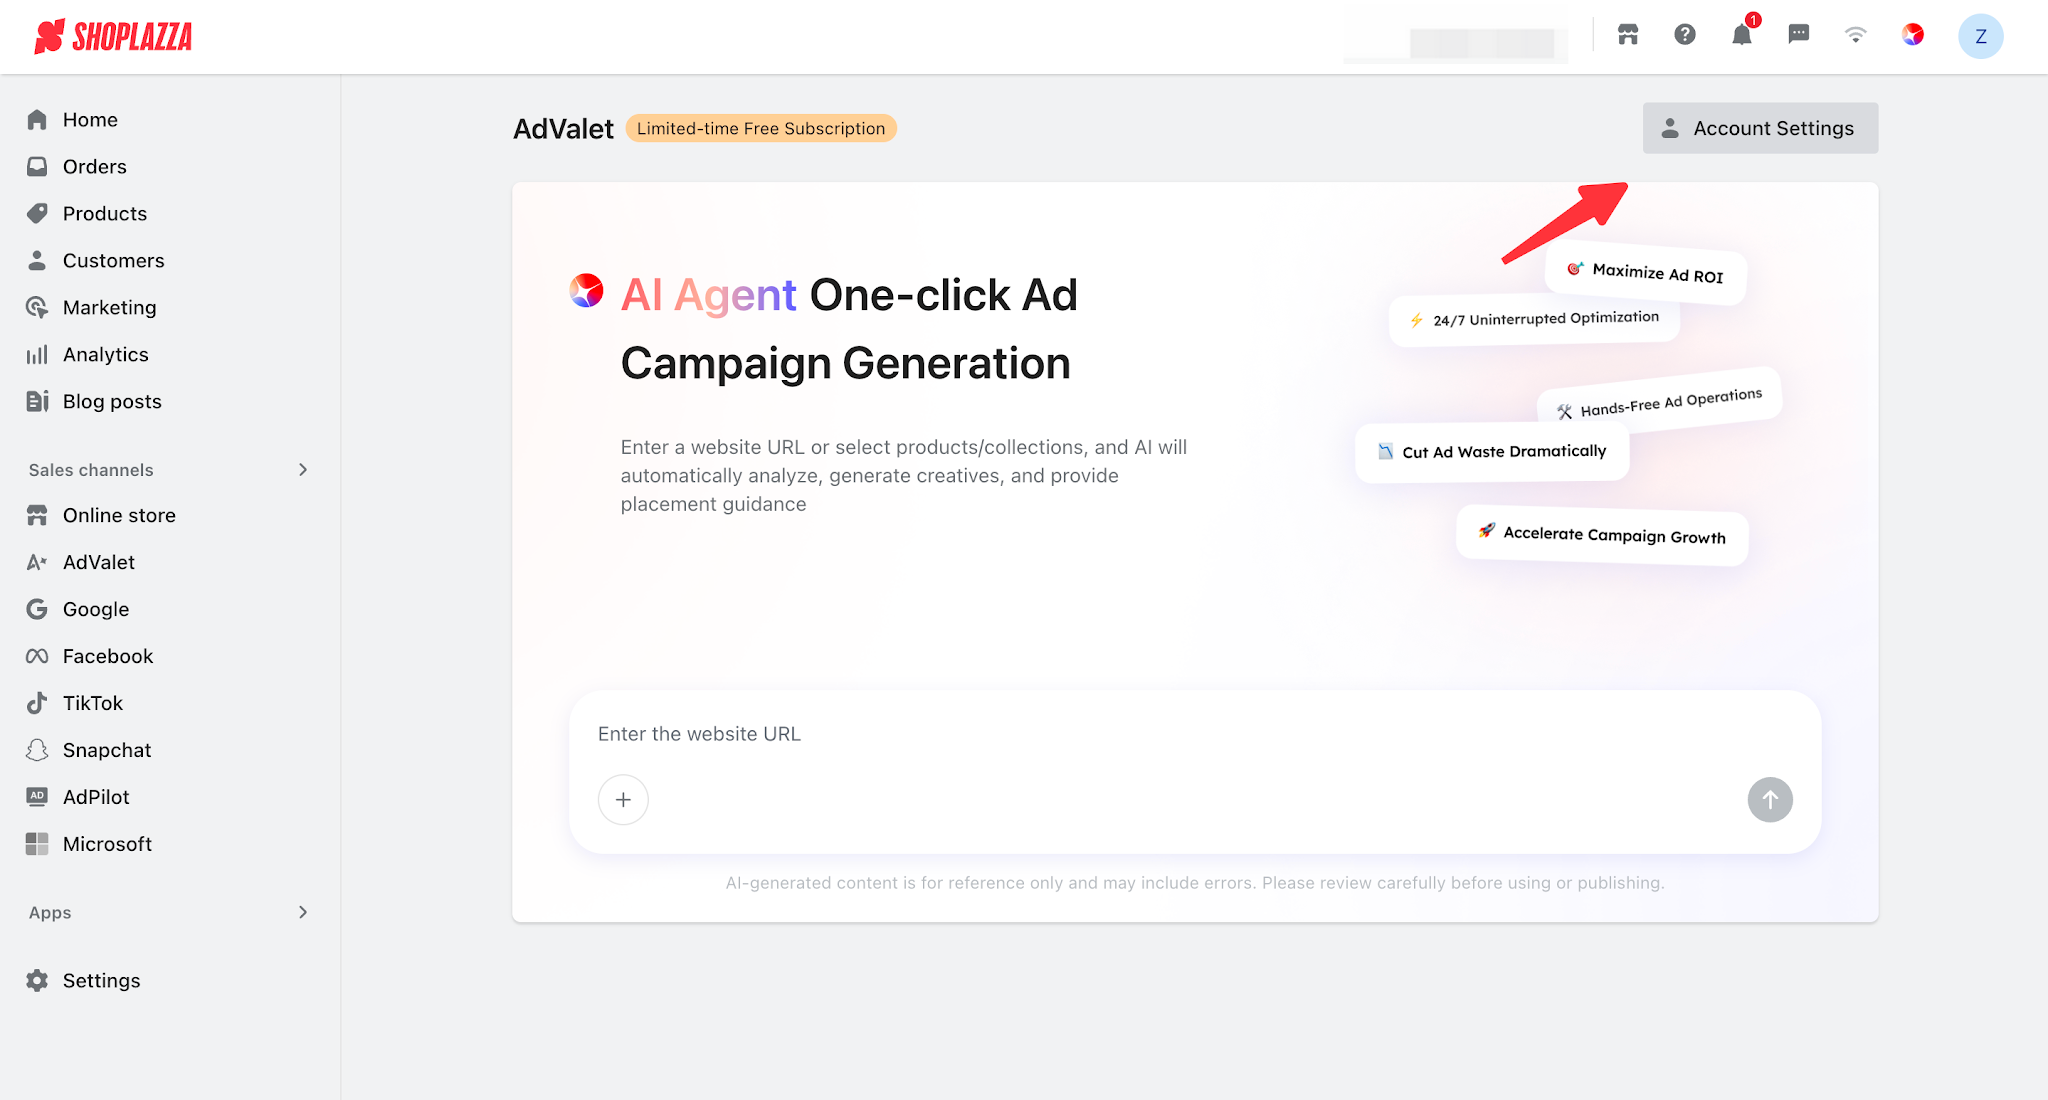
1. When entering AdValet for the first time, click Account Settings in the upper right corner of the page.
2. You can choose between two connection methods:
- Enable AI automatic advertising (recommended): Authorize Shoplazza to use your Facebook information, allowing AI to automatically configure assets and tracking. The process is as follows:
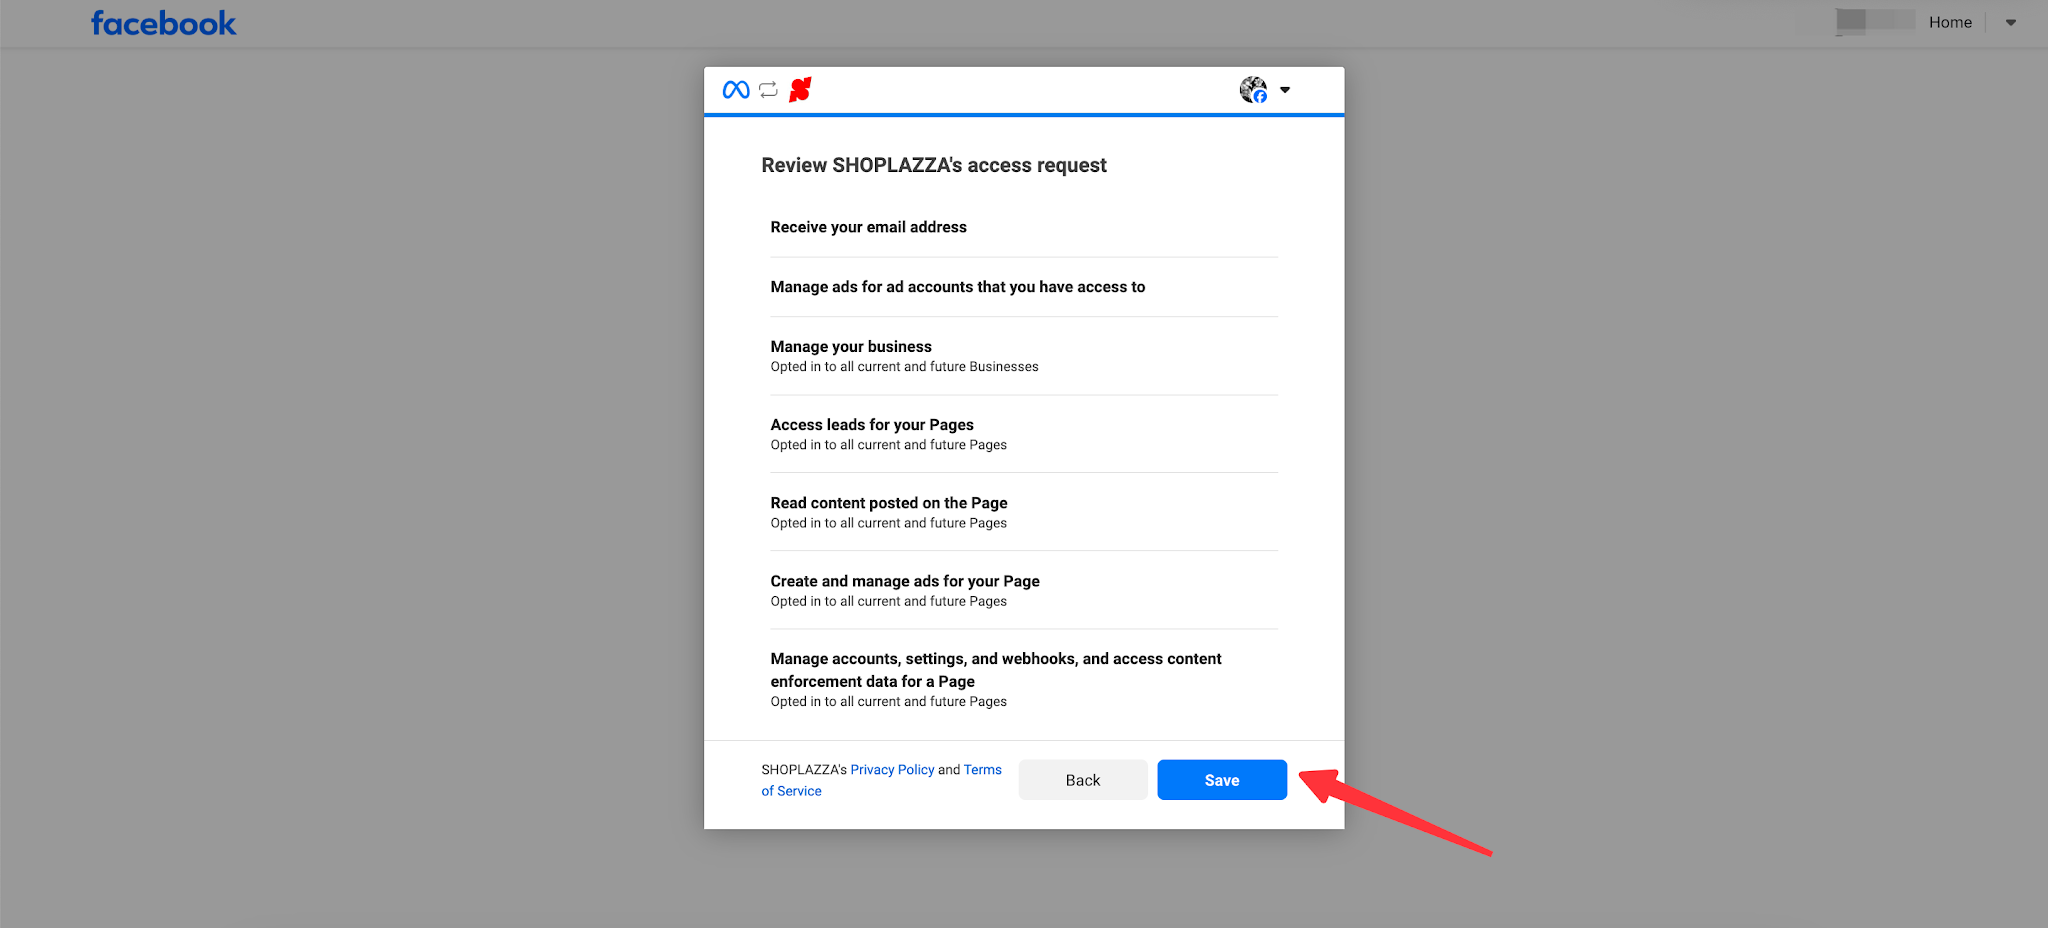
I. Click the Authorize button to grant Facebook account authorization.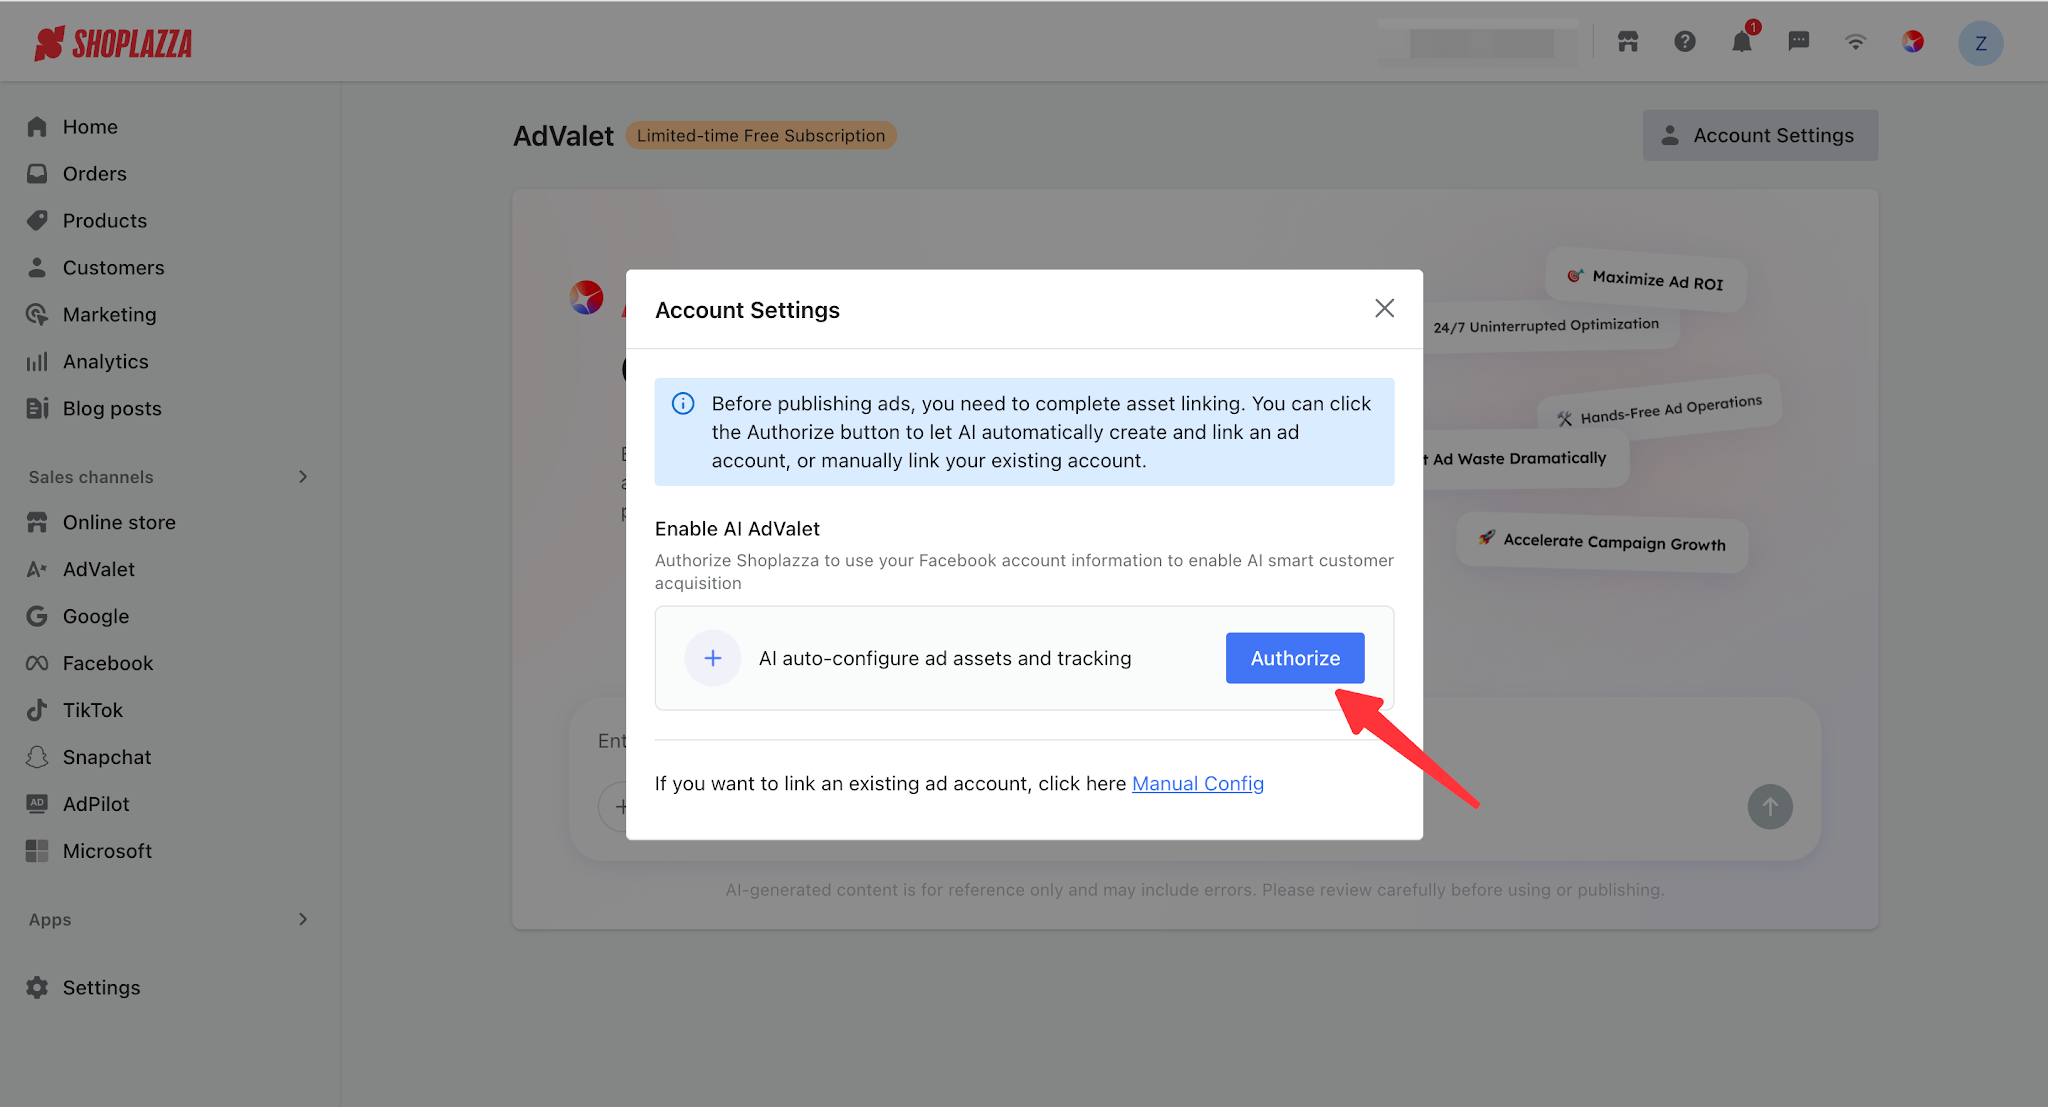
Ii. Select to enable all existing and future Business Manager accounts & Pages. After selecting, click the Continue button. Once the setup is complete, click Save to finish the authorization.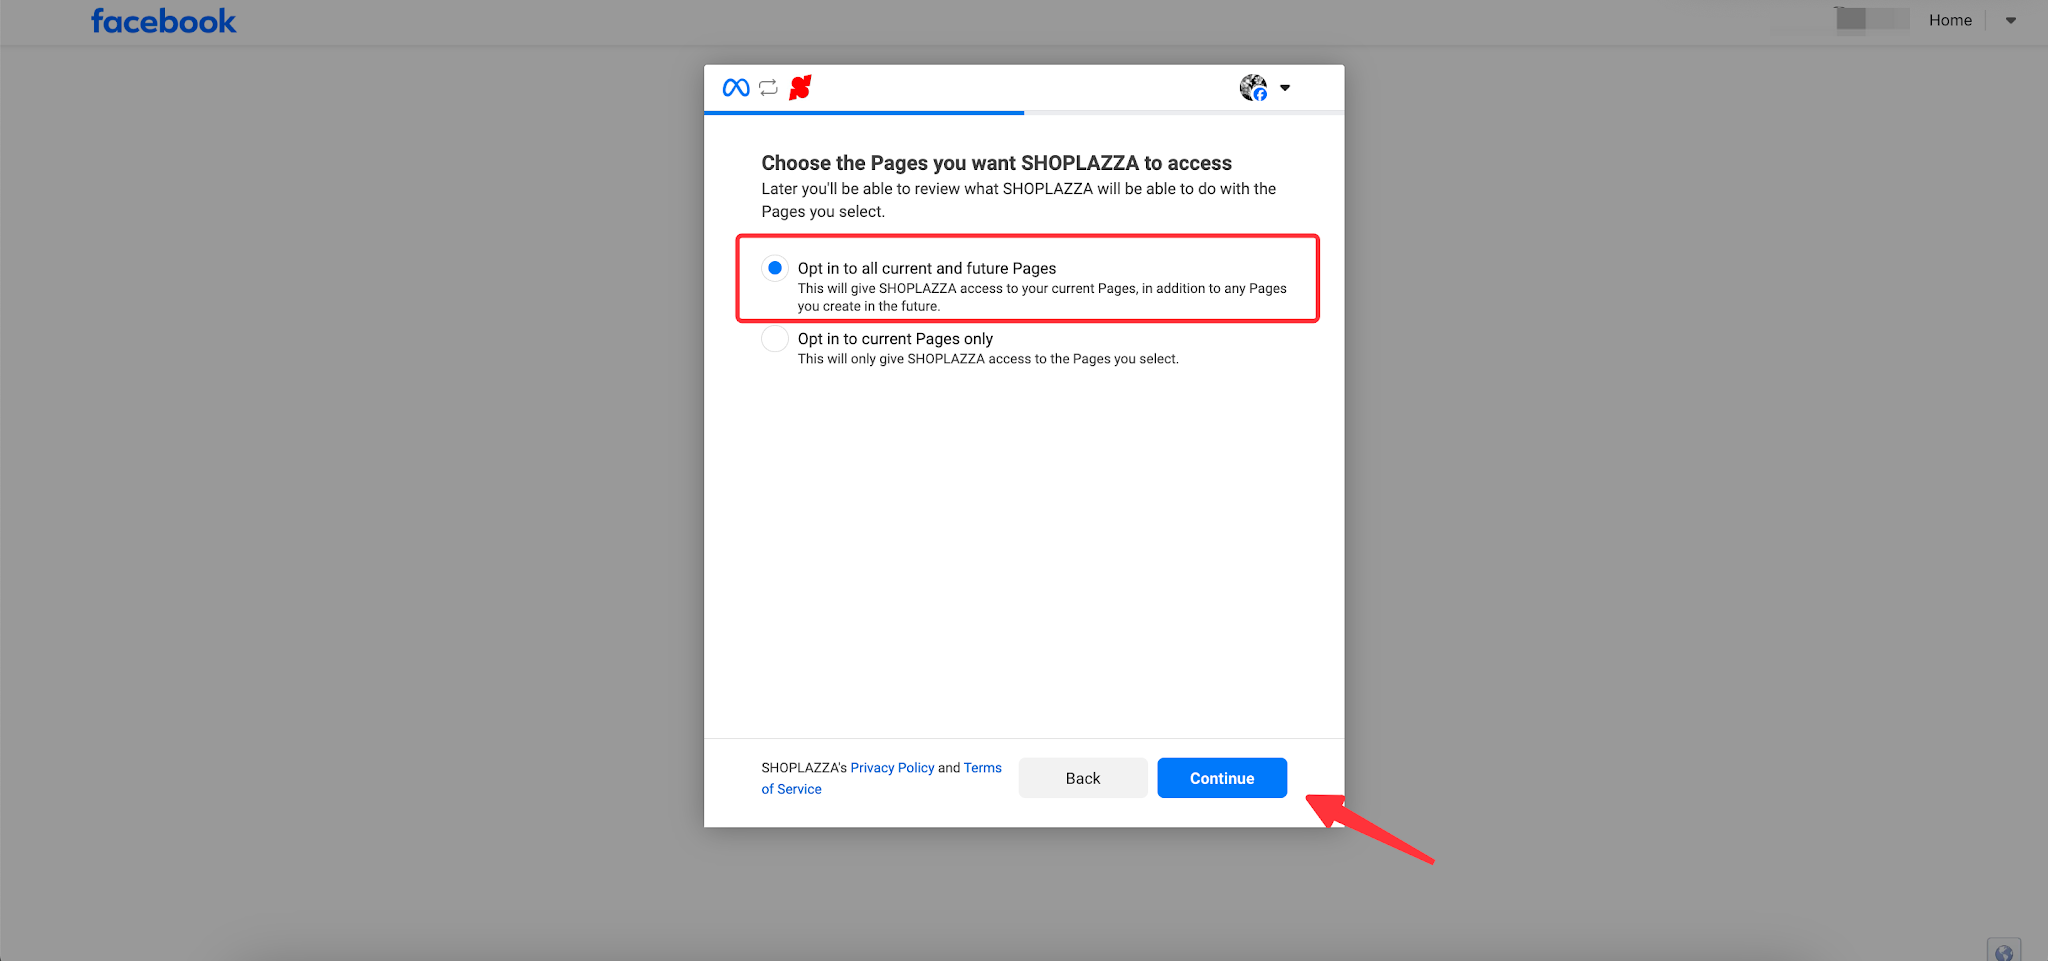
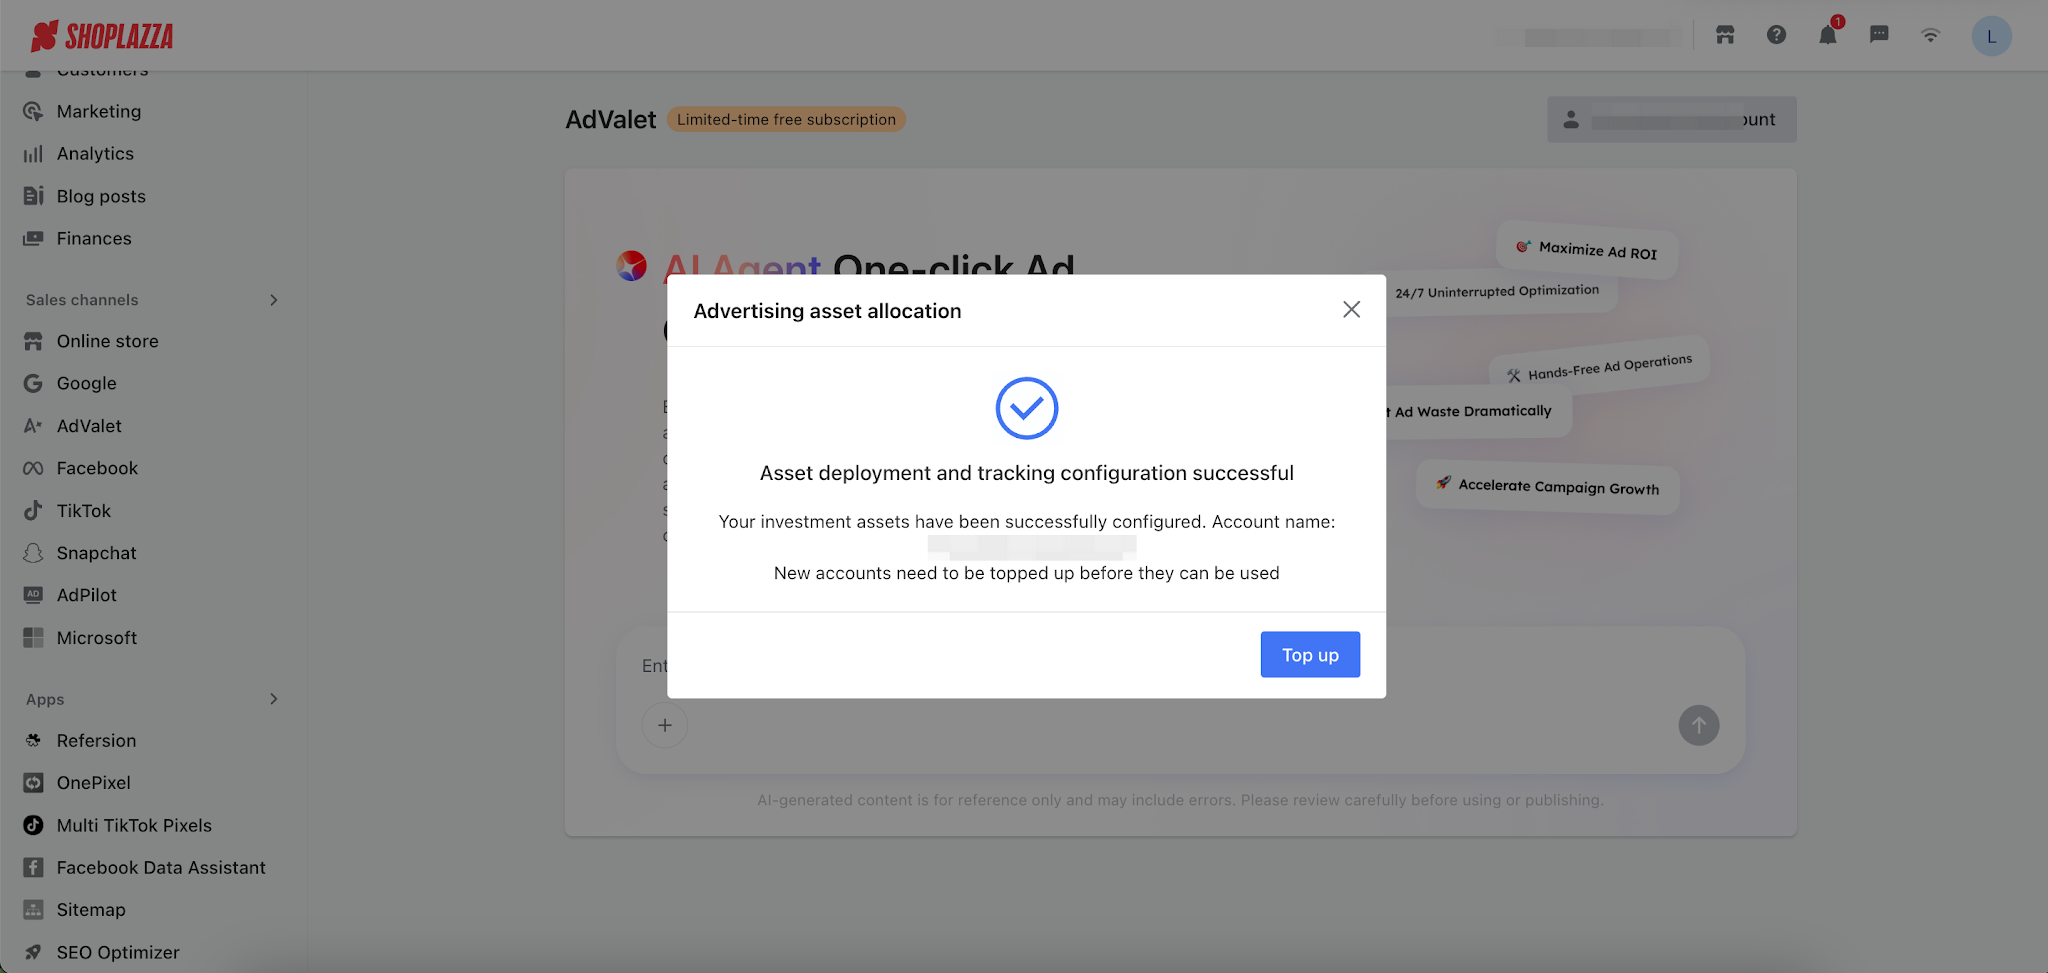
Iii. After the authorization is completed, we will automatically configure your advertising assets and tracking. Please wait for the asset setup to be completed.

- Use an existing Meta ad account: Click "Manual Configuration" to link your existing Meta advertising account.
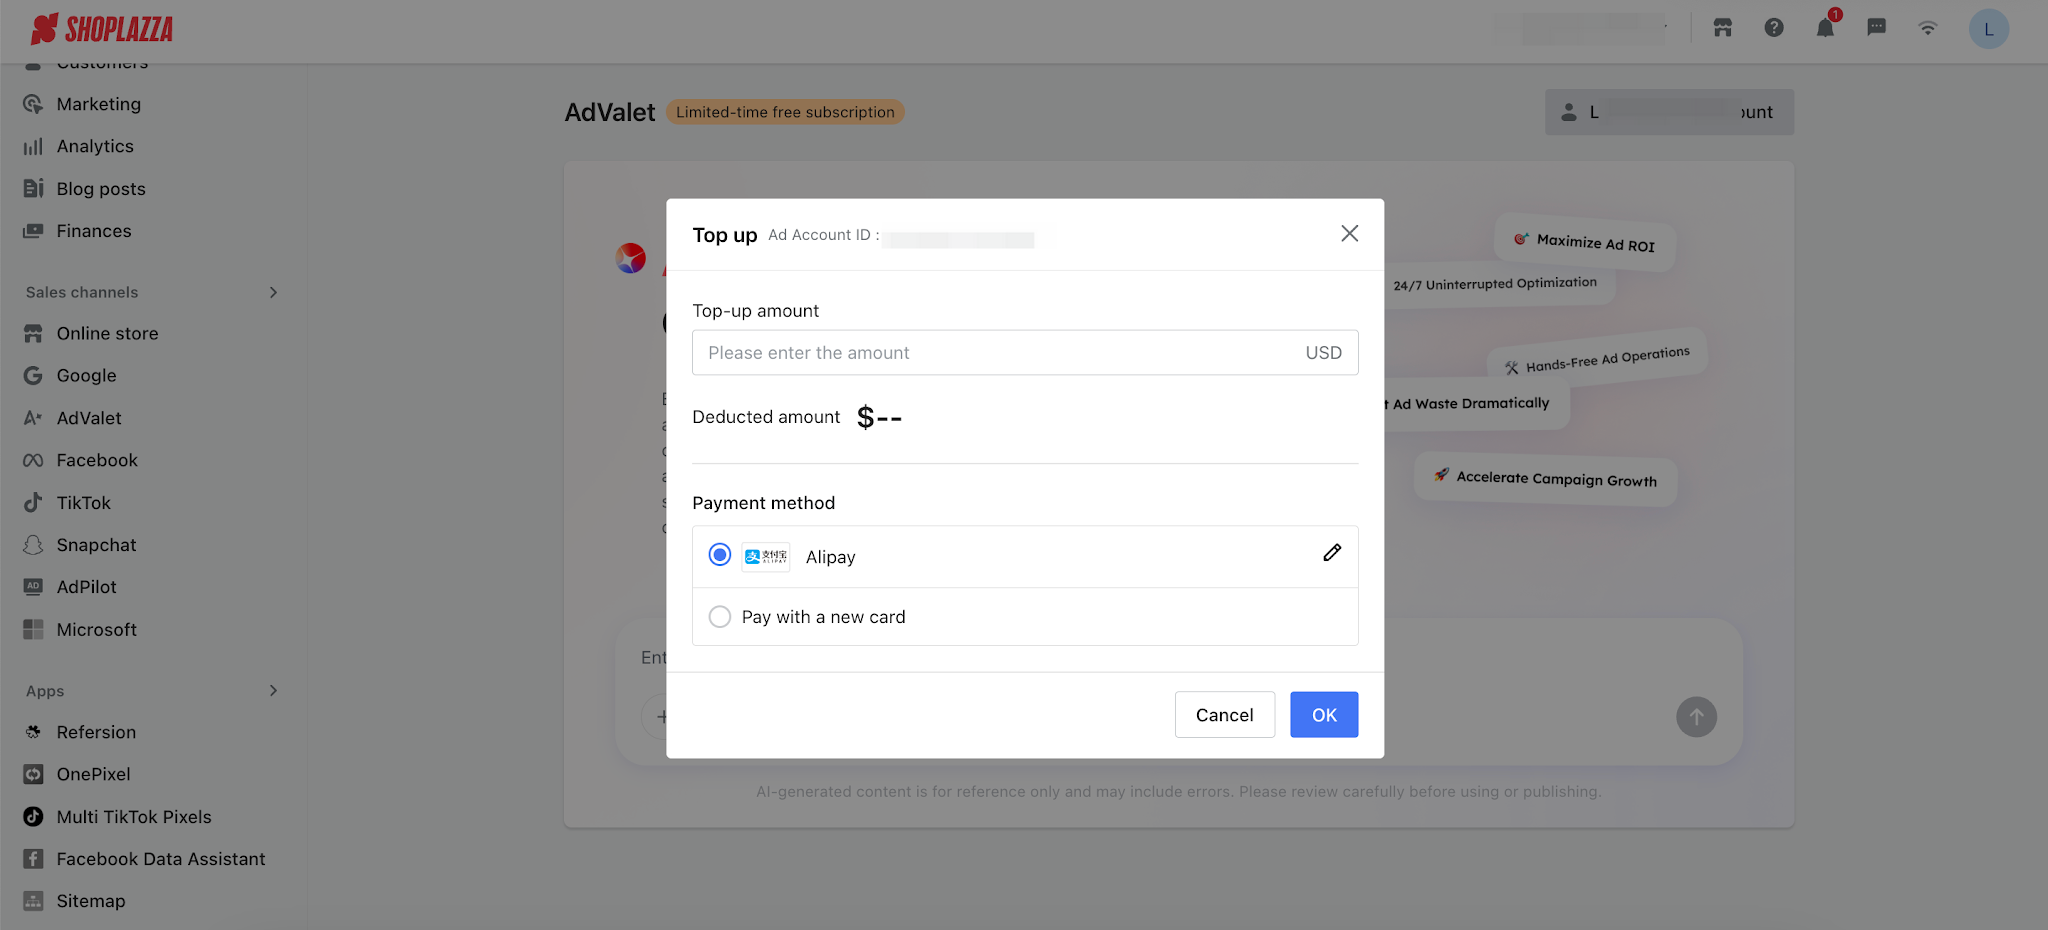
3. After the connection is completed, if you are using a newly created account, you will need to click [Top Up] to add funds to your ad account balance.
Step 2: Create an Ad Campaign
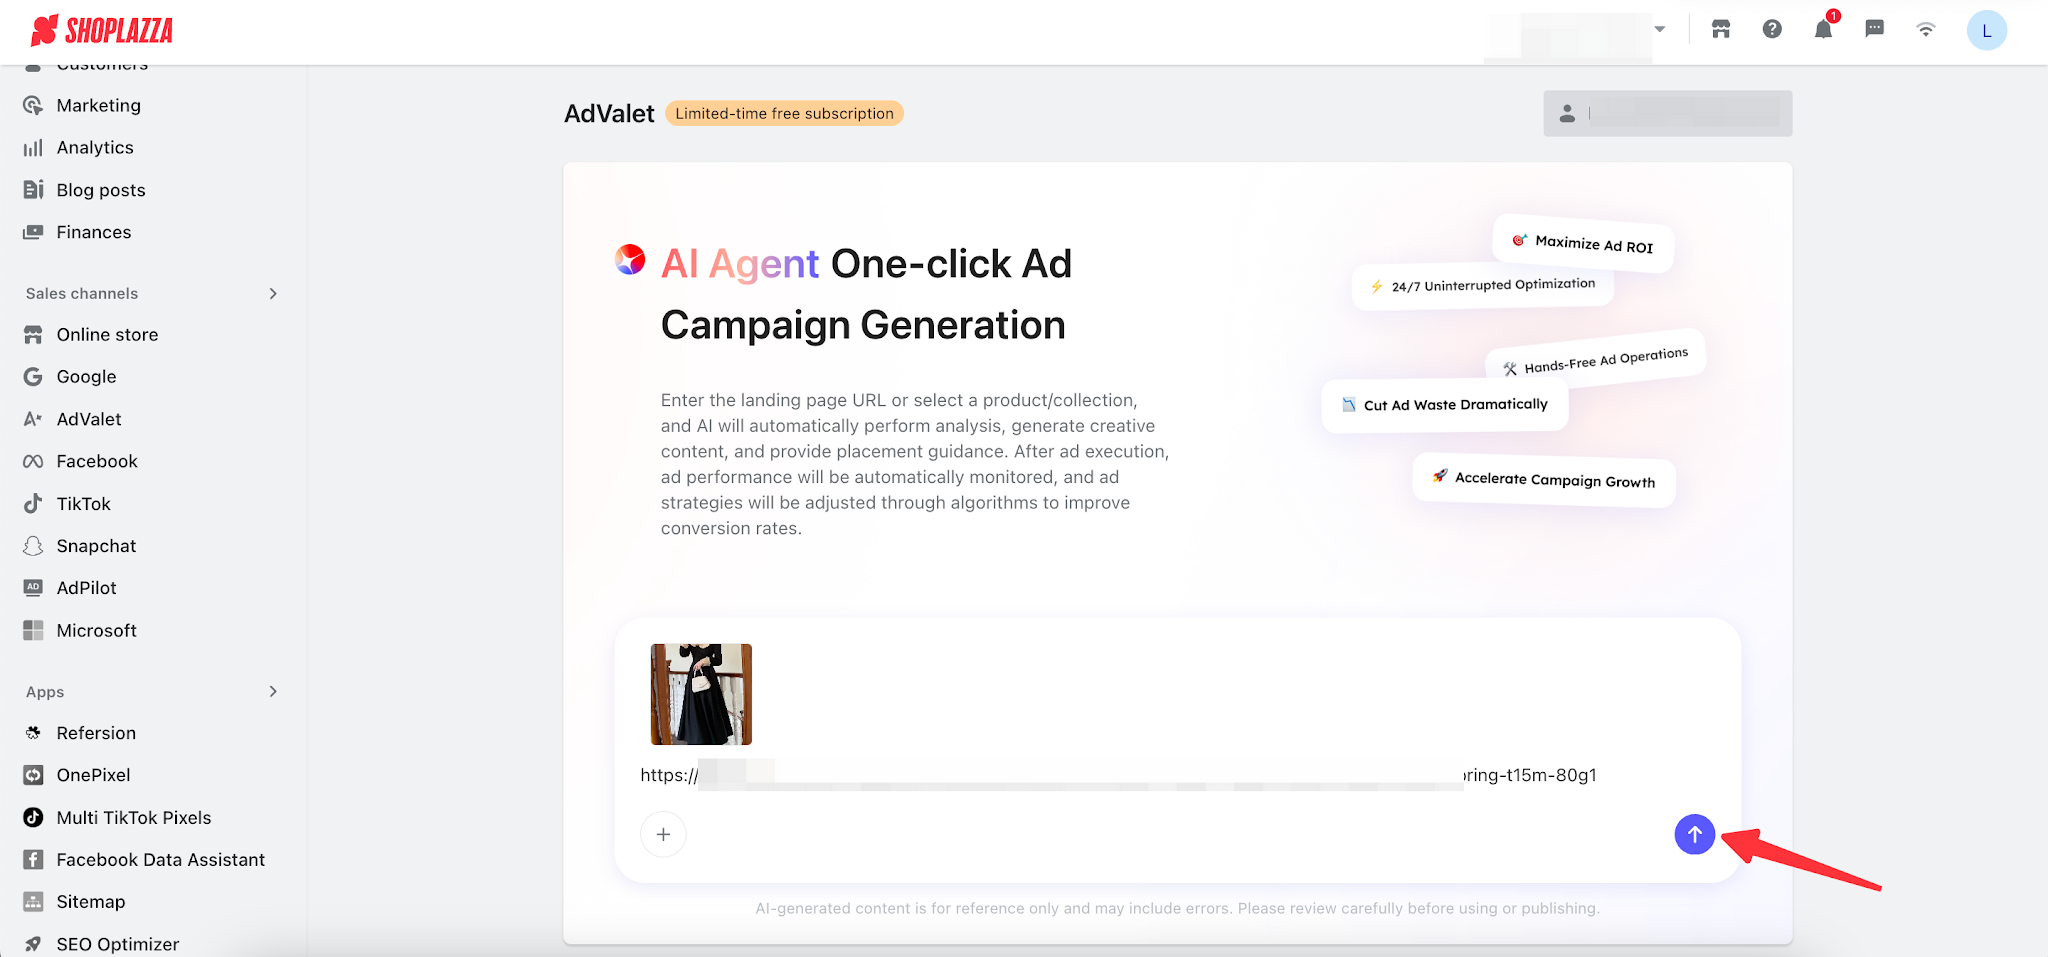
1. In the "One-click Campaign Creation" section, select your landing page for advertising:
- Enter a campaign URL: You can enter your store homepage or a specific landing page.
Note
The URL must start with http:// or https://.
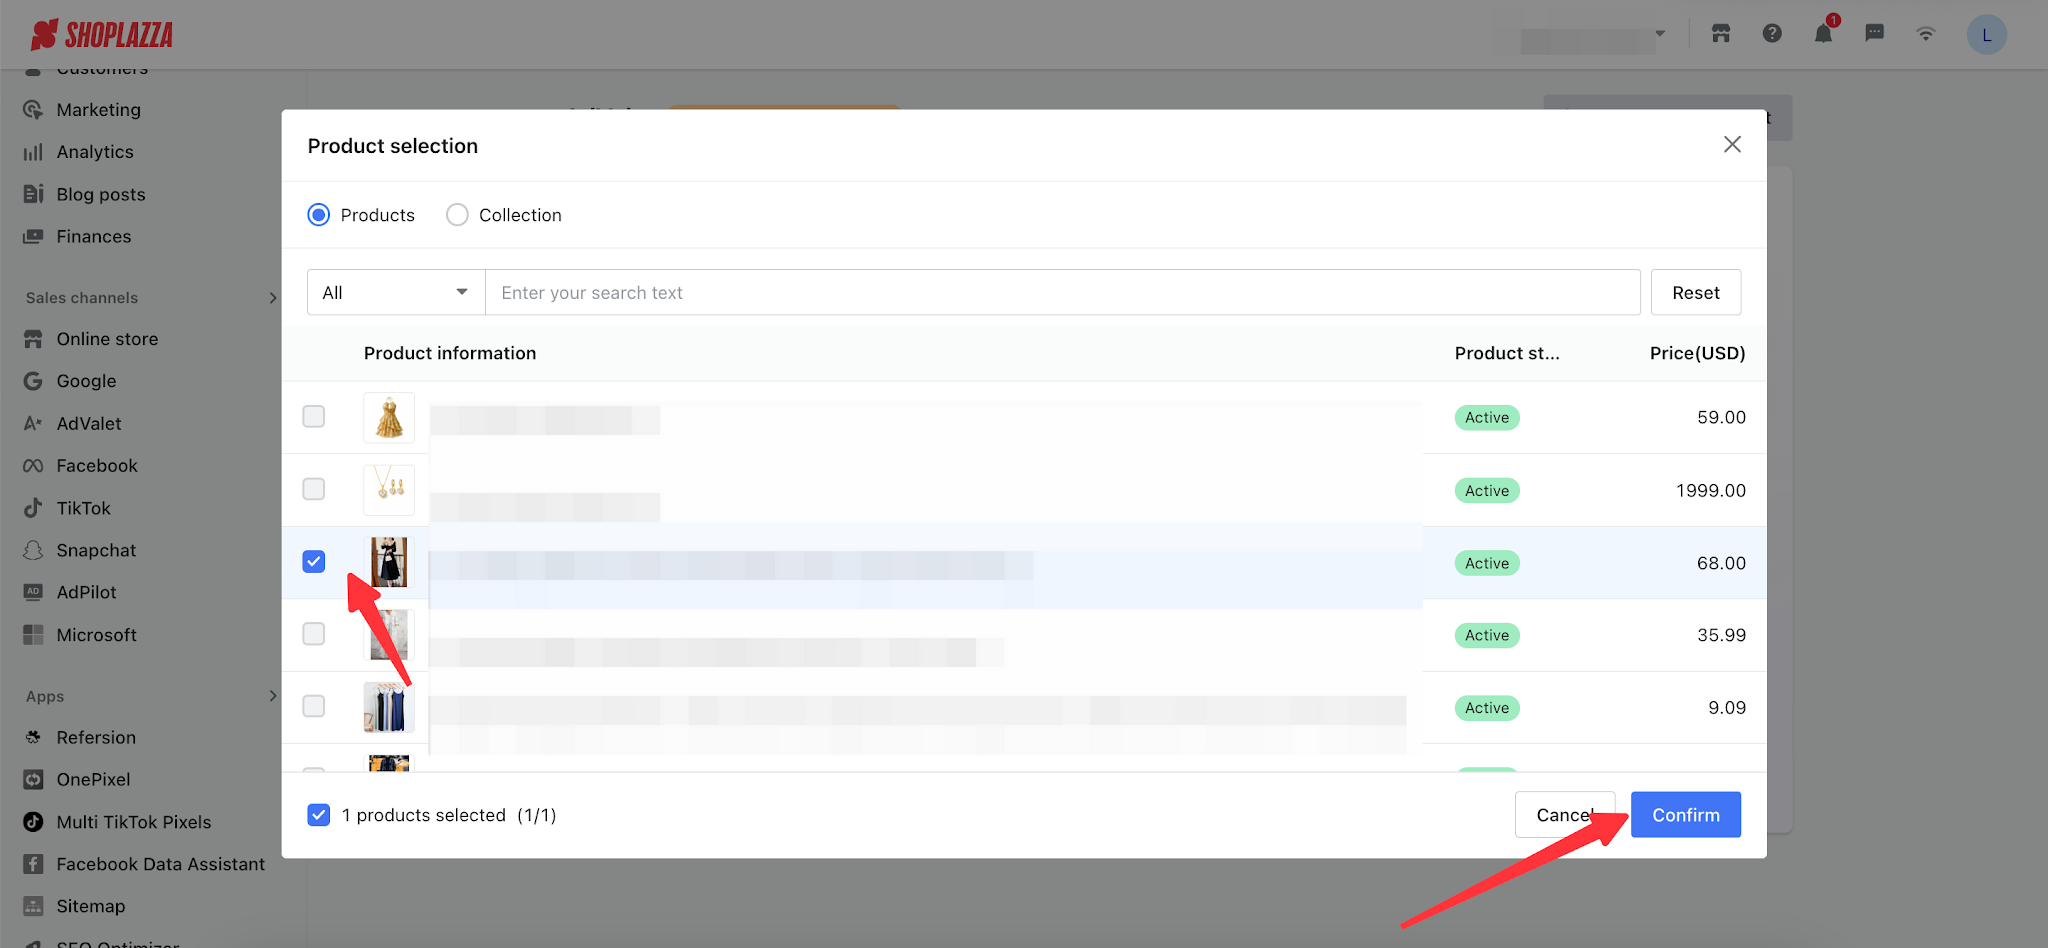
- Select a product or collection: Click the button to open a pop-up window and select one SPU (product) or one collection from your store list.
- Only one product or one collection can be selected.
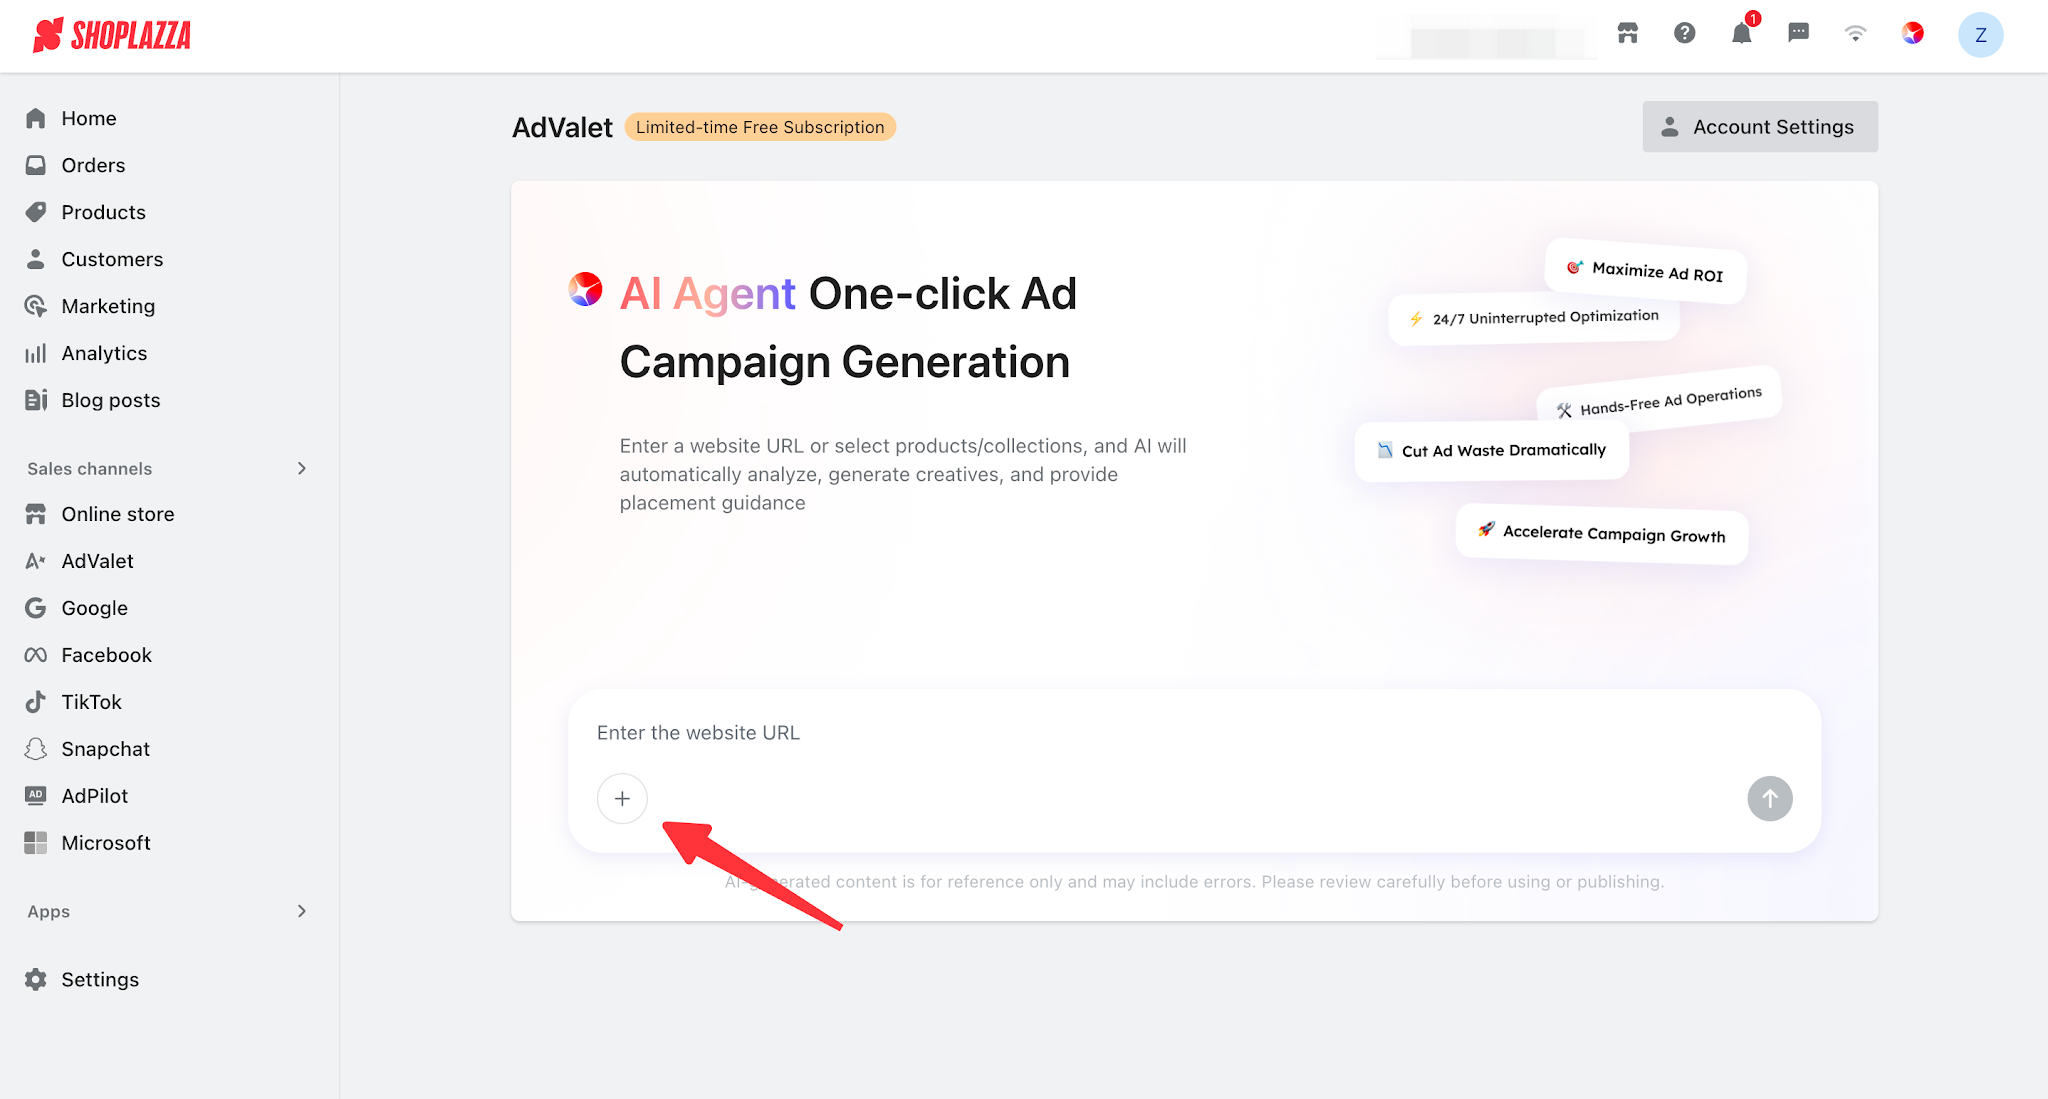
2. Click the Generate button, and AI will start analyzing the webpage and generate a preview.
Note
Before generating for the first time, please carefully review and confirm the AI disclaimer pop-up to ensure the content complies with Meta platform policies.
3. The ad creation process will automatically follow the steps below. You can preview the AI-generated audience, strategy, creatives, and more:
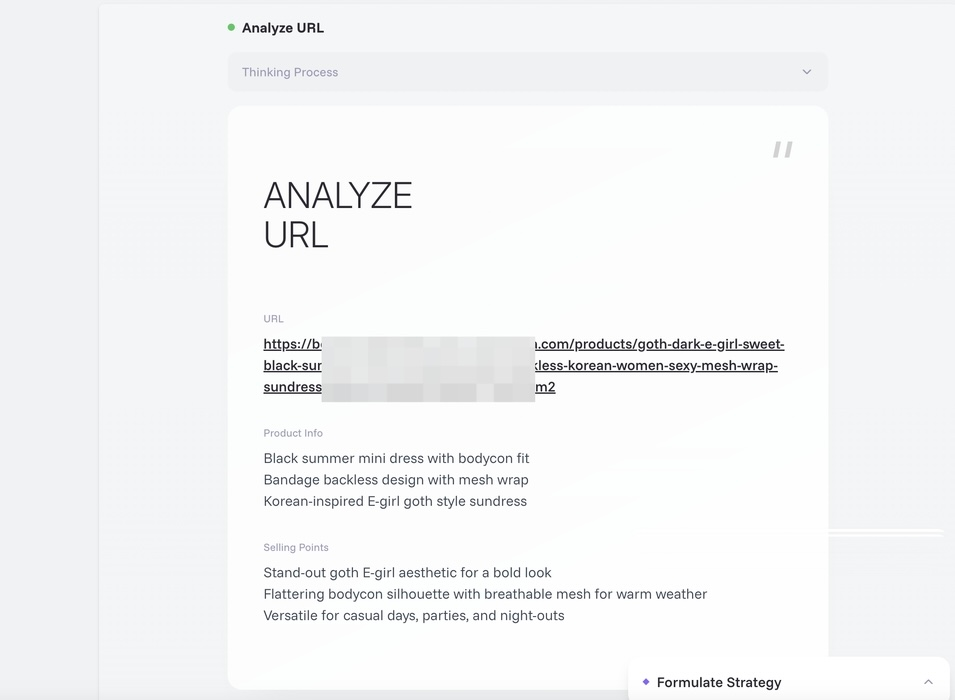
a. The AI performs URL analysis to identify key product or page information and selling points.

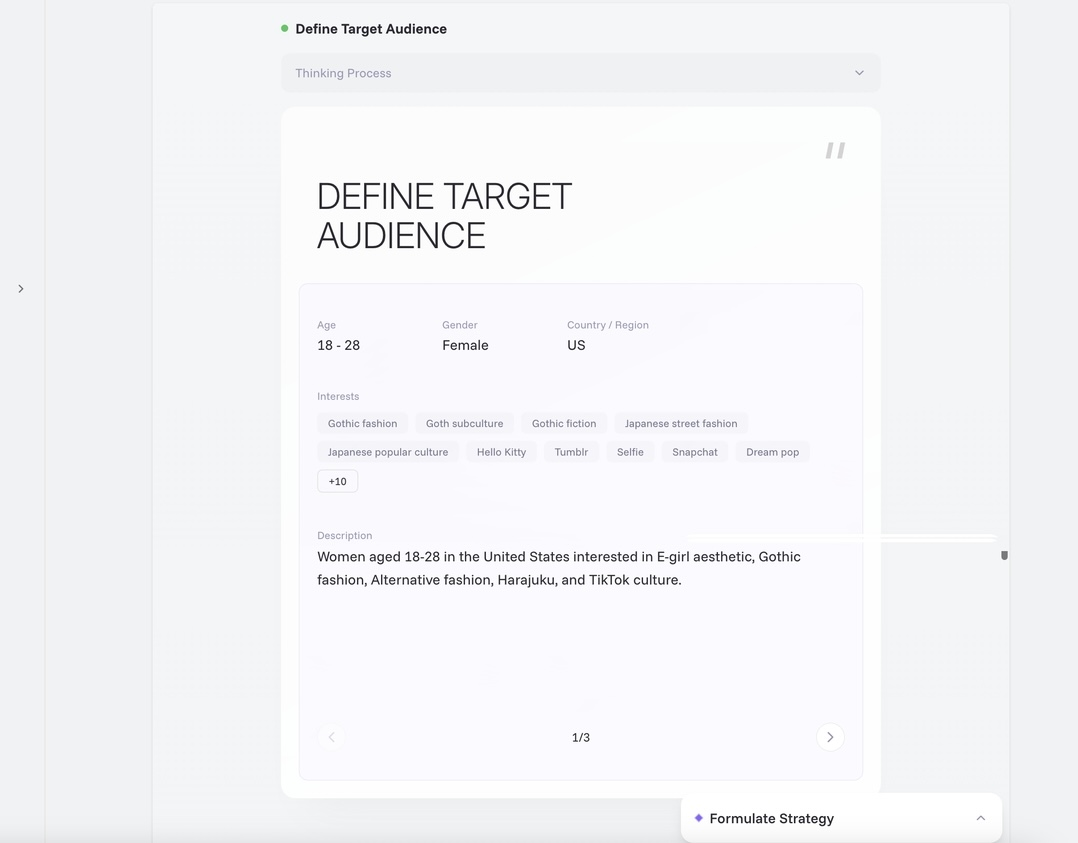
b. Analyze the target audience most likely to convert, generate three audience groups including age, gender, region, interest tags, etc., and automatically apply them to the ad.
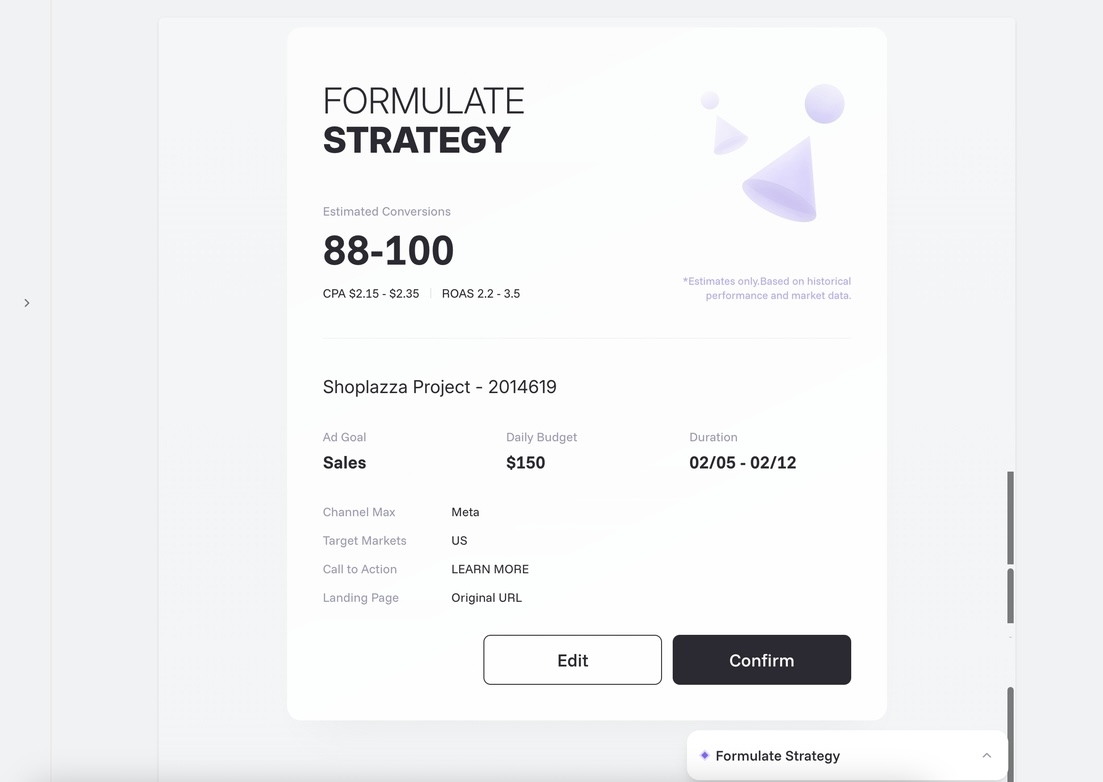
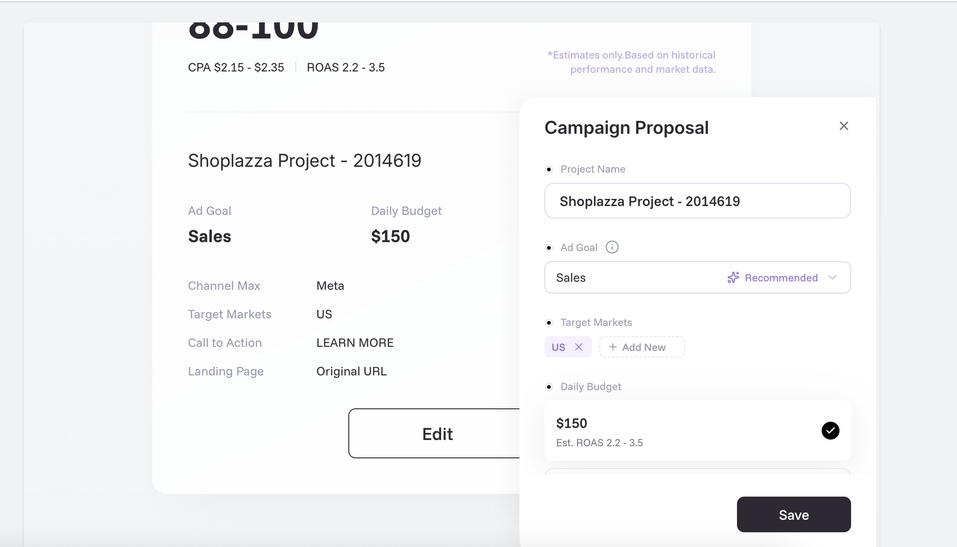
c. Generate the advertising strategy, including campaign objective, daily budget, and scheduling. You can also preview the expected ad performance here. In addition, you can click Edit to modify the advertising strategy. Click Confirm to proceed to the next step.
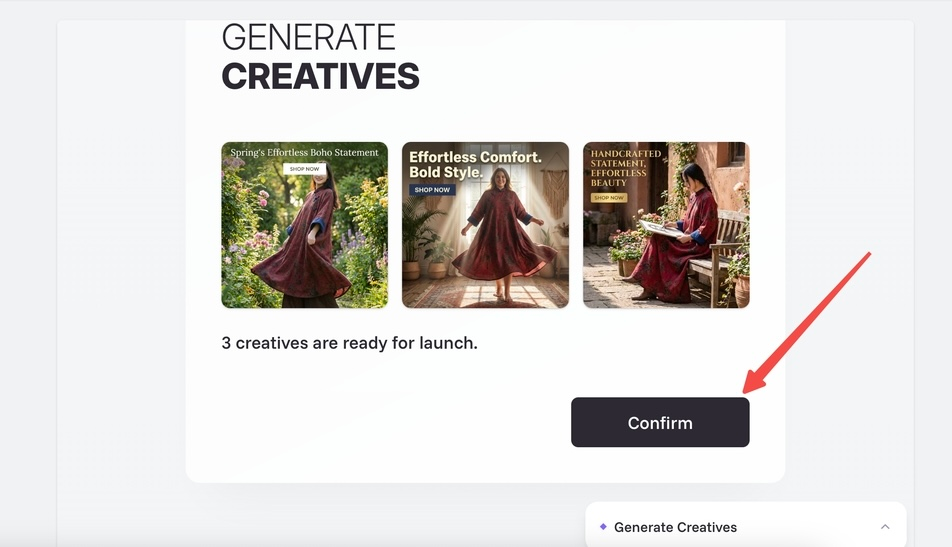
d. Generate ad creatives: we will create 3 ad assets for you. You can also click [Edit] to make adjustments to the creatives.
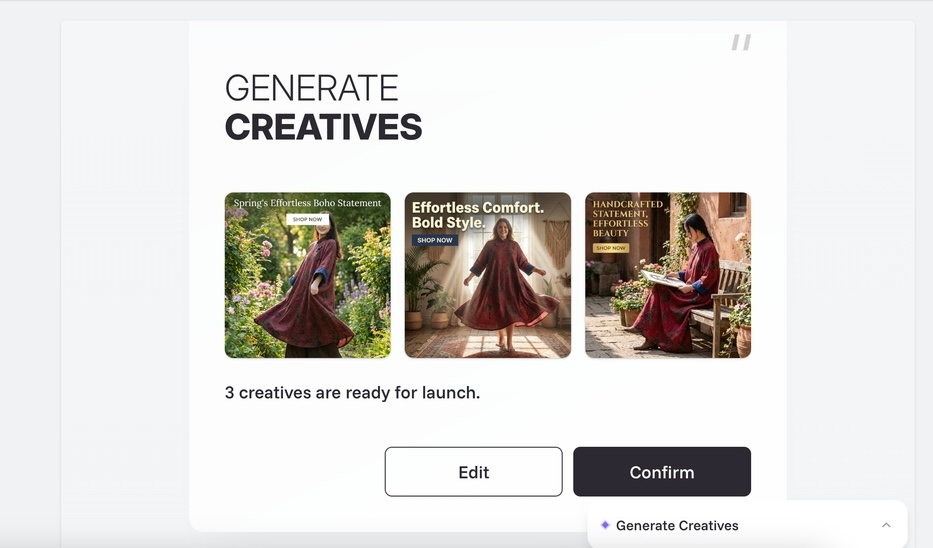
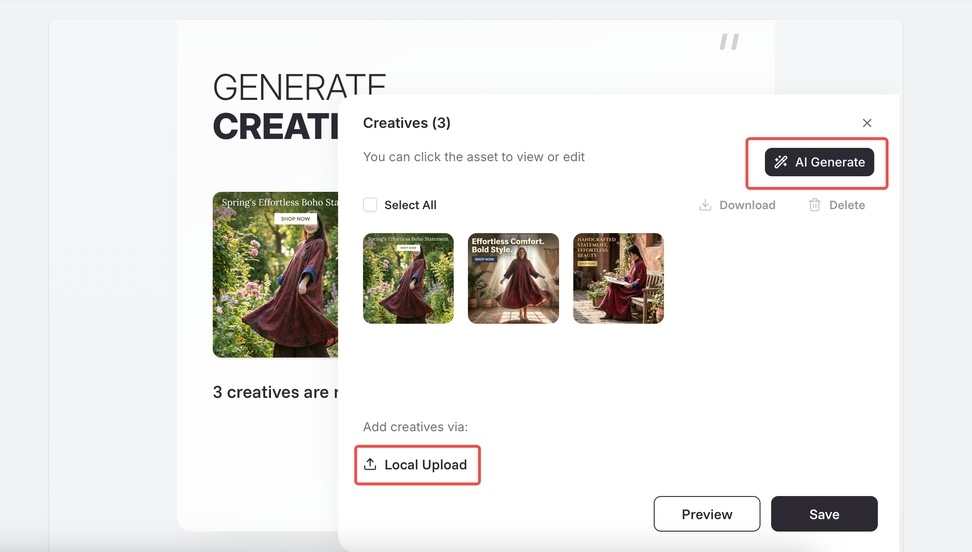
- You can also click on the creative assets to further adjust the images.

- After confirming the creatives, click [Confirm] to proceed to the next step.
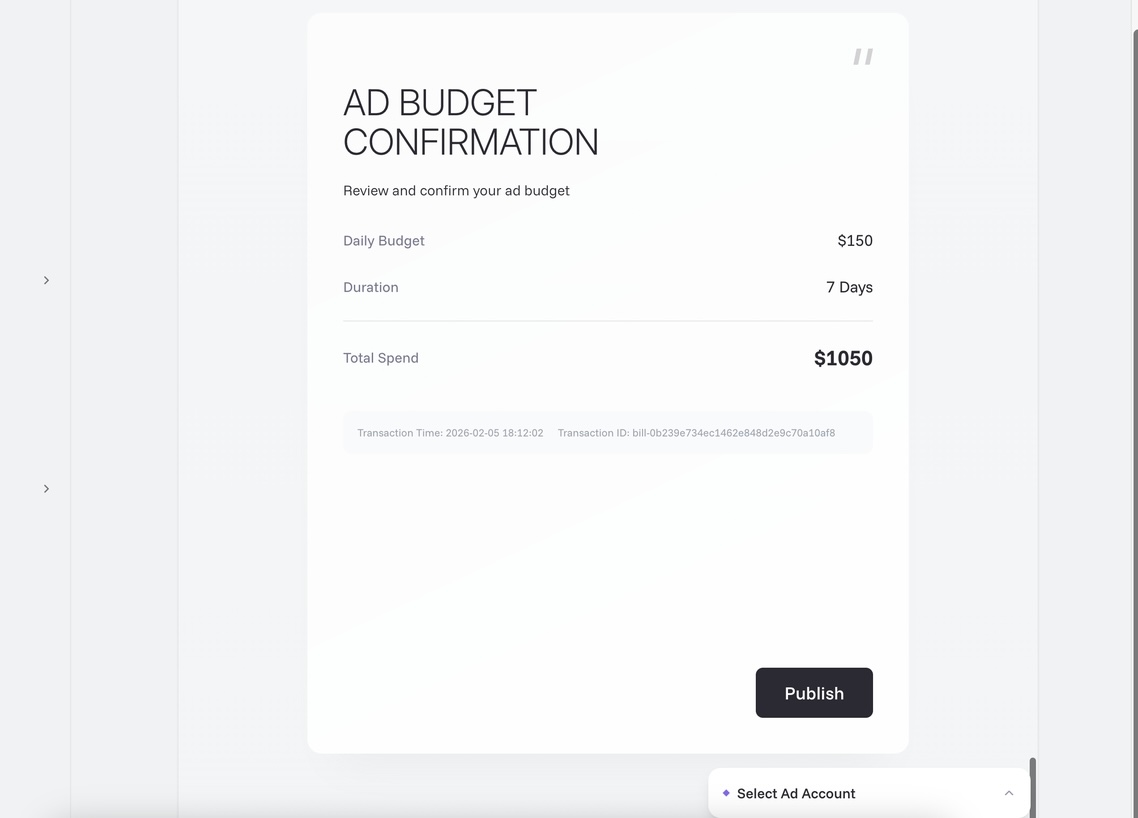
e. Confirm the ad budget and scheduling, then click [Publish] to launch the ad.

Step 3: Ad Management and Optimization
On the Campaign Management homepage, you can:
- Data overview: View total spend, impressions, conversions, and average CPR/CPC/CTR.
- Status control: Pause active ads; start or delete paused campaigns.
- Customized support: If you need more personalized assistance, click Contact Us at the bottom to submit a form.
Important Notes
- AI limitations: AI-generated content is for reference only and may contain inaccuracies. Please review carefully before publishing.
- Account unlinking risk: Unlinking the account will prevent you from creating new ads, and all existing campaigns and data will be permanently deleted.


Comments
Please sign in to leave a comment.