
Custom pages allow you to add essential standalone content to your Shoplazza store, such as About Us pages, Shipping Policies, and Terms of Service. These pages are independent of theme templates and can be linked to your store’s navigation menus, footers, or promotional links to enhance customer experience. Follow this guide to create and edit custom pages and integrate them effectively into your store structure.
Creating a new custom page
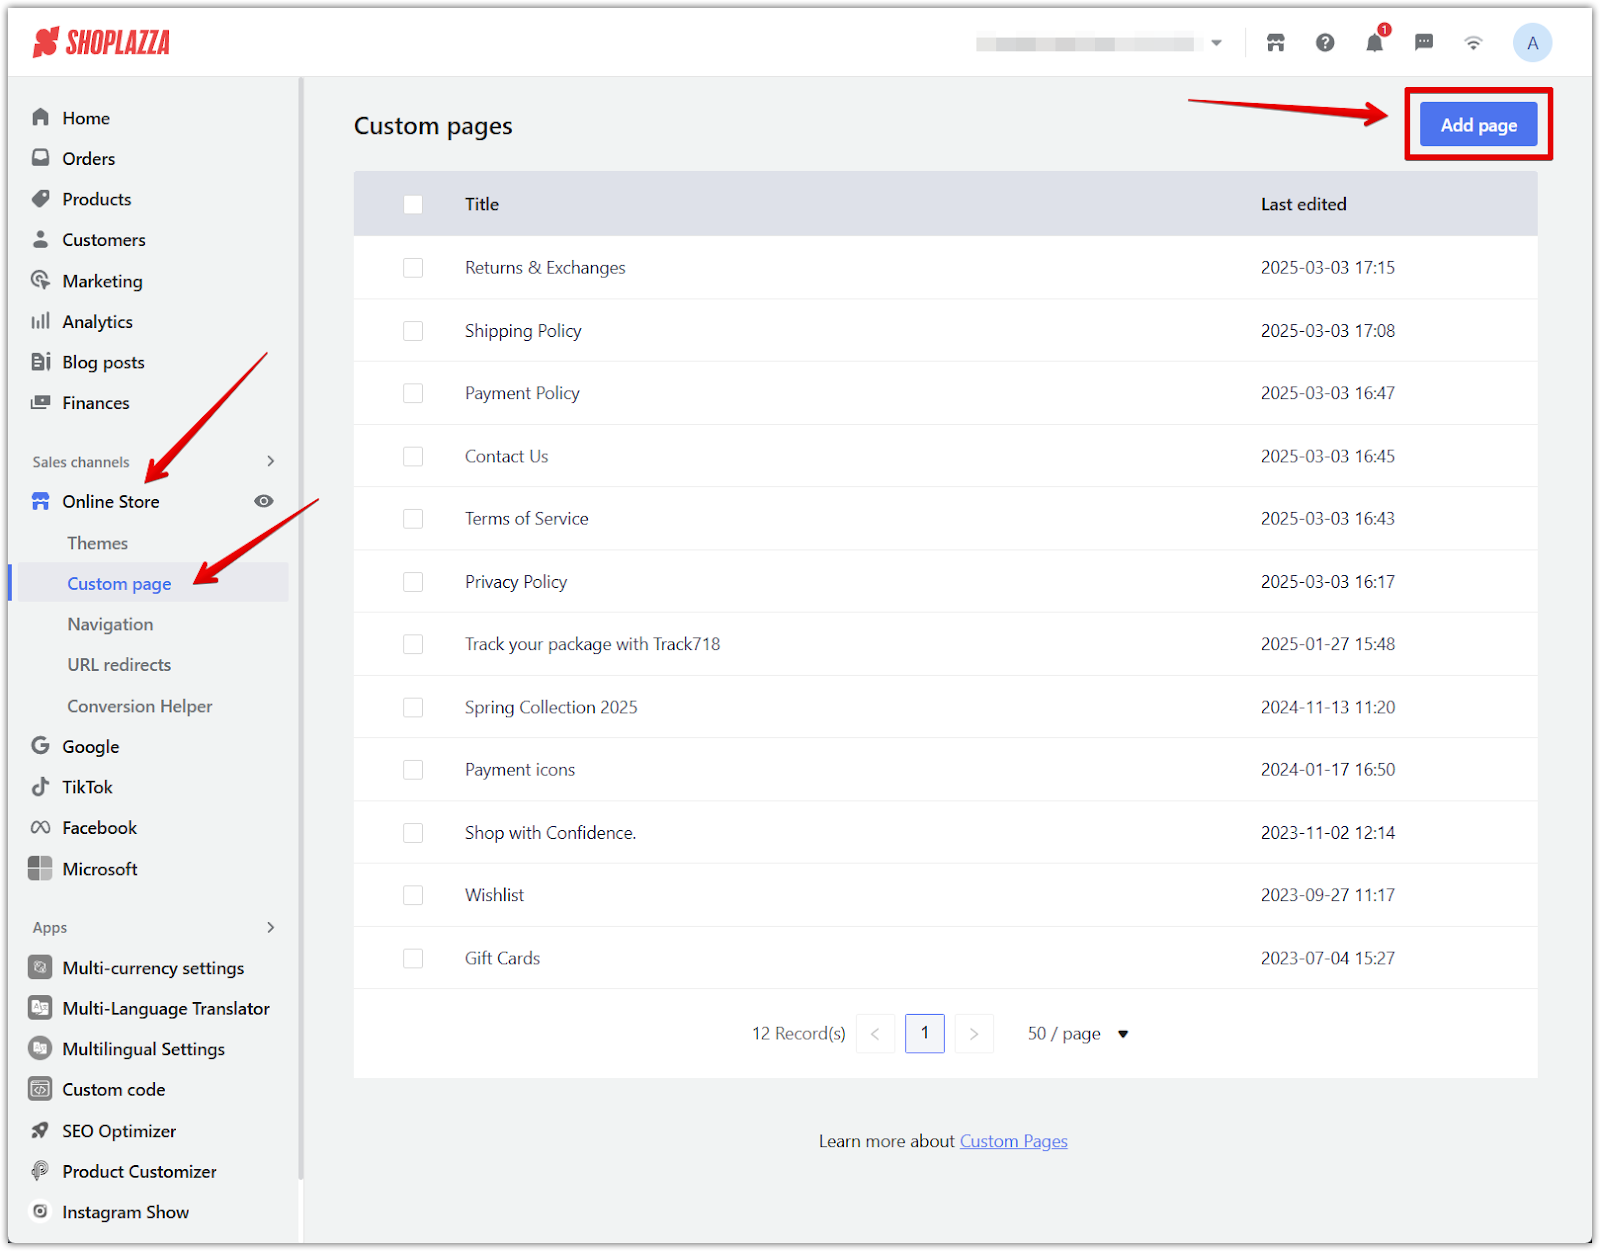
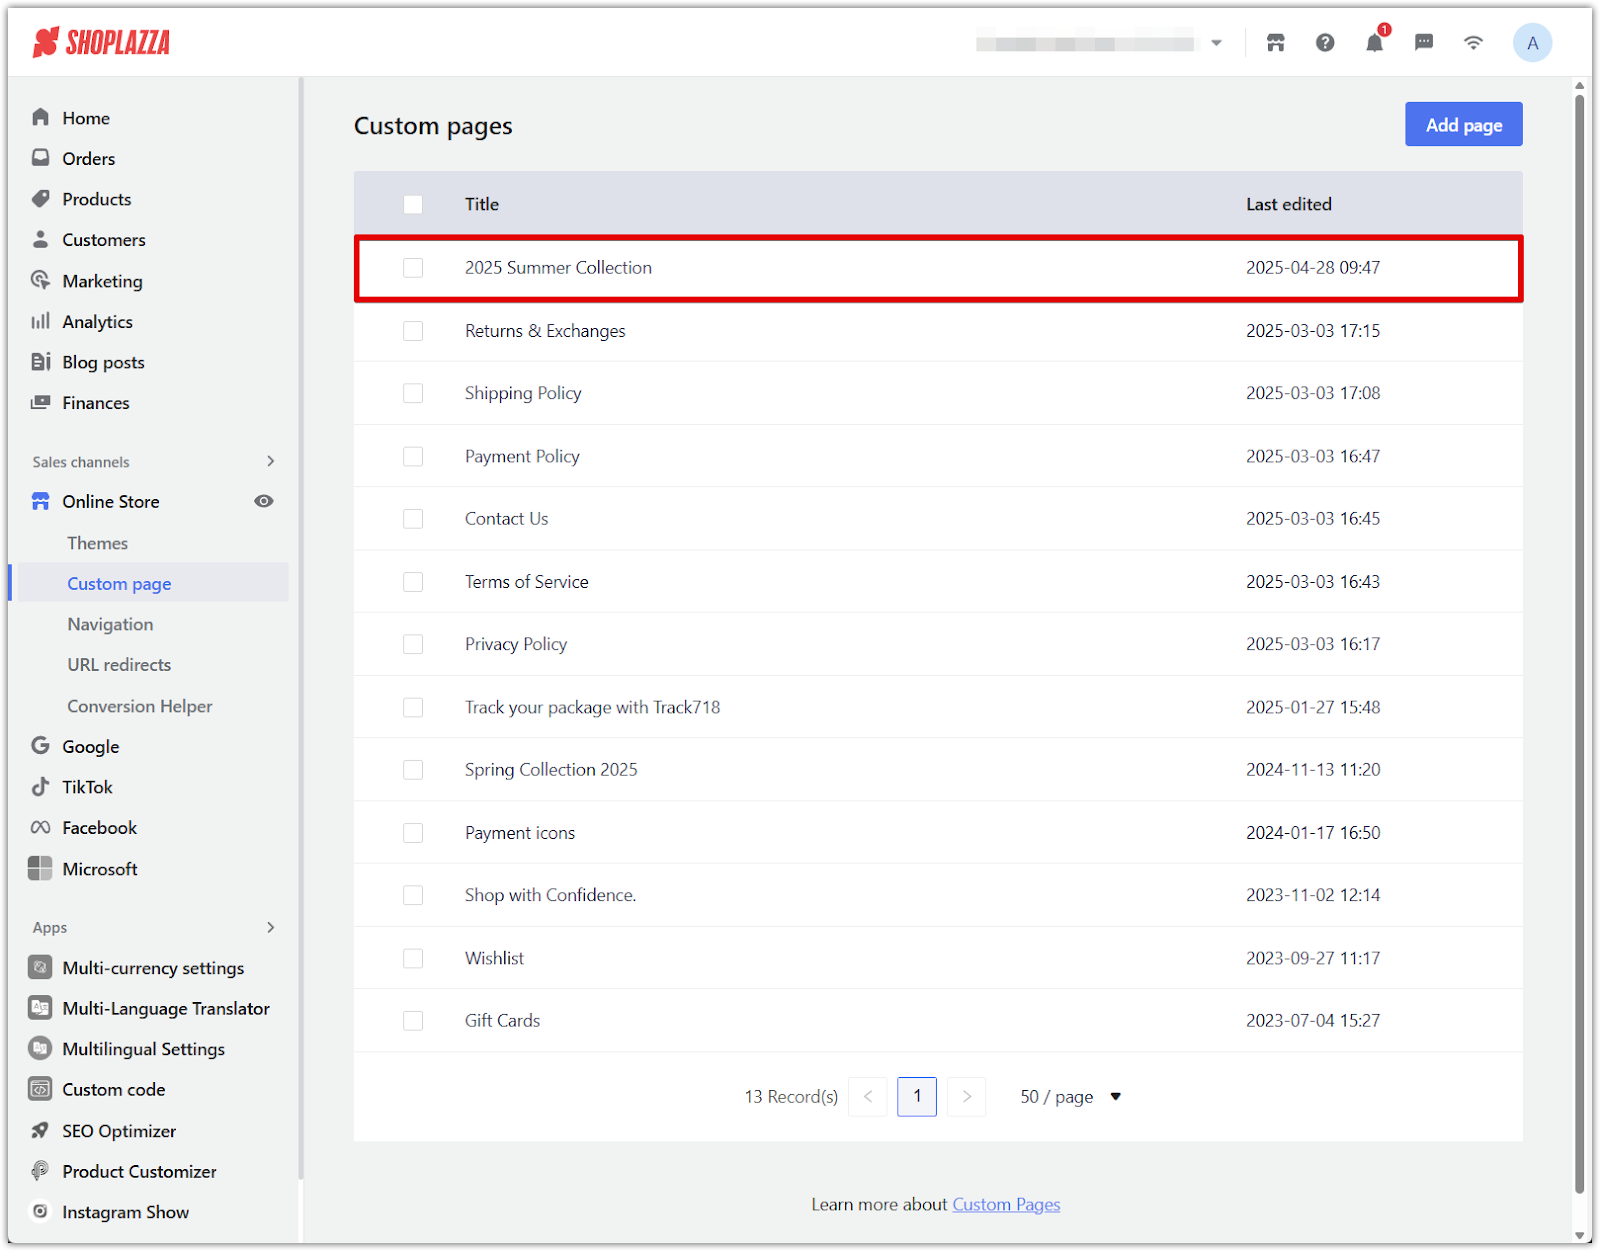
Start by creating a new custom page under the Pages section of your Shoplazza Admin.
1. Access the Pages section and create a new page: From your Shoplazza Admin, go to Online Store > Custom pages and click Add page to open the page editor.
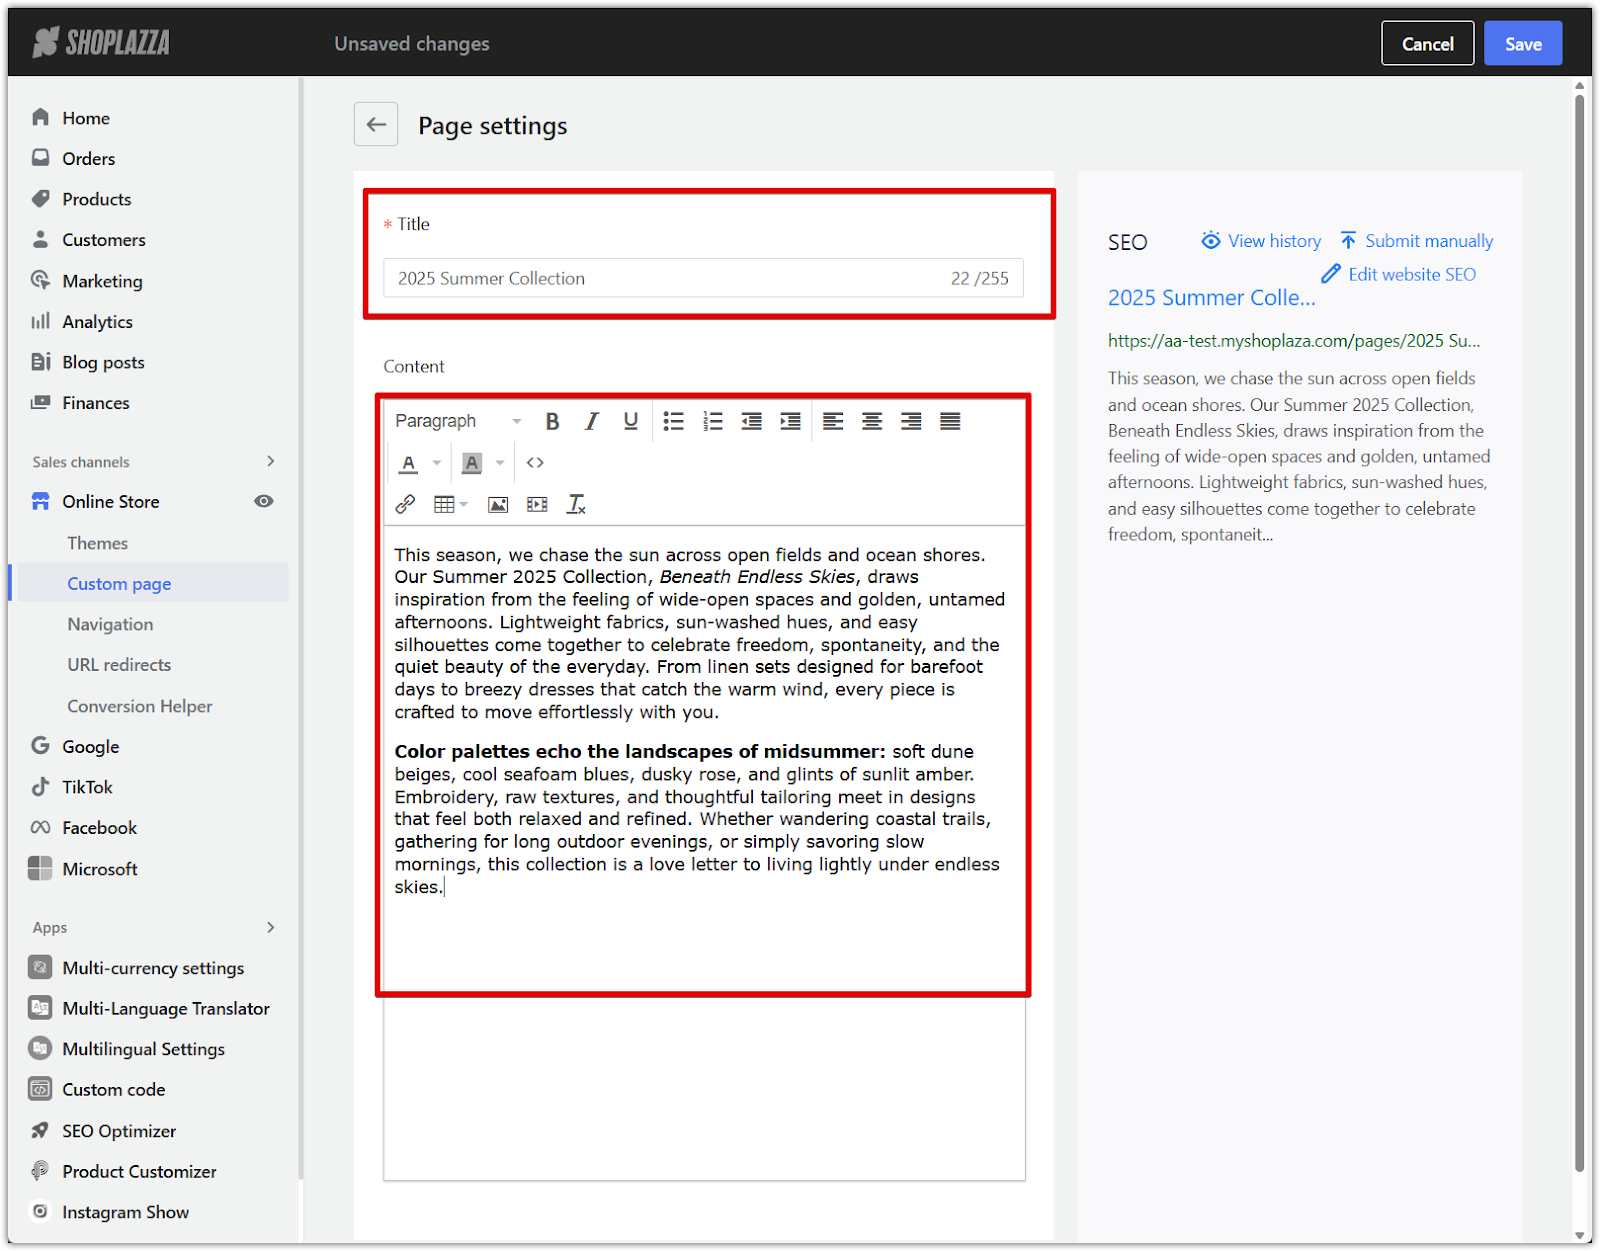
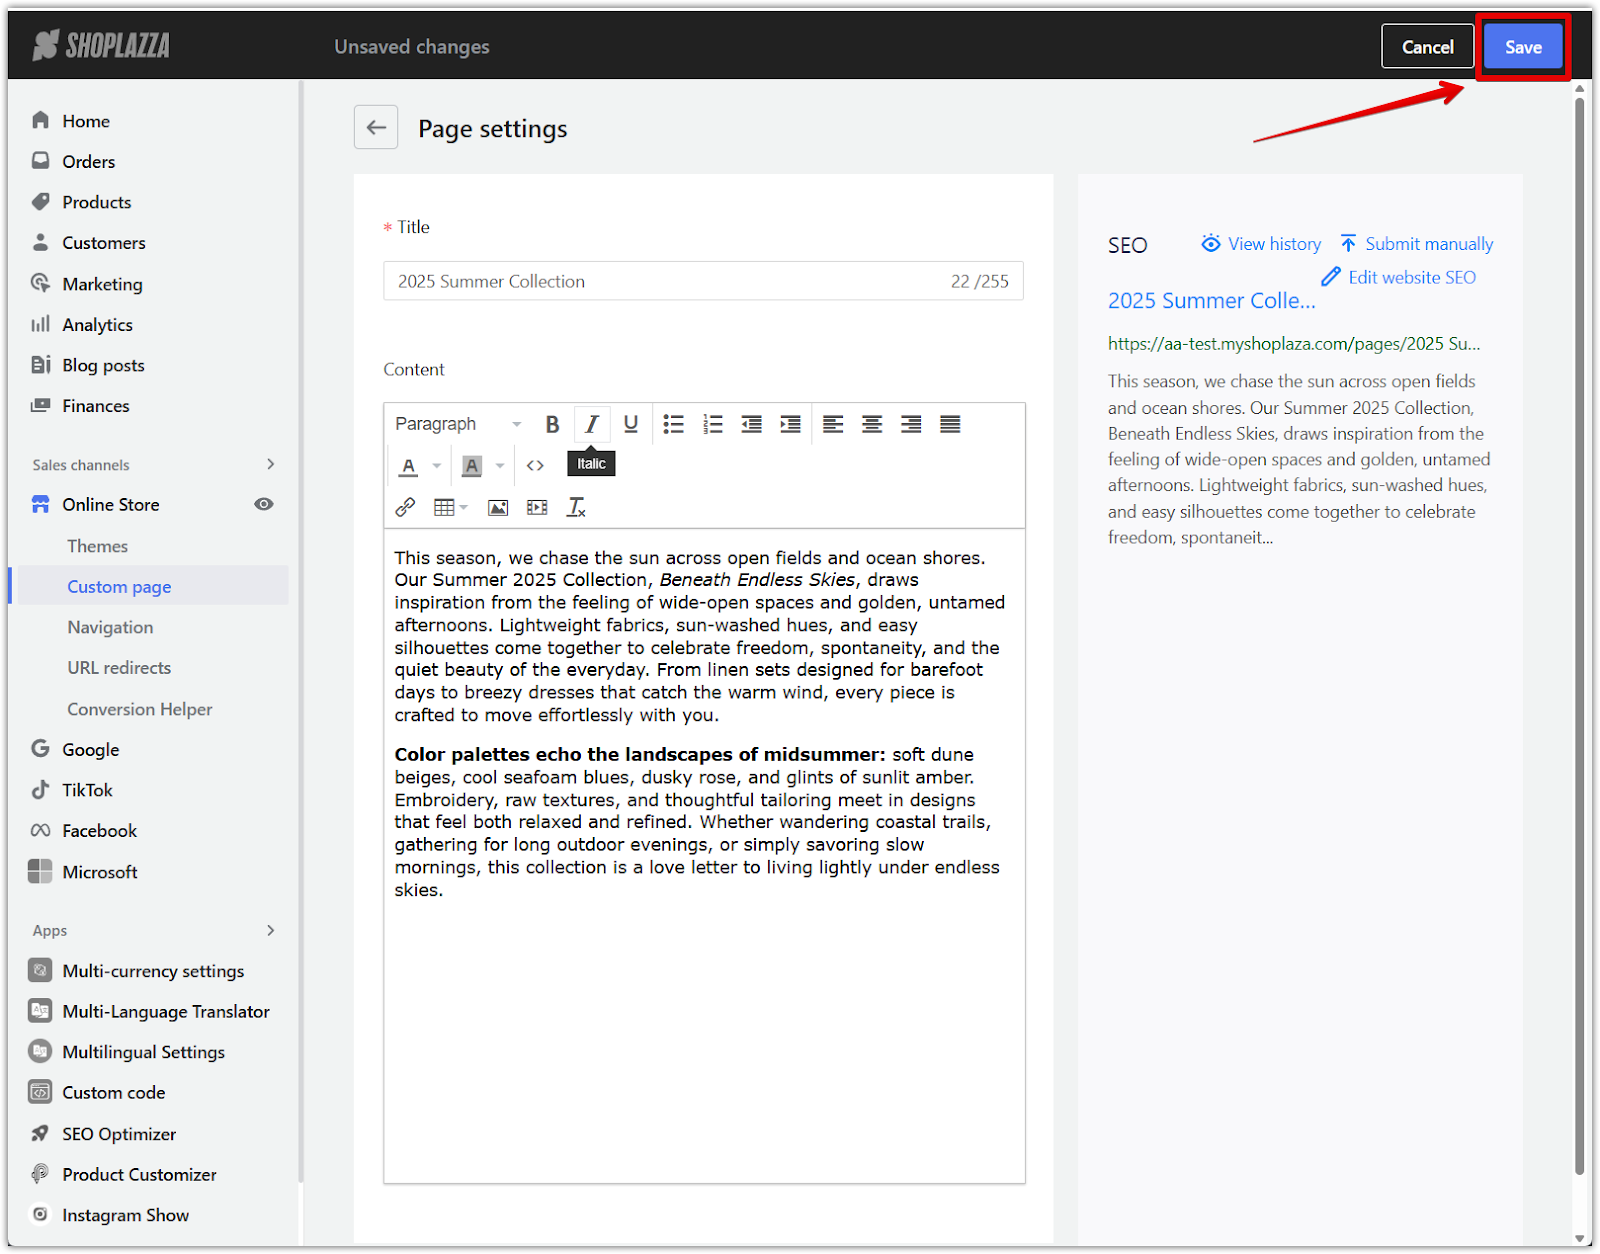
2. Enter the page title and content: Provide key details to inform your visitors about the purpose of the page.
- Add a clear, descriptive title that reflects the purpose of the custom page.
- Use the rich text editor to format text, add images, tables, links, or important details.
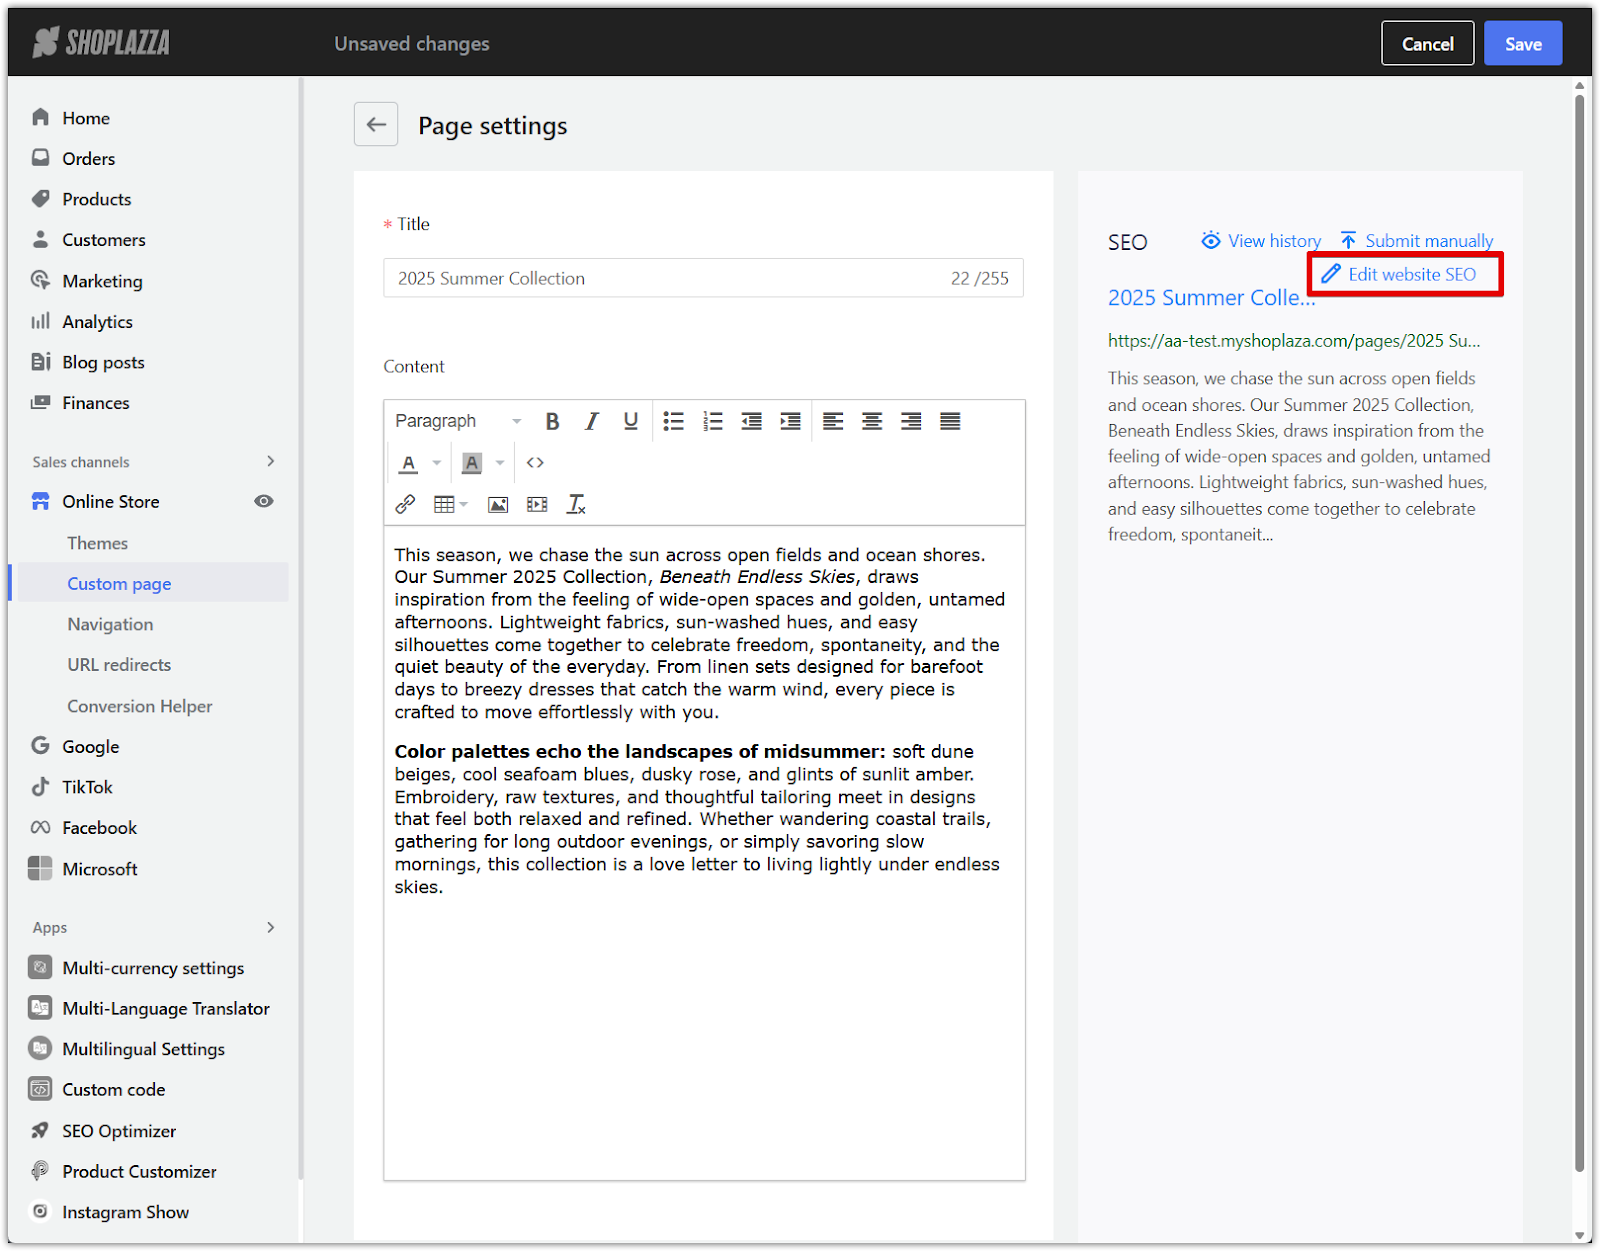
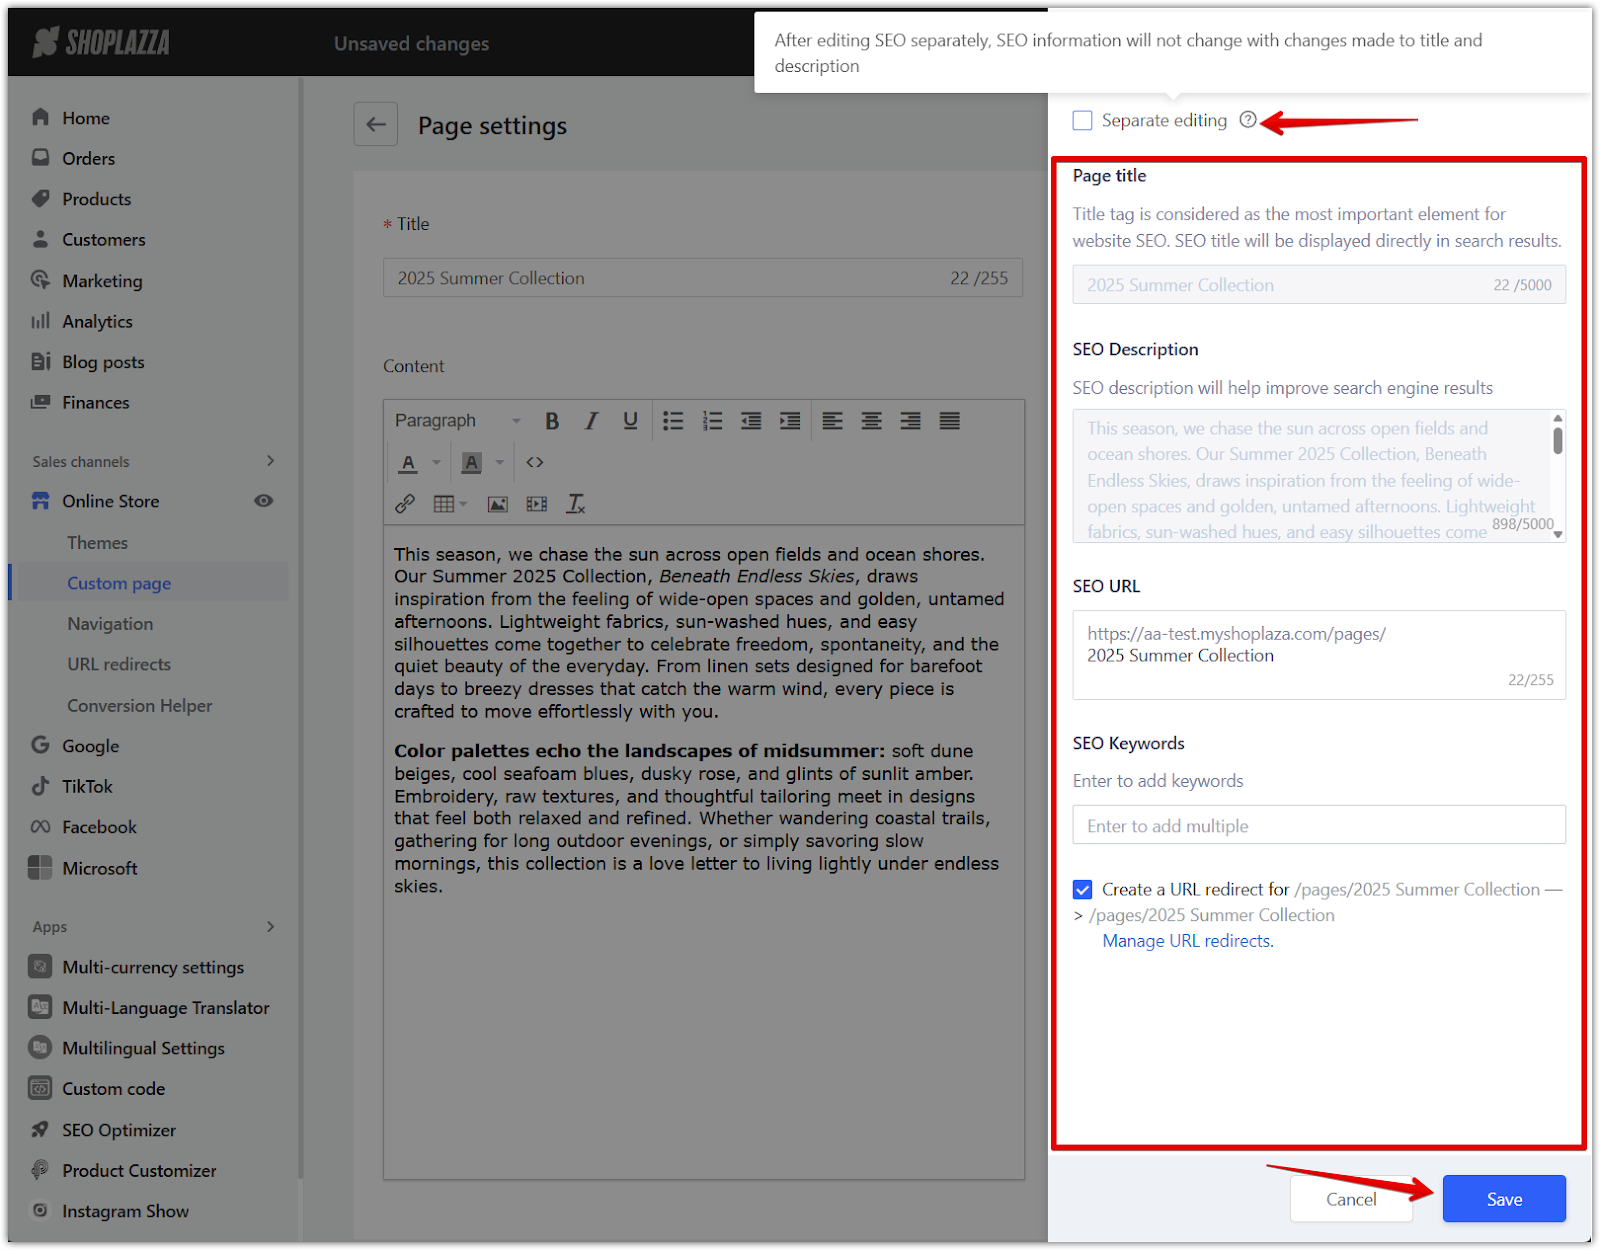
3. Adjust SEO settings: Optimize your page's visibility by completing the SEO fields. After editing SEO separately, any future changes made to the page title or description will not automatically update the SEO settings.
- Click Edit website SEO to configure the page title, meta description, and URL handle to improve search engine visibility and click Save.
4. Save the custom page: Click Save once all content and settings are complete. You can now find your new page in the Custom Pages section.
Editing and updating custom pages
Custom pages can be updated anytime to reflect the latest store policies or promotional details.
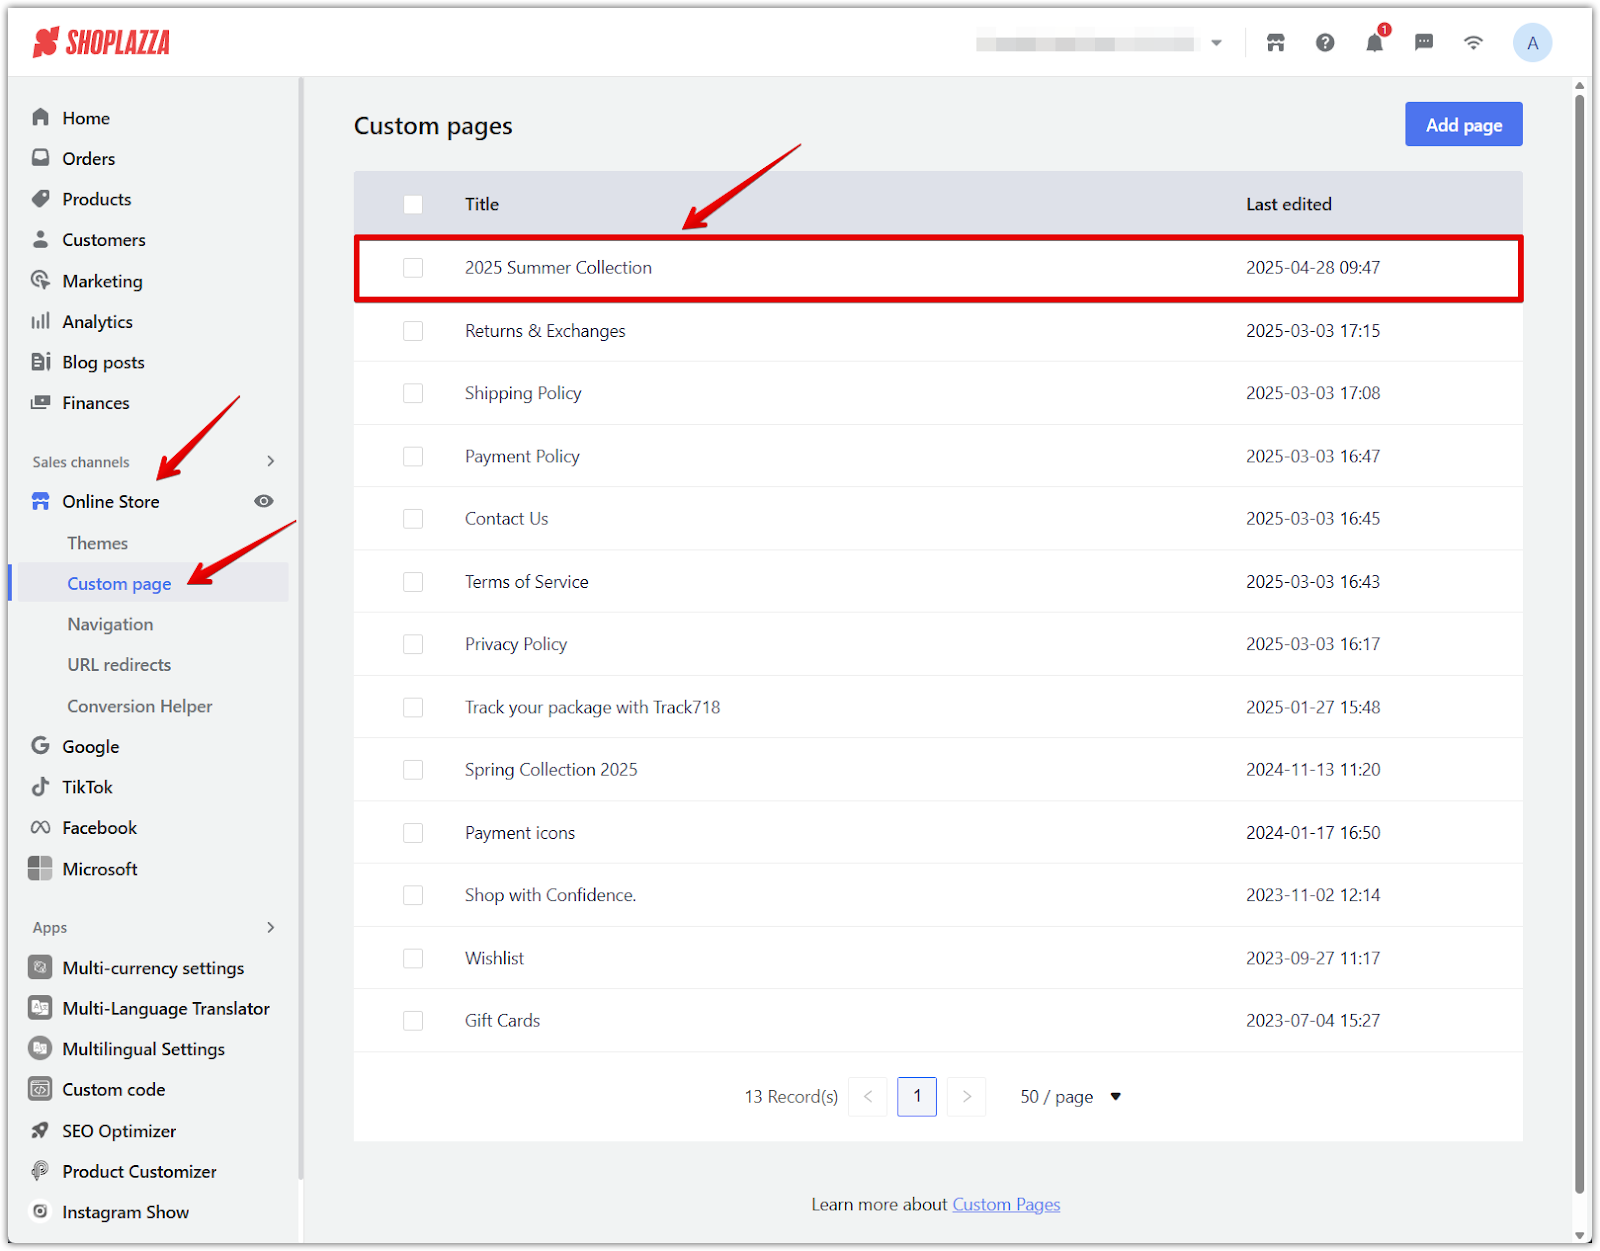
1. Locate the page: Go to Online Store > Custom page and find the page you want to edit.
2. Make edits: Update the content, images, links, or SEO information as needed.
3. Save changes: Always click Save to apply updates to the live custom page.

Adding custom pages to navigation menus
After creating a custom page, link it to your store’s navigation menus for easier customer access.
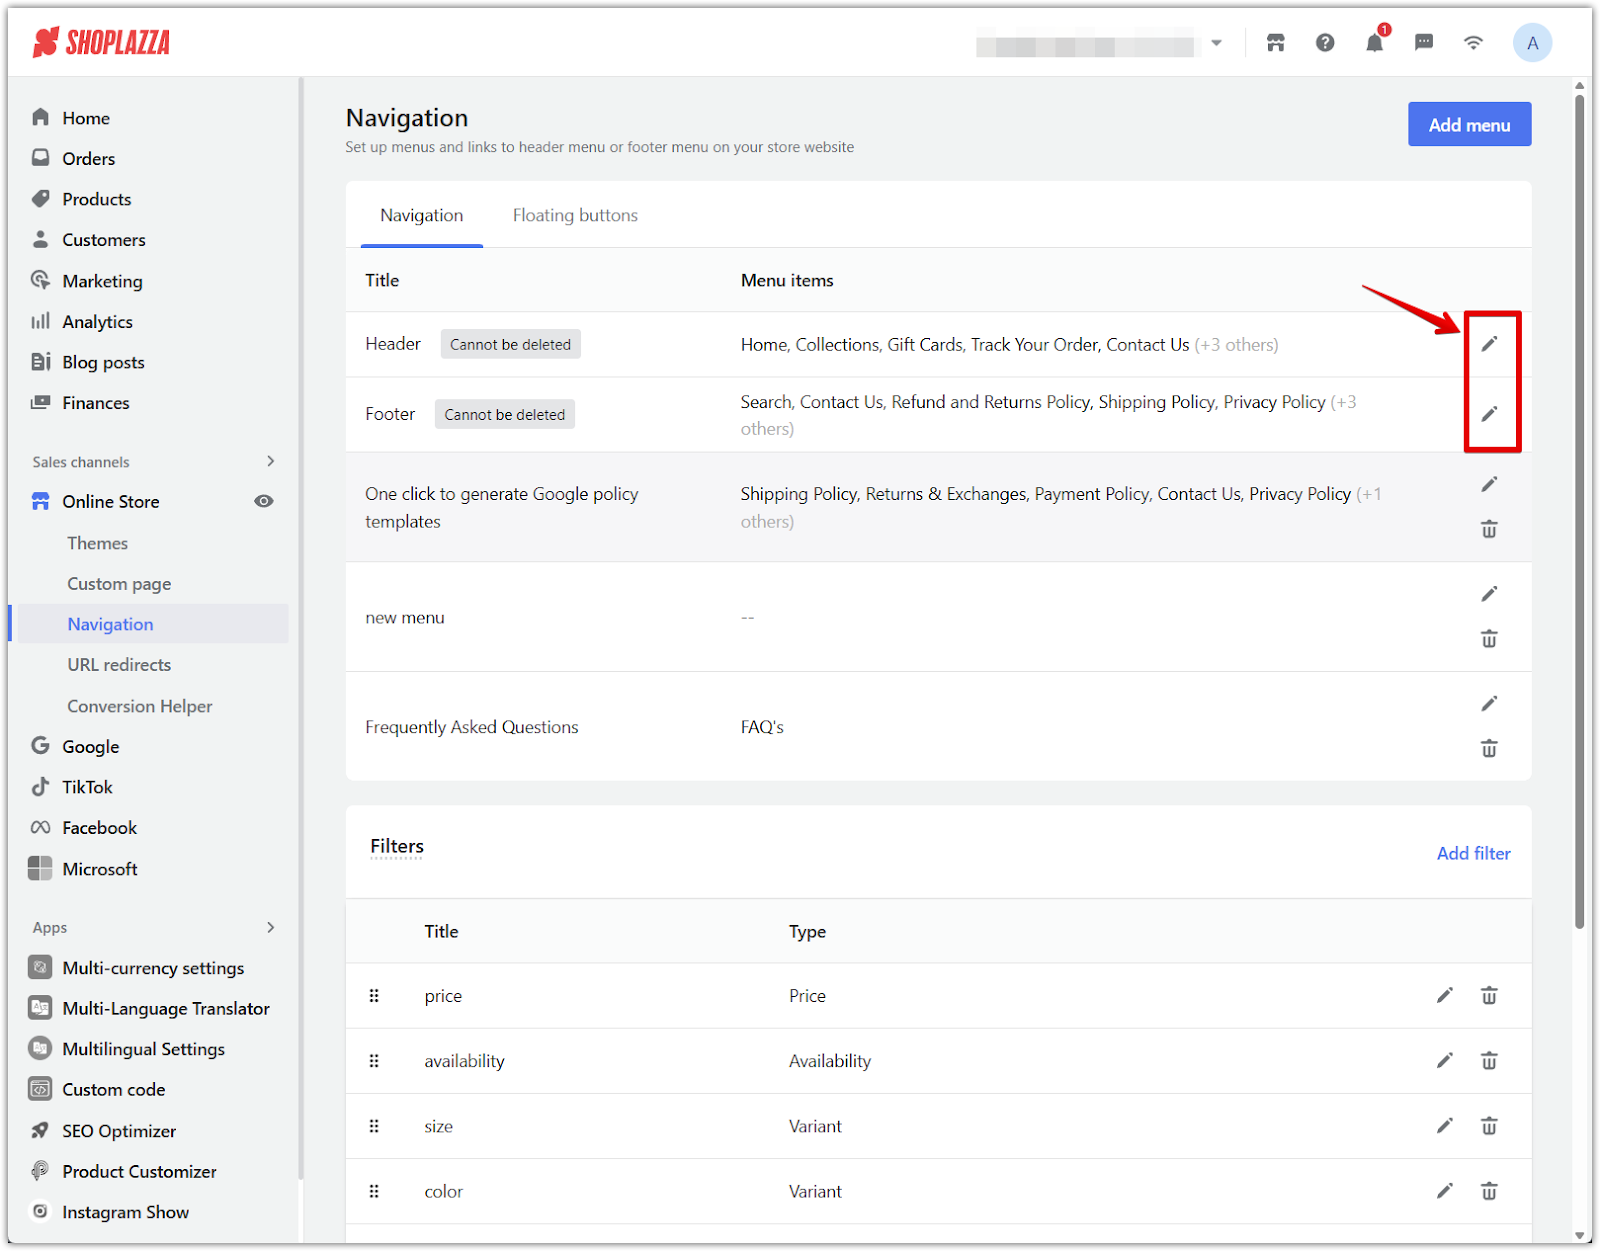
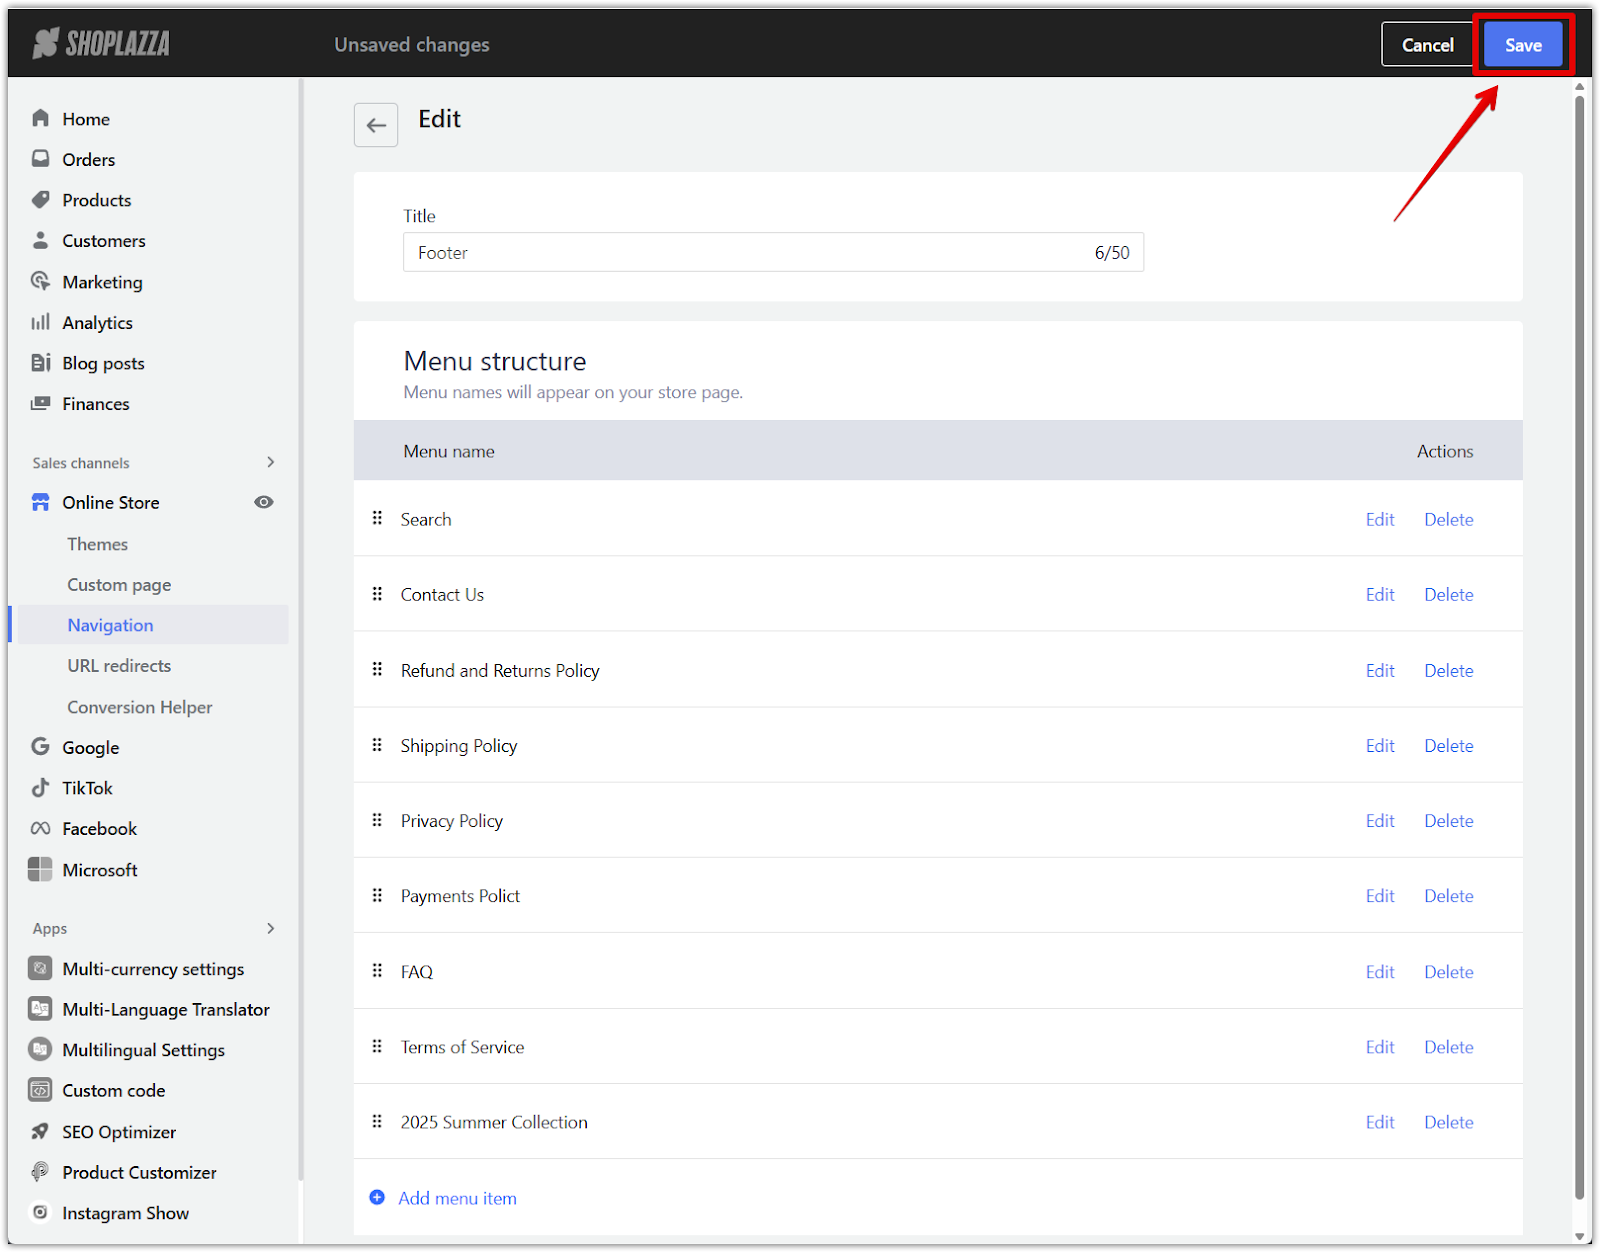
1. Access the navigation settings: Go to Online Store > Navigation from your Shoplazza Admin.
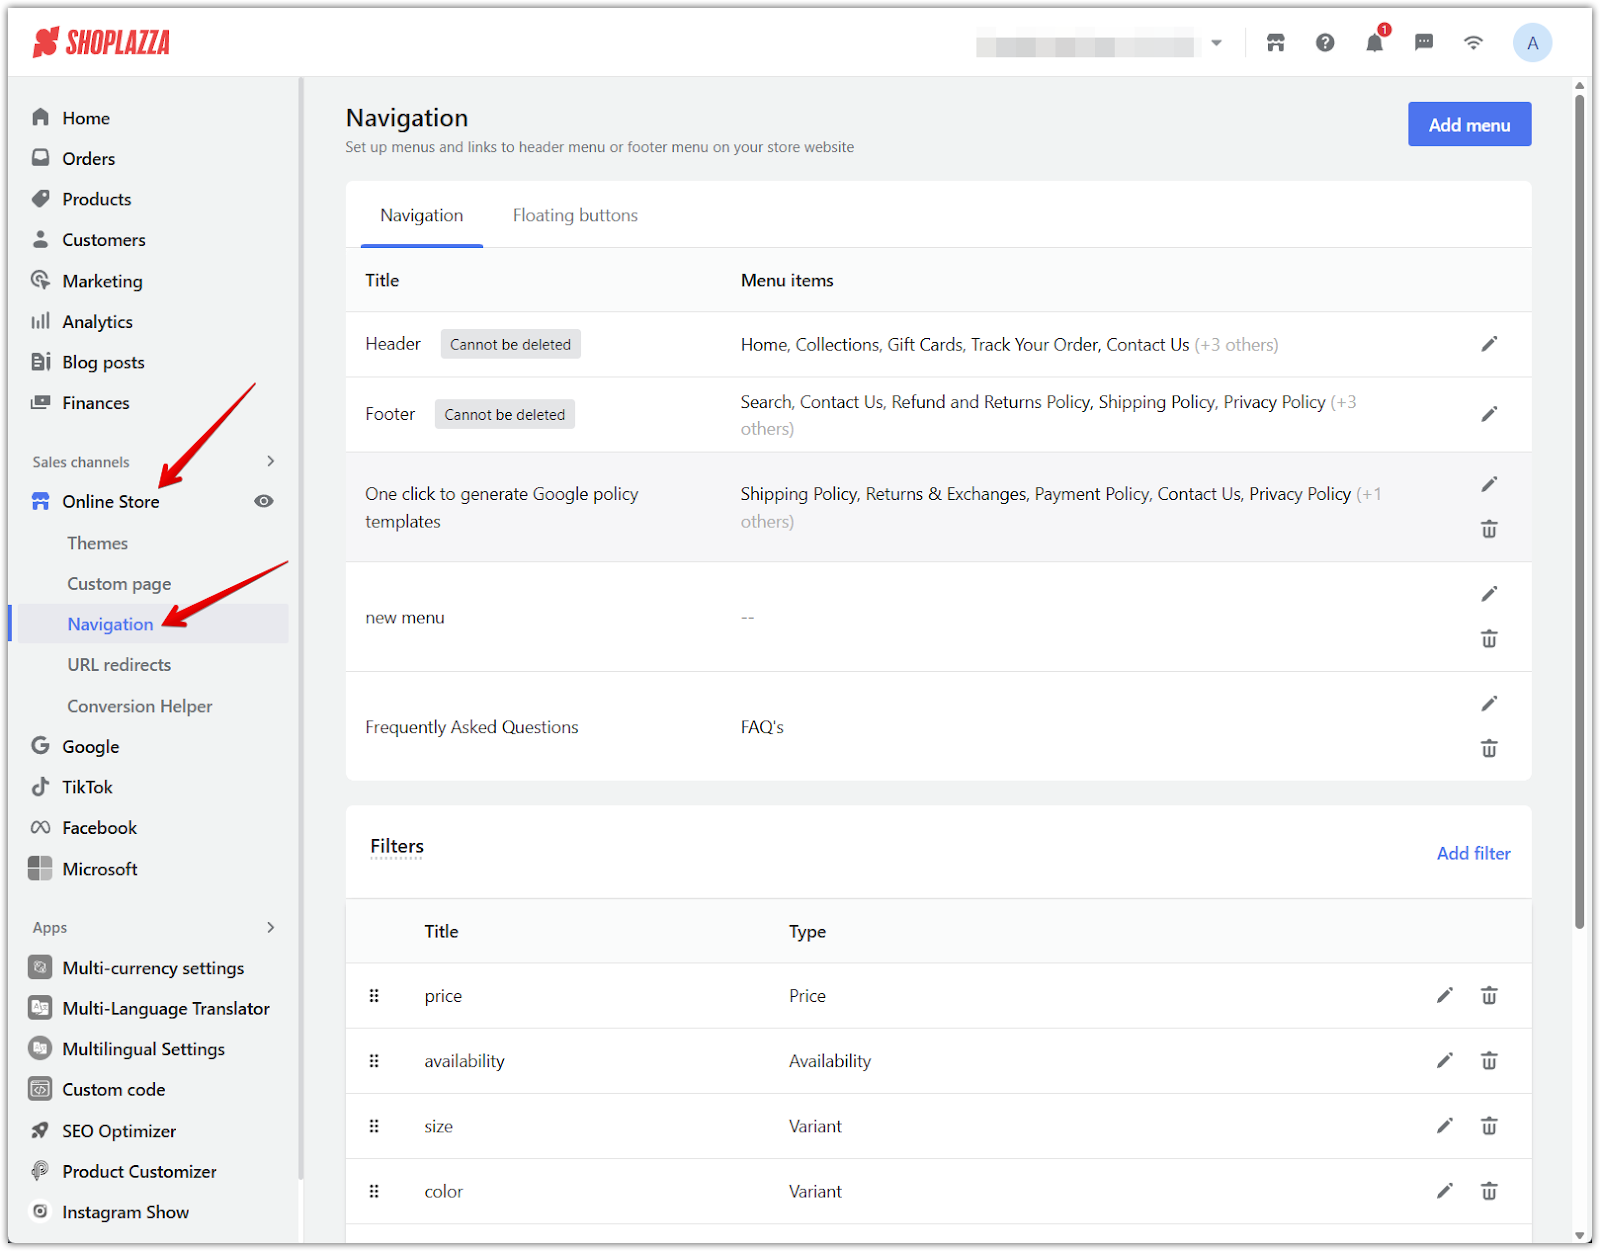
2. Edit the appropriate menu: Select the header, footer, or another menu you want to update.
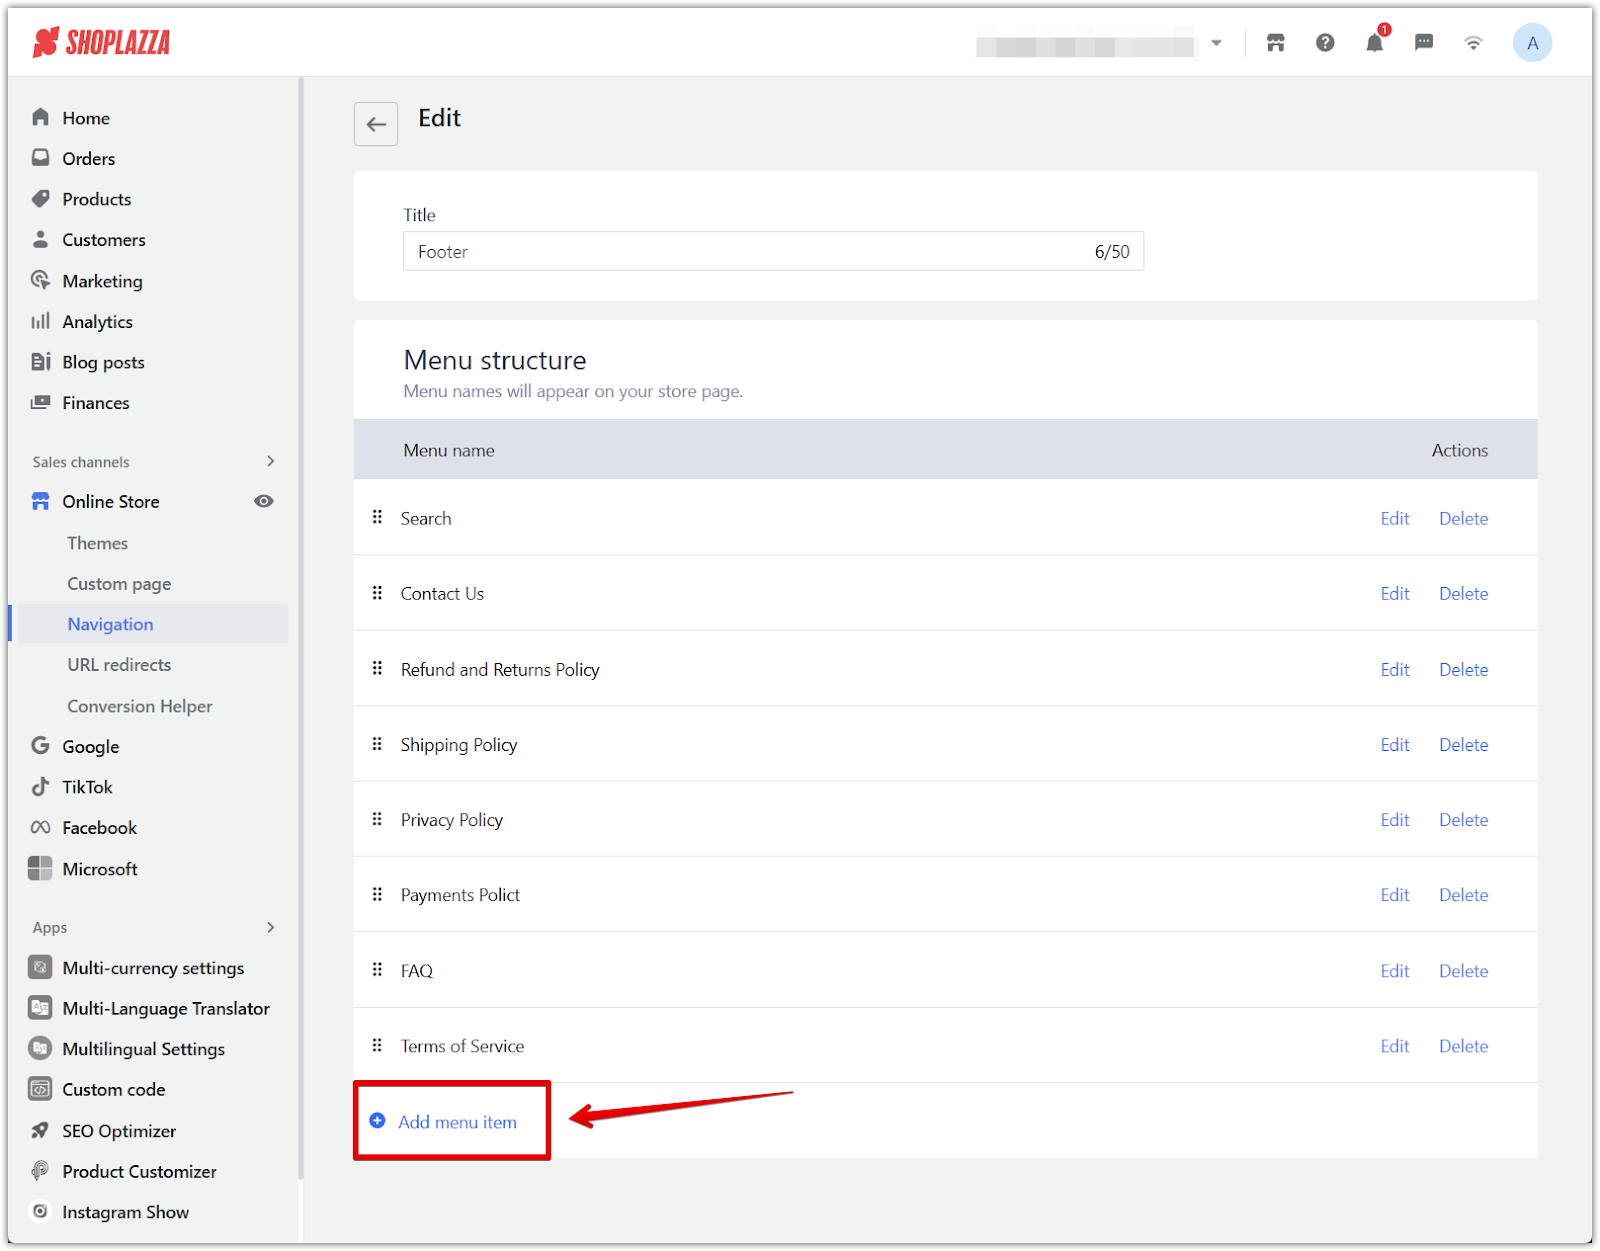
3. Add a menu item: Fill in the necessary link information to connect your custom page.
- Click Add menu item.
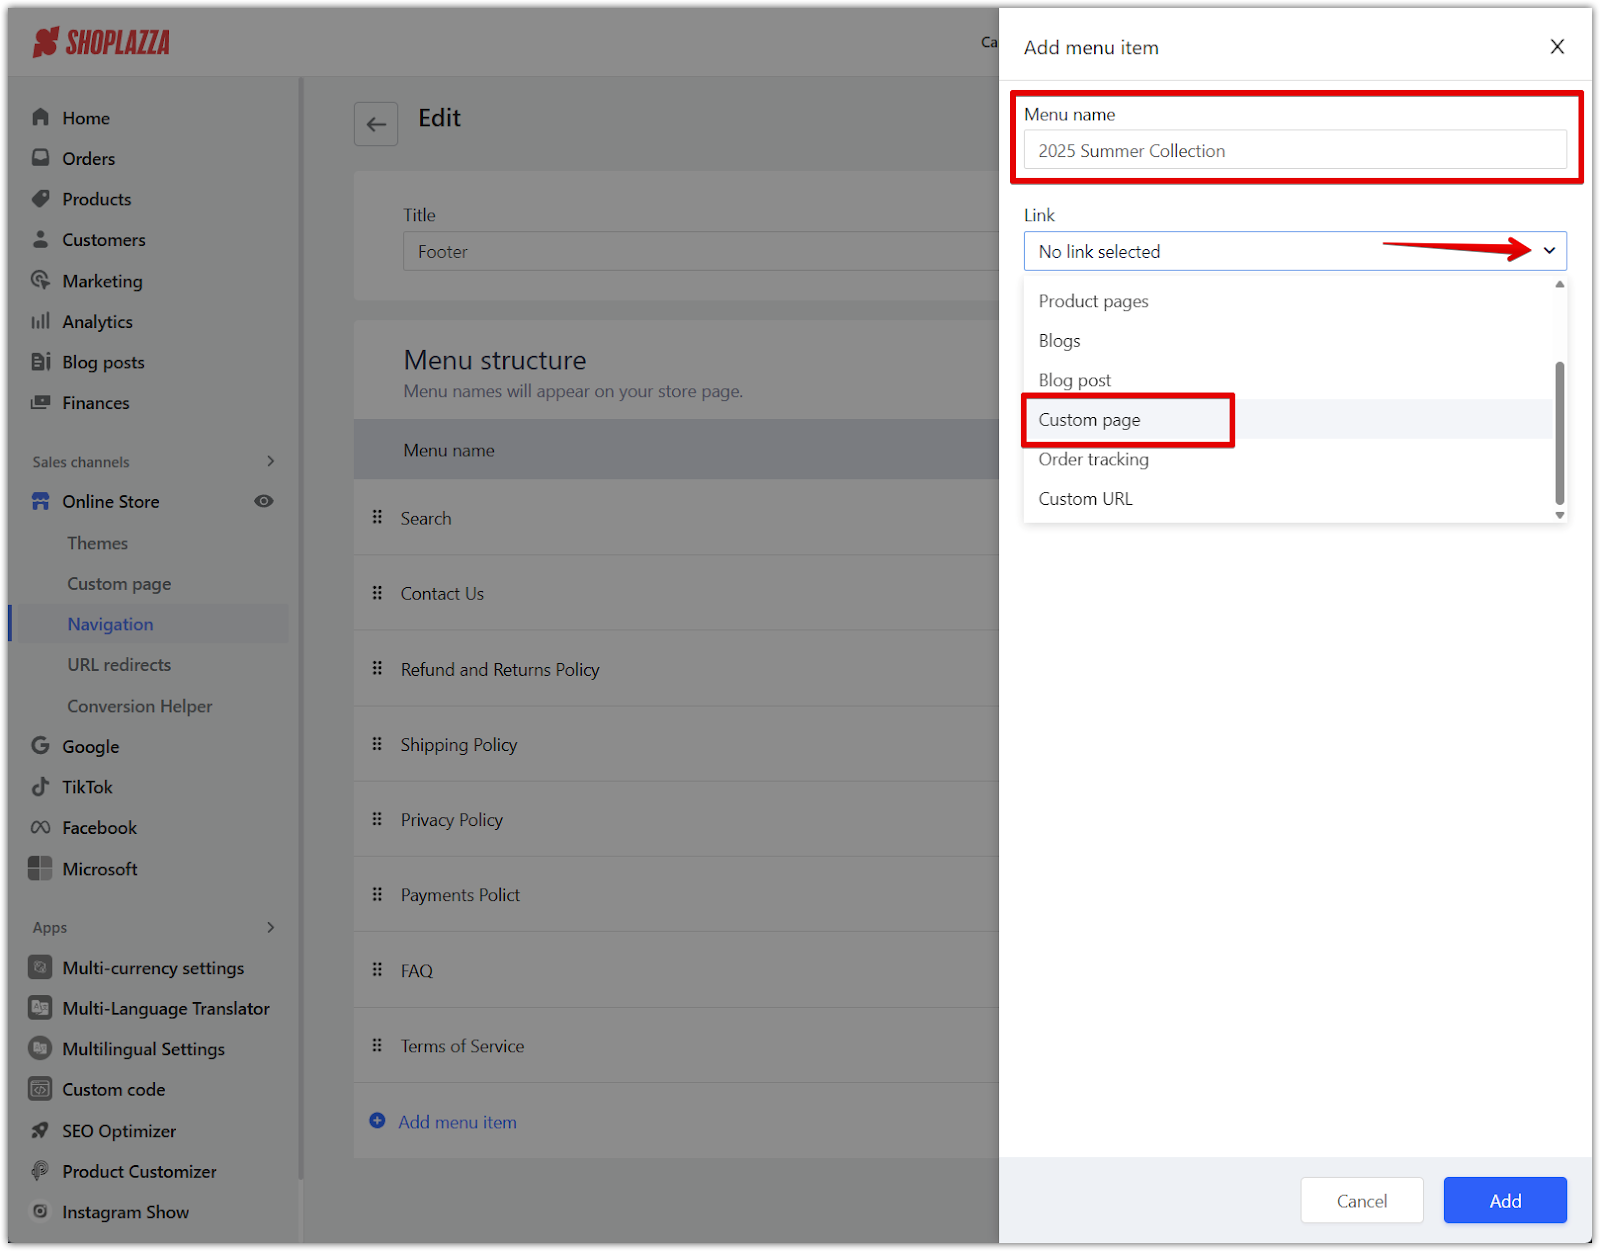
- Enter a name for the link and choose Custom page, then select the Page you created and click Confirm to update your store’s menus with the new link.
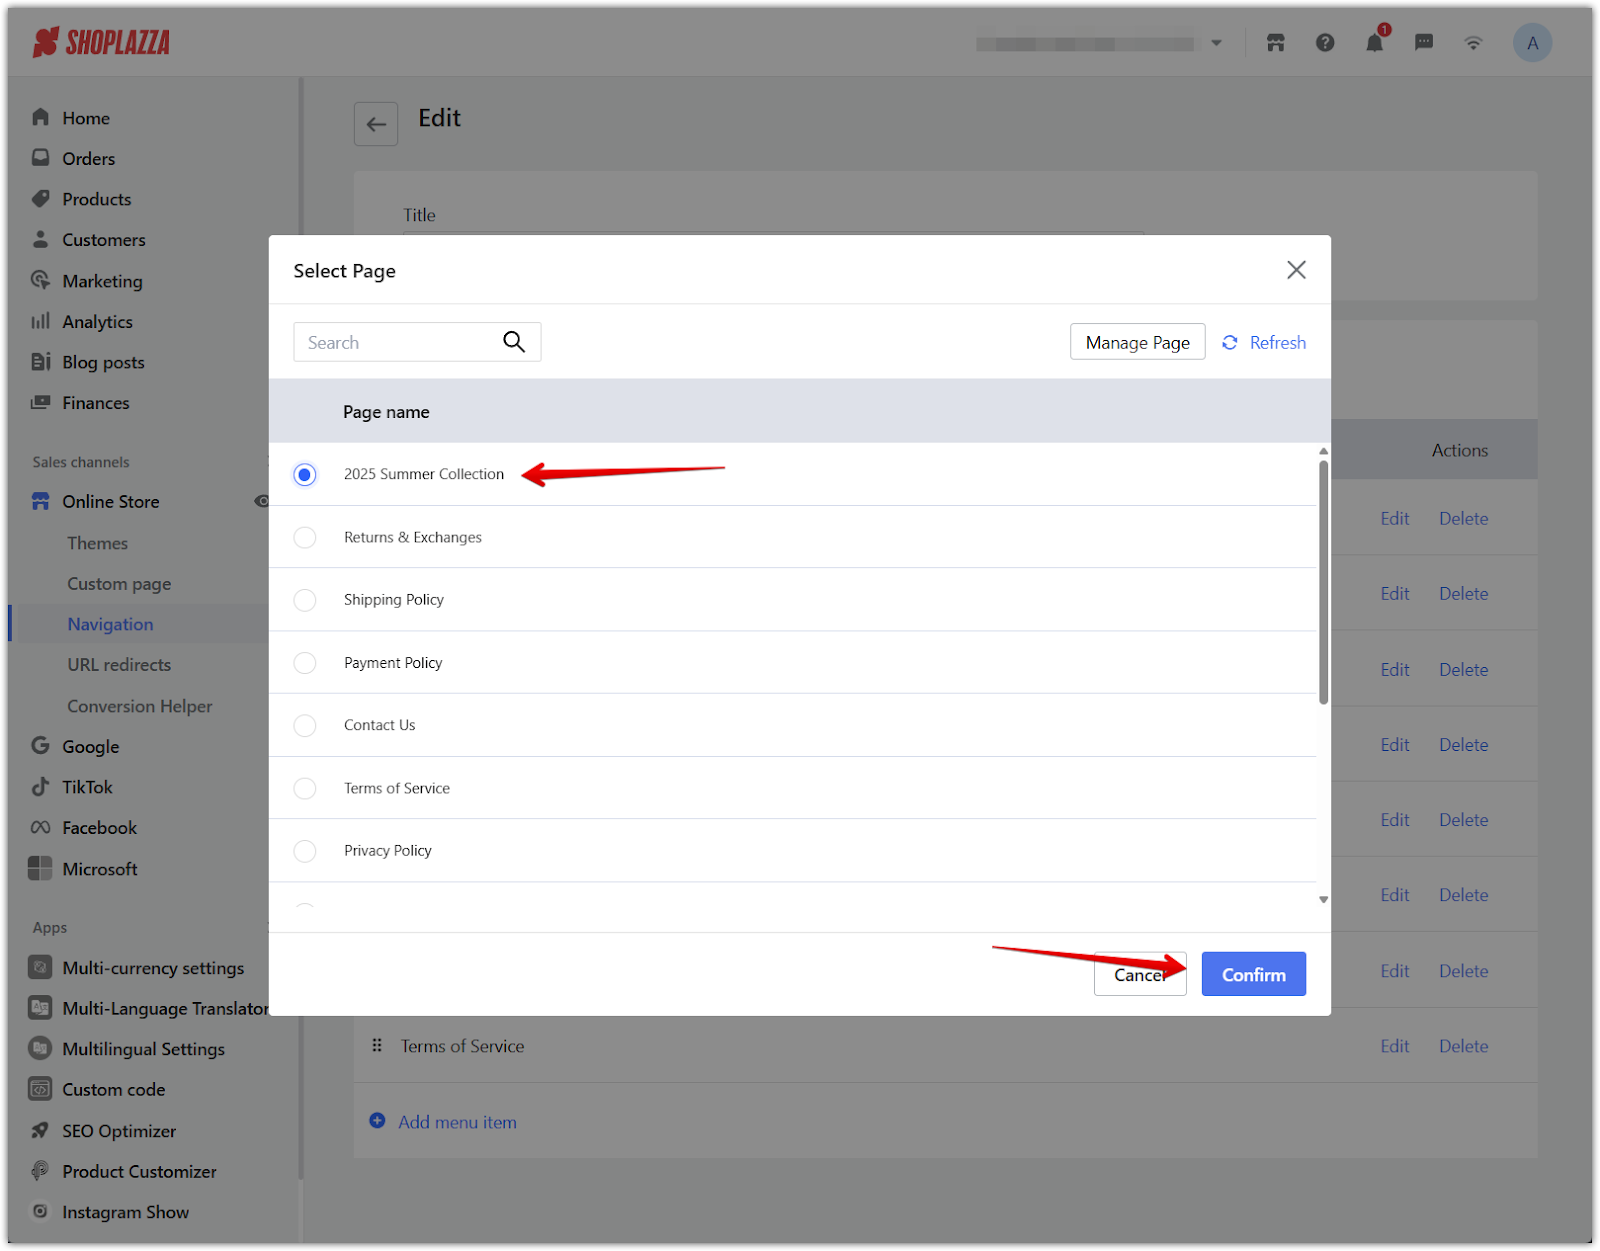
- Click Add to finalize the new menu item.

4. Save the navigation menu: Click Save to update your store’s menus with the new link. This ensures that the new menu item becomes part of the navigation menu you selected earlier.
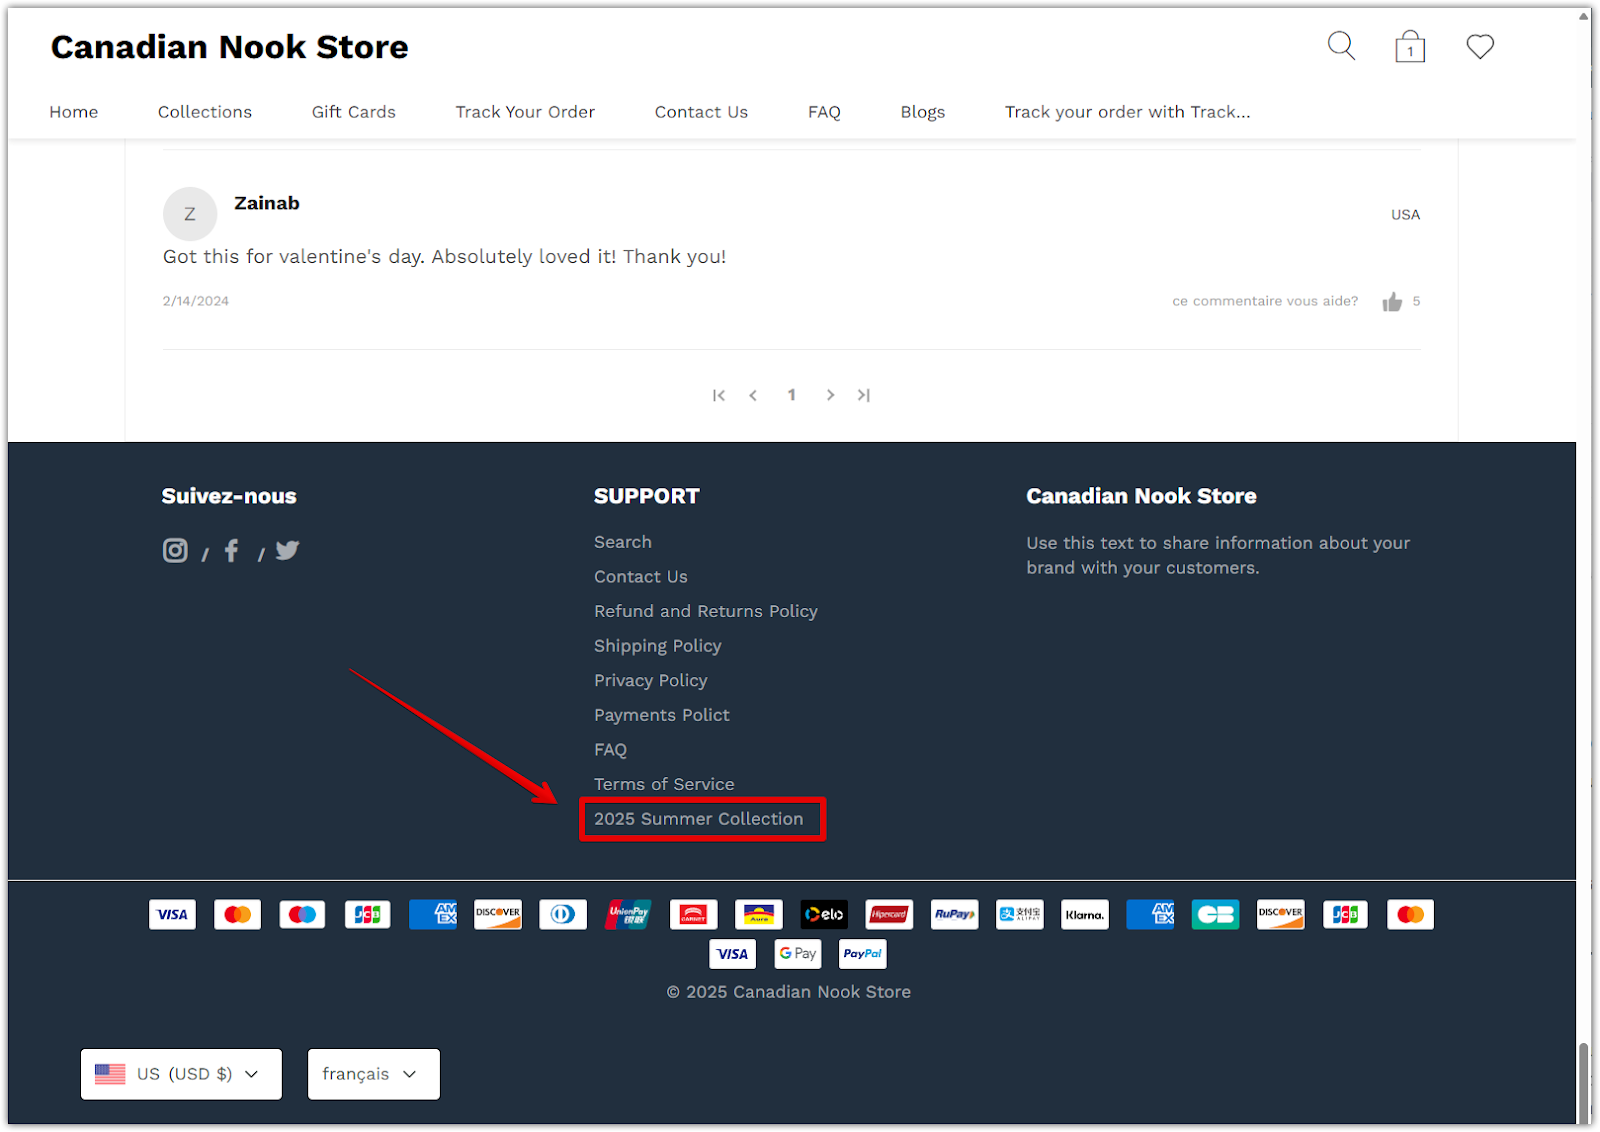
See how a custom page appears in navigation
Once the custom page is added to your store’s navigation, it will appear as a menu item where customers can easily access it. For example, the "2025 Summer Collection" page now appears in the footer menu of the store, allowing visitors to quickly find and view the new collection. This example shows how a custom page added to the footer menu becomes part of the overall navigation experience for your customers.
Optimizing custom pages for customer experience and SEO
- Write with clarity: Ensure every custom page communicates important information in an easy-to-read way.
- Use visuals wisely: Add images or icons that enhance the content without cluttering the page.
- Prioritize SEO: Use keywords naturally in titles, headings, and descriptions to strengthen search engine rankings.
- Test navigation flow: Ensure all custom pages are easily reachable from the main menus and key store areas.
Creating and maintaining professional custom pages strengthens your Shoplazza store’s credibility, improves customer experience, and supports your overall SEO and branding efforts. Focus on building clear, helpful pages that guide and inform your visitors at every stage of their shopping journey.


Comments
Please sign in to leave a comment.