
The Popups feature integrates directly with the Discounts Center, providing a unified interface to manage promotional messages. This upgrade consolidates tools like free shipping alerts, exit-intent offers, and countdown popups into a single entry point for easier setup and control.
You now have two formats available:
- Promo Popup for Amount off or Discount on Nth item promotions.
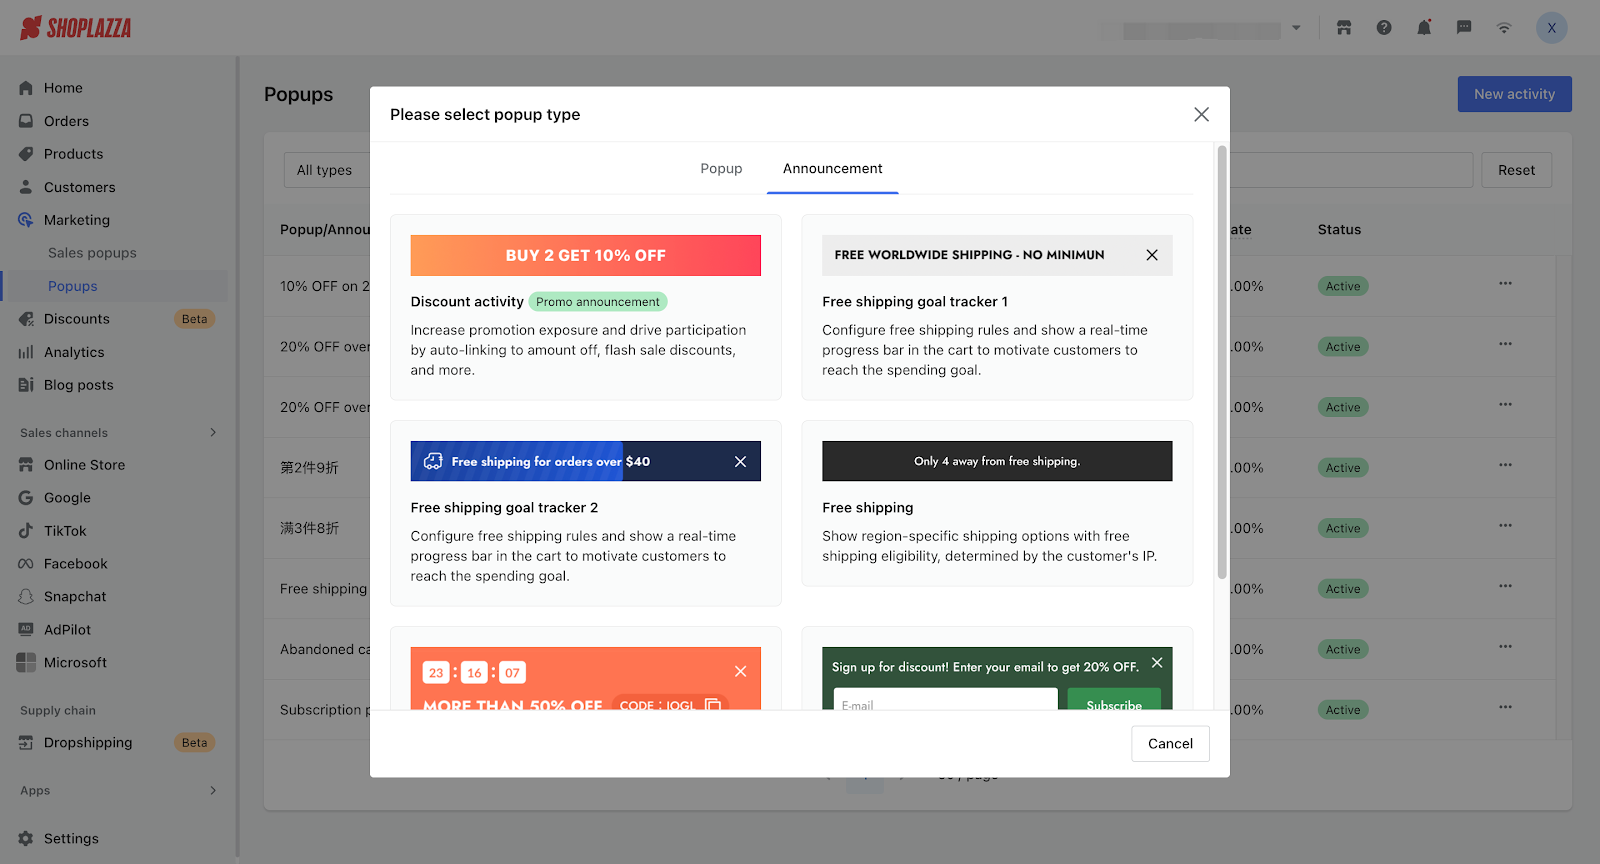
- Promo Announcement for Amount off, Discount on Nth item, and Flash sale campaigns.
This guide explains how to set up both types using the upgraded Popups interface.
Interface updates
The menu structure and entry flow have been redesigned to streamline promotion setup.
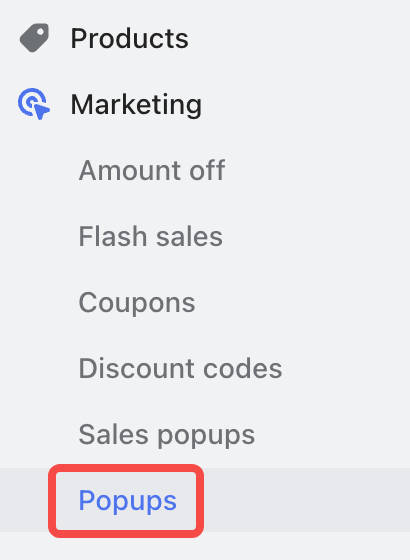
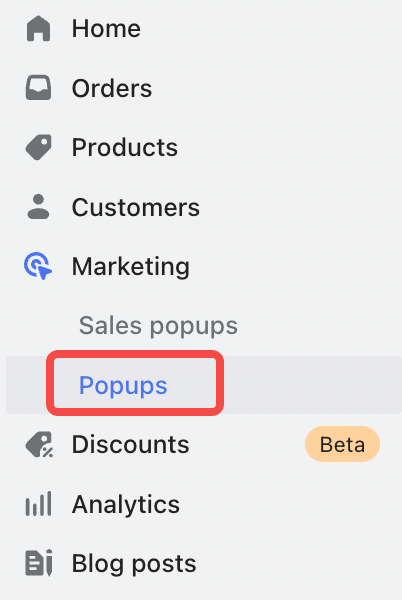
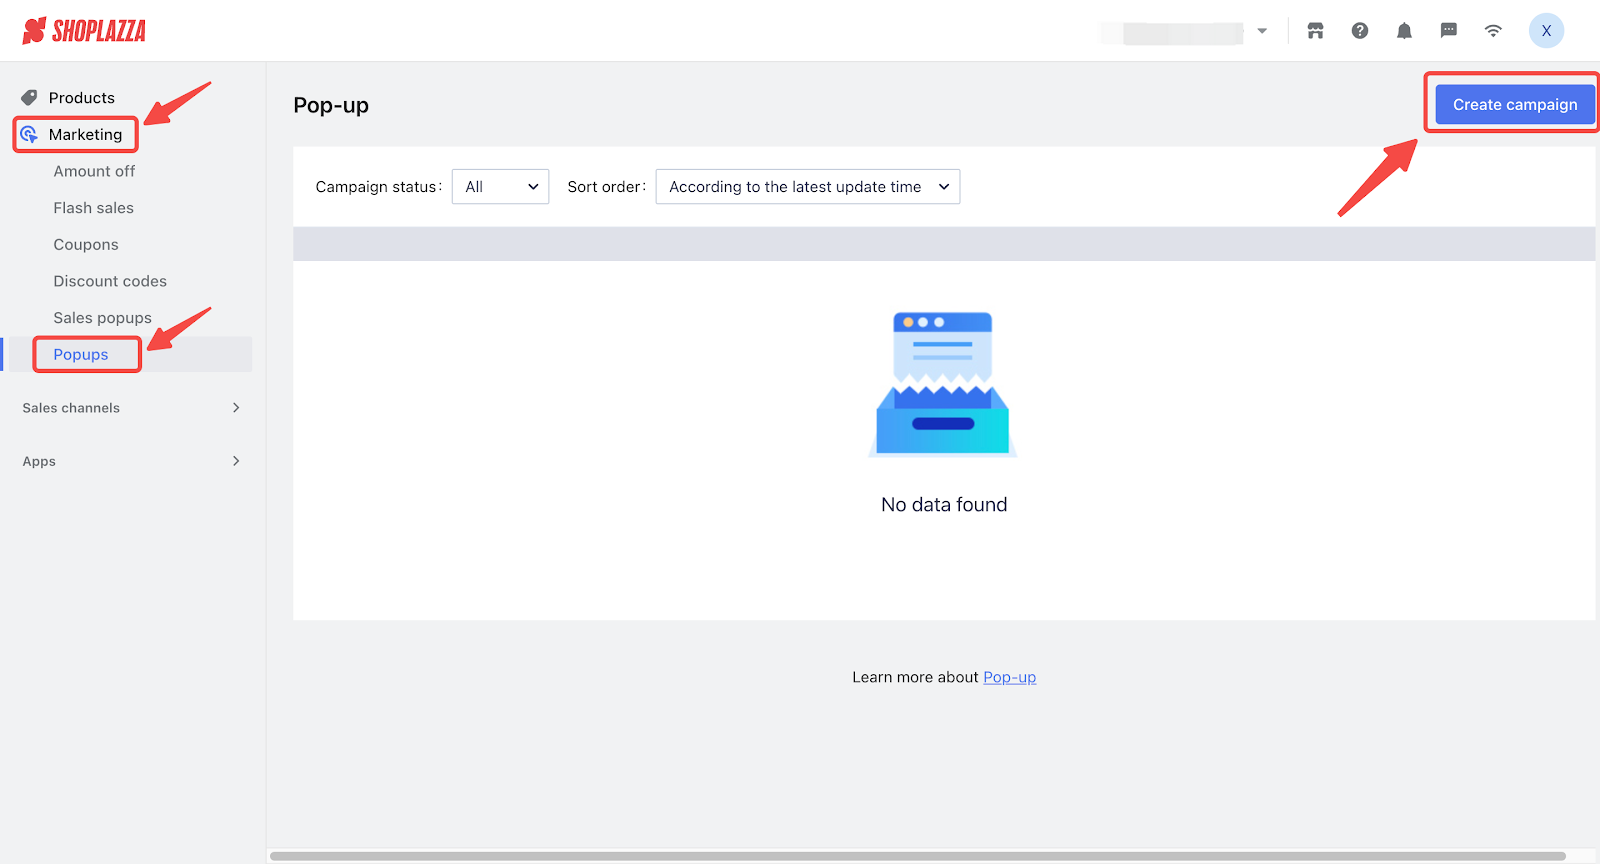
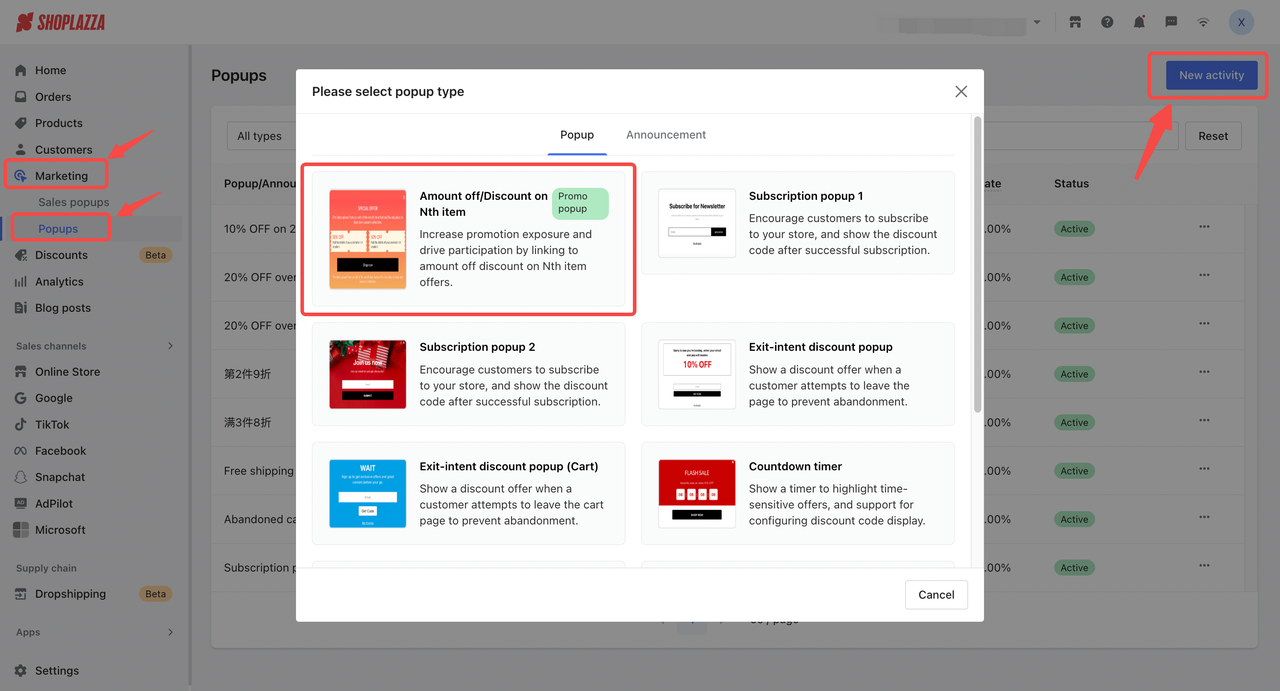
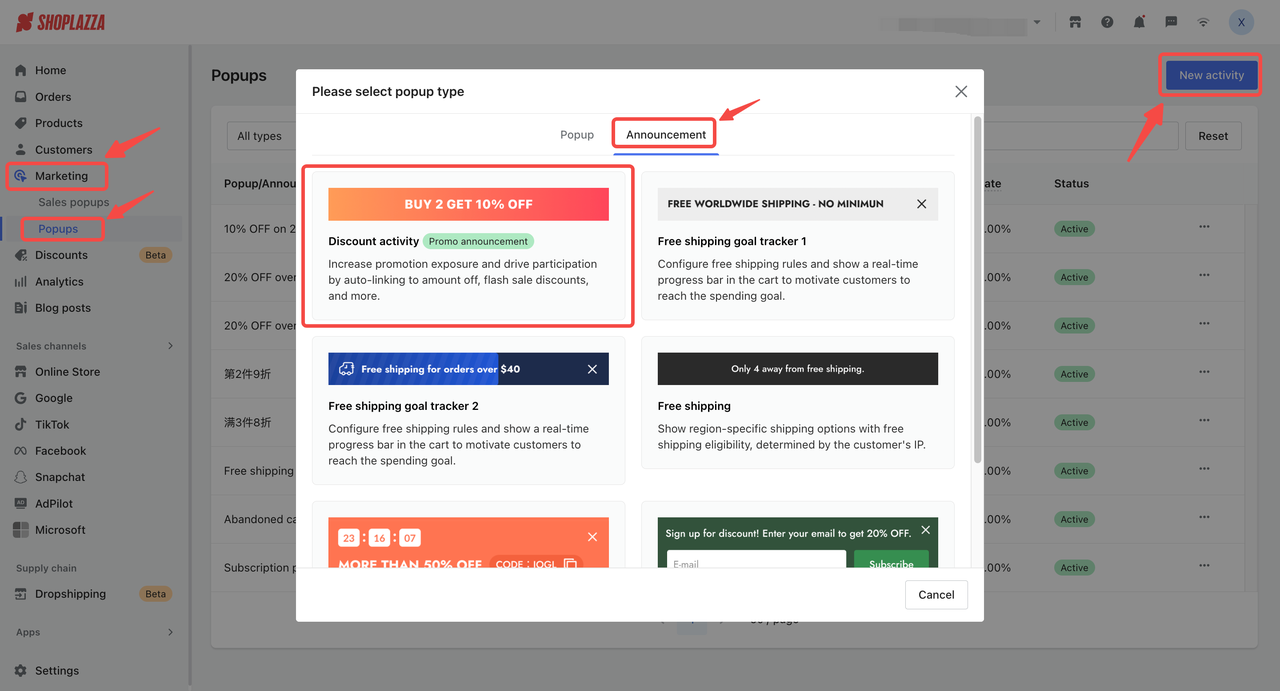
1. Open the Popups section: Go to Marketing > Popups in your Shoplazza admin. All popup and banner campaigns are now managed from this centralized location.
| Previous menu | Updated menu |
 |
 |
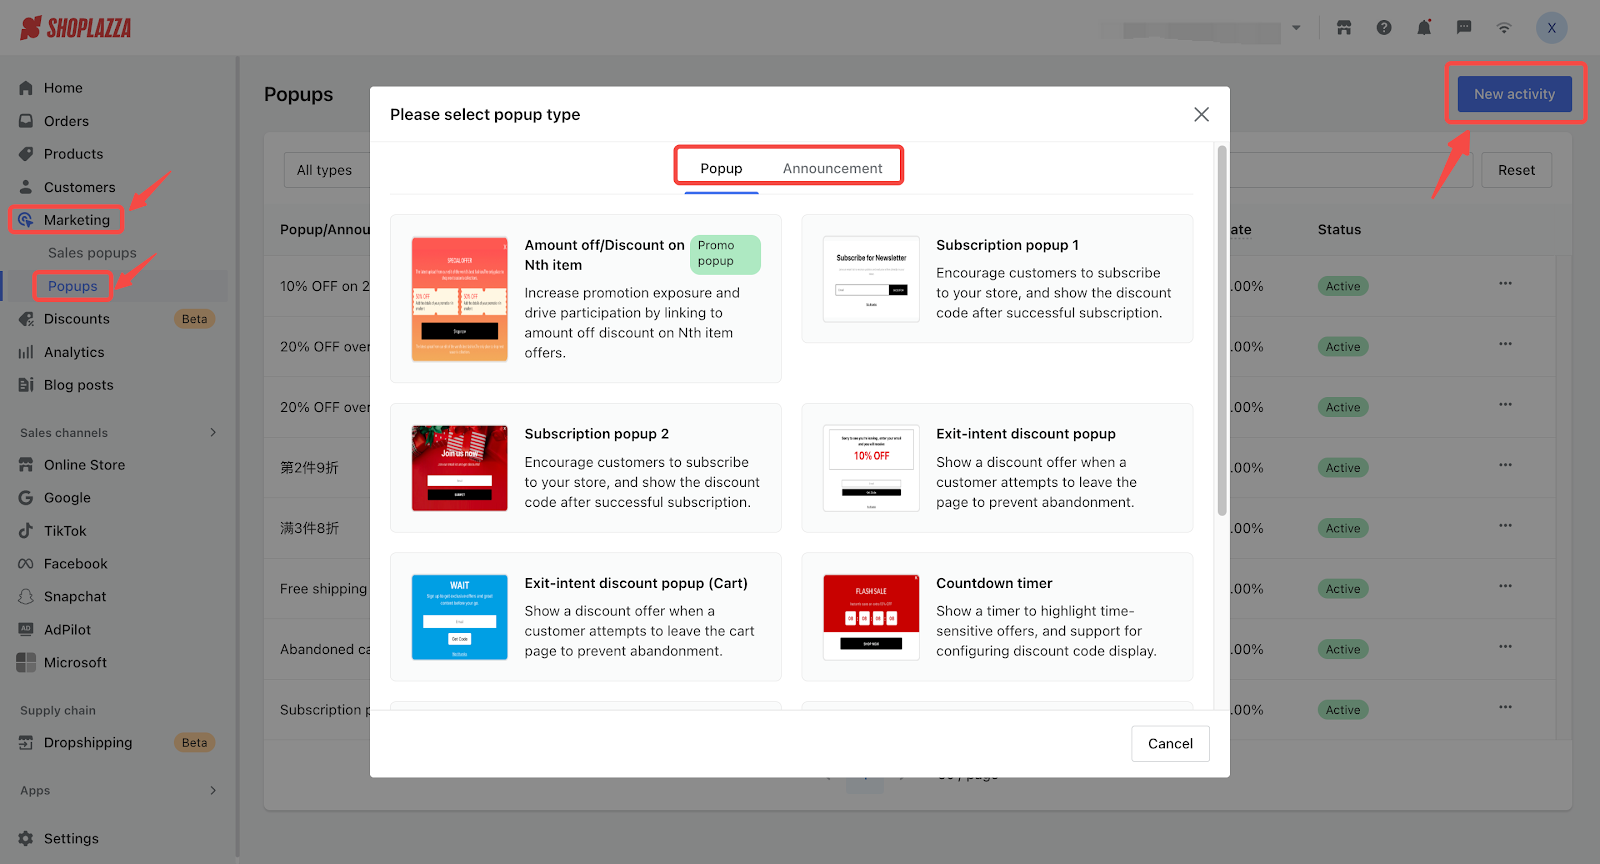
2. Create a new activity: Click New activity, then choose either Popup or Announcement. The system now uses a unified interface to handle both formats.
| Previous menu | Updated menu |
 |
 |
 |
 |
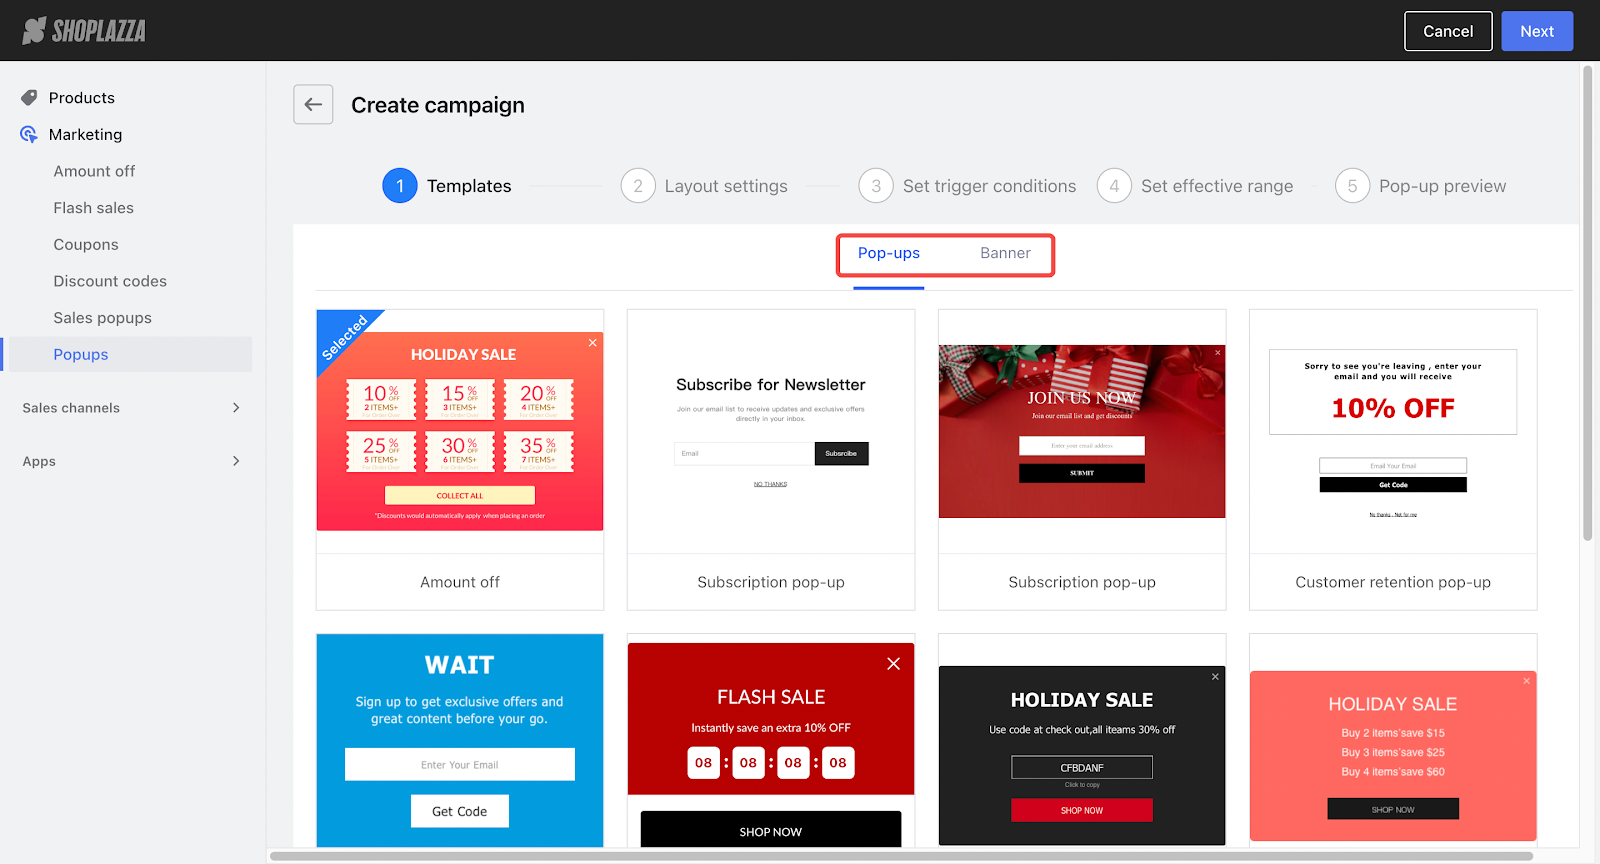
Promo popup setup - Discount on Nth item
Promo Popups display discount messages tied to specific promotions, such as Amount off or Discount on Nth item. Discount on Nth item refers to applying a discount when a customer purchases a certain number of items. For example, “Buy 2, get 1 at 50% off” or “Get 30% off every 3rd item.” This structure helps increase cart size and overall conversion value.
1. Start creating a promo popup: Go to Shoplazza admin > Marketing > Popups. Click New activity, go to the Popup tab, and select Amount off/Discount on Nth item to begin creating a promotional popup campaign.
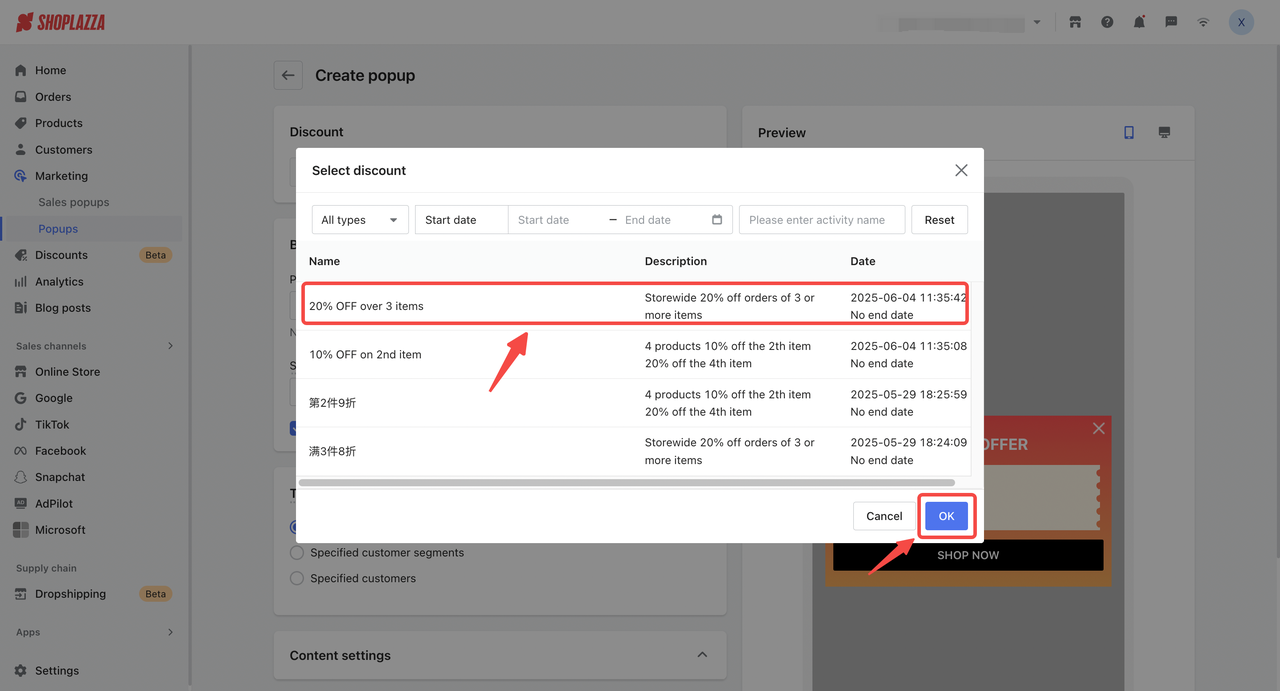
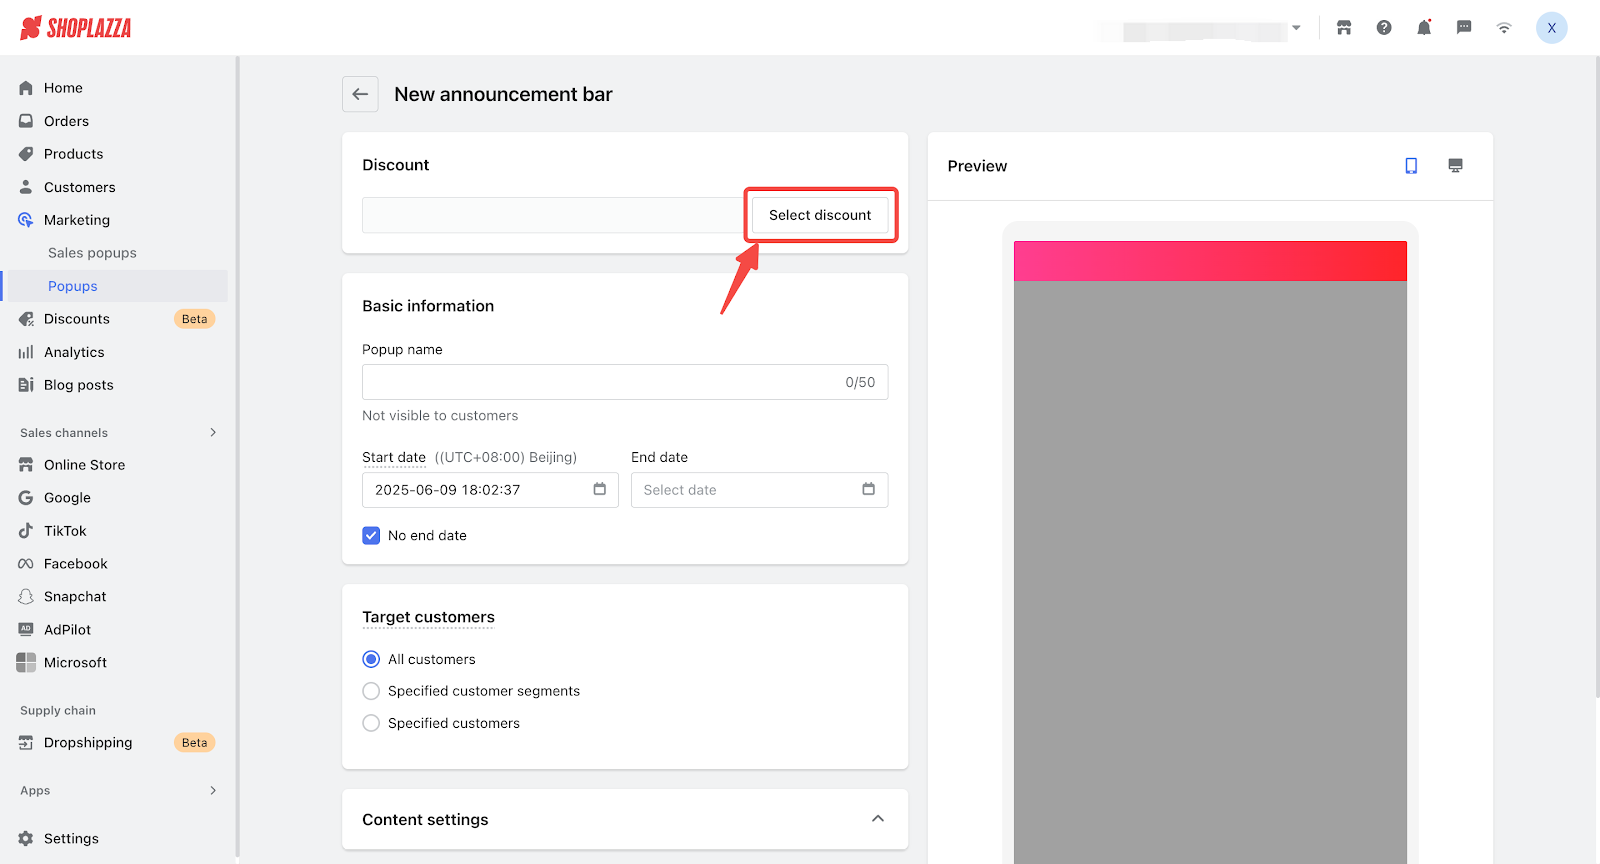
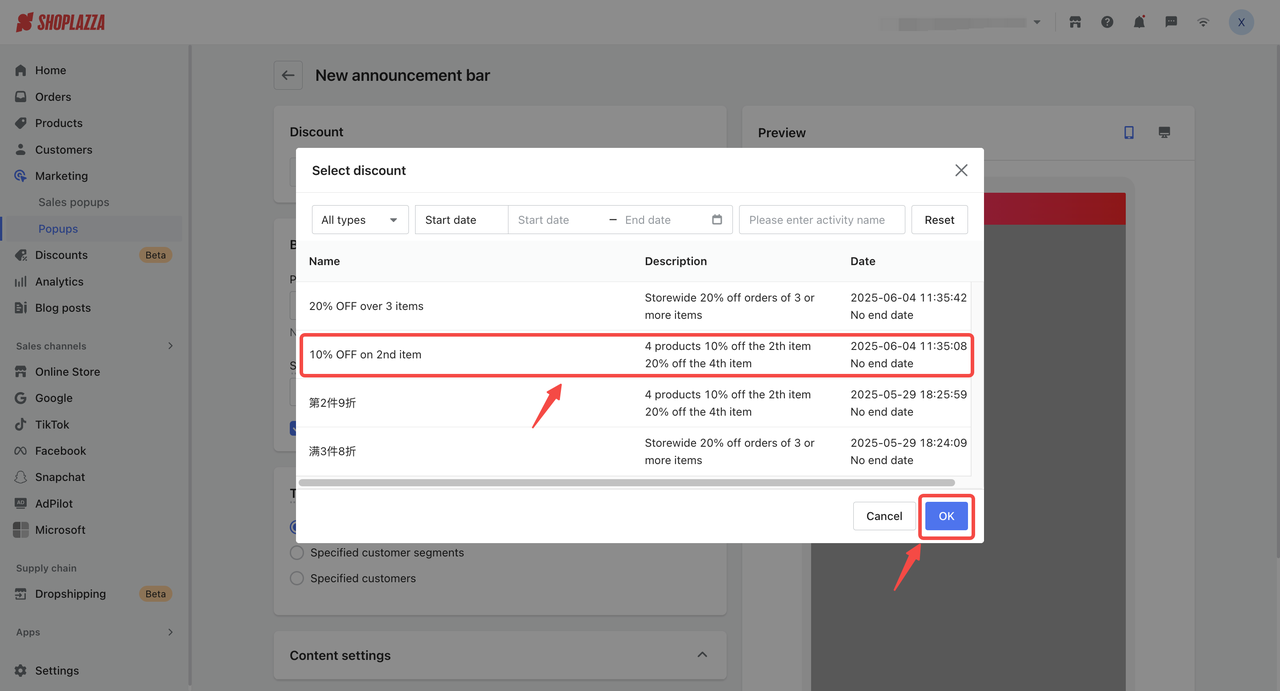
2. Select the promotion: Click Select discount, then choose the campaign to link with your popup. Only compatible discount types will appear in the list.
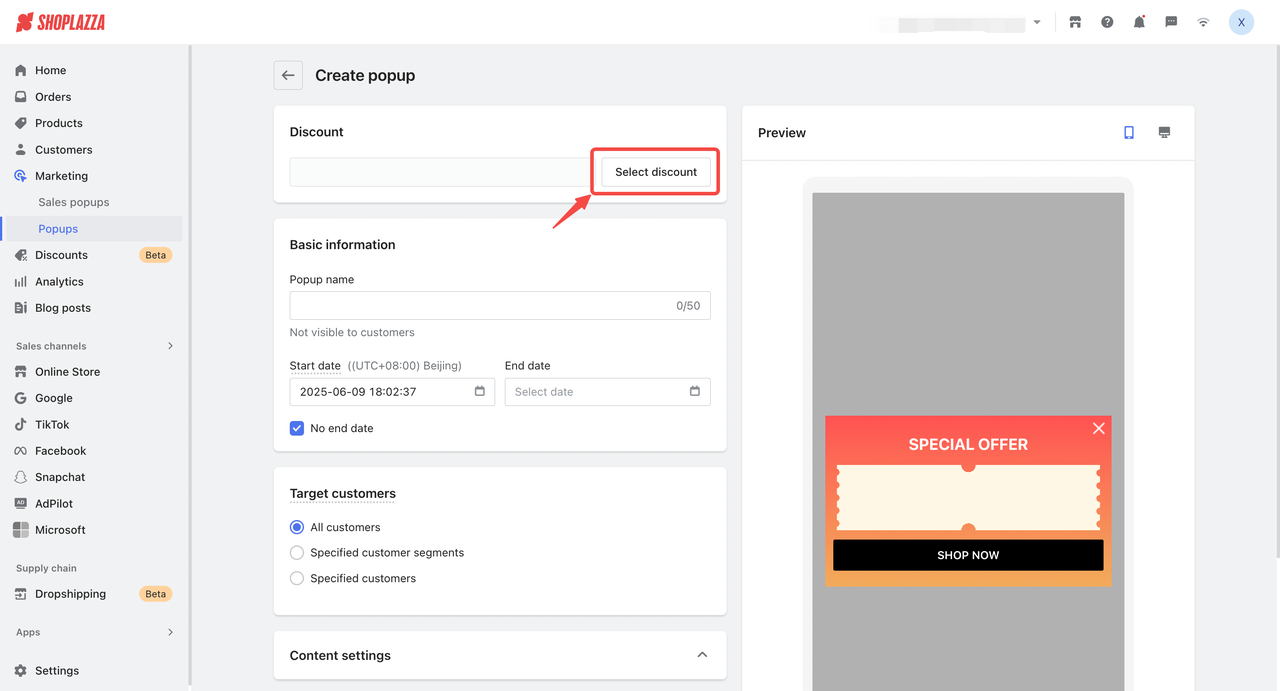
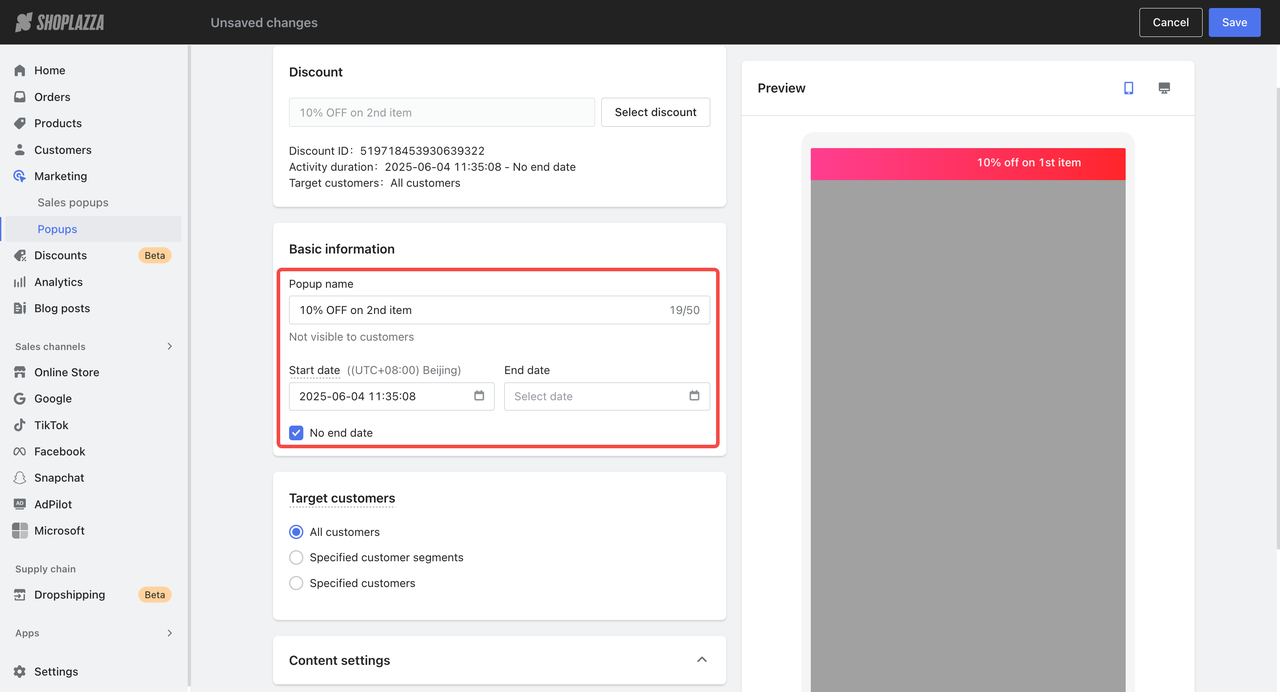
3. Configure campaign details: Set a popup name for internal use and define the start and end date. The start time follows your store’s time zone and cannot be set earlier than the current time.
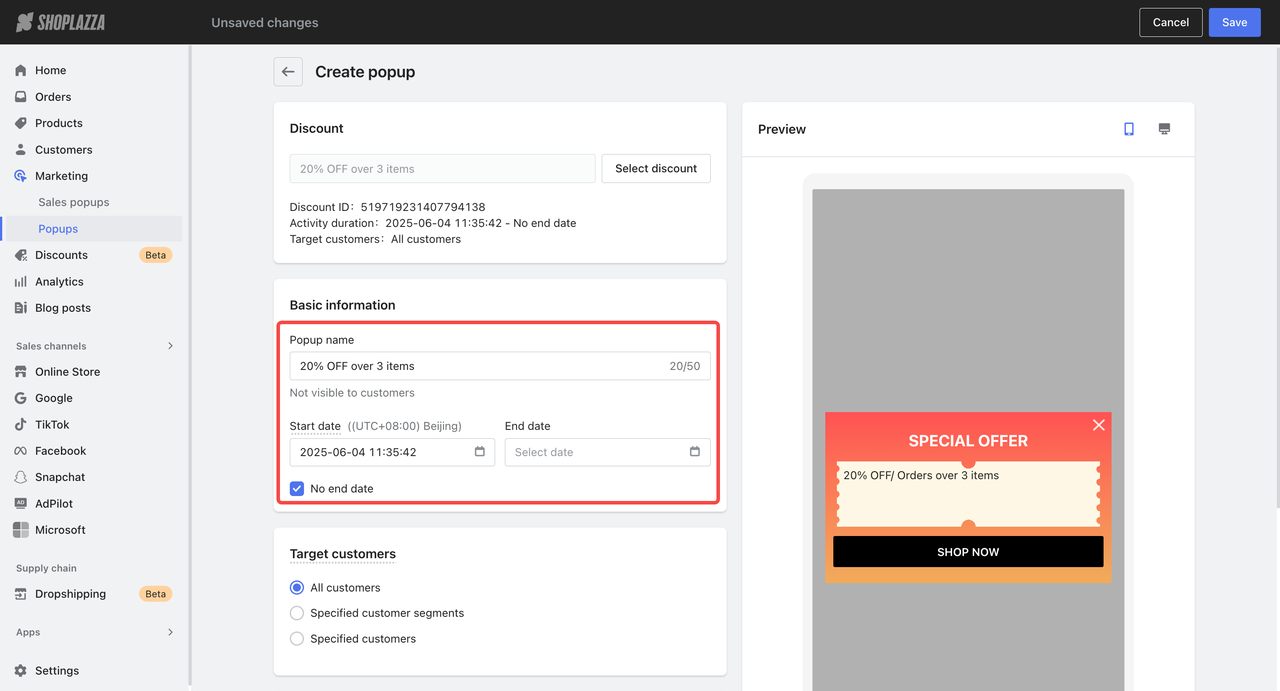
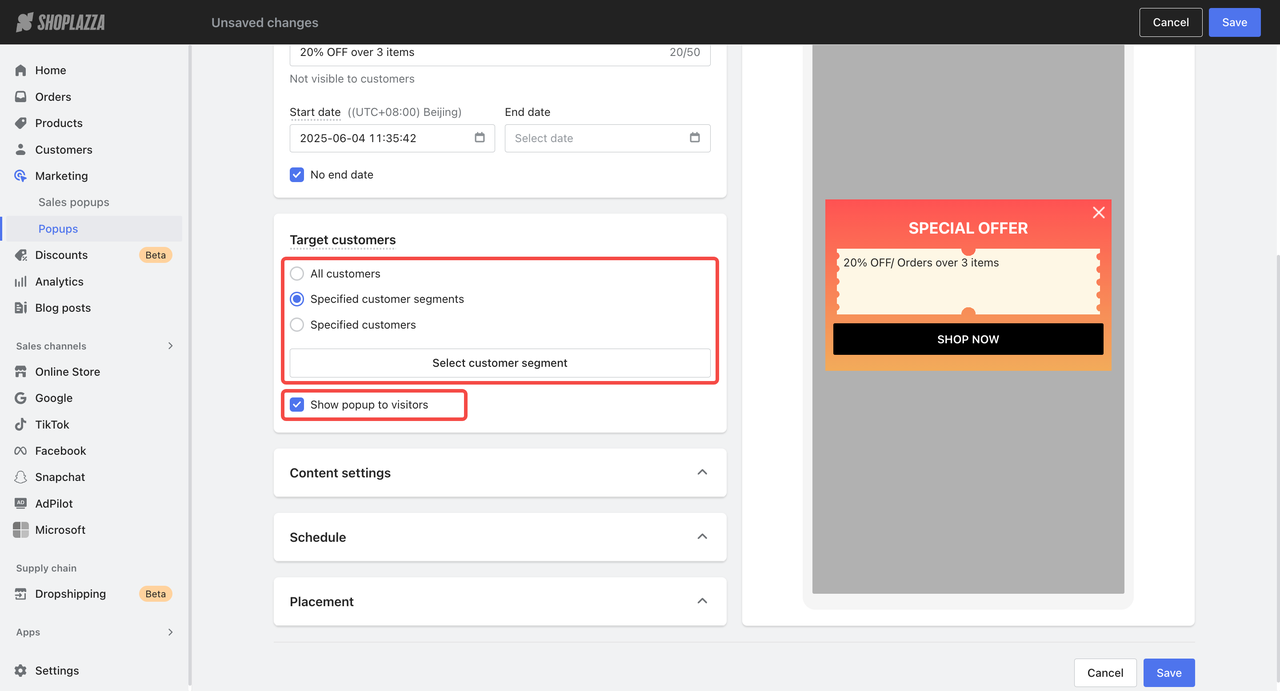
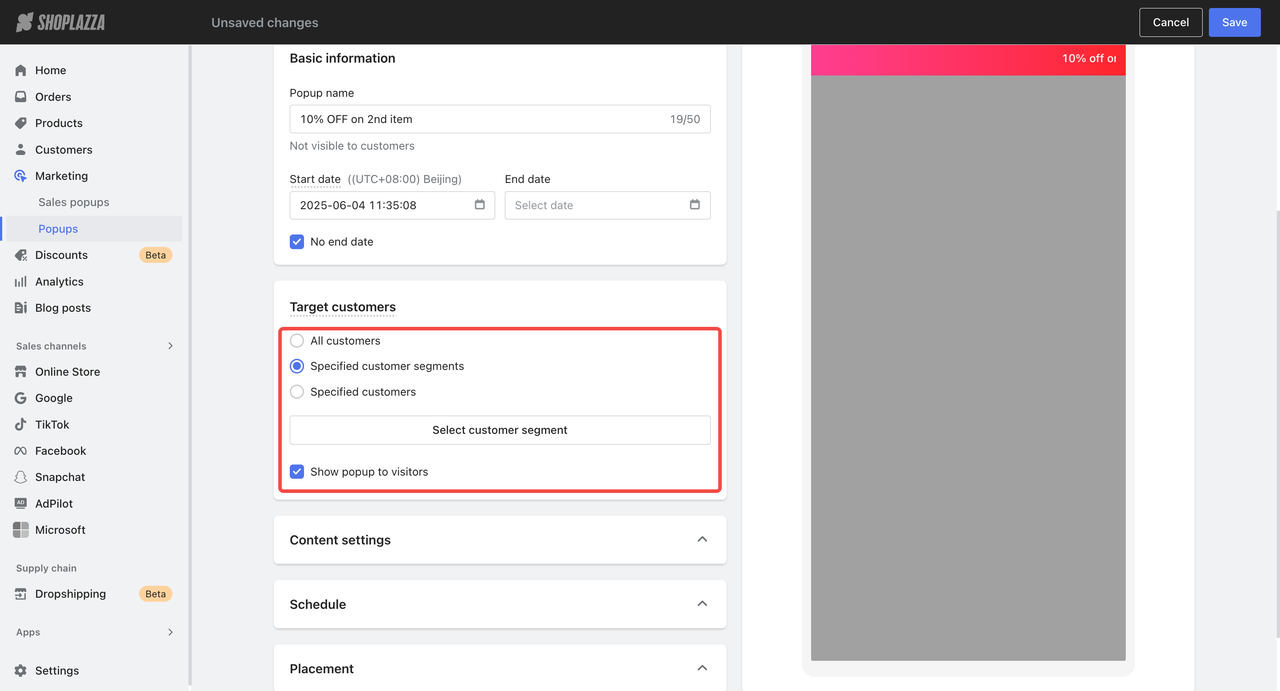
4. Choose the target audience: Choose whether to display the popup to all customers, specific segments, individual users, or unregistered visitors. The system filters customers automatically based on eligibility.
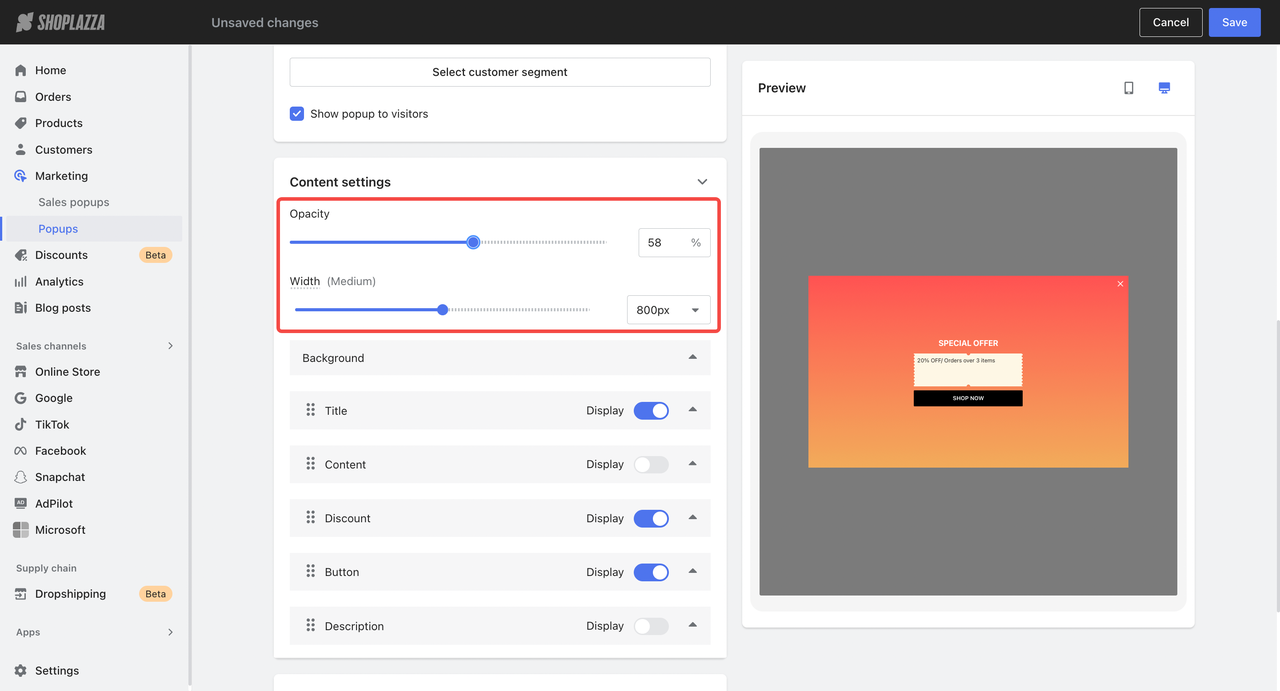
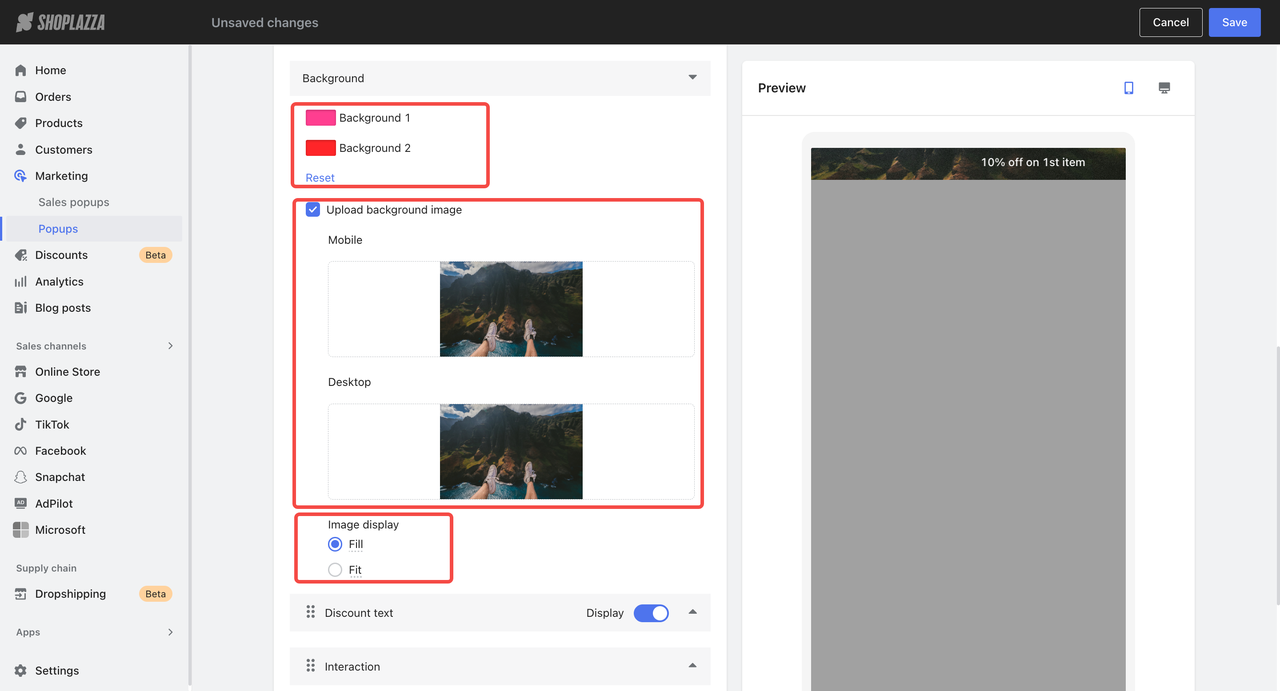
5. Customize layout and background: Adjust opacity and desktop width, set a background color, or upload images separately for desktop and mobile using Fill or Fit display options.
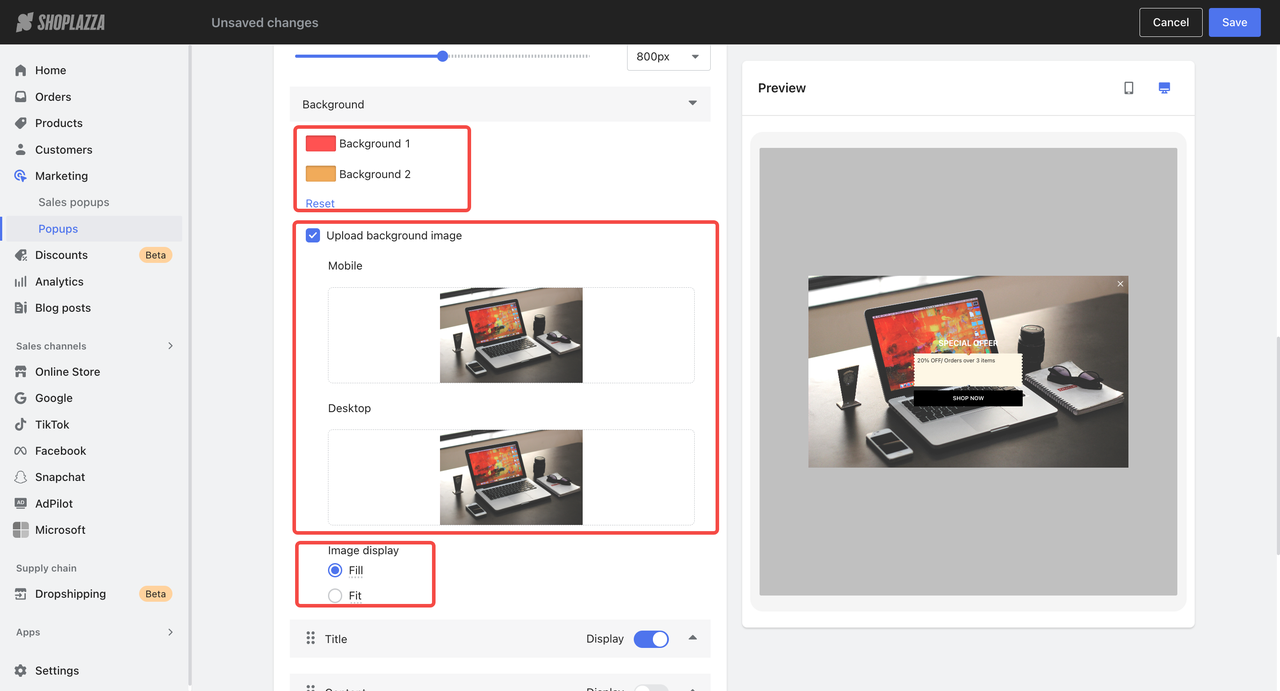
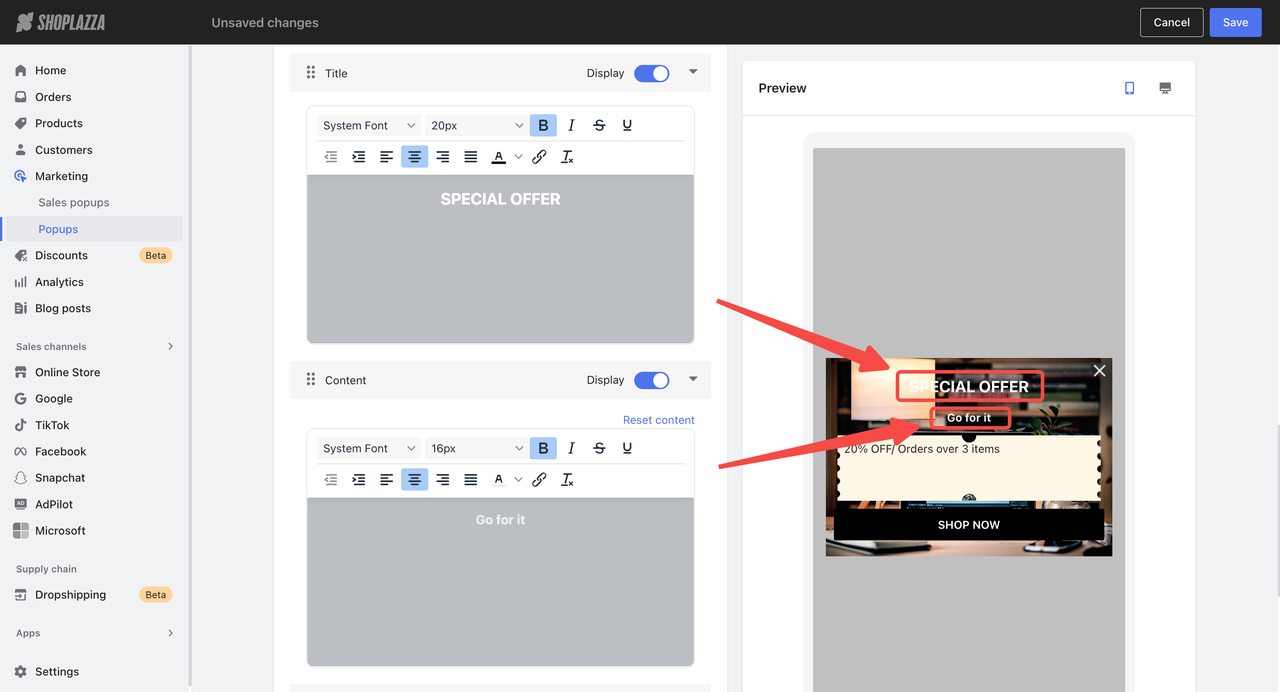
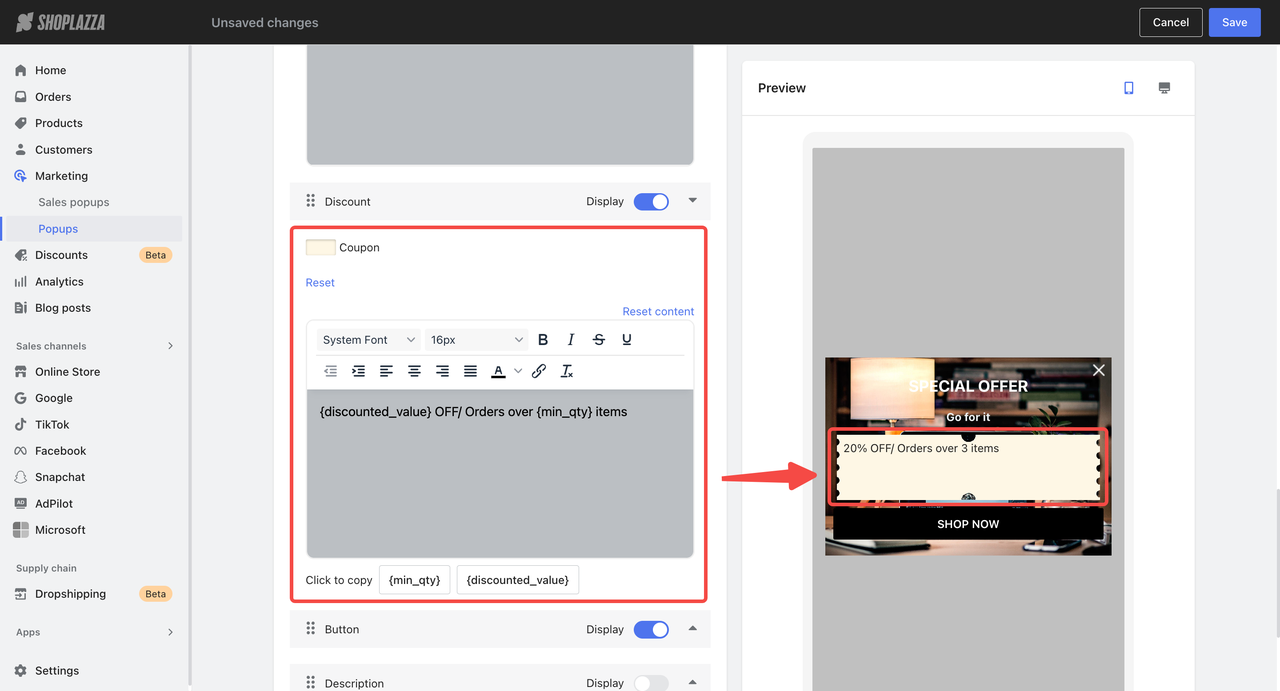
6. Edit popup content and messaging: Add a title, body text, and apply formatting. Enable or disable the discount display, edit the coupon text and colors, and format content (fields inside {} cannot be edited).
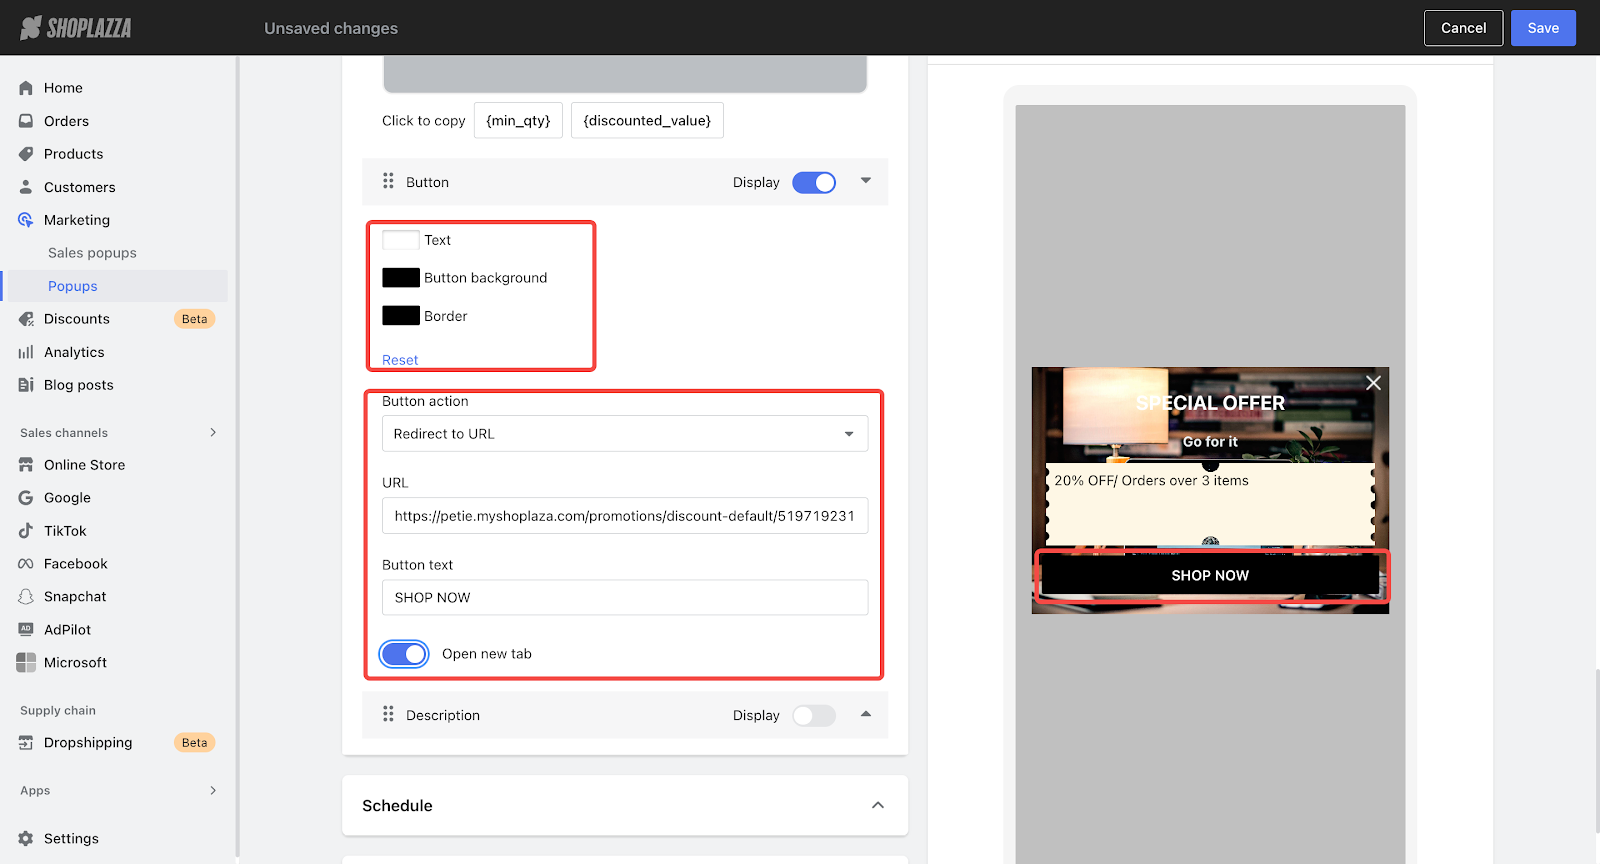
7. Set the call-to-action button: Choose the label, background, and border color. Select what happens when it's clicked. Redirect to URL (optionally open in a new tab) or close popup.
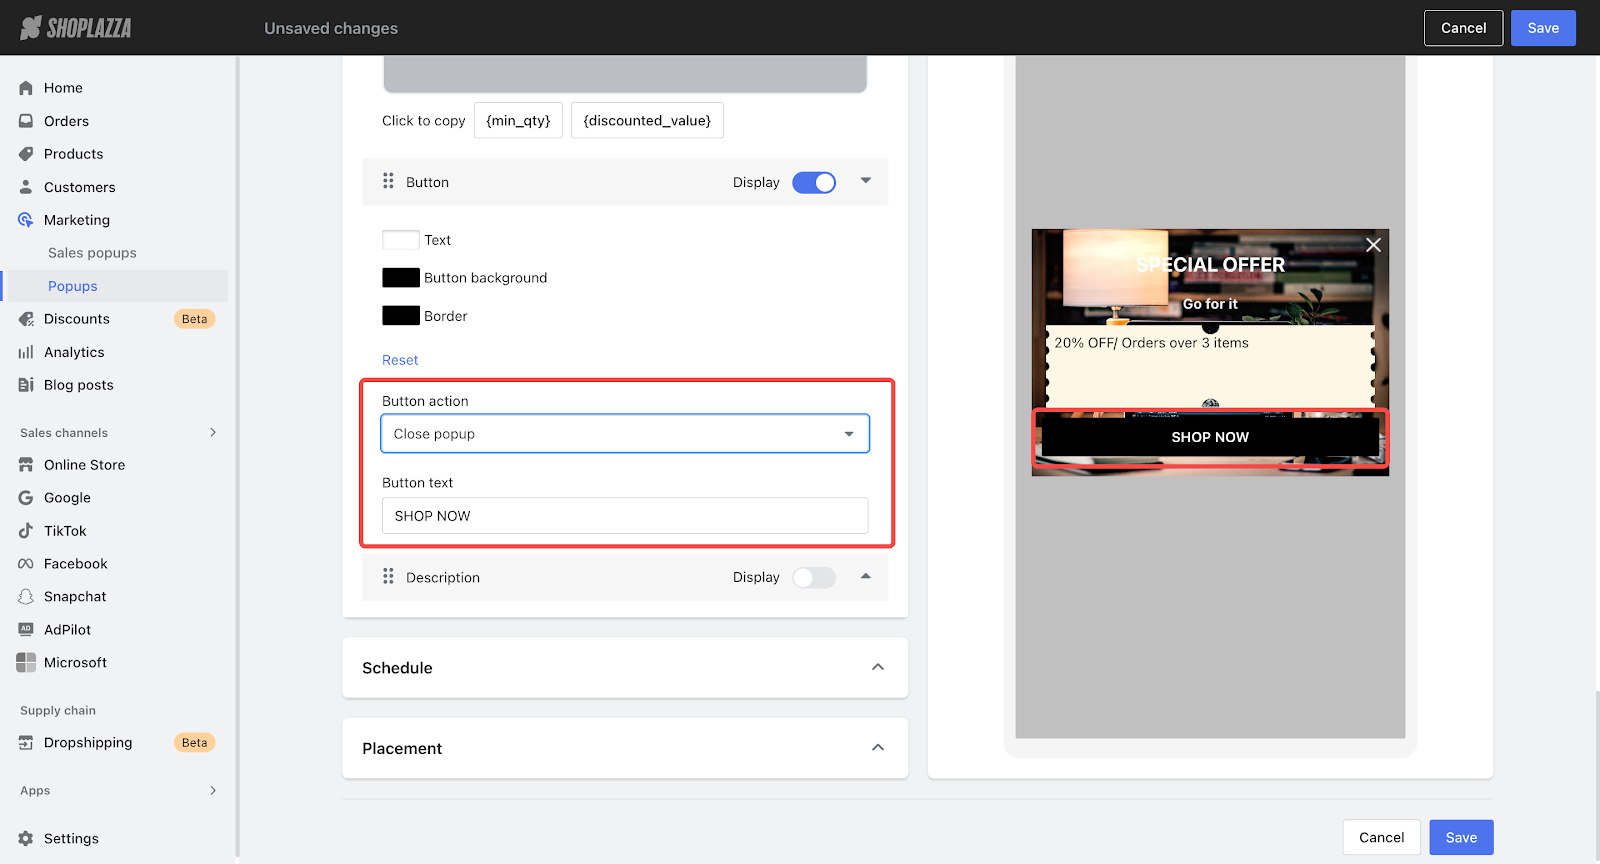
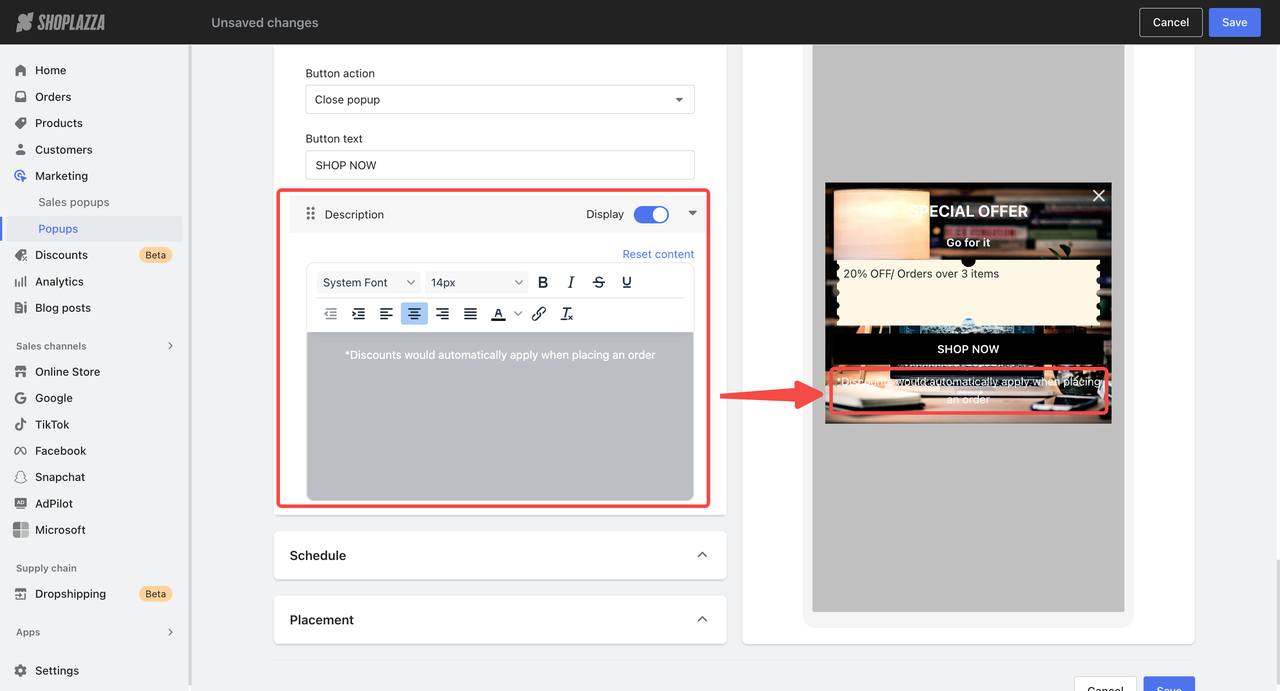
8. Add an optional description: If needed, toggle on the description setting and enter supporting text. Format the content to ensure clarity and consistency with your popup design.
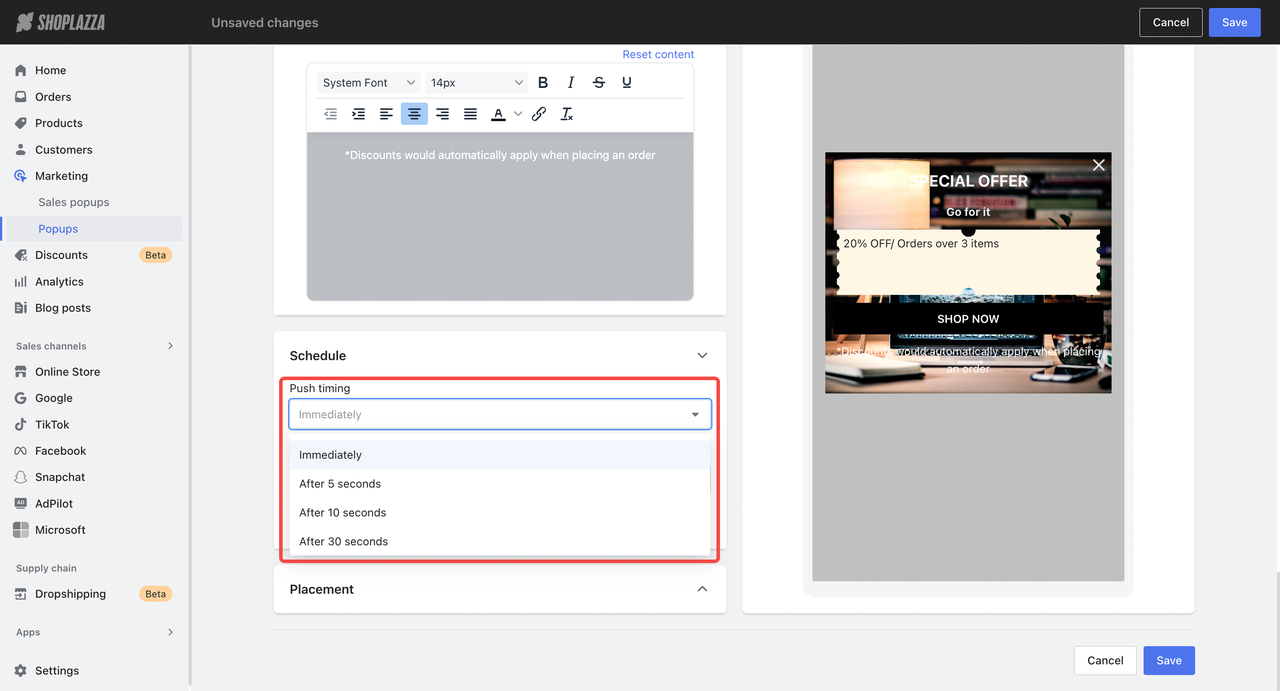
9. Set when the popup appears: Under Push timing, choose whether to show it immediately, or after 5, 10, or 30 seconds.
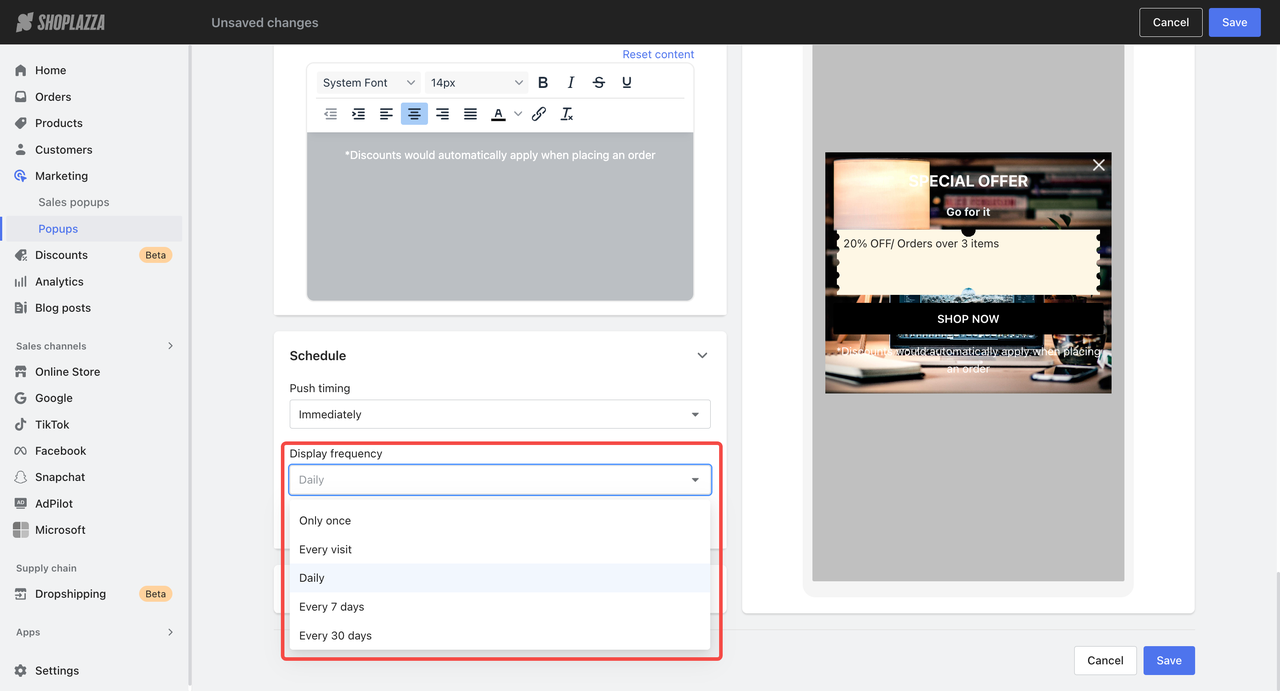
10. Set display timing and frequency: Choose when the popup appears, either immediately or after a selected delay. Decide if the popup appears:
- only once
- every visit
- daily
- every 7 days
- every 30 days
11. Set stop display conditions: Stop the popup from appearing after a customer clicks it or after it has been displayed a certain number of times.
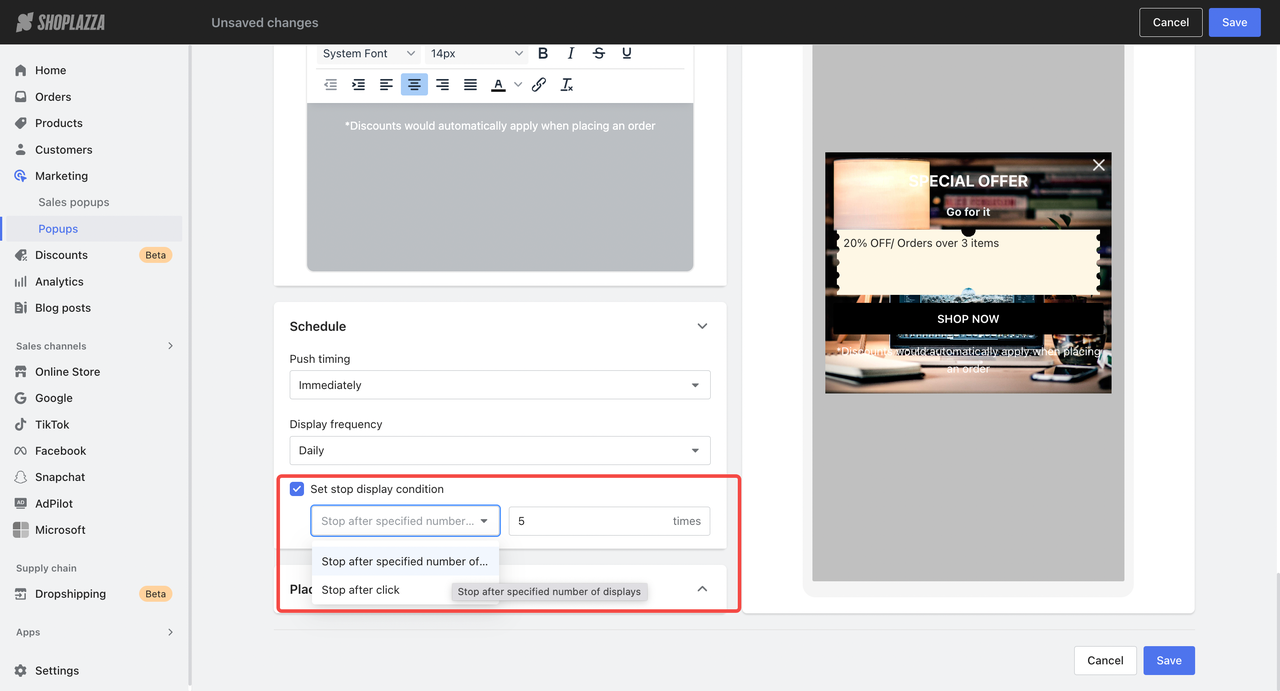
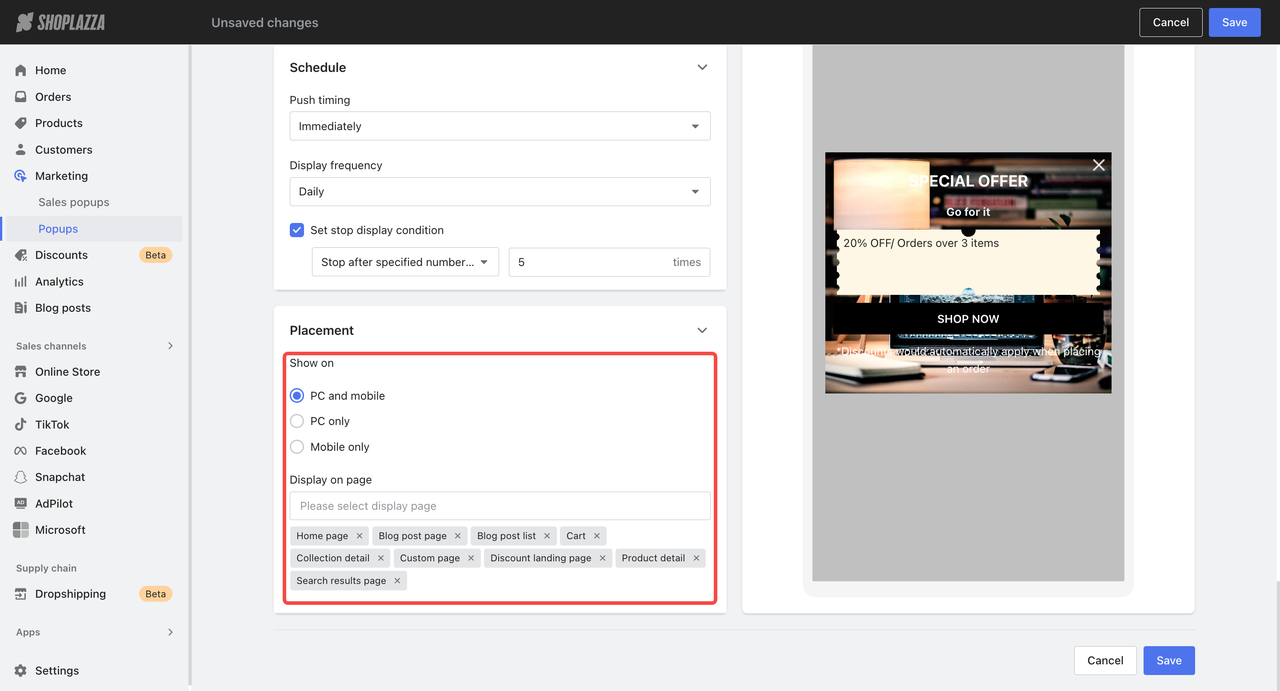
12. Set device and page placement: Choose device type (PC, mobile, or both) and where it appears in your store. Supported page types include:
- Product detail
- Collection detail
- Blog posts (list and detail)
- Search results
- Cart
- Home page
- Custom pages
- Discount landing page
Note
Popups do not appear on checkout or login pages.
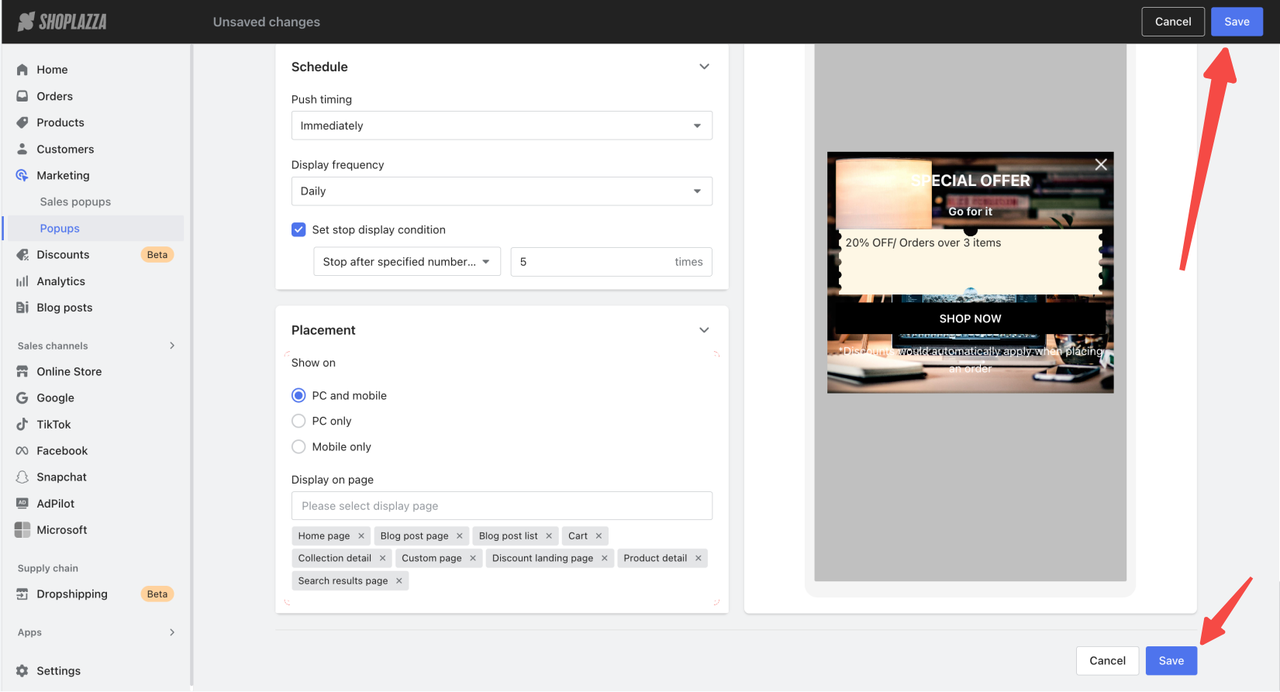
13. Save and publish the popup: Click Save to publish.
Promo announcement setup - Discount activity
The upgraded Promo announcement supports promotions such as Amount off, Discount on Nth item, and Flash sale, offering flexibility in how deals are displayed to customers.
1. Access the announcement setup page: Go to Shoplazza admin > Marketing > Popups, click New activity, then select the Announcement tab to begin configuring your promotional banner.
2. Select the discount to promote: Under the Discounts section, click Select discount, then choose the promotion to display in the announcement banner.
3. Configure basic banner information: Add a popup name (for internal reference) and define the start and end dates. Leave the end date blank if it should run indefinitely. Start times must follow your store’s time zone and cannot begin before the current time.
4. Choose the target audience: Select whether to display to all customers, specific segments, selected individuals, or visitors.
5. Customize layout and appearance: Set the opacity and width for the banner to control how it appears on desktop devices.
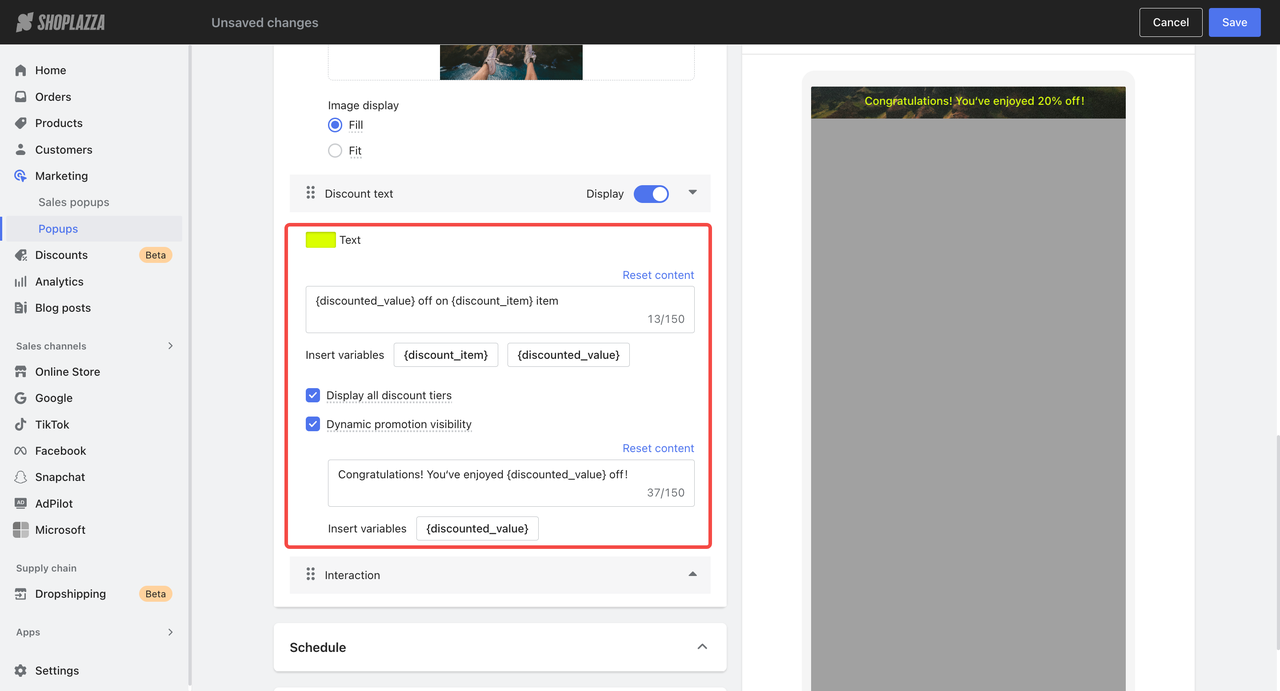
6. Edit discount text and visibility:
- Customize the text color and main discount message (fields in {} cannot be changed).
- Toggle Display all discount tiers to show full tier info or just the lowest.
- Enable Dynamic promotion visibility to update the message based on what the customer qualifies for in their cart.
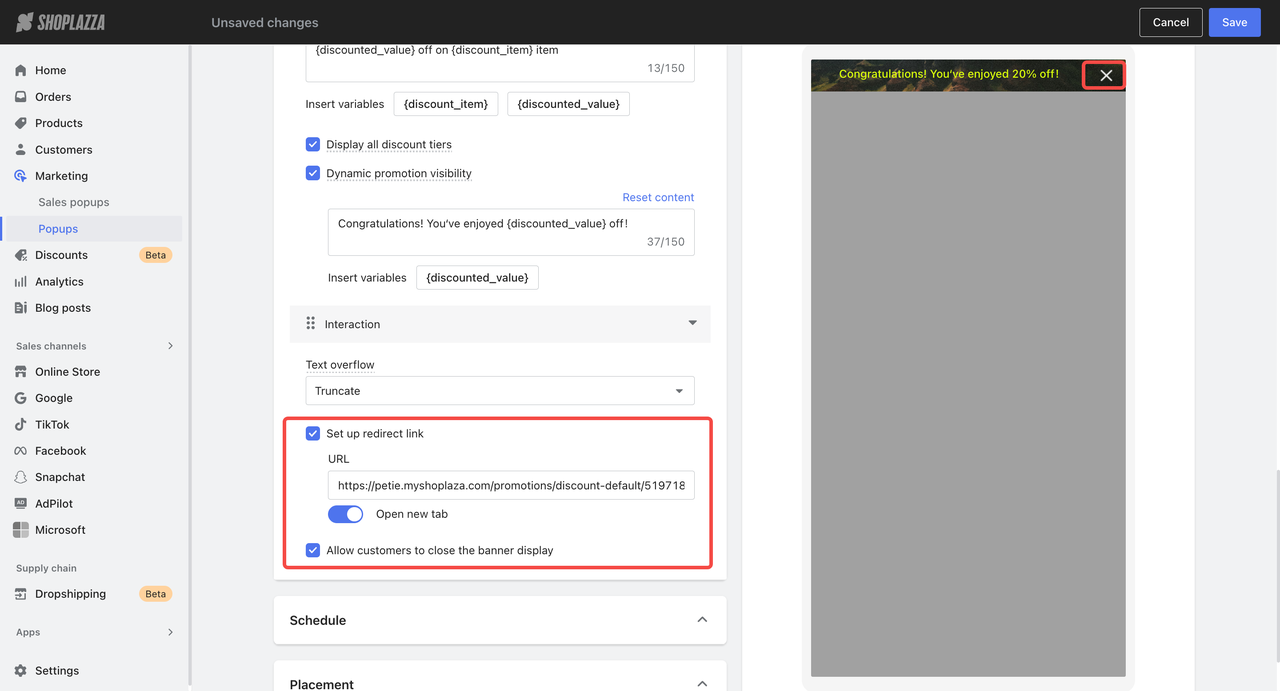
7. Set interaction behavior:
- Choose how overflow text appears: scroll horizontally or truncate.
- Add a redirect link, with an option to open it in a new tab.
- Allow customers to close the banner if needed.

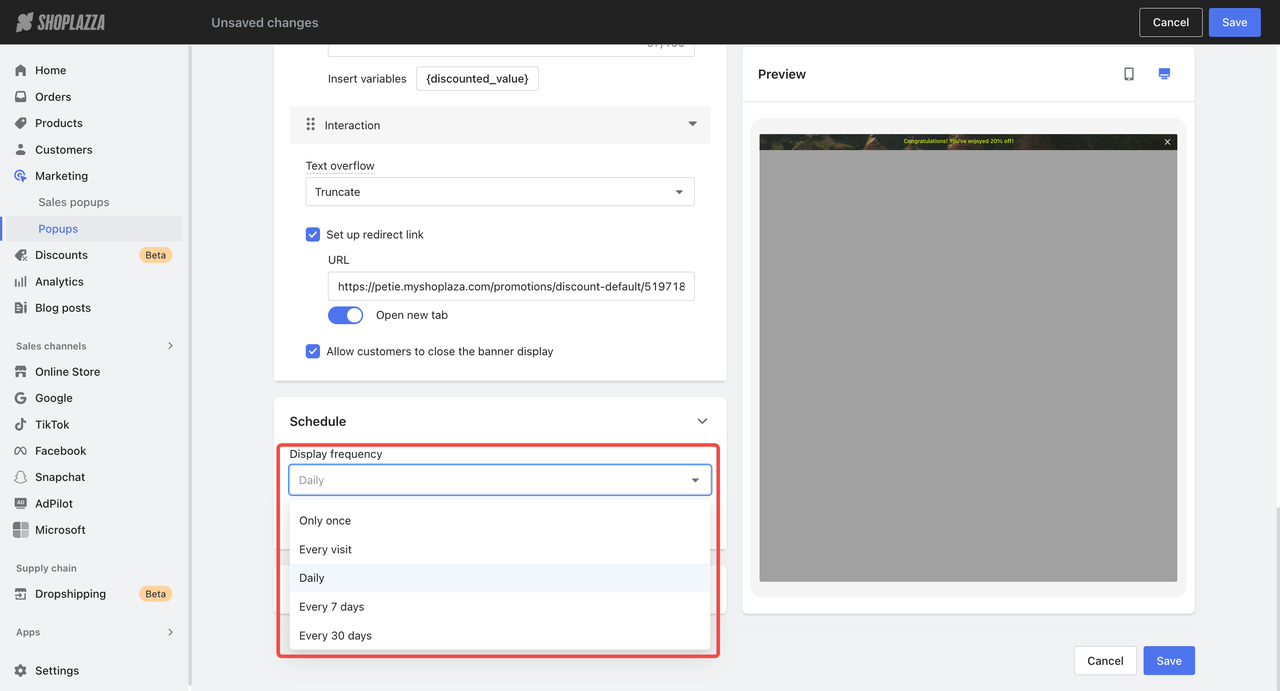
8. Set how often the banner is shown: Under Display frequency, decide how often the banner is displayed to visitors. Options include showing it only once, on every visit, daily, every 7 days, or every 30 days.
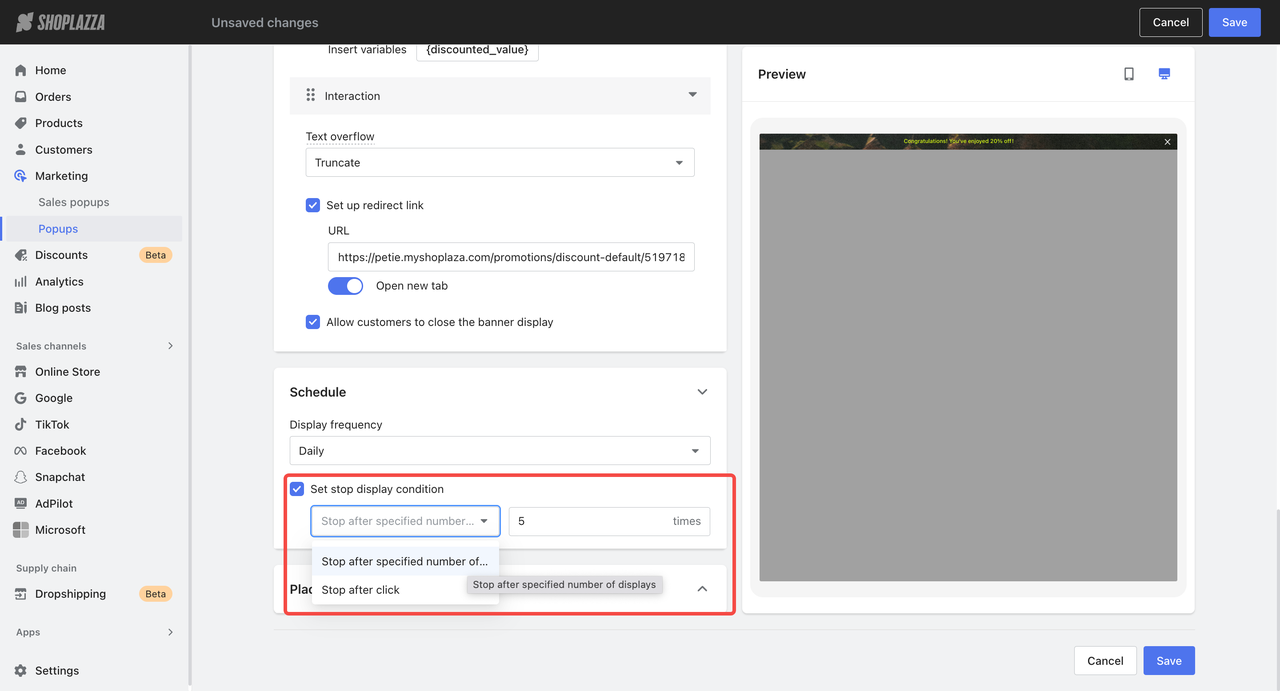
9. Set when the banner stops displaying: Choose whether the banner should stop appearing after a customer clicks on it or after it has been shown a set number of times.
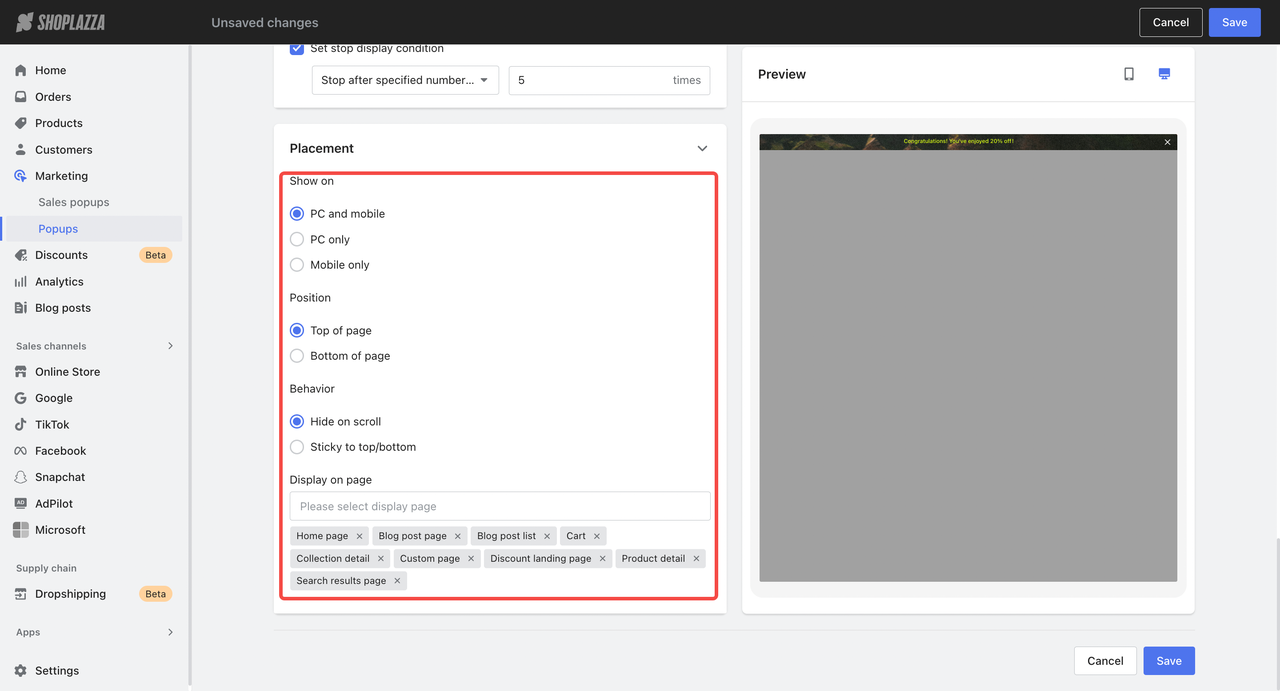
10. Set device and page placement: Select whether the announcement appears on PC and mobile, PC only, or Mobile only. Choose whether to place the banner at the top or bottom of the page, and whether it should stay visible when scrolling (sticky) or hide on scroll. Then choose the pages where the banner should appear. Options include:
- All pages (excluding checkout/payment and login/registration pages)
- Product detail
- Collection detail
- Blog post page
- Blog post list
- Search results page
- Cart
- Home page
- Custom pages
- Discount landing page
11. Save and publish your announcement: When configuration is complete, click Save to publish your Promo announcement.
The Popups Center simplifies campaign setup by consolidating design, targeting, and scheduling into a single streamlined workflow. Whether using popups or banners, this system supports personalized, time-sensitive promotions that align with the discount logic in the Discounts Center, helping improve conversions across key touchpoints.


Comments
Please sign in to leave a comment.